32. The HTML mode of version 12
We indicated at the beginning of version 12 that we would develop the application in several stages. We wrote:
- Based on the views of the HTML application, we will define the actions that the web application must implement. We will use the actual views here, but these could simply be views on paper;
- Based on these actions, we will define the service endpoints for the HTML application;
- we will implement these service endpoints using a server that serves web pages. This allows us to define the framework of the web server without worrying about the specific pages to be served. We will test these URL services using Postman;
- we will then test our jSON server with a console client;
- once the jSON server has been validated, we will move on to writing the HTML application;
We have the jSON and XML servers up and running. We can now move on to the HTML server. We will see that this server incorporates the entire architecture developed for the jSON / XML servers and adds HTML view management to them.
32.1. MVC Architecture
We will implement the so-called MVC architecture model (Model–View–Controller) as follows:
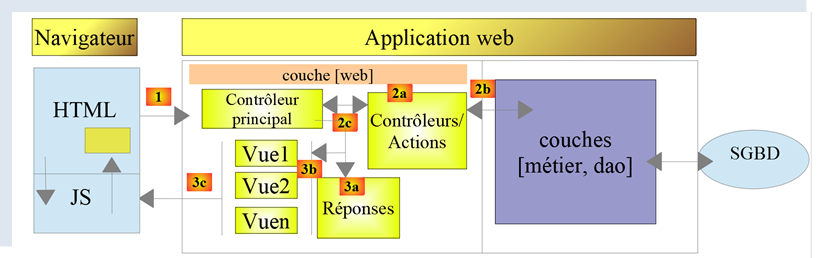
The processing of a client request will proceed as follows:
- 1 - Request
The requested URLs will be in the form http://machine:port/action/param1/param2/… The [Contrôleur principal] will use a configuration file to "route" the request to the correct controller. To do this, it will use the [action] field of the URL. The rest of the URL [param1/param2/…] consists of optional parameters that will be passed to the action. The C in MVC is here the string [Contrôleur principal, Contrôleur / Action]. If no controller can handle the requested action, the web server will respond that the requested URL was not found.
- 2 - Processing
- The selected action [2a] can use the parameters parami that [Contrôleur principal] passed to it. These may come from two sources:
- the [/param1/param2/…] path of the URL,
- parameters posted in the body of the client’s request;
- When processing the user's request, the action may require the [métier] [2b] layer. Once the client's request has been processed, it may trigger various responses. A classic example is:
- an error response if the request could not be processed correctly;
- a confirmation response otherwise;
- [Contrôleur / Action] will return its response [2c] to the main controller along with a status code. These status codes will uniquely represent the current state of the application. It will be either a success code or an error code;
- 3 - response
- depending on whether the client requested a response jSON, XML, or HTML, [Contrôleur principal] will instantiate [3a] with the appropriate response type and instruct it to send the response to the client. [Contrôleur principal] will pass on to it both the response and the status code provided by [Contrôleur / Action], which was executed;
- if the desired response is of type jSON or XML, the selected response will format the response from [Contrôleur / Action] that was provided to it and send it via [3c]. The client capable of processing this response can be a Python console script or a Javascript script hosted on a HTML page;
- if the desired response is of type HTML, the selected response will select one of the views HTML or [Vuei] using the status code provided to it. This is the V for MVC. A single view corresponds to a single status code. This view V will display the response from the [Contrôleur / Action] that was executed. It formats the data from this response using HTML, CSS, and Javascript. This data is called the view model. It is the M in MVC. The client is most often a browser;
32.2. The script tree of the HTML server
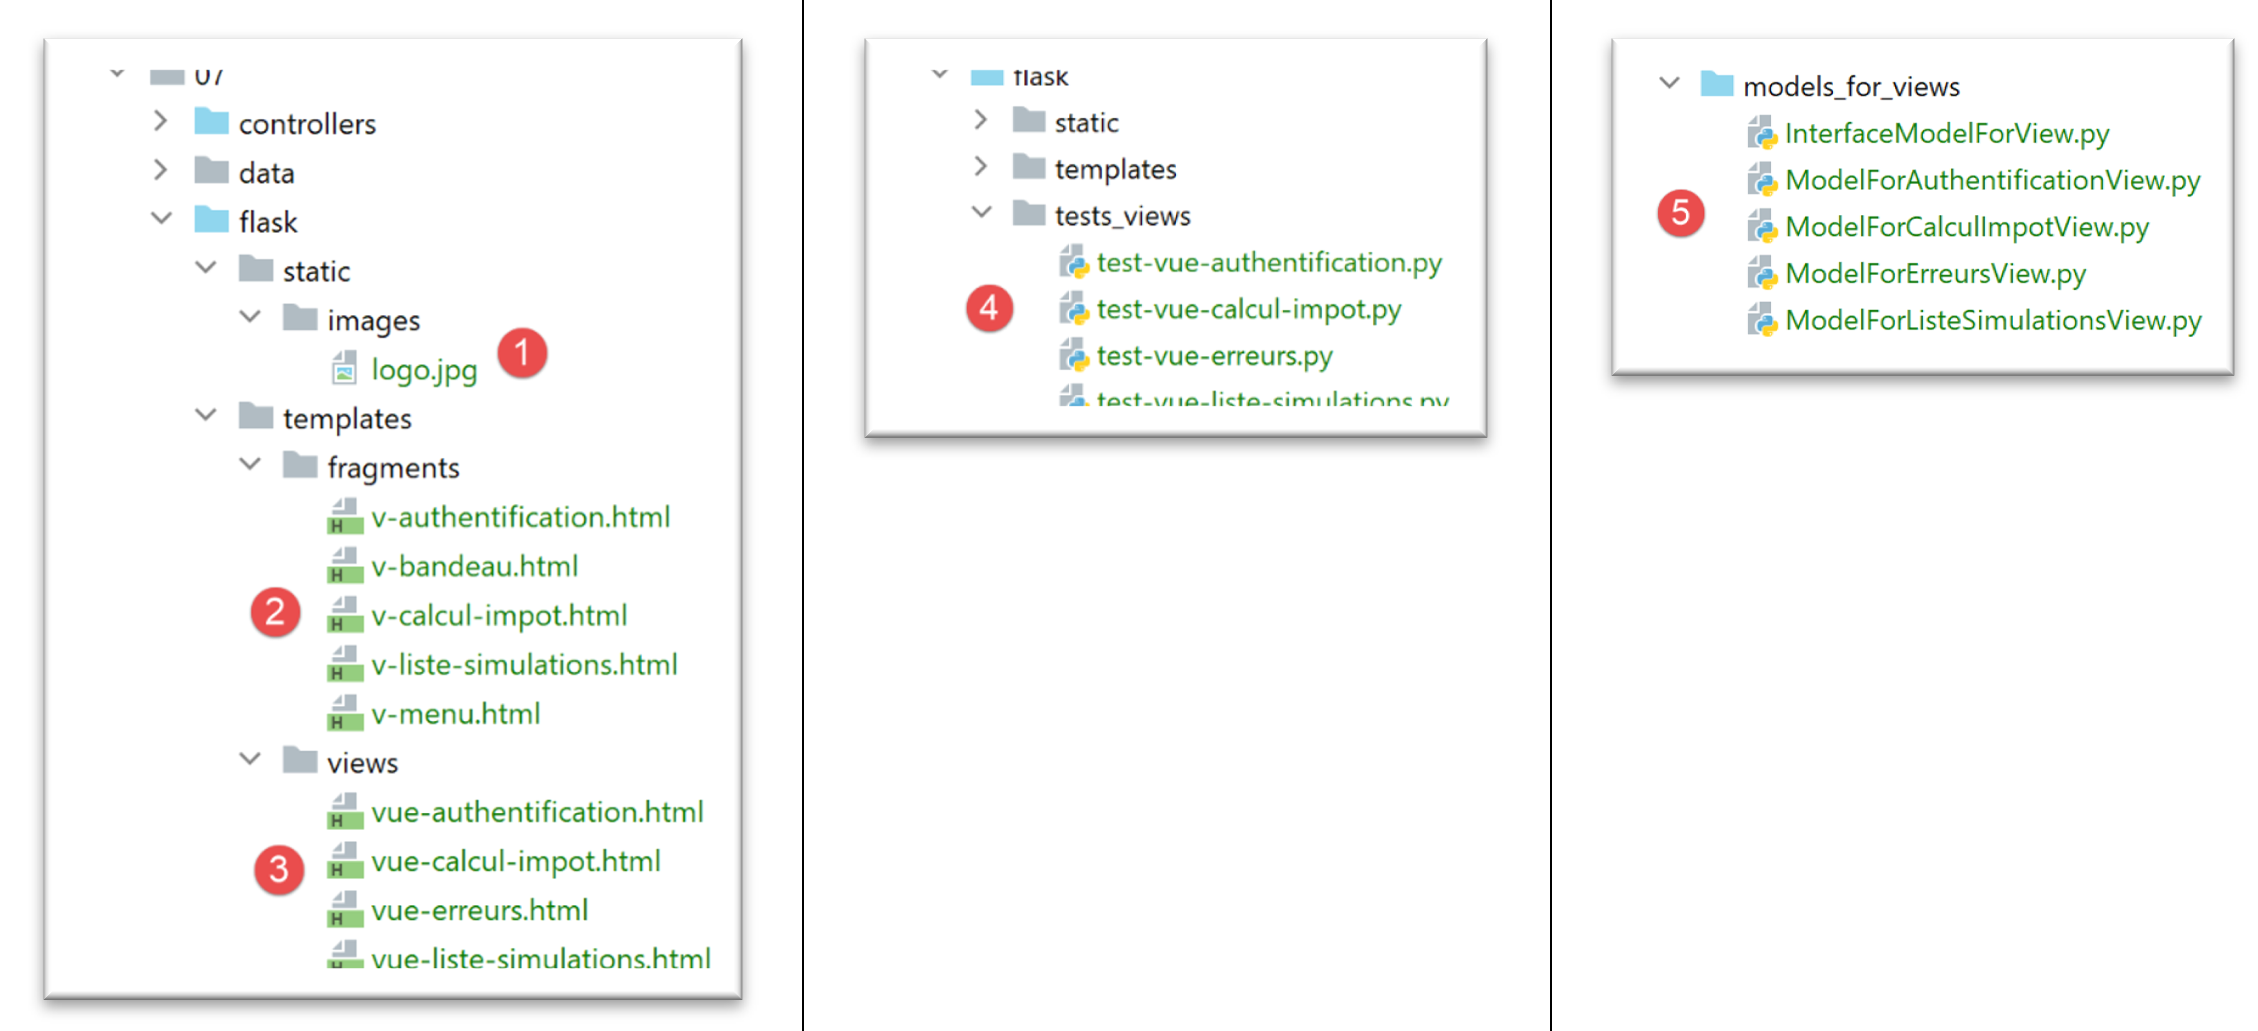
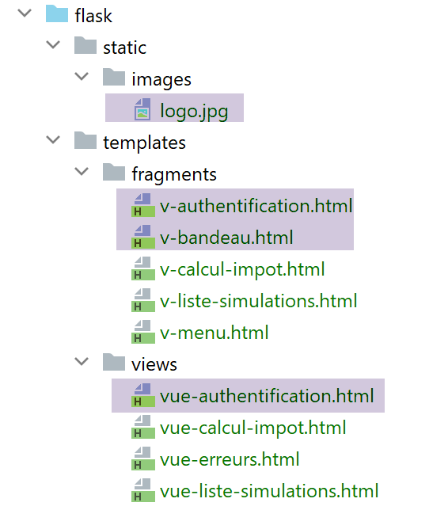
- in [1], the static elements of the HTML server;
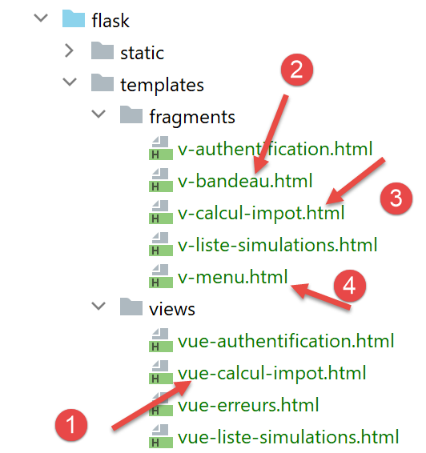
- in [2-3], the V views from server HTML. The fragments [2] are reusable elements in the views [3];
- in [4], a folder that will be used for static testing of the views;
- in [5], the folder containing the M templates for the V views, the M for MVC;
32.3. Overview of Views
The web application HTML uses four views. The first view is the authentication view:
- the action that leads to this first view is action [/init-session] [1];
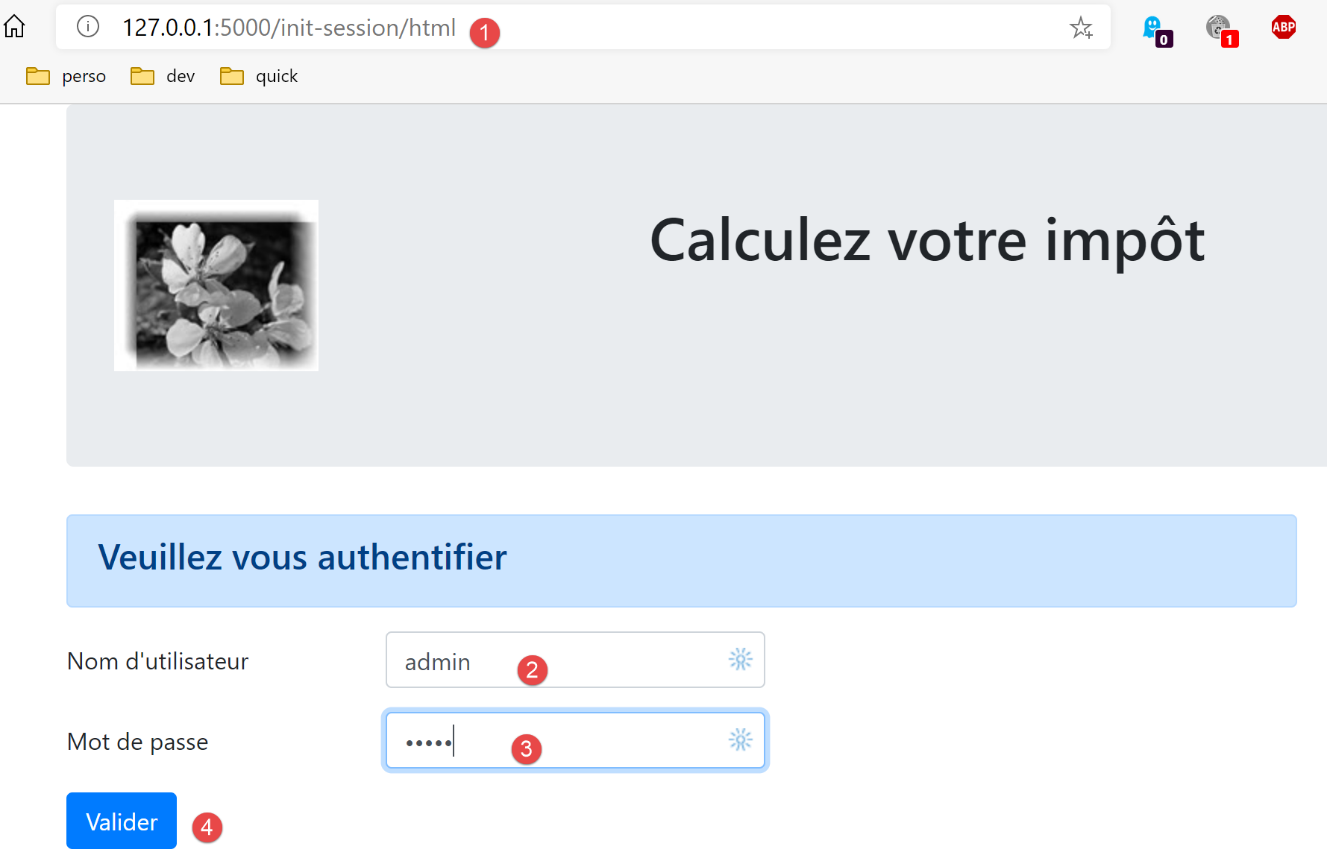
- Clicking the [Valider] button triggers the [/authentifier-utilisateur] action with two posted parameters [2-3];
The tax calculation view:
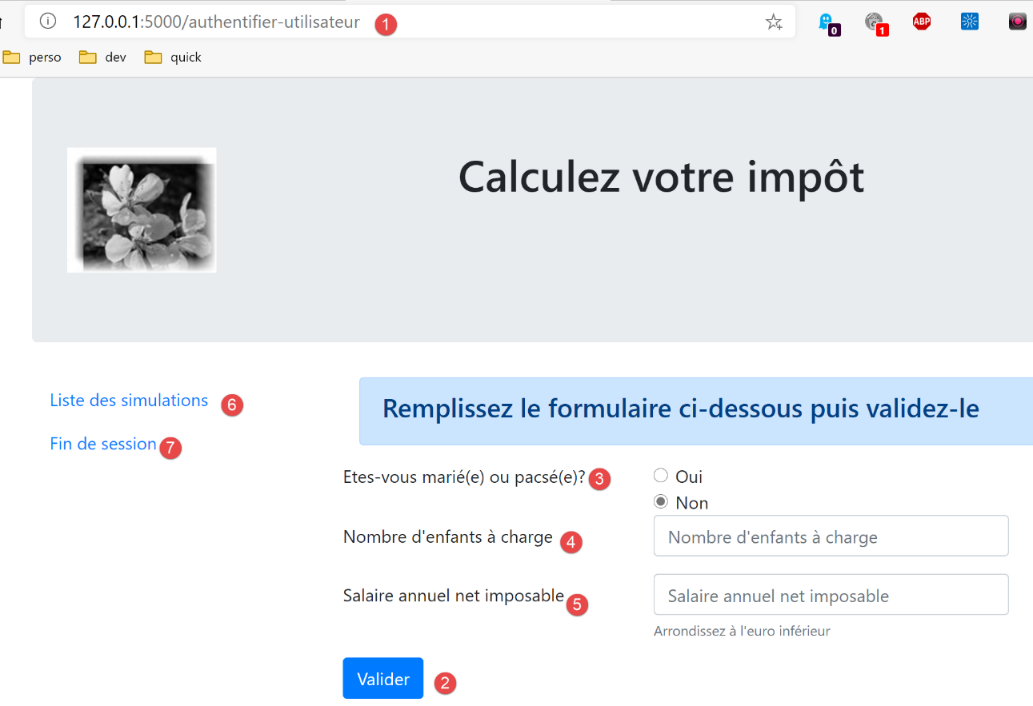
- in [1], the action [/authentifier-utilisateur] that brings up this view;
- In [2], clicking the [Valider] button triggers the execution of the [/calculer-impot] action with three posted parameters [2-5];
- clicking the link [6] triggers the action [/lister-simulations] without parameters;
- Clicking the link [7] triggers the action [/fin-session] without parameters;
The third view shows the simulations performed by the authenticated user:
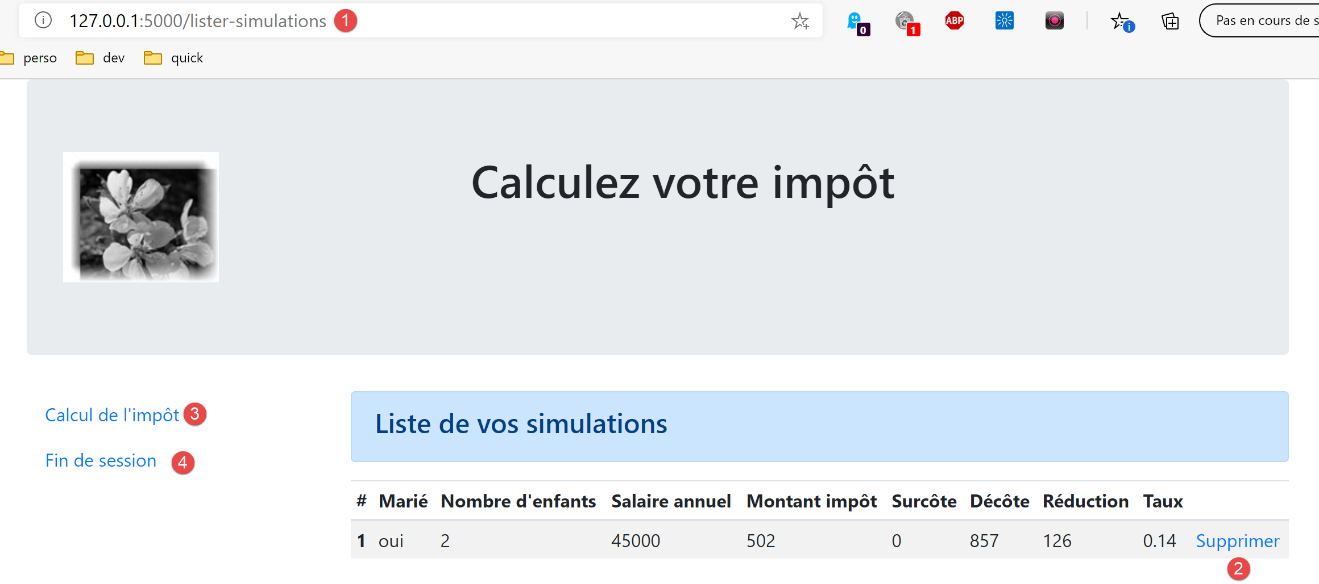
- in [1], the action [/lister-simulations] that brings up this view;
- In [2], clicking the link [Supprimer] triggers the action [/supprimer-simulation] with a parameter: the number of the simulation to be deleted from the list;
- clicking the link [3] triggers the action [/afficher-calcul-impot] without parameters, which redisplays the tax calculation view;
- Clicking the [4] link triggers the [/fin-session] action without parameters;
The fourth view will be called the unexpected errors view:
- in [1]: the user entered URL manually. However, in this example, there were no simulations. Therefore, the error message [2] is displayed. We are familiar with this message. We encountered it in jSON / XML. We will call this type of error an "unexpected error" because it cannot occur during normal use of the application. It is only when the user enters the URL codes themselves that they can occur;
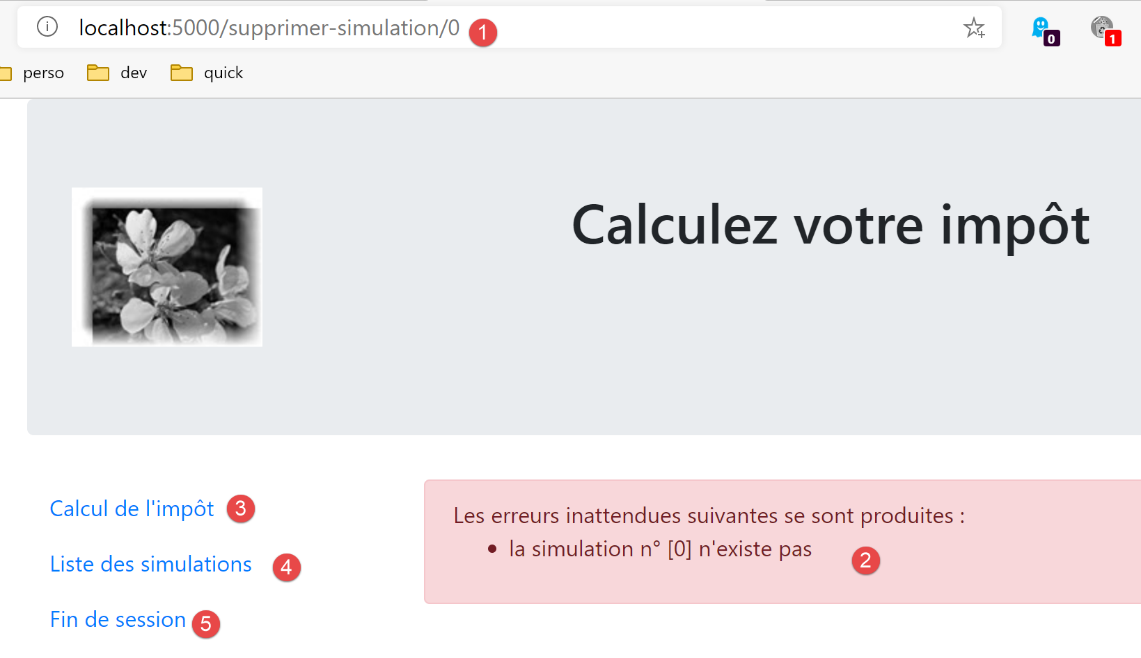
- in the event of an unexpected error, the [3-5] links allow you to return to one of the other three views;
Here is a reminder of the various URL service links for the jSON / XML server:
Action | Role | Execution Context |
/init-session | Used to set the type (json, xml, html) of the desired responses | Request GET Can be issued at any time |
/authenticate-user | Authorizes or denies a user's login | Request POST. The request must have two posted parameters [user, password] Can only be issued if the session type (json, xml, html) is known |
/tax-calculator | Perform a tax calculation simulation | Query POST. The request must have three posted parameters: [marié, enfants, salaire] Can only be issued if the session type (json, xml, html) is known and the user is authenticated |
/list-simulations | Requests a list of simulations performed since the start of the session | Request GET. Can only be issued if the session type (json, xml, html) is known and the user is authenticated |
/delete-simulation/number | Deletes a simulation from the list of simulations | Request GET. Can only be issued if the session type (json, xml, html) is known and the user is authenticated |
/display-tax-calculation | Displays the HTML tax calculation page | Request GET. Can only be issued if the session type (json, xml, html) is known and the user is authenticated |
/end-session | Ends the simulation session. | Technically, the old web session is deleted and a new session is created Can only be issued if the session type (json, xml, html) is known and the user is authenticated |
These various URL service commands will also be used for the HTML server.
32.4. View configuration
An action is handled by a controller. This controller returns a tuple (result, status_code) where:
- [résultat] is a dictionary of keys [action, état, réponse];
- [status_code] is the status code of the response HTTP that will be sent to the client;
In a HTML session, the page displayed following an action depends on the status code returned by the controller. This dependency is implemented in the [config] configuration as follows:
        # HTML views and their models depend on the state rendered by the controller
        "views": [
            {
                # authentication view
                "états": [
                    # /init-session success
                    700,
                    # /authentifier-user failure
                    201
                ],
                "view_name": "views/vue-authentification.html",
                "model_for_view": ModelForAuthentificationView()
            },
            {
                # tax calculation
                "états": [
                    # /authentifier-user success
                    200,
                    # /calculate-tax-success
                    300,
                    # /calculate-tax failure
                    301,
                    # /show-tax-calculation
                    800
                ],
                "view_name": "views/vue-calcul-impot.html",
                "model_for_view": ModelForCalculImpotView()
            },
            {
                # view of simulation list
                "états": [
                    # /lister-simulations
                    500,
                    # /suppress-simulation
                    600
                ],
                "view_name": "views/vue-liste-simulations.html",
                "model_for_view": ModelForListeSimulationsView()
            }
        ],

        # view of unexpected errors
        "view-erreurs": {
            "view_name": "views/vue-erreurs.html",
            "model_for_view": ModelForErreursView()
        },

        # redirections
        "redirections": [
            {
                "états": [
                    400,  # /end-session success
                ],
                # redirection to
                "to": "/init-session/html",
            }
        ],
    }
- lines 2–40: [views] is a list of views. Let’s consider the view in lines 3–13:
- line 11: the displayed view V;
- line 12: the class instance responsible for generating the model M for this view;
- lines 5–10: the states that lead to this view;
- lines 3–13: the authentication view;
- lines 14–28: the tax calculation view;
- lines 29–39: the simulation list view;
- lines 42–46: the unexpected errors view;
- lines 49–57: Some reports lead to a view via a redirect. This is the case for report 400, which corresponds to the successful action [/fin-session]. The client must then be redirected to action [http://machine:port/chemin/init-session/html];
We will now present the different views.
32.5. The authentication view
32.5.1. Overview of the view
The authentication view is as follows:
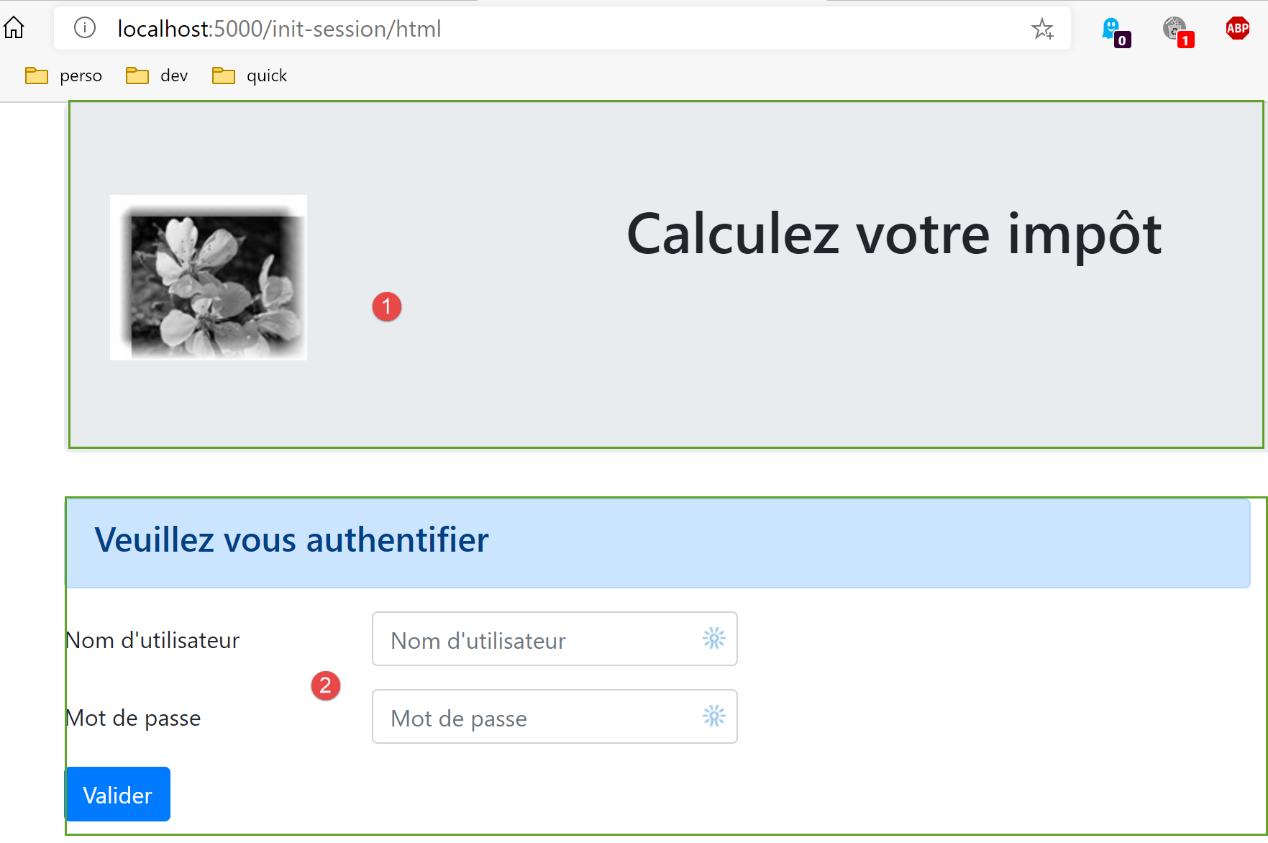
The view consists of two elements that we will call fragments:
- the fragment [1] is generated by the fragment [v-bandeau.html];
- the fragment [2] is generated by the fragment [v-authentification.html];
The authentication view is generated by the following page [vue-authentification.html]:
<!-- document HTML -->
<!doctype html>
<html lang="fr">
<head>
    <!-- Required meta tags -->
    <meta charset="utf-8">
    <meta name="viewport" content="width=device-width, initial-scale=1, shrink-to-fit=no">
    <!-- Bootstrap CSS -->
    <link rel="stylesheet" href="https://maxcdn.bootstrapcdn.com/bootstrap/4.4.1/css/bootstrap.min.css">
    <title>Application impôts</title>
</head>

<body>
<div class="container">
    <!-- headband -->
    {% include "fragments/v-bandeau.html" %}
    <!-- two-column line -->
    <div class="row">
        <div class="col-md-9">
            {% include "fragments/v-authentification.html" %}
        </div>
    </div>
    <!-- if error - displays an error alert -->
    {% if modèle.error %}
    <div class="row">
        <div class="col-md-9">
            <div class="alert alert-danger" role="alert">
                Les erreurs suivantes se sont produites :
                <ul>{{modèle.erreurs|safe}}</ul>
            </div>
        </div>
    </div>
    {% endif %}
</div>
</body>
</html>
Comments
- line 2: a HTML document begins with this line;
- lines 3–36: the HTML page is enclosed within the tags <html> </html>;
- lines 4–11: header (head) of the HTML document;
- Line 6: The <meta charset> tag here specifies that the document is encoded in UTF-8;
- line 7: the <meta name=’viewport’> tag sets the initial display of the view: across the full width of the screen displaying it (width) at its original size (initial-scale) without resizing to fit a smaller screen (shrink-to-fit);
- line 9: the <link rel='stylesheet'> tag specifies the CSS file that governs the view’s appearance. Here we are using the CSS Bootstrap 4.4.1 [https://getbootstrap.com/docs/4.0/getting-started/introduction/] framework ;
- line 10: the <title> tag sets the page title:
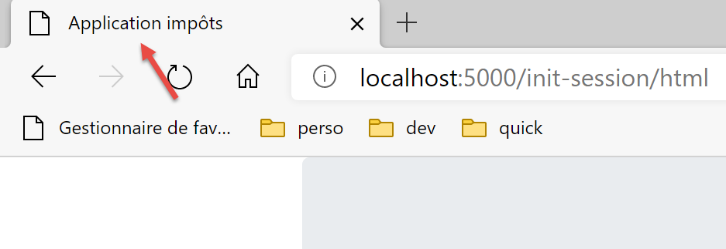
- lines 13–35: the body of the web page is enclosed within the body and /body tags;
- lines 14–34: the <div> tag delimits a section of the displayed page. The [class] attributes used in the view all refer to the CSS Bootstrap framework. The <div class=’container’> tag (line 14) delimits a Bootstrap container;
- line 26: the [v-bandeau.html] fragment is included. This fragment generates the [1] header of the page. We will describe it shortly;
- lines 18–22: the tag defines a Bootstrap row. These rows consist of 12 columns;
- line 19: the <div class=’col-md-9’> tag defines a 9-column section;
- line 20: we include the fragment [v-authentification.html], which displays the page’s [2] authentication form. We will describe it shortly;
- lines 24–33: the code HTML in these lines is only used if [modèle.error] is True. We will always proceed as follows: the template for a HTML view will be encapsulated in a [modèle] dictionary;
- lines 24–33: authentication fails if the user enters incorrect credentials. In this case, the authentication view is redisplayed with an error message. The [modèle.error] attribute indicates whether to display this error message;
- lines 27–30: define an area with a pink background (class="alert alert-danger") (line 27);
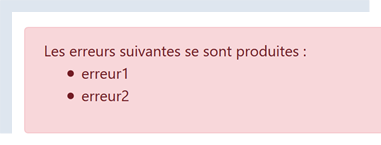
- line 28: text;
- line 29: the HTML tag <ul> (unordered list) displays a bulleted list. Each list item must have the syntax <li>item</li>. The value of [modèle.erreurs] is displayed here. This value is filtered (for the presence of |) by the [safe] filter. By default, when a string is sent to the browser, Flask “neutralizes” any HTML tags that might be present so that the browser does not interpret them. But sometimes you want them to be interpreted. This is the case here, where the string [modèle.erreurs] contains HTML tags <li> and </li> used to delimit a list item. In this case, we use the filter [safe], which tells Flask that the string to be displayed is safe and that it should therefore not sanitize the tags HTML it finds there;
Let’s note the dynamic elements to be defined in this code:
- [modèle.error]: to display an error message;
- [modèle.erreurs]: a list (in the HTML sense of the term) of error messages;
32.5.2. The fragment [v-bandeau.html]
The fragment [v-bandeau.html] displays the top banner of all views in the web application:
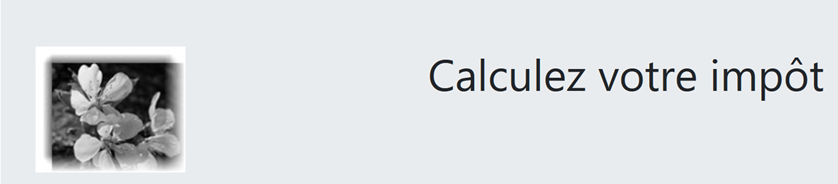
The code for the [v-bandeau.html] fragment is as follows:
<!-- Bootstrap Jumbotron -->
<div class="jumbotron">
    <div class="row">
        <div class="col-md-4">
            <img src="{{ url_for('static', filename='images/logo.jpg') }}" alt="Cerisier en fleurs"/>
        </div>
        <div class="col-md-8">
            <h1>
                Calculez votre impôt
            </h1>
        </div>
    </div>
</div>
Comments
- lines 2–13: The banner is wrapped in a Bootstrap Jumbotron section ([<div class="jumbotron">]). This Bootstrap class styles the displayed content in a specific way to make it stand out;
- lines 3-12: a Bootstrap row;
- lines 4-6: an image ([img]) is placed in the first four columns of the row;
- line 5: the syntax:
uses Flask’s [url_for] function. Here, its value will be the URL of the [images/logo.pg] file in the [static] folder;
- lines 7–11: the other 8 columns in the row (remember there are 12 in total) will be used to place text (line 9) in large font size (<h1>, lines 8–10);
32.5.3. The [v-authentification.html] fragment
The fragment [v-authentification.html] displays the web application’s authentication form:
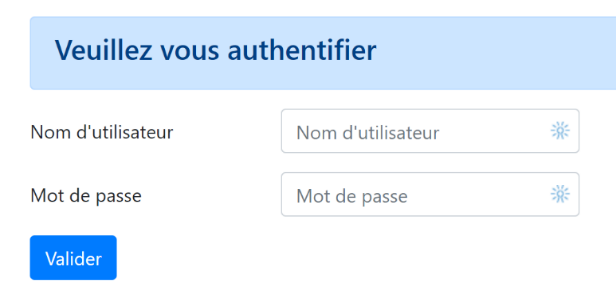
The code for fragment [v-authentification.html] is as follows:
<!-- form HTML - post values with [authentifier-utilisateur] action -->
<form method="post" action="/authentifier-utilisateur">

    <!-- title -->
    <div class="alert alert-primary" role="alert">
        <h4>Veuillez vous authentifier</h4>
    </div>

    <!-- bootstrap form -->
    <fieldset class="form-group">
        <!-- 1st line -->
        <div class="form-group row">
            <!-- wording -->
            <label for="user" class="col-md-3 col-form-label">Nom d'utilisateur</label>
            <div class="col-md-4">
                <!-- text input field -->
                <input type="text" class="form-control" id="user" name="user"
                       placeholder="Nom d'utilisateur" value="{{ modèle.login }}" required>
            </div>
        </div>
        <!-- 2nd line -->
        <div class="form-group row">
            <!-- wording -->
            <label for="password" class="col-md-3 col-form-label">Mot de passe</label>
            <!-- text input field -->
            <div class="col-md-4">
                <input type="password" class="form-control" id="password" name="password"
                       placeholder="Mot de passe" required>
            </div>
        </div>
        <!-- button type [submit] on a 3rd line -->
        <div class="form-group row">
            <div class="col-md-2">
                <button type="submit" class="btn btn-primary">Valider</button>
            </div>
        </div>
    </fieldset>

</form>
Comments
- Lines 2–39: The <form> tag defines a HTML form. This form generally has the following characteristics:
- it defines input fields (the <input> tags on lines 17 and 27);
- it has a [submit] button (line 34) that sends the entered values to the URL specified in the [action] attribute of the [form] tag (line 2). The HTTP method used to query this URL is specified in the [method] attribute of the [form] tag (line 2);
- here, when the user clicks the [Valider] button (line 34), the browser will submit (line 2) the values entered in the form to the URL [/authentifier-utilisateur] (line 2);
- The posted values are the values entered by the user in the input fields on lines 17 and 27. They will be posted in the body of the HTTP request that the browser will make in the form [x-www-forl-urlencoded]. The names of the [user, password] parameters are those of the [name] attributes of the input fields on lines 17 and 27;
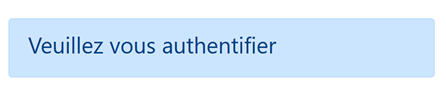
- Lines 5–7: a Bootstrap section to display a title on a blue background:
- lines 10–37: a Bootstrap form. All form elements will then be styled in a specific way;
- lines 12–20: define the first Bootstrap row of the form:

- line 14 defines the label [1] across three columns. The [for] attribute of the [label] tag links the label to the [id] attribute of the input field on line 17;
- lines 15–19: places the input field in a four-column layout;
- lines 17–18: the HTML and [input] tags describe an input field. It has several parameters:
- [type=’text’]: this is a text input field. You can type anything in it;
- [class=’form-control’]: Bootstrap style for the input field;
- [id=’user’]: ID of the input field. This ID is generally used by CSS and the code Javascript;
- [name=’user’]: name of the input field. This is the name under which the value entered by the user will be submitted by the browser [user=xx];
- [placeholder=’invite’]: the text displayed in the input field when the user has not yet typed anything;

- (continued)
- [value=’valeur’]: the text ‘value’ will be displayed in the input field as soon as it appears, before the user enters anything else. This mechanism is used in the event of an error to display the input that caused the error. Here, this value will be the value of the variable [modèle.login];
- [required]: requires the user to enter a value so that the form can be sent to the server:
- lines 21–30: similar code for password entry;
- line 27: [type=’password’] creates a text input field (you can type anything) but the characters you type are hidden:

- lines 32–36: a third Bootstrap line for the [Valider] button;
- line 34: because it has the [type=submit] attribute, clicking this button triggers the browser to send the entered values to the server, as explained earlier. The CSS [class="btn btn-primary"] attribute displays a blue button:
There is one last thing to explain. On line 2, the attribute [action="/authentifier-utilisateur"] defines an incomplete URL (it does not begin with http://machine:port/path). In our example, all URL entries in the application are of the form [http://machine:port/chemin/action/param1/param2/..], where [http://machine:port/chemin] is the root of the service URL entries. In [action="/authentifier-utilisateur"], we have an absolute URL, i.e., measured from the root of the URL. The complete URL for POST is therefore [http://machine:port/chemin/authentifier-utilisateur], and this is what the browser will use.
Note that this fragment uses the [modèle.login] template.
32.5.4. Visual Testing
We can test the views well before integrating them into the application. The goal here is to test their visual appearance. We will gather all the test views in the [tests_views] folder of the project:
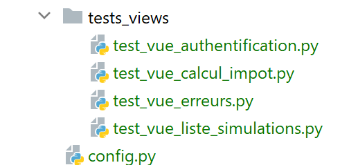
To test view V [vue-authentification.html], we need to create the data model M that it will display. We do this with the script [test_vue_authentification.py]:
from flask import Flask, render_template, make_response

# flask application
app = Flask(__name__, template_folder="../templates", static_folder="../static")

# Home URL
@app.route('/')
def index():
    # we encapsulate the paged data in the model
    modèle = {}
    # user code
    modèle["login"] = "albert"
    # error list
    modèle["error"] = True
    erreurs = ["erreur1", "erreur2"]
    # build a HTML list of errors
    content = ""
    for erreur in erreurs:
        content += f"<li>{erreur}</li>"
    modèle["erreurs"] = content
    # page display
    return make_response(render_template("views/vue-authentification.html", modèle=modèle))

# hand
if __name__ == '__main__':
    app.config.update(ENV="development", DEBUG=True)
    app.run()
Comments
- lines 1-3: we create a Flask application whose sole purpose is to display the view [vue-authentification.html] (line 22);
- line 7: the application has only a single URL service;
- Lines 9–20: The authentication view contains dynamic sections controlled by the [modèle] object. This object is called the view template. According to one of the two definitions given for the abbreviation MVC, this is the M in MVC. When defining the view [vue-authentification.html], we identified three dynamic values:
- [modèle.error]: a Boolean indicating whether to display an error message;
- [modèle.erreurs]: a list of error messages;
- [modèle.login]: a user’s login;
We therefore need to define these three dynamic values.
- Lines 9–20: We define the three dynamic elements of the authentication view;
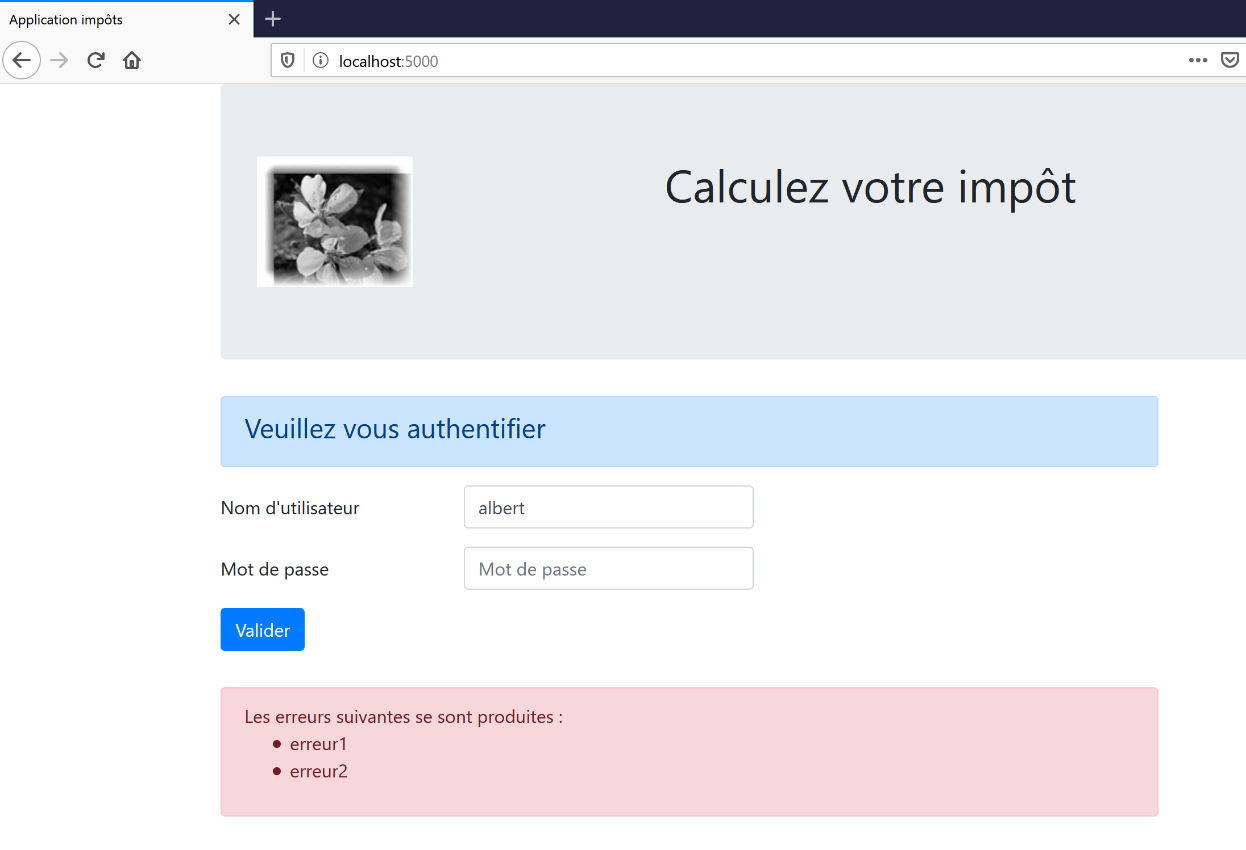
To run the test, we launch the [tests_views/test_vue_authentification.py] script and request the URL [/localhost:5000/]:
We continue these visual tests until we are satisfied with the result.
32.5.5. Calculating the view model
Once the visual appearance of the view has been determined, you can proceed to calculate the view model under real-world conditions. The view models will be generated by classes contained in the [models_for_views] folder:
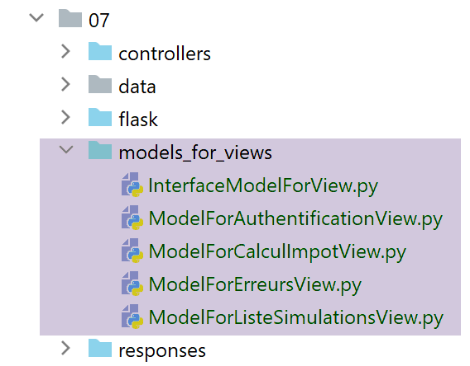
Each class generating a view model will implement the following [InterfaceModelForView] interface:
from abc import ABC, abstractmethod

from flask import Request
from werkzeug.local import LocalProxy

class InterfaceModelForView(ABC):

    @abstractmethod
    def get_model_for_view(self, request: Request, session: LocalProxy, config: dict, résultat: dict) -> dict:
        pass
- Lines 8–10: The [get_model_for_view] method is responsible for producing a view model encapsulated in a dictionary. To do this, it receives the following information:
- [request, session, config] are the same parameters used by the action controller. They are therefore also passed to the model;
- the controller has produced a result [résultat], which is also passed to the model. This result contains an important element [état] that indicates how the execution of the current action went. The model will use this information;
We have seen that in the application’s configuration, the status codes returned by the controllers are used to designate the view to be displayed:
        # HTML views and their models depend on the state rendered by the controller
        "views": [
            {
                # authentication view
                "états": [
                    # /init-session success
                    700,
                    # /authentifier-user failure
                    201
                ],
                "view_name": "views/vue-authentification.html",
                "model_for_view": ModelForAuthentificationView()
            },
            {
                # tax calculation
                "états": [
                    # /authentifier-user success
                    200,
                    # /calculate-tax-success
                    300,
                    # /calculate-tax failure
                    301,
                    # /show-tax-calculation
                    800
                ],
                "view_name": "views/vue-calcul-impot.html",
                "model_for_view": ModelForCalculImpotView()
            },
            {
                # view of simulation list
                "états": [
                    # /lister-simulations
                    500,
                    # /suppress-simulation
                    600
                ],
                "view_name": "views/vue-liste-simulations.html",
                "model_for_view": ModelForListeSimulationsView()
            }
        ],
        # view of unexpected errors
        "view-erreurs": {
            "view_name": "views/vue-erreurs.html",
            "model_for_view": ModelForErreursView()
        },
        # redirections
        "redirections": [
            {
                "états": [
                    400,  # /end-session success
                ],
                # redirection to
                "to": "/init-session/html",
            }
        ],
    }
It is therefore the status codes [700, 201] (lines 7 and 9) that cause the authentication view to be displayed. To understand the meaning of these codes, we can refer to the [Postman] tests performed on the jSON application:
- [init-session-json-700]: 700 is the status code following a successful [init-session] action: the empty authentication form is then displayed;
- [authentifier-utilisateur-201]: 201 is the status code following a failed [authentifier-utilisateur] action (unrecognized credentials): the authentication form is then displayed so that it can be corrected;
Now that we know when the authentication form should be displayed, we can define its template in [ModelForAuthentificationView] (line 12):
from flask import Request
from werkzeug.local import LocalProxy

from InterfaceModelForView import InterfaceModelForView

class ModelForAuthentificationView(InterfaceModelForView):

    def get_model_for_view(self, request: Request, session: LocalProxy, config: dict, résultat: dict) -> dict:
        # we encapsulate the paged data in the model
        modèle = {}
        # application status
        état = résultat["état"]
        # the model depends on the state
        if état == 700:
            # case of empty form display
            modèle["login"] = ""
            # no error to display
            modèle["error"] = False
        elif état == 201:
            # false authentication
            # the user initially entered is redisplayed
            modèle["login"] = request.form.get("user")
            # there is an error to display
            modèle["error"] = True
            # list HTML of error msg
            erreurs = ""
            for erreur in résultat["réponse"]:
                erreurs += f"<li>{erreur}</li>"
            modèle["erreurs"] = erreurs

        # we render the model
        return modèle
Comments
- line 8: the [get_model_for_view] method of the authentication view must provide a dictionary with three keys [error, erreurs, login]. This calculation is based on the status code returned by the action controller;
- line 12: we retrieve the status code returned by the controller that processed the current action;
- lines 14–29: the model depends on this status code;
- lines 15–18: case where a blank authentication form must be displayed;
- lines 20–29: case of failed authentication: we display the username entered by the user and display an error message. The user can then try another authentication attempt;
- line 22: the username initially entered by the user can be retrieved from the client request;
- line 24: it is indicated that there are errors to display;
- lines 26–29: in case of an error, result[‘réponse’] contains a list of errors;
32.5.6. Generating responses HTML
Let’s return to the MVC model of the HTML application:
- in 2 (2a, 2b): the controller executes an action;
- in 3 (3a, 3b, 3c): a view is selected and sent to the client;
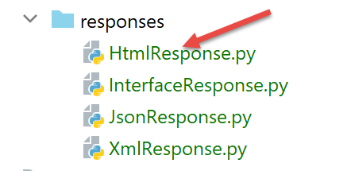
In [3a], a response type (jSON, XML, HTML) is selected. We have seen how the responses jSON and XML were generated, but not yet the responses HTML. These are generated by the class [HtmlResponse]:
Let’s recall how the type of response to send to the user is determined in the main script [main]:
        ….
        # build the response to be sent
        response_builder = config["responses"][type_response]
        response, status_code = response_builder \
            .build_http_response(request, session, config, status_code, résultat)
        # we send the answer
        return response, status_code
where, on line 3, config[‘responses’] is the following dictionary:
        # different types of response (json, xml, html)
        "responses": {
            "json": JsonResponse(),
            "html": HtmlResponse(),
            "xml": XmlResponse()
        },
It is therefore the [HtmlResponse] class that generates the HTML response. Its code is as follows:
# dictionary of HTML responses according to the status contained in the result

from flask import make_response, render_template
from flask.wrappers import Response
from werkzeug.local import LocalProxy

from InterfaceResponse import InterfaceResponse

class HtmlResponse(InterfaceResponse):

    def build_http_response(self, request: LocalProxy, session: LocalProxy, config: dict, status_code: int,
                            résultat: dict) -> (Response, int):
        # the HTML response depends on the status code returned by the controller
        état = résultat["état"]

        # do I need to redirect?
        for redirection in config["redirections"]:
            # conditions requiring redirection
            états = redirection["états"]
            if état in états:
                # you need to redirect
                return redirect(f"/{redirection['to']}"), status.HTTP_302_FOUND

        # a state corresponds to a view
        # search for it in the list of views
        views_configs = config["views"]
        trouvé = False
        i = 0
        # browse the list of views
        nb_views = len(views_configs)
        while not trouvé and i < nb_views:
            # view n° i
            view_config = views_configs[i]
            # states associated with view n° i
            états = view_config["états"]
            # is the state you're looking for in the states associated with view n° i?
            if état in états:
                trouvé = True
            else:
                # next view
                i += 1
        # found?
        if not trouvé:
            # if no view exists for the current state of the application
            # render error view
            view_config = config["view-erreurs"]

        # calculate the view model to be displayed
        model_for_view = view_config["model_for_view"]
        modèle = model_for_view.get_model_for_view(request, session, config, résultat)
        # generate the HTML response code
        html = render_template(view_config["view_name"], modèle=modèle)
        # build the HTTP response
        response = make_response(html)
        response.headers['Content-Type'] = 'text/html; charset=utf-8'
        # we return the result
        return response, status_code
- line 11: the [build_http_response] method responsible for generating the HTML response receives the following parameters:
- [request, session, dict]: these are the parameters used by the controller to process the current action;
- [status_code, résultat]: these are the two results produced by this same controller;
- line 14: as we mentioned, the server’s response HTML depends on the status code contained in the dictionary [résultat];
- lines 16–22: redirects are handled first. For now, we will ignore this case until we encounter an example of a redirect. Note that redirects are typically a use case for the HTML server. We do not encounter this case with the jSON and ouXML servers;
- lines 24–41: we search among the views for the one whose list [états] contains the desired state;
- lines 42–46: if no view is found, this is an unexpected error. Let’s take an example. During normal operation of the application, the [/supprimer-simulation] action should never fail. In fact, we will see that this deletion of simulations is performed using links generated by the code. These links are correct and cannot lead to an error. However, as we have seen, the user can type URL or [/supprimer-simulation/id] directly and thus cause an error. In this case, the [SupprimerSimulationController] controller returns a status code of 601. However, this status code is not in the list of status codes that trigger the display of a HTML page. Therefore, the error view will be displayed. It is defined as follows in the configuration:
        # view of unexpected errors
        "view-erreurs": {
            "view_name": "views/vue-erreurs.html",
            "model_for_view": ModelForErreursView()
        },
- line 49: once we know which view to display, we retrieve the class that generates its template. This class is also found in the [config] configuration;
- line 50: once this class is found, we generate the view model;
- line 52: once the model M of view V has been calculated, we can generate the view’s HTML code;
- lines 54–55: the response HTTP is constructed with a body HTML;
- lines 56–57: the response HTTP is returned with its status code;
32.5.7. Tests [Postman]
We will execute requests that generate the codes [700, 201], which display the authentication view:
- [init-session-html-700]: 700 is the status code following a successful [init-session] action: the empty authentication form is then displayed;
- [authentifier-utilisateur-201]: 201 is the status code following a failed [authentifier-utilisateur] action (unrecognized credentials): the authentication form is then displayed so that it can be corrected;
Simply reuse them and check if they correctly display the authentication view. Here are two examples:
Case 1: [init-session-html-700], start of a HTML session;
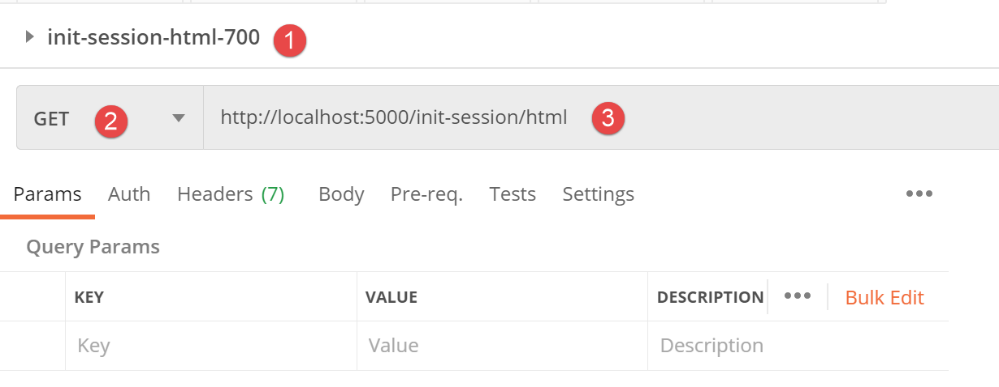
The response is as follows:
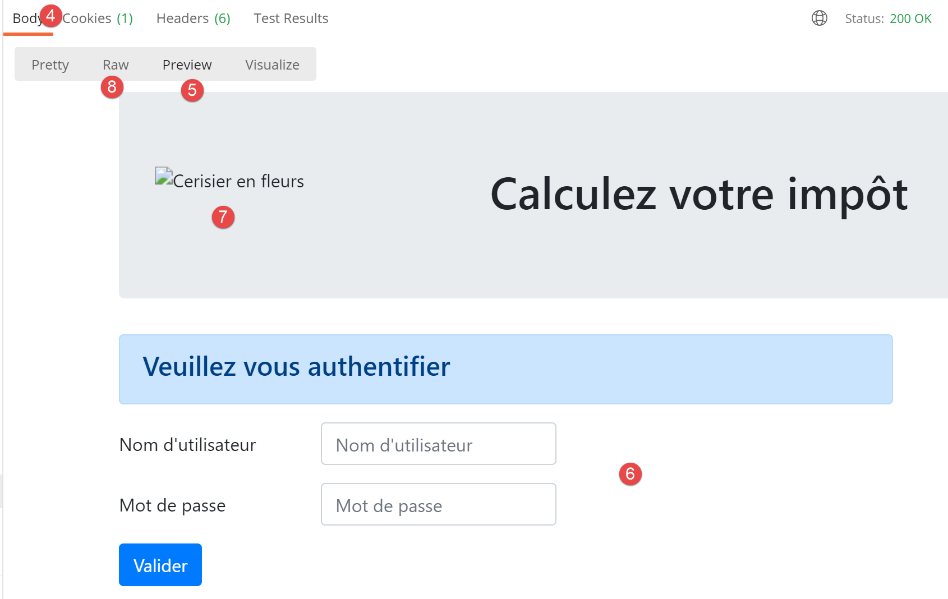
- In [5], the [Preview] mode allows you to view the received HTML page;
- in [6], we do indeed have the expected empty form;
- In [7], Postman did not follow the image link on the page;
- in [8], the [Raw] mode provides access to the received HTML;
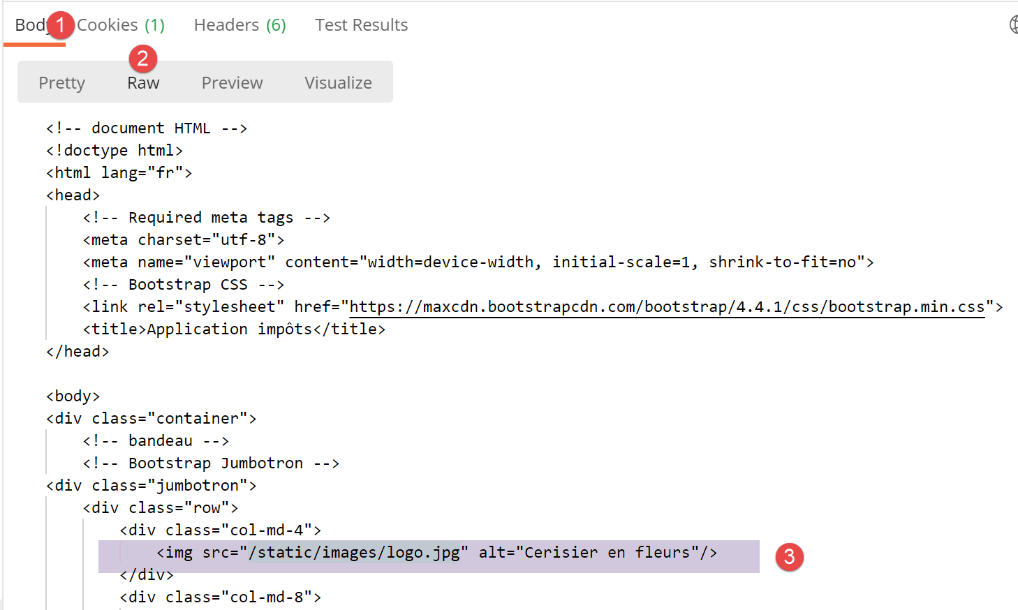
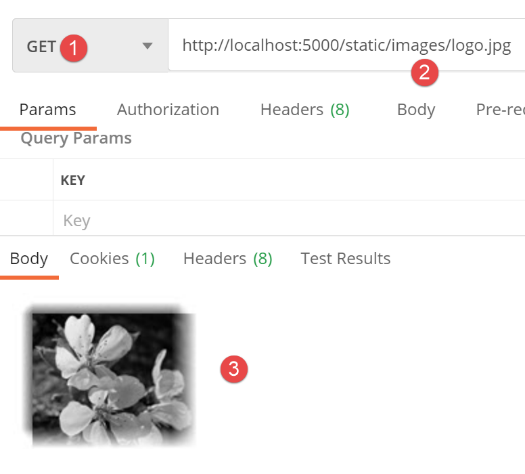
- In [3], the link that Postman did not load. It displayed the value of the [alt=alternative] attribute, which is shown when the image cannot be loaded. Here, it’s more likely that Postman didn’t want to load it. We can verify this by requesting URL and [http://localhost :5000/static/images.logo.jpg] with Postman:
Case 2: [authentifier-utilisateur-201], authentication error
Now, let’s perform an incorrect authentication after successfully initializing the HTML session:
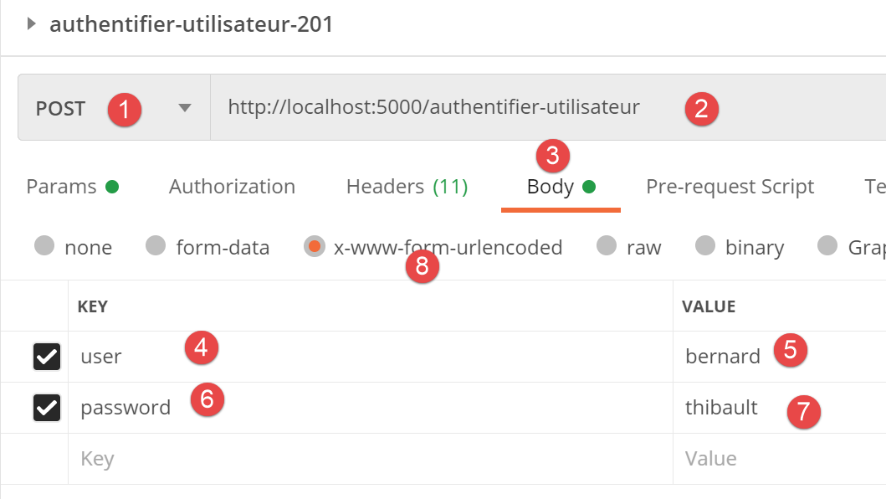
Above:
- in [4,7]: the request sends the string [user=bernard&password=thibault];
The response is as follows:
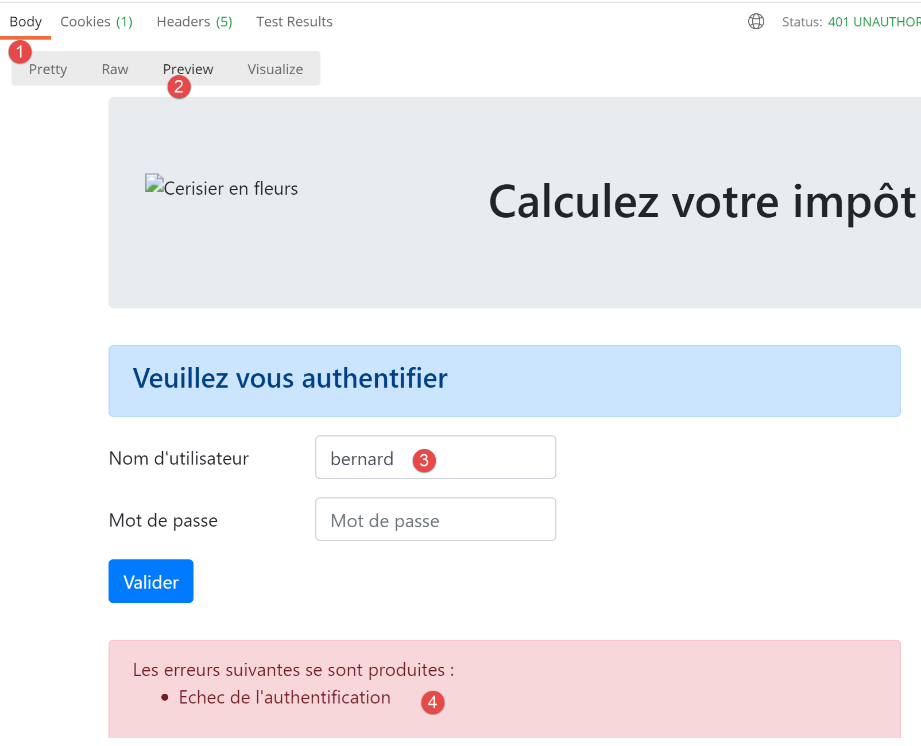
- in [4], an error message is displayed;
- in [3], the incorrect user was displayed again;
32.5.8. Conclusion
We were able to test the view [vue-authentification.html] without having written the other views. This was possible because:
- all controllers are written;
- [Postman] allows us to send requests to the server without needing all the views. When writing controllers, you must be prepared to handle requests that no view would allow. You should never assume a priori that “this request is impossible.” You must verify;
32.6. The tax calculation view
32.6.1. View Overview
The tax calculation view is as follows:
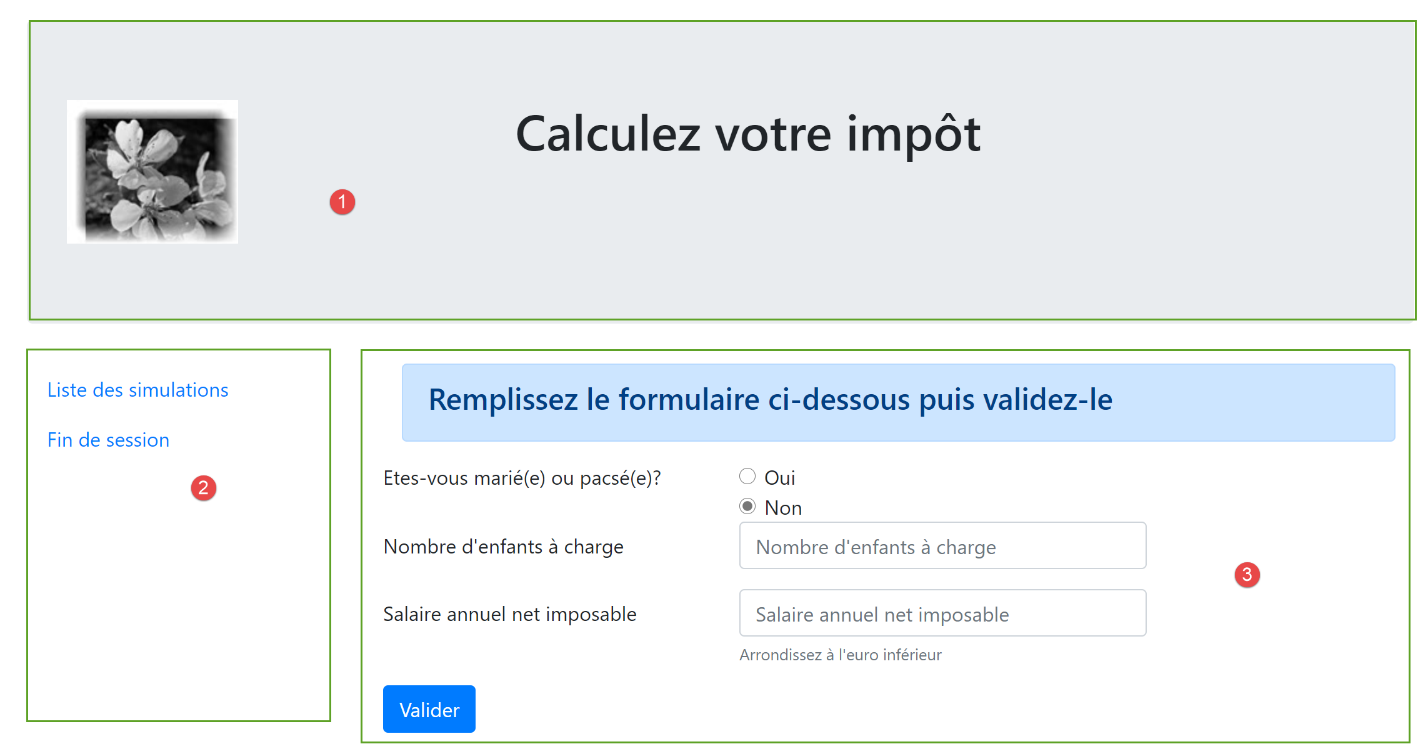
The view has three parts:
- 1: The top banner is generated by the fragment [v-bandeau.html], which has already been presented;
- 2: the tax calculation form generated by fragment [v-calcul-impot.html];
- 3: a menu containing two links, generated by the fragment [v-menu.html];
The tax calculation view is generated by the following code [vue-calcul-impot.html]:
<!-- document HTML -->
<!doctype html>
<html lang="fr">
<head>
    <!-- Required meta tags -->
    <meta charset="utf-8">
    <meta name="viewport" content="width=device-width, initial-scale=1, shrink-to-fit=no">
    <!-- Bootstrap CSS -->
    <link rel="stylesheet" href="https://maxcdn.bootstrapcdn.com/bootstrap/4.4.1/css/bootstrap.min.css">
    <title>Application impôts</title>
</head>

<body>
<div class="container">
    <!-- headband -->
    {% include "fragments/v-bandeau.html" %}
    <!-- two-column line -->
    <div class="row">
        <!-- the menu -->
        <div class="col-md-3">
            {% include "fragments/v-menu.html" %}
        </div>
        <!-- calculation form -->
        <div class="col-md-9">
            {% include "fragments/v-calcul-impot.html" %}
        </div>
    </div>
    <!-- success stories -->

    {% if modèle.success %}
    <!-- a success alert is displayed -->
    <div class="row">
        <div class="col-md-3">

        </div>
        <div class="col-md-9">
            <div class="alert alert-success" role="alert">
                {{modèle.impôt}}</br>
                {{modèle.décôte}}</br>
                {{modèle.réduction}}</br>
                {{modèle.surcôte}}</br>
                {{modèle.taux}}</br>
            </div>
        </div>
    </div>
    {% endif %}

    {% if modèle.error %}
    <!-- 9-column error list -->
    <div class="row">
        <div class="col-md-3">

        </div>
        <div class="col-md-9">
            <div class="alert alert-danger" role="alert">
                Les erreurs suivantes se sont produites :
                <ul>{{modèle.erreurs | safe}}</ul>
            </div>
        </div>
    </div>
    {% endif %}
</div>
</body>
</html>
Comments
- We only comment out new features that haven't been encountered yet;
- line 16: inclusion of the view's top banner in the view's first Bootstrap row;
- line 21: inclusion of the menu, which will occupy three columns of the view’s second Bootstrap row (lines 18, 20);
- line 25: inclusion of the tax calculation form, which will occupy nine columns (line 24) of the view’s second Bootstrap row (line 18);
- lines 30–46: if the tax calculation succeeds ([modèle.success=True]), then the result of the tax calculation is displayed in a green frame (lines 37–43). This frame is in the third Bootstrap row of the view (line 32) and occupies nine columns (line 36) to the right of three empty columns (lines 33–35). This frame will therefore be below the tax calculation form;
- lines 48–61: if the tax calculation fails ([modèle.error=True]), then an error message is displayed in a pink frame (lines 55–58). This frame is in the third Bootstrap row of the view (line 50) and occupies nine columns (line 54) to the right of three empty columns (lines 51–53). This frame will therefore also be below the tax calculation form;
32.6.2. The fragment [v-calcul-impot.html]
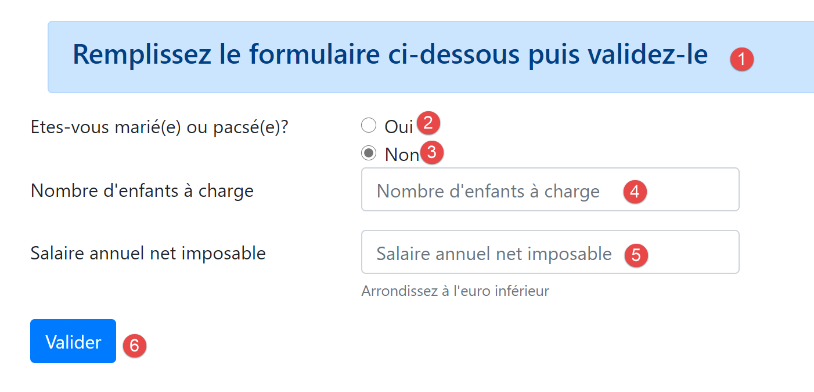
The fragment [v-calcul-impot.html] displays the tax calculation form of the web application:
The code for fragment [v-calcul-impot.html] is as follows:
<!-- form HTML posted -->
<form method="post" action="/calculer-impot">
    <!-- 12-column message on blue background -->
    <div class="col-md-12">
        <div class="alert alert-primary" role="alert">
            <h4>Remplissez le formulaire ci-dessous puis validez-le</h4>
        </div>
    </div>
    <!-- form elements -->
    <fieldset class="form-group">
        <!-- first row of 9 columns -->
        <div class="row">
            <!-- 4-column wording -->
            <legend class="col-form-label col-md-4 pt-0">Etes-vous marié(e) ou pacsé(e)?</legend>
            <!-- 5-column radio buttons-->
            <div class="col-md-5">
                <div class="form-check">
                    <input class="form-check-input" type="radio" name="marié" id="gridRadios1" value="oui" {{modèle.checkedOui}}>
                    <label class="form-check-label" for="gridRadios1">
                        Oui
                    </label>
                </div>
                <div class="form-check">
                    <input class="form-check-input" type="radio" name="marié" id="gridRadios2" value="non" {{modèle.checkedNon}}>
                    <label class="form-check-label" for="gridRadios2">
                        Non
                    </label>
                </div>
            </div>
        </div>
        <!-- second row of 9 columns -->
        <div class="form-group row">
            <!-- 4-column wording -->
            <label for="enfants" class="col-md-4 col-form-label">Nombre d'enfants à charge</label>
            <!-- 5-column numerical entry field for number of children -->
            <div class="col-md-5">
                <input type="number" min="0" step="1" class="form-control" id="enfants" name="enfants" placeholder="Nombre d'enfants à charge" value="{{modèle.enfants}}" required>
            </div>
        </div>
        <!-- third row of 9 columns -->
        <div class="form-group row">
            <!-- 4-column wording -->
            <label for="salaire" class="col-md-4 col-form-label">Salaire annuel net imposable</label>
            <!-- 5-column numeric input field for wages -->
            <div class="col-md-5">
                <input type="number" min="0" step="1" class="form-control" id="salaire" name="salaire" placeholder="Salaire annuel net imposable" aria-describedby="salaireHelp" value="{{modèle.salaire}}" required>
                <small id="salaireHelp" class="form-text text-muted">Arrondissez à l'euro inférieur</small>
            </div>
        </div>
        <!-- fourth row, 5-column [submit] button -->
        <div class="form-group row">
            <div class="col-md-5">
                <button type="submit" class="btn btn-primary">Valider</button>
            </div>
        </div>
    </fieldset>

</form>
Comments
- Line 2: Form HTML will be posted (attribute [method]) to URL [/calculer-impot] (attribute [action]). The posted values will be the values of the input fields:
- the value of the selected radio button in the form:
- [marié=oui] if the [Oui] radio button is selected (lines 17–22). [marié] is the value of the [name] attribute in line 18, and [oui] is the value of the [value] attribute in line 18;
- [marié=non] if the radio button [Non] is checked (lines 23–28). [marié] is the value of the [name] attribute in row 24, [non] is the value of the [value] attribute in row 24;
- the value of the numeric input field on line 37 in the form [enfants=xx], where [enfants] is the value of the [name] attribute on line 37, and [xx] is the value entered by the user via the keyboard;
- the value of the numeric input field on line 46 in the form [salaire=xx], where [salaire] is the value of the [name] attribute on line 46, and [xx] is the value entered by the user via the keyboard;
Finally, the posted value will be in the form [marié=xx&enfants=yy&salaire=zz].
- (continued)
- The entered values will be posted when the user clicks the button of type [submit] on line 53;
- Lines 16–30: the two radio buttons:

The two radio buttons are part of the same radio button group because they have the same [name] attribute (lines 18, 24). The browser ensures that within a radio button group, only one is selected at any given time. Therefore, clicking one deselects the one that was previously selected;
- they are radio buttons because of the [type="radio"] attribute (lines 18, 24);
- when the form is displayed (before input), one of the radio buttons must be selected: to do this, simply add the [checked=’checked’] attribute to the relevant <input type="radio"> tag. This is achieved using dynamic variables:
- [modèle.checkedOui] on line 18;
- [modèle->checkedNon] on line 24;
These variables will be part of the view template.
- Line 37: a numeric input field [type="number"] with a minimum value of 0 [min="0"]. In modern browsers, this means the user can only enter a number >=0. In these same modern browsers, the input can be made using a slider that can be clicked up or down. The [step="1"] attribute on line 37 indicates that the slider will operate in 1-unit increments. As a result, the slider will only accept integer values ranging from 0 to n in 1-unit increments. For manual input, this means that numbers with decimals will not be accepted;
- Line 37: For certain displays, the child input field must be pre-filled with the last entry made in that field. To achieve this, the attribute [value] is used to set the value to be displayed in the input field. This value will be dynamic and generated by the variable [modèle.enfants];

- Line 37: The attribute [required] requires the user to enter data for the form to be validated;
- line 46: same instructions for entering the salary as for entering children;
- line 53: the [submit] button triggers the POST of the values entered to the URL [/calculer-impot] (line 2);
32.6.3. The [v-menu.html] fragment
This fragment displays a menu to the left of the tax calculation form:
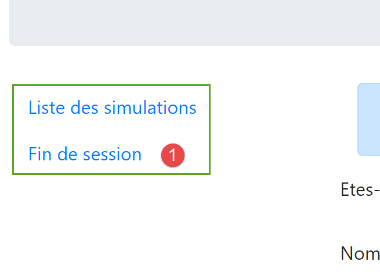
The code for this fragment is as follows:
<!-- bootstrap menu -->
<nav class="nav flex-column">
    <!-- display a list of links HTML -->
    {% for optionMenu in modèle.optionsMenu %}
      <a class="nav-link" href="{{optionMenu.url}}">{{optionMenu.text}}</a>
    {% endfor %}
</nav>
Comments
- lines 2–7: the HTML [nav] tag encloses a portion of the HTML document containing links from navigation to other documents;
- line 5: the HTML [a] tag introduces a link from navigation:
- [optionMenu.url]: is the URL to which one navigates when clicking on the [optionMenu.text] link. This is then a [GET optionMenu.url] operation performed by the browser. [optionMenu.url] will be an absolute URL measured from the application’s root [http://machine :port/chemin]. Thus, in [1], we will create the link:
- Line 5: The [modèle.optionsMenu] template for the fragment will be a list in the following format:
- lines 2, 7: the classes CSS and [nav, flex-column, nav-link] are Bootstrap classes that define the menu’s appearance;
32.6.4. Visual test
We gather these various elements in the [Tests] folder and create a test template for the [vue-calcul-impot.html] view:
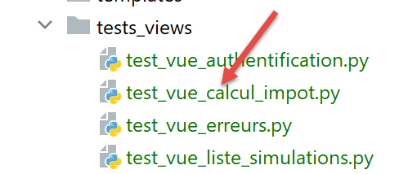
The test script [test_vue_calcul_impot] will be as follows:
from flask import Flask, render_template, make_response

# flask application
app = Flask(__name__, template_folder="../templates", static_folder="../static")

# Home URL
@app.route('/')
def index():
    # we encapsulate the paged data in the model
    modèle = {}
    # form
    modèle["checkedOui"] = ""
    modèle["checkedNon"] = 'checked="checked"'
    modèle["enfants"] = 2
    modèle["salaire"] = 300000
    # message of success
    modèle["success"] = True
    modèle["impôt"] = "Montant de l'impôt : 1000 euros"
    modèle["décôte"] = "Décôte : 15 euros"
    modèle["réduction"] = "Réduction : 20 euros"
    modèle["surcôte"] = "Surcôte : 0 euros"
    modèle["taux"] = "Taux d'imposition : 14 %"
    # error message
    modèle["error"] = True
    erreurs = ["erreur1", "erreur2"]
    # build a HTML list of errors
    content = ""
    for erreur in erreurs:
        content += f"<li>{erreur}</li>"
    modèle["erreurs"] = content
    # menu
    modèle["optionsMenu"] = [
        {"text": 'Liste des simulations', "url": '/lister-simulations'},
        {"text": 'Fin de session', "url": '/fin-session'}]
    # page display
    return make_response(render_template("views/vue-calcul-impot.html", modèle=modèle))

# hand
if __name__ == '__main__':
    app.config.update(ENV="development", DEBUG=True)
    app.run()
Comments
- lines 9-34: initialize all dynamic parts of the [vue-calcul-impot.html] view and the [v-calcul-impot.html] and [v-menu.html] fragments;
- line 36: the [vue-calcul-impot.html] view is displayed;
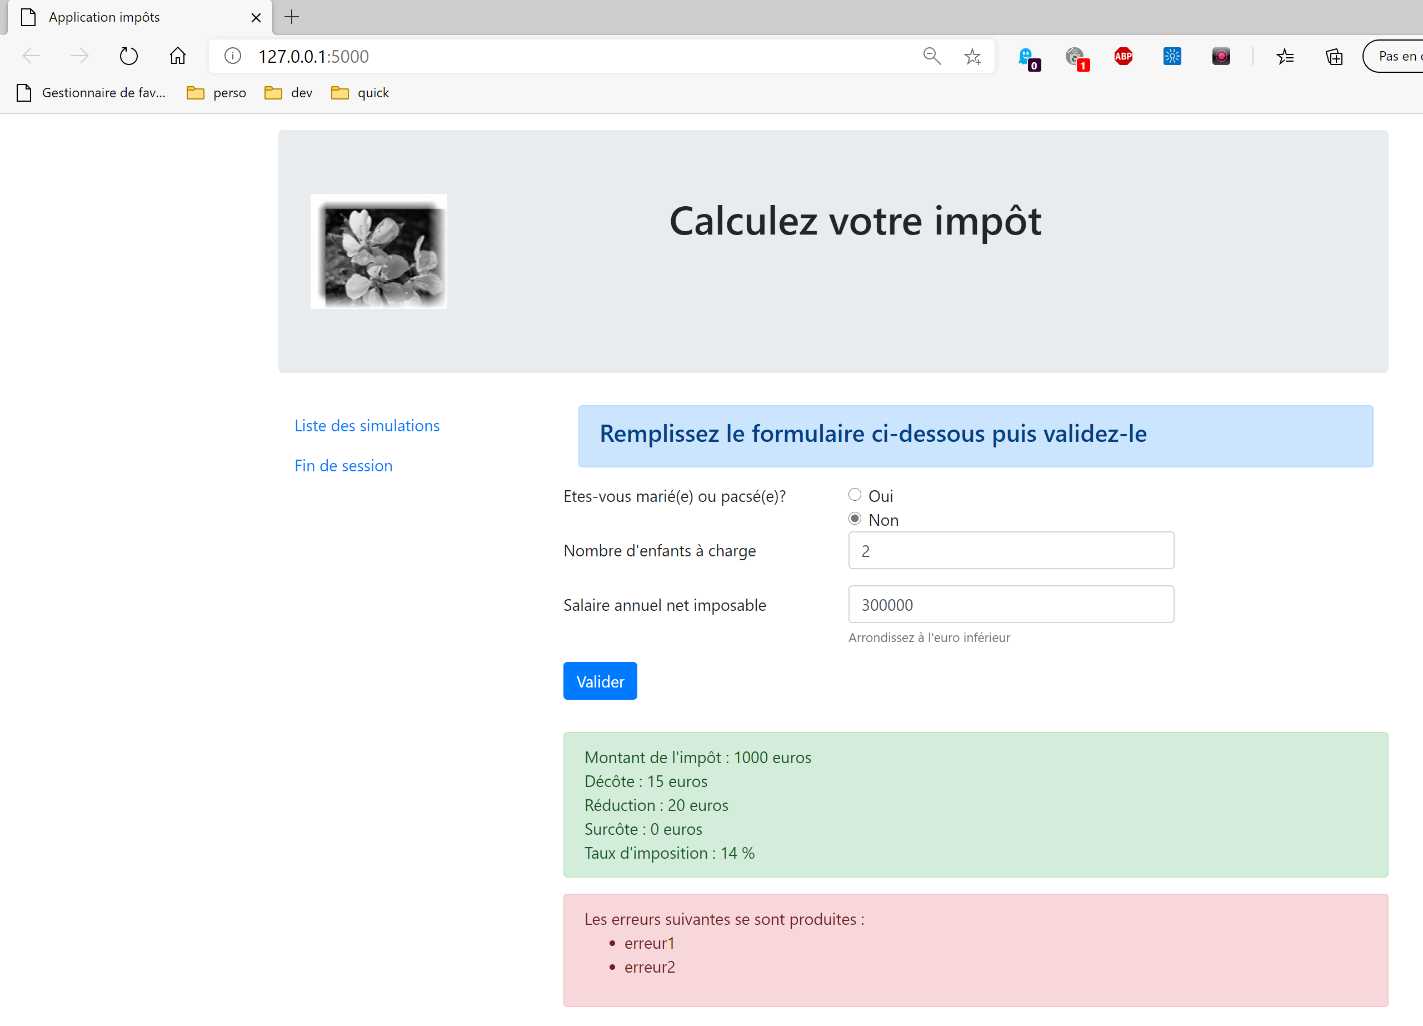
When we run the test script [test_vue_calcul_impot], we get the following result:
We work on this view until we are satisfied with the visual result. We can then proceed to integrate the view into the web application currently under development.
32.6.5. Calculating the view model
Once the visual appearance of the view has been determined, we can proceed to calculate the view model under real-world conditions. Let’s review the state codes that lead to this view. They can be found in the configuration file:
            {
                # tax calculation
                "états": [
                    # /authentifier-user success
                    200,
                    # /calculate-tax-success
                    300,
                    # /calculate-tax failure
                    301,
                    # /show-tax-calculation
                    800
                ],
                "view_name": "views/vue-calcul-impot.html",
                "model_for_view": ModelForCalculImpotView()
            },
These are the status codes [200, 300, 301, 800] that display the tax calculation view. To find the meaning of these codes, you can refer to the tests [Postman] performed on the application jSON:
- [authentifier-utilisateur-200]: 200 is the status code following a successful [authentifier-utilisateur] action: the empty tax calculation form is then displayed;
- [calculer-impot-300]: 300 is the status code following a successful [calculer-impot] action. The calculation form is then displayed with the data entered and the tax amount. The user can then perform another calculation;
- The status code [301] is returned for an incorrect tax calculation;
- status code [800] will be presented later. We have not encountered it yet;
Now that we know when the tax calculation form should be displayed, we can define its template in the [ModelForCalculImpotView] class:
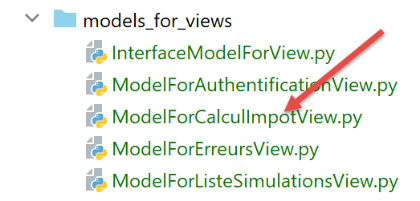
from flask import Request
from werkzeug.local import LocalProxy

from InterfaceModelForView import InterfaceModelForView

class ModelForCalculImpotView(InterfaceModelForView):

    def get_model_for_view(self, request: Request, session: LocalProxy, config: dict, résultat: dict) -> dict:
        # encapsulate view data in model
        modèle = {}
        # application status
        état = résultat["état"]
        # the model depends on the state
        if état in [200, 800]:
            # initial display of an empty form
            modèle["success"] = False
            modèle["error"] = False
            modèle["checkedNon"] = 'checked="checked"'
            modèle["checkedOui"] = ""
            modèle["enfants"] = ""
            modèle["salaire"] = ""
        elif état == 300:
            # successful calculation - result display
            modèle["success"] = True
            modèle["error"] = False
            modèle["impôt"] = f"Montant de l'impôt : {résultat['réponse']['impôt']} euros"
            modèle["décôte"] = f'Décôte : {résultat["réponse"]["décôte"]} euros'
            modèle["réduction"] = f"Réduction : {résultat['réponse']['réduction']} euros"
            modèle["surcôte"] = f'Surcôte : {résultat["réponse"]["surcôte"]} euros'
            modèle["taux"] = f"Taux d'imposition :  {résultat['réponse']['taux'] * 100} %"
            # form restored with values entered
            modèle["checkedOui"] = 'checked="checked"' if request.form.get("marié") == "oui" else ""
            modèle["checkedNon"] = 'checked="checked"' if request.form.get("marié") == "non" else ""
            modèle["enfants"] = request.form.get("enfants")
            modèle["salaire"] = request.form.get("salaire")
        elif état == 301:
            # error encountered - form restored with values entered
            modèle["checkedOui"] = 'checked="checked"' if request.form.get("marié") == "oui" else ""
            modèle["checkedNon"] = 'checked="checked"' if request.form.get("marié") == "non" else ""
            modèle["enfants"] = request.form.get("enfants")
            modèle["salaire"] = request.form.get("salaire")
            # error
            modèle["success"] = False
            modèle["error"] = True
            modèle["erreurs"] = ""
            for erreur in résultat['réponse']:
                modèle['erreurs'] += f"<li>{erreur}</li>"

        # menu options
        modèle["optionsMenu"] = [
            {"text": 'Liste des simulations', "url": '/lister-simulations'},
            {"text": 'Fin de session', "url": '/fin-session'}]
        # we render the model
        return modèle
Comments
- line 12: the view to display depends on the status code returned by the controller;
- lines 14–21: display of an empty form;
- lines 22–35: case where the tax calculation is successful. We redisplay the entered values as well as the tax amount;
- lines 36–47: case where the tax calculation fails;
- lines 49–52: calculation of the two menu options;
32.6.6. Tests [Postman]
We initialize a HTML session with the [init-session-html-700] request, then authenticate with the [authentifier-utilisateur-200] request. Then we use the following [calculer-impot-300] request:
The server's response is as follows:
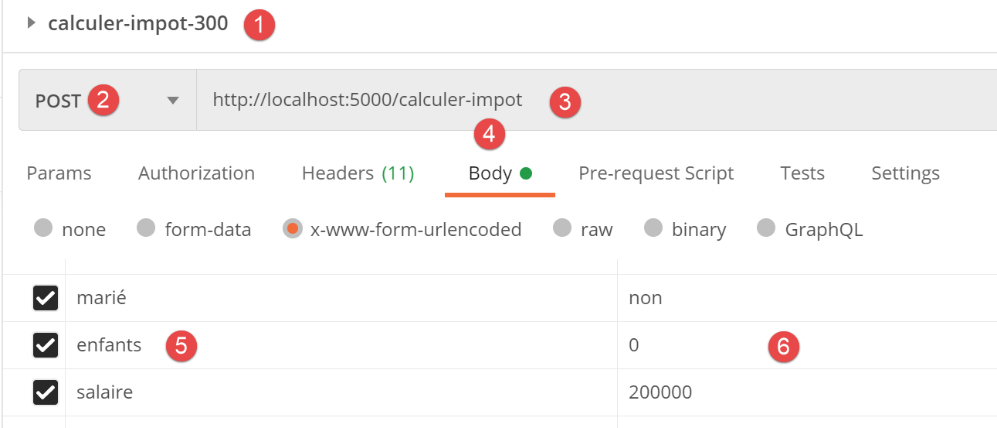
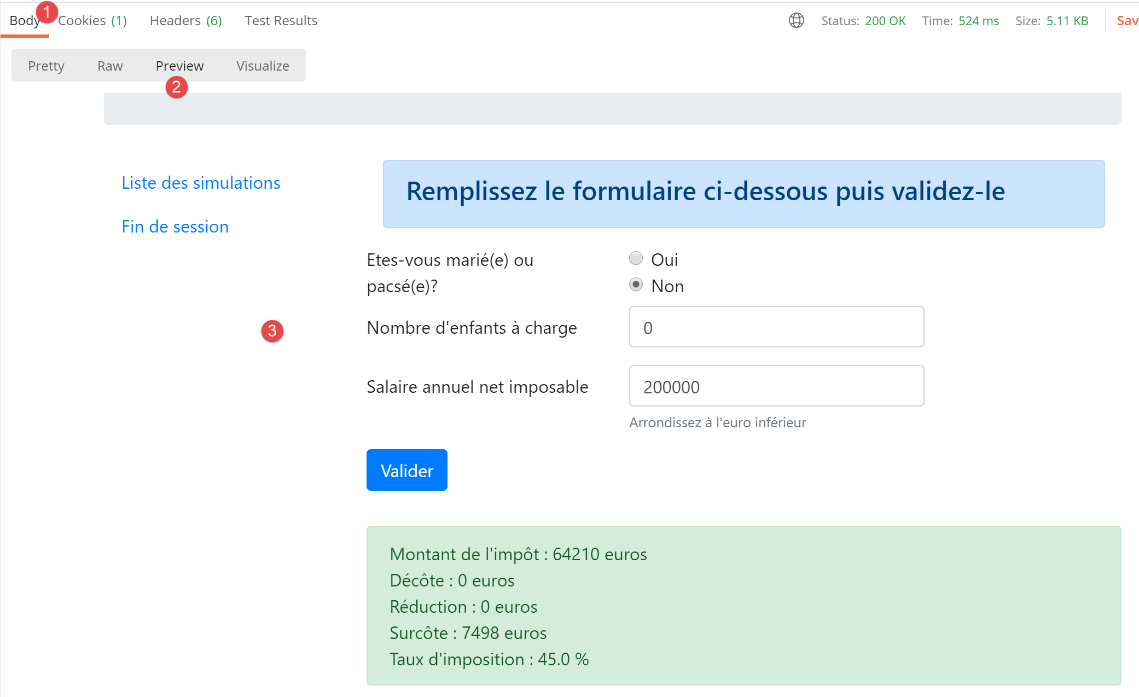
Now let’s try the following request: [calculer-impot-301]:
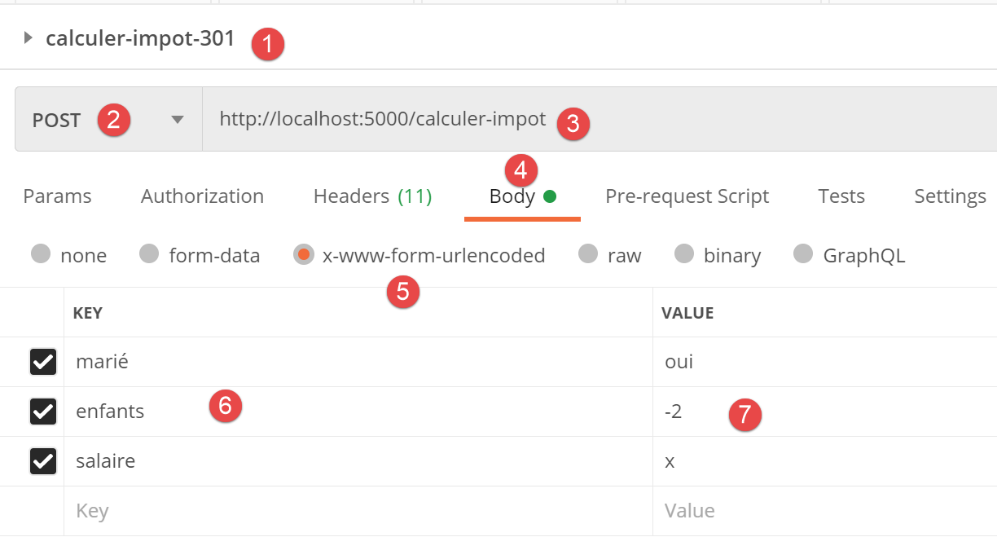
The server's response is as follows:
Now let’s try an unexpected scenario, one where parameters are missing from POST. This scenario is not possible during normal application operation. But anyone can “tinker” with a HTTP request as we are doing now:
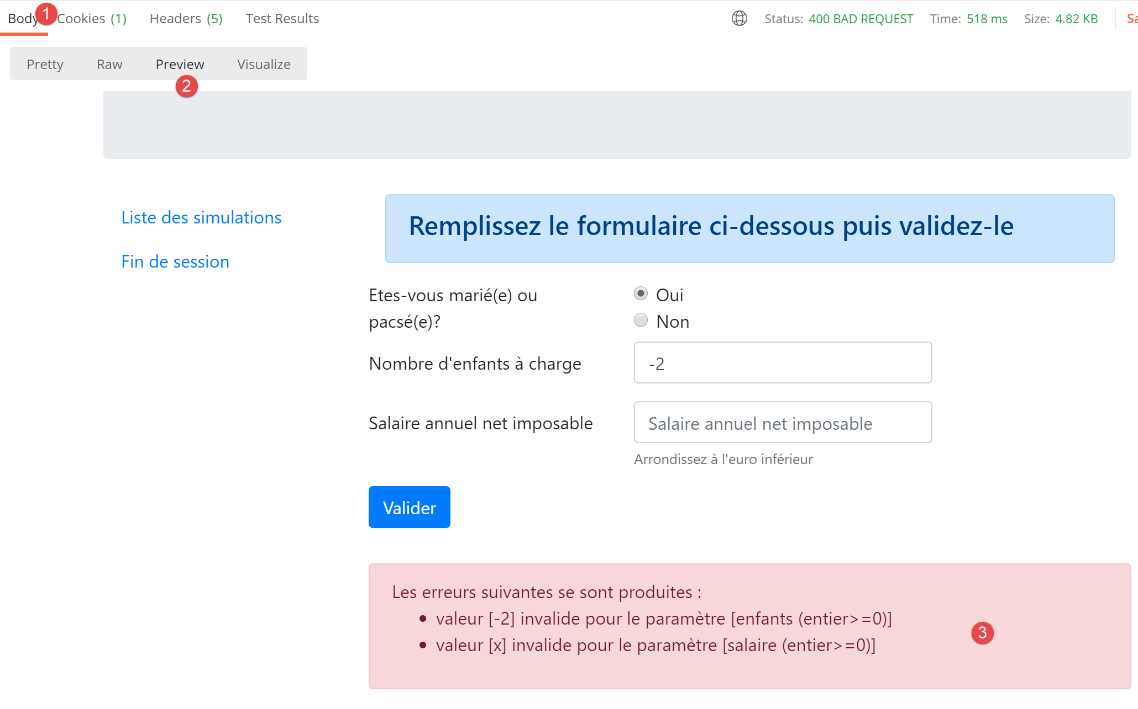
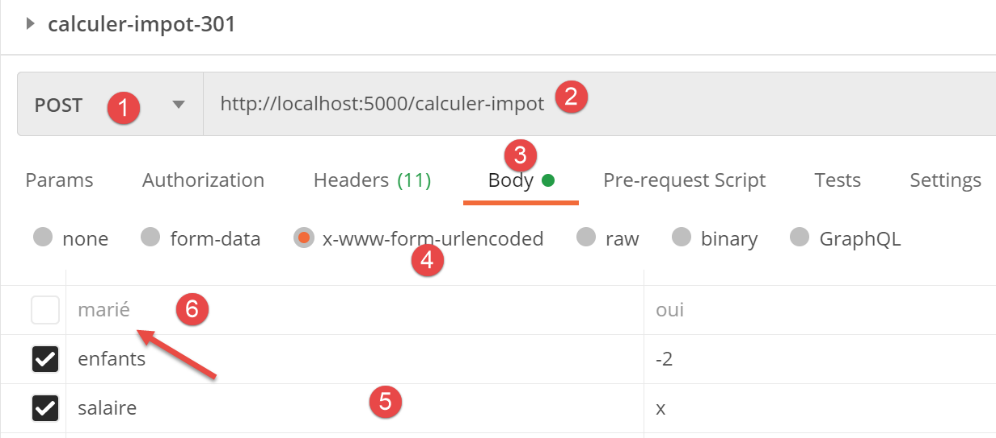
- In [6], we unchecked the posted parameter [marié];
The server’s response is as follows:
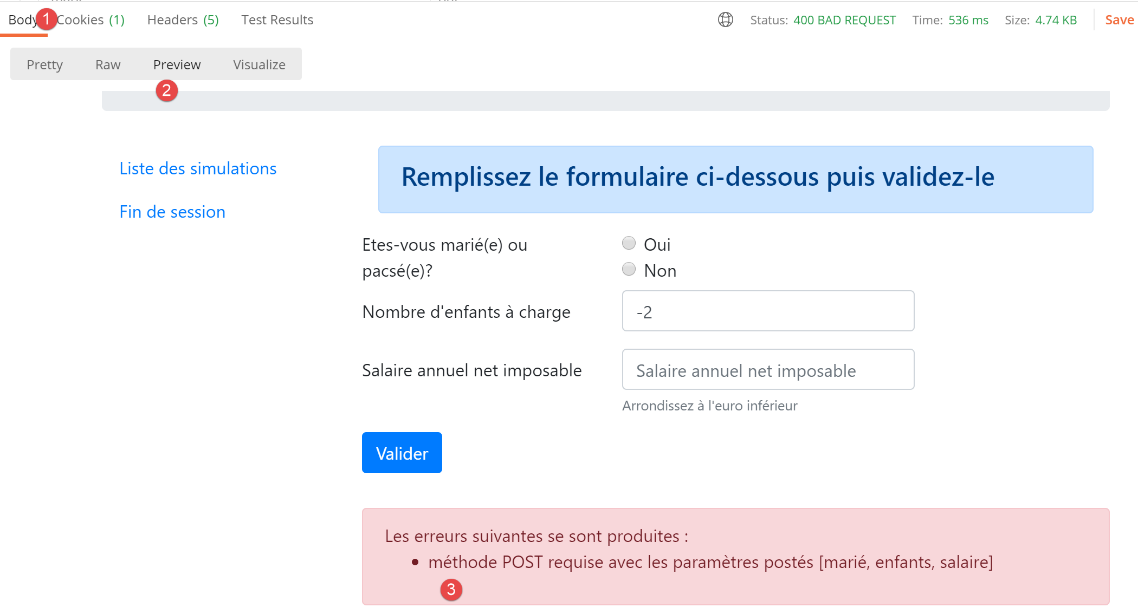
- in [3], the server error message;
In this application, we had a choice. We could have assigned this error case a status code that redirects to the unexpected errors page. In this application, we chose two status codes for each controller:
- [xx0]: for success;
- [xx1]: for failure;
For failure cases, we can use different status codes to enable more granular error handling. For example, we could have used:
- [xx1]: for errors to be displayed on the page that caused the error;
- [xx2]: for unexpected errors during normal use of the application;
32.7. The simulation list view
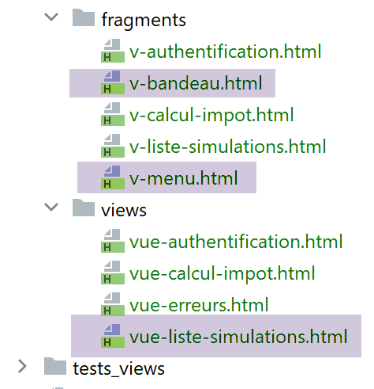
32.7.1. View overview
The view displaying the list of simulations is as follows:
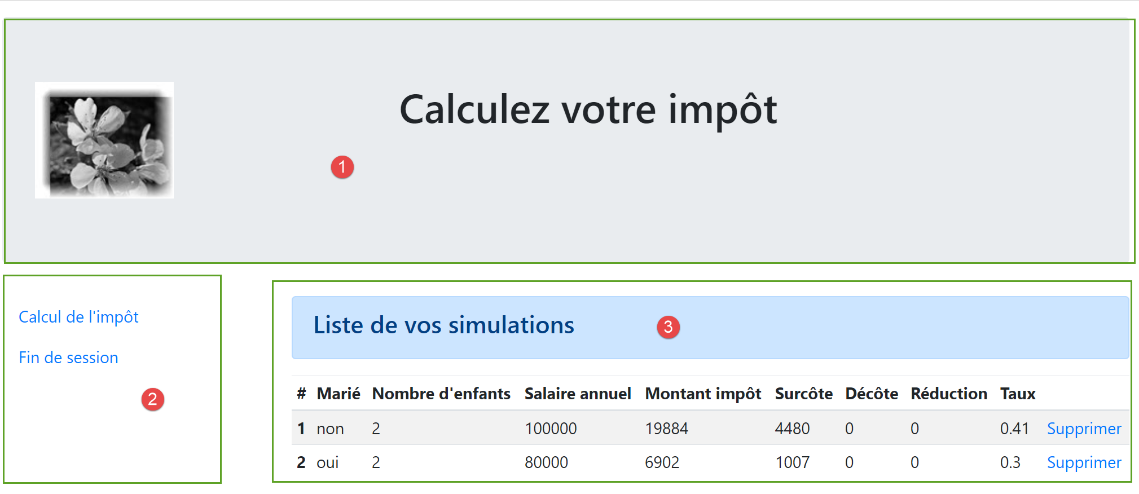
The view generated by the code [vue-liste-simulations.html] has three parts:
- 1: the top banner is generated by the [v-bandeau.html] fragment already presented;
- 3: the simulation table generated by the fragment [v-liste-simulations.html];
- 2: a menu with two links, generated by the fragment [v-menu.html] already presented;
The simulation view is generated by the following [vue-liste-simulations.html] code:
<!-- document HTML -->
<!doctype html>
<html lang="fr">
<head>
    <!-- Required meta tags -->
    <meta charset="utf-8">
    <meta name="viewport" content="width=device-width, initial-scale=1, shrink-to-fit=no">
    <!-- Bootstrap CSS -->
    <link rel="stylesheet" href="https://maxcdn.bootstrapcdn.com/bootstrap/4.4.1/css/bootstrap.min.css">
    <title>Application impôts</title>
</head>

<body>
<div class="container">
    <!-- headband -->
    {% include "fragments/v-bandeau.html" %}
    <!-- two-column line -->
    <div class="row">
        <!-- three-column menu-->
        <div class="col-md-3">
            {% include "fragments/v-menu.html" %}

        </div>
        <!-- list of simulations on 9 columns-->
        <div class="col-md-9">
            {% include "fragments/v-liste-simulations.html" %}
        </div>
    </div>
</div>
</body>
</html>
Comments
- line 16: inclusion of the [1] application banner;
- line 21: inclusion of the [2] menu. It will be displayed in three columns below the banner;
- line 26: inclusion of the [3] simulation table. It will be displayed in nine columns below the banner and to the right of the menu;
We have already discussed two of the three fragments of this view:
The fragment [v-liste-simulations.html] is as follows:
{% if modèle.simulations is undefined or modèle.simulations|length==0 %}
<!-- message on blue background -->
<div class="alert alert-primary" role="alert">
    <h4>Votre liste de simulations est vide</h4>
</div>
{% endif %}

{% if modèle.simulations is defined and modèle.simulations|length!=0 %}
<!-- message on blue background -->
<div class="alert alert-primary" role="alert">
    <h4>Liste de vos simulations</h4>
</div>

<!-- simulation table -->
<table class="table table-sm table-hover table-striped">
    <!-- headers of the six table columns -->
    <thead>
    <tr>
        <th scope="col">#</th>
        <th scope="col">Marié</th>
        <th scope="col">Nombre d'enfants</th>
        <th scope="col">Salaire annuel</th>
        <th scope="col">Montant impôt</th>
        <th scope="col">Surcôte</th>
        <th scope="col">Décôte</th>
        <th scope="col">Réduction</th>
        <th scope="col">Taux</th>
        <th scope="col"></th>
    </tr>
    </thead>
    <!-- table body (data displayed) -->
    <tbody>
    <!-- display each simulation by browsing the simulation table -->
    {% for simulation in modèle.simulations %}

    <!-- display a table row with 6 columns - <tr> tag -->
    <!-- column 1: row header (simulation no.) - <th scope='row' tag -->
    <!-- column 2: parameter value [marié] - <td> tag -->
    <!-- column 3: parameter value [enfants] - <td> tag -->
    <!-- column 4: parameter value [salaire] - <td> tag -->
    <!-- column 5: [impôt] (tax) parameter value - <td> tag -->
    <!-- column 6: parameter value [surcôte] - <td> tag -->
    <!-- column 7: parameter value [décôte] - <td> tag -->
    <!-- column 8: parameter value [réduction] - <td> tag -->
    <!-- column 9: [taux] (tax) parameter value - <td> tag -->
    <!-- column 10: link to delete simulation - <td> tag -->
    <tr>
        <th scope="row">{{simulation.id}}</th>
        <td>{{simulation.marié}}</td>
        <td>{{simulation.enfants}}</td>
        <td>{{simulation.salaire}}</td>
        <td>{{simulation.impôt}}</td>
        <td>{{simulation.surcôte}}</td>
        <td>{{simulation.décôte}}</td>
        <td>{{simulation.réduction}}</td>
        <td>{{simulation.taux}}</td>
        <td><a href="/supprimer-simulation/{{simulation.id}}">Supprimer</a></td>
    </tr>
    {% endfor %}
    </tr>
    </tbody>
</table>
{% endif %}
Comments
- A table named HTML is created using the <table> tag (lines 15 and 62);
- The table column headers are defined within a <thead> tag (table head, lines 17, 30). The <tr> tag (table row, lines 18 and 29) delimits a row. Lines 19–28: the <th> tag (table header) defines a column header. There are therefore ten of them. [scope="col"] indicates that the header applies to the column. [scope="row"] indicates that the header applies to the row;
- Lines 32–61: The <tbody> tag encloses the data displayed by the table;
- lines 47–58: the <tr> tag wraps a row of the table;
- Line 48: The <th scope='row'> tag defines the row header. The browser highlights this header;
- Lines 49–57: Each td tag (table data) defines a column in the row;
- Line 34: The list of simulations is found in the [modèle.simulations] template, which is a list of dictionaries;
- line 57: a link to delete the simulation. The URL uses the number of the simulation displayed in the row;
32.7.2. Visual Test
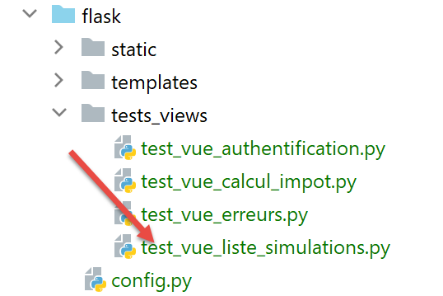
We create a test script for the [vue-liste-simulations.html] view:
The [test_vue_liste_simulations] script is as follows:
from flask import Flask, make_response, render_template

# flask application
app = Flask(__name__, template_folder="../templates", static_folder="../static")

# Home URL
@app.route('/')
def index():
    # we encapsulate the paged data in the model
    modèle = {}
    # put the simulations in the format expected by the page
    modèle["simulations"] = [
        {
            "id": 7,
            "marié": "oui",
            "enfants": 2,
            "salaire": 60000,
            "impôt": 448,
            "décôte": 100,
            "réduction": 20,
            "surcôte": 0,
            "taux": 0.14
        },
        {
            "id": 19,
            "marié": "non",
            "enfants": 2,
            "salaire": 200000,
            "impôt": 25600,
            "décôte": 0,
            "réduction": 0,
            "surcôte": 8400,
            "taux": 0.45
        }
    ]
    # menu
    modèle["optionsMenu"] = [
        {"text": "Calcul de l'impôt", "url": '/afficher-calcul-impot'},
        {"text": 'Fin de session', "url": '/fin-session'}]
    # page display
    return make_response(render_template("views/vue-liste-simulations.html", modèle=modèle))

# hand
if __name__ == '__main__':
    app.config.update(ENV="development", DEBUG=True)
    app.run()
Comments
- lines 12–35: we add two simulations to the model
- lines 37-39: the menu options table;
Let’s display this view by running this script. We get the following result:
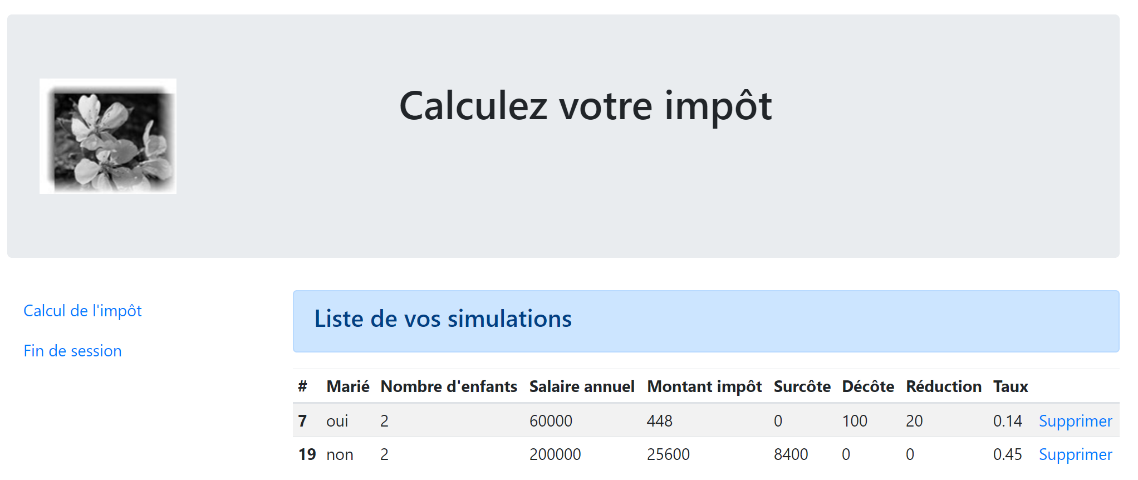
We work on this view until we are satisfied with the visual result. We can then proceed to integrate the view into the web application currently being developed.
32.7.3. Calculating the view model
Once the visual appearance of the view has been determined, we can proceed to calculate the view model under real-world conditions. Let’s review the state codes that lead to this view. They can be found in the configuration file:
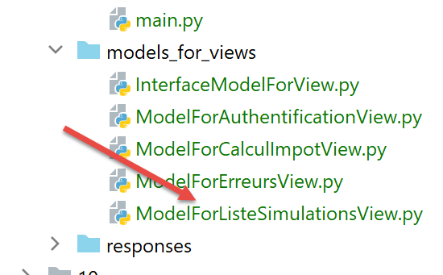
            {
                # view of simulation list
                "états": [
                    # /lister-simulations
                    500,
                    # /suppress-simulation
                    600
                ],
                "view_name": "views/vue-liste-simulations.html",
                "model_for_view": ModelForListeSimulationsView()
            }
These are the status codes [500, 600] that display the simulations view. To find the meaning of these codes, you can refer to the [Postman] tests performed on the jSON application:
- [lister-simulations-500]: 500 is the status code following a successful [lister-simulations] action: the list of simulations performed by the user is then displayed;
- [supprimer-simulation-600]: 600 is the status code following a successful [supprimer-simulation] action. The new list of simulations obtained after this deletion is then displayed;
Now that we know when the list of simulations should be displayed, we can calculate its template in the [ModelForListeSimulationsView] class:
from flask import Request
from werkzeug.local import LocalProxy

from InterfaceModelForView import InterfaceModelForView

class ModelForListeSimulationsView(InterfaceModelForView):

    def get_model_for_view(self, request: Request, session: LocalProxy, config: dict, résultat: dict) -> dict:
        # we encapsulate the paged data in the model
        modèle = {}
        # simulations are found in the response of the controller that executed the action
        # as an array of TaxPayer dictionaries
        modèle["simulations"] = résultat["réponse"]
        # menu
        modèle["optionsMenu"] = [
            {"text": "Calcul de l'impôt", "url": '/afficher-calcul-impot'},
            {"text": 'Fin de session', "url": '/fin-session'}]
        # we render the model
        return modèle
Comments
- line 13: the simulations to display are found in [result["réponse"]];
- lines 15-17: the menu options to display;
32.7.4. Tests [Postman]
We
- initialize a HTML session;
- authenticate;
- performs three tax calculations;
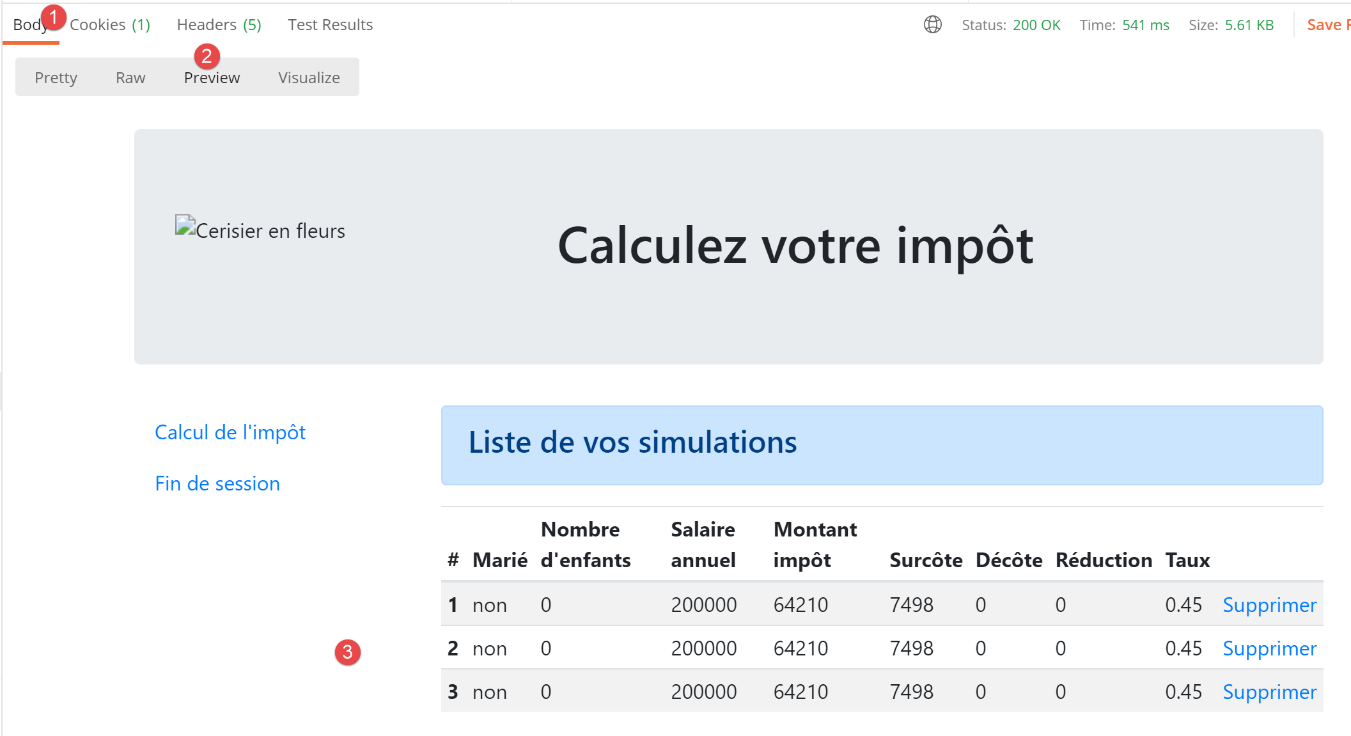
The [lister-simulations-500] test returns status code 500. This corresponds to a request to view the simulations:
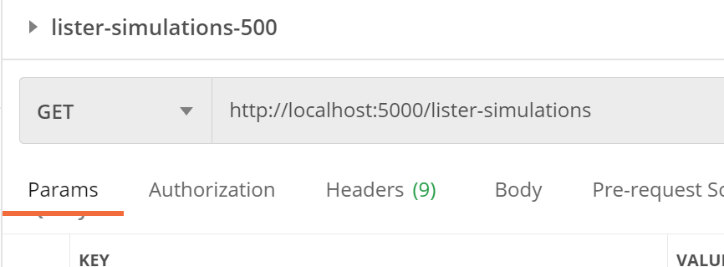
The server response is as follows:
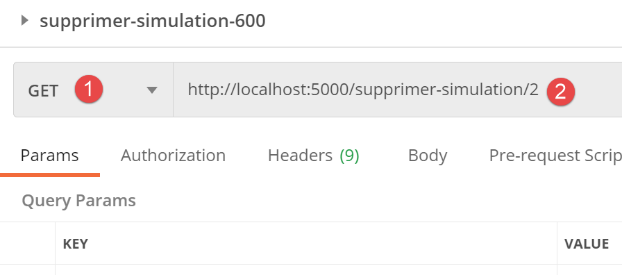
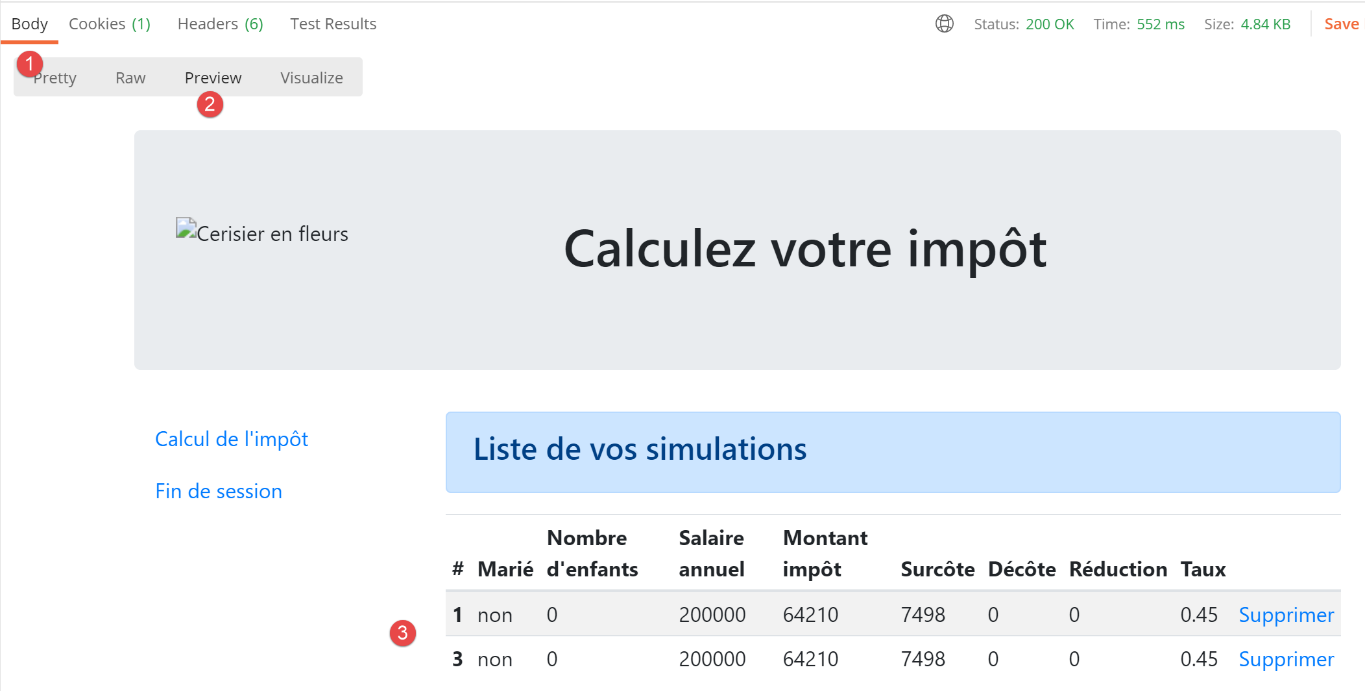
The [supprimer-simulation-600] test returns status code 600. Here, we will delete simulation #2.
The result returned is a list of simulations with one simulation missing:
32.8. Viewing Unexpected Errors
Here, we refer to an “unexpected error” as an error that should not have occurred during normal use of the web application. For example, requesting a tax calculation without being authenticated. Nothing prevents a user from typing URL [/calcul-impot] directly into their browser. Furthermore, as we have seen, they can trigger a POST on the URL [/calcul-impot] by not sending the expected parameters. We have seen that our web application was able to respond correctly to this request. We will refer to an "unexpected error" as an error that should not occur within the context of the HTML application. If it does occur, it is likely that someone is attempting to "hack" the application. For educational purposes, we have decided to display an error page for these cases. In reality, we could re-display the last page sent to the client. To do this, we simply need to store the last HTML response sent in the session. In the event of an unexpected error, we return this response. This way, the user will have the impression that the server is not responding to their errors since the displayed page does not change.
32.8.1. View Overview
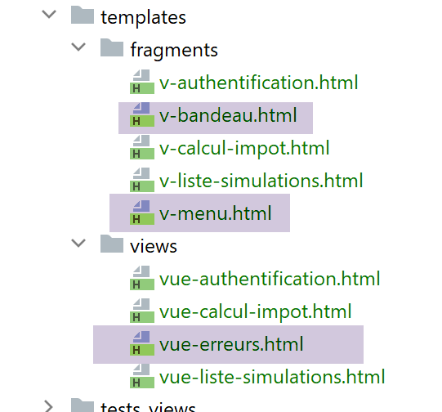
The view that displays unexpected errors is as follows:
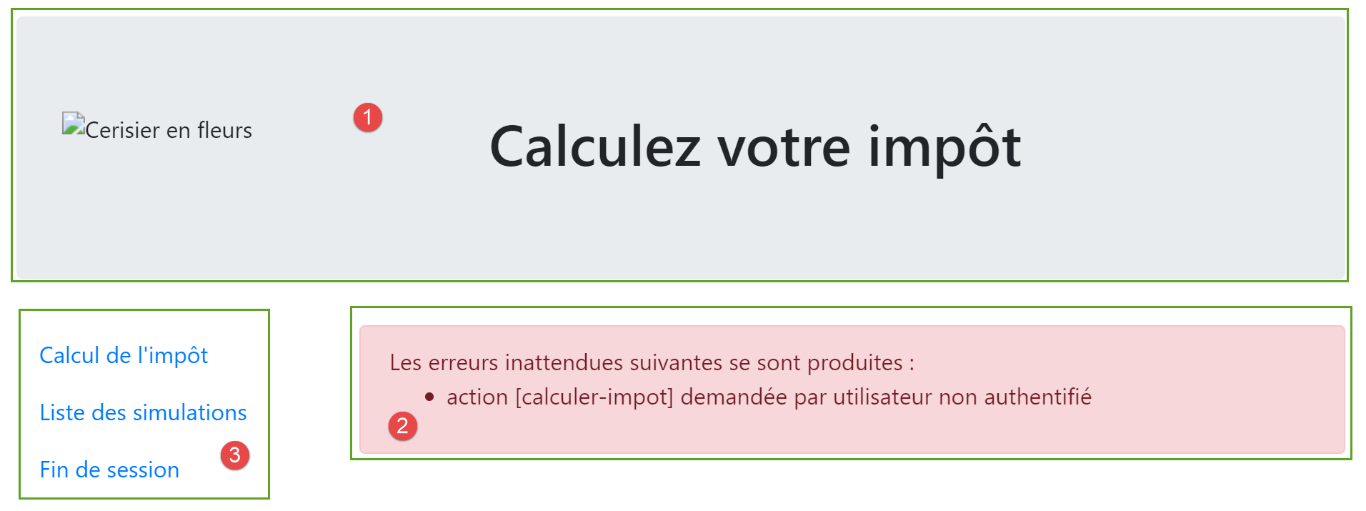
The view generated by the code [vue-erreurs.html] consists of three parts:
- 1: The top banner is generated by the [v-bandeau.html] fragment already presented;
- 2: the unexpected error(s);
- 3: a menu with three links, generated by the fragment [v-menu.html] already presented;
The view of the unexpected errors is generated by the following script [vue-erreurs.html]:
<!-- document HTML -->
<!doctype html>
<html lang="fr">
<head>
    <!-- Required meta tags -->
    <meta charset="utf-8">
    <meta name="viewport" content="width=device-width, initial-scale=1, shrink-to-fit=no">
    <!-- Bootstrap CSS -->
    <link rel="stylesheet" href="https://maxcdn.bootstrapcdn.com/bootstrap/4.4.1/css/bootstrap.min.css">
    <title>Application impôts</title>
</head>

<body>
<div class="container">
    <!-- 12-column banner -->
    {% include "fragments/v-bandeau.html" %}
    <!-- two-section line -->
    <div class="row">
        <!-- 3-column menu-->
        <div class="col-md-3">
            {% include "fragments/v-menu.html" %}
        </div>
        <!-- 9-column error list -->
        <div class="col-md-9">
            <div class="alert alert-danger" role="alert">
                Les erreurs inattendues suivantes se sont produites :
                <ul>{{modèle.erreurs|safe}}</ul>
            </div>
        </div>
    </div>
</div>
</body>
</html>
Comments
- line 16: inclusion of the [1] application banner;
- line 21: inclusion of the [3] menu. It will be displayed in three columns below the banner;
- lines 24–29: display of the error area across nine columns;
- line 25: this display will be in a Bootstrap container with a pink background;
- line 26: introductory text;
- line 27: the <ul> tag encloses a bulleted list. This bulleted list is provided by the [modèle.erreurs] template;
We have already commented on the two fragments of this view:
32.8.2. Visual test
We create a test script for the [vue-erreurs.html] view:
from flask import Flask, render_template, make_response

# flask application
app = Flask(__name__, template_folder="../templates", static_folder="../static")

# Home URL
@app.route('/')
def index():
    # we encapsulate the paged data in the model
    modèle = {}
    # build a HTML list of errors
    content = ""
    for erreur in ["erreur1", "erreur2"]:
        content += f"<li>{erreur}</li>"
    modèle["erreurs"] = content
    # menu options
    modèle["optionsMenu"] = [
        {"text": "Calcul de l'impôt", "url": '/calculer-impot'},
        {"text": 'Liste des simulations', "url": '/lister-simulations'},
        {"text": 'Fin de session', "url": '/fin-session'}]

    # page display
    return make_response(render_template("views/vue-erreurs.html", modèle=modèle))

# hand
if __name__ == '__main__':
    app.config.update(ENV="development", DEBUG=True)
    app.run()
Comments
- lines 11-15: construction of the HTML error list;
- lines 17-20: the menu options array;
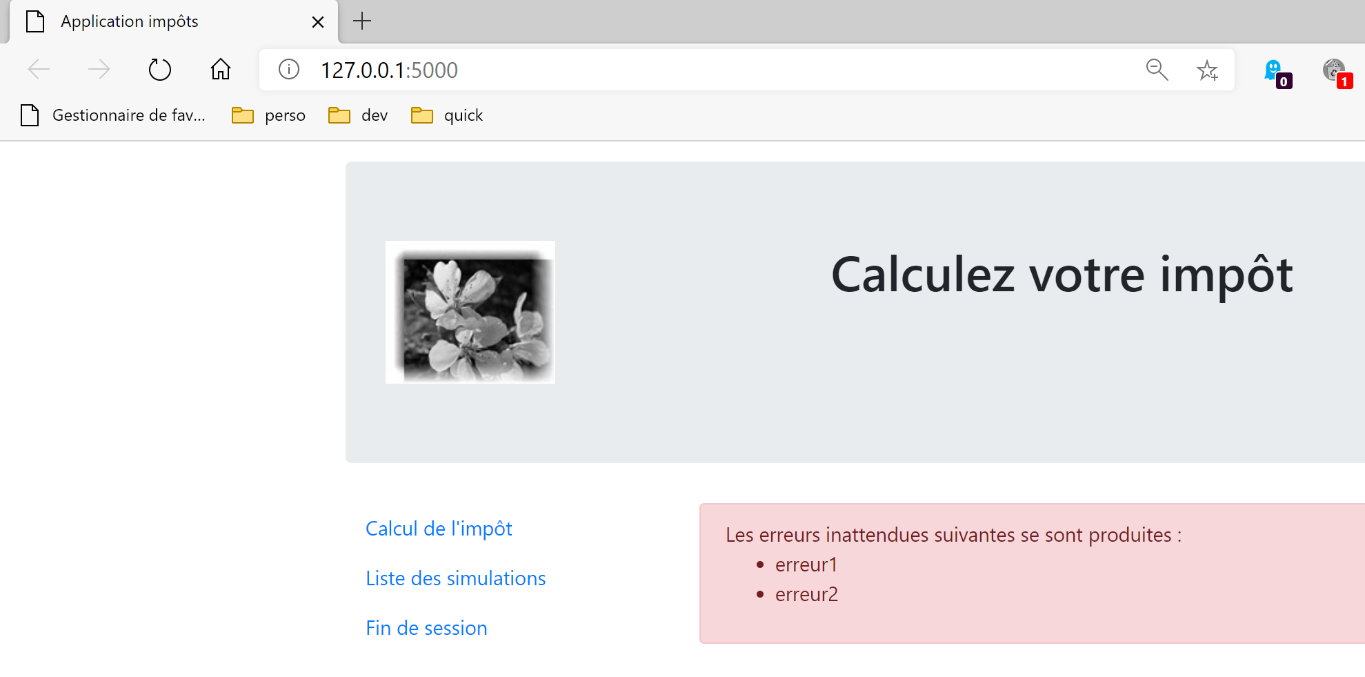
Let’s run this script. We get the following result:
We work on this view until we are satisfied with the visual result. We can then proceed to integrate the view into the web application currently under development.
32.8.3. Calculating the view model
Once the visual appearance of the view has been determined, we can proceed to calculate the view model under real-world conditions. Let’s review the state codes that lead to this view. They can be found in the configuration file:
        # HTML views and their models depend on the state rendered by the controller
        "views": [
            {
                # authentication view
                "états": [
                    # /init-session success
                    700,
                    # /end-session
                    400,
                    # /authentifier-user failure
                    201
                ],
                "view_name": "views/vue-authentification.html",
                "model_for_view": ModelForAuthentificationView()
            },
            {
                # tax calculation
                "états": [
                    # /authentifier-user success
                    200,
                    # /calculate-tax-success
                    300,
                    # /calculate-tax failure
                    301,
                    # /show-tax-calculation
                    800
                ],
                "view_name": "views/vue-calcul-impot.html",
                "model_for_view": ModelForCalculImpotView()
            },
            {
                # view of simulation list
                "états": [
                    # /lister-simulations
                    500,
                    # /suppress-simulation
                    600
                ],
                "view_name": "views/vue-liste-simulations.html",
                "model_for_view": ModelForListeSimulationsView()
            }
        ],
        # view of unexpected errors
        "view-erreurs": {
            "view_name": "views/vue-erreurs.html",
            "model_for_view": ModelForErreursView()
        },
It is the status codes that do not lead to a HTML view in lines 3–41 that cause the unexpected error view to be displayed.
The view model for [vue-erreurs.html] is calculated by the following class:
from flask import Request
from werkzeug.local import LocalProxy

from InterfaceModelForView import InterfaceModelForView

class ModelForErreursView(InterfaceModelForView):

    def get_model_for_view(self, request: Request, session: LocalProxy, config: dict, résultat: dict) -> dict:
        # the model
        modèle = {}
        # errors
        modèle["erreurs"] = ""
        for erreur in résultat['réponse']:
            modèle['erreurs'] += f"<li>{erreur}</li>"
        # menu
        modèle["optionsMenu"] = [
            {"text": "Calcul de l'impôt", "url": '/afficher-calcul-impot'},
            {"text": 'Liste des simulations', "url": '/lister-simulations'},
            {"text": 'Fin de session', "url": '/fin-session'}]
        # we render the model
        return modèle
Comments
- lines 11-14: calculation of the [modèle.erreurs] model used by the [vue-erreurs.html] view;
- lines 16-197: calculation of the [modèle.optionsMenu] template used by the [v-menu.html] fragment;
32.8.4. Tests [Postman]
We perform:
- the action [/init-session/html];
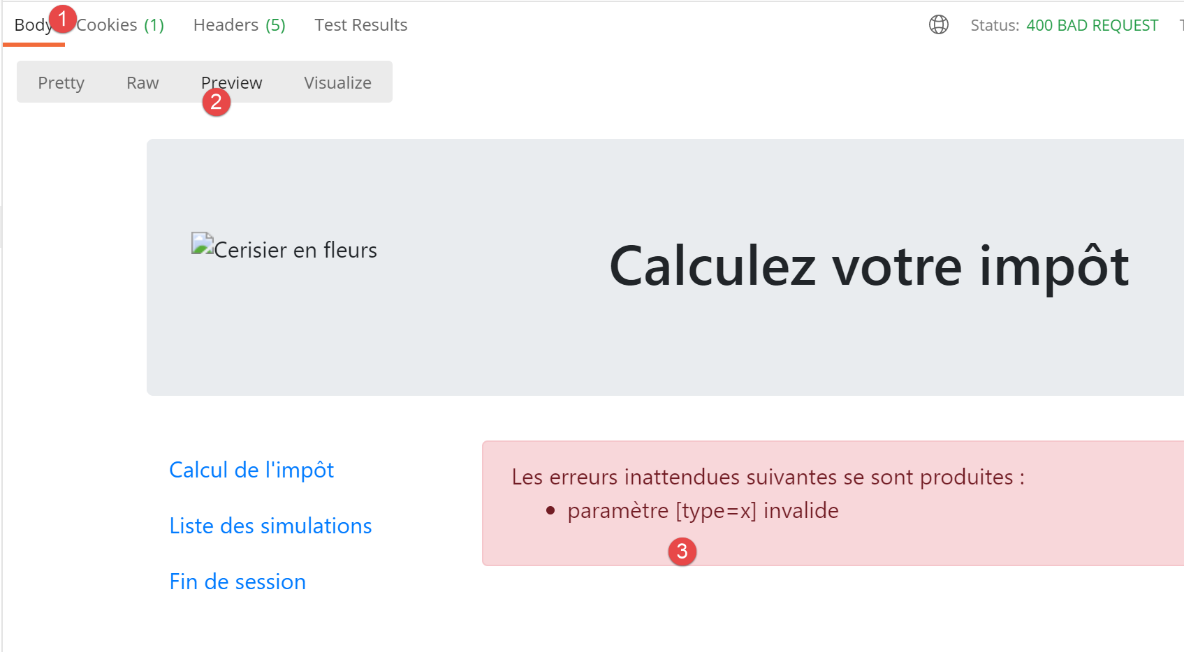
- then the action [/init-session/x];
The response HTML is then as follows:
32.9. Implementation of the application menu actions
Here we will discuss the implementation of menu actions. Let’s review the meaning of the links we’ve encountered
View | Link | Target | Role |
Tax Calculation | [Liste des simulations] | [/lister-simulations] | Request the list of simulations |
[Fin de session] | |||
List of simulations | [Calcul de l’impôt] | [/afficher-calcul-impot] | Display the tax calculation view |
[Fin de session] | |||
Unexpected errors | [Calcul de l’impôt] | [/afficher-calcul-impot] | Display the tax calculation view |
[Liste des simulations] | |||
[Fin de session] |
Note that clicking a link triggers a GET to the link’s target. The [/lister-simulations, /fin-session] actions have been implemented with a GET operation, which allows us to use them as link targets. When the action is performed via a POST, using a link is no longer possible unless it is combined with a Javascript.
32.9.1. The [/afficher-calcul-impot] action
From the actions above, it appears that the [/afficher-calcul-impot] action has not yet been implemented. This is a navigation operation between two views: the jSON or XML server has no reason to implement it because they do not have the concept of a view. It is the HTML server that introduces this concept.
We therefore need to implement the action [/afficher-calcul-impot]. This will allow us to review the procedure for implementing an action within the server.
First, we need to add a new secondary controller. We’ll call it [AfficherCalculImpotController]:
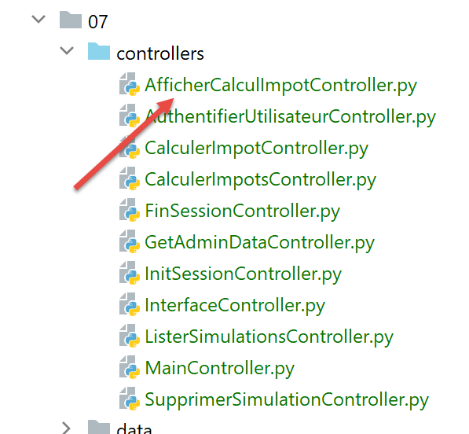
This controller must be added to the configuration file [config]:
    # controllers
    from AfficherCalculImpotController import AfficherCalculImpotController
    from AuthentifierUtilisateurController import AuthentifierUtilisateurController
    from CalculerImpotController import CalculerImpotController
    from CalculerImpotsController import CalculerImpotsController
    from FinSessionController import FinSessionController
    from GetAdminDataController import GetAdminDataController
    …


        # authorized shares and their controllers
        "controllers": {
            # initialization of a calculation session
            "init-session": InitSessionController(),
            # user authentication
            "authentifier-utilisateur": AuthentifierUtilisateurController(),
            # tax calculation in individual mode
            "calculer-impot": CalculerImpotController(),
            # batch mode tax calculation
            "calculer-impots": CalculerImpotsController(),
            # list of simulations
            "lister-simulations": ListerSimulationsController(),
            # deleting a simulation
            "supprimer-simulation": SupprimerSimulationController(),
            # end of calculation session
            "fin-session": FinSessionController(),
            # display tax calculation view
            "afficher-calcul-impot": AfficherCalculImpotController(),
            # obtaining data from tax authorities
            "get-admindata": GetAdminDataController(),
            # main controller
            "main-controller": MainController()
        },
…
       # HTML views and their models depend on the state rendered by the controller
        "views": [
            {
                # authentication view
                …
            },
            {
                # tax calculation
                "états": [
                    # /authentifier-user success
                    200,
                    # /calculate-tax-success
                    300,
                    # /calculate-tax failure
                    301,
                    # /show-tax-calculation
                    800
                ],
                "view_name": "views/vue-calcul-impot.html",
                "model_for_view": ModelForCalculImpotView()
            },
            {…
            }
        ],
- line 2: the new controller;
- line 28: the new action and its controller;
- line 51: the new controller will return status code 800. When switching views, there can be no error. The view displayed is the [vue-calcul-impot.html] view that we have studied, explained, and tested;
The [AfficherCalculImpotController] controller will be as follows:
from flask_api import status
from werkzeug.local import LocalProxy

from InterfaceController import InterfaceController

class AfficherCalculImpotController(InterfaceController):

    def execute(self, request: LocalProxy, session: LocalProxy, config: dict) -> (dict, int):
        # retrieve elements from path
        dummy, action = request.path.split('/')

        # change of view - just a status code to set
        return {"action": action, "état": 800, "réponse": ""}, status.HTTP_200_OK
Comments
- line 6: like the other secondary controllers, the new controller implements the [InterfaceController] interface;
- line 13: view changes are easy to implement: simply return a status code associated with the target view, in this case code 800 as seen above;
32.9.2. The [/fin-session] action
The [/fin-session] action is unique. It does not lead directly to a view but to a redirect. Recall that redirects are configured in the [config] configuration as follows:
        # redirections
        "redirections": [
            {
                "états": [
                    400,  # /end-session successful
                ],
                # redirection to
                "to": "/init-session/html",
            }
        ],
There is only one redirect in the application:
- when the controller returns the status code [400] (line 5), the client must be redirected to URL [http://machine:port/chemin/init-session/html] (line 8);
The status code [400] is the code returned following a successful [/fin-session] action. Why, then, must the client be redirected to URL [/init-session/html]? Because the [/fin-session] action code removes the session type from the web session. We then no longer know that we are in a html session. We need to redirect it. We do this using the [/init-session/html] action.
HTML redirects are handled by the [HtmlResponse] class:
   def build_http_response(self, request: LocalProxy, session: LocalProxy, config: dict, status_code: int,
                            résultat: dict) -> (Response, int):
        # the HTML response depends on the status code returned by the controller
        état = résultat["état"]

        # do I need to redirect?
        for redirection in config["redirections"]:
            # conditions requiring redirection
            états = redirection["états"]
            if état in états:
                # you need to redirect
                return redirect(f"{redirection['to']}"), status.HTTP_302_FOUND

        # a state corresponds to a view
        # search for it in the list of views
 ..
- Lines 6–12 handle redirects;
- line 7: config[‘redirections’] is a list of redirects. Each redirect is a dictionary with the keys:
- [états]: the states returned by the controller that lead to a redirect;
- [to]: the redirect URL;
- lines 7–12: we iterate through the list of redirects;
- line 9: for each redirect, retrieve the states that lead to it;
- line 10: if the tested state is in this list, then perform the redirect, line 12;
- line 12: note that the method [build_http_response] must return a two-element tuple:
- [response]: the HTTP response to be generated. This is constructed using the [redirect] function, whose parameter is the redirect address;
- [status_code]: the status code of the response HTTP, in this case the code [status.HTTP_302_FOUND], which instructs the client to redirect;
Let’s run a test [Postman]. We:
- initialize a session HTML [init-session/html];
- authenticate [/authentifier-utilisateur];
- end the session [/fin-session];
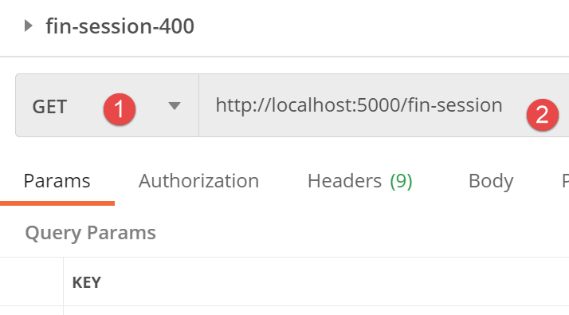
The server’s response is as follows:
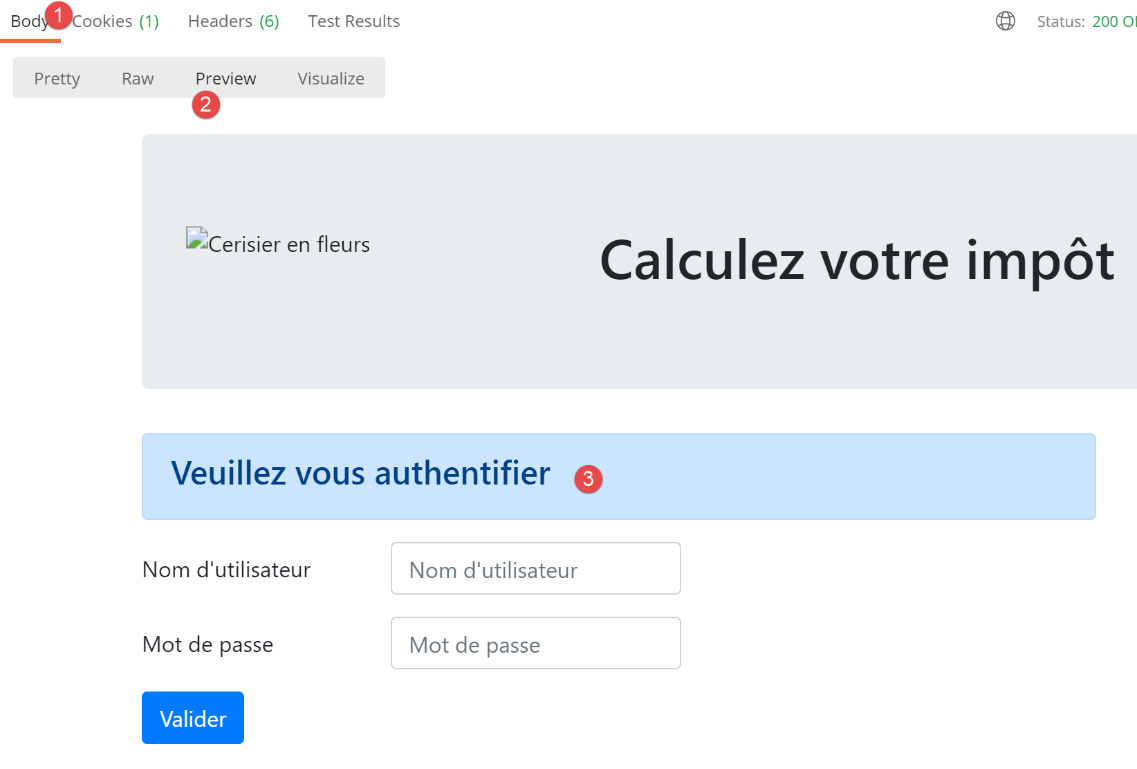
We have obtained the authentication view. This is indeed what we were expecting. Now, let’s see how it was obtained. Switch to the console [Postman] (Ctrl-Alt-C):

- in [1], the action [/fin-session];
- in [2-3], the 302 status code HTTP returned by the server tells the client that it is redirecting;
- in [4], the client [Postman] follows the redirection;
32.10. Testing the HTML application under real-world conditions
The code has been written and each action tested with [Postman]. We still need to test the sequence of views in a real-world scenario. We need a way to initialize the session HTML. We know we need to send the [/init-session/html] request to the server. This isn’t a very practical URL. We’d prefer to start with the URL [/].
We have written the following route in the main script [main]:
from flask import request, Flask, session, url_for, redirect
…
…
@app.route('/', methods=['GET'])
def index() -> tuple:
    # redirect to /init-session/html
    return redirect(url_for("init_session", type_response="html"), status.HTTP_302_FOUND)
…
# init-session
@app.route('/init-session/<string:type_response>', methods=['GET'])
def init_session(type_response: str) -> tuple:
    # execute the controller associated with the action
    return front_controller()
- lines 4-7: handling the [/] route. The entry point of the web application will be URL[/init-session/html] (line 10). Also on line 7, we redirect the client to this URL:
- The [url_for] function is imported on line 1. It has two parameters here (line 7):
- The first parameter is the name of one of the routing functions, in this case the one on line 11. We can see that this function expects a parameter [type_response], which is the type (json, xml, html) of response desired by the client;
- the second parameter takes the name of the parameter from line 11, [type_response], and assigns a value to it. If there were other parameters, we would repeat the operation for each of them;
- it returns the URL associated with the function designated by the two parameters provided to it. Here, this will return the URL from line 10, where the parameter is replaced by its value [/init-session/html];
- The [redirect] function was imported in line 1. Its role is to send a HTTP redirection header to the client:
- the first parameter is the URL to which the client must be redirected;
- the second parameter is the status code of the HTTP response sent to the client. The code [status.HTTP_302_FOUND] corresponds to a HTTP redirection;
We’re ready. We’ll now present a few view sequences.
In our browser, we enable developer tools (F12 in Chrome, Firefox, Edge) and request the URL startup page [http://localhost:5000/]. The server’s response is as follows:
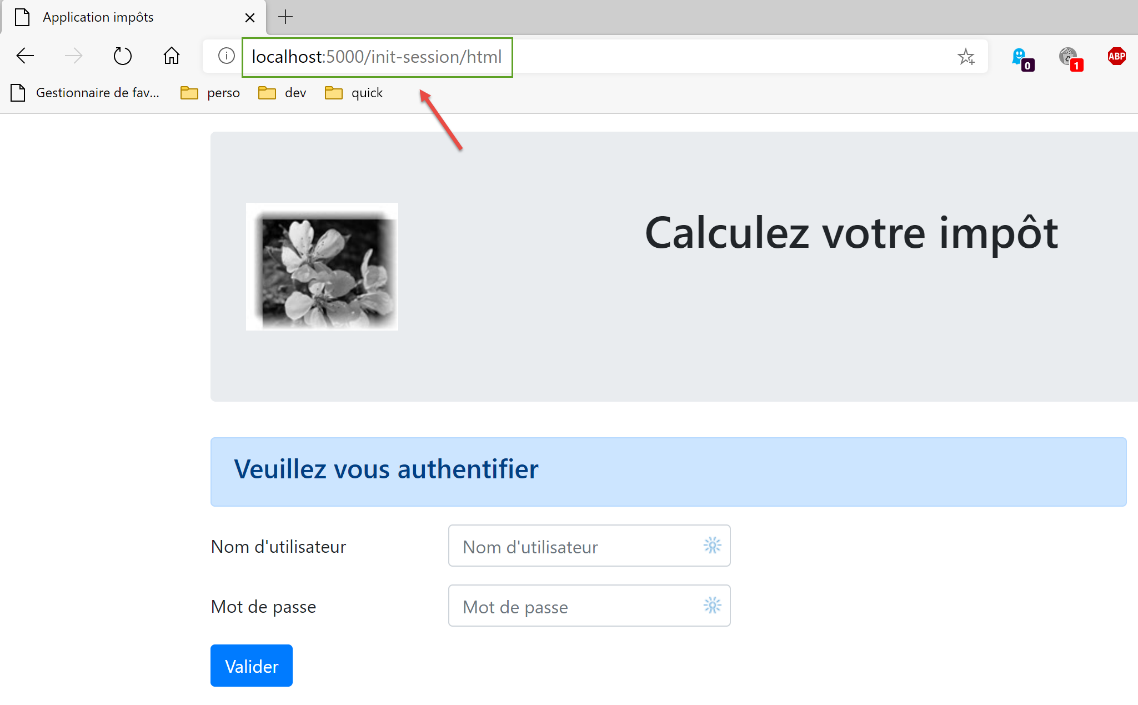
If we look at the network traffic between the client and the server:
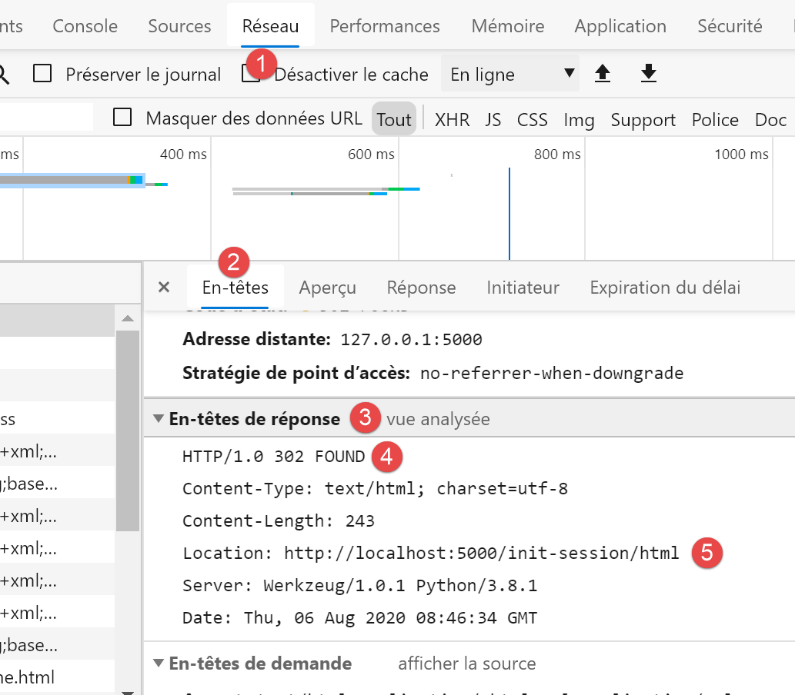
- we see that in [4, 5], the browser received a request to redirect to URL [/init-session/html];
Let’s fill out the form we received;
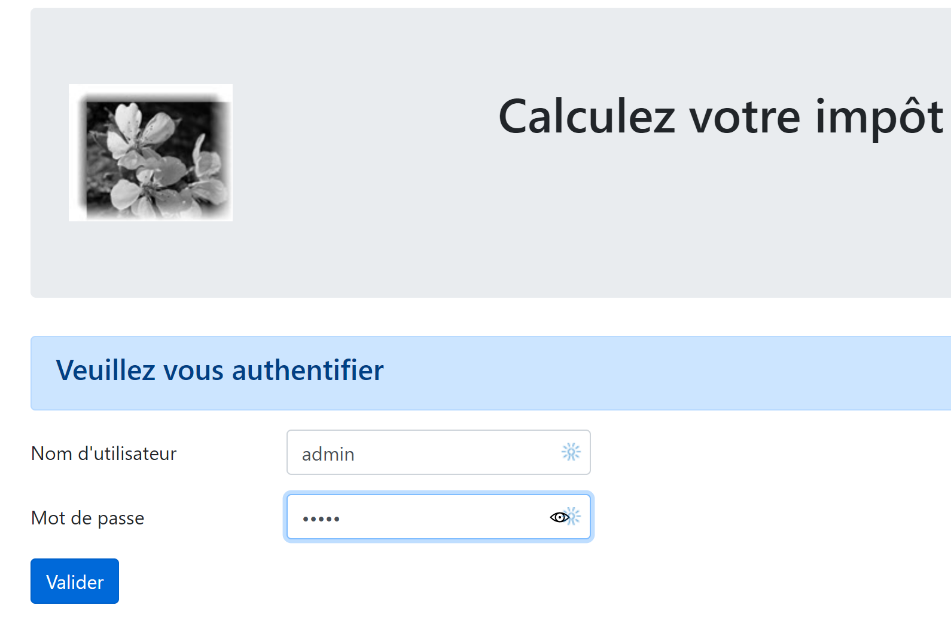
Then let’s run a few simulations:
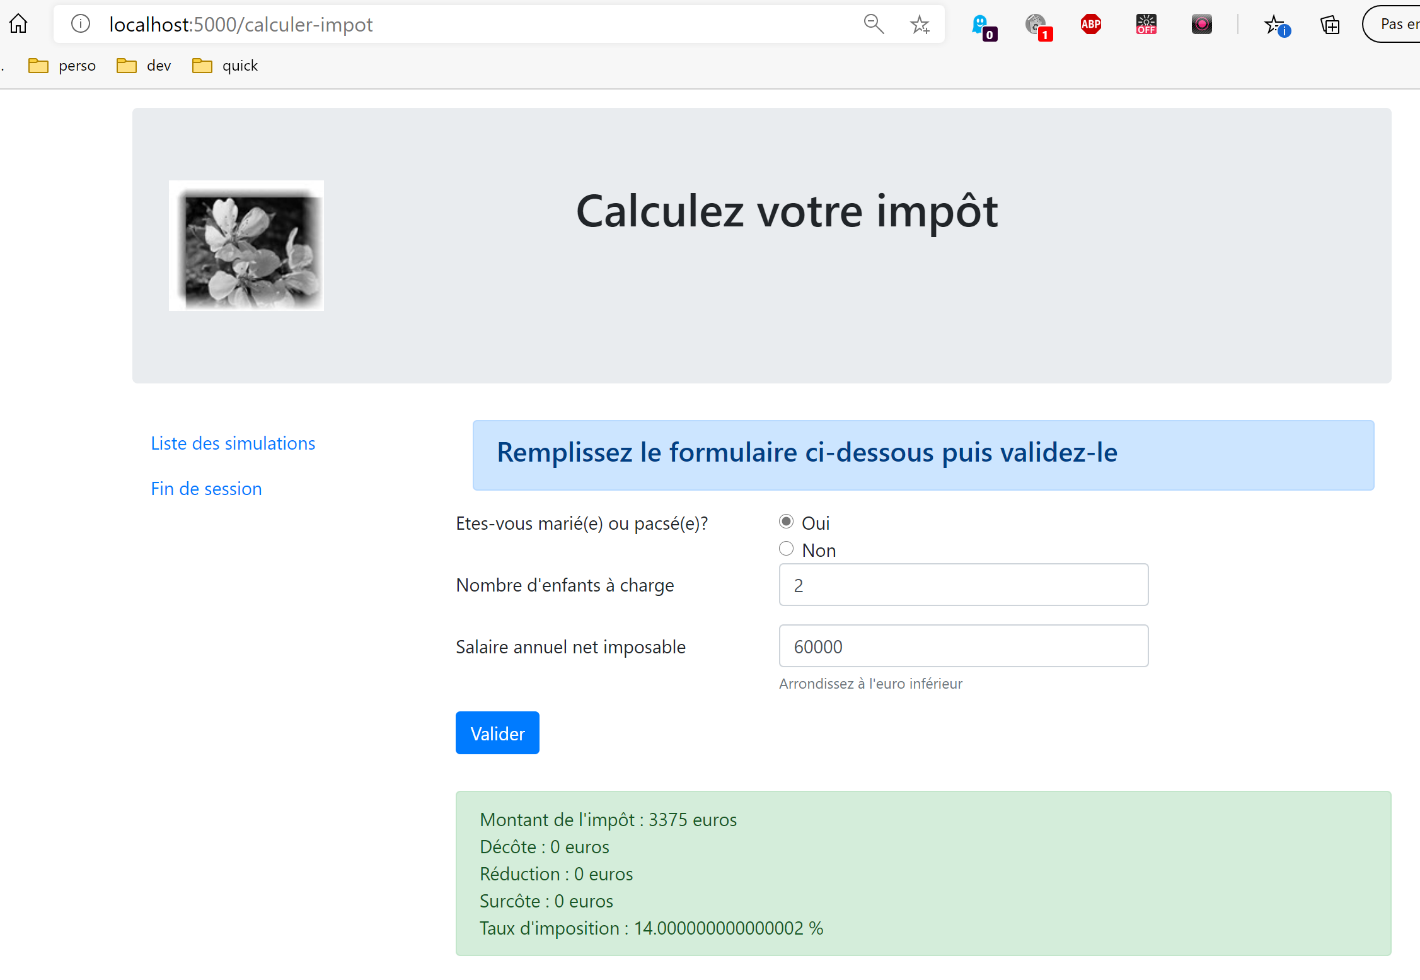
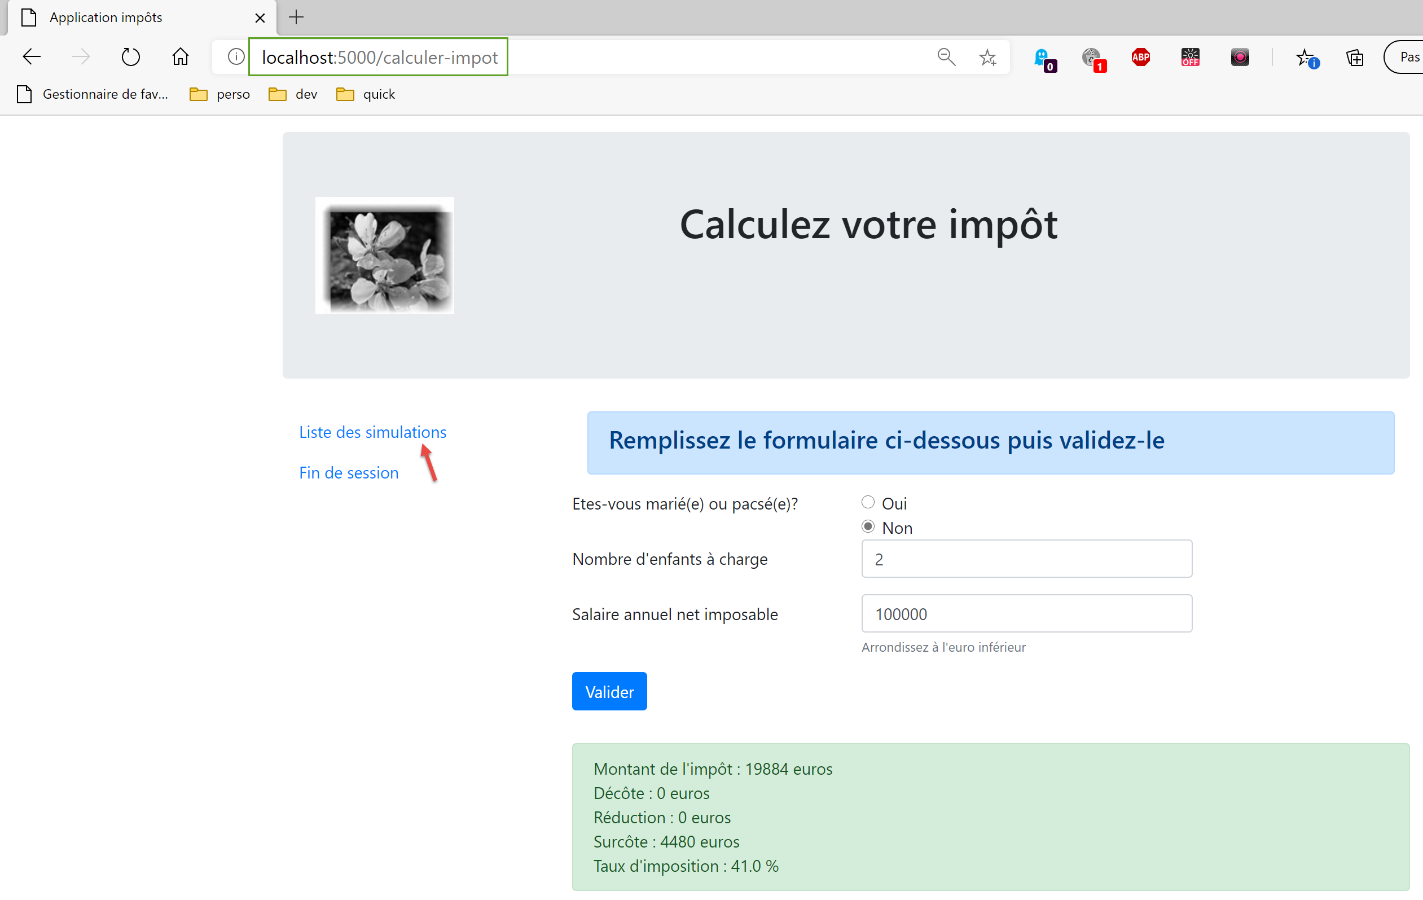
Let’s request the list of simulations:
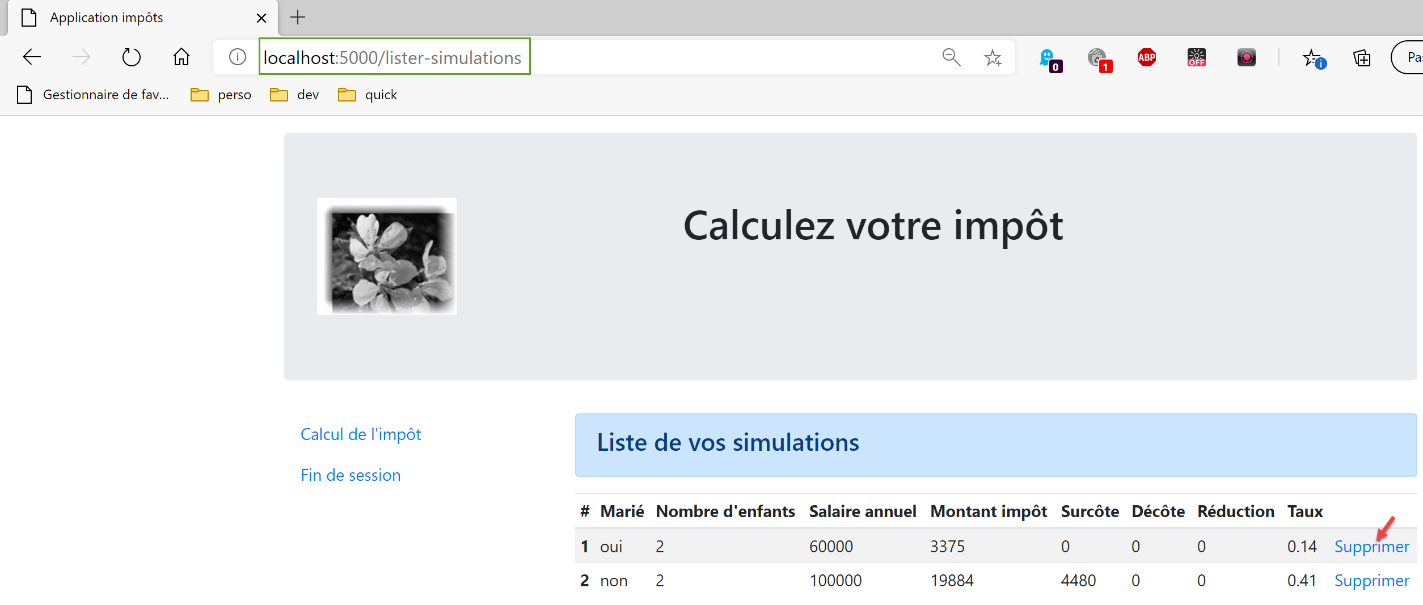
Delete the first simulation:
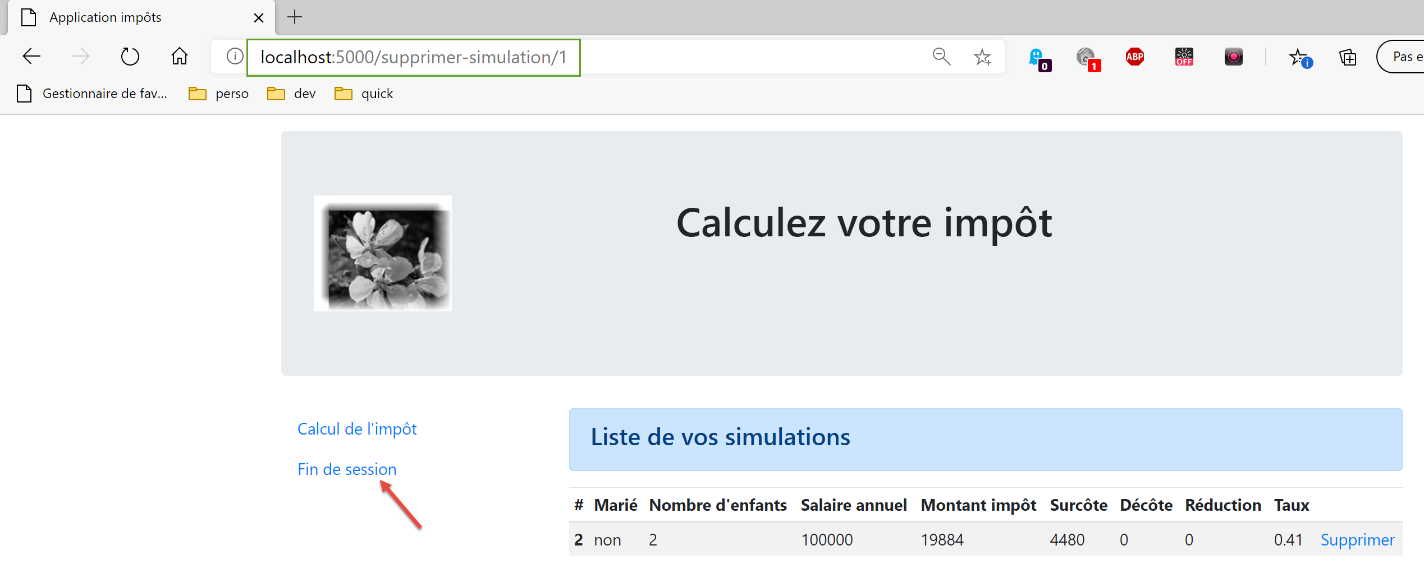
End the session:
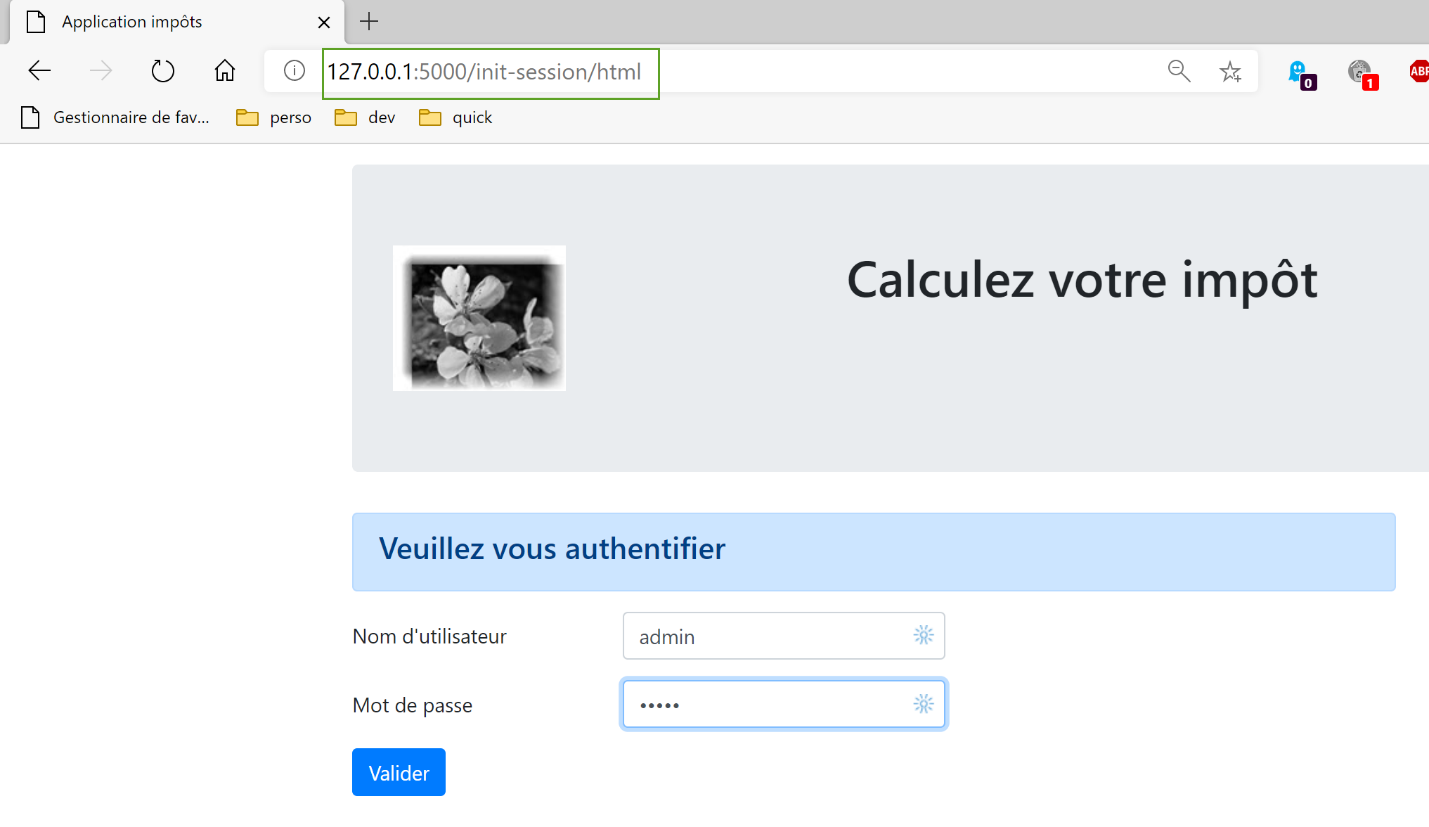
The reader is invited to perform additional tests.