21. Internet functions
We will now discuss Python’s Internet functions, which allow us to program TCP / IP (Transfer Control Protocol / Internet Protocol).
21.1. The basics of internet programming
21.1.1. General Overview
Consider communication between two remote machines A and B:
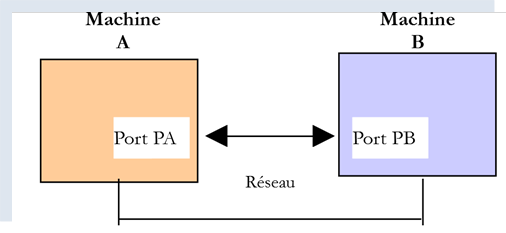
When a AppA application on machine A wants to communicate with a AppB application on machine B on the Internet, it must know several things:
- the IP (Internet Protocol) address or the name of machine B;
- the port number used by the AppB application. This is because machine B may host many applications that operate on the Internet. When it receives information from the network, it must know which application the information is intended for. The applications on machine B access the network through interfaces also known as communication ports. This information is contained in the packet received by machine B so that it can be delivered to the correct application;
- the communication protocols supported by machine B. In our study, we will use only the protocols TCP-IP;
- the communication protocol supported by the AppB application. In fact, machines A and B will "communicate" with each other. What they exchange will be encapsulated within the TCP-IP protocols. However, when, at the end of the chain, the AppB application receives the information sent by the AppA application, it must be able to interpret it. This is analogous to the situation where two people, A and B, communicate by telephone: their conversation is carried by the telephone. Speech is encoded as signals by telephone A, carried over telephone lines, and arrives at telephone B to be decoded. Person B then hears the speech. This is where the concept of a communication protocol comes into play: if A speaks French and B does not understand that language, A and B will not be able to communicate effectively;
Therefore, the two communicating applications must agree on the type of communication they will use. For example, communication with an FTP service is not the same as with a POP service: these two services do not accept the same commands. They have a different communication protocol;
21.1.2. Characteristics of the TCP protocol
Here, we will only examine network communications using the TCP transport protocol, whose main characteristics are as follows:
- The process wishing to transmit first establishes a connection with the process that will receive the information it is about to transmit. This connection is established between a port on the sending machine and a port on the receiving machine. A virtual path is thus created between the two ports, which will be reserved exclusively for the two processes that have established the connection;
- All packets sent by the source process follow this virtual path and arrive in the order in which they were sent;
- The transmitted information appears continuous. The sending process sends information at its own pace. This information is not necessarily sent immediately: the TCP protocol waits until it has enough to send. It is stored in a structure called a TCP segment. Once this segment is filled, it will be transmitted to the IP layer, where it will be encapsulated in a IP packet;
- Each segment sent by the TCP protocol is numbered. The receiving TCP protocol verifies that it is receiving the segments in sequence. For each segment received correctly, it sends an acknowledgment to the sender;
- when the sender receives this acknowledgment, it notifies the sending process. The sending process can thus confirm that a segment has been successfully delivered;
- if, after a certain amount of time, the TCP protocol that sent a segment does not receive an acknowledgment, it retransmits the segment in question, thereby ensuring the quality of the information delivery service;
- The virtual circuit established between the two communicating processes is full-duplex: this means that information can flow in both directions. Thus, the destination process can send acknowledgments even while the source process continues to send information. This allows, for example, the source TCP protocol to send multiple segments without waiting for an acknowledgment. If, after a certain amount of time, it realizes that it has not received an acknowledgment for a specific segment No. n, it will resume sending segments from that point;
21.1.3. The client-server relationship
Communication over the Internet is often asymmetric: machine A initiates a connection to request a service from machine B, specifying that it wants to establish a connection with machine B’s SB1 service. Machine B accepts or refuses. If it accepts, machine A can send its requests to service SB1. These requests must comply with the communication protocol understood by service SB1. A request-response dialogue is thus established between machine A, referred to as the client machine, and machine B, referred to as the server machine. One of the two partners will close the connection.
21.1.4. Client Architecture
The architecture of a network program requesting the services of a server application will be as follows:
21.1.5. Server architecture
The architecture of a program providing services will be as follows:
The server program handles a client’s initial connection request differently from its subsequent requests for service. The program does not provide the service itself. If it did, it would no longer be listening for connection requests while the service is active, and the clients requests would not be served. It proceeds differently: as soon as a connection request is received on the listening port and then accepted, the server creates a task responsible for providing the service requested by the client. This service is provided on another port of the server machine called the service port. This allows multiple clients to be served at the same time.
A service task will have the following structure:
21.2. Learn about the communication protocols of the Internet
21.2.1. Introduction
When a client connects to a server, a dialogue is established between them. The nature of this dialogue forms what is known as the server’s communication protocol. Among the most common Internet protocols are the following:
- HTTP: HyperText Transfer Protocol—the protocol for communicating with a web server (HTTP server);
- SMTP: Simple Mail Transfer Protocol—the protocol for communicating with an email sending server (SMTP server);
- POP: Post Office Protocol—the protocol for communicating with an email storage server (server POP). This is used to retrieve received emails, not to send them;
- IMAP: Internet Message Access Protocol—the protocol for communicating with an email storage server (server IMAP). This protocol has gradually replaced the older POP protocol;
- FTP: File Transfer Protocol—the protocol for communicating with a file storage server (server FTP);
All these protocols are text-based: the client and server exchange lines of text. If we have a client capable of:
- establish a connection with a TCP server;
- display the text lines sent by the server on the console;
- send the text lines that a user would type on the keyboard to the server;
then we are able to communicate with a TCP server using a text-based protocol, provided we know the rules of that protocol.
21.2.2. TCP Utilities
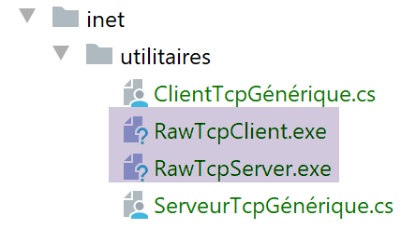
In the code associated with this document, there are two TCP communication utilities:
- [RawTcpClient] allows you to connect to port P of a server S;
- [RawTcpServer] allows you to create a server that listens for clients on port P;
These are two C# programs whose source codes are provided to you. You can therefore modify them.
The TCP [RawTcpServer] serveris called using the syntax [RawTcpServeur port] to create a TCP service on port [port] of the local machine (the computer you are working on):
- the server can serve multiple clients instances simultaneously;
- the server executes commands entered by the user via the keyboard. These are as follows:
- list: lists the clients currently connected to the server. These are displayed in the form [id=x-nom=y]. The [id] field is used to identify the clients;
- send x [texte]: sends text to client #x (id=x). The square brackets [] are not sent. They are required in the command. They are used to visually delimit the text sent to the client;
- close x: closes the connection with client #x;
- quit: closes all connections and stops the service;
- Lines sent by the client to the server are displayed on the console;
- All communication is logged in a text file named [machine-port.txt], where
- [machine] is the name of the machine on which the code is running;
- [port] is the service port that responds to client requests;
The client TCP [RawTcpClient] is called using the syntax [RawTcpClient serveur port] to connect to port [port] on the server [serveur]:
- the lines typed by the user on the keyboard are sent to the server;
- the lines sent by the server are displayed on the console;
- all communication is logged in a text file named [serveur-port.txt];
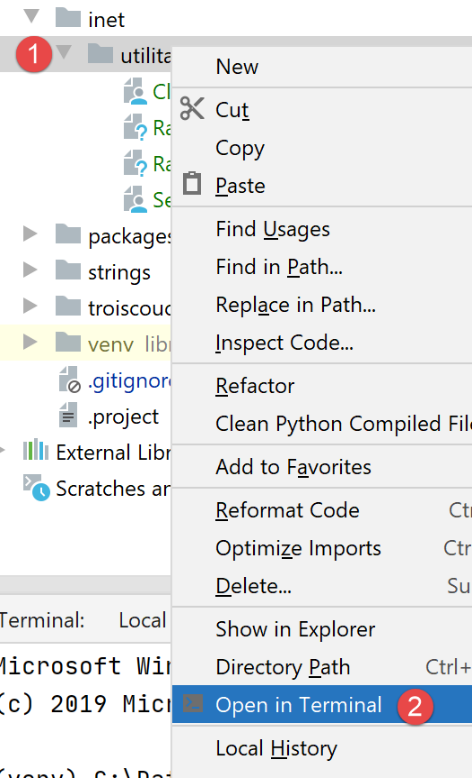
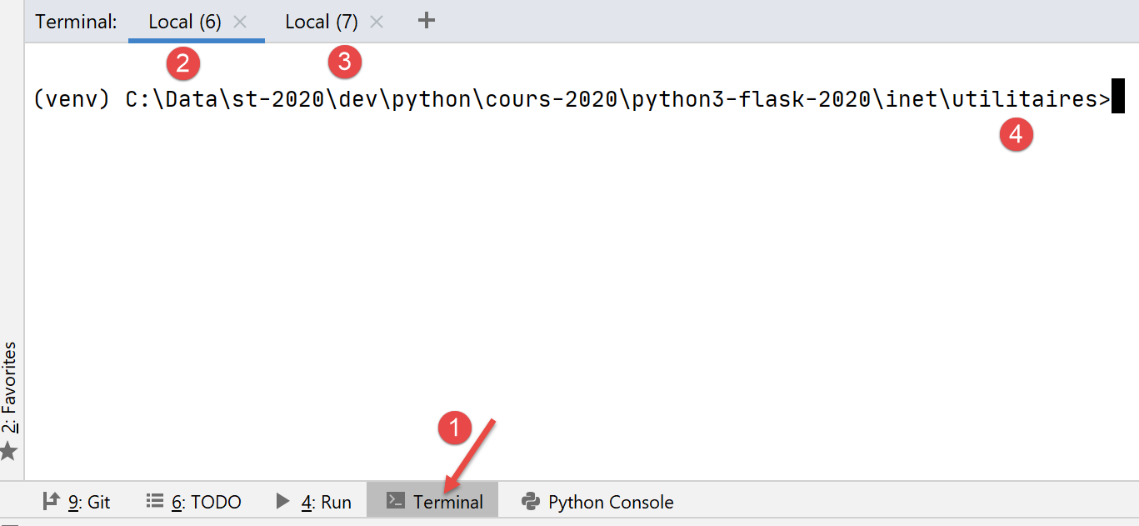
Let’s look at an example. We open two PyCharm terminal windows and navigate to the utilities folder in each of them:
In one of the windows, start the [RawTcpServer] server on port 100:
(venv) C:\Data\st-2020\dev\python\cours-2020\python3-flask-2020\inet\utilitaires>RawTcpServer.exe 100
server : Serveur générique lancé sur le port 0.0.0.0:100
server : Attente d'un client...
server : Commandes disponibles : [list, send id [texte], close id, quit]
user :
- line 1, we are in the utilities folder;
- line 1, we start the TCP server on port 100;
- lines 2–4: The server waits for a client named TCP and displays a list of commands that the user can type at the keyboard;
- line 5, the server waits for a command entered by the user via the keyboard;
In the other command window, we launch the TCP client:
(venv) C:\Data\st-2020\dev\python\cours-2020\python3-flask-2020\inet\utilitaires>RawTcpClient.exe localhost 100
Client [DESKTOP-30FF5FB:51173] connecté au serveur [localhost-100]
Tapez vos commandes (quit pour arrêter) :
- line 1, we are in the utilities folder;
- line 1: we launch the TCP client; we tell it to connect to port 100 on the local machine (the one running the [RawTcpClient] code);
- line 2, the client has successfully connected to the server. We specify the client’s details: it is on the machine [DESKTOP-30FF5FB] (the local machine in this example) and uses port [51173] to communicate with the server:
- line 3, the client is waiting for a command entered by the user via the keyboard;
Let’s return to the server window. Its contents have changed:
(venv) C:\Data\st-2020\dev\python\cours-2020\python3-flask-2020\inet\utilitaires>RawTcpServer.exe 100
server : Serveur générique lancé sur le port 0.0.0.0:100
server : Attente d'un client...
server : Commandes disponibles : [list, send id [texte], close id, quit]
user : server : Client 1-DESKTOP-30FF5FB-51173 connecté...
server : Attente d'un client...
- Line 5: A client has been detected. The server assigned it ID 1. The server correctly identified the remote client (machine and port);
- line 6, the server returns to waiting for a new client;
Let’s go back to the client window and send a command to the server:
(venv) C:\Data\st-2020\dev\python\cours-2020\python3-flask-2020\inet\utilitaires>RawTcpClient.exe localhost 100
Client [DESKTOP-30FF5FB:51173] connecté au serveur [localhost-100]
Tapez vos commandes (quit pour arrêter) :
hello from client
- line 4, the command sent to the server;
Let’s go back to the server window. Its content has changed:
(venv) C:\Data\st-2020\dev\python\cours-2020\python3-flask-2020\inet\utilitaires>RawTcpServer.exe 100
server : Serveur générique lancé sur le port 0.0.0.0:100
server : Attente d'un client...
server : Commandes disponibles : [list, send id [texte], close id, quit]
user : server : Client 1-DESKTOP-30FF5FB-51173 connecté...
server : Attente d'un client...
client 1 : [hello from client]
- line 7, in square brackets, the message received by the server;
Let's send a response to the client:
(venv) C:\Data\st-2020\dev\python\cours-2020\python3-flask-2020\inet\utilitaires>RawTcpServer.exe 100
server : Serveur générique lancé sur le port 0.0.0.0:100
server : Attente d'un client...
server : Commandes disponibles : [list, send id [texte], close id, quit]
user : server : Client 1-DESKTOP-30FF5FB-51173 connecté...
server : Attente d'un client...
client 1 : [hello from client]
send 1 [hello from server]
user :
- line 8, the response sent to client 1. Only the text between the brackets is sent, not the brackets themselves;
Let's go back to the client window:
(venv) C:\Data\st-2020\dev\python\cours-2020\python3-flask-2020\inet\utilitaires>RawTcpClient.exe localhost 100
Client [DESKTOP-30FF5FB:51173] connecté au serveur [localhost-100]
Tapez vos commandes (quit pour arrêter) :
hello from client
<-- [hello from server]
- line 5, the response received by the client. The text received is the one in square brackets;
Let’s go back to the server window to see other commands:
(venv) C:\Data\st-2020\dev\python\cours-2020\python3-flask-2020\inet\utilitaires>RawTcpServer.exe 100
server : Serveur générique lancé sur le port 0.0.0.0:100
server : Attente d'un client...
server : Commandes disponibles : [list, send id [texte], close id, quit]
user : server : Client 1-DESKTOP-30FF5FB-51173 connecté...
server : Attente d'un client...
client 1 : [hello from client]
send 1 [hello from server]
user : list
server : id=1-name=DESKTOP-30FF5FB-51173
user : close 1
server : Connexion client 1 fermée...
user : quit
server : fin du service
- Line 9, we request the list of clients;
- line 10, the response;
- line 11, we close the connection with client #1;
- line 12, the server's confirmation;
- line 13, we shut down the server;
- line 14, the server's confirmation;
Let’s go back to the client window:
(venv) C:\Data\st-2020\dev\python\cours-2020\python3-flask-2020\inet\utilitaires>RawTcpClient.exe localhost 100
Client [DESKTOP-30FF5FB:51173] connecté au serveur [localhost-100]
Tapez vos commandes (quit pour arrêter) :
hello from client
<-- [hello from server]
Perte de la connexion avec le serveur...
- line 6, the client detected the end of service;
Two log files have been created, one for the server and one for the client:
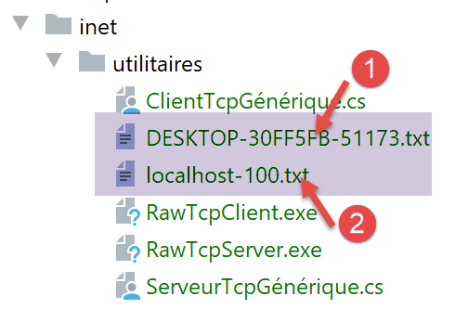
- in [1], the server logs: the file name is the client name in the format [machine-port]. This allows for different log files for different clients instances;
- in [2], the client logs: the file name is the server name in the format [machine-port];
The server logs are as follows:
<-- [hello from client]
--> [hello from server]
The client logs are as follows:
--> [hello from client]
<-- [hello from server]
21.3. Obtain the name or address IP of a machine on the Internet
Machines on the Internet are identified by a IP address (IPv4 or IPv6) and, more often than not, by a name. However, ultimately only the IP address is used by Internet communication protocols. Therefore, you need to know the IP address of a machine identified by its name.
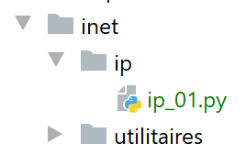
The [ip-01.py] script is as follows:
# imports
import socket


# ------------------------------------------------
def get_ip_and_name(nom_machine: str):
    # nom_machine: name of the machine whose address is required IP: name of the machine whose address is required IP: name of the machine whose address is required
    try:
        # nom_machine-->adresse IP
        ip = socket.gethostbyname(nom_machine)
        print(f"ip[{nom_machine}]={ip}")
    except socket.error as erreur:
        # error is displayed
        print(f"ip[{nom_machine}]={erreur}")
        return

    try:
        # address IP --> nom_machine
        names = socket.gethostbyaddr(ip)
        print(f"names[{ip}]={names}")
    except socket.error as erreur:
        # error is displayed
        print(f"names[{ip}]={erreur}")
        return


# ---------------------------------------- main

# internet machines
hosts = ["istia.univ-angers.fr", "www.univ-angers.fr", "sergetahe.com", "localhost", "xx"]

# IP addresses of HOTES machines
for host in hosts:
    print("-------------------------------------")
    get_ip_and_name(host)
# end
print("Terminé...")
Comments
- line 2: the [socket] module provides the functions needed to manage Internet sockets. [socket] stands for electrical socket, network socket;
- line 6: the [get_ip_and_name] function allows you to obtain the following from a machine’s Internet name:
- the machine's IP address;
- the machine name obtained from the previous IP address;
- line 10: the [socket.gethostbyname] function retrieves the IP address of a machine from one of its names (an internet machine may have a primary name and aliases);
- line 12: socket functions throw the [socket.error] exception as soon as an error occurs;
- line 19: the function [socket.gethostbyaddr] retrieves a machine’s name from its address IP. We will see that we can obtain a name different from the one passed in line 6;
- Line 30: a list of machine names. The last name is incorrect. The name [localhost] refers to the machine you are working on and that is running the script;
- lines 33–35: the IP values for these machines are displayed;
Results:
C:\Data\st-2020\dev\python\cours-2020\python3-flask-2020\venv\Scripts\python.exe C:/Data/st-2020/dev/python/cours-2020/python3-flask-2020/inet/ip/ip_01.py
-------------------------------------
ip[istia.univ-angers.fr]=193.49.144.41
names[193.49.144.41]=('ametys-fo-2.univ-angers.fr', [], ['193.49.144.41'])
-------------------------------------
ip[www.univ-angers.fr]=193.49.144.41
names[193.49.144.41]=('ametys-fo-2.univ-angers.fr', [], ['193.49.144.41'])
-------------------------------------
ip[sergetahe.com]=87.98.154.146
names[87.98.154.146]=('cluster026.hosting.ovh.net', [], ['87.98.154.146'])
-------------------------------------
ip[localhost]=127.0.0.1
names[127.0.0.1]=('DESKTOP-30FF5FB', [], ['127.0.0.1'])
-------------------------------------
ip[xx]=[Errno 11001] getaddrinfo failed
Terminé...

Process finished with exit code 0
21.4. The HTTP protocol (HyperText Transfer Protocol)
21.4.1. Example 1
When a browser displays a URL, it acts as a client to a web server, or in other words, a HTTP server. The browser takes the initiative and begins by sending a number of commands to the server. For this first example:
- the server will be the [RawTcpServer] utility;
- the client will be a browser;
First, we start the server on port 100:
(venv) C:\Data\st-2020\dev\python\cours-2020\python3-flask-2020\inet\utilitaires>RawTcpServer.exe 100
server : Serveur générique lancé sur le port 0.0.0.0:100
server : Attente d'un client...
server : Commandes disponibles : [list, send id [texte], close id, quit]
user :
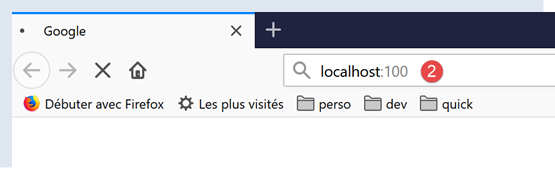
Then, using a browser, we request URL [http://localhost:100], meaning we specify that the requested server HTTP is running on port 100 of the local machine:
Let’s go back to the server window:
(venv) C:\Data\st-2020\dev\python\cours-2020\python3-flask-2020\inet\utilitaires>RawTcpServer.exe 100
server : Serveur générique lancé sur le port 0.0.0.0:100
server : Attente d'un client...
server : Commandes disponibles : [list, send id [texte], close id, quit]
user : server : Client 1-DESKTOP-30FF5FB-51438 connecté...
server : Attente d'un client...
server : Client 2-DESKTOP-30FF5FB-51439 connecté...
server : Attente d'un client...
client 1 : [GET / HTTP/1.1]
client 1 : [Host: localhost:100]
client 1 : [Connection: keep-alive]
client 1 : [DNT: 1]
client 1 : [Upgrade-Insecure-Requests: 1]
client 1 : [User-Agent: Mozilla/5.0 (Windows NT 10.0; Win64; x64) AppleWebKit/537.36 (KHTML, like Gecko) Chrome/83.0.4103.116 Safari/537.36]
client 1 : [Accept: text/html,application/xhtml+xml,application/xml;q=0.9,image/webp,image/apng,*/*;q=0.8,application/signed-exchange;v=b3;q=0.9]
client 1 : [Sec-Fetch-Site: none]
client 1 : [Sec-Fetch-Mode: navigate]
client 1 : [Sec-Fetch-User: ?1]
client 1 : [Sec-Fetch-Dest: document]
client 1 : [Accept-Encoding: gzip, deflate, br]
client 1 : [Accept-Language: fr-FR,fr;q=0.9,en-US;q=0.8,en;q=0.7]
client 1 : []
server : Client 3-DESKTOP-30FF5FB-51441 connecté...
server : Attente d'un client...
- line 5, the client that connected;
- lines 9–22: the series of text lines it sent:
- line 9: this line has the format [GET URL HTTP/1.1]. It requests URL / and asks the server to use the HTTP 1.1 protocol;
- line 10: this line has the format [Host: serveur:port]. The case of the command [Host] does not matter. Note that the client is querying a local server operating on port 100;
- line 14: the command [User-Agent] provides the client’s identity;
- line 15: the command [Accept] specifies which document types are accepted by the client;
- line 21: the command [Accept-Language] specifies the language in which the requested documents are desired if they exist in multiple languages;
- line 11: the command [Connection] specifies the desired connection mode: [keep-alive] indicates that the connection must be maintained until the exchange is complete;
- line 22: the client ends its commands with a blank line;
We terminate the connection by shutting down the server:
client 1 : []
server : Client 3-DESKTOP-30FF5FB-51441 connecté...
server : Attente d'un client...
quit
server : fin du service
21.4.2. Example 2
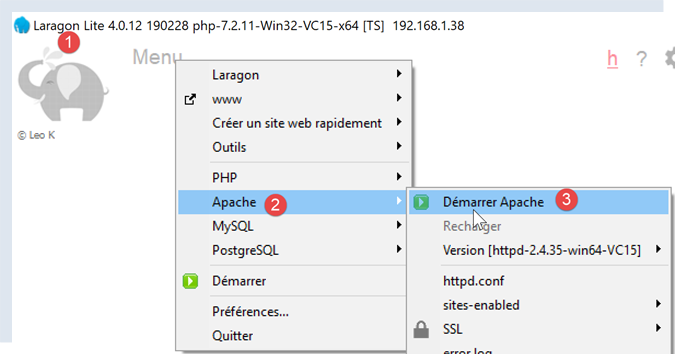
Now that we know the commands sent by a browser to request a URL, we will request this URL using our client TCP [RawTcpClient]. The Apache server in Laragon (section |Installing Laragon|) will be our web server.
Let’s launch Laragon and then the Apache web server:
Now, using a browser, let’s request the URL and [http://localhost:80]. Here we specify only the server [localhost:80] and no document path. In this case, the / path is requested, i.e., the root of the web server:
- to [1], the requested URL. We initially typed [http://localhost:80], and the browser (Firefox in this case) simply converted it to [localhost] because the protocol [http] is implied when no protocol is specified, and the port [80] is implied when the port is not specified;
- to [2], the root page / of the queried web server;
Now, let’s view the text received by the browser:
- right-click on the received page and select option [2]. We obtain the following source code:
<!DOCTYPE html>
<html>
<head>
    <title>Laragon</title>

    <link href="https://fonts.googleapis.com/css?family=Karla:400" rel="stylesheet" type="text/css">

    <style>
        html, body {
            height: 100%;
        }

        body {
            margin: 0;
            padding: 0;
            width: 100%;
            display: table;
            font-weight: 100;
            font-family: 'Karla';
        }

        .container {
            text-align: center;
            display: table-cell;
            vertical-align: middle;
        }

        .content {
            text-align: center;
            display: inline-block;
        }

        .title {
            font-size: 96px;
        }

        .opt {
            margin-top: 30px;
        }

            .opt a {
                text-decoration: none;
                font-size: 150%;
            }

        a:hover {
            color: red;
        }
    </style>
</head>
<body>
    <div class="container">
        <div class="content">
            <div class="title" title="Laragon">Laragon</div>

            <div class="info">
                <br />
                Apache/2.4.35 (Win64) OpenSSL/1.1.1b PHP/7.2.19<br />
                PHP version: 7.2.19   <span><a title="phpinfo()" href="/?q=info">info</a></span><br />
                Document Root: C:/MyPrograms/laragon/www<br />

            </div>
            <div class="opt">
                <div><a title="Getting Started" href="https://laragon.org/docs">Getting Started</a></div>
            </div>
        </div>

    </div>
</body>
</html>
Now let's request URL and [http://localhost:80] using our client TCP:
(venv) C:\Data\st-2020\dev\python\cours-2020\python3-flask-2020\inet\utilitaires>RawTcpClient.exe localhost 80
Client [DESKTOP-30FF5FB:51541] connecté au serveur [localhost-80]
Tapez vos commandes (quit pour arrêter) :
- Line 1: We connect to port 80 on the localhost server. This is where the Laragon web server runs;
Now we type the commands we discovered in the previous paragraph:
(venv) C:\Data\st-2020\dev\python\cours-2020\python3-flask-2020\inet\utilitaires>RawTcpClient.exe localhost 80
Client [DESKTOP-30FF5FB:51544] connecté au serveur [localhost-80]
Tapez vos commandes (quit pour arrêter) :
GET / HTTP/1.1
Host: localhost:80

<-- [HTTP/1.1 200 OK]
<-- [Date: Sun, 05 Jul 2020 12:42:14 GMT]
<-- [Server: Apache/2.4.35 (Win64) OpenSSL/1.1.1b PHP/7.2.19]
<-- [X-Powered-By: PHP/7.2.19]
<-- [Content-Length: 1776]
<-- [Content-Type: text/html; charset=UTF-8]
<-- []
<-- [<!DOCTYPE html>]
<-- [<html>]
<-- [    <head>]
<-- [        <title>Laragon</title>]
<-- []
<-- [        <link href="https://fonts.googleapis.com/css?family=Karla:400" rel="stylesheet" type="text/css">]
<-- []
<-- [        <style>]
<-- [            html, body {]
<-- [                height: 100%;]
<-- [            }]
<-- []
<-- [            body {]
<-- [                margin: 0;]
<-- [                padding: 0;]
<-- [                width: 100%;]
<-- [                display: table;]
<-- [                font-weight: 100;]
<-- [                font-family: 'Karla';]
<-- [            }]
<-- []
<-- [            .container {]
<-- [                text-align: center;]
<-- [                display: table-cell;]
<-- [                vertical-align: middle;]
<-- [            }]
<-- []
<-- [            .content {]
<-- [                text-align: center;]
<-- [                display: inline-block;]
<-- [            }]
<-- []
<-- [            .title {]
<-- [                font-size: 96px;]
<-- [            }]
<-- []
<-- [            .opt {]
<-- [                margin-top: 30px;]
<-- [            }]
<-- []
<-- [            .opt a {]
<-- [              text-decoration: none;]
<-- [              font-size: 150%;]
<-- [            }]
<-- [            ]
<-- [            a:hover {]
<-- [              color: red;]
<-- [            }]
<-- [        </style>]
<-- [    </head>]
<-- [    <body>]
<-- [        <div class="container">]
<-- [            <div class="content">]
<-- [                <div class="title" title="Laragon">Laragon</div>]
<-- [     ]
<-- [                <div class="info"><br />]
<-- [                      Apache/2.4.35 (Win64) OpenSSL/1.1.1b PHP/7.2.19<br />]
<-- [                      PHP version: 7.2.19   <span><a title="phpinfo()" href="/?q=info">info</a></span><br />]
<-- [                   Document Root: C:/MyPrograms/laragon/www<br />]
<-- []
<-- [                </div>]
<-- [                <div class="opt">]
<-- [               <div><a title="Getting Started" href="https://laragon.org/docs">Getting Started</a></div>]
<-- [                </div>]
<-- [            </div>]
<-- []
<-- [        </div>]
<-- [    </body>]
<-- [</html>]
Perte de la connexion avec le serveur...
- line 4, the command [GET]. Requesting the root directory / of the web server;
- line 5, the command [Host];
- these are the only two essential commands. For the other commands, the web server will use default values;
- line 6, the empty line that must end the client commands;
- below line 6 comes the web server’s response;
- lines 7–12: the headers of the server’s response;
- line 13: the empty line that signals the end of the http headers;
- lines 14–82: the HTML document requested on line 4;
We load the [localhost-80.txt] log file:
--> [GET / HTTP/1.1]
--> [Host: localhost:80]
--> []
<-- [HTTP/1.1 200 OK]
<-- [Date: Sun, 05 Jul 2020 12:42:14 GMT]
<-- [Server: Apache/2.4.35 (Win64) OpenSSL/1.1.1b PHP/7.2.19]
<-- [X-Powered-By: PHP/7.2.19]
<-- [Content-Length: 1776]
<-- [Content-Type: text/html; charset=UTF-8]
<-- []
<-- [<!DOCTYPE html>]
<-- [<html>]
<-- [    <head>]
<-- [        <title>Laragon</title>]
<-- []
<-- [        <link href="https://fonts.googleapis.com/css?family=Karla:400" rel="stylesheet" type="text/css">]
<-- []
<-- [        <style>]
<-- [            html, body {]
<-- [                height: 100%;]
<-- [            }]
<-- []
<-- [            body {]
<-- [                margin: 0;]
<-- [                padding: 0;]
<-- [                width: 100%;]
<-- [                display: table;]
<-- [                font-weight: 100;]
<-- [                font-family: 'Karla';]
<-- [            }]
<-- []
<-- [            .container {]
<-- [                text-align: center;]
<-- [                display: table-cell;]
<-- [                vertical-align: middle;]
<-- [            }]
<-- []
<-- [            .content {]
<-- [                text-align: center;]
<-- [                display: inline-block;]
<-- [            }]
<-- []
<-- [            .title {]
<-- [                font-size: 96px;]
<-- [            }]
<-- []
<-- [            .opt {]
<-- [                margin-top: 30px;]
<-- [            }]
<-- []
<-- [            .opt a {]
<-- [              text-decoration: none;]
<-- [              font-size: 150%;]
<-- [            }]
<-- [            ]
<-- [            a:hover {]
<-- [              color: red;]
<-- [            }]
<-- [        </style>]
<-- [    </head>]
<-- [    <body>]
<-- [        <div class="container">]
<-- [            <div class="content">]
<-- [                <div class="title" title="Laragon">Laragon</div>]
<-- [     ]
<-- [                <div class="info"><br />]
<-- [                      Apache/2.4.35 (Win64) OpenSSL/1.1.1b PHP/7.2.19<br />]
<-- [                      PHP version: 7.2.19   <span><a title="phpinfo()" href="/?q=info">info</a></span><br />]
<-- [                   Document Root: C:/MyPrograms/laragon/www<br />]
<-- []
<-- [                </div>]
<-- [                <div class="opt">]
<-- [               <div><a title="Getting Started" href="https://laragon.org/docs">Getting Started</a></div>]
<-- [                </div>]
<-- [            </div>]
<-- []
<-- [        </div>]
<-- [    </body>]
<-- [</html>]
- lines 11-79: the received HTML document. In the previous example, Firefox had received the same one;
We now have the basics to program a TCP client that would request a URL.
21.4.3. Example 3
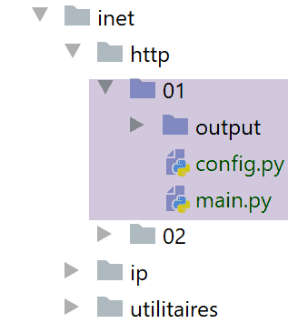
The [http/01/main.py] script is a HTTP client configured by the [config.py] file. The contents of the latter are as follows:
def configure():
    # URLs to query
    urls = [
        # site: name of the site to connect to
        # port: web service port
        # GET : URL requested
        # headers: HTTP headers to be sent in the request
        # endOfLine: end-of-line marker in headers HTTP sent
        # encoding: encoding the server response
        # timeout: maximum wait time for a server response
        {
            "site": "localhost",
            "port": 80,
            "GET": "/",
            "headers": {
                "Host": "localhost:80",
                "User-Agent": "client Python",
                "Accept": "text/HTML",
                "Accept-Language": "fr"
            },
            "endOfLine": "\r\n",
            "encoding": "utf-8",
            "timeout": 0.5
        },
        {
            "site": "sergetahe.com",
            "port": 80,
            "GET": "/",
            "headers": {
                "Host": "sergetahe.com:80",
                "User-Agent": "client Python",
                "Accept": "text/HTML",
                "Accept-Language": "fr"
            },
            "endOfLine": "\r\n",
            "encoding": "utf-8",
            "timeout": 5
        },
        {
            "site": "tahe.developpez.com",
            "port": 443,
            "GET": "/",
            "headers": {
                "Host": "tahe.developpez.com:443",
                "User-Agent": "client Python",
                "Accept": "text/HTML",
                "Accept-Language": "fr"
            },
            "endOfLine": "\r\n",
            "encoding": "utf-8",
            "timeout": 2
        },
        {
            "site": "www.sergetahe.com",
            "port": 80,
            "GET": "/cours-tutoriels-de-programmation/",
            "headers": {
                "Host": "sergetahe.com:80",
                "User-Agent": "client Python",
                "Accept": "text/HTML",
                "Accept-Language": "fr"
            },
            "endOfLine": "\r\n",
            "encoding": "utf-8",
            "timeout": 5
        }
    ]
    # we return the configuration
    return {
        "urls": urls
    }
- The file’s content is a list of URL, where each list item is a dictionary. This dictionary specifies how to connect to the site designated by the key [site];
- lines 4–10: the meaning of the keys in each dictionary;
The [http/01/main.py] script is as follows:
# imports
import codecs
import socket


# -----------------------------------------------------------------------
def get_url(url: dict, suivi: bool = True):
    # reads URL url["GET"] from site url[site] and stores it in file url[site].html
    # client/server dialog is based on the HTTP protocol specified in the [url] dictionary
    # we let the exceptions rise

    sock = None
    html = None
    try:
        # connection to [site] on port 80 with a timeout
        site = url['site']
        sock = socket.create_connection((site, int(url['port'])), float(url['timeout']))

        # connection represents a bidirectional communication flow
        # between the client (this program) and the contacted web server
        # this channel is used for the exchange of orders and information
        # the dialog protocol is HTTP

        # create file site.html - change troublesome characters for a file name
        site2 = site.replace("/", "_")
        site2 = site2.replace(".", "_")
        html_filename = f'{site2}.html'
        html = codecs.open(f"output/{html_filename}", "w", "utf-8")

        # the client will start the HTTP dialog with the server
        if suivi:
            print(f"Client : début de la communication avec le serveur [{site}]")

        # depending on the server, client lines must end with \nor \r\n
        end_of_line = url["endOfLine"]
        # the customer sends the GET command to request the URL config["GET"]
        # syntax GET URL HTTP/1.1
        commande = f"GET {url['GET']} HTTP/1.1{end_of_line}"
        # followed?
        if suivi:
            print(f"--> {commande}", end='')
        # send the command to the server
        sock.send(bytearray(commande, 'utf-8'))
        # header transmission HTTP
        for verb, value in url['headers'].items():
            # build the command to be sent
            commande = f"{verb}: {value}{end_of_line}"
            # followed?
            if suivi:
                print(f"--> {commande}", end='')
            # send the command to the server
            sock.send(bytearray(commande, 'utf-8'))
        # we send the HTTP [Connection: close] header to ask the web server to
        # close the connection once the requested document has been sent
        sock.send(bytearray(f"Connection: close{end_of_line}", 'utf-8'))
        # protocol HTTP headers must end with an empty line
        sock.send(bytearray(end_of_line, 'utf-8'))
        #
        # the server will now respond on the sock channel. It will send all
        # then close the channel. The client reads everything that arrives from sock
        # until the channel closes
        #
        # we first read the HTTP headers sent by the server
        # they also end with an empty line
        if suivi:
            print(f"Réponse du serveur [{site}]")

        # read the socket as if it were a text file
        encoding = f"{url['encoding']}" if url['encoding'] else None
        if encoding:
            file = sock.makefile(encoding=encoding)
        else:
            file = sock.makefile()
        # we process this file line by line
        fini = False
        while not fini:
            # current line reading
            ligne = file.readline().strip()
            # do we have a non-empty line?
            if ligne:
                if suivi:
                    # header HTTP is displayed
                    print(f"<-- {ligne}")
            else:
                # this was the empty line - HTTP headers are finished
                fini = True
        # we read the HTML document that will follow the empty line
        # current line reading
        ligne = file.readline()
        while ligne:
            # record in log file
            html.write(str(ligne))
            # next line
            ligne = file.readline()
            # the loop ends when the server closes the connection
    finally:
        # the customer closes the connection
        if sock:
            sock.close()
        # close file html
        if html:
            html.close()


# -------------------main

# configure the application
import config
config = config.configure()

# get the URL from the configuration file
for url in config['urls']:
    print("-------------------------")
    print(url['site'])
    print("-------------------------")
    try:
        # reading URL from site [site]
        get_url(url)
    except BaseException as erreur:
        print(f"L'erreur suivante s'est produite : {erreur}")
    finally:
        pass
# end
print("Terminé...")
Code comments:
- lines 108-109: the [config] dictionary from the [config.py] module is retrieved;
- lines 111-122: this dictionary is used;
- lines 118, 7: the [get_url(url)] function requests a document from the url[site] website and stores it in the url[site] text file.HTML. By default, client/server exchanges are logged to the console (tracking=True);
- everything is done in a [try / finally] (lines 14–96). There is no [except] clause. Exceptions will be propagated to the calling code, which catches and displays them (lines 119–120);
- lines 16-17: opening a connection to the web server. The [socket.create_connection] function takes three parameters:
- [param1]: is the name of the Internet machine we want to reach;
- [param2]: is the port number of the service you want to connect to;
- [param3]: [socket.create_connection] returns a socket, and [param3], if present, specifies the timeout for the created socket. The timeout is the maximum wait time for the socket while it waits for a response from the remote machine;
- lines 27-28: creation of the file [site.html] in which the received document HTML will be stored;
- lines 34–43: the client’s first command must be the command [GET URL HTTP/1.1];
- line 43: the [sock.send] function allows the client to send data to the server. Here, the text line sent has the following meaning: "I want (GET) the page [URL] from the website I am connected to. I am using the HTTP version 1.1 protocol";
- line 43: the [sock.send(bytearray(commande, 'utf-8'))] instruction sends a byte array. This array is obtained by converting the string [commande] into a sequence of UTF-8-encoded bytes;
- lines 44–52: the remaining lines of the protocol HTTP [Host, User-Agent, Accept, Accept-Language…] are sent. Their order does not matter;
- Lines 53–55: We send the header HTTP [Connection: close] to instruct the server to close its connection once it has sent the requested document. By default, it does not do this. We must therefore explicitly ask it to do so. The benefit is that this closure will be detected on the client side, and this is how the client will know that it has received the entire requested document;
- lines 56–57: an empty line is sent to the server to indicate that the client has finished sending its headers HTTP and is now waiting for the requested document;
- lines 68–86: The server will first send a series of HTTP headers that provide various details about the requested document. These headers end with an empty line;
- lines 69–73: To read the server’s response line by line, the [sock.makefile(encoding=encoding)] method is used. The optional parameter [encoding] specifies the expected text encoding. After this operation, the stream of lines sent by the server can be read as a standard text file;
- line 78: we read a line sent by the server using the [readline] method. We remove the spaces (whitespace, line-end characters) at the beginning and end of the line;
- lines 81–83: if the line is not empty and tracking has been requested, the received line is displayed on the console;
- lines 84–86: if the empty line marking the end of the HTTP headers sent by the server has been retrieved, the loop on line 76 is terminated;
- lines 90-95: the text lines of the server’s response can be read line by line using a while loop and saved to the text file [html]. When the web server has sent the entire page requested, it closes its connection with the client. On the client side, this will be detected as an end-of-file, and we will exit the loop in lines 90–95;
- lines 96–102: whether there is an error or not, all resources used by the code are released;
Results:
The console displays the following logs:
C:\Data\st-2020\dev\python\cours-2020\python3-flask-2020\venv\Scripts\python.exe C:/Data/st-2020/dev/python/cours-2020/python3-flask-2020/inet/http/01/main.py
-------------------------
localhost
-------------------------
Client : début de la communication avec le serveur [localhost]
--> GET / HTTP/1.1
--> Host: localhost:80
--> User-Agent: Python client
--> Accept: text/HTML
--> Accept-Language: en
Réponse du serveur [localhost]
<-- HTTP/1.1 200 OK
<-- Date: Sun, 05 Jul 2020 16:27:46 GMT
<-- Server: Apache/2.4.35 (Win64) OpenSSL/1.1.1b PHP/7.2.19
<-- X-Powered-By: PHP/7.2.19
<-- Content-Length: 1776
<-- Connection: close
<-- Content-Type: text/html; charset=UTF-8
-------------------------
sergetahe.com
-------------------------
Client : début de la communication avec le serveur [sergetahe.com]
--> GET / HTTP/1.1
--> Host: sergetahe.com:80
--> User-Agent: Python client
--> Accept: text/HTML
--> Accept-Language: en
Réponse du serveur [sergetahe.com]
<-- HTTP/1.1 302 Found
<-- Date: Sun, 05 Jul 2020 16:27:45 GMT
<-- Content-Type: text/html; charset=UTF-8
<-- Transfer-Encoding: chunked
<-- Connection: close
<-- Server: Apache
<-- X-Powered-By: PHP/7.3
<-- Location: http://sergetahe.com:80/programming-courses-tutorials
<-- Set-Cookie: SERVERID68971=2620178|XwH/h|XwH/h; path=/
<-- X-IPLB-Instance: 17106
-------------------------
tahe.developpez.com
-------------------------
Client : début de la communication avec le serveur [tahe.developpez.com]
--> GET / HTTP/1.1
--> Host: tahe.developpez.com:443
--> User-Agent: Python client
--> Accept: text/HTML
--> Accept-Language: en
Réponse du serveur [tahe.developpez.com]
<-- HTTP/1.1 400 Bad Request
<-- Date: Sun, 05 Jul 2020 16:27:45 GMT
<-- Server: Apache/2.4.38 (Debian)
<-- Content-Length: 453
<-- Connection: close
<-- Content-Type: text/html; charset=iso-8859-1
-------------------------
www.sergetahe.com
-------------------------
Client : début de la communication avec le serveur [www.sergetahe.com]
--> GET /courses-programming-tutorials/ HTTP/1.1
--> Host: sergetahe.com:80
--> User-Agent: Python client
--> Accept: text/HTML
--> Accept-Language: en
Réponse du serveur [www.sergetahe.com]
<-- HTTP/1.1 301 Moved Permanently
<-- Date: Sun, 05 Jul 2020 16:27:45 GMT
<-- Content-Type: text/html; charset=iso-8859-1
<-- Content-Length: 263
<-- Connection: close
<-- Server: Apache
<-- Location: https://sergetahe.com/cours-tutoriels-de-programmation/
<-- Set-Cookie: SERVERID68971=2620178|XwH/h|XwH/h; path=/
<-- X-IPLB-Instance: 17095
Terminé...

Process finished with exit code 0
Comments
- line 12: URL [http://localhost/] was found (code 200);
- line 29: URL [http://sergetahe.com/] was not found (code 302). Code 302 means that the requested page has changed from URL. The new URL is indicated by the header HTTP [Location] on line 36;
- line 49: the request sent to the server [http://tahe.developpez.com] is invalid (code 400);
- line 65: URL [http://www.sergetahe.com/] was not found (code 301). Code 301 means that the requested page has permanently changed its URL. The new URL is indicated by the HTTP [Location] header in line 71;
In general, 3xx, 4xx, and 5xx codes from a HTTP server are error codes.
The execution produced the following files:
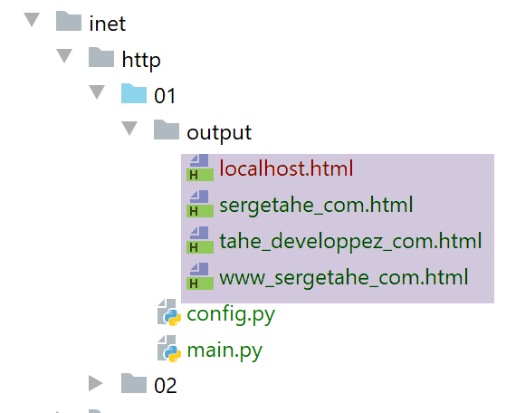
The received [output/localhost.HTML] file is as follows:
<!DOCTYPE html>
<html>
    <head>
        <title>Laragon</title>

        <link href="https://fonts.googleapis.com/css?family=Karla:400" rel="stylesheet" type="text/css">

        <style>
            html, body {
                height: 100%;
            }

            body {
                margin: 0;
                padding: 0;
                width: 100%;
                display: table;
                font-weight: 100;
                font-family: 'Karla';
            }

            .container {
                text-align: center;
                display: table-cell;
                vertical-align: middle;
            }

            .content {
                text-align: center;
                display: inline-block;
            }

            .title {
                font-size: 96px;
            }

            .opt {
                margin-top: 30px;
            }

            .opt a {
              text-decoration: none;
              font-size: 150%;
            }

            a:hover {
              color: red;
            }
        </style>
    </head>
    <body>
        <div class="container">
            <div class="content">
                <div class="title" title="Laragon">Laragon</div>

                <div class="info"><br />
                      Apache/2.4.35 (Win64) OpenSSL/1.1.1b PHP/7.2.19<br />
                      PHP version: 7.2.19   <span><a title="phpinfo()" href="/?q=info">info</a></span><br />
                      Document Root: C:/MyPrograms/laragon/www<br />

                </div>
                <div class="opt">
                  <div><a title="Getting Started" href="https://laragon.org/docs">Getting Started</a></div>
                </div>
            </div>

        </div>
    </body>
</html>
We did indeed receive the same document as with the Firefox browser.
The received [output/sergetahe_com.html] document is as follows:
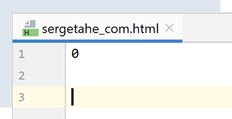
Most http servers send their responses to requests in chunks. Each chunk sent is preceded by a line indicating the number of bytes in the following chunk. This allows the client to read that exact number of bytes to retrieve the chunk. Here, the 0 indicates that the following chunk has zero bytes. Recall that the server had indicated that the document [http://sergetahe.com/] had changed from URL. Therefore, it did not send a document.
The document [output/tahe_developpez_com.html] is as follows:
<!DOCTYPE HTML PUBLIC "-//IETF//DTD HTML 2.0//EN">
<html><head>
<title>400 Bad Request</title>
</head><body>
<h1>Bad Request</h1>
<p>Your browser sent a request that this server could not understand.<br />
Reason: You're speaking plain HTTP to an SSL-enabled server port.<br />
 Instead use the HTTPS scheme to access this URL, please.<br />
</p>
<hr>
<address>Apache/2.4.38 (Debian) Server at 2eurocents.developpez.com Port 80</address>
</body></html>
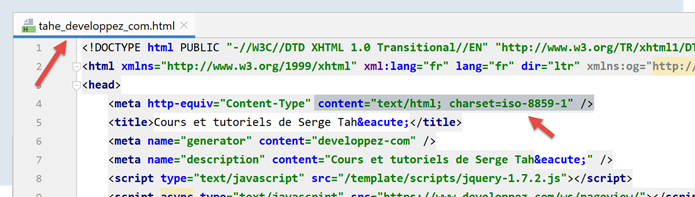
- Lines 1–12: The server sent a HTML document despite the fact that the request was incorrect (line 49 of the results). The HTML document allows the server to specify the cause of the error. This is indicated on lines 6 and 7:
- line 7: our client used the HTTP protocol;
- line 8: the server uses the HTTPS protocol (S=secure) and does not accept the HTTP protocol;
The [output/www_sergetahe_com.html] document is as follows:
<!DOCTYPE HTML PUBLIC "-//IETF//DTD HTML 2.0//EN">
<html><head>
<title>301 Moved Permanently</title>
</head><body>
<h1>Moved Permanently</h1>
<p>The document has moved <a href="https://sergetahe.com/cours-tutoriels-de-programmation/">here</a>.</p>
</body></html>
Here too, an error occurred (line 3). However, the server sends a document named HTML detailing the error (lines 1–7).
21.4.4. Example 4
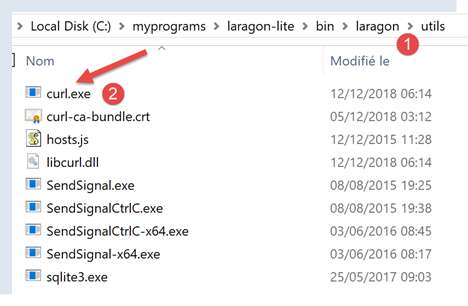
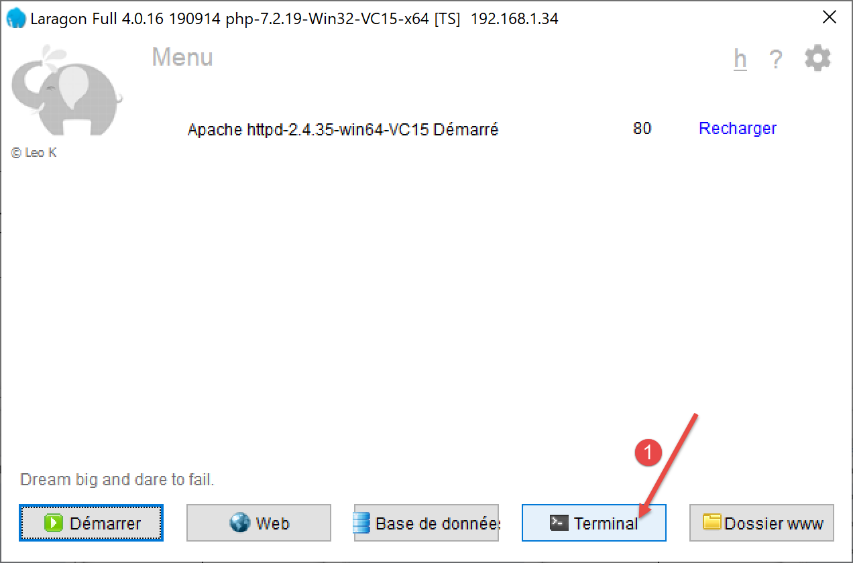
The previous examples have shown us that our HTTP client was insufficient. We will now introduce a tool called [curl] that allows you to retrieve web documents by handling the issues mentioned: the HTTPS protocol, documents sent in chunks, redirects… The [curl] tool was installed with Laragon:
Let’s open a PyCharm [1] terminal:
- in [1], access to the terminals of PyCharm;
- in [2-3], the already active terminals;
- in [4], the folder you are currently in. This does not matter in the following steps;
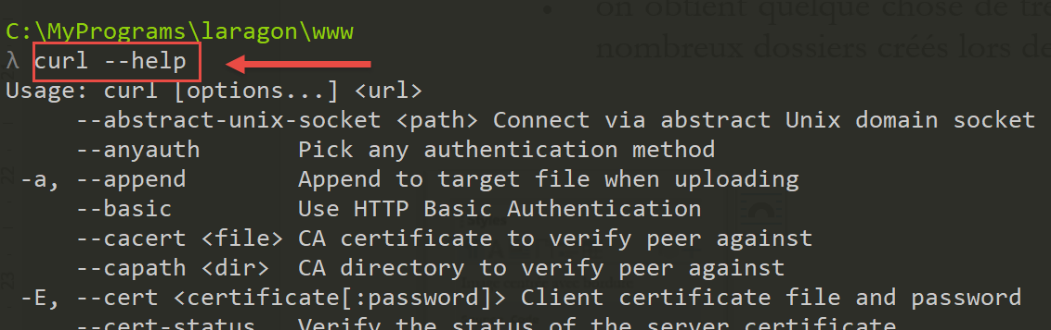
In the terminal, we type the following command:
(venv) C:\Data\st-2020\dev\python\cours-2020\python3-flask-2020\inet\utilitaires>curl --help
Usage: curl [options...] <url>
     --abstract-unix-socket <path> Connect via abstract Unix domain socket
     --anyauth Pick any authentication method
 -a, --append        Append to target file when uploading
     --basic Use HTTP Basic Authentication
     --cacert <CA certificate> CA certificate to verify peer against
…
The fact that the [curl –help] command produced results shows that the [curl] command is in the PATH directory of the terminal. On Windows, PATH is the set of directories searched when the user types an executable command, in this case [curl]. The value of PATH can be determined:
(venv) C:\Data\st-2020\dev\python\cours-2020\python3-flask-2020\inet\utilitaires>echo %PATH%
C:\Data\st-2020\dev\python\cours-2020\python3-flask-2020\venv\Scripts;C:\Program Files (x86)\Common Files\Oracle\Java\javapath;C:\Program Files\Python38\Scripts\;C:\Program Files\Python38\;C:\windows\system32;C:\windows;C:\windows\System32\Wbem;C:\windows\System32\WindowsPowerShell\v1.0\;C:\windows\System32\OpenSSH\;C:\Program Files\Git\cmd;C:\Users\serge\AppData\Local\Microsoft\WindowsApps;;C:\Program Files\JetBrains\PyCharm Community Edition 2020.1.2\bin;
Line 2 lists the PATH folders separated by semicolons. No folder related to Laragon appears in this list. Upon further investigation, we find that there is a [curl] folder inside the [c:\windows\system32] folder. This is the one that responded earlier.
If you want to use the [curl] tool included with Laragon, you can proceed as follows:

- in [2], the Laragon terminal;
- in [3], this button allows you to create new terminals, each of which opens in a tab in the window above;
- In [4], we request the PATH from the Laragon terminal;
- the result is quite different from what was obtained in a PyCharm terminal. This PATH contains numerous folders created during the installation of Laragon. The folder containing the [curl] tool is one of them:
After that, use the terminal of your choice. Just keep in mind that when you want to use a tool provided by Laragon, the Laragon terminal is the preferred option.
The [curl --help] command displays all the configuration options for [curl]. There are several dozen of them. We will use very few of them. To request a URL, simply type the command [curl URL]. This command will display the requested document on the console. If you also want the HTTP exchanges between the client and the server, type [curl --verbose URL]. Finally, to save the requested HTML document to a file, type [curl --verbose --output fichier URL].
To avoid cluttering our machine’s file system, let’s move to another location (I’m using a Laragon terminal here):
λ cd \Temp\

C:\Temp
λ mkdir curl

C:\Temp
λ cd curl\

C:\Temp\curl
λ dir
 Le volume dans le lecteur C s’appelle Local Disk
 Le numéro de série du volume est B84C-D958

 Répertoire de C:\Temp\curl

05/07/2020  19:31    <DIR>          .
05/07/2020  19:31    <DIR>          ..
               0 fichier(s)                0 octets
               2 Rép(s)  892 388 098 048 octets libres
- line 3, navigate to the [c:\temp] folder. If this folder does not exist, you can create it or choose another one;
- line 6, create a folder named [curl];
- line 9, navigate to it;
- On line 12, we list its contents. It is empty (line 20);
Make sure the Laragon Apache server is running, and using [curl], request URL and [http://localhost/] with the command [curl –verbose –output localhost.html http://localhost/]. The following results are obtained:
λ curl --verbose --output localhost.html http://localhost/
  % Total    % Received % Xferd  Average Speed   Time    Time     Time  Current
                                 Dload  Upload   Total   Spent    Left  Speed
  0     0    0     0    0     0      0      0 --:--:-- --:--:-- --:--:-- 0* Trying ::1...
* TCP_NODELAY set
*   Trying 127.0.0.1...
* TCP_NODELAY set
  0     0    0     0    0     0      0      0 --:--:-- 0:00:01 --:--:-- 0* Connected to localhost (::1) port 80 (#0)
  0     0    0     0    0     0      0      0 --:--:-- 0:00:01 --:--:-- 0> GET / HTTP/1.1
> Host: localhost
> User-Agent: curl/7.63.0
> Accept: */*
>
< HTTP/1.1 200 OK
< Date: Sun, 05 Jul 2020 17:35:43 GMT
< Server: Apache/2.4.35 (Win64) OpenSSL/1.1.1b PHP/7.2.19
< X-Powered-By: PHP/7.2.19
< Content-Length: 1776
< Content-Type: text/html; charset=UTF-8
<
{ [1776 bytes data]
100  1776  100  1776    0     0   1062      0  0:00:01  0:00:01 --:--:--  1062
* Connection #0 to host localhost left intact
- lines 10–13: lines sent by [curl] to the [localhost] server. The HTTP protocol is recognized;
- lines 14–20: lines sent in response by the server;
- line 14: indicates that the requested document was successfully received;
The file [localhost.html] contains the requested document. You can verify this by opening the file in a text editor.
Now let’s request URL [https://tahe.developpez.com:443/]. To obtain this URL, the client HTTP must be able to process HTTPS. This is the case for the client [curl].
The console output is as follows:
C:\Temp\curl
λ curl --verbose --output tahe.developpez.com.html https://tahe.developpez.com:443/
  % Total    % Received % Xferd  Average Speed   Time    Time     Time  Current
                                 Dload  Upload   Total   Spent    Left  Speed
  0     0    0     0    0     0      0      0 --:--:-- --:--:-- --:--:--     0*   Trying 87.98.130.52...
* TCP_NODELAY set
  0     0    0     0    0     0      0      0 --:--:-- --:--:-- --:--:--     0* Connected to tahe.developpez.com (87.98.130.52) port 443 (#0)
* ALPN, offering h2
* ALPN, offering http/1.1
* successfully set certificate verify locations:
*   CAfile: C:\MyPrograms\laragon\bin\laragon\utils\curl-ca-bundle.crt
  CApath: none
} [5 bytes data]
* TLSv1.3 (OUT), TLS handshake, Client hello (1):
} [512 bytes data]
* TLSv1.3 (IN), TLS handshake, Server hello (2):
{ [122 bytes data]
* TLSv1.3 (IN), TLS handshake, Encrypted Extensions (8):
{ [25 bytes data]
* TLSv1.3 (IN), TLS handshake, Certificate (11):
{ [2563 bytes data]
* TLSv1.3 (IN), TLS handshake, CERT verify (15):
{ [264 bytes data]
* TLSv1.3 (IN), TLS handshake, Finished (20):
{ [52 bytes data]
* TLSv1.3 (OUT), TLS change cipher, Change cipher spec (1):
} [1 bytes data]
* TLSv1.3 (OUT), TLS handshake, Finished (20):
} [52 bytes data]
* SSL connection using TLSv1.3 / TLS_AES_256_GCM_SHA384
* ALPN, server accepted to use http/1.1
* Server certificate:
*  subject: CN=*.developpez.com
*  start date: Jul  1 15:38:30 2020 GMT
*  expire date: Sep 29 15:38:30 2020 GMT
*  subjectAltName: host "tahe.developpez.com" matched cert's "*.developpez.com"
*  issuer: C=US; O=Let's Encrypt; CN=Let's Encrypt Authority X3
*  SSL certificate verify ok.
} [5 bytes data]
> GET / HTTP/1.1
> Host: tahe.developpez.com
> User-Agent: curl/7.63.0
> Accept: */*
>
{ [5 bytes data]
* TLSv1.3 (IN), TLS handshake, Newsession Ticket (4):
{ [281 bytes data]
* TLSv1.3 (IN), TLS handshake, Newsession Ticket (4):
{ [297 bytes data]
* old SSL session ID is stale, removing
{ [5 bytes data]
< HTTP/1.1 200 OK
< Date: Sun, 05 Jul 2020 17:39:53 GMT
< Server: Apache/2.4.38 (Debian)
< X-Powered-By: PHP/5.3.29
< Vary: Accept-Encoding
< Transfer-Encoding: chunked
< Content-Type: text/html
<
{ [6 bytes data]
100   99k    0   99k    0     0  79343      0 --:--:--  0:00:01 --:--:-- 79343
* Connection #0 to host tahe.developpez.com left intact
- lines 10-39: client/server exchanges to secure the connection: this connection will be encrypted;
- lines 41-44: the headers HTTP sent by the client [curl] to the server;
- line 52: the requested document was successfully found;
- line 57: the document is sent in chunks;
[curl] correctly handles both the secure protocol HTTPS and the fact that the document is being sent in chunks. The sent document will be found here in the file [tahe.developpez.com.html].
Now let’s request the URL [http://sergetahe.com/cours-tutoriels-de-programmation]. We saw that for this URL, there was a redirect to URL and [http://sergetahe.com/cours-tutoriels-de-programmation/] (with a / at the end).
The console output is as follows:
C:\Temp\curl
λ curl --verbose --output sergetahe.com.html --location http://sergetahe.com/cours-tutoriels-de-programmation
  % Total    % Received % Xferd  Average Speed   Time    Time     Time  Current
                                 Dload  Upload   Total   Spent    Left  Speed
  0     0    0     0    0     0      0      0 --:--:-- --:--:-- --:--:--     0*   Trying 87.98.154.146...
* TCP_NODELAY set
* Connected to sergetahe.com (87.98.154.146) port 80 (#0)
> GET /cours-tutoriels-de-programmation HTTP/1.1
> Host: sergetahe.com
> User-Agent: curl/7.63.0
> Accept: */*
>
< HTTP/1.1 301 Moved Permanently
< Date: Sun, 05 Jul 2020 17:44:17 GMT
< Content-Type: text/html; charset=iso-8859-1
< Content-Length: 262
< Server: Apache
< Location: http://sergetahe.com/cours-tutoriels-de-programmation/
< Set-Cookie: SERVERID68971=2620178|XwIRd|XwIRd; path=/
< X-IPLB-Instance: 17095
<
* Ignoring the response-body
{ [262 bytes data]
100   262  100   262    0     0   1858      0 --:--:-- --:--:-- --:--:--  1858
* Connection #0 to host sergetahe.com left intact
* Issue another request to this URL: 'http://sergetahe.com/cours-tutoriels-de-programmation/'
* Found bundle for host sergetahe.com: 0x14385f8 [can pipeline]
* Could pipeline, but not asked to!
* Re-using existing connection! (#0) with host sergetahe.com
* Connected to sergetahe.com (87.98.154.146) port 80 (#0)
> GET /cours-tutoriels-de-programmation/ HTTP/1.1
> Host: sergetahe.com
> User-Agent: curl/7.63.0
> Accept: */*
>
< HTTP/1.1 301 Moved Permanently
< Date: Sun, 05 Jul 2020 17:44:17 GMT
< Content-Type: text/html; charset=iso-8859-1
< Content-Length: 263
< Server: Apache
< Location: https://sergetahe.com/cours-tutoriels-de-programmation/
< Set-Cookie: SERVERID68971=2620178|XwIRd|XwIRd; path=/
< X-IPLB-Instance: 17095
<
* Ignoring the response-body
{ [263 bytes data]
100   263  100   263    0     0    764      0 --:--:-- --:--:-- --:--:--   764
* Connection #0 to host sergetahe.com left intact
* Issue another request to this URL: 'https://sergetahe.com/cours-tutoriels-de-programmation/'
*   Trying 87.98.154.146...
* TCP_NODELAY set
* Connected to sergetahe.com (87.98.154.146) port 443 (#1)
* ALPN, offering h2
* ALPN, offering http/1.1
* successfully set certificate verify locations:
*   CAfile: C:\MyPrograms\laragon\bin\laragon\utils\curl-ca-bundle.crt
  CApath: none
} [5 bytes data]
* TLSv1.3 (OUT), TLS handshake, Client hello (1):
} [512 bytes data]
* TLSv1.3 (IN), TLS handshake, Server hello (2):
{ [102 bytes data]
* TLSv1.2 (IN), TLS handshake, Certificate (11):
{ [2572 bytes data]
* TLSv1.2 (IN), TLS handshake, Server key exchange (12):
{ [333 bytes data]
* TLSv1.2 (IN), TLS handshake, Server finished (14):
{ [4 bytes data]
* TLSv1.2 (OUT), TLS handshake, Client key exchange (16):
} [70 bytes data]
* TLSv1.2 (OUT), TLS change cipher, Change cipher spec (1):
} [1 bytes data]
* TLSv1.2 (OUT), TLS handshake, Finished (20):
} [16 bytes data]
  0     0    0     0    0     0      0      0 --:--:-- --:--:-- --:--:--     0* TLSv1.2 (IN), TLS handshake, Finished (20):
{ [16 bytes data]
* SSL connection using TLSv1.2 / ECDHE-RSA-AES128-GCM-SHA256
* ALPN, server accepted to use h2
* Server certificate:
*  subject: CN=sergetahe.com
*  start date: May 10 01:41:15 2020 GMT
*  expire date: Aug  8 01:41:15 2020 GMT
*  subjectAltName: host "sergetahe.com" matched cert's "sergetahe.com"
*  issuer: C=US; O=Let's Encrypt; CN=Let's Encrypt Authority X3
*  SSL certificate verify ok.
* Using HTTP2, server supports multi-use
* Connection state changed (HTTP/2 confirmed)
* Copying HTTP/2 data in stream buffer to connection buffer after upgrade: len=0
} [5 bytes data]
* Using Stream ID: 1 (easy handle 0x2bee870)
} [5 bytes data]
> GET /cours-tutoriels-de-programmation/ HTTP/2
> Host: sergetahe.com
> User-Agent: curl/7.63.0
> Accept: */*
>
{ [5 bytes data]
* Connection state changed (MAX_CONCURRENT_STREAMS == 128)!
} [5 bytes data]
  0     0    0     0    0     0      0      0 --:--:--  0:00:01 --:--:--     0< HTTP/2 200
< date: Sun, 05 Jul 2020 17:44:19 GMT
< content-type: text/html; charset=UTF-8
< server: Apache
< x-powered-by: PHP/7.3
< link: <https://sergetahe.com/cours-tutoriels-de-programmation/wp-json/>; rel="https://api.w.org/"
< link: <https://sergetahe.com/cours-tutoriels-de-programmation/>; rel=shortlink
< vary: Accept-Encoding
< x-iplb-instance: 17080
< set-cookie: SERVERID68971=2620178|XwIRd|XwIRd; path=/
<
{ [5 bytes data]
100 49634    0 49634    0     0  26040      0 --:--:--  0:00:01 --:--:-- 37830
* Connection #1 to host sergetahe.com left intact
- line 2: we use option [--location] to indicate that we want to follow the redirects sent by the server;
- line 13: the server indicates that the requested document has changed to URL;
- line 18: it indicates the new URL for the requested document;
- line 31: [curl] sends a new request, this time to the new URL;
- line 36: the server responds again that URL has changed;
- line 41: the new URL is exactly the same as the one that was redirected, with one minor difference: the protocol has changed. It has become HTTPS (line 41) whereas it was previously http (line 31);
- line 49: a new request is sent to the new URL. This one is encrypted. Consequently, a whole security setup dialogue takes place, lines 53–91;
- line 92: the new URL is requested, this time using the HTTP/2 protocol;
- line 100: the document has been found;
The requested document will be found in the file [sergetahe.com.html].
C:\Temp\curl
λ dir
 Le volume dans le lecteur C s’appelle Local Disk
 Le numéro de série du volume est B84C-D958

 Répertoire de C:\Temp\curl

05/07/2020  19:44    <DIR>          .
05/07/2020  19:44    <DIR>          ..
05/07/2020  19:35             1 776 localhost.html
05/07/2020  19:44            49 634 sergetahe.com.html
05/07/2020  19:39           101 639 tahe.developpez.com.html
               3 fichier(s)          153 049 octets
               2 Rép(s)  892 385 628 160 octets libres
21.4.5. Example 5
Python has a module called [pyccurl] that allows you to use the capabilities of the [curl] tool in a Python program. We install this module:

We will write a new [http/02/main.py] script:
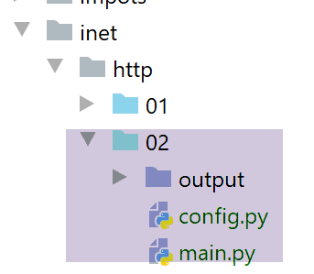
The [http/02/config] file is as follows:
def configure():
    # list of URL to be queried
    urls = [
        # site: server to connect to
        # timeout: maximum time to wait for a response from the server
        # target : url to request
        # encoding: encoding the server response
        {
            "site": "sergetahe.com",
            "timeout": 2000,
            "target": "http://sergetahe.com",
            "encoding": "utf-8"
        },
        {
            "site": "tahe.developpez.com",
            "timeout": 500,
            "target": "https://tahe.developpez.com",
            "encoding": "iso-8859-1"
        },
        {
            "site": "www.polytech-angers.fr",
            "timeout": 500,
            "target": "http://www.polytech-angers.fr",
            "encoding": "utf-8"
        },
        {
            "site": "localhost",
            "timeout": 500,
            "target": "http://localhost",
            "encoding": "utf-8"
        }
    ]
    # we return the configuration
    return {
        'urls': urls
    }
The file contains a list of dictionaries, each of which has the following structure:
- site: the name of a web server;
- encoding: the expected document encoding type;
- timeout: maximum wait time for the server response, expressed in milliseconds. After this time, the client will disconnect;
- url: URL of the requested document;
The code for the [http/02/main.py] script is as follows:
# imports
import codecs
from io import BytesIO

import pycurl


# -----------------------------------------------------------------------
def get_url(url: dict, suivi=True):
    # reads the URL url[url] and stores it in file output/url['site'].html
    # if [suivi=True] then there is console monitoring of the client/server exchange
    # url[timeout] is the customer call timeout;
    # url [encoding] is the encoding of the requested document

    # retrieve configuration data
    server = url['site']
    timeout = url['timeout']
    target = url['target']
    encoding = url['encoding']
    # follow-up
    print(f"Client : début de la communication avec le serveur [{server}]")

    # we let the exceptions rise
    html = None
    curl = None
    try:
        # Session initialization cURL
        curl = pycurl.Curl()
        # binary flow
        flux = BytesIO()
        # curl options
        options = {
            # URL
            curl.URL: target,
            # WRITEDATA: where received data will be stored
            curl.WRITEDATA: flux,
            # verbose mode
            curl.VERBOSE: suivi,
            # new connection - no cache
            curl.FRESH_CONNECT: True,
            # request timeout (in seconds)
            curl.TIMEOUT: timeout,
            curl.CONNECTTIMEOUT: timeout,
            # do not check the validity of SSL certificates
            curl.SSL_VERIFYPEER: False,
            # track redirects
            curl.FOLLOWLOCATION: True
        }
        # curl settings
        for option, value in options.items():
            curl.setopt(option, value)
        # Execution of the CURL query with these parameters
        curl.perform()
        # create file server.html - change troublesome characters for a file name
        server2 = server.replace("/", "_")
        server2 = server2.replace(".", "_")
        html_filename = f'{server2}.html'
        html = codecs.open(f"output/{html_filename}", "w", encoding)
        # saving the received document in the HTML file
        html.write(flux.getvalue().decode(encoding))
    finally:
        # freeing up resources
        if curl:
            curl.close()
        if html:
            html.close()


# -------------------main
# configure the application
import config
config = config.configure()

# get the URL from the configuration file
for url in config['urls']:
    print("-------------------------")
    print(url['site'])
    print("-------------------------")
    try:
        # reading URL from site [site]
        get_url(url)
    # except BaseException as error:
    #     print(f "The following error has occurred: {error}")
    finally:
        pass
# end
print("Terminé...")
Comments
- line 5: we import the [pycurl] module;
- line 3: we import the [BytesIO] class, which will allow us to store the data received from the server in a binary stream;
- lines 70–72: retrieve the application configuration;
- lines 75-85: we loop through the list of URL found in the configuration;
- line 81: for each URL, we call the [get_url] function, which will download theURL url[‘target’] with a timeout url['timeout'];
- line 9: the [get_url] function receives the configuration of the URL to be queried;
- lines 16–19: the configuration of URL is retrieved into separate variables;
- lines 26, 61: all operations are performed within a try/finally block. Exceptions are not caught; they are passed up to the calling code, which catches them;
- line 28: a [curl] session is prepared. [pycurl.Curl()] returns a [curl] resource that will perform the transaction with a server;
- line 30: instantiation of the binary stream that will store the received data;
- lines 32–48: The [options] dictionary configures the [curl] connection to the server. Their roles are indicated in the comments;
- lines 49–51: The connection options are passed to the [curl] resource;
- line 53: connection to URL requested with the defined options. Because of option [curl.WRITEDATA: flux] (line 36), the [curl.perform()] function will store the received data in [flux];
- lines 54–60: the file HTML is created to store the received document HTML;
- line 60: the [flux.getvalue()] binary stream will be stored as a character string in the HTML file. The encoding of this string is specified in the [decode(encoding)] method. Therefore, you must know the encoding of the document sent by the server. If you make a mistake, the decoding of the binary stream will fail. The encoding is specified in the URL configuration file (line 12, for example). We could have handled this information dynamically since the server sends it in its HTTP headers. That would have been preferable. To keep the code simple, we did not do so. To determine the document’s encoding type, simply request the desired URL using a browser and examine the HTTP headers sent by the browser in debug mode (F12), or check the document itself, as it also specifies the encoding:
- lines 61–66: allocated resources are released;
When running the [main.py] script, the following console output is obtained:
C:\Data\st-2020\dev\python\cours-2020\python3-flask-2020\venv\Scripts\python.exe C:/Data/st-2020/dev/python/cours-2020/python3-flask-2020/inet/http/02/main.py
-------------------------
sergetahe.com
-------------------------
Client : début de la communication avec le serveur [sergetahe.com]
*   Trying 87.98.154.146:80...
* TCP_NODELAY set
* Connected to sergetahe.com (87.98.154.146) port 80 (#0)
> GET / HTTP/1.1
Host: sergetahe.com
User-Agent: PycURL/7.43.0.5 libcurl/7.68.0 OpenSSL/1.1.1d zlib/1.2.11 c-ares/1.15.0 WinIDN libssh2/1.9.0 nghttp2/1.40.0
Accept: */*

* Mark bundle as not supporting multiuse
< HTTP/1.1 302 Found
< Date: Mon, 06 Jul 2020 06:45:52 GMT
< Content-Type: text/html; charset=UTF-8
< Transfer-Encoding: chunked
< Server: Apache
< X-Powered-By: PHP/7.3
< Location: http://sergetahe.com/cours-tutoriels-de-programmation
< Set-Cookie: SERVERID68971=26218|XwLIo|XwLIo; path=/
< X-IPLB-Instance: 17102
<
* Ignoring the response-body
* Connection #0 to host sergetahe.com left intact
* Issue another request to this URL: 'http://sergetahe.com/cours-tutoriels-de-programmation'
* Found bundle for host sergetahe.com: 0x25eacafb5d0 [serially]
* Can not multiplex, even if we wanted to!
* Re-using existing connection! (#0) with host sergetahe.com
* Connected to sergetahe.com (87.98.154.146) port 80 (#0)
> GET /cours-tutoriels-de-programmation HTTP/1.1
Host: sergetahe.com
User-Agent: PycURL/7.43.0.5 libcurl/7.68.0 OpenSSL/1.1.1d zlib/1.2.11 c-ares/1.15.0 WinIDN libssh2/1.9.0 nghttp2/1.40.0
Accept: */*

* Mark bundle as not supporting multiuse
< HTTP/1.1 301 Moved Permanently
< Date: Mon, 06 Jul 2020 06:45:52 GMT
< Content-Type: text/html; charset=iso-8859-1
< Content-Length: 262
< Server: Apache
< Location: http://sergetahe.com/cours-tutoriels-de-programmation/
< Set-Cookie: SERVERID68971=26218|XwLIo|XwLIo; path=/
< X-IPLB-Instance: 17102
<
* Ignoring the response-body
* Connection #0 to host sergetahe.com left intact
* Issue another request to this URL: 'http://sergetahe.com/cours-tutoriels-de-programmation/'
* Found bundle for host sergetahe.com: 0x25eacafb5d0 [serially]
* Can not multiplex, even if we wanted to!
* Re-using existing connection! (#0) with host sergetahe.com
* Connected to sergetahe.com (87.98.154.146) port 80 (#0)
> GET /cours-tutoriels-de-programmation/ HTTP/1.1
Host: sergetahe.com
User-Agent: PycURL/7.43.0.5 libcurl/7.68.0 OpenSSL/1.1.1d zlib/1.2.11 c-ares/1.15.0 WinIDN libssh2/1.9.0 nghttp2/1.40.0
Accept: */*

* Mark bundle as not supporting multiuse
< HTTP/1.1 301 Moved Permanently
< Date: Mon, 06 Jul 2020 06:45:52 GMT
< Content-Type: text/html; charset=iso-8859-1
< Content-Length: 263
< Server: Apache
< Location: https://sergetahe.com/cours-tutoriels-de-programmation/
< Set-Cookie: SERVERID68971=26218|XwLIo|XwLIo; path=/
< X-IPLB-Instance: 17102
<
* Ignoring the response-body
* Connection #0 to host sergetahe.com left intact
* Issue another request to this URL: 'https://sergetahe.com/cours-tutoriels-de-programmation/'
*   Trying 87.98.154.146:443...
* TCP_NODELAY set
* ….
* Using Stream ID: 1 (easy handle 0x25eaec77010)
> GET /cours-tutoriels-de-programmation/ HTTP/2
Host: sergetahe.com
user-agent: PycURL/7.43.0.5 libcurl/7.68.0 OpenSSL/1.1.1d zlib/1.2.11 c-ares/1.15.0 WinIDN libssh2/1.9.0 nghttp2/1.40.0
accept: */*

* Connection state changed (MAX_CONCURRENT_STREAMS == 128)!
< HTTP/2 200
< date: Mon, 06 Jul 2020 06:45:53 GMT
< content-type: text/html; charset=UTF-8
< server: Apache
< x-powered-by: PHP/7.3
< link: <https://sergetahe.com/cours-tutoriels-de-programmation/wp-json/>; rel="https://api.w.org/"
< link: <https://sergetahe.com/cours-tutoriels-de-programmation/>; rel=shortlink
< vary: Accept-Encoding
< x-iplb-instance: 17080
< set-cookie: SERVERID68971=26218|XwLIp|XwLIp; path=/
<
* Connection #1 to host sergetahe.com left intact
-------------------------
tahe.developpez.com
-------------------------
Client : début de la communication avec le serveur [tahe.developpez.com]
*   Trying 87.98.130.52:443...
* TCP_NODELAY set
* Connected to tahe.developpez.com (87.98.130.52) port 443 (#0)
* ALPN, offering h2
* ALPN, offering http/1.1
* SSL connection using TLSv1.3 / TLS_AES_256_GCM_SHA384
* ALPN, server accepted to use http/1.1
* Server certificate:
*  subject: CN=*.developpez.com
*  start date: Jul  1 15:38:30 2020 GMT
*  expire date: Sep 29 15:38:30 2020 GMT
*  subjectAltName: host "tahe.developpez.com" matched cert's "*.developpez.com"
*  issuer: C=US; O=Let's Encrypt; CN=Let's Encrypt Authority X3
*  SSL certificate verify result: unable to get local issuer certificate (20), continuing anyway.
> GET / HTTP/1.1
Host: tahe.developpez.com
User-Agent: PycURL/7.43.0.5 libcurl/7.68.0 OpenSSL/1.1.1d zlib/1.2.11 c-ares/1.15.0 WinIDN libssh2/1.9.0 nghttp2/1.40.0
Accept: */*

* old SSL session ID is stale, removing
* Mark bundle as not supporting multiuse
< HTTP/1.1 200 OK
< Date: Mon, 06 Jul 2020 06:45:53 GMT
< Server: Apache/2.4.38 (Debian)
< X-Powered-By: PHP/5.3.29
< Vary: Accept-Encoding
< Transfer-Encoding: chunked
< Content-Type: text/html
<
* Connection #0 to host tahe.developpez.com left intact
-------------------------
www.polytech-angers.fr
-------------------------
Client : début de la communication avec le serveur [www.polytech-angers.fr]
*   Trying 193.49.144.41:80...
* TCP_NODELAY set
* Connected to www.polytech-angers.fr (193.49.144.41) port 80 (#0)
> GET / HTTP/1.1
Host: www.polytech-angers.fr
User-Agent: PycURL/7.43.0.5 libcurl/7.68.0 OpenSSL/1.1.1d zlib/1.2.11 c-ares/1.15.0 WinIDN libssh2/1.9.0 nghttp2/1.40.0
Accept: */*

* Mark bundle as not supporting multiuse
< HTTP/1.1 301 Moved Permanently
< Date: Mon, 06 Jul 2020 06:45:54 GMT
< Server: Apache/2.4.29 (Ubuntu)
< Location: http://www.polytech-angers.fr/fr/index.html
< Cache-Control: max-age=1
< Expires: Mon, 06 Jul 2020 06:45:55 GMT
< Content-Length: 339
< Content-Type: text/html; charset=iso-8859-1
<
* Ignoring the response-body
* Connection #0 to host www.polytech-angers.fr left intact
* Issue another request to this URL: 'http://www.polytech-angers.fr/fr/index.html'
* Found bundle for host www.polytech-angers.fr: 0x25eacafb490 [serially]
* Can not multiplex, even if we wanted to!
* Re-using existing connection! (#0) with host www.polytech-angers.fr
* Connected to www.polytech-angers.fr (193.49.144.41) port 80 (#0)
> GET /fr/index.html HTTP/1.1
Host: www.polytech-angers.fr
User-Agent: PycURL/7.43.0.5 libcurl/7.68.0 OpenSSL/1.1.1d zlib/1.2.11 c-ares/1.15.0 WinIDN libssh2/1.9.0 nghttp2/1.40.0
Accept: */*

* Mark bundle as not supporting multiuse
< HTTP/1.1 200 OK
< Date: Mon, 06 Jul 2020 06:45:54 GMT
< Server: Apache/2.4.29 (Ubuntu)
< Last-Modified: Mon, 06 Jul 2020 04:50:09 GMT
< ETag: "85be-5a9be9bfcf228"
< Accept-Ranges: bytes
< Content-Length: 34238
< Cache-Control: max-age=1
< Expires: Mon, 06 Jul 2020 06:45:55 GMT
< Vary: Accept-Encoding
< Content-Type: text/html; charset=UTF-8
< Content-Language: fr
<
* Connection #0 to host www.polytech-angers.fr left intact
-------------------------
localhost
-------------------------
Client : début de la communication avec le serveur [localhost]
*   Trying ::1:80...
* TCP_NODELAY set
* Connected to localhost (::1) port 80 (#0)
> GET / HTTP/1.1
Host: localhost
User-Agent: PycURL/7.43.0.5 libcurl/7.68.0 OpenSSL/1.1.1d zlib/1.2.11 c-ares/1.15.0 WinIDN libssh2/1.9.0 nghttp2/1.40.0
Accept: */*

* Mark bundle as not supporting multiuse
< HTTP/1.1 200 OK
< Date: Mon, 06 Jul 2020 06:45:54 GMT
< Server: Apache/2.4.35 (Win64) OpenSSL/1.1.1b PHP/7.2.19
< X-Powered-By: PHP/7.2.19
< Content-Length: 1776
< Content-Type: text/html; charset=UTF-8
<
* Connection #0 to host localhost left intact
Terminé...

Process finished with exit code 0
Comments
- in blue, the http commands sent to the server;
- in green, the data received in response by the client;
- we get the same exchanges as with the [curl] tool;
- line 9: URL [http://sergetahe.com/] is requested;
- line 15: the server responds that the page has moved. Line 21, the new URL;
- line 32: URL [http://sergetahe.com/cours-tutoriels-de-programmation] is requested;
- line 38: the server responds that the page has moved. Line 43, the new URL;
- Line 54: URL [http://sergetahe.com/cours-tutoriels-de-programmation/] is requested;
- Line 60: The server responds that the page has moved. Line 65: The new URL. It uses the secure protocol [HTTPS];
- Lines 71–75: The secure protocol is established with the server;
- line 76: URL [https://sergetahe.com/cours-tutoriels-de-programmation/] is requested;
- line 82: the requested document was found;
21.4.6. Conclusion
In this section, we explored the HTTP protocol and wrote a [http/02/main.py] script capable of downloading a URL from the web.
21.5. The SMTP protocol (Simple Mail Transfer Protocol)
21.5.1. Introduction
In this chapter:
- [Serveur B] will be a local SMTP server that we will install;
- [Client A] will be a SMTP client in various forms:
- the [RawTcpClient] client to explore the SMTP protocol;
- a Python script replaying the SMTP protocol from the [RawTcpClient] client;
- a Python script using the [smtplib] module to send all kinds of emails;
21.5.2. Creating a [gmail] email address
To perform our SMTP tests, we will need an email address to send to. To do this, we will create a Gmail address [https://www.google.com/intl/fr/gmail/about/]:
Note: Send a few emails to the address you created. Do not proceed until you are sure that the account you created is able to receive emails.
21.5.3. Installing a SMTP server
For our tests, we will install the [hMailServer] mail server, which is both a SMTP server for sending emails and a POP3 (Post Office Protocol) that allows you to read emails stored on the server, and a IMAP server (Internet Message Access Protocol) that also allows you to read emails stored on the server but goes beyond that. In particular, it allows you to manage email storage on the server.
The [hMailServer] mail server is available as of URL [https://www.hmailserver.com/] (May 2019).
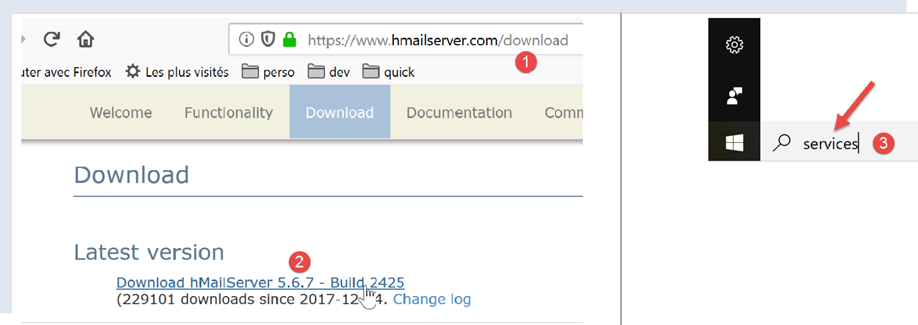
During installation, you will be asked for certain information:
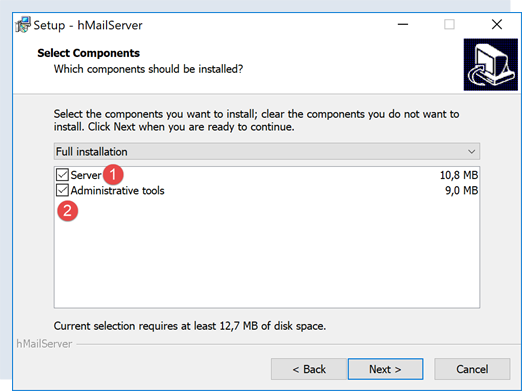
- In [1-2], select both the mail server and the tools to manage it;
- during installation, you will be asked for the administrator password: make a note of it, as you will need it;
[hMailServer] installs as a Windows service that starts automatically when the computer boots up. It is preferable to choose a manual startup:
- In [3], type [services] into the text box on the status bar;
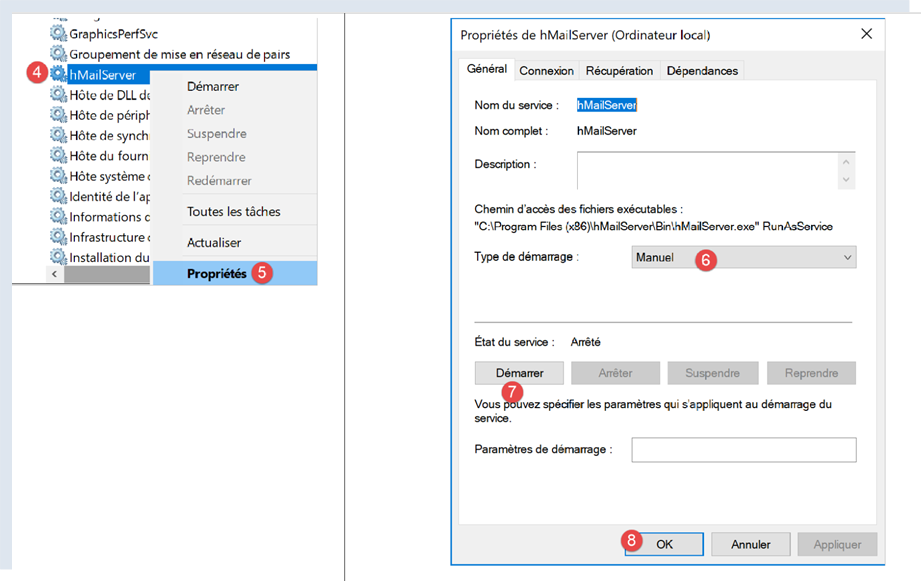
- In [4-8], set the service to [manuel] mode (6), then start it (7);
Once started, the [hMailServer] server must be configured. The server was installed with an administration program [hMailServer Administrator]:
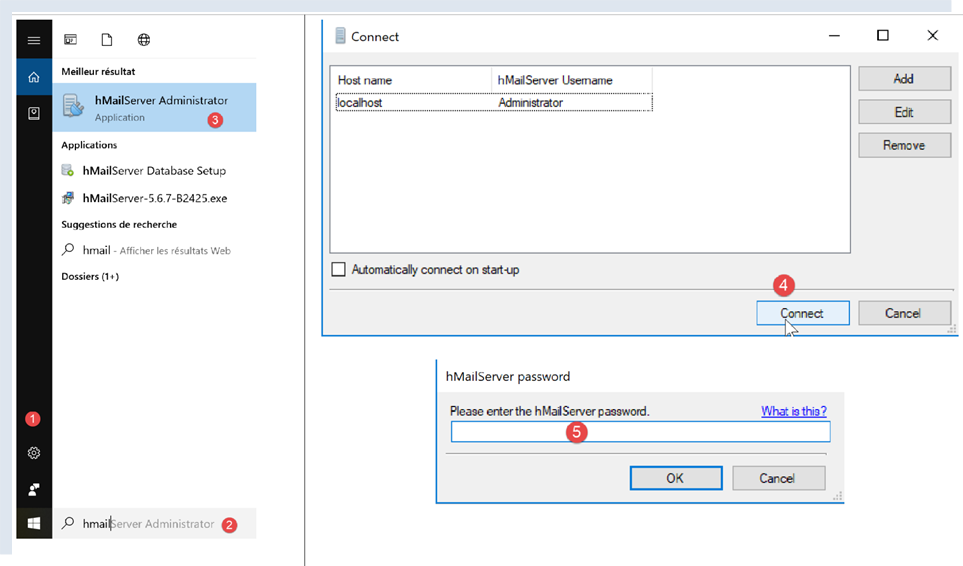
- In [2], in the status bar input field, type [hmailserver];
- in [3], launch the administrator;
- In [4], connect the administrator to the [hMailServer] server;
- In [5], enter the password you set during the installation of [hMailServer];
If you have forgotten the password, proceed as follows:
- stop the [hMailServer] server;
- Open the file [<hmailserver>/bin/hmailserver.ini], where <hmailserver> is the server’s installation directory:
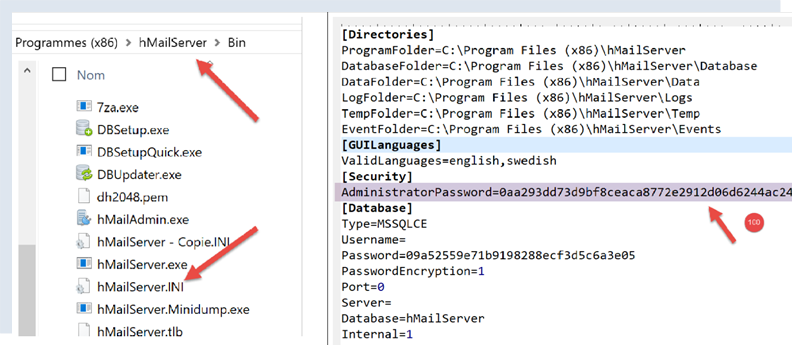
- In [100], remove the password from the line [AdministratorPassword]. This will result in the administrator no longer having a password. Simply type [Entrée] when prompted;
ValidLanguages=english,swedish
[Security]
AdministratorPassword=
[Database]
Let’s continue configuring the server:
- In [1-2], add a domain (if it doesn’t already exist);
- in [3], you can enter just about anything for the tests we’re going to run. In reality, you would need to enter the name of an existing domain;
We will create a user account:
- right-click on [Accounts] (7) then (8) to add a new user;
- In the [General] tab (9), we define a user [guest] (10) with the password [guest] (11). They will have the email address [guest@localhost] (10);
- in [12], the user [guest] is activated;
- in [13-14], the user is created;

- in [27], the port for the service SMTP;
- in [28], this service does not require authentication;
- in [30], enter the welcome message that the SMTP server will send to its clients clients;
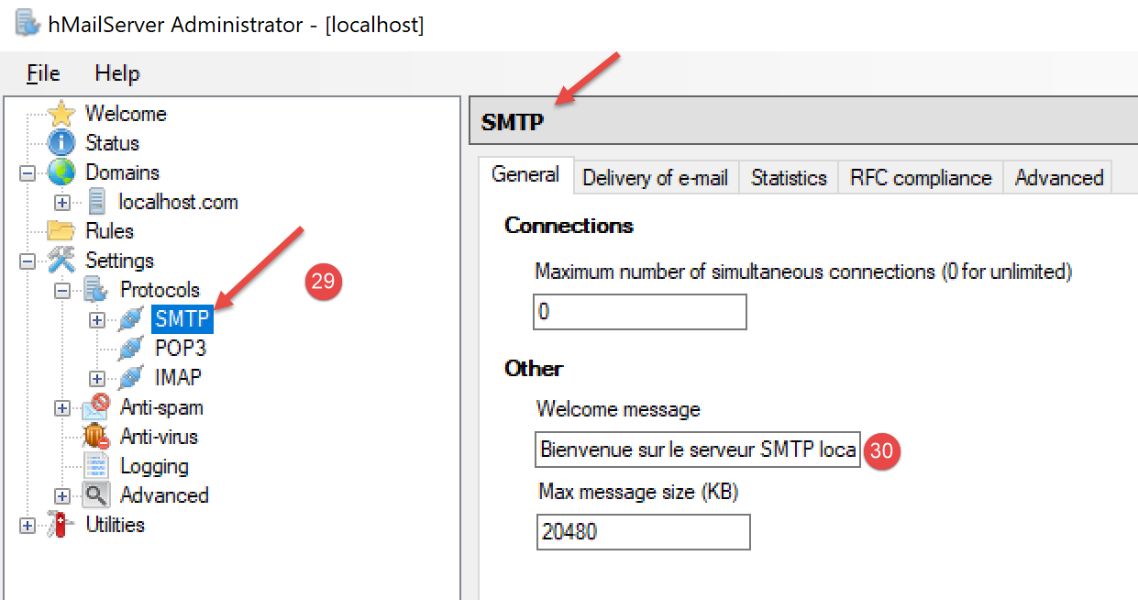
Do the same for the POP3 server:
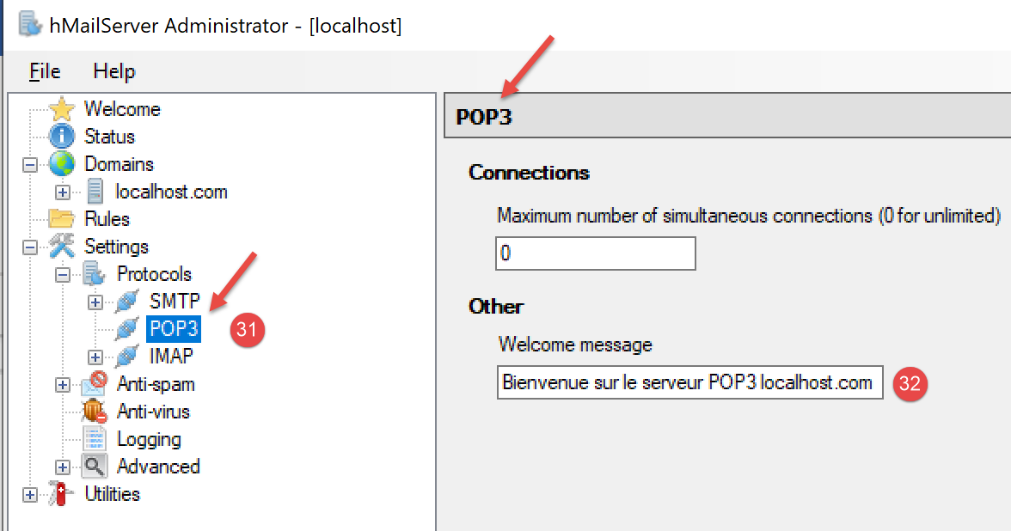
We do the same for the IMAP server:
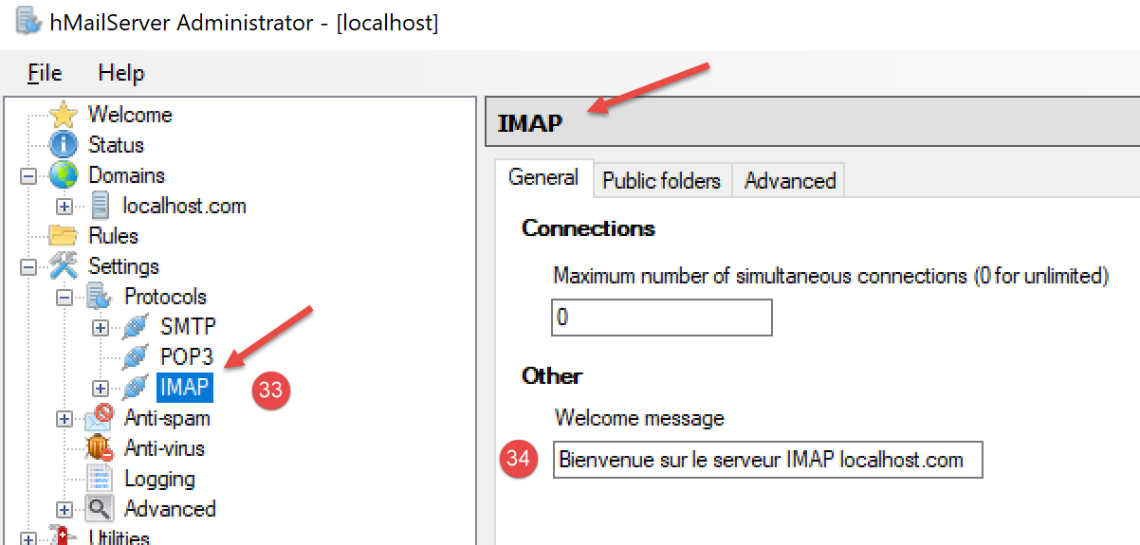
We specify the default domain for server [hMailServer] (there may be several) :
- In [37], specify that the default domain for server SMTP is the one you created in [38];
After saving this configuration, you can test it as follows. Open a PyCharm terminal in the utilities folder:

Then type the following command:
(venv) C:\Data\st-2020\dev\python\cours-2020\python3-flask-2020\inet\utilitaires>RawTcpClient.exe localhost 25
Client [DESKTOP-30FF5FB:50170] connecté au serveur [localhost-25]
Tapez vos commandes (quit pour arrêter) :
<-- [220 Bienvenue sur le serveur SMTP localhost.com]
- line 1: we connect to port 25 on the machine [localhost]. This is where an unsecured SMTP server from the [hMailServer] server is running;
- line 4: we receive the welcome message that we configured in step 30 above;
The SMTP server is therefore up and running. Type the command [quit] to end the connection with the SMTP server on port 25.
Now let’s do the same with port 587, which is the default port for the secure SMTP mail relay service:
(venv) C:\Data\st-2020\dev\python\cours-2020\python3-flask-2020\inet\utilitaires>RawTcpClient.exe localhost 587
Client [DESKTOP-30FF5FB:50217] connecté au serveur [localhost-587]
Tapez vos commandes (quit pour arrêter) :
<-- [220 Bienvenue sur le serveur SMTP localhost.com]
- line 4, the response from the SMTP server running on port 587;
Now let’s do the same with port 110, which is the default port for the POP3 mail relay service:
(venv) C:\Data\st-2020\dev\python\cours-2020\python3-flask-2020\inet\utilitaires>RawTcpClient.exe localhost 110
Client [DESKTOP-30FF5FB:50210] connecté au serveur [localhost-110]
Tapez vos commandes (quit pour arrêter) :
<-- [+OK Bienvenue sur le serveur POP3 localhost.com]
- line 4, we received the welcome message from the POP3 server;
Now let’s do the same with port 143, which is the default port for the IMAP mail retrieval service:
(venv) C:\Data\st-2020\dev\python\cours-2020\python3-flask-2020\inet\utilitaires>RawTcpClient.exe localhost 143
Client [DESKTOP-30FF5FB:50212] connecté au serveur [localhost-143]
Tapez vos commandes (quit pour arrêter) :
<-- [* OK Bienvenue sur le serveur IMAP localhost.com]
- line 4, we received the welcome message from the server IMAP;
21.5.4. Installing an email client
To read the email we are going to send, we need an email client. For those who do not have one, we will show you how to install and configure the [Thunderbird] client:
- In [1]: download [thunderbird] and then install it;
- start the [hMailServer] mail server if it isn’t already running;
- in [2-3]: once Thunderbird is running, we will create an email account for the user [guest@localhost] on the mail server [hMailServer];

- in [7-11]: the server POP3, which will allow us to read mail from the mail server [hMailServer], is located at the address [localhost] and operates on port 110;
- in [12-16]: The server SMTP, which will allow us to send mail on behalf of users of the mail server [hMailServer], is located at [localhost] and operates on port 25;
- [18]: We can test this configuration;

- in [26]: because we do not have encryption SSL, Thunderbird warns us that our configuration poses risks;
- in [28]: the account has been created;
To test the created account, we will use Thunderbird to:
- send an email to the user [guest@localhost.com] (protocol SMTP);
- read the email received by this user (protocol POP3);
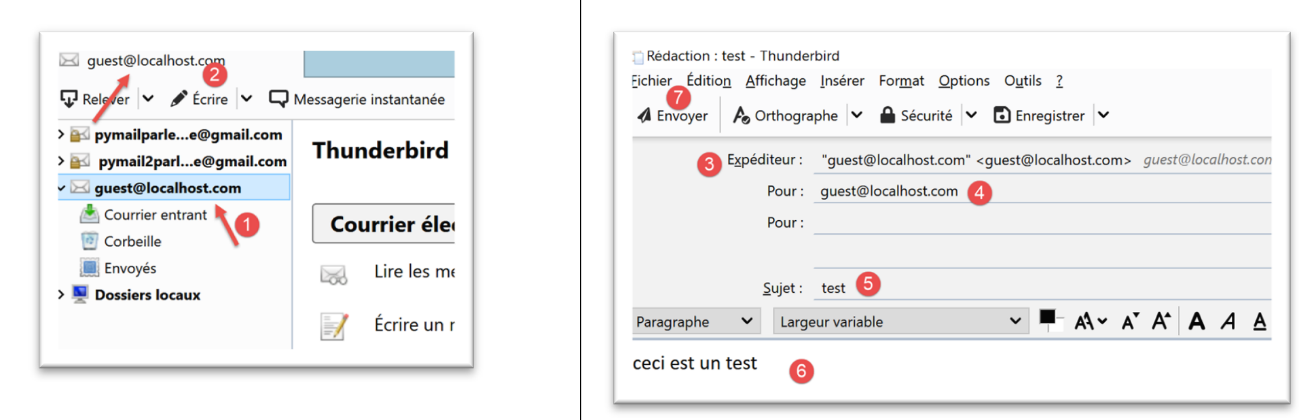
- in [3]: the sender;
- in [4]: the recipient;
- in [5]: the email subject;
- in [6]: the email content;
- in [7]: to send the email;
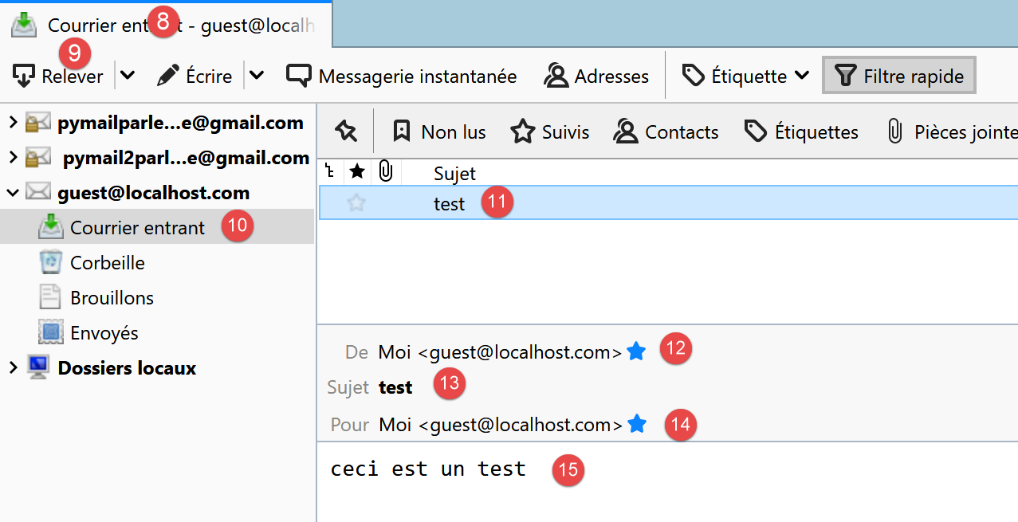
- in [8-9]: the user's mail is retrieved from [guest@localhost];
- in [10-15]: the received message;
We will also send an email to user [pymailparlexemple@gmail.com]. Let’s create an account for them in Thunderbird so they can read the email they will receive:
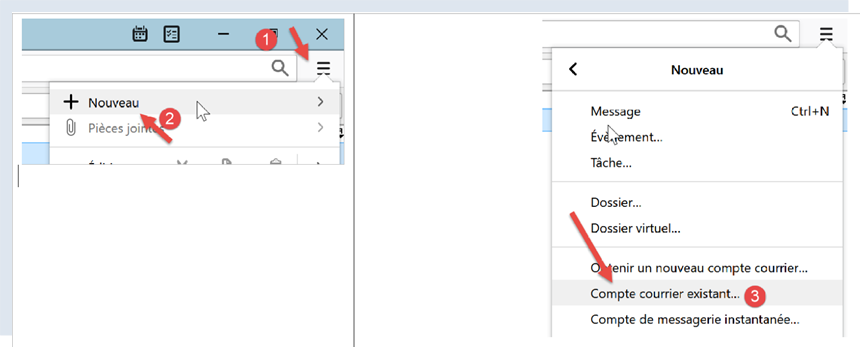
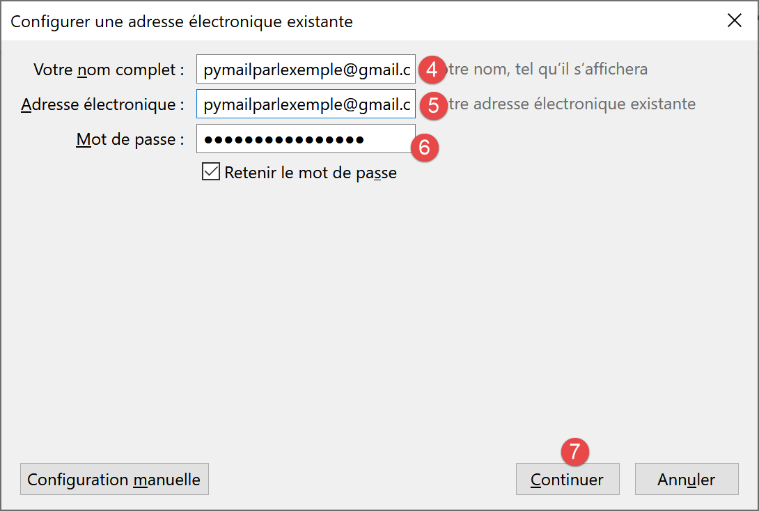
- in [4]: enter whatever you like;
- in [5]: the address is [pymailparlexemple@gmail.com];
- in [6]: enter the password you assigned to this user when you created them;
- in [7]: confirm this configuration;
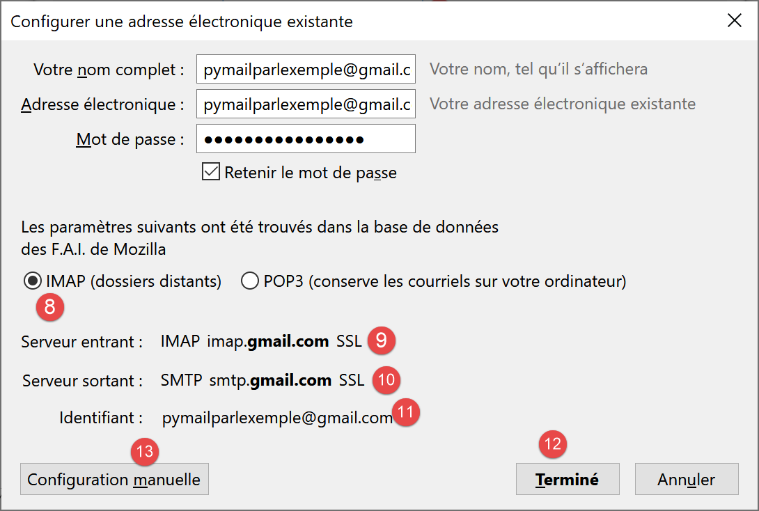
- in [8]: Thunderbird has retrieved the following information from its database;
- in [9]: the mail retrieval protocol is no longer POP3 but IMAP. The main difference between the two is that [POP3] downloads the read email to the local machine where the email client is located and deletes it from the remote server, whereas [IMAP] keeps the email on the remote server;
- in [10]: identification of the SMTP server;
- in [13]: to obtain more information about the servers IMAP and SMTP, switch to manual configuration;
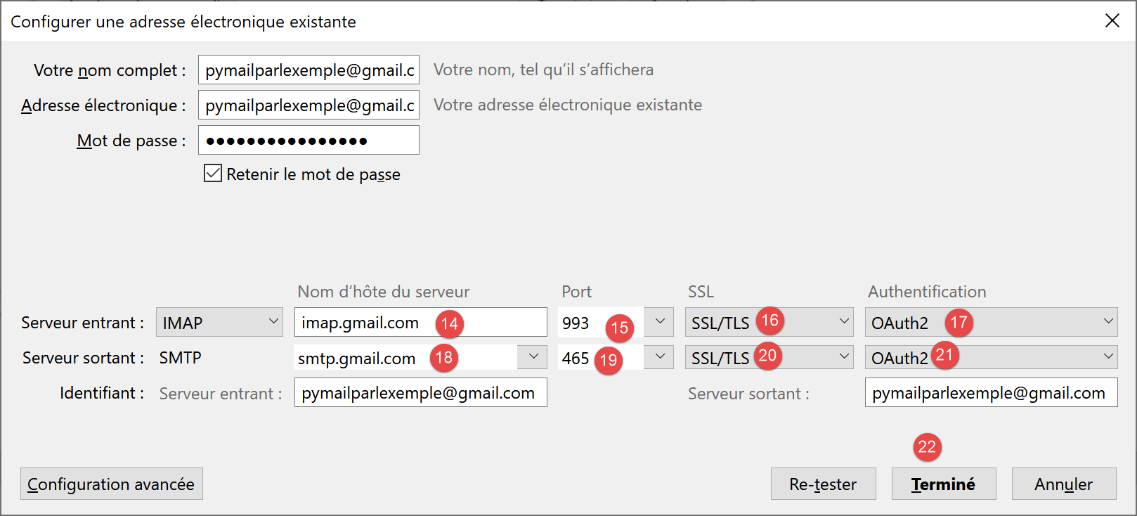
- in [14-17]: the characteristics of server IMAP;
- in [18-21]: the characteristics of the SMTP server;
- in [22]: we finish the configuration;
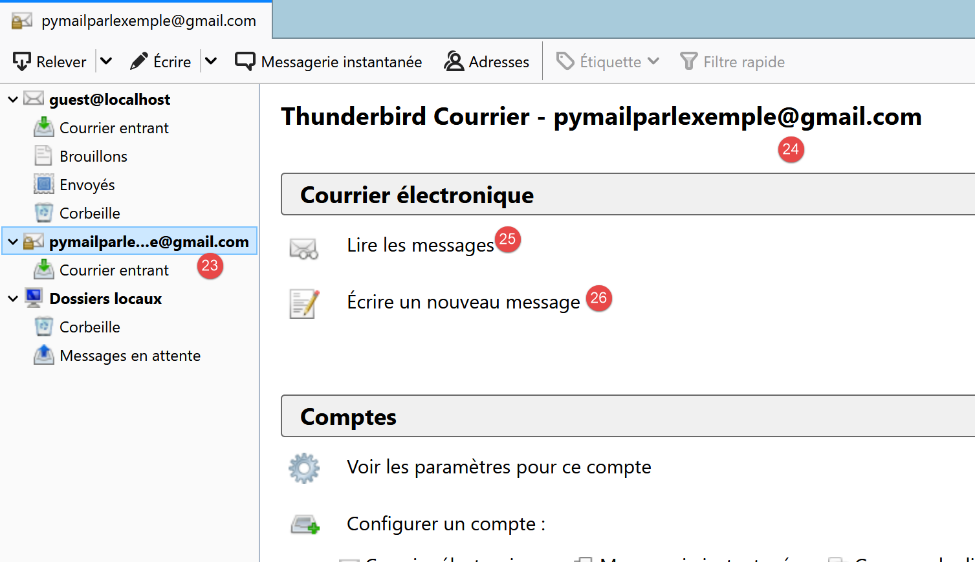
- in [23-24]: the new Thunderbird account;
- in [26]: writing a new message;
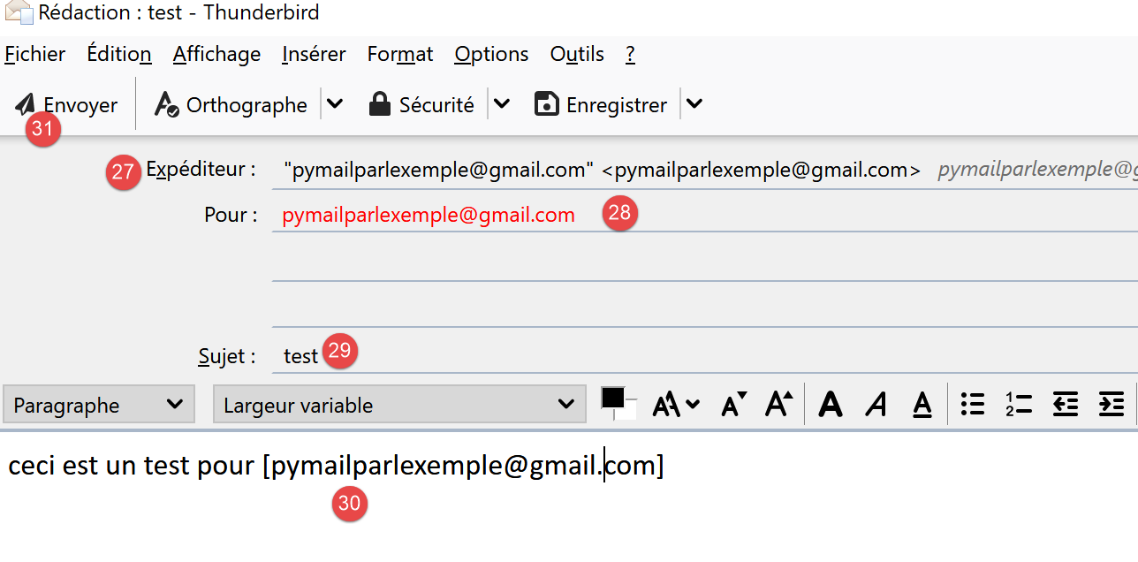
- in [27]: the sender is [pymailparlexemple@gmail.com];
- in [28]: the recipient is [pymailparlexemple@gmail.com];
- in [29-30]: the message;
- in [31]: to send it;
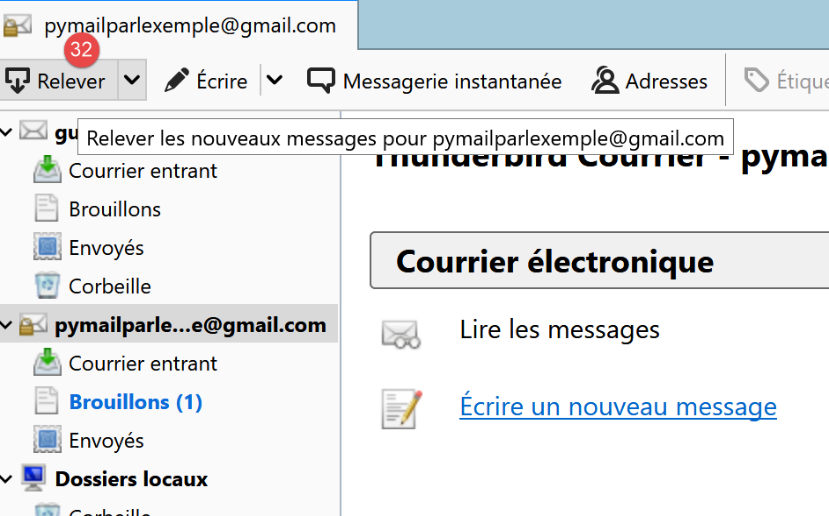
- in [32]: checking mail from various accounts;
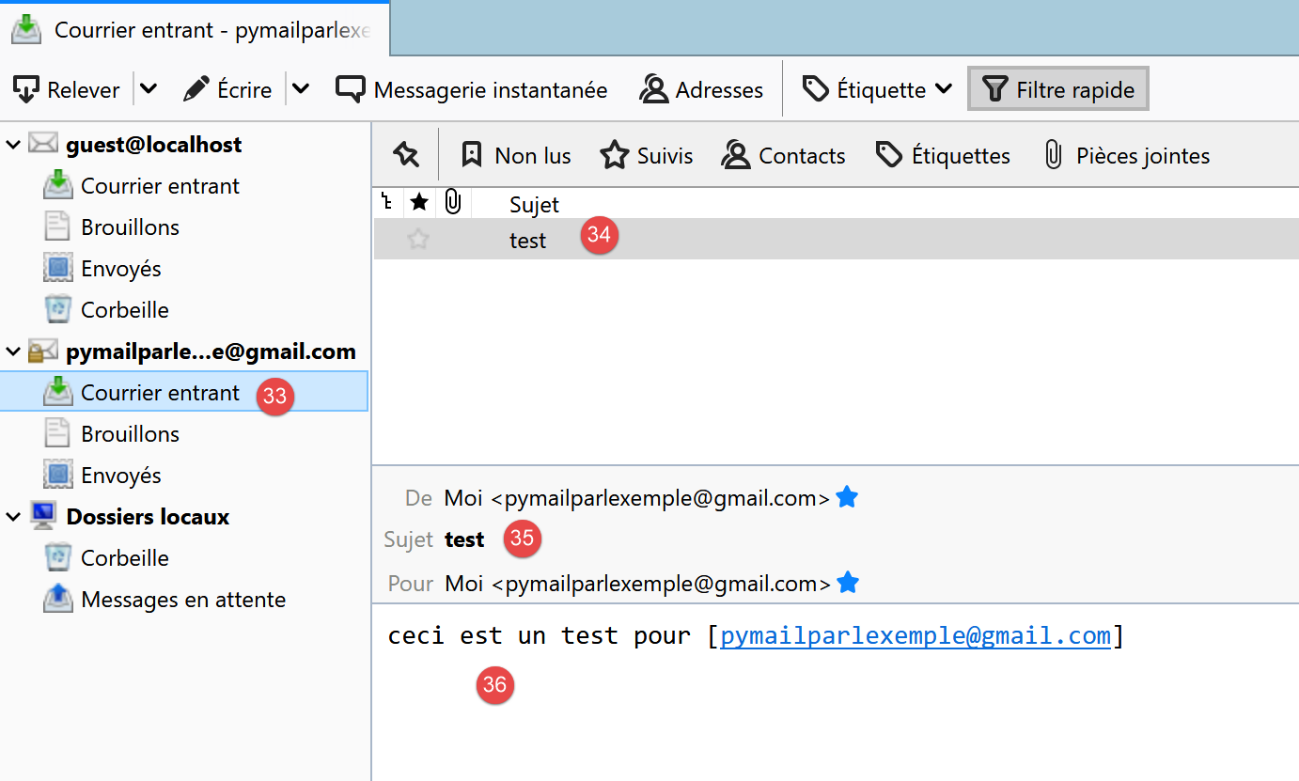
- in [33-36]: the mail received by the user [pymailparlexemple@gmail.com]
We also create:
- a new Gmail account [pymail2parlexemple@gmail.com];
- a new Thunderbird account [pymail2parlexemple@gmail.com] to retrieve messages from the user of the same name:
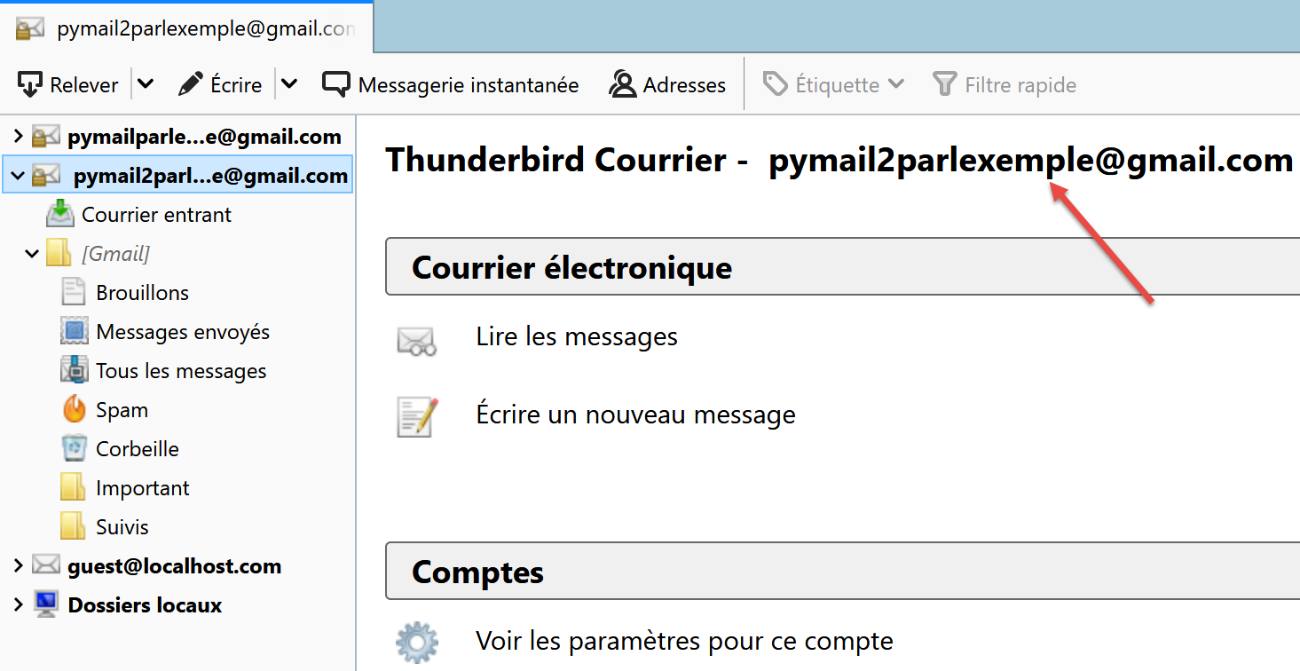
We now have the tools to explore the protocols SMTP, POP3, and IMAP. We’ll start with the protocol SMTP.
21.5.5. The SMTP protocol
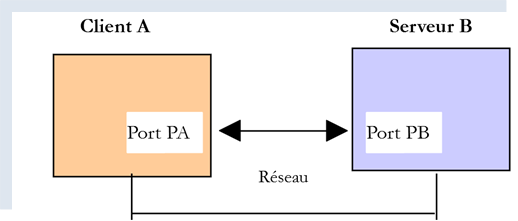
We will explore the SMTP protocol by examining the logs of the [hMailServer] server. To do this, we enable them using the [hmailServerAdministrator] tool:
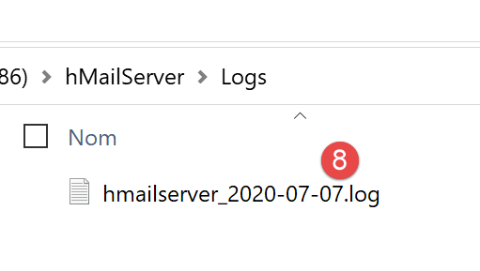
- in [2], the logs are enabled;
- in [3-5]: we enable them for the SMTP, POP3, and IMAP protocols;
- In [7], we ask to see them;
- In [8], open the log file with any text editor;
In the following example, the client will be [Thunderbird] and the server will be [hMailServer]. Using Thunderbird, have the user [guest@localhost.com] send a message to themselves:
The logs will then look like this:
"SMTPD"    5828    22    "2020-07-07 10:02:54.263"    "127.0.0.1"    "SENT: 220 Bienvenue sur le serveur SMTP localhost.com"
"SMTPD"    21956    22    "2020-07-07 10:02:54.360"    "127.0.0.1"    "RECEIVED: EHLO [127.0.0.1]"
"SMTPD"    21956    22    "2020-07-07 10:02:54.362"    "127.0.0.1"    "SENT: 250-DESKTOP-30FF5FB[nl]250-SIZE 20480000[nl]250-AUTH LOGIN[nl]250 HELP"
"SMTPD"    5828    22    "2020-07-07 10:02:54.381"    "127.0.0.1"    "RECEIVED: MAIL FROM:<guest@localhost.com> SIZE=433"
"SMTPD"    5828    22    "2020-07-07 10:02:54.386"    "127.0.0.1"    "SENT: 250 OK"
"SMTPD"    21956    22    "2020-07-07 10:02:54.470"    "127.0.0.1"    "RECEIVED: RCPT TO:<guest@localhost.com>"
"SMTPD"    21956    22    "2020-07-07 10:02:54.473"    "127.0.0.1"    "SENT: 250 OK"
"SMTPD"    21956    22    "2020-07-07 10:02:54.478"    "127.0.0.1"    "RECEIVED: DATA"
"SMTPD"    21956    22    "2020-07-07 10:02:54.479"    "127.0.0.1"    "SENT: 354 OK, send."
"SMTPD"    21860    22    "2020-07-07 10:02:54.496"    "127.0.0.1"    "SENT: 250 Queued (0.016 seconds)"
"SMTPD"    21568    22    "2020-07-07 10:02:54.505"    "127.0.0.1"    "RECEIVED: QUIT"
"SMTPD"    21568    22    "2020-07-07 10:02:54.506"    "127.0.0.1"    "SENT: 221 goodbye"
The lines above describe the dialogue that took place between the client SMTP (the Thunderbird email client) and the server SMTP (hMailServer). The [SENT] lines indicate what the SMTP server sent to its client. The [RECEIVED] lines indicate what the SMTP server received from its client.
- Line 1: Immediately after the client connects to the SMTP server, the server sends a welcome message to the client;
- Line 2: The client sends the command [EHLO] to identify itself. Here, it provides its address IP [127.0.0.1], which refers to the machine [localhost]—that is, the machine running the client SMTP;
- Line 3: The server sends a series of responses: [250]. [nl] stands for [newline], i.e., the \n character. The responses are in the form [250-] except for the last one, which is in the form [250 ]. This is how the client SMTP knows that the server’s response SMTP has ended and that it can send a command. The [250] command sequence was intended to inform client SMTP of a set of commands it could use;
- line 4: the client SMTP sends the command [MAIL FROM : adresse_mail_expéditeur], which identifies the sender of the message;
- line 5: the server SMTP responds with [250 OK], indicating that it has understood the command;
- line 6: the client SMTP sends the command [RCPT TO : adresse_mail_destinataire] to specify the recipient’s address;
- line 7: once again, the server SMTP indicates that it has understood the command;
- line 8: the server SMTP sends the command [DATA]. This means it is going to send the message content;
- line 9: the server SMTP indicates via the response [354 OK] that it is ready to receive the message. The text [send .] indicates that the client SMTP must end its message with a line containing only a single period;
- what we don’t see next is that client SMTP sends its message. The logs do not show this;
- Line 10: Client SMTP sent the period indicating the end of the message. Server SMTP responds that it has queued the message;
- Client SMTP sends it the command [QUIT] to indicate that it is closing the connection;
- line 12: the server responds;
Now that we understand the client/server dialogue for the SMTP protocol, let’s try to replicate it with our client [RawTcpClient]. We’ll use a terminal PyCharm:
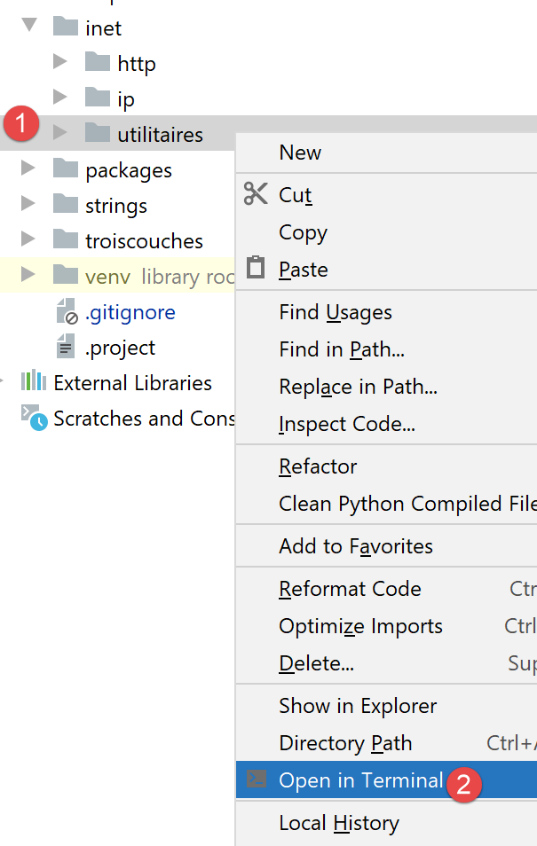
Let’s examine a new example:
- Client A will be the generic client TCP ([RawTcpClient]);
- Server B will be the mail server [hMailServer];
- Client A will ask Server B to deliver an email sent by user [guest@localhost.com] to themselves;
- we will verify that the recipient has indeed received the sent email;
We launch the client as follows:
(venv) C:\Data\st-2020\dev\python\cours-2020\python3-flask-2020\inet\utilitaires>RawTcpClient.exe localhost 25 --quit bye
Client [DESKTOP-30FF5FB:53122] connecté au serveur [localhost-25]
Tapez vos commandes (quit pour arrêter) :
<-- [220 Bienvenue sur le serveur SMTP localhost.com]
- line [1], we connect to port 25 of the local machine, where the SMTP service of [hMailServer] operates. The [--quit bye] argument indicates that the user will exit the program by typing the command [bye]. Without this argument, the command to end the program is [quit]. However, [quit] is also a command in the SMTP protocol. We must therefore avoid this ambiguity;
- line [2], the client is successfully connected;
- line [3], the client is waiting for commands entered via the keyboard;
- line [4], the server sends the client its welcome message;
We continue the dialogue as follows:
(venv) C:\Data\st-2020\dev\python\cours-2020\python3-flask-2020\inet\utilitaires>RawTcpClient.exe localhost 25
Client [DESKTOP-30FF5FB:53155] connecté au serveur [localhost-25]
Tapez vos commandes (quit pour arrêter) :
<-- [220 Bienvenue sur le serveur SMTP localhost.com]
EHLO localhost
<-- [250-DESKTOP-30FF5FB]
<-- [250-SIZE 20480000]
<-- [250-AUTH LOGIN]
<-- [250 HELP]
MAIL FROM: guest@localhost.com
<-- [250 OK]
RCPT TO: guest@localhost.com
<-- [250 OK]
DATA
<-- [354 OK, send.]
from: guest@localhost.com
to: guest@localhost.com
subject: ceci est un test

ligne1
ligne2
.
<-- [250 Queued (37.824 seconds)]
QUIT
Fin de la connexion avec le serveur
- in [5], the client sends the command [EHLO nom-de-la-machine-client]. The server responds with a series of messages in the form [250-xx] (6). The code [250] indicates that the command sent by the client was successful;
- in [10], the client specifies the sender of the message, in this case [guest@localhost.com];
- in [11], the server’s response;
- in [12], the message recipient is indicated, here the user [guest@localhost.com];
- in [13], the server's response;
- in [14], the command [DATA] tells the server that the client is going to send the message content;
- in [15], the server’s response;
- in [16-22], the client must send a list of text lines ending with a line containing only a single period. The message may contain [Subject:, From:, To:] lines (16–18) to define, respectively, the message subject, sender, and recipient;
- in [19], the preceding headers must be followed by a blank line;
- in [20-21], the message text;
- In [22], the line containing only a single period indicates the end of the message;
- in [23], once the server has received the line containing only a single period, it queues the message;
- In [24], the client tells the server that it is finished;
- In [25], we see that the server has closed the connection to the client;
Now let’s check in Thunderbird to see if user [guest@localhost.com] has indeed received the message:
- In [1-6], we see that the user [guest@localhost.com] has indeed received the message;
Finally, our client [RawTcpClient] successfully sent a message via the server SMTP [localhost]. Now, let’s use the same method to send a message to [pymailparlexemple@gmail.com]:
(venv) C:\Data\st-2020\dev\python\cours-2020\python3-flask-2020\inet\utilitaires>RawTcpClient.exe smtp.gmail.com 587
Client [DESKTOP-30FF5FB:53210] connecté au serveur [smtp.gmail.com-587]
Tapez vos commandes (quit pour arrêter) :
<-- [220 smtp.gmail.com ESMTP w13sm643278wrr.67 - gsmtp]
EHLO localhost
<-- [250-smtp.gmail.com at your service, [2a01:cb05:80e8:b500:3c4b:2203:91fa:9b00]]
<-- [250-SIZE 35882577]
<-- [250-8BITMIME]
<-- [250-STARTTLS]
<-- [250-ENHANCEDSTATUSCODES]
<-- [250-PIPELINING]
<-- [250-CHUNKING]
<-- [250 SMTPUTF8]
MAIL FROM: pymailparlexemple@gmail.com
<-- [530 5.7.0 Must issue a STARTTLS command first. w13sm643278wrr.67 - gsmtp]
QUIT
Fin de la connexion avec le serveur
- line 1: we are using Gmail’s SMTP server, which operates on port 587;
- line 15: we are blocked because the SMTP server is asking us to establish a secure connection, which we do not know how to do. Unlike the previous example, the [smtp.gmail.com] server (line 1) requires authentication. It only accepts users registered in the [gmail.com] domain, such as clients. This authentication is secure and takes place within an encrypted connection.
The first example provided the basics for building a basic SMTP client in Python. The second showed that some SMTP servers (most of them, in fact) require authentication via an encrypted connection.
21.5.6. [smtp/01] scripts: a basic SMTP client
We will reproduce in Python what we previously learned about the SMTP protocol.
The [smtp/01/config] file configures the application as follows:
def configure() -> dict:
    return {
        # description: description of the e-mail sent
        # smtp-server: SMTP server
        # smtp-port: server port SMTP
        # from : expéditeur
        # to: recipient
        # subject : mail subject
        # message : mail message
        "mails": [
            {
                "description": "mail to localhost via localhost",
                "smtp-server": "localhost",
                "smtp-port": "25",
                "from": "guest@localhost.com",
                "to": "guest@localhost.com",
                "subject": "to localhost via localhost",
                # we send UTF-8
                "content-type": 'text/plain; charset="utf-8"',
                # we test accented characters
                "message": "aglaë séléné\nva au marché\nacheter des fleurs"
            },
            {
                "description": "mail to gmail via gmail",
                "smtp-server": "smtp.gmail.com",
                "smtp-port": "587",
                "from": "pymailparlexemple@gmail.com",
                "to": "pymailparlexemple@gmail.com",
                "subject": "to gmail via gmail",
                # we send UTF-8
                "Content-type": 'text/plain; charset="utf-8"',
                # we test accented characters
                "message": "aglaë séléné\nva au marché\nacheter des fleurs"
            }
        ]
    }
- Lines 10–35: a list of emails to send. For each one, the following information is specified:
- [description]: a text describing the email;
- [smtp-server]: the server SMTP to use;
- [smtp-port]: its service port;
- [from]: the email sender;
- [to]: the email recipient;
- [subject]: the email subject;
- [content-type]: the email encoding;
- [message]: the email message;
The code [01/main] for client SMTP is as follows:
# imports
import socket


# -----------------------------------------------------------------------
def sendmail(mail: dict, verbose: bool):
    # sends message to smtp server smtpserver from sender
    # as recipient. If verbose=True, tracks client-server exchanges

    # let system errors show up
    connexion = None
    try:
        # local machine name (required for SMTP protocol)
        client = socket.gethostbyaddr(socket.gethostbyname("localhost"))[0]
        # open a connection on port 25 of smtpServer
        connexion = socket.create_connection((mail["smtp-server"], 25))

        # connection represents a bidirectional communication flow
        # between the client (this program) and the smtp server contacted
        # this channel is used for the exchange of orders and information

        # after connection, the server sends a welcome message which is read as follows
        send_command(connexion, "", verbose, True)
        # cmde ehlo:
        send_command(connexion, f"EHLO {client}", verbose, True)
        # cmde mail from:
        send_command(connexion, f"MAIL FROM: <{mail['from']}>", verbose, True)
        # cmde rcpt to:
        send_command(connexion, f"RCPT TO: <{mail['to']}>", verbose, True)
        # cmde data
        send_command(connexion, "DATA", verbose, True)
        # prepare message to send
        # it must contain the lines
        # From: expéditeur
        # To: recipient
        # blank line
        # Message
        # .
        data = f"{mail['message']}"
        # send message
        send_command(connexion, data, verbose, False)
        # shipping .
        send_command(connexion, "\r\n.\r\n", verbose, False)
        # cmde quit
        send_command(connexion, "QUIT", verbose, True)
        # end
    finally:
        # locking connection
        if connexion:
            connexion.close()


# --------------------------------------------------------------------------
def send_command(connexion: socket, commande: str, verbose: bool, with_rclf: bool):
    # sends command to connection channel
    # verbose mode if verbose=True
    # si with_rclf=True, ajoute la séquence rclf à commande

    # data
    rclf = "\r\n" if with_rclf else ""
    # send cmde if order not empty
    if commande:
        # let system errors show up
        #
        # order dispatch
        connexion.send(bytearray(f"{commande}{rclf}", 'utf-8'))
        # possible echo
        if verbose:
            affiche(commande, 1)
        # read response of less than 1000 characters
        reponse = str(connexion.recv(1000), 'utf-8')
        # possible echo
        if verbose:
            affiche(reponse, 2)
        # error code recovery
        codeErreur = int(reponse[0:3])
        # error returned by the server?
        if codeErreur >= 500:
            # throw an exception with the error
            raise BaseException(reponse[4:])
        # error-free return


# --------------------------------------------------------------------------
def affiche(echange: str, sens: int):
    # displays exchange ? screen
    # if sens=1 displays -->change
    # if sens=2 displays <-- exchange without last 2 characters rclf
    if sens == 1:
        print(f"--> [{echange}]")
        return
    elif sens == 2:
        l = len(echange)
        print(f"<-- [{echange[0:l - 2]}]")
        return


# main ----------------------------------------------------------------

# client SMTP (SendMail Transfer Protocol) for sending a message
# information is taken from a config file containing the following information for each server

# description: description of the e-mail sent
# smtp-server: SMTP server
# smtp-port: server port SMTP
# from : expéditeur
# to: recipient
# subject : mail subject
# message : mail message


# communication protocol SMTP client-server
# -> client connects to smtp server port 25
# <- server sends him a welcome message
# -> customer sends command EHLO: machine name
# <- server responds OK or not
# -> client envoie la commande mail from: <exp?diteur>
# <- server responds OK or not
# -> client sends the rcpt to command: <recipient>
# <- server responds OK or not
# -> customer sends data command
# <- server responds OK or not
# -> client sends all the lines of its message and ends with a line containing the single character .
# <- server responds OK or not
# -> customer sends quit order
# <- server responds OK or not

# server responses have the form xxx text where xxx is a 3-digit number. Any number xxx >=500
# indicates an error. The answer may consist of several lines all beginning with xxx- except the last one
# of the form xxx(space)

# exchanged text lines must end with RC(#13) and LF(#10) characters

# application configuration
import config
config = config.configure()

# we deal with e-mails one by one
for mail in config['mails']:
    try:
        # logs
        print("----------------------------------")
        print(f"Envoi du message [{mail['description']}]")
        # preparing the message to be sent
        mail[
            "message"] = f"From: {mail['from']}\nTo: {mail['to']}\n" \
                         f"Subject: {mail['subject']}\n" \
                         f"Content-type: {mail['content-type']}" \
                         f"\n\n{mail['message']}"
        # send message in verbose mode
        sendmail(mail, True)
        # end
        print("Message envoyé...")
    except BaseException as erreur:
        # error is displayed
        print(f"L'erreur suivante s'est produite : {erreur}")
    finally:
        pass
    # next mail
Comments
- lines 134–136: configure the application;
- lines 139–151: we list all the emails found in the configuration;
- lines 141–143: display what we are going to do;
- lines 144–149: define the message to be sent. The message [message] is preceded by the headers [From, To, Subject, Content-type];
- line 151: the email is sent by the function [sendmail], which accepts two parameters:
- [mail]: the dictionary containing the information needed to send the email;
- [verbose]: a Boolean indicating whether client/server exchanges should be logged on the console;
- lines 154–156: all exceptions thrown by the [sendmail] function are caught. They are displayed;
- line 6: [mail] is the dictionary describing the email to be sent;
- line 14: in the SMTP protocol, the client must send its name. Here, we retrieve the name of the local machine that will act as the client;
- line 16: connection to the server SMTP to which the message will be sent;
- lines 22–23: if the connection was established with the SMTP server, it will send a welcome message, which is read here;
- the [sendmail] function then sends the various commands that a SMTP client must send:
- lines 24-25: the command EHLO;
- lines 26–27: the command MAIL FROM: ;
- lines 28-29: the command RCPT TO: ;
- lines 30-31: the command DATA ;
- lines 32-41: sending the message (From, To, Subject, Content-type, text);
- lines 42-43: sending the end-of-message character;
- lines 44-457: the QUIT command, which terminates the client's dialogue with the SMTP server;
- [sendmail] runs within [try / finally], which allows all exceptions to be propagated to the calling code. We know that the calling code catches all of them to display them;
- lines 48–50: release of resources;
- line 54: the function [send_command] is responsible for sending client commands to the server SMTP. It accepts four parameters:
- [connexion]: the connection linking the client to the server;
- [commande]: the command to be sent;
- [verbose]: if TRUE, then client/server exchanges are logged on the console;
- [with_rclf]: If TRUE, send the command terminated by the \r\n sequence. This is required for all commands in the SMTP protocol, but [send_command] is also used to send the message. In this case, the \r\n sequence is not added;
- line 62: the command is sent only if it is not empty;
- lines 65–66: the command is sent to the server as a UTF-8 byte string;
- lines 70-71: reading all lines of the response. We assume it is less than 1000 characters. The response may span multiple lines. Each line is in the form XXX-YYY, where XXX is a numeric code, except for the last line of the response, which is in the form XXX YYY (without the hyphen);
- line 76: read the error code XXX from the first line;
- lines 78-80: if the numeric code XXX is greater than 500, then the server returned an error. An exception is then thrown;
Results
Running the script produces the following console output:
C:\Data\st-2020\dev\python\cours-2020\python3-flask-2020\venv\Scripts\python.exe C:/Data/st-2020/dev/python/cours-2020/python3-flask-2020/inet/smtp/01/main.py
----------------------------------
Envoi du message [mail to localhost via localhost]
--> [EHLO DESKTOP-30FF5FB]
<-- [220 Bienvenue sur le serveur SMTP localhost.com]
--> [MAIL FROM: <guest@localhost.com>]
<-- [250-DESKTOP-30FF5FB
250-SIZE 20480000
250-AUTH LOGIN
250 HELP]
--> [RCPT TO: <guest@localhost.com>]
<-- [250 OK]
--> [DATA]
<-- [250 OK]
--> [From: guest@localhost.com
To: guest@localhost.com
Subject: to localhost via localhost
Content-type: text/plain; charset="utf-8"

aglaë séléné
va au marché
acheter des fleurs]
<-- [354 OK, send.]
--> [
.
]
<-- [250 Queued (0.000 seconds)]
--> [QUIT]
<-- [221 goodbye]
Message envoyé...
----------------------------------
Envoi du message [mail to gmail via gmail]
--> [EHLO DESKTOP-30FF5FB]
<-- [220 smtp.gmail.com ESMTP u1sm1364433wrb.78 - gsmtp]
--> [MAIL FROM: <pymailparlexemple@gmail.com>]
<-- [250-smtp.gmail.com at your service, [2a01:cb05:80e8:b500:3c4b:2203:91fa:9b00]
250-SIZE 35882577
250-8BITMIME
250-STARTTLS
250-ENHANCEDSTATUSCODES
250-PIPELINING
250-CHUNKING
250 SMTPUTF8]
--> [RCPT TO: <pymailparlexemple@gmail.com>]
<-- [530 5.7.0 Must issue a STARTTLS command first. u1sm1364433wrb.78 - gsmtp]
L'erreur suivante s'est produite : 5.7.0 Must issue a STARTTLS command first. u1sm1364433wrb.78 - gsmtp


Process finished with exit code 0
- lines 3–30: The use of the SMTP and [hMailServer] servers to send an email to [guest@localhost] is proceeding smoothly;
- lines 32–46: Using the server SMTP [smtp.gmail.com] to send an email to [pymailparlexemple@gmail.com] is not working properly: on line 45, the server SMTP returns a 530 error code with an error message. This indicates that the client SMTP must first authenticate via a secure connection. Our client did not do so and is therefore denied;
The results in Thunderbird are as follows:
21.5.7. [smtp/02] scripts: a SMTP script written using the [smtplib] library
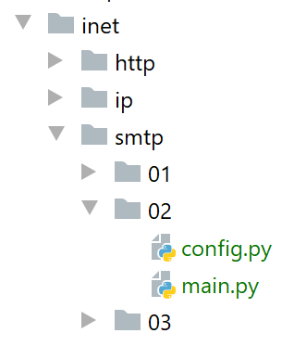
The previous client has at least two shortcomings:
- it cannot use a secure connection if the server requires one;
- it cannot attach files to the message;
We will address the first shortcoming in the [smtp/02] script. In our new script, we will use the Python module [smtplib].
The [smtp/02/main] script will use the following jSON [smtp/02/config] configuration file:
def configure() -> dict:
    return {
        # description: description of the e-mail sent
        # smtp-server: SMTP server
        # smtp-port: server port SMTP
        # from : expéditeur
        # to: recipient
        # subject : mail subject
        # message : mail message
        "mails": [
            {
                "description": "mail to localhost via localhost avec smtplib",
                "smtp-server": "localhost",
                "smtp-port": "25",
                "from": "guest@localhost.com",
                "to": "guest@localhost.com",
                "subject": "to localhost via localhost avec smtplib",
                # we test accented characters
                "message": "aglaë séléné\nva au marché\nacheter des fleurs",
            },
            {
                "description": "mail to gmail via gmail avec smtplib",
                "smtp-server": "smtp.gmail.com",
                "smtp-port": "587",
                "from": "pymail2parlexemple@gmail.com",
                "to": "pymail2parlexemple@gmail.com",
                "subject": "to gmail via gmail avec smtplib",
                # we test accented characters
                "message": "aglaë séléné\nva au marché\nacheter des fleurs",
                # smtp with authentication
                "user": "pymail2parlexemple@gmail.com",
                "password": "#6prIlh@1QZ3TG",
            }
        ]
    }
We find the same fields as in the [smtp/01/config] file, with two additional fields when the SMTP server requests authentication:
- line 31, [user]: the username used to authenticate the connection;
- line 32, [password]: their password;
These two fields are only present if the contacted SMTP server requires authentication. This is then performed via a secure connection.
The code for the [smtp/02/main.py] script is as follows:
# imports
import smtplib
from email.mime.text import MIMEText
from email.utils import formatdate


# -----------------------------------------------------------------------
def sendmail(mail: dict, verbose: True):
    # sends message to smtp server smtpserver from sender
    # as recipient. If verbose=True, tracks client-server exchanges

    # we use the smtplib library
    # we let the exceptions rise
    #
    # the SMTP server
    server = smtplib.SMTP(mail["smtp-server"])
    # verbose mode
    server.set_debuglevel(verbose)
    # secure connection?
    if "user" in mail:
        # secure connection
        server.starttls()
        # EHLO order + authentication
        server.login(mail["user"], mail["password"])

   # construction of a Multipart message - this is the message that Multipart will send
    msg = MIMEText(mail["message"])
    msg['from'] = mail["from"]
    msg['to'] = mail["to"]
    msg['date'] = formatdate(localtime=True)
    msg['subject'] = mail["subject"]
    # we send the message
    server.send_message(msg)
    # we leave
    server.quit()


# main ----------------------------------------------------------------

# information is taken from a config file containing the following information for each server

# description: description of the e-mail sent
# smtp-server: SMTP server
# smtp-port: server port SMTP
# from : expéditeur
# to: recipient
# subject : mail subject
# content-type: mail encoding
# message : mail message


# application configuration
import config
config = config.configure()

# we deal with e-mails one by one
for mail in config['mails']:
    try:
        # logs
        print("----------------------------------")
        print(f"Envoi du message [{mail['description']}]")
        # send message in verbose mode
        sendmail(mail, True)
        # end
        print("Message envoyé...")
    except BaseException as erreur:
        # error is displayed
        print(f"L'erreur suivante s'est produite : {erreur}")
    finally:
        pass
    # next mail
Comments
- lines 8-35: only the [sendmail] function is used. It will now use the [smtplib] module (line 2);
- line 16: connection to the SMTP server;
- line 18: if [verbose=True], client/server exchanges will be displayed on the console;
- lines 20–24: authentication is performed if required by the SMTP server;
- line 22: authentication is performed over a secure connection;
- line 24: authentication;
- lines 26-33: message sent. The dialogue with the [smtp/01/main] script will then take place. If authentication occurred, it will take place over a secure connection;
- line 35: the client/server dialogue ends;
Before running the [smtp/02/main] script, you must modify the configuration of the [pymailparlexemple@gmail.com] Gmail account:
- Log in to the Gmail account [pymailparlexemple@gmail.com];
- Change the following settings:

- In [2], allow less secure apps to access the account;
Do the same for the second Gmail account [pymail2parlexemple@gmail.com].
Results
When running the script [smtp/02/main], the following console output is displayed:
C:\Data\st-2020\dev\python\cours-2020\python3-flask-2020\venv\Scripts\python.exe C:/Data/st-2020/dev/python/cours-2020/python3-flask-2020/inet/smtp/02/main.py
----------------------------------
Envoi du message [mail to localhost via localhost avec smtplib]
send: 'ehlo [192.168.43.163]\r\n'
reply: b'250-DESKTOP-30FF5FB\r\n'
reply: b'250-SIZE 20480000\r\n'
reply: b'250-AUTH LOGIN\r\n'
reply: b'250 HELP\r\n'
reply: retcode (250); Msg: b'DESKTOP-30FF5FB\nSIZE 20480000\nAUTH LOGIN\nHELP'
send: 'mail FROM:<guest@localhost.com> size=310\r\n'
reply: b'250 OK\r\n'
reply: retcode (250); Msg: b'OK'
send: 'rcpt TO:<guest@localhost.com>\r\n'
reply: b'250 OK\r\n'
reply: retcode (250); Msg: b'OK'
send: 'data\r\n'
reply: b'354 OK, send.\r\n'
reply: retcode (354); Msg: b'OK, send.'
data: (354, b'OK, send.')
send: b'Content-Type: text/plain; charset="utf-8"\r\nMIME-Version: 1.0\r\nContent-Transfer-Encoding: base64\r\nfrom: guest@localhost.com\r\nto: guest@localhost.com\r\ndate: Wed, 08 Jul 2020 08:35:39 +0200\r\nsubject: to localhost via localhost avec smtplib\r\n\r\nYWdsYcOrIHPDqWzDqW7DqQp2YSBhdSBtYXJjaMOpCmFjaGV0ZXIgZGVzIGZsZXVycw==\r\n.\r\n'
reply: b'250 Queued (0.000 seconds)\r\n'
reply: retcode (250); Msg: b'Queued (0.000 seconds)'
data: (250, b'Queued (0.000 seconds)')
send: 'quit\r\n'
reply: b'221 goodbye\r\n'
reply: retcode (221); Msg: b'goodbye'
Message envoyé...
----------------------------------
Envoi du message [mail to gmail via gmail avec smtplib]
send: 'ehlo [192.168.43.163]\r\n'
reply: b'250-smtp.gmail.com at your service, [37.172.118.130]\r\n'
reply: b'250-SIZE 35882577\r\n'
reply: b'250-8BITMIME\r\n'
reply: b'250-STARTTLS\r\n'
reply: b'250-ENHANCEDSTATUSCODES\r\n'
reply: b'250-PIPELINING\r\n'
reply: b'250-CHUNKING\r\n'
reply: b'250 SMTPUTF8\r\n'
reply: retcode (250); Msg: b'smtp.gmail.com at your service, [37.172.118.130]\nSIZE 35882577\n8BITMIME\nSTARTTLS\nENHANCEDSTATUSCODES\nPIPELINING\nCHUNKING\nSMTPUTF8'
send: 'STARTTLS\r\n'
reply: b'220 2.0.0 Ready to start TLS\r\n'
reply: retcode (220); Msg: b'2.0.0 Ready to start TLS'
send: 'ehlo [192.168.43.163]\r\n'
reply: b'250-smtp.gmail.com at your service, [37.172.118.130]\r\n'
reply: b'250-SIZE 35882577\r\n'
reply: b'250-8BITMIME\r\n'
reply: b'250-AUTH LOGIN PLAIN XOAUTH2 PLAIN-CLIENTTOKEN OAUTHBEARER XOAUTH\r\n'
reply: b'250-ENHANCEDSTATUSCODES\r\n'
reply: b'250-PIPELINING\r\n'
reply: b'250-CHUNKING\r\n'
reply: b'250 SMTPUTF8\r\n'
reply: retcode (250); Msg: b'smtp.gmail.com at your service, [37.172.118.130]\nSIZE 35882577\n8BITMIME\nAUTH LOGIN PLAIN XOAUTH2 PLAIN-CLIENTTOKEN OAUTHBEARER XOAUTH\nENHANCEDSTATUSCODES\nPIPELINING\nCHUNKING\nSMTPUTF8'
send: 'AUTH PLAIN AHB5bWFpbDJwYXJsZXhlbXBsZUBnbWFpbC5jb20AIzZwcklsaEQmQDFRWjNURw==\r\n'
reply: b'235 2.7.0 Accepted\r\n'
reply: retcode (235); Msg: b'2.7.0 Accepted'
send: 'mail FROM:<pymail2parlexemple@gmail.com> size=320\r\n'
reply: b'250 2.1.0 OK e5sm4132618wrs.33 - gsmtp\r\n'
reply: retcode (250); Msg: b'2.1.0 OK e5sm4132618wrs.33 - gsmtp'
send: 'rcpt TO:<pymail2parlexemple@gmail.com>\r\n'
reply: b'250 2.1.5 OK e5sm4132618wrs.33 - gsmtp\r\n'
reply: retcode (250); Msg: b'2.1.5 OK e5sm4132618wrs.33 - gsmtp'
send: 'data\r\n'
reply: b'354  Go ahead e5sm4132618wrs.33 - gsmtp\r\n'
reply: retcode (354); Msg: b'Go ahead e5sm4132618wrs.33 - gsmtp'
data: (354, b'Go ahead e5sm4132618wrs.33 - gsmtp')
send: b'Content-Type: text/plain; charset="utf-8"\r\nMIME-Version: 1.0\r\nContent-Transfer-Encoding: base64\r\nfrom: pymail2parlexemple@gmail.com\r\nto: pymail2parlexemple@gmail.com\r\ndate: Wed, 08 Jul 2020 08:35:40 +0200\r\nsubject: to gmail via gmail avec smtplib\r\n\r\nYWdsYcOrIHPDqWzDqW7DqQp2YSBhdSBtYXJjaMOpCmFjaGV0ZXIgZGVzIGZsZXVycw==\r\n.\r\n'
reply: b'250 2.0.0 OK  1594190139 e5sm4132618wrs.33 - gsmtp\r\n'
reply: retcode (250); Msg: b'2.0.0 OK  1594190139 e5sm4132618wrs.33 - gsmtp'
data: (250, b'2.0.0 OK  1594190139 e5sm4132618wrs.33 - gsmtp')
send: 'quit\r\n'
Message envoyé...
reply: b'221 2.0.0 closing connection e5sm4132618wrs.33 - gsmtp\r\n'
reply: retcode (221); Msg: b'2.0.0 closing connection e5sm4132618wrs.33 - gsmtp'

Process finished with exit code 0
- line 40: the client [smtplib] initiates the dialogue to establish an encrypted connection with the server SMTP, which we were unable to do in the script [smtp/main/01];
- Otherwise, we find the familiar commands of the SMTP protocol;
If we check the Gmail account of user [pymail2parlexemple], we see the following:
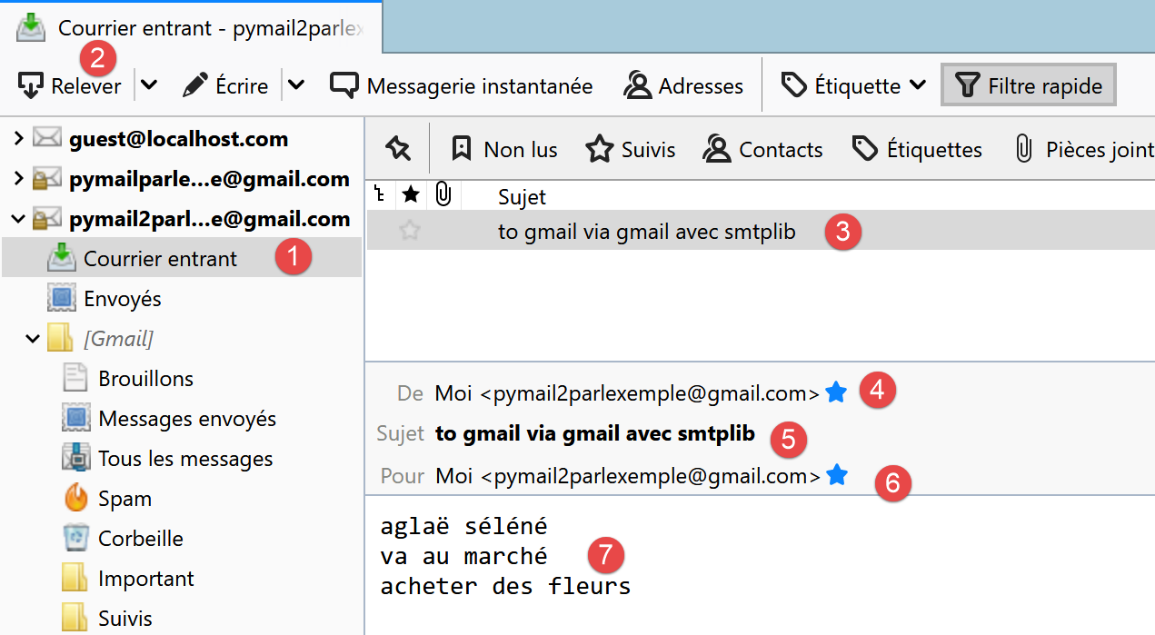
21.5.8. [smtp/03] scripts: managing attached files
We complete the script [smtp/02/main] so that the sent email can have attached files.
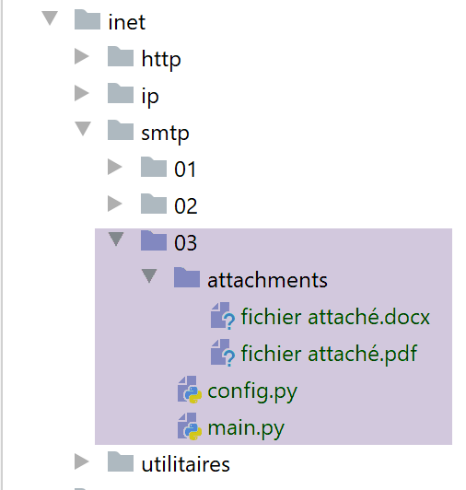
The script [smtp/03/main] is configured by the following script [smtp/03/config]:
import os


def configure() -> dict:
    # application configuration
    script_dir = os.path.dirname(os.path.abspath(__file__))

    return {
        # description: description of the e-mail sent
        # smtp-server: SMTP server
        # smtp-port: server port SMTP
        # from : expéditeur
        # to: recipient
        # subject : mail subject
        # message : mail message
        "mails": [
            {
                "description": "mail to gmail via gmail avec smtplib",
                "smtp-server": "smtp.gmail.com",
                "smtp-port": "587",
                "from": "pymail2parlexemple@gmail.com",
                "to": "pymail2parlexemple@gmail.com",
                "subject": "to gmail via gmail avec smtplib",
                # we test accented characters
                "message": "aglaë séléné\nva au marché\nacheter des fleurs",
                # smtp with authentication
                "user": "pymail2parlexemple@gmail.com",
                "password": "#6prIlhD&@1QZ3TG",
                # here, absolute paths must be set for attached files
                "attachments": [
                    f"{script_dir}/attachments/fichier attaché.docx",
                    f"{script_dir}/attachments/fichier attaché.pdf",
                ]
            }
        ]
    }
The file [smtp/03/config] differs from the previously used file [smtp/02/config] only in the optional presence of a list [attachments] (lines 30–32) that specifies the list of files to attach to the message to be sent.
The [smtp/03/main] script is as follows:
# imports
import email
import mimetypes
import os
import smtplib
from email import encoders
from email.mime.audio import MIMEAudio
from email.mime.base import MIMEBase
from email.mime.image import MIMEImage
from email.mime.message import MIMEMessage
from email.mime.multipart import MIMEMultipart
from email.mime.text import MIMEText
from email.utils import formatdate


# -----------------------------------------------------------------------
def sendmail(mail: dict, verbose: True):
    # envoie mail[message] au serveur smtp mail[smtp-server] de la part de mail[from]
    # for mail[to]. If verbose=True, tracks client-server exchanges

    # we use the smtplib library
    # we let the exceptions rise
    #
    # the SMTP server
    server = smtplib.SMTP(mail["smtp-server"])
    # verbose mode
    server.set_debuglevel(verbose)
    # secure connection?
    if "user" in mail:
        server.starttls()
        server.login(mail["user"], mail["password"])

    # construction of a Multipart message - this is the message that will be sent
    # credit: https://docs.python.org/3.4/library/email-examples.html
    msg = MIMEMultipart()
    msg['From'] = mail["from"]
    msg['To'] = mail["to"]
    msg['Date'] = formatdate(localtime=True)
    msg['Subject'] = mail["subject"]
    # attach the text message in MIMEText format
    msg.attach(MIMEText(mail["message"]))
    # we go through the attachments
    for path in mail["attachments"]:
        # path must be an absolute path
        # you can guess the type of file attached
        ctype, encoding = mimetypes.guess_type(path)
        # if you haven't guessed
        if ctype is None or encoding is not None:
            # No guess could be made, or the file is encoded (compressed), so
            # use a generic bag-of-bits type.
            ctype = 'application/octet-stream'
        # decompose the type into maintype/subtype
        maintype, subtype = ctype.split('/', 1)
        # we deal with the various cases
        if maintype == 'text':
            with open(path) as fp:
                # Note: we should handle calculating the charset
                part = MIMEText(fp.read(), _subtype=subtype)
        elif maintype == 'image':
            with open(path, 'rb') as fp:
                part = MIMEImage(fp.read(), _subtype=subtype)
        elif maintype == 'audio':
            with open(path, 'rb') as fp:
                part = MIMEAudio(fp.read(), _subtype=subtype)
        # message type case / rfc822
        elif maintype == 'message':
            with open(path, 'rb') as fp:
                part = MIMEMessage(email.message_from_bytes(fp.read()))
        else:
            # other cases
            with open(path, 'rb') as fp:
                part = MIMEBase(maintype, subtype)
                part.set_payload(fp.read())
            # Encode the payload using Base64
            encoders.encode_base64(part)
        # Set the filename parameter
        basename = os.path.basename(path)
        part.add_header('Content-Disposition', 'attachment', filename=basename)
        # attach the file to the message to be sent
        msg.attach(part)
    # all attachments have been made - the message is sent as a string
    server.send_message(msg)


# main ----------------------------------------------------------------

..
Comments
- lines 18-32: the [sendmail] function remains the same as it was when there were no attachments;
- line 35: the following code is taken from official Python documentation;
- line 36: the message to be sent will consist of several parts: text and attached files. This is called a [Multipart] message;
- lines 37–40: the [Multipart] message contains the standard fields found in any email;
- line 42: the various parts of the [Multipart] [msg] message are attached to the message using the [msg.attach] method (line 81). The attached parts can be of any type. These are identified by a type MIME. The type MIME of plain text is the type [MIMEText];
- lines 44–81: all attachments for the message to be sent (line 81) will be attached to the [msg Multipart] message;
- line 44: [path] represents the absolute path of the file to be attached;
- Line 47: To determine the type (MIME) to use for the attachment, we will use the file extension (.docx, .php…) of the file to be attached. The [mimetypes.guess_type] method performs this task. It returns two pieces of information:
- [ctype]: the file’s type (MIME);
- [encoding]: information about its encoding;
- lines 49–52: if the file type MIME cannot be determined, it is identified as a binary file (line 52);
- line 54: a file’s MIME type is broken down into a primary type and a secondary type, for example [application/pdf]. These two elements are separated;
- lines 56–76: different cases are handled depending on the value of the primary type MIME. For example, in the case of a file [application/pdf], lines 70–76 are executed:
- lines 56–59: the case where the attached file is a text file. In this case, an element of type [MIMEText] with content [fp.read] is created;
- lines 60–62: the case where the file contains an image. In this case, we create an element of type [MIMEImage] with content [fp.read];
- lines 63–65: the case where the file is an audio file. In this case, an element of type [MIMEAudio] with content [fp.read] is created;
- lines 66–69: the case where the file is an email. In this case, an element of type [MIMEMessage] (line 69) with content [email.message_from_bytes(fp.read())] is created. Unlike the previous cases where the content of the MIME element was the binary content of the associated file, here the content of the MIMEMessage element is of type [email.message.Message];
- lines 70–76: other cases. This includes, for example, the Word files and PDF in our example;
- line 72: the file to be attached is opened in binary mode (rb=read binary);
- line 74: [fp.read] reads the entire binary file;
- lines 72–74: the [with open(…) as file] structure does two things:
- it opens the file and assigns it the descriptor [file];
- it ensures that upon exiting [with], whether an error occurs or not, the descriptor [file] will be closed. It is therefore an alternative to the [try file=open(…)/ finally] structure;
- line 73: a new [part] element is created to be included in the Multipart message. Here, the [MIMEBase] class is used, and the [maintype, subtype] elements determined on line 54 are passed to the constructor;
- line 74: the element to be included in the Multipart message must have content. This can be initialized using the [set_payload] method;
- lines 75–76: attached files must be encoded using 7-bit encoding. Historically, some SMTP servers only supported 7-bit encoded characters. Here, the encoding known as ‘Base64’ is used;
- line 77: starting from this line, the processing applies to all the MIME types we created on lines 56–76 [MIMEMessage, MIMEImage, MIMEAudio, MIMEBase, MIMEText];
- line 79: the element to be added to the Multipart message has a header describing it. Here, we indicate that the added element corresponds to an attached file. The name of this file is the third parameter passed to the [add_header] method. This file name is often used by email clients to save the attached file under that name in the client’s file system. So far, we have been working with the absolute path of the attached file. Here, we simply pass its name without the path (line 78);
- line 81: the file’s binary data is embedded in the [msg Multipart] message;
- line 83: once all parts of the message have been attached to [msg Multipart], it is sent;
Results
If we run the script [smtp/03/main] with the previously presented file [smtp/02/config], the account [pymail2parlexemple@gmail.com] receives this:
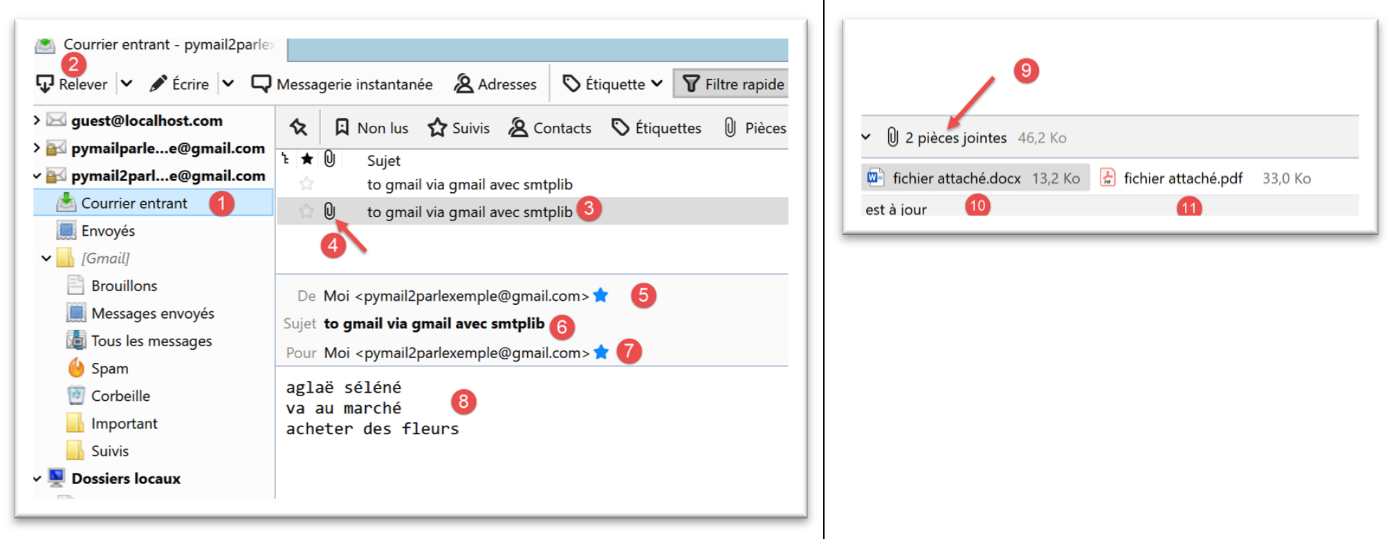
We can see the attached files in [4, 9-11].
Let’s look at an example now with an email attachment. We will save the email received in [3] above:
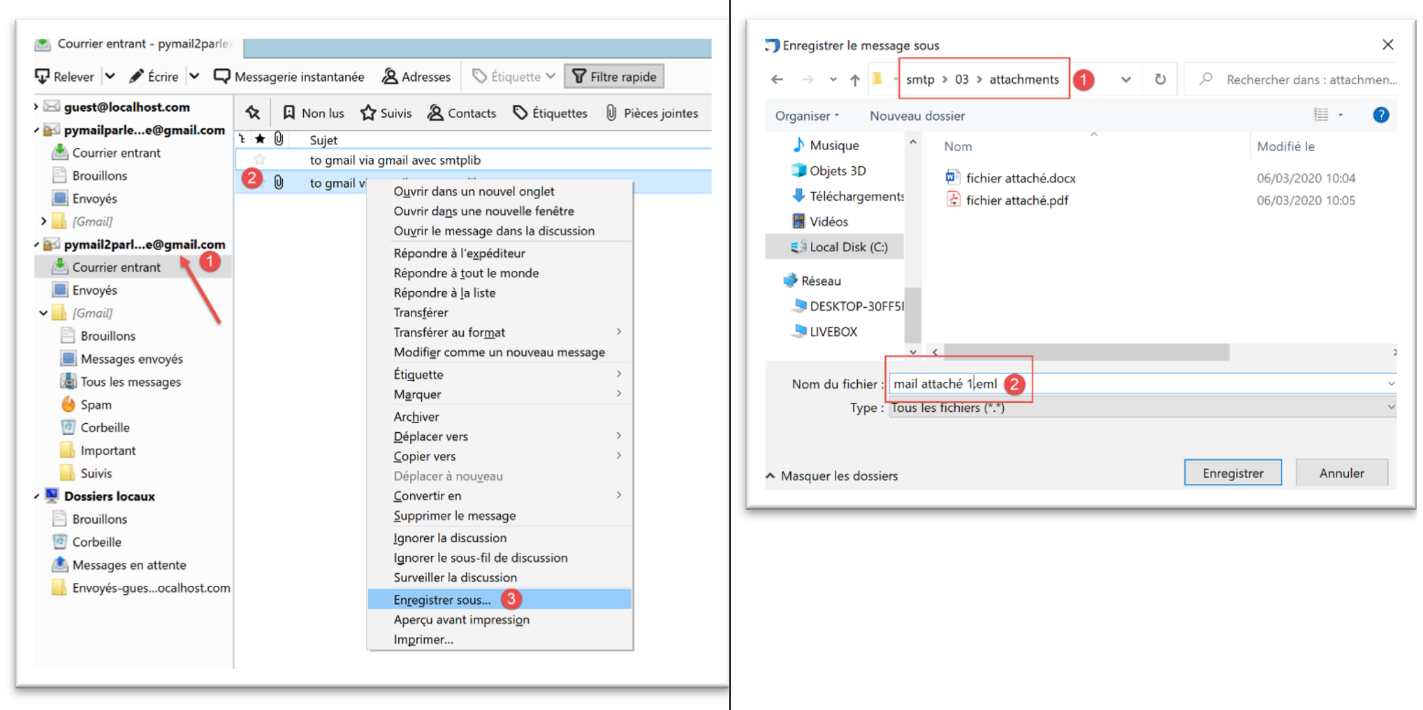
We save the email as [mail attaché 1.eml] in the [smtp/03/attachments] folder.
We now modify the file [smtp/03/config] as follows:
import os


def configure() -> dict:
    # application configuration
    script_dir = os.path.dirname(os.path.abspath(__file__))

    return {
        # description: description of the e-mail sent
        # smtp-server: SMTP server
        # smtp-port: server port SMTP
        # from : expéditeur
        # to: recipient
        # subject : mail subject
        # message : mail message
        "mails": [
            {
                "description": "mail to gmail via gmail avec smtplib",
                "smtp-server": "smtp.gmail.com",
                "smtp-port": "587",
                "from": "pymail2parlexemple@gmail.com",
                "to": "pymail2parlexemple@gmail.com",
                "subject": "to gmail via gmail avec smtplib",
                # we test accented characters
                "message": "aglaë séléné\nva au marché\nacheter des fleurs",
                # smtp with authentication
                "user": "pymail2parlexemple@gmail.com",
                "password": "#6prIlhD&@1QZ3TG",
                # here, absolute paths must be set for attached files
                "attachments": [
                    f"{script_dir}/attachments/fichier attaché.docx",
                    f"{script_dir}/attachments/fichier attaché.pdf",
                    f"{script_dir}/attachments/mail attaché 1.eml",
                ]
            }
        ]
    }
- line 33, we added an attachment;
Now we run the script [smtp/03/main] again. This produces the following result in the mailbox of user [pymail2parlexemple@gmail.com]:
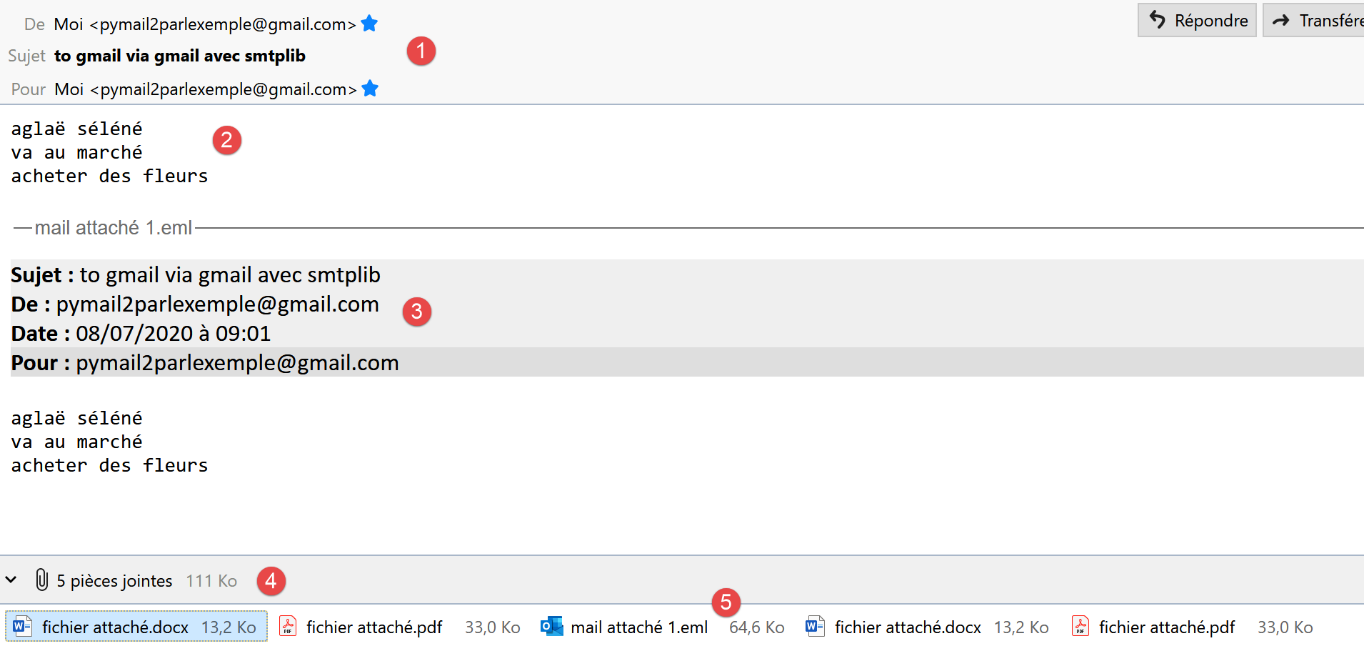
- in [1], the received email;
- in [2]: the message text;
- in [3]: the text of the attached email;
- in [4]: Thunderbird found 5 attachments:
- [fichier attaché.docx];
- [fichier attaché.pdf];
- [mail attaché 1.eml]. This attachment is itself an email containing two attachments:
- [fichier attaché.docx];
- [fichier attaché.pdf];
21.6. The POP3 protocol
21.6.1. Introduction
To read emails stored on a mail server, two protocols exist:
- the POP3 protocol (Post Office Protocol), historically the first protocol but rarely used today;
- the IMAP protocol (Internet Message Access Protocol), which is newer than POP3 and currently the most widely used;
To explore the POP3 protocol, we will use the following architecture:

- [Serveur B] will be, depending on the situation:
- a local POP3 server, implemented by the [hMailServer] mail server;
- the [pop.gmail.com] server, which is the POP3 server of the [gmail.com] mail manager;
- [Client A] will be a client of POP3 in various forms:
- the client [RawTcpClient] to discover the protocol POP3;
- a Python script replaying the POP3 protocol from the [RawTcpClient] client;
- a Python script using Python modules to manage attached files and to use an encrypted and authenticated connection when the POP3 server requires it;
21.6.2. Exploring the POP3 protocol
As we did with the SMTP protocol, we will explore the POP3 protocol using the logs from the [hMailServer] mail server. To do this, we need to start this server.
Using Thunderbird, we will:
- send an email to the user [guest@localhost.com];
- read this user’s mailbox;
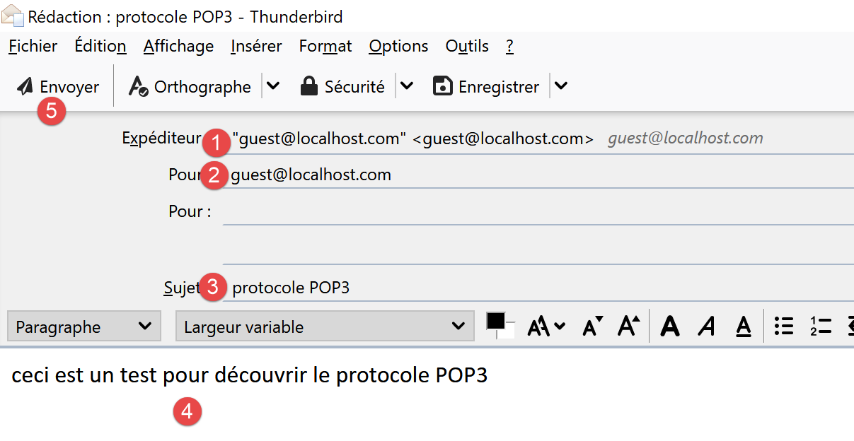
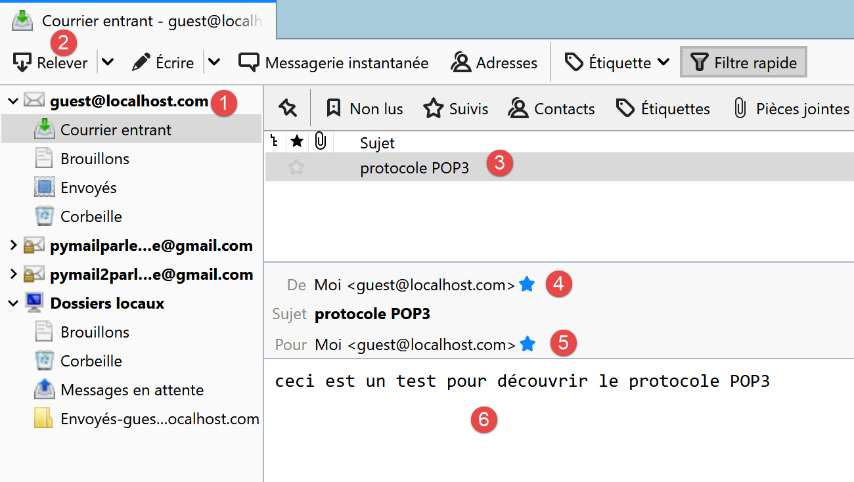
In [3-6] above, the message received by user [guest@localhost.com].
We will now examine the logs for the [hMailServer] server. To do this, we will use the [hMailServer Administrator] administration tool:
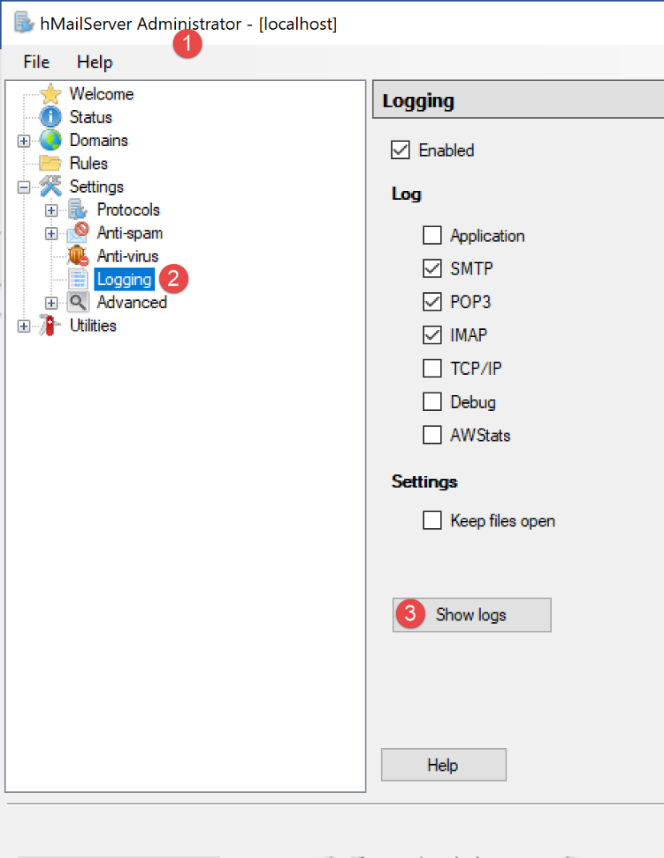
The POP3 logs are as follows (the last lines in today’s log file):
"POP3D"    35084    5    "2020-07-08 14:19:46.392"    "127.0.0.1"    "SENT: +OK Bienvenue sur le serveur POP3 localhost.com"
"POP3D"    34968    5    "2020-07-08 14:19:46.405"    "127.0.0.1"    "RECEIVED: CAPA"
"POP3D"    34968    5    "2020-07-08 14:19:46.407"    "127.0.0.1"    "SENT: +OK CAPA list follows[nl]USER[nl]UIDL[nl]TOP[nl]."
"POP3D"    35076    5    "2020-07-08 14:19:46.410"    "127.0.0.1"    "RECEIVED: USER guest"
"POP3D"    35076    5    "2020-07-08 14:19:46.411"    "127.0.0.1"    "SENT: +OK Send your password"
"POP3D"    34968    5    "2020-07-08 14:19:46.418"    "127.0.0.1"    "RECEIVED: PASS ***"
"POP3D"    34968    5    "2020-07-08 14:19:46.421"    "127.0.0.1"    "SENT: +OK Mailbox locked and ready"
"POP3D"    34968    5    "2020-07-08 14:19:46.423"    "127.0.0.1"    "RECEIVED: STAT"
"POP3D"    34968    5    "2020-07-08 14:19:46.423"    "127.0.0.1"    "SENT: +OK 1 612"
"POP3D"    34968    5    "2020-07-08 14:19:46.426"    "127.0.0.1"    "RECEIVED: LIST"
"POP3D"    34968    5    "2020-07-08 14:19:46.426"    "127.0.0.1"    "SENT: +OK 1 messages (612 octets)"
"POP3D"    34968    5    "2020-07-08 14:19:46.426"    "127.0.0.1"    "SENT: 1 612[nl]."
"POP3D"    35076    5    "2020-07-08 14:19:46.427"    "127.0.0.1"    "RECEIVED: UIDL"
"POP3D"    35076    5    "2020-07-08 14:19:46.428"    "127.0.0.1"    "SENT: +OK 1 messages (612 octets)[nl]1 42[nl]."
"POP3D"    34968    5    "2020-07-08 14:19:46.435"    "127.0.0.1"    "RECEIVED: RETR 1"
"POP3D"    34968    5    "2020-07-08 14:19:46.436"    "127.0.0.1"    "SENT: ."
"POP3D"    34924    5    "2020-07-08 14:19:46.459"    "127.0.0.1"    "RECEIVED: QUIT"
"POP3D"    34924    5    "2020-07-08 14:19:46.459"    "127.0.0.1"    "SENT: +OK POP3 server saying goodbye..."
- line 1: the POP3 server sends a welcome message to the client (Thunderbird) that has just connected;
- line 2: the client sends the command [CAPA] (capabilities) to request a list of commands it can use;
- line 3: the server replies that it can use the [USER, UIDL, TOP] commands. The POP server begins its responses with [+OK] or [-ERR] to indicate whether it succeeded or failed to execute the client’s command;
- Line 4: The client sends the command [USER guest] to indicate that it wants to view the mailbox of user [guest];
- line 5: the server responds with [+OK] and requests the password for [guest];
- line 6: the client sends the command [PASS password] to send the password for user [guest]. Here, the password is in plain text because the server POP3 did not require a secure connection. We will see that this will be different with the Gmail server POP3;
- line 7: the server has validated the username and password. It indicates that it is blocking the mailbox of user [guest];
- line 8: the client sends the command [STAT] requesting information about the mailbox;
- line 9: the server responds that there is a 612-byte message. Generally, it responds that there are N messages and provides the total size of these messages;
- line 10: the client sends the command [LIST]. This command requests the list of messages;
- line 11: the server sends the list of messages in the following format:
- a summary line with the number of messages and their total size;
- one line per message indicating the message number and its size;
- line 13: the client sends the command [UIDL], which requests a list of messages with their identifiers. Each message is identified by a unique number within the email service;
- line 14: the server’s response. We can see that message #1 in the list has the identifier 42;
- Line 15: The client sends the command [RETR 1], which requests that message #1 from the list be transferred to it;
- Line 16: The server POP3 does so;
- line 17: the client sends the command [QUIT] to indicate that it is going to disconnect from the server POP3;
- line 18: the server will also close its connection with the client, but first it sends a goodbye message;
We will now reproduce elements of the above dialogue using the client [RawTcpClient] running in a PyCharm window:
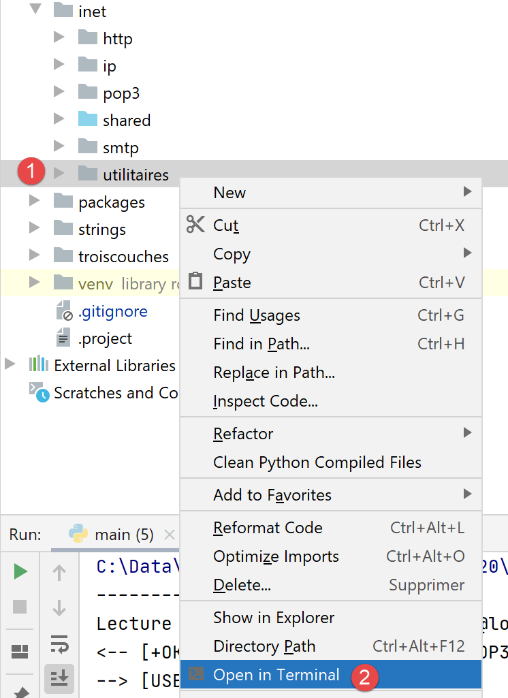
The dialogue is as follows:
(venv) C:\Data\st-2020\dev\python\cours-2020\python3-flask-2020\inet\utilitaires>RawTcpClient.exe localhost 110
Client [DESKTOP-30FF5FB:63762] connecté au serveur [localhost-110]
Tapez vos commandes (quit pour arrêter) :
<-- [+OK Bienvenue sur le serveur POP3 localhost.com]
USER guest
<-- [+OK Send your password]
PASS guest
<-- [+OK Mailbox locked and ready]
LIST
<-- [+OK 1 messages (612 octets)]
<-- [1 612]
<-- [.]
RETR 1
<-- [+OK 612 octets]
<-- [Return-Path: guest@localhost.com]
<-- [Received: from [127.0.0.1] (DESKTOP-30FF5FB [127.0.0.1])]
<-- [   by DESKTOP-30FF5FB with ESMTP]
<-- [   ; Wed, 8 Jul 2020 14:19:36 +0200]
<-- [To: guest@localhost.com]
<-- [From: "guest@localhost.com" <guest@localhost.com>]
<-- [Subject: protocole POP3]
<-- [Message-ID: <ca895136-25c5-411e-373a-a68cbd0eca51@localhost.com>]
<-- [Date: Wed, 8 Jul 2020 14:19:33 +0200]
<-- [User-Agent: Mozilla/5.0 (Windows NT 10.0; WOW64; rv:68.0) Gecko/20100101]
<-- [ Thunderbird/68.10.0]
<-- [MIME-Version: 1.0]
<-- [Content-Type: text/plain; charset=utf-8; format=flowed]
<-- [Content-Transfer-Encoding: 8bit]
<-- [Content-Language: fr]
<-- []
<-- [ceci est un test pour découvrir le protocole POP3]
<-- []
<-- [.]
QUIT
Fin de la connexion avec le serveur
- line 1: we open a connection to port 110 on the machine [localhost]. This is where the POP3 service from [hMailServer] operates;
- on lines 5, 7, 9, 13, and 34, we use the [USER, PASS, LIST, RETR, QUIT] commands;
- line 4: the welcome message from the POP3 server;
- line 5: we indicate that we want to access the user’s mailbox [guest];
- line 7: we send the user’s password [guest] in plain text;
- line 9: we request the list of messages in the mailbox;
- line 13: request message #1;
- lines 14–33: the server POP3 sends message #1;
- line 34: the session is terminated;
Here is a summary of some common commands accepted by a POP3 server:
- the command [USER] is used to specify the user whose mailbox you want to read;
- The [PASS] command is used to set a password;
- The command [LIST] retrieves the list of messages in the user's mailbox;
- The command [RETR] retrieves the message specified by the number provided;
- The command [DELE] requests the deletion of the message specified by the number provided;
- The command [QUIT] tells the server that you are finished;
The server's response can take several forms:
- a single line beginning with [+OK] to indicate that the client’s previous command was successful;
- a single line beginning with [-ERR] to indicate that the client's previous command failed;
- multiple lines where:
- the first line begins with [+OK];
- the last line consists of a single period;
21.6.3. [pop3/01] scripts: a basic POP3 client
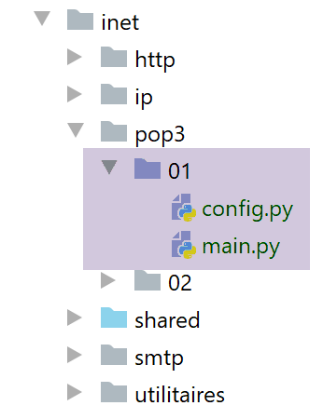
Since the POP3 protocol has the same structure as the SMTP protocol, the [pop3/01/main.py] script is a port of the [smtp/01/main.py] script. It will have the following configuration file [pop3/01/config.py]:
def configure() -> dict:
    # mailboxes from which e-mails are collected
    mailboxes = [
        # server: server POP3
        # port: server port POP3
        # user: user whose messages are to be read
        # password: your password
        # maxmails: maximum number of e-mails to download
        # timeout: maximum wait time for a server response
        # encoding: encoding incoming e-mails
        # delete: if True, then mail is deleted from the mailbox
        # once they have been downloaded locally

        {
            "server": "localhost",
            "port": "110",
            "user": "guest",
            "password": "guest",
            "maxmails": 10,
            "timeout": 1.0,
            "encoding": "utf-8",
            "delete": False
        }
    ]
    # we return the configuration
    return {
        "mailboxes": mailboxes
    }
- lines 3–24: the list of mailboxes to check. Here, there is only one;
- lines 4–12: meanings of the dictionary entries defining each mailbox;
- Line 15: The server POP3 being queried is the local server [hMailServer];
- Lines 17–18: We want to read the mailbox of user [guest@localhost];
- line 19: we will read at most 10 emails;
- line 20: the client will wait a maximum of 1 second for a response from the server;
- line 21: the encoding type of the messages read;
- line 22: we will not delete the downloaded messages;
The script [pop3/01/main.py] is as follows:
# imports
import re
import socket


# -----------------------------------------------------------------------
def readmails(mailbox: dict, verbose: bool):
    # reads the mailbox described by the [mailbox] dictionary
    # if verbose=True, tracks client-server exchanges
…


# --------------------------------------------------------------------------
def send_command(mailbox: dict, connexion: socket, commande: str, verbose: bool, with_rclf: bool) -> str:
    # sends command to connection channel
    # verbose mode if verbose=True
    # si with_rclf=True, ajoute la séquence rclf à échange
    # returns the 1st line of the answer
…


# --------------------------------------------------------------------------
def affiche(echange: str, sens: int):
    …


# main ----------------------------------------------------------------

# POP3 client (Post Office Protocol) for reading mailbox messages
# communication protocol POP3 client-server
# -> client connects to smtp server port 110
# <- server sends him a welcome message
# -> customer sends command USER user
# <- server responds OK or not
# -> customer sends PASS mot_de_passe order
# <- server responds OK or not
# -> customer sends LIST command
# <- server responds OK or not
# -> customer sends command RETR n° for each email
# <- server responds OK or not. If OK sends the requested mail content
# -> server sends all the mail lines and ends with a line containing the
# single character .
# -> customer sends command DELE n° to delete an e-mail
# <- server responds OK or not
# # -> client sends QUIT command to end dialog with server
# <- server responds OK or not
# server responses have the form +OK text where -ERR text
# The answer may consist of several lines. In this case, the last line consists of a single dot
# text lines exchanged must end with the characters RC(#13) and LF(#10)
#

# retrieve application configuration
import config
config = config.configure()

# we process mailboxes one by one
for mailbox in config['mailboxes']:
    try:
        # console display
        print("----------------------------------")
        print(
            f"Lecture de la boîte mail POP3 {mailbox['user']}@{mailbox['server']}:{mailbox['port']}")
        # reading the mailbox in verbose mode
        readmails(mailbox, True)
        # end
        print("Lecture terminée...")
    except BaseException as erreur:
        # error is displayed
        print(f"L'erreur suivante s'est produite : {erreur}")
    finally:
        pass
Comments
As we mentioned, [pop3/01/main.py] is a port of the [smtp/01/main.py] script that we have already discussed. We will only comment on the main differences:
- line 64: the [readmails] function is responsible for reading emails from a mailbox. The information needed to connect to this mailbox is in the [mailbox] dictionary. The second parameter, [True], is the [Verbose] parameter, which here requests tracking of client/server exchanges;
The function [readmails] is as follows:
# -----------------------------------------------------------------------
def readmails(mailbox: dict, verbose: bool):
    # reads mail from the mailbox described by the [mailbox] dictionary
    # if verbose=True, tracks client-server exchanges

    # isolate mailbox parameters
    # we assume that the [mailbox] dictionary is valid
    server = mailbox['server']
    port = int(mailbox['port'])
    user = mailbox['user']
    password = mailbox['password']
    maxmails = mailbox['maxmails']
    delete = mailbox['delete']
    timeout = mailbox['timeout']

    # let system errors show up
    connexion = None
    try:
        # opens a connection on port [port] from [server] with a one-second timeout
        connexion = socket.create_connection((server, port), timeout=timeout)

        # connection represents a bidirectional communication flow
        # between the client (this program) and the pop3 server contacted
        # this channel is used for the exchange of orders and information

        # read welcome message
        send_command(mailbox, connexion, "", verbose, True)
        # cmde USER
        send_command(mailbox, connexion, f"USER {user}", verbose, True)
        # cmde PASS
        send_command(mailbox, connexion, f"PASS {password}", verbose, True)
        # cmde LIST
        première_ligne = send_command(mailbox, connexion, "LIST", verbose, True)
        # analysis of the 1st line to find out the number of messages
        match = re.match(r"^\+OK (\d+)", première_ligne)
        nbmessages = int(match.groups()[0])
        # we loop on the messages
        imessage = 0
        while imessage < nbmessages and imessage < maxmails:
            # cmde RETR
            send_command(mailbox, connexion, f"RETR {imessage + 1}", verbose, True)
            # cmde DELE
            if delete:
                send_command(mailbox, connexion, f"DELE {imessage + 1}", verbose, True)
            # next msg
            imessage += 1
        # cmde QUIT
        send_command(mailbox, connexion, "QUIT", verbose, True)
        # end
    finally:
        # locking connection
        if connexion:
            connexion.close()
Comments
- lines 8–14: retrieve the configuration information for the mailbox to be accessed;
- lines 19-20: open a connection to the POP3 server;
- lines 26-27: read the welcome message sent by the server;
- lines 28-29: send the command [USER] to identify the user whose emails we want;
- lines 30-31: send the command [PASS] to provide this user’s password;
- lines 32-33: send the command [LIST] to find out how many emails are in this user’s mailbox. The function [sendCommand] returns the first line of the server’s response. In this line, the server indicates how many messages are in the mailbox;
- lines 34–36: retrieve the number of messages from the first line of the response;
- lines 39–46: we loop through each message. For each one, we issue two commands:
- RETR i: to retrieve message #i (lines 40–41);
- DELE i: to delete it if the configuration requires that read messages be deleted from the server (lines 43–44);
- lines 47–48: the command [QUIT] is sent to tell the server that we are finished;
The function [send_command] is as follows:
# --------------------------------------------------------------------------
def send_command(mailbox: dict, connexion: socket, commande: str, verbose: bool, with_rclf: bool) -> str:
    # sends command to connection channel
    # verbose mode if verbose=True
    # si with_rclf=True, ajoute la séquence rclf à échange
    # returns the 1st line of the answer

    # end-of-line mark
    if with_rclf:
        rclf = "\r\n"
    else:
        rclf = ""
    # send order if not empty
    if commande:
        connexion.send(bytearray(f"{commande}{rclf}", 'utf-8'))
        # possible echo
        if verbose:
            affiche(commande, 1)
    # read the socket as if it were a text file
    encoding = f"{mailbox['encoding']}" if mailbox['encoding'] else None
    file = connexion.makefile(encoding=encoding)
    # we process this file line by line
    # read 1st line
    première_ligne = réponse = file.readline().strip()
    # verbose mode?
    if verbose:
        affiche(première_ligne, 2)
    # error code recovery
    code_erreur = réponse[0]
    if code_erreur == "-":
        # there has been an error
        raise BaseException(réponse[5:])
    # special case of multi-line responses LIST, RETR
    cmd = commande.lower()[0:4]
    if cmd == "list" or cmd == "retr":
        # last line of the answer?
        dernière_ligne = False
        while not dernière_ligne:
            # read next line
            ligne_suivante = file.readline().strip()
            # verbose mode?
            if verbose:
                affiche(ligne_suivante, 2)
            # last line?
            dernière_ligne = ligne_suivante == "."
    # finished - we return the 1st line
    return première_ligne
Comments
- lines 13-18: the command [command] is sent to the server POP3 only if it is not empty. This is necessary to read the welcome message from the POP3 server, which it sends even though the client has not yet sent any commands;
- Lines 19–21: The socket is read as if it were a text file. This allows us to use the [readline] method (line 24) and thus read the message line by line. We use the key [encoding] from the dictionary [mailbox] to specify the encoding of the lines to be read;
- line 24: we read the first line of the response;
- lines 28–32: we handle the case of a possible error. These are of type [-ERR invalid password, -ERR mailbox unknown, -ERR unable to lock mailbox…];
- line 32: an exception is thrown with the error message;
- line 35: only commands of the form [list, retr] can have multi-line responses;
- lines 36–45: in the case of a multi-line response, we display all received lines (lines 42–43) until the last line is received (line 45);
- line 46: the first line read is returned because, in the case of the [LIST] command, it contains the number of messages in the mailbox;
Results
Let’s take the previous example. Using Thunderbird, we sent the following message to the user [guest@localhost] (the server hMailServer must be running):
Upon execution, we obtain the following results:
C:\Data\st-2020\dev\python\cours-2020\python3-flask-2020\venv\Scripts\python.exe C:/Data/st-2020/dev/python/cours-2020/python3-flask-2020/inet/pop3/01/main.py
----------------------------------
Lecture de la boîte mail POP3 guest@localhost:110
<-- [+OK Bienvenue sur le serveur POP3 localhost.com]
--> [USER guest]
<-- [+OK Send your password]
--> [PASS guest]
<-- [+OK Mailbox locked and ready]
--> [LIST]
<-- [+OK 1 messages (612 octets)]
<-- [1 612]
<-- [.]
--> [RETR 1]
<-- [+OK 612 octets]
<-- [Return-Path: guest@localhost.com]
<-- [Received: from [127.0.0.1] (DESKTOP-30FF5FB [127.0.0.1])]
<-- [by DESKTOP-30FF5FB with ESMTP]
<-- [; Wed, 8 Jul 2020 14:19:36 +0200]
<-- [To: guest@localhost.com]
<-- [From: "guest@localhost.com" <guest@localhost.com>]
<-- [Subject: protocole POP3]
<-- [Message-ID: <ca895136-25c5-411e-373a-a68cbd0eca51@localhost.com>]
<-- [Date: Wed, 8 Jul 2020 14:19:33 +0200]
<-- [User-Agent: Mozilla/5.0 (Windows NT 10.0; WOW64; rv:68.0) Gecko/20100101]
<-- [Thunderbird/68.10.0]
<-- [MIME-Version: 1.0]
<-- [Content-Type: text/plain; charset=utf-8; format=flowed]
<-- [Content-Transfer-Encoding: 8bit]
<-- [Content-Language: fr]
<-- []
<-- [ceci est un test pour découvrir le protocole POP3]
<-- []
<-- [.]
--> [QUIT]
<-- [+OK POP3 server saying goodbye...]
Lecture terminée...

Process finished with exit code 0
- lines 15-31: the message sent to [guest@localhost] is retrieved correctly.
Here we have a basic POP3 client that lacks certain capabilities:
- the ability to communicate with a secure POP3 server;
- the ability to read attachments in a message;
We will implement these two capabilities with a new script, which will be more complex this time.
21.6.4. [pop3/02] scripts: POP3 client with the [poplib] and [email] modules
We will write a POP3 client to manage attachments and handle communication with secure servers. Additionally, we will save messages and their attachments to files.
We will use two Python modules:
- [poplib]: which will handle the POP3 protocol;
- [email]: which includes numerous submodules that will allow us to analyze the received messages. Each message is a structured string containing:
- the message headers [From, To, Subject, Return-Path…];
- the message in its text and, if applicable, HTML versions;
- the attached files;
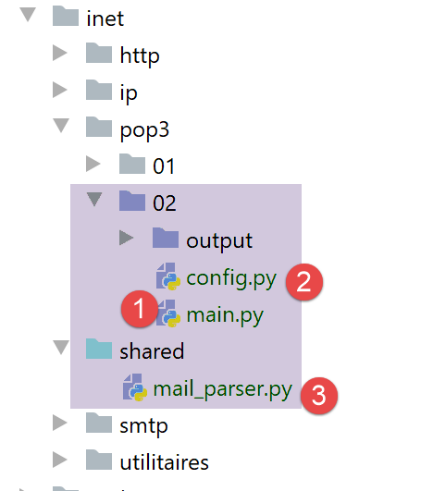
The [inet/pop3/02/main] [1] script is configured by the [inet/pop3/02/config] [2] file and uses the [inet/shared/mail_parser] [3].
The file [pop3/02/config] is as follows:
import os


def configure() -> dict:
    # application configuration
    config = {
        # list of mailboxes to be managed
        "mailboxes": [
            # server: server POP3
            # port: server port POP3
            # user: user whose messages are to be read
            # password: your password
            # maxmails: maximum number of e-mails to download
            # timeout: maximum wait time for a server response
            # delete: true if downloaded messages are to be deleted from the server
            # ssl: true if mail is read over a secure link
            # output: the storage folder for downloaded messages

            {
                "server": "pop.gmail.com",
                "port": "995",
                "user": "pymail2parlexemple@gmail.com",
                "password": "#6prIlhD&@1QZ3TG",
                "maxmails": 10,
                "delete": False,
                "ssl": True,
                "timeout": 2.0,
                "output": "output"
            }
        ]
    }
    # absolute path of script folder
    script_dir = os.path.dirname(os.path.abspath(__file__))

    # absolute paths of folders to be included in the syspath
    absolute_dependencies = [
        # local file
        f"{script_dir}/../../shared",
   ]

    # syspath configuration
    from myutils import set_syspath
    set_syspath(absolute_dependencies)

    # we return the configuration
    return config
The file defines the list of mailboxes to check and sets the application’s Python version.
There is only one mailbox here:
- lines 22-23: the user whose emails we want to read;
- lines 20-21: the name and port of the POP3 server that stores this user’s emails;
- line 24: the maximum number of emails to retrieve. In fact, if you try this script on your own mailbox, you probably won’t want to retrieve the hundreds of emails stored there;
- line 25: a Boolean value indicating whether an email should be deleted after being read (delete=True);
- line 26: setting the [ssl] attribute to True means that the POP3 server defined in lines 20–21 uses an encrypted connection;
- line 27: the maximum timeout for server responses, expressed in seconds;
- line 28: the folder in which to store read emails. It will be created if it does not exist. This is a relative path. When executed, it will be relative to the folder from which you run the script. With [Pycharm], this folder will be that of the [pop3/02] script;
The script [pop3/02/main] is as follows:
# imports
import email
import os
import poplib
import shutil


# reading a mailbox
def readmails(mailbox: dict, verbose: bool):
    # reads the mailbox described by the [mailbox] dictionary
    # if verbose=True, tracks client-server exchanges
…

# main ----------------------------------------------------------------
#  POP3 client (Post Office Protocol) for reading e-mails

# retrieve application configuration
import config
config = config.configure()

# we process mailboxes one by one
for mailbox in config['mailboxes']:
    try:
        # console display
        print("----------------------------------")
        print(
            f"Lecture de la boîte mail POP3 {mailbox['user']}@{mailbox['server']}:{mailbox['port']}")
        # reading the mailbox in verbose mode
        readmails(mailbox, True)
        # end
        print("Lecture terminée...")
    except BaseException as erreur:
        # error is displayed
        print(f"L'erreur suivante s'est produite : {erreur}")
    finally:
        pass
- lines 17-36: the [main] section of the script is similar to that of the [pop3/01] script;
The [readmails] function is as follows:
# reading a mailbox
def readmails(mailbox: dict, verbose: bool):
    # reads the mailbox described by the [mailbox] dictionary
    # if verbose=True, tracks client-server exchanges

    # import from mail_parser
    from mail_parser import save_message

    # isolate mailbox parameters
    # we assume that the [mailbox] dictionary is valid
    server = mailbox['server']
    port = int(mailbox['port'])
    user = mailbox['user']
    password = mailbox['password']
    maxmails = mailbox['maxmails']
    ssl = mailbox['ssl']
    timeout = mailbox['timeout']
    output = mailbox['output']

    # let system errors show up
    pop3 = None
    try:
        # create storage folders if they don't exist
        if not os.path.isdir(output):
            os.mkdir(output)
        # user
        dir2 = f"{output}/{user}"
        # delete the [dir2] folder if it exists, then recreate it
        if os.path.isdir(dir2):
            # delete
            shutil.rmtree(dir2)
        # creation
        os.mkdir(dir2)
        # open a connection on the [port] port of [server]
        if ssl:
            pop3 = poplib.POP3_SSL(server, port, timeout=timeout)
        else:
            pop3 = poplib.POP3(server, port, timeout=timeout)

        # connection represents a bidirectional communication flow
        # between the client (this program) and the pop3 server contacted
        # this channel is used for the exchange of orders and information

        # verbose mode
        pop3.set_debuglevel(2 if verbose else 0)
        # read welcome message
        pop3.getwelcome(    )
        # cmde USER
        réponse = pop3.user(user)
        # cmde PASS
        réponse = pop3.pass_(password)
        # cmde LIST
        liste = pop3.list()
        # mails are in liste[1]
        imail = 0
        nb_mails = len(liste[1])
        fini = imail == maxmails or imail == nb_mails
        éléments = liste[1]
        while not fini:
            # common feature
            élément = éléments[imail]
            # element is a list of bytes decoded in string
            desc = élément.decode()
            # we have a chain separated by blanks
            # the 1st element is the message number
            num = desc.split()[0]
            # we retrieve the message
            message = pop3.retr(int(num))
            # the message lines are in message [1]
            str_message = ""
            for ligne in message[1]:
                # line is a sequence of bytes decoded as string
                str_message += f"{ligne.decode()}\r\n"
            # message folder
            dir3 = f"{dir2}/message_{num}"
            # if the folder doesn't exist, we create it
            if not os.path.isdir(dir3):
                os.mkdir(dir3)
            # object email.message.Message
            save_message(dir3, email.message_from_string(str_message), 0)
            # one more mail
            imail += 1
            # have we reached the max?
            fini = imail == maxmails or imail == nb_mails

        # cmde QUIT
        pop3.quit()
    finally:
        # locking connection
        if pop3:
            pop3.close()
Comments
- lines 6-7: we import the [mail_parser.save_message] function used on line 80;
- The function code is encapsulated in a try (line 22)/finally (line 88) block. This ensures that all exceptions are propagated to the main code, which catches and displays them;
- lines 11-18: retrieve the mailbox configuration information;
- lines 23–33: all messages will be stored in the folder [output/user], where [output] and [user] are defined in the configuration. We therefore create the folders [output] and then [output/user] in succession. To create the latter, we first delete it on line 31. [shutil] is a module that must be imported. [shutil.rmtree(dir)] deletes the folder [dir] and everything it contains;
- for all operations on system files, use the [os] module, which must also be imported;
- Lines 34–38: A connection is established with the POP3 server. If the server is secure, the [poplib.POP3_SSL] class is used; otherwise, the [poplib.POP3] class is used. The [ssl] attribute used on line 35 comes from the mailbox configuration;
- line 45: we set a logging level:
- 0: no logs;
- 1: commands issued by the POP3 client are logged;
- 2: detailed logs. We can also see what the client POP3 receives;
- line 47: after the connection, the server POP3 sends a welcome message. We read this message;
- lines 48–49: command USER of the POP3 protocol;
- lines 50–51: command PASS of the POP3 protocol;
- Lines 52–53: LIST command from the POP3 protocol. The response is a tuple (response, ['mesg_num octets'…], bytes), for example list=(b'+OK 3 messages (3859 bytes)', [b'1 584', b'2 550', b'3 2725'], 22). We see that the first two elements of the tuple are bytes (prefix b). list[1] is an array where each element is a sequence of bytes containing two pieces of information: the message number and its size in bytes;
- line 56: from the above, we can deduce that the number of messages in the mailbox can be obtained via [email.message_from_bytes(data2[0][1])];
- lines 59–84: we loop through each message. We stop when all have been read or when we have reached the maximum number of emails set by configuration;
- line 61: current element of the array liste[1], so something like b'1 584', a sequence of bytes;
- line 63: we convert the sequence of bytes to a character string. We now have the string '1 584';
- line 66: we retrieve the message number, here the string '1';
- line 68: we issue the command POP3 RETR num. We receive a response like:
[message=(b'+OK 584 octets', [b'Return-Path: guest@localhost', b'Received: from [127.0.0.1] (localhost [127.0.0.1])', b'\tby DESKTOP-528I5CU with ESMTPA', b'\t; Tue, 17 Mar 2020 09:41:50 +0100', b'To: guest@localhost', b'From: "guest@localhost" <guest@localhost>', b'Subject: test', b'Message-ID: <2572d0f0-5b7c-2c31-5a70-c628293d5709@localhost>', b'Date: Tue, 17 Mar 2020 09:41:48 +0100', b'User-Agent: Mozilla/5.0 (Windows NT 10.0; WOW64; rv:68.0) Gecko/20100101', b' Thunderbird/68.6.0', b'MIME-Version: 1.0', b'Content-Type: text/plain; charset=utf-8; format=flowed', b'Content-Transfer-Encoding: 8bit', b'Content-Language: fr', b'', b'h\xc3\xa9l\xc3\xa8ne est all\xc3\xa9e au march\xc3\xa9 acheter des l\xc3\xa9gumes.', b''], 614)]
- (continued)
- message is a tuple of three elements;
- message[1] is an array of lines. Each line is a sequence of bytes (prefixed with 'b'). The complete message is formed by this set of lines;
- [Return-Path, Received, To, Subject, Message-ID, Content-Type, Content-Transfer-Encoding, Content-Language] are the message headers. Each provides information about the received message. This information will be used to retrieve the message body (the penultimate element of the message[1] array);
- Lines 71–73: We create the string [strMessage], which consists of all the lines of the message. We now have the message in the form of a character string. This message may contain other messages as well as attachments. This is because attachments are stored as character strings. So one key point to remember is that an email is initially a string of characters, and it is this string of characters that must be analyzed to extract the attachments, any other embedded messages, and of course the message body—what the sender wrote;
- lines 74–78: we will store the message body and the message attachments in the [dir3] folder;
- lines 79-80: we will delegate the analysis of the message to a function named [save_message]:
- the first parameter is [dir3], the folder in which the message content must be stored;
- the second parameter is a [email.message.Message] object. This object has methods to retrieve the various parts of the message (body, attachments) as well as all its headers. You must import the [email] module to access this object. The [email.message_from_string] function allows you to construct a [email.message.Message] object from the message’s character string;
The function [save_message] is part of the module [mail_parser]:

The module [mail_parser] was imported into lines 6–7 of the function [readmails];
In [mail_parser.py], the function [save_message] is as follows:
# imports
import codecs
import email.contentmanager
import email.header
import email.iterators
import email.message
import os


# save a message of type email.message.Message
# this function can be called recursively
def save_message(output: str, email_message: email.message.Message, irfc822=0) -> int:
    # output: message backup folder
    # email_message: the message to be saved
    # irfc822: current numbering of attached e-mails
    #
    # part of the message
    part = email_message
    # les entêtes [From, To, Subject] sont trouvés dans une des parties multipart
    # or in a [text/*] part when there is no [multipart] part
    keys = part.keys()
    # From doit faire partie des entêtes, sinon la partie n'a pas les entêtes qu'on cherche
    if "From" in keys:
        # some headers are recovered
        headers = [f"From: {decode_header(part.get('From'))}",
                   f"To: {decode_header(part.get('To'))}",
                   f"Subject: {decode_header(part.get('Subject'))}",
                   f"Return-Path: {decode_header(part.get('Return-Path'))}",
                   f"User-Agent: {decode_header(part.get('User-Agent'))}",
                   f"Date: {decode_header(part.get('Date'))}"]
        # save headers in a text file
        with codecs.open(f"{output}/headers.txt", "w", "utf-8") as file:
            # writing to file
            string = '\r\n'.join(headers)
            file.write(f"{string}\r\n")

    # part type [part]
    main_type = part.get_content_maintype()
   …
Comments
- line 12: the function takes up to three parameters:
- [output]: the folder where the message should be saved (2nd parameter);
- [email_message]: a message of type [email.message.Message]. This type is a structured type. It contains the email text as well as all attached files and provides methods for retrieving its various elements;
- [irfc822]: this parameter is used to number the emails encapsulated in [email_message];
- Line 18: The [email_message] object is placed in [part]. The type [email.message.Message] contains parts [part] (message body, attachments, encapsulated emails) that are also of type [email.message.Message]. Each [part] part may have subparts. Thus, the type [email.message.Message] is a tree of elements of type [email.message.Message]:
- [part.ismultipart()] equals [True] if the part [part] contains subparts. These are then accessible via [part.get_payload()];
- when [part.ismultipart()] equals [False], this means we have reached a leaf node in the initial message tree: this may be:
- the message body in the form of plain text;
- the message body in the form of HTML text;
- an attachment (with the exception of an encapsulated message, for which [part.ismultipart()] is equal to [True]);
- due to the tree-like nature of the parameter [email.message.Message], the function [save_message] will be called recursively. Recursion stops when the leaves of the tree are reached, i.e., a part [part] for which [part.ismultipart()] equals [False];
- line 21: we request the keys (or headers) of the message currently being parsed (which, due to recursion, may be a subpart of the initial message);
- lines 23–35: we want to record the headers:
- [From]: the sender of the message;
- [To]: the message recipient;
- [Subject]: the subject of the message;
- [Return-Path]: the recipient to whom we must reply if we wish to reply. Indeed, this information is not always included in [From];
- [User-Agent]: the client POP3 communicating with the server POP3;
- [Date]: date the email was sent;
- line 23: only one of the message parts contains these headers. For the other parts, the code in lines 23–35 will be ignored;
- lines 25–30: a list is created with the six headers;
- line 25: let’s analyze the first header:
- [part.get(key)] allows us to retrieve the header associated with the key [key];
- this header may be encoded. If the encoding is not UTF-8, the header is decoded and re-encoded in UTF-8 using the function [decode_header];
- the first header will be in the form [From: pymail2lexemple@gmail.com];
- lines 31–35: the headers are saved to the file [output/headers.txt];
The [decode_header] function is as follows (still in [mail_parser.py]):
# decoding headers
def decode_header(header: object) -> str:
    # decode the header
    header = email.header.decode_header(f"{header}")
    # the result is an array - here it will have only one element of type (header, encoding)
    # if encoding==None, then header is a string
    # otherwise it's a list of bytes encoded by encoding
    header, encoding = header[0]
    if not encoding:
        # if no encoding
        return header
    else:
        # if encoded, we decode
        return header.decode(encoding)
Comments
- line 4: decode the header:
- you must import the [email.header] module;
- we get a list of [(header1,encoding1) , (header2, encoding2)…] tuples;
- for [From, To, Subject, Return-Path, Date] headers, the list will have only one element;
- line 8: retrieve the single header and its encoding:
- if [encoding==None], then [header] is the header in the form of a character string;
- otherwise, [header] is a sequence of bytes representing the encoded header;
- lines 10-11: if there was no encoding, then the header is returned;
- lines 12–14: if there was encoding, then we decode the sequence of bytes we retrieved into a string and return it;
Let’s return to the [save_message] function:
# save a message of type email.message.Message
# this function can be called recursively
def save_message(output: str, email_message: email.message.Message, irfc822=0) -> int:
    # output: message backup folder
    # email_message: the message to be saved
    # irfc822: current numbering of attached e-mails
    #
    # part of the message
    part = email_message
    # les entêtes [From, To, Subject] sont trouvés dans une des parties multipart
    # or in a [text/*] part when there is no [multipart] part
    keys = part.keys()
    # From doit faire partie des entêtes, sinon la partie n'a pas les entêtes qu'on cherche
    if "From" in keys:
        # some headers are recovered
        headers = [f"From: {decode_header(part.get('From'))}",
                   f"To: {decode_header(part.get('To'))}",
                   f"Subject: {decode_header(part.get('Subject'))}",
                   f"Return-Path: {decode_header(part.get('Return-Path'))}",
                   f"User-Agent: {decode_header(part.get('User-Agent'))}",
                   f"Date: {decode_header(part.get('Date'))}"]
        # save headers in a text file
        with codecs.open(f"{output}/headers.txt", "w", "utf-8") as file:
            # writing to file
            string = '\r\n'.join(headers)
            file.write(f"{string}\r\n")

    # part type [part]
    main_type = part.get_content_maintype()
    sub_type = part.get_content_subtype()
    type_of_part = f"{main_type}/{sub_type}"
    # if the message is of type text/plain
    if type_of_part == "text/plain":
        # text message
        save_textmessage(output, part, 0)

    # if the message type is text/html
    elif type_of_part == "text/html":
        # message HTML
        save_textmessage(output, part, 1)

    # if the message is a container of parts
    elif part.is_multipart():
        …
    else:
        …
    # ignore other parts (not text/plain, not text/html, not attachment)
    # return the current value of irfc822 (numbering of attached e-mails stored in the output folder)
    return irfc822
Comments
- lines 1-26: we processed the headers of the initial message;
- lines 28-31: parts of a message of type [email.message.Message] have a main type and a subtype. We retrieve them;
- lines 32-35: if the processed part has the type [text/plain], then we have reached a leaf node in the initial message tree. This is the text the sender wrote in their message;
- line 35: this text is written to a file:
- the first parameter, [output], is the folder where the text should be saved;
- the second parameter is the part of the message containing the text to be saved;
- the third parameter is 0 to save normal text, 1 for HTML text;
- lines 37–40: if the section is of type [text/html], then we have also reached a leaf node in the initial message tree. This is the text the sender wrote in their message, this time in HTML format. Not all email clients support this format;
The function [save_textmessage] is as follows:
# saving a text message
def save_textmessage(output: str, part: email.message.Message, type_of_text: int):
    # headers
    headers = []
    # message charset
    charset = part.get_content_charset()
    if charset is not None:
        charset = part.get_content_charset().lower()
        headers.append(f"Charset: {charset}")
    # content coding mode
    content_transfer_encoding = part.get("Content-Transfer-Encoding")
    if content_transfer_encoding is not None:
        headers.append(f"Transfer-Content-Encoding: {content_transfer_encoding}")
    # 8bit mode was a problem
    if content_transfer_encoding == "8bit":
        # retrieve the mail message
        msg = part.get_payload()
    else:
        # retrieve the mail message
        msg = email.contentmanager.raw_data_manager.get_content(part)
    # by text type
    filename = None
    if type_of_text == 0:
        # save headers
        with codecs.open(f"{output}/headers.txt", "a", "utf-8") as file:
            # writing to file
            string = '\r\n'.join(headers)
            file.write(f"{string}\r\n")
        # text file for content
        filename = f"{output}/mail.txt"
    elif type_of_text == 1:
        # html file for content
        filename = f"{output}/mail.html"
    # save message
    with codecs.open(filename, "w", "utf-8") as file:
        # writing to file
        file.write(msg)
Comments
- Like the headers, the message text may be encoded. There can be two encodings:
- the initial encoding of the text (UTF-8, ISO-8859-1, etc.). This is the encoding used by the mail server that sent the message. It is identified by the [Content-Type] header in the received message;
- a second encoding that the original text may have undergone in order to be sent. This is identified by the [Transfer-Content-Encoding] header in the received message;
- line 6: the initial encoding of the text;
- line 11: the second encoding that the text underwent for its transfer to the recipient;
- lines 9, 13: these two pieces of information are placed in the list [headers]. They will be added to the information in the file [headers.txt], which records certain message headers;
- line 20: [email.contentmanager.raw_data_manager.get_content] allows us to retrieve the message with its initial encoding 1. We have removed encoding 2. However, the [email.contentmanager.raw_data_manager] object only supports two types of [Transfer-Content-Encoding]:
- [quoted-printable];
- [base64];
It ignores the others. However, Thunderbird, for example, uses [Transfer-Content-Encoding], named "8bit". This encoding is ignored, and messages containing accented characters are garbled. The message can then be retrieved using the [part.get_payload()] method (lines 15–17);
- line 21: at this point, we have the message stripped of its transfer encoding, i.e., the message as it was written by the sender;
- lines 22–37: this is the case where we need to save a text message;
- lines 24–28: we save the two headers constructed in lines 9 and 13 to the file [headers.txt]. This file already exists and contains headers. Therefore, we use mode "a" (line 25) to open this file. "a" stands for "append," and the new headers are added (at the end of the file) to the existing contents of the [headers.txt] file;
- line 30: the name of the file in which to save the text message;
- line 33: the name of the file in which to save the message HTML;
- lines 34–37: the UTF-8 text is saved to a file;
Let’s return to the [save_message] function:
# save a message of type email.message.Message
# this function can be called recursively
def save_message(output: str, email_message: email.message.Message, irfc822=0) -> int:
    # output: message backup folder
    # email_message: the message to be saved
    # irfc822: current numbering of attached e-mails
    #
    # part of the message
    part = email_message
    # les entêtes [From, To, Subject] sont trouvés dans une des parties multipart
    # or in a [text/*] part when there is no [multipart] part
    keys = part.keys()
    # From doit faire partie des entêtes, sinon la partie n'a pas les entêtes qu'on cherche
    if "From" in keys:
        # some headers are recovered
        headers = [f"From: {decode_header(part.get('From'))}",
                   f"To: {decode_header(part.get('To'))}",
                   f"Subject: {decode_header(part.get('Subject'))}",
                   f"Return-Path: {decode_header(part.get('Return-Path'))}",
                   f"User-Agent: {decode_header(part.get('User-Agent'))}",
                   f"Date: {decode_header(part.get('Date'))}"]
        # save headers in a text file
        with codecs.open(f"{output}/headers.txt", "w", "utf-8") as file:
            # writing to file
            string = '\r\n'.join(headers)
            file.write(f"{string}\r\n")

    # part type [part]
    main_type = part.get_content_maintype()
    sub_type = part.get_content_subtype()
    type_of_part = f"{main_type}/{sub_type}"
    # if the message is of type text/plain
    if type_of_part == "text/plain":
        # text message
        save_textmessage(output, part, 0)

    # if the message type is text/html
    elif type_of_part == "text/html":
        # message HTML
        save_textmessage(output, part, 1)

    # if the message is a container of parts
    elif part.is_multipart():
        # special case of attached mail
        if type_of_part == "message/rfc822":
            # create a new output2 folder for attached mail
            irfc822 += 1
            output2 = f"{output}/rfc822_{irfc822}"
            os.mkdir(output2)
            # save irfc822 message subparts in output2
            for subpart in part.get_payload():
                # in the new irfc822 folder restarts at 0
                save_message(output2, subpart, 0)

        else:
            # we're not dealing with an attached e-mail
            # save sub-sections in current folder output
            # irfc822 must then be incremented for each message/rfc822 subpart
            for subpart in part.get_payload():
                # save_message returns the last value of irfc822
                # incremented by 1 if subpart="message/rfc822", not incremented otherwise
                irfc822 = save_message(output, subpart, irfc822)
    else:
        # other cases (not text/plain, not text/html, not multipart)
        # attachment?
        disposition = part.get('Content-Disposition')
        if disposition and disposition.startswith('attachment'):
            save_attachment(output, part)
    # ignore other parts (not text/plain, not text/html, not attachment)
    # return the current value of irfc822 (numbering of attached e-mails stored in the output folder)
    return irfc822
Comments
- lines 33-40: we have handled two possible cases for a message at one end of the initial message tree (no subparts). We still have two cases left to handle:
- lines 43-62: the case where the analyzed part itself contains subparts (part.ismultipart()==True);
- lines 63–68: for the remaining cases, we only handle the case where the analyzed part is an attachment;
We handle this last case. We are again at one end of the initial message (no subparts). We have already encountered two cases of this type: the text/plain and text/html types. We now handle the case of the attached file.
- line 66: the attachment is identified by the key [Content-Disposition];
- line 67: if this key exists and begins with the string [attachment], then we are dealing with an attachment to the message;
- line 68: the attachment is saved in the folder [output];
The function [save_attachment] is as follows:
# safeguarding an attachment
def save_attachment(output: str, part: email.message.Message):
    # name of attached file
    filename = os.path.basename(part.get_filename())

    # the file name can be encoded
    # par exemple =?utf-8?Q?Cours-Tutoriels-Serge-Tah=C3=A9-1568x268=2Ep
    filename = decode_header(filename)
    # save the attached file
    with open(f"{output}/{filename}", "wb") as file:
        file.write(part.get_payload(decode=True))
- line 4: if [part] is an attachment, then the name of the attached file is obtained as [part.get_filename]. We only keep the file name, not its path;
- Line 8: File names are typically encoded in the same way as the message headers. Therefore, the [decode_header] function is used to decode them;
- Line 11: The content of the attached file is currently a string generated by encoding (often Base64) the original file content into text. To retrieve this original content, we use the [part.get_payload(decode=True)] function. The parameter [decode=True] indicates that the content of the attached file must be decoded. This yields a sequence of bytes;
- line 10: this sequence of bytes is saved to the file [output/filename]. The "wb" mode for opening the file stands for "write binary";
Let’s return to the code for the [save_message] function:
def save_message(output: str, email_message: email.message.Message, irfc822=0) -> int:
    # output: message backup folder
    # email_message: the message to be saved
    # irfc822: current numbering of attached e-mails
    #
    # part of the message
    part = email_message
    # les entêtes [From, To, Subject] sont trouvés dans une des parties multipart
    # or in a [text/*] part when there is no [multipart] part
    keys = part.keys()
    # From doit faire partie des entêtes, sinon la partie n'a pas les entêtes qu'on cherche
    if "From" in keys:
        # some headers are recovered
        headers = [f"From: {decode_header(part.get('From'))}",
                   f"To: {decode_header(part.get('To'))}",
                   f"Subject: {decode_header(part.get('Subject'))}",
                   f"Return-Path: {decode_header(part.get('Return-Path'))}",
                   f"User-Agent: {decode_header(part.get('User-Agent'))}",
                   f"Date: {decode_header(part.get('Date'))}"]
        # save headers in a text file
        with codecs.open(f"{output}/headers.txt", "w", "utf-8") as file:
            # writing to file
            string = '\r\n'.join(headers)
            file.write(f"{string}\r\n")

    # part type [part]
    main_type = part.get_content_maintype()
    sub_type = part.get_content_subtype()
    type_of_part = f"{main_type}/{sub_type}"
    # if the message is of type text/plain
    if type_of_part == "text/plain":
        # text message
        save_textmessage(output, part, 0)

    # if the message type is text/html
    elif type_of_part == "text/html":
        # message HTML
        save_textmessage(output, part, 1)

    # if the message is a container of parts
    elif part.is_multipart():
        # special case of attached mail
        if type_of_part == "message/rfc822":
            # create a new output2 folder for attached mail
            irfc822 += 1
            output2 = f"{output}/rfc822_{irfc822}"
            os.mkdir(output2)
            # save irfc822 message subparts in output2
            for subpart in part.get_payload():
                # in the new irfc822 folder restarts at 0
                save_message(output2, subpart, 0)

        else:
            # we're not dealing with an attached e-mail
            # save sub-sections in current folder output
            # irfc822 must then be incremented for each message/rfc822 subpart
            for subpart in part.get_payload():
                # save_message returns the last value of irfc822
                # incremented by 1 if subpart="message/rfc822", not incremented otherwise
                irfc822 = save_message(output, subpart, irfc822)
    else:
        # other cases (not text/plain, not text/html, not multipart)
        # attachment?
        disposition = part.get('Content-Disposition')
        if disposition and disposition.startswith('attachment'):
            save_attachment(output, part)
    # ignore other parts (not text/plain, not text/html, not attachment)
    # return the current value of irfc822 (numbering of attached e-mails stored in the output folder)
    return irfc822
Comments
- We have handled the cases involving the end nodes of the initial message tree: the parts [text/plain, text/html et Content-Disposition=attachment;…] We still need to handle the case where the analyzed part is a container of parts, i.e., it contains subparts [part.is_multipart()==True], line 41. To reach the end nodes of the message tree, we must therefore parse these sub-parts;
- line 43: we handle the case where the analyzed part has type [message/rfc822] in a special way. This is the type of an email. This is therefore the case where an email has another email as an attachment;
The code is as follows:
    # if the message is a container of parts
    elif part.is_multipart():
        # special case of attached mail
        if type_of_part == "message/rfc822":
            # create a new output2 folder for attached mail
            irfc822 += 1
            output2 = f"{output}/rfc822_{irfc822}"
            os.mkdir(output2)
            # save irfc822 message subparts in output2
            for subpart in part.get_payload():
                # in the new irfc822 folder restarts at 0
                save_message(output2, subpart, 0)

        else:
            # we're not dealing with an attached e-mail
            # save sub-sections in current folder output
            # irfc822 must then be incremented for each message/rfc822 subpart
            for subpart in part.get_payload():
                # save_message returns the last irfc822 value
                # incremented by 1 if subpart="message/rfc822", not incremented otherwise
                irfc822 = save_message(output, subpart, irfc822)
…
    return irfc822
- The difference between a [message/rfc822] part and the other multipart parts is that the save directory changes;
- lines 6–8: for the [message/rfc822] part, the save folder becomes that of line 7, [output/rfc822_x], where x is the number of the attached email, 1 for the first, 2 for the second…;
- line 21: for the other multipart parts, the save folder remains the [output] folder of the initial message. The folder is not changed;
- lines 10–12: each sub-part is saved via a recursive call to [save_message]. The third parameter is the index number of the emails encapsulated in [subpart]. Initially, this index is 0;
- line 21: same explanation as for line 12, but the value of the third parameter [irfc822] changes. If there are multiple encapsulated emails in the loop on lines 18–21, they must be stored in […/rfc822-1…/rfc822_2…] folders. Therefore, the third parameter of the [save_message] function must successively take the values 1, 2, 3… To do this, [save_message] sets the value of [irfc822] (line 21).
Let’s take an example and assume that the list of sub-sections on line 18 is [subpart1, subpart2, subpart3, subpart4, subpart5] and that [subpart1, subpart3, subpart5] are attached emails, [subpart2] is a text/plain part, and [subpart4] is an attachment, and that we have not yet encountered an attached email in the message [irfc822=0]. In this case:
- (continued)
- [subpart1] is saved by line 21: the function [saveMessage] is executed with irfc822=0;
- [subpart1] is an email attachment, so irfc822 is set to 1 (line 6 of the code). A folder named [output/irfc822_1] is created. The value returned by [saveMessage(ouput,subpart1,0)] is therefore 1 (line 23);
- [subpart2] is saved by line 21: the function [saveMessage] is executed with irfc822=1;
- [subpart2] is not an email attachment. Therefore, irfc822 remains at 1. This is the value retrieved in line 21;
- [subpart3] is saved by line 21: the function [save_message] is executed with irfc822=1;
- [subpart3] is an email attachment, so irfc822 is set to 2 (line 6 of the code). A folder named [output/irfc822_2] is created. The value returned by [save_message(ouput,subpart1,1)] is therefore 2 (line 21);
- [subpart4] is saved by line 21: the function [save_message] is executed with irfc822=2;
- [subpart4] is not an email attachment. Therefore, irfc822 remains at 2. This is the value retrieved in line 21;
- [subpart5] is saved by line 21: the function [save_message] is executed with irfc822=2;
- [subpart5] is an email with an attachment, so irfc822 changes to 3 (line 6 of the code). A folder named [output/irfc822_3] is created. The value returned by [save_message(ouput,subpart1,2)] is therefore 3 (line 21);
Execution examples
We send 4 emails to [pymail2parlexemple@gmail.com] from: [Gmail, Outlook, em Client, Thunderbird]
- [Gmail]: [https://mail.google.com/];
- [Outlook]: [https://outlook.live.com/owa/];
- [em Client]: [https://www.emclient.com/];
- [Mozilla Thunderbird]: [https://www.thunderbird.net/fr/];
All emails will have the subject [hélène va au marché] and the body text [acheter des légumes]. We want to test how accented characters are rendered.
We read them using the [pop3/02/main] script configured with the following [pop3/02/config] file:
import os


def configure() -> dict:
    # application configuration
    config = {
        # list of mailboxes to be managed
        "mailboxes": [
            # server: server POP3
            # port: server port POP3
            # user: user whose messages are to be read
            # password: your password
            # maxmails: maximum number of e-mails to download
            # timeout: maximum wait time for a server response
            # delete: true if downloaded messages are to be deleted from the server
            # ssl: true if mail is read over a secure link
            # output: the storage folder for downloaded messages

            {
                "server": "pop.gmail.com",
                "port": "995",
                "user": "pymail2parlexemple@gmail.com",
                "password": "#6prD&@1QZ3TG",
                "maxmails": 10,
                "delete": False,
                "ssl": True,
                "timeout": 2.0,
                "output": "output"
            }
        ]
    }
    # absolute path of script folder
    script_dir = os.path.dirname(os.path.abspath(__file__))

    # absolute paths of folders to be included in the syspath
    absolute_dependencies = [
        # local file
        f"{script_dir}/../../shared",
    ]

    # syspath configuration
    from myutils import set_syspath
    set_syspath(absolute_dependencies)

    # we return the configuration
    return config
The result is as follows:
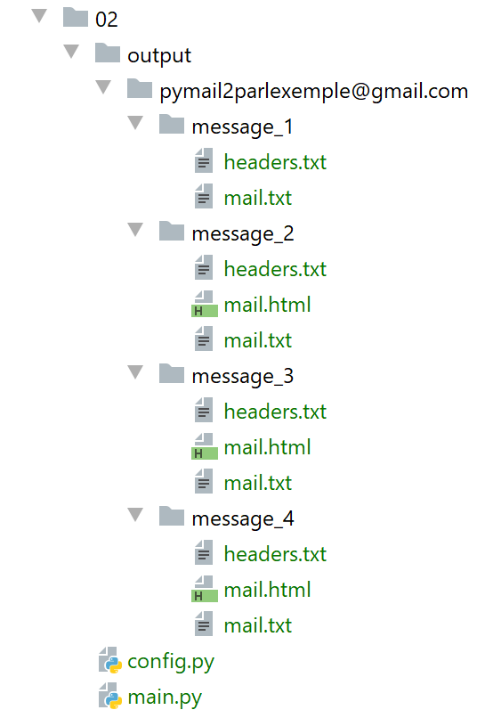
Message 1 is the one sent by Thunderbird:
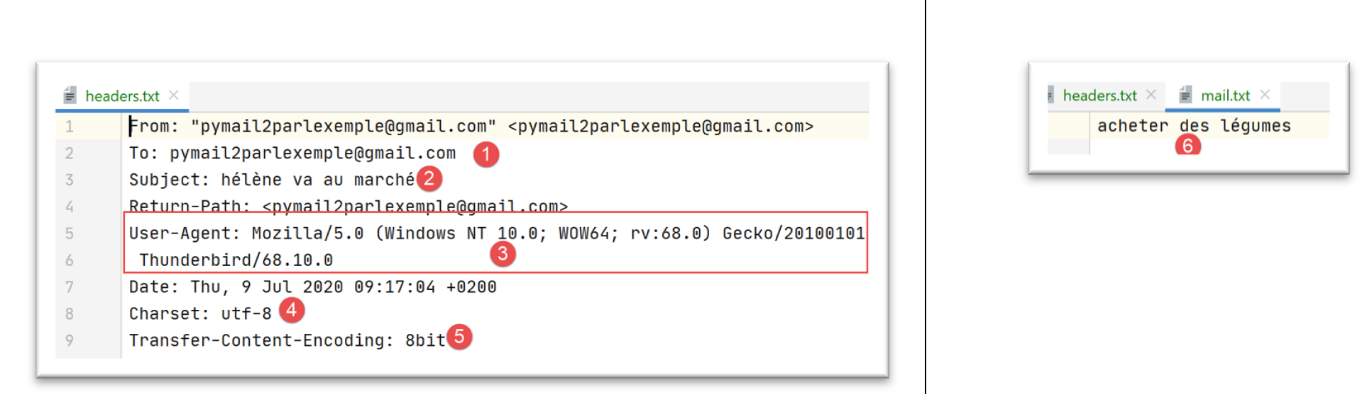
- in [5], Thunderbird [3] uses a [Transfer-Content-Encoding] of type [8bit];
- in [4]: the message is encoded in UTF-8;
Message 2 is the one sent by the email client:
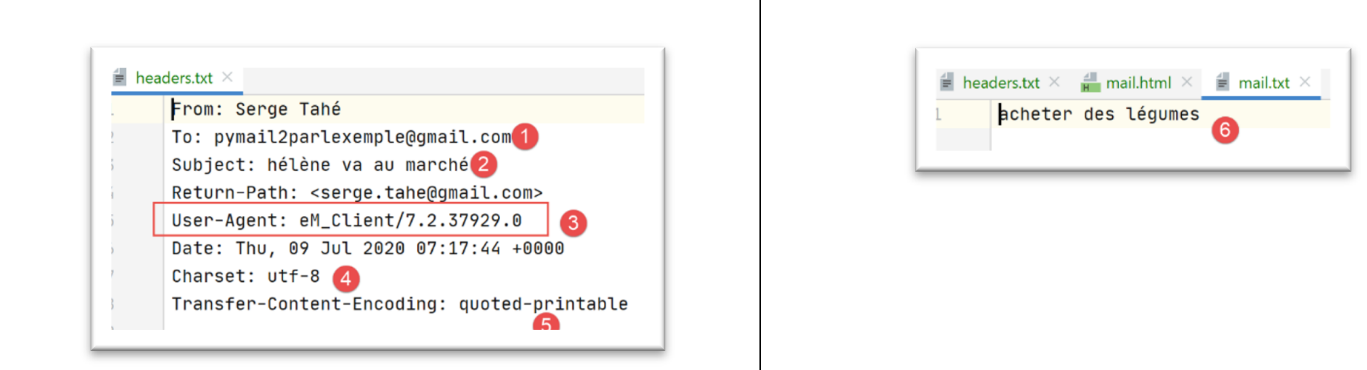

Note that [em Client] encodes the text in UTF-8 [4] and transfers it to [quoted-printable] [5]. It also sent a copy of the message in HTML [7-8]. All the email clients tested here can do this. It is a configuration setting.
Message 3 is the one sent by Gmail:
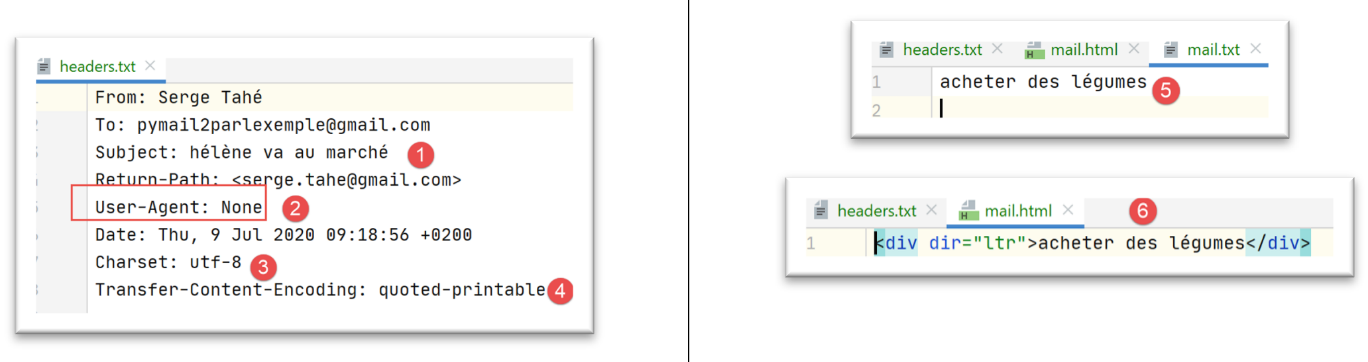
Note that Gmail encodes the text in UTF-8 [3] and transfers it in [quoted-printable] [4]. In [6], the version HTML of the message.
Message 4 is the one sent by Outlook:
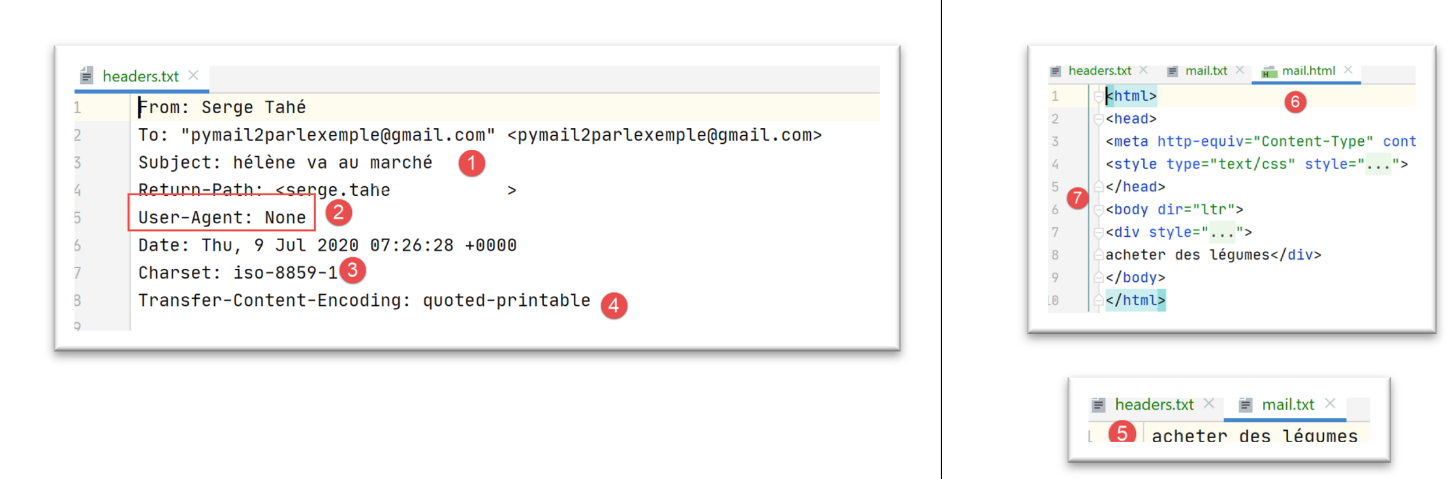
Note that Outlook encodes the text in ISO-8859-1 [3] and transfers it in [quoted-printable] [4].
The previous examples demonstrate two things:
- our [pop3/02] client was functional;
- email clients have different ways of sending an email;
Now let’s look at the attached files. Using Thunderbird, we empty the mailbox of user [pymail2parlexemple@gmail.com]. Then we use the script [smtp/03/main] to send an email with the following configuration: [smtp/03/config]:
import os


def configure() -> dict:
    # application configuration
    script_dir = os.path.dirname(os.path.abspath(__file__))

    return {
        # description: description of the e-mail sent
        # smtp-server: SMTP server
        # smtp-port: server port SMTP
        # from : expéditeur
        # to: recipient
        # subject : mail subject
        # message : mail message
        "mails": [
            {
                "description": "mail to gmail via gmail avec smtplib",
                "smtp-server": "smtp.gmail.com",
                "smtp-port": "587",
                "from": "pymail2parlexemple@gmail.com",
                "to": "pymail2parlexemple@gmail.com",
                "subject": "to gmail via gmail avec smtplib",
                # we test accented characters
                "message": "aglaë séléné\nva au marché\nacheter des fleurs",
                # smtp with authentication
                "user": "pymail2parlexemple@gmail.com",
                "password": "#6prIlhD&@1QZ3TG",
                # here, absolute paths must be set for attached files
                "attachments": [
                    f"{script_dir}/attachments/fichier attaché.docx",
                    f"{script_dir}/attachments/fichier attaché.pdf",
                    f"{script_dir}/attachments/mail attaché 1.eml",
                ]
            }
        ]
    }
- lines 31-33: we attach to the email:
- a Word file;
- a PDF file;
- an email containing the same two attached files;
Once the email is sent, we run the [pop3/02] script to read the mailbox of the user [pymail2parlexemple@gmail.com]. The results are as follows:
- in [1]: the message with its two attached files;
- in [2]: the attached email itself with its two attached files;
Conclusion
The [mail_parser.py] module is particularly complex. This is due to the complexity of the emails themselves. We will reuse this module for the IMAP protocol.
21.7. The IMAP protocol
21.7.1. Introduction
To read emails stored on a mail server, two protocols exist:
- the POP3 protocol (Post Office Protocol), historically the first protocol but rarely used now;
- the IMAP protocol (Internet Message Access Protocol), which is newer than POP3 and currently the most widely used;
To explore the IMAP protocol, we will use the following architecture:
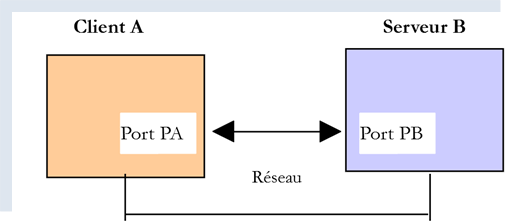
- [Serveur B] will be, depending on the situation:
- a local IMAP server, implemented by the [hMailServer] mail server;
- the [imap.gmail.com:993] server, which is the IMAP server of the [Gmail] mail manager;
- [Client A] will be a Python script using Python modules to manage attachments and to use an encrypted and authenticated connection when required by the IMAP server;
The IMAP protocol goes beyond the POP3 protocol:
- emails are stored on the IMAP server and can be organized into folders;
- The IMAP client can send commands to create, modify, or delete these folders;
Let’s look at an example with Thunderbird. In the following architecture:
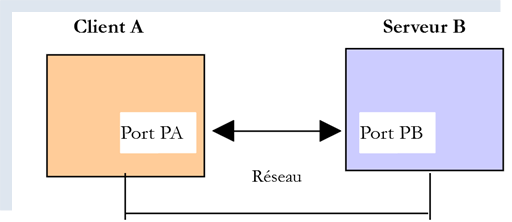
- Thunderbird is client A;
- [imap.gmail.com] is server B (Gmail);
Let’s create a folder in user [pymail2parlexemple@gmail.com]’s emails using Thunderbird:
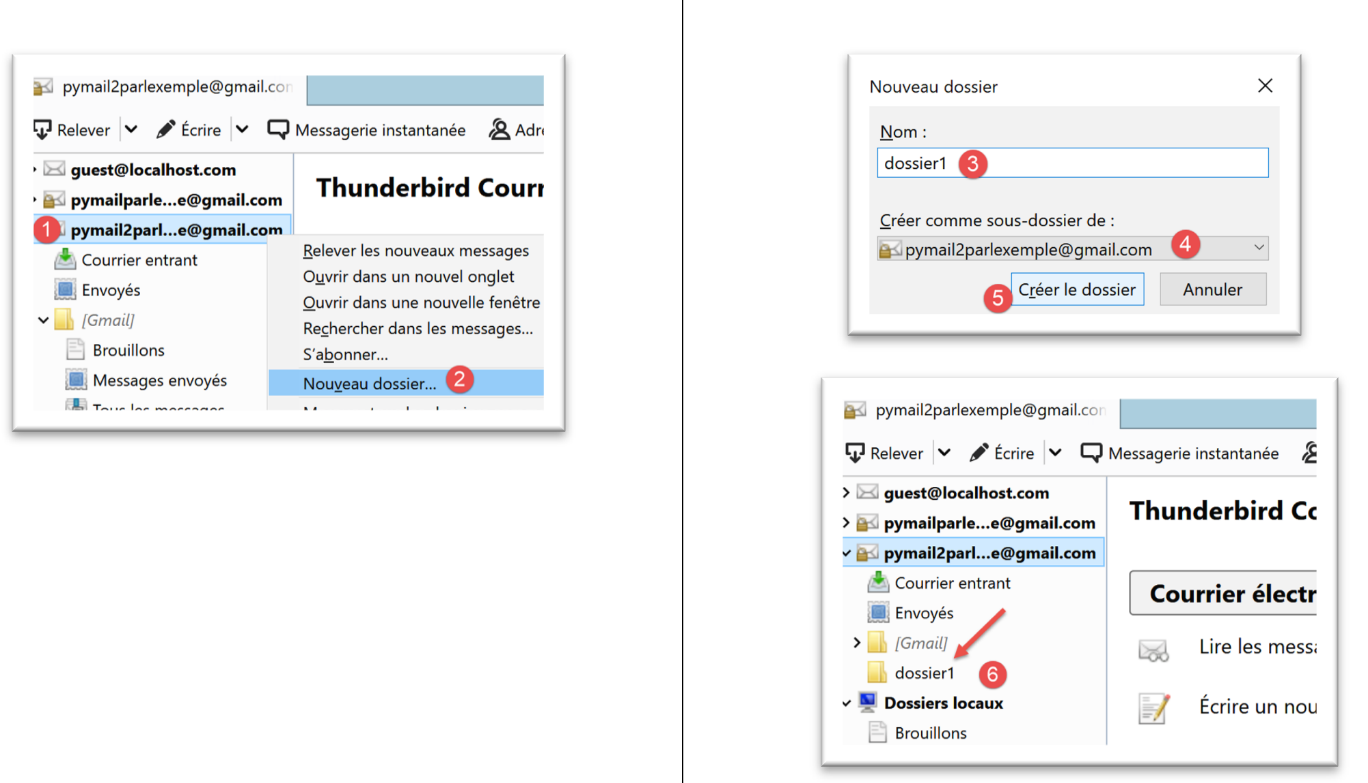
- In [1-6], we create the folder [dossier1];
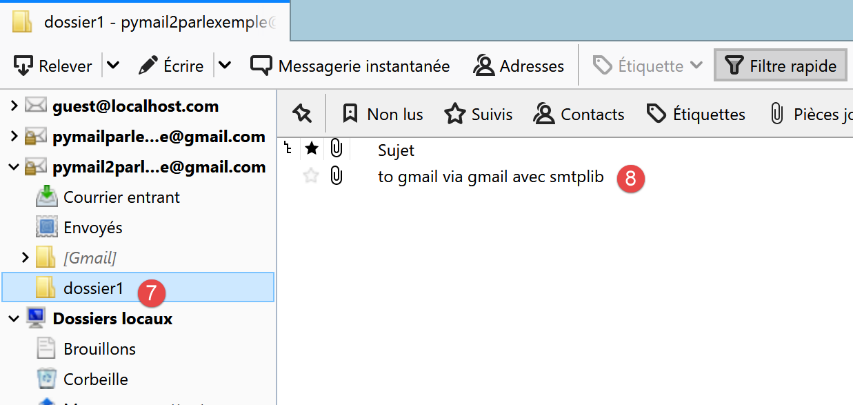
- In [7-8], we move (using the mouse) all files from the [Courrier entrant] folder into the [dossier1] folder;
Now let’s log in to the Gmail website and sign in as user [pymail2parlexemple@gmail.com]:
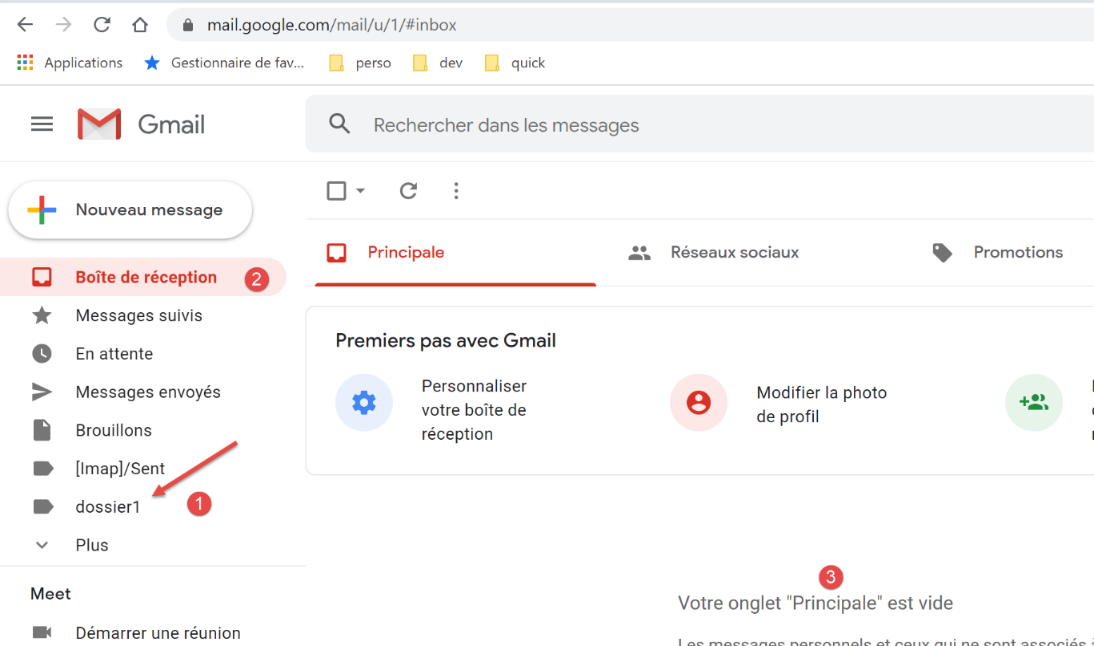
- In [2-3], the inbox is empty;
- In [1], the folder [dossier1] that was created;
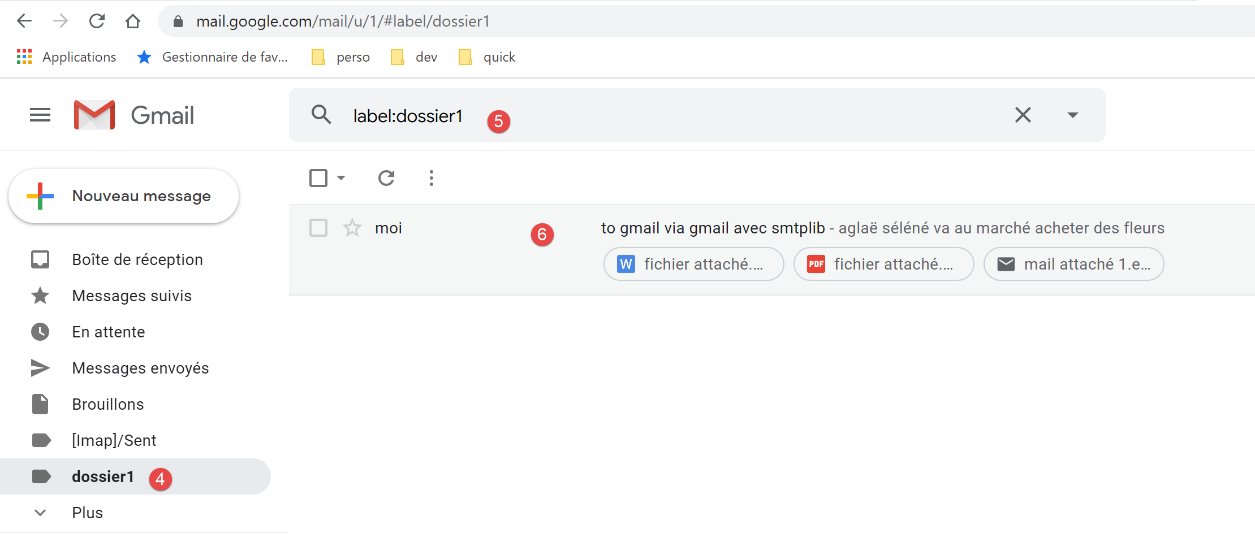
- in [4-6]: the emails that were moved to the [dossier1] folder;
We are looking at the following architecture:
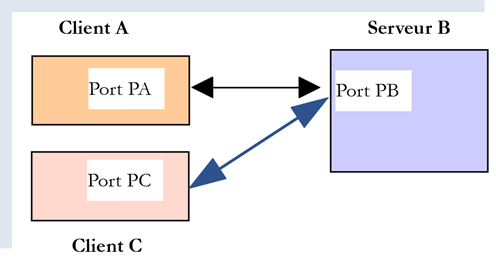
- Client A is the Thunderbird application;
- Client C is the Gmail web application;
- Server B is the Gmail server IMAP;
The user’s folder tree is maintained by the IMAP server. Then all clients and IMAP servers synchronize with it to display the user’s account folders. Here, Thunderbird sent several commands to:
- create the folder [dossier1];
- transfer messages to this folder;
21.7.2. script [imap/main]: client IMAP with module [imaplib]
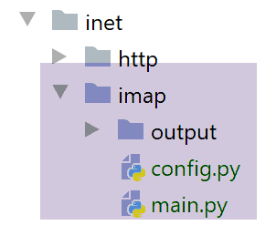
The script [imap/main] is configured by the following script [imap/config]:
import os


def configure() -> dict:
    # application configuration
    config = {
        # list of mailboxes to be managed
        "mailboxes": [
            # server: server IMAP
            # port: server port IMAP
            # user: user whose messages are to be read
            # password: your password
            # maxmails: maximum number of e-mails to download
            # timeout: maximum wait time for a server response
            # delete: true if downloaded messages are to be deleted from the server
            # ssl: true if mail is read over a secure link
            # output: the storage folder for downloaded messages

            {
                "server": "imap.gmail.com",
                "port": "993",
                "user": "pymail2parlexemple@gmail.com",
                "password": "#6prIlhD&@1QZ3TG",
                "maxmails": 10,
                "ssl": True,
                "timeout": 2.0,
                "output": "output"
            }
        ]
    }
    # absolute path of script folder
    script_dir = os.path.dirname(os.path.abspath(__file__))

    # absolute paths of folders to be included in the syspath
    absolute_dependencies = [
        # local file
        f"{script_dir}/../shared",
    ]

    # syspath configuration
    from myutils import set_syspath
    set_syspath(absolute_dependencies)

    # we return the configuration
    return config
Comments
- lines 8–29: the key [mailboxes] is associated with the list of mailboxes to check;
- line 20: the server IMAP;
- line 21: its service port;
- lines 22-23: the user whose emails you want to read;
- line 24: the maximum number of emails to retrieve;
- line 25: indicates whether to establish a secure connection with the IMAP server (True) or not (False);
- line 26: the maximum timeout for waiting for a response from the server;
- line 27: folder for saving the read emails;
The [imap/main] script is as follows:
# imports
import email
import imaplib
import os
import shutil


# -----------------------------------------------------------------------

def readmails(mailbox: dict):
    …


# main ----------------------------------------------------------------
#  IMAP client for reading e-mails

# retrieve application configuration
import config
config = config.configure()

# we process mailboxes one by one
for mailbox in config['mailboxes']:
    try:
        # console display
        print("----------------------------------")
        print(
            f"Lecture de la boîte mail POP3 {mailbox['user']} / {mailbox['server']}:{mailbox['port']}")
        # mailbox reading
        readmails(mailbox)
        # end
        print("Lecture terminée...")
    # except BaseException as error:
    #     # error is displayed
    #     print(f "The following error has occurred: {error}")
    finally:
        pass
Comments
- lines 14-36: we see the same approach as in the |pop3/02/main| script;
The [readmails] function is as follows:
def readmails(mailbox: dict):
    # we let the exceptions rise
    #
    # mail parser module
    from mail_parser import save_message

    # retrieve configuration information
    output = mailbox['output']
    user = mailbox['user']
    password = mailbox['password']
    timeout = mailbox['timeout']
    server = mailbox['server']
    port = int(mailbox['port'])
    maxmails = mailbox['maxmails']
    ssl = mailbox['ssl']
    #
    # here we go
    imap_resource = None
    try:
        # create storage folders if they don't exist
        if not os.path.isdir(output):
            os.mkdir(output)
        # user
        dir2 = f"{output}/{user}"
        # delete the [dir2] folder if it exists, then recreate it
        if os.path.isdir(dir2):
            # delete
            shutil.rmtree(dir2)
        # creation
        os.mkdir(dir2)
        # server connection IMAP
        if ssl:
            imap_resource = imaplib.IMAP4_SSL(server, port)
        else:
            imap_resource = imaplib.IMAP4(server, port)
        # customer communication timeout
        sock = imap_resource.socket()
        sock.settimeout(timeout)
        # authentication
        imap_resource.login(user, password)
        # select folder INBOX (incoming mail)
        imap_resource.select('INBOX')
        # retrieve all messages in this folder: criterion ALL
        # no particular encoding : None
        typ1, data1 = imap_resource.search(None, 'ALL')
        # print(f"typ={typ1}, data={data1}")

        # data1[0] is an array of bytes containing the numbers of all messages separated by a space
        nums = data1[0].split()
        imail = 0
        fini = imail >= maxmails or imail >= len(nums)
        # we read your e-mails one by one
        while not fini:
            # num is a message number in binary
            num = nums[imail]
            # print(f "message n° {num}")

            # retrieve msg n° num
            typ2, data2 = imap_resource.fetch(num, '(RFC822)')
            # print(f"type={typ2}, data={data2}")

            # data is a list containing tuples, in this case a single tuple
            # data[0] is the tuple, dataQZXW2HTMLBWzBdZQXQZXW2HTMLBWzFdZQX is the second element of the tuple
            # dataQZXW2HTMLBWzBdZQXQZXW2HTMLBWzFdZQX contains a sequence of bytes representing all the lines in the message
            # message means message text + all attached files

            # the message is retrieved as type email.message.Message
            message = email.message_from_bytes(data2[0][1])
            # message folder
            dir3 = f"{dir2}/message_{int(num)}"
            # if the folder doesn't exist, we create it
            if not os.path.isdir(dir3):
                os.mkdir(dir3)
            # save it
            save_message(dir3, message)
            # next message
            imail += 1
            fini = imail >= maxmails or imail >= len(nums)
    finally:
        if imap_resource:
            # close the mailbox connection
            imap_resource.close()
            # disconnect from server IMAP
            imap_resource.logout()
Comments
- lines 7–15: retrieve the configuration settings;
- lines 19, 79: the code is controlled by a try/finally block. Exceptions are therefore not caught (no except clause), so they are passed up to the calling code, which catches and displays them;
- lines 23–30: create the folder for saving emails;
- lines 31–35: we connect to the IMAP server. The class used differs depending on whether we are dealing with a secure IMAP server (IMAP4_SSL) or a non-secure one (IMAP4);
- lines 36–38: Set the client/server communication timeout;
- lines 39-40: authenticate with the IMAP server;
- lines 41-42: we saw that a user’s mailbox IMAP can be organized into folders. The folder [INBOX] is the inbox. To select the folder [dossier1], we would write [imapResource.select('dossier1')];
- lines 43–45: we request a list of all messages found in [INBOX]:
- the first parameter of [imapResource.search] is an encoding type. [None] means "no encoding filter";
- The second parameter is a filter. There are different ways to express this. The filter [ALL] means that we want all messages in the folder;
The result of [imapResource.search] looks like this:
typ=OK, data=[b'1 2']
[data] is a list containing the message numbers retrieved. These are in binary. Above, two messages were found in the folder [INBOX];
- line 49: we retrieve the message numbers. Above, we will have the list [b'1' b'2'], a list of numbers encoded in binary;
- lines 53–78: we will loop through to read the messages in the [INBOX] folder;
- lines 54-55: message number;
- lines 58-59: message number [num] is requested from the server IMAP;
- the first parameter is the number of the desired message;
- the second parameter is a string "(part1)(part2)…" where [parti] is the name of a part of the message. I haven’t looked into this further. The name (RFC822) refers to the entire email;
We receive something in the following format:
type=OK, data=[(b'1 (RFC822 {614}', b'Return-Path: guest@localhost\r\nReceived: from [127.0.0.1] (localhost [127.0.0.1])\r\n\tby DESKTOP-528I5CU with ESMTPA\r\n\t; Tue, 17 Mar 2020 09:41:50 +0100\r\nTo: guest@localhost\r\nFrom: "guest@localhost" <guest@localhost>\r\nSubject: test\r\nMessage-ID: <2572d0f0-5b7c-2c31-5a70-c628293d5709@localhost>\r\nDate: Tue, 17 Mar 2020 09:41:48 +0100\r\nUser-Agent: Mozilla/5.0 (Windows NT 10.0; WOW64; rv:68.0) Gecko/20100101\r\n Thunderbird/68.6.0\r\nMIME-Version: 1.0\r\nContent-Type: text/plain; charset=utf-8; format=flowed\r\nContent-Transfer-Encoding: 8bit\r\nContent-Language: fr\r\n\r\nh\xc3\xa9l\xc3\xa8ne est all\xc3\xa9e au march\xc3\xa9 acheter des l\xc3\xa9gumes.\r\n\r\n'), b')']
The element [data] is a list with one element, and that single element is a tuple of three elements:
data = [
    (b'1 (RFC822 {614}',
     b'Return-Path: guest@localhost\r\nReceived: from [127.0.0.1] (localhost [127.0.0.1])\r\n\tby DESKTOP-528I5CU with ESMTPA\r\n\t; Tue, 17 Mar 2020 09:41:50 +0100\r\nTo: guest@localhost\r\nFrom: "guest@localhost" <guest@localhost>\r\nSubject: test\r\nMessage-ID: <2572d0f0-5b7c-2c31-5a70-c628293d5709@localhost>\r\nDate: Tue, 17 Mar 2020 09:41:48 +0100\r\nUser-Agent: Mozilla/5.0 (Windows NT 10.0; WOW64; rv:68.0) Gecko/20100101\r\n Thunderbird/68.6.0\r\nMIME-Version: 1.0\r\nContent-Type: text/plain; charset=utf-8; format=flowed\r\nContent-Transfer-Encoding: 8bit\r\nContent-Language: fr\r\n\r\nh\xc3\xa9l\xc3\xa8ne est all\xc3\xa9e au march\xc3\xa9 acheter des l\xc3\xa9gumes.\r\n\r\n'),
    b')'
]
The second element of this tuple is a binary string representing the entire requested message. The elements above are the same as those presented when studying the [mail_parser] module.
data[0] represents a two-element tuple. data[0][1] represents the lines of the message in binary form.
- Line 68: The function [taxpayers[slice(10,12)]] constructs an object of type [email.message.Message] from the lines of the message. The type [email.message.Message] is the parameter type of the [mail_parser] module that we wrote earlier;
- lines 69–73: we create the save folder for message no. [num];
- line 75: we call the function [save_message] from the module [mail_parser] on line 5. This function was described in the section |pop3/02/main|;
- lines 76–78: we loop back to process the next message;
- lines 79-84: whether there was an error or not:
- line 82: the connection to the queried folder is closed;
- line 84: we disconnect from the IMAP server;
The results obtained are identical to those obtained with the [pop3/02/main] script. This is normal since the same [mail_parser] mail parser is used.