2. Setting up a working environment
The scripts were written and tested in the following environment:
- an Apache web server environment / SGBD MySQL / PHP 7.3 called Laragon;
- the IDE development environment Netbeans 10.0;
2.1. Installing Laragon
Laragon is a package that combines several software components:
- an Apache web server. We will use it to write web scripts in PHP;
- SGBD MySQL;
- the PHP scripting language;
- a Redis server implementing a cache for web applications:
Laragon can be downloaded (March 2019) at the following address:
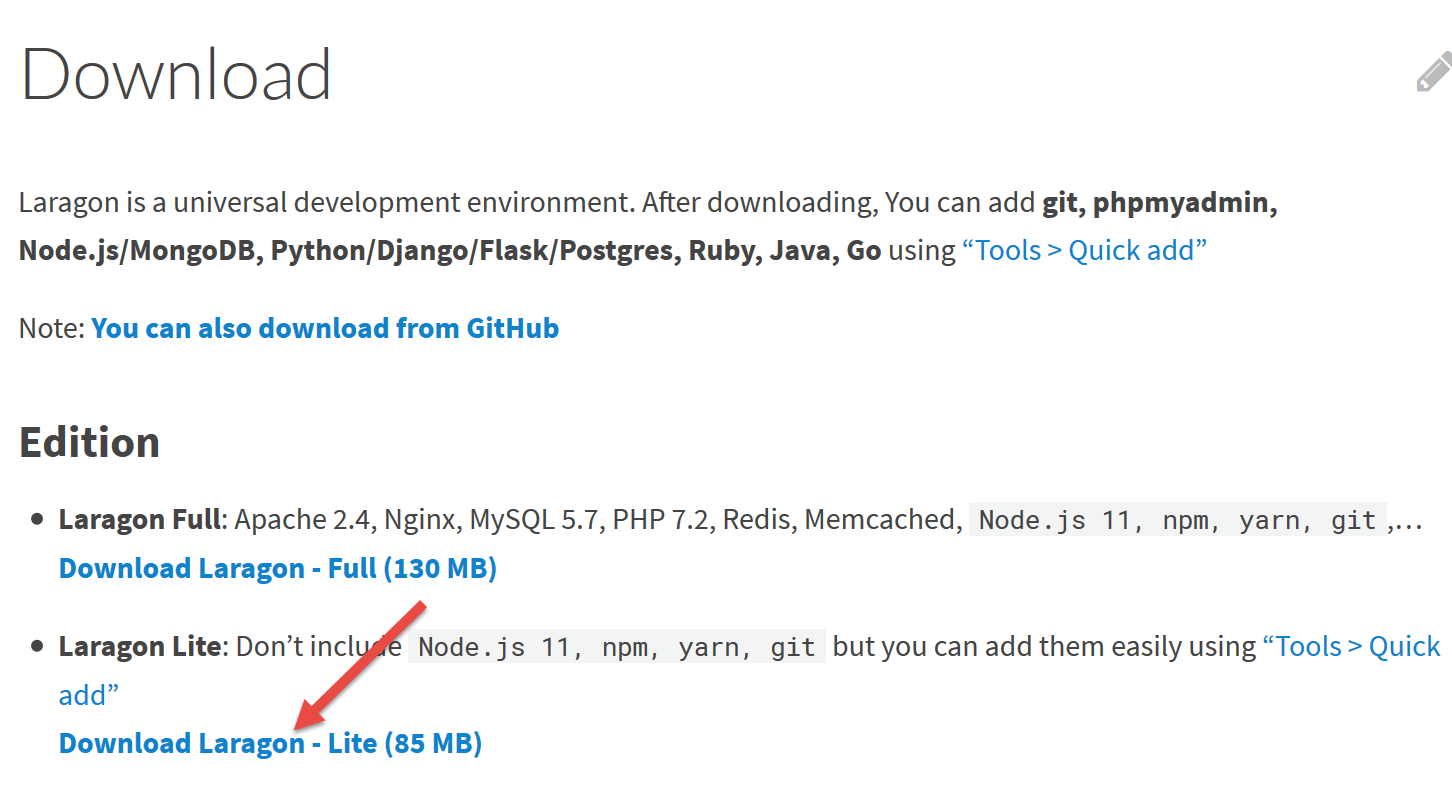
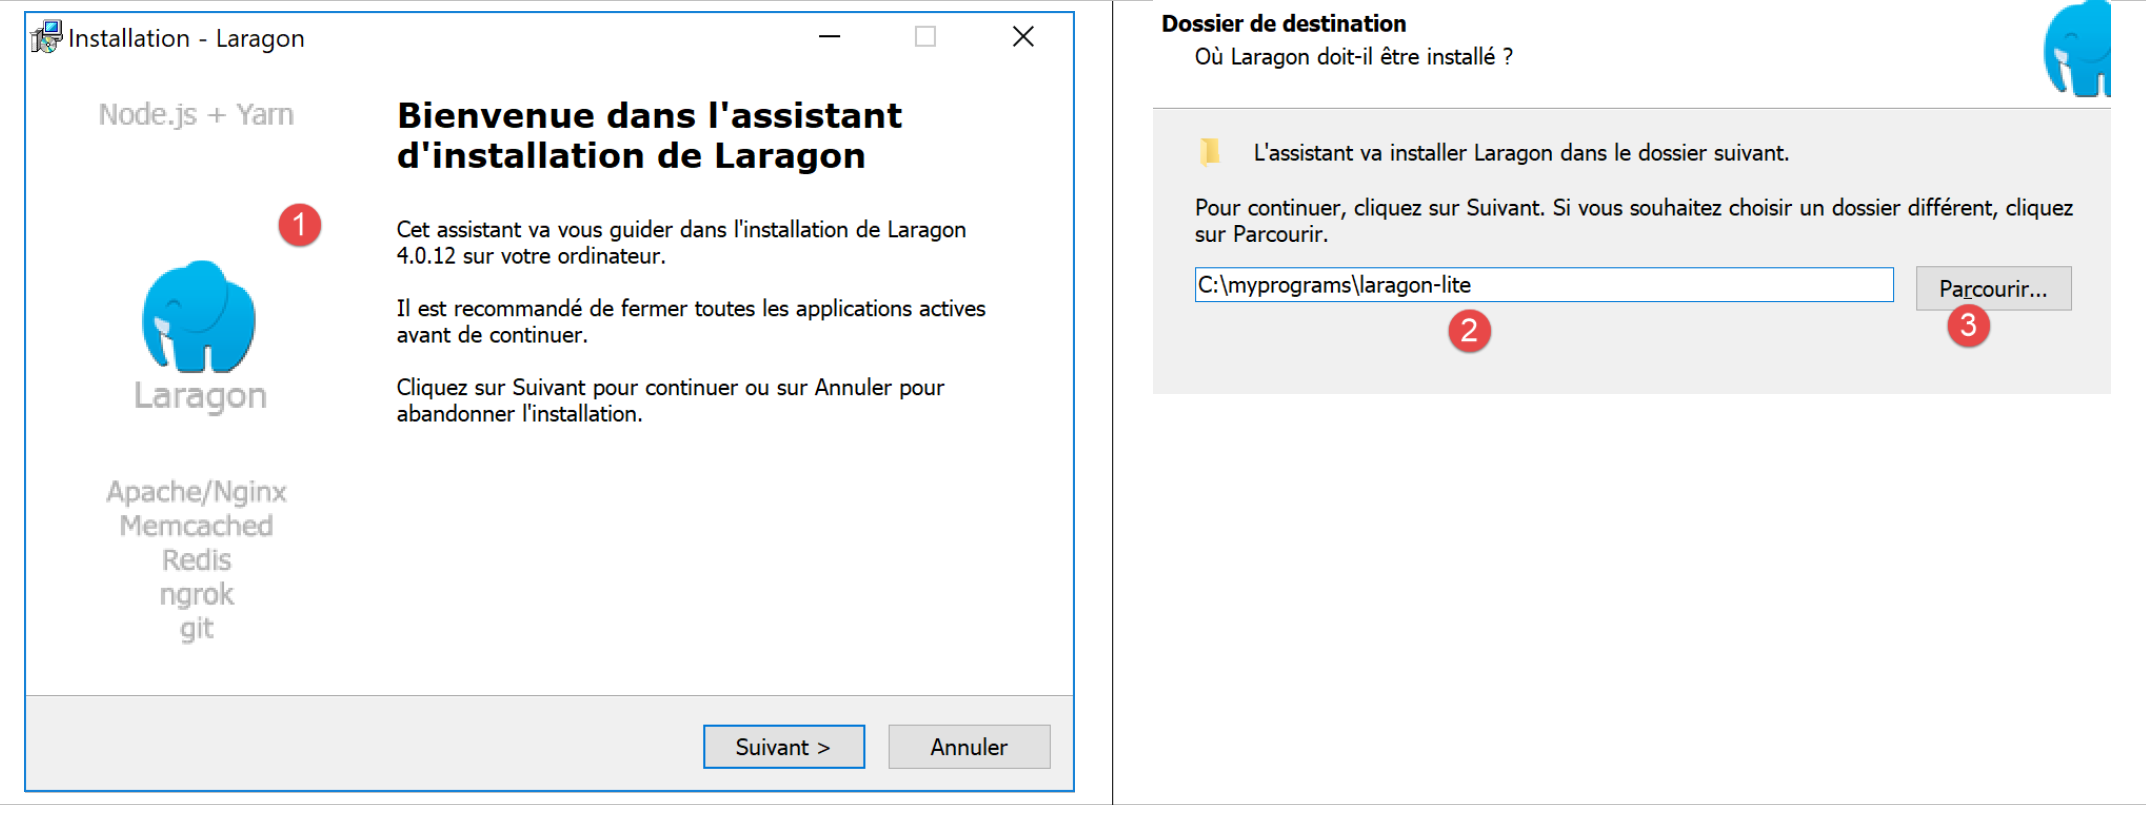
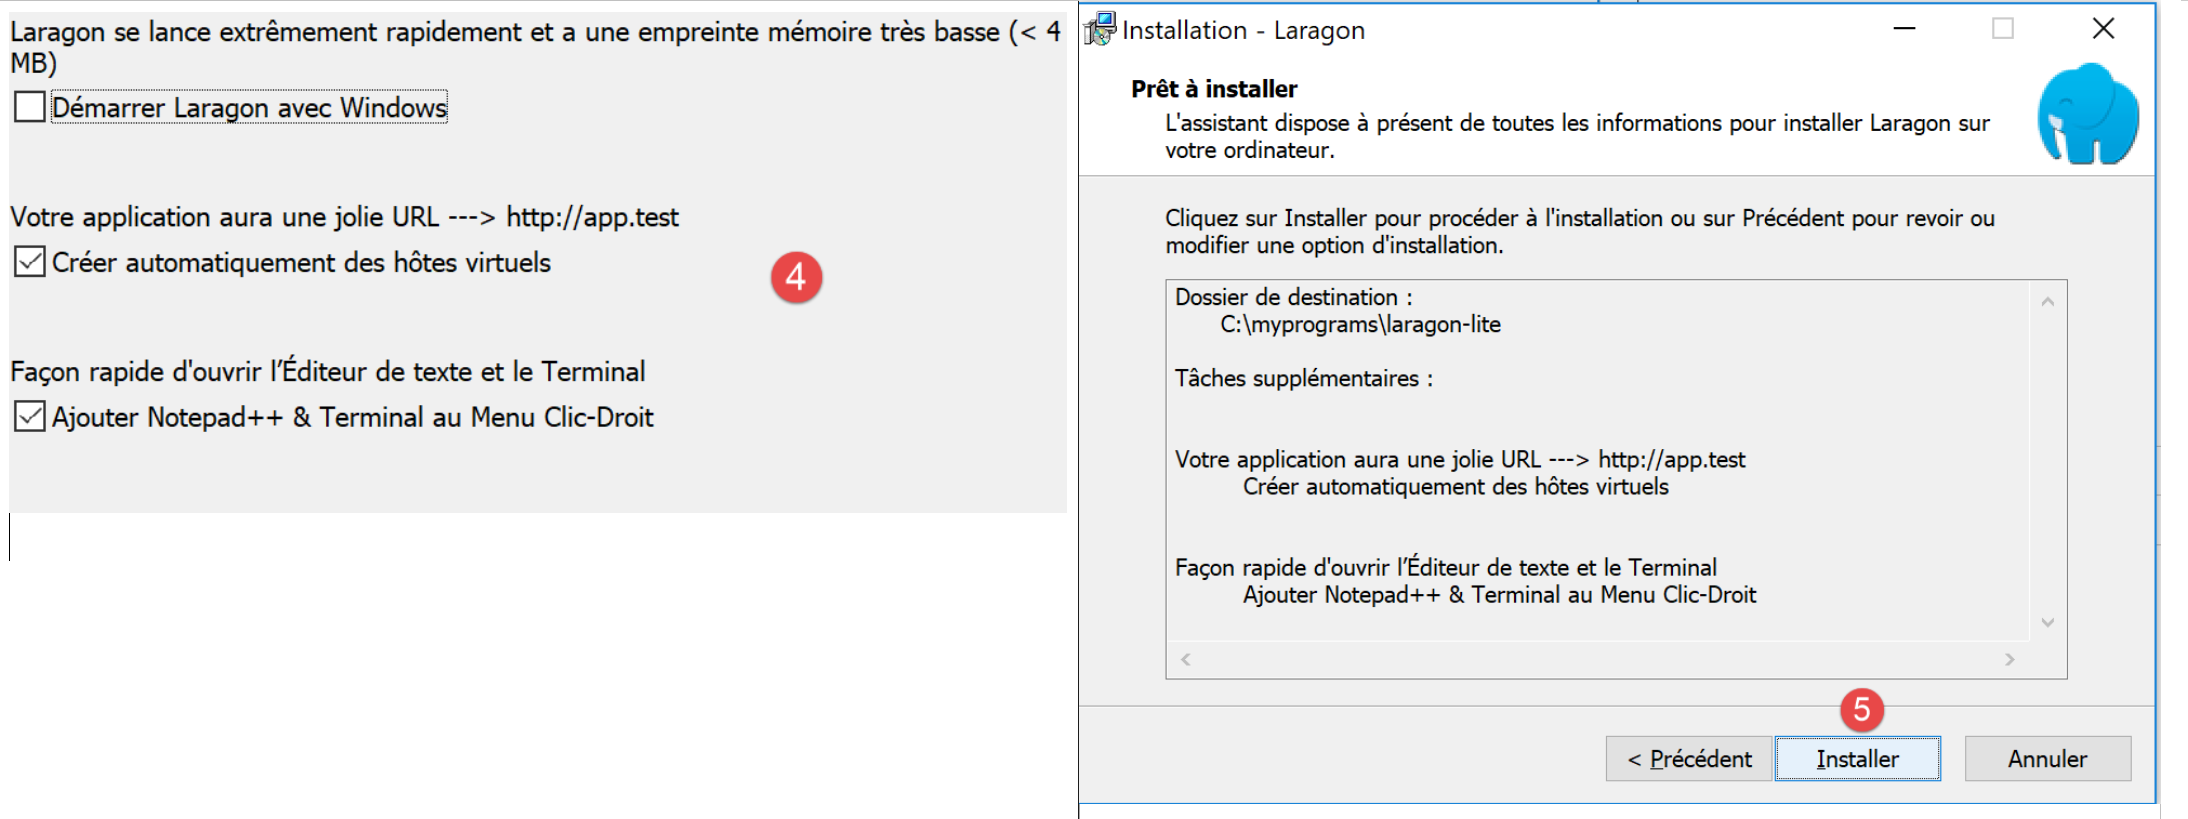
- the installation [1-5] creates the following directory structure:
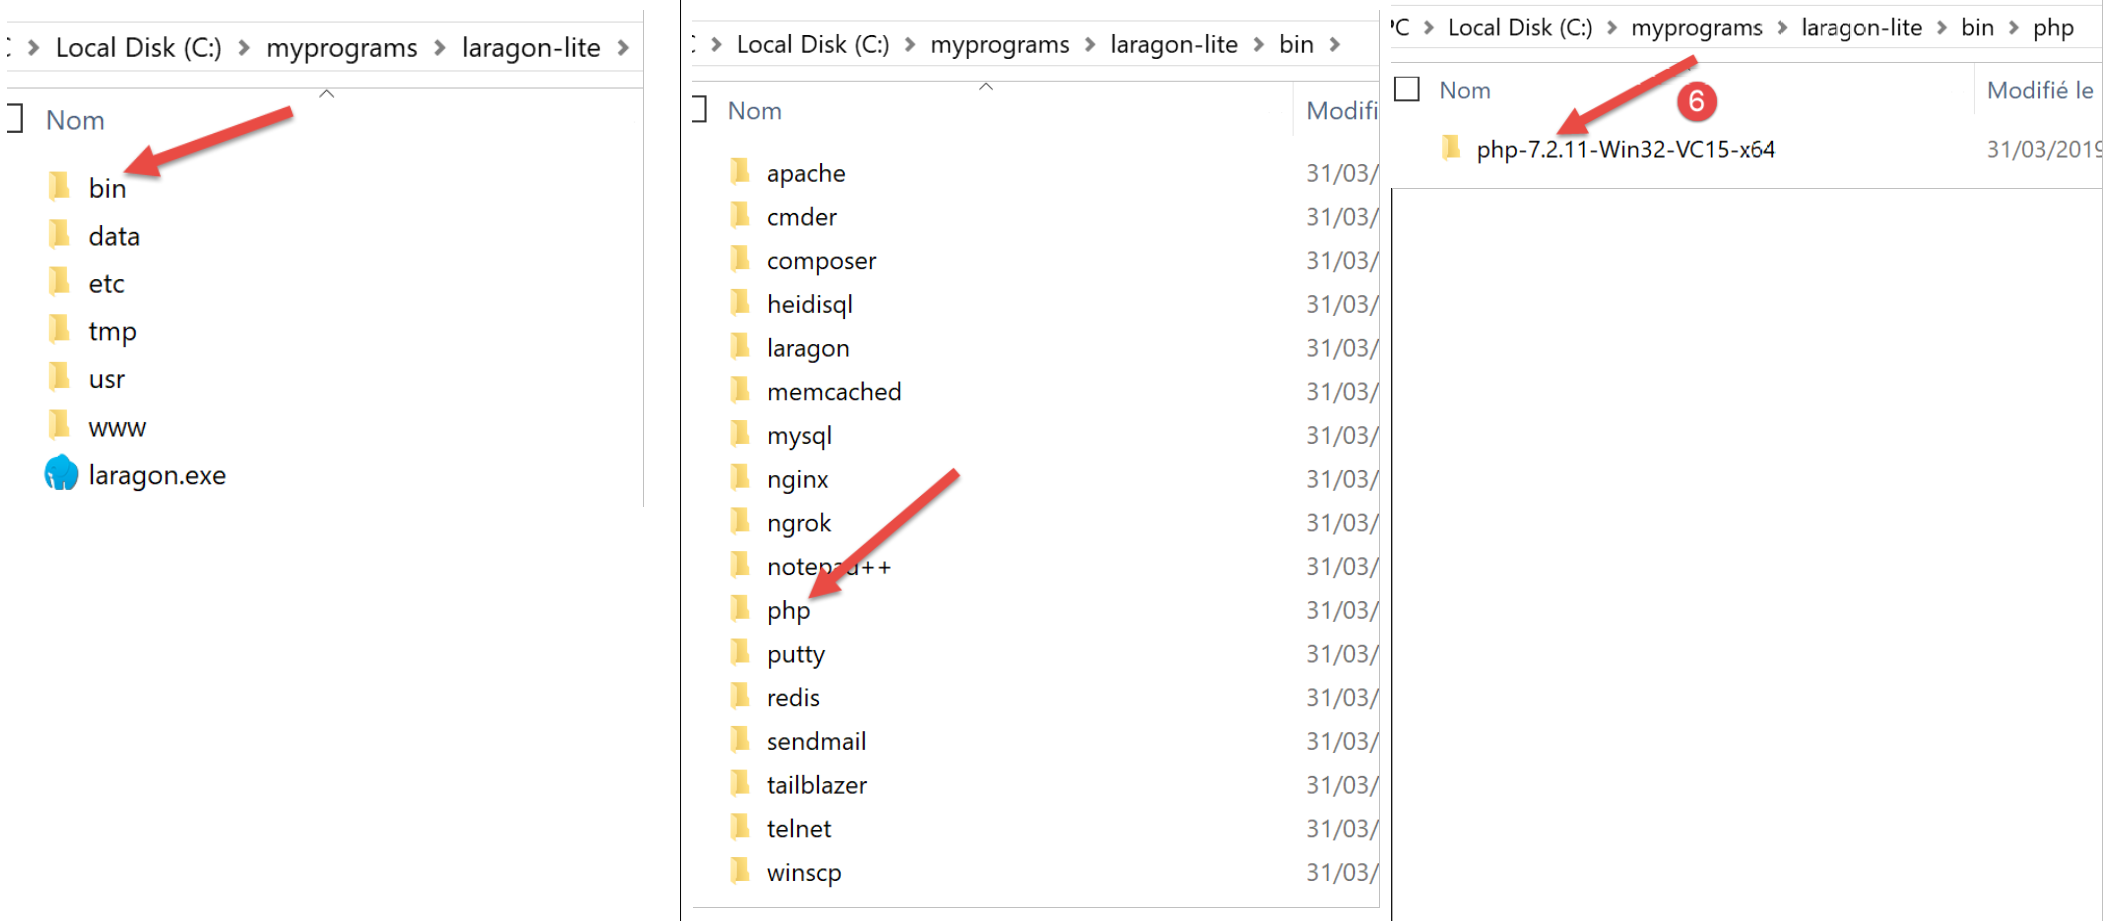
- in [6], the installation folder for PHP;
Launching [Laragon] displays the following window:
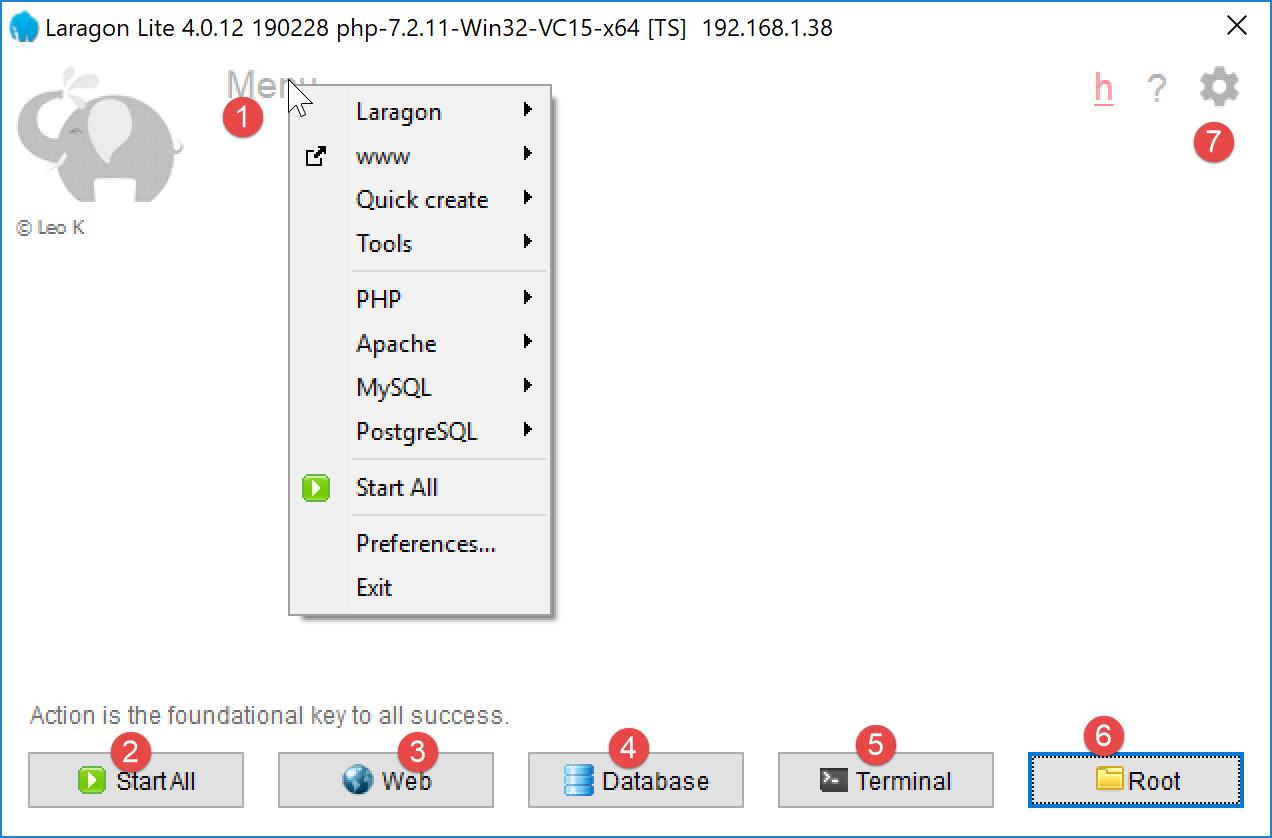
- [1]: the Laragon main menu;
- [2]: the [Start All] button launches the Apache web server and the SGBD MySQL;
- [3]: the [WEB] button displays the [http://localhost] web page, which corresponds to the PHP [<laragon>/www/index.php] file, where <laragon> is the Laragon installation folder;
- [4]: The [Database] button allows you to manage SGBD and MySQL using the [phpMyAdmin] tool. You must install this tool first;
- [5]: The [Terminal] button opens a command prompt;
- [6]: The [Root] button opens a Windows Explorer window positioned on the [<laragon>/www] folder, which is the root of the [http://localhost] website. This is where you should place all web applications managed by Laragon’s Apache server;
Let’s open a Laragon terminal [5]:
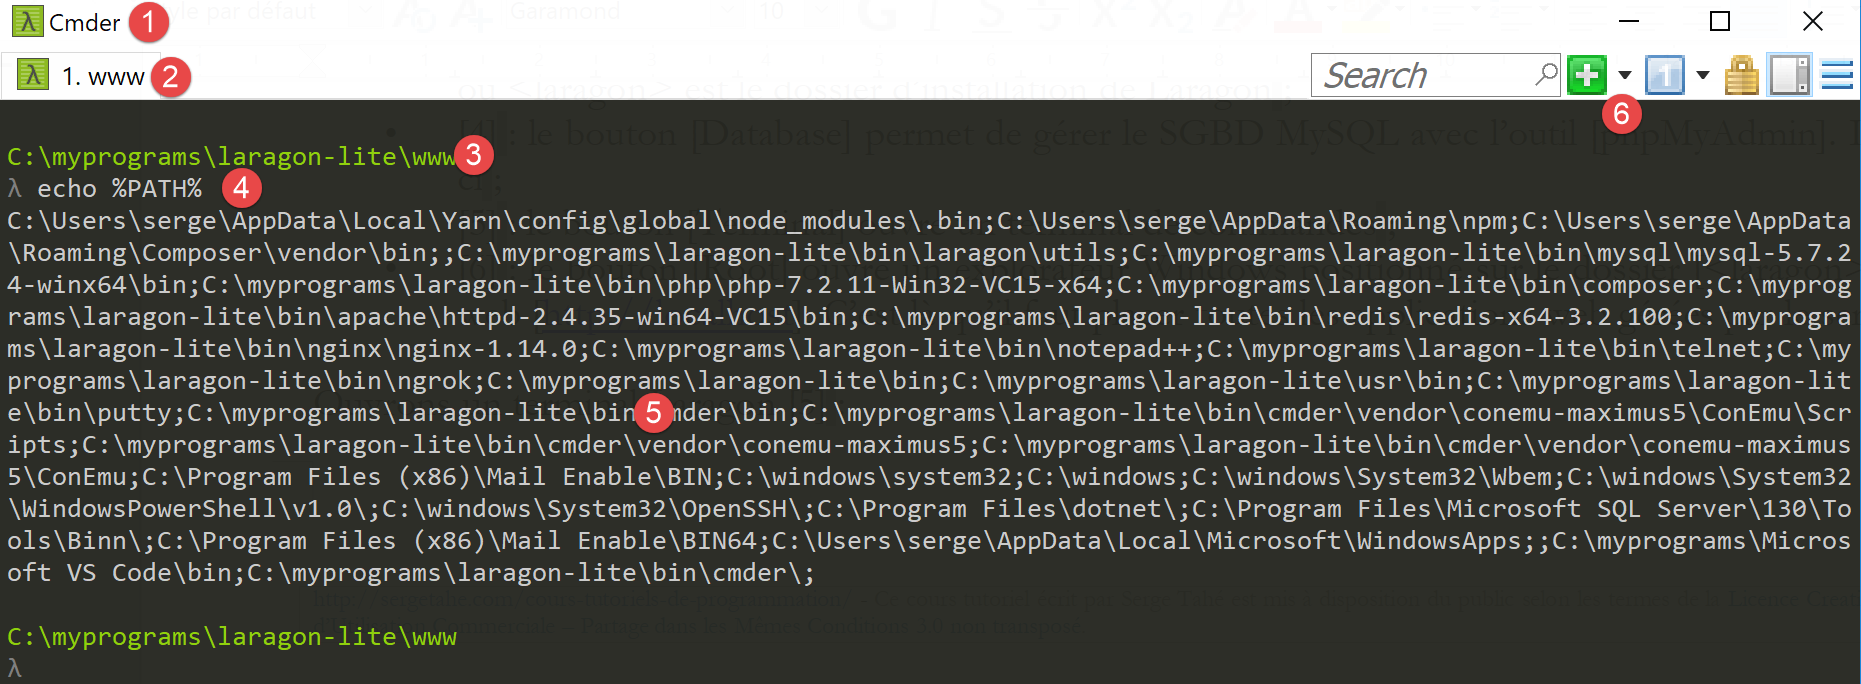
- in [1], the terminal type. Three types of terminals are available in [6];
- in [2, 3]: the current directory;
- In [4], type the command [echo %PATH%] to display the list of folders searched when looking for an executable. All of Laragon’s main folders are included in this executable path, which would not be the case if you opened a [cmd] command window in Windows. In this document, when you are asked to type commands to install a particular piece of software, these commands are generally typed in a Laragon terminal;
2.2. Installing IDE Netbeans 10.0
IDE Netbeans 10.0 can be downloaded from the following address (March 2019):
https://netbeans.apache.org/download/index.HTML
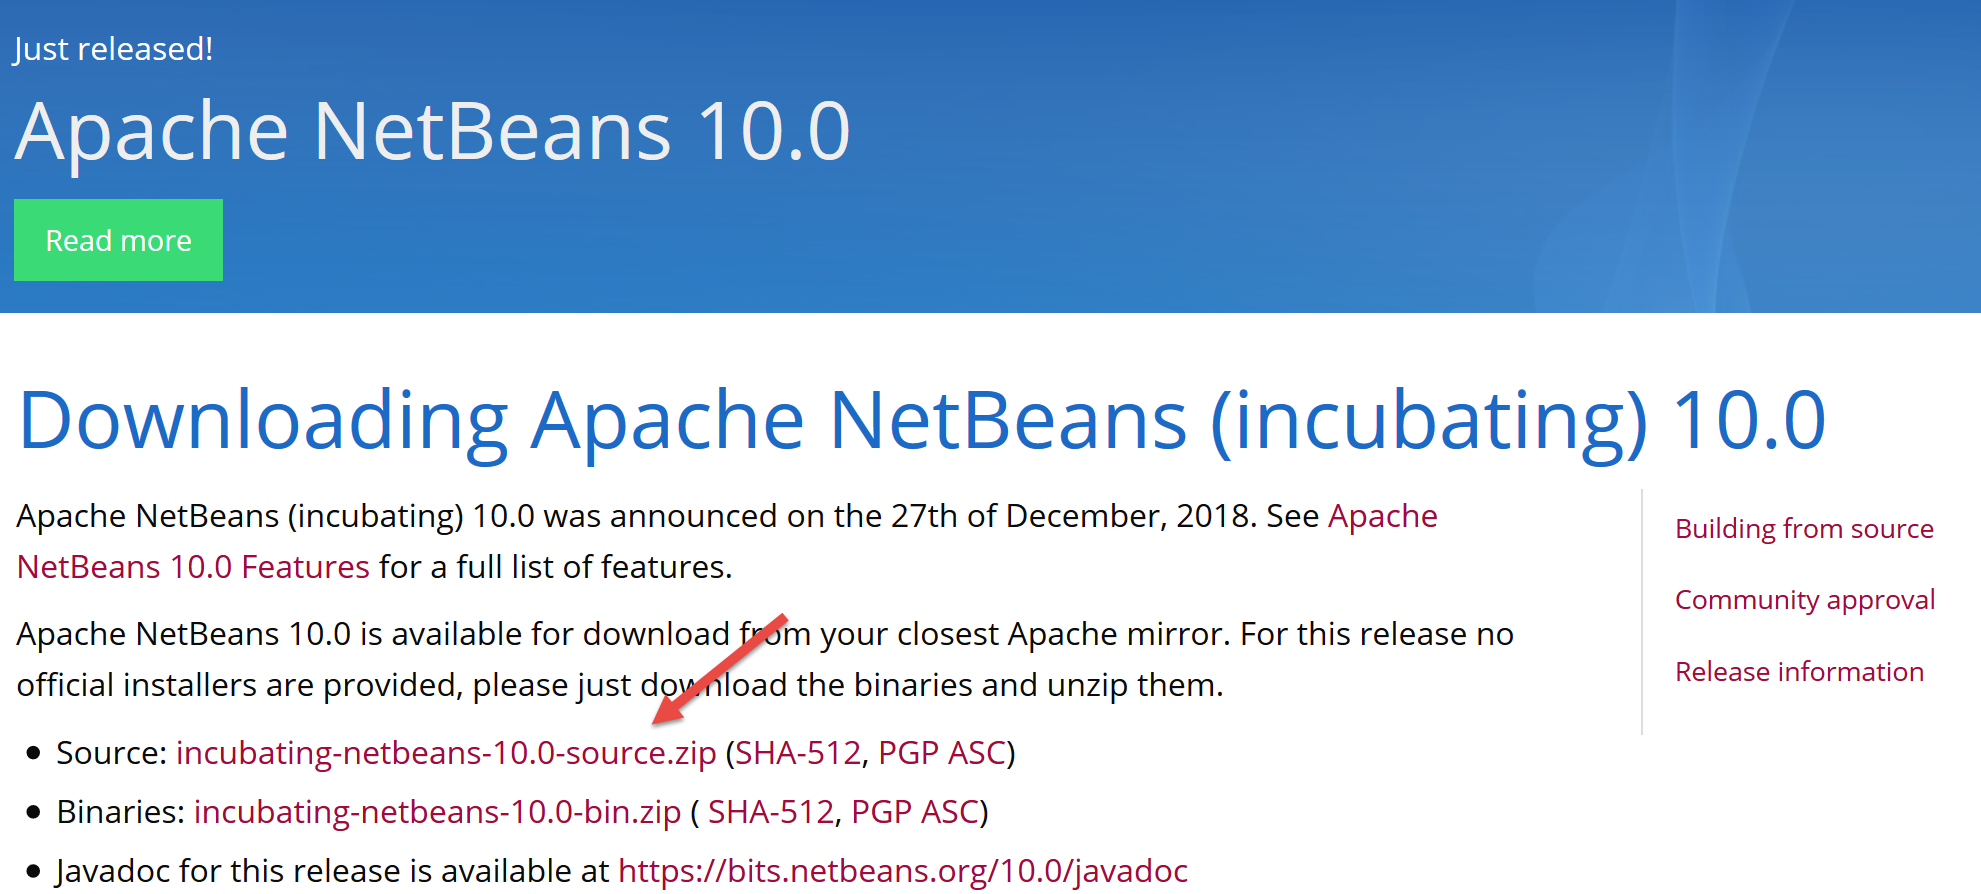
The downloaded file is a ZIP file that simply needs to be unzipped. Once Netbeans is installed and launched, you can create your first PHP project.
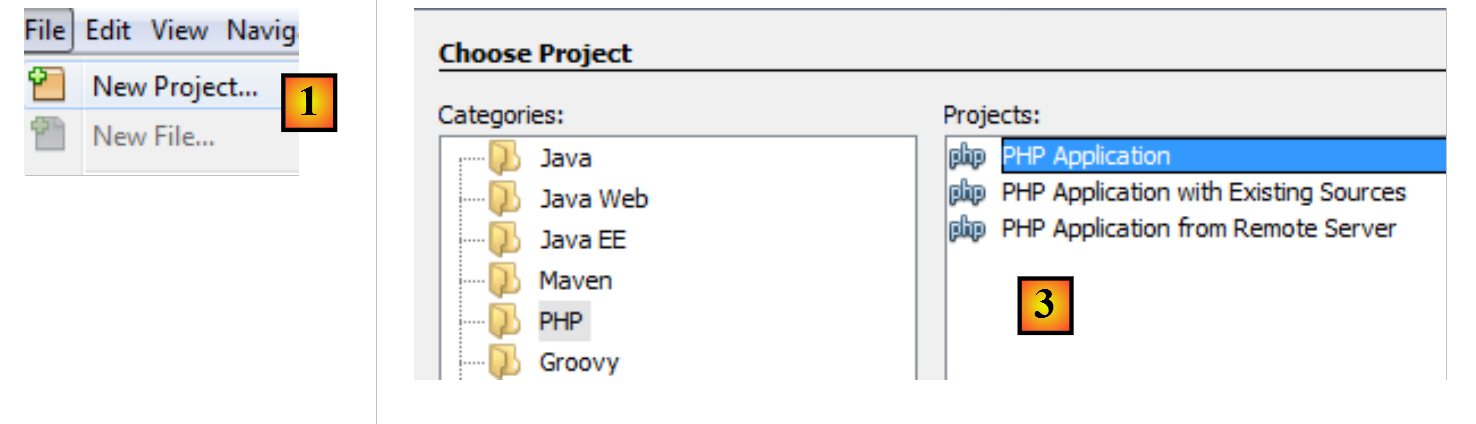
- In [1], select File / New Project;
- In [2], select the [PHP] category;
- In [3], select the project type [PHP Application];
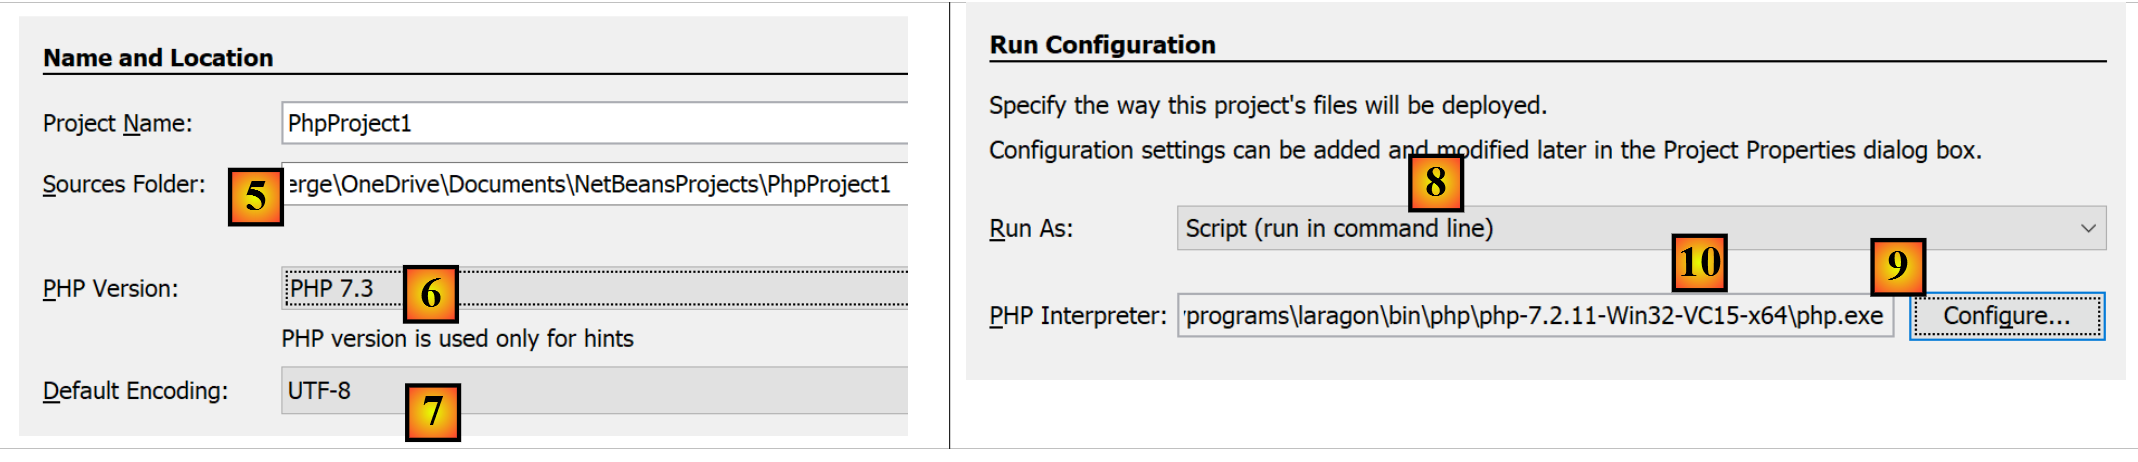
- In [4], name the project;
- in [5], choose a folder for the project;
- in [6], select the version file downloaded from PHP;
- In [7], select UTF-8 encoding for the PHP files;
- In [8], select [Script] mode to run PHP scripts in command-line mode. Select [Local WEB Server] to run a PHP script in a web environment;
- In [9,10], specify the installation directory for the PHP interpreter from the Laragon package:
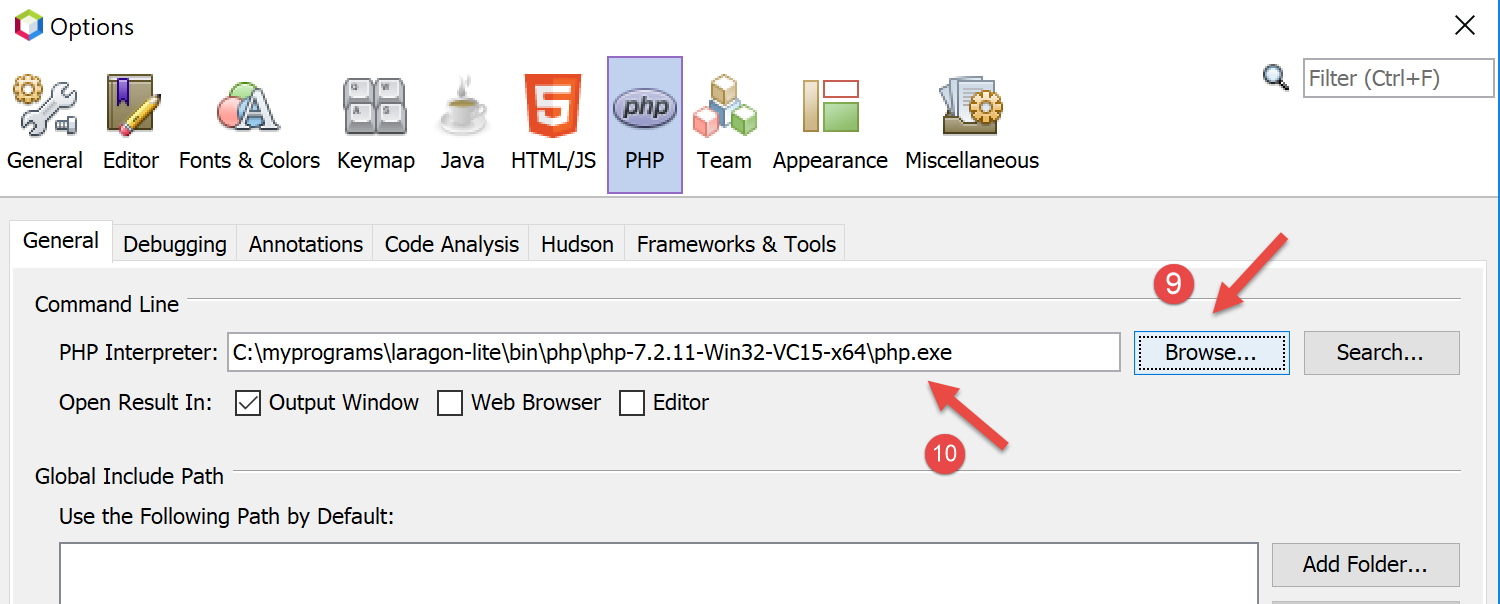
- Select [Finish] to complete the PHP project creation wizard;
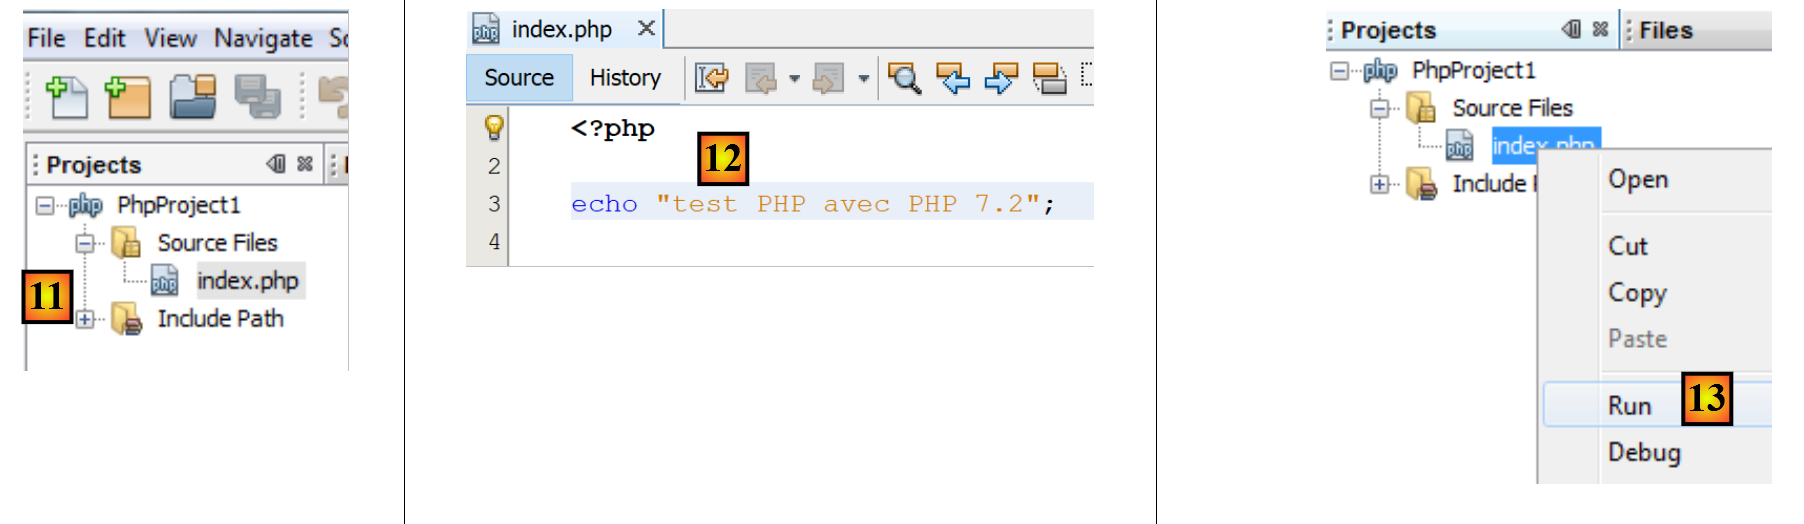
- In [11], the project is created with a script [index.php];
- in [12], a minimal PHP script is written;
- in [13], we run [index.php];

- In [14], the results from Netbeans are displayed in the [output] window;
- In [15], a new script is created;
- in [16], the new script;
The reader can create all the scripts that follow in different folders within the same PHP project. The source code for the scripts in this document is available in the following Netbeans directory structure:
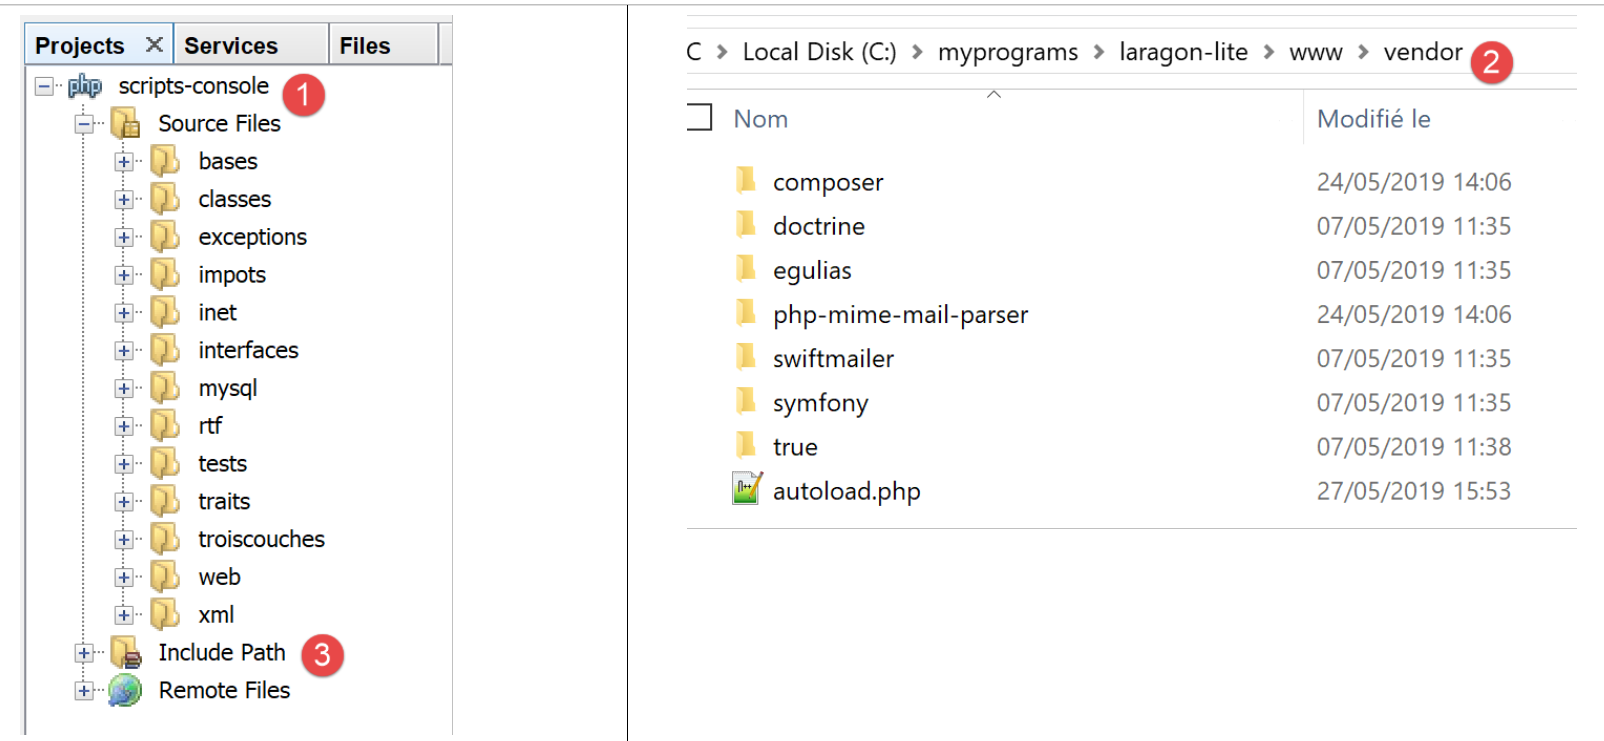
The scripts in this document are located in the [scripts-console] [1] project directory. We will also use PHP libraries, which will be placed in the [<laragon-lite>/www/vendor] [2] folder, where <laragon-lite> is the installation folder for the Laragon software. In order for Netbeans to recognize the libraries from [2] as part of the [scripts-console] project, we need to include the [vendor] [2] folder in the [Include Path] [3] branch of the project. We will configure Netbeans so that the [<laragon-lite>/www/vendor] and [2] folders are included in any new PHP project, not just in the [scripts-console] project :
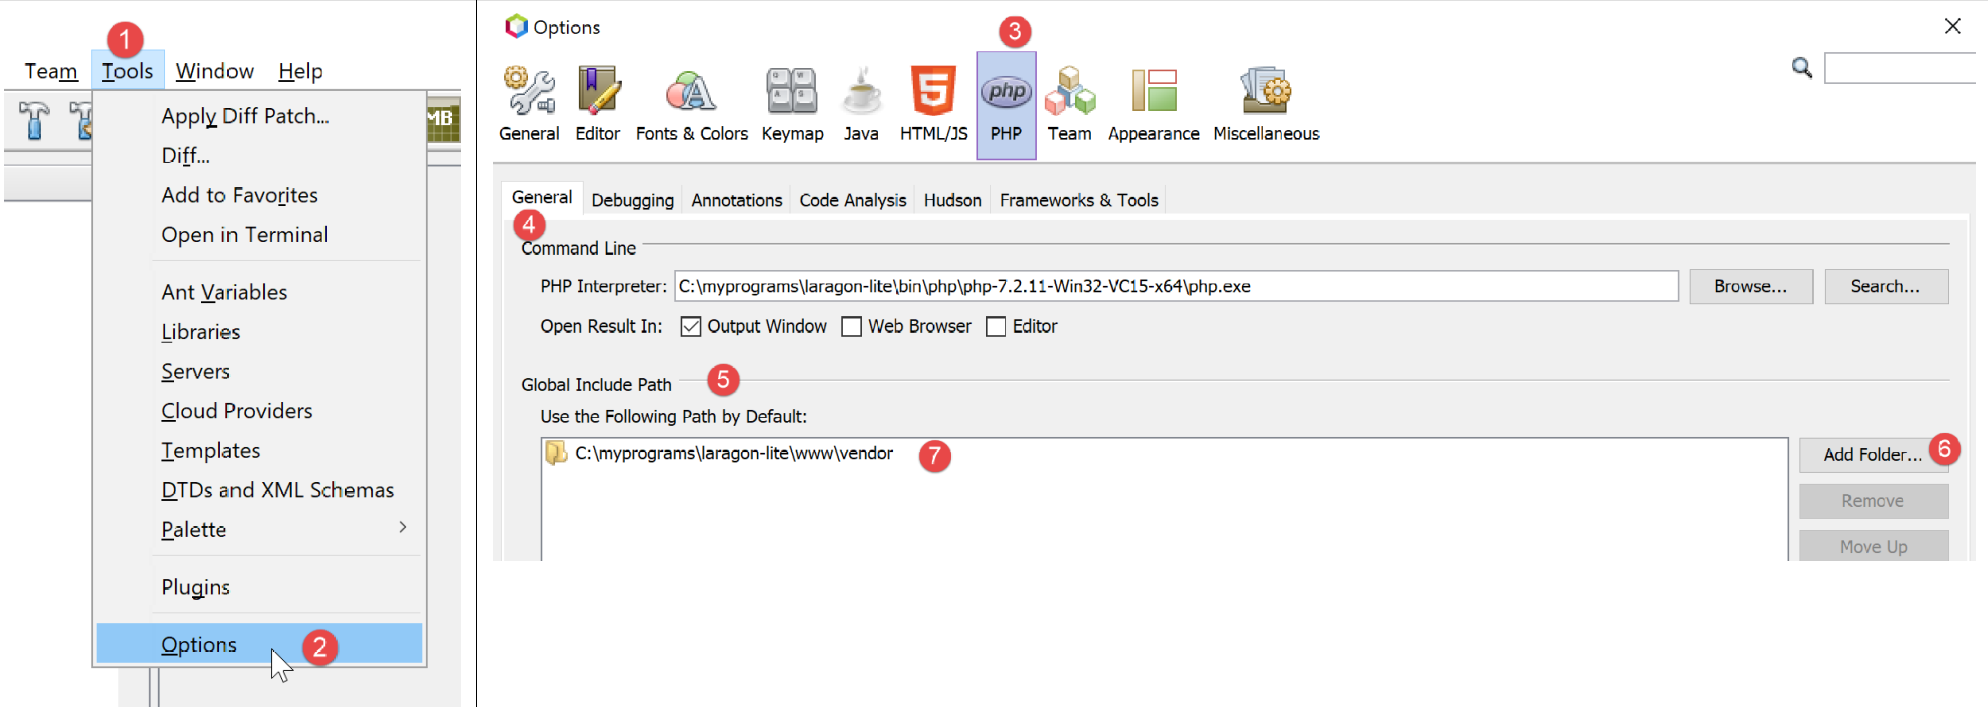
- In [1-2], go to the options for Netbeans;
- in [3-4], configure the options for PHP;
- In [5-7], configure [Global Include Path] from PHP: the folders specified in [7] are automatically included in [Include Path] for any PHP project;
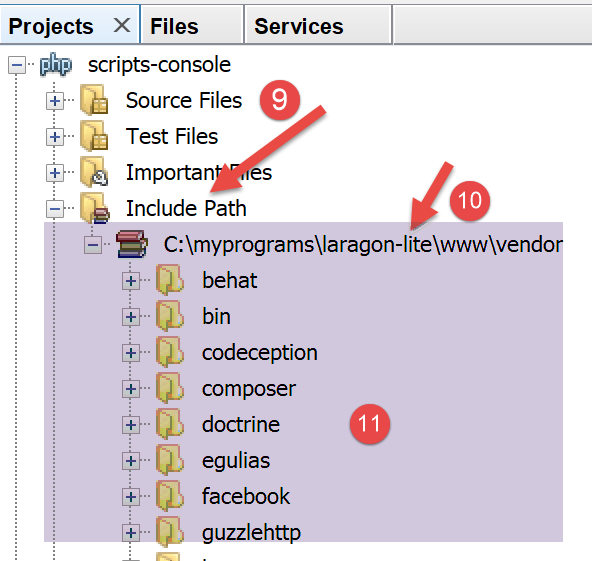
- in [9], you can access the properties of the [Include Path] branch;
- in [10-11], the new libraries explored by Netbeans. Netbeans explores the code PHP in these libraries and stores their classes, interfaces, functions, etc., in order to provide assistance to the developer;
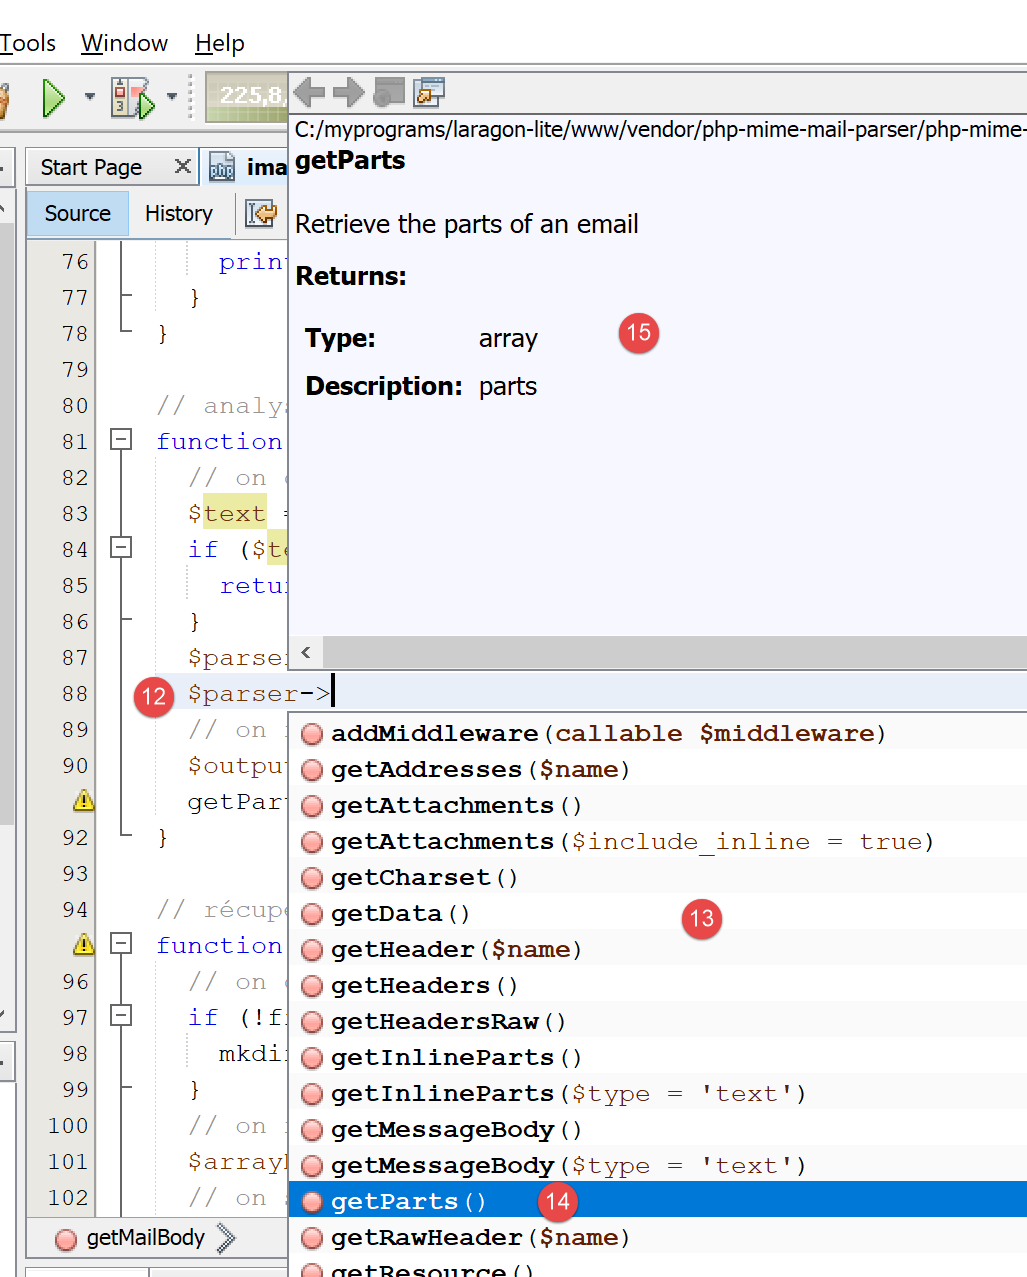
- In [12], a code snippet uses the [PhpMimeMailParser\Parser] class from the [vendor/php-mime-mail-parser] library;
- In [13], Netbeans lists the methods of this class;
- in [14-15], Netbeans displays the documentation for the selected method;
The concept of [Include Path] is specific to Netbeans here. PHP also has this concept, but they are, in principle, two different concepts.
Now that the work environment has been set up, we can cover the basics of PHP.