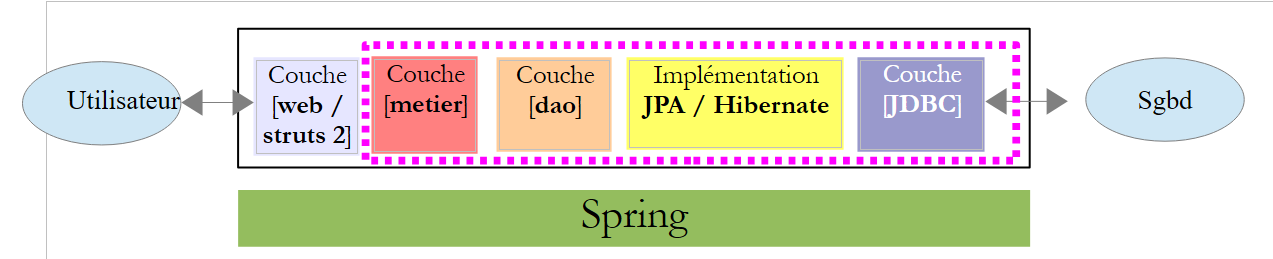
20. Case Study – version 2
We now present the final version of our application:
 |
The new Netbeans project is obtained by copying the [pam-02] project:
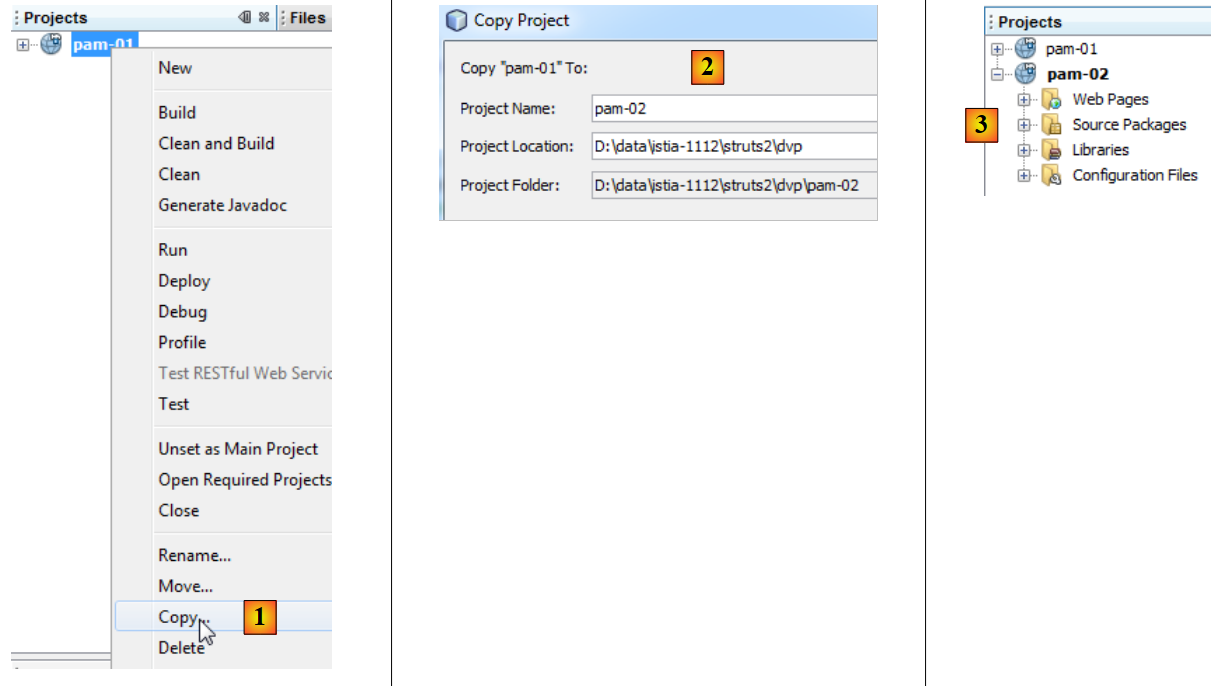 |
- In [1], we copy the new project
- in [2], we name the new project [pam-02] and specify its folder
- in [3], the new project [pam-02]
To "connect" the actual layer [metier] to the web layer we built, you need to do three things:
- delete the simulated layer [metier] that we created
- configure Spring to instantiate the real [metier] layer found in the [pam-spring-metier-dao-jpa-hibernate.jar] archive
- add all the necessary archives to the project (Spring, Hibernate, JPA, and the MySQL JDBC driver).
The Spring configuration file [WEB-INF/applicationContext.xml] becomes the following:
<?xml version="1.0" encoding="UTF-8"?>
<beans xmlns="http://www.springframework.org/schema/beans" xmlns:xsi="http://www.w3.org/2001/XMLSchema-instance"
       xmlns:tx="http://www.springframework.org/schema/tx"
       xsi:schemaLocation="http://www.springframework.org/schema/beans http://www.springframework.org/schema/beans/spring-beans-2.0.xsd http://www.springframework.org/schema/tx http://www.springframework.org/schema/tx/spring-tx-2.0.xsd">

  <!-- application layers -->

<!-- web -->
  <bean id="config" class="web.Config" init-method="init">
    <property name="metier" ref="metier"/>
  </bean>
  <!-- business -->
  <bean id="metier" class="metier.Metier">
    <property name="employeDao" ref="employeDao"/>
    <property name="cotisationDao" ref="cotisationDao"/>
  </bean>
  <!--  dao -->
  <bean id="employeDao" class="dao.EmployeDao" />
  <bean id="indemniteDao" class="dao.IndemniteDao" />
  <bean id="cotisationDao" class="dao.CotisationDao" />

  <!-- configuration JPA -->
  <bean id="entityManagerFactory" class="org.springframework.orm.jpa.LocalContainerEntityManagerFactoryBean">
    <property name="dataSource" ref="dataSource" />
    <property name="jpaVendorAdapter">
      <bean class="org.springframework.orm.jpa.vendor.HibernateJpaVendorAdapter">
        <property name="databasePlatform" value="org.hibernate.dialect.MySQL5InnoDBDialect" />
      </bean>
    </property>
    <property name="loadTimeWeaver">
      <bean class="org.springframework.instrument.classloading.InstrumentationLoadTimeWeaver" />
    </property>
  </bean>

  <!-- data source DBCP -->
  <bean id="dataSource" class="org.apache.commons.dbcp.BasicDataSource" destroy-method="close">
    <property name="driverClassName" value="com.mysql.jdbc.Driver" />
    <property name="url" value="jdbc:mysql://localhost:3306/dbpam_hibernate" />
    <property name="username" value="root" />
    <property name="password" value="" />
  </bean>

  <!-- transaction manager -->
  <tx:annotation-driven transaction-manager="txManager" />
  <bean id="txManager" class="org.springframework.orm.jpa.JpaTransactionManager">
    <property name="entityManagerFactory" ref="entityManagerFactory" />
  </bean>

  <!-- translation of exceptions -->
  <bean class="org.springframework.dao.annotation.PersistenceExceptionTranslationPostProcessor" />

  <!-- persistence -->
  <bean class="org.springframework.orm.jpa.support.PersistenceAnnotationBeanPostProcessor" />

</beans>
Lines 36–41 configure database access.
The new libraries (Spring, Hibernate, JPA, and the MySQL JDBC driver) are added from the [lib] and [2] folders. The entire folder is used. There are several dozen .jar files to add to [1]:
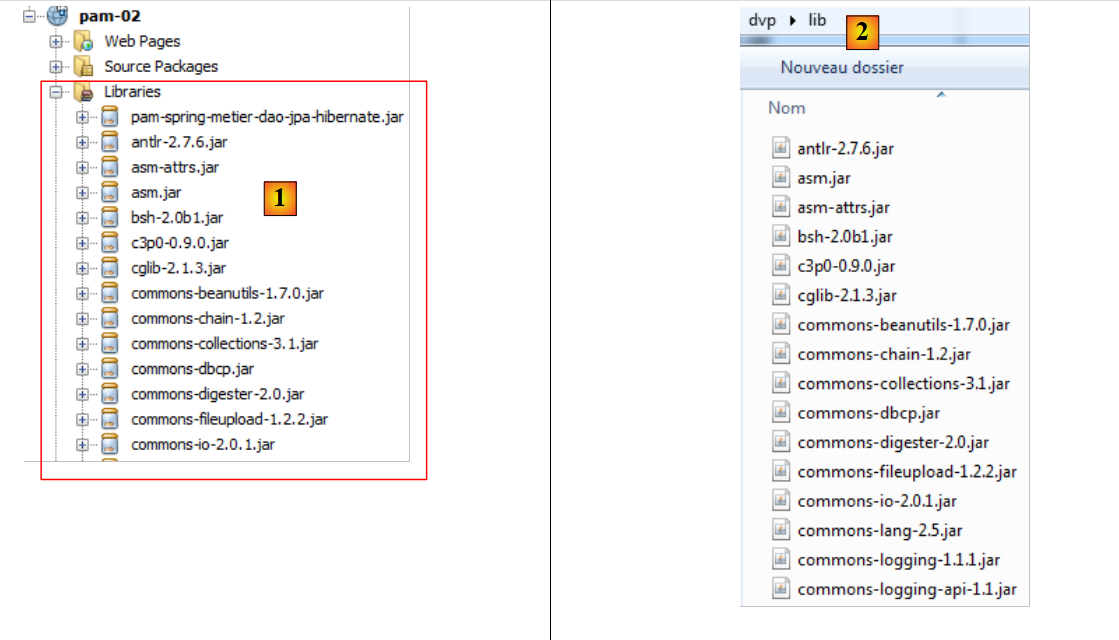 |
It was quite difficult to build this library because these frameworks sometimes use the same archives. Duplicates must therefore be removed. These files have been collected in the [lib] [2] folder within the examples archive of this document so that the reader does not have to rebuild this library themselves.
That’s it. The new [pam-02] application will now work with SGBD. Here is a screenshot of a salary calculation:
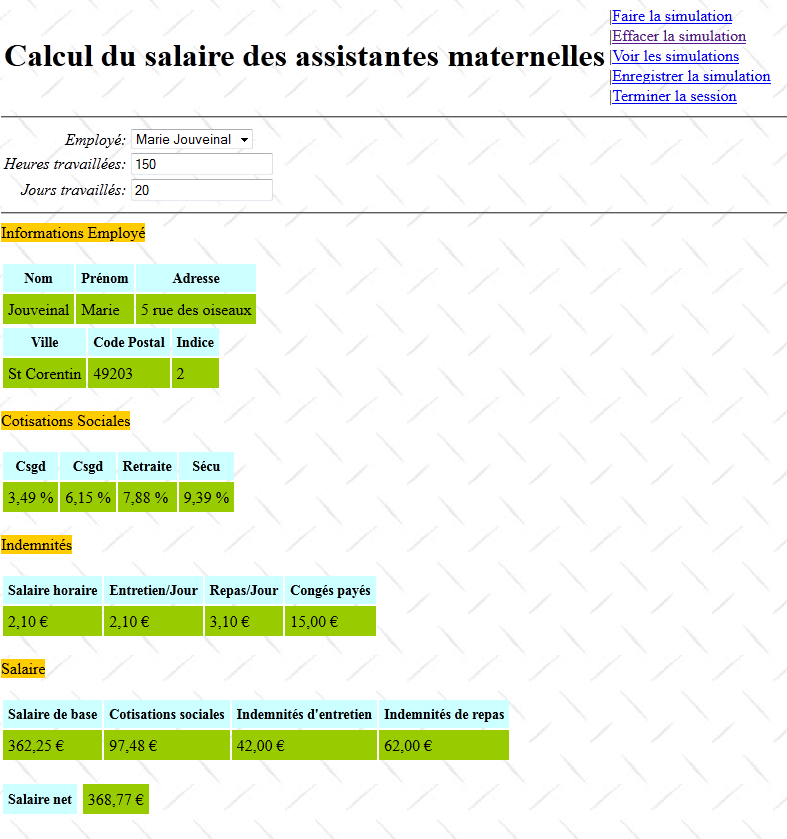
This time, the calculated salary is the actual salary and not the fictitious salary from version 1. The reader is invited to test the new application.