7. Spring Data JPA EclipseLink
7.1. 简介
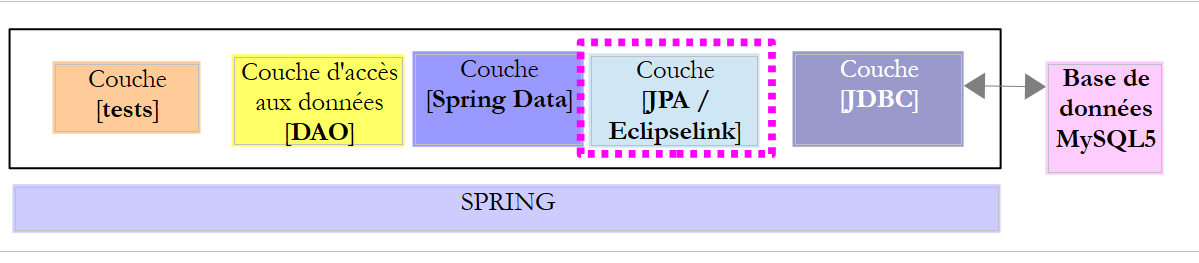
我们沿用之前的架构,现在通过 JPA / EclipseLink 层进行实现。
 |
7.2. 工作环境的搭建
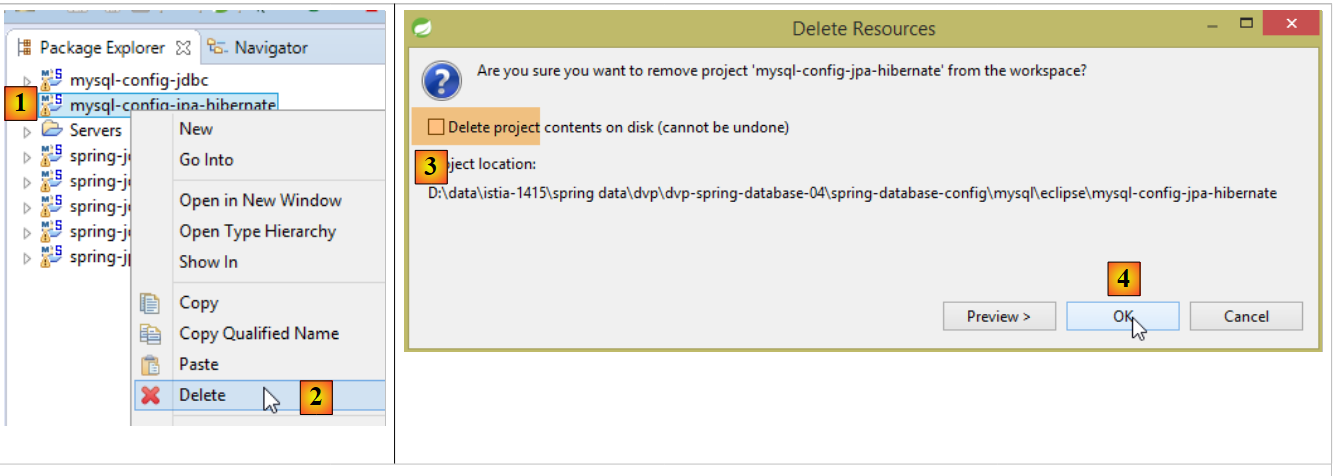
使用 STS 下载项目 [myql-config-jpa-hibernate] [1-4]:
 |
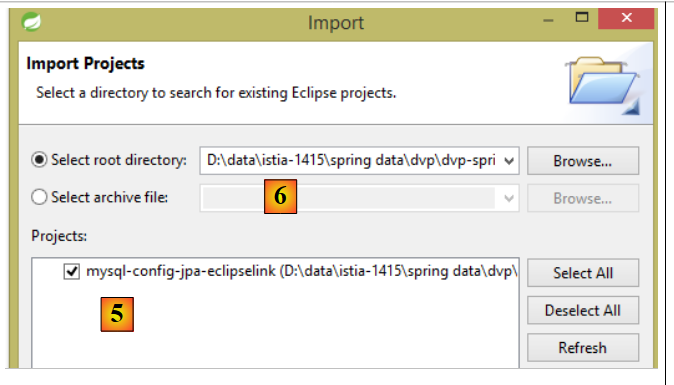
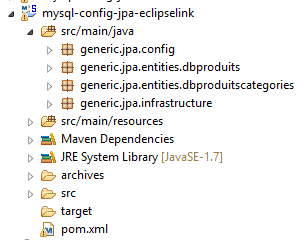
然后导入位于文件夹 [<exemples>/spring-database-config/mysql/eclipse] [6] 中的项目 [mysl-config-jpa-eclipselink] [5]:
 |
完成上述操作后,重置 [Package Explorer] 中所有项目的 Maven 环境(Alt-F5):
 |
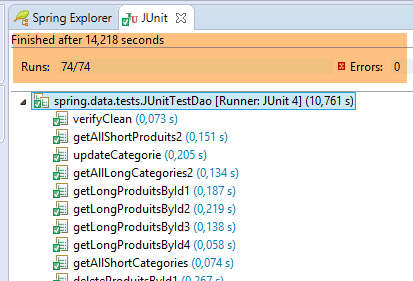
然后,为验证工作环境,请执行名为 [spring-jpa-generic-JUnitTestDao-hibernate-eclipselink] 的运行配置:
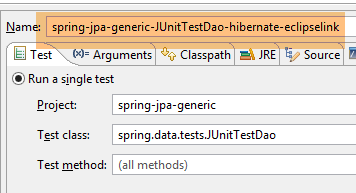 |
该配置将执行测试 [JUnitTestDao]。该测试必须成功:
 |
7.3. JPA 配置层项目
 |
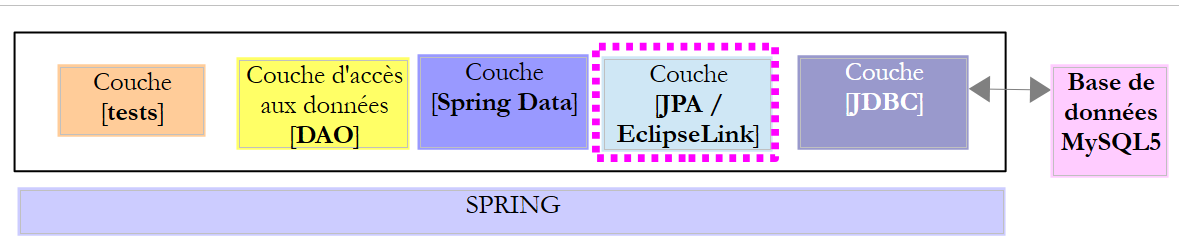
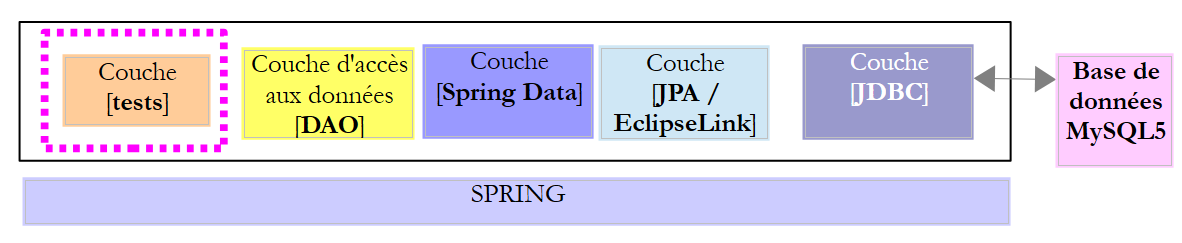
该项目的目的是配置以下架构中的 JPA 层:
 |
7.3.1. Maven 配置
该项目是一个 Maven 项目,由以下 [pom.xml] 文件进行配置:
<project xsi:schemaLocation="http://maven.apache.org/POM/4.0.0 http://maven.apache.org/xsd/maven-4.0.0.xsd"
    xmlns="http://maven.apache.org/POM/4.0.0" xmlns:xsi="http://www.w3.org/2001/XMLSchema-instance">

    <modelVersion>4.0.0</modelVersion>
    <groupId>dvp.spring.database</groupId>
    <artifactId>generic-config-jpa</artifactId>
    <version>0.0.1-SNAPSHOT</version>
    <name>configuration mysql openjpa</name>

    <parent>
        <groupId>org.springframework.boot</groupId>
        <artifactId>spring-boot-starter-parent</artifactId>
        <version>1.2.3.RELEASE</version>
    </parent>

    <dependencies>
        <!-- 变量依赖 ********************************************** -->
        <!-- JPA 提供程序 -->
        <dependency>
            <groupId>org.eclipse.persistence</groupId>
            <artifactId>eclipselink</artifactId>
            <version>2.6.0</version>
        </dependency>
        <!-- 常量依赖 ********************************************** -->
        <!-- Spring Data -->
        <dependency>
            <groupId>org.springframework.data</groupId>
            <artifactId>spring-data-jpa</artifactId>
        </dependency>
        <!-- JDBC 继承配置 -->
        <dependency>
            <groupId>dvp.spring.database</groupId>
            <artifactId>generic-config-jdbc</artifactId>
            <version>0.0.1-SNAPSHOT</version>
            <exclusions>
                <exclusion>
                    <groupId>org.springframework.boot</groupId>
                    <artifactId>spring-boot-starter-jdbc</artifactId>
                </exclusion>
            </exclusions>
        </dependency>
    </dependencies>

    <properties>
        <project.build.sourceEncoding>UTF-8</project.build.sourceEncoding>
        <java.version>1.7</java.version>
    </properties>

    <build>
        <plugins>
            <!-- [https://flexguse.wordpress.com/2013/08/10/maven-spring-data-jpa-eclipselink-and-static-weaving/] -->
            <plugin>
                <groupId>org.apache.maven.plugins</groupId>
                <artifactId>maven-surefire-plugin</artifactId>
                <version>2.18.1</version>
            </plugin>
            <!-- 此插件确保 EclipseLink 静态编织 -->
            <plugin>
                <artifactId>staticweave-maven-plugin</artifactId>
                <groupId>de.empulse.eclipselink</groupId>
                <version>1.0.0</version>
                <executions>
                    <execution>
                        <goals>
                            <goal>weave</goal>
                        </goals>
                        <phase>process-classes</phase>
                        <configuration>
                            <logLevel>ALL</logLevel>
                            <!-- <includeProjectClasspath>true</includeProjectClasspath> -->
                        </configuration>
                    </execution>
                </executions>
                <dependencies>
                    <dependency>
                        <groupId>org.eclipse.persistence</groupId>
                        <artifactId>eclipselink</artifactId>
                        <version>2.6.0</version>
                    </dependency>
                </dependencies>
            </plugin>
        </plugins>
        <pluginManagement>
            <plugins>
                <!--此插件的配置仅用于存储 Eclipse m2e 设置。它对 Maven 构建本身没有任何影响。 -->
                <plugin>
                    <groupId>org.eclipse.m2e</groupId>
                    <artifactId>lifecycle-mapping</artifactId>
                    <version>1.0.0</version>
                    <configuration>
                        <lifecycleMappingMetadata>
                            <pluginExecutions>
                                <pluginExecution>
                                    <pluginExecutionFilter>
                                        <groupId>
                                            de.empulse.eclipselink
                                        </groupId>
                                        <artifactId>
                                            staticweave-maven-plugin
                                        </artifactId>
                                        <versionRange>
                                            [1.0.0,)
                                        </versionRange>
                                        <goals>
                                            <goal>weave</goal>
                                        </goals>
                                    </pluginExecutionFilter>
                                    <action>
                                        <execute>
                                            <runOnIncremental>true</runOnIncremental>
                                        </execute>
                                    </action>
                                </pluginExecution>
                            </pluginExecutions>
                        </lifecycleMappingMetadata>
                    </configuration>
                </plugin>
            </plugins>
        </pluginManagement>
    </build>

</project>
- 第 5-7 行:该项目生成的 Maven 工件。它与项目 [mysql-config-jpa-hibernate] 的工件相同。这意味着在任何给定时刻,这两个项目中只能有一个处于活动状态;
- 第 10-14 行:父 Maven 项目,用于确定该项目所需的大部分依赖项的版本;
- 第 19-22 行:EclipseLink 库;
- 第 26-29 行:Spring Data 库;
- 第 32-34 行:JPA 层配置项目基于 JDBC 层配置项目,后者定义的内容包括: 所用 SGBD 的 JDBC 驱动程序以及待用数据库的连接信息;
- 第35-40行:图层JDBC的配置项目包含库[Spring JDBC],此处将其替换为库[Spring Data JPA]。 因此,建议不要将其包含在项目的依赖项中。不过,即使保留该库,也不会导致错误;
- 第58至81行的插件实现了JPA实体的“weaving”。 所谓“weaving”,是指对 JPA 实体进行的转换(增强),使其支持延迟加载。 我们无需配置 Hibernate 即可实现该 weaving 功能。 对于 EclipseLink,则需要一个 Maven 插件。我花了很多时间研究如何强制 EclipseLink 遵守下方注解 [@ManyToOne] 的 [fetch = FetchType.LAZY] 属性:
    @ManyToOne(fetch = FetchType.LAZY)
    @JoinColumn(name = ConfigJdbc.TAB_PRODUITS_CATEGORIE_ID)
private Categorie categorie;
JPA规范指出,注解[@ManyToOne]的[fetch = FetchType.LAZY]属性是一个“提示” (提示),JPA 实现无需遵循该提示。实际上,EclipseLink 默认情况下确实不遵循该提示。需要进行特殊配置才能使其遵循该提示。 经过多次无果的排查,我找到了第51行提到的URL的解决方案。当将第58-81行代码加入[pom.xml]文件时,Eclipse会报错。 这是[m2e]插件的配置问题,该插件负责在Eclipse中管理Maven项目。必须添加第83-119行才能消除该错误。
最终,依赖项如下:
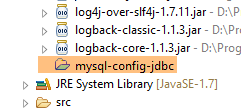 |
7.3.2. Spring 配置
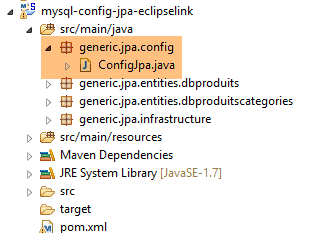 |
类 [ConfigJpa] 用于配置 Spring 项目:
package generic.jpa.config;

import generic.jdbc.config.ConfigJdbc;

import javax.persistence.EntityManagerFactory;

import org.apache.tomcat.jdbc.pool.DataSource;
import org.springframework.context.annotation.Bean;
import org.springframework.context.annotation.Configuration;
import org.springframework.context.annotation.Import;
import org.springframework.orm.jpa.JpaTransactionManager;
import org.springframework.orm.jpa.JpaVendorAdapter;
import org.springframework.orm.jpa.LocalContainerEntityManagerFactoryBean;
import org.springframework.orm.jpa.vendor.Database;
import org.springframework.orm.jpa.vendor.EclipseLinkJpaVendorAdapter;
import org.springframework.transaction.PlatformTransactionManager;

@Configuration
@Import({ ConfigJdbc.class })
public class ConfigJpa {

    // 提供程序 JPA
    @Bean
    public JpaVendorAdapter jpaVendorAdapter() {
        // 注意:JPA 实体和 EclipseLink 配置位于文件 META-INF/persistence.xml 中
        EclipseLinkJpaVendorAdapter eclipseLinkJpaVendorAdapter = new EclipseLinkJpaVendorAdapter();
        eclipseLinkJpaVendorAdapter.setShowSql(false);
        eclipseLinkJpaVendorAdapter.setDatabase(Database.MYSQL);
        eclipseLinkJpaVendorAdapter.setGenerateDdl(true);
        return eclipseLinkJpaVendorAdapter;
    }

    // 数据源
    @Bean
    public DataSource dataSource() {
        // 数据源 TomcatJdbc
        DataSource dataSource = new DataSource();
        // 访问配置JDBC
        dataSource.setDriverClassName(ConfigJdbc.DRIVER_CLASSNAME);
        dataSource.setUsername(ConfigJdbc.USER_DBPRODUITSCATEGORIES);
        dataSource.setPassword(ConfigJdbc.PASSWD_DBPRODUITSCATEGORIES);
        dataSource.setUrl(ConfigJdbc.URL_DBPRODUITSCATEGORIES);
        // 初始打开的连接
        dataSource.setInitialSize(5);
        // 结果
        return dataSource;
    }

    // EntityManagerFactory
    @Bean
    public EntityManagerFactory entityManagerFactory(JpaVendorAdapter jpaVendorAdapter, DataSource dataSource) {
        LocalContainerEntityManagerFactoryBean factory = new LocalContainerEntityManagerFactoryBean();
        factory.setJpaVendorAdapter(jpaVendorAdapter);
        factory.setDataSource(dataSource);
        factory.afterPropertiesSet();
        EntityManagerFactory entityManagerFactory = factory.getObject();
        return entityManagerFactory;
    }

    // 事务管理器
    @Bean
    public PlatformTransactionManager transactionManager(EntityManagerFactory entityManagerFactory) {
        JpaTransactionManager txManager = new JpaTransactionManager();
        txManager.setEntityManagerFactory(entityManagerFactory);
        return txManager;
    }

}
此配置与第 6.3.2 节中针对 Hibernate 实现 JPA 的配置类似。我们仅详细说明差异:
- 第 23-31 行:[jpaVendorAdapter] Bean 现由 EclipseLink 实现;
- 第 50-58 行:在 JPA 版本的 Hibernate 中,原代码为:
该代码用于指定应从何处查找 JPA 实体。此处,我们参考 [persistence.xml] 文件(第 25 行注释)(参见第 6.3.4 节)来同时:
- 定义实体 JPA;
- 为这些实体的 weaving 配置 EclipseLink;
7.4. 文件 [persistence.xml]
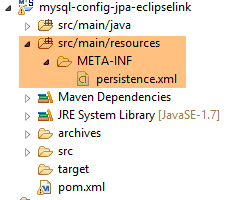 |
<?xml version="1.0" encoding="UTF-8"?>
<persistence version="1.0" xmlns="http://java.sun.com/xml/ns/persistence" xmlns:xsi="http://www.w3.org/2001/XMLSchema-instance"
    xsi:schemaLocation="http://java.sun.com/xml/ns/persistence http://java.sun.com/xml/ns/persistence/persistence_1_0.xsd">
    <persistence-unit name="generic-jpa-entities-dbproduitscategories" transaction-type="RESOURCE_LOCAL">
        <!-- 实体 JPA -->
        <class>generic.jpa.entities.dbproduitscategories.Categorie</class>
        <class>generic.jpa.entities.dbproduitscategories.Produit</class>
        <class>generic.jpa.entities.dbproduitscategories.User</class>
        <class>generic.jpa.entities.dbproduitscategories.Role</class>
        <class>generic.jpa.entities.dbproduitscategories.UserRole</class>
        <exclude-unlisted-classes>true</exclude-unlisted-classes>
        <!-- [@ManyToOne] 在 LAZY 模式下进行搜索所需的属性 -->
        <properties>
            <property name="eclipselink.weaving" value="static" />
            <property name="eclipselink.weaving.lazy" value="true" />
            <property name="eclipselink.weaving.internal" value="true" />
        </properties>
    </persistence-unit>
</persistence>
- 第 4 行:持久化单元。其名称可任意设定(属性 name);
- 第 6-10 行:待管理的五个 JPA 实体;
- 第11行非常重要。有时一个项目会定义在不同框架中使用的实体。第11行确保除了第5-10行定义的实体外,不会有其他实体。当这些实体用于生成数据源表时,这一点尤为重要。多余的实体会导致生成多余的表;
- 第13-17行:为静态的weaving配置EclipseLink。weaving有两种类型:
- [statique]:一旦 JPA 层被实例化,JPA 实体就会被编织(woven);
- [dynamique]:JPA 实体在首次进入 JPA 层时被增强(woven);
7.5. 实体 JPA
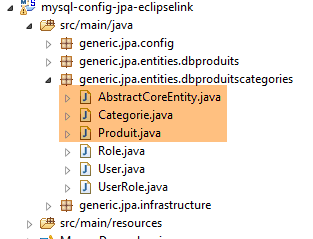 |
JPA 实体即第 6.3.3 节中针对 Hibernate 实现所描述的实体,但有两点不同:
- 所有 JPA 实体都带有注解 [@Cache(alwaysRefresh = true)],该注解会禁用 EclipseLink 的缓存。 在本文档中,未使用所采用的 JPA 实现的缓存。EclipseLink 的缓存似乎默认处于活动状态,并在测试中引发了错误。
@Entity
@Table(name = ConfigJdbc.TAB_CATEGORIES)
@JsonFilter("jsonFilterCategorie")
@Cache(alwaysRefresh = true)
public class Categorie implements AbstractCoreEntity {
- 所有 [@OneToMany] 注解均附带 [@CascadeOnDelete] 注解:
    @OneToMany(fetch = FetchType.LAZY, mappedBy = "categorie", cascade = { CascadeType.ALL })
    @CascadeOnDelete
    private List<Produit> produits;
该注释在根据实体 JPA 生成表时起作用。 它为外键(此处为 PRODUITS[CATEGORIE_ID] ---> CATEGORIES[ID]) SQL [ON DELETE CASCADE] 属性,该属性确保每当在表 [CATEGORIES] 中删除一个类别时, [PRODUITS]表中的对应产品也会被删除;
注:需要注意的是,正如我们刚才所见,该注释在创建表时和运行表时都会被使用。 EclipseLink 假设 SQL [ON DELETE CASCADE] 属性确实存在,并在每次被要求删除类别时都会使用它。如果该属性缺失,将会引发错误。
7.6. 测试层
 |
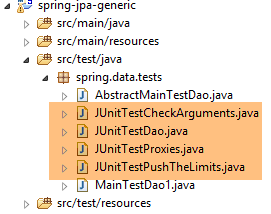 |
上述测试与 Spring JDBC 和 Spring JPA Hibernate 实现中的测试完全一致。如有需要,请参阅以下页面:
- [JUnitTestCheckArguments]:第 4.11.1 节;
- [JUnitTestDao]:第 4.11.2 节;
- [JUnitTestPushTheLimits]:第 4.11.3 节;
- [JUnitTestProxies]:第6.4.5段;
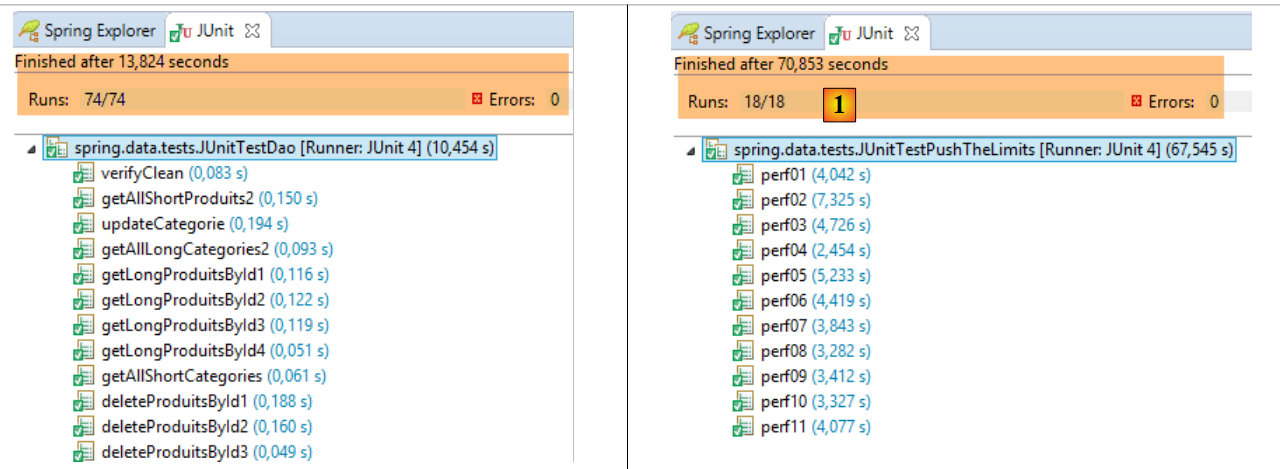
所得结果如下:
 |
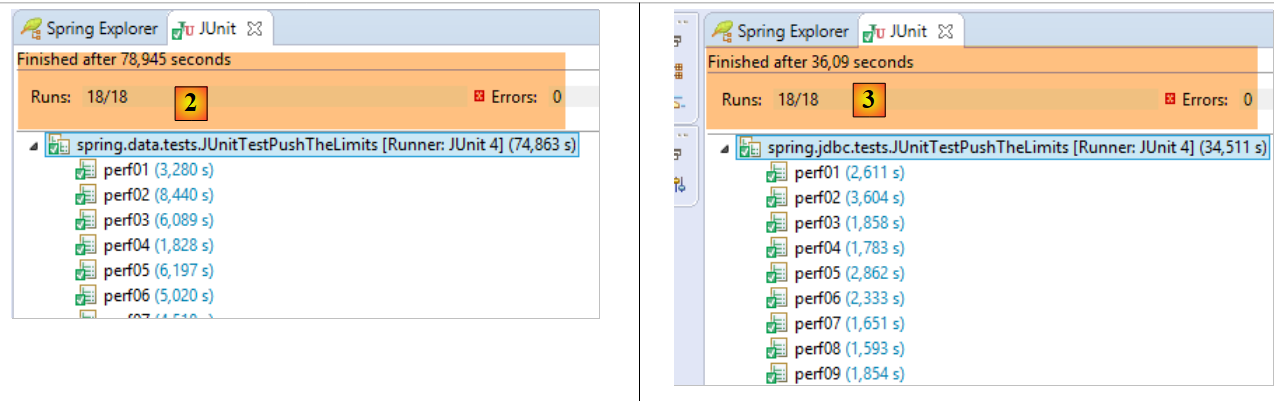 |
- 在 [1]、[JUnitTestPushTheLimits-EclipseLink] 中:70.583 秒
- 在 [2]、[JUnitTestPushTheLimits-Hibernate] 中:78.945 秒
- 在 [3]、[JUnitTestPushTheLimits-JDBC] 中:36.09 秒
[JUnitTestProxies] 测试在控制台显示以下结果:
Vidage de la base de données --------------------------------
doNothing
Vidage de la base de données --------------------------------
getShortCategoriesByName1 --------------------------------
Catégorie de type : PROXY
Catégorie :
1
Vidage de la base de données --------------------------------
getLongCategoriesByName1 --------------------------------
Catégorie de type : POJO
Catégorie :
1
Vidage de la base de données --------------------------------
getShortProduitsByName1 --------------------------------
Produit de type : PROXY
Nom de la catégorie du produit :
categorie[0]
Vidage de la base de données --------------------------------
getLongProduitsByName1 --------------------------------
Produit de type : POJO
Nom de la catégorie du produit :
categorie[0]
由此可见,当访问类型为 PROXY 的类中的字段 [Categorie.produits],以及类型为 PROXY 的产品中的字段 [Produit.categorie] 时, 两种情况下都能成功获取信息(第7行和第17行)。在三个JPA实现中,这是唯一一个能在PROXY实体上实现此功能的。