23. Appendices
Here we explain how to install the tools used in this document on Windows 7 or 8 machines. The screenshots generally show the 64-bit versions of SGBD and the installed tools. Readers should adapt the instructions to their own environment.
23.1. Installing JDK
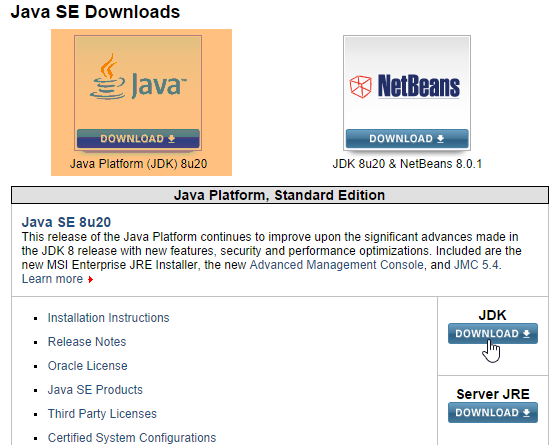
The URL is available in [http://www.oracle.com/technetwork/java/javase/downloads/index.html] (October 2014), with JDK being the most recent version. We will refer to the JDK installation directory as <jdk-install>.
23.2. Installing Maven
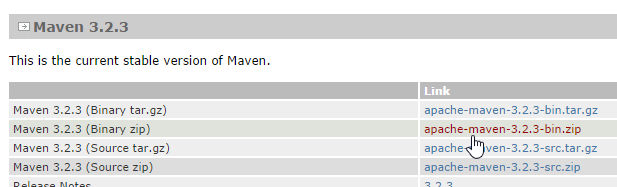
Maven is a tool for managing dependencies in a Java project and more. It is available (October 2014) at URL [http://maven.apache.org/download.cgi].
Download and unzip the archive. We will refer to the Maven installation folder as <maven-install>.
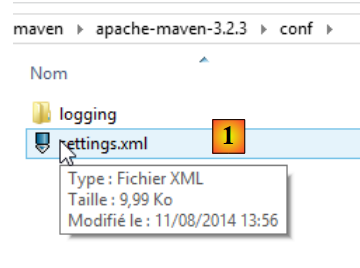
- In [1], the file [conf / settings.xml] configures Maven;
It contains the following lines:
  <!-- localRepository
   | The path to the local repository maven will use to store artifacts.
   |
   | Default: ${user.home}/.m2/repository
  <localRepository>/path/to/local/repo</localRepository>
-->
The default value on line 4 may cause issues for some software using Maven if, like me, your {user.home} has a space in its path (for example, [C:\Users\Serge Tahé]). We will specify (line 7) a different folder for the local Maven repository:
  <!-- localRepository
   | The path to the local repository maven will use to store artifacts.
   |
   | Default: ${user.home}/.m2/repository
  <localRepository>/path/to/local/repo</localRepository>
  -->
<localRepository>D:\Programs\devjava\maven\.m2\repository</localRepository>
On line 7, avoid using a path that contains spaces.
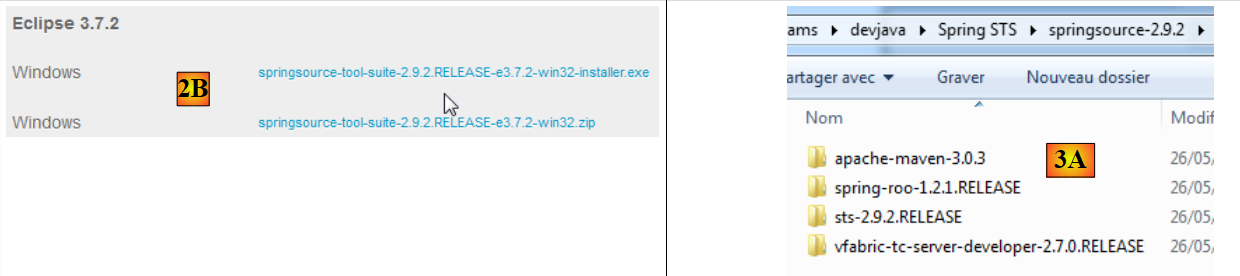
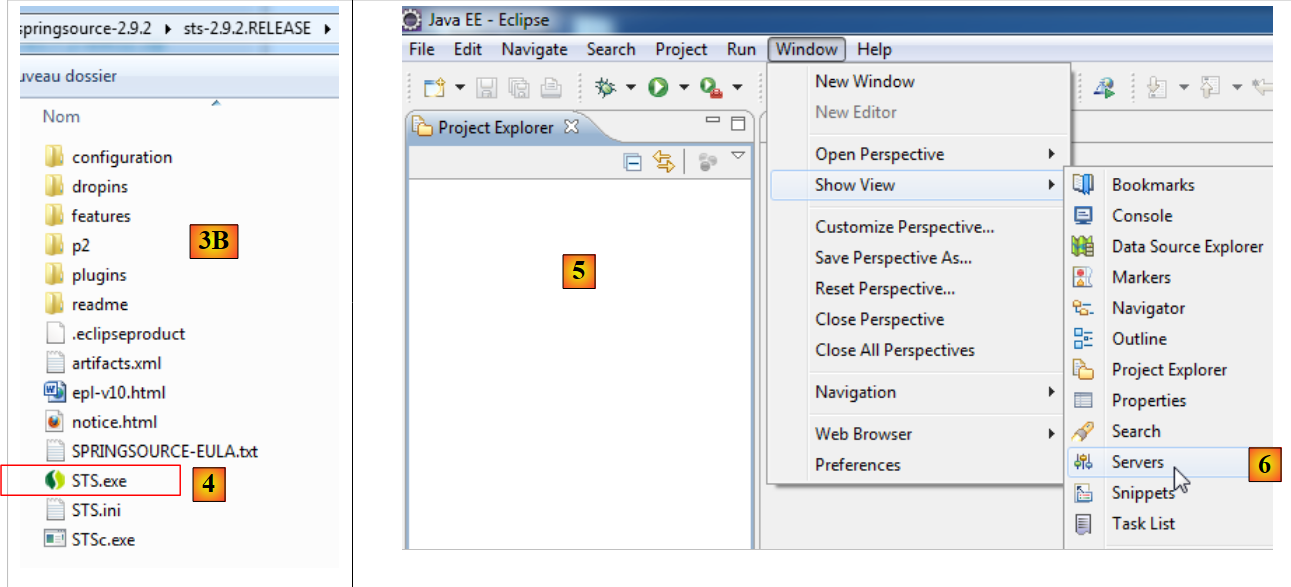
We will install SpringSource Tool Suite [http://www.springsource.com/developer/sts] (October 2014), an Eclipse environment pre-configured with numerous plugins related to the Spring framework and also with a pre-installed Maven configuration.
- Go to the SpringSource Tool Suite (STS) website [1], to download the current version of version from STS [2A] [2B],
- the downloaded file is an installer that creates the [3A] [3B] file tree. In [4], the executable is launched,
- in [5], the IDE work window appears after closing the welcome window. In [6], the application servers window is displayed,
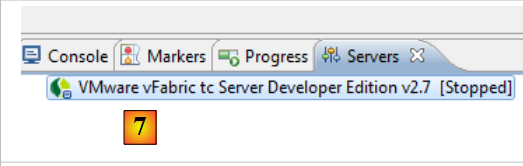
- in [7], the servers window. A server is registered. It is a Tomcat-compatible VMware server.
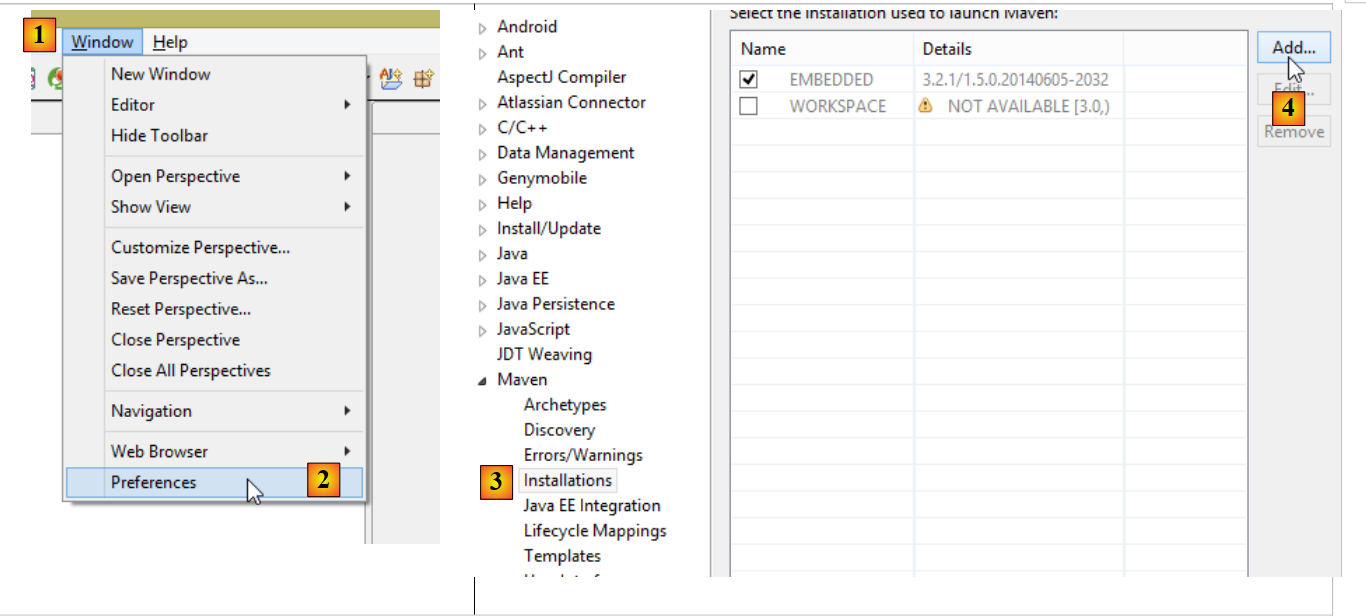
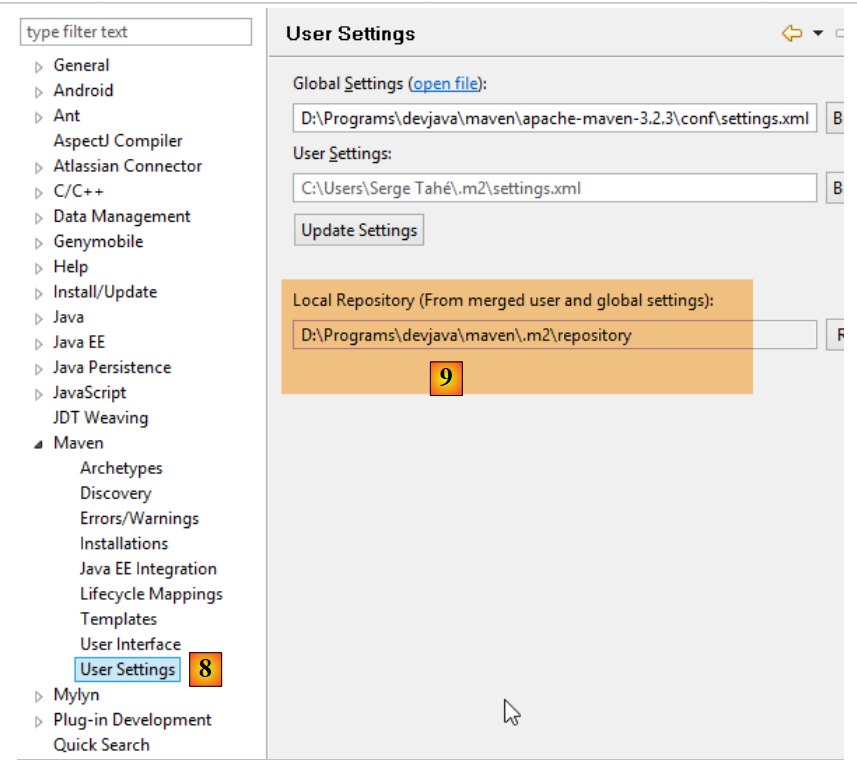
You must specify the Maven installation directory in STS:
- in [1-2], configure STS;
- in [3-4], add a new Maven installation;
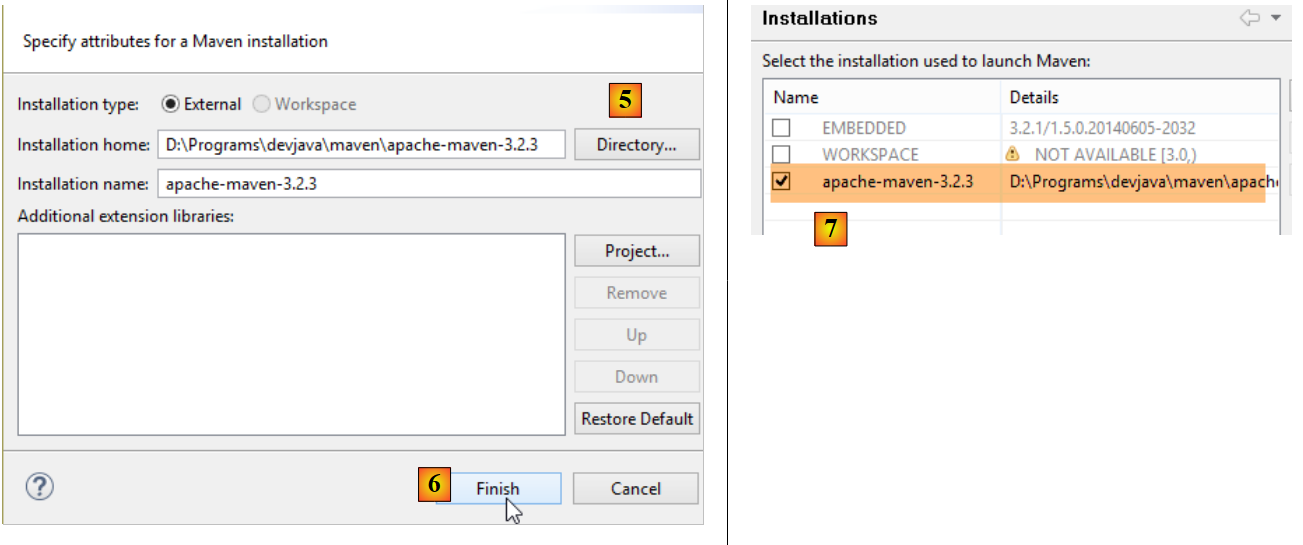
- In [5], specify the Maven installation directory;
- In [6], we finish the wizard;
- In [7], set the new Maven installation as the default;
- In [8-9], verify the local Maven repository—the folder where it will store the dependencies it downloads and where STS will place the artifacts that will be built;
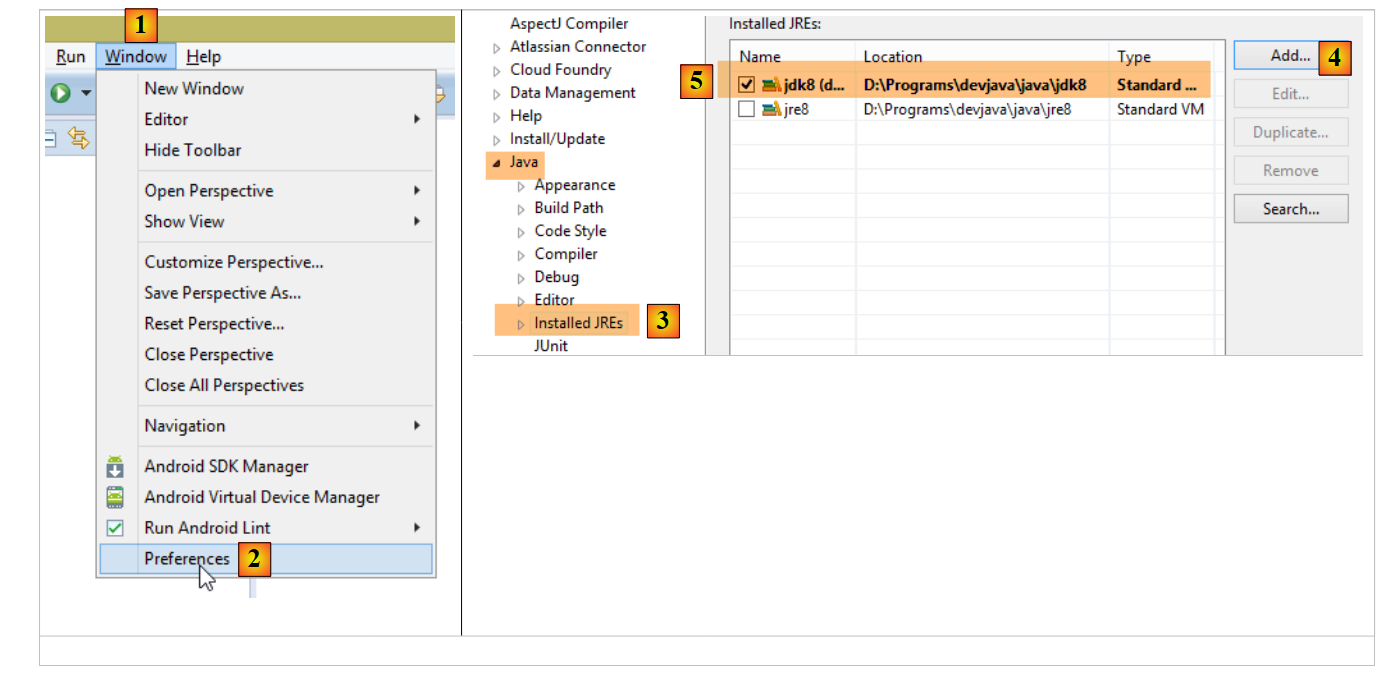
You must also select a JDK (Java Development Kit) to run both Eclipse projects with and without Maven [1-5].
With [4], you can add JDK (Java Development Kit) or JRE (Java Runtime Environment). The latter can execute .class files but cannot compile .java files to produce them. JDK can do both. We will choose JDK because certain Maven operations require JDK.
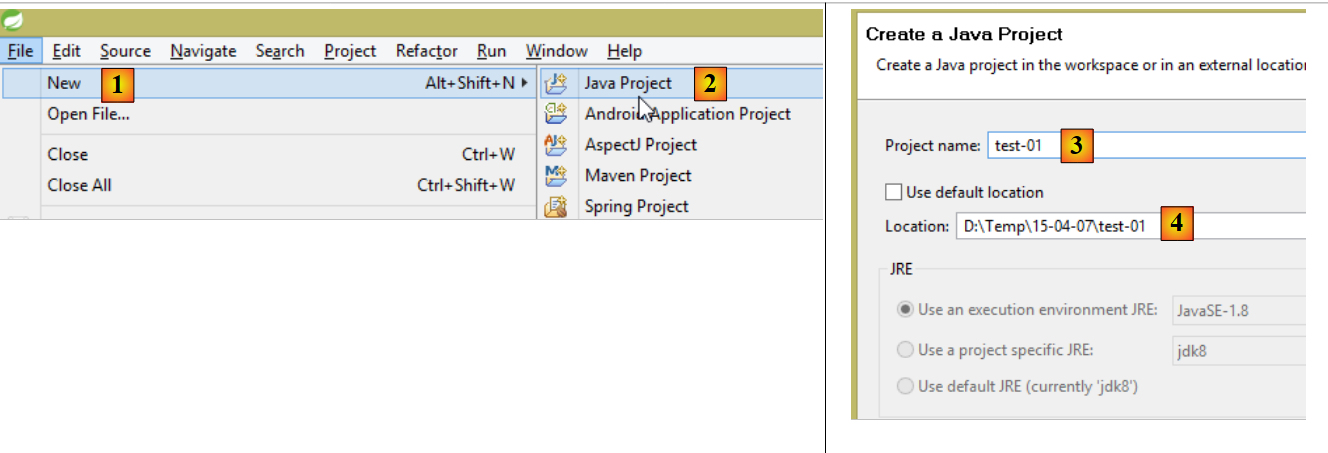
To create an Eclipse project, proceed as follows:
- In [3], give the project a name;
- In [4], select an existing, empty folder;
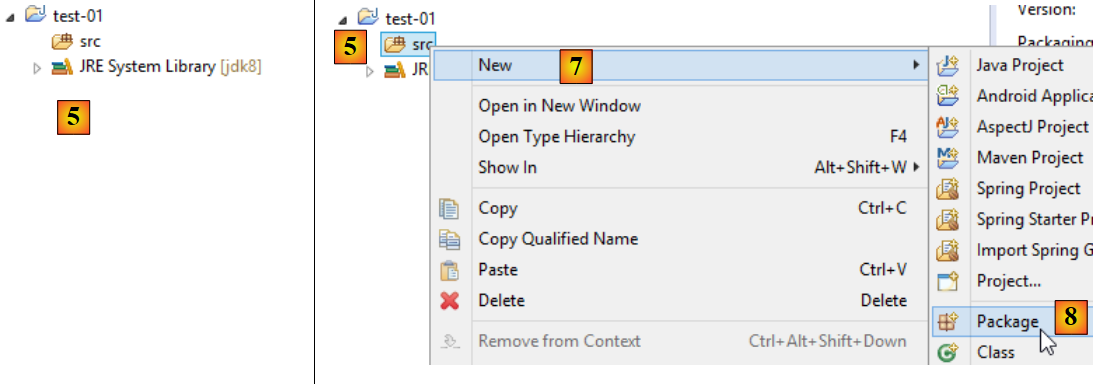
- In [5], the project is created;
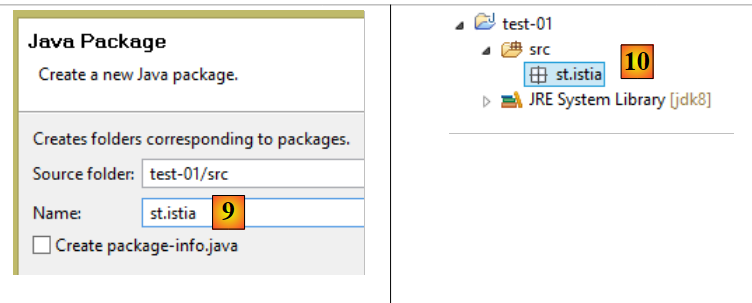
- In [5-8], create a package. A package is a folder that contains Java code. Two classes can have the same name if they belong to different packages. Within a project, there cannot be two packages with the same name. Therefore, you cannot use a package name that already exists in one of the project’s dependencies. A company will use a package name that specifies the company, the project, and its various branches;
- In [9], give the package a name;
- In [10], the package created;
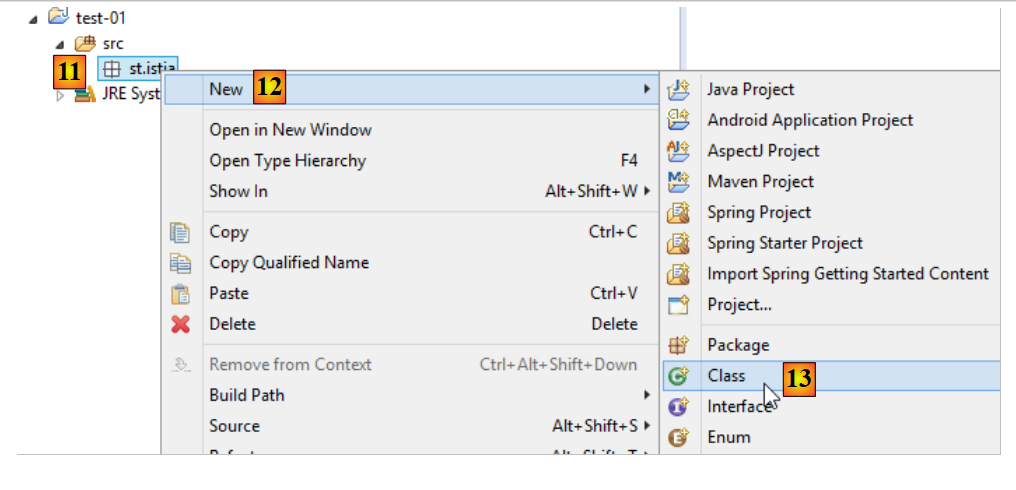
- In [11-13], create a class in the package that was created;
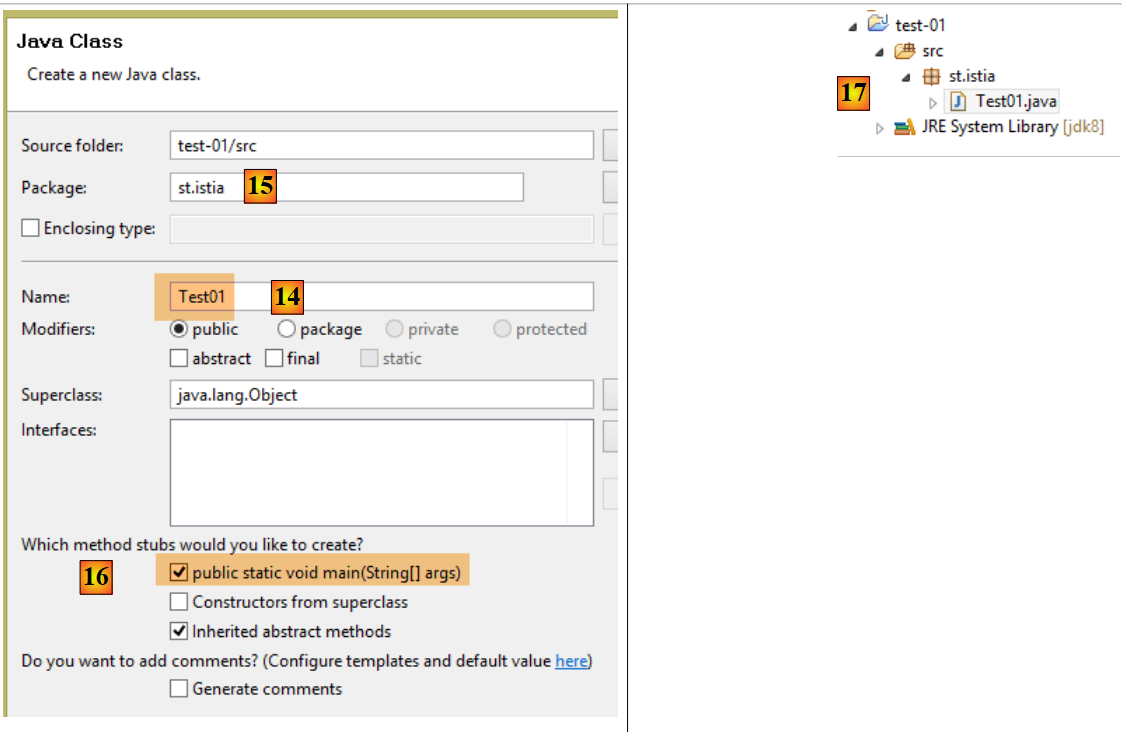
- In [14], give the class a name (must comply with the CamelCase standard—each word in the name must begin with a capital letter followed by lowercase letters);
- In [15], verify the package;
- In [16], check the box. This requests that the static method [main] be generated. This method makes a class executable, i.e., the first class to be executed in a project;
- In [17], the class created this way;
In the [main] method, enter the following code, which displays text on the console:
package st.istia;

public class Test01 {

    public static void main(String[] args) {
        System.out.println("test01");
    }

}
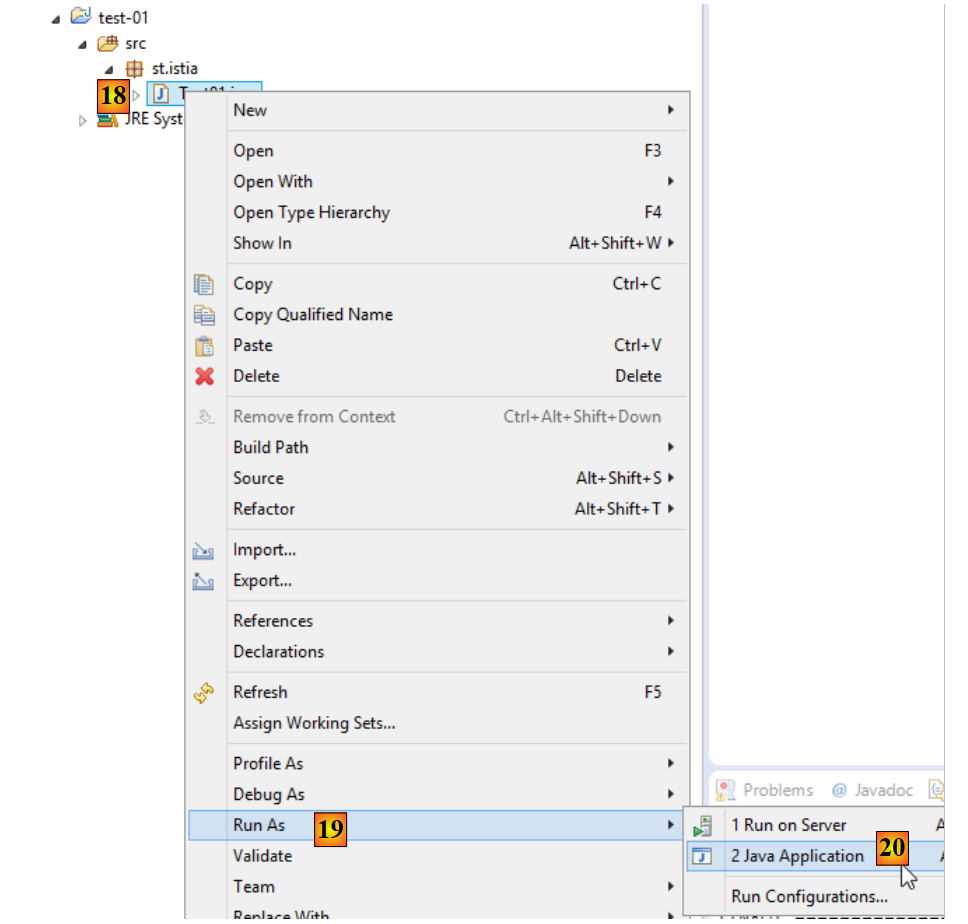
- in [18-20], run the class. Its method [main] will then be executed;
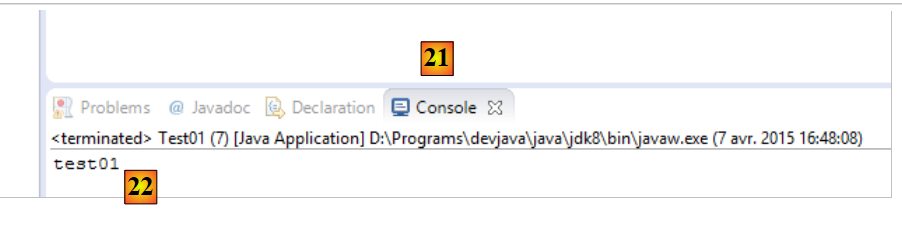
- in [21-22], the result of the application;
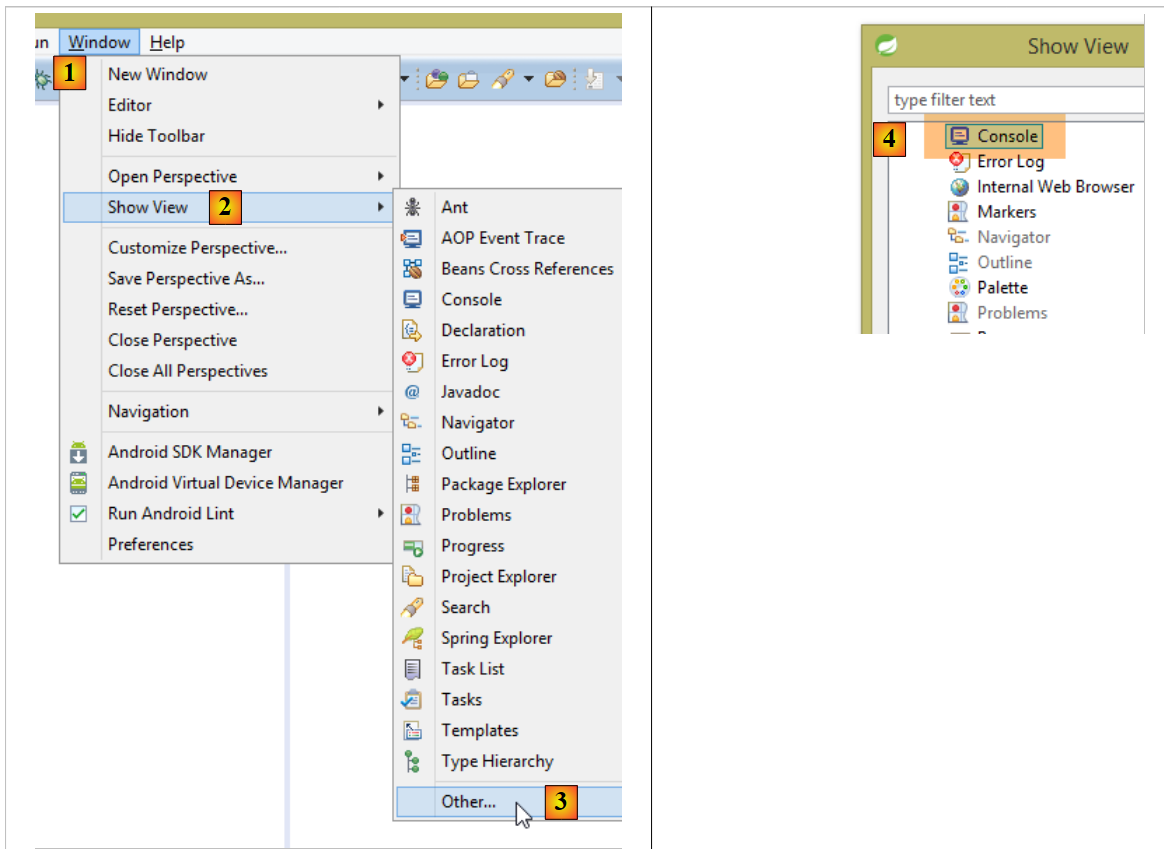
If the [Console] view is not present, proceed as follows [1-4]:
When importing an Eclipse project, it may contain errors. This may be due to an incorrect project configuration. To correct the error (if there is one), proceed as follows:
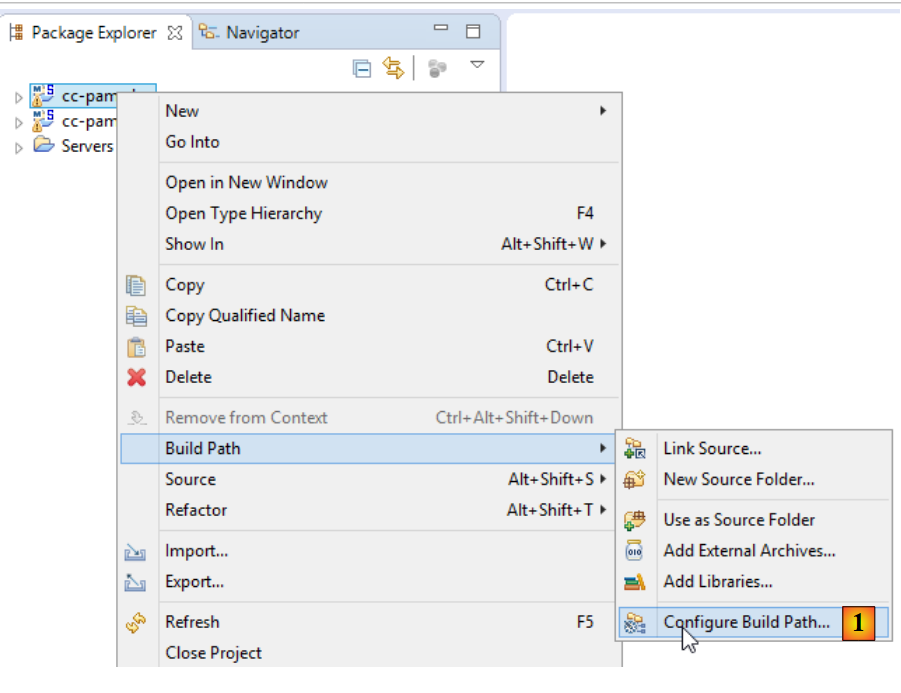
- In [1], modify the project's [Build Path];
- In [2], the project is configured to use a JVM 1.5;
- In [3], remove this dependency;
- In [4], add a new dependency;
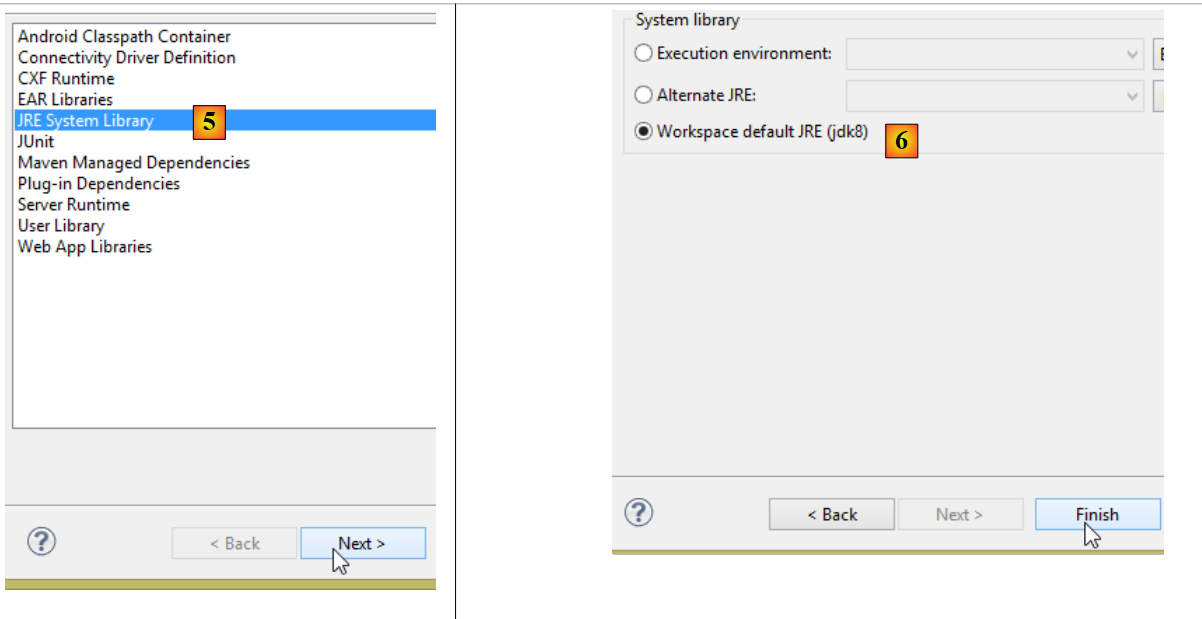
- In [5], add a JVM;
- In [6], select the JVM from the item;
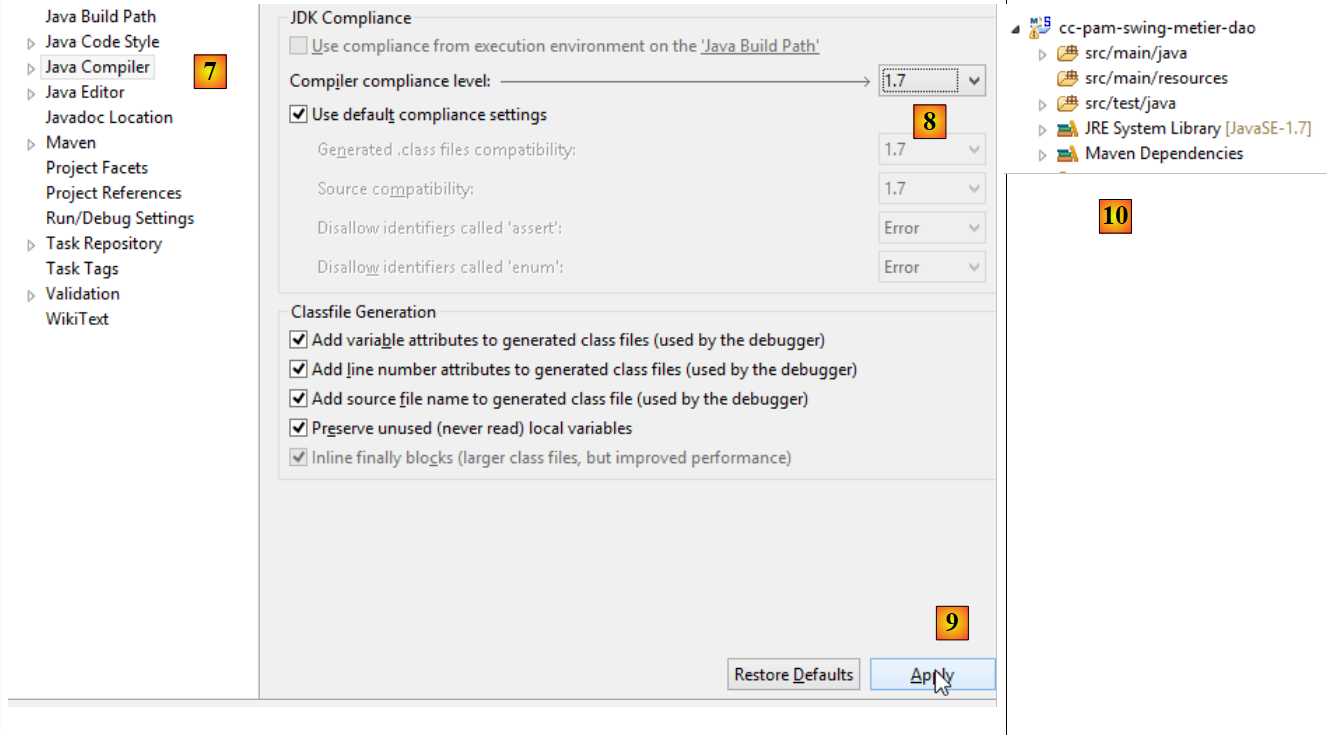
Once this is done, validate everything and then move on to the [Java compiler] property of the [7] project:
- In [8], instruct the compiler to accept all Java language features up to and including version 1.7 (or 1.8);
- In [9], we validate;
- In [10], the reconfigured project should no longer contain any errors;
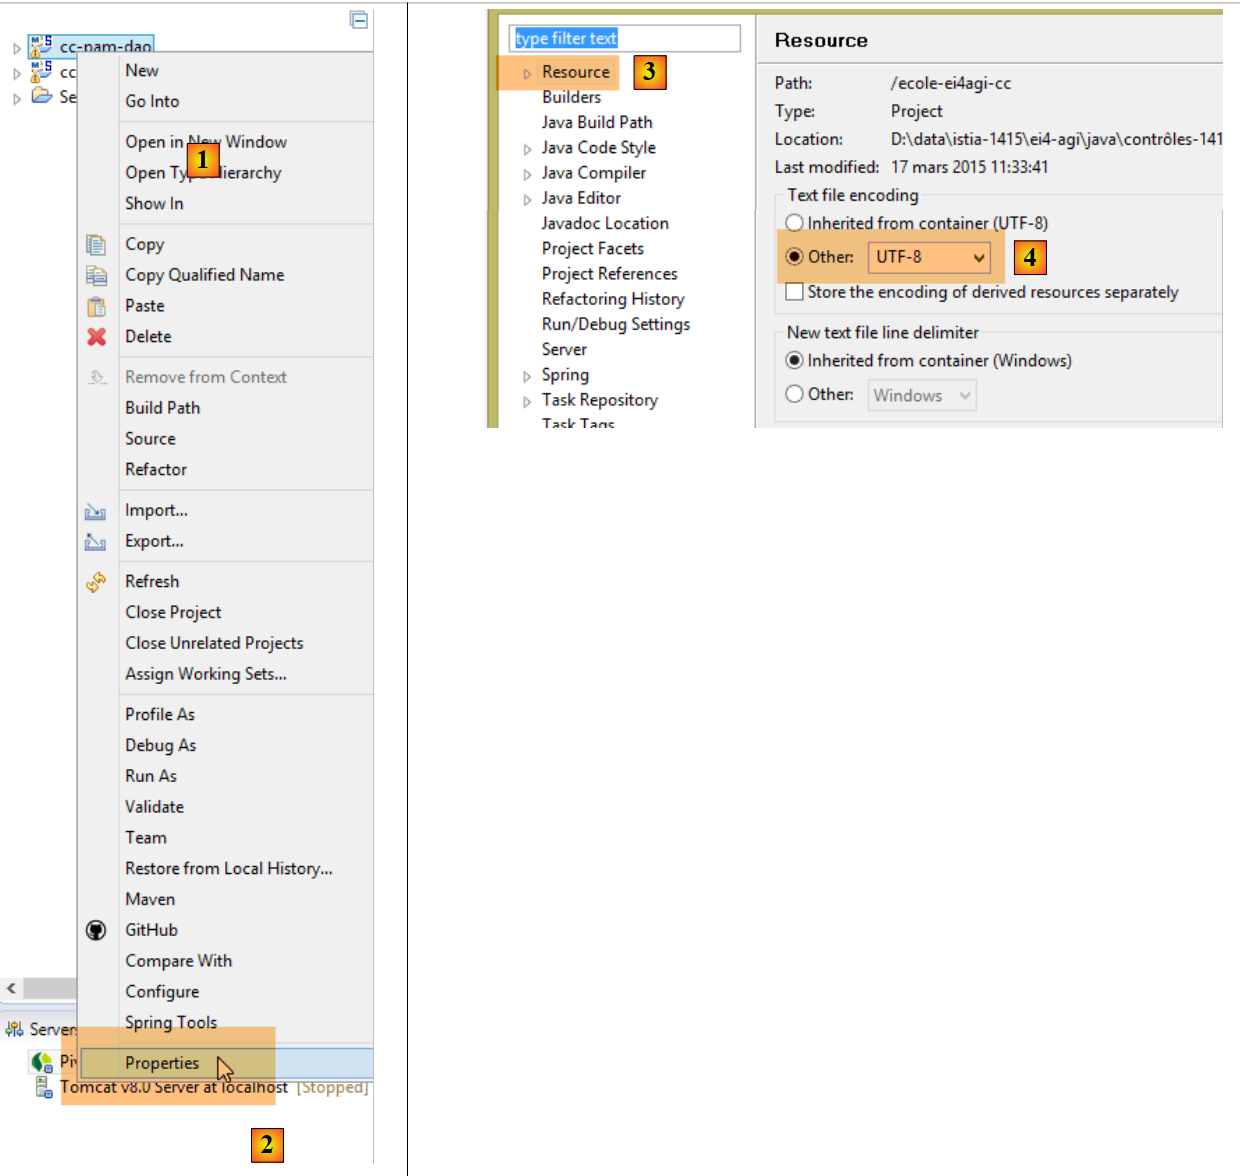
Additionally, the imported project can use UTF-8 character encoding. Follow these steps to set this encoding in the imported project:
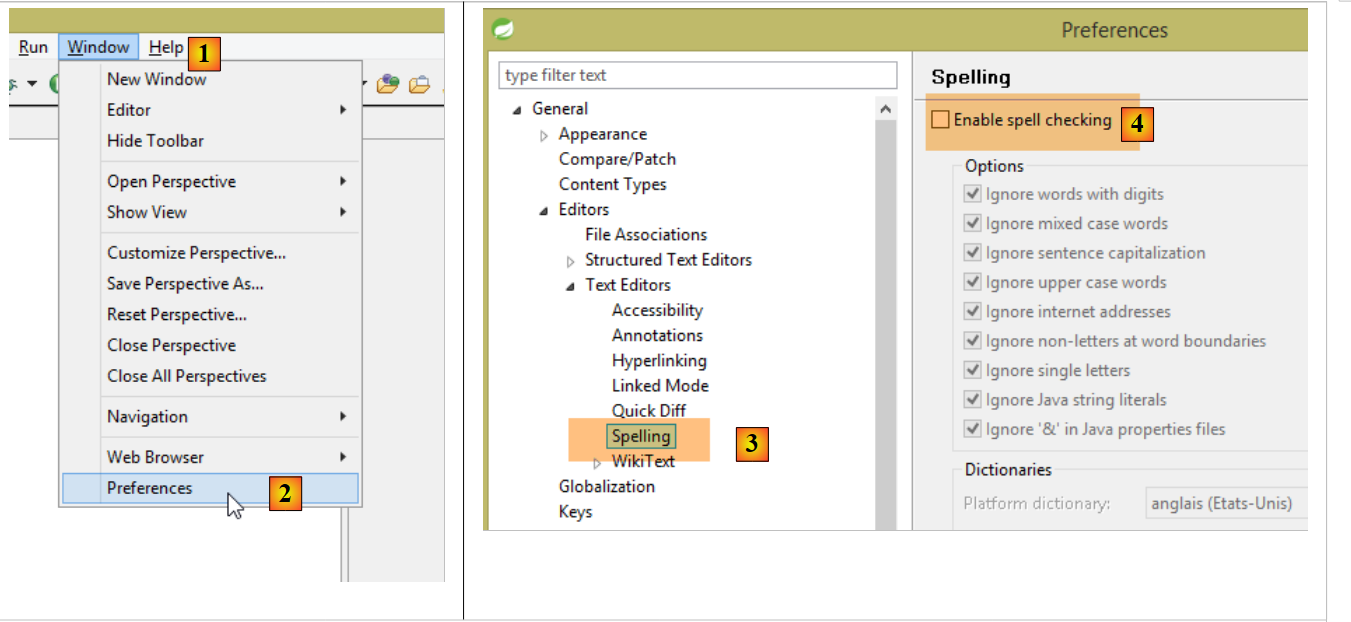
Additionally, it may be helpful to disable spell checking in the project to prevent French comments from being underlined as incorrect. Follow the steps below:
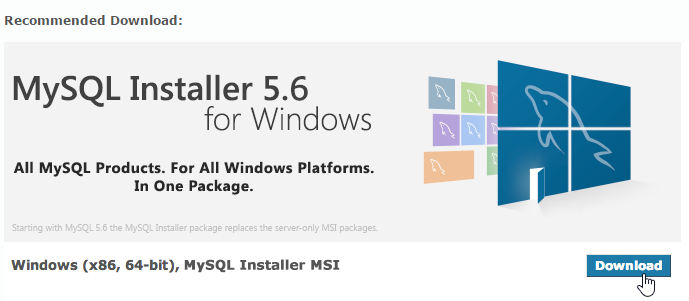
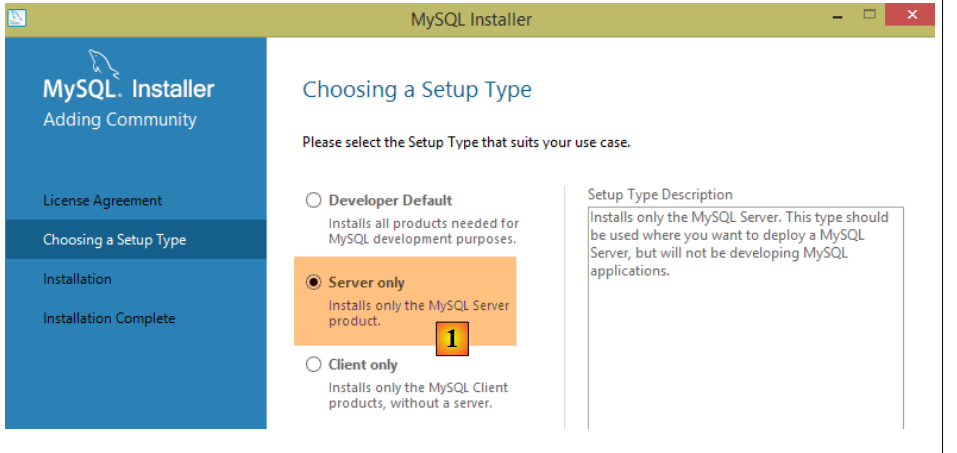
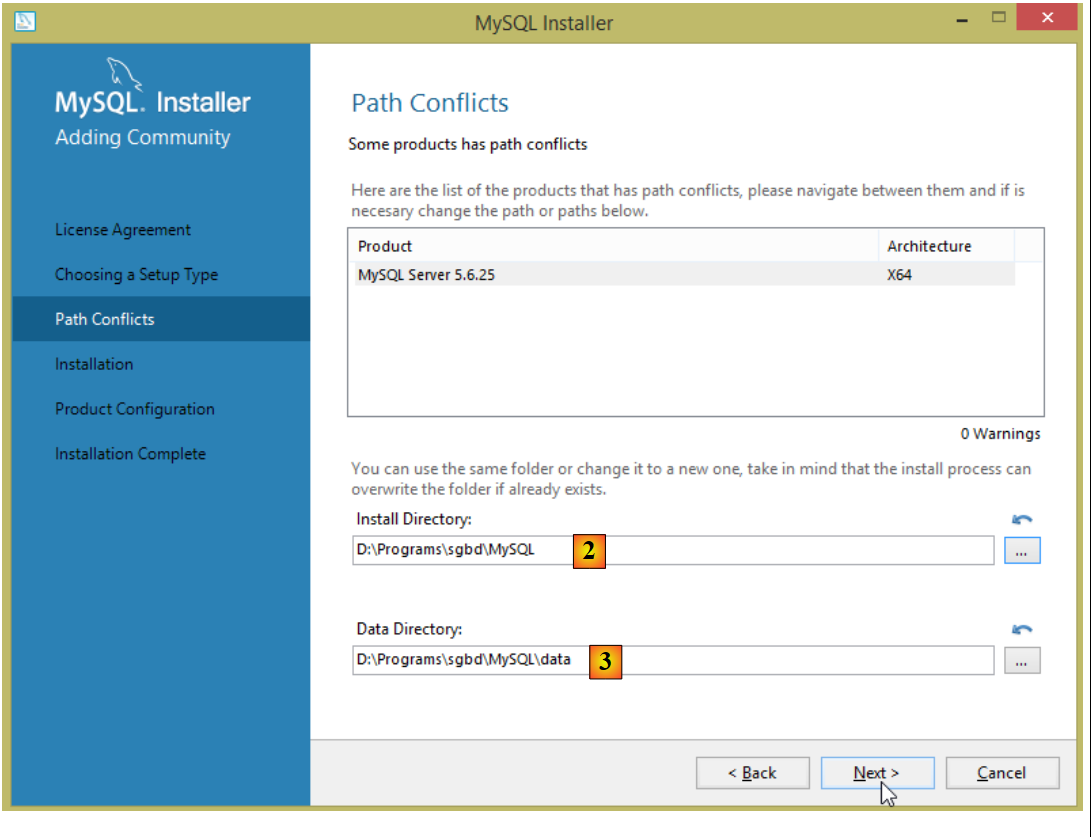
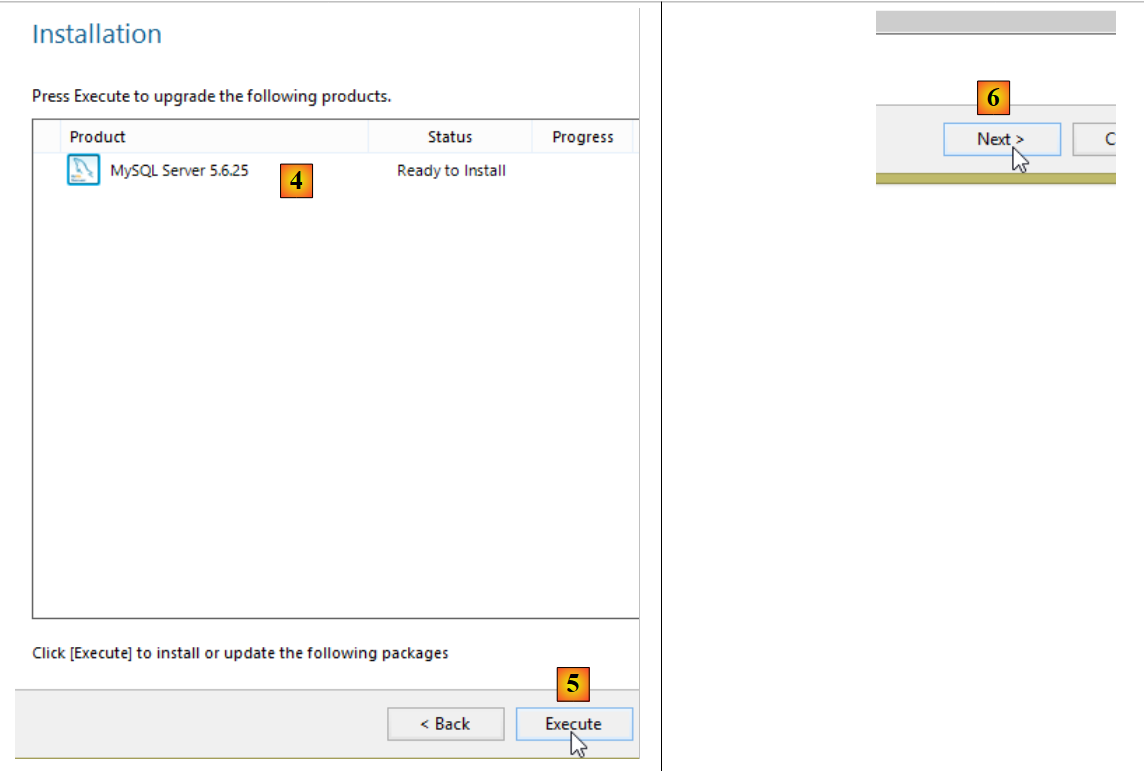
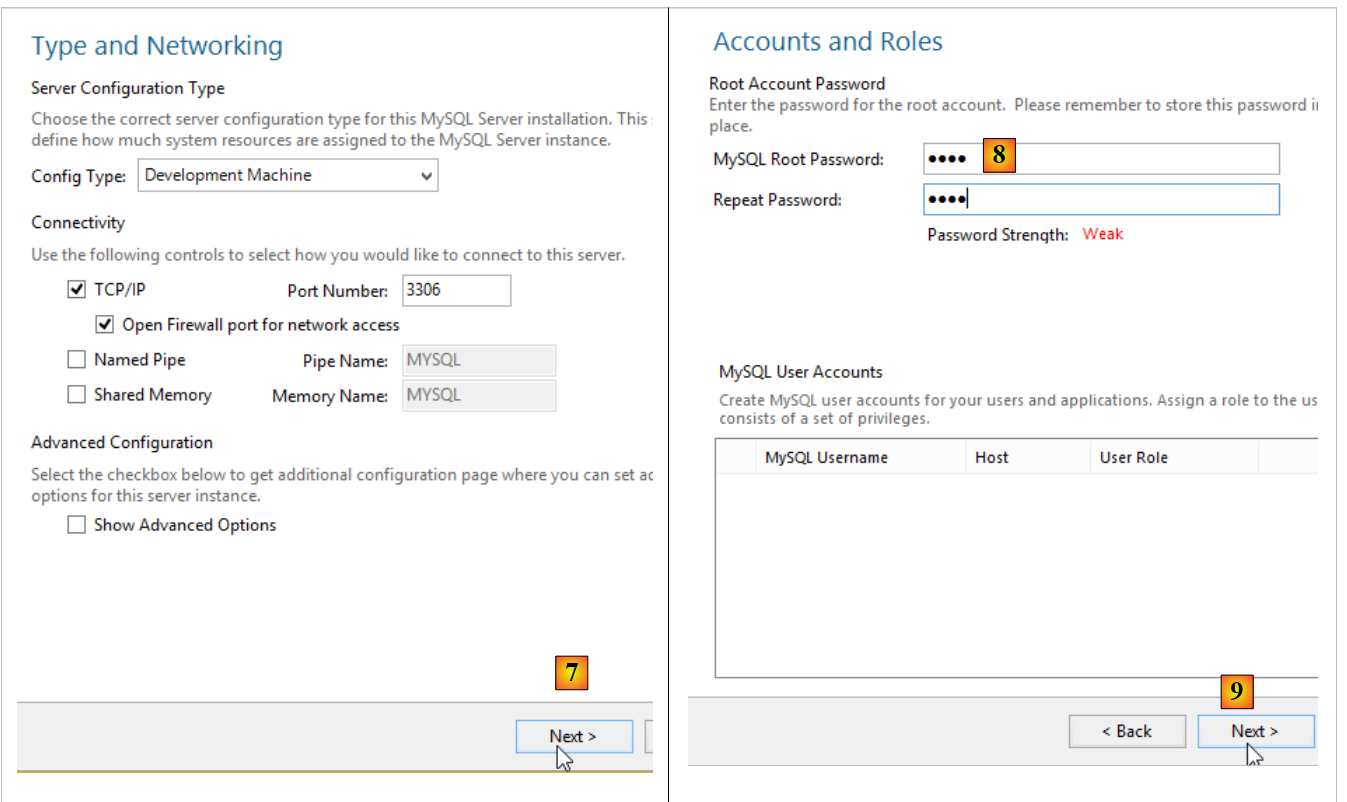
The SGBD MySQL5 Community Edition can be found (June 2015) at the URL [https://dev.mysql.com/downloads/mysql/]:
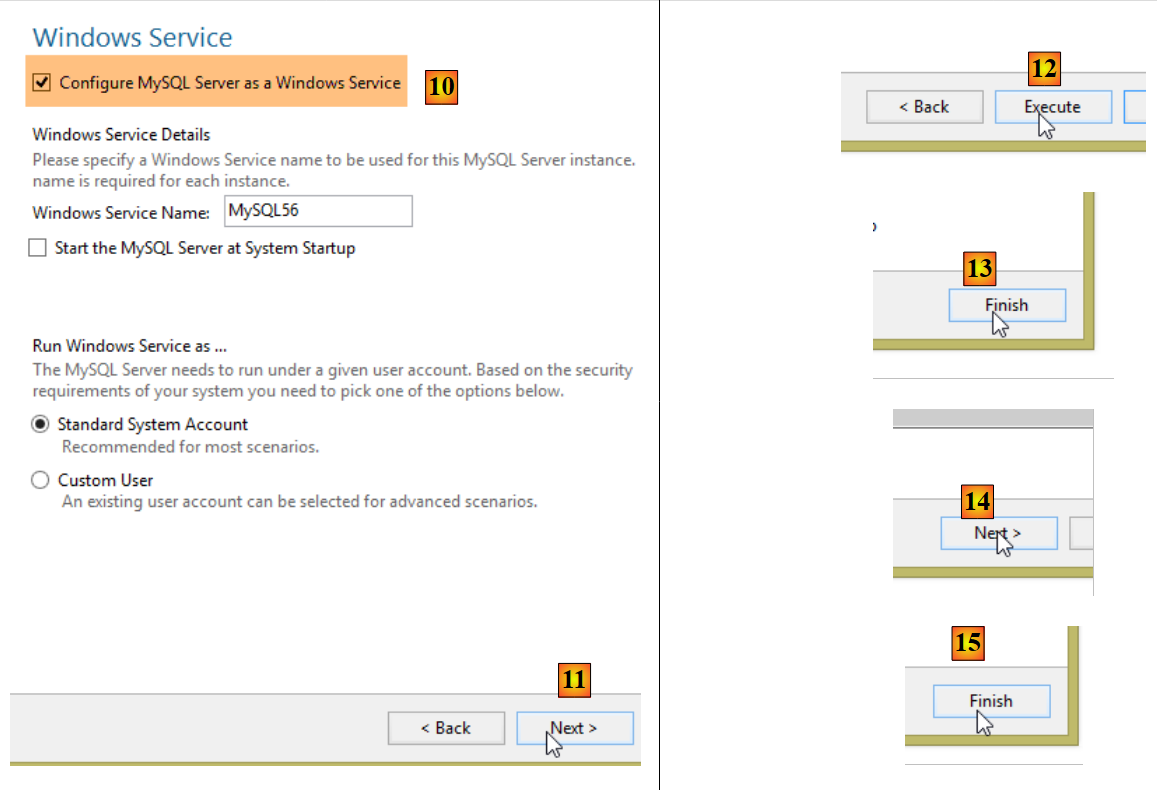
The installation proceeds as follows:
- In [8], the password [root] was used. In this document, the administrator credentials for SGBD MySQL are [root / root];
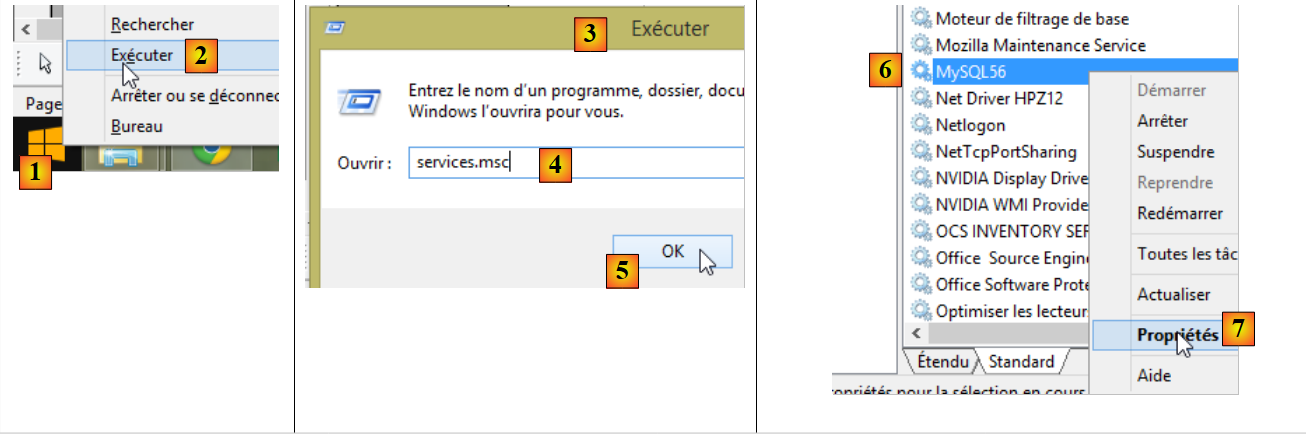
Once MySQL 5 is installed, open the Windows Services management page:
- [1]: Windows icon in the lower-left corner;
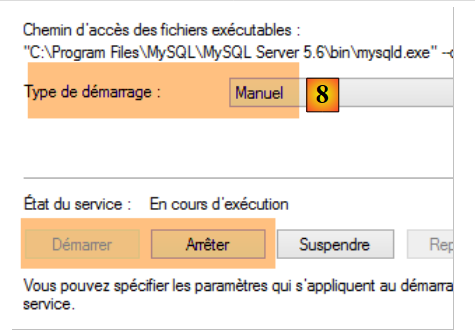
- In [8], set the [MySQL56] service to manual startup so that it does not consume resources unnecessarily. You will launch it from the Services page whenever you need it;
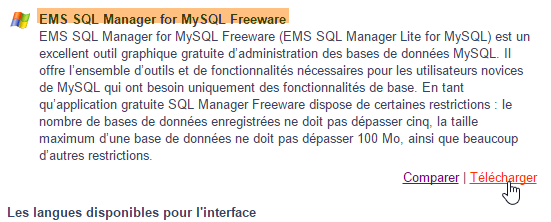
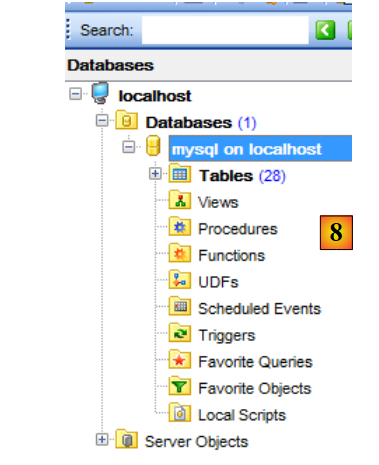
23.5. Installing EMS MyManager
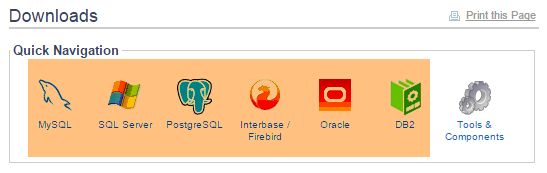
The [http://www.sqlmanager.net/en/] site offers free clients tools to manage six types of SGBD:
The advantage is that they all feature the same interface for managing SGBD. This is ideal for this document, where we want to manage all six SGBD. There is no need to learn a new client when switching between SGBD files. They can all be found in the URL and [http://www.sqlmanager.net/download/] folders. You can download the free "lite" versions:
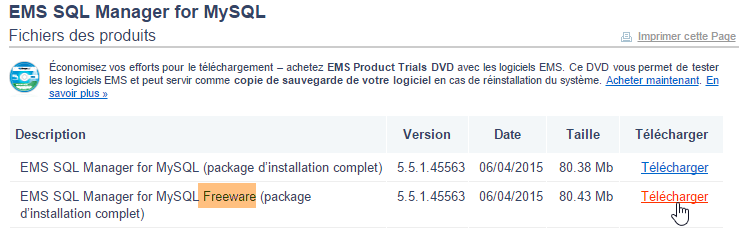
The currently available (May 2015) URL downloads are as follows:
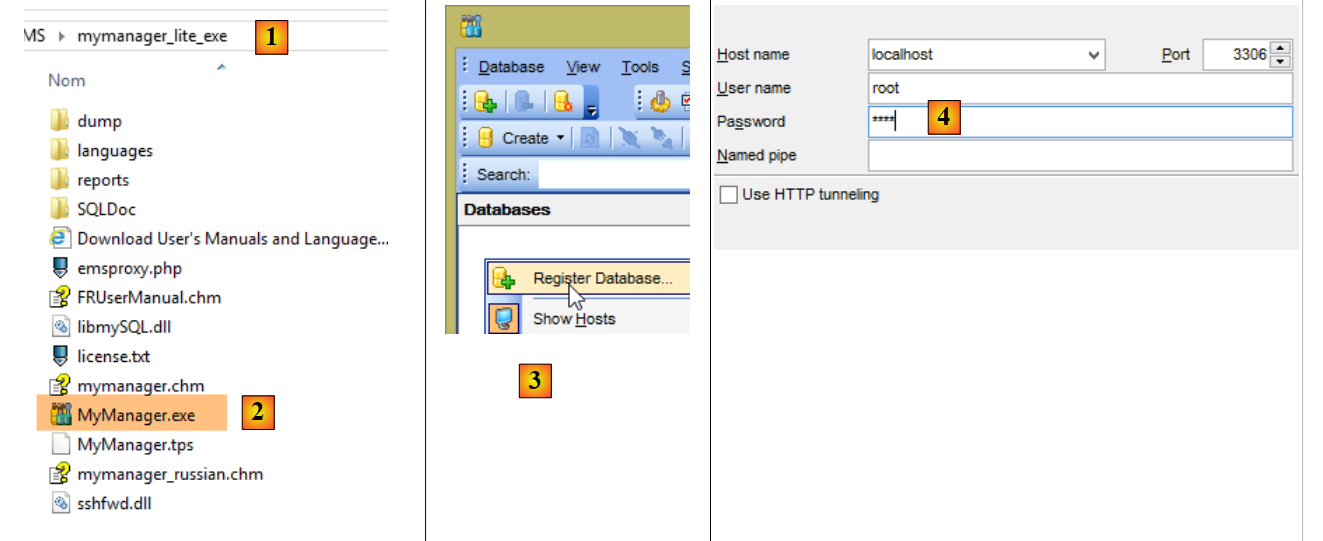
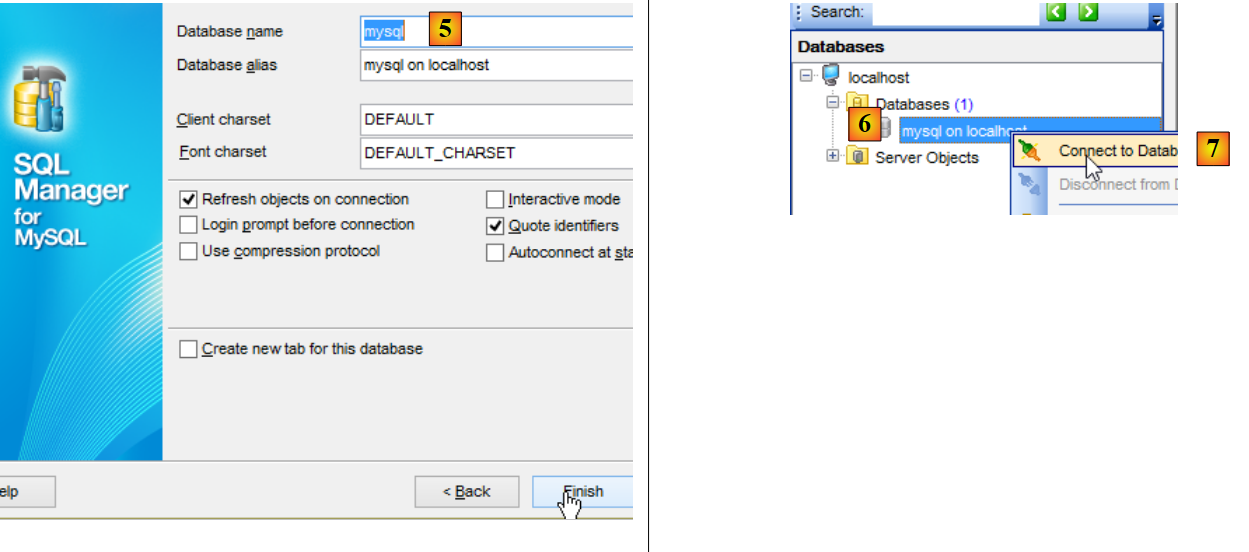
When installing, for example, the MyManager client from MySQL5, the following directory structure is obtained:
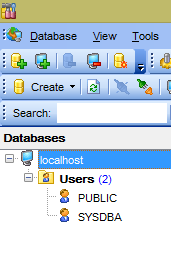
- the executable is in [2];
- the steps in [3-8] show how to connect [MyManager] to one of the databases in MySQL;
- in [4], the password is [root];
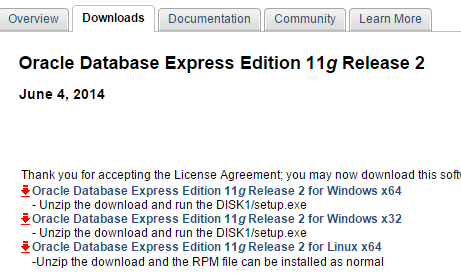
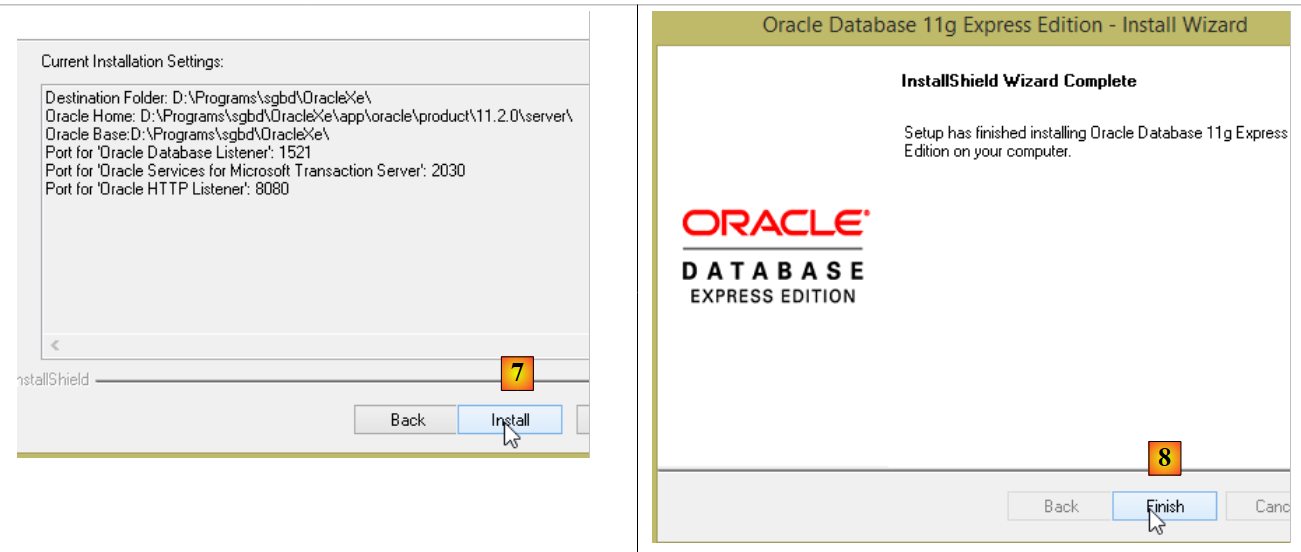
23.6. Installing SGBD Oracle Database Express Edition 11g Release 2
SGBD Oracle Database Express Edition 11g Release 2 is available as of URL (June 2015): [http://www.oracle.com/technetwork/database/database-techno logies/express-edition/downloads/index.html]:
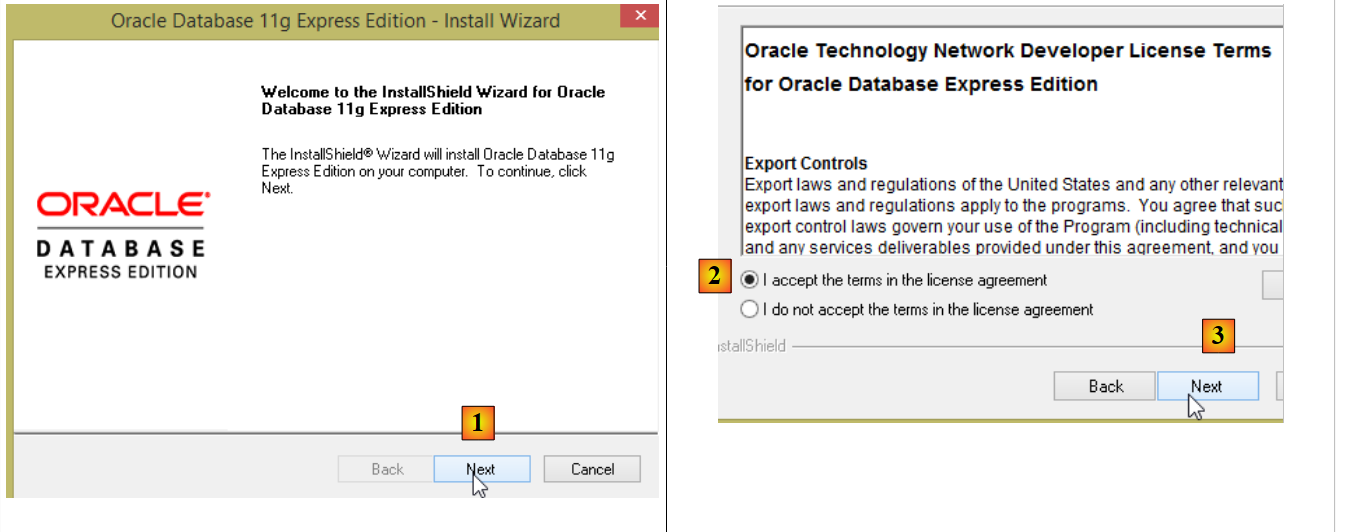
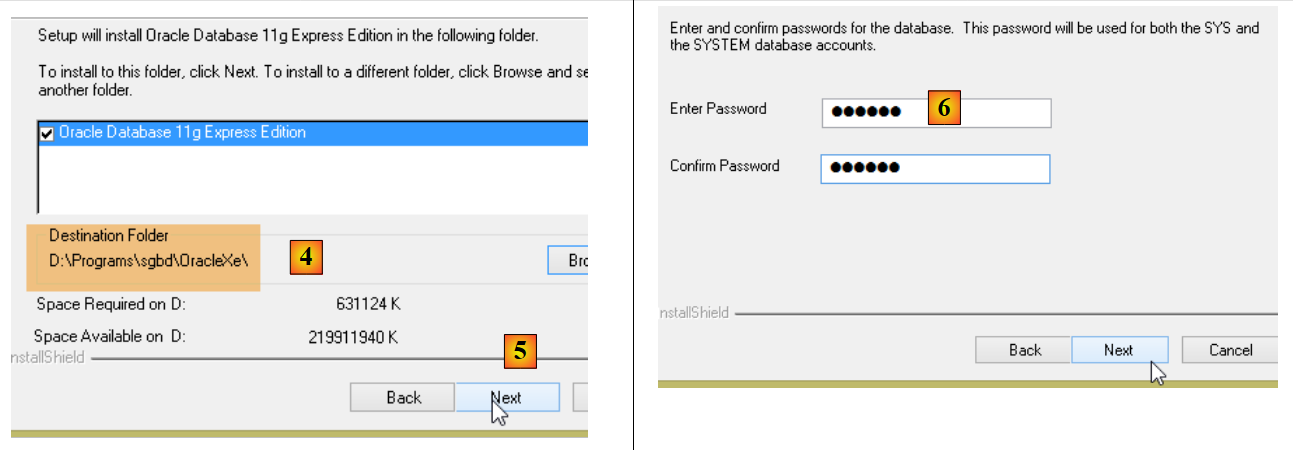
The installation proceeds as follows:
- In [6], enter the password [system]. In this document, the Oracle administrator credentials are [system / system];
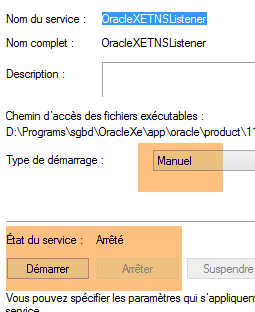
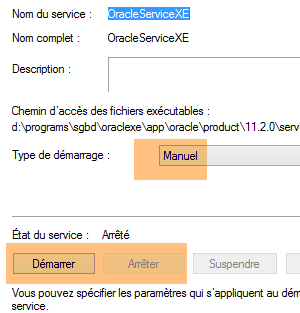
The installation installs Oracle as a Windows service. Several services are installed, all of which are set to start automatically by default. The first step is to switch them to manual mode:
Two services must be started:
- [OracleXETNSListener], which listens on port 1521 for requests made to SGBD;
- [OracleServiceXE], which is SGBD;
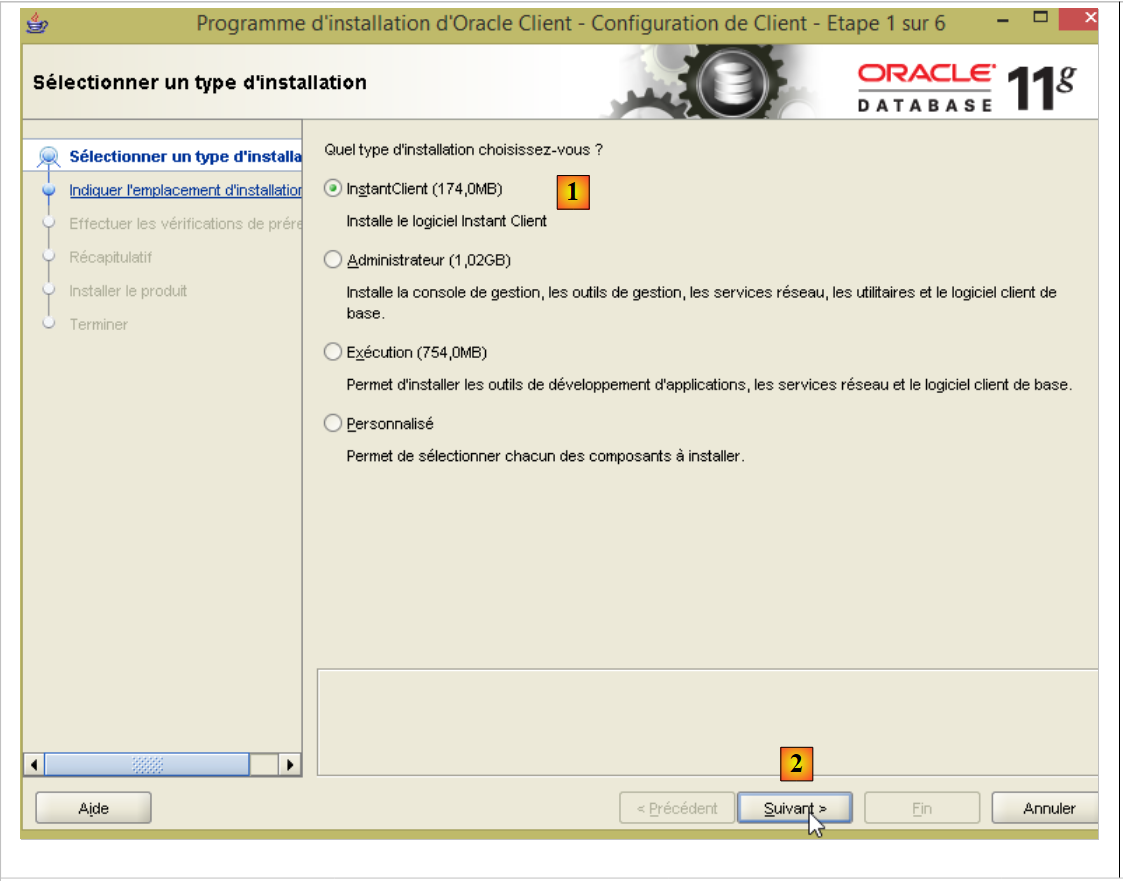
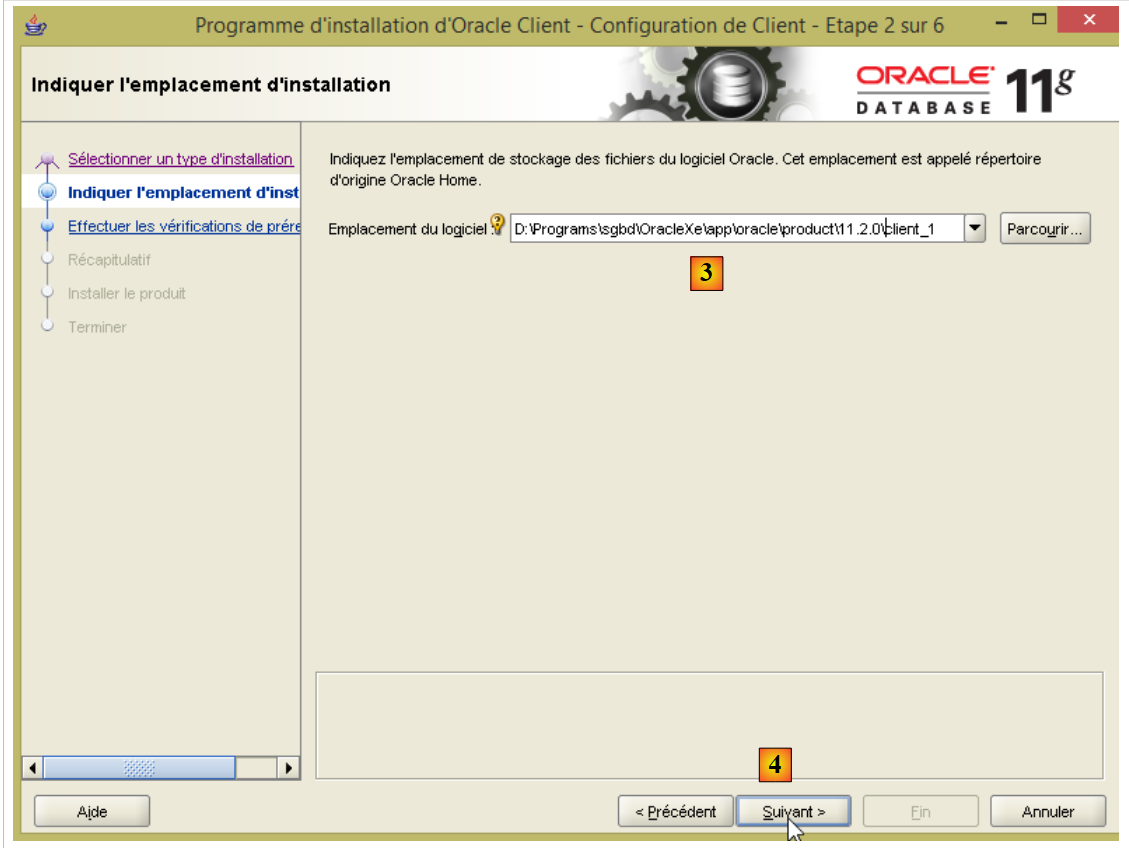
To administer Oracle, we will use the [OraManager] client (section 23.5). To make it usable, you must first install the [Oracle Database Express Edition 11g Release 2 Client] suite available at URL (June 2015): [http://www.oracle.com/technetwork/database/enterprise-edition/downloads/112010-win32soft-098987.html]. You must download the 32-bit version because [OraManager] is a 32-bit client:
Install this suite as follows:
- In [3], specify the folder <oracleXE-install>\app\oracle\product\11.2.0\client_1, where <oracleXE-install> is the folder where you installed Oracle Express;
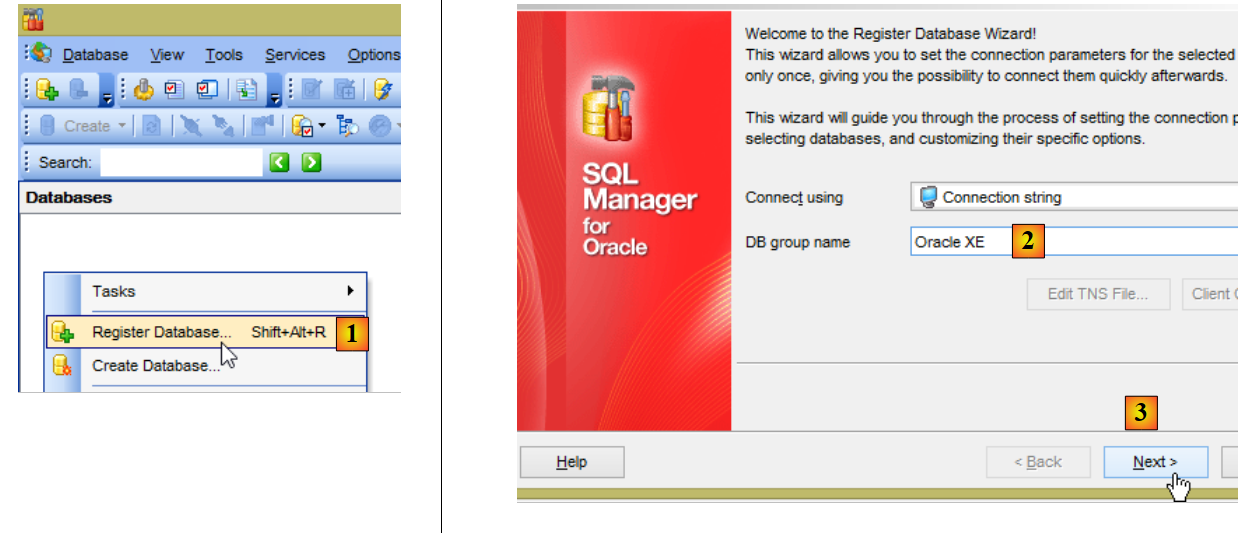
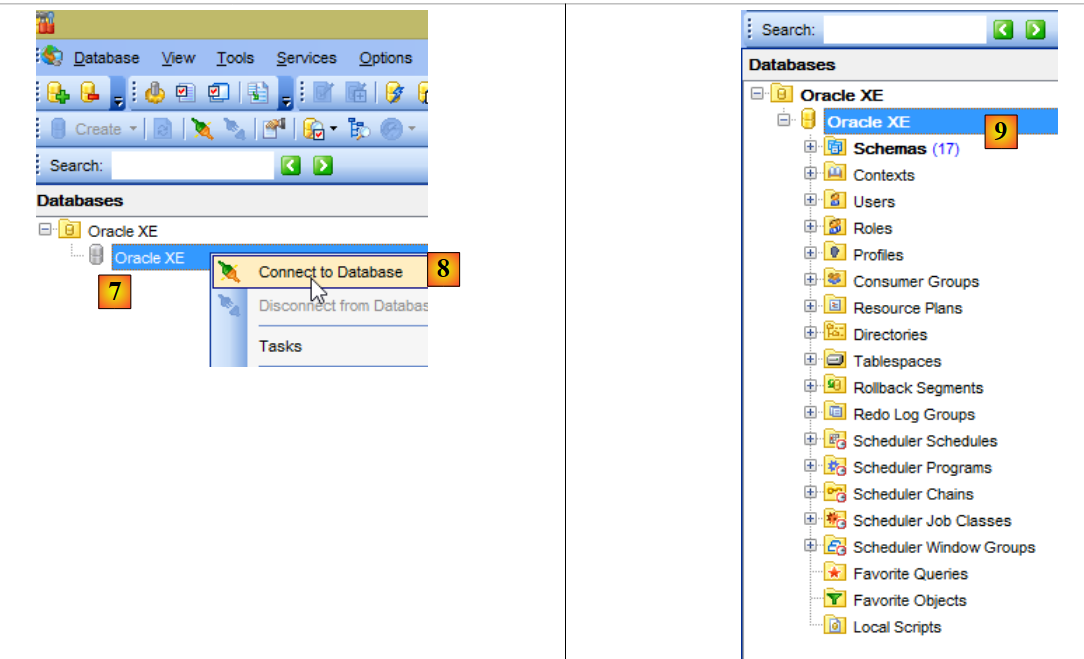
Now, let’s connect the [OraManager] client to the SGBD Oracle server:
- In [2], the group name is arbitrary;
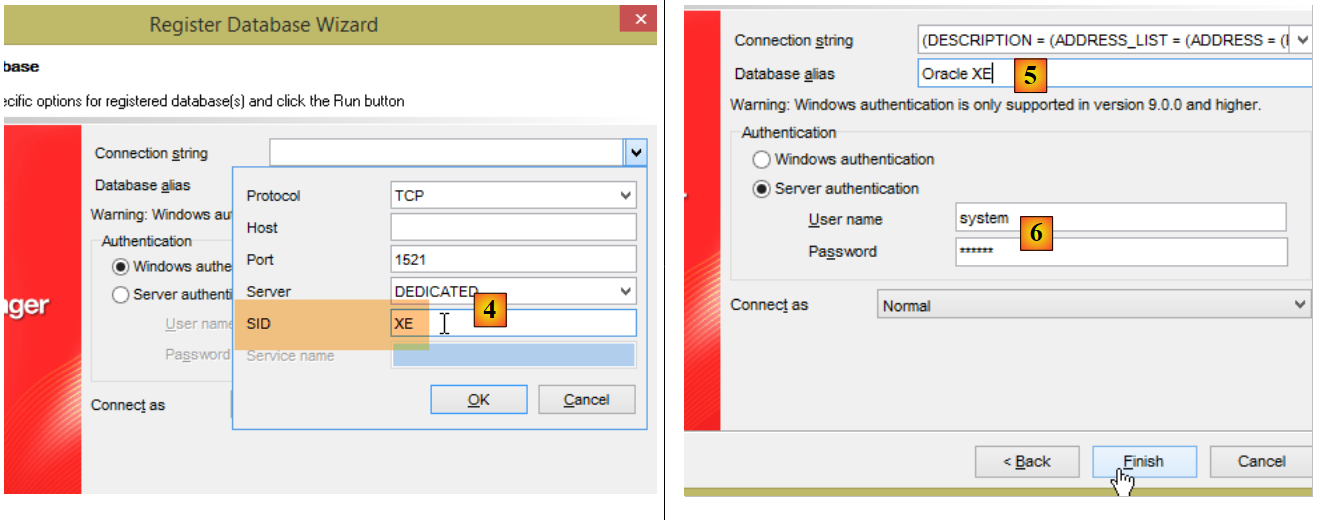
- In [4], you must enter XE;
- in [5], the alias is free;
- in [6], the identifiers are [system / system];
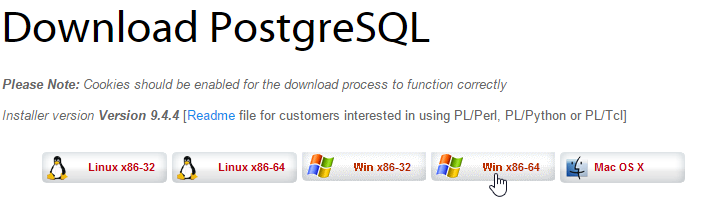
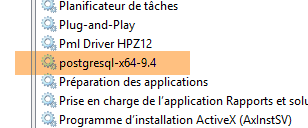
23.7. Installation of SGBD PostgreSQL 9.4
SGBD PostgreSQL 9.4 is available at URL (June 2015): [http://www.enterprisedb.com/products-services-training/pgdownload#windows]:
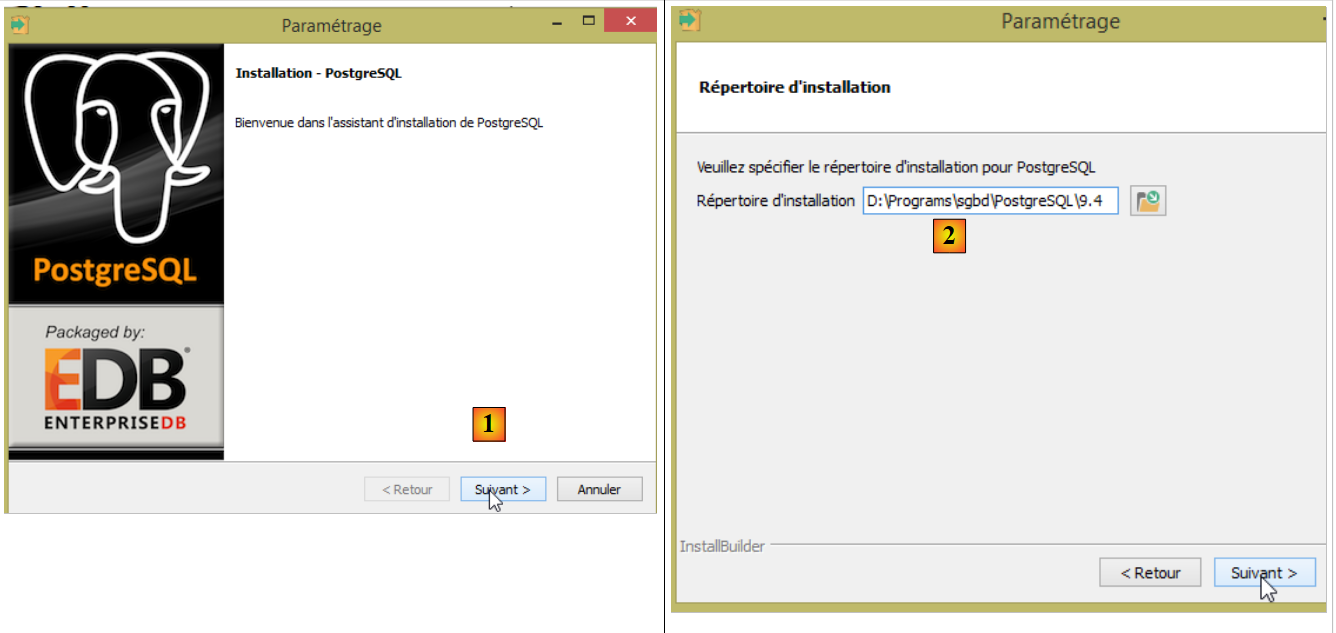
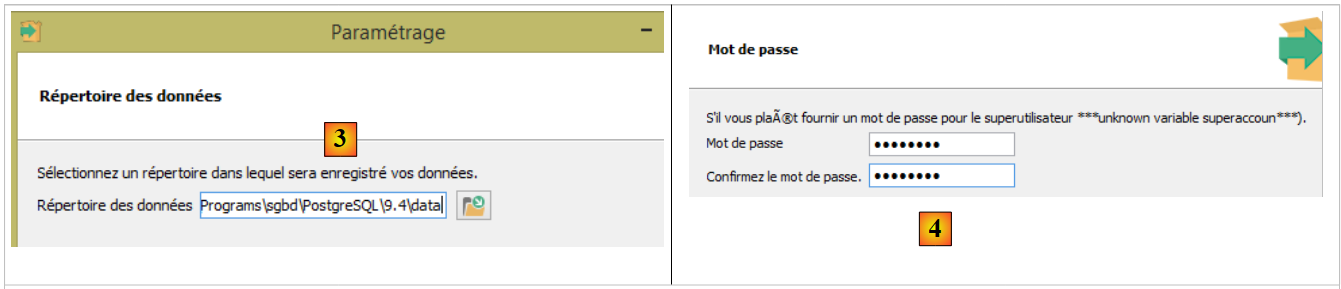
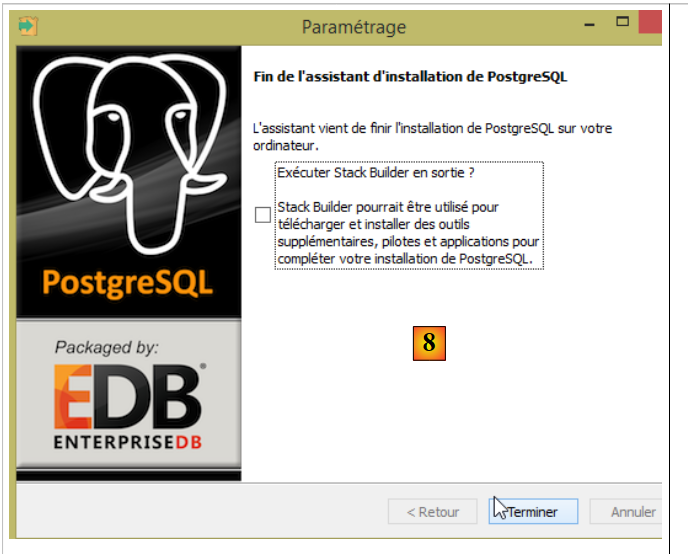
The installation proceeds as follows:
- In [4], the password is postgres. In this document, the administrator credentials for SGBD and PostgreSQL are [postgres / postgres];
The installation sets up PostgreSQL as a Windows service with automatic startup. The first step is to switch it to manual mode:
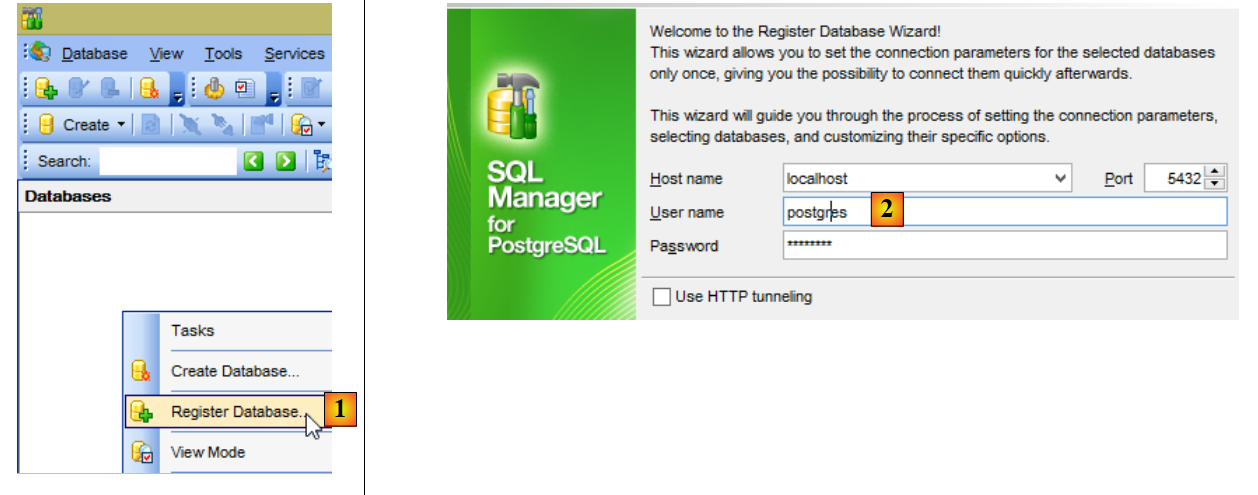
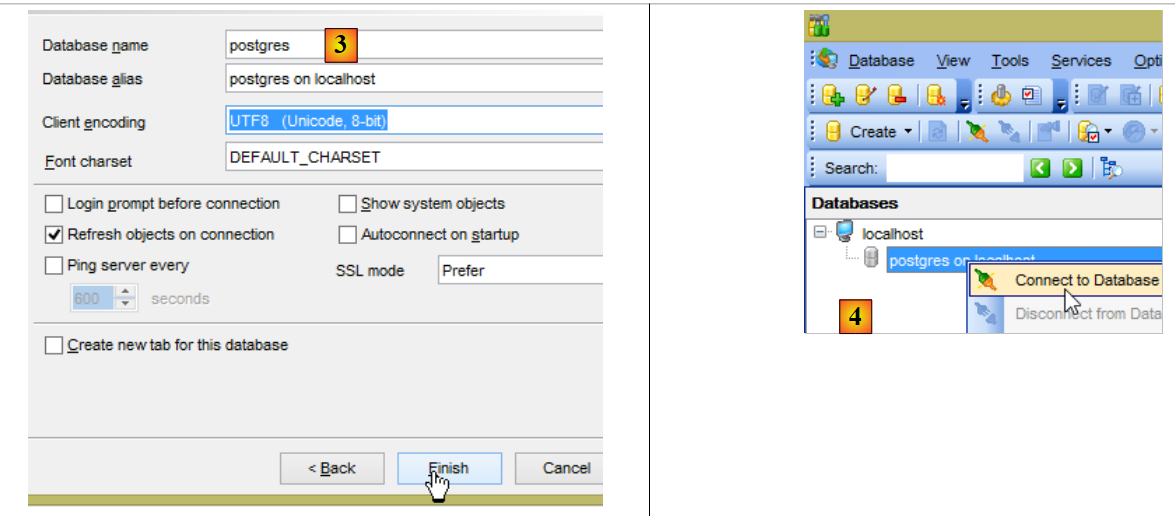
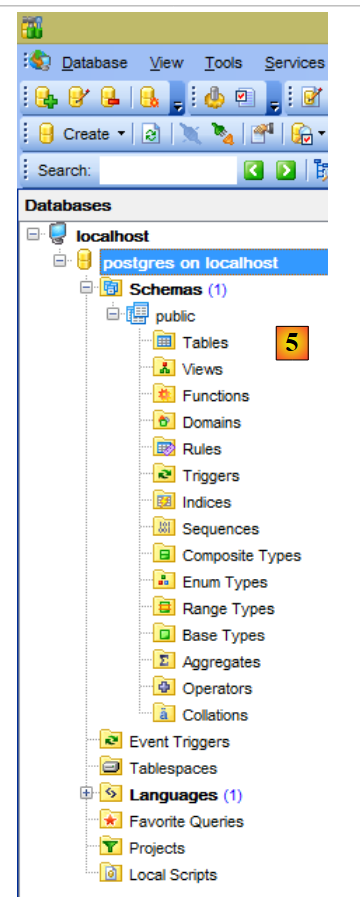
Now connect the [PgManager] client (see section 23.5) to SGBD and PostgreSQL:
- in [2], the credentials are [postgres / postgres];
- in [3], you connect to the database [postgres];
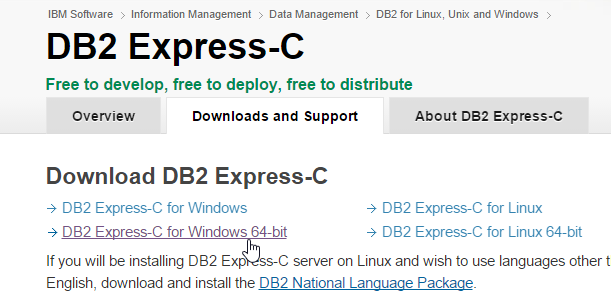
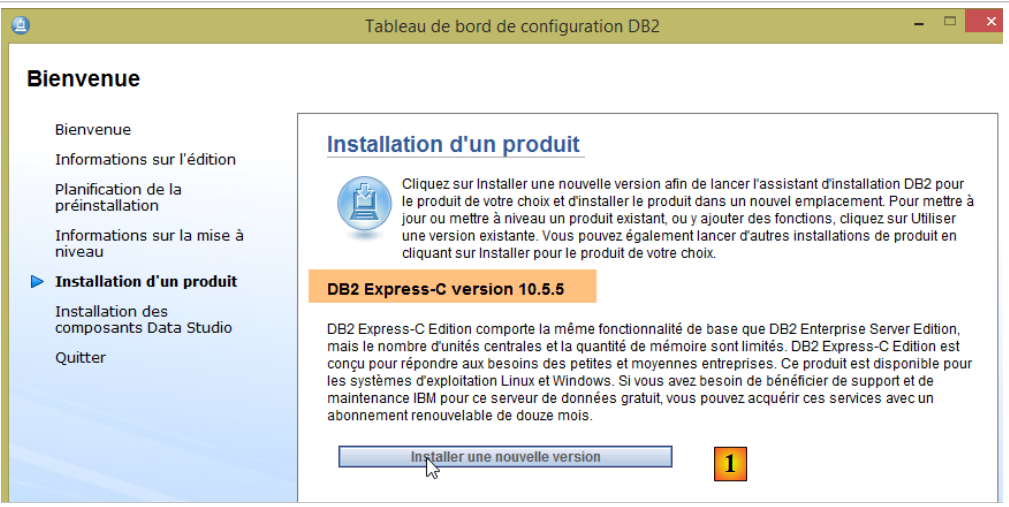
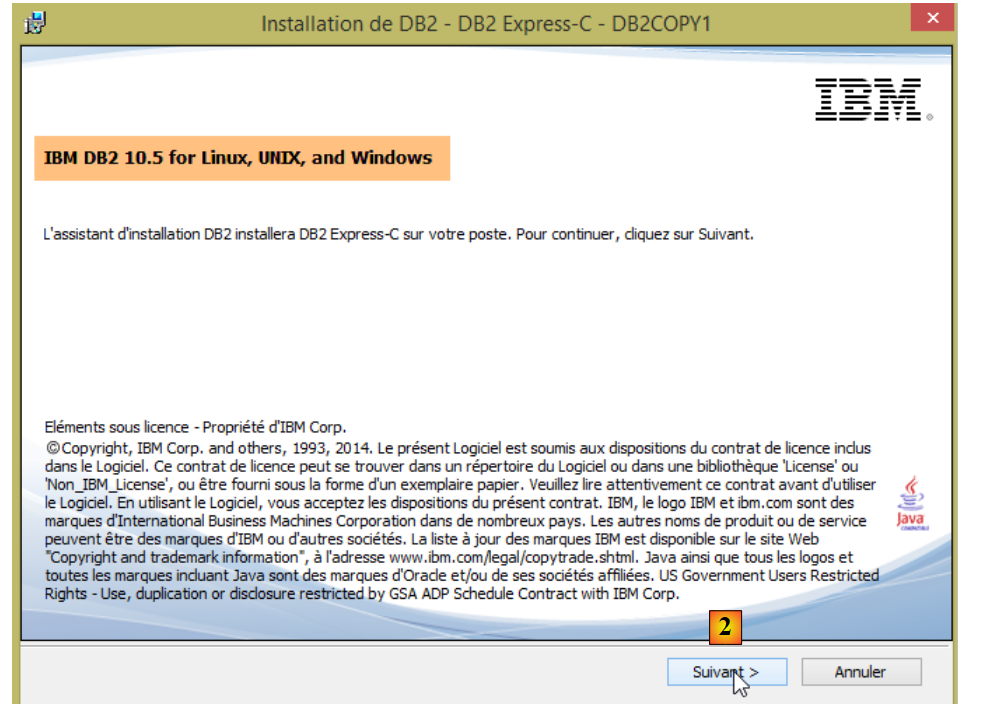
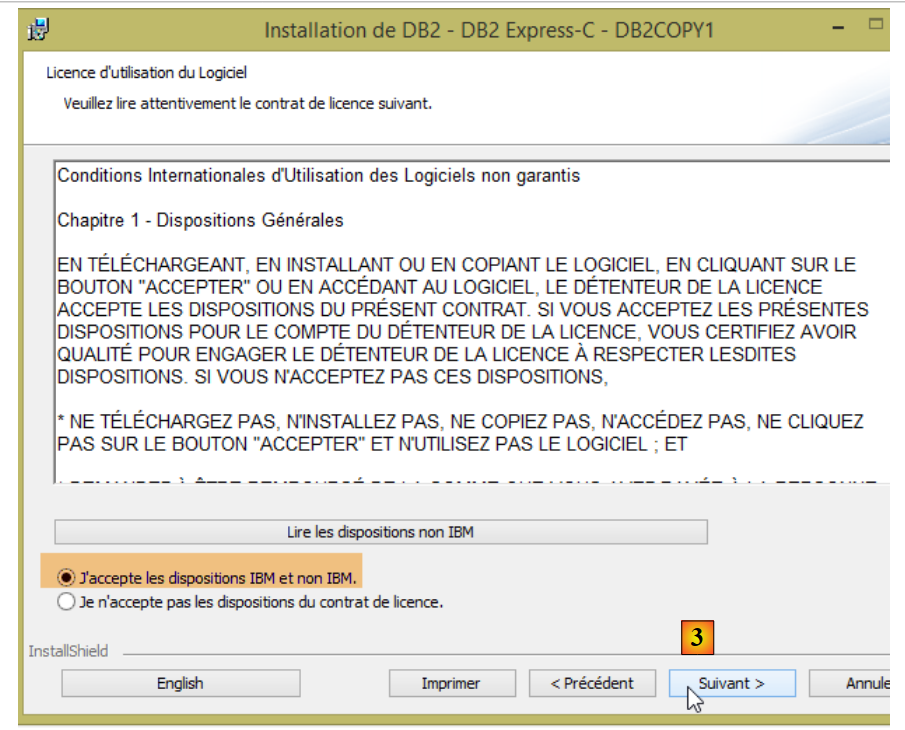
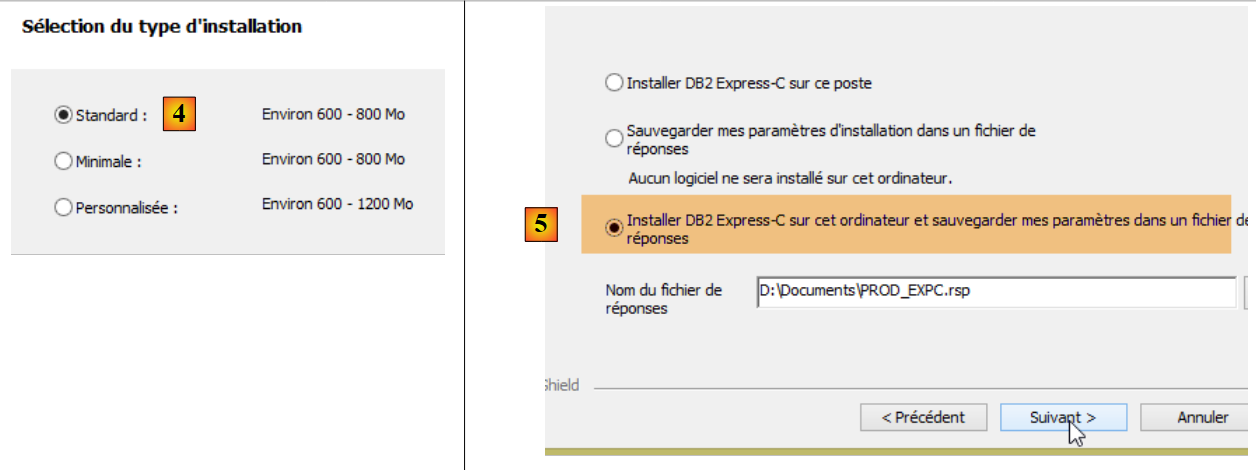
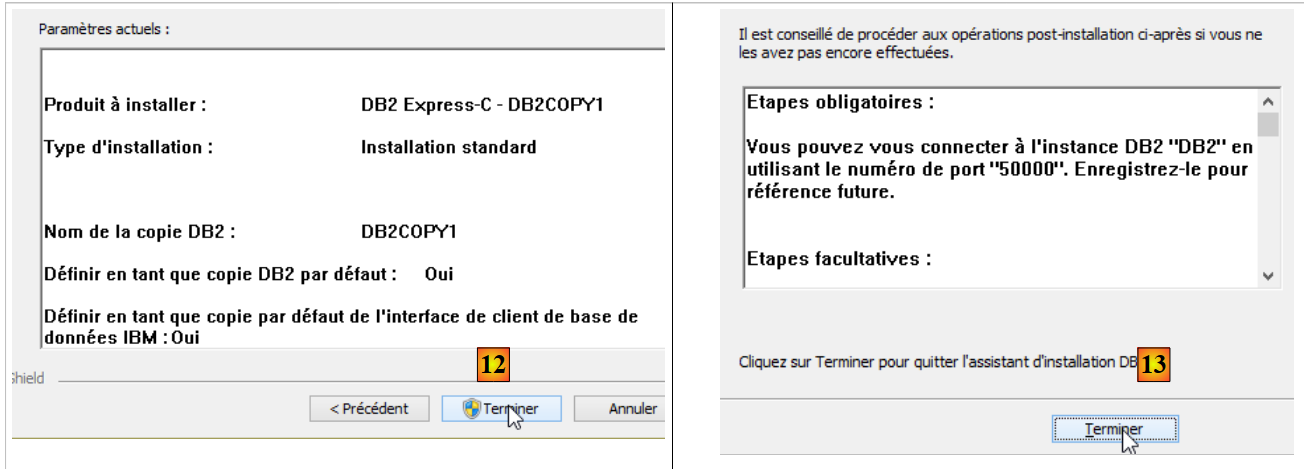
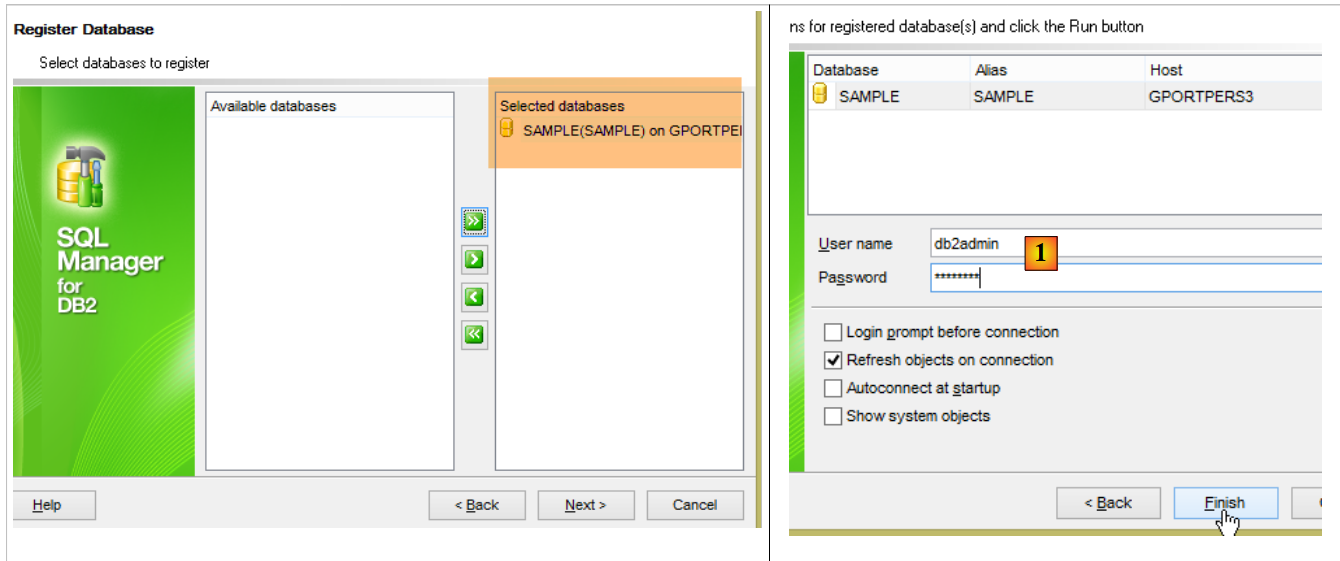
23.8. Installation of SGBD DB2 Express
The SGBD DB2 Express is available at URL (June 2015): [http://www-01.ibm.com/software/data/db2/express-c/download.html]:
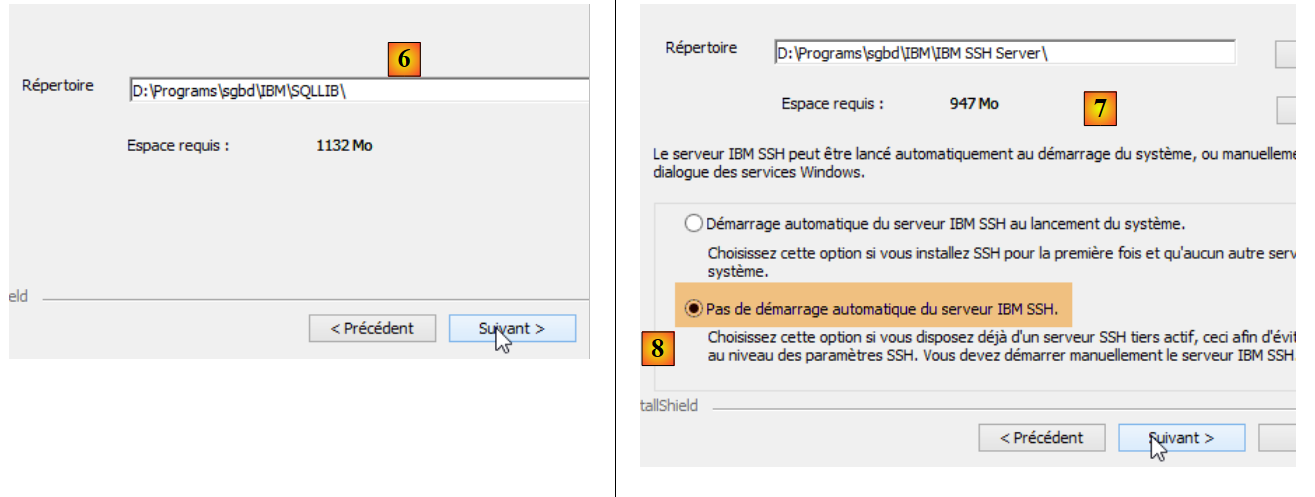
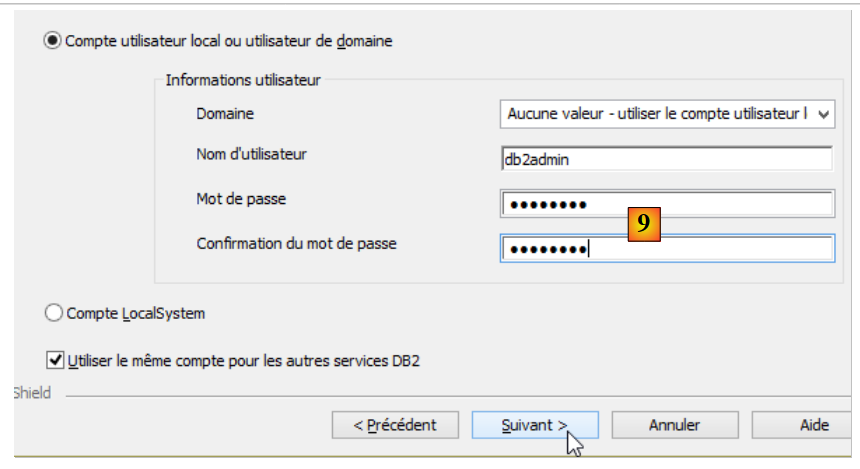
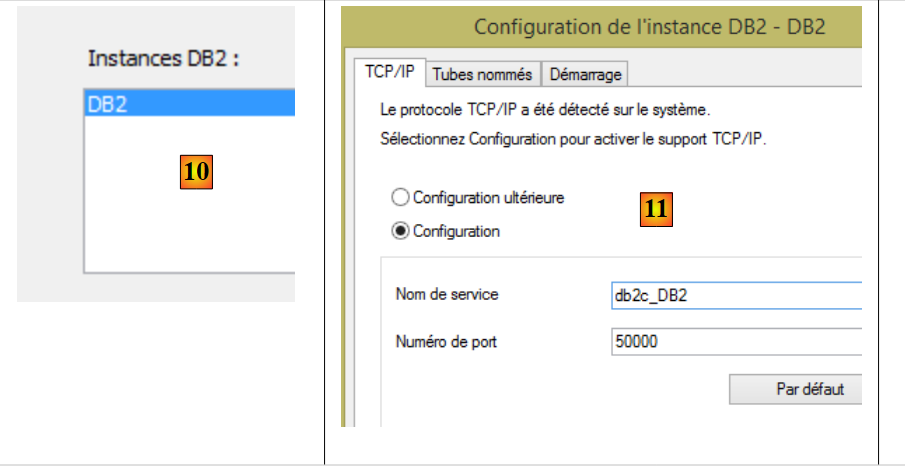
The installation proceeds as follows:
- In [9], the password is [db2admin]. In this document, the administrator credentials for SGBD are [db2admin / db2admin];
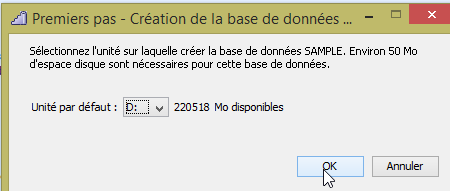
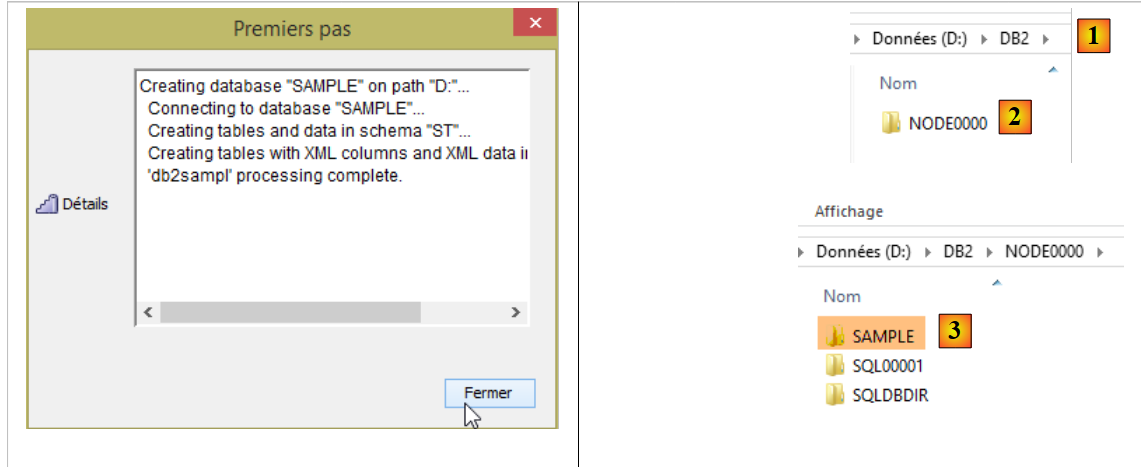
Note: You may be tempted to skip this step. Do not do so. It will create the folder where the DB2 databases we are about to create will be stored.
- A folder named [d:\DB2] was created in [1];
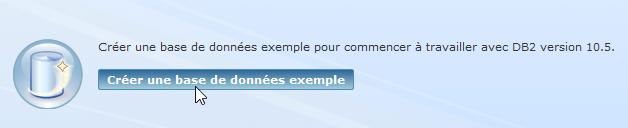
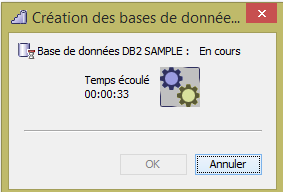
- The database [SAMPLE] was created in the folder [d:\db2\node0000];
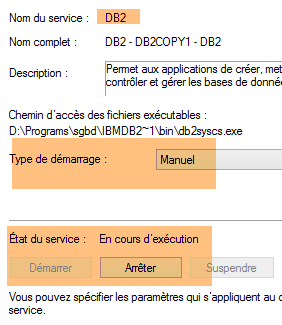
The installation sets up DB2 as a Windows service with automatic startup. The first step is to switch it to manual mode:
Do this for all the [DB2*] services listed above. Only the [DB2 - DB2COPY1] service needs to be started for the purposes of this document.
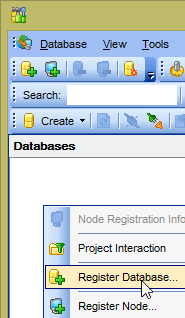
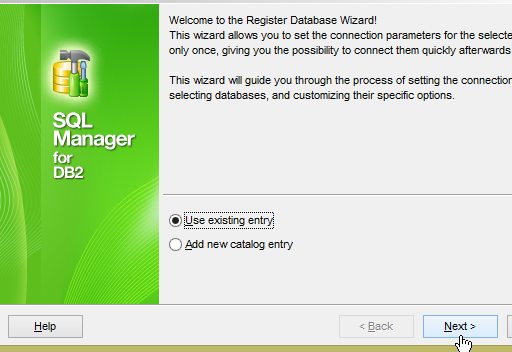
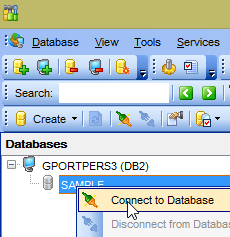
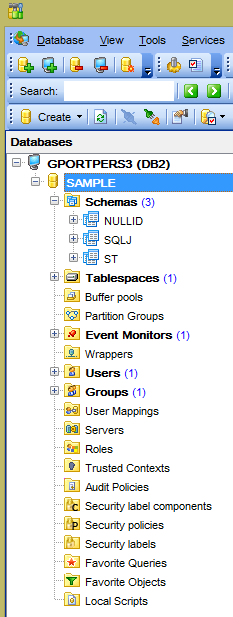
Now connect the [Db2Manager] client (see section 23.5) to SGBD and DB2:
- in [1], use the [db2admin / db2admin] credentials;
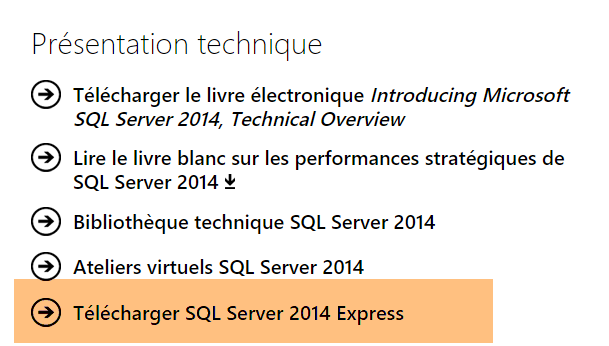
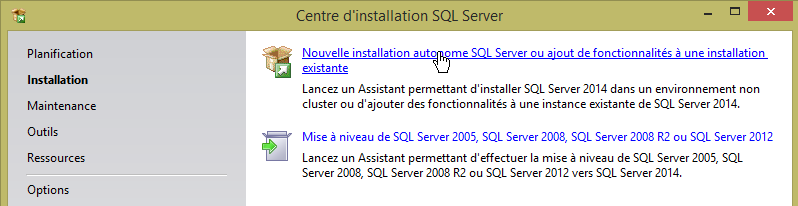
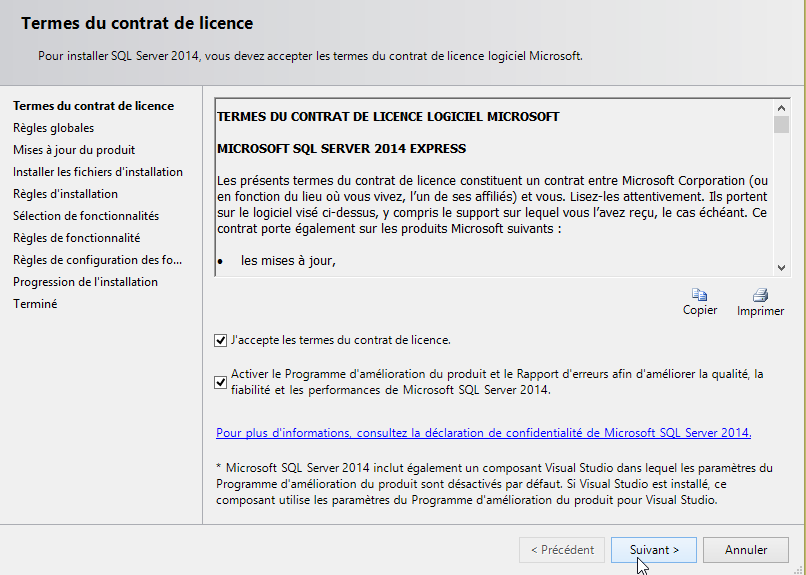
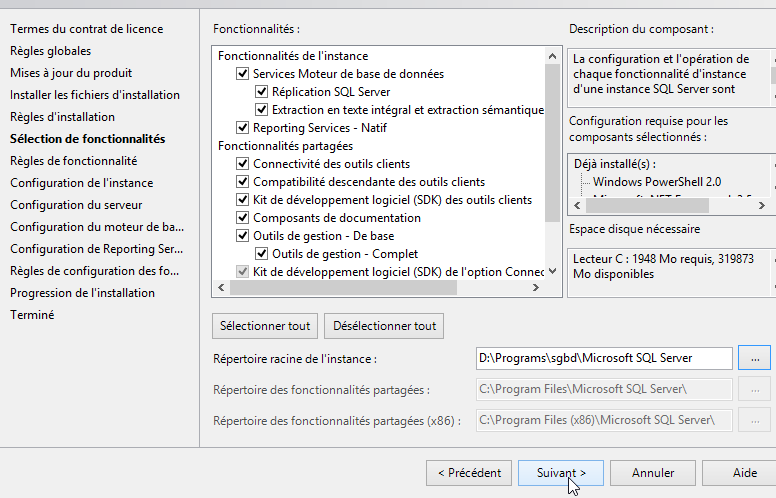
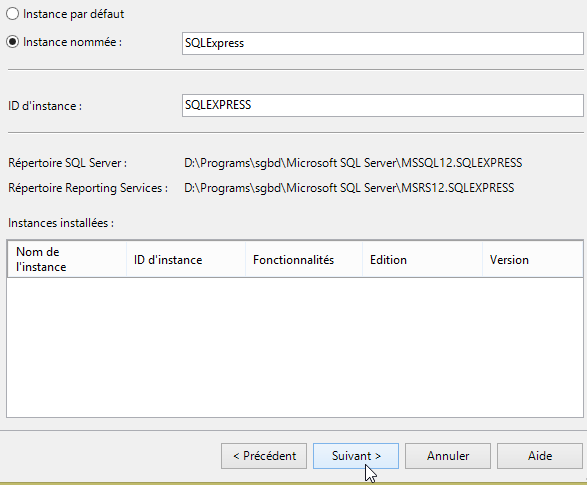
23.9. Installation of SGBD SQL Server 2014 Express
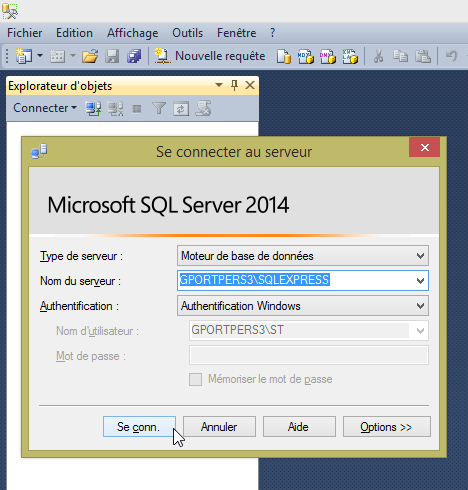
SGBD SQL Server 2014 Express is available as of URL (June 2015): [http://www.microsoft.com/fr-fr/server-cloud/products/sql-server/]:
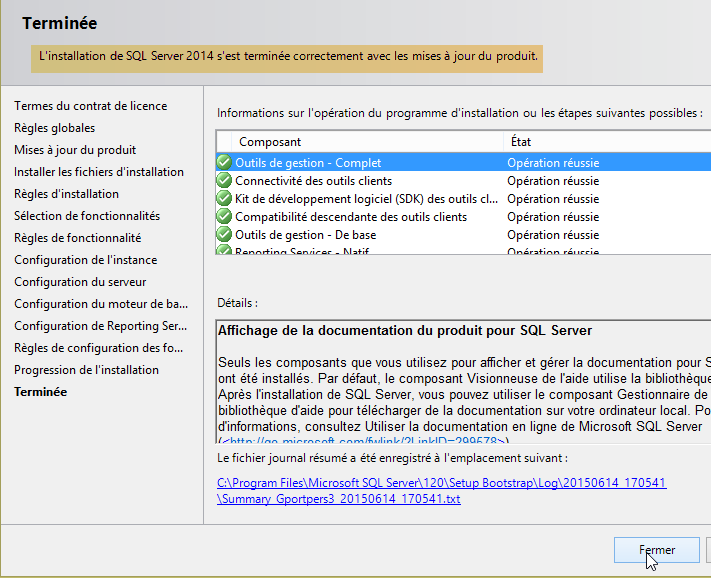
The installation proceeds as follows:
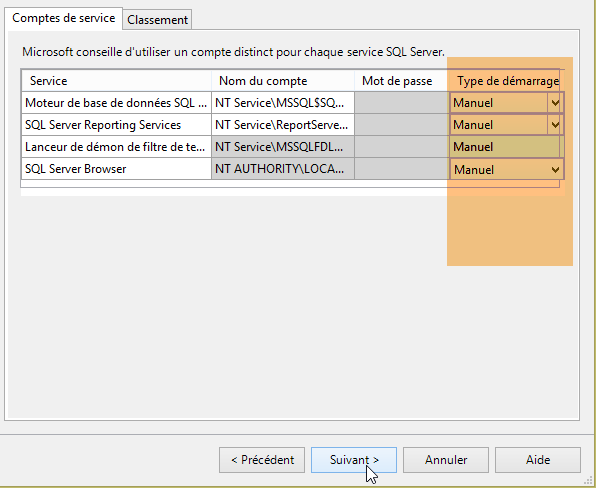
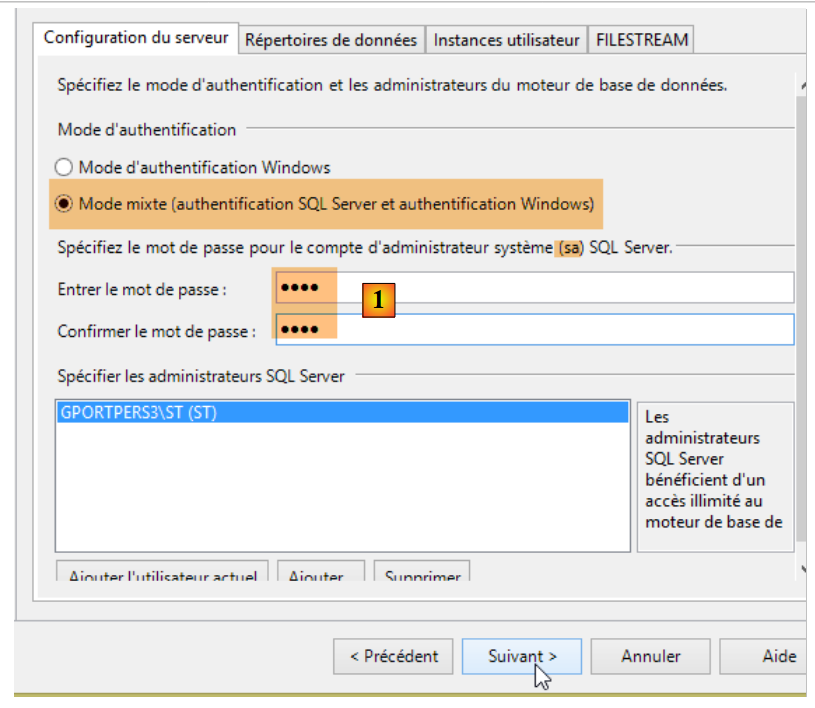
- In [1], set any password. We will change it later;
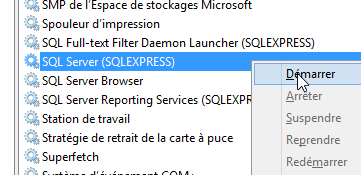
Next, start the SQL Server service:
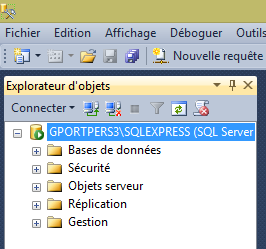
Once this is done, launch the [Microsoft SQL Server Management Studio] client, which was installed at the same time as SGBD (see Start Menu):
We could use this client to administer the SQL Server. However, for consistency with the clients clients of the other SGBD servers, we will use the [MsManager] client (see section 23.5).
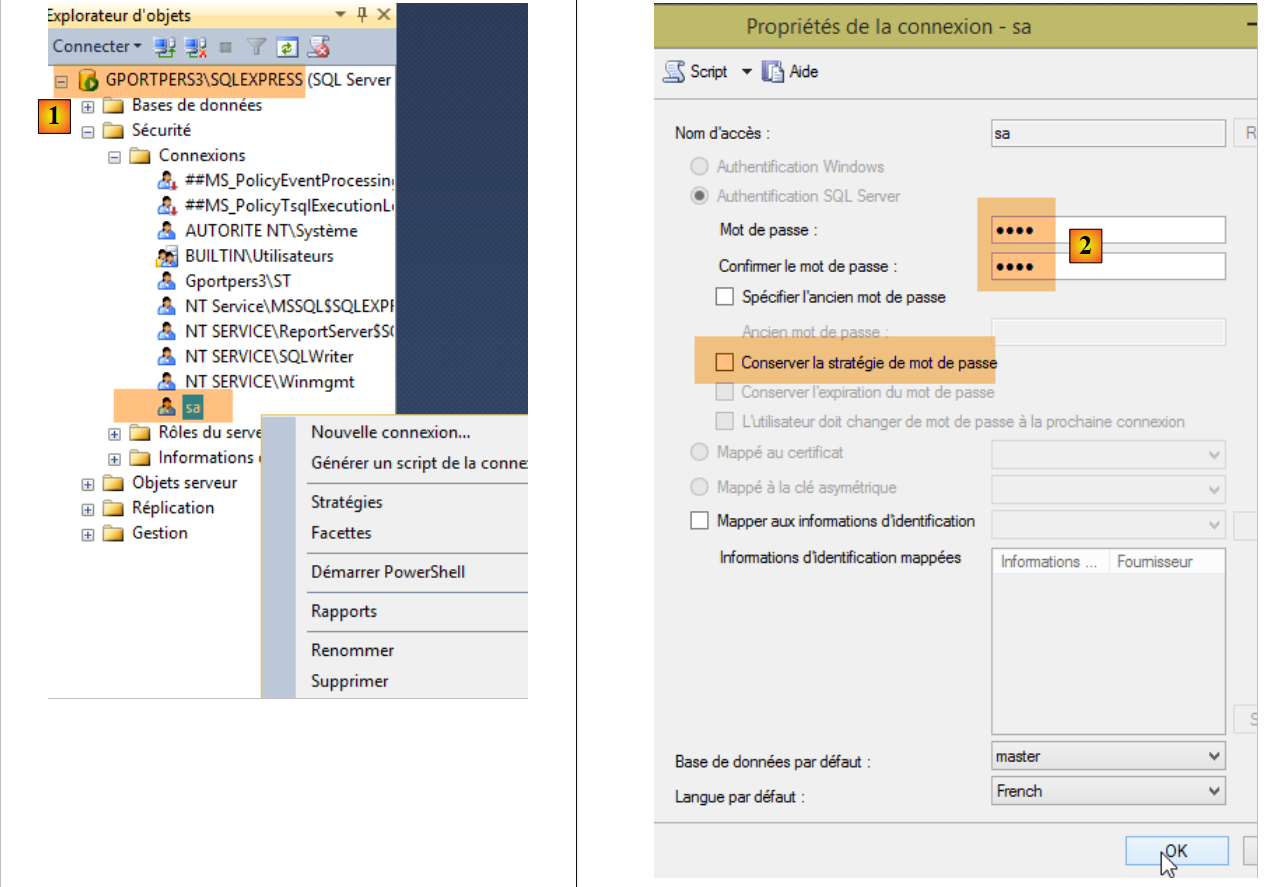
- In [1], note the name of the SGBD;
- in [2], we have set the password to msde. In this document, the administrator credentials for SGBD are [sa / msde];
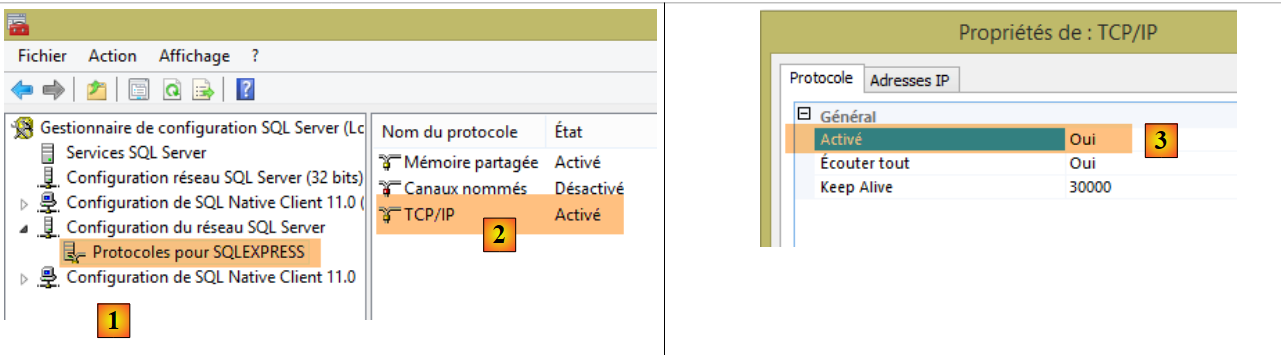
Once this is done, launch the [Gestionaire de configuration SQL Server] tool, which was installed at the same time as SGBD (see Start Menu):
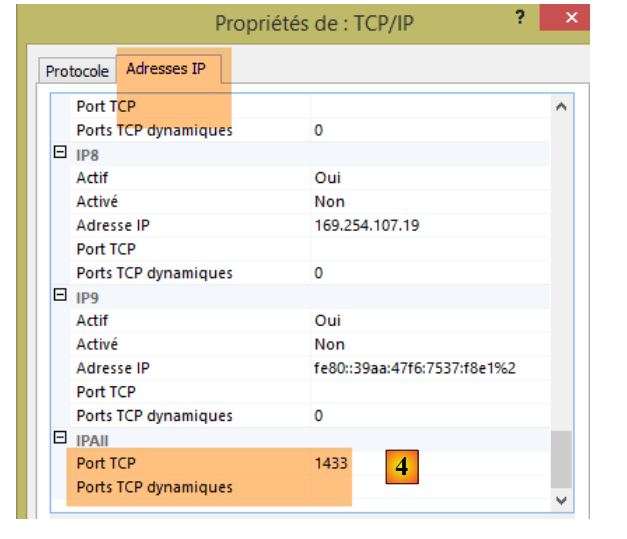
- By default, in [2], the TCP/IP communication is not enabled. For this document, you must enable it in [3];
- In [4], again for the purposes of this document, you must specify that SGBD waits for requests from clients on port 1433. The value of [Ports TCP dynamiques] must be empty;
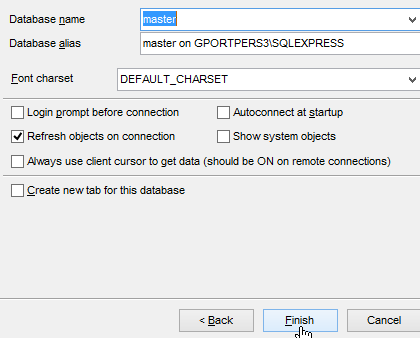
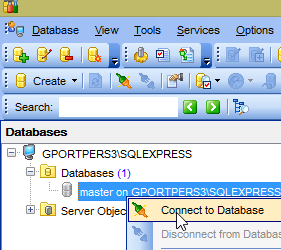
Once this is done, launch the [MsManager] client (see section 23.5):
- in [3], enter the name noted in [1];
- In [4], the credentials are [sa / msde];
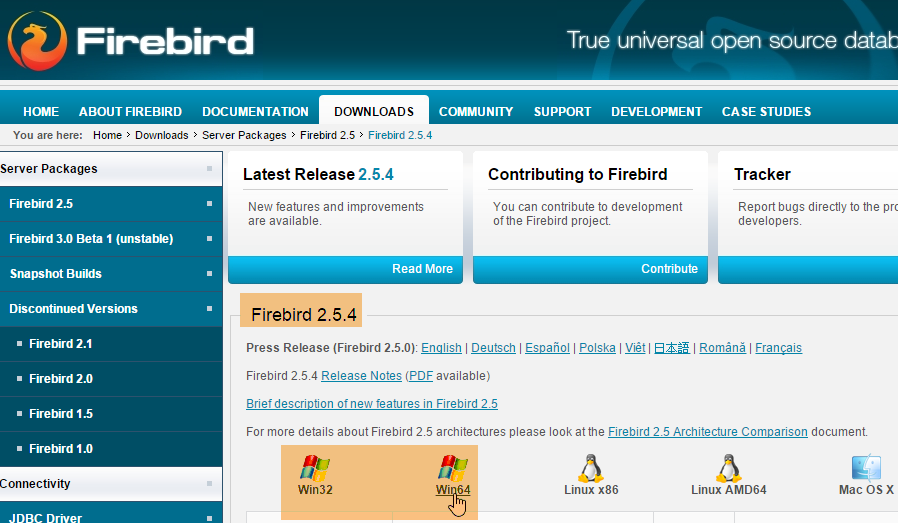
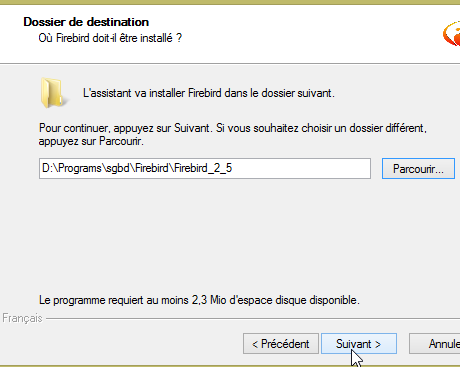
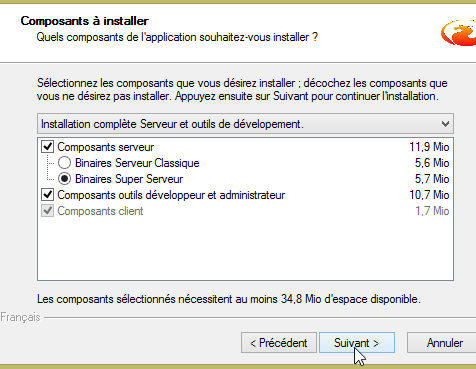
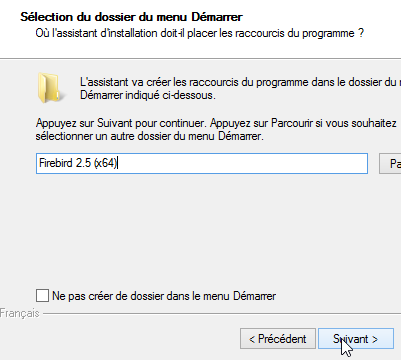
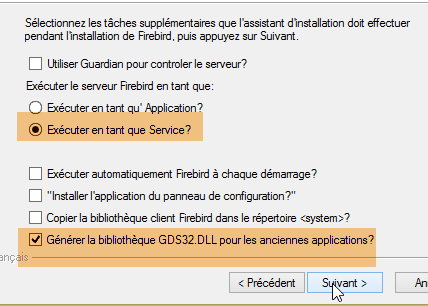
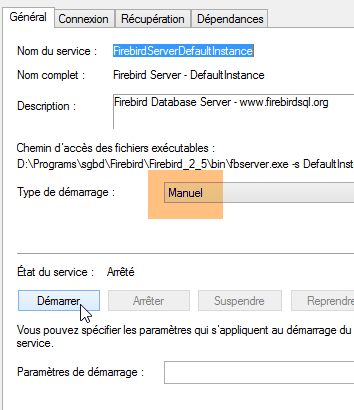
23.10. Installing SGBD Firebird
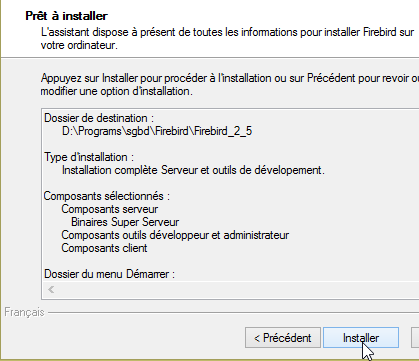
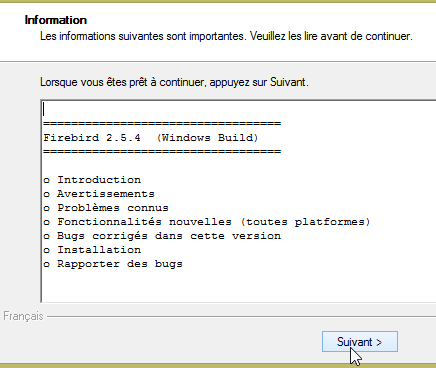
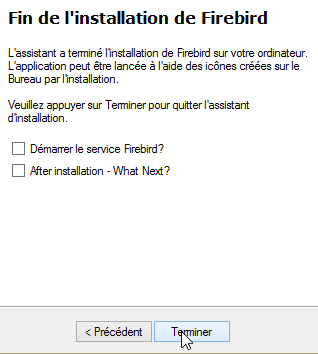
SGBD Firebird 2.5.4 is available at URL (June 2015): [http://www.firebirdsql.org/en/firebird-2-5-4/]:
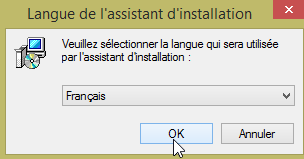
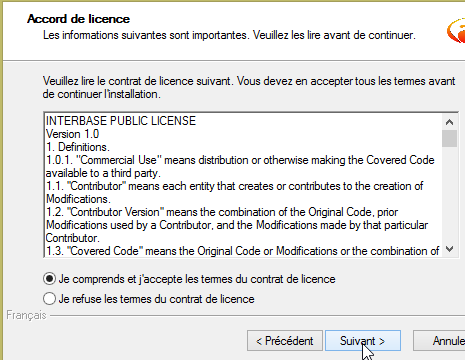
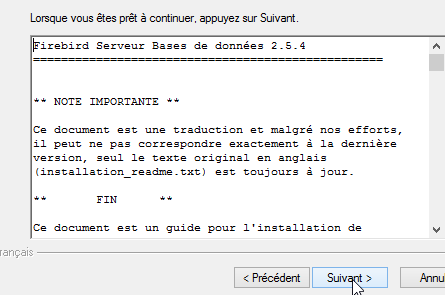
The installation proceeds as follows:
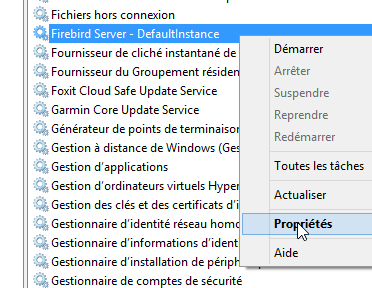
Once this is done, let’s check the startup mode of the created Windows service:
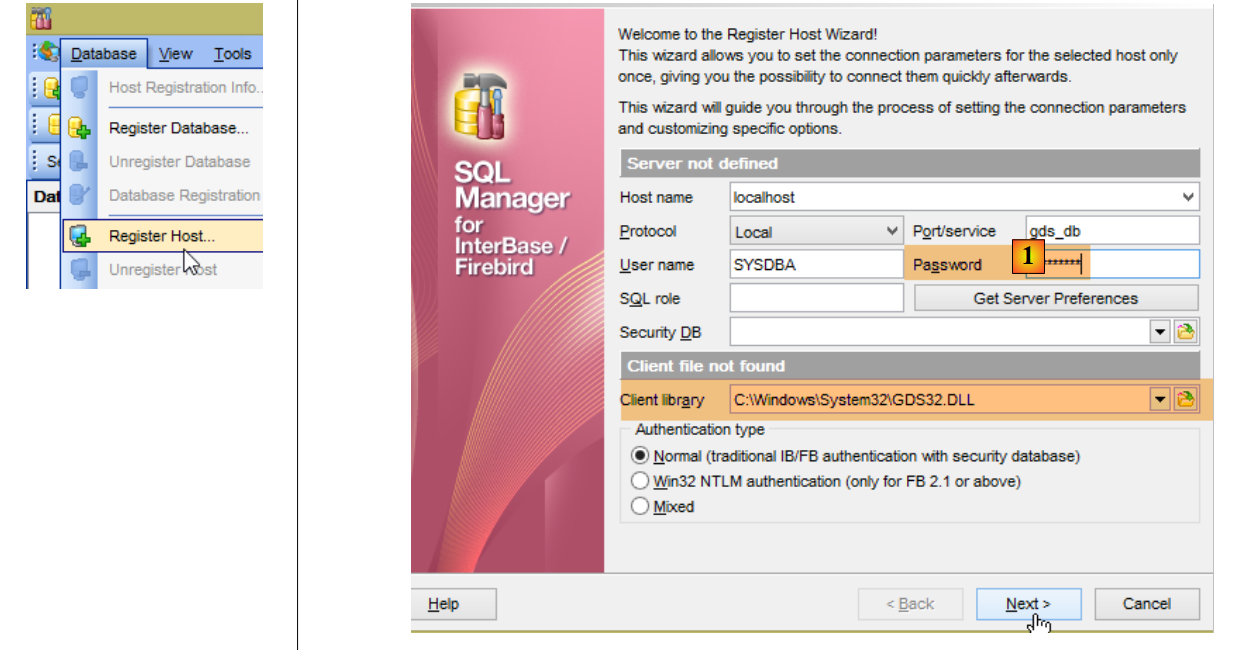
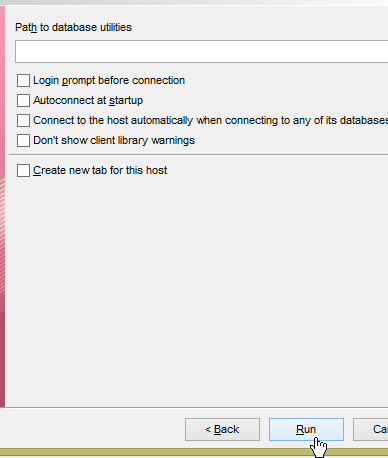
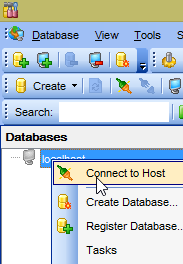
Now connect the [IBManager] client (see section 23.5) to the installed SGBD Firebird:
- In [1], the password is masterkey;
23.11. Installing the [Advanced Rest Client] Chrome plugin
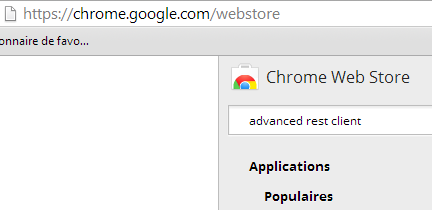
In this document, we are using Google’s Chrome browser (http://www.google.fr/intl/fr/chrome/browser/). We will add the [Advanced Rest Client] extension to it. Here’s how to do it:
- the application is then available for download:
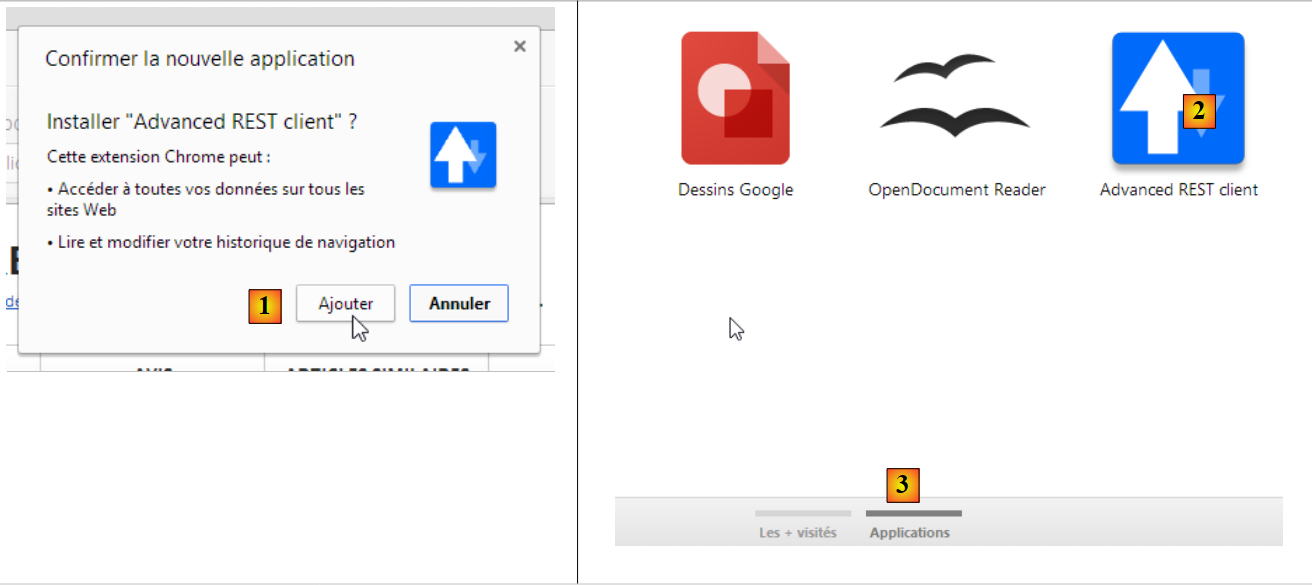
- To get it, you'll need to create a Google account. [Google Web Store] then asks for confirmation [1]:
- In [2], the added extension is available in the option [Applications] [3]. This option is displayed on every new tab you create (CTRL-T) in the browser.
23.12. Managing jSON in Java
In a way that is trans nsparent to the developer, the [Spring MVC] framework uses the jSON [Jackson] library. To illustrate what jSON (JavaScript Object Notation), we present here a program that serializes objects into jSON and performs the reverse operation by deserializing the generated jSON strings to recreate the original objects.
The 'Jackson' library allows you to construct:
- the jSON string of an object: new ObjectMapper().writeValueAsString(object);
- an object from a string jSON: new ObjectMapper().readValue(jsonString, Object.class).
Both methods are likely to throw an exception. Here is an example.
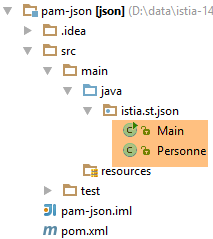
The project above is a Maven project with the following [pom.xml] file:
<?xml version="1.0" encoding="UTF-8"?>
<project xmlns="http://maven.apache.org/POM/4.0.0"
         xmlns:xsi="http://www.w3.org/2001/XMLSchema-instance"
         xsi:schemaLocation="http://maven.apache.org/POM/4.0.0 http://maven.apache.org/xsd/maven-4.0.0.xsd">
  <modelVersion>4.0.0</modelVersion>

  <groupId>istia.st.pam</groupId>
  <artifactId>json</artifactId>
  <version>1.0-SNAPSHOT</version>

  <dependencies>
    <dependency>
      <groupId>com.fasterxml.jackson.core</groupId>
      <artifactId>jackson-databind</artifactId>
      <version>2.3.3</version>
    </dependency>
  </dependencies>
</project>
- lines 12-16: the dependency that includes the 'Jackson' library;
The [Personne] class is as follows:
package istia.st.json;

public class Personne {
    // data
    private String nom;
    private String prenom;
    private int age;

    // manufacturers
    public Personne() {

    }

    public Personne(String nom, String prénom, int âge) {
        this.nom = nom;
        this.prenom = prénom;
        this.age = âge;
    }

    // signature
    public String toString() {
        return String.format("Personne[%s, %s, %d]", nom, prenom, age);
    }

    // getters and setters
...
}
The [Main] class is as follows:
package istia.st.json;

import com.fasterxml.jackson.databind.ObjectMapper;

import java.io.IOException;
import java.util.HashMap;
import java.util.Map;

public class Main {
  // the serialization / deserialization tool
  static ObjectMapper mapper = new ObjectMapper();

  public static void main(String[] args) throws IOException {
    // creation of a person
    Personne paul = new Personne("Denis", "Paul", 40);
    // display jSON
    String json = mapper.writeValueAsString(paul);
    System.out.println("Json=" + json);
    // instantiation Person from Json
    Personne p = mapper.readValue(json, Personne.class);
    // person display
    System.out.println("Personne=" + p);
    // a picture
    Personne virginie = new Personne("Radot", "Virginie", 20);
    Personne[] personnes = new Personne[]{paul, virginie};
    // display Json
    json = mapper.writeValueAsString(personnes);
    System.out.println("Json personnes=" + json);
    // dictionary
    Map<String, Personne> hpersonnes = new HashMap<String, Personne>();
    hpersonnes.put("1", paul);
    hpersonnes.put("2", virginie);
    // display Json
    json = mapper.writeValueAsString(hpersonnes);
    System.out.println("Json hpersonnes=" + json);
  }
}
Executing this class produces the following screen output:
| Json={"nom":"Denis","prenom":"Paul","age":40}
Personne=Personne[Denis, Paul, 40]
Json personnes=[{"nom":"Denis","prenom":"Paul","age":40},{"nom":"Radot","prenom":"Virginie","age":20}]
Json hpersonnes={"2":{"nom":"Radot","prenom":"Virginie","age":20},"1":{"nom":"Denis","prenom":"Paul","age":40}}
|
Key takeaways from the example:
- the object [ObjectMapper] required for the transformations jSON / Object: line 11;
- the transformation [Personne] --> jSON: line 17;
- the transformation jSON --> [Personne]: line 20;
- the exception [IOException] thrown by both methods: line 13.