20. [dbproduitscategories] 数据库访问 Web 服务的安全防护
20.1. 搭建工作环境
我们将通过以下项目来实现Web服务的安全防护:
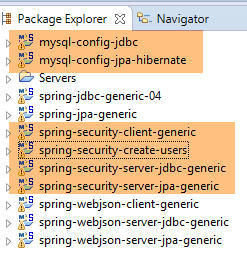 |
- [spring-security-*]项目位于[<exemples>\spring-database-generic\spring-security]文件夹中;
- 将为 SGBD 和 MySQL 项目配置安全措施,先部署 [DAO / JDBC] 层,再部署 [DAO / JPA / Hibernate] 层;
- 按 Alt-F5 键,然后重新生成所有 Maven 项目;
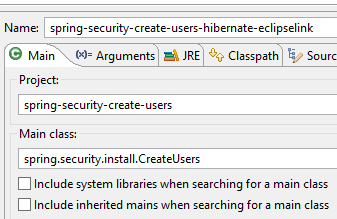
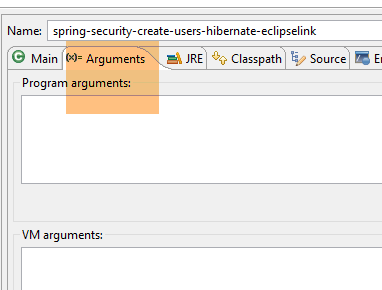
我们需要在 [dbproduitscategories] 数据库中创建用户。为此,请使用运行配置 [spring-security-create-users-hibernate-eclipselink]:
 |  |
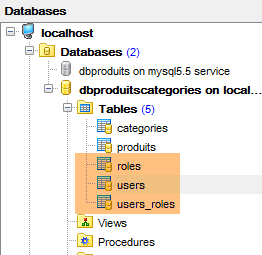
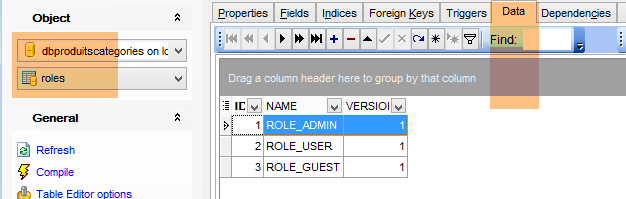
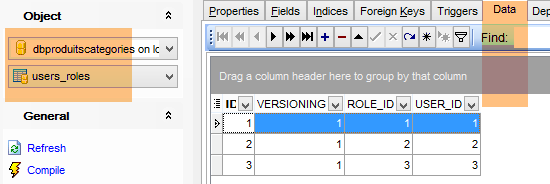
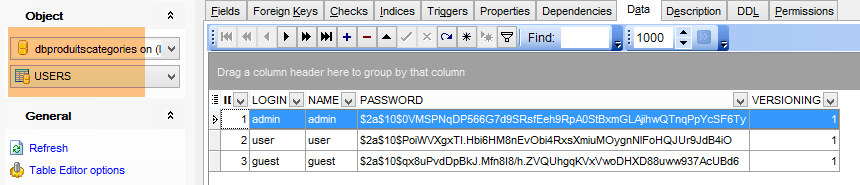
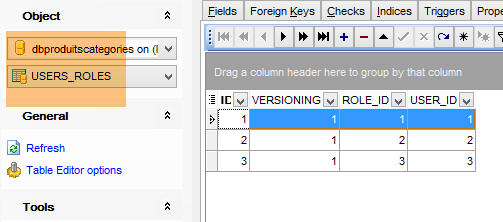
执行此配置会将表 [dbproduitscategories] 的数据填充到表 [USERS, ROLES, USERS_ROLES] 中:
 |
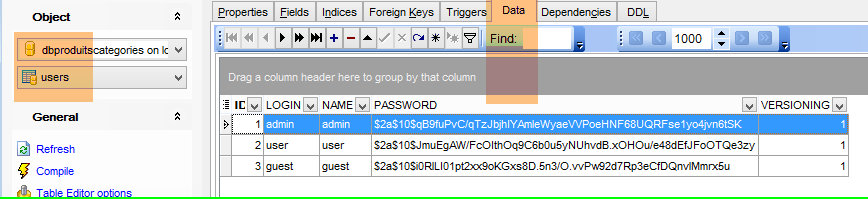 |
生成的标识符 [login/passwd] 如下:[admin/admin]、[user/user]、[guest/guest]。在数据库中,密码是加密的。
 |
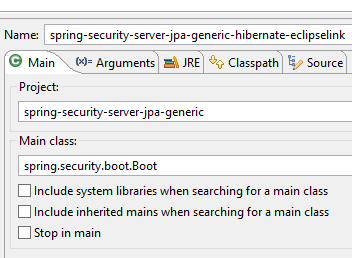
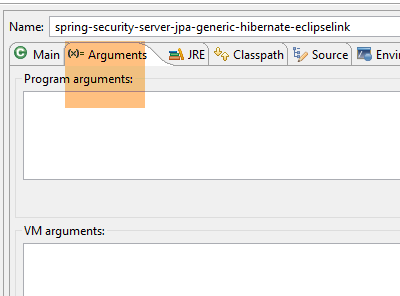
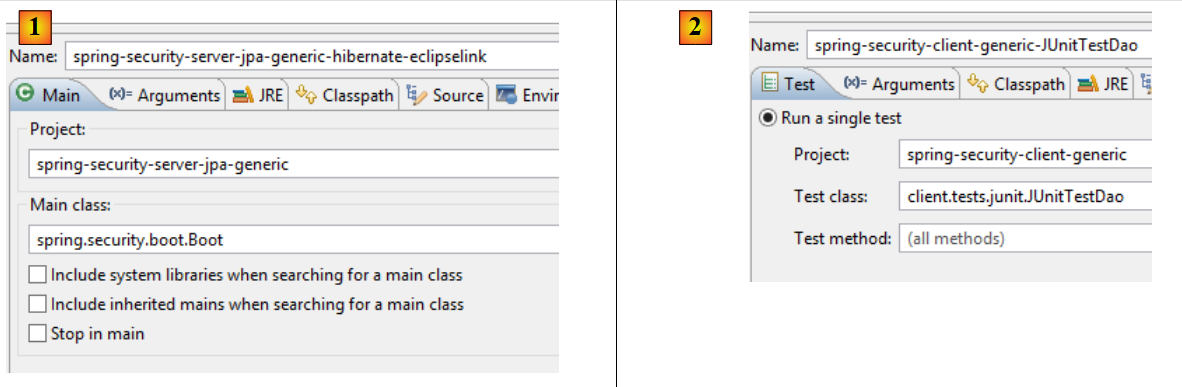
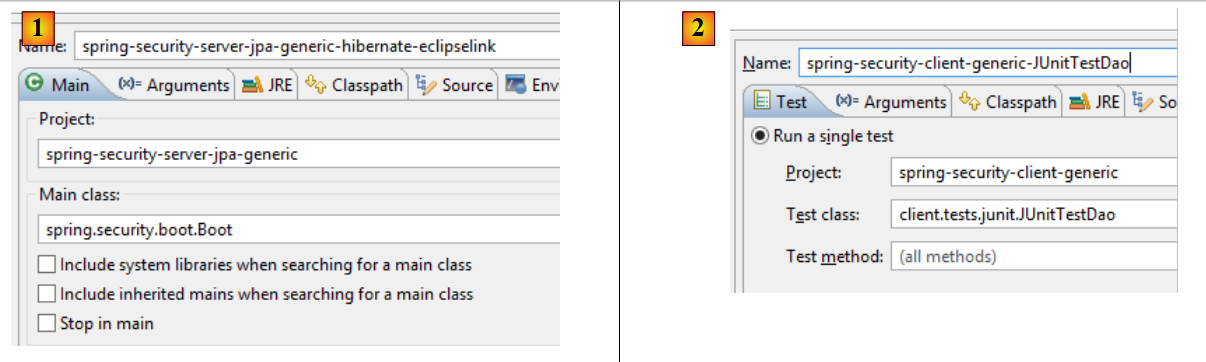
完成上述操作后,请执行名为 [spring-security-server-jpa-generic-hibernate-eclipselink] 的运行配置,该配置将启动安全 Web 服务(需先启动 MySQL):
 |  |
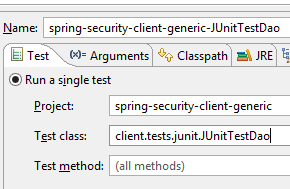
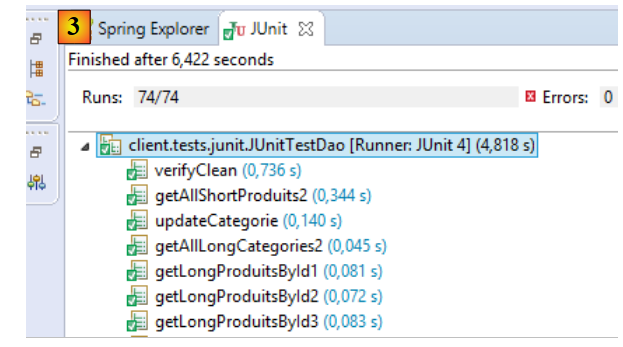
然后执行名为 [spring-security-client-generic-JUnitTestDao] 的运行配置,该配置用于测试安全 Web 服务:
 |  |
测试应成功。
20.2. Eclipse 项目 [spring-security-server-jdbc-generic]
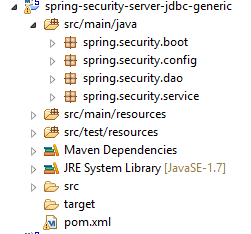
安全 Web 服务由项目 [spring-security-server-jdbc-generic] 实现:
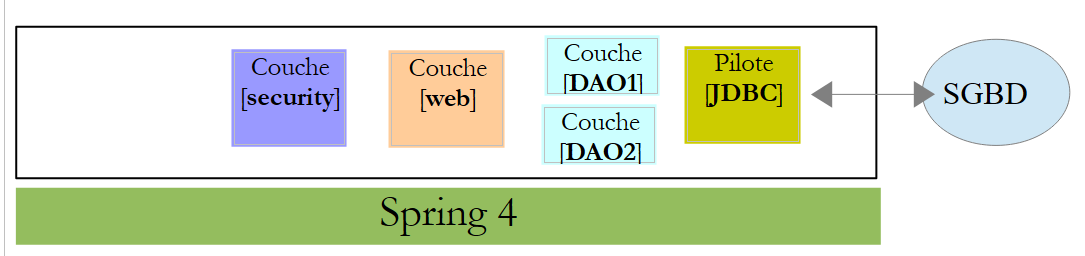 |
上文所述:
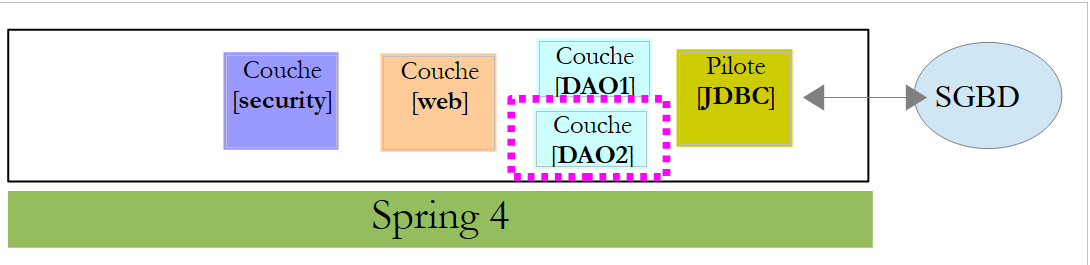
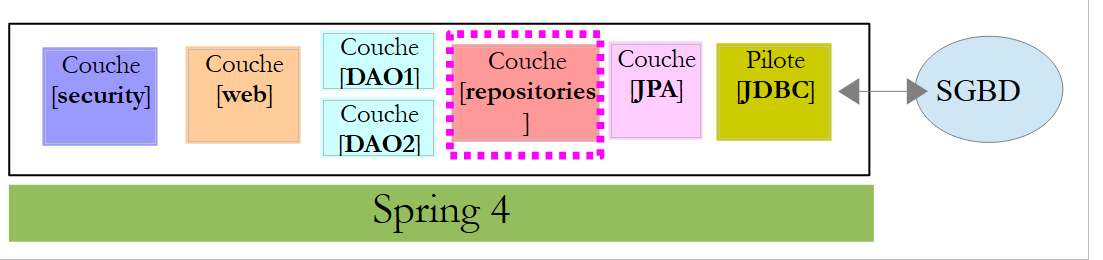
- [DAO1] 层即为 [DAO] 层,该层管理 [dbproduitscategories] 数据库中的 [PRODUITS] 和 [CATEGORIES] 表。 该层已编写完成;
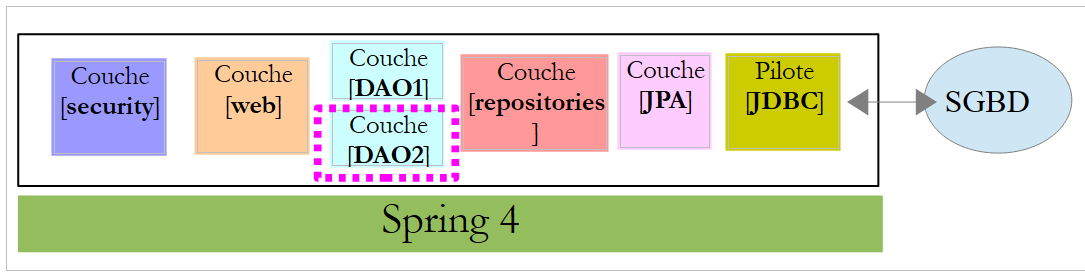
- [DAO2] 层是 [DAO] 层,该层管理数据库 [dbproduitscategories] 中的表 [USERS]、 [ROLES] 和 [USERS_ROLES] 表的 [dbproduitscategories] 层。该层尚待编写;
 |
20.2.1. Maven 配置
项目 [spring-security-server-jdbc-generic] 是一个由以下 [pom.xml] 文件配置的 Maven 项目:
<project xmlns="http://maven.apache.org/POM/4.0.0" xmlns:xsi="http://www.w3.org/2001/XMLSchema-instance"
    xsi:schemaLocation="http://maven.apache.org/POM/4.0.0 http://maven.apache.org/xsd/maven-4.0.0.xsd">
    <modelVersion>4.0.0</modelVersion>
    <groupId>dvp.spring.database</groupId>
    <artifactId>spring-security-server-jdbc-generic</artifactId>
    <version>0.0.1-SNAPSHOT</version>

    <name>spring-security-server-jdbc-generic</name>
    <description>démo spring security</description>

    <properties>
        <project.build.sourceEncoding>UTF-8</project.build.sourceEncoding>
        <java.version>1.7</java.version>
    </properties>

    <parent>
        <groupId>org.springframework.boot</groupId>
        <artifactId>spring-boot-starter-parent</artifactId>
        <version>1.2.3.RELEASE</version>
    </parent>

    <dependencies>
        <!-- Spring Security -->
        <dependency>
            <groupId>org.springframework.boot</groupId>
            <artifactId>spring-boot-starter-security</artifactId>
        </dependency>
        <!-- Web 服务器 / jSON -->
        <dependency>
            <groupId>dvp.spring.database</groupId>
            <artifactId>spring-webjson-server-jdbc-generic</artifactId>
            <version>0.0.1-SNAPSHOT</version>
        </dependency>
    </dependencies>
    <!-- 插件 -->
    <build>
        <plugins>
            <plugin>
                <groupId>org.apache.maven.plugins</groupId>
                <artifactId>maven-surefire-plugin</artifactId>
                <version>2.18.1</version>
            </plugin>
        </plugins>
    </build>

</project>
- 第 29-33 行:沿用现有配置,包含已研究的 Web 服务 / json / jdbc 存档;
- 第 24-27 行:引入 Spring Security 类所需的依赖项;
最终,该项目对Eclipse中加载的其他项目具有以下依赖关系:
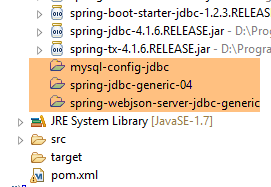 |
20.2.2. [DAO2] 层
 |
如上:
- 层 [DAO1] 即为管理数据库 [dbproduitscategories] 中表 [PRODUITS] 和 [CATEGORIES] 的层 [DAO]。 它已经编写好了;
- [DAO2] 层是 [DAO] 层,该层管理数据库 [DAO2] 中的表 [USERS]、 [ROLES] 和 [USERS_ROLES] 表的 [dbproduitscategories] 层。这就是我们接下来要编写的内容;
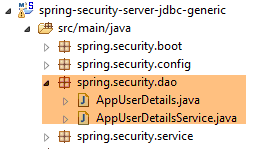 |
Spring Security 要求创建一个实现以下接口的类:
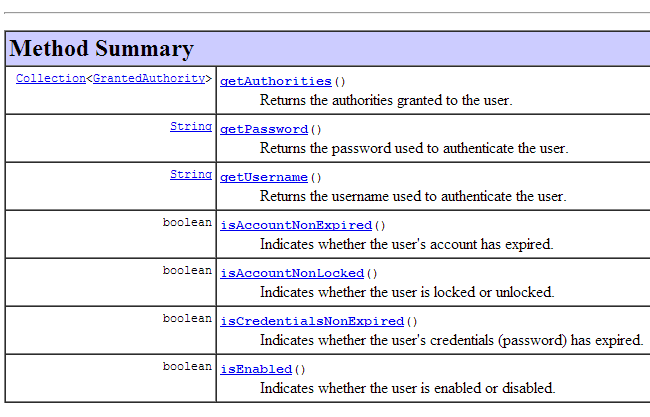 |
此接口在此由类 [AppUserDetails] 实现:
package spring.security.dao;

import generic.jdbc.config.ConfigJdbc;

import java.sql.ResultSet;
import java.sql.SQLException;
import java.util.ArrayList;
import java.util.Collection;
import java.util.Collections;
import java.util.List;

import org.springframework.jdbc.core.RowMapper;
import org.springframework.jdbc.core.namedparam.NamedParameterJdbcTemplate;
import org.springframework.security.core.GrantedAuthority;
import org.springframework.security.core.authority.SimpleGrantedAuthority;
import org.springframework.security.core.userdetails.UserDetails;

import spring.jdbc.entities.Role;
import spring.jdbc.entities.User;
import spring.jdbc.infrastructure.DaoException;

public class AppUserDetails implements UserDetails {

    private static final long serialVersionUID = 1L;

    // JdbcTemplate
    private NamedParameterJdbcTemplate namedParameterJdbcTemplate;
    // 属性
    private User user;
    private String simpleClassName = getClass().getSimpleName();

    // 构造函数
    public AppUserDetails() {
    }

    public AppUserDetails(User user, NamedParameterJdbcTemplate namedParameterJdbcTemplate) {
        this.user = user;
        this.namedParameterJdbcTemplate = namedParameterJdbcTemplate;
    }

    // -------------------------接口
    @Override
    public Collection<? extends GrantedAuthority> getAuthorities() {
        Collection<GrantedAuthority> authorities = new ArrayList<>();
        for (Role role : getRoles(user.getId())) {
            authorities.add(new SimpleGrantedAuthority(role.getName()));
        }
        return authorities;
    }
...

    // 私有方法----------------
    private List<Role> getRoles(Long id) {
        try {
            // 通过用户ID查找用户
            return namedParameterJdbcTemplate.query(ConfigJdbc.SELECT_ROLES_BYUSERID, Collections.singletonMap("id", id),    new ShortRoleMapper());
        } catch (Exception e) {
            //e.printStackTrace();
            throw new DaoException(167, e, simpleClassName);
        }
    }

}

// --------------------- 映射器
class ShortRoleMapper implements RowMapper<Role> {

    @Override
    public Role mapRow(ResultSet rs, int rowNum) throws SQLException {
        return new Role(rs.getLong("r_ID"), rs.getLong("r_VERSIONING"), rs.getString("r_NAME"));
    }
}
- 第 22 行:类 [AppUserDetails] 实现了接口 [UserDetails];
- 第 29-30 行:该类封装了一个用户(第 19 行)以及用于获取该用户详细信息的存储库(第 20 行);
- 第 27 行:将通过 JDBC 访问数据库,具体使用 [spring-jdbc-generic-04] 项目中定义的 [NamedParameterJdbcTemplate namedParameterJdbcTemplate] 对象。 需要注意的是,该对象并非像通常那样由Spring注入。它是通过第36-39行的构造函数提供的。为什么?因为类[AppUserDetails]不是Spring组件(缺少@Component注解),因此无法对其进行注入;
- 第36-39行:通过用户及其存储库实例化该类的构造函数;
- 第 42-49 行:实现接口 [UserDetails] 中的方法 [getAuthorities]。该方法需构建一个由 [GrantedAuthority] 类型或其派生类型元素组成的集合。 此处,我们使用派生类型 [SimpleGrantedAuthority](第 46 行),该类型封装了第 29 行中用户的一个角色的名称;
- 第45-47行:遍历第29行用户角色的列表,以构建一个[SimpleGrantedAuthority]类型的元素列表;
- 第45行:为获取用户的角色,调用第53行中的私有方法[getRoles];
- 第56行:执行以下命令 SQL [ConfigJdbc.SELECT_ROLES_BYUSERID](定义在 [Configjdbc] 中):
public static final String SELECT_ROLES_BYUSERID = "SELECT DISTINCT r.ID as r_ID, r.VERSIONING as r_VERSIONING, r.NAME as r_NAME FROM ROLES r, USERS u, USERS_ROLES ur WHERE u.ID=:id AND ur.USER_ID=u.ID AND ur.ROLE_ID=r.ID";
该查询 SQL 对三个表 [USERS, ROLES, USERS_ROLES] 进行连接,以获取通过主键标识的用户角色。其参数由要查询角色的用户的主键 [:id] 设定。
- 第56行:[SELECT]查询的每行结果都会通过第66-72行的[ShortRowMapper]类转换为[Role]实体;
让我们回到类 [AppUserDetails] 的代码:
package spring.security.dao;

...

public class AppUserDetails implements UserDetails {

    private static final long serialVersionUID = 1L;

    // JdbcTemplate
    private NamedParameterJdbcTemplate namedParameterJdbcTemplate;
    // 属性
    private User user;
    private String simpleClassName = getClass().getSimpleName();

    // 构造函数
    public AppUserDetails() {
    }

    public AppUserDetails(User user, NamedParameterJdbcTemplate namedParameterJdbcTemplate) {
        this.user = user;
        this.namedParameterJdbcTemplate = namedParameterJdbcTemplate;
    }

    // -------------------------接口
    @Override
    public Collection<? extends GrantedAuthority> getAuthorities() {
        Collection<GrantedAuthority> authorities = new ArrayList<>();
        for (Role role : getRoles(user.getId())) {
            authorities.add(new SimpleGrantedAuthority(role.getName()));
        }
        return authorities;
    }

    @Override
    public String getPassword() {
        return user.getPassword();
    }

    @Override
    public String getUsername() {
        return user.getLogin();
    }

    @Override
    public boolean isAccountNonExpired() {
        return true;
    }

    @Override
    public boolean isAccountNonLocked() {
        return true;
    }

    @Override
    public boolean isCredentialsNonExpired() {
        return true;
    }

    @Override
    public boolean isEnabled() {
        return true;
    }

    // 获取器和设置器
    ...
}
- 第35-37行:实现了接口[UserDetails]中的方法[getPassword]。将第12行的用户密码返回;
- 第39-42行:实现了接口[UserDetails]中的方法[getUserName]。返回第12行用户的登录名;
- 第44-47行:用户账户永不过期;
- 第49-52行:用户账户永不被锁定;
- 第54-57行:用户凭证永不过期;
- 第59-62行:用户账户始终处于活动状态;
Spring Security 还要求存在一个实现 [AppUserDetailsService] 接口的类:
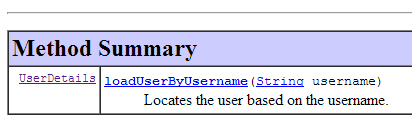 |
该接口由以下 [AppUserDetailsService] 类实现:
package spring.security.dao;

import generic.jdbc.config.ConfigJdbc;

import java.sql.ResultSet;
import java.sql.SQLException;
import java.util.Collections;
import java.util.List;

import org.springframework.beans.factory.annotation.Autowired;
import org.springframework.jdbc.core.RowMapper;
import org.springframework.jdbc.core.namedparam.NamedParameterJdbcTemplate;
import org.springframework.security.core.userdetails.UserDetails;
import org.springframework.security.core.userdetails.UserDetailsService;
import org.springframework.security.core.userdetails.UsernameNotFoundException;
import org.springframework.stereotype.Service;

import spring.jdbc.entities.User;
import spring.jdbc.infrastructure.DaoException;

@Service
public class AppUserDetailsService implements UserDetailsService {

    // 注入
    @Autowired
    private NamedParameterJdbcTemplate namedParameterJdbcTemplate;

    // 局部
    private String simpleClassName = getClass().getSimpleName();

    @Override
    public UserDetails loadUserByUsername(String login) throws UsernameNotFoundException {
        List<User> users;
        try {
            // 通过登录名查找用户
            users = namedParameterJdbcTemplate.query(ConfigJdbc.SELECT_USER_BYLOGIN,
                    Collections.singletonMap("login", login), new ShortUserMapper());
        } catch (Exception e) {
            throw new DaoException(145, e, simpleClassName);
        }
        // 找到了吗?
        if (users.size() == 0) {
            throw new UsernameNotFoundException(String.format("login [%s] inexistant", login));
        }
        // 返回用户详细信息
        return new AppUserDetails(users.get(0), namedParameterJdbcTemplate);
    }
}

// --------------------- 映射器
class ShortUserMapper implements RowMapper<User> {

    @Override
    public User mapRow(ResultSet rs, int rowNum) throws SQLException {
        return new User(rs.getLong("u_ID"), rs.getLong("u_VERSIONING"), rs.getString("u_NAME"), rs.getString("u_LOGIN"),
                rs.getString("u_PASSWORD"));
    }
}
- 第 21 行:该类将作为 Spring 组件;
- 第 25-26 行:将通过 JDBC 访问数据库,使用在 [spring-jdbc-generic-04] 项目 Bean 中定义的 [NamedParameterJdbcTemplate namedParameterJdbcTemplate] 对象;
- 第31-49行:实现接口[UserDetailsService](第22行)中的方法[loadUserByUsername]。参数为用户登录名;
- 第36-37行:通过用户登录名进行用户查询。SQL [ConfigJdbc.SELECT_USER_BYLOGIN]的顺序如下:
public static final String SELECT_USER_BYLOGIN = "SELECT u.ID as u_ID, u.VERSIONING as u_VERSIONING, u.NAME as u_NAME,u.LOGIN as u_LOGIN,u.PASSWORD as u_PASSWORD FROM USERS u WHERE u.LOGIN= :login";
由 SELECT 生成的每一行,都会通过第 52-58 行中的 [ShortUserMapper] 类转换为 [User] 实体。
- 第 42-44 行:若未找到,则抛出异常;
- 第 46 行:构建并渲染一个 [AppUserDetails] 对象。该对象确实属于 [UserDetails] 类型(第 32 行)。向其构造函数传递两项信息:
- 已找到的用户;
- [namedParameterJdbcTemplate] 对象,该对象将使 [AppUserDetails] 类能够查询数据库;
20.2.3. [web] 层
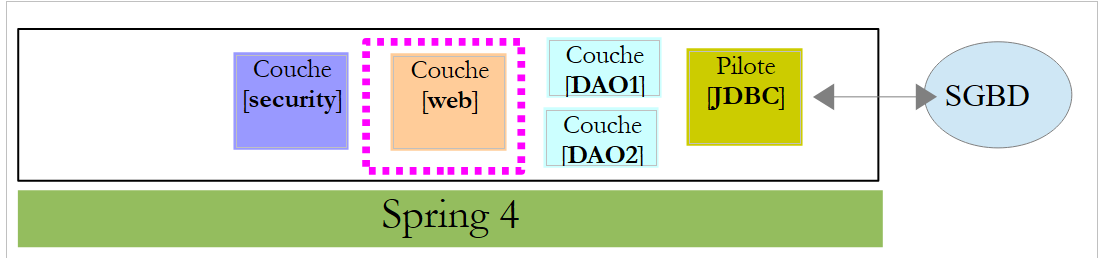 |
项目 [spring-security-server-jdbc-generic] 依赖于项目 [spring-webjson-server-jdbc-generic]:
|
正是该项目实现了 [web] 层。该层无需修改。
20.2.4. 项目的安全配置
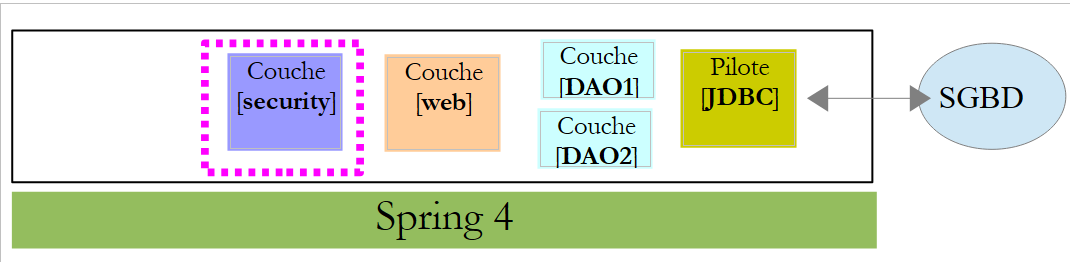 |
该项目由以下类 [AppConfig] 进行配置:
1 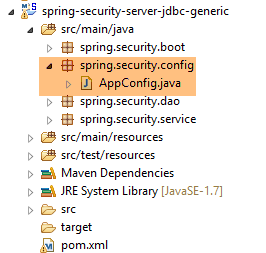 |
我们之前已经接触过一个 Spring Security 配置类(参见第 19.2.4 节):
package hello;

import org.springframework.context.annotation.Configuration;
import org.springframework.security.config.annotation.authentication.builders.AuthenticationManagerBuilder;
import org.springframework.security.config.annotation.web.builders.HttpSecurity;
import org.springframework.security.config.annotation.web.configuration.WebSecurityConfigurerAdapter;
import org.springframework.security.config.annotation.web.servlet.configuration.EnableWebMvcSecurity;

@Configuration
@EnableWebMvcSecurity
public class WebSecurityConfig extends WebSecurityConfigurerAdapter {
    @Override
    protected void configure(HttpSecurity http) throws Exception {
        http.authorizeRequests().antMatchers("/", "/home").permitAll().anyRequest().authenticated();
        http.formLogin().loginPage("/login").permitAll().and().logout().permitAll();
    }

    @Override
    protected void configure(AuthenticationManagerBuilder auth) throws Exception {
        auth.inMemoryAuthentication().withUser("user").password("password").roles("USER");
    }
}
我们将采用相同的步骤:
- 第 11 行:定义一个继承自 [WebSecurityConfigurerAdapter] 类的类;
- 第 13 行:定义方法 [configure(HttpSecurity http)],用于定义 Web 服务中各个 URL 的访问权限;
- 第19行:定义方法[configure(AuthenticationManagerBuilder auth)],用于定义用户及其角色;
[AppConfig] 类将如下所示:
package spring.security.config;

import org.springframework.beans.factory.annotation.Autowired;
import org.springframework.context.annotation.ComponentScan;
import org.springframework.context.annotation.Configuration;
import org.springframework.context.annotation.Import;
import org.springframework.http.HttpMethod;
import org.springframework.security.config.annotation.authentication.builders.AuthenticationManagerBuilder;
import org.springframework.security.config.annotation.web.builders.HttpSecurity;
import org.springframework.security.config.annotation.web.configuration.EnableWebSecurity;
import org.springframework.security.config.annotation.web.configuration.WebSecurityConfigurerAdapter;
import org.springframework.security.crypto.bcrypt.BCryptPasswordEncoder;

import spring.security.dao.AppUserDetailsService;
import spring.webjson.server.config.WebConfig;

@Configuration
@EnableWebSecurity
@ComponentScan(basePackages = { "spring.security.dao", "spring.security.service" })
@Import({ spring.webjson.server.config.AppConfig.class, WebConfig.class })
public class AppConfig extends WebSecurityConfigurerAdapter {
    @Autowired
    private AppUserDetailsService appUserDetailsService;

    // 安全防护
    private boolean activateSecurity = true;

    @Override
    protected void configure(AuthenticationManagerBuilder registry) throws Exception {
        // 身份验证由 Bean 完成 [appUserDetailsService]
        // 密码由哈希算法加密 BCrypt
        registry.userDetailsService(appUserDetailsService).passwordEncoder(new BCryptPasswordEncoder());
    }

    @Override
    protected void configure(HttpSecurity http) throws Exception {
        // CSRF
        http.csrf().disable();
        // 安全应用?
        if (activateSecurity) {
            // 密码通过 Authorization: Basic xxxx 头部传递
            http.httpBasic();
            // 必须为所有人授权 HTTP OPTIONS 方法
            http.authorizeRequests() //
                    .antMatchers(HttpMethod.OPTIONS, "/", "/**").permitAll();
            // 仅 ADMIN 角色可使用该应用程序
            http.authorizeRequests() //
                    .antMatchers("/", "/**") // 所有 URL
                    .hasRole("ADMIN");
            // 是否需要会话?
            //http.sessionManagement().sessionCreationPolicy(SessionCreationPolicy.STATELESS);
        }
    }
}
- 第17行:该类是一个Spring配置类;
- 第18行:启用Spring Security组件;
- 第26行:获取[DAO2]层以及[spring.security.service]包中的Spring组件,后者将在后续内容中讨论;
- 第 23 行:导入 [spring-webjson-server-jdbc-generic] 项目的 Bean,该项目实现了 [web] 层。其中还包含 [DAO1] 层的 Bean;
- 第 22-23 行:注入了 [AppUserDetails] 类,该类为应用程序用户提供访问权限;
- 第 26 行:一个布尔值,用于控制 Web 应用程序是否处于安全状态(true)或非安全状态(false);
- 第28-33行:方法[configure(HttpSecurity http)]定义用户及其角色。该方法接收一个类型为[AuthenticationManagerBuilder]的参数。该参数包含两项信息(第32行):
- 对第23行服务[appUserDetailsService]的引用,该服务提供对已注册用户的访问权限。需注意的是,此处并未显示用户是否存储在数据库中。因此,这些用户可能存储在缓存中,或由Web服务提供……
- 密码所使用的加密类型。我们采用了BCrypt算法;
- 第35-53行:方法[configure(HttpSecurity http)]定义了Web服务中URL的访问权限;
- 第 38 行:我们在入门项目中看到,默认情况下 Spring Security 会管理一个 CSRF 令牌(跨站请求伪造),需要进行身份验证的用户必须将该令牌发回给服务器。 此处该机制已被禁用。结合布尔值(isSecured=false),这使得可以不使用安全机制来运行Web应用程序;
- 第 42 行:启用 HTTP 标头认证模式。客户端需发送以下 HTTP 标头:
其中 code 是字符串 login:password 通过 Base64 算法编码后的结果。例如,字符串 admin:admin 的 Base64 编码为 YWRtaW46YWRtaW4=。 因此,用户名 [admin] 和密码 [admin] 将发送以下标头 HTTP 进行身份验证:
- 第 47-49 行:表示拥有角色 [ROLE_ADMIN] 的用户可以访问 Web 服务中的所有 URL。这意味着没有该角色的用户无法访问该 Web 服务;
- 第 51 行:在 [session] 模式下,用户完成一次身份验证后,后续访问无需再次验证。这是 Spring Security 的默认设置。 第 51 行会禁用此模式。若该行生效,用户每次访问都需进行身份验证。由于无会话状态下受保护 Web 服务的响应速度低于有会话状态,因此第 51 行已被注释掉;
20.2.5. 安全 Web 服务测试
我们将使用 Chrome 客户端 [Advanced Rest Client] 测试 Web 服务。我们需要指定 HTTP 身份验证头:
其中 [code] 是字符串 [login:password] 的 Base64 编码。要生成此代码,可以使用 [spring-security-create-users] 项目中的以下程序:
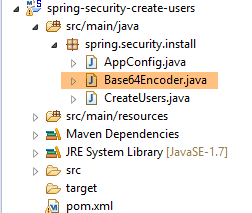 |
package spring.security.helpers;

import org.springframework.security.crypto.codec.Base64;

public class Base64Encoder {

    public static void main(String[] args) {
        // 需要两个参数:登录名 密码
        if (args.length != 2) {
            System.out.println("Syntaxe : login password");
            System.exit(0);
        }
        // 获取这两个参数
        String chaîne = String.format("%s:%s", args[0], args[1]);
        // 对字符串进行编码
        byte[] data = Base64.encode(chaîne.getBytes());
        // 显示其 Base64 编码
        System.out.println(new String(data));
    }

}
如果我们使用两个参数 [admin admin] 运行该程序:
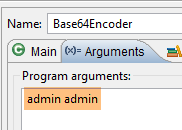 |
将得到以下结果:
现在我们可以进行测试了:
- 需启动 SGBD 和 MySQL;
- 我们将名为 [spring-jdbc-generic-04-fillDataBase] 的运行配置填入 [PRODUITS] 和 [CATEGORIES] 表中:
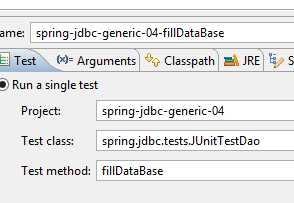 |
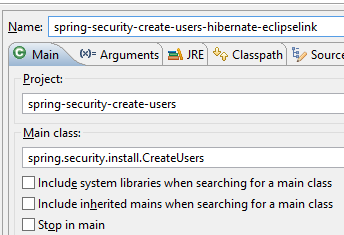
- 如果尚未执行,我们将使用名为 [spring-security-create-users-hibernate-eclipselink] 的运行配置填充表 [USERS, ROLES, USERS_ROLES]:
 |
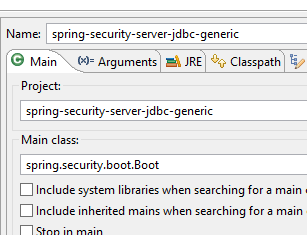
- 我们使用名为 [spring-security-server-jdbc-generic] 的运行配置启动安全 Web 服务:
 |
随后,使用 Chrome 客户端 [Advanced Rest Client],我们请求所有类别的详细版本:
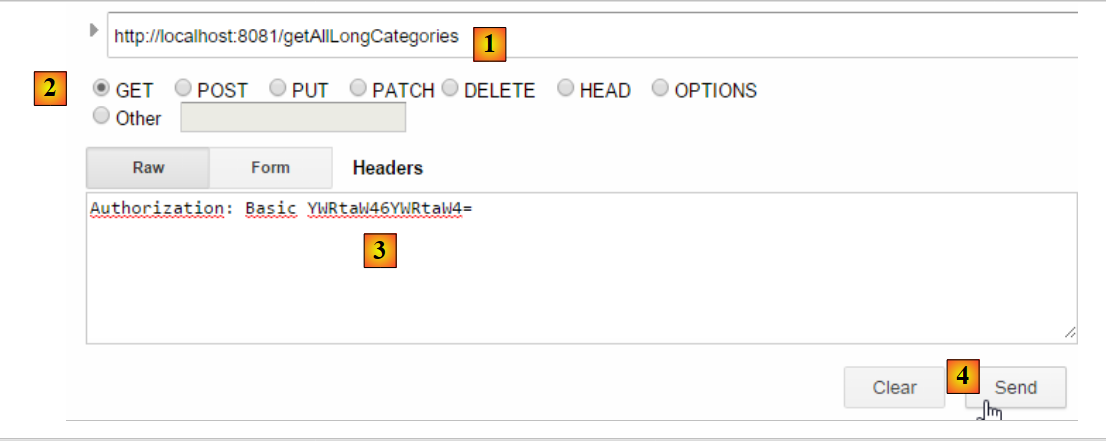 |
- 在 [1] 中,我们请求详细分类的 URL;
- 在 [2] 中,使用 GET 方法;
- 在 [3] 中,我们提供身份验证的 HTTP 标头。代码 [YWRtaW46YWRtaW4=] 是字符串 [admin:admin] 的 Base64 编码;
- 在 [4] 中,我们发送命令 HTTP;
服务器的响应如下:
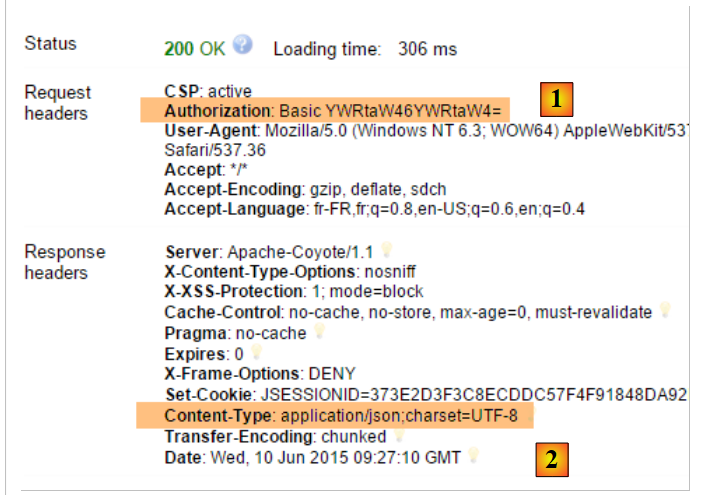 |
- 在 [1] 中,包含认证头部 HTTP;
- 在 [2] 中,服务器返回响应 jSON;
确实获得了分类列表:
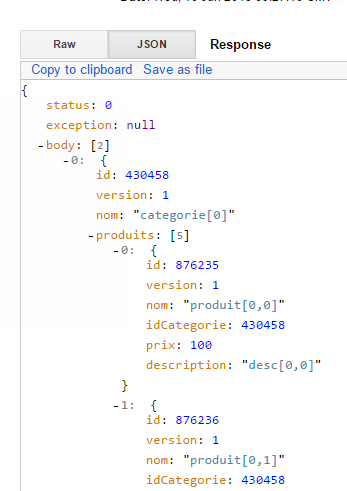 |
现在尝试发送一个带有错误认证头部的 HTTP 请求。响应如下:
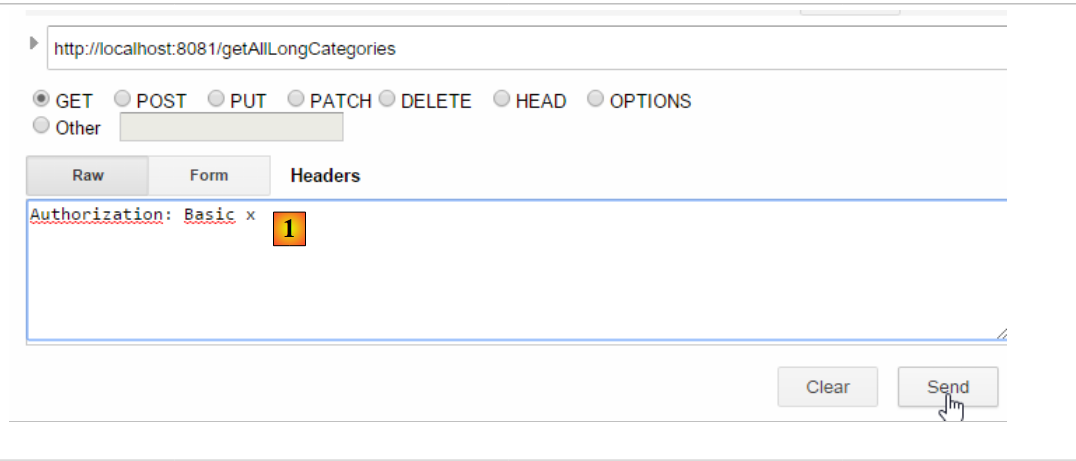 |
- 在 [1] 中:认证头 HTTP;
我们得到以下响应:
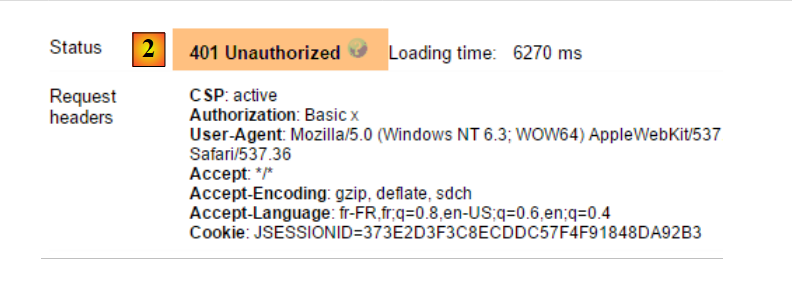 |
- 转换为 [2]:Web 服务的响应;
现在,我们尝试用户 user / user。该用户存在,但无权访问 Web 服务。如果我们使用两个参数 [user user] 运行 Base64 编码程序:
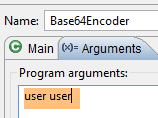 |
将得到以下结果:
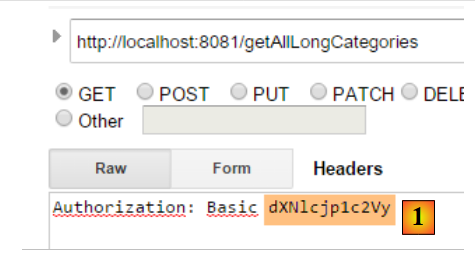 |
- 在 [1] 中:认证头 HTTP 错误;
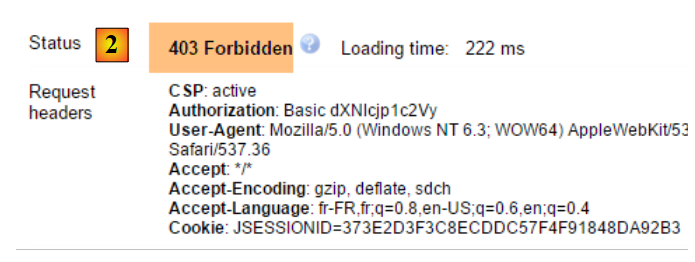 |
- 在 [2] 中:Web 服务的响应。它与之前的 [401 Unauthorized] 不同。这次,用户已成功认证,但没有足够的权限访问 URL;
一个安全的Web服务现已投入运行。
20.2.6. 一个 URL 身份验证
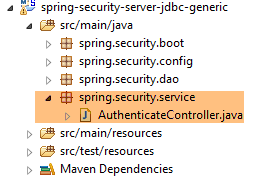 |
我们将创建一个 URL,用于判断用户是否被授权访问 Web 服务。为此,我们创建以下新的控制器 MVC [AuthenticateController]:
package spring.security.service;

import org.springframework.web.bind.annotation.RequestMapping;
import org.springframework.web.bind.annotation.RequestMethod;
import org.springframework.web.bind.annotation.RestController;

import spring.webjson.server.service.Response;

@RestController
public class AuthenticateController {
    @RequestMapping(value = "/authenticate", method = RequestMethod.GET)
    public Response<Void> authenticate() {
        return new Response<Void>(0, null, null);
    }

}
- 第 9 行:类 [AuthenticateController] 是一个 Spring 控制器。因此,它暴露了 URL。 注解 [@RestController] 表示处理这些 URL 的方法会自行向客户端返回响应;
- 第 11 行:暴露 URL 和 [/authenticate];
- 第 12-14 行:该方法仅返回一个空的 [Response] 对象,但其 [status] 字段值为 0,表明未发生错误;
这个 URL 有什么用?当我们仅需对用户进行身份验证时,会调用它。我们已经看到,如果安全层不接受该用户,它会抛出异常。以下是一个示例;
使用用户 [admin:admin]:
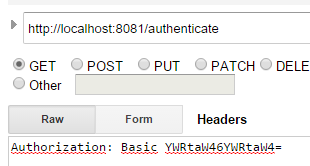 | 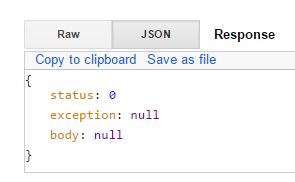 |
返回的是空响应,但没有抛出异常。
使用用户 [user:user]:
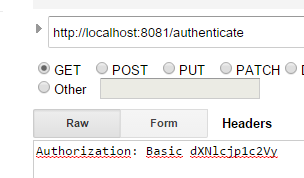 | 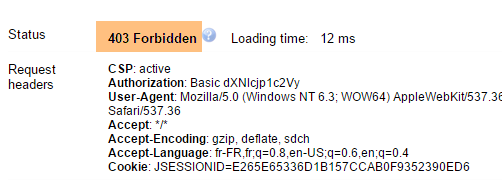 |
发生了异常。
20.2.7. 结论
在无需修改原始 Web/JSON 项目的情况下,成功为 Spring Security 添加了必要的类。这种非常理想的情况源于数据库中新增的三个表与现有表相互独立。 甚至可以将它们放在一个独立的数据库中。在其他情况下,新增的表可能与现有表存在关联。此时,现有 [DAO] 层的代码需要进行审查。
20.3. 为安全 Web 服务 / jSON 编写的客户端
我们已经为非安全 Web 服务 / jSON 编写了一个客户端:
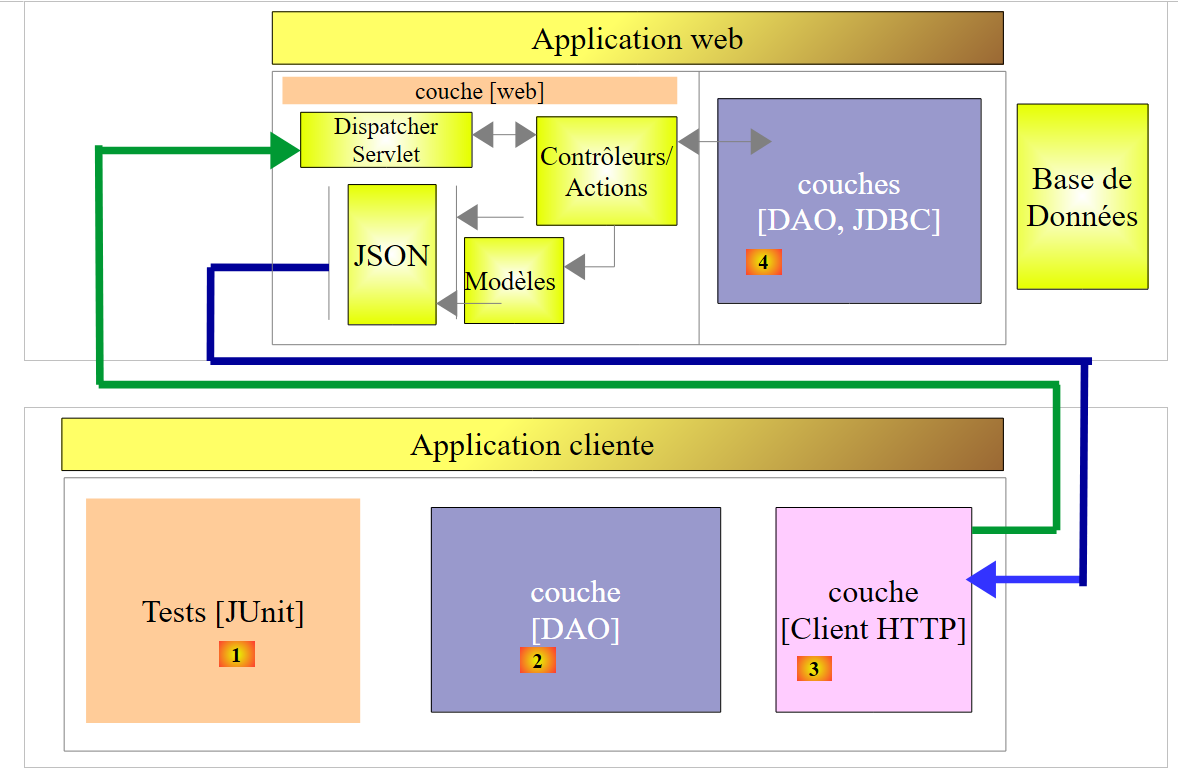 |
现在我们将编写一个针对安全 Web 服务的客户端:
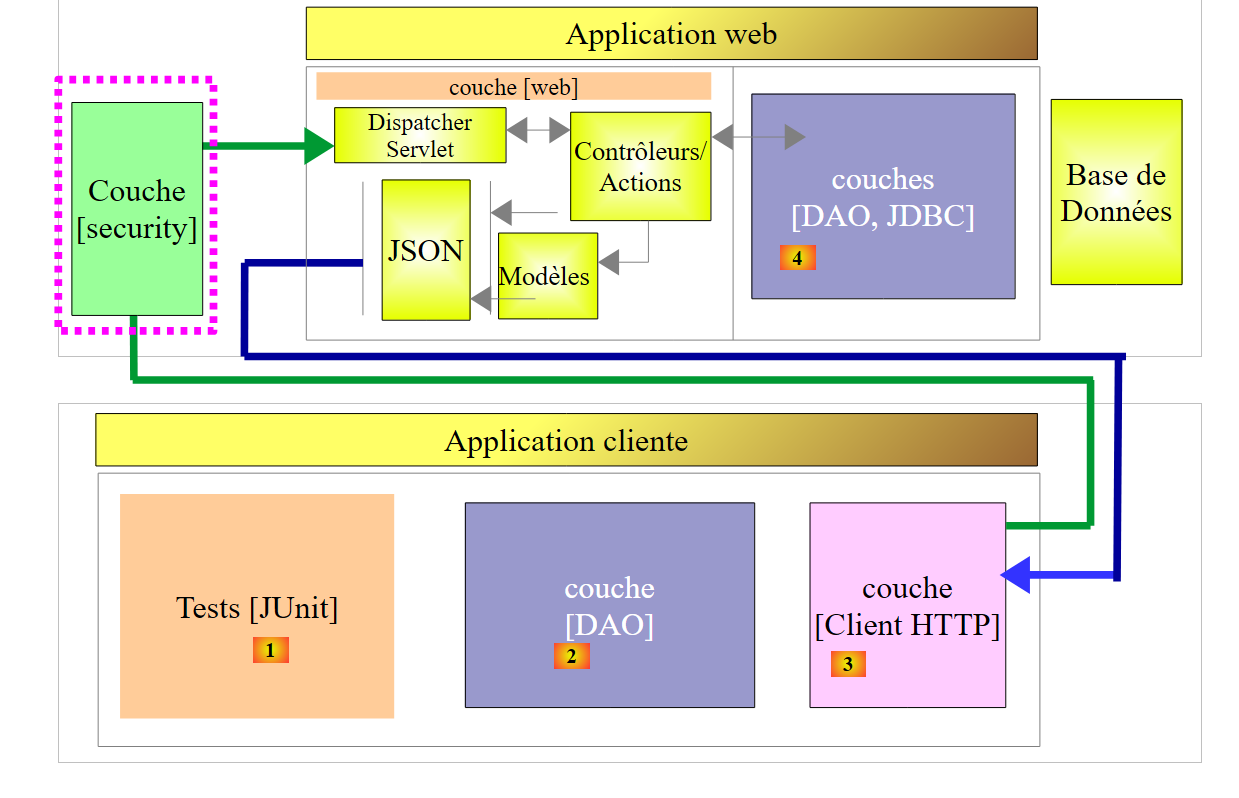 |
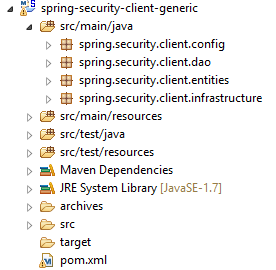 |
20.3.1. [Client HTTP] 层
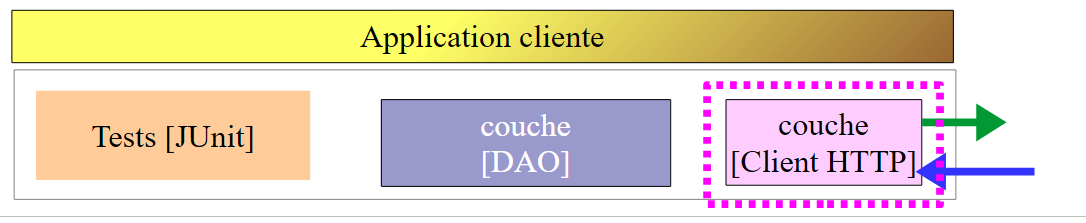 |
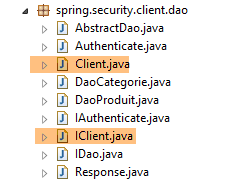 |  |
类 [Client] 负责与安全 Web 服务器 / HTTP 进行通信。 正如我们刚才所见,在此通信中,客户端现在必须发送一个身份验证头,例如:
[IClient] 接口变为如下形式:
package spring.webjson.client.dao;

import org.springframework.http.HttpMethod;

import spring.webjson.client.entities.Credentials;

public interface IClient {
    public <T1, T2> T1 getResponse(Credentials credentials,String url, HttpMethod method, int errStatus, T2 body);
}
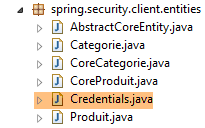
- 第 8 行:方法 [getResponse] 的第一个参数现为一个 [Credentials] 对象,该对象封装了用户的身份信息:
package spring.security.client.entities;

public class Credentials {

    // 属性
    private String login;
    private String password;

    // 构造函数
    public Credentials() {
    }

    public Credentials(String login, String password) {
        this.login = login;
        this.password = password;
    }

    // 获取器和设置器
...
}
实现 [IClient] 接口的 [Client] 类发生如下变化:
package spring.security.client.dao;

...

@Component
public class Client implements IClient {

    // 注入
    @Autowired
    protected RestTemplate restTemplate;
    @Autowired
    protected String urlServiceWebJson;

    // 局部变量
    private String simpleClassName = getClass().getSimpleName();

    private String getBase64(Credentials credentials) {
        // 将用户名和密码进行 Base64 编码 - 需要 Java 8
        String chaîne = String.format("%s:%s", credentials.getLogin(), credentials.getPassword());
        return String.format("Basic %s", new String(Base64.getEncoder().encode(chaîne.getBytes())));
    }

    // 通用请求
    @Override
    public <T1, T2> T1 getResponse(Credentials credentials, String url, HttpMethod method, int errStatus, T2 body) {
        // 服务器响应
        ResponseEntity<Response<T1>> response;
        try {
            // 准备请求
            RequestEntity<?> request = null;
            if (method == HttpMethod.GET) {
                HeadersBuilder<?> headersBuilder = RequestEntity.get(new URI(String.format("%s%s", urlServiceWebJson, url)))    .accept(MediaType.APPLICATION_JSON);
                if (credentials != null) {
                    headersBuilder = headersBuilder.header("Authorization", getBase64(credentials));
                }
                request = headersBuilder.build();
            }
            if (method == HttpMethod.POST) {
                BodyBuilder bodyBuilder = RequestEntity.post(new URI(String.format("%s%s", urlServiceWebJson, url))).header("Content-Type", "application/json").accept(MediaType.APPLICATION_JSON);
                if (credentials != null) {
                    bodyBuilder = bodyBuilder.header("Authorization", getBase64(credentials));
                }
                request = bodyBuilder.body(body);
            }
            // 执行请求
            response = restTemplate.exchange(request, new ParameterizedTypeReference<Response<T1>>() {
            });
        } catch (Exception e) {
            // 封装异常
            throw new DaoException(errStatus, e, simpleClassName);
        }
...
    }
...
}
- 第 33-35 行、第 40-42 行:如果用户 [credentials] 不为空,则添加身份验证头。 用户及其密码的编码由第17-21行的[getBase64]方法负责。 需注意,该方法使用了一个属于 JDK 1.8 的 [Base64] 类。我们的 HTTP 客户端可与非安全 Web 服务配合使用。 只需向其传递一个等于 null 的 [credentials];
- 除上述行外,代码保持不变;
20.3.2. [DAO] 层
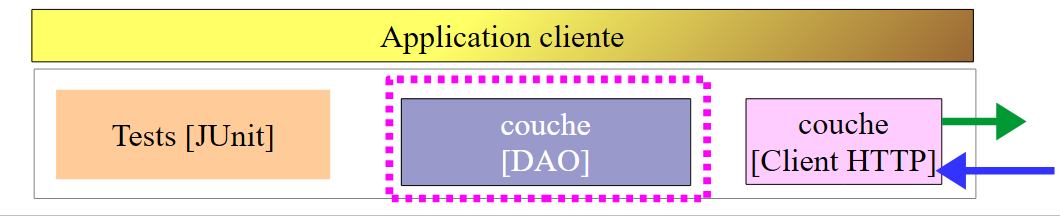 |
20.3.2.1. [IDao] 接口
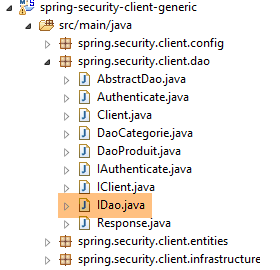 |
项目 [spring-webjson-client-generic] 中接口 [IDao] 的所有方法都接收一个额外参数 [Credentials credentials]:
package spring.security.client.dao;

import java.util.List;

import spring.security.client.entities.AbstractCoreEntity;
import spring.security.client.entities.Credentials;

public interface IDao<T extends AbstractCoreEntity> extends IAuthenticate {

    // 所有 T 实体的列表
    public List<T> getAllShortEntities(Credentials credentials);

    public List<T> getAllLongEntities(Credentials credentials);

    // 特定实体的列表 - 简短版本
    public List<T> getShortEntitiesById(Credentials credentials, Iterable<Long> ids);

    public List<T> getShortEntitiesById(Credentials credentials, Long... ids);

    public List<T> getShortEntitiesByName(Credentials credentials, Iterable<String> names);

    public List<T> getShortEntitiesByName(Credentials credentials, String... names);

    // 特定实体的列表 - 长版
    public List<T> getLongEntitiesById(Credentials credentials, Iterable<Long> ids);

    public List<T> getLongEntitiesById(Credentials credentials, Long... ids);

    public List<T> getLongEntitiesByName(Credentials credentials, Iterable<String> names);

    public List<T> getLongEntitiesByName(Credentials credentials, String... names);

    // 更新多个实体
    public List<T> saveEntities(Credentials credentials, Iterable<T> entities);

    public List<T> saveEntities(Credentials credentials, @SuppressWarnings("unchecked") T... entities);

    // 删除所有实体
    public void deleteAllEntities(Credentials credentials);

    // 删除多个实体
    public void deleteEntitiesById(Credentials credentials, Iterable<Long> ids);

    public void deleteEntitiesById(Credentials credentials, Long... ids);

    public void deleteEntitiesByName(Credentials credentials, Iterable<String> names);

    public void deleteEntitiesByName(Credentials credentials, String... names);

    public void deleteEntitiesByEntity(Credentials credentials, Iterable<T> entities);

    public void deleteEntitiesByEntity(Credentials credentials, @SuppressWarnings("unchecked") T... entities);
}
- 第 8 行:接口 [IDao] 继承了以下接口 [IAuthenticate]:
package spring.security.client.dao;

import spring.security.client.entities.Credentials;

public interface IAuthenticate {
    // 身份验证
    public void authenticate(Credentials credentials);
}
接口 [IAuthenticate] 仅包含唯一的方法 [authenticate]。如果用户 [Credentials credentials] 被安全 Web 服务接受,该方法不返回任何值(void);否则抛出异常。
20.3.2.2. 类 [AbstractDao]
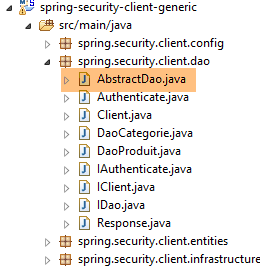 |
需要指出的是,[AbstractDao]类是[DaoCategorie]类的父类,后者管理产品类别的URL,而[DaoProduit]类则管理产品的URL。项目 [spring-webjson-client-generic] 中类 [AbstractDao] 的所有方法都会接收一个额外的参数 [Credentials credentials],并将该参数传递给子类。以下是一个示例:
    @Override
    public List<T1> getShortEntitiesById(Credentials credentials, Iterable<Long> ids) {
        // 参数有效性
        List<T1> entities = checkNullOrEmptyArgument(true, ids);
        if (entities != null) {
            return entities;
        }
        // 结果
        return getShortEntitiesById(credentials, Lists.newArrayList(ids));
}
- 方法 [getShortEntitiesById] 接收参数 [Credentials credentials](第 2 行),并将其传递(第 9 行)给子类的 [getShortEntitiesById] 方法;
类 [AbstractDao] 的骨架如下:
package spring.security.client.dao;

import java.util.ArrayList;
import java.util.List;

import org.springframework.beans.factory.annotation.Autowired;

import spring.security.client.entities.AbstractCoreEntity;
import spring.security.client.entities.Credentials;
import spring.security.client.infrastructure.MyIllegalArgumentException;

import com.google.common.collect.Lists;

public abstract class AbstractDao<T1 extends AbstractCoreEntity> implements IDao<T1> {

    @Autowired
    private IAuthenticate authenticate;

...
}
- 第 14 行:该类实现了我们之前描述的 [IDao] 接口;
- 第 16-17 行:注入了一个 [IAuthenticate] 接口的实例。该接口由以下 [Authenticate] 类实现:
package spring.security.client.dao;

import org.springframework.beans.factory.annotation.Autowired;
import org.springframework.http.HttpMethod;
import org.springframework.stereotype.Component;

import spring.security.client.entities.Credentials;

@Component
public class Authenticate implements IAuthenticate{
    @Autowired
    protected IClient client;

    // 验证 [credentials,mdp]
    public void authenticate(Credentials credentials) {
        client.<Void, Void> getResponse(credentials, "/authenticate", HttpMethod.GET, 111, (Void) null);
    }

}
- 第 9 行:类 [Authenticate] 是 Spring 组件;
- 第 10 行:该类实现了 [IAuthenticate] 接口;
- 第 11-12 行:注入客户端 HTTP,用于与安全 Web 服务进行交互;
- 第15-17行:实现了接口中的[authenticate]方法;
- 第16行:向URL [/authenticate]发送了一条HTTP GET命令。 第 20.2.6 节已介绍了该 URL 的用法。其原理是:如果用户 [credentials] 未知或权限不足,则调用将引发异常;
类 [AbstractDao] 以如下方式实现了接口 [IDao] 中的方法 [authenticate]:
    @Autowired
    private IAuthenticate authenticate;

    @Override
    public void authenticate(Credentials credentials) {
        authenticate.authenticate(credentials);
}
- 第 7 行:任务被委托给类 [Authenticate] 的方法 [authenticate]。因此,如果用户 [Credentials credentials] 未被安全 Web 服务接受,则会抛出异常;
20.3.2.3. 类 [DaoCategorie, DaoProduit]
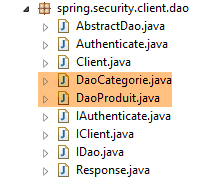 |
[DaoCategorie, DaoProduit]类是[spring-webjson-server-generic]项目的类,带有额外的参数[Credentials credentials]。以下是一个示例:
@Component
public class DaoCategorie extends AbstractDao<Categorie> {

    // 注入
    @Autowired
    protected ApplicationContext context;
    @Autowired
    protected IClient client;

    @Override
    public List<Categorie> getAllShortEntities(Credentials credentials) {
        try {
            // 过滤器jSON
            ObjectMapper mapper = context.getBean("jsonMapperShortCategorie", ObjectMapper.class);
            // 获取所有分类
            Object map = client.<List<Categorie>, Void> getResponse(credentials, "/getAllShortCategories", HttpMethod.GET,
                    202, null);
            // 类别列表 List<Categorie>
            return mapper.readValue(mapper.writeValueAsString(map), new TypeReference<List<Categorie>>() {
            });
        } catch (DaoException e1) {
            throw e1;
        } catch (Exception e2) {
            throw new DaoException(221, e2, simpleClassName);
        }
    }
....
20.3.3. Spring配置
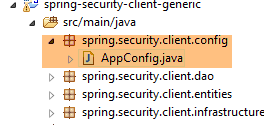 |
类 [AppConfig] 用于配置项目的 Spring 环境。它与 [spring-webjson-client-generic] 项目中的配置完全相同,仅有一处细微差别:
@Configuration
@ComponentScan({ "spring.security.client.dao" })
public class AppConfig {
- 第 2 行:需填写新层 [DAO] 的包名;
20.3.4. [DAO] 层的测试
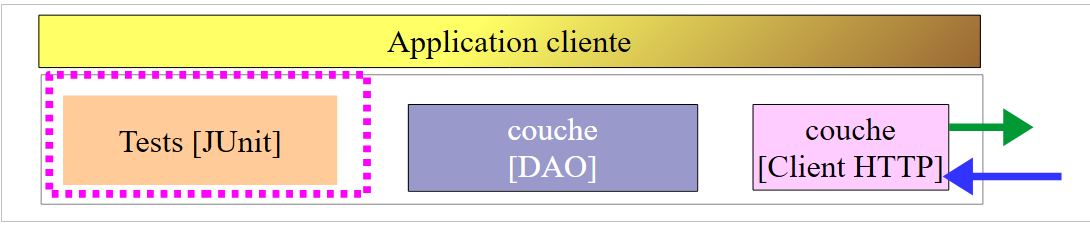 |
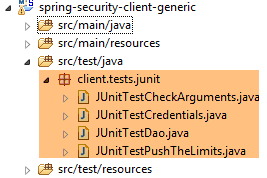 |
20.3.4.1. 测试 [JUnitTestCredentials]
[JUnitTestCredentials]测试使用[IDao.authenticate]方法来验证某些用户的有效性:
package client.tests.junit;

import org.junit.Assert;
import org.junit.BeforeClass;
import org.junit.Test;
import org.junit.runner.RunWith;
import org.springframework.beans.factory.annotation.Autowired;
import org.springframework.boot.test.SpringApplicationConfiguration;
import org.springframework.test.context.junit4.SpringJUnit4ClassRunner;

import spring.security.client.config.AppConfig;
import spring.security.client.dao.IAuthenticate;
import spring.security.client.entities.Credentials;
import spring.security.client.infrastructure.DaoException;

@SpringApplicationConfiguration(classes = AppConfig.class)
@RunWith(SpringJUnit4ClassRunner.class)
public class JUnitTestCredentials {

    // 层 [DAO]
    @Autowired
    private IAuthenticate authenticate;

    // 用户
    static private Credentials admin;
    static private Credentials user;
    static private Credentials unknown;

    @BeforeClass
    public static void init() {
        admin = new Credentials("admin", "admin");
        user = new Credentials("user", "user");
        unknown = new Credentials("x", "y");
    }

    @Test()
    public void checkUserUser() {
        DaoException se = null;
        try {
            authenticate.authenticate(user);
        } catch (DaoException e) {
            se = e;
            System.out.println("checkUserUser: " + e);
        }
        Assert.assertNotNull(se);
        Assert.assertEquals("403 Forbidden", se.getExceptions().get(0).getErrorMessage());
    }

    @Test()
    public void checkUserUnknown() {
        DaoException se = null;
        try {
            authenticate.authenticate(unknown);
        } catch (DaoException e) {
            se = e;
            System.out.println("checkUserUnknown : " + e);
        }
        Assert.assertNotNull(se);
        Assert.assertEquals("401 Unauthorized", se.getExceptions().get(0).getErrorMessage());
    }

    @Test()
    public void checkUserAdmin() {
        DaoException se = null;
        try {
            authenticate.authenticate(admin);
        } catch (DaoException e) {
            se = e;
            System.out.println("checkUserAdmin : " + e);
        }
        Assert.assertNull(se);
    }
}
- 在测试类初始化时(第29-34行),创建了三个用户:
- 用户 [admin] 拥有访问 Web 服务 URL 的权限。该权限在第 63-72 行进行测试;
- 用户 [user] 存在,但无权使用 Web 服务的 URL。该用户在第 37-47 行进行测试;
- 用户 [unknown] 不存在。测试范围为第 50-60 行;
使用名为 [spring-security-server-jdbc-generic] [1] 的运行配置启动安全 Web 服务:
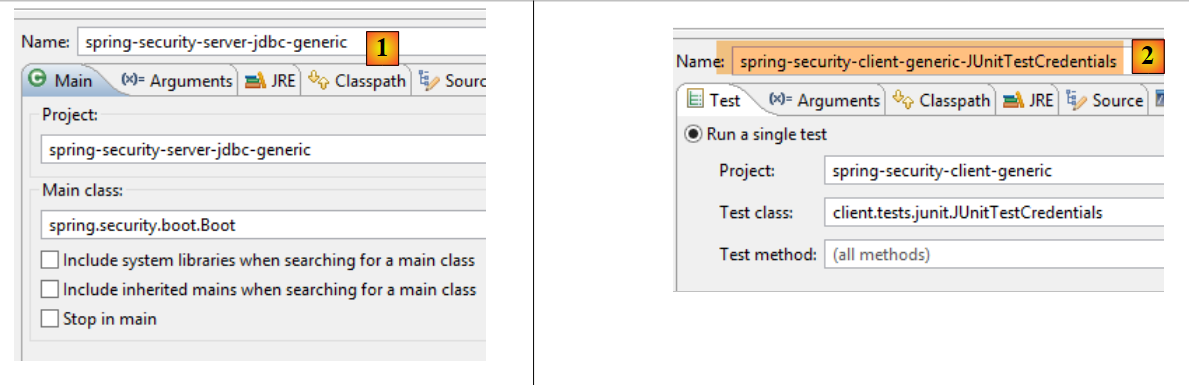 |
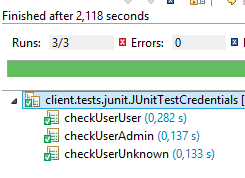
随后使用名为 [spring-security-client-generic-JUnitTestCredentials] [2] 的运行配置启动测试 JUnit [JUnitTestCredentials]。获得的控制台结果如下:
且测试成功:
 |
20.3.4.2. 测试 [JUnitTestDao]
测试 [JUnitTestDao] 与非安全项目中的 [spring-webjson-client-generic] 完全相同,,只是现在被测试的 [DAO] 层方法的首个参数均为用户 [admin / admin]:
@SpringApplicationConfiguration(classes = AppConfig.class)
@RunWith(SpringJUnit4ClassRunner.class)
public class JUnitTestDao {

    // Spring 上下文
    @Autowired
    private ApplicationContext context;
    // [DAO] 层
    @Autowired
    private IDao<Produit> daoProduit;
    @Autowired
    private IDao<Categorie> daoCategorie;

....

    // 用户
    static private Credentials admin;

    @BeforeClass
    public static void init() {
        admin = new Credentials("admin", "admin");
    }

    @Before
    public void clean() {
        // 每次测试前清理数据库
        log("Vidage de la base de données", 1);
        // 清空表 [CATEGORIES] 并级联清空表 [PRODUITS]
        daoCategorie.deleteAllEntities(admin);
        // 清空字典
        for (Long id : mapCategories.keySet()) {
            mapCategories.remove(id);
        }
        for (Long id : mapProduits.keySet()) {
            mapProduits.remove(id);
        }
    }

    private List<Categorie> fill(int nbCategories, int nbProduits) {
        // 填充表
        ...
        // 添加分类 - 产品也将随之
        // 插入 - 同时返回结果
        return daoCategorie.saveEntities(admin, categories);
    }

    private Object[] showDataBase() throws BeansException, JsonProcessingException {
        // 分类列表
        log("Liste des catégories", 2);
        List<Categorie> categories = daoCategorie.getAllShortEntities(admin);
        affiche(categories, context.getBean("jsonMapperShortCategorie", ObjectMapper.class));
        // 产品列表
        log("Liste des produits", 2);
        List<Produit> produits = daoProduit.getAllShortEntities(admin);
        affiche(produits, context.getBean("jsonMapperShortProduit", ObjectMapper.class));
        // 结果
        return new Object[] { categories, produits };
    }
...
所有操作均由用户 [admin / admin] 执行,该用户是唯一拥有安全 Web 服务访问权限的用户。
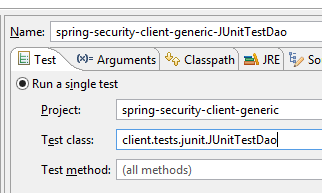
我们将使用名为 [spring-security-client-generic-JUnitTestDao] 的运行配置启动测试:
 |
测试通过,但可以发现其速度比非安全Web服务更慢。应用程序的安全化会显著增加其响应时间。在安全Web服务的性能方面,有一个重要因素值得注意:在其配置类[AppConfig]中,我们写道:
    @Override
    protected void configure(HttpSecurity http) throws Exception {
        // CSRF
        http.csrf().disable();
        // 安全应用?
        if (activateSecurity) {
            // 密码通过 Authorization: Basic xxxx 头部传递
            http.httpBasic();
            // 必须为所有人授权 HTTP OPTIONS 方法
            http.authorizeRequests() //
                    .antMatchers(HttpMethod.OPTIONS, "/", "/**").permitAll();
            // 仅 ADMIN 角色可使用该应用程序
            http.authorizeRequests() //
                    .antMatchers("/", "/**") // 所有 URL
                    .hasRole("ADMIN");
            // 无会话
            http.sessionManagement().sessionCreationPolicy(SessionCreationPolicy.STATELESS);
        }
}
第17行代码会产生性能开销。它决定了用户是否需要在每次访问时进行身份验证。如果将其注释掉,JUnit测试的耗时将明显缩短, 这是因为用户 [admin] 仅在首次测试时进行身份验证,后续测试则无需验证(即使客户端发送了身份验证头 HTTP,服务器也不会重新验证用户的密码)。
20.4. Eclipse 项目 [spring-security-server-jpa-generic]
安全 Web 服务现将由项目 [spring-security-server-jpa-generic] 实现,该项目基于项目 [spring-jpa-generic],后者使用 Spring Data JPA 管理数据库访问:
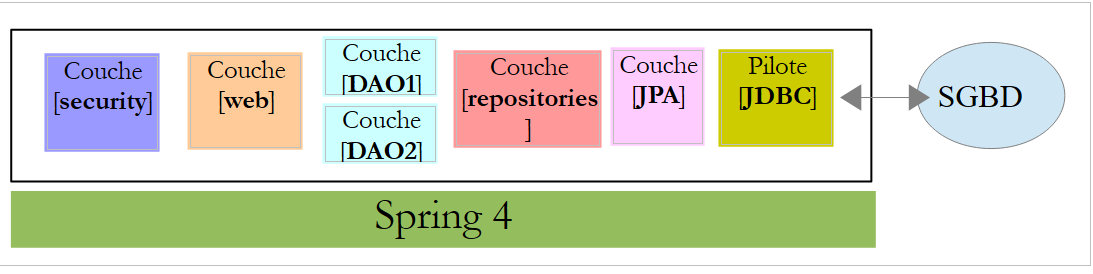 |
上文所述:
- [DAO1] 层即 [DAO] 层,该层管理数据库 [dbproduitscategories] 中的表 [PRODUITS] 和 [CATEGORIES]。 该层已编写完成;
- [DAO2] 层是 [DAO] 层,该层管理数据库 [dbproduitscategories] 中的表 [USERS]、 [ROLES] 和 [USERS_ROLES] 表的 [dbproduitscategories] 层。该层尚待编写;
项目 [spring-security-server-jpa-generic] 首先通过复制先前研究过的项目 [spring-security-server-jdbc-generic] 获得。实际上,层 [web] 和 [security] 保持不变,因为:
- [DAO1 / Repositories / JPA] 层(已编写)与 [DAO1 / JDBC] 层具有相同的接口;
- 待写的层 [DAO2 / Repositories / JPA] 将与层 [DAO2 / JDBC] 具有相同的接口;
项目 [spring-security-server-jpa-generic] 如下:
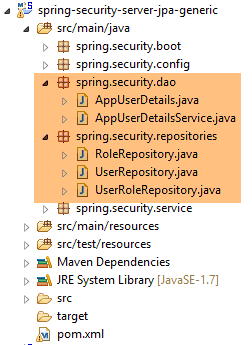 |
- 包 [spring.security.repositories] 实现了层 [repositories];
- 包 [spring.security.dao] 实现了层 [dao2];
20.4.1. Maven 项目
该项目是一个由以下 [pom.xml] 文件配置的 Maven 项目:
<project xmlns="http://maven.apache.org/POM/4.0.0" xmlns:xsi="http://www.w3.org/2001/XMLSchema-instance"
    xsi:schemaLocation="http://maven.apache.org/POM/4.0.0 http://maven.apache.org/xsd/maven-4.0.0.xsd">
    <modelVersion>4.0.0</modelVersion>
    <groupId>dvp.spring.database</groupId>
    <artifactId>spring-security-server-jpa-generic</artifactId>
    <version>0.0.1-SNAPSHOT</version>

    <name>spring-security-server-jpa-generic</name>
    <description>démo spring security</description>

    <properties>
        <project.build.sourceEncoding>UTF-8</project.build.sourceEncoding>
        <java.version>1.7</java.version>
    </properties>

    <parent>
        <groupId>org.springframework.boot</groupId>
        <artifactId>spring-boot-starter-parent</artifactId>
        <version>1.2.3.RELEASE</version>
    </parent>

    <dependencies>
        <!-- Spring Security -->
        <dependency>
            <groupId>org.springframework.boot</groupId>
            <artifactId>spring-boot-starter-security</artifactId>
        </dependency>
        <!-- Web 服务器 / jSON -->
        <dependency>
            <groupId>dvp.spring.database</groupId>
            <artifactId>spring-webjson-server-jpa-generic</artifactId>
            <version>0.0.1-SNAPSHOT</version>
        </dependency>
    </dependencies>
    <!-- 插件 -->
    <build>
        <plugins>
            <plugin>
                <groupId>org.apache.maven.plugins</groupId>
                <artifactId>maven-surefire-plugin</artifactId>
                <version>2.18.1</version>
            </plugin>
        </plugins>
    </build>

</project>
- 第 24-27 行:项目对 [security] 层的依赖;
- 第29-33行:项目中[web]层的依赖关系。项目[spring-webjson-server-jpa-generic]完全实现了[web]层。该层无需编写或修改;
最终,依赖关系如下:
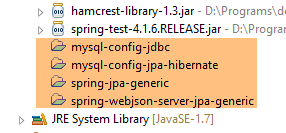 |
20.4.2. Spring配置
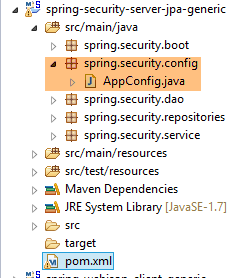 |
前一个项目 [spring-security-server-jdbc-generic] 的配置文件 [AppConfig] 适用。只需向其中添加一项额外配置:
@Configuration
@EnableWebSecurity
@EnableJpaRepositories(basePackages = { "spring.security.repositories" })
@ComponentScan(basePackages = { "spring.security.dao", "spring.security.service" })
@Import({ spring.webjson.server.config.AppConfig.class })
public class AppConfig extends WebSecurityConfigurerAdapter {
- 第 3 行:声明实现 [repositories] 层的包;
- 第 4 行:包含 Spring Bean 的包在新项目中使用相同名称;
- 第 5 行:在之前的项目中,类 [spring.webjson.server.config.AppConfig] 位于依赖项 [spring-webjson-server-jdbc-generic] 中。在此处,它将位于依赖项 [spring-webjson-server-jpa-generic] 中;
20.4.3. JPA 层
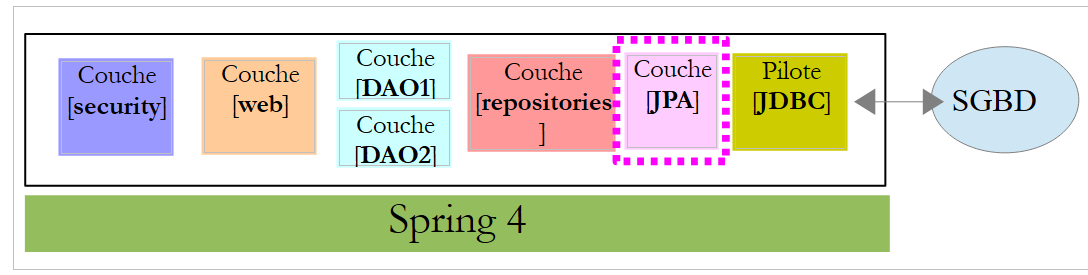 |
由层 [JPA] 管理的实体 JPA 位于项目 [mysql-config-jpa-hibernate] [2] 中,该项目是项目 QZXW2HTMLP005265Z 的依赖项QX:
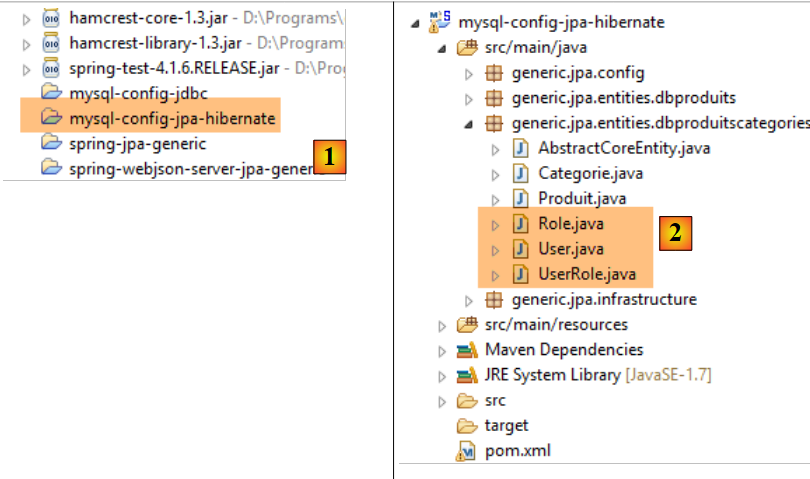 |
类 [User] 是表 [USERS] 的映像:

- ID:主键;
- VERSION:行版本控制列;
- IDENTITY:用户的描述性标识;
- LOGIN:用户的登录名;
- PASSWORD:其密码;
package generic.jpa.entities.dbproduitscategories;

import generic.jdbc.config.ConfigJdbc;

import java.util.List;

import javax.persistence.CascadeType;
import javax.persistence.Column;
import javax.persistence.Entity;
import javax.persistence.FetchType;
import javax.persistence.GeneratedValue;
import javax.persistence.GenerationType;
import javax.persistence.Id;
import javax.persistence.OneToMany;
import javax.persistence.Table;
import javax.persistence.Transient;
import javax.persistence.Version;

import com.fasterxml.jackson.annotation.JsonIgnore;

@Entity
@Table(name = ConfigJdbc.TAB_USERS)
public class User implements AbstractCoreEntity {
    // 属性
    @Id
    @GeneratedValue(strategy = GenerationType.IDENTITY)
    @Column(name = ConfigJdbc.TAB_JPA_ID)
    protected Long id;

    @Version
    @Column(name = ConfigJdbc.TAB_JPA_VERSIONING)
    protected Long version;

    @Transient
    protected EntityType entityType=EntityType.POJO;

    // 属性
    @Column(name = ConfigJdbc.TAB_USERS_NAME, length = 30, nullable = false)
    private String name;
    @Column(name = ConfigJdbc.TAB_USERS_LOGIN, length = 30, unique = true, nullable = false)
    private String login;
    @Column(name = ConfigJdbc.TAB_USERS_PASSWORD, length = 60, nullable = false)
    private String password;

    // 相关的 UserRole
    @OneToMany(fetch = FetchType.LAZY, mappedBy = "user", cascade = { CascadeType.ALL })
    @JsonIgnore
    private List<UserRole> userRoles;

    // 构造函数
    public User() {
    }

    public User(Long id, Long version, String identity, String login, String password) {
        this.id = id;
        this.version = version;
        this.name = identity;
        this.login = login;
        this.password = password;
    }

    // ------------------------------------------------------------
    // 重写 [equals] 和 [hashcode]
...

    // 获取器和设置器
...
}
- 第 23 行:该类实现了已用于其他实体的 [AbstractCoreEntity] 接口;
- 第 34-35 行:实体的类型。该属性不会保存在数据库中 [@Transient];
- 第 38-43 行:用户的三个基本属性(name、login、password);
- 第 46-48 行:用户的角色列表。用户可能拥有多个角色。同样,我们将看到一个角色可以关联多个用户。 因此,按照JPA中的术语定义,实体[User]与[Role]之间存在一种[ManyToMany]关系:
- 一个用户可以关联多个角色;
- 一个角色可以关联多个用户;
该关系[ManyToMany]通过关联表[USERS_ROLES]在数据库中实现。 如果用户 U 与角色 R 存在关联,则在表 [USERS_ROLES] 中记录该关联,并保存实体 (U,R) 的主键对。在 JPA 表中, 连接实体 [User] 和 [Role] 的关系 [ManyToMany] 可以拆分为两个关系 [ManyToOne, OneToMany]:
- (续)
- 从实体 [User] 指向实体 [UserRole] 的关系 [ManyToOne];
- 从实体 [UserRole] 到实体 [UserRole] 的关系 [OneToMany];
同样,连接实体 [Role] 和 [User] 的关系 [ManyToMany] 可以拆分为两个关系 [ManyToOne, OneToMany]:
- (续)
- 从实体 [Role] 指向实体 [UserRole] 的关系 [ManyToOne];
- 从实体 [UserRole] 到实体 [User] 的关系 [OneToMany];
- 关系 48:用户拥有多个角色的事实通过关系 [OneToMany] 指向实体 [UserRole] 来表示;
类 [Role] 是表 [ROLES] 的映射:

- ID:主键;
- VERSION:行版本控制列;
- NAME:角色名称。默认情况下,Spring Security 期望名称采用 ROLE_XX 的格式,例如 ROLE_ADMIN 或 ROLE_GUEST;
package generic.jpa.entities.dbproduitscategories;

import generic.jdbc.config.ConfigJdbc;

import java.util.List;

import javax.persistence.CascadeType;
import javax.persistence.Column;
import javax.persistence.Entity;
import javax.persistence.FetchType;
import javax.persistence.GeneratedValue;
import javax.persistence.GenerationType;
import javax.persistence.Id;
import javax.persistence.OneToMany;
import javax.persistence.Table;
import javax.persistence.Transient;
import javax.persistence.Version;

import com.fasterxml.jackson.annotation.JsonIgnore;

@Entity
@Table(name = ConfigJdbc.TAB_ROLES)
public class Role implements AbstractCoreEntity {
    // 属性
    @Id
    @GeneratedValue(strategy = GenerationType.IDENTITY)
    @Column(name = ConfigJdbc.TAB_JPA_ID)
    protected Long id;

    @Version
    @Column(name = ConfigJdbc.TAB_JPA_VERSIONING)
    protected Long version;

    @Transient
    protected EntityType entityType=EntityType.POJO;

    // 属性
    @Column(name = ConfigJdbc.TAB_ROLES_NAME, length = 30, unique = true, nullable = false)
    private String name;

    // 相关的 UserRole
    @OneToMany(fetch = FetchType.LAZY, mappedBy = "role", cascade = { CascadeType.ALL })
    @JsonIgnore
    private List<UserRole> userRoles;

    // 构造函数
    public Role() {
    }

    public Role(Long id, Long version, String name) {
        this.id = id;
        this.version = version;
        this.name = name;
    }

    // 获取器和设置器
    public Role(String name) {
        this.name = name;
    }

    // ------------------------------------------------------------
    // 重写 [equals] 和 [hashcode]
...
    // getter 和 setter
...
}
- 第 42-44 行:一个角色可以关联多个用户,这通过 [@OneToMany] 与实体 [UserRole] 之间的关系来体现;
类 [UserRole] 是表 [USERS_ROLES] 的映射:

一个用户可以拥有多个角色,一个角色可以包含多个用户。我们有一个多对多关系,由表 [USERS_ROLES] 体现。
- ID:主键;
- VERSION:行版本控制列;
- USER_ID:用户标识;
- ROLE_ID:角色标识符;
package generic.jpa.entities.dbproduitscategories;

import generic.jdbc.config.ConfigJdbc;

import javax.persistence.Column;
import javax.persistence.Entity;
import javax.persistence.FetchType;
import javax.persistence.GeneratedValue;
import javax.persistence.GenerationType;
import javax.persistence.Id;
import javax.persistence.JoinColumn;
import javax.persistence.ManyToOne;
import javax.persistence.Table;
import javax.persistence.Transient;
import javax.persistence.Version;

@Entity
@Table(name = ConfigJdbc.TAB_USERS_ROLES)
public class UserRole implements AbstractCoreEntity {
    // 属性
    @Id
    @GeneratedValue(strategy = GenerationType.IDENTITY)
    @Column(name = ConfigJdbc.TAB_JPA_ID)
    protected Long id;

    @Version
    @Column(name = ConfigJdbc.TAB_JPA_VERSIONING)
    protected Long version;

    @Transient
    protected EntityType entityType=EntityType.POJO;

    // 一个 UserRole 引用一个 User
    @ManyToOne(fetch = FetchType.LAZY)
    @JoinColumn(name = ConfigJdbc.TAB_USERS_ROLES_USER_ID, nullable = false)
    private User user;

    // 一个 UserRole 引用一个 Role
    @ManyToOne(fetch = FetchType.LAZY)
    @JoinColumn(name = ConfigJdbc.TAB_USERS_ROLES_ROLE_ID, nullable = false)
    private Role role;

    // 构造函数
    public UserRole() {

    }

    public UserRole(User user, Role role) {
        this.user = user;
        this.role = role;
    }

    // ------------------------------------------------------------
    // 重写 [equals] 和 [hashcode]
    ...

    // 获取器和设置器
...
}
- 第 34-36 行:实现表 [USERS_ROLES] 到表 [USERS] 的外键;
- 第38-41行:实现表[USERS_ROLES]到表[ROLES]的外键;
20.4.4. [repositories]层
 |
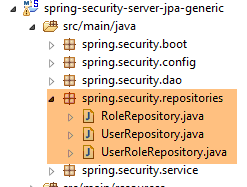 |
接口 [UserRepository] 管理对实体 [User] 的访问:
package spring.security.repositories;

import generic.jpa.entities.dbproduitscategories.Role;
import generic.jpa.entities.dbproduitscategories.User;

import org.springframework.data.jpa.repository.Query;
import org.springframework.data.repository.CrudRepository;

public interface UserRepository extends CrudRepository<User, Long> {

    // 按 ID 标识的用户角色列表
    @Query("select ur.role from UserRole ur where ur.user.id=?1")
    Iterable<Role> getRoles(long id);

    // 按唯一登录名查询用户的角色列表
    @Query("select ur.role from UserRole ur where ur.user.login=?1 and ur.user.password=?2")
    Iterable<Role> getRoles(String login, String password);

    // 通过登录名查询用户
    User findUserByLogin(String login);
}
- 第 9 行:接口 [UserRepository] 继承了 Spring Data 的 [CrudRepository] 接口(第 7 行);
- 第 12-13 行:方法 [getRoles(long id)] 可获取通过 [id] 标识的用户的全部角色
- 第16-17行:同上,但针对通过登录名/密码识别的用户;
- 第 20 行:通过用户名查找用户;
接口 [RoleRepository] 管理对实体 [Role] 的访问:
package spring.security.repositories;

import generic.jpa.entities.dbproduitscategories.Role;

import org.springframework.data.repository.CrudRepository;

public interface RoleRepository extends CrudRepository<Role, Long> {

    // 通过名称搜索角色
    Role findRoleByName(String name);

}
- 第7行:接口[RoleRepository]扩展了接口[CrudRepository];
- 第 10 行:可通过名称搜索角色。在此提醒,实体 [Role] 包含字段 [name]。 方法 [findEntityByChamp] 由 Spring Data 自动实现。因此,此处无需实现方法 [finRoleByName],只需在接口中声明即可。
接口 [UserRoleRepository] 管理对实体 [UserRole] 的访问:
package spring.security.repositories;

import generic.jpa.entities.dbproduitscategories.UserRole;

import org.springframework.data.repository.CrudRepository;

public interface UserRoleRepository extends CrudRepository<UserRole, Long> {

}
- 第 7 行:接口 [UserRoleRepository] 仅继承了接口 [CrudRepository],未为其添加新方法;
20.4.5. 尿布 [DAO2]
 |
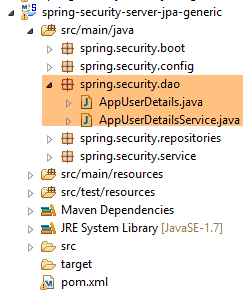 |
在 [DAO2] 层中,包含与第 20.2.2 节中先前研究过的 [spring-security-server-jdbc-generic] 项目中的 [DAO2] 层相同的类。 现在只需借助 [repositories] 层中的类来实现它们即可。
[AppUserDetails] 类的演变如下:
package spring.security.dao;

import generic.jpa.entities.dbproduitscategories.Role;
import generic.jpa.entities.dbproduitscategories.User;

import java.util.ArrayList;
import java.util.Collection;

import org.springframework.security.core.GrantedAuthority;
import org.springframework.security.core.authority.SimpleGrantedAuthority;
import org.springframework.security.core.userdetails.UserDetails;

import spring.data.infrastructure.DaoException;
import spring.security.repositories.UserRepository;

public class AppUserDetails implements UserDetails {

    private static final long serialVersionUID = 1L;

    // 属性
    private User user;
    private UserRepository userRepository;

    // 本地
    private String simpleClassName = getClass().getSimpleName();

    // 构造函数
    public AppUserDetails() {
    }

    public AppUserDetails(User user, UserRepository userRepository) {
        this.user = user;
        this.userRepository = userRepository;
    }

    // -------------------------接口
    @Override
    public Collection<? extends GrantedAuthority> getAuthorities() {
        Collection<GrantedAuthority> authorities = new ArrayList<>();
        Iterable<Role> roles;
        try {
            roles = userRepository.getRoles(user.getId());
        } catch (Exception e) {
            e.printStackTrace();
            throw new DaoException(167, e, simpleClassName);
        }
        for (Role role : roles) {
            authorities.add(new SimpleGrantedAuthority(role.getName()));
        }
        return authorities;
    }
...
}
- 第 31 行,该类的构造函数接收 [UserRepository] 对象作为第二个参数,这使得该类能够获取特定用户的角色(第 42 行);
Spring 组件 [AppUserDetailsService] 的演变如下:
package spring.security.dao;

import generic.jpa.entities.dbproduitscategories.User;

import org.springframework.beans.factory.annotation.Autowired;
import org.springframework.security.core.userdetails.UserDetails;
import org.springframework.security.core.userdetails.UserDetailsService;
import org.springframework.security.core.userdetails.UsernameNotFoundException;
import org.springframework.stereotype.Service;

import spring.data.infrastructure.DaoException;
import spring.security.repositories.UserRepository;

@Service
public class AppUserDetailsService implements UserDetailsService {

    @Autowired
    private UserRepository userRepository;
    // 本地
    private String simpleClassName = getClass().getName();

    @Override
    public UserDetails loadUserByUsername(String login) throws UsernameNotFoundException {
        // 通过登录名查找用户
        User user;
        try {
            user = userRepository.findUserByLogin(login);
        } catch (Exception e) {
            throw new DaoException(168, e, simpleClassName);
        }
        // 找到?
        if (user == null) {
            throw new UsernameNotFoundException(String.format("login [%s] inexistant", login));
        }
        // 返回用户详细信息
        return new AppUserDetails(user, userRepository);
    }

}
- 第 18 行:注入 Spring 组件 [userRepository],该组件将使服务能够根据登录名识别用户(第 27 行);
最终发现,我们只需要 [userRepository],而无需另外两个仓库 [roleRepository, userRoleRepository]。这两个仓库将在后续项目中使用,旨在填充 [USERS, ROLES, USERS_ROLES] 表。
20.4.6. 测试
使用名为 [spring-security-server-jpa-generic-hibernate-eclipselink] [1] 的配置启动了安全 Web 服务。 通用客户端的 [JUnitTestDao] 测试使用名为 [spring-security-client-generic-JUnitTestDao] [2] 的配置启动:
 |
测试成功。
20.5. Eclipse 项目 [spring-security-create-users]
 |
 |
20.5.1. 数据库
项目运行将 [dbproduitscategories] 表的数据填入 [USERS, ROLES, USERS_ROLES] 表:
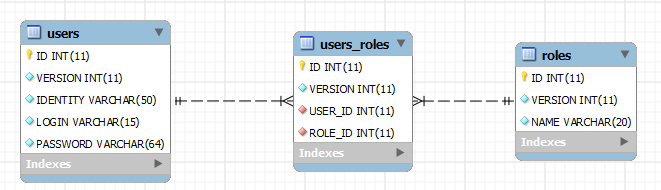
|
|
生成的标识符 [login/passwd] 如下:[admin/admin]、[user/user]、[guest/guest]。在数据库中,密码是加密的。
|
20.5.2. Maven 配置
该项目是一个由以下文件 [pom.xml] 配置的 Maven 项目:
<?xml version="1.0" encoding="UTF-8"?>
<project xmlns="http://maven.apache.org/POM/4.0.0" xmlns:xsi="http://www.w3.org/2001/XMLSchema-instance"
    xsi:schemaLocation="http://maven.apache.org/POM/4.0.0 http://maven.apache.org/xsd/maven-4.0.0.xsd">
    <modelVersion>4.0.0</modelVersion>

    <groupId>dvp.spring.database</groupId>
    <artifactId>spring-security-create-users-jpa</artifactId>
    <version>0.0.1-SNAPSHOT</version>
    <packaging>jar</packaging>

    <name>spring-security-create-users-jpa</name>
    <description>création de utilisateurs dans la base [dbproduitscategories]</description>

    <parent>
        <groupId>org.springframework.boot</groupId>
        <artifactId>spring-boot-starter-parent</artifactId>
        <version>1.2.3.RELEASE</version>
    </parent>

    <dependencies>
        <!-- Spring Security -->
        <dependency>
            <groupId>org.springframework.boot</groupId>
            <artifactId>spring-boot-starter-security</artifactId>
        </dependency>
        <!-- spring-security-server-jpa-generic -->
        <dependency>
            <groupId>dvp.spring.database</groupId>
            <artifactId>spring-security-server-jpa-generic</artifactId>
            <version>0.0.1-SNAPSHOT</version>
        </dependency>
    </dependencies>

    <properties>
        <project.build.sourceEncoding>UTF-8</project.build.sourceEncoding>
        <java.version>1.7</java.version>
    </properties>

    <build>
        <plugins>
            <plugin>
                <groupId>org.apache.maven.plugins</groupId>
                <artifactId>maven-surefire-plugin</artifactId>
                <version>2.18.1</version>
            </plugin>
        </plugins>
    </build>

</project>
- 第 22-25 行:对 Spring Security 框架的依赖。该框架提供了密码加密算法
- 第27-31行:依赖于我们刚刚构建的[spring-security-server-jpa-generic]项目。该项目实现了该项目的[repositories]和[JPA]层;
最终,依赖关系如下:
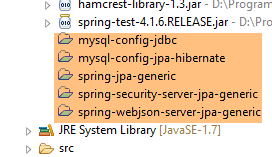 |
20.5.3. [console] 层
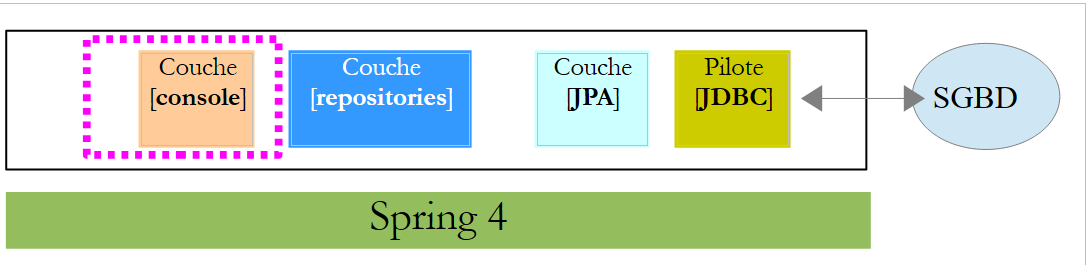 |
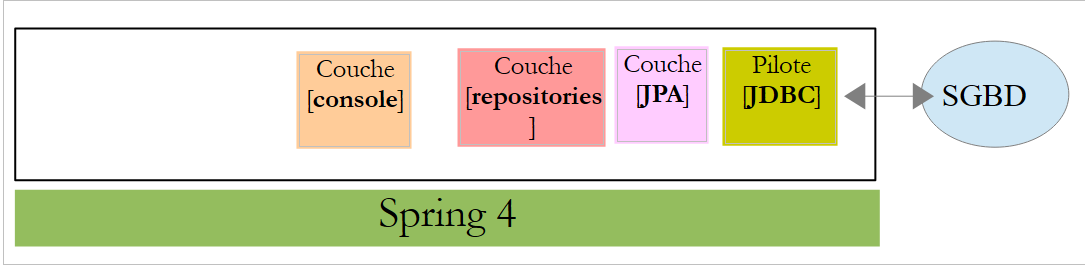
由于 [repositories] 和 [JPA] 这两层已由依赖项 [spring-security-server-jpa-generic] 实现,因此只需实现 [console] 这一层。
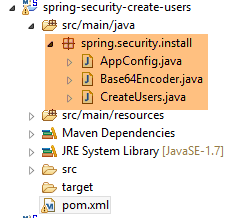 |
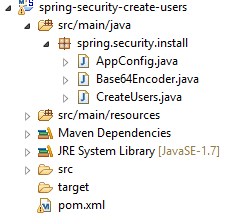
- [AppConfig] 是该项目的 Spring 配置类;
- [CreateUsers] 是用于创建用户和角色的可执行类;
- [Base64Encoder] 是一个辅助类,用于生成 [login, password] 对的 Base64 编码。我们之前已经用过它。它对本项目没有用;
Spring 配置类 [AppConfig] 如下所示:
package spring.security.install;

import generic.jpa.config.ConfigJpa;

import org.springframework.context.annotation.Configuration;
import org.springframework.context.annotation.Import;
import org.springframework.data.jpa.repository.config.EnableJpaRepositories;

@Configuration
@EnableJpaRepositories(basePackages = { "spring.security.repositories" })
@Import({ ConfigJpa.class })
public class AppConfig {
}
- 第 10 行:指定应用程序中 [repositories] 的位置。它们位于依赖项 [spring-security-server-jpa-generic] 的 [spring.security.repositories] 包中
- 第 11 行:导入 [ConfigJpa] 类的 Bean,该类用于配置项目的 [JPA] 层。该类位于依赖项 [mysql-config-jpa-hibernate] 中:
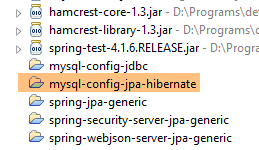 |
类 [CreateUsers] 如下所示:
package spring.security.install;

import generic.jpa.entities.dbproduitscategories.Role;
import generic.jpa.entities.dbproduitscategories.User;
import generic.jpa.entities.dbproduitscategories.UserRole;

import org.springframework.context.annotation.AnnotationConfigApplicationContext;
import org.springframework.security.crypto.bcrypt.BCrypt;

import spring.security.repositories.RoleRepository;
import spring.security.repositories.UserRepository;
import spring.security.repositories.UserRoleRepository;

public class CreateUsers {

    public static void main(String[] args) {

        // 结束
        System.out.println("Travail en cours...");

        // 创建三个用户
        String[] logins = { "admin", "user", "guest" };
        String[] passwds = { "admin", "user", "guest" };
        String[] roles = { "admin", "user", "guest" };

        // Spring 上下文
        AnnotationConfigApplicationContext context = new AnnotationConfigApplicationContext(AppConfig.class);
        UserRepository userRepository = context.getBean(UserRepository.class);
        RoleRepository roleRepository = context.getBean(RoleRepository.class);
        UserRoleRepository userRoleRepository = context.getBean(UserRoleRepository.class);
        for (int i = 0; i < logins.length; i++) {
            // 获取第 i 号用户的信息
            String login = logins[i];
            String password = passwds[i];
            String roleName = String.format("ROLE_%s", roles[i].toUpperCase());
            // 该角色是否已存在?
            Role role = roleRepository.findRoleByName(roleName);
            // 如果不存在则创建
            if (role == null) {
                role = roleRepository.save(new Role(roleName));
            }
            // 该用户是否已存在?
            User user = userRepository.findUserByLogin(login);
            // 如果不存在,则创建该用户
            if (user == null) {
                // 使用 bcrypt 对密码进行哈希处理
                String crypt = BCrypt.hashpw(password, BCrypt.gensalt());
                // 保存用户
                user = userRepository.save(new User(null, null, login, login, crypt));
                // 建立与角色的关联
                userRoleRepository.save(new UserRole(user, role));
            } else {
                // 用户已存在——是否拥有所请求的角色?
                boolean trouvé = false;
                for (Role r : userRepository.getRoles(user.getId())) {
                    if (r.getName().equals(roleName)) {
                        trouvé = true;
                        break;
                    }
                }
                // 若未找到,则创建与角色的关联
                if (!trouvé) {
                    userRoleRepository.save(new UserRole(user, role));
                }
            }
        }
        // 关闭 Spring 上下文
        context.close();
        // 结束
        System.out.println("Travail terminé...");
    }

}
- 第 22-24 行:定义了三个用户的登录名、密码和角色;
- 第 27 行:基于配置类 [AppConfig] 构建 Spring 上下文;
- 第28-30行:获取三个[Repository]对象的引用,这些引用可用于创建用户;
- 第31行:创建这三个用户;
- 第33-35行:创建第i个用户的相关信息;
- 第 37 行:检查该角色是否已存在;
- 第39-41行:如果不存在,则在数据库中创建该角色。其名称将采用[ROLE_XX]的格式;
- 第43行:检查登录名是否已存在;
- 第 45-52 行:若登录名不存在,则在数据库中创建;
- 第 47 行:对密码进行加密。此处使用了 Spring Security 的 [BCrypt] 类(第 8 行)。因此需要该框架的依赖包。文件 [pom.xml] 包含以下依赖:
        <dependency>
            <groupId>org.springframework.boot</groupId>
            <artifactId>spring-boot-starter-security</artifactId>
</dependency>
- 第 49 行:将用户信息写入数据库;
- 第 51 行:以及将其与角色关联的关系;
- 第 55-60 行:若登录用户已存在——则检查其现有角色中是否已包含要分配的角色;
- 第 62-64 行:若未找到目标角色,则在表 [USERS_ROLES] 中创建一条记录,将用户与其角色关联;
- 未对可能出现的异常进行防护。这是一个用于快速创建用户的辅助类;
要运行该项目,需执行名为 [spring-security-create-users-hibernate-eclipselink] 的运行配置:
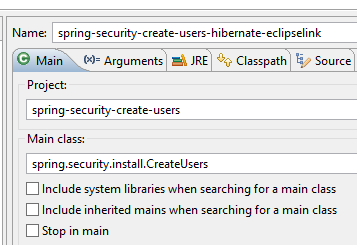 |
我们刚刚构建了两个安全的 Web 服务:
- 一个采用[security / web / JDBC / MySQL]架构;
- 另一个采用 [security / web / Hibernate / MySQL] 架构;
现在我们来探讨另外两种架构:
- 一种是 [security / web / EclipseLink / SQL Server 2014 Express] 架构;
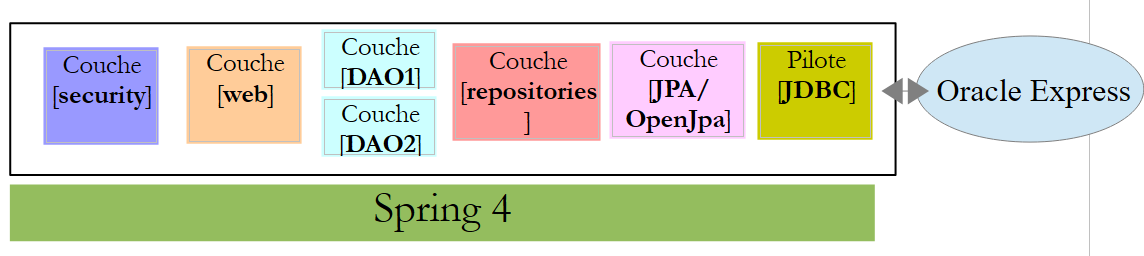
- [security / web / OpenJpa / Oracle Express]架构;
20.5.4. [security / web / EclipseLink / SQL Server]架构
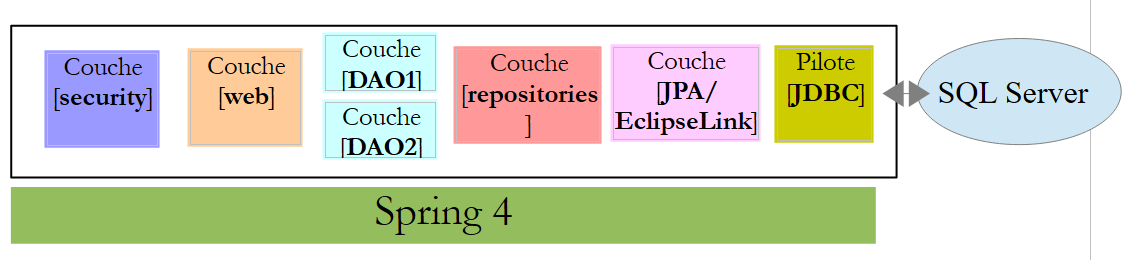 |
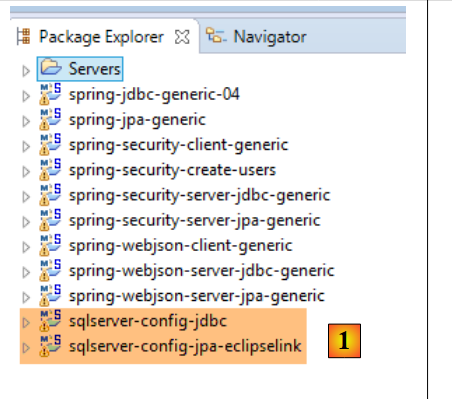 |
- 在 [1] 中,加载配置 [JDBC / SQL Server] 层和 [JPA / EclipseLink / SQL Server] 层的项目;
注意:按 Alt-F5 键,然后重新生成所有 Maven 项目。
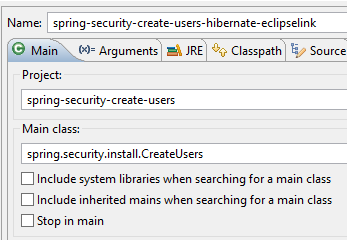
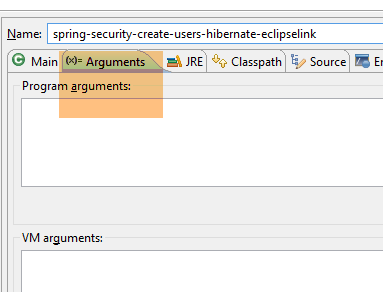
假设 SGBD SQL 服务器已启动,且数据库 [dbproduitscategories] 已生成。首先,我们需要填充该数据库中的 [USERS, ROLES, USERS_ROLES] 表。 为此,请执行名为 [spring-security-create-users-hibernate-eclipselink] 的运行配置:
 |  |
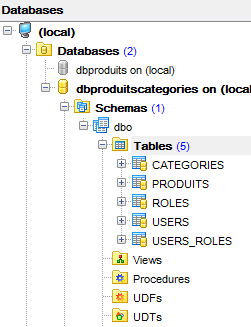
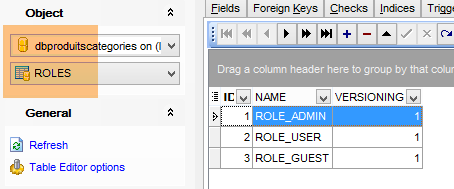
该配置将向以下三个表中填充数据:
 |  |
 |
 |
- 使用名为 [spring-security-server-jpa-generic-hibernate-eclipselink][1] 的配置启动安全 Web 服务;
- 使用名为 [spring-security-client-generic-JUnitTestDao][2] 的配置运行测试 JUnitTestDao。该测试应成功通过 [3];
 |
 |
20.5.5. 架构 [security / web / OpenJpa / Oracle Express]
 |
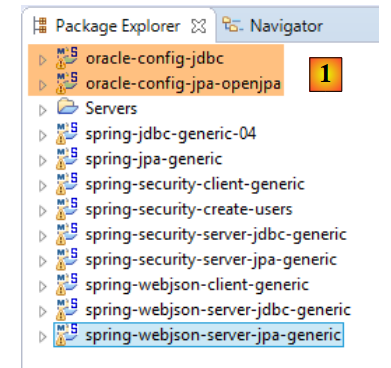 |
- 在 [1] 中,加载了配置 [JDBC / Oracle Express] 层和 [JPA / OpenJpa / Oracle Express] 层的项目;
注意:按 Alt-F5 键,然后重新生成所有 Maven 项目。
假设 Oracle Express 实例 SGBD 已启动,且数据库 [dbproduitscategories] 已生成。首先,我们需要填充该数据库中的 [USERS, ROLES, USERS_ROLES] 表。 为此,请执行名为 [spring-security-create-users-openjpa] 的运行配置:
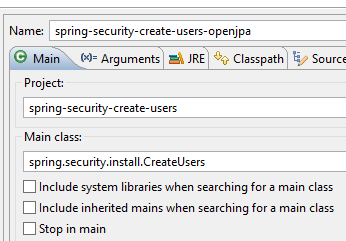 | 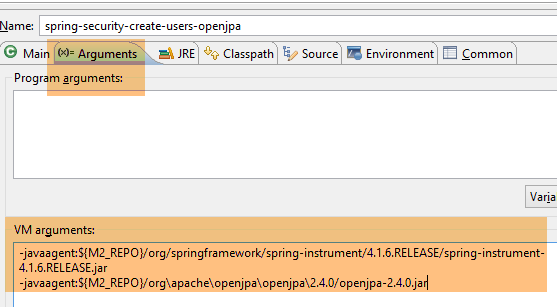 |
该配置将向以下三个表中填充数据:
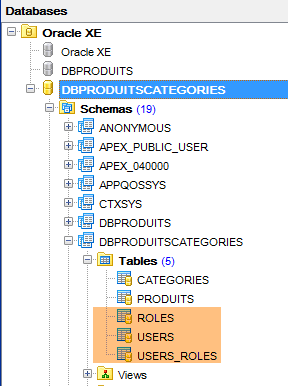 | 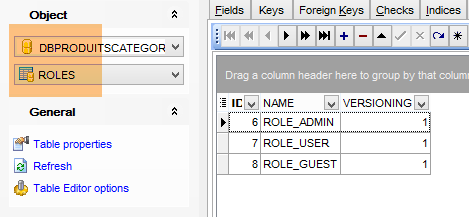 |
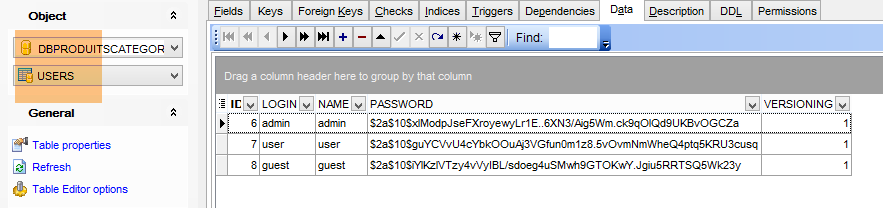 |
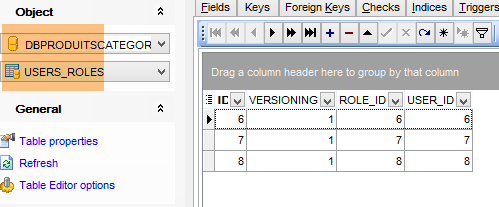 |
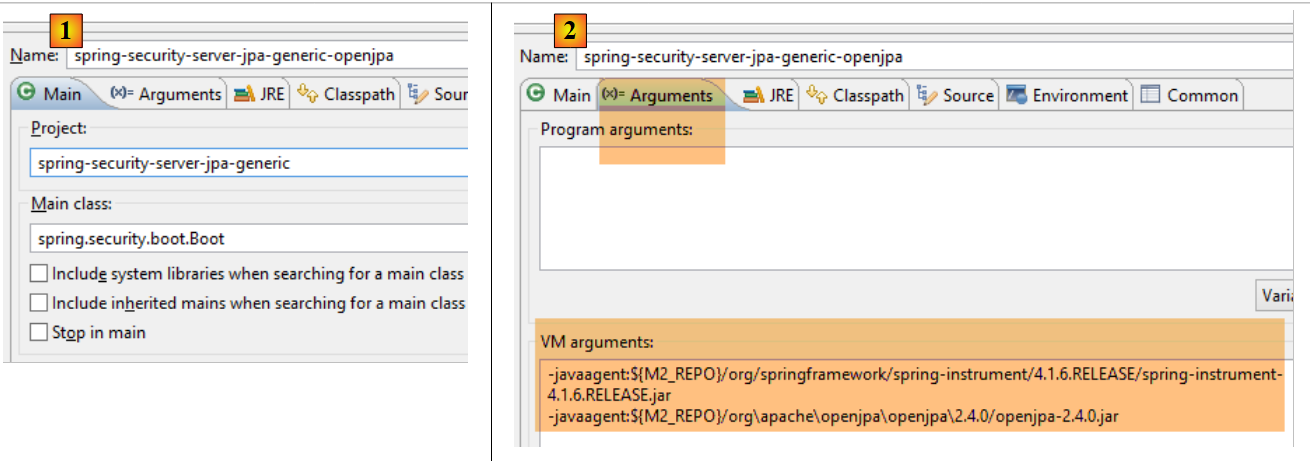
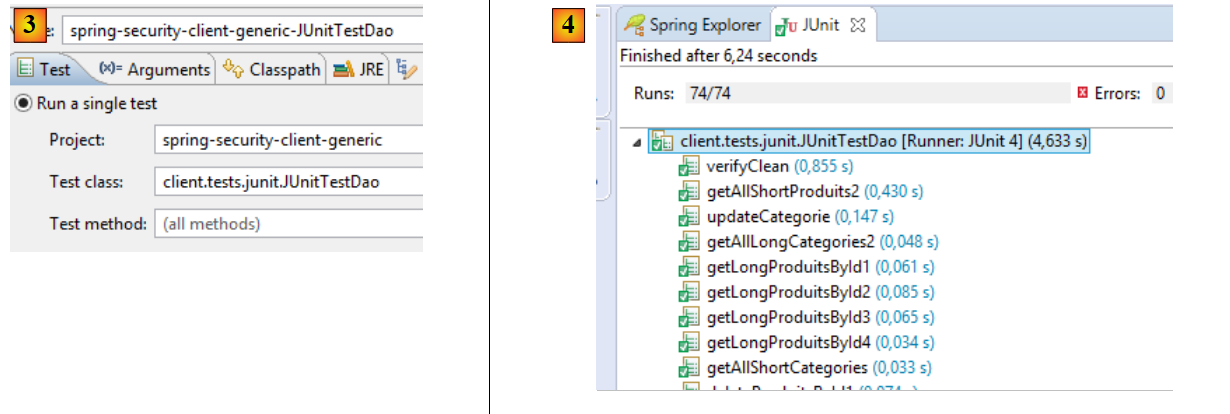
- 使用名为 [spring-security-server-jpa-generic-openjpa][1-2] 的配置启动安全 Web 服务;
- 使用名为 [spring-security-client-generic-JUnitTestDao][3] 的配置运行测试 JUnitTestDao。该测试应成功通过 [4];
 |
 |