1. General Information
The PDF of this document can be found HERE.
1.1. Objectives
Here, we aim to explore a development method called STRUTS. Jakarta Struts is a project of the Apache Software Foundation (www.apache.org) that aims to provide a standard framework for developing Java web applications following the so-called MVC architecture (Model-View-Controller).
1.2. The MVC Model
The MVC model seeks to separate the presentation, processing, and data access layers. A web application adhering to this model will be structured as follows:
 |
Such an architecture is called a 3-tier or 3-level architecture:
- the user interface is the V (the view)
- the application logic is the C (the controller)
- the data sources are the M (Model)
The user interface is often a web browser, but it can also be a standalone application that sends HTTP requests to the web service over the network and formats the results it receives in return. The application logic consists of scripts that process user requests. The data source is often a database, but it can also be simple flat files, a directory, a remote web service, etc. The developer should maintain a high degree of independence between these three entities so that if one of them changes, the other two do not have to change, or only minimally.
When applying this model with servlets and JSP pages, the following architecture is obtained:
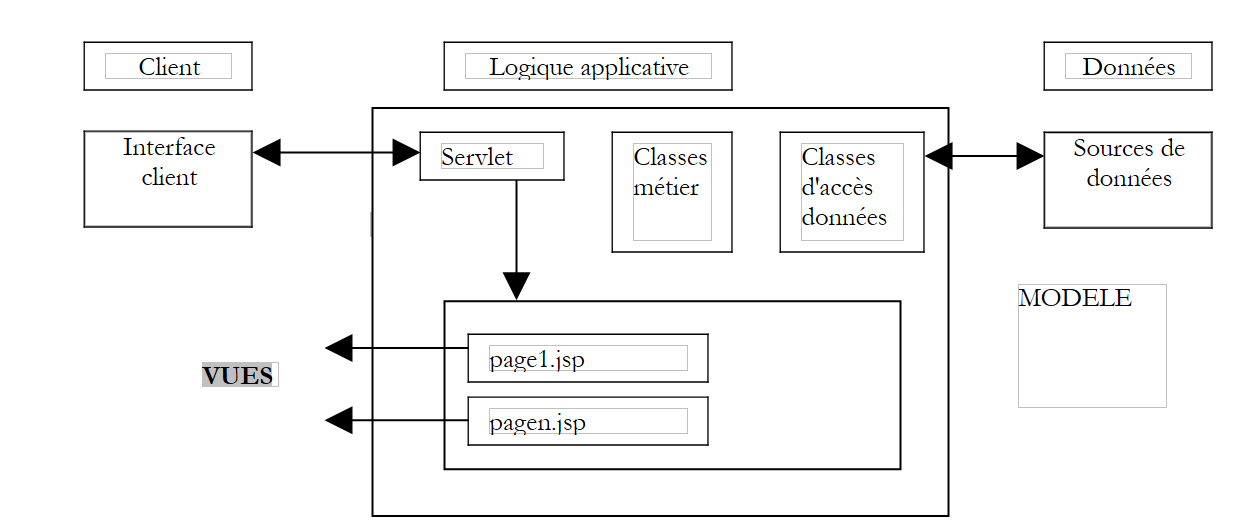 |
In the [Logique Applicative] block, we distinguish
- the servlet, which serves as the application’s entry point and is also called the controller
- the [Classes métier] block, which contains the Java classes required for the application’s logic
- the [Classes d'accès aux données] block, which contains the Java classes needed to retrieve the data required by the servlet, often persistent data (BD, files, WEB service, etc.)
- the JSP page block, which constitutes the application views.
1.3. A development approach using servlets and pages
We have defined a process for developing Java web applications that follows the previous MVC model. We will review it here.
- We will begin by defining all the application views. These are the web pages presented to the user. We will therefore adopt the user’s perspective when designing the views. There are three types of views:
- the input form, which is designed to collect information from the user. It typically includes a button to send the entered information to the server.
- the response page, which is used solely to provide information to the user. This often includes a link allowing the user to continue using the application on another page.
- the mixed page: the servlet has sent the client a page containing information it generated. This same page will be used by the client to provide the servlet with additional information.
- Each view will generate a page named JSP. For each of these:
- we will design the page’s layout
- we will determine which parts of it are dynamic:
- the information intended for the user, which must be provided by the servlet as parameters to the JSP view
- the input data that must be transmitted to the servlet for processing. This data must be part of a HTML form.
- We can diagram the I/O for each view
 |
- Inputs are the data that the servlet must provide to the JSP page, either in the request or the session.
- The outputs are the data that the JSP page must provide to the servlet. They are part of a HTML form, and the servlet will retrieve them via an operation of the type request.getparameter(...).
- We will write the Java/JSP code for each view. It will most often take the following form:
<%@ page ... %>    // class imports most often
<%!
     // page instance variables JSP (=global)
     // only necessary if JSP page has methods sharing variables (rare)
    ...
%>
<%
     // retrieve data sent by the servlet
     // either in the request or in the session
    ...
%>

<html>
...
         // here we'll try to minimize the java code
</html>
- We can then move on to the initial tests. The deployment method explained below is specific to the Tomcat server:
- the application context must be created in Tomcat’s server.xml file. We can start by testing this context. Let C be this context and DC the folder associated with it. We will create a static file named test.html and place it in the DC folder. After starting Tomcat, we will request the file test.html using a browser via the URL URL://localhost:8080/http/test.DC/test.html.
- Each JSP page can be tested. If a JSP page is named formulaire.jsp, we will request URL http://localhost:8080/DC/formulaire.jsp using a browser. The page JSP expects values from the servlet that calls it. Here we are calling it directly, so it will not receive the expected parameters. To ensure that testing is still possible, we will manually initialize the expected parameters with constants in the JSP page. These initial tests verify that the JSP pages are syntactically correct.
- We then write the servlet code. It has two distinct methods:
- the init method, which is used to:
- retrieve the application’s configuration parameters from its web.xml file
- potentially create instances of business classes that it will need to use later
- handling any list of initialization errors that will be returned to future users of the application. This error handling may include sending an email to the application administrator to notify them of a malfunction
- the doGet or doPost method, depending on how the servlet receives its parameters from its clients. If the servlet handles multiple forms, it is advisable for each of them to send information that uniquely identifies it. This can be done using a hidden attribute in the form of the type <input type="hidden" name="action" value="...">. The servlet can start by reading the value of this parameter and then delegate the processing of the request to an internal private method responsible for handling this type of request.
- We should avoid putting business logic in the servlet as much as possible. It is not designed for that. The servlet acts as a sort of team leader (controller) that receives requests from its clients (web) and has them executed by the most appropriate people (the business classes). When writing the servlet, you will define the interface of the business classes to be created (constructors, methods). This applies if these business classes need to be created. If they already exist, then the servlet must adapt to the existing interface.
- The servlet code will be compiled.
- We will write the skeleton of the business classes required by the servlet. For example, if the servlet uses an object of type proxyArticles and this class must have a method getCodes that returns a list (ArrayList) of character strings, we can initially simply write:
public ArrayList getCodes(){
    String[] codes= {"code1","code2","code3"};
    ArrayList aCodes=new ArrayList();
    for(int i=0;i<codes.length;i++){
        aCodes.add(codes[i]);
    }
        return aCodes;
}
- We can then move on to testing the servlet.
- The application's web.xml configuration file must be created. It must contain all the information expected by the servlet's init method (<init-param>). Additionally, we set the URL through which the main servlet will be accessed (<servlet-mapping>).
- All necessary classes (servlet, business classes) are placed in WEB-INF/classes.
- All necessary class libraries (.jar) are placed in WEB-INF/lib. These libraries may contain business classes, JDBC drivers, etc.
- The JSP views are placed in the application root or in a dedicated folder. The same applies to other resources (html, images, audio, videos, etc.)
- Once this is done, the application is tested and the initial errors are corrected. At the end of this phase, the application architecture is operational. This testing phase can be challenging, given that Tomcat does not provide a built-in debugging tool. To address this, Tomcat would need to be integrated into a development tool (such as JBuilder Developer, Sun One Studio, etc.). You can use the System.out.println("....") instructions, which write to the Tomcat window. The first thing to check is that the init method successfully retrieves all data from the web.xml file. To do this, you can write the values of these parameters to the Tomcat console. Similarly, verify that the doGet and doPost methods correctly retrieve the parameters from the various HTML forms in the application.
We write the business classes required by the servlet. This generally involves the standard development of a Java class, which is usually independent of any web application. It will first be tested outside this environment, for example with a console application. Once a business class has been written, it can be integrated into the web application’s deployment architecture and tested for proper integration. This process is repeated for each business class.
1.4. The STRUTS Development Approach
The creators of the STRUTS methodology sought to define a standard development method that adheres to the MVC architecture for web applications written in Java. There are two aspects to the STRUTS project:
- the development method. We will see that it is quite similar to the one described above for JSP servlets and pages
- the tools that allow us to apply this development method. These are Java class libraries available on the Apache Foundation website (www.apache.org).
1.4.1. The development method
The architecture MVC used by STRUTS is as follows:
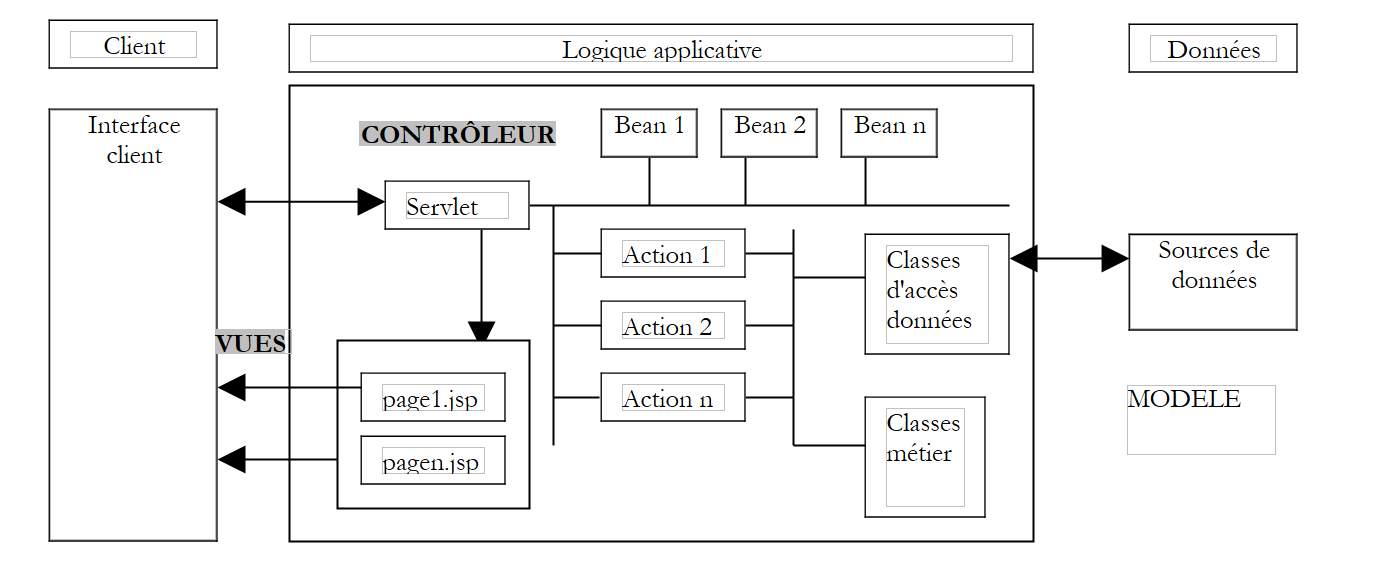 |
- The controller is the heart of the application. All client requests pass through it. It is a generic servlet provided by STRUTS. In some cases, you may need to extend it. For simple cases, this is not necessary. This generic servlet retrieves the information it needs from a file most often named struts-config.xml.
- If the client request contains form parameters, these are placed in a Bean object. A class is said to be of the Bean type if it follows construction rules that we will discuss later. The Bean objects created over time are stored in the client’s session or request. This setting is configurable. They do not need to be recreated if they have already been created.
- in the Struts configuration file config.html, for each URL that must be processed programmatically (and therefore does not correspond to a JSP view that could be requested directly), certain information is associated:
- the name of the Action-type class responsible for processing the request. Here again, the instantiated Action object can be stored in the session or the request.
- if the requested URL is parameterized (as in the case of a form being sent to the controller), the name of the bean responsible for storing the form data is specified.
- Armed with this information provided by its configuration file, upon receiving a request for URL from a client, the controller is able to determine whether a bean needs to be created and which one. Once instantiated, the bean can verify whether the data it has stored—which comes from the form—is valid or not. A method in the bean called `validate` is automatically called by the controller. The bean is constructed by the developer. The developer therefore places the code that verifies the validity of the form data within the `validate` method. If the data is found to be invalid, the controller will not proceed further. It will pass control to a view whose name it finds in its configuration file. The interaction is then complete. Note that the developer can choose not to have the form’s validity checked. This is also done in the file struts-config.html. In this case, the controller does not call the bean’s validate method.
- If the bean’s data is correct, or if there is no validation, or if there is no bean, the controller hands control over to the Action object associated with URL. It does this by calling the `execute` method of that object, passing it the reference to the bean it may have constructed. This is where the developer performs the necessary tasks: they may need to call business logic classes or data access classes. At the end of processing, the Action object returns to the controller the name of the view it must send in response to the client.
- The controller sends this response. The interaction with the client is complete.
The STRUTS development methodology begins to take shape:
- Defining the views. A distinction is made between views that are forms and those that are not.
- Each form view generates a definition in the struts-config.xml file. The following information is defined there:
- the name of the Bean class that will contain the form data, as well as an indication of whether the data must be validated or not. If it must be validated and is found to be invalid, the view to be sent in response to the client in this case must be specified.
- the name of the Action class responsible for processing the form.
- the names of all views that may be sent to the client once the request has been processed. The Action class will select one of them based on the result of the processing.
- Each view is represented by a JSP page. We will see that in views—particularly form views—a library of Struts-specific tags is sometimes used.
- Each form view generates a definition in the struts-config.xml file. The following information is defined there:
- Writing the JavaBean classes corresponding to the form views
- Writing the Action classes responsible for processing the forms
- Writing any business logic or data access classes
1.4.2. Development Tools for STRUTS
The STRUTS project is one of the projects of the Apache Software Foundation. Several of these projects are grouped under the name Jakarta and are available at URL http://jakarta.apache.org:
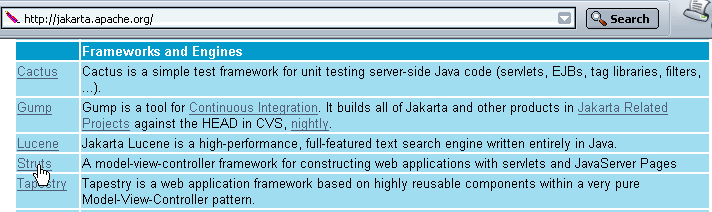
We recommend reading this page. Many of the projects are of interest to Java developers. If we follow the Struts link above, we arrive at the project’s home page:

Here, too, it is recommended that you read the home page. To download the Struts Java libraries, follow the "Binaries" link above:
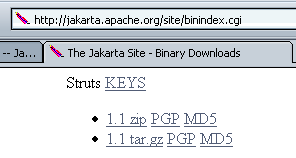
For Windows users, use the 1.1.zip link, and for Unix users, use the 1.1.tar.gz link (Nov 2003). Once the 1.1.zip file is unzipped, we get the following directory structure:
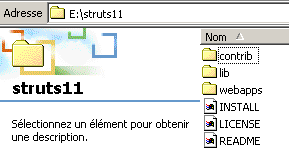
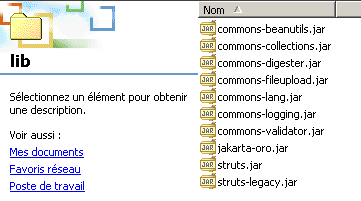
In this directory structure, you will find the Java class libraries required for development: STRUTS. These are contained in .jar or .war files, which are analogous to .zip files. They can be opened using the same utilities. Most of the required libraries are located in the lib folder above:
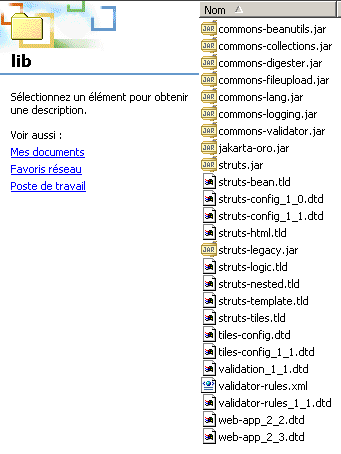
In addition to the .jar class libraries, there are .dtd (Document Type Definition) files that contain validation rules for XML files. A XML file may reference such a DTD file within its content. The program (called a parser) that analyzes the contents of the XML file will use the validity rules found in the referenced DTD file to determine whether the XML file is syntactically correct. For example, the file struts-config_1_1.dtd defines the construction rules for the Struts configuration file struts-config.xml for Struts version 1.1.
Let’s now look at where to place the various elements of the Struts directory structure to deploy a Struts application on the Tomcat server.
1.5. Deploying a Struts Application
A Struts application is a web application like any other. It therefore follows the deployment rules of the container in which it runs. Here, an application, which we will call strutspersonne, will be run by a Tomcat server version 4.x. The deployment procedure for Tomcat version 5.x is provided in the appendix. Here, we follow the deployment rules for Tomcat 4.x:
- We define the strutspersonne context in Tomcat’s server.xml configuration file:
Once this is done, we may need to restart Tomcat so that it takes the new context into account. We can verify the validity of the context by requesting the URL http://localhost:8080/strutspersonne URL:
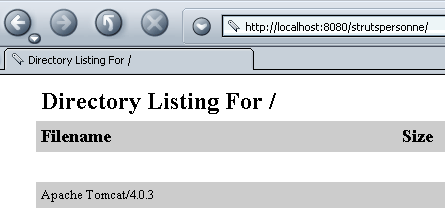
If we do not get an error page, the context is correct.
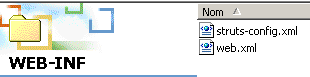
- We create the WEB-INF subfolder in the physical folder associated with the strutspersonne context.
- In the application's WEB-INF folder, we define the application's web.xml configuration file:
<?xml version="1.0" encoding="ISO-8859-1"?>

<!DOCTYPE web-app
    PUBLIC "-//Sun Microsystems, Inc.//DTD Web Application 2.3//EN"
    "http://java.sun.com/dtd/web-app_2_3.dtd">

<web-app>
    <servlet>
      <servlet-name>action</servlet-name>
    <servlet-class>org.apache.struts.action.ActionServlet</servlet-class>
    <init-param>
        <param-name>config</param-name>
      <param-value>/WEB-INF/struts-config.xml</param-value>
    </init-param>
  </servlet>

  <servlet-mapping>
      <servlet-name>action</servlet-name>
    <url-pattern>*.do</url-pattern>
  </servlet-mapping>

</web-app>
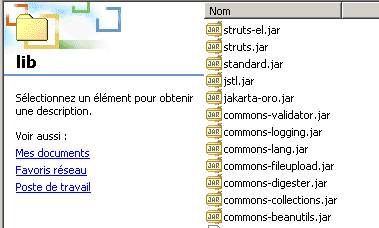
- The application's controller (servlet) class is a predefined Struts class called ActionServlet. It is located in the struts.jar file. To ensure that Tomcat can find this class, we will place struts.jar in the <tomcat>\common\lib folder, which is one of the folders Tomcat searches when looking for classes. In fact, we will place all the .jar files found in the <struts>\lib folder there, where <struts> is the root folder of the Struts directory tree.
- We will also place the struts-el.jar and jstl.jar files found in <struts>\contrib\struts-el\lib:
- Here, we have access to the web server. This is not always the case. If you deploy a web/Java application in a web container that you do not administer yourself, it is best for the application to include all the libraries it needs. These must then be placed in the WEB-INF/lib folder, which you must create.
- We indicated that the controller needed a certain amount of information that it normally found in a file named struts-config.xml located in the same folder as web.xml. In fact, the name of this file is configurable. It is the parameter config, mentioned above, that sets this name.
- The <servlet-mapping> tag indicates that the controller will be reached via all URL files ending with the .do suffix. This mapping is required by Struts. These URL files will then be filtered by the controller, which will only accept the URL files declared in its struts-config.xml configuration file
For now, our web.xml file is sufficient.
- We will request the URL /main.do from the strutspersonne application. Based on the previous web.xml file, this URL will therefore be passed to the org.apache.struts.action servlet. The ActionServlet class will be instantiated and its init method called. This method attempts to read the configuration file defined by the config parameter. This file must therefore exist. We create the following struts-config.xml file:
<?xml version="1.0" encoding="ISO-8859-1" ?>

<!DOCTYPE struts-config PUBLIC
          "-//Apache Software Foundation//DTD Struts Configuration 1.1//EN"
          "http://jakarta.apache.org/struts/dtds/struts-config_1_1.dtd">

<struts-config>
    <action-mappings>
      <action
          path="/main"
          parameter="/main.html"
          type="org.apache.struts.actions.ForwardAction"
      />
    </action-mappings>
</struts-config>
Note that the file DTD in struts-config.xml is not the same as the one in the web.xml file, indicating that they do not have the same structure. For each URL that the controller must handle, we need to define an <action> tag. This tag is used to tell the controller what to do when it is asked for this URL. Here, we specify the following:
- path="/main": defines the name of the URL configured by the <action> tag. The .do suffix is implicit.
- type="org.apache.struts.actions.ForwardAction": defines the name of the Action class that must handle the request. Here, we use a predefined Action class in Struts. It does nothing on its own and forwards the client’s request to the URL specified in the parameter attribute.
- parameter="/main.html": the name of the URL to which the request should be forwarded. In this case, it is a static HTML file.
In summary, when the user requests the URL /main.do, they will receive the URL /main.html.
- The main.html file will be as follows:
<html>
    <head>
      <title>Application strutspersonne</title>
  </head>
  <body>
      Application strutspersonne active ....
  </body>
</html>
This file is located in the strutspersonne/views application folder:

It can be accessed directly using the URL URL://localhost:8080/strutspersonne/main.html:
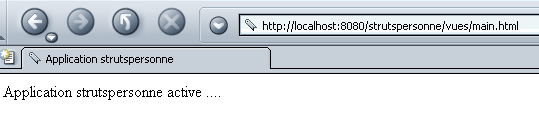
Here, the application’s Struts controller did not intervene, since it only intervenes when a *.do file is requested. However, in this case, we requested /vues/main.URL.
- The struts-config.xml file created earlier must be placed in the same WEB-INF folder as the web.xml file:
- We will now verify that the strutspersonne application controller is working properly by requesting URL /main.do after restarting Tomcat if necessary.
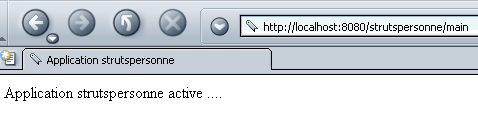
Here, the Struts controller intervened since we requested a URL of type *.do. We did indeed get the expected page (main.html). We now have the basic components of our application’s operation: the strutspersonne context, the configuration files web.xml and struts-config.xml, and the Struts libraries.
What would have happened if we had requested a URL of type /toto.do? According to the web.xml file in the strutspersonne application, the Struts controller is then called to process it. It then looks at its struts-config.html configuration file and finds no configuration for the /toto path. What does it do then? Let’s try:
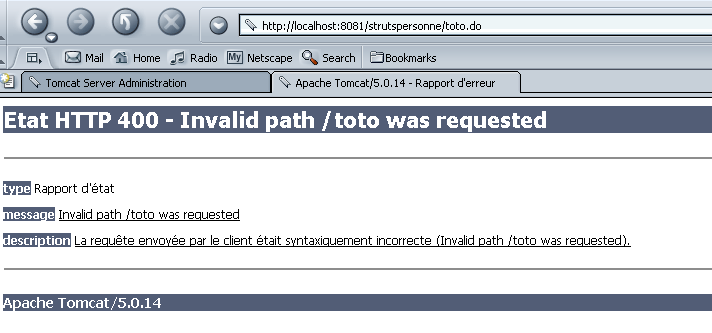
We get an error page, which seems normal. We can now move on to writing an application.