2. Installing Visual C# 2008
In late January 2008, the Express versions of Visual Studio 2008 were available for download at the following address: [2]: [1]: [http://msdn2.microsoft.com/fr-fr/express/future/default(en-us).aspx]:
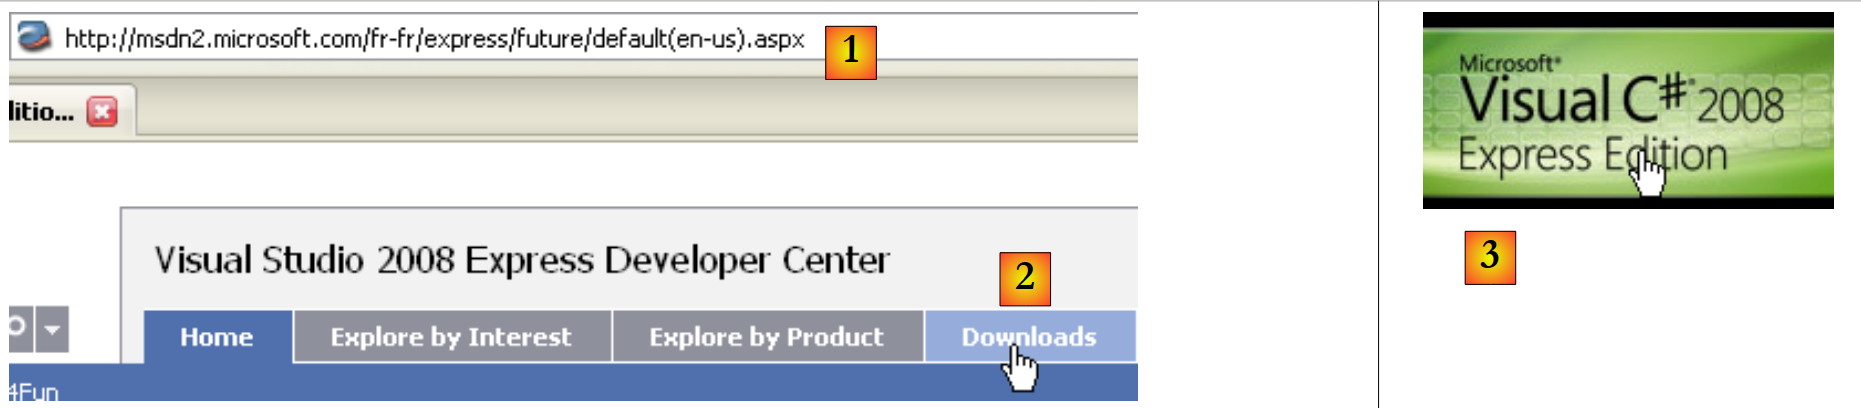 |
- [1]: the download address
- [2]: the Downloads tab
- [3]: Download C# 2008
Installing C# 2008 will also install the following:
- the .NET Framework 3.5
- SGBD SQL Server Compact 3.5
- the MSDN documentation
To create your first program with C# 2008, follow these steps after launching C#:
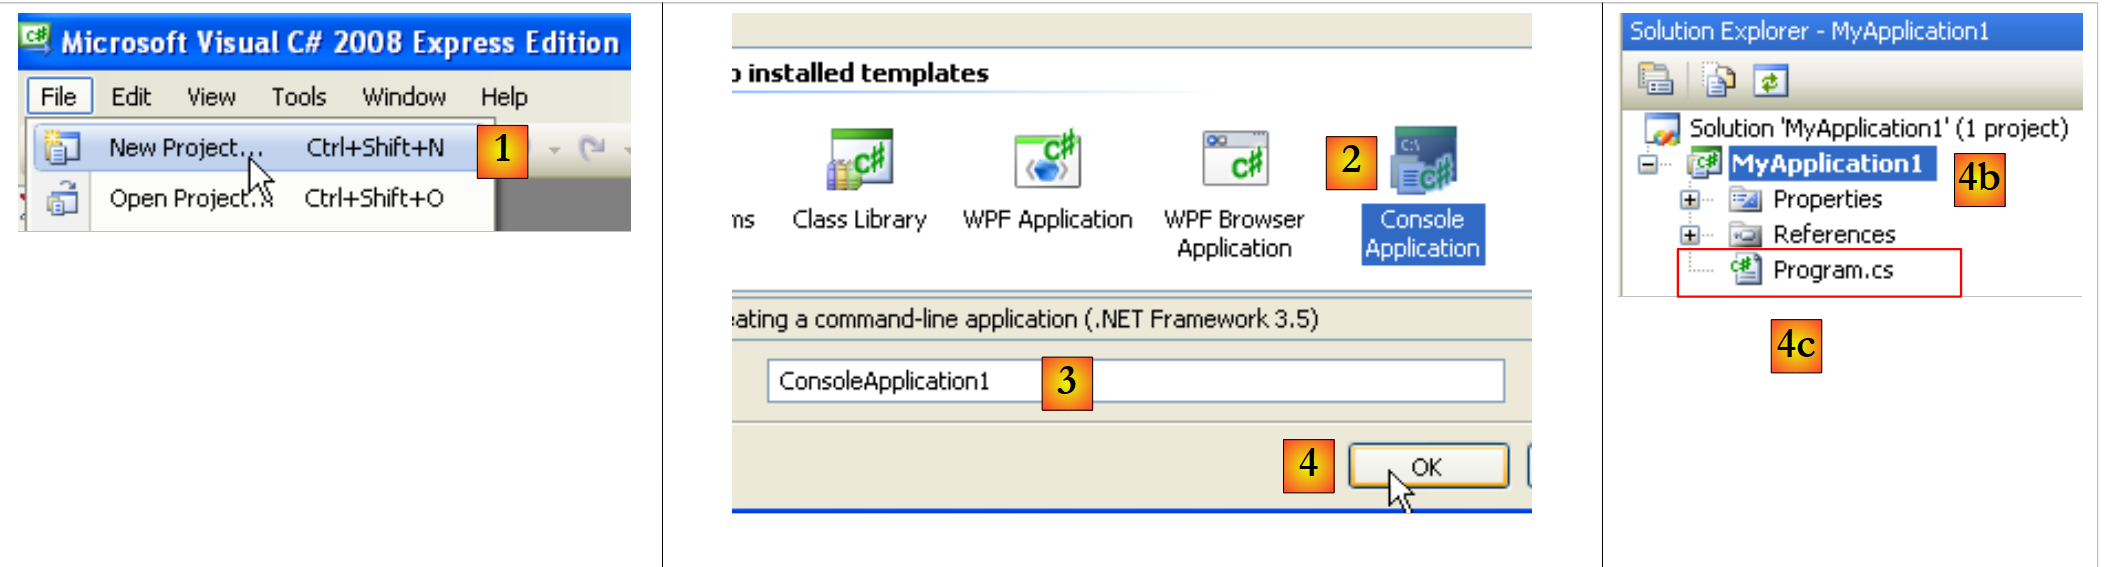 |
- [1]: Select File / New Project
- [2]: Select a Console application
- [3]: Name the project—this will be changed below
- [4b]: the project has been created
- [4c]: Program.cs is the default C# program generated in the project.
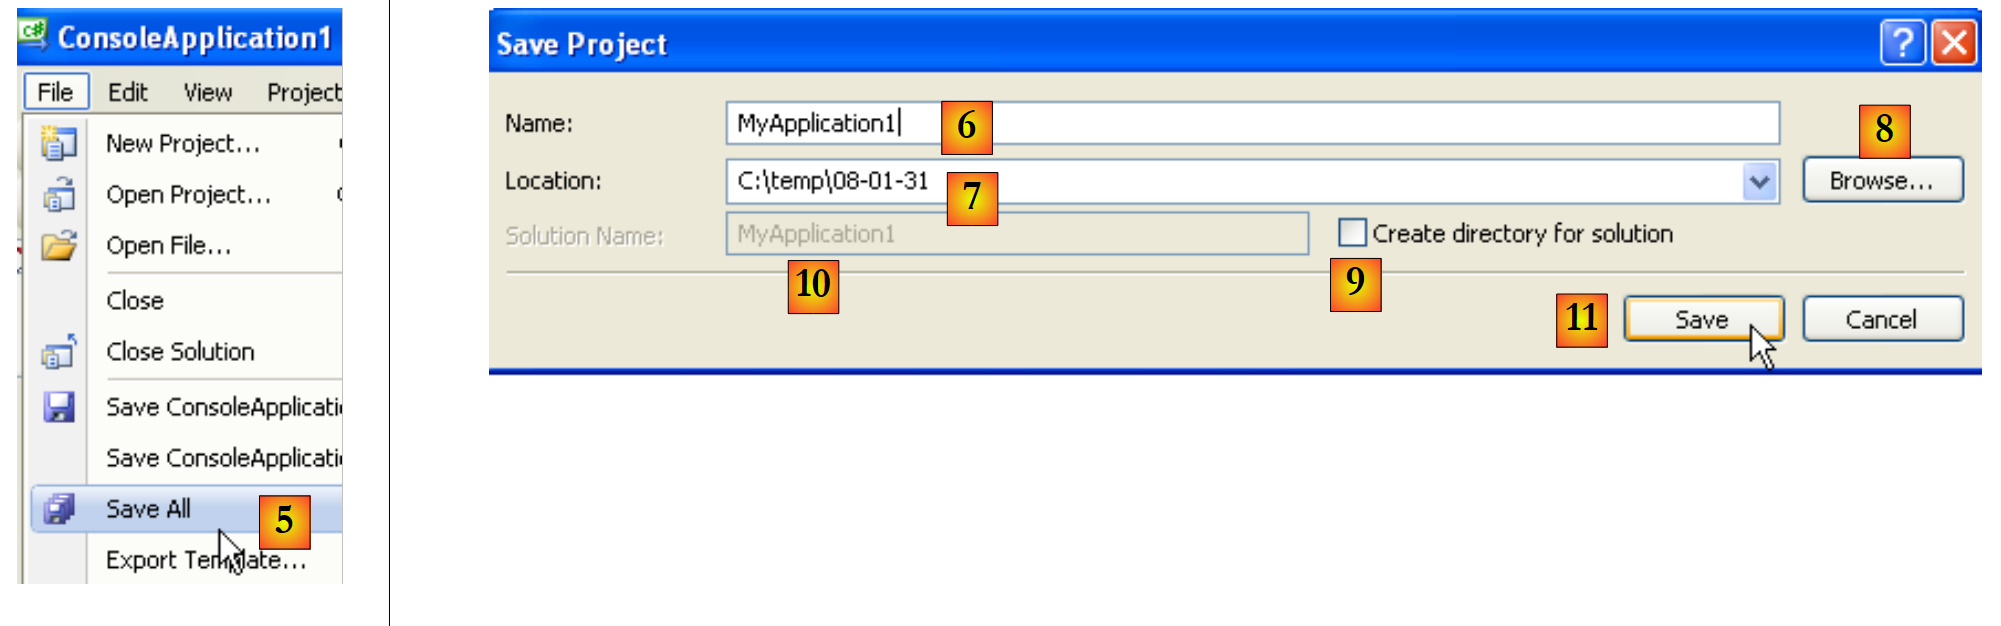 |
- The first step did not ask where to place the project. If you do nothing, it will be saved to a default location that will likely not suit your needs. option [5] allows you to save the project to a specific folder.
- You can rename the project in [6] and specify its folder in [7]. To do this, you can use [8]. Here, the project will ultimately be in the [C:\temp\08-01-31\MyApplication1] folder.
- By checking [9], you can create a folder for the solution named in [10]. If Solution1 is the name of the solution:
- a folder named [C:\temp\08-01-31\Solution1] will be created for the Solution1 solution
- a folder named [C:\temp\08-01-31\Solution1\MyApplication1] will be created for the project MyApplication1. This solution works well for solutions consisting of multiple projects. Each project will have a subfolder within the solution folder.
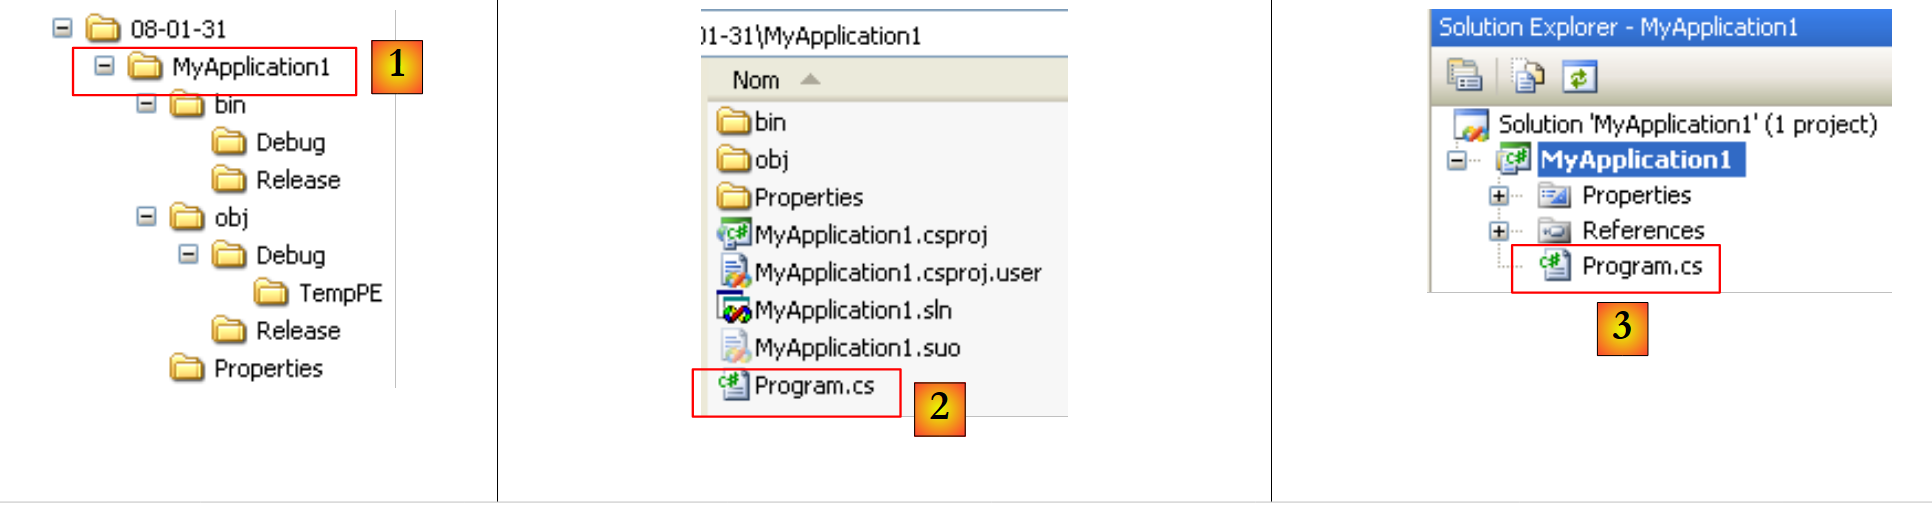 |
- in [1]: the Windows folder for the MyApplication1 project
- in [2]: its contents
- in [3]: the project in the Visual Studio Project Explorer
Let’s modify the code in the [Program.cs] and [3] files as follows:
using System;

namespace ConsoleApplication1 {
    class Program {
        static void Main(string[] args) {
            Console.WriteLine("1er essai avec C# 2008");
        }
    }
}
- line 3: the namespace of the class defined on line 4. Thus, the full name of the class defined on line 4 is ConsoleApplication1.Program.
- Lines 5–7: The static Main method, which is executed when a class is instantiated
- line 6: a screen display
The program can be run as follows:
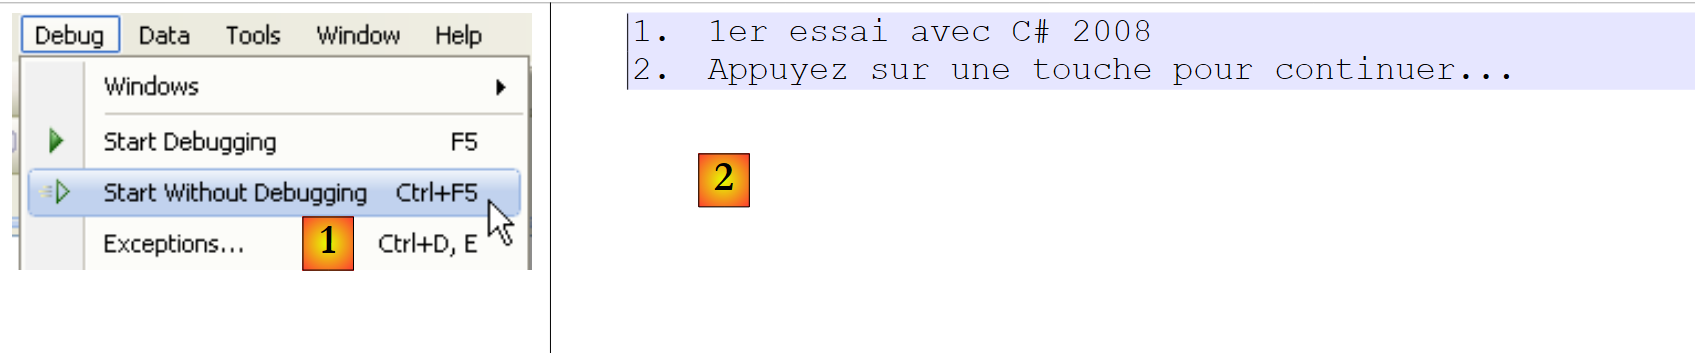 |
- [Ctrl-F5] to run the project, in [1]
- in [2], the resulting console output.
The execution added files to the project:
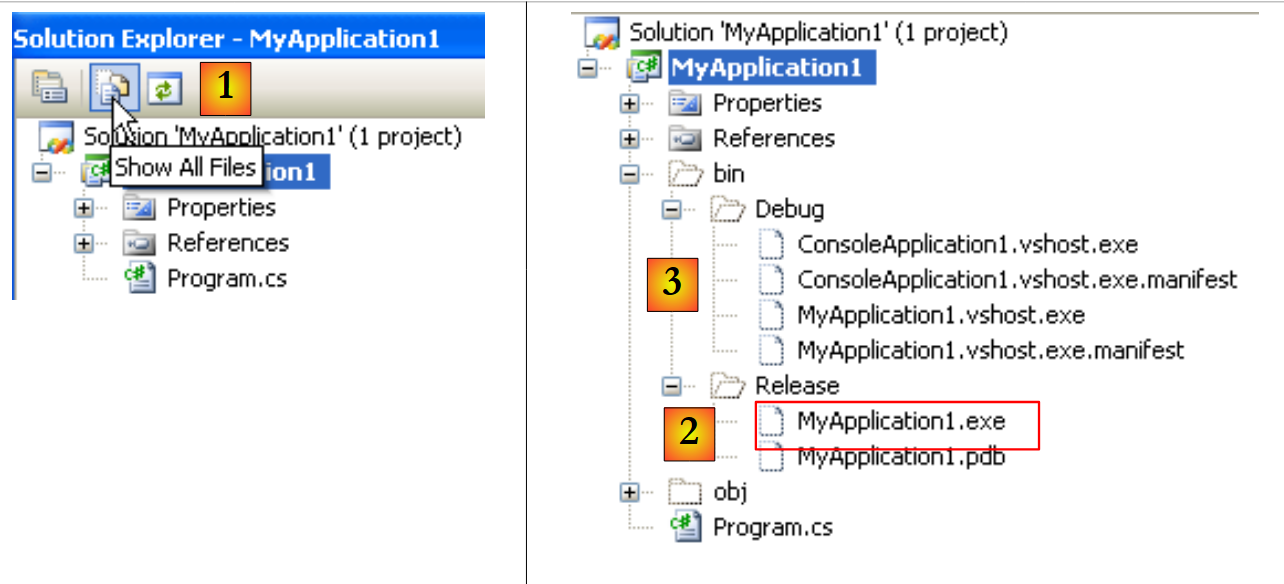 |
- in [1], all project files are displayed
- in [2]: the [Release] folder contains the project's executable file [MyApplication1.exe].
- In [3]: the [Debug] folder, which would also contain a project executable named [MyApplication1.exe] if the project had been run in [Debug] mode (F5 key instead of Ctrl-F5). This is not the same executable as the one obtained in [Release] mode. It contains additional information that enables the debugging process to take place.
You can add a new project to the current solution:
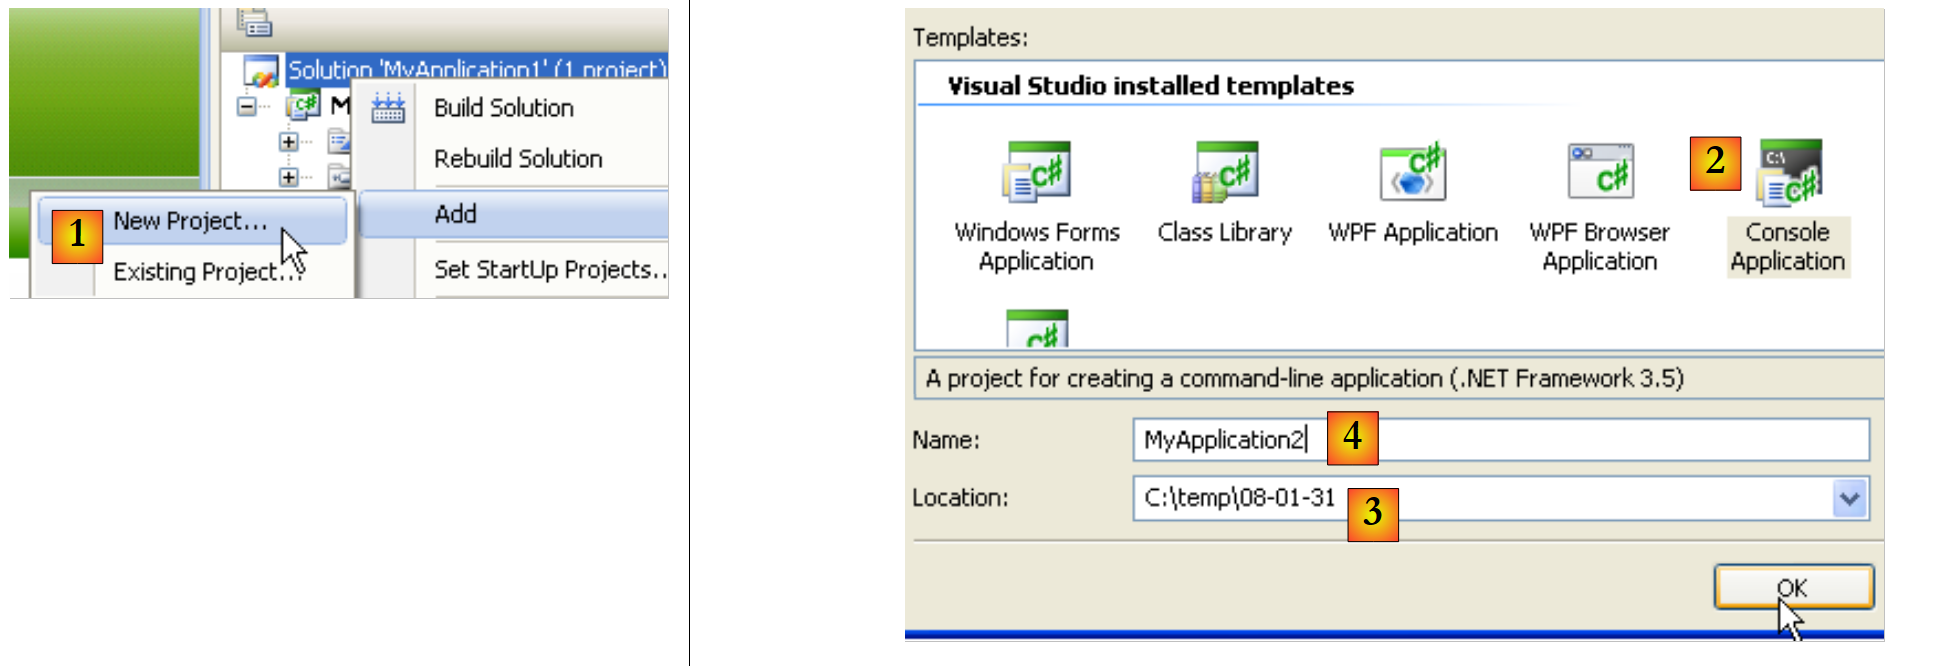 |
- [1]: right-click on the solution (not the project) / Add / New Project
- [2]: select an application type
- [3]: The default folder is the one containing the existing project folder [MyApplication1]
- 4: Name the new project
The solution now has two projects:
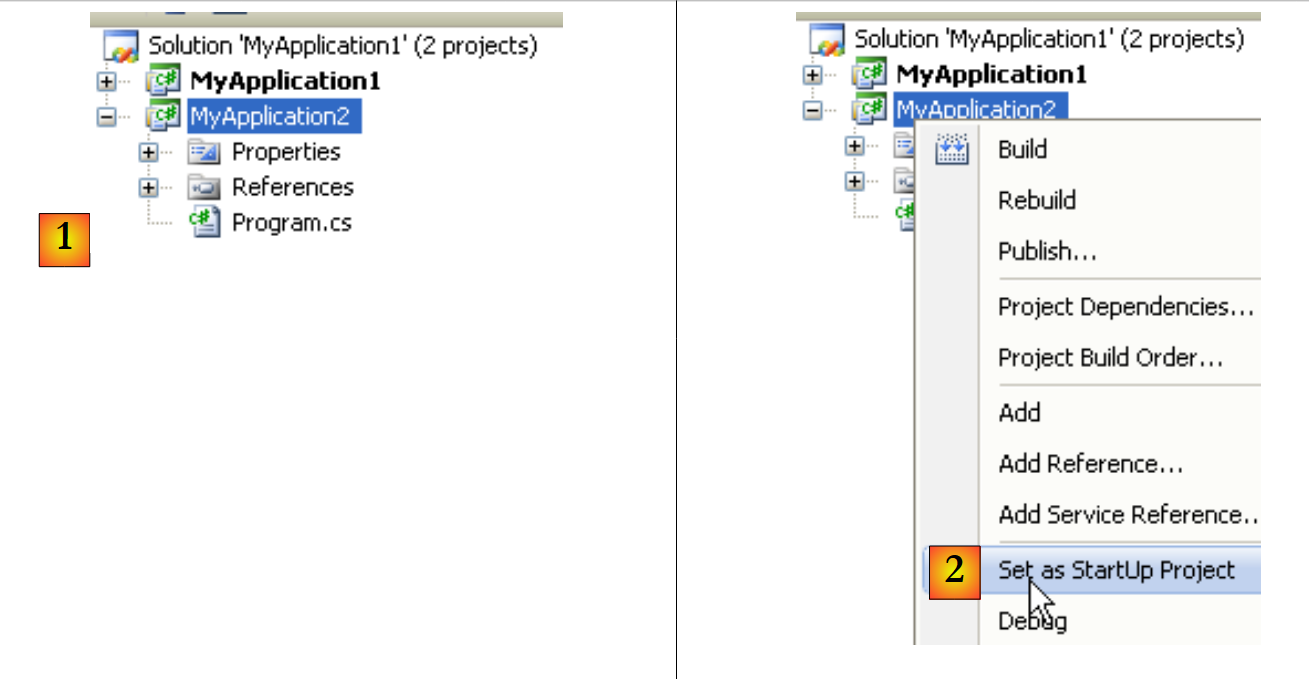 |
- [1]: the new project
- [2]: When the solution is run (F5 or Ctrl-F5), one of the projects is executed. This is the one designated as [2].
A project can have multiple executable classes (containing a Main method). In this case, you must specify which class to run when the project is executed:
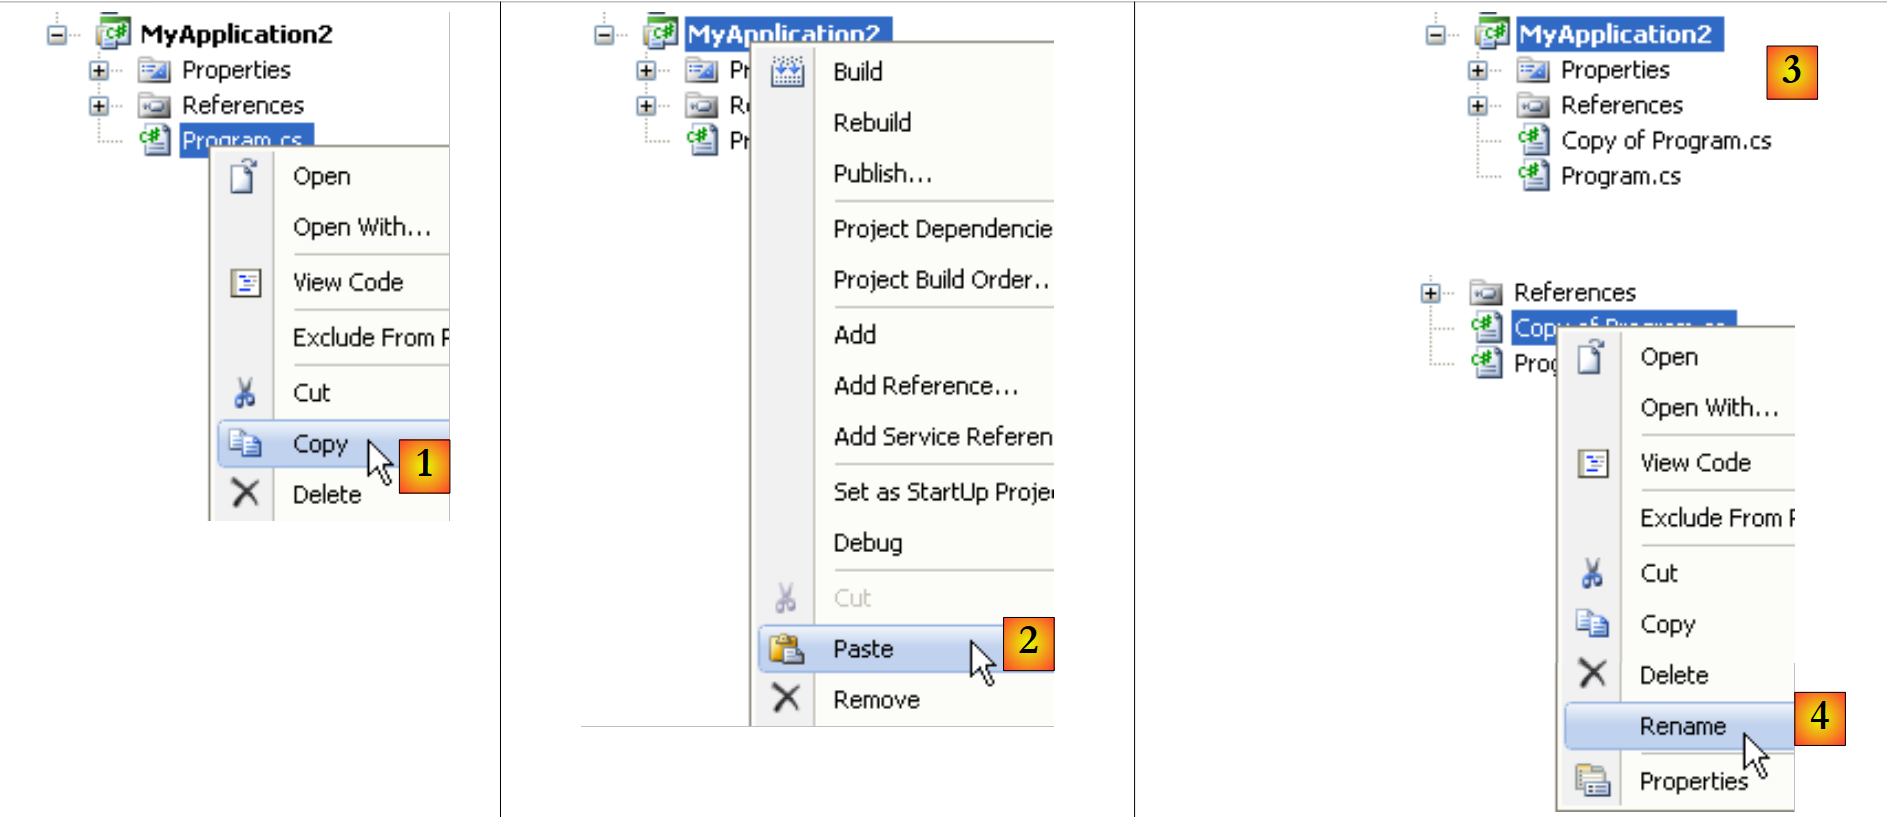 |
- [1, 2]: Copy and paste the file [Program.cs]
- [3]: the result of the copy/paste
- [4,5]: rename both files
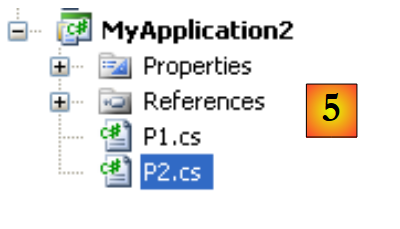 |
The P1 class (line 4):
using System;

namespace MyApplication2 {
    class P1 {
        static void Main(string[] args) {
        }
    }
}
The P2 class (line 4):
using System;

namespace MyApplication2 {
    class P2 {
        static void Main(string[] args) {
        }
    }
}
The [MyApplication2] project now has two classes with a static Main method. You must tell the project which one to run:
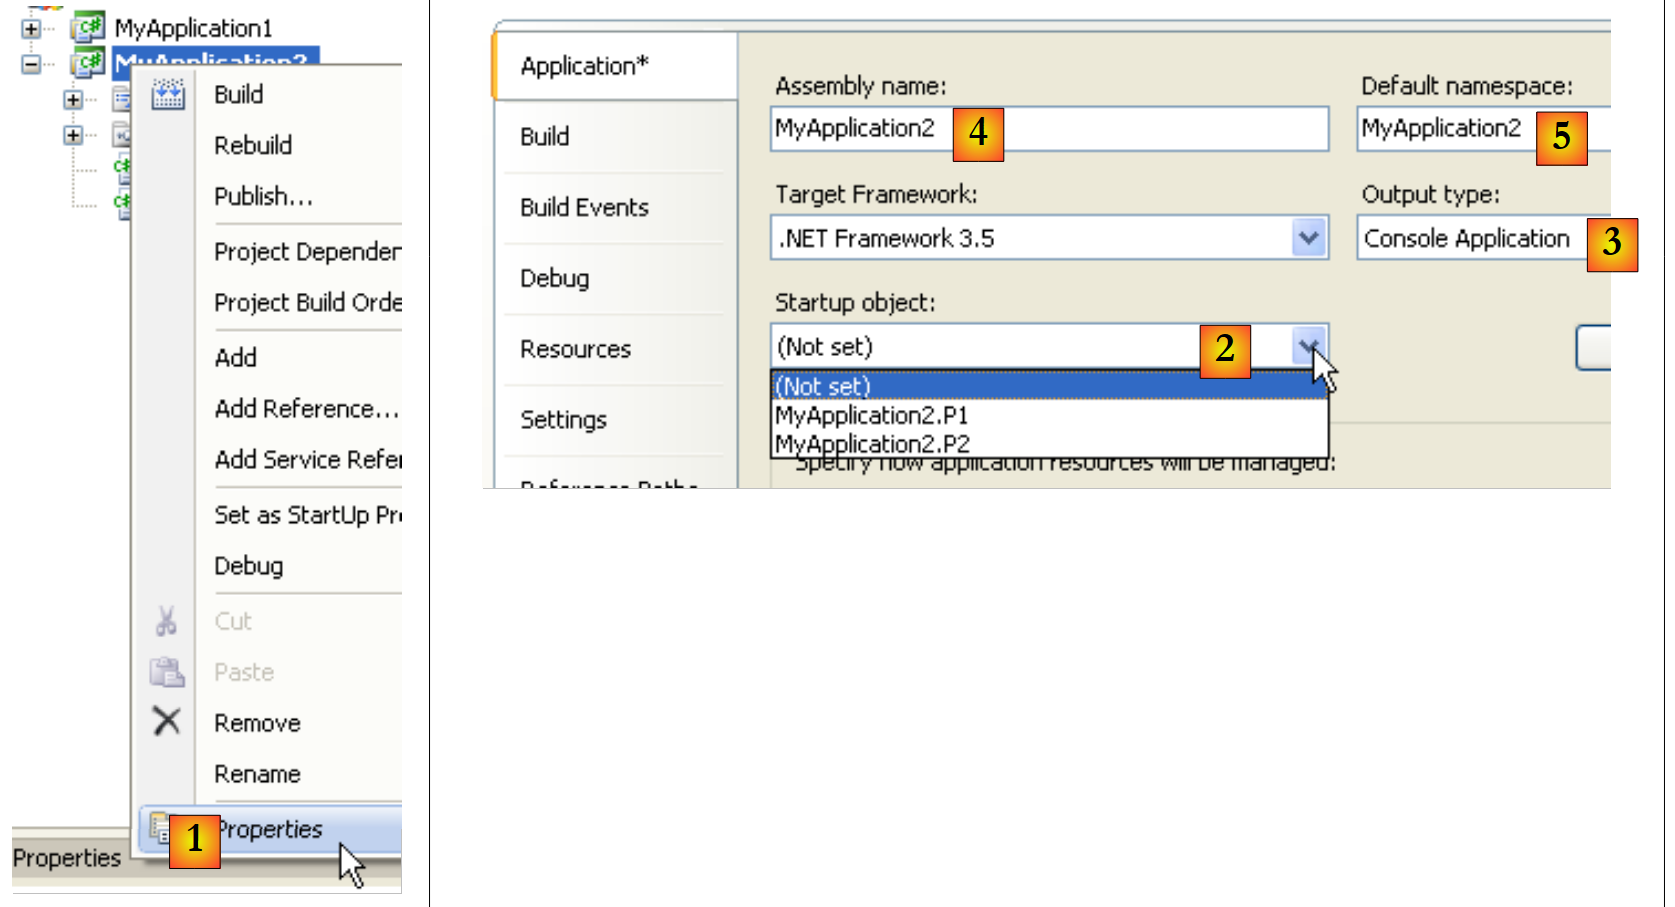 |
- in [1]: the properties of the [MyApplication2] project
- in [2]: the choice of which class to run when the project is executed (F5 or Ctrl-F5)
- in [3]: the type of executable produced—here, a Console application will produce an .exe file.
- in 4: the name of the generated executable (without the .exe)
- in [5]: the default namespace. This is the one that will be generated in the code of each new class added to the project. It can then be changed directly in the code, if necessary.