20. 案例研究 – 第2版
现在,我们介绍应用程序的最终版本:
 |
新的 NetBeans 项目 [pam-02] 是通过复制项目 [pam-01] 获得的:
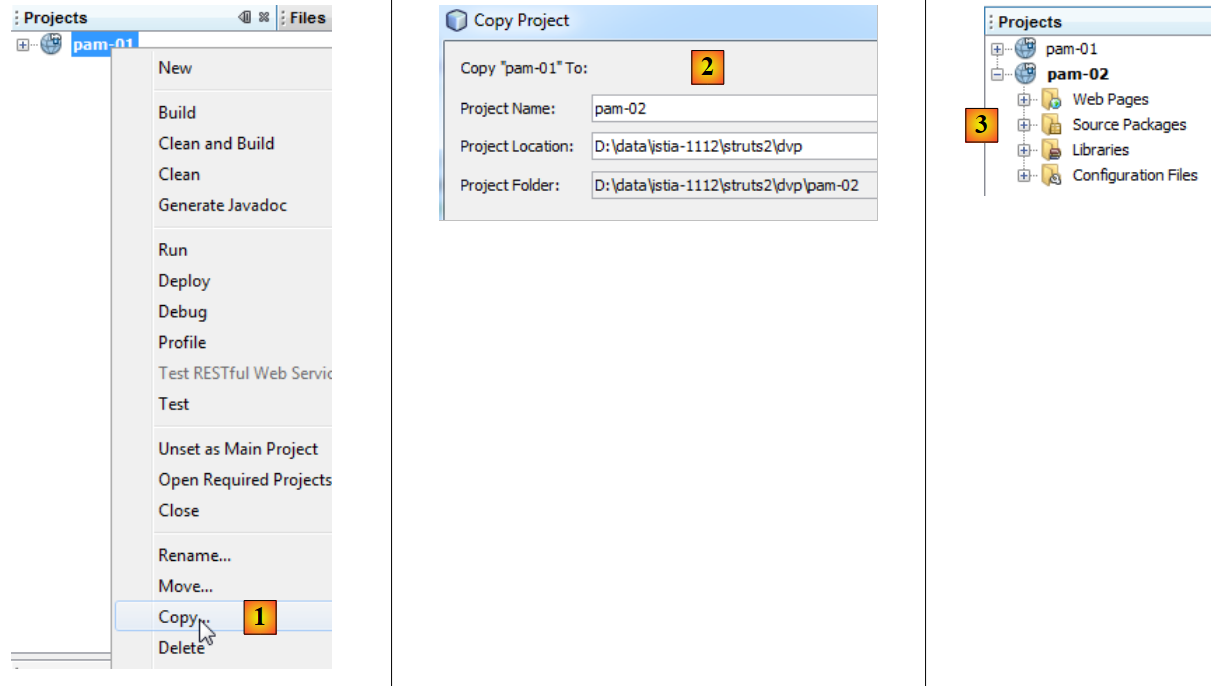 |
- 将其复制为 [1],将新项目
- 到 [2],将新项目命名为 [pam-02] 并指定其文件夹
- 在 [3] 中,新的项目 [pam-02]
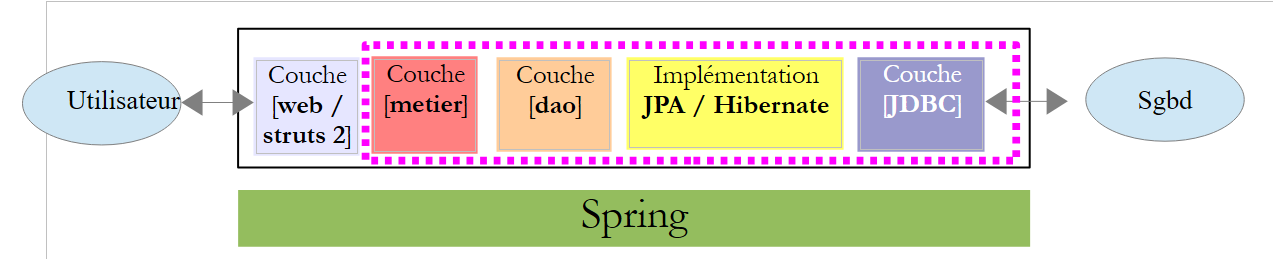
要将真实的 [metier] 层“接入”我们构建的 Web 层,需要完成三项操作:
- 删除我们之前创建的模拟层 [metier]
- 配置 Spring 使其实例化位于 [pam-spring-metier-dao-jpa-hibernate.jar] 归档文件中的真实 [metier] 层
- 将所有必要的包(Spring、Hibernate、JPA、MySQL的JDBC驱动程序)添加到项目中。
Spring配置文件[WEB-INF/applicationContext.xml]内容如下:
<?xml version="1.0" encoding="UTF-8"?>
<beans xmlns="http://www.springframework.org/schema/beans" xmlns:xsi="http://www.w3.org/2001/XMLSchema-instance"
       xmlns:tx="http://www.springframework.org/schema/tx"
       xsi:schemaLocation="http://www.springframework.org/schema/beans http://www.springframework.org/schema/beans/spring-beans-2.0.xsd http://www.springframework.org/schema/tx http://www.springframework.org/schema/tx/spring-tx-2.0.xsd">

  <!-- 应用层 -->

<!-- Web -->
  <bean id="config" class="web.Config" init-method="init">
    <property name="metier" ref="metier"/>
  </bean>
  <!-- 业务 -->
  <bean id="metier" class="metier.Metier">
    <property name="employeDao" ref="employeDao"/>
    <property name="cotisationDao" ref="cotisationDao"/>
  </bean>
  <!-- DAO -->
  <bean id="employeDao" class="dao.EmployeDao" />
  <bean id="indemniteDao" class="dao.IndemniteDao" />
  <bean id="cotisationDao" class="dao.CotisationDao" />

  <!-- 配置JPA -->
  <bean id="entityManagerFactory" class="org.springframework.orm.jpa.LocalContainerEntityManagerFactoryBean">
    <property name="dataSource" ref="dataSource" />
    <property name="jpaVendorAdapter">
      <bean class="org.springframework.orm.jpa.vendor.HibernateJpaVendorAdapter">
        <property name="databasePlatform" value="org.hibernate.dialect.MySQL5InnoDBDialect" />
      </bean>
    </property>
    <property name="loadTimeWeaver">
      <bean class="org.springframework.instrument.classloading.InstrumentationLoadTimeWeaver" />
    </property>
  </bean>

  <!-- 数据源 DBCP -->
  <bean id="dataSource" class="org.apache.commons.dbcp.BasicDataSource" destroy-method="close">
    <property name="driverClassName" value="com.mysql.jdbc.Driver" />
    <property name="url" value="jdbc:mysql://localhost:3306/dbpam_hibernate" />
    <property name="username" value="root" />
    <property name="password" value="" />
  </bean>

  <!-- 事务管理器 -->
  <tx:annotation-driven transaction-manager="txManager" />
  <bean id="txManager" class="org.springframework.orm.jpa.JpaTransactionManager">
    <property name="entityManagerFactory" ref="entityManagerFactory" />
  </bean>

  <!-- 异常处理 -->
  <bean class="org.springframework.dao.annotation.PersistenceExceptionTranslationPostProcessor" />

  <!-- 持久化 -->
  <bean class="org.springframework.orm.jpa.support.PersistenceAnnotationBeanPostProcessor" />

</beans>
第 36-41 行配置了数据库访问。
新增库(Spring、Hibernate、JPA、MySQL的JDBC驱动)需从[lib]和[2]文件夹中添加。 需将整个文件夹复制过来。其中包含数十个需要添加的 .jar 文件 [1]:
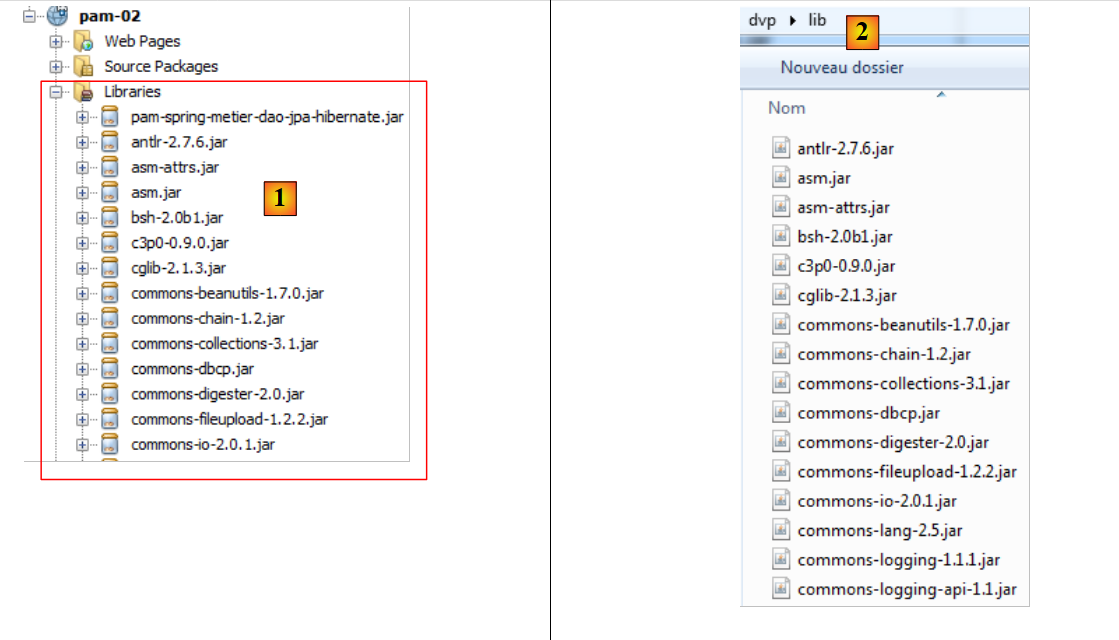 |
构建该库的过程相当困难,因为这些框架有时会使用相同的归档文件。因此必须删除重复项。这些文件已汇总到本文档示例归档中的 [lib] [2] 文件夹中,以便读者无需自行重建该库。
就这样。新的应用程序 [pam-02] 现在将与 SGBD 协同工作。以下是薪资计算的屏幕截图:
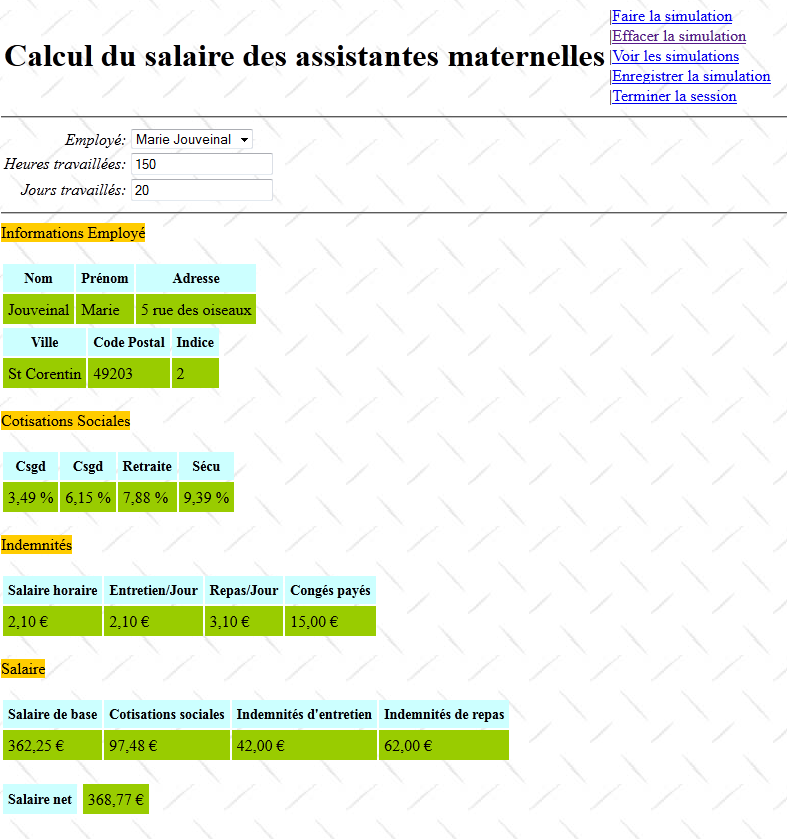
此次计算出的工资是真实工资,而非第 1 版中的虚拟工资。欢迎读者测试新应用程序。