5. Graphical Interfaces with VB.NET and VS.NET
Here we aim to show how to build graphical user interfaces with VB.NET. First, we will look at the base classes of the .NET platform that allow us to build a graphical user interface. Initially, we will not use any automatic generation tools. Then we will use Visual Studio.NET (VS.NET), a Microsoft development tool that facilitates the development of applications using .NET languages, particularly the construction of graphical user interfaces. The VS.version version used is the English version.
5.1. The Basics of Graphical User Interfaces
5.1.1. A simple window
Consider the following code:
' options
Option Strict On
Option Explicit On

' namespaces
Imports System
Imports System.Drawing
Imports System.Windows.Forms

' the form class
Public Class Form1
    Inherits Form

    ' the manufacturer
    Public Sub New()
        ' window title
        Me.Text = "Mon premier formulaire"
        ' window dimensions
        Me.Size = New System.Drawing.Size(300, 100)
    End Sub

    ' test function
    Public Shared Sub Main(ByVal args() As String)
        ' the form is displayed
        Application.Run(New Form1)
    End Sub
End Class
The previous code is compiled and then executed
Execution displays the following window:
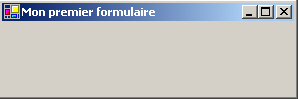
A graphical user interface generally derives from the base class System.Windows.Forms.Form:
The base class Form defines a basic window with close, maximize/minimize buttons, adjustable size, etc., and handles events on these graphical objects. Here we specialize the base class by setting its title and its width (300) and height (100). This is done in its constructor:
Public Sub New()
' window title
Me.Text = "Mon premier formulaire"
' window dimensions
Me.Size = New System.Drawing.Size(300, 100)
End Sub
The window title is set by the Text property and the dimensions by the Size property. Size is defined in the System.Drawing namespace and is a structure. The Main procedure launches the graphical application as follows:
Application.Run(New Form1)
A Form1-type form is created and displayed, then the application listens for events that occur on the form (clicks, mouse movements, etc.) and executes those that the form handles. Here, our form does not handle any events other than those handled by the base Form class (clicks on close, maximize/minimize buttons, window resizing, window movement, etc.).
5.1.2. A Form with a Button
Now let’s add a button to our window:
' options
Option Strict On
Option Explicit On
' namespaces
Imports System
Imports System.Drawing
Imports System.Windows.Forms
' the form class
Public Class Form1
    Inherits Form
' attributes
Private cmdTest As Button
' the manufacturer
Public Sub New()
' the title
Me.Text = "Mon premier formulaire"
' dimensions
Me.Size = New System.Drawing.Size(300, 100)
' a button
' creation
Me.cmdTest = New Button
' position
cmdTest.Location = New System.Drawing.Point(110, 20)
' size
cmdTest.Size = New System.Drawing.Size(80, 30)
' wording
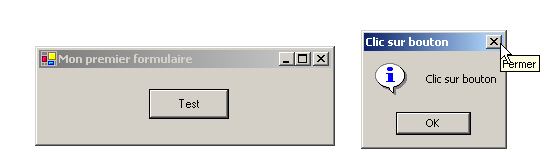
cmdTest.Text = "Test"
' event manager
AddHandler cmdTest.Click, AddressOf cmdTest_Click
' add button to form
Me.Controls.Add(cmdTest)
End Sub
    ' event manager
    Private Sub cmdTest_Click(ByVal sender As Object, ByVal evt As EventArgs)
        ' there was a click on the button - we say it
        MessageBox.Show("Clic sur bouton", "Clic sur bouton", MessageBoxButtons.OK, MessageBoxIcon.Information)
    End Sub
' test function
Public Shared Sub Main(ByVal args() As String)
' the form is displayed
Application.Run(New Form1)
End Sub
End Class
We have added a button to the form:
' a button
' creation
Me.cmdTest = New Button
' position
cmdTest.Location = New System.Drawing.Point(110, 20)
' size
cmdTest.Size = New System.Drawing.Size(80, 30)
' wording
cmdTest.Text = "Test"
' event manager
AddHandler cmdTest.Click, AddressOf cmdTest_Click
' add button to form
Me.Controls.Add(cmdTest)
The Location property sets the coordinates (110,20) of the button's top-left corner using a Point structure. The button's width and height are set to (80,30) using a Size structure. The button's Text property sets the button's label. The Button class has a Click event defined as follows:
where EventHandler is a "delegate" function with the following signature:
This means that the event handler for the [Click] event on the button must have the signature of the [EventHandler] delegate. Here, when the cmdTest button is clicked, the cmdTest_Click method will be called. This is defined as follows, in accordance with the previous EventHandler template:
' event manager
Private Sub cmdTest_Click(ByVal sender As Object, ByVal evt As EventArgs)
' there was a click on the button - we say it
MessageBox.Show("Clic sur bouton", "Clic sur bouton", MessageBoxButtons.OK, MessageBoxIcon.Information)
End Sub
We simply display a message:
The class is compiled and executed:
dos>vbc /r:system.dll /r:system.drawing.dll /r:system.windows.forms.dll frm2.vb
Compilateur Microsoft (R) Visual Basic .NET version 7.10.3052.4

dos>frm2
The MessageBox class is used to display messages in a window. Here, we used the constructor
Overloads Public Shared Function Show(ByVal owner As IWin32Window,ByVal text As String,ByVal caption As String,ByVal buttons As MessageBoxButtons,ByVal icon As MessageBoxIcon) As DialogResult
text | the message to display |
caption | the window title |
buttons | the buttons in the window |
icon | the icon displayed in the window |
The buttons parameter can take values from the following constants:
constant | buttons |
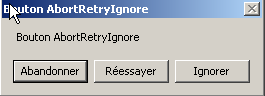 | |
 | |
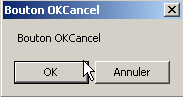 | |
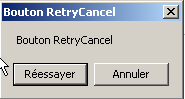 | |
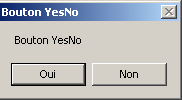 | |
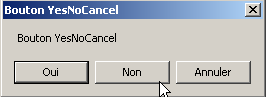 |
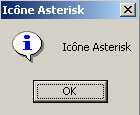
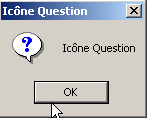
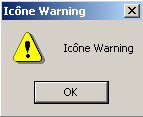
The icon parameter can take values from the following constants:
 | Same as above Stop | ||
idem Warning | 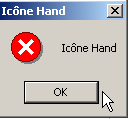 | ||
same as Asterisk |  | ||
 | Same as Hand | ||
 |
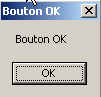
The Show method is a static method that returns a result of type System.Windows.Forms.DialogResult, which is an enumeration:
public enum System.Windows.Forms.DialogResult
{
    Abort = 0x00000003,
    Cancel = 0x00000002,
    Ignore = 0x00000005,
    No = 0x00000007,
    None = 0x00000000,
    OK = 0x00000001,
    Retry = 0x00000004,
    Yes = 0x00000006,
}
To find out which button the user clicked to close the MessageBox window, we write:
dim res as DialogResult=MessageBox.Show(..)
if res=DialogResult.Yes then
' he pressed the yes button
...
end if
5.2. Building a graphical user interface with Visual Studio.NET
We will revisit some of the examples seen previously, this time building them with Visual Studio.NET.
5.2.1. Initial project creation
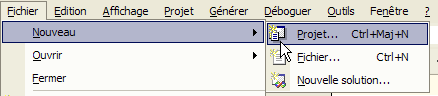
- Launch VS.NET and select File/New/Project
- Specify your project’s characteristics
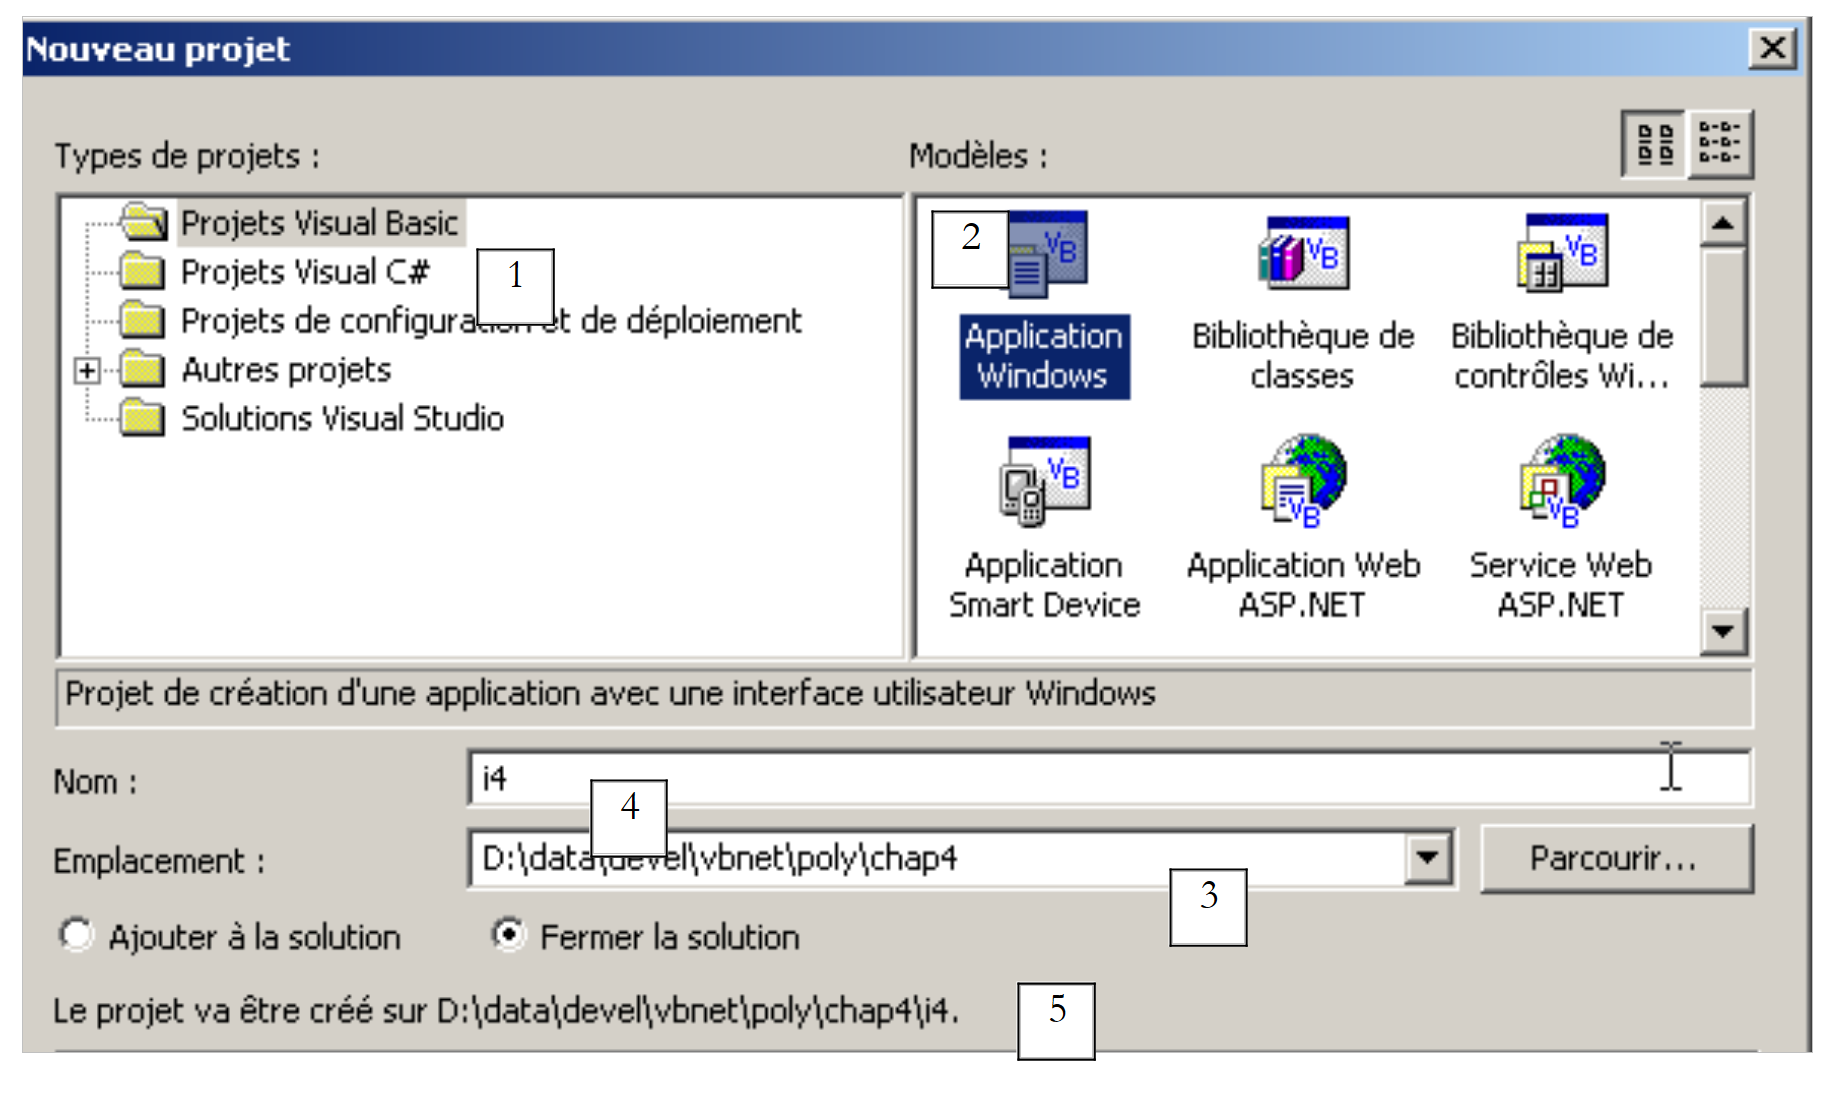 |
- Select the type of project you want to build; here, a VB.NET project (1)
- Select the type of application you want to build; here, a Windows application (2)
- Specify the folder where you want to place the project subfolder (3)
- Specify the project name (4). This will also be the name of the folder containing the project files
- The name of this folder is displayed in (5)
- A number of folders and files are then created under the i4 folder:
subfolders of the project1 folder 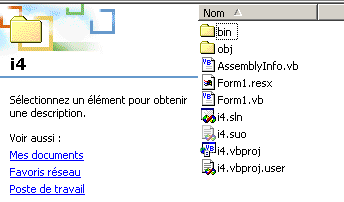 |
Of these files, only one is relevant: the form1.cs file, which is the source file associated with the form created by VS.NET. We will return to this later.
5.2.2. The VS.NET interface window
The VS.NET interface now displays certain elements of our i4 project:
We have a graphical user interface design window:
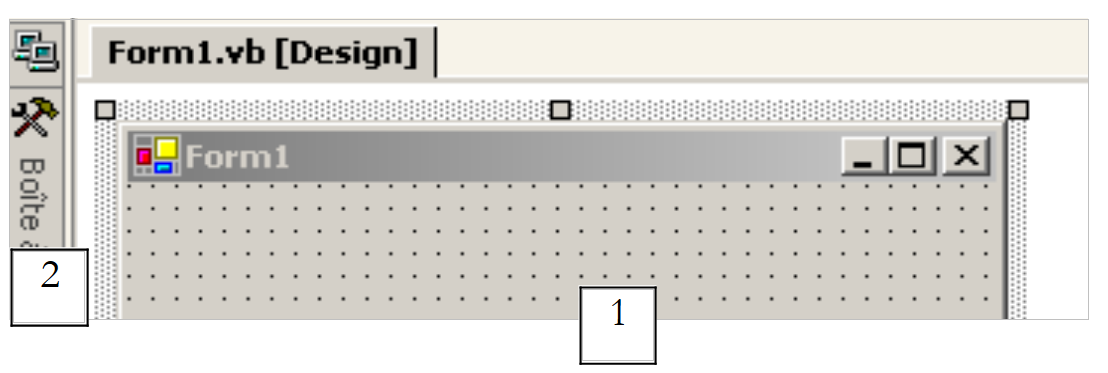 |
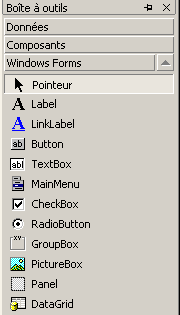
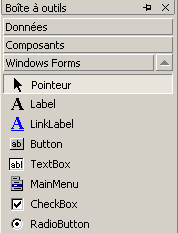
By selecting controls from the toolbar (toolbox 2) and dropping them onto the window surface (1), we can build a graphical user interface. If we hover the mouse over the "toolbox," it expands to reveal a number of controls:
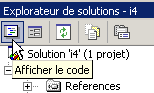
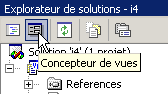
For now, we are not using any of them. Still on the VS.NET screen, we find the "Explorer Solution" window:
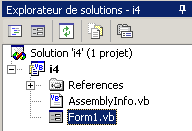
Initially, we won’t use this window much. It displays all the files that make up the project. Only one of them interests us: the source file for our program, here Form1.vb. By right-clicking on Form1.vb, a menu appears that allows you to access either the source code of our graphical user interface (View Code) or the graphical user interface itself (View Designer):
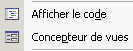
You can access both of these directly from the "Solution Explorer" window:
 |  |
Open windows "stack" in the main design window:
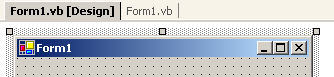
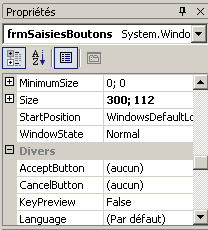
Here, Form1.vb[Design] refers to the design window and Form1.vb to the code window. Simply click on one of the tabs to switch between windows. Another important window displayed on the VS.NET screen is the Properties window:
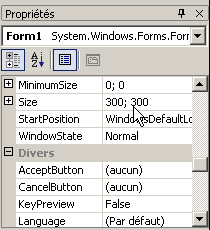
The properties displayed in the window are those of the control currently selected in the graphical design window. You can access various project windows using the View menu:
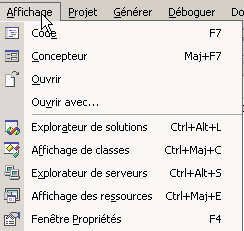
It includes the main windows just described, along with their keyboard shortcuts.
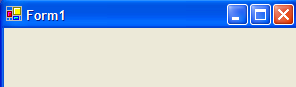
5.2.3. Running a Project
Even though we haven't written any code yet, we have an executable project. Press F5 or select Debug/Start to run it. The following window appears:

This window can be maximized, minimized, resized, and closed.
5.2.4. The code generated by VS.NET
Let’s look at the code (View/Code) for our application:
Public Class Form1
    Inherits System.Windows.Forms.Form

#Region "Code generated by the Windows Form Designer

    Public Sub New()
        MyBase.New()

        'This call is required by the Windows Form Designer.
        InitializeComponent()

        'Add any initialization after InitializeComponent() call

    End Sub

    'The substituted method Disposes of the form to clean up the list of components.
    Protected Overloads Overrides Sub Dispose(ByVal disposing As Boolean)
        If disposing Then
            If Not (components Is Nothing) Then
                components.Dispose()
            End If
        End If
        MyBase.Dispose(disposing)
    End Sub

    'Required by the Windows Form Designer
    Private components As System.ComponentModel.IContainer

    'REMARQUE: the following procedure is required by the Windows Form Designer
    'It can be modified using the Windows Form Designer.
    'Do not modify it using the code editor.
    <System.Diagnostics.DebuggerStepThrough()> Private Sub InitializeComponent()
        components = New System.ComponentModel.Container()
        Me.Text = "Form2"
    End Sub

#End Region

End Class
A graphical user interface derives from the base class System.Windows.Forms.Form:
The Form base class defines a basic window with close and maximize/minimize buttons, adjustable size, etc., and handles events on these graphical objects. The form's constructor uses a method named InitializeComponent in which the form's controls are created and initialized.
Public Sub New()
MyBase.New()
'This call is required by the Windows Form Designer.
InitializeComponent()
'Add any initialization after InitializeComponent() call
End Sub
Any other work to be done in the constructor can be done after the call to InitializeComponent. The InitializeComponent method
Private Sub InitializeComponent()
'
'Form1
'
Me.AutoScaleBaseSize = New System.Drawing.Size(5, 13)
Me.ClientSize = New System.Drawing.Size(292, 53)
Me.Name = "Form1"
Me.Text = "Form1"
End Sub
sets the title of the "Form1" window, its width (292), and its height (53). The window title is set by the Text property and the dimensions by the Size property. Size is defined in the System.Drawing namespace and is a structure. To run this application, we need to define the project’s main module. To do this, we use the option [Projets/Propriétés]:
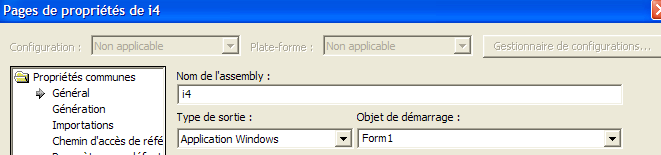
In [Objet de démarrage], we specify [Form1], which is the form we just created. To start execution, we use option and [Déboguer/Démarrer]:
5.2.5. Compiling in a DOS window
Now, let’s try to compile and run this application in a DOS window:
dos>dir form1.vb
14/03/2004 11:53 514 Form1.vb
dos>vbc /r:system.dll /r:system.windows.forms.dll form1.vb
vbc : error BC30420: 'Sub Main' est introuvable dans 'Form1'.
The compiler indicates that it cannot find the procedure [Main]. Indeed, VS.NET did not generate it. However, we have already encountered it in the previous examples. It has the following form:
Shared Sub Main()
' launch application
Application.Run(New Form1) ' où Form1 est le formulaire
End Sub
Let’s add the previous code to the [Form1.vb] code and recompile:
dos>vbc /r:system.dll /r:system.windows.forms.dll form2.vb
Compilateur Microsoft (R) Visual Basic .NET version 7.10.3052.4
Form2.vb(41) : error BC30451: Le nom 'Application' n'est pas déclaré.
Application.Run(New Form2)
~~~~~~~~~~~
This time, the name [Application] is unknown. This simply means that we haven't imported its namespace [System.Windows.Forms]. Let's add the following statement:
Then recompile:
This time, it works. Let's run it:
A Form1-type form is created and displayed. You can avoid adding the [Main] procedure by using the compiler's option /m option, which allows you to specify the class to execute if it inherits from System.Windows.Form:
The option /m:form2 indicates that the class to be executed is the class named [form2].
5.2.6. Event Handling
Once the form is displayed, the application listens for events that occur on the form (clicks, mouse movements, etc.) and executes those that the form handles. Here, our form does not handle any events other than those handled by the base Form class (clicks on close buttons, maximize/minimize, window resizing, window movement, etc.). The generated form uses a components attribute that is not used anywhere. The Dispose method is also unnecessary here. The same applies to certain namespaces (Collections, ComponentModel, Data) that are used and the one defined for the projet1 project. Therefore, in this example, the code can be simplified to the following:
Imports System
Imports System.Drawing
Imports System.Windows.Forms
Public Class Form1
    Inherits System.Windows.Forms.Form
' manufacturer
Public Sub New()
' building the form with its components
InitializeComponent()
End Sub
Private Sub InitializeComponent()
' window size
Me.Size = New System.Drawing.Size(300, 300)
' window title
Me.Text = "Form1"
End Sub
Shared Sub Main()
' launch application
Application.Run(New Form1)
End Sub
End Class
5.2.7. Conclusion
We will now accept the code generated by VS.NET as-is and simply add our own code, specifically to handle events related to the various controls on the form.
5.3. Window with input field, button, and label
5.3.1. Graphic Design
In the previous example, we did not place any components in the window. We will start a new project called interface2. To do this, we will follow the procedure described earlier to create a project:

Now let’s build a window with a button, a label, and an input field:
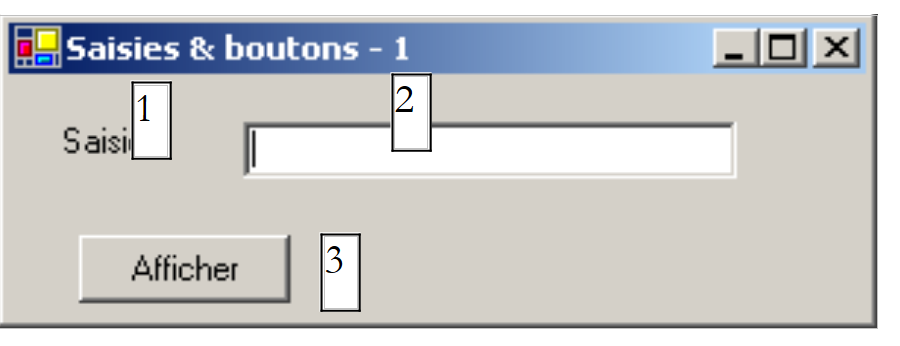 |
The fields are as follows:
No. | Name | type | role |
1 | lblSaisie | Label | a label |
2 | txtSaisie | TextBox | an input field |
3 | btnAfficher | Button | to display the contents of the input field in a dialog box txtSaisie |
You can proceed as follows to build this window: right-click in the window outside of any component and select option Properties to access the window's properties:
The Properties window then appears on the right:
Some of these properties are worth noting:
to set the window’s background color | |
to set the color of the graphics or text in the window | |
to associate a menu with the window | |
to give the window a title | |
to set the window type | |
to set the font for text in the window | |
to set the window name |
Here, we set the Text and Name properties:
Inputs & buttons - 1 | |
frmSaisiesBoutons |
Using the "Toolbox" bar
- select the components you need
- drop them onto the window and set their correct dimensions
 |  |
Once you have selected the component from the "toolbox," use the "Esc" key to hide the toolbar, then drop and resize the component. Do this for the three : Label, TextBox, Button. To align and size the components correctly, use the Format menu: | 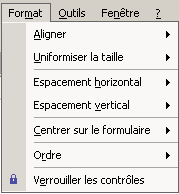 |
The formatting process works as follows:
The option Align command allows you to align components |  |
The option Make Same Size feature ensures that components have the same height or the same width: | 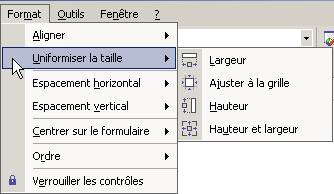 |
option Horizontal Spacing allows, for example, horizontally align components with equal spacing between them. The same applies for the option Vertical Spacing, which aligns vertically. The option Center in Form allows you to center a component horizontally or vertically in the window: | 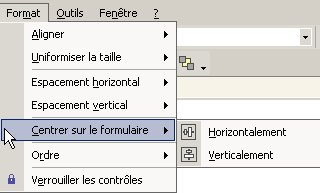 |
Once the components are correctly placed in the window, set their properties. To do this, right-click on the component and select the option Properties:
Select the component to open open its Properties window. In this window, modify the following properties: name: lblSaisie, text: Entry
Select the component to open its properties window. In this window, modify the following properties: name: txtSaisie, text: leave blank
name: cmdAfficher, text: Show
text: Inputs & buttons - 1 | 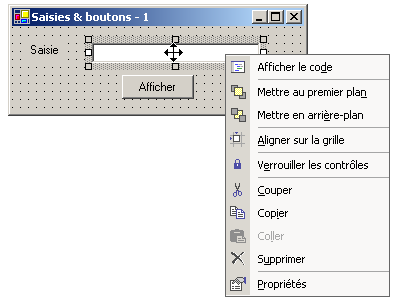 |
We can run (Ctrl-F5) our project to get a first glimpse of the window in action: | |
Close the window. We still need to write the procedure associated with a click on the Show button.
5.3.2. Handling form events
Let’s look at the code generated by the visual designer:
...

Public Class frmSaisiesBoutons
  Inherits System.Windows.Forms.Form

  ' components
    Private components As System.ComponentModel.Container = Nothing
    Friend WithEvents btnAfficher As System.Windows.Forms.Button
    Friend WithEvents lblsaisie As System.Windows.Forms.Label
    Friend WithEvents txtsaisie As System.Windows.Forms.TextBox

  ' manufacturer
  Public Sub New()
    InitializeComponent()
  End Sub

...

  ' component initialization
    Private Sub InitializeComponent()
...
    End Sub
End Class
First, note the specific declaration of the components:
- the Friend keyword indicates that the component is visible to all classes in the project
- the keyword WithEvents indicates that the component generates events. We will now look at how to handle these events
Display the form’s code window (View/Code or F7):
 |
The window above displays two drop-down lists (1) and (2). List (1) is the list of form components:
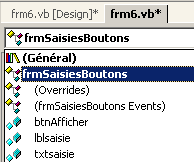
List (2) is the list of events associated with the component selected in (1):
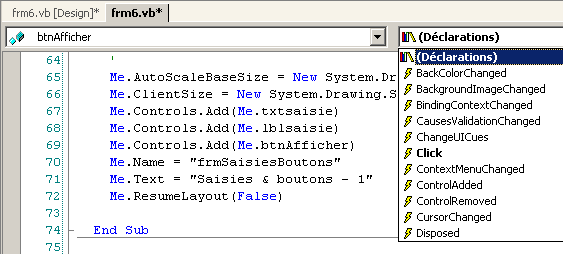
One of the events associated with the component is displayed in bold (in this case, Click). This is the component's default event. You can access the handler for this specific event by double-clicking the component in the design window. VB.net then automatically generates the skeleton of the event handler in the code window and positions the cursor on it. To access the handlers for other events, go to the code window, select the component from the list (1), and select the event from (2). VB.net then generates the skeleton of the event handler or positions the cursor on it if it was already generated:
    Private Sub btnAfficher_Click(ByVal sender As System.Object, ByVal e As System.EventArgs) Handles btnAfficher.Click
...
    End Sub
By default, VB.net C_E names the event handler E for component C. You can change this name if you wish. However, this is not recommended. VB developers generally keep the name generated by VB, which ensures naming consistency across all VB programs. The association of the btnAfficher_Click procedure with the Click event of the btnAfficher component is not done via the procedure name but via the handles keyword:
Handles btnAfficher.Click
In the example above, the handles keyword specifies that the procedure handles the Click event of the btnAfficher component. The event handler has two parameters:
the object that triggered the event (in this case, the button) | |
a EventArgs object that details the event that occurred |
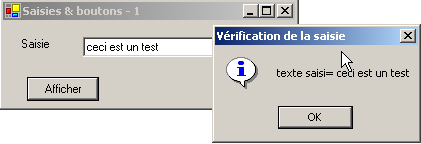
We will not use any of these parameters here. All that remains is to complete the code. Here, we want to display a dialog box containing the contents of the txtSaisie field:
    Private Sub btnAfficher_Click(ByVal sender As Object, ByVal e As System.EventArgs)
        ' the text entered in the TxtSaisie input box is displayed
        MessageBox.Show("texte saisi= " + txtsaisie.Text, "Vérification de la saisie", MessageBoxButtons.OK, MessageBoxIcon.Information)
    End Sub
When the application is run, the following occurs:
5.3.3. Another method for handling events
For the btnAfficher button, VS.NET generated the following code:
Private Sub InitializeComponent()
        ...
        '
        'btnAfficher
        '
        Me.btnAfficher.Location = New System.Drawing.Point(102, 48)
        Me.btnAfficher.Name = "btnAfficher"
        Me.btnAfficher.Size = New System.Drawing.Size(88, 24)
        Me.btnAfficher.TabIndex = 2
        Me.btnAfficher.Text = "Afficher"
...
    End Sub

...

    ' event manager click on cmdAfficher button
    Private Sub btnAfficher_Click(ByVal sender As System.Object, ByVal e As System.EventArgs) Handles btnAfficher.Click
...
    End Sub
We can associate the btnAfficher_Click procedure with the Click event of the btnAfficher button in another way:
Private Sub InitializeComponent()
        ...
        '
        'btnAfficher
        '
        Me.btnAfficher.Location = New System.Drawing.Point(102, 48)
        Me.btnAfficher.Name = "btnAfficher"
        Me.btnAfficher.Size = New System.Drawing.Size(88, 24)
        Me.btnAfficher.TabIndex = 2
        Me.btnAfficher.Text = "Afficher"
        AddHandler btnAfficher.Click, AddressOf btnAfficher_Click
...
    End Sub

...

    ' event manager click on cmdAfficher button
    Private Sub btnAfficher_Click(ByVal sender As System.Object, ByVal e As System.EventArgs)
...
    End Sub
The procedure btnAfficher_Click has lost the Handles keyword, thereby losing its association with the event btnAfficher.Click. This association is now made using the keyword AddHandler:
AddHandler btnAfficher.Click, AddressOf btnAfficher_Click
The code above, which will be placed in the form’s InitializeComponent procedure, associates the procedure named btnAfficher_Click with the btnAfficher.Click event. Furthermore, the btnAfficher component no longer requires the WithEvents keyword:
Friend btnAfficher As System.Windows.Forms.Button
What is the difference between the two methods?
- The `handles` keyword allows you to associate an event with a procedure only at design time. The designer knows in advance that procedure P must handle events E1, E2, ... and writes the code
Private Sub btnAfficher_Click(ByVal sender As System.Object, ByVal e As System.EventArgs) handles E1, E2, ..., En
It is indeed possible for a procedure to handle multiple events.
- The addhandler keyword allows an event to be associated with a procedure at runtime. This is useful in a producer-consumer event framework. An object produces a specific event that may be of interest to other objects. These objects subscribe to the producer to receive the event (a temperature exceeding a critical threshold, for example). During application execution, the event producer will be required to execute various instructions:
where E is the event produced by the producer and P1 is one of the procedures belonging to the various objects consuming this event. We will have the opportunity to revisit a producer-consumer event application in a later chapter.
5.3.4. Conclusion
From the two projects studied, we can conclude that once the graphical interface is built with VS.NET, the developer’s task is to write the event handlers for the events they wish to manage within that graphical interface. From now on, we will present only the code for these handlers.
5.4. Some Useful Components
We will now present various applications that utilize the most common components in order to explore their main methods and properties. For each application, we will present the graphical user interface and the relevant code, particularly the event handlers.
5.4.1. Form
We begin by introducing the essential component: the form onto which components are placed. We have already covered some of its basic properties. Here, we will focus on a few important events of a form.
The form is loading | |
The form is closing | |
The form is closed |
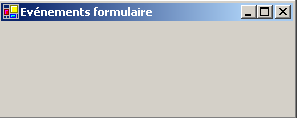
The Load event occurs even before the form is displayed. The Closing event occurs when the form is being closed. This closing can still be stopped programmatically. We create a form named Form1 without any components:
We handle the three previous events:
    Private Sub Form1_Load(ByVal sender As Object, ByVal e As System.EventArgs) Handles MyBase.Load
        ' initial form loading
        MessageBox.Show("Evt Load", "Load")
    End Sub

    Private Sub Form1_Closing(ByVal sender As Object, ByVal e As System.ComponentModel.CancelEventArgs) Handles MyBase.Closing
        ' the form is closing
        MessageBox.Show("Evt Closing", "Closing")
        ' confirmation requested
        Dim réponse As DialogResult = MessageBox.Show("Voulez-vous vraiment quitter l'application", "Closing", MessageBoxButtons.YesNo, MessageBoxIcon.Question)
        If réponse = DialogResult.No Then
            e.Cancel = True
        End If
    End Sub

    Private Sub Form1_Closed(ByVal sender As Object, ByVal e As System.EventArgs) Handles MyBase.Closed
        ' the form is closing
        MessageBox.Show("Evt Closed", "Closed")
    End Sub
We use the MessageBox function to be notified of the various events. The Closing event occurs when the user closes the window. | 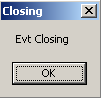 |
We then ask them if they really want to exit the application: | 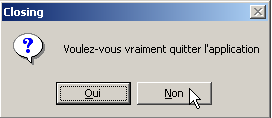 |
If they answer No, we set the Cancel property of the CancelEventArgs event that the method received as a parameter. If we set this property to False, the of the window is canceled; otherwise, it proceeds: | 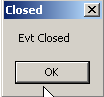 |
5.4.2. Label components and TextBox input fields
We have already encountered these two components. Label is a text component and TextBox is an input field component. Their main property is Text, which refers to either the content of the input field or the label text. This property is read/write. The event typically used for TextBox is TextChanged, which signals that the user has modified the input field. Here is an example that uses the TextChanged event to track changes in an input field:
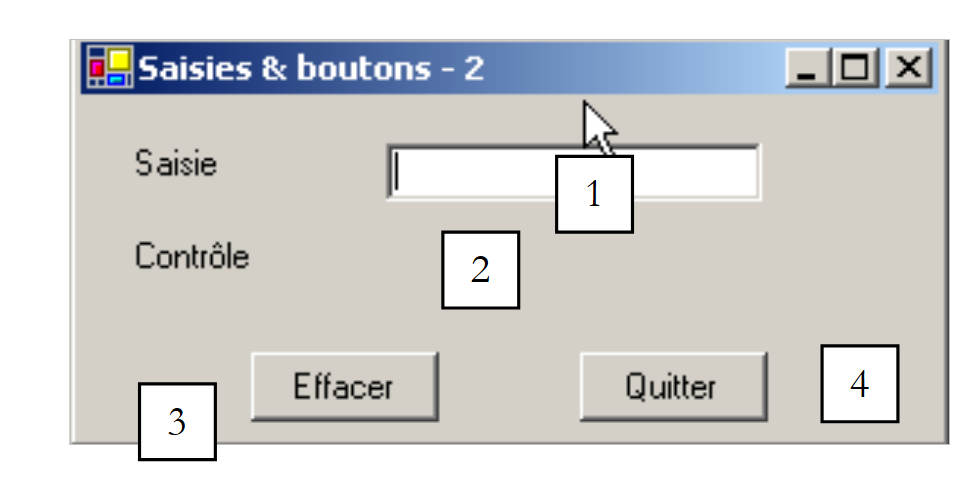 |
No. | type | name | role |
1 | TextBox | txtSaisie | input field |
2 | Label | lblControle | displays the text from 1 in real time |
3 | Button | cmdEffacer | to clear fields 1 and 2 |
4 | Button | cmdQuitter | to exit the application |
The relevant code for this application is the event handlers:
  ' click on btn quit
    Private Sub cmdQuitter_Click(ByVal sender As Object, ByVal e As System.EventArgs) _
    Handles cmdQuitter.Click
        ' click on the Quit button - exit the application
        Application.Exit()
    End Sub

    ' field modification txtSaisie
    Private Sub txtSaisie_TextChanged(ByVal sender As Object, ByVal e As System.EventArgs) _
    Handles txtSaisie.TextChanged
        ' the content of TextBox has changed - copy it to Label lblControle
        lblControle.Text = txtSaisie.Text
    End Sub

    ' click on btn delete
    Private Sub cmdEffacer_Click(ByVal sender As Object, ByVal e As System.EventArgs) _
    Handles cmdEffacer.Click
        ' delete the contents of the input box
        txtSaisie.Text = ""
    End Sub

    ' a key has been pressed
    Private Sub txtSaisie_KeyPress(ByVal sender As Object, ByVal e As System.Windows.Forms.KeyPressEventArgs) _
    Handles txtSaisie.KeyPress
        ' see which key has been pressed
        Dim touche As Char = e.KeyChar
        If touche = ControlChars.Cr Then
            MessageBox.Show(txtSaisie.Text, "Contrôle", MessageBoxButtons.OK, MessageBoxIcon.Information)
            e.Handled = True
        End If
    End Sub
Note how the application is terminated in the cmdQuitter_Click procedure: Application.Exit(). The following example uses a multi-line TextBox:
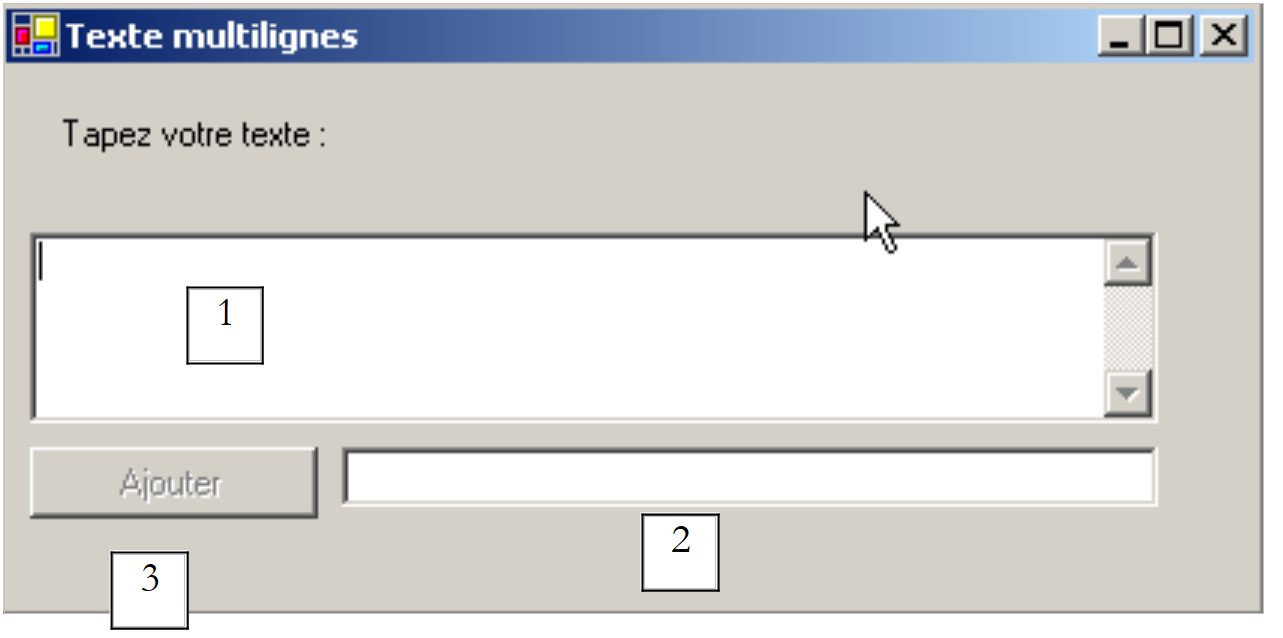 |
The list of controls is as follows:
No. | Type | name | role |
1 | TextBox | txtMultiLignes | multi-line input field |
2 | TextBox | txtAjout | single-line input field |
3 | Button | btnAjouter | Adds the content from 2 to 1 |
To make a TextBox multi-line, set the following control properties:
to allow multiple lines of text | |
to specify whether the control should have scroll bars (Horizontal, Vertical, Both) or not (None) | |
if set to true, the Enter key will move to the next line | |
if set to true, the Tab key will insert a tab in the text |
The relevant code is the one that handles the click on the [Ajouter] button and the one that handles changes to the [txtAjout] input field:
    ' évt btnAjouter_Click
    Private Sub btnAjouter_Click1(ByVal sender As Object, ByVal e As System.EventArgs) _
    Handles btnAjouter.Click
        ' add the content of txtAjout to that of txtMultilignes
        txtMultilignes.Text &= txtAjout.Text
        txtAjout.Text = ""
    End Sub

    ' evt txtAjout_TextChanged
    Private Sub txtAjout_TextChanged1(ByVal sender As Object, ByVal e As System.EventArgs) _
    Handles txtAjout.TextChanged
        ' set the state of the Add button
        btnAjouter.Enabled = txtAjout.Text.Trim() <> ""
    End Sub
5.4.3. drop-down lists ComboBox
 |  |
A ComboBox component is a drop-down list combined with an input field: the user can either select an item from (2) or type text into (1). There are three types of ComboBox defined by the Style property:
non-dropdown list with edit box | |
drop-down list with edit box | |
drop-down list without an edit box |
By default, the type of a ComboBox is DropDown. To find the ComboBox class, type ComboBox in the help index (Help/Index). The ComboBox class has a single constructor:
Public Sub New() | creates an empty ComboBox object |
The items of ComboBox are available in the Items property:
This is an indexed property, where *Items(i) refers to the i-th item in the combo box. Let C be a combo box and C.Items* its list of items. We have the following properties:
number of items in the combo | |
element i of the combo | |
adds the object o as the last element of the combo | |
adds an array of objects to the end of the combo | |
adds the object o at position i in the combo box | |
removes element i from the combo box | |
removes object o from the combo box | |
clears all items from the combo box | |
returns the position i of object o in the combo box |
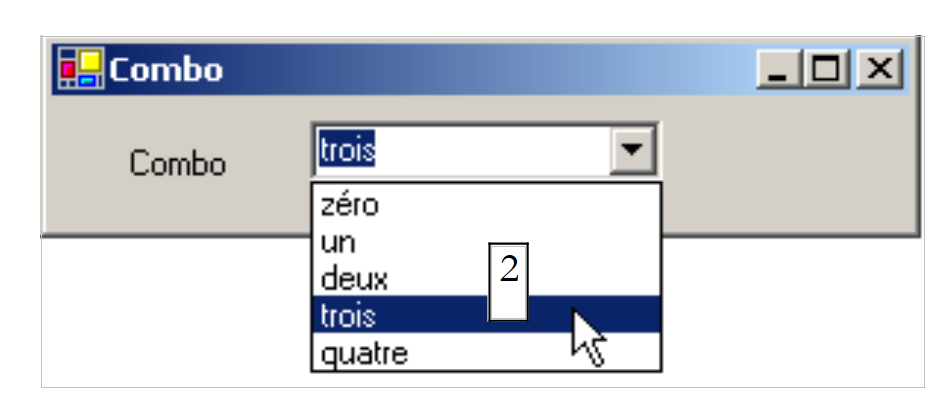
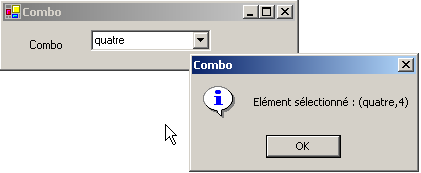
It may seem surprising that a combo box can contain objects when it usually contains strings. Visually, this is indeed the case. If a ComboBox contains an object obj, it displays the string obj.ToString(). Recall that every object has a ToString method inherited from the object class, which returns a character string that "represents" the object. The element selected in combo box C is C.SelectedItem or C.Items(C.SelectedIndex), where C.SelectedIndex is the number of the selected element, with this number starting at zero for the first element.
When an item is selected from the drop-down list, the SelectedIndexChanged event is triggered, which can then be used to detect a change in the combo box selection. In the following application, we use this event to display the item that was selected from the list.
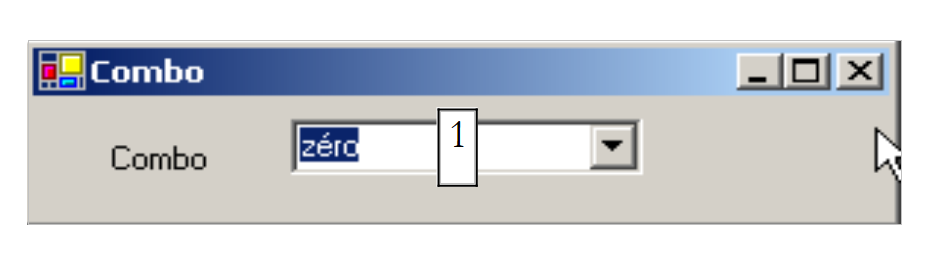
We are only showing the relevant code for the window. In the form’s constructor, we populate the combo box:
  Public Sub New()
    ' form creation
    InitializeComponent()
    ' combo filling
    cmbNombres.Items.AddRange(New String() {"zéro", "un", "deux", "trois", "quatre"})
        ' we select the 1st element of the list
    cmbNombres.SelectedIndex = 0
  End Sub
We handle the combo's SelectedIndexChanged event, which signals a new selected item:
    Private Sub cmbNombres_SelectedIndexChanged(ByVal sender As Object, ByVal e As System.EventArgs) _
    Handles cmbNombres.SelectedIndexChanged
        ' the selected item has changed - it is displayed
        MessageBox.Show("Elément sélectionné : (" & cmbNombres.SelectedItem.ToString & "," & cmbNombres.SelectedIndex & ")", "Combo", MessageBoxButtons.OK, MessageBoxIcon.Information)
    End Sub
5.4.4. Component ListBox
We propose to build the following interface:
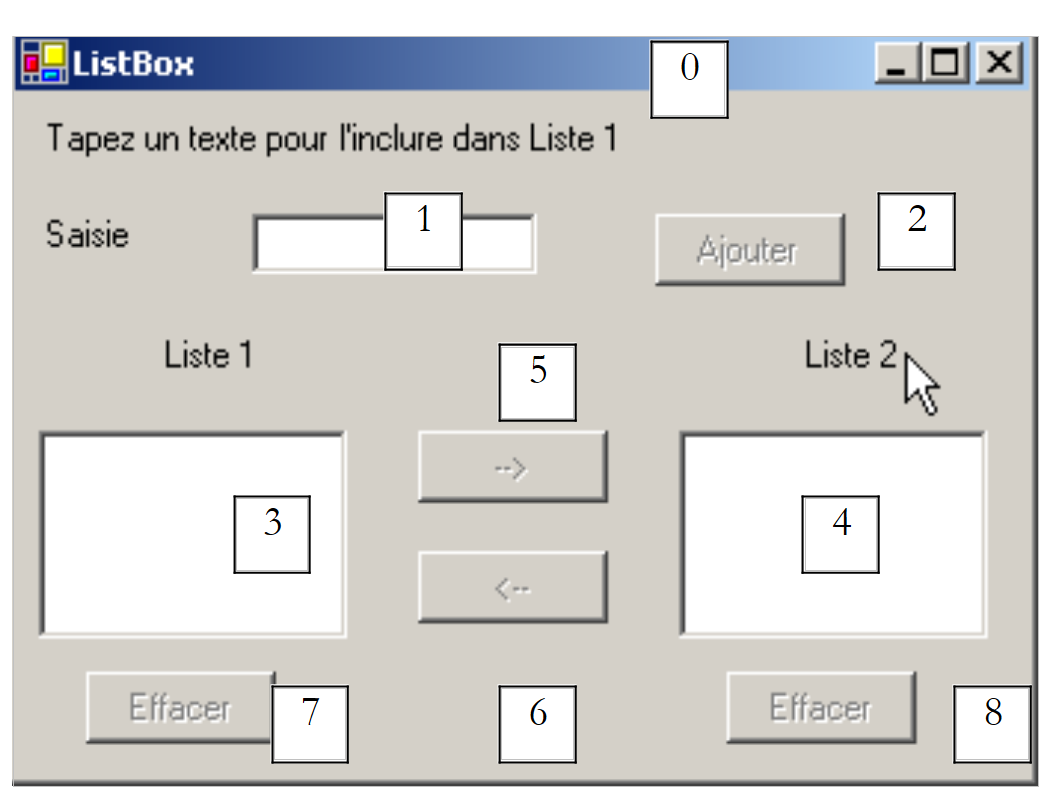 |
The components of this window are as follows:
No. | Type | name | role/properties |
0 | Form | Form1 | form - BorderStyle=FixedSingle |
1 | TextBox | txtSaisie | input field |
2 | Button | btnAjouter | button to add the contents of input field 1 to list 3 |
3 | ListBox | listBox1 | List 1 |
4 | ListBox | listBox2 | List 2 |
5 | Button | btn1TO2 | Moves the selected items from List 1 to List 2 |
6 | Button | cmd2T0 | does the opposite |
7 | Button | btnEffacer1 | clear list 1 |
8 | Button | btnEffacer2 | Clear list 2 |
- The user types text into field 1. They add it to list 1 using the Add button (2). The input field (1) is then cleared, and the user can add a new item.
- They can transfer items from one list to another by selecting the item to be transferred in one of the lists and choosing the appropriate transfer button 5 or 6. The transferred item is added to the end of the destination list and removed from the source list.
- They can double-click on an item in List 1. This item is then transferred to the input box for editing and removed from List 1.
The buttons are enabled or disabled according to the following rules:
- the Add button is enabled only if there is non-empty text in the input field
- Button 5 for transferring from List 1 to List 2 is enabled only if an item is selected in List 1
- Button 6 for transferring from List 2 to List 1 is enabled only if an item is selected in List 2
- Buttons 7 and 8 for clearing Lists 1 and 2 are enabled only if the list to be cleared contains items.
Under the above conditions, all buttons must be disabled when the application starts. To achieve this, the Enabled property of the buttons must be set to false. This can be done at design time, which will generate the corresponding code in the InitializeComponent method, or we can do it ourselves in the constructor as shown below:
    Public Sub New()
        ' initial form creation
        InitializeComponent()
        ' additional initializations
        ' a number of buttons are disabled
        btnAjouter.Enabled = False
        btn1TO2.Enabled = False
        btn2TO1.Enabled = False
        btnEffacer1.Enabled = False
        btnEffacer2.Enabled = False
    End Sub
The state of the Add button is controlled by the content of the text input field. The TextChanged event allows us to track changes to this content:
    ' change in field txtsaisie
    Private Sub txtSaisie_TextChanged(ByVal sender As Object, ByVal e As System.EventArgs) _
    Handles txtSaisie.TextChanged
        ' the content of txtSaisie has changed
        ' the Add button is only lit if the entry is non-empty
        btnAjouter.Enabled = txtSaisie.Text.Trim() <> ""
    End Sub
The state of the transfer buttons depends on whether or not an item has been selected in the list they control:
    ' chgt selected item without listbox1
    Private Sub listBox1_SelectedIndexChanged(ByVal sender As Object, ByVal e As System.EventArgs) _
    Handles listBox1.SelectedIndexChanged

        ' an item has been selected
        ' switch on the 1 to 2 transfer button
        btn1TO2.Enabled = True
    End Sub

    ' chgt selected item without listbox2
    Private Sub listBox2_SelectedIndexChanged(ByVal sender As Object, ByVal e As System.EventArgs) _
    Handles listBox2.SelectedIndexChanged
        ' an item has been selected
        ' switch on the 2 to 1 transfer button
        btn2TO1.Enabled = True
    End Sub
The code associated with clicking the Add button is as follows:
    ' click on btn Add
    Private Sub btnAjouter_Click(ByVal sender As Object, ByVal e As System.EventArgs) _
    Handles btnAjouter.Click
        ' add a new element to list 1
        listBox1.Items.Add(txtSaisie.Text.Trim())
        ' raz de la saisie
        txtSaisie.Text = ""
        ' List 1 is not empty
        btnEffacer1.Enabled = True
        ' return focus to input box
        txtSaisie.Focus()
    End Sub
Note the Focus method, which allows you to set the "focus" on a form control. The code associated with clicking the Clear buttons:
    ' click on btn Delete1
    Private Sub btnEffacer1_Click(ByVal sender As Object, ByVal e As System.EventArgs) _
    Handles btnEffacer1.Click
        ' delete list 1
        listBox1.Items.Clear()
        btnEffacer1.Enabled = False
    End Sub

    ' click on btn delete2
    Private Sub btnEffacer2_Click(ByVal sender As Object, ByVal e As System.EventArgs)
        ' delete list 2
        listBox2.Items.Clear()
        btnEffacer2.Enabled = False
    End Sub
The code to transfer selected items from one list to another:
    ' click on btn btn1to2
    Private Sub btn1TO2_Click(ByVal sender As Object, ByVal e As System.EventArgs) _
    Handles btn1TO2.Click
        ' transfer the item selected in List 1 to List 2
        transfert(listBox1, listBox2)
        ' delete buttons
        btnEffacer2.Enabled = True
        btnEffacer1.Enabled = listBox1.Items.Count <> 0
        ' transfer buttons
        btn1TO2.Enabled = False
        btn2TO1.Enabled = False
    End Sub

    ' click on btn btn2to1
    Private Sub btn2TO1_Click(ByVal sender As Object, ByVal e As System.EventArgs) _
    Handles btn2TO1.Click
        ' transfer item selected in List 2 to List 1
        transfert(listBox2, listBox1)
        ' delete buttons
        btnEffacer1.Enabled = True
        btnEffacer2.Enabled = listBox2.Items.Count <> 0
        ' transfer buttons
        btn1TO2.Enabled = False
        btn2TO1.Enabled = False
    End Sub

    ' transfer
    Private Sub transfert(ByVal l1 As ListBox, ByVal l2 As ListBox)
        ' transfer selected item from list 1 to list l2
        ' a selected item?
        If l1.SelectedIndex = -1 Then Return
        ' addition to l2
        l2.Items.Add(l1.SelectedItem)
        ' deletion in l1
        l1.Items.RemoveAt(l1.SelectedIndex)
    End Sub
First, we create a method
Private Sub transfert(ByVal l1 As ListBox, ByVal l2 As ListBox)
that transfers the selected item from list l1 to list l2. This allows us to use a single method instead of two to transfer an item from listBox1 to listBox2 or from listBox2 to listBox1. Before Avat performs the transfer, we ensure that an element is indeed selected in list l1:
        ' a selected item?
        If l1.SelectedIndex = -1 Then Return
The SelectedIndex property is -1 if no item is currently selected. In the procedures
    Private Sub btnXTOY_Click(ByVal sender As Object, ByVal e As System.EventArgs) _
    Handles btnXTOY.Click
We transfer the contents of list X to list Y and update the state of certain buttons to reflect the new state of the lists.
5.4.5. Checkboxes CheckBox, radio buttons ButtonRadio
We propose to write the following application:
 |
The window components are as follows:
No. | type | name | role |
1 | RadioButton | radioButton1 radioButton2 radioButton3 | 3 radio buttons |
2 | CheckBox | chechBox1 chechBox2 chechBox3 | 3 checkboxes |
3 | ListBox | lstValeurs | a list |
If the three radio buttons are created one after the other, they are part of the same group by default. Therefore, when one is checked, the others are not. The event of interest for these six controls is the CheckChanged event, which indicates that the state of the checkbox or radio button has changed. This state is represented in both cases by the Boolean property Check, which, when true, means the control is selected. Here, we have used a single method to handle all six CheckChanged events: the display method:
  ' poster
    Private Sub affiche(ByVal sender As Object, ByVal e As System.EventArgs) _
    Handles checkBox1.CheckedChanged, checkBox2.CheckedChanged, checkBox3.CheckedChanged, _
    radioButton1.CheckedChanged, radioButton2.CheckedChanged, radioButton3.CheckedChanged
        ' displays radio button or checkbox status
        ' is it a checkbox?
        If (TypeOf (sender) Is CheckBox) Then
            Dim chk As CheckBox = CType(sender, CheckBox)
            lstValeurs.Items.Insert(0, chk.Name & "=" & chk.Checked)
        End If
        ' is it a radiobutton?
        If (TypeOf (sender) Is RadioButton) Then
            Dim rdb As RadioButton = CType(sender, RadioButton)
            lstValeurs.Items.Insert(0, rdb.Name & "=" & rdb.Checked)
        End If
    End Sub
The syntax TypeOf (sender) Is CheckBox allows you to check if the sender object is of type CheckBox. This then allows us to cast to the exact type of sender. The method displays in the lstValeurs list the name of the component that triggered the event and the value of its Checked property. At runtime, we see that clicking a radio button triggers two CheckChanged events: one on the old checked button, which changes to "unchecked," and the other on the new button, which changes to "checked."
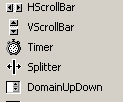
5.4.6. ScrollBar sliders
There are several types of sliders: the horizontal slider (hScrollBar), the vertical slider (vScrollBar), and the counter (NumericUpDown). | 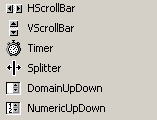 |
Let’s create the following application:
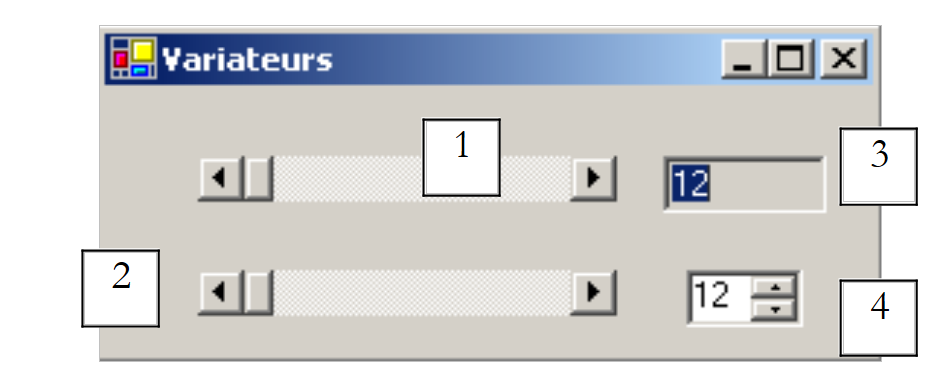 |
No. | Type | name | role |
1 | hScrollBar | hScrollBar1 | a horizontal variator |
2 | hScrollBar | hScrollBar2 | a horizontal variator that follows the variations of variator 1 |
3 | TextBox | txtValeur | Displays the value of the horizontal slider ReadOnly=true to prevent any input |
4 | NumericUpDown | incrementer | allows you to set the value of slider 2 |
- A ScrollBar slider allows the user to select a value from a range of integer values represented by the slider's "track" along which a cursor moves. The slider's value is available in its Value property.
- For a horizontal slider, the left end represents the minimum value of the range, the right end the maximum value, and the cursor the currently selected value. For a vertical slider, the minimum is represented by the top end, and the maximum by the bottom end. These values are represented by the Minimum and Maximum properties and default to 0 and 100.
- Clicking on the ends of the slider changes the value by one increment (positive or negative) depending on the end clicked, referred to as SmallChange, which defaults to 1.
- Clicking on either side of the slider changes the value by one increment (positive or negative) depending on the end clicked, referred to as LargeChange, which defaults to 10.
- When you click on the top end of a vertical slider, its value decreases. This may surprise the average user, who normally expects to see the value "increase." This issue is resolved by setting the properties SmallChange and LargeChange to negative values
- These five properties (Value, Minimum, Maximum, SmallChange, LargeChange) are accessible for both reading and writing.
- The drive’s main event is the one that signals a value change: the Scroll event.
A NumericUpDown component is similar to the slider: it also has Minimum, Maximum, and Value properties, with default values of 0, 100, and 0. However, in this case, the Value property is displayed in an input box that is an integral part of the control. The user can modify this value themselves unless the control’s ReadOnly property has been set to true. The increment value is set by the Increment property, with a default value of 1. The main event of the NumericUpDown component is the one that signals a value change: the ValueChanged event. The relevant code for our application is as follows:
The form is formatted during its construction:
    ' manufacturer
    Public Sub New()
        ' initial form creation
        InitializeComponent()
        ' drive 2 is given the same characteristics as drive 1
        hScrollBar2.Minimum = hScrollBar1.Value
        hScrollBar2.Minimum = hScrollBar1.Minimum
        hScrollBar2.Maximum = hScrollBar1.Maximum
        hScrollBar2.LargeChange = hScrollBar1.LargeChange
        hScrollBar2.SmallChange = hScrollBar1.SmallChange
        ' ditto for the incrementer
        incrémenteur.Minimum = hScrollBar1.Value
        incrémenteur.Minimum = hScrollBar1.Minimum
        incrémenteur.Maximum = hScrollBar1.Maximum
        incrémenteur.Increment = hScrollBar1.SmallChange
        ' give TextBox the value of drive 1
        txtValeur.Text = "" & hScrollBar1.Value
    End Sub
The handler that tracks changes in the value of slider 1:
    ' hscrollbar1 drive management
    Private Sub hScrollBar1_Scroll(ByVal sender As Object, ByVal e As System.Windows.Forms.ScrollEventArgs) _
    Handles hScrollBar1.Scroll
        ' value change on drive 1
        ' its value is passed on to drive 2 and the TxtValeur textbox
        hScrollBar2.Value = hScrollBar1.Value
        txtValeur.Text = "" & hScrollBar1.Value
    End Sub
The handler that tracks changes in the value of slider 2:
    ' hscrollbar2 drive management
    Private Sub hScrollBar2_Scroll(ByVal sender As Object, ByVal e As System.Windows.Forms.ScrollEventArgs) _
    Handles hScrollBar2.Scroll
        ' inhibits all changes to drive 2
        ' forcing it to keep the value of drive 1
        e.NewValue = hScrollBar1.Value
    End Sub
The handler that tracks changes in the scroll bar:
    ' incremental management
    Private Sub incrémenteur_ValueChanged(ByVal sender As Object, ByVal e As System.EventArgs) _
    Handles incrémenteur.ValueChanged
        ' set the value of controller 2
        hScrollBar2.Value = CType(incrémenteur.Value, Integer)
    End Sub
5.5. Mouse Events
When drawing in a container, it is important to know the mouse position to, for example, display a point when clicked. Mouse movements trigger events in the container within which it moves.
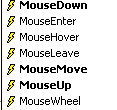 |  |
The mouse has just entered the control's area | |
The mouse has just left the control's area | |
The mouse is moving within the control's area | |
Left mouse button pressed | |
Left mouse button released | |
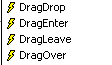
The user drops an object onto the control | |
The user enters the control's area by dragging an object | |
The user exits the control's area while dragging an object | |
The user hovers over the control's area while dragging an object |
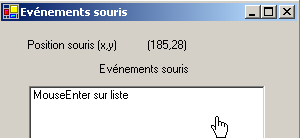
Here is a program to help you better understand when the various mouse events occur:
 |
No. | Type | name | role |
1 | Label | lblPosition | to display the mouse position in form 1, list 2, or button 3 |
2 | ListBox | lstEvts | to display mouse events other than MouseMove |
3 | Button | btnEffacer | to clear the contents of 2 |
The event handlers are as follows. To track mouse movements on all three controls, we write a single handler:
' évt form1_mousemove
Private Sub Form1_MouseMove(ByVal sender As System.Object, ByVal e As System.Windows.Forms.MouseEventArgs) _
Handles MyBase.MouseMove, lstEvts.MouseMove, btnEffacer.MouseMove, lstEvts.MouseMove
' mvt mouse - displays its (X,Y) coordinates
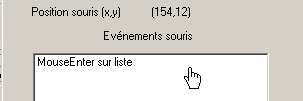
lblPosition.Text = "(" & e.X & "," & e.Y & ")"
End Sub
It is important to note that every time the mouse enters a control’s area, its coordinate system changes. Its origin (0,0) is the top-left corner of the control it is currently on. Thus, during execution, when moving the mouse from the form to the button, the change in coordinates is clearly visible. To better visualize these changes in the mouse’s scope, you can use the Cursor property of the controls:
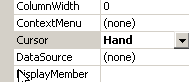
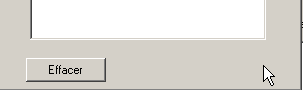
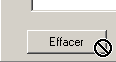
This property allows you to set the shape of the mouse cursor when it enters the control’s area. Thus, in our example, we have set the cursor to Default for the form itself, Hand for List 2, and No for Button 3, as shown in the screenshots below.
In the [InitializeComponent] method, the code generated by these choices is as follows:
        Me.lstEvts.Cursor = System.Windows.Forms.Cursors.Hand
        Me.btnEffacer.Cursor = System.Windows.Forms.Cursors.No
Additionally, to detect mouse entries and exits on List 2, we handle the MouseEnter and MouseLeave events for this same list:
' evt lstEvts_MouseEnter
Private Sub lstEvts_MouseEnter(ByVal sender As System.Object, ByVal e As System.EventArgs) _
Handles lstEvts.MouseEnter
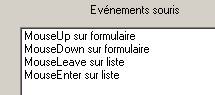
affiche("MouseEnter sur liste")
End Sub
' evt lstEvts_MouseLeave
Private Sub lstEvts_MouseLeave(ByVal sender As System.Object, ByVal e As System.EventArgs) _
Handles lstEvts.MouseLeave
affiche("MouseLeave sur liste")
End Sub
' poster
Private Sub affiche(ByVal message As String)
' the message is displayed at the top of the event list
lstEvts.Items.Insert(0, message)
End Sub
To handle clicks on the form, we handle the MouseDown and MouseUp events:
    ' évt Form1_MouseDown
    Private Sub Form1_MouseDown(ByVal sender As System.Object, ByVal e As System.Windows.Forms.MouseEventArgs) _
    Handles MyBase.MouseDown
        affiche("MouseDown sur formulaire")
    End Sub

    ' évt Form1_MouseUp
    Private Sub Form1_MouseUp(ByVal sender As System.Object, ByVal e As System.Windows.Forms.MouseEventArgs) _
    Handles MyBase.MouseUp
        affiche("MouseUp sur formulaire")
    End Sub
Finally, the code for the Click event handler on the Delete button:
    ' évt btnEffacer_Click
    Private Sub btnEffacer_Click(ByVal sender As System.Object, ByVal e As System.EventArgs) _
    Handles btnEffacer.Click
        ' clears the event list
        lstEvts.Items.Clear()
    End Sub
5.6. Create a window with a menu
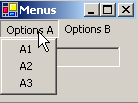
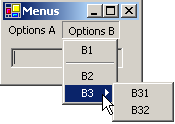
Now let's see how to create a window with a menu. We will create the following window:
 |
Control 1 is a read-only TextBox (ReadOnly=true) named txtStatut. The menu tree is as follows:
 |  |
Menu options are controls just like other visual components and have properties and events. For example, the property table for the option menu control A1:
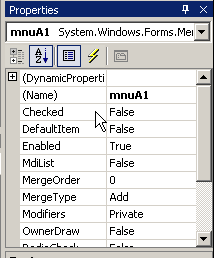
Two properties are used in our example:
the name of the menu control | |
the label of the option menu |
The properties of the various menu options in our example are as follows:
Name | Text |
mnuA | Options A |
mnuA1 | A1 |
mnuA2 | A2 |
mnuA3 | A3 |
mnuB | Options B |
mnuB1 | B1 |
mnuSep1 | - (separator) |
mnuB2 | B2 |
mnuB3 | B3 |
mnuB31 | B31 |
mnuB32 | B32 |
To create a menu, select the "MainMenu" component from the "ToolBox" bar:

You will then have an empty menu that appears on the form with empty fields labeled "Type Here." Simply enter the various menu options there:
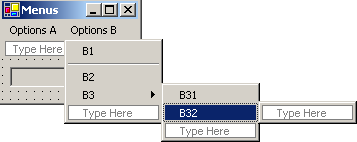
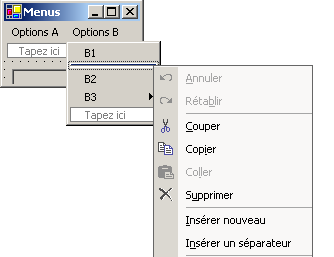
To insert a separator between two options, as shown above between options B1 and B2, position the cursor where you want the separator in the menu, right-click, and select option Insert Separator:
If you run the application using Ctrl-F5, you get a form with a menu that currently does nothing. Menu options are treated as components: they have properties and events. In [fenêtre de code], select the mnuA1 component, then select the associated events:

If we trigger the Click event above, VS.NET automatically generates the following procedure:
Private Sub mnuA1_Click(ByVal sender As Object, ByVal e As System.EventArgs) Handles mnuA.Click
....
    End Sub
We could proceed this way for all menu options. Here, the same procedure can be used for all options. Therefore, we rename the previous procedure *to display* and declare the events it handles:
    Private Sub affiche(ByVal sender As Object, ByVal e As System.EventArgs) _
    Handles mnuA1.Click, mnuA2.Click, mnuB1.Click, mnuB2.Click, mnuB31.Click, mnuB32.Click
        ' displays the name of the selected submenu in the TextBox
        txtStatut.Text = (CType(sender, MenuItem)).Text
    End Sub
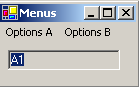
In this method, we simply display the Text property of the menu item option from the event source. The event source sender is of type Object. The menu options are of type MenuItem, so here we must cast the object to MenuItem. Run the application and select the option A1 to get the following message:
The relevant code for this application, aside from that of the Display method, is the code for constructing the menu in the form’s constructor (InitializeComponent):
  Private Sub InitializeComponent()
    Me.mainMenu1 = New System.Windows.Forms.MainMenu
    Me.mnuA = New System.Windows.Forms.MenuItem
    Me.mnuA1 = New System.Windows.Forms.MenuItem
    Me.mnuA2 = New System.Windows.Forms.MenuItem
    Me.mnuA3 = New System.Windows.Forms.MenuItem
    Me.mnuB = New System.Windows.Forms.MenuItem
    Me.mnuB1 = New System.Windows.Forms.MenuItem
    Me.mnuB2 = New System.Windows.Forms.MenuItem
    Me.mnuB3 = New System.Windows.Forms.MenuItem
    Me.mnuB31 = New System.Windows.Forms.MenuItem
    Me.mnuB32 = New System.Windows.Forms.MenuItem
    Me.txtStatut = New System.Windows.Forms.TextBox
    Me.mnuSep1 = New System.Windows.Forms.MenuItem
    Me.SuspendLayout()
    '
    ' mainMenu1
    '
    Me.mainMenu1.MenuItems.AddRange(New System.Windows.Forms.MenuItem() {Me.mnuA, Me.mnuB})

    '
    ' mnuA
    '
    Me.mnuA.Index = 0
    Me.mnuA.MenuItems.AddRange(New System.Windows.Forms.MenuItem() {Me.mnuA1, Me.mnuA2, Me.mnuA3})
    Me.mnuA.Text = "Options A"
    '
    ' mnuA1
    '
    Me.mnuA1.Index = 0
    Me.mnuA1.Text = "A1"
        '
    ' mnuA2
    '
    Me.mnuA2.Index = 1
    Me.mnuA2.Text = "A2"
        '
    ' mnuA3
    '
    Me.mnuA3.Index = 2
    Me.mnuA3.Text = "A3"
        '
    ' mnuB
    '
    Me.mnuB.Index = 1
    Me.mnuB.MenuItems.AddRange(New System.Windows.Forms.MenuItem() {Me.mnuB1, Me.mnuSep1, Me.mnuB2, Me.mnuB3})

    Me.mnuB.Text = "Options B"
    '
    ' mnuB1
    '
    Me.mnuB1.Index = 0
    Me.mnuB1.Text = "B1"
        '
    ' mnuB2
    '
    Me.mnuB2.Index = 2
    Me.mnuB2.Text = "B2"

    '
    ' mnuB3
    '
    Me.mnuB3.Index = 3
    Me.mnuB3.MenuItems.AddRange(New System.Windows.Forms.MenuItem() {Me.mnuB31, Me.mnuB32})
    Me.mnuB3.Text = "B3"
        '
    ' mnuB31
    '
    Me.mnuB31.Index = 0
    Me.mnuB31.Text = "B31"
        '
    ' mnuB32
    '
    Me.mnuB32.Index = 1
    Me.mnuB32.Text = "B32"
        '
    ' txtStatut
    '
    Me.txtStatut.Location = New System.Drawing.Point(8, 8)
    Me.txtStatut.Name = "txtStatut"
    Me.txtStatut.ReadOnly = True
    Me.txtStatut.Size = New System.Drawing.Size(112, 20)
    Me.txtStatut.TabIndex = 0
    Me.txtStatut.Text = ""
    '
    ' mnuSep1
    '
    Me.mnuSep1.Index = 1
    Me.mnuSep1.Text = "-"
    '
    ' Form1
    '
    Me.AutoScaleBaseSize = New System.Drawing.Size(5, 13)
    Me.ClientSize = New System.Drawing.Size(136, 42)
    Me.Controls.Add(txtStatut)
    Me.Menu = Me.mainMenu1
    Me.Name = "Form1"
    Me.Text = "Menus"
    Me.ResumeLayout(False)
  End Sub
Note the statement that associates the menu with the form:
Me.Menu = Me.mainMenu1
5.7. Non-visual components
We will now look at a number of non-visual components: these are used during design but are not visible during runtime.
5.7.1. Dialog boxes OpenFileDialog and SaveFileDialog
We will build the following application:
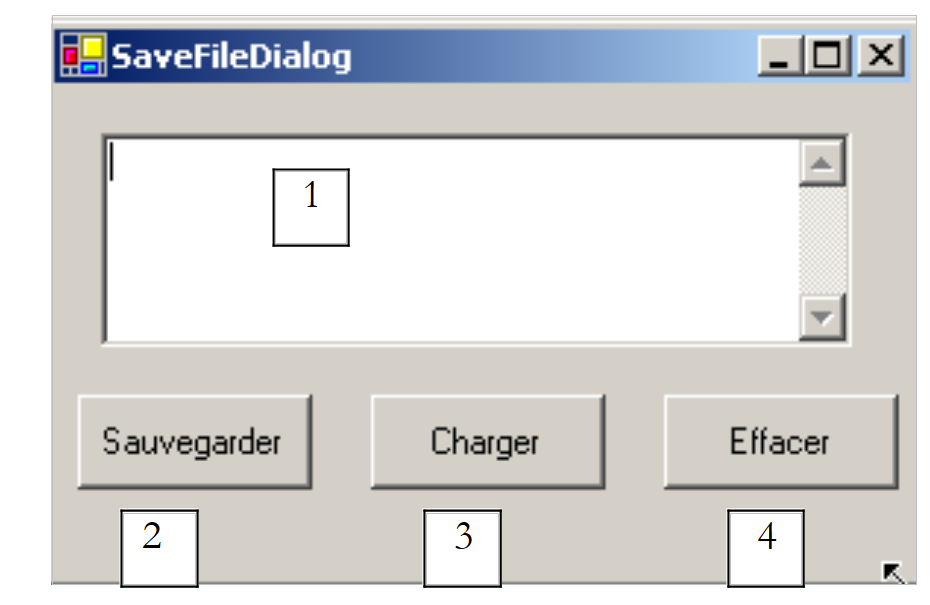 |
The controls are as follows:
No. | Type | Name | role |
1 | TextBox multi-line | txtTexte | text typed by the user or uploaded from a file |
2 | Button | btnSauvegarder | Saves the text from 1 to a text file |
3 | Button | btnCharger | allows you to load the contents of a text file into 1 |
4 | Button | btnEffacer | clears the contents of 1 |
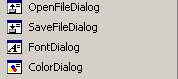
Two non-visual controls are used:
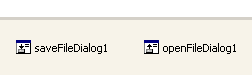
When they are dragged from the "ToolBox" and dropped onto the form, they are placed in a separate area at the bottom of the form. The "Dialog" components are dragged from the "ToolBox":
The code for the Clear button is simple:
    Private Sub btnEffacer_Click(ByVal sender As Object, ByVal e As System.EventArgs) _
    Handles btnEffacer.Click
        ' clear the input box
        txtTexte.Text = ""
    End Sub
The SaveFileDialog class is defined as follows:
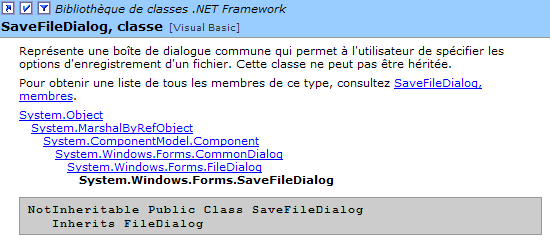
It derives from several class levels. Of its many properties and methods, we will focus on the following:
the file types offered in the file type drop-down list of the dialog box | |
the number of the file type offered by default in the list above. Starts at 0. | |
the folder initially displayed for saving the file | |
The name of the backup file specified by the user | |
method that displays the save dialog box. Returns a result of type DialogResult. |
The ShowDialog method displays a dialog box similar to the following:
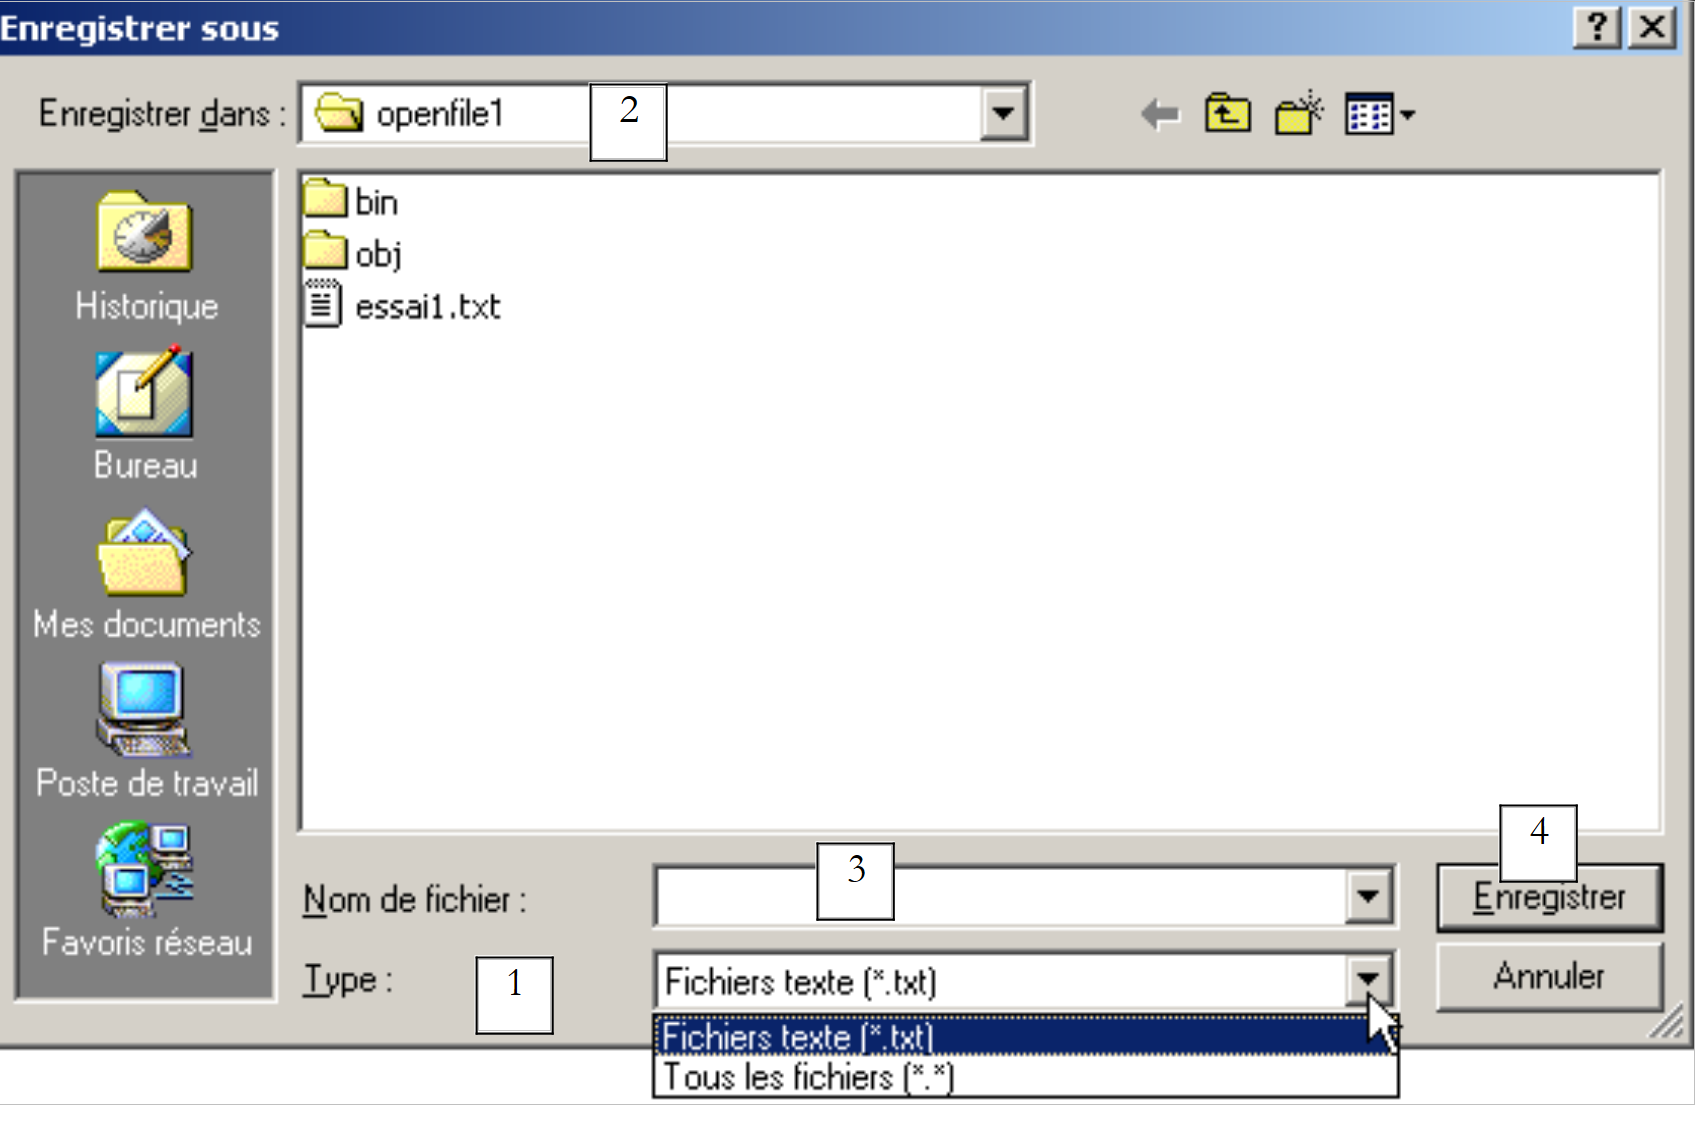 |
drop-down list based on the Filter property. The default file type is set by FilterIndex | |
current folder, set by InitialDirectory if this property has been specified | |
the file name selected or typed directly by the user. Will be available in the FileName property | |
Save/Cancel buttons. If the Save button is used, the ShowDialog function returns the result DialogResult.OK |
The save procedure can be written as follows:
    Private Sub btnSauvegarder_Click(ByVal sender As Object, ByVal e As System.EventArgs) _
    Handles btnSauvegarder.Click
        ' save the input box in a text file
        ' set the savefileDialog1 dialog box
        saveFileDialog1.InitialDirectory = Application.ExecutablePath
        saveFileDialog1.Filter = "Fichiers texte (*.txt)|*.txt|Tous les fichiers (*.*)|*.*"
        saveFileDialog1.FilterIndex = 0
        ' display the dialog box and retrieve the result
        If saveFileDialog1.ShowDialog() = DialogResult.OK Then
            ' retrieve the file name
            Dim nomFichier As String = saveFileDialog1.FileName
            Dim fichier As StreamWriter = Nothing
            Try
                ' open the file for writing
                fichier = New StreamWriter(nomFichier)
                ' we write the text inside
                fichier.Write(txtTexte.Text)
            Catch ex As Exception
                ' problem
                MessageBox.Show("Problème à l'écriture du fichier (" + ex.Message + ")", "Erreur", MessageBoxButtons.OK, MessageBoxIcon.Error)
                Return
            Finally
                ' close the file
                Try
                    fichier.Close()
                Catch
                End Try
            End Try
        End If
    End Sub
- We set the initial directory to the directory containing the application's executable file:
- We set the file types to display
Note the filter syntax: filter1|filter2|..|filteren, where filteri = Text|file type. Here, the user can choose between *.txt and *.* files.
- We set the file type to display at the beginning
Here, *.txt files will be displayed to the user first.
- The dialog box is displayed and its result retrieved
If saveFileDialog1.ShowDialog() = DialogResult.OK Then
- While the dialog box is displayed, the user no longer has access to the main form (a so-called modal dialog box). The user sets the name of the file to be saved and exits the dialog box either by clicking the Save button, the Cancel button, or by closing the dialog box. The result of the ShowDialog method is DialogResult.OK only if the user used the Save button to exit the dialog box.
- Once this is done, the name of the file to be created is now in the FileName property of the saveFileDialog1 object. We are then back to the standard process of creating a text file. We write the contents of TextBox: txtTexte.Text while handling any exceptions that may occur.
The OpenFileDialog class is very similar to the SaveFileDialog class and derives from the same class lineage. Of these properties and methods, we will focus on the following:
the file types offered in the file type drop-down list of the dialog box | |
the index of the file type offered by default in the list above. Starts at 0. | |
the folder initially displayed for searching for the file to open | |
The name of the file to open, as specified by the user | |
method that displays the save dialog box. Returns a result of type DialogResult. |
The ShowDialog method displays a dialog box similar to the following:
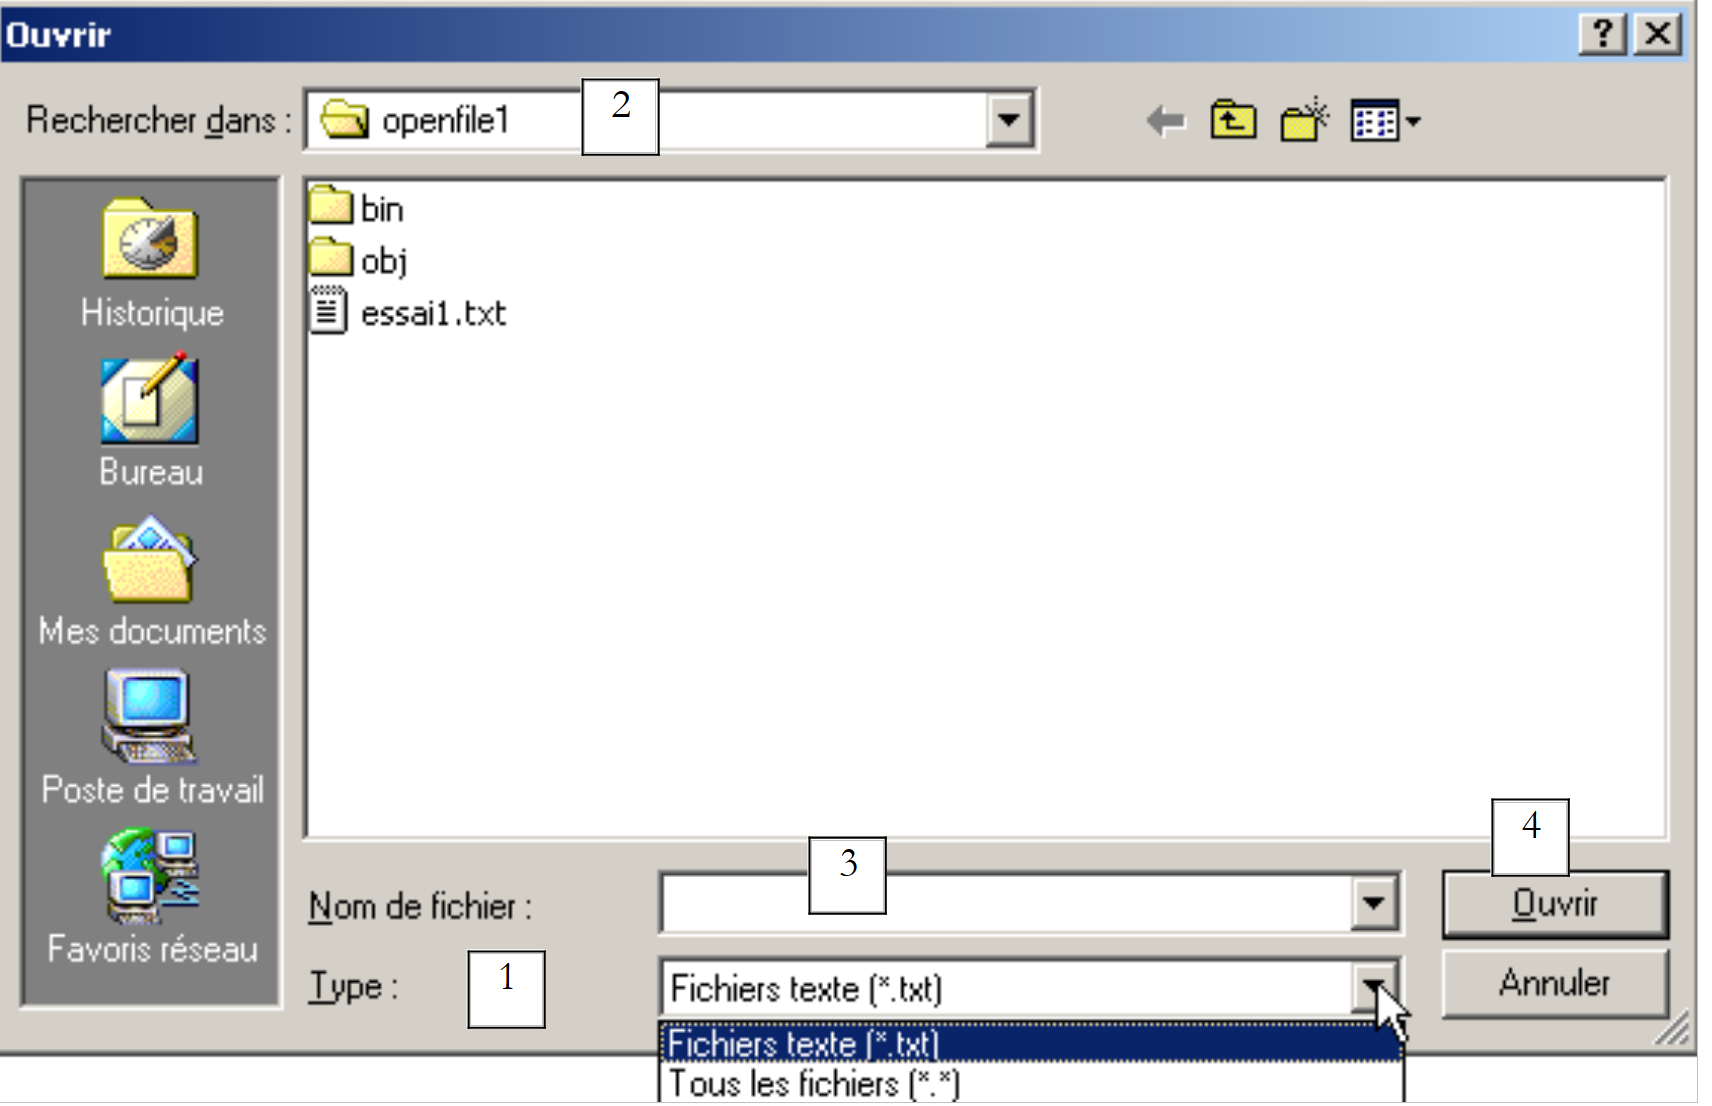 |
drop-down list built from the Filter property. The default file type is set by FilterIndex | |
current folder, set by InitialDirectory if this property has been specified | |
File name selected or typed directly by the user. Will be available in the FileName property | |
Open/Cancel buttons. If the Open button is used, the ShowDialog function returns the result DialogResult.OK |
The opening procedure can be written as follows:
Private Sub btnCharger_Click(ByVal sender As Object, ByVal e As System.EventArgs) _
    Handles btnCharger.Click
        ' load a text file into the input box
        ' set the openfileDialog1 dialog box
        openFileDialog1.InitialDirectory = Application.ExecutablePath
        openFileDialog1.Filter = "Fichiers texte (*.txt)|*.txt|Tous les fichiers (*.*)|*.*"
        openFileDialog1.FilterIndex = 0
        ' display the dialog box and retrieve the result
        If openFileDialog1.ShowDialog() = DialogResult.OK Then
            ' retrieve the file name
            Dim nomFichier As String = openFileDialog1.FileName
            Dim fichier As StreamReader = Nothing
            Try
                ' open the file in read mode
                fichier = New StreamReader(nomFichier)
                ' read the entire file and put it in the TextBox
                txtTexte.Text = fichier.ReadToEnd()
            Catch ex As Exception
                ' problem
                MessageBox.Show("Problème à la lecture du fichier (" + ex.Message + ")", "Erreur", MessageBoxButtons.OK, MessageBoxIcon.Error)
                Return
            Finally
                ' close the file
                Try
                    fichier.Close()
                Catch
                End Try
            End Try
        End If
    End Sub
- We set the initial directory to the directory containing the application's executable file:
- We set the file types to display
- Set the file type to display first
Here, *.txt files will be displayed to the user first.
- The dialog box is displayed and its result is retrieved
If openFileDialog1.ShowDialog() = DialogResult.OK Then
While the dialog box is displayed, the user no longer has access to the main form (a so-called modal dialog box). The user specifies the name of the file to open and exits the dialog box either by clicking the Open button, the Cancel button, or by closing the dialog box. The result of the ShowDialog method is DialogResult.OK only if the user used the Open button to exit the dialog box.
- Once this is done, the name of the file to be created is now in the FileName property of the openFileDialog1 object. We are then back to the standard reading of a text file. Note the method that allows you to read the entire file:
- The file’s content is stored in the TextBox and txtTexte objects. Handle any exceptions that may occur.
5.7.2. Dialog boxes FontColor and ColorDialog
We continue the previous example by introducing two new buttons:
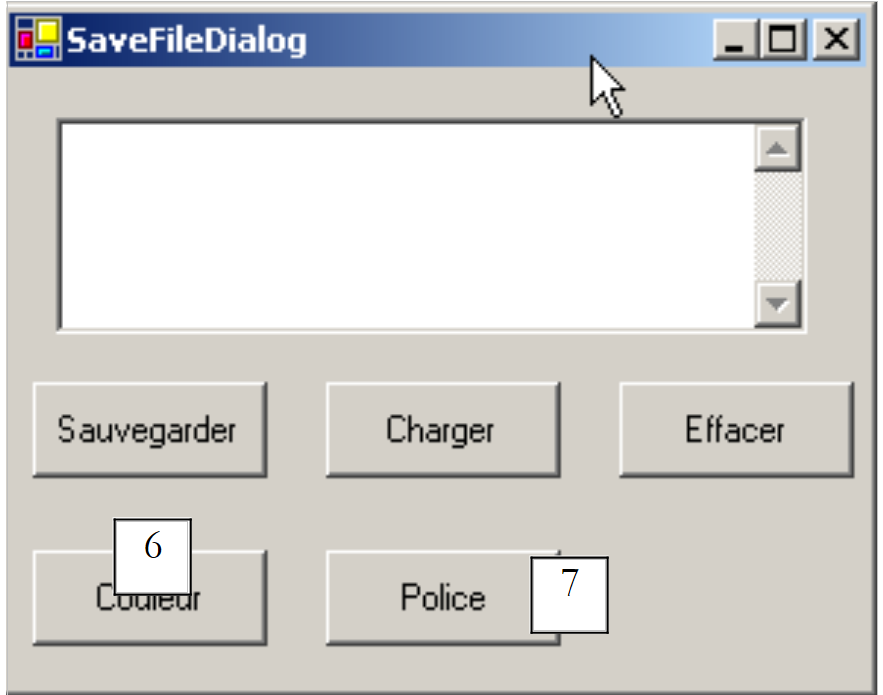 |
No. | type | name | role |
6 | Button | btnCouleur | to set the font color of TextBox |
7 | Button | btnPolice | to set the font of the TextBox |
We place a ColorDialog control and a FontDialog control on the form:
The classes FontDialog and ColorDialog have a method ShowDialog analogous to the method ShowDialog of the classes OpenFileDialog and SaveFileDialog. The ShowDialog method of the ColorDialog class allows you to select a color:
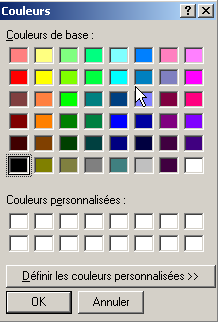
If the user exits the dialog box using the OK button, the result of the ShowDialog method is DialogResult.OK, and the selected color is stored in the Color property of the ColorDialog object being used. The ShowDialog method of the FontDialog class allows you to select a font:
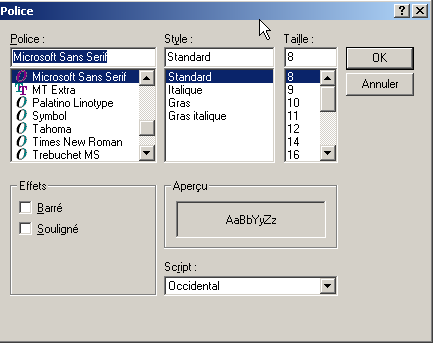
If the user closes the dialog box using the OK button, the result of the ShowDialog method is DialogResult.OK and the selected font is in the Font property of the FontDialog object used. We have the elements to handle clicks on the Color and Font buttons:
    Private Sub btnCouleur_Click(ByVal sender As Object, ByVal e As System.EventArgs) _
    Handles btnCouleur.Click
        ' choice of text color
        If colorDialog1.ShowDialog() = DialogResult.OK Then
            ' change the forecolor property of TextBox
            txtTexte.ForeColor = colorDialog1.Color
        End If
    End Sub


    Private Sub btnPolice_Click(ByVal sender As Object, ByVal e As System.EventArgs) _
    Handles btnPolice.Click
        ' font selection
        If fontDialog1.ShowDialog() = DialogResult.OK Then
            ' change the font property of TextBox
            txtTexte.Font = fontDialog1.Font
        End If
    End Sub
5.7.3. Timer
Here, we will write the following application:
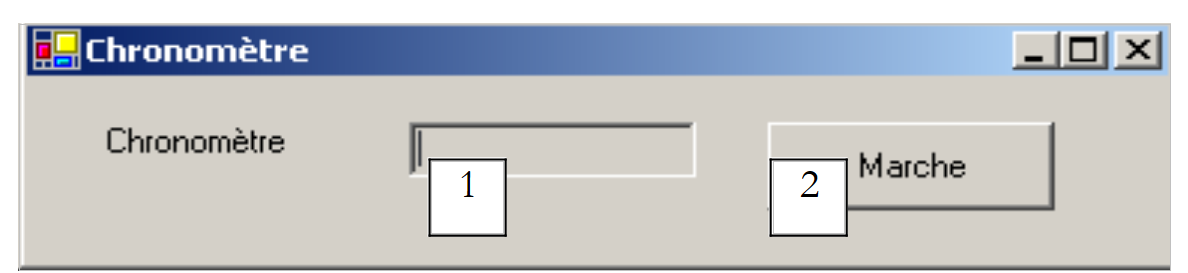 |
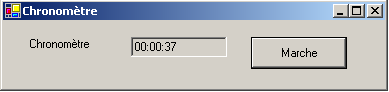
No. | Type | Name | Role |
1 | TextBox, ReadOnly=true | txtChrono | displays a timer |
2 | Button | btnArretMarche | Stop/Start button for the timer |
3 | Timer | timer1 | component emitting an event here every second |
The stopwatch is running:
The timer stopped:
To change the content of TextBox and txtChrono every second, we need a component that generates an event every second, an event that we can intercept to update the stopwatch display. This component is the Timer:
Once this component is installed on the form (in the non-visual components section), a Timer object is created in the form's constructor. The System.Windows.Forms.Timer class is defined as follows:
Of its properties, we will focus only on the following:
number of milliseconds after which a Tick event is triggered. | |
The event triggered at the end of the Interval milliseconds | |
sets the timer to active (true) or inactive (false) |
In our example, the timer is named timer1 and timer1.Interval is set to 1000 ms (1s). The Tick event will therefore occur every second. A click on the Start/Stop button is handled by the following procedure:
    Private Sub btnArretMarche_Click(ByVal sender As Object, ByVal e As System.EventArgs) _
    Handles btnArretMarche.Click
        ' off or on?
        If btnArretMarche.Text = "Marche" Then
            ' we note the start time
            début = DateTime.Now
            ' we display it
            txtChrono.Text = "00:00:00"
            ' start timer
            timer1.Enabled = True
            ' change the button label
            btnArretMarche.Text = "Arrêt"
            ' end
            Return
        End If        '
        If btnArretMarche.Text = "Arrêt" Then
            ' timer off
            timer1.Enabled = False
            ' change the button label
            btnArretMarche.Text = "Marche"
            ' end
            Return
        End If
    End Sub

    Private Sub timer1_Tick(ByVal sender As Object, ByVal e As System.EventArgs) _
    Handles timer1.Tick
        ' a second has passed
        Dim maintenant As DateTime = DateTime.Now
        Dim durée As TimeSpan = DateTime.op_Subtraction(maintenant, début)
        txtChrono.Text = "" + durée.Hours.ToString("d2") + ":" + durée.Minutes.ToString("d2") + ":" + durée.Seconds.ToString("d2")
    End Sub
The label of the Start/Stop button is either "Stop" or "Start". We therefore have to check this label to determine what to do.
- If the label is "Start", we store the start time in a global variable of the form object, the timer is started (Enabled=true), and the button label changes to "Stop".
- If the label is "Stop", the timer is stopped (Enabled=false) and the button label is changed to "Start".
Public Class Timer1
  Inherits System.Windows.Forms.Form
  Private WithEvents timer1 As System.Windows.Forms.Timer
  Private WithEvents btnArretMarche As System.Windows.Forms.Button
  Private components As System.ComponentModel.IContainer
  Private WithEvents txtChrono As System.Windows.Forms.TextBox
  Private WithEvents label1 As System.Windows.Forms.Label

  ' instance variables
  Private début As DateTime
The start attribute above is known in all methods of the class. We still need to handle the Tick event on the timer1 object, an event that occurs every second:
    Private Sub timer1_Tick(ByVal sender As Object, ByVal e As System.EventArgs) _
    Handles timer1.Tick
        ' a second has passed
        Dim maintenant As DateTime = DateTime.Now
        Dim durée As TimeSpan = DateTime.op_Subtraction(maintenant, début)
        txtChrono.Text = "" + durée.Hours.ToString("d2") + ":" + durée.Minutes.ToString("d2") + ":" + durée.Seconds.ToString("d2")
    End Sub
We calculate the elapsed time since the stopwatch was started. We obtain an object of type TimeSpan, which represents a duration in time. This must be displayed in the stopwatch in the format hh:mm:ss. To do this, we use the Hours, Minutes, and Seconds properties of the TimeSPan object, which represent the hours, minutes, and seconds of the duration, respectively. We display this in the format ToString("d2") to ensure a two-digit display.
5.8. The IMPOTS example
We return to the IMPOTS application, which we have already covered twice. We now add a graphical user interface to it:
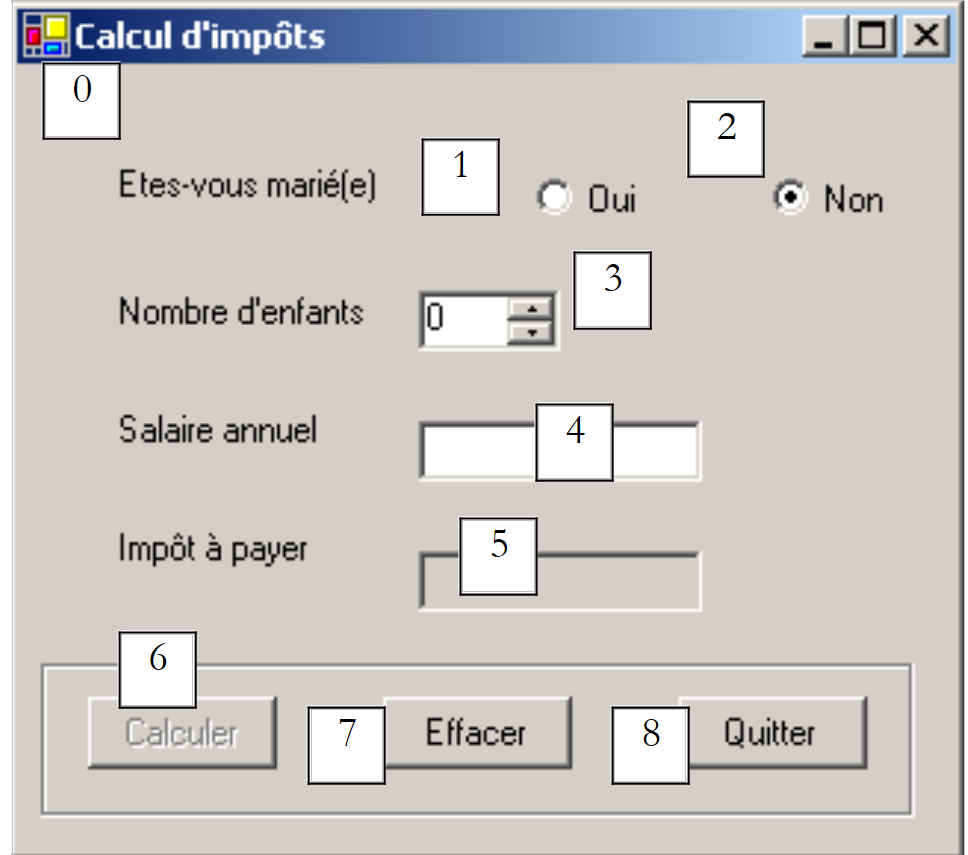 |
The controls are as follows
No. | type | name | role |
RadioButton | rdOui | check if married | |
RadioButton | rdNon | Checked if not married | |
NumericUpDown | incEnfants | number of the taxpayer's children Minimum=0, Maximum=20, Increment=1 | |
TextBox | txtSalaire | taxpayer's annual salary in F | |
TextBox | txtImpots | Amount of tax due ReadOnly=true | |
Button | btnCalculer | Starts the tax calculation | |
Button | btnEffacer | resets the form to its initial state upon loading | |
Button | btnQuitter | to exit the application |
Operating Rules
- The Calculate button remains disabled as long as the salary field is empty
- if, when the calculation is run, the salary turns out to be incorrect, an error is reported:

The program is shown below. It uses the *impot* class created in the chapter on classes. Some of the code automatically generated by VS.NET has not been reproduced here.
using System;
using System.Drawing;
using System.Collections;
using System.ComponentModel;
using System.Windows.Forms;
using System.Data;
' options
Option Explicit On
Option Strict On

' namespaces
Imports System
Imports System.Drawing
Imports System.Collections
Imports System.ComponentModel
Imports System.Windows.Forms
Imports System.Data

' form class
Public Class frmImpots
  Inherits System.Windows.Forms.Form
  Private WithEvents label1 As System.Windows.Forms.Label
  Private WithEvents rdOui As System.Windows.Forms.RadioButton
  Private WithEvents rdNon As System.Windows.Forms.RadioButton
  Private WithEvents label2 As System.Windows.Forms.Label
  Private WithEvents txtSalaire As System.Windows.Forms.TextBox
  Private WithEvents label3 As System.Windows.Forms.Label
  Private WithEvents label4 As System.Windows.Forms.Label
  Private WithEvents groupBox1 As System.Windows.Forms.GroupBox
  Private WithEvents btnCalculer As System.Windows.Forms.Button
  Private WithEvents btnEffacer As System.Windows.Forms.Button
  Private WithEvents btnQuitter As System.Windows.Forms.Button
  Private WithEvents txtImpots As System.Windows.Forms.TextBox
  Private components As System.ComponentModel.Container = Nothing
  Private WithEvents incEnfants As System.Windows.Forms.NumericUpDown

  ' data tables required for tax calculation
  Private limites() As Decimal = {12620D, 13190D, 15640D, 24740D, 31810D, 39970D, 48360D, 55790D, 92970D, 127860D, 151250D, 172040D, 195000D, 0D}
  Private coeffR() As Decimal = {0D, 0.05D, 0.1D, 0.15D, 0.2D, 0.25D, 0.3D, 0.35D, 0.4D, 0.45D, 0.55D, 0.5D, 0.6D, 0.65D}
  Private coeffN() As Decimal = {0D, 631D, 1290.5D, 2072.5D, 3309.5D, 4900D, 6898.5D, 9316.5D, 12106D, 16754.5D, 23147.5D, 30710D, 39312D, 49062D}
  ' tax object
  Private objImpôt As impot = Nothing


  Public Sub New()
    InitializeComponent()
    ' form initialization
    btnEffacer_Click(Nothing, Nothing)
    btnCalculer.Enabled = False
    ' tax object creation
    Try
      objImpôt = New impot(limites, coeffR, coeffN)
    Catch ex As Exception
      MessageBox.Show("Impossible de créer l'objet impôt (" + ex.Message + ")", "Erreur", MessageBoxButtons.OK, MessageBoxIcon.Error)
      ' inhibit the salary entry field
      txtSalaire.Enabled = False
    End Try 'try-catch
  End Sub
  Protected Overloads Sub Dispose(ByVal disposing As Boolean)
....
  End Sub
  Private Sub InitializeComponent()
    Me.btnQuitter = New System.Windows.Forms.Button
    Me.groupBox1 = New System.Windows.Forms.GroupBox
    Me.btnEffacer = New System.Windows.Forms.Button
    Me.btnCalculer = New System.Windows.Forms.Button
    Me.txtSalaire = New System.Windows.Forms.TextBox
    Me.label1 = New System.Windows.Forms.Label
    Me.label2 = New System.Windows.Forms.Label
    Me.label3 = New System.Windows.Forms.Label
    Me.rdNon = New System.Windows.Forms.RadioButton
    Me.txtImpots = New System.Windows.Forms.TextBox
    Me.label4 = New System.Windows.Forms.Label
    Me.rdOui = New System.Windows.Forms.RadioButton
    Me.incEnfants = New System.Windows.Forms.NumericUpDown
    Me.groupBox1.SuspendLayout()
    CType(Me.incEnfants, System.ComponentModel.ISupportInitialize).BeginInit()
    Me.SuspendLayout()
....
  End Sub 'InitializeComponent

  Public Shared Sub Main()
    Application.Run(New frmImpots)
  End Sub 'Main


  Private Sub btnEffacer_Click(ByVal sender As Object, ByVal e As System.EventArgs) _
  Handles btnEffacer.Click
    ' raz du formulaire
    incEnfants.Value = 0
    txtSalaire.Text = ""
    txtImpots.Text = ""
    rdNon.Checked = True
  End Sub 'btnEffacer_Click


  Private Sub txtSalaire_TextChanged(ByVal sender As Object, ByVal e As System.EventArgs) _
  Handles txtSalaire.TextChanged
    ' calculate button status
    btnCalculer.Enabled = txtSalaire.Text.Trim() <> ""
  End Sub 'txtSalaire_TextChanged


  Private Sub btnQuitter_Click(ByVal sender As Object, ByVal e As System.EventArgs) _
  Handles btnQuitter.Click
    ' end application
    Application.Exit()
  End Sub 'btnQuitter_Click


  Private Sub btnCalculer_Click(ByVal sender As Object, ByVal e As System.EventArgs) _
  Handles btnCalculer.Click
    ' is the salary correct?
    Dim intSalaire As Integer = 0
    Try
      ' salary recovery
      intSalaire = Integer.Parse(txtSalaire.Text)
      ' it must be >=0
      If intSalaire < 0 Then
        Throw New Exception("")
      End If
    Catch ex As Exception
      ' error msg
      MessageBox.Show(Me, "Salaire incorrect", "Erreur de saisie", MessageBoxButtons.OK, MessageBoxIcon.Error)
      ' focus on wrong field
      txtSalaire.Focus()
      ' select text for input field
      txtSalaire.SelectAll()
      ' back to visual interface
      Return
    End Try 'try-catch
    ' salary is correct - tax is calculated
    txtImpots.Text = "" & CLng(objImpôt.calculer(rdOui.Checked, CInt(incEnfants.Value), intSalaire))
  End Sub 'btnCalculer_Click
End Class
Here we use the assembly impots.dll, which is the result of compiling the impots class from Chapter 2. Recall that this assembly can be generated in console mode using the command
This command generates the file impots.dll, known as an assembly. This assembly can then be used in various projects. Here, in our project under VS.NET, we use the project properties window:
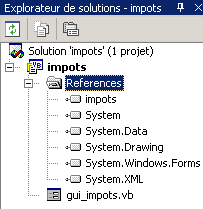
To add a reference (an assembly), we right-click on the References key above, select option and [Ajouter une référence], and specify the [impots.dll] assembly that we have placed in the project folder:
dos>dir
01/03/2004  14:39                9 250 gui_impots.vb
01/03/2004  14:37                4 096 impots.dll
01/03/2004  14:41               12 288 gui_impots.exe
Once the [impots.dll] assembly is included in the project, the [impots] class becomes known to the project. Previously, it was not. Another method is to include the impots.vb source file in the project. To do this, in the project properties window, right-click on the project, select option [Ajouter/Ajouter un élément existant], and specify the file impots.vb.