10. Appendices
Here we explain how to install the tools used in this document on Windows 7 through 10 machines. The reader should adapt these instructions to their own environment.
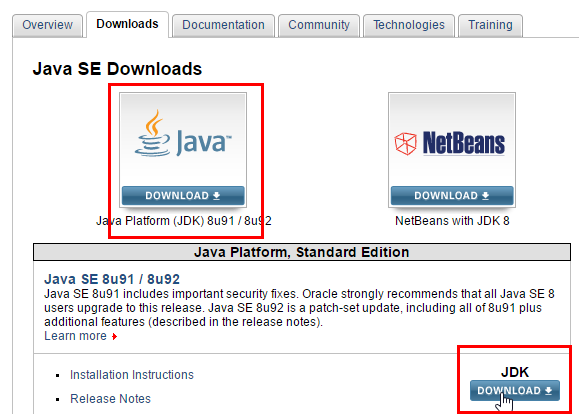
10.1. Installing JDK
The most recent version, JDK, can be found at URL [http://www.oracle.com/technetwork/java/javase/downloads/index.html] (April 2016). We will refer to the JDK installation folder as <jdk-install>.
 |
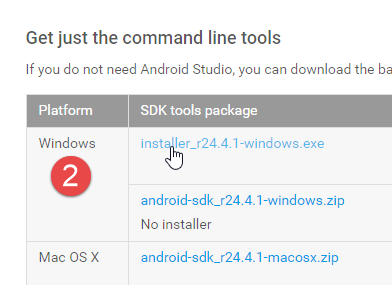
10.2. Installing the SDK Android Manager
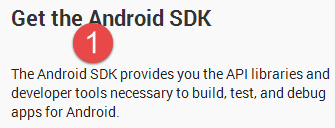 |
- in [1], why we need the SDK Android Manager;
The SDK Android Manager can be found at [https://developer.android.com/studio/index.html#downloads] (May 2016).
 |
Install the SDK Manager. We will refer to its installation directory as <sdk-manager-install>. Launch it.
The project has been configured for (see section 9.3.2):
- SDK API 23 [2];
- SDK Build-tools 23.0.3 [3];
- SDK Tool 25.1.3 [4]
Make sure you have downloaded these items.
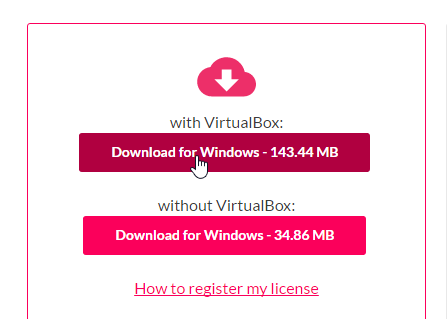
10.3. Installing the Genymotion emulator manager
The emulators provided with Android SDK are slow, which discourages their use. The company [Genymotion] offers a high-performance emulator. It is available at URL [https://cloud.genymotion.com/page/launchpad/download/] (May 2016).
You will need to register to obtain a version for personal use. Download the [Genymotion] product along with the VirtualBox virtual machine:
We will refer to the [Genymotion] installation folder as <genymotion-install>. Launch [Genymotion]. Then download an image for a tablet:
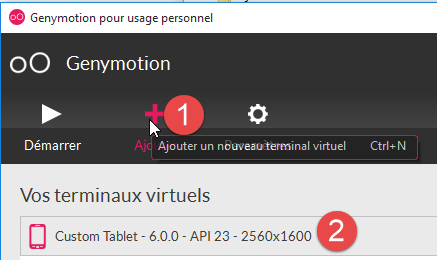 |
- in [1], add the virtual terminal described in [2];
10.4. Installation of IDE IntellijIDEA Community Edition
The IDE [ Intellij IDEA Community Edition] is available at the URL [https://www.jetbrains.com/idea/#chooseYourEdition]:
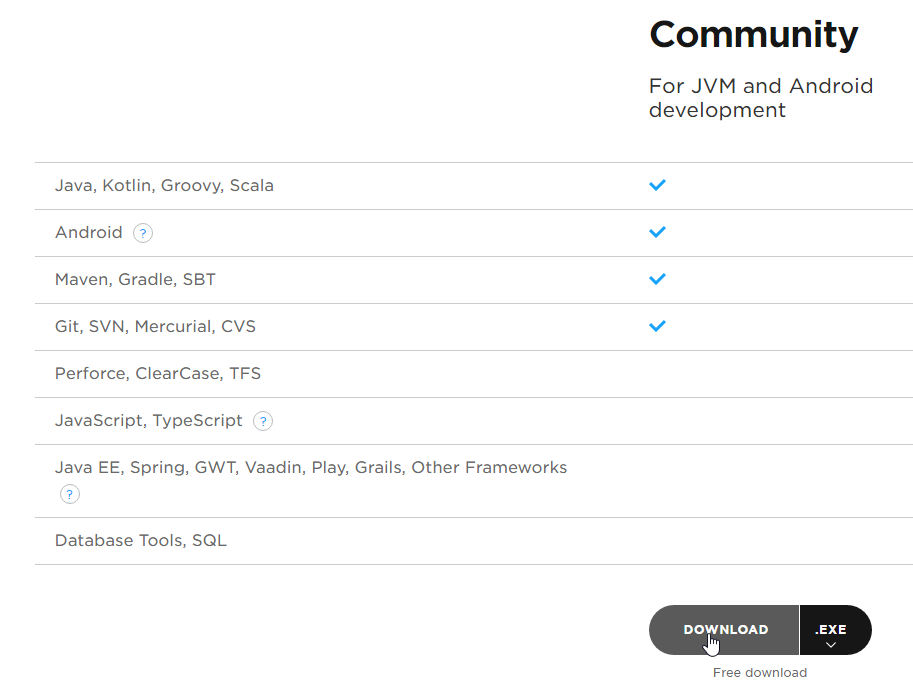 |
Install the IDE and then launch it.
 | 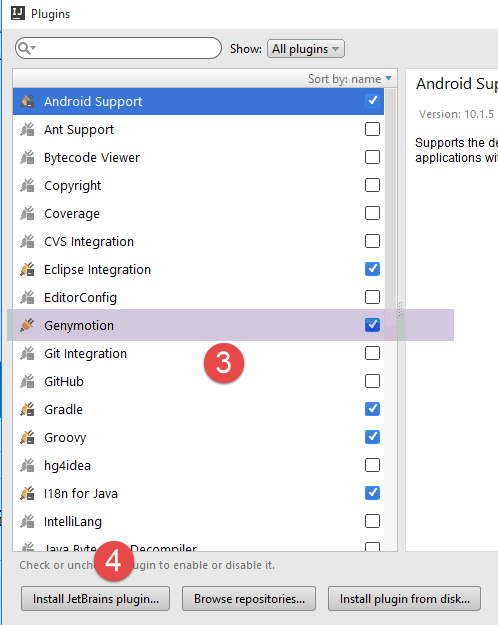 |
- In [1-2], configure the plugins;
- In [3-4], add the [Genymotion] plugin to IDE;
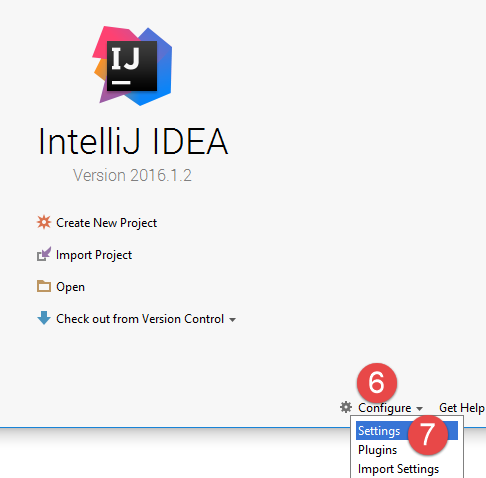 |
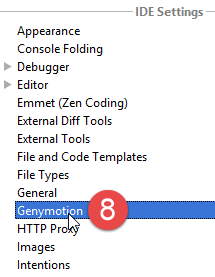
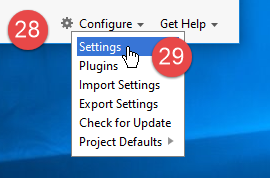
- In [6-7], configure IDE;
 | 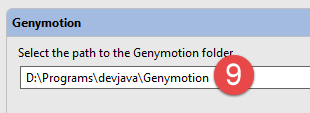 |
- in [8-9], specify the installation directory for the [Genymotion] emulator manager;
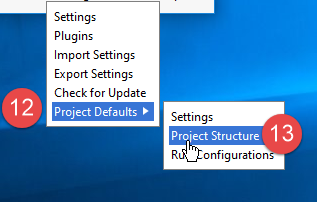 |
- in [12-13], configure the default project type;
 |  |
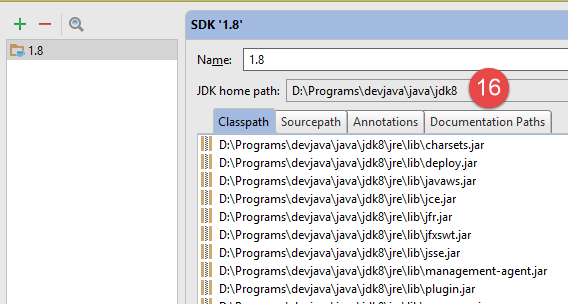 |
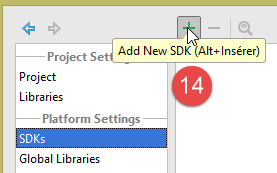
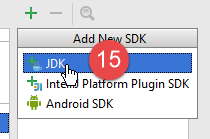
- in [14-16], configure JDK;
 |
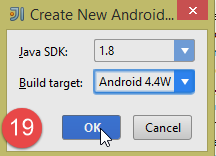 | 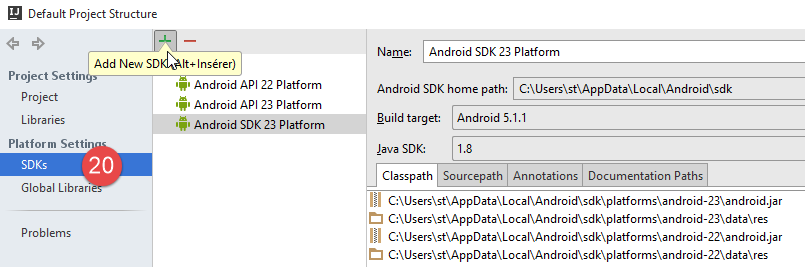 |
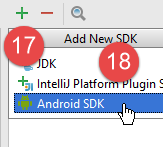
- In [17-20], configure the Android SDK;
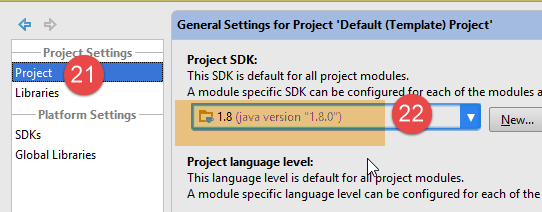 |
- In [21-22], the default JDK for projects is specified;
 |  |
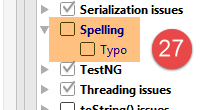 |
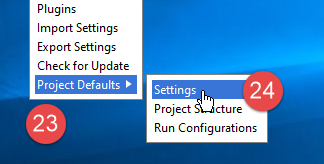
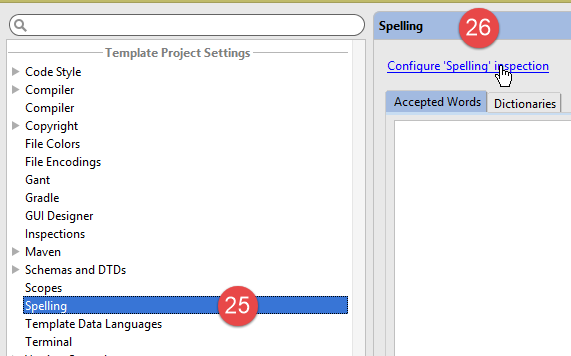
- In [23-27], disable spell check, which is set to English by default;
 | 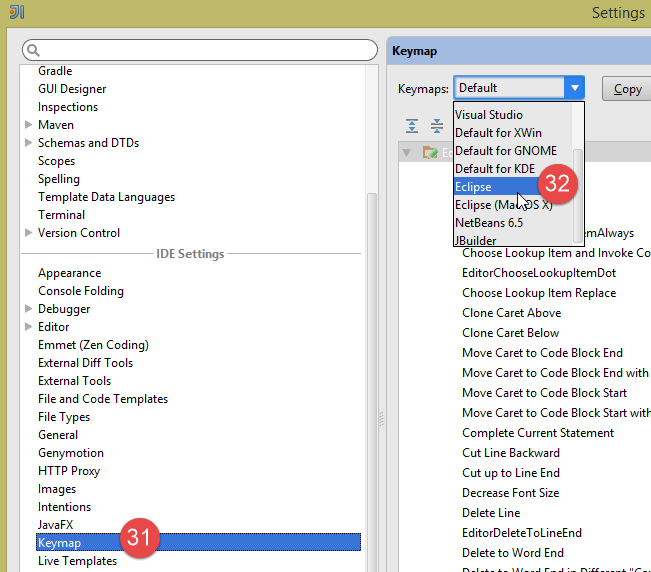 |
- In [28-32], choose the type of keyboard shortcuts you want. You can keep the default one from Intellij or choose one from another IDE that you are more accustomed to;
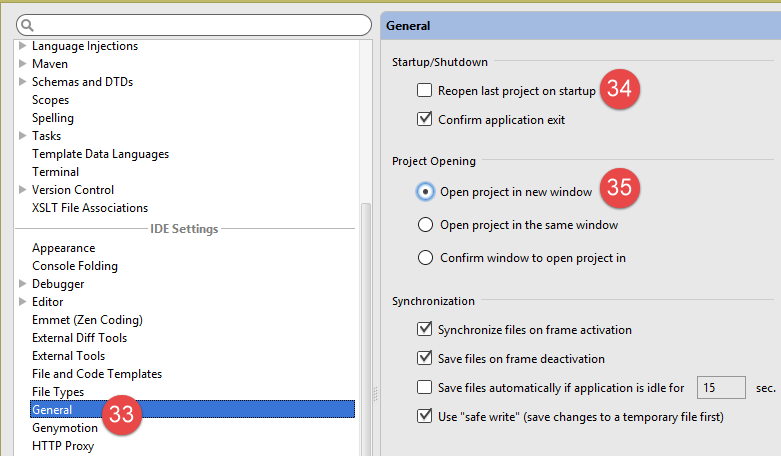 |
- In [33-35], configure IDE for multiple projects. It can manage several projects in the same window or in different windows;
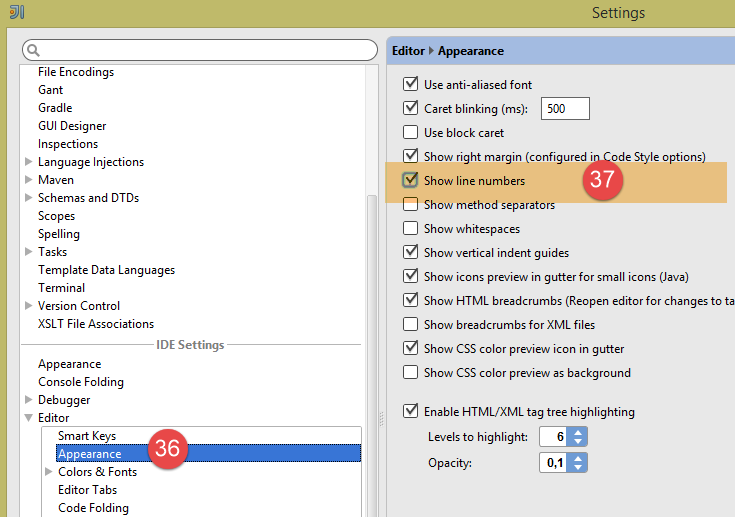 |
- In [36-37], number the lines by default. This will allow you to quickly find the line that caused an exception;
10.5. Using the Examples
The example projects for IntellijIDEA are available |ICI|. Section 1.3 explains how to open them.
10.6. Managing the jSON in Java
Transparently for the developer, the [Spring MVC] framework uses the JSON [Jackson] library. To illustrate what JSON (JavaScript Object Notation), we present here a program that serializes objects into JSON and performs the reverse operation by deserializing the generated JSON strings to recreate the original objects.
The 'Jackson' library allows you to construct:
- the JSON string of an object: new ObjectMapper().writeValueAsString(object);
- an object from a string JSON: new ObjectMapper().readValue(jsonString, Object.class).
Both methods are likely to throw a IOException. Here is an example.
 |
The project above is a Maven project with the following [pom.xml] file:
<?xml version="1.0" encoding="UTF-8"?>
<project xmlns="http://maven.apache.org/POM/4.0.0"
         xmlns:xsi="http://www.w3.org/2001/XMLSchema-instance"
         xsi:schemaLocation="http://maven.apache.org/POM/4.0.0 http://maven.apache.org/xsd/maven-4.0.0.xsd">
  <modelVersion>4.0.0</modelVersion>

  <groupId>istia.st</groupId>
  <artifactId>json</artifactId>
  <version>1.0-SNAPSHOT</version>

  <dependencies>
    <dependency>
      <groupId>com.fasterxml.jackson.core</groupId>
      <artifactId>jackson-databind</artifactId>
      <version>2.3.3</version>
    </dependency>
  </dependencies>
</project>
- lines 12–16: the dependency that imports the 'Jackson' library;
The [Personne] class is as follows:
package istia.st.json;

public class Personne {
    // data
    private String nom;
    private String prenom;
    private int age;

    // manufacturers
    public Personne() {

    }

    public Personne(String nom, String prénom, int âge) {
        this.nom = nom;
        this.prenom = prénom;
        this.age = âge;
    }

    // signature
    public String toString() {
        return String.format("Personne[%s, %s, %d]", nom, prenom, age);
    }

    // getters and setters
...
}
The [Main] class is as follows:
package istia.st.json;

import com.fasterxml.jackson.databind.ObjectMapper;

import java.io.IOException;
import java.util.HashMap;
import java.util.Map;

public class Main {
  // the serialization / deserialization tool
  static ObjectMapper mapper = new ObjectMapper();

  public static void main(String[] args) throws IOException {
    // creation of a person
    Personne paul = new Personne("Denis", "Paul", 40);
    // display Json
    String json = mapper.writeValueAsString(paul);
    System.out.println("Json=" + json);
    // instantiation Person from Json
    Personne p = mapper.readValue(json, Personne.class);
    // person display
    System.out.println("Personne=" + p);
    // a picture
    Personne virginie = new Personne("Radot", "Virginie", 20);
    Personne[] personnes = new Personne[]{paul, virginie};
    // display Json
    json = mapper.writeValueAsString(personnes);
    System.out.println("Json personnes=" + json);
    // dictionary
    Map<String, Personne> hpersonnes = new HashMap<String, Personne>();
    hpersonnes.put("1", paul);
    hpersonnes.put("2", virginie);
    // display Json
    json = mapper.writeValueAsString(hpersonnes);
    System.out.println("Json hpersonnes=" + json);
  }
}
Executing this class produces the following screen output:
Key takeaways from the example:
- the object [ObjectMapper] required for the transformations JSON / Object: line 11;
- the transformation [Personne] --> JSON: line 17;
- the transformation JSON --> [Personne]: line 20;
- the exception [IOException] thrown by both methods: line 13.
Table of Contents
1Introduction 5
1.1Background 5
1.2 Tools Used 6
1.3 The example codes 6
2An introductory example 9
2.1The architecture of the example application 9
2.2The executable 9
2.3 The synchronous interface 11
2.4 The synchronous call 12
2.5 Testing Synchronous Calls 13
2.6 The Asynchronous Interface and Its Implementation 14
2.7 The Asynchronous Call 16
2.8 Testing Asynchronous Calls 19
2.8.1 with the [Schedulers.io] scheduler 20
2.8.2 with the [Schedulers.computation] scheduler 20
2.8.3 with scheduler [Schedulers.newThread] 21
2.8.4 with schedulers [Schedulers.trampoline, Schedulers.immediate] 22
2.9Boundary Cases 22
2.10 Conclusion 24
3Signatures of Generic Classes and Methods 27
4Java 8 lambda functions 32
4.1Example-01 - Functional interfaces and lambdas 32
4.2Example-02 - The Predicate<T> functional interface 34
4.3 Example 03 - The Functional Interface Function<T,R> 37
4.4Example-04 - The Consumer<T> functional interface 38
4.5Example-05 - the functional interface BiConsumer<T,U> 40
4.6Example-06 - the functional interface BiFunction<T,U,R> 41
4.7Example-07 - the Supplier<T> functional interface 43
5The Stream<T> type in Java 8 45
5.1Example-01 - The Stream class 45
5.2Example-02 - Parallel Processing of Stream Elements 47
5.3 Example 3 - Parallel Processing of Stream Elements 48
5.4Example-04 - Filtering a Stream 50
5.5Example-05 - Creating a Stream<T2> from a Stream<T1> 52
5.6Example-06 - Other methods of the Stream<T> class 53
5.6.1[findFirst] 54
5.6.2[findAny] 55
5.6.3[skip] 56
5.6.4[limit] 58
5.6.5[count] 59
5.6.6[max, min] 60
5.6.7[reduce] 63
5.6.8[sorted] 63
5.6.9[anyMatch, noneMatch, allMatch] 65
5.6.10[collect(Collectors.groupingBy)] 65
5.6.11[distinct] 67
5.6.12[flatMap] 68
5.6.13 Primitive Number Flow Methods 71
6Functional Interfaces of the RxJava Library 72
6.1 Example-01: The [Action0] functional interface 72
6.2Example-02, 03: The [Actioni] functional interface 73
6.3 Example-04, 05: The [Funci] functional interface 74
7The RxJava library 77
7.1 Creating and subscribing to observables 77
7.1.1Example-01: The [Observable.from] Method 77
7.1.2Example-03: The Observer Class 82
7.1.3Example-04: the [Observable.create] method 84
7.1.4Example-05: Refactoring of [Exemple-04] 86
7.2 Execution Thread, Observation Thread 88
7.2.1Example-06: Observable and Observer in a Thread Other Than [main] 88
7.2.2Example-07: Observable and Observer in Two Different Threads 90
7.3 Predefined Observables 92
7.3.1Example-08: The [Observable.range] method 92
7.3.2Example-09: the Observable.[interval, take, doNext] methods 96
7.3.3Examples-10/12: the Observable.[error, empty, never] methods 98
7.4 Multithreading 102
7.4.1Example-13: Action thread, observation thread 103
7.5 Combinations of Multiple Observables 106
7.5.1Example 14: Merging two observables with [Observable.merge] 106
7.5.2Example 15: Concatenating two observables with [Observable.concat] 108
7.5.3Example-16: Combining two observables with [Observable.zip] 109
7.5.4Example-17: Combining two observables with [Observable.combineLatest] 111
7.5.5Example-18: Combining two observables with [Observable.amb] 113
7.6Processing Chain for an Observable 114
7.6.1Example-19: Transforming an observable with [Observable.map] 114
7.6.2Example-20: Filtering an observable with [Observable.filter] 116
7.6.3Example-21: Transforming an observable with [Observable.flapMap] 117
7.6.4Example-22: Other methods of the [Observable] class 123
7.7 Schedulers 127
7.7.1Example-23: The [Schedulers.computation] scheduler 127
7.7.2Example 24: The [Schedulers.io] Scheduler 128
7.7.3Example 25: the scheduler [Schedulers.newThread] 129
7.7.4Example 26: Schedulers [Schedulers.immediate, Schedulers.trampoline] 130
7.8 Conclusion 133
8RxJava in the Swing Environment 134
8.1 Introduction 134
8.2 Code Structure 135
8.3 Project Execution 136
8.4 The Synchronous Service 136
8.5 The Asynchronous Service 139
8.6The graphical user interface 141
8.7 Instantiating the graphical user interface 143
8.8Executing Synchronous Requests 144
8.9Executing asynchronous requests 145
9RxJava in the Android Environment 149
9.1 Introduction 149
9.2 The Web Service / jSON 149
9.2.1The Intellij Project Idea 150
9.2.2 The project's Gradle dependencies 151
9.2.3The [métier] layer 153
9.2.4 The Web Service / JSON 156
9.2.5 Spring Project Configuration 160
9.2.6Running the Web Server 161
9.3 The Android Client 161
9.3.1 RxAndroid 161
9.3.2The Intellij Project Idea 162
9.3.3Running the Intellij and Idea projects 164
9.3.4The project's Gradle dependencies 166
9.3.5 The Android application manifest 167
9.3.6The [DAO] layer 168
9.3.6.1The [IDao] interface of the [DAO] layer 168
9.3.6.2Implementation of the [DAO] layer 170
9.3.7Application Views 172
9.3.7.1The [MyFragment] Class 174
9.3.7.2The [RequestFragment] fragment of the query 176
9.3.7.3The [ResponseFragment] fragment of the response 177
9.3.7.4 The Android activity [MainActivity] 178
9.3.7.5The fragment [RequestFragment] 185
9.3.7.6 The fragment [ResponseFragment] 187
9.3.8 Examples of Observables 190
9.3.8.1Example-01 190
9.3.8.2Example-02 193
9.3.8.3Example-03 195
9.3.8.4Example-04 197
9.3.8.5Example-05 198
9.3.8.6To continue 202
9.3.9Conclusion 202
10Appendices 203
10.1Installing a JDK 203
10.2Installing the SDK Android Manager 203
10.3 Installing the Genymotion Emulator Manager 204
10.4 Installing the IDE IntellijIDEA Community Edition 205
10.5Using the Examples 210
10.6 Managing jSON in Java 211