5. The view and its template
5.1. Introduction
Let’s return to the architecture of a ASP.NET MVC application:
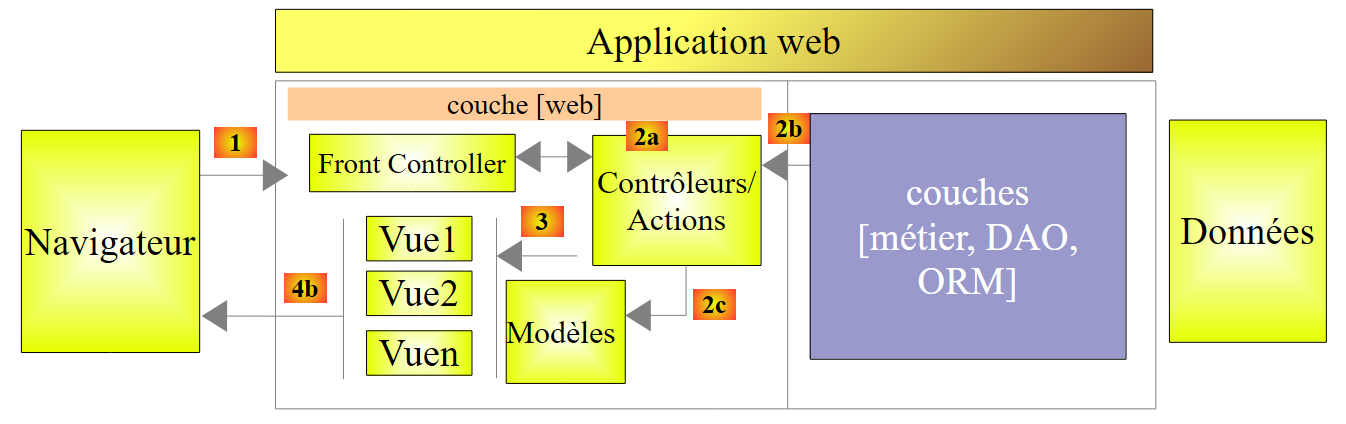 |
In the previous chapter, we examined how ASP.NET MVC presented the information from the request [1] to an action [2a] in the form of a model that could contain validation constraints. This model was provided as input to the action, and we called it the action model. We are now interested in the most common result of an action, the type [ViewResult], which corresponds to a view V [3] accompanied by its model M [2c]. This model will be called the V view model, not to be confused with the action model we just studied. One is an input to the action, the other is an output.
Let’s start by creating a new project named [Exemple-03] [1], still within the same solution, of the basic type ASP.NET MVC:
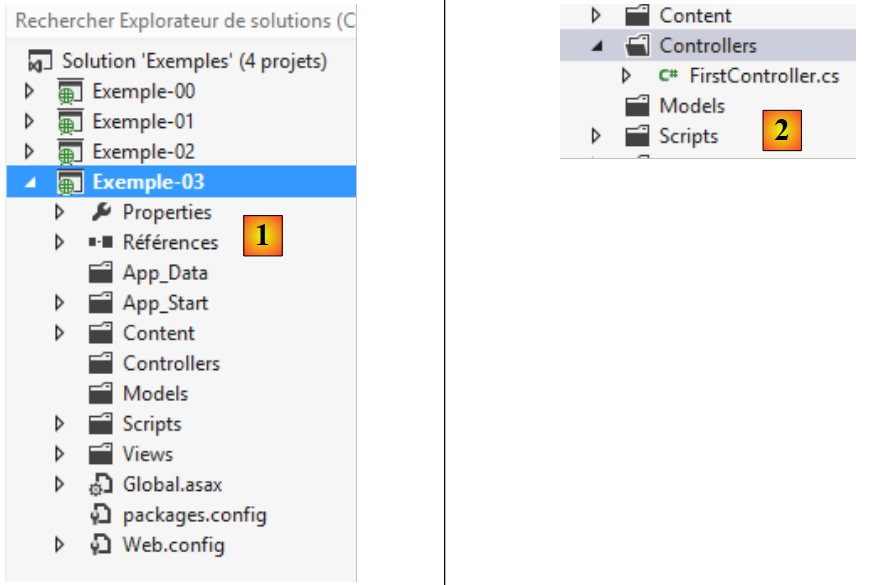 |
Let’s create a controller named [First] [2]. The generated code for this controller is as follows:
using System.Web.Mvc;

namespace Exemple_03.Controllers
{
  public class FirstController : Controller
  {
    public ActionResult Index()
    {
      return View();
    }

  }
}
- lines 7–10: an action [Index] has been created. The result type of the method [Index] is that of the class [ActionResult], from which most possible results of an action are derived;
- line 9: the [View] method of the [Controller] class (line 5) returns a [ViewResult] type that derives from [ActionResult]. This method supports numerous overloads. We will look at a few of them. The main one is as follows:
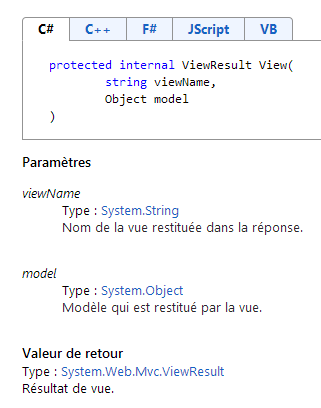 |
- the first parameter is the name of the view. If it is missing, the view used is the one with the same name as the action that produces the [ViewResult] and will be searched for in the [/Views/{controller}] folder, where {controller} is the name of the controller;
- the second is the view template. If it is missing, the view has no template.
The [Index] method below:
public ActionResult Index()
    {
      return View();
}
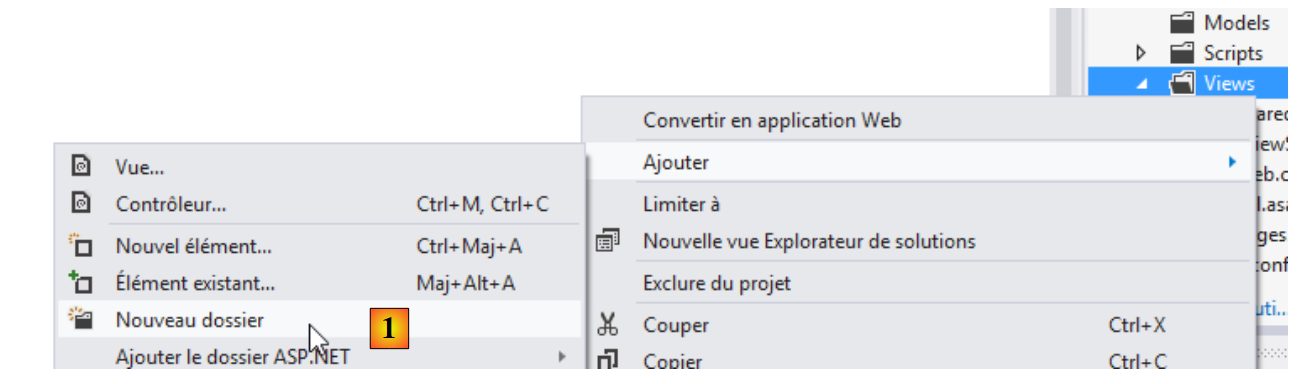
requests that the view [/Views/First/Index.cshtml] be displayed. It does not pass any template to it. Let’s create the folder [/Views/First]:
 |
then create the view [Index] [2] inside it:
 |
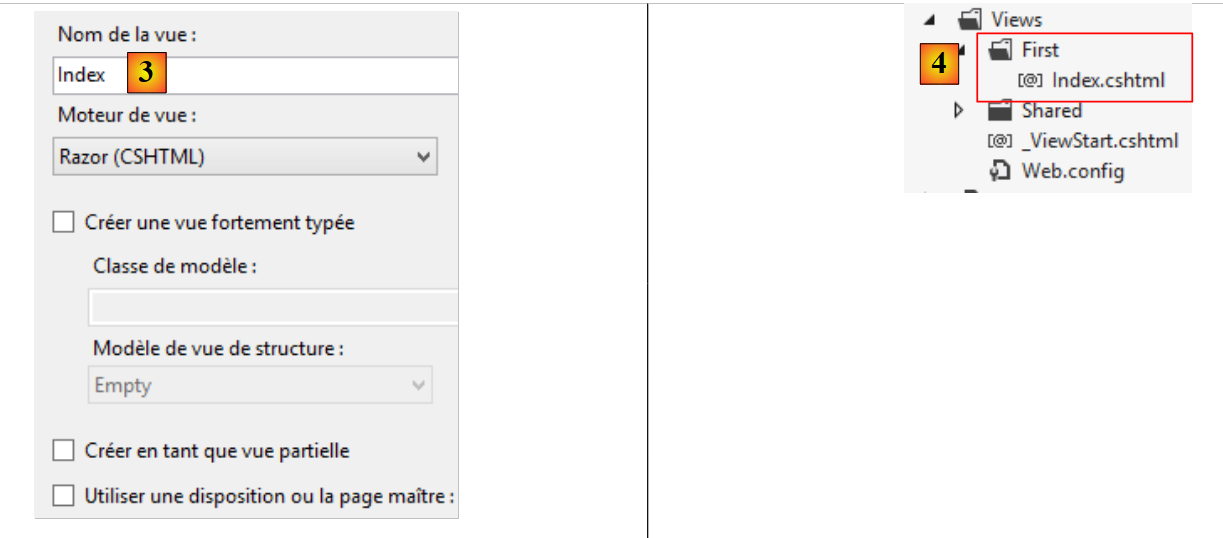 |
We specify the view name as [3]. This is created in [4]. The generated code is as follows:
@{
    Layout = null;
}

<!DOCTYPE html>

<html>
<head>
    <meta name="viewport" content="width=device-width" />
    <title>Index</title>
</head>
<body>
    <div>

    </div>
</body>
</html>
This is classic HTML except for lines 1–3, which are C# code. The program that manages the views is called a view engine. It handles everything that isn’t HTML to convert it into HTML. Ultimately, this is what will be sent to the client. The view engine here is called [Razor]. It allows C# code to be included in a view. [Razor] will interpret this C# code and generate HTML code from it. Here are some basic rules for including C# code in a view:
- The switch from HTML to C# occurs when the @ character is encountered (line 1). If this character introduces a code block, curly braces are added (lines 1 and 3). If it introduces a variable whose value you want to retrieve, simply write @variable;
- The switch from C# to HTML occurs when the < character is encountered (line 5). Sometimes, you may need to force this switch, particularly when including plain text without the HTML tag in the page. In that case, use the <text> tag to insert the text: <text>plain text here</text>.
Line 2 above indicates that the [Index] view has no master page.
Let’s modify the view as follows:
@{
  Layout = null;
  string vue = "Index";
}

<!DOCTYPE html>

<html>
<head>
  <meta name="viewport" content="width=device-width" />
  <title>Index</title>
</head>
<body>
  <div>
    <h3>Vue @vue</h3>
  </div>
</body>
</html>
- line 3: defines a C# variable;
- line 15: displays the value of this variable.
Now let's request the URL [/First/Index]:
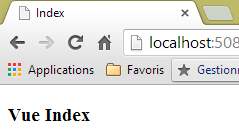 |
The received HTML code is as follows:
This is a pure HTML document. All C# code has been removed.
5.2. Use [ViewBag] to pass information to the view
We create a new action called [Action01] associated with the view [Action01.cshtml]:
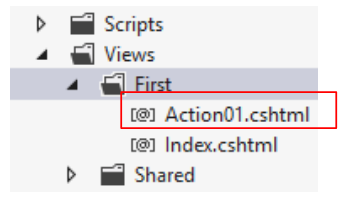 |
The [Action01] action is as follows:
    // Action01
    public ViewResult Action01()
    {
      ViewBag.info = string.Format("Contrôleur={0}, Action={1}", RouteData.Values["controller"], RouteData.Values["action"]);
      return View();
}
- line 4: we use the controller's [ViewBag] property. This is a dynamic object to which properties can be added, as shown in line 4. A unique feature of this object is that it is also accessible to the view. This is therefore a way to pass information to it;
- Line 5: The action’s default view is requested. This is the [/First/Action01.cshtml] view. No template is passed to it.
The view [Action01.cshtml] is as follows:
@{
  Layout = null;
}

<!DOCTYPE html>

<html>
<head>
  <meta name="viewport" content="width=device-width" />
  <title>Action01</title>
</head>
<body>
  <div>
    <h4>@ViewBag.info</h4>
  </div>
</body>
</html>
- Line 14: The property [ViewBag.info] is displayed.
Let's test it. We request the URL [/First/Action01]:
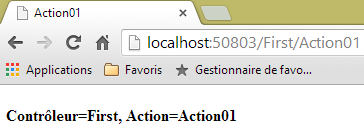 |
5.3. Use a strongly typed model to pass information to the view
The previous method has the drawback of not allowing for error detection before execution. Thus, if the [Action01.cshtml] view uses the code
<h4>@ViewBag.Info</h4>
an error will occur because the property [Info] does not exist. The one created by the action [Action01] is named [info]. We can therefore use a strongly typed model to avoid this issue.
In one of the examples discussed earlier, the action was as follows:
    // Action10
    public ContentResult Action10(ActionModel03 modèle)
    {
      string erreurs = getErrorMessagesFor(ModelState);
      string texte = string.Format("email={0}, jour={1}, info1={2}, info2={3}, info3={4}, erreurs={5}",
        modèle.Email, modèle.Jour, modèle.Info1, modèle.Info2, modèle.Info3, erreurs);
      return Content(texte, "text/plain", Encoding.UTF8);
}
The [Action10] action sent six pieces of information (Email, Day, Info1, Info2, Info3, errors) to its client in the form of a string. We will pass this information to a view model named [ViewModel01]. Since this model reuses information from [ActionModel03], we will derive it from that class.
We start by copying [ActionModel03] from the [Exemple-02] project into the current [Exemple-03] project:
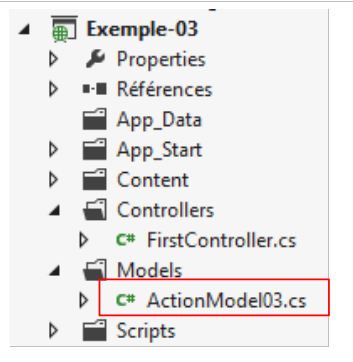 |
and we change its namespace to match that of the [Exemple-03] project:
using System.ComponentModel.DataAnnotations;
namespace Exemple_03.Models
{
  public class ActionModel03
  {
    [Required(ErrorMessage = "Le paramètre email est requis")]
    [EmailAddress(ErrorMessage = "Le paramètre email n'a pas un format valide")]
    public string Email { get; set; }

    [Required(ErrorMessage = "Le paramètre jour est requis")]
    [RegularExpression(@"^\d{1,2}$", ErrorMessage = "Le paramètre jour doit avoir 1 ou 2 chiffres")]
    public string Jour { get; set; }

    [Required(ErrorMessage = "Le paramètre info1 est requis")]
    [MaxLength(4, ErrorMessage = "Le paramètre info1 ne peut avoir plus de 4 caractères")]
    public string Info1 { get; set; }

    [Required(ErrorMessage = "Le paramètre info2 est requis")]
    [MinLength(2, ErrorMessage = "Le paramètre info2 ne peut avoir moins de 2 caractères")]
    public string Info2 { get; set; }

    [Required(ErrorMessage = "Le paramètre info3 est requis")]
    [MinLength(4, ErrorMessage = "Le paramètre info3 doit avoir 4 caractères exactement")]
    [MaxLength(4, ErrorMessage = "Le paramètre info3 doit avoir 4 caractères exactement")]
    public string Info3 { get; set; }
  }
}
- line 2: the new namespace;
Then we create the [ViewModel01] class:
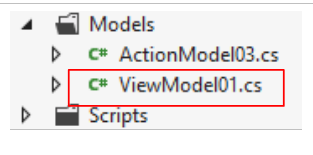 |
The code for [ViewModel01] is as follows:
namespace Exemple_03.Models
{
  public class ViewModel01 : ActionModel03
  {
    public string Erreurs { get; set; }
  }
}
- line 3: the class inherits from [ActionModel03] and therefore from the properties of [Email, Jour, Info1, Info2, Info3];
- line 5: we add the [Erreurs] property to it.
We now write the action [Action02], which:
- takes the action template [ActionModel03] as input;
- and outputs the view template [ViewModel01].
Its code is as follows:
    // Action02
    public ViewResult Action02(ActionModel03 modèle)
    {
      string erreurs = getErrorMessagesFor(ModelState);
      return View(new ViewModel01(){Email=modèle.Email, Jour=modèle.Jour, Info1=modèle.Info1, Info2=modèle.Info2, Info3=modèle.Info3, Erreurs=erreurs});
}
- line 1: [Action02] receives the action model [ActionModel03]. It returns a result of type [ViewResult];
- line 4: errors related to the action template [ActionModel03] are aggregated into the string [erreurs]. The method [getErrorMessagesFor] was described on page 65 and has been included in the controller [First] of the new project;
- Line 5: The [View] method is called with a parameter. This parameter is the view model. The view is not specified. Therefore, the default view [/Views/First/Action02] will be used. The view model [ViewModel01] is instantiated and initialized with the five pieces of information from the action model [ActionModel03] and the information [erreurs] constructed in line 4.
We now construct the view [/First/Action02.cshtml]:
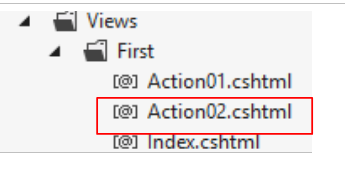 |
Its code is as follows:
@model Exemple_03.Models.ViewModel01
@{
  Layout = null;
}

<!DOCTYPE html>

<html>
<head>
  <meta name="viewport" content="width=device-width" />
  <title>Action02</title>
</head>
<body>
  <h3>Informations du modèle de vue</h3>
  <ul>
    <li>Email : @Model.Email</li>
    <li>Jour : @Model.Jour</li>
    <li>Info1 : @Model.Info1</li>
    <li>Info2 : @Model.Info2</li>
    <li>Info3 : @Model.Info3</li>
    <li>Erreurs : @Model.Erreurs</li>
  </ul>
</body>
</html>
- The new feature is in line 1. The notation [@model] defines the type of the view model. This model is then referenced by the notation [@Model] (lines 16–21);
- Lines 15–22: The model information is displayed in a list.
Let’s look at a few examples of executing the [Action02] action.
First, without parameters:
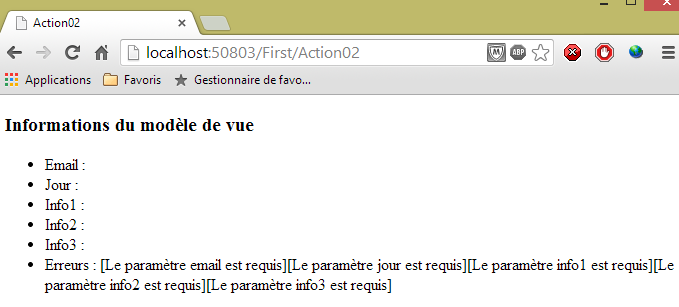 |
then with incorrect parameters:
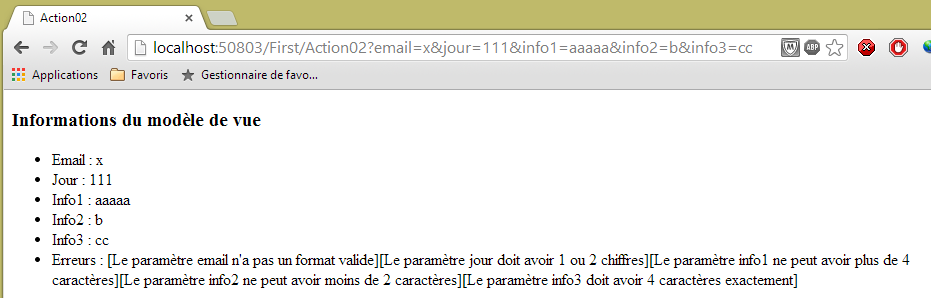 |
then with correct parameters:
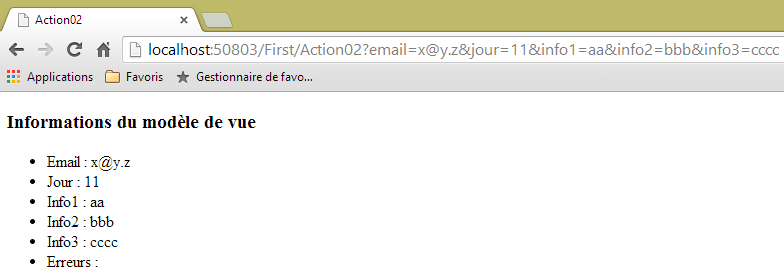 |
In this example, the view template [ViewModel01] uses the information from the action template [ActionModel03]. This is often the case. We can then use a single template that serves as both an action template and a view template. We create a new template, [ActionModel04]:
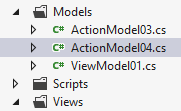 |
which will be as follows:
using System.ComponentModel.DataAnnotations;
using System.Web.Mvc;
namespace Exemple_03.Models
{
  [Bind(Exclude="Erreurs")]
  public class ActionModel04
  {
    // ---------------------- Action --------------------------------
    [Required(ErrorMessage = "Le paramètre email est requis")]
    [EmailAddress(ErrorMessage = "Le paramètre email n'a pas un format valide")]
    public string Email { get; set; }

    [Required(ErrorMessage = "Le paramètre jour est requis")]
    [RegularExpression(@"^\d{1,2}$", ErrorMessage = "Le paramètre jour doit avoir 1 ou 2 chiffres")]
    public string Jour { get; set; }

    [Required(ErrorMessage = "Le paramètre info1 est requis")]
    [MaxLength(4, ErrorMessage = "Le paramètre info1 ne peut avoir plus de 4 caractères")]
    public string Info1 { get; set; }

    [Required(ErrorMessage = "Le paramètre info2 est requis")]
    [MinLength(2, ErrorMessage = "Le paramètre info2 ne peut avoir moins de 2 caractères")]
    public string Info2 { get; set; }

    [Required(ErrorMessage = "Le paramètre info3 est requis")]
    [MinLength(4, ErrorMessage = "Le paramètre info3 doit avoir 4 caractères exactement")]
    [MaxLength(4, ErrorMessage = "Le paramètre info3 doit avoir 4 caractères exactement")]
    public string Info3 { get; set; }

    // ---------------------- view --------------------------------
    public string Erreurs { get; set; }
  }
}
- lines 8-28: the action model with its integrity constraints. These fields will also be part of the view;
- line 31: a property specific to the view model. It was excluded from the action model by the annotation on line 5.
We create the following new action [Action03]:
    // Action03
    public ViewResult Action03(ActionModel04 modèle)
    {
      modèle.Erreurs = getErrorMessagesFor(ModelState);
      return View(modèle);
}
- line 2: [Action03] receives the action model of type [ActionModel04];
- line 5: and returns this same model as the view model;
- line 4: supplemented with the information [Erreurs];
All that remains is to create the view [/First/Action03.cshtml]:
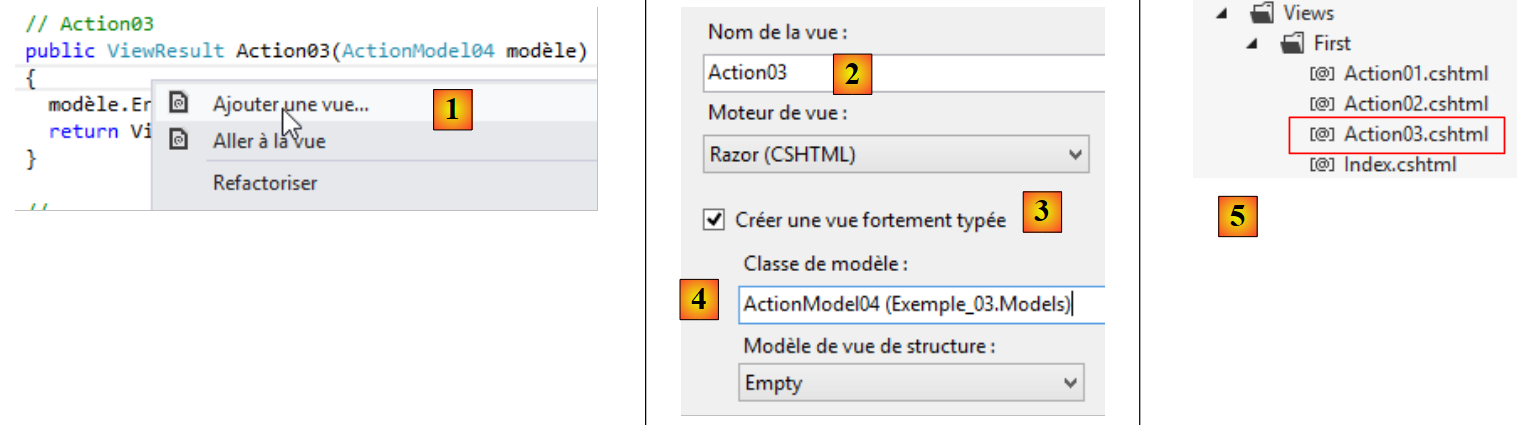 |
- in [1]: right-click in the code for [Action03], then [Ajouter une vue];
- to [2]: the default view name;
- in [3]: specify that you are creating a strongly typed view;
- in [4]: select the correct class from the drop-down list, in this case the class [ActionModel04];
- in [5]: the view created.
We give the view [Action03] the same code as the view [Action02]. Only the view template (line 1) and the page title (line 11) change:
@model Exemple_03.Models.ActionModel04
@{
  Layout = null;
}

<!DOCTYPE html>

<html>
<head>
  <meta name="viewport" content="width=device-width" />
  <title>Action03</title>
</head>
<body>
  <h3>Informations du modèle de vue</h3>
  <ul>
    <li>Email : @Model.Email</li>
    <li>Jour : @Model.Jour</li>
    <li>Info1 : @Model.Info1</li>
    <li>Info2 : @Model.Info2</li>
    <li>Info3 : @Model.Info3</li>
    <li>Erreurs : @Model.Erreurs</li>
  </ul>
</body>
</html>
Now let's call action [Action03] without any parameters:
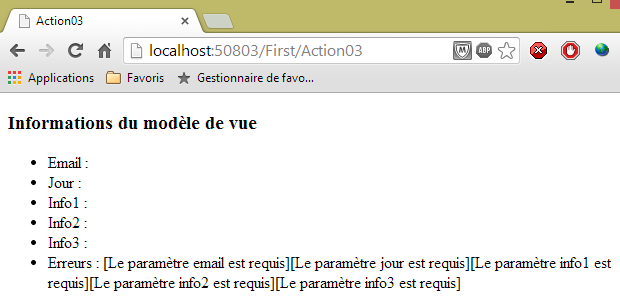 |
The results are the same as before. It is common to use the same model for both the action and the view, since the view model often reuses information from the action model. We therefore use a broader model that can be used by both the action and the view it generates. We must take care to exclude from the data binding any information that does not belong to the action model. Otherwise, a knowledgeable user could initialize parts of the view model without our knowledge.
5.4. [Razor] – Getting Started
We will now present some elements of the [Razor] views, primarily the foreach and if statements.
Suppose we want to display a list of people in a table HTML. The view model could be as follows [ViewModel02]:
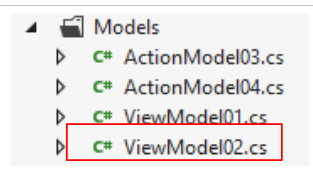 |
namespace Exemple_03.Models
{
  public class ViewModel02
  {
    public Personne[] Personnes { get; set; }
    public ViewModel02()
    {
      Personnes = new Personne[] { new Personne { Nom = "Pierre", Age = 44 }, new Personne { Nom = "Pauline", Age = 12 } };
    }
  }

  public class Personne
  {
    public string Nom { get; set; }
    public int Age { get; set; }
  }
}
- The model view is the class [ViewModel02], lines 3–10;
- line 5: the model has an array of people of type [Personne] defined on lines 12–16;
- lines 6–10: the model’s constructor initializes the [Personnes] property from line 5 with an array of two people.
The action that produces this model as output will be the following [Action04]:
    // Action04
    public ViewResult Action04()
    {
      return View(new ViewModel02());
}
- line 2: the action has no input model;
- line 4: it passes its default view, an instance of the [ViewModel02] model that we just defined.
The [Action04.cshtml] view will display the [ViewModel02] model:
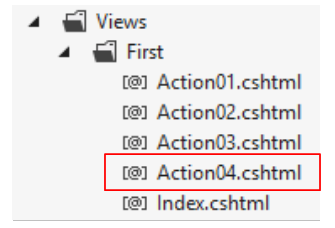 |
The code for the [Action04.cshtml] view is as follows:
@model Exemple_03.Models.ViewModel02
@using Exemple_03.Models

@{
  Layout = null;
}

<!DOCTYPE html>

<html>
<head>
  <meta name="viewport" content="width=device-width" />
  <title>Action04</title>
</head>
<body>
  <table border="1">
    <thead>
      <tr>
        <th>Nom</th>
        <th>Age</th>
      </tr>
    </thead>
    <tbody>
      @foreach (Personne p in Model.Personnes)
      {
        <tr>
          <td>@p.Nom</td>
          <td>@p.Age</td>
        </tr>
      }
    </tbody>
  </table>
</body>
</html>
- line 1: the view template;
- line 2: import of the namespace for the [Personne] class used on line 24;
- lines 16–32: the HTML table, which displays the individuals in the model;
- line 24: the start of the C# code is indicated by the @ character. The [foreach] statement will loop through all the people in the model;
- lines 26–27: the < character ends the C# code and starts the HTML code. Then, the @ character appears again to switch back to C# and write the person’s name. Then, the < character appears again, switching back to HTML mode;
- line 28: the person’s age is written.
Executing the [Action04] action yields the following result:
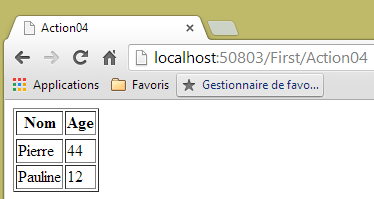 |
Other elements of a view can be populated by a collection: lists (dropdown or otherwise), radio buttons, and checkboxes. Consider the following new example, which displays a dropdown list.
The [ViewModel05] model will be as follows:
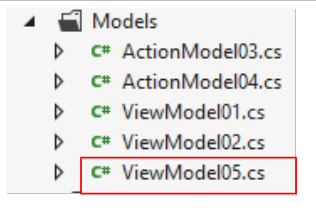 |
namespace Exemple_03.Models
{
  public class ViewModel05
  {
    public Personne2[] Personnes { get; set; }
    public int SelectedId { get; set; }

    public ViewModel05()
    {
      Personnes = new Personne2[] {
        new Personne2 { Id = 1, Prénom = "Pierre", Nom = "Martino" },
        new Personne2 { Id = 2, Prénom = "Pauline", Nom = "Pereiro" },
        new Personne2 { Id = 3, Prénom = "Jacques", Nom = "Alfonso" } };
      SelectedId = 2;
    }
  }

  public class Personne2
  {
    public int Id { get; set; }
    public string Nom { get; set; }
    public string Prénom { get; set; }
  }
}
- line 18: a class [Personne2] with three properties;
- line 3: the [ViewModel05] model for the view;
- line 5: the list of people to display in the drop-down list in the form [Prénom Nom];
- line 6: the [Id] of the person to be selected from the drop-down list;
- lines 8–16: the constructor that creates an array of three people (lines 10–13) and sets the [Id] of the person who should appear selected.
The view [Action05.cshtml] will display this template:
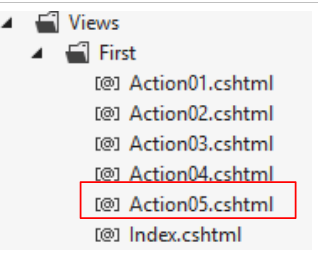 |
Its code is as follows:
@model Exemple_03.Models.ViewModel05
@using Exemple_03.Models

@{
  Layout = null;
}

<!DOCTYPE html>

<html>
<head>
  <meta name="viewport" content="width=device-width" />
  <title>Action05</title>
</head>
<body>
  <select>
    @foreach (Personne2 p in Model.Personnes)
    {
      string selected = "";
      if (p.Id == Model.SelectedId)
      {
        selected = "selected=\"selected\"";
      }
      <option value="@p.Id" @selected>@p.Prénom @p.Nom</option>
    }
  </select>
</body>
</html>
The characteristics of the HTML drop-down list were presented in section 2.5.2.6. To recap:
Combo | <select size="1" name="cmbValeurs"> <option value="1">choice1</option> <option selected="selected" value="2">choice2</option> <option value="3">choice3</option> </select> |
 |
HTML tag | <select size=".." name=".."> <option [selected="selected"] value=”v”>...</option> ... </select> displays the text between the <option>...</option> |
attributes | name="cmbValeurs": control name. size="1": number of visible list items. size="1" makes the list equivalent to a combo box. selected="selected": if this keyword is present for a list item, that item appears selected in the list. In our example above, the list item choice2 appears as the selected item in the combo box when it is first displayed. value=”v”: if the item is selected by the user, this value ([v]) is posted to the server. If this attribute is absent, the displayed and selected text is posted to the server. |
The code in lines 17–25 generates the <option> tags that are placed within the <select> tag on line 16.
- line 17: we iterate through the list of people in the model;
- line 20: we check if the current person is the one that should be selected. If so, we prepare the text selected="selected" to be inserted into the <option> tag;
- line 24: the <option> tag is written.
Let’s call the action [Action05]:
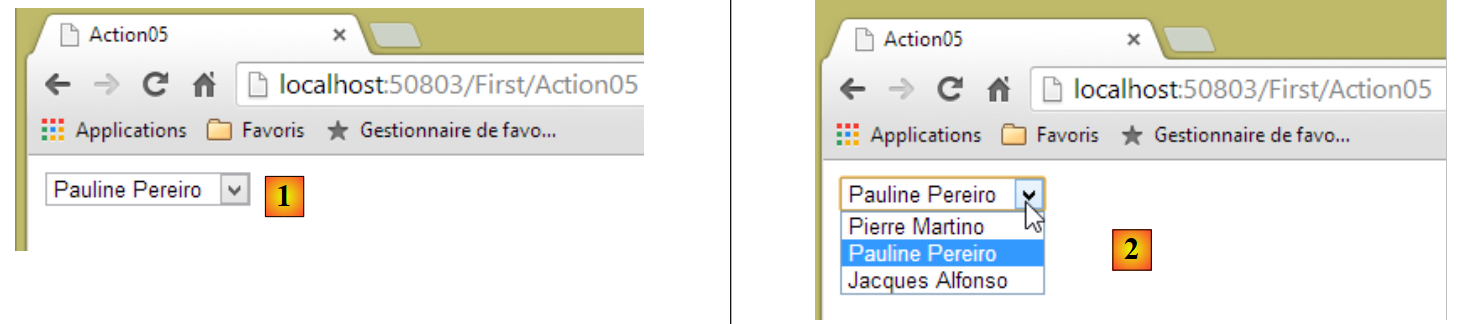 |
- in [1,2], the people are displayed in the form [Prénom Nom];
- in [1,2], the selected person is the one with [Id] equal to 2.
Let’s now examine the source code HTML for the page above:
<!DOCTYPE html>
<html>
<head>
<meta name="viewport" content="width=device-width" />
<title>Action05</title>
</head>
<body>
<select>
<option value="1" >Pierre Martino</option>
<option value="2" selected="selected">Pauline Pereiro</option>
<option value="3" >Jacques Alfonso</option>
</select>
</body>
</html>
- lines 10-12: the three <option> tags generated by the code [Razor];
- line 11: it is indeed the person from [Id]=2 who was selected.
The two examples above will suffice. When writing a [Razor] view, you must resist the temptation to include logic within it. The C# code would allow us to do so. However, in the MVC model, the logic must be in the action or in the lower layers ([Metier, DAO]) but not in the view. Even when following the MVC pattern, you may end up with a lot of logic in the view to calculate intermediate values. This may mean that the pattern used is not detailed enough. It must contain the final values the view needs so that it does not have to calculate them itself. A good view is one with minimal logic and where the view’s HTML structure remains clear. If too much C# code is inserted, the HTML structure can become unreadable.
In the example above, the drop-down list could be used by a user, and we would then want to know which person they selected. For this, we need a form.
5.5. Form – Getting Started
The form presented to the user will be as follows:
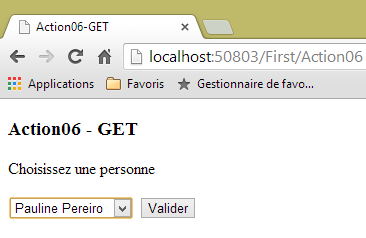 |
The view template will be the [ViewModel05] template used previously. The action that will display this view will be as follows:
    // Action06-GET
    [HttpGet]
    public ViewResult Action06()
    {
      return View("Action06Get",new ViewModel05());
}
- line 2: the action can only be requested by a command HTTP GET;
- line 5: the view [/First/Action06Get.cshtml] will be displayed using an instance of type [ViewModel05] as a template.
The view [/First/Action06Get.cshtml] will be as follows:
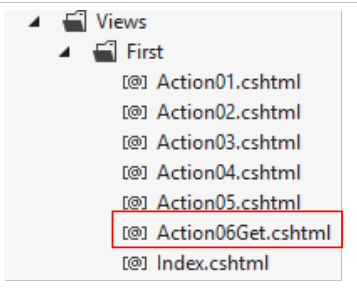 |
@model Exemple_03.Models.ViewModel05
@using Exemple_03.Models

@{
  Layout = null;
}

<!DOCTYPE html>

<html>
<head>
  <meta name="viewport" content="width=device-width" />
  <title>Action06-GET</title>
</head>
<body>
  <h3>Action06 - GET</h3>
  <p>Choisissez une personne</p>
  <form method="post" action="/First/Action06">
    <select name="personneId">
      @foreach (Personne2 p in Model.Personnes)
      {
        string selected = "";
        if (p.Id == Model.SelectedId)
        {
          selected = "selected=\"selected\"";
        }
        <option value="@p.Id" @selected>@p.Prénom @p.Nom</option>
      }
    </select>
    <input name="valider" type="submit" value="Valider" />
  </form>
</body>
</html>
The main new features are as follows:
- line 18: In order for the browser to transmit the information entered by a user, we need a form. It is delimited by the <form> tag on lines 18 and 31.
The <form> tag was introduced in section 2.5.2.1. Let’s review its characteristics:
form | |
HTML tag | <form name="..." method="..." action="...">...</form> |
attributes | name="frmexemple": form name - optional method="..." : method used by the browser to send the values collected in the form to the web server action="..." : URL to which the values collected in the form will be sent. A web form is enclosed within the tags <form>...</form>. The form can have a name (name="xx"). This applies to all controls found within a form. The purpose of a form is to collect information entered by the user via the keyboard or mouse and send it to a web server URL. Which one? The one referenced in the action="URL" attribute. If this attribute is missing, the information will be sent to the server of the document in which the form is located. A web client can use two different methods, called HTTP and PUT, to send data to a web server. The method="method" attribute, with method set to GET or POST, in the <form> tag tells the browser which method to use to send the information collected in the form to the URL specified by the action="URL" attribute. When the method attribute is not specified, the GET method is used by default. |
- line 18: we see that the form values will be sent to the URL [/First/Action06] via a HTTP POST command;
- Line 30: A form must have a button of type [submit]. This button triggers the submission of the entered values to the URL specified by the [action] attribute of the <form> tag.
What exactly will the browser transmit when the user clicks the [Valider] button? This was explained in section 2.5.3.1. Let’s recap what was said:
HTML control | visual | returned value(s) |
<input type="radio" value="Yes" name="R1"/>Yes <input type="radio" name="R1" value="no" checked="checked"/>No | 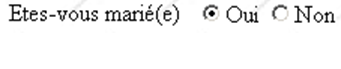 | R1=Yes - the value of the value attribute of the radio button selected by the user. |
<input type="checkbox" name="C1" value="one"/>1 <input type="checkbox" name="C2" value="two" checked="checked"/>2 <input type="checkbox" name="C3" value="three"/>3 |  | C1=one C2=two - values of the value attributes of the checkboxes selected by the user |
<input type="text" name="txtSaisie" size="20" value="a few words"/> |  | txtInput=Web+programming - text typed by the user in the input field. Spaces have been replaced by the + sign |
<input type="password" name="txtMdp" size="20" value="unMotDePasse"/> |  | txtPassword=thisissecret - text typed by the user in the input field |
<textarea rows="2" name="areaSaisie" cols="20"> line1 line2 line3 </textarea> |  | inputArea=the+basics+of+Web%0D%0A Web+programming - text typed by the user in the input field. %OD%OA is the end-of-line marker. Spaces have been replaced by the + sign |
<select size="1" name="cmbValeurs"> <option value='1'>choice1</option> <option selected="selected" value='2'>choice2</option> <option value='3'>option3</option> </select> | 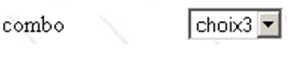 | cmbValues=3 - [value] attribute of the element selected by the user |
<select size="3" name="lst1"> <option selected="selected" value='1'>list1</option> <option value='2'>list2</option> <option value='3'>list3</option> <option value='4'>list4</option> <option value='5'>list5</option> </select> | 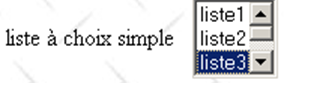 | lst1=3 - [value] attribute of the element selected by the user |
<select size="3" name="lst2" multiple="multiple"> <option selected="selected" value='1'>list1</option> <option value='2'>list2</option> <option selected="selected" value='3'>list3</option> <option value='4'>list4</option> <option value='5'>list5</option> </select> | 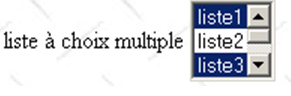 | lst2=1 lst2=3 - [value] attributes of the elements selected by the user |
<input type="submit" value="Send" name="cmdRenvoyer"/> | cmdResend=Submit - name and value attribute of the button used to send the form data to the server | |
<input type="hidden" name="secret" value="uneValeur"/> | secret=aValue - value attribute of the hidden field |
In our form, we have two tags that can send a value:
    <select name="personneId">
...
</select>
and
<input name="valider" type="submit" value="Valider" />
If the user selects person #2, the values will be posted in the following format:
The parameter names are those of the [name] attributes of the tags affected by POST. Without this attribute, the tags do not send a value. Thus, in the example above, we could omit the name="submit" attribute from the [submit] button. The value sent is the [value] attribute of the button. Here, this information is not relevant to us. Sometimes forms have multiple [submit]-type buttons. In that case, it is important to know which button was clicked. We will then assign the [name] attribute to the different buttons.
The select tag consists of a series of option tags:
<select name="personneId">
<option value="1" >Pierre Martino</option>
<option value="2" selected="selected">Pauline Pereiro</option>
<option value="3" >Jacques Alfonso</option>
</select>
The value of the [value] attribute of the selected option is posted. If this attribute is missing, the text displayed by the option, for example [Pierre Martino], is posted.
The string
will be posted to the following URL [/First/Action06]:
    // Action06-POST
    [HttpPost]
    public ViewResult Action06(ActionModel06 modèle)
    {
      return View("Action06Post",modèle);
}
You may recall that we already had an action named [Action06]:
    // Action06-GET
    [HttpGet]
    public ViewResult Action06()
    {
      return View("Action06Get",new ViewModel05());
}
It is possible to have two actions with the same name provided that they do not process the same commands HTTP:
- [Action06] on line 3 handles a POST (line 2);
- [Action06] on line c handles a GET (line b).
The action [Action06], which handles POST, will receive the following parameter string:
We need an action model to encapsulate these values. This will be the following [ActionModel06] model:
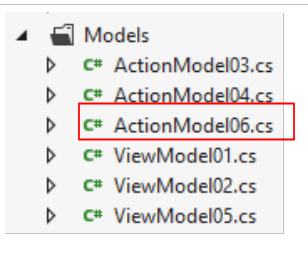 |
using System.ComponentModel.DataAnnotations;
namespace Exemple_03.Models
{
  public class ActionModel06
  {
    [Required(ErrorMessage = "Le paramètre [personneId] est requis")]
    public int PersonneId { get; set; }

    [Required(ErrorMessage = "Le paramètre [valider] est requis")]
    public string Valider { get; set; }
  }
}
The [Action06] action receives this model and passes it as-is to the following [Action06Post] view (line 5 of the action):
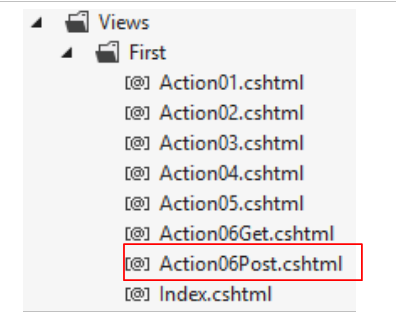 |
@model Exemple_03.Models.ActionModel06

@{
  Layout = null;
}

<!DOCTYPE html>

<html>
<head>
  <meta name="viewport" content="width=device-width" />
  <title>Action06Post</title>
</head>
<body>
  <h3>Action06 - POST</h3>
  Valeurs postées :
  <ul>
    <li>ID de la personne sélectionnée : @Model.PersonneId</li>
    <li>Commande utilisée : @Model.Valider</li>
  </ul>
</body>
</html>
The model is displayed on lines 18 and 19.
Let's look at an example:
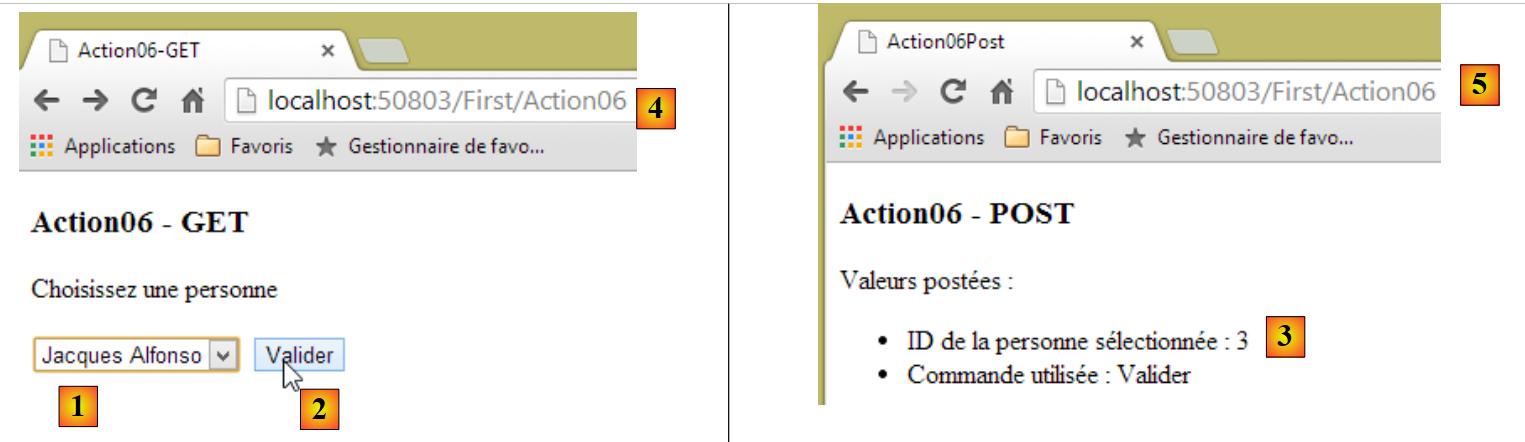 |
In [1], we select the third person from [Id], which is equal to 3. In [2], we submit the form. In [3], the received values. In [4,5], we see that the same URL was called, one by a GET [4], and the other by a POST and [5]. This is not visible in URL.
In the view displayed following POST, you might want the first and last name of the selected person rather than their number. You must then update the view for POST and its template.
We create an action [Action07] to handle this case. This action will need to use the user’s session to store the list of people. We will follow the model discussed in Section 4.10, which allows us to include data from the [Application] and [Session] scopes in the action’s model.
The session model will be the following [SessionModel] class:
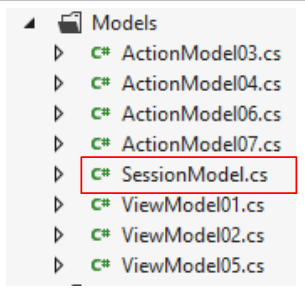 |
namespace Exemple_03.Models
{
  public class SessionModel
  {
    public Personne2[] Personnes { get; set; }
  }
}
- line 2: the session will store the list of people displayed in the drop-down list;
We need to bind the previous type [SessionModel] to a binder that we will call [SessionModelBinder]. This will be the same as the one described on page 82:
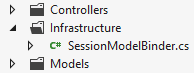 |
using System.Web.Mvc;

namespace Exemple_03.Infrastructure
{
  public class SessionModelBinder : IModelBinder
  {
    public object BindModel(ControllerContext controllerContext, ModelBindingContext bindingContext)
    {
      // render scope data [Session]
      return controllerContext.HttpContext.Session["data"];
    }
  }
}
The binding between the [SessionModel] model and its [SessionModelBinder] binder is defined in [Global.asax]:
public class MvcApplication : System.Web.HttpApplication
  {
    protected void Application_Start()
    {
      ...

      // model binders
      ModelBinders.Binders.Add(typeof(SessionModel), new SessionModelBinder());
    }
    // Session
    public void Session_Start()
    {
      Session["data"] = new SessionModel();
    }
  }
- line 8: the model is bound to its binder in [Application_Start];
- line 13: an instance of type [SessionModel] is added to the session associated with the key [data].
Once this is done, the [Action07] action is as follows:
    // Action07-GET
    [HttpGet]
    public ViewResult Action07(SessionModel session)
    {
      ViewModel05 modèleVue = new ViewModel05();
      session.Personnes= modèleVue.Personnes;
      return View("Action07Get", modèleVue);
}
- line 3: the action retrieves a type [SessionModel], i.e., the scope data [Session] associated with the key [data];
- line 5: the view model is created;
- line 6: the array of people is placed in the session. We will need it in the next query, the one for POST. The HTTP protocol is a stateless protocol. A session must be used to maintain state between requests. A session is specific to a user and is managed by the web server;
- Line 7: The [Action07Get.cshtml] view is displayed. It is as follows:
@model Exemple_03.Models.ViewModel05
@using Exemple_03.Models
...
<body>
  <h3>Action07 - GET</h3>
  <p>Choisissez une personne</p>
  <form method="post" action="/First/Action07">
....
  </form>
</body>
</html>
It is identical to the [Action06Get.cshtml] view already discussed. The main difference is on line 7: the URL to which the form values will be posted. These will be processed by the following [Action07] action:
    // Action07-POST
    [HttpPost]
    public ViewResult Action07(SessionModel session, ActionModel06 modèle)
    {
      Personne2 personne = session.Personnes.Where(p => p.Id == modèle.PersonneId).First<Personne2>();
      string strPersonne = string.Format("{0} {1}", personne.Prénom, personne.Nom);
      return View("Action07Post", (object)strPersonne);
}
- Line 3: The posted values are encapsulated in the [ActionModel06] action model used previously (below):
using System.ComponentModel.DataAnnotations;
namespace Exemple_03.Models
{
  public class ActionModel06
  {
    [Required(ErrorMessage = "Le paramètre [personneId] est requis")]
    public int PersonneId { get; set; }

    [Required(ErrorMessage = "Le paramètre [valider] est requis")]
    public string Valider { get; set; }
  }
}
- line 3: the first parameter is the scope data [Session] associated with the key [data];
- line 5: a query LINQ retrieves the person with the [Id] that was posted;
- line 6: the character string to be displayed by the [Action07Post] view is constructed (line 8);
- line 7: to call the correct constructor [View], the type [string] must be cast to [object].
The view [Action07Post.cshtml] is as follows:
@model string

@{
  Layout = null;
}

<!DOCTYPE html>

<html>
<head>
  <meta name="viewport" content="width=device-width" />
  <title>Action07-Post</title>
</head>
<body>
  <h3>Action07-POST</h3>
  Vous avez sélectionné [@Model].
</body>
</html>
- Line 1: The template is of type [string];
- line 16: the character string is displayed.
Here is an example of execution:
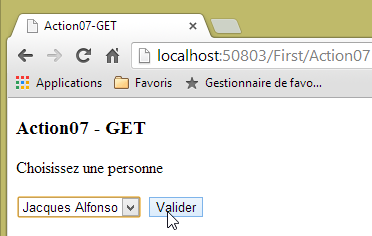 | 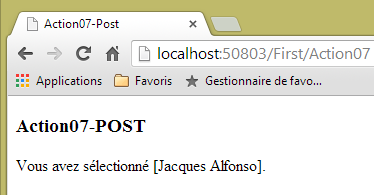 |
5.6. Form – a complete example
In section 2.5.2.1, we examined the following HTML form:
1 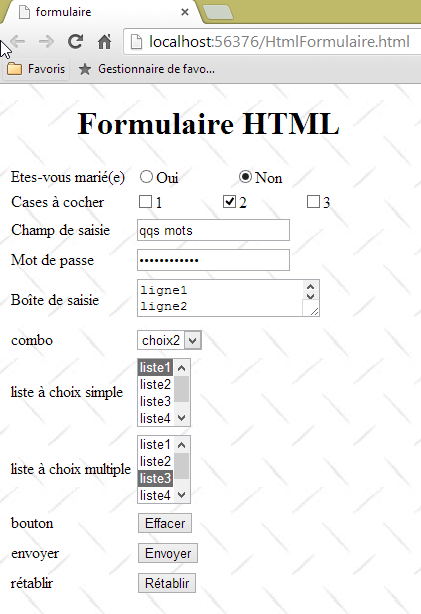 |
We will examine an action [Action08Get] that displays (GET) this form and an action [Action08Post] that processes (POST) the values entered by the user. A classic pattern.
The view template [1] above will be an instance of the class [ViewModel08]. This class will serve as both:
- the model for the view generated by a GET on the action [Action08Get];
- the model for the [Action08Post] action for a POST request.
 |
 |
5.6.1. The [Application] scope model
We will assume that the elements displayed by the radio buttons, checkboxes, and various lists are scope data [Application]. This is a common scenario. This information comes from a configuration file or a database accessed when the application starts in the [Application_Start] method of [Global.asax]. This method is implemented as follows:
    protected void Application_Start()
    {
....

      // model binders
      ModelBinders.Binders.Add(typeof(SessionModel), new SessionModelBinder());
      ModelBinders.Binders.Add(typeof(ApplicationModel), new ApplicationModelBinder());

      // scope data [Application]
      Application["data"] = new ApplicationModel();
}
- line 7: the type [ApplicationModel], which we will describe shortly, is associated with the data binder [ApplicationModelBinder], which we already introduced on page 82;
- line 10: an instance of type [ApplicationModel] is stored in the application dictionary, associated with the key [data].
The [ApplicationModel] class is used to encapsulate all data within the [Application] scope. Here, it will encapsulate the data that the form must display:
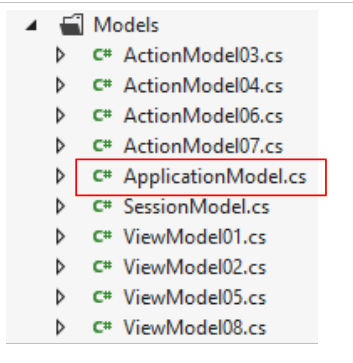 |
namespace Exemple_03.Models
{
  public class ApplicationModel
  {
    // the collections to be displayed in the form
    public Item[] RadioButtonFieldItems { get; set; }
    public Item[] CheckBoxesFieldItems { get; set; }
    public Item[] DropDownListFieldItems { get; set; }
    public Item[] SimpleChoiceListFieldItems { get; set; }
    public Item[] MultipleChoiceListFieldItems { get; set; }

    // initializing fields and collections
    public ApplicationModel()
    {
      RadioButtonFieldItems = new Item[]{
        new Item {Value="1",Label="oui"},
        new Item {Value="2", Label="non"}
      };
      CheckBoxesFieldItems = new Item[]{
        new Item {Value="1",Label="1"},
        new Item {Value="2", Label="2"},
        new Item {Value="3", Label="3"}
      };
      DropDownListFieldItems = new Item[]{
        new Item {Value="1",Label="choix1"},
        new Item {Value="2", Label="choix2"},
        new Item {Value="3", Label="choix3"}
      };
      SimpleChoiceListFieldItems = new Item[]{
        new Item {Value="1",Label="liste1"},
        new Item {Value="2", Label="liste2"},
        new Item {Value="3", Label="liste3"},
        new Item {Value="4", Label="liste4"},
        new Item {Value="5", Label="liste5"}
      };
      MultipleChoiceListFieldItems = new Item[]{
        new Item {Value="1",Label="liste1"},
        new Item {Value="2", Label="liste2"},
        new Item {Value="3", Label="liste3"},
        new Item {Value="4", Label="liste4"},
        new Item {Value="5", Label="liste5"}
      };
    }
    // the collections item
    public class Item
    {
      public string Label { get; set; }
      public string Value { get; set; }
    }

  }
}
- lines 45–49: the form control representing the various collections. [Label] is the text displayed by the form control, [Value] is the value submitted by this control when it is selected;
- line 6: the collection displayed by the radio button;
- line 7: the collection displayed by the checkboxes;
- line 8: the collection displayed by the drop-down list;
- line 9: the collection displayed by the single-select list;
- line 10: the collection displayed by the multi-select list;
- lines 13–43: these collections are initialized by the class’s parameterless constructor.
The various collections will populate the following form:
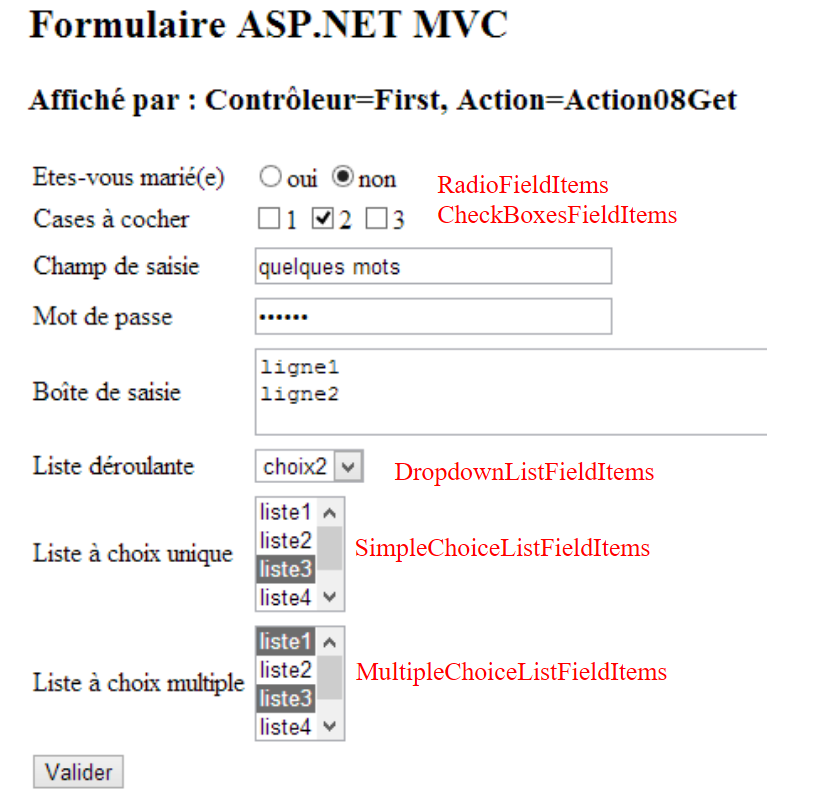 |
5.6.2. The template for action [Action08Get]
The previous form will be displayed by the following action [Action08Get]:
    // Action08-GET
    [HttpGet]
    public ViewResult Action08Get(ApplicationModel application)
    {
      ViewBag.info = string.Format("Contrôleur={0}, Action={1}", RouteData.Values["controller"], RouteData.Values["action"]);
      return View("Formulaire", new ViewModel08(application));
}
- line 2: [Action08Get] will only respond to a command [GET];
- line 3: it receives as a parameter the application model we just described;
- line 5: it initializes data in the dynamic container [ViewBag];
- line 6: it displays the view [/First/Formulaire.cshtml] with the model [ViewModel08]. This model will be that of the form presented earlier. To do this, we pass the application model that defines the elements to be displayed to the constructor.
5.6.3. The model for the [Formulaire] view
The [ViewModel08] class will be the form model. This class is as follows:
using System.ComponentModel.DataAnnotations;
using System.Web.Mvc;
using Exemple_03.Models;

namespace Exemple_03.Models
{
  public class ViewModel08
  {
    // input fields
    public string RadioButtonField { get; set; }
    public string[] CheckBoxesField { get; set; }
    public string TextField { get; set; }
    public string PasswordField { get; set; }
    public string TextAreaField { get; set; }
    public string DropDownListField { get; set; }
    public string SimpleChoiceListField { get; set; }
    public string[] MultipleChoiceListField { get; set; }

    // the collections to be displayed in the form
    public ApplicationModel.Item[] RadioButtonFieldItems { get; set; }
    public ApplicationModel.Item[] CheckBoxesFieldItems { get; set; }
    public ApplicationModel.Item[] DropDownListFieldItems { get; set; }
    public ApplicationModel.Item[] SimpleChoiceListFieldItems { get; set; }
    public ApplicationModel.Item[] MultipleChoiceListFieldItems { get; set; }

    // manufacturers
    public ViewModel08()
    {
    }

    public ViewModel08(ApplicationModel application)
    {
      // initialization collections
      RadioButtonFieldItems = application.RadioButtonFieldItems;
      CheckBoxesFieldItems = application.CheckBoxesFieldItems;
      DropDownListFieldItems = application.DropDownListFieldItems;
      SimpleChoiceListFieldItems = application.SimpleChoiceListFieldItems;
      MultipleChoiceListFieldItems = application.MultipleChoiceListFieldItems;
      // field initialization
      RadioButtonField = "2";
      CheckBoxesField = new string[] { "2" };
      TextField = "quelques mots";
      PasswordField = "secret";
      TextAreaField = "ligne1\nligne2";
      DropDownListField = "2";
      SimpleChoiceListField = "3";
      MultipleChoiceListField = new string[] { "1", "3" };
    }
  }
}
- In a form, there are two types of elements: those that are displayed and those that are entered;
- Lines 20–24 define the elements to be displayed. These are the form’s various collections. They are found in the application model (lines 34–38);
- Lines 10–17: define the form’s input fields;
- line 10: [RadioButtonField] will retrieve the value submitted by the following lines of the form:
<!-- radio buttons -->
<tr>
<td>Etes-vous marié(e)</td>
<td>
<input type="radio" name="RadioButtonField" value="1" />oui
<input type="radio" name="RadioButtonField" value="2" checked="checked"/>non
</td>
</tr>
Note in lines 5 and 6 that the attribute [name] for both radio buttons is the name of the property that will be initialized. In the posted data, you will find a string in the following format:
param1=val1&RadioButtonField=2¶m2=val2
if the user has checked the radio button labeled [non]. In fact, it is the [value] attribute of the checked radio button that is posted.
- Line 11: [CheckBoxesField] will retrieve the values submitted by the following lines of the form:
<!-- checkboxes -->
<tr>
<td>Cases à cocher</td>
<td>
<input type="checkbox" name="CheckBoxesField" value="1" />1
<input type="checkbox" name="CheckBoxesField" value="2" checked="checked"/>2
<input type="checkbox" name="CheckBoxesField" value="3" />3
</td>
Note in lines 5 and 6 that the [name] attribute of the checkboxes is the name of the property that will be initialized. In the posted data, you will find a string in the form:
param1=val1&CheckBoxesField=2&CheckBoxesField=3¶m2=val2
if the user has checked the checkboxes labeled [2] and [3]. It is the [value] attribute of the checked options that is posted. Because multiple parameters with the same name can be posted, [CheckBoxesField] is an array of values rather than a single value. If no checkbox is selected, the parameter [CheckBoxesField] will be absent from the posted string, and the property of the same name in the model will not be initialized. This can be problematic, as we will see.
- Line 12: [TextField] will retrieve the value posted by the following lines of the form:
          <!-- single-line text input field -->
          <tr>
            <td>Champ de saisie</td>
            <td>
              <input type="text" name="TextField" value="quelques mots" size="30" />
            </td>
</tr>
Line 5: The [name] attribute of the input field is the name of the property that will be initialized. In the posted data, you will find a string in the following format:
param1=val1&TextField=abcdef¶m2=val2
if the user entered [abcdef] in the input field.
- Line 13: [PasswordField] will retrieve the value posted by the following lines of the form:
        <!-- password entry field -->
        <tr>
          <td>Mot de passe</td>
          <td>
            <input type="password" name="PasswordField" value="secret" size="30" />
          </td>
</tr>
Line 5: The [name] attribute of the input field is the name of the property that will be initialized. In the posted data, you will find a string in the following format:
param1=val1&PasswordField=abcdef¶m2=val2
if the user entered [abcdef] in the input field.
- Line 14: [TextAreaField] will retrieve the value posted by the following lines of the form:
        <!-- multiline text input field -->
        <tr>
          <td>Boîte de saisie</td>
          <td>
            <textarea name="TextAreaField" cols="40" rows="3">ligne1
ligne2</textarea>
          </td>
</tr>
Line 5: The [name] attribute of the input field is the name of the property that will be initialized. In the posted data, you will find a string in the following format:
param1=val1&TextAreaField=abcdef%0D%OAhijk¶m2=val2
if the user entered [abcdef] followed by a line break and [ijk] in the input field.
- Line 15: [DropDownListField] will retrieve the value posted by the following lines of the form:
<!-- the drop-down list -->
<tr>
<td>Liste déroulante</td>
<td>
<select name="DropDownListField">
<option value="1" >choix1</option>
<option value="2" selected="selected">choix2</option>
<option value="3" >choix3</option>
</select>
</tr>
Line 5: The [name] attribute of the <select> tag is the name of the property that will be initialized. In the posted data, you will find a string in the following format:
param1=val1&DropDownListField=1¶m2=val2
if the user has selected option [choix1]. It is the [value] attribute of the selected option that is posted.
- Line 16: [SingleChoiceListField] will retrieve the value posted by the following lines of the form:
<!-- single-choice list -->
<tr>
<td>Liste à choix unique</td>
<td>
<select name="SimpleChoiceListField" size="3">
<option value="1" >liste1</option>
<option value="2" >liste2</option>
<option value="3" selected="selected">liste3</option>
<option value="4" >liste4</option>
<option value="5" >liste5</option>
</select>
</tr>
Line 5: The [name] attribute of the <select> tag is the name of the property that will be initialized. It is the [size="3"] attribute that prevents a drop-down list from appearing. In the posted data, you will find a string in the following format:
param1=val1&SimpleChoiceListField=3¶m2=val2
if the user has selected option [liste3]. It is the [value] attribute of the selected option that is posted. The [SingleChoiceListField] parameter may be missing from the posted string if no item has been selected.
- Line 17: [MultipleChoiceListField] will retrieve the values posted by the following lines of the form:
<!-- multiple choice list -->
<tr>
<td>Liste à choix multiple</td>
<td>
<select name="MultipleChoiceListField" size="3" multiple="multiple">
<option value="1" selected="selected">liste1</option>
<option value="2" >liste2</option>
<option value="3" selected="selected">liste3</option>
<option value="4" >liste4</option>
<option value="5" >liste5</option>
</select>
</tr>
Line 5: The [name] attribute of the <select> tag is the name of the property that will be initialized. The [size="3"] attribute prevents a drop-down list from appearing, and the [multiple] attribute allows the user to select multiple items by holding down the [Ctrl] key. In the posted data, you will find a string in the following format:
param1=val1&MultipleChoiceListField=1&MultipleChoiceListField=3¶m2=val2
if the user has selected the options [liste1] and [liste3]. It is the [value] attribute of the selected options that is posted. Because multiple parameters with the same name can be posted, [MultipleChoiceListField] is an array of values rather than a single value. If no checkbox is selected, the [MultipleChoiceListField] parameter will be absent from the posted string, and the model property of the same name will not be initialized.
The various input fields shown above will receive the values posted by the form. They can also be initialized before the form is submitted. This is what has been done here:
      // field initialization
      RadioButtonField = "2";
      CheckBoxesField = new string[] { "2" };
      TextField = "quelques mots";
      PasswordField = "secret";
      TextAreaField = "ligne1\nligne2";
      DropDownListField = "2";
      SimpleChoiceListField = "3";
MultipleChoiceListField = new string[] { "1", "3" };
If these values were obtained after a POST of the form, this would mean that the user has:
- line 2: selected the radio button;
- line 3: checked the checkboxes;
- line 4: entered [quelques mots] in the input field;
- line 5: entered [secret] as the password;
- line 6: typed [ligne1\nligne2] into the multi-line input field;
- line 7: selected option [choix2] from the drop-down list;
- line 8: selected option and [liste3] from the single-select list;
- line 9: selected the options [liste1] and [liste3] from the multiple-choice list;
Let’s assume that a POST event has occurred and we want to return the form exactly as it was entered. This is typically what happens when an incorrect form is returned to the user. The form is returned exactly as it was entered.
5.6.4. The [Formulaire] view
The [/First/Formulaire.cshtml] view displays the form:
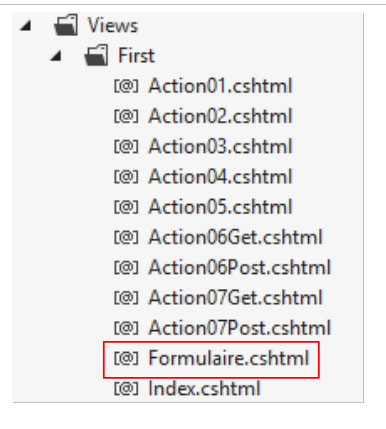 |
@model Exemple_03.Models.ViewModel08
@using Exemple_03.Models
@{
  Layout = null;
}
<html>
<head>
  <meta name="viewport" content="width=device-width" />
  <title>Formulaire</title>
</head>
<body>
  <form method="post" action="Action08Post">
    <h2>Formulaire ASP.NET MVC</h2>
    <h3>Affiché par : @ViewBag.info</h3>
    <table>
      <thead></thead>
      <tbody>
        <!-- radio buttons -->
        <tr>
          <td>Etes-vous marié(e)</td>
          <td>
            @foreach (ApplicationModel.Item item in @Model.RadioButtonFieldItems)
            {
              string strChecked = item.Value == @Model.RadioButtonField ? "checked=\"checked\"" : "";
              <input type="radio" name="RadioButtonField" value="@item.Value" @strChecked/>@item.Label
              <text/>
            }
          </td>
        </tr>
...
      </tbody>
    </table>
    <input type="submit" value="Valider" />
  </form>
</body>
</html>
- line 1: [ViewModel08] is the form template;
- line 12: the <form> tag of the form. This will be submitted using the [POST] method (method attribute) to the URL [/First/Action08Post] (action attribute);
- line 33: the [submit] button used to submit the form;
- lines 22–27: display the radio buttons:
 |
- line 22: iterates through the collection displayed by the radio button;
- line 24: the button with the attribute [value] must have the value of the property [RadioButtonField] selected. To do this, it must have the attribute [checked="checked"];
- line 25: generation of the <input type="radio"> tag with the value [@item.Value] and the label [@item.Label];
- line 26: the <text/> tag is not a recognized HTML tag. It is there for [Razor]. Upon encountering it, [Razor] will generate a line break. This has no effect on the displayed form but does affect the generated HTML code. The <input type="radio"> tags are then on two different lines instead of being on the same line. This makes the code more readable when you view the source code of the displayed page in the browser;
Let’s review the other elements of the view:
        <!-- checkboxes -->
        <tr>
          <td>Cases à cocher</td>
          <td>
            @{
              foreach (ApplicationModel.Item item in @Model.CheckBoxesFieldItems)
              {
                string strChecked = @Model.CheckBoxesField.Contains(item.Value) ? "checked=\"checked\"" : "";
              <input type="checkbox" name="CheckBoxesField" value="@item.Value" @strChecked/>@item.Label
              <text/>
              }
            }
</td>
- line 6: we iterate through the collection displayed by the checkboxes;
- line 8: a checkbox whose [value] attribute is one of the values of the [CheckBoxesField] property must be checked. To do this, it must have the [checked="checked"] attribute. We use a LINQ expression to determine whether a value is contained in an array;
- line 25: generation of the <input type="checkbox"> tag with the value [@item.Value] and the label [@item.Label];
<!-- single-line text input field -->
          <tr>
            <td>Champ de saisie</td>
            <td>
              <input type="text" name="TextField" value="@Model.TextField" size="30" />
            </td>
          </tr>
        <!-- password entry field -->
        <tr>
          <td>Mot de passe</td>
          <td>
            <input type="password" name="PasswordField" value="@Model.PasswordField" size="30" />
          </td>
        </tr>
        <!-- multiline text input field -->
        <tr>
          <td>Boîte de saisie</td>
          <td>
            <textarea name="TextAreaField" cols="40" rows="3">@Model.TextAreaField</textarea>
          </td>
        </tr>
- lines 5, 12: we assign the value of the model to the [value] attribute of the tag;
- line 19: same as above, but with a different syntax.
        <!-- the drop-down list -->
        <tr>
          <td>Liste déroulante</td>
          <td>
            <select name="DropDownListField">
              @{
                foreach (ApplicationModel.Item item in @Model.DropDownListFieldItems)
                {
                  string strChecked = item.Value == @Model.DropDownListField ? "selected=\"selected\"" : "";
                <option value="@item.Value" @strChecked>@item.Label</option>
                }
              }
            </select>
</tr>
- line 7: we iterate through the collection displayed by the dropdown list;
- line 9: a option whose [value] attribute has the value of the [DropDownListField] property must then be selected. To do this, it must have the [selected="selected"] attribute;
- line 25: generation of the tag <option value="value">label</option> with value [@item.Value] and label [@item.Label];
        <!-- single-choice list -->
        <tr>
          <td>Liste à choix unique</td>
          <td>
            <select name="SimpleChoiceListField" size="3">
              @{
                foreach (ApplicationModel.Item item in @Model.SimpleChoiceListFieldItems)
                {
                  string strChecked = item.Value == @Model.SimpleChoiceListField ? "selected=\"selected\"" : "";
                <option value="@item.Value" @strChecked>@item.Label</option>
                }
              }
            </select>
</tr>
The explanation is the same as for the drop-down list.
        <!-- multiple choice list -->
        <tr>
          <td>Liste à choix multiple</td>
          <td>
            <select name="MultipleChoiceListField" size="3" multiple="multiple">
              @{
                foreach (ApplicationModel.Item item in @Model.MultipleChoiceListFieldItems)
                {
                  string strChecked = @Model.MultipleChoiceListField.Contains(item.Value) ? "selected=\"selected\"" : "";
                <option value="@item.Value" @strChecked>@item.Label</option>
                }
              }
            </select>
</tr>
- line 7: we iterate through the collection displayed by the list;
- line 9: a option whose [value] attribute has one of the values of the [MultipleChoiceListField] property must be selected. To do this, it must have the [selected="selected"] attribute. We use a LINQ expression to determine if a value is contained in an array;
- Line 10: Generation of the tag <option value="value">label</option> with value [@item.Value] and label [@item.Label];
5.6.5. Processing the POST action of the form
We have seen that the form will be posted to action [Action08Post]:
<form method="post" action="Action08Post">
Action [Action08Post] is as follows:
    // Action08-POST
    [HttpPost]
    public ViewResult Action08Post(ApplicationModel application, FormCollection posted)
    {
      ViewBag.info = string.Format("Contrôleur={0}, Action={1}", RouteData.Values["controller"], RouteData.Values["action"]);
      ViewModel08 modèle = new ViewModel08(application);
      TryUpdateModel(modèle,posted);
      return View("Formulaire", modèle);
}
- Line 3: The application model is passed as a parameter along with the posted values. These are available in a type named [FormCollection]. The value of the posted parameter [RadioButtonField] is obtained via the expression posted[" RadioButtonField"]. This returns a string or the null pointer. If we write posted[" CheckBoxesField"], we will get an array of strings or the null pointer;
- so why not write:
public ViewResult Action08Post(ApplicationModel application, ViewModel08 posted)
There are two reasons:
- the first is that the framework will instantiate the [ViewModel08] model using the parameterless constructor, which will result in the model’s collections not being initialized;
- the second is that we want to control what goes into the model. We know there are four possible sources for the model: the parameters of a GET, a POST, the route used, and those of an uploaded file. Here, we want to initialize the model solely with the posted values.
- line 6: we instantiate the model using the correct constructor;
- line 7: we initialize it with the posted values. After this operation, the model corresponds to the user’s input;
- Line 8: We display the form again. The user will see it exactly as it was entered.
Let’s look at an example:
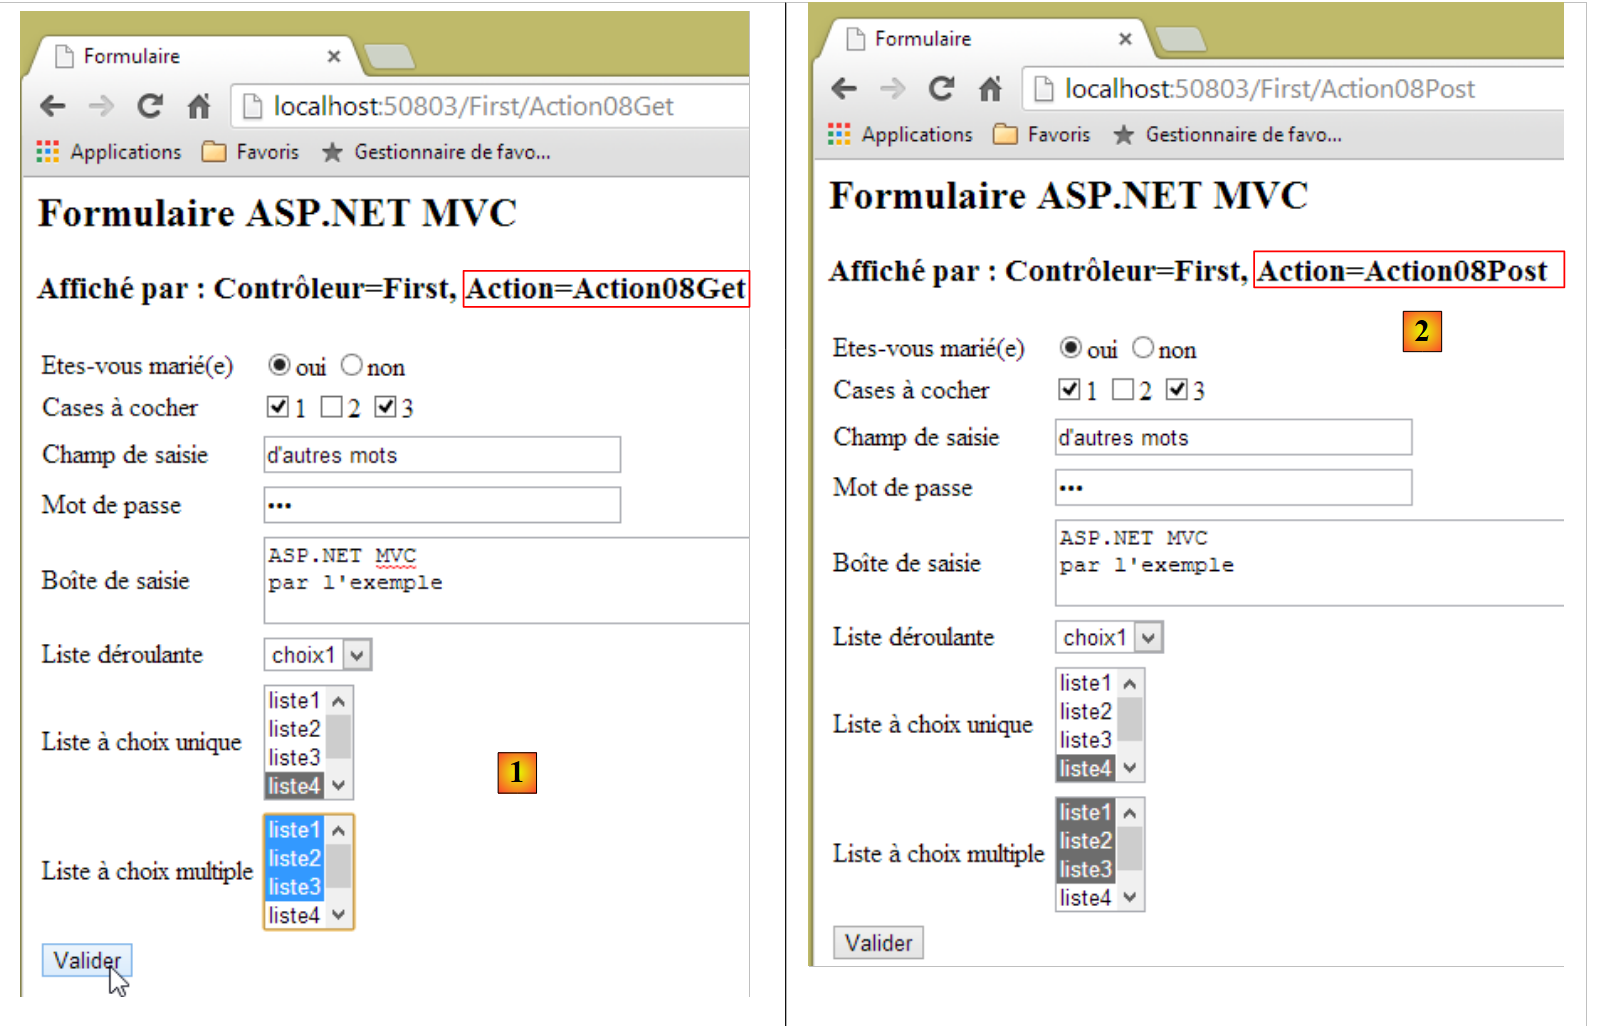 |
In [2], the result of [POST] accurately reflects what was entered in [1].
5.6.6. Handling anomalies in POST
We mentioned that if no value was checked or selected for the [CheckBoxesField, SimpleChoiceListField, MultipleChoiceListField] fields, then the corresponding parameters were not included in the posted string, and therefore the properties with the same names in the model were not initialized.
Let’s look at the following example:
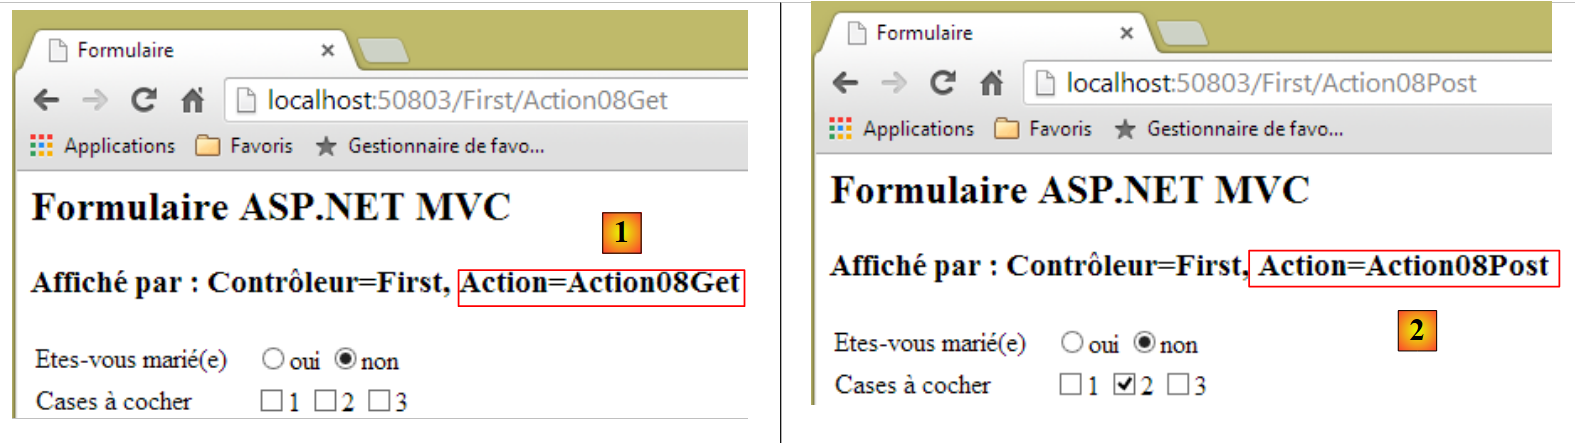 |
- In [1], no checkbox was checked;
- in [2], [POST] returns a checked box.
The explanation is as follows:
- because there are no checked boxes, the [CheckBoxesField] parameter is not included in the posted values;
- the [Action08Post] action proceeds as follows:
    [HttpPost]
    public ViewResult Action08Post(ApplicationModel application, FormCollection posted)
    {
      ViewBag.info = ...
      ViewModel08 modèle = new ViewModel08(application);
      TryUpdateModel(modèle,posted);
      return View("Formulaire", modèle);
}
- line 5: the form model is instantiated. However, the constructor used assigns the array ["2"] to the property [CheckBoxesField];
- line 6: the posted values are saved in the model. Since the parameter [CheckBoxesField] is not among the posted values, the property of the same name is not assigned. It therefore retains its value ["2"], which means that when displayed, checkbox #2 is checked when it should not be.
This issue can be resolved in various ways. We choose to resolve it in the code for action [Action08Post]:
// Action08-POST
    [HttpPost]
    public ViewResult Action08Post(ApplicationModel application, FormCollection posted)
    {
      ViewBag.info = string.Format("Contrôleur={0}, Action={1}", RouteData.Values["controller"], RouteData.Values["action"]);
      ViewModel08 modèle = new ViewModel08(application);
      TryUpdateModel(modèle,posted);
      // processing of non-posted values
      if (posted["CheckBoxesField"] == null)
      {
        modèle.CheckBoxesField = new string[] { };
      }
      if (posted["SimpleChoiceListField"] == null)
      {
        modèle.SimpleChoiceListField = "";
      }
      if (posted["MultipleChoiceListField"] == null)
      {
        modèle.MultipleChoiceListField = new string[] { };
      }
      // form display
      return View("Formulaire", modèle);
    }
- Lines 9–20: We check whether certain parameters have been submitted or not. If not, we initialize them with the value corresponding to the user not having entered anything. This check was not performed for the dropdown list, which always has an item selected, unlike the other lists.
Readers are invited to test this new version.
5.7. Using specialized methods for form generation
5.7.1. The new form
We create a new form, [Formulaire2.cshtml], which will generate a form identical to the previous one:
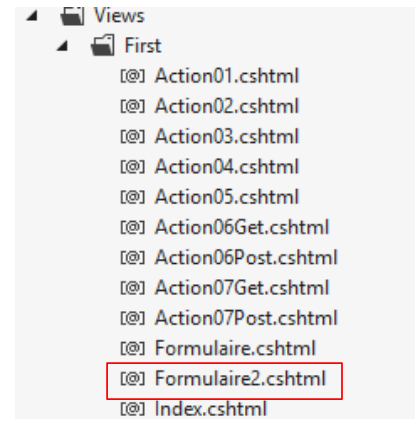 |
Let’s revisit the code used to generate the form’s drop-down list:
        <!-- the drop-down list -->
        <tr>
          <td>Liste déroulante</td>
          <td>
            <select name="DropDownListField">
              @{
                foreach (ApplicationModel.Item item in @Model.DropDownListFieldItems)
                {
                  string strChecked = item.Value == @Model.DropDownListField ? "selected=\"selected\"" : "";
                <option value="@item.Value" @strChecked>@item.Label</option>
                }
              }
            </select>
</tr>
This code has two drawbacks:
- the most significant is that we lose sight of the nature of the component—in this case, a drop-down list—due to the complexity of the code;
- line 5: if you make a mistake in the name of the model property to be used as the [name] attribute, you won’t notice it until runtime.
ASP.NET MVC offers specialized methods called [HTML Helpers] which, as their name suggests, are designed to facilitate the generation of HTML, particularly for forms. With these classes, the previous dropdown list is written as follows:
        <!-- the drop-down list -->
        <tr>
          <td>Liste déroulante</td>
          <td>@Html.DropDownListFor(m => m.DropDownListField,
           new SelectList(@Model.DropDownListFieldItems, "Value", "Label"))
          </td>
</tr>
The drop-down list is generated by lines 4-5. The code is significantly less complex. The HTML code generated for the drop-down list is as follows:
        <!-- the drop-down list -->
        <tr>
          <td>Liste déroulante</td>
          <td><select id="DropDownListField" name="DropDownListField"><option value="1">choix1</option>
<option selected="selected" value="2">choix2</option>
<option value="3">choix3</option>
</select></td>
</tr>
- line 4: the [name] attribute is correct;
- lines 4–6: the options are generated correctly and the correct option has been selected.
Let’s go back to the code that generated these HTML lines:
@Html.DropDownListFor(m => m.DropDownListField, new SelectList(@Model.DropDownListFieldItems, "Value", "Label"))
- The first parameter is a lambda function (that’s its name) where `m` represents the view model and `m.DropDowListField` is a property of that model. The HTML code generator will use the name of this property to generate the [id] and [name] attributes of the [select] that will be generated. If a non-existent property is used, an error will occur at compile time rather than at runtime. This is an improvement over the previous solution, where naming errors were only detected at runtime;
- the second parameter is used to specify the collection of elements that will populate the drop-down list. The [SelectList] class allows you to build this collection:
- its first parameter is any collection of elements. Here we have a collection of type [Item];
- its second parameter is the property of the elements that will provide the value of the <option> tag. Here, it is the [Value] property of the [Item] class;
- its third parameter is the property of the elements that will provide the label for the <option> tag. Here, it is the [Label] property of the [Item] class;
- To determine which option should be selected (selected attribute), the framework does what we do: it compares the value of option to the current value of the [DropDownListField] property.
Now let’s look at the other methods we can use:
Radio buttons
The new code is as follows:
        <!-- radio buttons -->
        <tr>
          <td>Etes-vous marié(e)</td>
          <td>
            @{
    foreach (ApplicationModel.Item item in @Model.RadioButtonFieldItems)
    {
              @Html.RadioButtonFor(m => m.RadioButtonField, @item.Value)@item.Label
              <text/>
    }
            }
          </td>
</tr>
The generated HTML code is as follows:
        <!-- radio buttons -->
        <tr>
          <td>Etes-vous marié(e)</td>
          <td>
<input id="RadioButtonField" name="RadioButtonField" type="radio" value="1" />oui
<input checked="checked" id="RadioButtonField" name="RadioButtonField" type="radio" value="2" />non
          </td>
</tr>
The method used is [Html.RadioButtonFor]:
- the first parameter is the model property that will be associated with the radio button (attribute [name]);
- the second parameter is the value to be assigned to the radio button (attribute [value]).
Checkboxes
The code changes as follows:
        <!-- checkboxes -->
        <tr>
          <td>Cases à cocher</td>
          <td>
            @{
              @Html.CheckBoxFor(m=>m.CheckBoxField1) @Model.CheckBoxesFieldItems[0].Label
              @Html.CheckBoxFor(m=>m.CheckBoxField2) @Model.CheckBoxesFieldItems[1].Label
              @Html.CheckBoxFor(m=>m.CheckBoxField3) @Model.CheckBoxesFieldItems[2].Label
            }
</td>
The method used to generate checkboxes is [Html.CheckBoxFor]:
The parameter is the model’s Boolean property that will be associated with the checkbox. If [Propriété=true], the checkbox will be checked. If [Propriété=false], the checkbox will not be checked. In all cases, the [value] attribute is set to true. The generated code HTML is as follows:
<input id="Propriété" name="Propriété" type="checkbox" value="true" />
<input name="Propriété" type="hidden" value="false" />
- line 1: the checkbox with the attribute [value="true"];
- line 2: a hidden field (type=hidden) with the same name [Propriété] as the checkbox with the attribute [value="false"]. Why are there two [input] tags with the same name? There are two cases:
- the checkbox in line 1 is checked. In this case, the posted parameter string is Property=true&Property=false (lines 1 and 2). Since the property [Propriété] expects only one value, one might think that the framework assigns the value [true] to [Propriété]. It would simply need to perform a logical OR between the received values to achieve this;
- the checkbox on line 1 is not checked. Therefore, the posted parameter string is Property=false (line 2 only), and so the property [Propriété] receives the value [false], which is correct (the checkbox was not checked).
Single-line input field
The new code is as follows:
          <!-- single-line text input field -->
          <tr>
            <td>Champ de saisie</td>
            <td>
              @Html.TextBoxFor(m => m.TextField, new { size = "30" })
            </td>
</tr>
The generated HTML code is as follows:
          <!-- single-line text input field -->
          <tr>
            <td>Champ de saisie</td>
            <td>
              <input id="TextField" name="TextField" size="30" type="text" value="quelques mots" />
            </td>
</tr>
The method used is as follows:
@Html.TextBoxFor(m => m.TextField, new { size = "30" })
- the first parameter specifies the property of the model associated with the input field. The property name will be used in the [name] and [id] attributes of the generated <input> tag, and its value will be assigned to the [value] attribute;
- The second parameter is an anonymous class specifying certain attributes of the generated HTML tag, in this case the [size] attribute.
Password entry field
The new code is as follows:
        <!-- password entry field -->
        <tr>
          <td>Mot de passe</td>
          <td>
            @Html.PasswordFor(m => m.PasswordField, new { size = "15" })
          </td>
</tr>
The generated HTML code is as follows:
        <!-- password entry field -->
        <tr>
          <td>Mot de passe</td>
          <td>
            <input id="PasswordField" name="PasswordField" size="15" type="password" />
          </td>
</tr>
The method used is as follows:
@Html.PasswordFor(m => m.PasswordField, new { size = "15" })
The operation is similar to that of the [Html.TexBoxFor] method.
Multi-line input field
The new code is as follows:
        <!-- multiline text input field -->
        <tr>
          <td>Boîte de saisie</td>
          <td>
            @Html.TextAreaFor(m => m.TextAreaField, new { cols = "30", rows = "5" })
          </td>
</tr>
The generated code HTML is as follows:
        <!-- multiline text input field -->
        <tr>
          <td>Boîte de saisie</td>
          <td>
            <textarea cols="30" id="TextAreaField" name="TextAreaField" rows="5">
ligne1
ligne2</textarea>
          </td>
</tr>
The method used is as follows:
@Html.TextAreaFor(m => m.TextAreaField, new { cols = "30", rows = "5" })
The operation is similar to that of method [Html.TexBoxFor].
Single-select list
The new code is as follows:
        <!-- single-choice list -->
        <tr>
          <td>Liste à choix unique</td>
          <td>
          @Html.DropDownListFor(m => m.SimpleChoiceListField, new SelectList(@Model.SimpleChoiceListFieldItems, "Value", "Label"), new { size = "3" })
</tr>
and the generated code HTML is as follows:
        <!-- single-choice list -->
        <tr>
          <td>Liste à choix unique</td>
          <td>
          <select id="SimpleChoiceListField" name="SimpleChoiceListField" size="3">
<option value="1">liste1</option>
<option value="2">liste2</option>
<option selected="selected" value="3">liste3</option>
<option value="4">liste4</option>
<option value="5">liste5</option>
</select>
</tr>
We have already examined the [Html.DropDownListFor] method. The only difference here is the third parameter, which is used to specify a [size] attribute other than 1. It is this feature that changes a drop-down list ([size=1]) into a simple list.
The multiple-choice list
The new code is as follows:
        <!-- multiple choice list -->
        <tr>
          <td>Liste à choix multiple</td>
          <td>
          @Html.ListBoxFor(m => m.MultipleChoiceListField, new SelectList(@Model.MultipleChoiceListFieldItems, "Value", "Label"), new { size = "5" })
</tr>
and the generated code HTML is as follows:
        <!-- multiple choice list -->
        <tr>
          <td>Liste à choix multiple</td>
          <td>
          <select id="MultipleChoiceListField" multiple="multiple" name="MultipleChoiceListField" size="5">
<option selected="selected" value="1">liste1</option>
<option value="2">liste2</option>
<option selected="selected" value="3">liste3</option>
<option value="4">liste4</option>
<option value="5">liste5</option>
</select>
</tr>
The method
@Html.ListBoxFor(m => m.MultipleChoiceListField, new SelectList(@Model.MultipleChoiceListFieldItems, "Value", "Label"), new { size = "5" })
works like the [Html.DropDownListFor] method, except that it generates a multi-select list. The selected options are those whose value (value attribute) is in the [MultipleChoiceListField] array.
The form tag can also be generated using a method:
  @using (Html.BeginForm("Action09Post", "First"))
  {
...
  }
The generated HTML code is as follows:
<form action="/First/Action09Post" method="post">
    ...
</form>
The method
Html.BeginForm("Action09Post", "First")
takes the name of an action as its first parameter and the name of a controller as its second parameter.
5.7.2. The actions and the model
The form will be rendered by the following action:
    // Action09-GET
    [HttpGet]
    public ViewResult Action09Get(ApplicationModel application)
    {
      ViewBag.info = string.Format("Contrôleur={0}, Action={1}", RouteData.Values["controller"], RouteData.Values["action"]);
      return View("Formulaire2", new ViewModel09(application));
}
The view returned on line 6 is [Formulaire2], associated with the following model [ViewModel09]:
using System.ComponentModel.DataAnnotations;
using System.Web.Mvc;
using Exemple_03.Models;

namespace Exemple_03.Models
{
  public class ViewModel09
  {
    // input fields
    public string RadioButtonField { get; set; }
    public bool CheckBoxField1 { get; set; }
    public bool CheckBoxField2 { get; set; }
    public bool CheckBoxField3 { get; set; }
    public string TextField { get; set; }
    public string PasswordField { get; set; }
    public string TextAreaField { get; set; }
    public string DropDownListField { get; set; }
    public string SimpleChoiceListField { get; set; }
    public string[] MultipleChoiceListField { get; set; }

    // the collections to be displayed in the form
    public ApplicationModel.Item[] RadioButtonFieldItems { get; set; }
    public ApplicationModel.Item[] CheckBoxesFieldItems { get; set; }
    public ApplicationModel.Item[] DropDownListFieldItems { get; set; }
    public ApplicationModel.Item[] SimpleChoiceListFieldItems { get; set; }
    public ApplicationModel.Item[] MultipleChoiceListFieldItems { get; set; }

    // manufacturers
    public ViewModel09()
    {
    }

    public ViewModel09(ApplicationModel application)
    {
      // initialization collections
      RadioButtonFieldItems = application.RadioButtonFieldItems;
      CheckBoxesFieldItems = application.CheckBoxesFieldItems;
      DropDownListFieldItems = application.DropDownListFieldItems;
      SimpleChoiceListFieldItems = application.SimpleChoiceListFieldItems;
      MultipleChoiceListFieldItems = application.MultipleChoiceListFieldItems;
      // field initialization
      RadioButtonField = "2";
      CheckBoxField2 = true;
      TextField = "quelques mots";
      PasswordField = "secret";
      TextAreaField = "ligne1\nligne2";
      DropDownListField = "2";
      SimpleChoiceListField = "3";
      MultipleChoiceListField = new string[] { "1", "3" };
    }
  }
}
[ViewModel09] differs from [ViewModel08] in its handling of checkboxes. Instead of having an array of three checkboxes, three separate checkboxes were used (lines 11–13).
The form will be processed by the following [Action09Post] action:
    // Action09-POST
    [HttpPost]
    public ViewResult Action09Post(ApplicationModel application, FormCollection posted)
    {
      ViewBag.info = string.Format("Contrôleur={0}, Action={1}", RouteData.Values["controller"], RouteData.Values["action"]);
      ViewModel09 modèle = new ViewModel09(application);
      TryUpdateModel(modèle, posted);
      // processing of non-posted values
      if (posted["SimpleChoiceListField"] == null)
      {
        modèle.SimpleChoiceListField = "";
      }
      if (posted["MultipleChoiceListField"] == null)
      {
        modèle.MultipleChoiceListField = new string[] { };
      }
      // form display
      return View("Formulaire2", modèle);
}
The [Action09Post] action is identical to the [Action08Post] action except for two points:
- line 18: the [Formulaire2] view is used instead of the [Formulaire] view;
- checkboxes that were unchecked are no longer handled. This is now handled correctly by the [Html.CheckBoxFor] method.
5.8. Generating a form from the model's metadata
There are other methods besides the ones mentioned above for generating a form. One of them involves associating information with a field in the model that will allow the MVC framework to know which input tag to generate. This information is called metadata.
Consider the following view model [ViewModel10]:
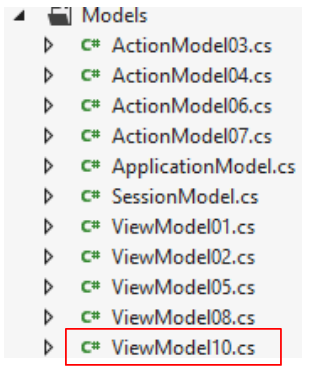 |
using System;
using System.ComponentModel.DataAnnotations;
using System.Drawing;

namespace Exemple_03.Models
{
  public class ViewModel10
  {
    [Display(Name="Text")]
    [DataType(DataType.Text)]
    public string Text { get; set; }

    [Display(Name = "TextArea")]
    [DataType(DataType.MultilineText)]
    public string MultiLineText { get; set; }

    [Display(Name = "Number")]
    public int Number { get; set; }

    [Display(Name = "Decimal")]
    [UIHint("Decimal")]
    public double Decimal { get; set; }

    [Display(Name = "Tel")]
    [DataType(DataType.PhoneNumber)]
    public string Tel { get; set; }

    [Display(Name = "Date")]
    [DataType(DataType.Date)]
    public DateTime Date { get; set; }

    [Display(Name = "Time")]
    [DataType(DataType.Time)]
    public DateTime Time { get; set; }

    [Display(Name = "HiddenInput")]
    [UIHint("HiddenInput")]
    public string HiddenInput { get; set; }

    [Display(Name = "Boolean")]
    [UIHint("Boolean")]
    public bool Boolean { get; set; }

    [Display(Name = "Email")]
    [DataType(DataType.EmailAddress)]
    public string Email{ get; set; }

    [Display(Name = "Url")]
    [DataType(DataType.Url)]
    public string Url { get; set; }

    [Display(Name = "Password")]
    [DataType(DataType.Password)]
    public string Password { get; set; }

    [Display(Name = "Currency")]
    [DataType(DataType.Currency)]
    public double Currency { get; set; }

    [Display(Name = "CreditCard")]
    [DataType(DataType.CreditCard)]
    public string CreditCard { get; set; }

    // manufacturer
    public ViewModel10()
    {
      Text = "tra la la";
      MultiLineText = "ligne1\nligne2";
      Number = 4;
      Decimal = 10.2;
      Tel = "0617181920";
      Date = DateTime.Now;
      Time = DateTime.Now;
      HiddenInput = "caché";
      Boolean = true;
      Email = "x@y.z";
      Url = "http://istia.univ-angers.fr";
      Password = "mdp";
      Currency = 4.2;
      CreditCard = "0123456789012345";
    }
  }
}
The metadata consists of the tags [Display, DataType, UIHint].
This view template will be built by the following [Action10Get] action:
    // Action10-GET
    [HttpGet]
    public ViewResult Action10Get()
    {
      return View(new ViewModel10());
}
In line 5 above, we instruct the default view for action [/First/Action10Get.cshtml ] to display the view model of type [ViewModel10]. This view is as follows:
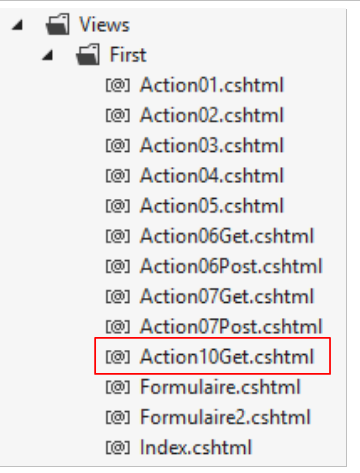 |
@model Exemple_03.Models.ViewModel10

@{
  Layout = null;
}

<!DOCTYPE html>

<html>
<head>
  <meta name="viewport" content="width=device-width" />
  <title>Action10Get</title>
</head>
<body>
  <h3>Formulaire ASP.NET MVC - 2</h3>
  @using (Html.BeginForm("Action10Post", "First"))
  {
    <table>
      <thead>
        <tr>
          <th>LabelFor</th>
          <th>EditorFor</th>
          <th>DisplayFor</th>
        </tr>
      </thead>
      <tbody>
        <tr>
          <td>@Html.LabelFor(m => m.Text)</td>
          <td>@Html.EditorFor(m => m.Text)</td>
          <td>@Html.DisplayFor(m => m.Text)</td>
        </tr>
        <tr>
          <td>@Html.LabelFor(m => m.MultiLineText)</td>
          <td>@Html.EditorFor(m => m.MultiLineText)</td>
          <td>@Html.DisplayFor(m => m.MultiLineText)</td>
        </tr>
        <tr>
          <td>@Html.LabelFor(m => m.Number)</td>
          <td>@Html.EditorFor(m => m.Number)</td>
          <td>@Html.DisplayFor(m => m.Number)</td>
        </tr>
        <tr>
          <td>@Html.LabelFor(m => m.Decimal)</td>
          <td>@Html.EditorFor(m => m.Decimal)</td>
          <td>@Html.DisplayFor(m => m.Decimal)</td>
        </tr>
        <tr>
          <td>@Html.LabelFor(m => m.Tel)</td>
          <td>@Html.EditorFor(m => m.Tel)</td>
          <td>@Html.DisplayFor(m => m.Tel)</td>
        </tr>
        <tr>
          <td>@Html.LabelFor(m => m.Date)</td>
          <td>@Html.EditorFor(m => m.Date)</td>
          <td>@Html.DisplayFor(m => m.Date)</td>
        </tr>
        <tr>
          <td>@Html.LabelFor(m => m.Time)</td>
          <td>@Html.EditorFor(m => m.Time)</td>
          <td>@Html.DisplayFor(m => m.Time)</td>
        </tr>
        <tr>
          <td>@Html.LabelFor(m => m.HiddenInput)</td>
          <td>@Html.EditorFor(m => m.HiddenInput)</td>
          <td>@Html.DisplayFor(m => m.HiddenInput)</td>
        </tr>
        <tr>
          <td>@Html.LabelFor(m => m.Boolean)</td>
          <td>@Html.EditorFor(m => m.Boolean)</td>
          <td>@Html.DisplayFor(m => m.Boolean)</td>
        </tr>
        <tr>
          <td>@Html.LabelFor(m => m.Email)</td>
          <td>@Html.EditorFor(m => m.Email)</td>
          <td>@Html.DisplayFor(m => m.Email)</td>
        </tr>
        <tr>
          <td>@Html.LabelFor(m => m.Url)</td>
          <td>@Html.EditorFor(m => m.Url)</td>
          <td>@Html.DisplayFor(m => m.Url)</td>
        </tr>
        <tr>
          <td>@Html.LabelFor(m => m.Password)</td>
          <td>@Html.EditorFor(m => m.Password)</td>
          <td>@Html.DisplayFor(m => m.Password)</td>
        </tr>
        <tr>
          <td>@Html.LabelFor(m => m.Currency)</td>
          <td>@Html.EditorFor(m => m.Currency)</td>
          <td>@Html.DisplayFor(m => m.Currency)</td>
        </tr>
        <tr>
          <td>@Html.LabelFor(m => m.CreditCard)</td>
          <td>@Html.EditorFor(m => m.CreditCard)</td>
          <td>@Html.DisplayFor(m => m.CreditCard)</td>
        </tr>
      </tbody>
    </table>
    <input type="submit" value="Valider" />
  }
</body>
</html>
For each of the model's properties, we use the method:
- Html.LabelFor to display the value of the property's [DisplayName] metadata;
- Html.EditorFor to generate the HTML input tag for the property’s value. This method will use the property’s [DataType] and [UIHint] metadata;
- Html.DisplayFor to display the property value in the format specified by the [DataType] metadata.
Here is an example of execution using the Chrome browser:
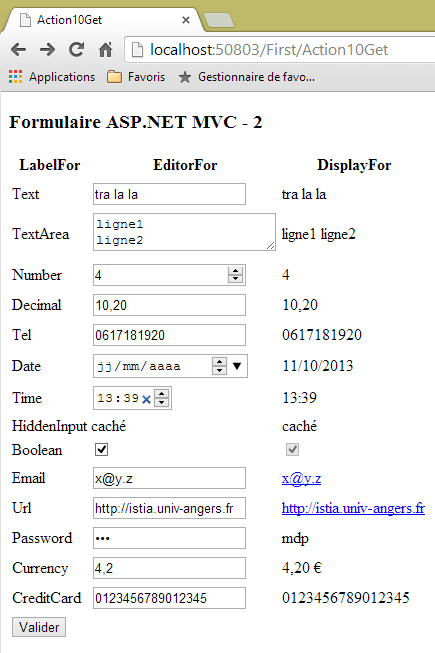
Depending on the browser used, different pages may be displayed. This is because the generated view uses the new tags introduced by version 5 from HTML, known as HTML5. Not all browsers support this version yet. Above, the Chrome browser supports it partially.
5.8.1. The form's [POST]
The form's [POST] is handled by the following [Action10Post] action:
    // Action10-POST
    [HttpPost]
    public ContentResult Action10Post(ViewModel10 modèle)
    {
      string erreurs = getErrorMessagesFor(ModelState);
      string texte = string.Format("Contrôleur={0}, Action={1}, valide={2}, erreurs={3}", RouteData.Values["controller"], RouteData.Values["action"], ModelState.IsValid, erreurs);
      return Content(texte, "text/plain", Encoding.UTF8);
}
- line 3: the [Action10Post] action uses the submitted form as its input model;
- line 5: we retrieve the validation errors from this form;
- line 6: the text response to the client is prepared;
- line 7: we send it.
Let’s now examine the properties of the [ViewModel10] template one by one and see how the associated metadata affects the generated HTML and the validation of the input fields.
5.8.2. Property [Text]
Definition
    [Display(Name="Text")]
    [DataType(DataType.Text)]
    public string Text { get; set; }
...
Text = "tra la la";
View
      <tr>
        <td>@Html.LabelFor(m => m.Text)</td>
        <td>@Html.EditorFor(m => m.Text)</td>
        <td>@Html.DisplayFor(m => m.Text)</td>
</tr>
Visual
 |
HTML generated
      <tr>
        <td><label for="Text">Text</label></td>
        <td><input class="text-box single-line" id="Text" name="Text" type="text" value="tra la la" /></td>
        <td>tra la la</td>
</tr>
Comments
- The method [Html.LabelFor] generated the <label> tag on line 2. The value of the [for] attribute is the name of the parameter property of the [Html.LabelFor] method
public string Text { get; set; }
The text displayed between the start and end of the tag is the metadata text
[Display(Name="Text")]
The [Html.LabelFor] method always proceeds in this manner. We will not revisit this for the other properties.
- The [Html.EditorFor] method generated the <input> tag on line 3. Note that it has a [class] attribute that associates the CSS and [text-box single-line] classes with the tag. The attributes [id] and [name] have the value [Text], which is the name of the parameter property of the method [Html.EditorFor]. The attribute [type] was assigned the value [text] due to the metadata
[DataType(DataType.Text)]
- the method [Html.DisplayFor] generated the text in line 4. This is the value of the parameter property of the method [Html.DisplayFor ]. This method is influenced by the metadata
[DataType(DataType.Text)]
, which causes the value to be displayed as unformatted text.
5.8.3. Property [MultiLineText]
Definition
    [Display(Name = "TextArea")]
    [DataType(DataType.MultilineText)]
public string MultiLineText { get; set; }
View
      <tr>
        <td>@Html.LabelFor(m => m.MultiLineText)</td>
        <td>@Html.EditorFor(m => m.MultiLineText)</td>
        <td>@Html.DisplayFor(m => m.MultiLineText)</td>
</tr>
Visual
 |
HTML generated
      <tr>
        <td><label for="MultiLineText">TextArea</label></td>
        <td><textarea class="text-box multi-line" id="MultiLineText" name="MultiLineText">
ligne1
ligne2</textarea></td>
        <td>ligne1
ligne2</td>
</tr>
Comments
- The method [Html.EditorFor] generated the <textarea> tag for line 3. Note that it has a [class] attribute that associates the CSS and [text-box multi-line] classes with the tag. The attributes [id] and [name] have as their value the name [MultiLineText] of the parameter property of the method [Html.EditorFor]. This is always the case. We will not mention this again. The generated tag is <textarea> because of the metadata
[DataType(DataType.MultilineText)]
which specified that the property was multi-line text.
- The method [Html.DisplayFor] generated the text for lines 4–5. This is the value of the parameter property of the method [Html.DisplayFor ].
5.8.4. Property [Number]
Definition
    [Display(Name = "Number")]
public int Number { get; set; }
View
      <tr>
        <td>@Html.LabelFor(m => m.Number)</td>
        <td>@Html.EditorFor(m => m.Number)</td>
        <td>@Html.DisplayFor(m => m.Number)</td>
</tr>
Visual
 |
HTML generated
<tr>
        <td><label for="Number">Number</label></td>
        <td><input class="text-box single-line" data-val="true" data-val-number="Le champ Number doit être un nombre." data-val-required="Le champ Number est requis." id="Number" name="Number" type="number" value="4" /></td>
        <td>4</td>
      </tr>
Comments
- The method [Html.EditorFor] generated the <input> tag on line 3 with a [type] attribute of type [number]. Apparently simply because the property has type [int]. The attributes [data-val], [data-val-number], and [data-val-required] are attributes not recognized by HTML5. They are used by a client-side data validation framework Javascript;
- the [Html.DisplayFor] method generated the text on line 4, the property value.
Validation
The [data-x] attributes influence client-side data validation. Here are two examples:
You enter an incorrect number and submit the form:
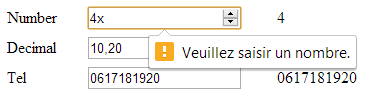 |
In the example above, validation occurred on the client side. The form will not be submitted until the error has been corrected.
Another example: you enter nothing:
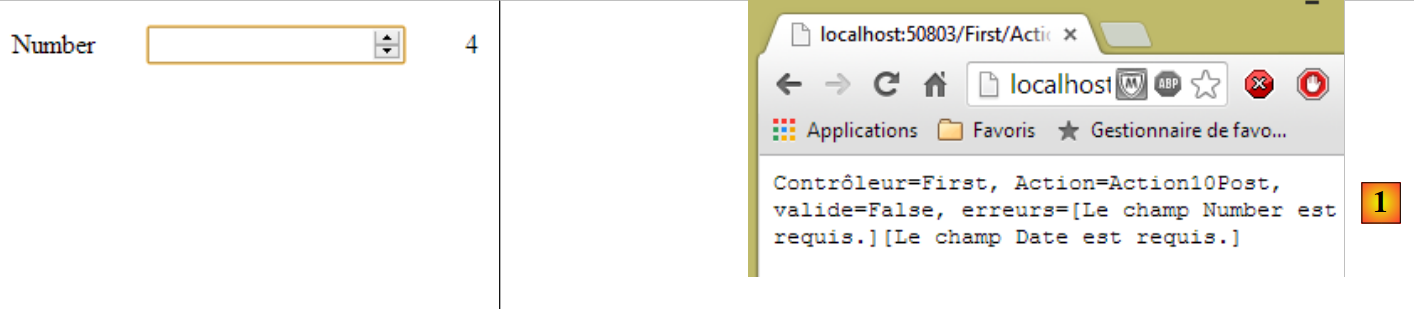 |
In [1] above, [Action10Post] reports an error. You may recall that we previously achieved this behavior by using the [Required] attribute on the property to be checked (see page 69), in this case the [Number] property. Here, we did not have to do that.
5.8.5. Property [Decimal]
Definition
    [Display(Name = "Decimal")]
    [UIHint("Decimal")]
public double Decimal { get; set; }
View
      <tr>
        <td>@Html.LabelFor(m => m.Decimal)</td>
        <td>@Html.EditorFor(m => m.Decimal)</td>
        <td>@Html.DisplayFor(m => m.Decimal)</td>
</tr>
Visual
 |
HTML generated
      <tr>
        <td><label for="Decimal">Decimal</label></td>
        <td><input class="text-box single-line" data-val="true" data-val-number="Le champ Decimal doit être un nombre." data-val-required="Le champ Decimal est requis." id="Decimal" name="Decimal" type="text" value="10,20" /></td>
        <td>10,20</td>
</tr>
Comments
- The method [Html.EditorFor] generated the <input> tag on line 3 with a [type] attribute of type [text]. The other attributes are identical to those generated for the previous [Number] property. The metadata:
[UIHint("Decimal")]
causes the property value to be displayed with two decimal places for both the [Html.EditorFor] and [Html.DisplayFor] methods
Validation
No validation errors are reported on the client side, unlike in the previous case. The error is reported only by the [Action10Post] action. Again, the decimal number is required without needing to set the [Required] attribute.
5.8.6. Property [Tel]
Definition
    [Display(Name = "Tel")]
    [DataType(DataType.PhoneNumber)]
public string Tel { get; set; }
View
      <tr>
        <td>@Html.LabelFor(m => m.Tel)</td>
        <td>@Html.EditorFor(m => m.Tel)</td>
        <td>@Html.DisplayFor(m => m.Tel)</td>
</tr>
Visual
 |
HTML generated
      <tr>
        <td><label for="Tel">Tel</label></td>
        <td><input class="text-box single-line" id="Tel" name="Tel" type="tel" value="0617181920" /></td>
        <td>0617181920</td>
</tr>
Comments
- The method [Html.EditorFor] generated the <input> tag on line 3 with a [type] attribute of type [tel]. This value was generated due to the metadata:
[DataType(DataType.PhoneNumber)]
The type [tel] for a <input> tag is a new addition to HTML5. The Chrome browser treated it as a <input> tag with the type [text].
Validation
No validation errors are reported on the client or server side. You can enter anything.
5.8.7. Property [Date]
Definition
    [Display(Name = "Date")]
    [DataType(DataType.Date)]
public DateTime Date { get; set; }
View
      <tr>
        <td>@Html.LabelFor(m => m.Date)</td>
        <td>@Html.EditorFor(m => m.Date)</td>
        <td>@Html.DisplayFor(m => m.Date)</td>
</tr>
Visual
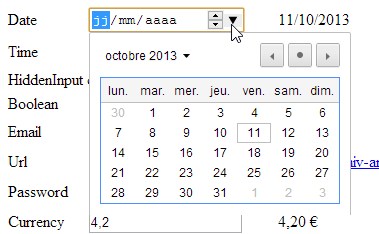 |
HTML generated
      <tr>
        <td><label for="Date">Date</label></td>
        <td><input class="text-box single-line" data-val="true" data-val-date="Le champ Date doit être une date." data-val-required="Le champ Date est requis." id="Date" name="Date" type="date" value="11/10/2013" /></td>
        <td>11/10/2013</td>
</tr>
Comments
- The [Html.EditorFor] method generated the <input> tag on line 3 with a [type] attribute of type [date]. This value was generated due to the metadata:
[DataType(DataType.Date)]
The [date] type for a <input> tag is a new feature (HTML5). The Chrome browser recognizes it and allows you to enter the date using a calendar. Furthermore, the entered date is displayed in the [jj/mm/aaaa] format, meaning that Chrome adapts the date format to the browser’s [locale].
- The [Html.DisplayFor] method also wrote the date in the [jj/mm/aaaa] format, again due to the presence of the [Date] metadata.
Validation
An invalid date is flagged on the client side ([1]), preventing the form from being submitted to the server (POST).
 |
The absence of a date is not reported on the client side but is reported on the server side as [2].
5.8.8. Property [Time]
Definition
    [Display(Name = "Time")]
    [DataType(DataType.Time)]
public DateTime Time { get; set; }
View
      <tr>
        <td>@Html.LabelFor(m => m.Time)</td>
        <td>@Html.EditorFor(m => m.Time)</td>
        <td>@Html.DisplayFor(m => m.Time)</td>
</tr>
Visual
 |
HTML generated
      <tr>
        <td><label for="Time">Time</label></td>
        <td><input class="text-box single-line" data-val="true" data-val-required="Le champ Time est requis." id="Time" name="Time" type="time" value="11:17" /></td>
        <td>11:17</td>
</tr>
Comments
- The [Html.EditorFor] method generated the <input> tag on line 3 with a [type] attribute of type [time]. This value was generated due to the metadata:
[DataType(DataType.Time)]
The type [time] for a <input> tag is a new feature HTML5. The Chrome browser recognizes it and allows you to enter a time in the form [hh:mm];
- the [Html.DisplayFor] method also wrote the time in the form [hh:mm], again due to the presence of the [Time] metadata.
Validation
It is technically not possible to enter an invalid time. The absence of a time is flagged on the server side:
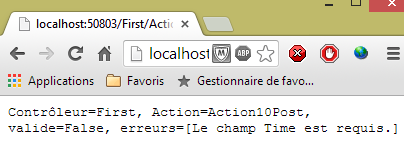 |
5.8.9. Property [HiddenInput]
Definition
    [Display(Name = "HiddenInput")]
    [UIHint("HiddenInput")]
public string HiddenInput { get; set; }
View
      <tr>
        <td>@Html.LabelFor(m => m.HiddenInput)</td>
        <td>@Html.EditorFor(m => m.HiddenInput)</td>
        <td>@Html.DisplayFor(m => m.HiddenInput)</td>
</tr>
Visual
 |
HTML generated
<tr>
<td><label for="HiddenInput">HiddenInput</label></td>
<td>caché<input id="HiddenInput" name="HiddenInput" type="hidden" value="caché" /></td>
<td>caché</td>
</tr>
Comments
- The [Html.EditorFor] method generated the <input> tag on line 3 with a [type] attribute of type [hidden], i.e., a hidden field (but one that is nevertheless submitted). This value was generated due to the metadata:
[UIHint("HiddenInput")]
- The method [Html.DisplayFor] wrote the value of the hidden field.
5.8.10. Property [Boolean]
Definition
    [Display(Name = "Boolean")]
public bool Boolean { get; set; }
View
      <tr>
        <td>@Html.LabelFor(m => m.Boolean)</td>
        <td>@Html.EditorFor(m => m.Boolean)</td>
        <td>@Html.DisplayFor(m => m.Boolean)</td>
</tr>
Image
 |
HTML generated
      <tr>
        <td><label for="Boolean">Boolean</label></td>
        <td><input checked="checked" class="check-box" data-val="true" data-val-required="Le champ Boolean est requis." id="Boolean" name="Boolean" type="checkbox" value="true" /><input name="Boolean" type="hidden" value="false" /></td>
        <td><input checked="checked" class="check-box" disabled="disabled" type="checkbox" /></td>
</tr>
Comments
- The [Html.EditorFor] method generated the <input> tag on line 3 with a [type] attribute of type [checkbox], i.e., a checkbox. This value was generated because the property is Boolean:
public bool Boolean { get; set; }
- The method [Html.DisplayFor] generated line 4, also a checkbox (type attribute) but disabled (disabled attribute).
5.8.11. Property [Email]
Definition
    [Display(Name = "Email")]
    [DataType(DataType.EmailAddress)]
public string Email{ get; set; }
View
      <tr>
        <td>@Html.LabelFor(m => m.Email)</td>
        <td>@Html.EditorFor(m => m.Email)</td>
        <td>@Html.DisplayFor(m => m.Email)</td>
</tr>
Visual
 |
HTML generated
      <tr>
        <td><label for="Email">Email</label></td>
        <td><input class="text-box single-line" id="Email" name="Email" type="email" value="x@y.z" /></td>
        <td><a href="mailto:x@y.z">x@y.z</a></td>
</tr>
Comments
- The [Html.EditorFor] method generated the <input> tag on line 3 with a [type] attribute of type [email]. This type is new in HTML5. This type was generated due to the metadata:
[DataType(DataType.EmailAddress)]
Chrome appears to have treated this type as a [text] type.
- The [Html.DisplayFor] method generated line 4: a link to the email address.
Validation
An invalid address is reported on the client side [1]:
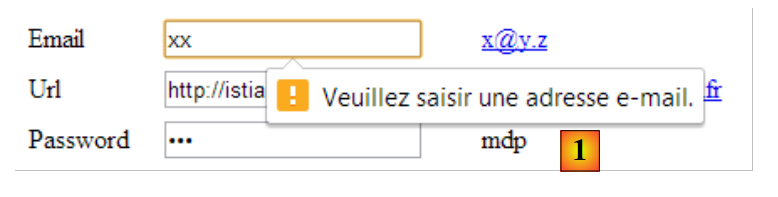 |
Leaving the field blank does not cause an error.
5.8.12. Property [Url]
Definition
    [Display(Name = "Url")]
    [DataType(DataType.Url)]
public string Url { get; set; }
View
      <tr>
        <td>@Html.LabelFor(m => m.Url)</td>
        <td>@Html.EditorFor(m => m.Url)</td>
        <td>@Html.DisplayFor(m => m.Url)</td>
</tr>
Visual
 |
HTML generated
      <tr>
        <td><label for="Url">Url</label></td>
        <td><input class="text-box single-line" id="Url" name="Url" type="url" value="http://istia.univ-angers.fr" /></td>
        <td><a href="http://istia.univ-angers.fr">http://istia.univ-angers.fr</a></td>
</tr>
Comments
- The [Html.EditorFor] method generated the <input> tag on line 3 with a [type] attribute of type [url]. This type is new in HTML5. It was generated due to the metadata:
[DataType(DataType.Url)]
Chrome appears to treat this type as a [text] type.
- The [Html.DisplayFor] method generated line 4: a link to URL.
Validation
An invalid URL is reported on the client side [1]:
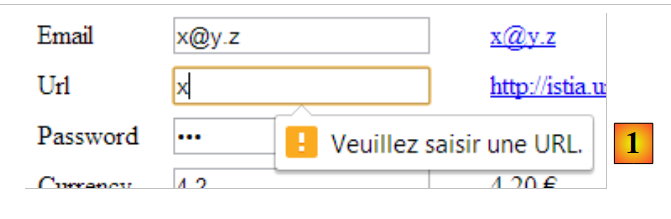 |
No input does not cause an error.
5.8.13. [Password] property
Definition
    [Display(Name = "Password")]
    [DataType(DataType.Password)]
public string Password { get; set; }
View
      <tr>
        <td>@Html.LabelFor(m => m.Password)</td>
        <td>@Html.EditorFor(m => m.Password)</td>
        <td>@Html.DisplayFor(m => m.Password)</td>
</tr>
Visual
 |
HTML generated
      <tr>
        <td><label for="Password">Password</label></td>
        <td><input class="text-box single-line password" id="Password" name="Password" type="password" value="mdp" /></td>
        <td>mdp</td>
</tr>
Comments
- The [Html.EditorFor] method generated the <input> tag on line 3 with a [type] attribute of type [password]. This type was generated due to the metadata:
[DataType(DataType.Password)]
- The method [Html.DisplayFor] generated line 4.
5.8.14. Property [Currency]
Definition
    [Display(Name = "Currency")]
    [DataType(DataType.Currency)]
public double Currency { get; set; }
View
      <tr>
        <td>@Html.LabelFor(m => m.Currency)</td>
        <td>@Html.EditorFor(m => m.Currency)</td>
        <td>@Html.DisplayFor(m => m.Currency)</td>
</tr>
Visual
 |
HTML generated
      <tr>
        <td><label for="Currency">Currency</label></td>
        <td><input class="text-box single-line" data-val="true" data-val-number="Le champ Currency doit être un nombre." data-val-required="Le champ Currency est requis." id="Currency" name="Currency" type="text" value="4,2" /></td>
        <td>4,20 €</td>
</tr>
Comments
- The method [Html.EditorFor] generated the input tag on line 3 with an attribute [type] of type [text];
- The [Html.DisplayFor] method generated line 4, a number with two decimal places and a currency symbol. This format was used because of the metadata:
[DataType(DataType.Currency)]
Validation
An invalid value [1] or a missing value [2] is reported on the server side:
 |
5.8.15. Property [CreditCard]
Definition
    [Display(Name = "CreditCard")]
    [DataType(DataType.CreditCard)]
public string CreditCard { get; set; }
View
      <tr>
        <td>@Html.LabelFor(m => m.CreditCard)</td>
        <td>@Html.EditorFor(m => m.CreditCard)</td>
        <td>@Html.DisplayFor(m => m.CreditCard)</td>
</tr>
Visual
 |
HTML generated
      <tr>
        <td><label for="CreditCard">CreditCard</label></td>
        <td><input class="text-box single-line" id="CreditCard" name="CreditCard" type="text" value="0123456789012345" /></td>
        <td>0123456789012345</td>
</tr>
Comments
- The method [Html.EditorFor] generated the <input> tag on line 3 with an attribute [type] of type [text]. The [Html.DisplayFor] method generated line 4. It is not clear here what the metadata contributes:
[DataType(DataType.CreditCard)]
Validation
No validation is performed, either on the client side or on the server side.
5.9. Form Validation
We have already addressed the issue of validating an action’s model in Section 4.5 and the following sections. We revisit this issue in the context of a form:
- how to notify the user of input errors;
- perform validations on both the client-side and the server-side to report errors to the user more quickly.
5.9.1. Server-side validation
Consider the following model:
using System;
using System.Collections.Generic;
using System.ComponentModel.DataAnnotations;
using System.Net.Mail;

namespace Exemple_03.Models
{
  public class ViewModel11 : IValidatableObject
  {

    [Required(ErrorMessage = "Information requise")]
    [Display(Name = "Chaîne d'au moins quatre caractères")]
    [RegularExpression(@"^.{4,}$", ErrorMessage = "Information incorrecte")]
    public string Chaine1 { get; set; }

    [Display(Name = "Chaîne d'au plus quatre caractères")]
    [Required(ErrorMessage = "Information requise")]
    [RegularExpression(@"^.{1,4}$", ErrorMessage = "Information incorrecte")]
    public string Chaine2 { get; set; }

    [Required(ErrorMessage = "Information requise")]
    [Display(Name = "Chaîne de quatre caractères exactement")]
    [RegularExpression(@"^.{4,4}$", ErrorMessage = "Information incorrecte")]
    public string Chaine3 { get; set; }

    [Required(ErrorMessage = "Information requise")]
    [Display(Name = "Nombre entier")]
    public int Entier1 { get; set; }

    [Display(Name = "Nombre entier dans l'intervalle [1,100]")]
    [Required(ErrorMessage = "Information requise")]
    [Range(1, 100, ErrorMessage = "Information incorrecte")]
    public int Entier2 { get; set; }

    [Display(Name = "Nombre réel")]
    [Required(ErrorMessage = "Information requise")]
    public double Reel1 { get; set; }

    [Display(Name = "Nombre réel dans l'intervalle [10.2, 11.3]")]
    [Required(ErrorMessage = "Information requise")]
    [Range(10.2, 11.3, ErrorMessage = "Information incorrecte")]
    public double Reel2 { get; set; }

    [Display(Name = "Adresse mail")]
    [Required(ErrorMessage = "Information requise")]
    public string Email1 { get; set; }

    [Display(Name = "Date sous la forme dd/jj/aaaa")]
    [RegularExpression(@"\s*\d{2}/\d{2}/\d{4}\s*", ErrorMessage = "Information incorrecte")]
    [Required(ErrorMessage = "Information requise")]
    public string Regexp1 { get; set; }

    [Display(Name = "Date postérieure à celle d'aujourd'hui")]
    [Required(ErrorMessage = "Information requise")]
    [DataType(DataType.Date)]
    public DateTime Date1 { get; set; }

    // validation
    public IEnumerable<ValidationResult> Validate(ValidationContext validationContext)
    {
      List<ValidationResult> résultats = new List<ValidationResult>();
      // Date 1
      if (Date1.Date <= DateTime.Now.Date)
      {
        résultats.Add(new ValidationResult("Information incorrecte", new string[] { "Date1" }));
      }
      // Email1
      try
      {
        new MailAddress(Email1);
      }
      catch
      {
        résultats.Add(new ValidationResult("Information incorrecte", new string[] { "Email1" }));
      }
      // return the list of errors
      return résultats;
    }
  }
}
This model will be displayed by the following view [Action11Get.cshtml]:
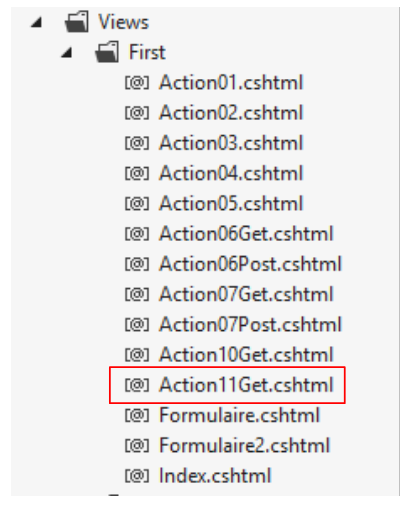 |
@model Exemple_03.Models.ViewModel11
@{
  Layout = null;
}

<!DOCTYPE html>

<html>
<head>
  <meta name="viewport" content="width=device-width" />
  <title>Action11Get</title>
  <link rel="stylesheet" href="~/Content/Site.css" />
</head>
<body>
  <h3>Formulaire ASP.NET MVC – Validation 1</h3>
  @using (Html.BeginForm("Action11Post", "First"))
  {
    <table>
      <thead>
        <tr>
          <th>Type attendu</th>
          <th>Valeur saisie</th>
          <th>Message d'error</th>
        </tr>
      </thead>
      <tbody>
        <tr>
          <td>@Html.LabelFor(m => m.Chaine1)</td>
          <td>@Html.EditorFor(m => m.Chaine1)</td>
          <td>@Html.ValidationMessageFor(m => m.Chaine1)</td>
        </tr>
        <tr>
          <td>@Html.LabelFor(m => m.Chaine2)</td>
          <td>@Html.EditorFor(m => m.Chaine2)</td>
          <td>@Html.ValidationMessageFor(m => m.Chaine2)</td>
        </tr>
        <tr>
          <td>@Html.LabelFor(m => m.Chaine3)</td>
          <td>@Html.EditorFor(m => m.Chaine3)</td>
          <td>@Html.ValidationMessageFor(m => m.Chaine3)</td>
        </tr>
        <tr>
          <td>@Html.LabelFor(m => m.Entier1)</td>
          <td>@Html.EditorFor(m => m.Entier1)</td>
          <td>@Html.ValidationMessageFor(m => m.Entier1)</td>
        </tr>
        <tr>
          <td>@Html.LabelFor(m => m.Entier2)</td>
          <td>@Html.EditorFor(m => m.Entier2)</td>
          <td>@Html.ValidationMessageFor(m => m.Entier2)</td>
        </tr>
        <tr>
          <td>@Html.LabelFor(m => m.Reel1)</td>
          <td>@Html.EditorFor(m => m.Reel1)</td>
          <td>@Html.ValidationMessageFor(m => m.Reel1)</td>
        </tr>
        <tr>
          <td>@Html.LabelFor(m => m.Reel2)</td>
          <td>@Html.EditorFor(m => m.Reel2)</td>
          <td>@Html.ValidationMessageFor(m => m.Reel2)</td>
        </tr>
        <tr>
          <td>@Html.LabelFor(m => m.Email1)</td>
          <td>@Html.EditorFor(m => m.Email1)</td>
          <td>@Html.ValidationMessageFor(m => m.Email1)</td>
        </tr>
        <tr>
          <td>@Html.LabelFor(m => m.Regexp1)</td>
          <td>@Html.EditorFor(m => m.Regexp1)</td>
          <td>@Html.ValidationMessageFor(m => m.Regexp1)</td>
        </tr>
        <tr>
          <td>@Html.LabelFor(m => m.Date1)</td>
          <td>@Html.EditorFor(m => m.Date1)</td>
          <td>@Html.ValidationMessageFor(m => m.Date1)</td>
        </tr>
      </tbody>
    </table>
    <p>
      <input type="submit" value="Valider" />
    </p>
  }
</body>
</html>
- line 12: references the [Site.css] stylesheet. By default, it contains classes used to highlight form input errors;
- lines 18–25: a three-column table:
- Column 1 displays text using the [Html.LabelFor] method;
- Column 2 displays the input using the [Html.EditorFor] method,
- Column 3 displays any input errors using method [Html.ValidationMessageFor];
The [Action11Get] action is used to display the form:
    // Action11-GET
    [HttpGet]
    public ViewResult Action11Get()
    {
      return View("Action11Get", new ViewModel11());
}
The [Action11Post] action is used to redisplay the form with any input errors:
    // Action11-POST
    [HttpPost]
    public ViewResult Action11Post(ViewModel11 modèle)
    {
      return View("Action11Get", modèle);
}
- Line 3: The [ViewModel11] model is created and then initialized with the posted values. Errors may then occur. Each invalid property P of the model is associated with an error message. This is the message that the form’s [Html.ValidationMessageFor] method retrieves.
Here is an example of execution:
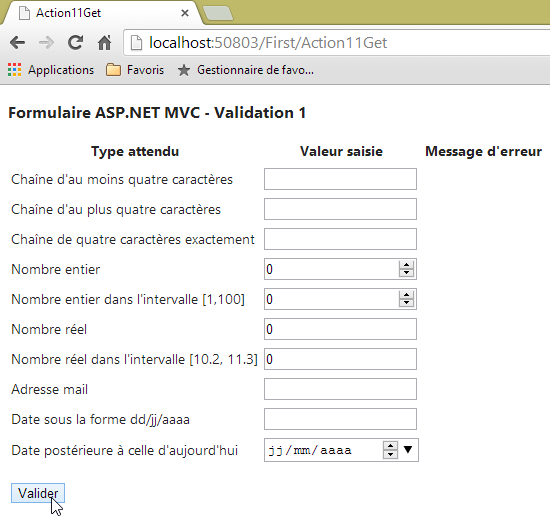 | 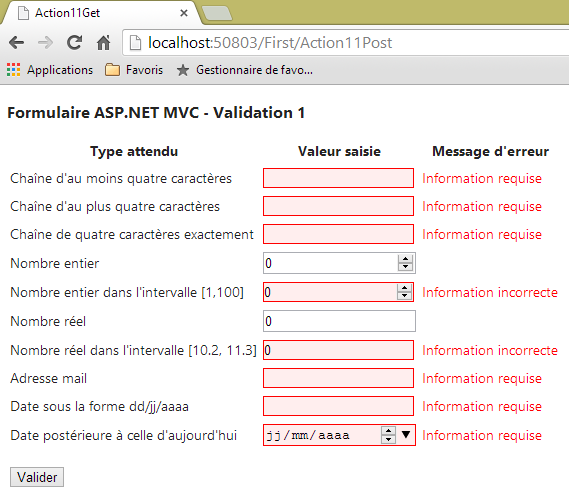 |
Here is another example:
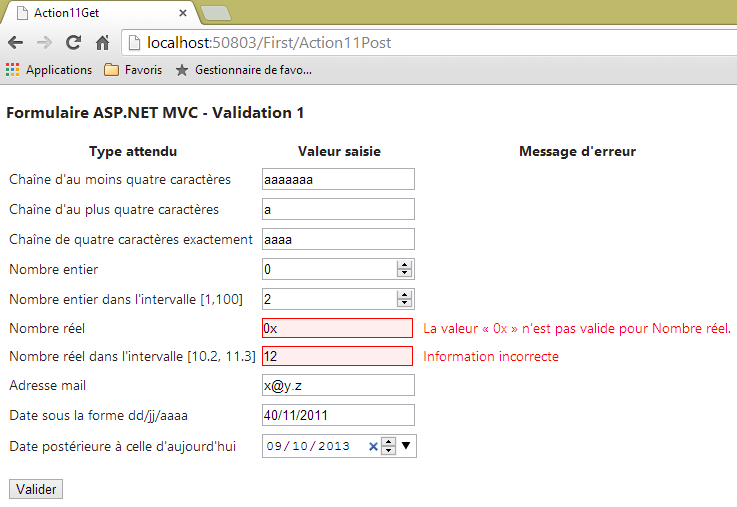 |
Note that both dates are incorrect (the current date is 10/11/2013) but the errors are not reported. These errors are detected by the model’s [Validate] method:
    // validation
    public IEnumerable<ValidationResult> Validate(ValidationContext validationContext)
    {
      List<ValidationResult> résultats = new List<ValidationResult>();
      // Date 1
      if (Date1.Date <= DateTime.Now.Date)
      {
        résultats.Add(new ValidationResult("Information incorrecte", new string[] { "Date1" }));
      }
      // Email1
      try
      {
        new MailAddress(Email1);
      }
      catch
      {
        résultats.Add(new ValidationResult("Information incorrecte", new string[] { "Email1" }));
      }
      // Regexp1
      try
      {
        DateTime.ParseExact(Regexp1, "dd/MM/yyyy", CultureInfo.CreateSpecificCulture("fr-FR"));
      }
      catch
      {
        résultats.Add(new ValidationResult("Information incorrecte", new string[] { "Regexp1" }));
      }

      // return the list of errors
      return résultats;
}
The [Validate] method is only executed once all attribute validations have passed. This is demonstrated in a final example:
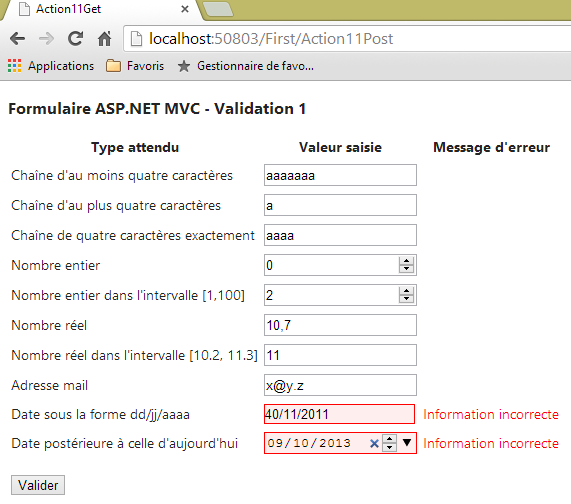 |
5.9.2. Client-side validation
All previous validations were performed on the server side. Therefore, a round trip between the client and the server is required for the user to become aware of their errors. Client-side validation uses the Javascript code to notify the user of their errors as early as possible, and in any case before the POST. The latter can only occur once all detected errors have been corrected.
We reuse the previous [ViewModel11] template, but now display it with the following [Action12Get.cshtml] view:
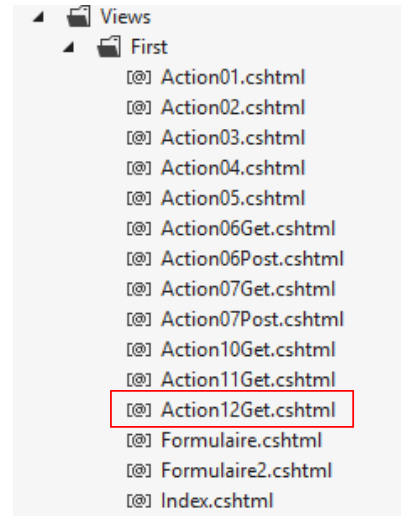 |
@model Exemple_03.Models.ViewModel11
@{
  Layout = null;
}

<!DOCTYPE html>

<html>
<head>
  <meta name="viewport" content="width=device-width" />
  <title>Action12Get</title>
  <link rel="stylesheet" href="~/Content/Site.css" />
  <script type="text/javascript" src="~/Scripts/jquery-1.8.2.min.js" ></script>
  <script type="text/javascript" src="~/Scripts/jquery.validate.min.js" ></script>
  <script type="text/javascript" src="~/Scripts/jquery.validate.unobtrusive.min.js" ></script>
</head>
<body>
  <h3>Formulaire ASP.NET MVC - Validation 1</h3>
  @using (Html.BeginForm("Action11Post", "First"))
  {
    <table>
      <thead>
        <tr>
          <th>Type attendu</th>
          <th>Valeur saisie</th>
          <th>Message d'error</th>
        </tr>
      </thead>
      <tbody>
...
      </tbody>
    </table>
    <p>
      <input type="submit" value="Valider" />
    </p>
  }
</body>
</html>
Note: Line 13, adapt the version from jQuery to match the one you have with your version from Visual Studio (see below).
Client-side validation requires the presence of line 3 below in the application's [Web.config] file.
  <appSettings>
    ...
    <add key="ClientValidationEnabled" value="true" />
</appSettings>
- Lines 1–4: The [appSettings] section must be a direct child of the [configuration] section in the [Web.config] file;
The [Action12Get] view is identical to the previous [Action11Get] view except for lines 13-15. These lines include the Javascript scripts required for client-side validation in the view. These scripts are located in the [Scripts] folder of the project:
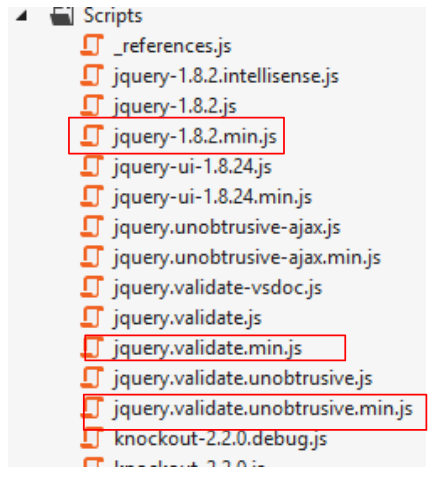 |
Each script has a normal version (version) and a minified version (version). The latter is lighter but unreadable. We use it in production. The readable version is used in development.
The [Action12Get.cshtml] view will be displayed by the following [Action12Get] action:
    // Action12-GET
    [HttpGet]
    public ViewResult Action12Get()
    {
      return View("Action12Get", new ViewModel11());
}
The submitted form will be processed by the following action [Action12Post]:
    // Action12-POST
    [HttpPost]
    public ViewResult Action12Post(ViewModel11 modèle)
    {
      return View("Action12Get", modèle);
}
Let's see how this works with an example:
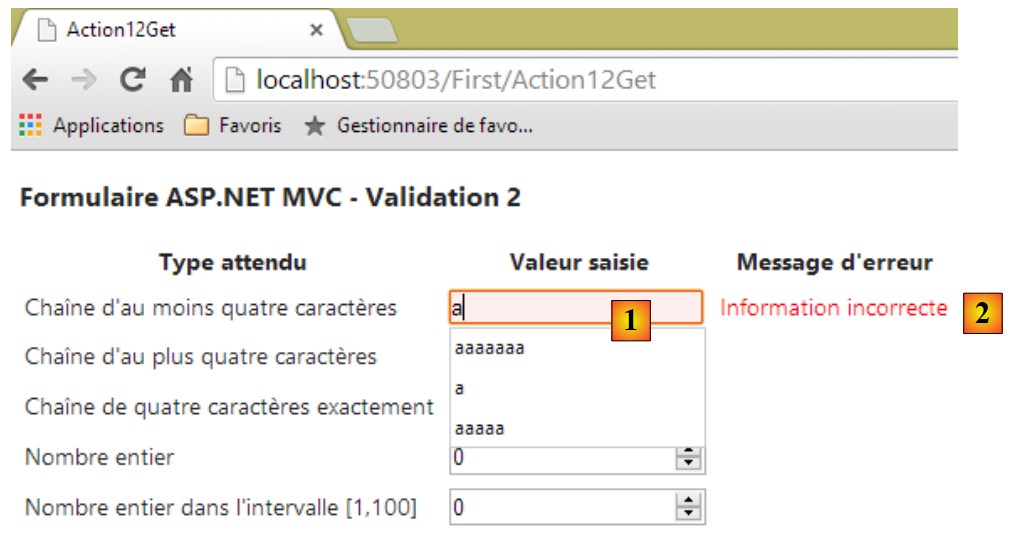 |
As soon as you type a character in [1], the message in [2] appears because the expected value must be at least four characters long. Thus, validation occurs with each new character typed. The error message disappears after the fourth character is typed. With that done, let’s validate the form:
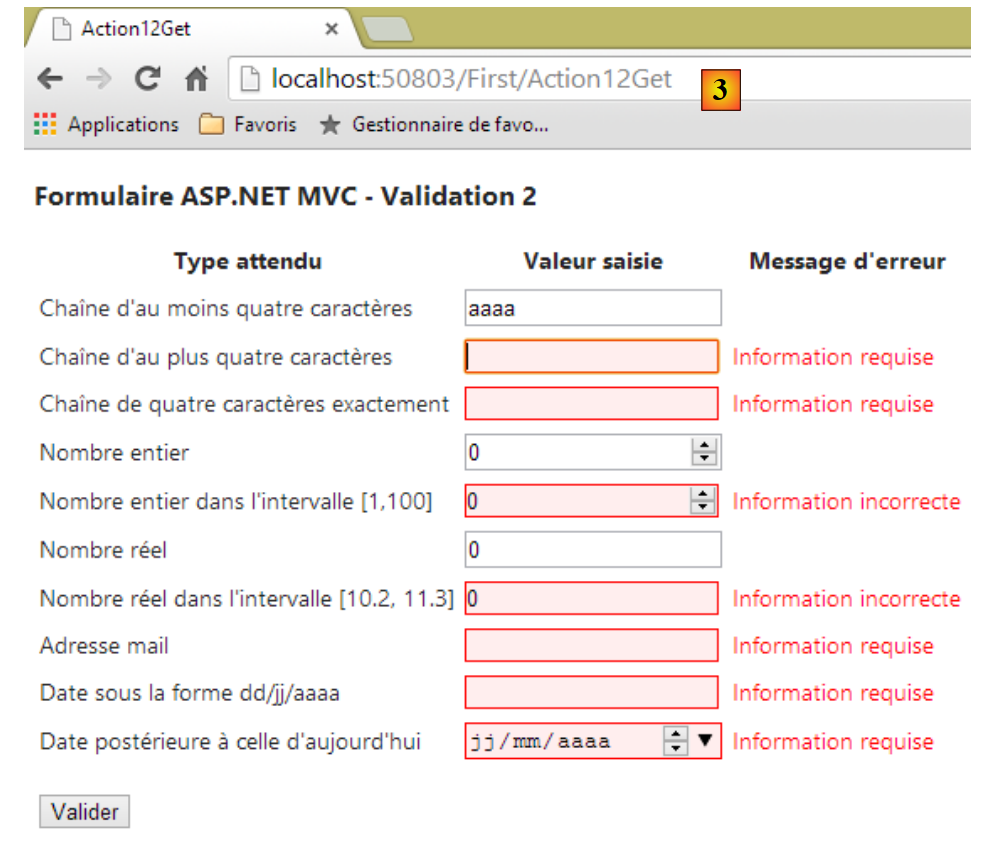 |
The URL [3] shows us that the [POST] did not occur. However, clicking the [Valider] button triggered all client-side validations, and new error messages appeared.
Let’s look at the HTML generated for the first entry, for example:
<tr>
<td><label for="Chaine1">Chaîne d'au moins quatre caractères</label></td>
<td><input class="text-box single-line" data-val="true" data-val-regex="Information incorrecte" data-val-regex-pattern="^.{4,}$" data-val-required="Information requise" id="Chaine1" name="Chaine1" type="text" value="" /></td>
<td><span class="field-validation-valid" data-valmsg-for="Chaine1" data-valmsg-replace="true"></span></td>
</tr>
- line 3, we find:
- the error message for when the input is missing [data-val-required],
- the error message for the case where the entry is incorrect [data-val-regex],
- the regular expression for the entered string [data-val-regex-pattern];
- line 4, other attributes [data-x] used to display any error message;
The attributes [data-x] of the generated tags are utilized by the Javascript that we have embedded in the view. If this is absent, these attributes are simply ignored, and there is no client-side validation. It works the same way as in the previous example. Hence the term [unobtrusive] for this technique.
5.10. Link Management for navigation and Actions
We will create the following two views to illustrate link management in a view:
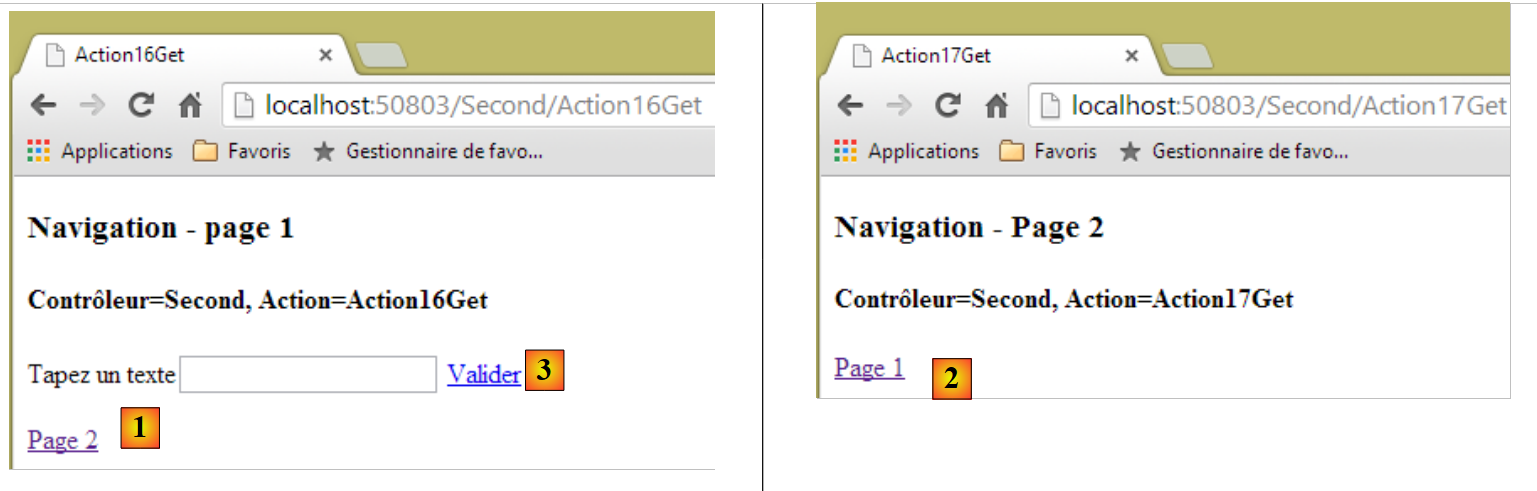 |
- In [1] and [2], there are two links from navigation;
- In [3], there is an action link that submits the form. It is not used for navigation.
Page 1 is generated by the following view, [Action16Get.cshtml]:
@{
  Layout = null;
}

<!DOCTYPE html>

<html>
<head>
  <meta name="viewport" content="width=device-width" />
  <title>Action16Get</title>
  <script>
    function postForm() {
      // retrieve the document form
      var form = document.forms[0];
      // submission
      form.submit();
    }
  </script>
</head>
<body>
  <h3>Navigation - page 1</h3>
  <h4>@ViewBag.info</h4>
  @using (Html.BeginForm("Action16Post", "Second"))
  {
    @Html.Label("data", "Tapez un texte")
    @Html.TextBox("data")
    <a href="javascript:postForm()">Valider</a>
  }
  <p>
    @Html.ActionLink("Page 2", "Action17Get", "Second")
  </p>
</body>
</html>
- line 22: a piece of information initialized by the action that will render the view;
- lines 23–28: a form;
- line 25: a label for the field [data];
- line 26: an input field named [data];
- line 27: a link of type [submit]. When clicked, the function Javascript [postForm] is executed (href attribute). This is defined on lines 12–17;
- line 14: a reference is retrieved for the first form in the document, the one on line 23;
- line 16: this form is submitted. Ultimately, it behaves as if a button of type [submit] had been clicked. The form is submitted to the controller and action specified on line 23;
- line 30: a link to navigation. The generated HTML code is as follows:
<a href="/Second/Action17Get">Page 2</a>
The method used is ActionLink(Text, Action, Controller).
Page 2 is generated by the following [Action17Get.cshtml] view:
@{
  Layout = null;
}

<!DOCTYPE html>

<html>
<head>
  <meta name="viewport" content="width=device-width" />
  <title>Action17Get</title>
</head>
<body>
  <h3>Navigation - Page 2</h3>
  <h4>@ViewBag.info</h4>
  <p>
    @Html.ActionLink("Page 1", "Action16Get", "Second")
  </p>
</body>
</html>
The actions that generate these views are as follows:
      // Action16-GET
      [HttpGet]
      public ViewResult Action16Get()
      {
        ViewBag.info = string.Format("Contrôleur={0}, Action={1}", RouteData.Values["controller"], RouteData.Values["action"]);
        return View("Action16Get");
      }

      // Action16-POST
      [HttpPost]
      public ViewResult Action16Post(string data)
      {
        ViewBag.info = string.Format("Contrôleur={0}, Action={1}, Data={2}", RouteData.Values["controller"], RouteData.Values["action"], data);
        return View("Action16Get");
      }

      // Action17-GET
      [HttpGet]
      public ViewResult Action17Get()
      {
        ViewBag.info = string.Format("Contrôleur={0}, Action={1}", RouteData.Values["controller"], RouteData.Values["action"]);
        return View();
}
- line 6, the action [Action16Get] generates the view [Action16Get.cshtml], i.e., page 1 of the example. This view is based on the template [ViewBag] (line 5);
- line 19: the action [Action17Get] generates the view [Action17Get.cshtml], i.e., page 2 of the example. This view is based on [ViewBag] (line 21);
- Line 11: The action [Action16Post] processes the POST from the form of the view [Action16Get.cshtml]. It receives the parameter named [data]. Recall that this is the name of the input field in the form;
- line 13: information is placed in [ViewBag];
- line 14: the view [Action16Get.cshtml] is displayed.
Readers are invited to test this example.