9. Case Study
9.1. Introduction
We will present a case study previously published in an article available at URL [http://tahe.developpez.com/dotnet/pam-aspnet/]. In that article, the case study was conducted using the standard ASP.NET and the ORM NHibernate. Here, we will implement it using ASP.NET, MVC, and ORM Entity Framework. As in the existing article, the case study is presented as a university course. It is therefore intended for students. For all questions, references to the chapters we have just detailed are provided to indicate useful reading material.
9.2. The Problem to Solve
We want to write a web application that allows a user to simulate payroll calculations for child care providers at the "Maison de la petite enfance" association in a municipality. We will focus as much on the organization of the application’s DotNet code as on the code itself.
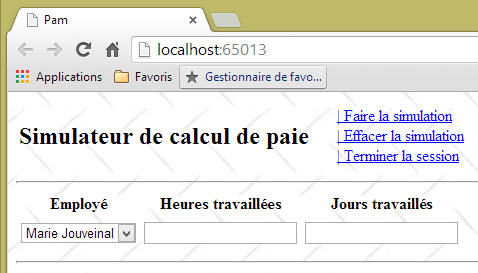
The application will be of the type APU [Application à Page Unique] and will use exclusively Ajax calls to communicate with the server. It will present the following views to the user:
- the [VueSaisies] view, which displays the simulation form
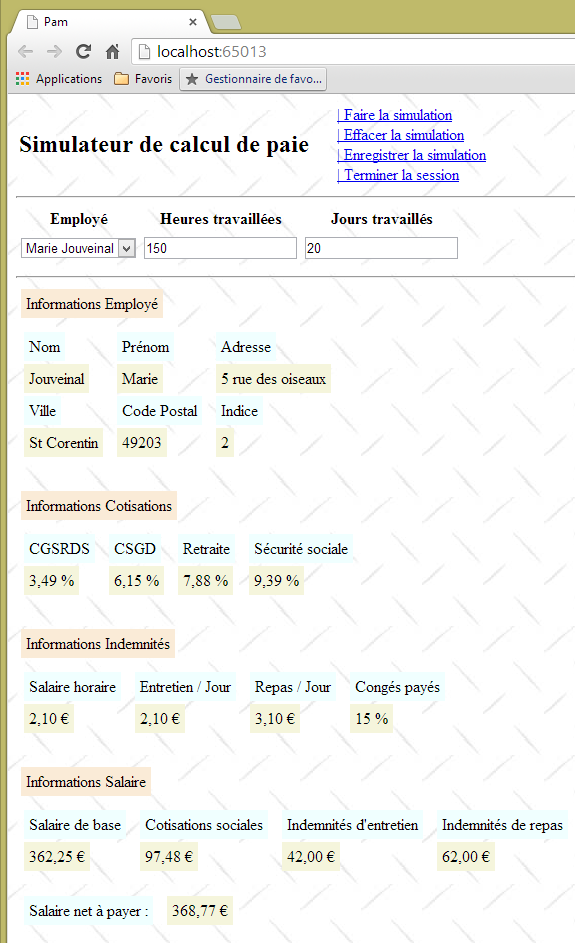
- the [VueSimulation] view used to display the detailed simulation results:
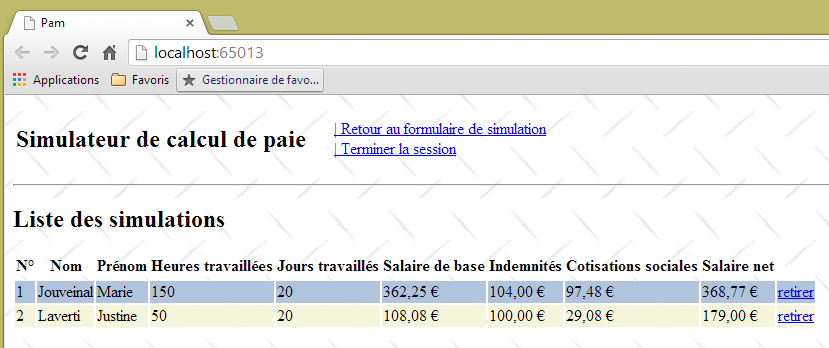
- the [VueSimulations] view, which lists the simulations performed by the client
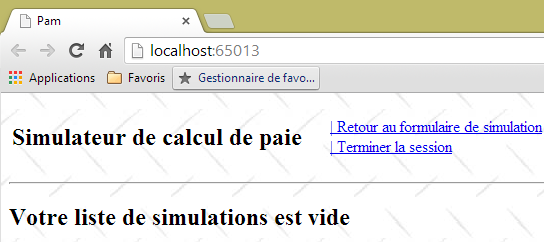
- the [VueSimulationsVides] view, which indicates that the client has no simulations or no more simulations:
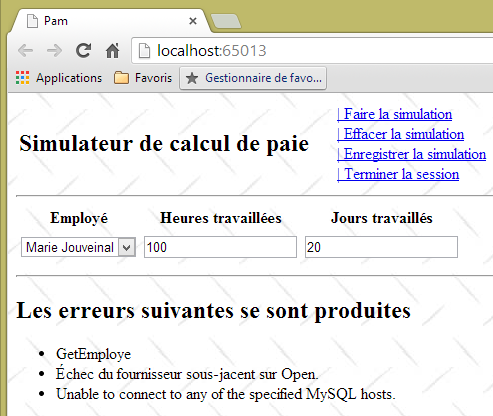
- the [VueErreurs] view, which indicates one or more errors (here, SGBD and MySQL have been terminated):
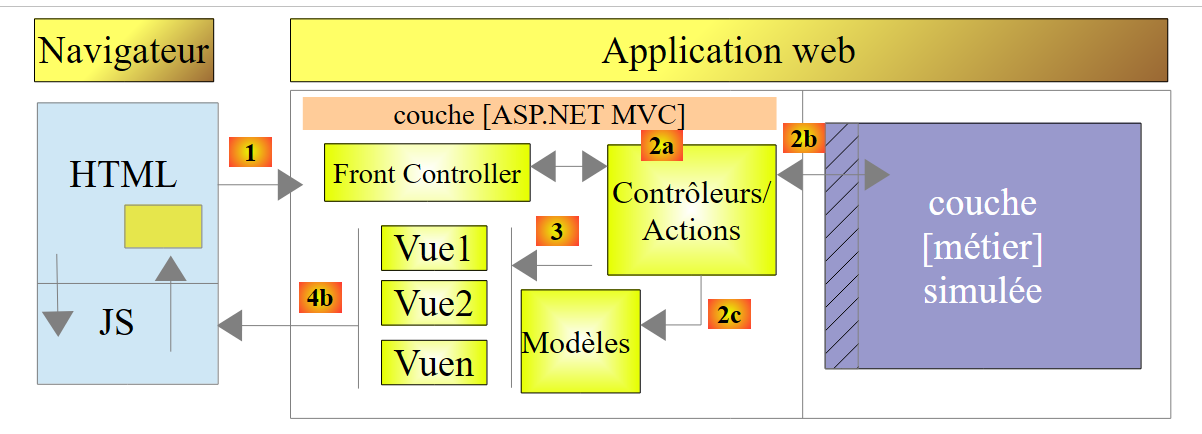
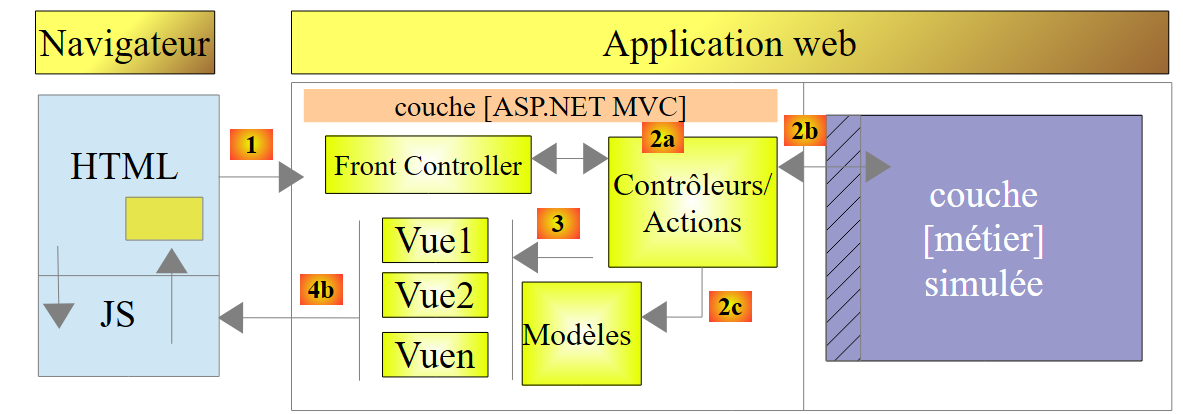
9.3. Application Architecture
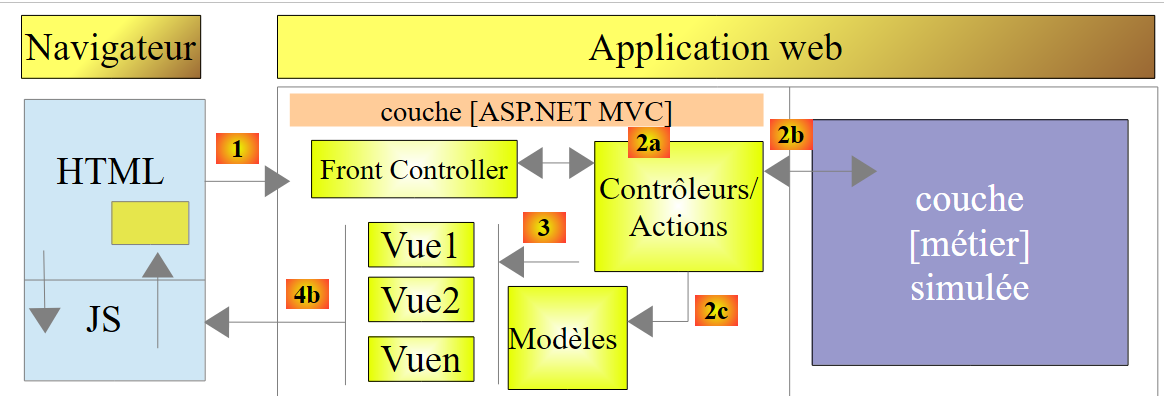
The application architecture will be as follows:
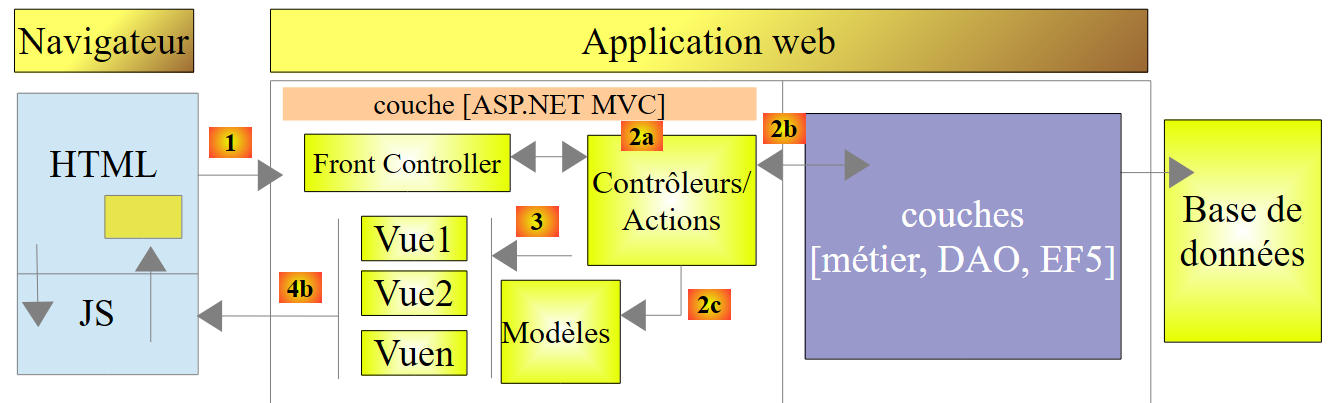 |
The [EF5] layer refers to the ORM Entity Framework 5. The SGBD used will be MySQL.
We will first build this application with a simulated [métier] layer:
 |
This will allow us to focus solely on the [web] layer. The simulated [métier] layer will conform to the interface of the actual [métier] layer. Once the [web] layer is operational, we will then build the [métier], [DAO], and [EF5] layers.
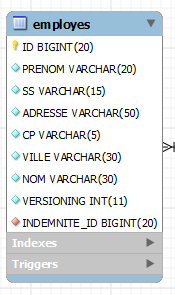
9.4. The database
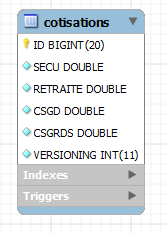
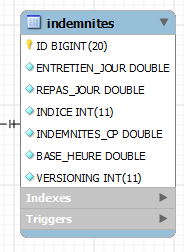
The static data needed to generate the pay stub is stored in a database named MySQL (pam=Childcare Payroll). This database has an administrator named root with no password. It contains three tables:
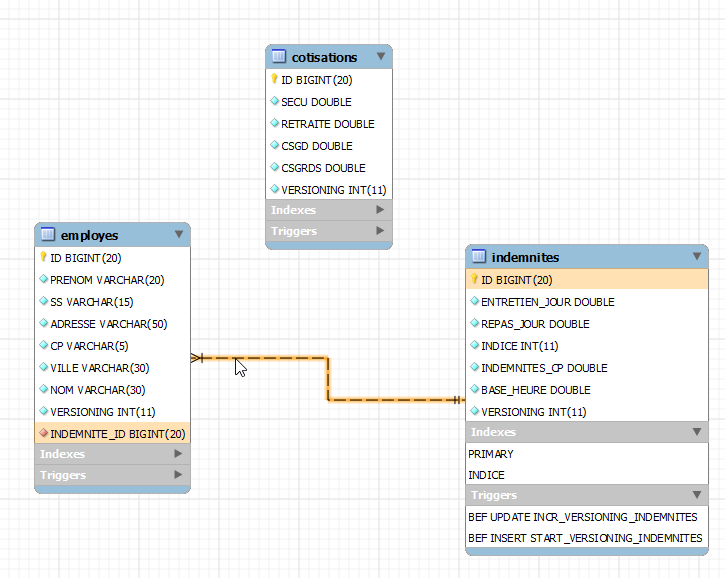
There is a foreign key relationship between the column EMPLOYES (INDEMNITE_ID) and the column INDEMNITES (ID). The structure of this database is dictated by its use with EF5. We will revisit this when we build the lower layers of the application.
Structure:
 |
|
Its contents could be as follows:
![]()
Structure:
 |
|
Its contents could be as follows:
![]()
Social security rates are independent of the employee. The previous table has only one row.
 |
|
Its content could be as follows:
![]()
9.5. Calculation method for a child care provider’s monthly salary
We now present the method for calculating a child care provider’s monthly salary. As an example, we will use the salary of Ms. Marie Jouveinal, who worked 150 hours over 20 days during the pay period.
The following elements are taken into account: | [TOTALHEURES]: total hours worked in the month [TOTALJOURS]: total days worked in the month | [TOTALHEURES]=150 [TOTALJOURS]= 20 |
The child care provider’s base salary is calculated using the following formula: | [SALAIREBASE]=([TOTALHEURES]*[BASEHEURE])*(1+[INDEMNITESCP]/100) | [SALAIREBASE] = (150 * [2.1]) * (1 + 0.15) = 362.25 |
A number of social security contributions must be deducted from this base salary: | General social contribution and social debt repayment contribution: [SALAIREBASE]*[CSGRDS/100] Deductible general social contribution: [SALAIREBASE]*[CSGD/100] Social Security, Widow’s, and Old-Age Benefits: [SALAIREBASE]*[SECU/100] Supplementary Pension + AGPF + Unemployment Insurance: [SALAIREBASE]*[RETRAITE/100] | CSGRDS: 12.64 CSGD: 22.28 Social Security: 34.02 Pension: 28.55 |
Total social contributions: | [COTISATIONSSOCIALES]=[SALAIREBASE]*(CSGRDS+CSGD+SECU+RETRAITE)/100 | [COTISATIONSSOCIALES]=97.48 |
In addition, the child care provider is entitled to a daily living allowance and a meal allowance for each day worked. As such, she receives the following allowances: | [Indemnités]=[TOTALJOURS]*(ENTRETIENJOUR+REPASJOUR) | [INDEMNITES]=104 |
Ultimately, the salary net to be paid to the child care provider is as follows: | [SALAIREBASE] - [COTISATIONSSOCIALES] + [INDEMNITÉS] | [salaire NET]=368.77 |
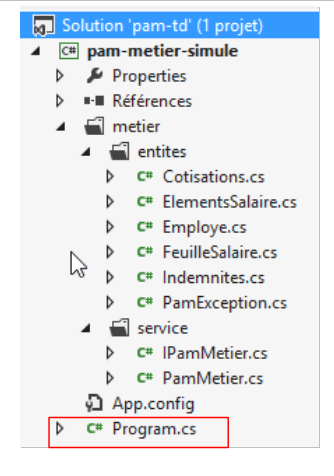
9.6. The Visual Studio project for the [web] layer
The Visual Web Developer project for the application will be as follows:
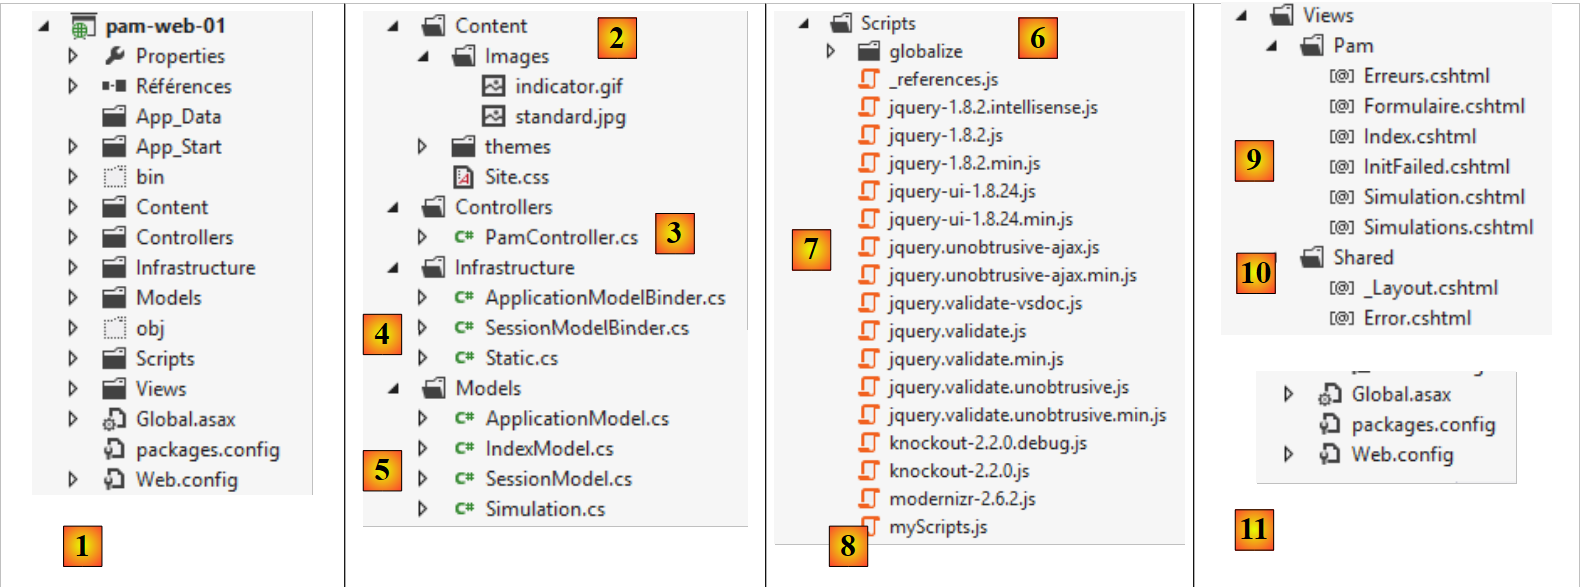 |
- in [1], the general structure of the [pam-web-01] project;
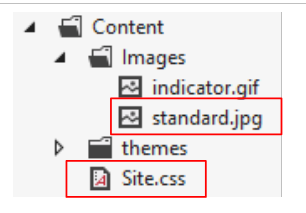
- in [2], the [Content] folder is where the project's static resources are stored:
- [indicator.gif]: the animated image showing the wait for an Ajax request to complete,
- [standard.jpg]: the background image for the various views,
- [Site.css]: the application’s style sheet;
- in [3], the application’s single controller [PamController];
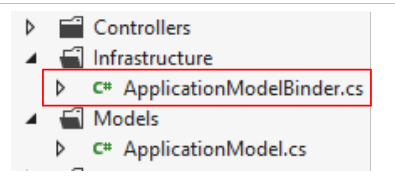
- in [4], classes required by the application but that cannot be classified as elements of MVC:
- [ApplicationModelBinder]: the class that allows data from scope [Application] to be included in the action model,
- [SessionModelBinder]: the class that allows data from scope [Session] to be included in the action model,
- [Static]: a helper class with static methods;
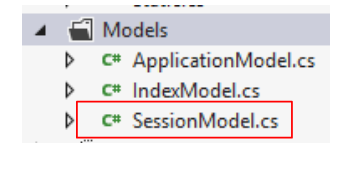
- in [5], the application models, whether action or view models:
- [ApplicationModel]: model containing the scope data from [Application],
- [SessionModel]: model containing the scope data from [Session],
- [Simulation]: class encapsulating the elements of a payroll calculation simulation,
- [IndexModel]: model of the first view [Index] displayed by the application;
- in [6], the JS scripts required for the application’s globalization;
- in [7], the JS scripts from the JQuery family required for the internationalization, client-side validation, and AJAX implementation of the application;
- In [8], [myScripts.js] is the file containing our own scripts, JS;
- in [9], the application views:
- [Index]: the home page,
- [Formulaire]: form for entering employee information and their hours and days worked,
- [Simulation]: the view displaying a simulation,
- [Simulations]: the view displaying the list of simulations performed,
- [Erreurs]: the view displaying a list of any errors,
- [InitFailed]: the view displaying error messages if the application fails to initialize;
- in [10], the master page of the application [_Layout];
- in [11], the files [Web.config] and [Global.asax] used to configure the application.
9.7. Step 1 – Setting up the simulated [métier] layer
From this point on, we describe the steps to follow to complete the case study. Where appropriate, we provide the chapter number so you can review it if needed to complete the task. Some project components are provided in a folder named [aspnetmvc-support.zip], which can be found on the website for this document. Inside, you will find the folder [étudedecas-support] with the following contents:
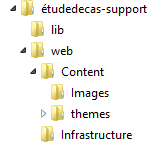 |
The project also incorporates elements presented in previous chapters. You can simply retrieve these by copying and pasting them between this PDF file and Visual Studio.
9.7.1. The Visual Studio solution for the complete application
First, we will create a Visual Studio solution in which we will create two projects:
- a project for the simulated [métier] layer;
- a project for the MVC web layer.
 |
We will use two tools:
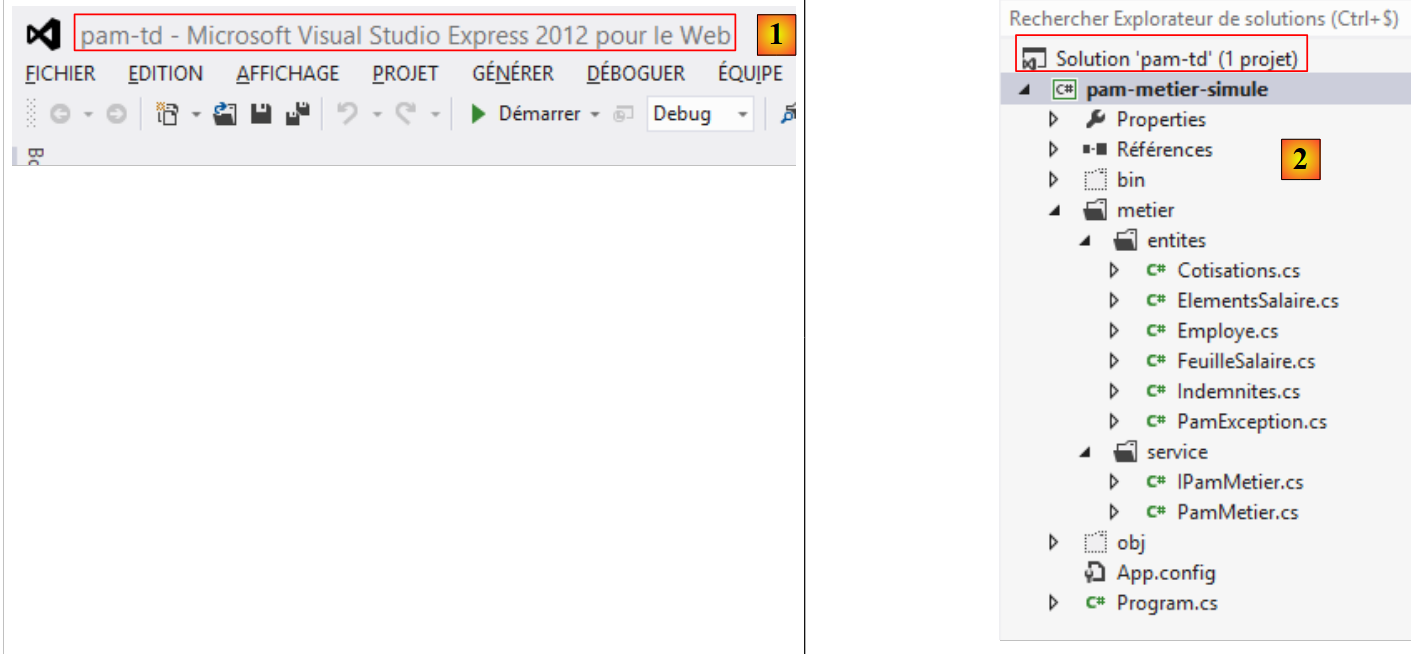
- Visual Studio Express 2012 for Desktop, which will be used to build the [métier] layer;
- Visual Studio Express 2012 for the Web, which will be used to build the [web] layer.
Using Visual Studio Express for Desktop, we create a solution named [pam-td]:
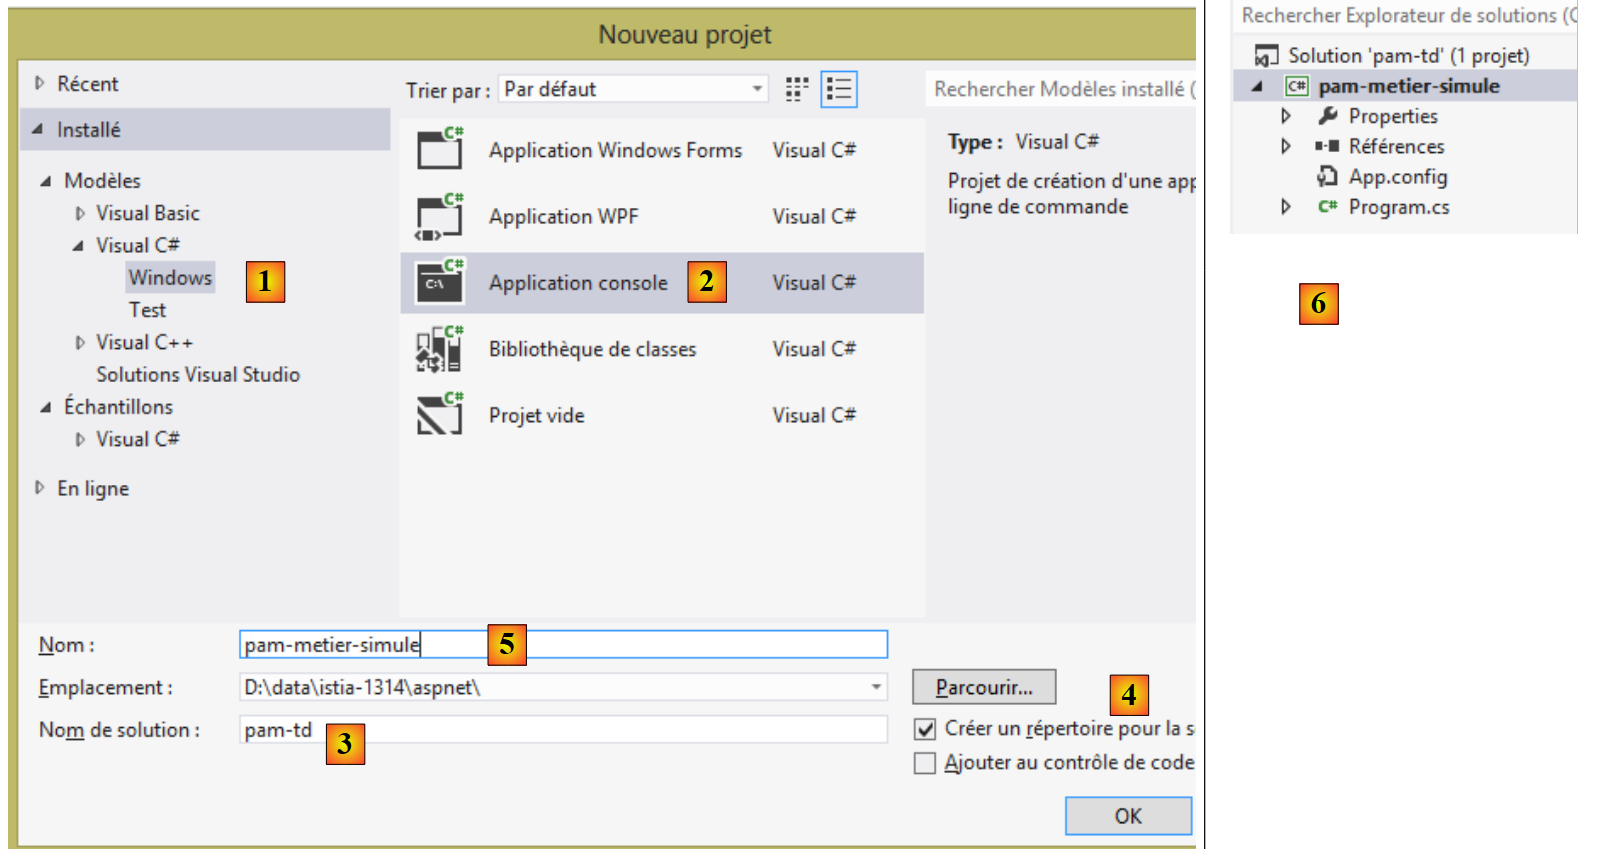 |
- In [1], select a C# application;
- in [2], select [Application console];
- in [3], name the solution;
- In [4], generate a directory for this solution;
- In [5], name the layer [métier];
- in [6], the generated solution.
9.7.2. The interface of the [métier] layer
In a layered architecture, it is good practice for communication between layers to occur via interfaces:
 |
What interface should layer [métier] present to layer [web]? What interactions are possible between these two layers? Let’s recall the web interface that will be presented to the user:
 |
- When the form is first displayed, the list of employees must be found in [1]. A simplified list is sufficient (Last Name, First Name, SS). The SS number is required to access additional information about the selected employee (fields 6 through 11).
- Information 12 through 15 are the various rates for cotisations.
- Information 16 through 19 are the employee’s allowances
- Information 20 through 24 are the salary components calculated based on user entries 1 through 3.
The [IPamMetier] interface provided to the [web] layer by the [métier] layer must meet the above requirements. There are many possible interfaces. We propose the following:
using Pam.Metier.Entites;
namespace Pam.Metier.Service
{
  public interface IPamMetier
  {
    // list of all employee identities
    Employe[] GetAllIdentitesEmployes();

    // ------- salary calculation
    FeuilleSalaire GetSalaire(string ss, double heuresTravaillées, int joursTravaillés);
  }
}
- line 7: the method that will populate the [1] combo box
- line 10: the method that will retrieve information 6 through 24. These have been collected in an object of type [FeuilleSalaire], which we will describe shortly.
We will place this interface in a folder named [metier/service]:
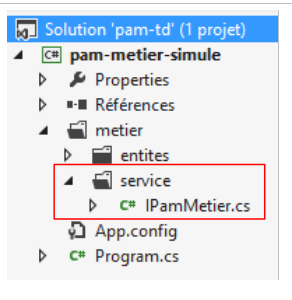 |
9.7.3. The entities of the [métier] layer
The previous interface uses two classes, [Employe] and [FeuilleSalaire], which we need to define:
- [Employe] is the representation of a row in the [employes] table in the database;
- [FeuilleSalaire] is an employee’s pay stub.
The entities will be placed in a folder named [metier / entites] within the project:
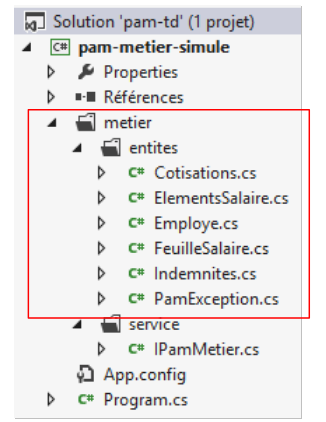 |
In the final architecture, the [métier] layer will handle image entities from the database:
We will use the following classes to represent the rows of the three database tables. Refer to Section 9.4 for the meanings of the various fields.
Class [Employe]
It represents a row in the [employes] table. Its code is as follows:
using System;

namespace Pam.Metier.Entites
{

  public class Employe
  {
    public string SS { get; set; }
    public string Nom { get; set; }
    public string Prenom { get; set; }
    public string Adresse { get; set; }
    public string Ville { get; set; }
    public string CodePostal { get; set; }
    public Indemnites Indemnites { get; set; }

    // signature
    public override string ToString()
    {
      return string.Format("Employé[{0},{1},{2},{3},{4},{5}]", SS, Nom, Prenom, Adresse, Ville, CodePostal);
    }
  }
}
Class [Indemnites]
It represents a row in the [indemnites] table. Its code is as follows:
using System;

namespace Pam.Metier.Entites
{
  public class Indemnites
  {
    public int Indice { get; set; }
    public double BaseHeure { get; set; }
    public double EntretienJour { get; set; }
    public double RepasJour { get; set; }
    public double IndemnitesCp { get; set; }
    // signature
    public override string ToString()
    {
      return string.Format("Indemnités[{0},{1},{2},{3},{4}]", Indice, BaseHeure, EntretienJour, RepasJour, IndemnitesCp);
    }
  }
}
Class [Cotisations]
It represents a row in the [cotisations] table. Its code is as follows:
using System;

namespace Pam.Metier.Entites
{

  public class Cotisations
  {
    public double CsgRds { get; set; }
    public double Csgd { get; set; }
    public double Secu { get; set; }
    public double Retraite { get; set; }
    // signature
    public override string ToString()
    {
      return string.Format("Cotisations[{0},{1},{2},{3}]", CsgRds, Csgd, Secu, Retraite);
    }
  }
}
Note that the classes do not include the [ID] and [VERSIONING] columns from the tables. These columns, which are useful when using ORM and EF5, are not relevant in the context of the simulated [métier] layer.
The class [FeuilleSalaire] encapsulates fields 6 through 24 of the form already presented:
namespace Pam.Metier.Entites
{
  public class FeuilleSalaire
  {

    // automatic properties
    public Employe Employe { get; set; }
    public Cotisations Cotisations { get; set; }
    public ElementsSalaire ElementsSalaire { get; set; }

    // ToString
    public override string ToString()
    {
      return string.Format("[{0},{1},{2}]", Employe, Cotisations, ElementsSalaire);
    }
  }
}
- line 7: information 6 through 11 about the employee whose salary is being calculated, and information 16 through 19 about their allowances. It is important to note here that a [Employe] object encapsulates a [Indemnites] object representing their allowances;
- line 8: information 12 through 15;
- line 9: information 20 through 24;
- Lines 12–14: the [ToString] method.
The class [ElementsSalaire] encapsulates information 20 through 24 from the form:
namespace Pam.Metier.Entites
{
  public class ElementsSalaire
  {
    // automatic properties
    public double SalaireBase { get; set; }
    public double CotisationsSociales { get; set; }
    public double IndemnitesEntretien { get; set; }
    public double IndemnitesRepas { get; set; }
    public double SalaireNet { get; set; }


    // ToString
    public override string ToString()
    {
      return string.Format("[{0} : {1} : {2} : {3} : {4} ]", SalaireBase, CotisationsSociales, IndemnitesEntretien, IndemnitesRepas, SalaireNet);
    }
  }
}
- lines 6–10: the salary components as explained in the business rules described above;
- line 6: the employee’s base salary, based on the number of hours worked;
- line 7: the cotisations deductions taken from this base salary;
- lines 8 and 9: allowances to be added to the base salary, based on the employee’s index and the number of days worked;
- line 10: the net salary to be paid;
- Lines 14–17: the [ToString] method for the class.
9.7.4. The [PamException] class
We create a specific exception type for our application. It is the following [PamException] type:
using System;

namespace Pam.Metier.Entites
{
  // exceptional class
  public class PamException : Exception
  {

    // the error code
    public int Code { get; set; }

    // manufacturers
    public PamException()
    {
    }

    public PamException(int Code)
      : base()
    {
      this.Code = Code;
    }

    public PamException(string message, int Code)
      : base(message)
    {
      this.Code = Code;
    }

    public PamException(string message, Exception ex, int Code)
      : base(message, ex)
    {
      this.Code = Code;
    }
  }
}
- line 6: the class derives from the [Exception] class;
- line 10: it has a public property [Code], which is an error code;
- In our application, we will use two types of constructors:
- the one in lines 23–27, which can be used as shown below:
- (continued)
- or the one in lines 29–33, which is designed to propagate an exception by wrapping it in an exception of type [PamException]:
try{
....
}catch (IOException ex){
     // we encapsulate the exception ex
    throw new PamException("Problème d'accès aux données",ex,10);
}
This second method has the advantage of not losing the information that the first exception may contain.
9.7.5. Implementation of the [métier] layer
The [IPamMetier] interface will be implemented by the following [PamMetier] class:
using System;
using Pam.Metier.Entites;
using System.Collections.Generic;

namespace Pam.Metier.Service
{
  public class PamMetier : IPamMetier
  {
    // list of cached employees
    public Employe[] Employes { get; set; }
    // employees indexed by their SS number
    private IDictionary<string, Employe> dicEmployes = new Dictionary<string, Employe>();

    // list of employees
    public Employe[] GetAllIdentitesEmployes()
    {
...
      // we return the list of employees
      return Employes;
    }

    // salary calculation
    public FeuilleSalaire GetSalaire(string ss, double heuresTravaillées, int joursTravaillés)
    {
...
  }
}
- line 7: the class [PamMetier] implements the interface [IPamMetier];
- line 10: the class [PamMetier] caches the list of employees;
- line 12: a dictionary that associates an employee with their social security number;
- lines 15–20: the method that returns the list of employees;
- lines 23–26: the method that calculates an employee’s salary.
The [GetAllIdentitesEmploye] method is as follows:
// list of employees
    public Employe[] GetAllIdentitesEmployes()
    {
      if (Employes == null)
      {
        // we create a table of three employees
        Employes = new Employe[3];
        Employes[0] = new Employe()
        {
          SS = "254104940426058",
          Nom = "Jouveinal",
          Prenom = "Marie",
          Adresse = "5 rue des oiseaux",
          Ville = "St Corentin",
          CodePostal = "49203",
          Indemnites = new Indemnites() { Indice = 2, BaseHeure = 2.1, EntretienJour = 2.1, RepasJour = 3.1, IndemnitesCp = 15 }
        };
        dicEmployes.Add(Employes[0].SS, Employes[0]);
        Employes[1] = new Employe()
        {
          SS = "260124402111742",
          Nom = "Laverti",
          Prenom = "Justine",
          Adresse = "La brûlerie",
          Ville = "St Marcel",
          CodePostal = "49014",
          Indemnites = new Indemnites() { Indice = 1, BaseHeure = 1.93, EntretienJour = 2, RepasJour = 3, IndemnitesCp = 12 }
        };
        dicEmployes.Add(Employes[1].SS, Employes[1]);
        // a fictitious employee who will not be included in the dictionary
        // to simulate a non-existent employee
        Employes[2] = new Employe()
        {
          SS = "XX",
          Nom = "X",
          Prenom = "X",
          Adresse = "X",
          Ville = "X",
          CodePostal = "X",
          Indemnites = new Indemnites() { Indice = 0, BaseHeure = 0, EntretienJour = 0, RepasJour = 0, IndemnitesCp = 0 }
        };
      }
      // we return the list of employees
      return Employes;
    }
- line 4: check if the list of employees has not already been created;
- line 7: if not, we create an array of three employees;
- lines 8–17: the first employee;
- line 18: it is added to the dictionary;
- lines 19–28: the second employee;
- line 29: he is added to the dictionary;
- lines 32–42: the third employee. This one is not added to the dictionary for a reason we will explain.
The method [GetSalaire] will be as follows:
    // salary calculation
    public FeuilleSalaire GetSalaire(string ss, double heuresTravaillées, int joursTravaillés)
    {
      // we retrieve employee n° SS
      Employe e = dicEmployes.ContainsKey(ss) ? dicEmployes[ss] : null;
      // exists?
      if (e == null)
      {
        throw new PamException(string.Format("L'employé de n° SS [{0}] n'existe pas", ss), 10);
      }
      // a fictitious payslip is returned
      return new FeuilleSalaire()
      {
        Employe = e,
        Cotisations = new Cotisations() { CsgRds = 3.49, Csgd = 6.15, Secu = 9.38, Retraite = 7.88 },
        ElementsSalaire = new ElementsSalaire() { CotisationsSociales = 100, IndemnitesEntretien = 100, IndemnitesRepas = 100, SalaireBase = 100, SalaireNet = 100 }
      };
}
- line 2: the method receives the employee ID SS for whom we want to calculate the salary, along with the number of hours worked and the number of days worked;
- line 5: we look up the employee in the dictionary. Remember that one of them is not there;
- lines 7–10: if the employee is not found, a [PamException] exception is thrown;
- lines 12–17: a fictitious pay stub is returned.
9.7.6. The console test for the [métier] layer
The design of the [métier] layer is currently as follows:
 |
The [Program] class above will test the methods of the [IPamMetier] interface. A basic example could be as follows:
using Pam.Metier.Entites;
using Pam.Metier.Service;
using System;

namespace Pam.Metier.Tests
{
  class Program
  {
    public static void Main()
    {
      // instantiation layer [business]
      IPamMetier pamMetier = new PamMetier();
      // list of employees
      Employe[] employes = pamMetier.GetAllIdentitesEmployes();
      Console.WriteLine("Liste des employés--------------------");
      foreach (Employe e in employes)
      {
        Console.WriteLine(e);
      }
      // payslip calculations
      Console.WriteLine("Calculs de feuilles de salaire-----------------");
      Console.WriteLine(pamMetier.GetSalaire(employes[0].SS, 30, 5));
      Console.WriteLine(pamMetier.GetSalaire(employes[1].SS, 150, 20));
      try
      {
        Console.WriteLine(pamMetier.GetSalaire(employes[2].SS, 150, 20));
      }
      catch (PamException ex)
      {
        Console.WriteLine(string.Format("PamException : {0}", ex.Message));
      }
    }
  }
}
- line 12: instantiation of the [métier] layer;
- lines 14–19: testing the [GetAllIdentitesEmploye] method of the [IPamMetier] interface;
- lines 21–31: testing the [GetSalaire] method of the [IPamMetier] interface.
Running this console program produces the following results:
The reader is invited to make the connection between these results and the executed code.
In order to use this project in the web project we are going to build, we are turning it into a class library:
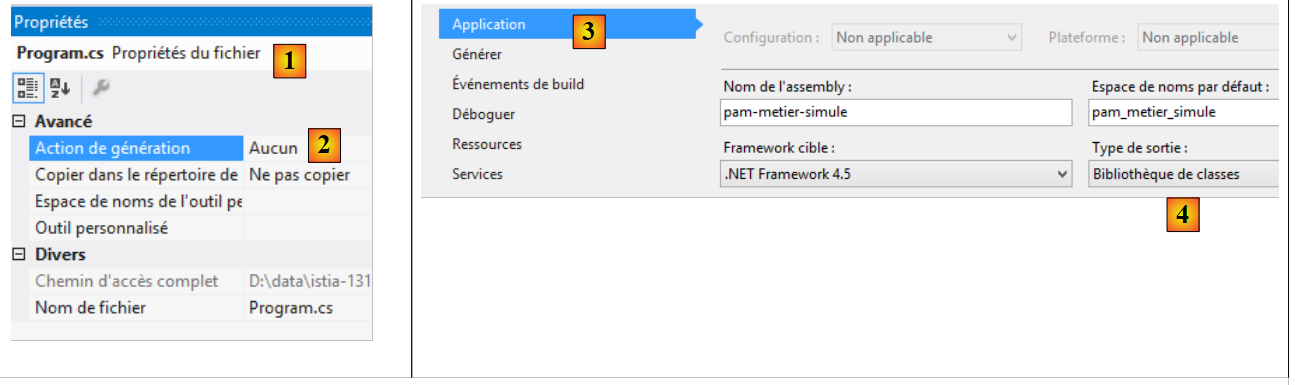 |
- in [1], in the properties of the file [Program.cs];
- in [2], we specify that the file will not be part of the generated assembly;
- in [3, 4], in the properties of the [pam-metier-simule] project, in the option [Application] [3], [4] specifies that the generation must provide a class library (in the form of a DLL).
 |
- In [5], an assembly of type [Release] is requested. The other type is [Debug]. The assembly then contains information that facilitates debugging;
- In [6], the project [pam-metier-simule] is generated;
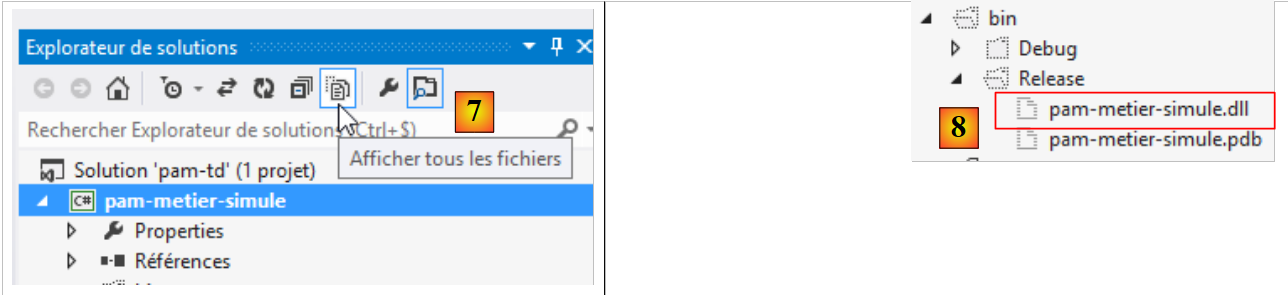 |
- In [7], all files in the solution are displayed;
- in [8], in the [bin / Release] folder, the DLL file for our project.
9.8. Step 2: Setting up the web application
In the previous Visual Studio solution, we will create the project for the web layer, MVC.
 |
Using Visual Studio Express for the Web, we open the [pam-td] solution previously created with Visual Studio Express for the Desktop.
 |
- In [1], the [pam-td] solution was loaded into Visual Studio Express for the Web;
- In [2], the solution and project for the simulated [métier] layer that we just created.
In this next step, we will create the skeleton of the web application.
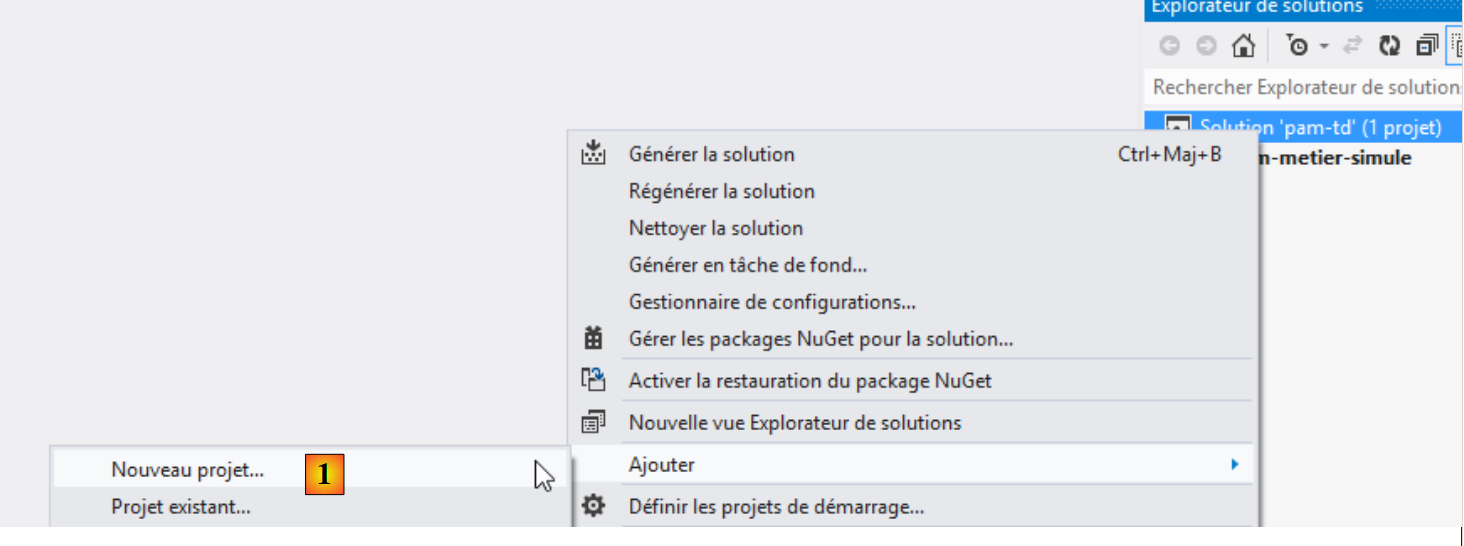 |
- In [1], we add a new project to the [pam-td] solution;
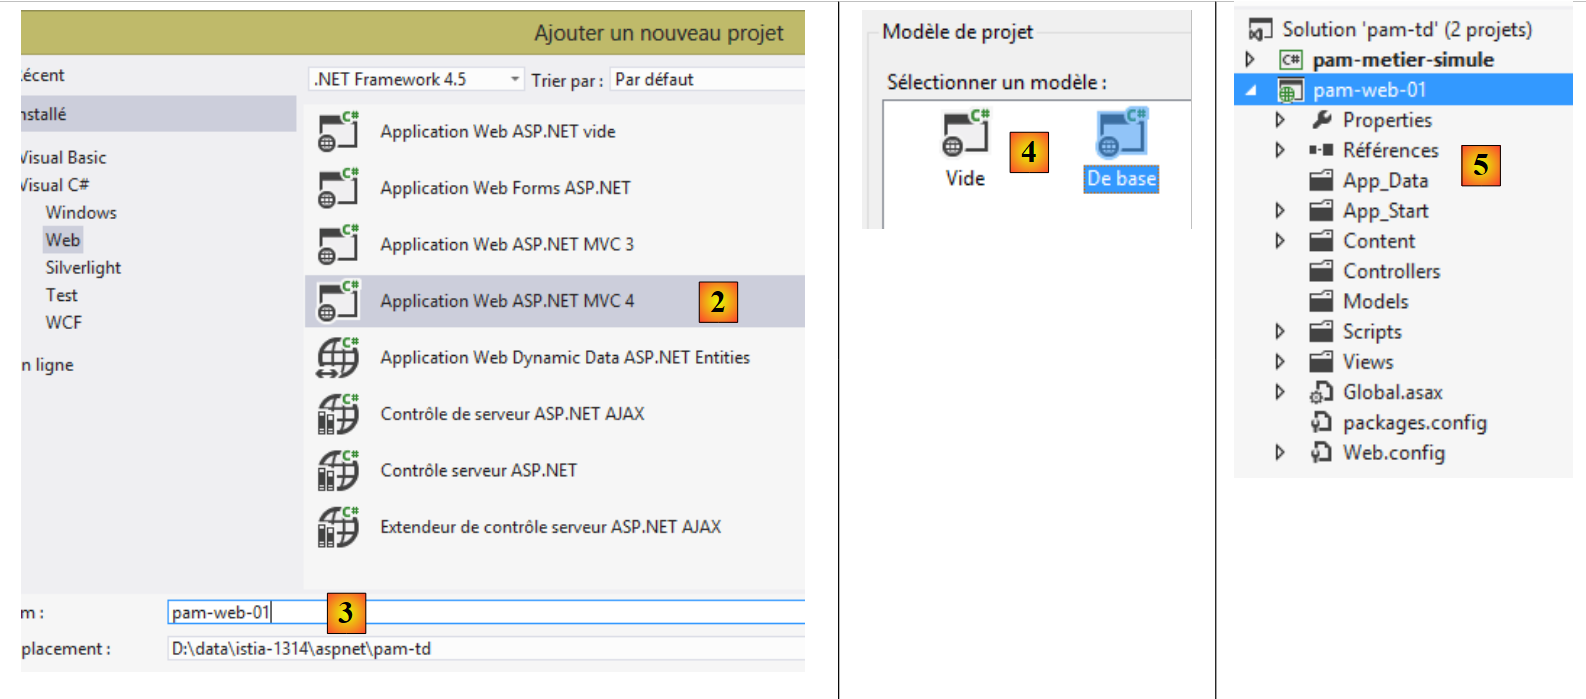 |
- In [2], we select a project named ASP.NET MVC 4;
- named [pam-web-01] [3];
- In [4], select the base template ASP.NET MVC;
- in [5], the project is created;
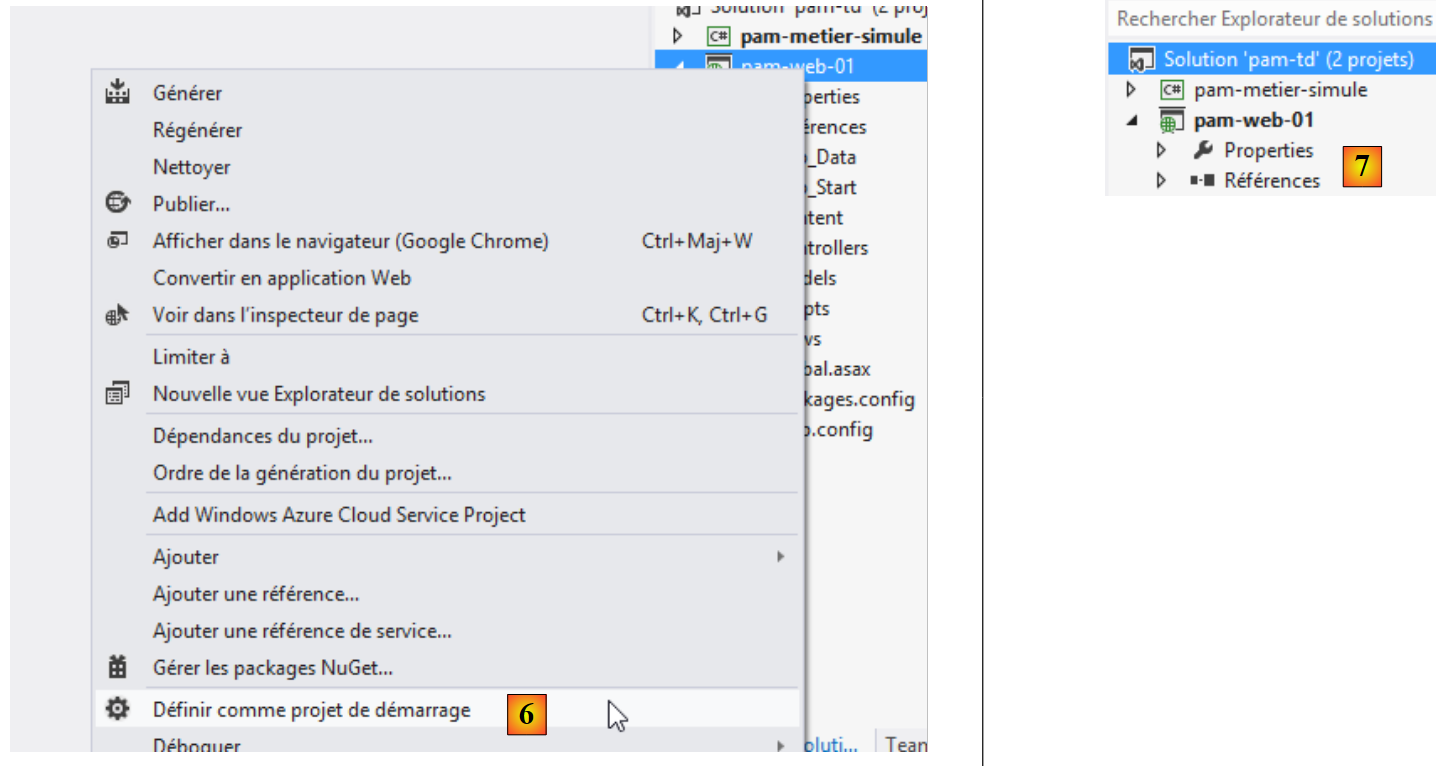 |
- in [6], the new project is made the solution's startup project, the one that will be executed when [Ctrl-F5] is run;
- in [7], the name of the new project is bolded, indicating that it is the solution's startup project.
Now, using Windows Explorer, replace the project’s [Content] folder with the [étudedecas-support / web / Content] folder. Once this is done, you must include the new files in the [pam-web-01] project. Proceed as follows:
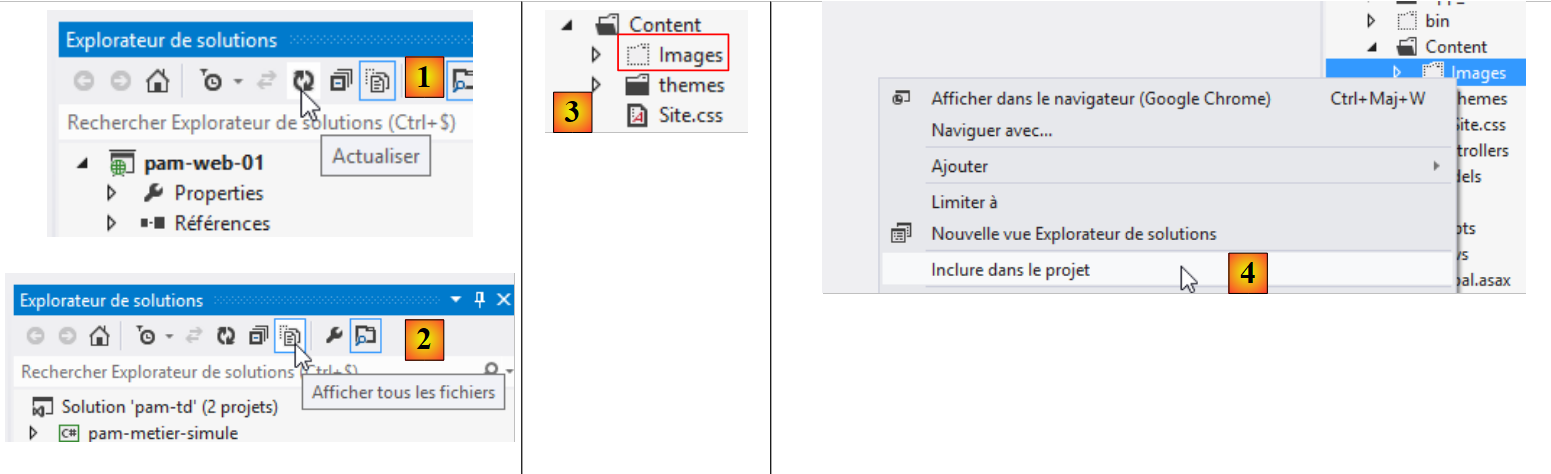 |
- In [1], refresh the solution;
- In [2], display all files in the solution;
- In [3], a folder named [Images] appears;
- which is included in the project in [4].
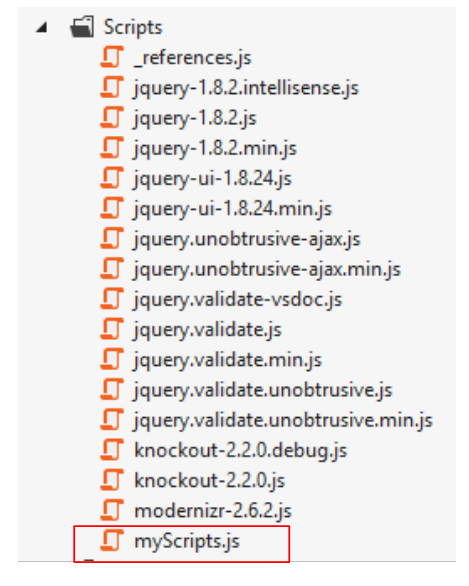
In the [Scripts] folder, add the JQuery and [1] scripts required for client-side validation.
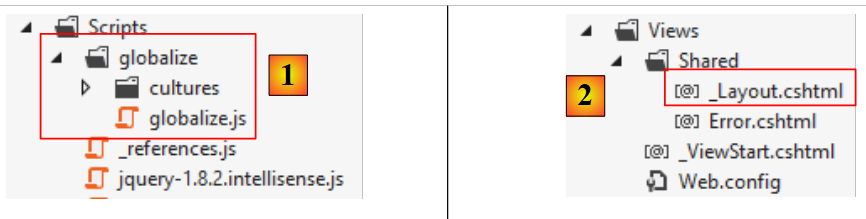 |
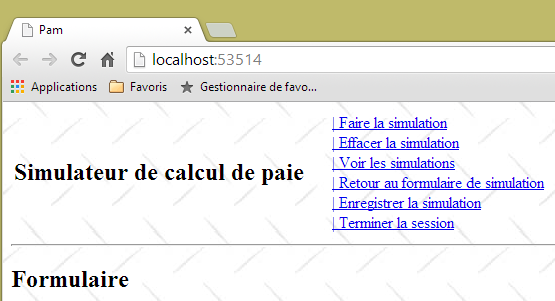
The master page [_Layout.cshtml] [2] will have the following content:
<!DOCTYPE html>
<html>
<head>
  <title>@ViewBag.Title</title>
  <meta charset="utf-8" />
  <meta name="viewport" content="width=device-width" />
  <link rel="stylesheet" href="~/Content/Site.css" />
  <script type="text/javascript" src="~/Scripts/jquery-1.8.2.min.js"></script>
  <script type="text/javascript" src="~/Scripts/jquery.validate.min.js"></script>
  <script type="text/javascript" src="~/Scripts/jquery.validate.unobtrusive.min.js"></script>
  <script type="text/javascript" src="~/Scripts/globalize/globalize.js"></script>
  <script type="text/javascript" src="~/Scripts/globalize/cultures/globalize.culture.fr-FR.js"></script>
  <script type="text/javascript" src="~/Scripts/jquery.unobtrusive-ajax.js"></script>
  <script type="text/javascript" src="~/Scripts/myScripts.js"></script>
</head>
<body>
  <table>
    <tbody>
      <tr>
        <td>
          <h2>Simulateur de calcul de paie</h2>
        </td>
        <td style="width: 20px">
          <img id="loading" style="display: none" src="~/Content/images/indicator.gif" />
        </td>
        <td>
          <a id="lnkFaireSimulation" href="javascript:faireSimulation()">| Faire la simulation<br />
          </a>
          <a id="lnkEffacerSimulation" href="javascript:effacerSimulation()">| Effacer la simulation<br />
          </a>
          <a id="lnkVoirSimulations" href="javascript:voirSimulations()">| Voir les simulations<br />
          </a>
          <a id="lnkRetourFormulaire" href="javascript:retourFormulaire()">| Retour au formulaire de simulation<br />
          </a>
          <a id="lnkEnregistrerSimulation" href="javascript:enregistrerSimulation()">| Enregistrer la simulation<br />
          </a>
          <a id="lnkTerminerSession" href="javascript:terminerSession()">| Terminer la session<br />
          </a>
        </td>
    </tbody>
  </table>
  <hr />
  <div id="content">
    @RenderBody()
  </div>
</body>
</html>
Note: Line 8, update the version from jQuery to match your version in Visual Studio.
- Line 7: reference to the application's style sheet;
- Lines 8–10: references to the scripts required for client-side validation;
- Lines 11–12: references to the scripts required for entering French decimal numbers with a comma;
- line 13: reference to the scripts required for Ajax mode;
- line 14: application-specific scripts;
- line 24: the loading image for Ajax calls;
- lines 26–39: six links Javascript;
- line 43: the section where the application’s various views will be displayed;
- line 44: the body of the application’s various views.
Next, we will modify the application’s default route:
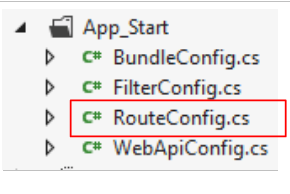 |
The file [RouteConfig] will have the following content:
using System.Web.Mvc;
using System.Web.Routing;

namespace pam_web_01
{
  public class RouteConfig
  {
    public static void RegisterRoutes(RouteCollection routes)
    {
      routes.IgnoreRoute("{resource}.axd/{*pathInfo}");

      routes.MapRoute(
          name: "Default",
          url: "{controller}/{action}",
          defaults: new { controller = "Pam", action = "Index" }
      );
    }
  }
}
- line 14: URL will be formatted as [{controller}/{action}];
- line 15: if no action is specified, the action [Index] will be used. If no controller is specified, the controller [Pam] will be used.
From this configuration, it follows that URL [/] is equivalent to URL [/Pam/Index]. Since our application is of type APU, URL and [/] will be the only URL for it.
Create the [Pam] controller:
Modify the [PamController] controller as follows:
using System.Web.Mvc;

namespace Pam.Web.Controllers
{
    public class PamController : Controller
    {
        [HttpGet]
        public ViewResult Index()
        {
            return View();
        }

    }
}
- line 3: we place the controller in the [Pam.Web.Controllers] namespace;
- line 7: the [Index] action will only process the HTTP and GET commands;
- line 8: we return a type [ViewResult] rather than a type [ActionResult].
Now create the view [Index.cshtml] displayed by the action [Index] above:
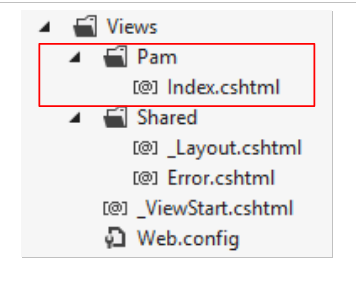 |
Modify [Index.cshtml] as follows:
@{
  ViewBag.Title = "Pam";
}
<h2>Formulaire</h2>
Run the application using [Ctrl-F5]. You should see the following page:
 |
Task: Explain what happened.
The application uses a style sheet referenced in the master page [_Layout.cshtml]:
<link rel="stylesheet" href="~/Content/Site.css" />
The [/Content/Site.css] stylesheet defines a background image for the application's pages:
body {
  background-image: url("/Content/Images/standard.jpg");
}
 |
9.9. Step 3: Implementing the APU template
We want to write an application based on the APU template (Single-Page Application) described in Section 7.5 and Section 7.6. The single page is the one loaded by the browser when the application starts:
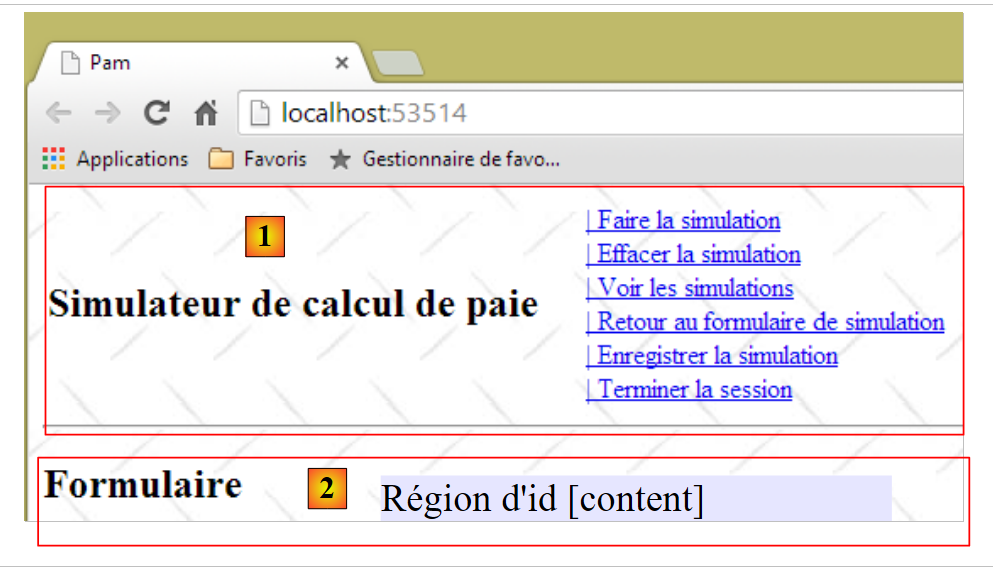 |
- the [1] section above is the fixed part of the single page. We have seen that it is provided by the master page [_Layout.cshtml];
- the section [2] is the variable part of the single page. It is located in the region id [content] of the master page [_Layout.cshtml]:
<!DOCTYPE html>
<html>
<head>
  <title>@ViewBag.Title</title>
  ...
  <script type="text/javascript" src="~/Scripts/myScripts.js"></script>
</head>
<body>
  <table>
...
  </table>
  <hr />
  <div id="content">
    @RenderBody()
  </div>
</body>
</html>
The various page fragments of the application will be displayed in the id [content] region on line 13. They will be displayed via Ajax calls. The Javascript scripts executing these calls are in the [myScripts.js] file referenced on line 6. Create this file, which we will need:
 |
We will now follow the APU template described in section 7.6. Reread that section if you have forgotten it. We will now set up the various page fragments displayed by the application.
9.9.1. The Javascript developer tools
Remember that with the Chrome browser, you have a range of tools to debug the HTML, CSS, and Javascript elements of your pages. These tools were partially introduced in section 7.2. In the APU template, browsers cache the Javascript scripts referenced by the application’s first page. Therefore, you must remember to clear this cache when you modify your scripts; otherwise, the changes may not be applied. Here’s how to do it in Chrome:
- Type [Ctrl-Maj-I] to display the development environment
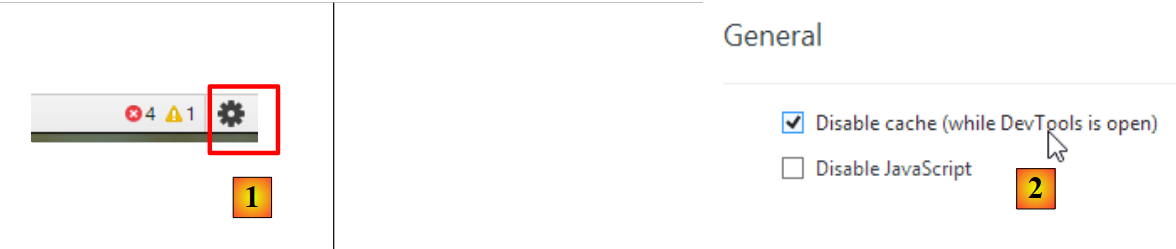 |
- click the [1] icon in the bottom-right corner of the development window;
- then check the option [2] option that disables the cache in development mode.
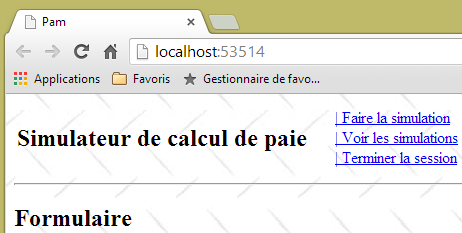
9.9.2. Using a partial view to display the form
The input form is one of the fragments displayed by the application. Currently, this form is displayed by the [Index.cshtml] view, which is a full view:
@{
  ViewBag.Title = "Pam";
}
<h2>Formulaire</h2>
This view is displayed by the [Index] action:
    [HttpGet]
    public ViewResult Index()
    {
      return View();
}
Line 4 above displays the [View] view, not the [PartialView] partial view. We need a partial view for the form, which will be a page fragment. We modify the [Index.cshtml] view as follows:
@{
  ViewBag.Title = "Pam";
}
@Html.Partial("Formulaire")
Line 4: The form is no longer part of the [Index.cshtml] page. It is now located in a partial view, [Formulaire.cshtml]:
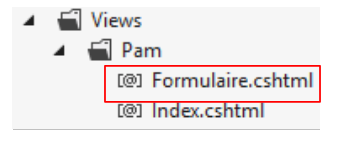 |
The code for [Formulaire.cshtml] is simply as follows:
<h2>Formulaire</h2>
Make these changes and verify that you still get the following view when the application starts:
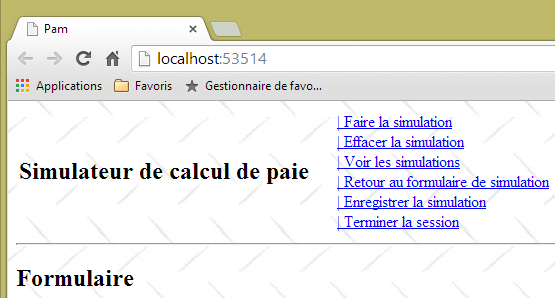 |
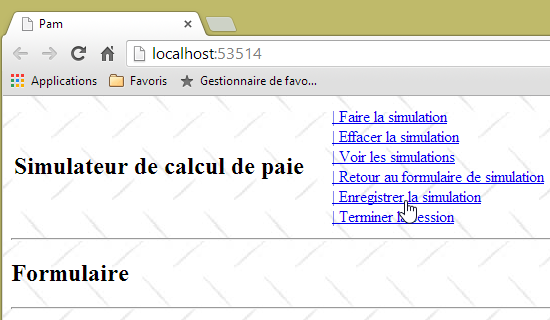
9.9.3. The Ajax call [faireSimulation]
We are interested in the fragment displayed when the user clicks the link [Faire la simulation]:
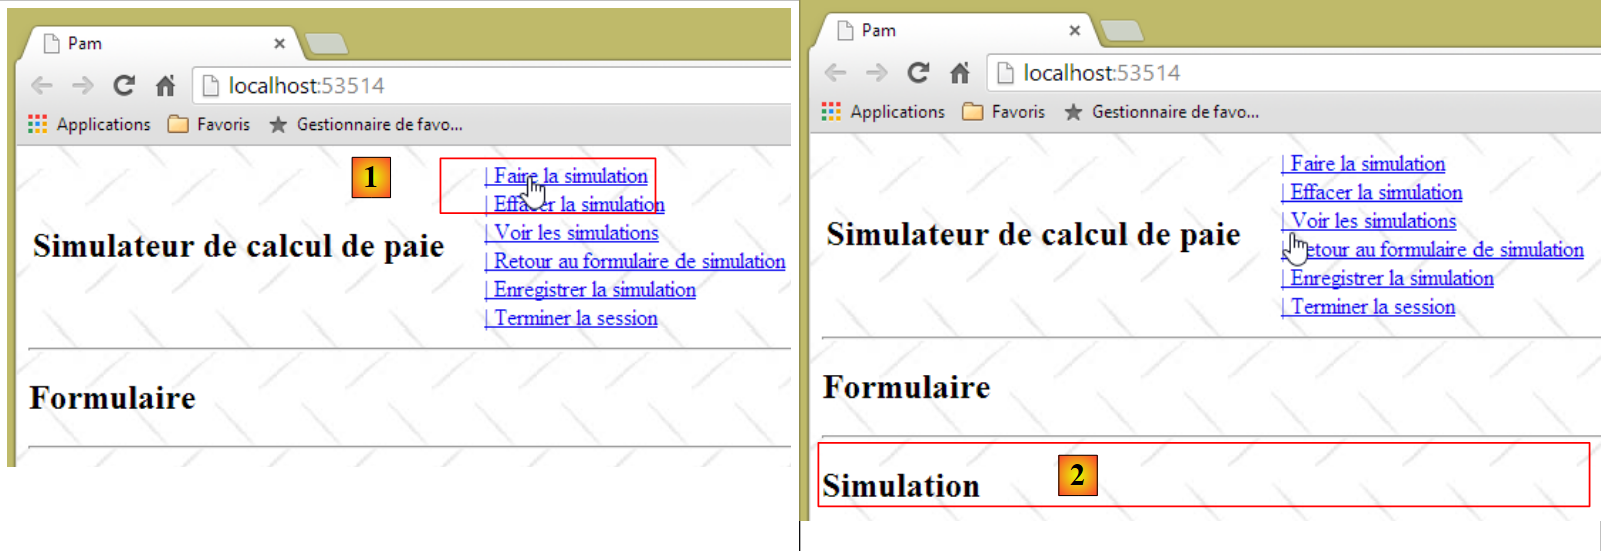 |
- in [1], the user clicks the link [Faire la simulation];
- in [2], the simulation appears below the form.
We modify the partial view [Formulaire.cshtml], which displays the form, as follows:
<h2>Formulaire</h2>
<div id="simulation" />
Line 3: We create a region named id to house the simulation fragment.
We create the following partial view [Simulation.cshtml]:
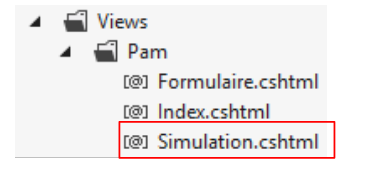 |
The content of the [Simulation.cshtml] view is as follows:
<hr />
<h2>Simulation</h2>
We now need to write the code Javascript that handles the click on the link [Faire la simulation]. We will follow the procedure outlined in section 7.6.5. First, let’s look at the code for the link in [_Layout.cshtml]:
<a id="lnkFaireSimulation" href="javascript:faireSimulation()">| Faire la simulation<br />
</a>
We can see that clicking on the [Faire la simulation] link will trigger the execution of the JS and [faireSimulation] functions. This function will be written to the file [myScripts.js], along with the other JS functions required by the application:
// global variables
var loading;
var content;

function faireSimulation() {
  // make a manual Ajax call
...
}

function effacerSimulation() {
  // delete form entries
...
}

function enregistrerSimulation() {
  // make a manual Ajax call
  ...
}

function voirSimulations() {
  // make a manual Ajax call
  ...
}

function retourFormulaire() {
  // make a manual Ajax call
...
}

function terminerSession() {
...
}

// document loading
$(document).ready(function () {
  // retrieve the references of the page's various components
  loading = $("#loading");
  content = $("#content");
});
- lines 35–39: the JQuery function executed when the application starts;
- lines 37-38: initialize the global variables from lines 2 and 3.
Note that the elements id, [loading], and [content] are defined in the master page [_Layout.cshtml] (lines 14 and 21 below):
<!DOCTYPE html>
<html>
<head>
...
</head>
<body>
  <table>
    <tbody>
      <tr>
        <td>
          <h2>Simulateur de calcul de paie</h2>
        </td>
        <td style="width: 20px">
          <img id="loading" style="display: none" src="~/Content/images/indicator.gif" />
        </td>
...
        </td>
    </tbody>
  </table>
  <hr />
  <div id="content">
    @RenderBody()
  </div>
</body>
</html>
Task: Following the procedure described in section 7.6.5, write the function JS [faireSimulation]. This function will send an Ajax call of type POST to the action [/Pam/FaireSimulation]. No data will be posted at this time. The[/Pam/FaireSimulation] action will return the partial view [Simulation.cshtml] to the JS [faireSimulation] function, which will then place this HTML data flow in the of id [simulation] in the form.
Test the [Faire la simulation] link in your application.
9.9.4. The Ajax call [enregistrerSimulation]
The link [Enregistrer la simulation] is defined as follows in [_Layout.cshtml]:
<a id="lnkEnregistrerSimulation" href="javascript:enregistrerSimulation()">| Enregistrer la simulation<br />
</a>
Task: Following the previous procedure, write the function JS [enregistrerSimulation]. This function will send an Ajax call of type POST to the action [/Pam/EnregistrerSimulation]. No data will be posted for now. Theaction [/Pam/EnregistrerSimulation] will return the partial view [Simulations.cshtml] to the function JS [enregistrerSimulation], which will then place this data flow HTML in the of id [content] on the master page.
The view [Simulations.cshtml] is as follows:
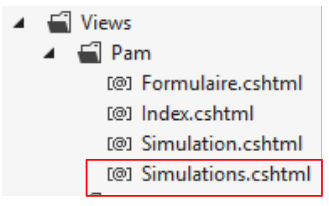 |
Its content is as follows:
<h2>Simulations</h2>
Here is an example of execution:
 | 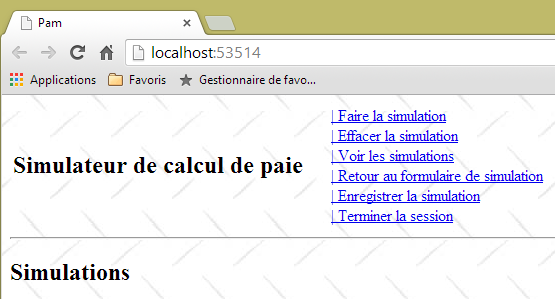 |
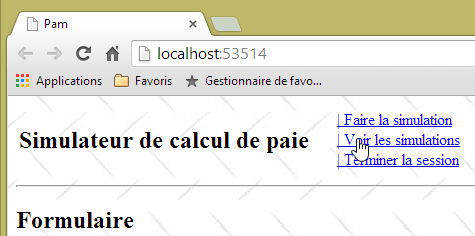
9.9.5. The Ajax call [voirSimulations]
The link [Voir les simulations] is defined as follows in [_Layout.cshtml]:
<a id="lnkVoirSimulations" href="javascript:voirSimulations()">| Voir les simulations<br />
</a>
Task: Following the previous procedure, write the function JS [voirSimulations]. This function will send an Ajax call of type POST to the action [/Pam/VoirSimulations]. No data will be posted for now. Theaction [/Pam/VoirSimulations] will return the partial view [Simulations.cshtml] to the function JS [voirSimulations], which will then place this data flow HTML in the of id [content] on the master page.
The view [Simulations.cshtml] is the one already used in the previous question.
Here is an example of execution:
 |
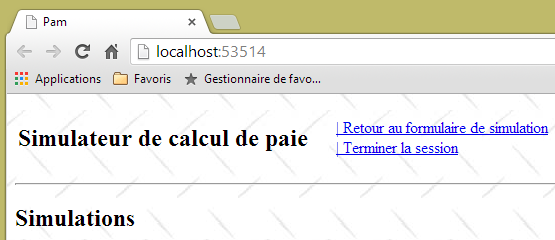
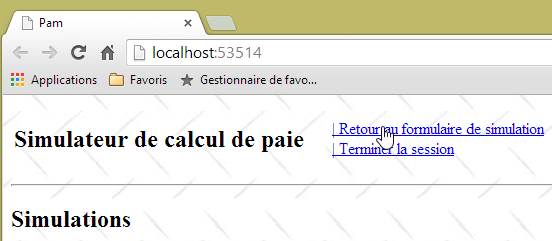
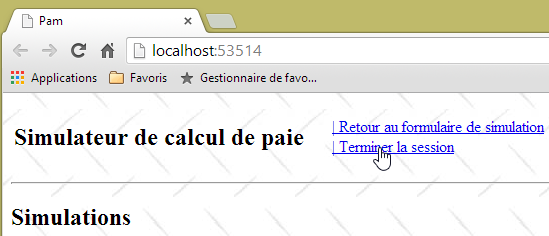
9.9.6. The Ajax call [retourFormulaire]
The link [Retour au formulaire de simulation] is defined as follows in [_Layout.cshtml]:
<a id="lnkRetourFormulaire" href="javascript:retourFormulaire()">| Retour au formulaire de simulation<br />
</a>
Exercise: Following the previous steps, write the function JS [retourFormulaire]. This function will send an Ajax call of type POST to the action [/Pam/Formulaire]. No data will be posted for now. Theaction [/Pam/Formulaire] will return the partial view [Formulaire.cshtml] to the function JS [retourFormulaire], which will then place this data flow HTML in the of id [content] on the master page.
The view [Formulaire .cshtml] has already been defined. Here is an example of execution:
 |
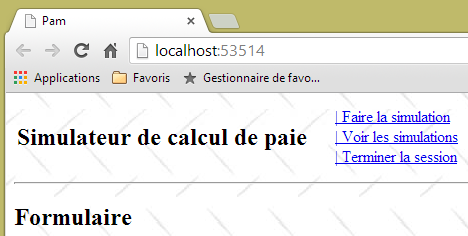
9.9.7. The Ajax call [terminerSession]
The link [Terminer la session] is defined as follows in [_Layout.cshtml]:
<a id="lnkTerminerSession" href="javascript:terminerSession()">| Terminer la session<br />
</a>
Task: Following the previous procedure, write the function JS [terminerSession]. This function will send an Ajax call of type POST to the action [/Pam/TerminerSession]. No data will be posted for now. The[/Pam/TerminerSession] action will return the partial view [Formulaire.cshtml] to the JS [terminerSession] function, which will then place this HTML data flow in the of id [content] on the master page.
Here is an example of execution:
 |
9.9.8. The function JS [effacerSimulation]
The link [Effacer la simulation] is defined as follows in [_Layout.cshtml]:
<a id="lnkEffacerSimulation" href="javascript:effacerSimulation()">| Effacer la simulation<br />
</a>
The purpose of the function JS [effacerSimulation] is:
- to hide the [Simulation] fragment if it exists;
- to restore the form's input fields to the state they were in when the application was first loaded (when there are input fields—for now, there are none).
Task: Write the function JS [effacerSimulation]. There is no Ajax call here. What happens is internal to the browser and does not involve the server.
Here is an example of execution:
 |
9.9.9. Handling navigation between screens
For now, the links are still displayed. We will now manage their display using a function Javascript. First, let’s review the code for the six Javascript links in [_Layout.cshtml]:
<a id="lnkFaireSimulation" href="javascript:faireSimulation()">| Faire la simulation<br />
</a>
<a id="lnkEffacerSimulation" href="javascript:effacerSimulation()">| Effacer la simulation<br />
</a>
<a id="lnkVoirSimulations" href="javascript:voirSimulations()">| Voir les simulations<br />
</a>
<a id="lnkRetourFormulaire" href="javascript:retourFormulaire()">| Retour au formulaire de simulation<br />
</a>
<a id="lnkEnregistrerSimulation" href="javascript:enregistrerSimulation()">| Enregistrer la simulation<br />
</a>
<a id="lnkTerminerSession" href="javascript:terminerSession()">| Terminer la session<br />
</a>
All links have a [id] attribute that will allow us to manage them in Javascript. We modify the JS method executed when the page loads as follows:
// global variables
var loading;
var content;
var lnkFaireSimulation;
var lnkEffacerSimulation
var lnkEnregistrerSimulation;
var lnkTerminerSession;
var lnkVoirSimulations;
var lnkRetourFormulaire;
var options;

...
// document loading
$(document).ready(function () {
  // retrieve the references of the page's various components
  loading = $("#loading");
  content = $("#content");
  // menu links
  lnkFaireSimulation = $("#lnkFaireSimulation");
  lnkEffacerSimulation = $("#lnkEffacerSimulation");
  lnkEnregistrerSimulation = $("#lnkEnregistrerSimulation");
  lnkVoirSimulations = $("#lnkVoirSimulations");
  lnkTerminerSession = $("#lnkTerminerSession");
  lnkRetourFormulaire = $("#lnkRetourFormulaire");
  // we put them in a table
  options = [lnkFaireSimulation, lnkEffacerSimulation, lnkEnregistrerSimulation, lnkVoirSimulations, lnkTerminerSession, lnkRetourFormulaire];
  // hide certain page elements
  loading.hide();
  // set the menu
  setMenu([lnkFaireSimulation, lnkVoirSimulations, lnkTerminerSession]);
});
- lines 19–24: retrieve the references for the six links. These references are defined as global variables on lines 4–9;
- line 26: the array [options] is initialized with the six references. This array is defined as a global variable on line 10;
- line 28: the animated image indicating that Ajax calls are pending is hidden;
- line 30: the [lnkFaireSimulation, lnkVoirSimulations, lnkTerminerSession] links are displayed. The others will be hidden.
The JS [setMenu] function is as follows:
function setMenu(show) {
  // display table links [show]
...
}
Task: Write the function JS [setMenu].
If T is an array of links:
- T.length is the number of links;
- T[i] is link number i;
- T[i].show() displays link number i;
- T[i].hide() hides link #i.
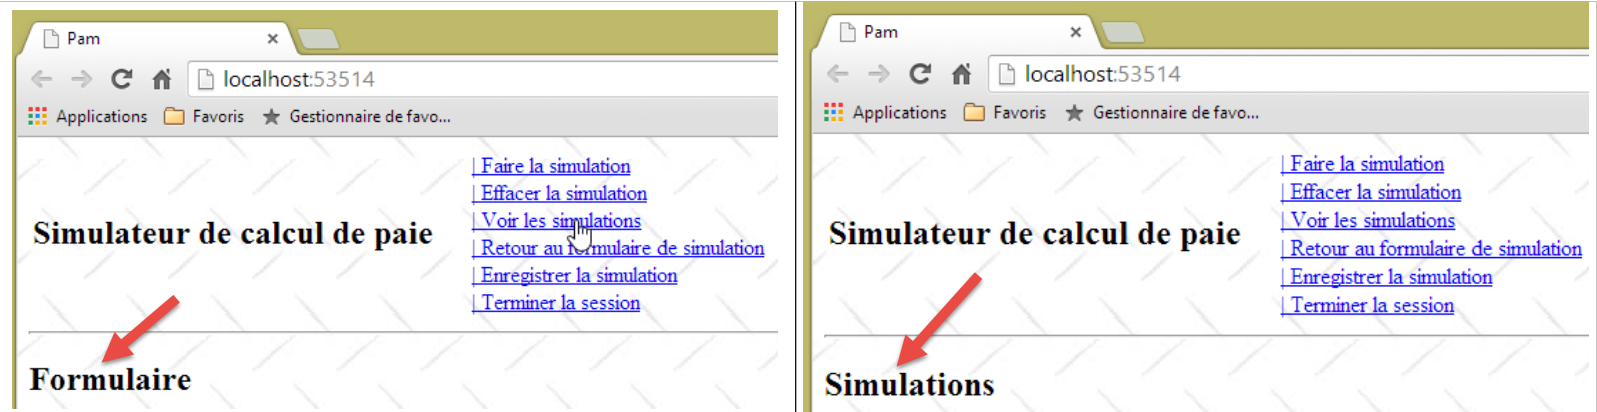
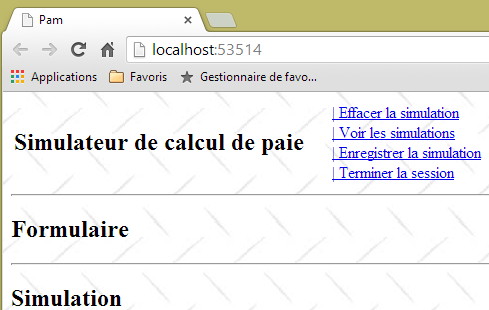
With these new functions JS, the page displayed at startup is as follows:
 |
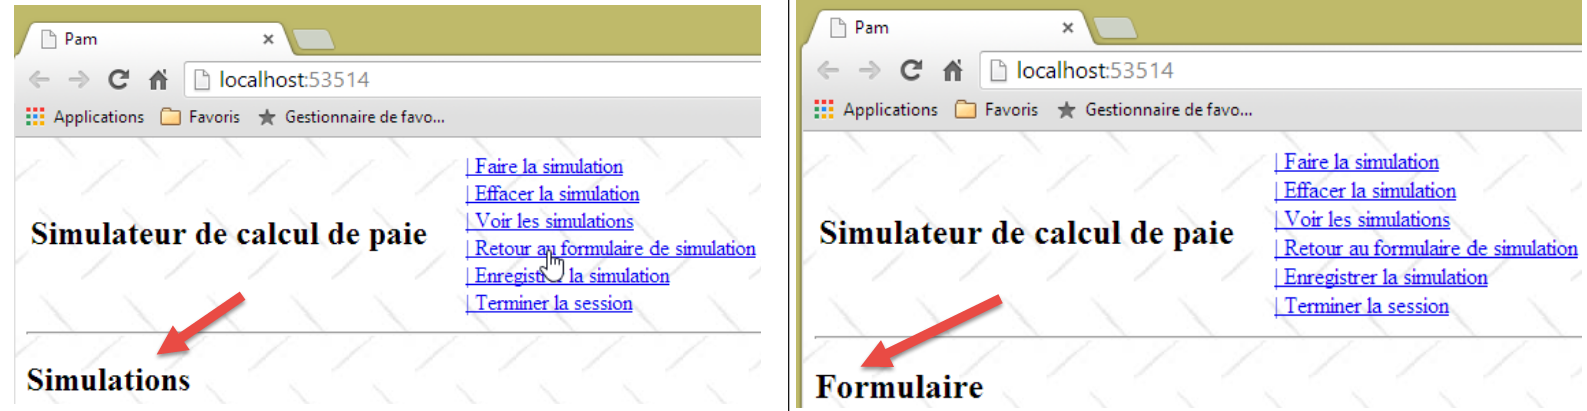
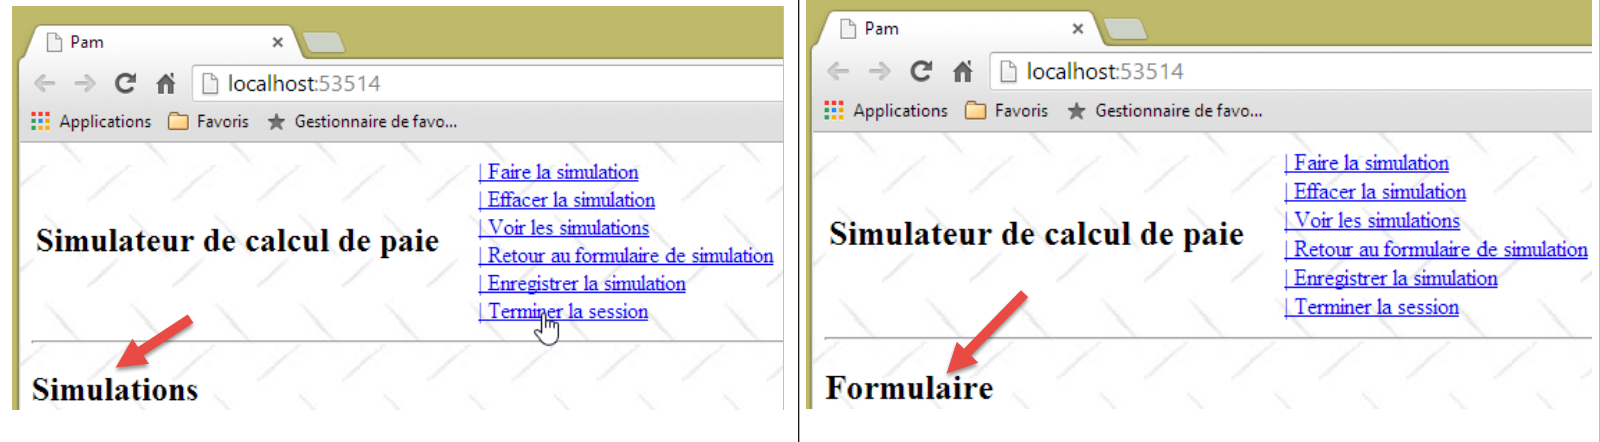
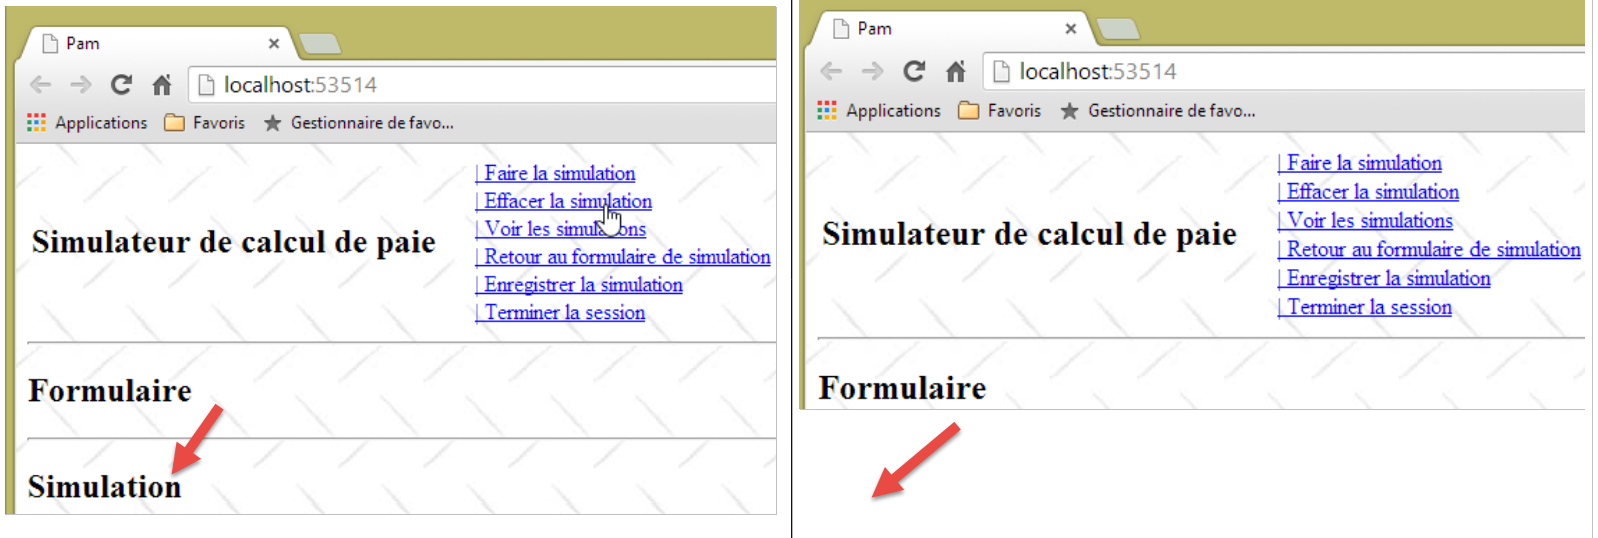
Adapt the functions JS and [faireSimulation, effacerSimulation, enregistrerSimulation, voirSimulations, retourFormulaire, terminerSession] to display the following screens:
 |  |
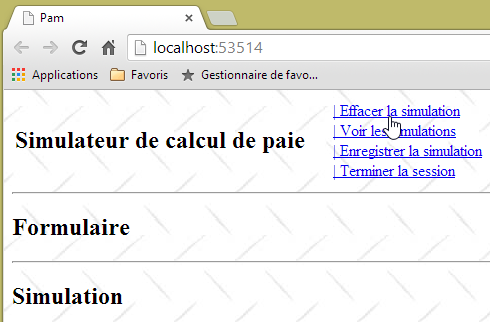 | 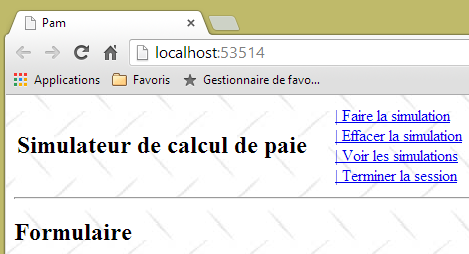 |
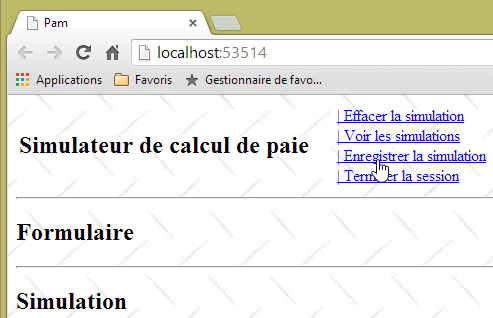 |  |
 |  |
 |  |
 |  |
Now that the APU template and the links from navigation are in place, we can move on to writing the server-side actions and views. As you progress through the steps, you will find that some of the Ajax links that currently work will no longer function, because you will be modifying the partial views sent to the client. As you build the various server-side actions and views, the client-side Ajax links will resume functioning as intended.
9.10. Step 4: Writing the [Index] server action
Currently, when the application starts, we see the following screen:
|
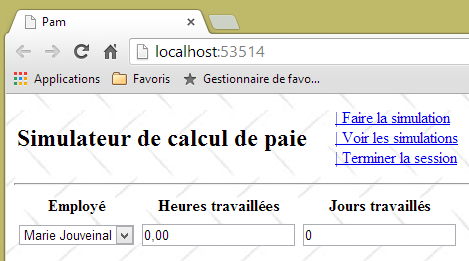
Instead of this screen, we would like to see the following:
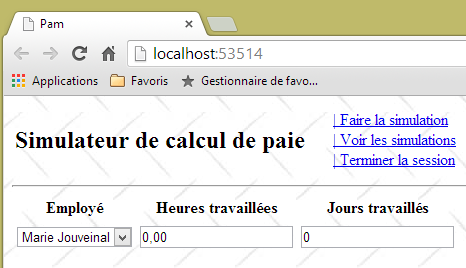 |
The [Index] action is responsible for generating this page. Let’s note a few things:
- The page displays a form with three input fields:
- the employee whose salary is being calculated,
- the number of hours worked,
- the number of days worked;
- the form is submitted via the link [Faire la simulation];
- the validity of the input fields [Heures travaillées] and [Jours travaillés] must be verified;
- the list of employees comes from the [métier] layer that we built previously.
Here is the current code for action [Index]:
    [HttpGet]
    public ViewResult Index()
    {
      return View();
}
the one from the [Index.cshtml] view that this action displays:
@{
  ViewBag.Title = "Pam";
}
@Html.Partial("Formulaire")
and the partial view [Formulaire.cshtml]:
<h2>Formulaire</h2>
Changes will be made in these three locations.
9.10.1. The form template
Let’s return to the processing chain for URL [/Pam/Index]:
 |
- the client's request HTTP arrives at [1];
- in [2], the information contained in the request is transformed into the action template [3], which serves as input for the action [4];
- in [4], the action, based on this model, will generate a response. This response will have two components: a view V [6] and the model M of this view [5];
- The view V [6] will use its template M [5] to generate the response HTTP for the client.
The action we are interested in is action [Index], which currently looks like this:
    [HttpGet]
    public ViewResult Index()
    {
      return View();
}
The [Index] action does not pass any model to the [Index.cshtml] view. Therefore, the view will not be able to display the list of employees. This list can be requested from the [métier] layer. To do this, the [pam-web-01] project must have a reference to the [pam-metier-simule] project. We will create this reference now:
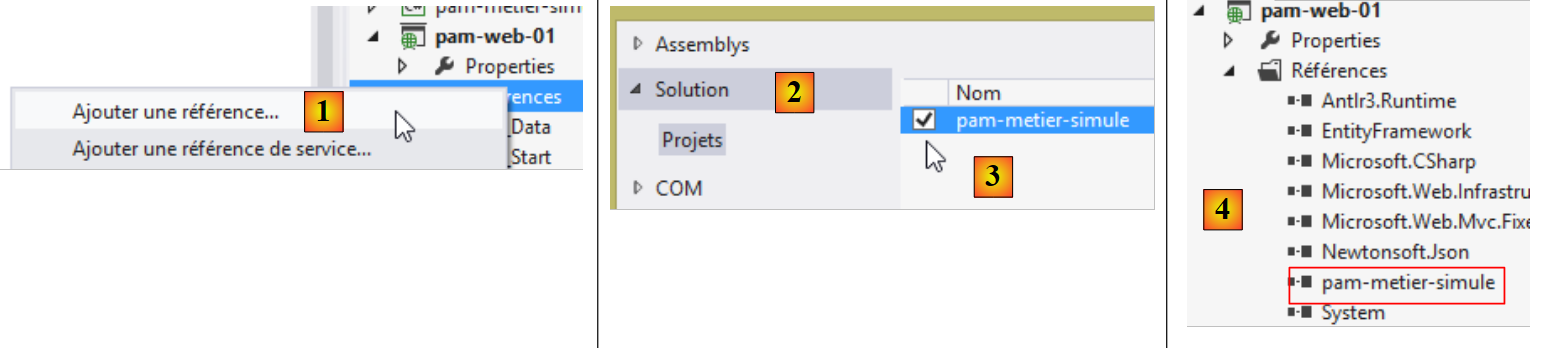 |
- In [1], right-click on [References] in the [pam-web-01] project, then on [Ajouter une référence];
- in [2], select option, [Solution], then the project [pam-metier-simule] in [3];
- In [4], the [pam-metier-simule] project has been added to the references of the [pam-web-01] project.
9.10.2. The Application Model
We introduced the important concepts of the application model and the session model in Section 4.10, page 78. We will now use them. Recall that we place in the model:
- application model: read-only data for all users. This model constitutes a shared memory for all requests from all users;
- session data that is read-write for a given user. This model constitutes a shared memory for all requests from that user.
What will we put in the application model? Let’s return to its architecture:
 |
The [web] layer holds a reference to the [métier] layer. This can be shared by all users. We can therefore place it in the application model. Furthermore, we will assume that the list of employees does not change. It can therefore be read once and then shared among all users. We therefore propose the following application model:
 |
The code for the [ApplicationModel] class could be as follows:
using Pam.Metier.Entites;
using Pam.Metier.Service;
namespace PamWeb.Models
{
  public class ApplicationModel
  {
    // --- application scope data ---
    public Employe[] Employes { get; set; }
    public IPamMetier PamMetier { get; set; }
  }
}
To display a drop-down list in a view, you write something like the following:
        <!-- the drop-down list -->
        <tr>
          <td>Liste déroulante</td>
          <td>@Html.DropDownListFor(m => m.DropDownListField,
           new SelectList(@Model.DropDownListFieldItems, "Value", "Label"))
          </td>
</tr>
The [DropDownListFor] method expects a SelectListItem[] array as its second parameter, which was previously provided by a [SelectList] type. We need to construct such an array with the list of employees. Since the employees do not change, this array can also be placed in the application model. We update it as follows:
using Pam.Metier.Entites;
using Pam.Metier.Service;
using System.Web.Mvc;

namespace Pam.Web.Models
{
  public class ApplicationModel
  {
    // --- application scope data ---
    public Employe[] Employes { get; set; }
    public IPamMetier PamMetier { get; set; }
    public SelectListItem[] EmployesItems { get; set; }
  }
}
When should this model be constructed? We demonstrated this in Section 4.10. It occurs during the execution of the [Application_Start] method in the [Global.asax] file:
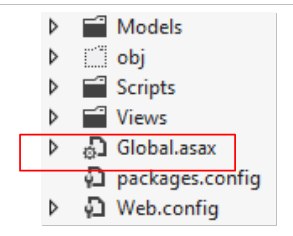 |
The [Application_Start] method currently looks like this:
using System.Web.Http;
using System.Web.Mvc;
using System.Web.Optimization;
using System.Web.Routing;

namespace pam_web_01
{
  public class MvcApplication : System.Web.HttpApplication
  {
    protected void Application_Start()
    {
      AreaRegistration.RegisterAllAreas();

      WebApiConfig.Register(GlobalConfiguration.Configuration);
      FilterConfig.RegisterGlobalFilters(GlobalFilters.Filters);
      RouteConfig.RegisterRoutes(RouteTable.Routes);
      BundleConfig.RegisterBundles(BundleTable.Bundles);
    }
  }
}
We extend it as follows:
using Pam.Metier.Entites;
using Pam.Metier.Service;
using PamWeb.Infrastructure;
using PamWeb.Models;
using System.Web.Http;
using System.Web.Mvc;
using System.Web.Optimization;
using System.Web.Routing;

namespace pam_web_01
{
  public class MvcApplication : System.Web.HttpApplication
  {
    protected void Application_Start()
    {
      // ----------Auto-generated
      AreaRegistration.RegisterAllAreas();
      WebApiConfig.Register(GlobalConfiguration.Configuration);
      FilterConfig.RegisterGlobalFilters(GlobalFilters.Filters);
      RouteConfig.RegisterRoutes(RouteTable.Routes);
      BundleConfig.RegisterBundles(BundleTable.Bundles);
      // -------------------------------------------------------------------
      // ---------- specific configuration
      // -------------------------------------------------------------------
      // application scope data
      ApplicationModel application = new ApplicationModel();
      Application["data"] = application;
        // instantiation layer [business]
        application.PamMetier = ...
        // employee roster
        application.Employes = ...
        // employee combo items
        application.EmployesItems = ...
      // model binder for [ApplicationModel]
      ...
    }
  }
}
Task: Complete the code for the [Application_Start] method. Everything you need is in section 4.10. Take the time to reread this section—it’s short but important.
Line 33 actually consists of several lines. To create an object of type [SelectListItem], you can use the following method:
new SelectListItem() { Text = unTexte, Value = uneValeur };
This [SelectListItem] will be used to generate the following HTML <option> tag:
in the drop-down list. We will ensure that:
- unTexte is the employee's first name followed by their last name;
- uneValeur is the employee’s ID number;
Line 35, above, you will need the class [ApplicationModelBinder] described in section 4.10, page 82:
 |
9.10.3. The action code [Index]
Now that we have defined a model for the application, we can update the action code [Index] as follows:
    [HttpGet]
    public ViewResult Index(ApplicationModel application)
    {
      return View();
}
- Line 4: The application model is now a parameter of the [Index] action. We explained in Section 4.10 how this parameter is initialized by the framework.
9.10.4. The model for the [Index.cshtml] view
Now, the [Index] action has access to the employees stored in the application model. It must now pass them to the [Index.cshtml] view that it will display. We could pass a [ApplicationModel] type as the model for the [Index.cshtml] view, but we will soon see that this view needs additional information that is not in [ApplicationModel]. We will use the following view model [IndexModel]:
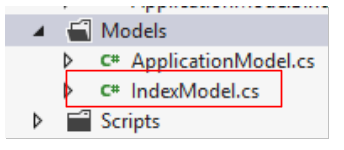 |
namespace Pam.Web.Models
{
  public class IndexModel
  {
    // application scope data
    public ApplicationModel Application { get; set; }
  }
}
- Line 6: [IndexModel] embeds the application model.
The [Index] action becomes the following:
    [HttpGet]
    public ViewResult Index(ApplicationModel application)
    {
      return View(new IndexModel() { Application = application });
}
- line 4, the default view [Index.cshtml] is displayed using a [IndexModel] model initialized with data from the application model.
We know that the [Index.cshtml] view must display a form:
Let’s return to the request processing chain:
 |
For the request [GET /Pam/Index]:
- the action is [Index];
- the model for this action is [ApplicationModel];
- the view is [Index.cshtml];
- the model for this view is [IndexModel].
When the form is submitted, we will have a similar processing chain:
- the action is the one that processes POST;
- its template collects the posted values, in this case:
- the ID SS of the selected employee;
- the number of hours worked;
- the number of days worked;
We could create an action model that combines these three values. It is also common to reuse the model used to display the form. That is what we will do here. The [IndexModel] class evolves as follows:
using System.ComponentModel.DataAnnotations;
using System.Web.Mvc;
namespace Pam.Web.Models
{
  [Bind(Exclude = "Application")]
  public class IndexModel
  {
    // application scope data
    public ApplicationModel Application { get; set; }

    // posted values
    [Display(Name = "Employé")]
    public string SS { get; set; }
    [Display(Name = "Heures travaillées")]
    [UIHint("Decimal")]
    public double HeuresTravaillées { get; set; }
    [Display(Name = "Jours travaillés")]
    public double JoursTravaillés { get; set; }
  }
}
- Lines 13, 16, 18: the three posted values. Note that [joursTravaillés] was declared as type [double], whereas an integer is actually expected. The type [double] was introduced to facilitate client-side validation of this field, as validating a type [int] had caused issues;
- lines 12, 14, 17: labels for the [Html.LabelFor] methods of the view associated with the model;
- line 15: an annotation to display the [HeuresTravaillées] field with two decimal places;
- line 5: it is specified that the property named [Application] is not included in the posted values.
9.10.5. The views [Index.cshtml] and [Formulaire.cshtml]
The view [Index.cshtml] is displayed by the following action [Index]:
    [HttpGet]
    public ViewResult Index(ApplicationModel application)
    {
      return View(new IndexModel() { Application = application });
}
Interestingly, the [Index.cshtml] view remains unchanged:
@{
  ViewBag.Title = "Pam";
}
@Html.Partial("Formulaire")
- the view does not declare any template;
- line 4: it includes the partial view [Formulaire.cshtml], again without passing a template to it. During testing, it was observed that the [IndexModel] model passed to the [Index.cshtml] view was implicitly propagated to the [Formulaire.cshtml] partial view. This latter view could now take the following form:
@model Pam.Web.Models.IndexModel

@using (Html.BeginForm("FaireSimulation", "Pam", FormMethod.Post, new { id = "formulaire" }))
{
  <table>
    <thead>
      <tr>
...
      </tr>
    </thead>
    <tbody>
      <tr>
...
      </tr>
      <tr>
...
      </tr>
    </tbody>
  </table>
}
<div id="simulation" />
- line 1: the view receives a model of type [IndexModel];
- line 3: the form;
- lines 6–10: the headers of the data entry table;
- lines 12–14: the data entry row;
- lines 15–17: any error messages.
Task: Complete the code for the [Formulaire.cshtml] view. Use the [DropDownListFor, EditorFor, LabelFor, ValidationMessageFor] methods described in Section 5.7.
9.10.6. Testing the [Index] action
We have written all the elements of the URL [/Pam/Index] processing chain:
 |
We are testing the application with [Ctrl-F5]:
 | 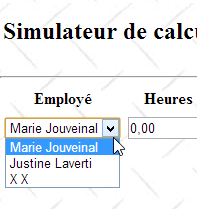 |
You must verify that your drop-down list has been populated with the list of employees we defined in the simulated [métier] layer.
9.11. Step 5: Implementing input validation
9.11.1. The problem
Although we haven’t done anything to enable it, client-side validation is already in effect:
 |
 |
Client-side validation is enabled by default due to line 3 below in the application’s [Web.config] file.
  <appSettings>
    ...
    <add key="ClientValidationEnabled" value="true" />
</appSettings>
However, because in [IndexModel], the field [JoursTravaillés] was declared as type [double]:
public double JoursTravaillés { get; set; }
you can enter a real number in this field:
 |
Furthermore, arbitrary values can be entered in both fields:
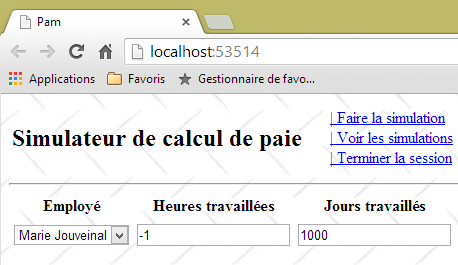 |
The form's [IndexModel] model is currently as follows:
using System.ComponentModel.DataAnnotations;
using System.Web.Mvc;
namespace Pam.Web.Models
{
  [Bind(Exclude = "Application")]
  public class IndexModel
  {
    // application scope data
    public ApplicationModel Application { get; set; }

    // posted values
    [Display(Name = "Employé")]
    public string SS { get; set; }
    [Display(Name = "Heures travaillées")]
    [UIHint("Decimal")]
    public double HeuresTravaillées { get; set; }
    [Display(Name = "Jours travaillés")]
    public double JoursTravaillés { get; set; }
  }
}
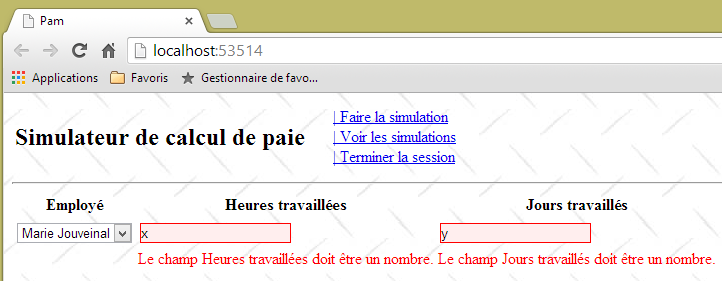
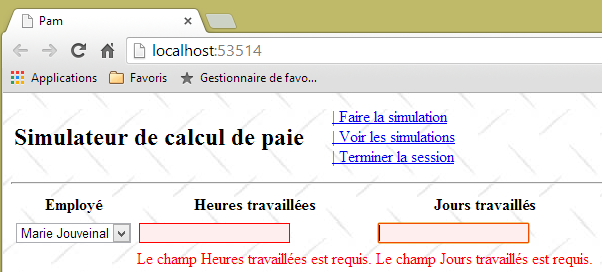
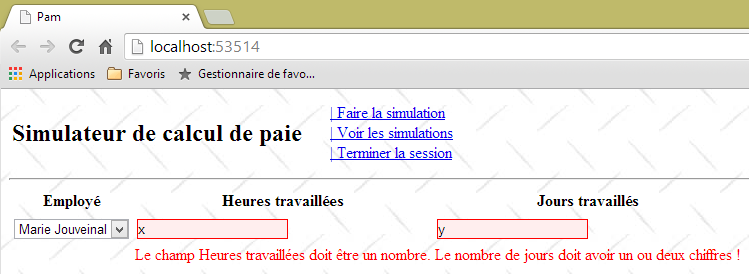
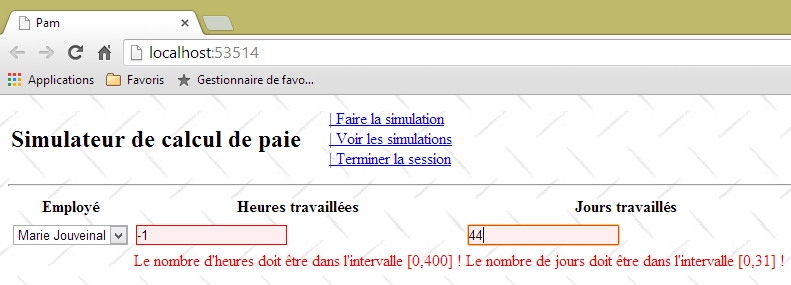
Task: Improve this model to:
- display custom error messages;
- accept only real values in the range [0,400] for the field [HeuresTravaillées];
- accept only integer values in the range [0,31] for the field [JoursTravaillées];
You can refer to the example in Section 7.6.2. To verify that the number of days worked is an integer, you can use a regular expression (see examples in Section 5.9.1).
Here are examples of what is expected:
 |
 |
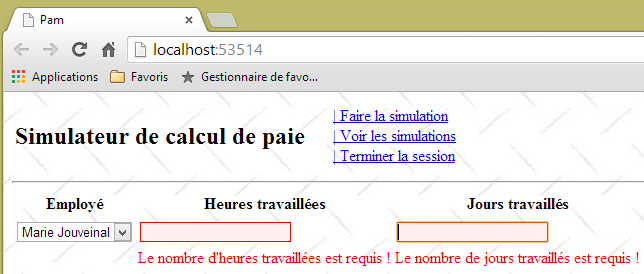 |
9.11.2. Entering real numbers in French format
In the application’s current version, the number of hours worked must be a decimal number in the Anglo-Saxon format (with a decimal point). The French format with a comma is not accepted:
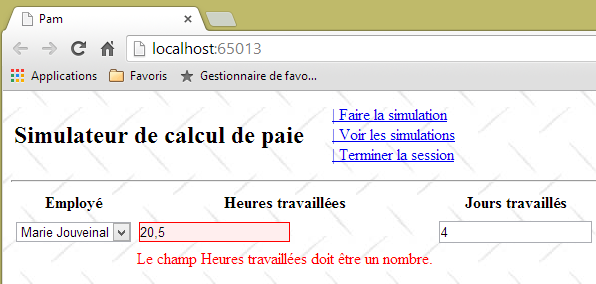 |
This issue has been identified and addressed in section 6.1.
Task: Following the procedure in the section mentioned above, make the necessary changes so that real numbers can be entered using the French decimal format. Test your application.
Now, the previous screen becomes:
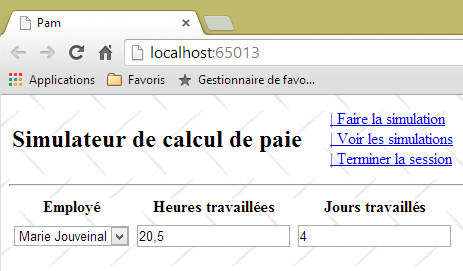 |
9.11.3. Form validation via the link Javascript [Faire la simulation]
Currently, invalid values can be submitted, as shown in the following sequence:
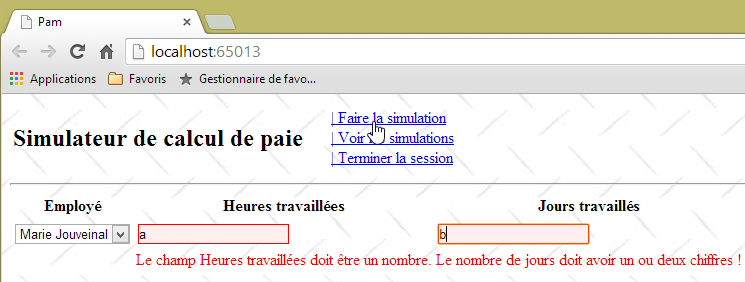 |
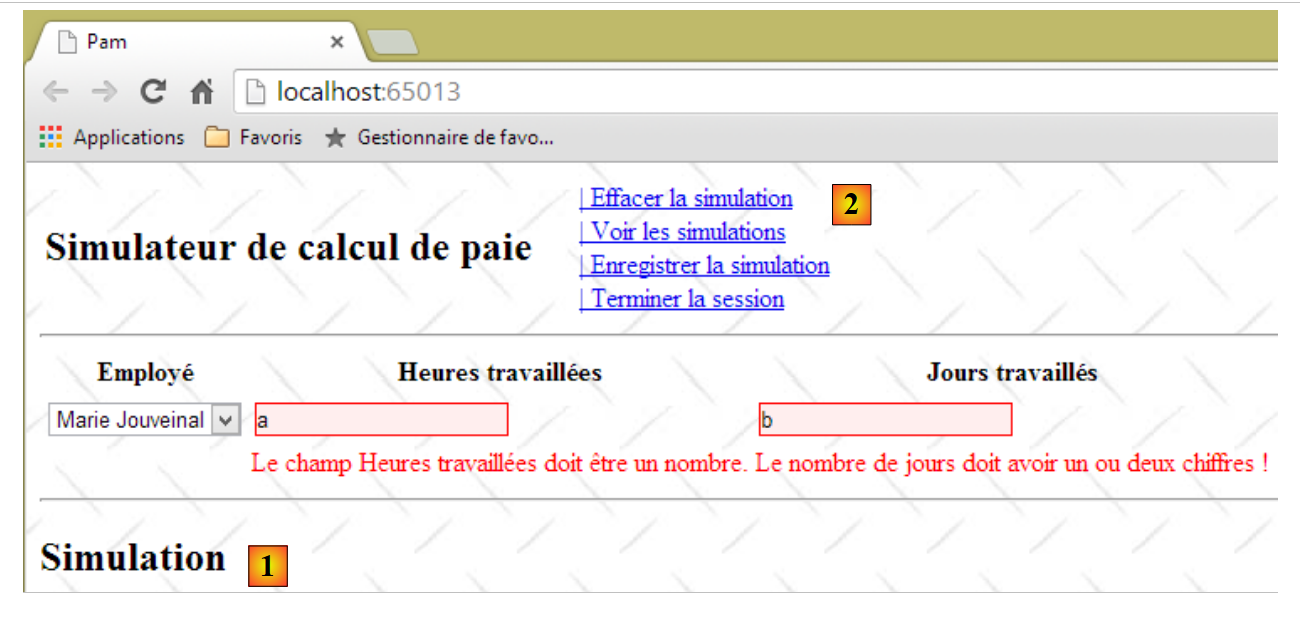 |
The presence of the simulation in [1] and the menu change in [2] show that clicking the [Faire la simulation] link submitted the form even though the entered values were invalid. This issue has been identified and addressed in Section 7.6.5.
Task: Following the procedure outlined in the aforementioned section, ensure that the POST from the [Faire la simulation] link cannot be executed if the entered values are invalid. Remember to clear your browser cache before testing your changes.
Note that the partial view [Formulaire.cshtml] generates a form HTML from id and [formulaire] (line 1 below):
@using (Html.BeginForm("FaireSimulation", "Pam", FormMethod.Post, new { id = "formulaire" }))
{
...
}
This can be verified by viewing the form's source code in the browser:
<div id="content">

    <form action="/Pam/FaireSimulation" id="formulaire" method="post">
    ...
    </form>
    <div id="simulation" />
</div>
9.12. Step 6: Run a simulation
9.12.1. The problem
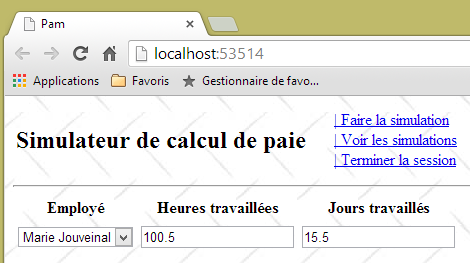
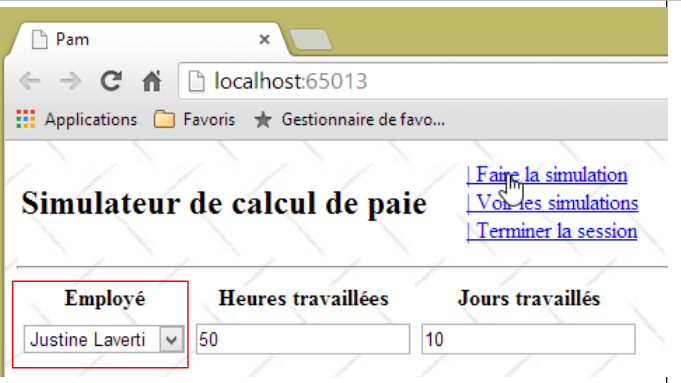
When we run a simulation, we want to obtain the following result:
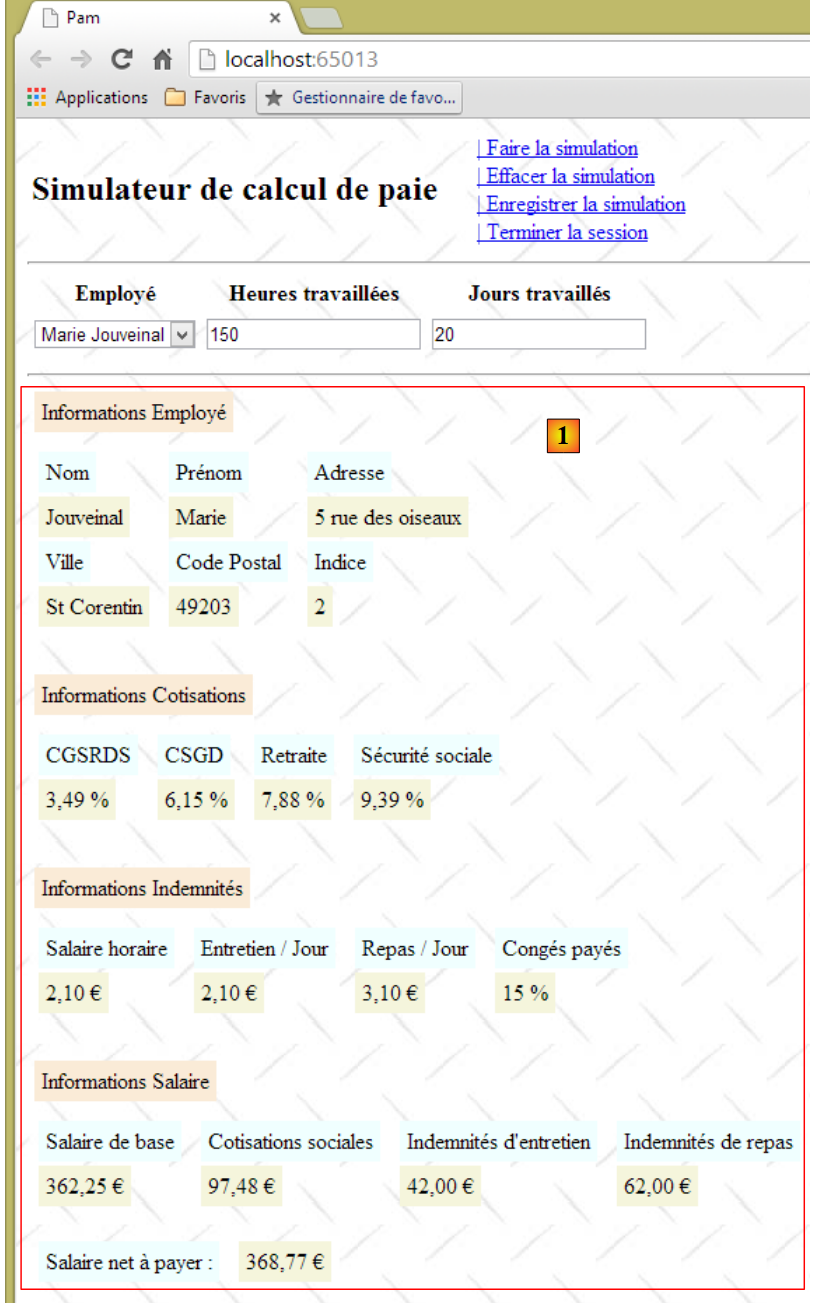 |
The partial view [Simulation.cshtml] now displays an employee's pay stub.
9.12.2. Writing the view [Simulation.cshtml]
The view [Simulation.cshtml] evolves as follows:
@model Pam.Metier.Entites.FeuilleSalaire
<hr />
<p><span class="info">Informations Employé</span></p>
<table>
  <tbody>
    <tr>
      <td><span class="libellé">Nom</span>
      </td>
      <td><span class="libellé">Prénom</span>
      </td>
      <td><span class="libellé">Adresse</span>
      </td>
    </tr>
    <tr>
      <td>
        <span class="valeur">@Model.Employe.Nom</span>
      </td>
...
    </tr>
    <tr>
      <td><span class="libellé">Ville</span>
      </td>
      <td><span class="libellé">Code Postal</span>
      </td>
      <td><span class="libellé">Indice</span>
      </td>
    </tr>
    <tr>
...
    </tr>
  </tbody>
</table>
<br />
<p><span class="info">Informations Cotisations</span></p>
<table>
...
  </tbody>
</table>
<br />
<p><span class="info">Informations Indemnités</span></p>
<table>
...
</table>
<br />
<p><span class="info">Informations Salaire</span></p>
<table>
...
</table>
<br />
<table>
...
</table>
- line 1: the view [Simulation.cshtml] is based on the type [FeuilleSalaire] defined in section 9.7.3;
- the view uses the [libellé, info, valeur] classes defined in the [Content / Site.css] application style sheet:
.libellé {
  background-color: azure;
  margin: 5px;
  padding: 5px;
}

.info {
  background-color: antiquewhite;
  margin: 5px;
  padding: 5px;
}

.valeur {
  background-color: beige;
  padding: 5px;
  margin: 5px;
}
Additionally, still in [Site.css], we set the row heights of the various tables HTML in the region of id [simulation], specifically where the pay stub is displayed:
#simulation table tr {
  height: 30px;
}
Task: Complete view [Simulation.cshtml].
To display the euro amount of a sum of money, use the [string.Format] method:
The above instruction displays [somme] as a monetary value [C] (Currency) with two decimal places [C2].
To test this view, a pay stub must be provided to it. This must be supplied by the [/Pam/FaireSimulation] action, which is the target of the Ajax call from the [Faire la simulation] link. Currently, this action is as follows:
    [HttpGet]
    public ViewResult Index(ApplicationModel application)
    {
      return View(new IndexModel() { Application = application });
    }

    // make a simulation
    [HttpPost]
    public PartialViewResult FaireSimulation()
    {
      return PartialView("Simulation");
}
In the code above, the [FaireSimulation] action does not pass any model to the [Simulation.cshtml] view. It needs to pass a pay stub to it. We know that the [métier] layer performs the payroll calculations. This [métier] layer is accessible via the [ApplicationModel] application model that we defined in section 9.10.2:
  public class ApplicationModel
  {
    // --- application scope data ---
    public Employe[] Employes { get; set; }
    public IPamMetier PamMetier { get; set; }
    public SelectListItem[] EmployesItems { get; set; }
}
The [métier] layer is accessible via the property on line 5 above. To allow the [FaireSimulation] action to access the [métier] layer, we will pass it the application model as we did for the [Index] action. The code then evolves as follows:
    // make a simulation
    [HttpPost]
    public PartialViewResult FaireSimulation(ApplicationModel application)
    {
      return PartialView("Simulation");
}
Now, within the action, we are able to calculate a fictitious pay stub. The code evolves as follows:
// make a simulation
    [HttpPost]
    public PartialViewResult FaireSimulation(ApplicationModel application)
    {
      FeuilleSalaire feuilleSalaire = application.PamMetier.GetSalaire("254104940426058", 150, 20);
      return PartialView("Simulation", feuilleSalaire);
    }
- In line 5, a fictitious salary is calculated. The first parameter is an existing SS number. It was defined in the [métier] class simulated in section 9.7.5. The second parameter is the number of hours worked, and the third is the number of days worked;
- Line 6: This pay slip is passed as a template to view [Simulation.cshtml].
We are now ready to test the view [Simulation.cshtml]:
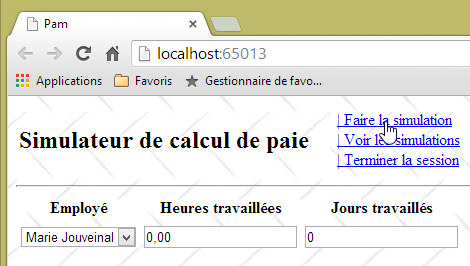 |
We make no entries and request the simulation. We then obtain the following result:
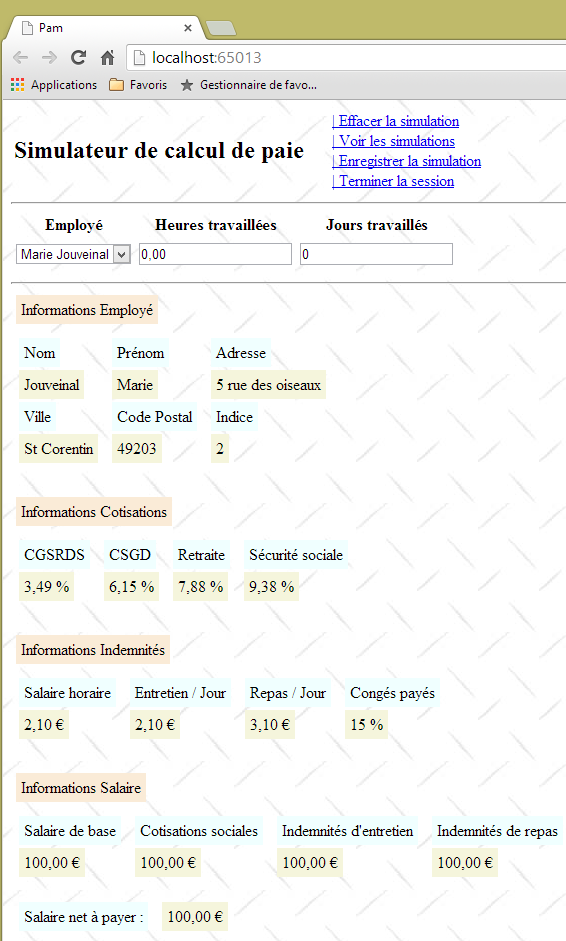 |
9.12.3. Calculation of actual pay
Our current [FaireSimulation] action always calculates the same pay slip:
    // make a simulation
    [HttpPost]
    public PartialViewResult FaireSimulation(ApplicationModel application)
    {
      FeuilleSalaire feuilleSalaire = application.PamMetier.GetSalaire("254104940426058", 150, 20);
      return PartialView("Simulation", feuilleSalaire);
}
It does not take into account the entered information:
- the employee whose salary is being calculated;
- the number of hours worked;
- the number of days worked.
The entered values are passed to action [FaireSimulation] as follows:
- the user clicks on the [Faire la simulation] link. This triggers the execution of the JS [faireSimulation] function that we have already written;
- the function JS [faireSimulation] then makes an Ajax call to the server action [/Pam/FaireSimulation] that we are currently working on. For now, the function JS [faireSimulation] does not send any information to the server action. It will need to send it the values entered by the user;
- the server action [/Pam/FaireSimulation] will retrieve the values entered from the values posted by the functions JS and [faireSimulation].
Let’s start with point 2: the function JS [faireSimulation] must post the values entered by the user to the server action [/Pam/FaireSimulation].
Task: Complete the function JS [faireSimulation] so that it posts the values entered by the user. You can refer to the example in Section 7.6.5, where this issue was addressed.
Let’s now address point 3 above. The server action [/Pam/FaireSimulation] must retrieve the values posted by the functions JS and [faireSimulation].
Task: Complete the server method [FaireSimulation] so that it calculates the salary using the values posted by the functions JS and [faireSimulation]. We can again refer to the example in section 7.6.5, where this issue was addressed. For now, we will assume that the model derived from the posted values is still valid.
Hint: The server action [FaireSimulation] proceeds as follows:
// make a simulation
    [HttpPost]
    public PartialViewResult FaireSimulation(ApplicationModel application, FormCollection data)
    {
      // action model creation
      ...
      // we try to retrieve the values posted in this model
      ...
      // salary calculation
      FeuilleSalaire feuilleSalaire = ...
      // the salary sheet is displayed
      return PartialView("Simulation", feuilleSalaire);
    }
Here is an example of the output:
 |
We select [Justine Laverti]. We then get the following result:
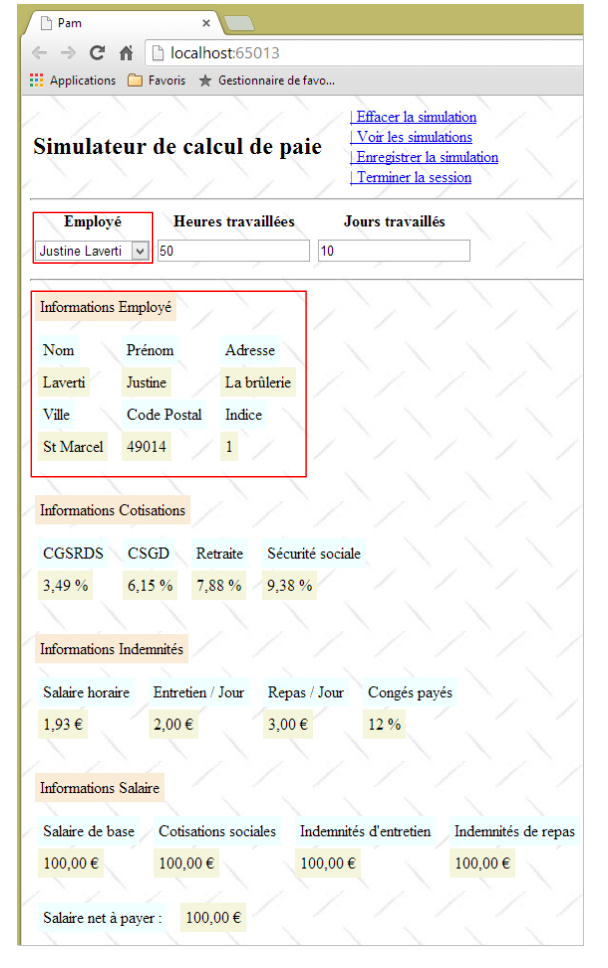 |
We have indeed obtained the fictitious payslip for [Justine Laverti]. Previously, the single payslip that was calculated was that of [Marie Jouveinal]. So the value posted for the employee selection was used. As for the number of hours and the number of days, we cannot say anything since our simulated [métier] layer does not take them into account.
9.12.4. Error Handling
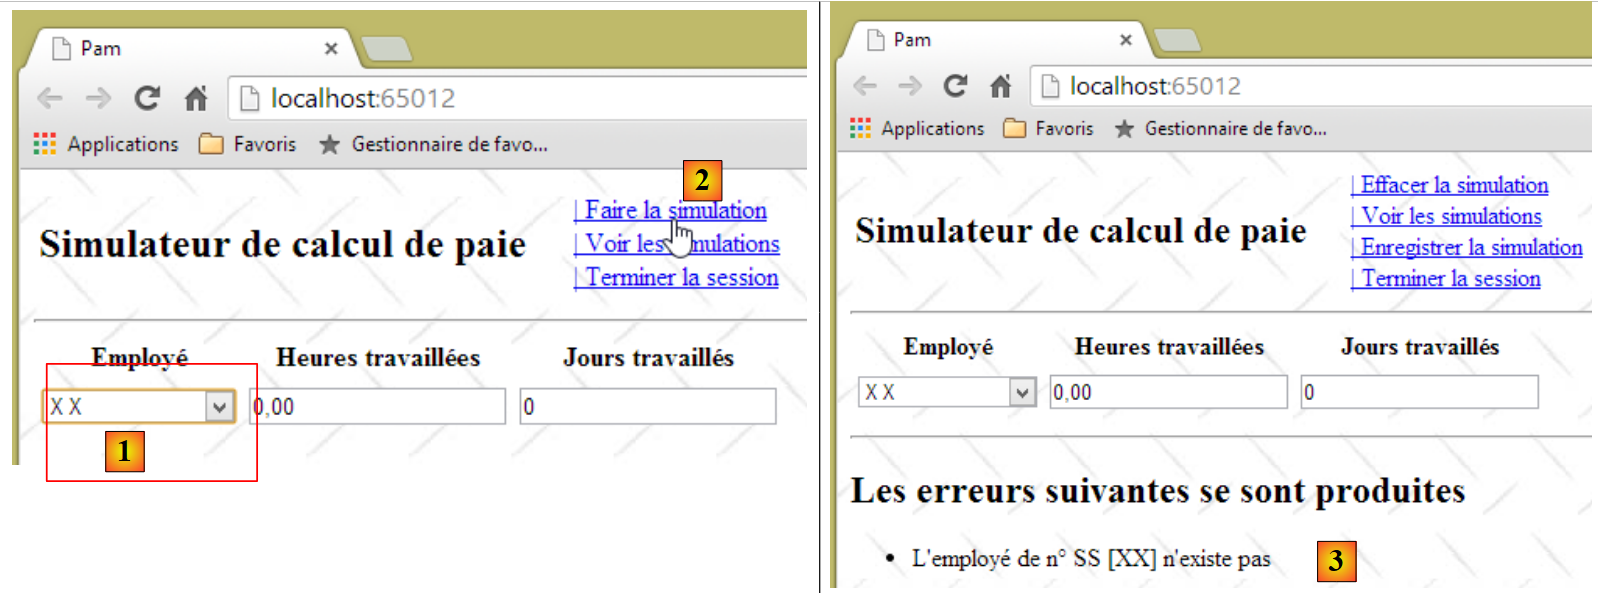
Let’s look at the following example:
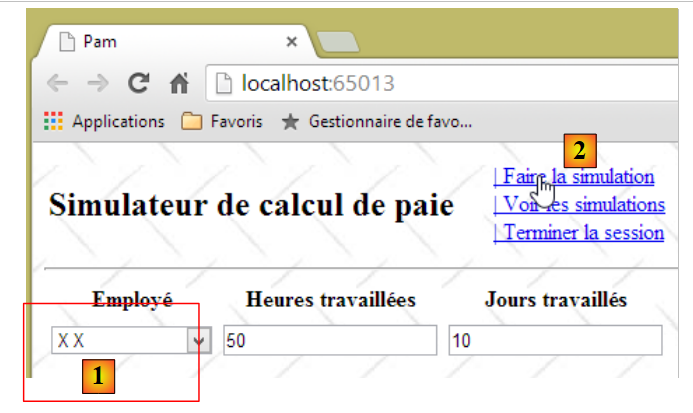 |
- In [1], we select an employee who does not exist (see the definition of the simulated layer [métier] in section 9.7.5;
- in [2], we run the simulation;
- in [3] below, an error page is returned.
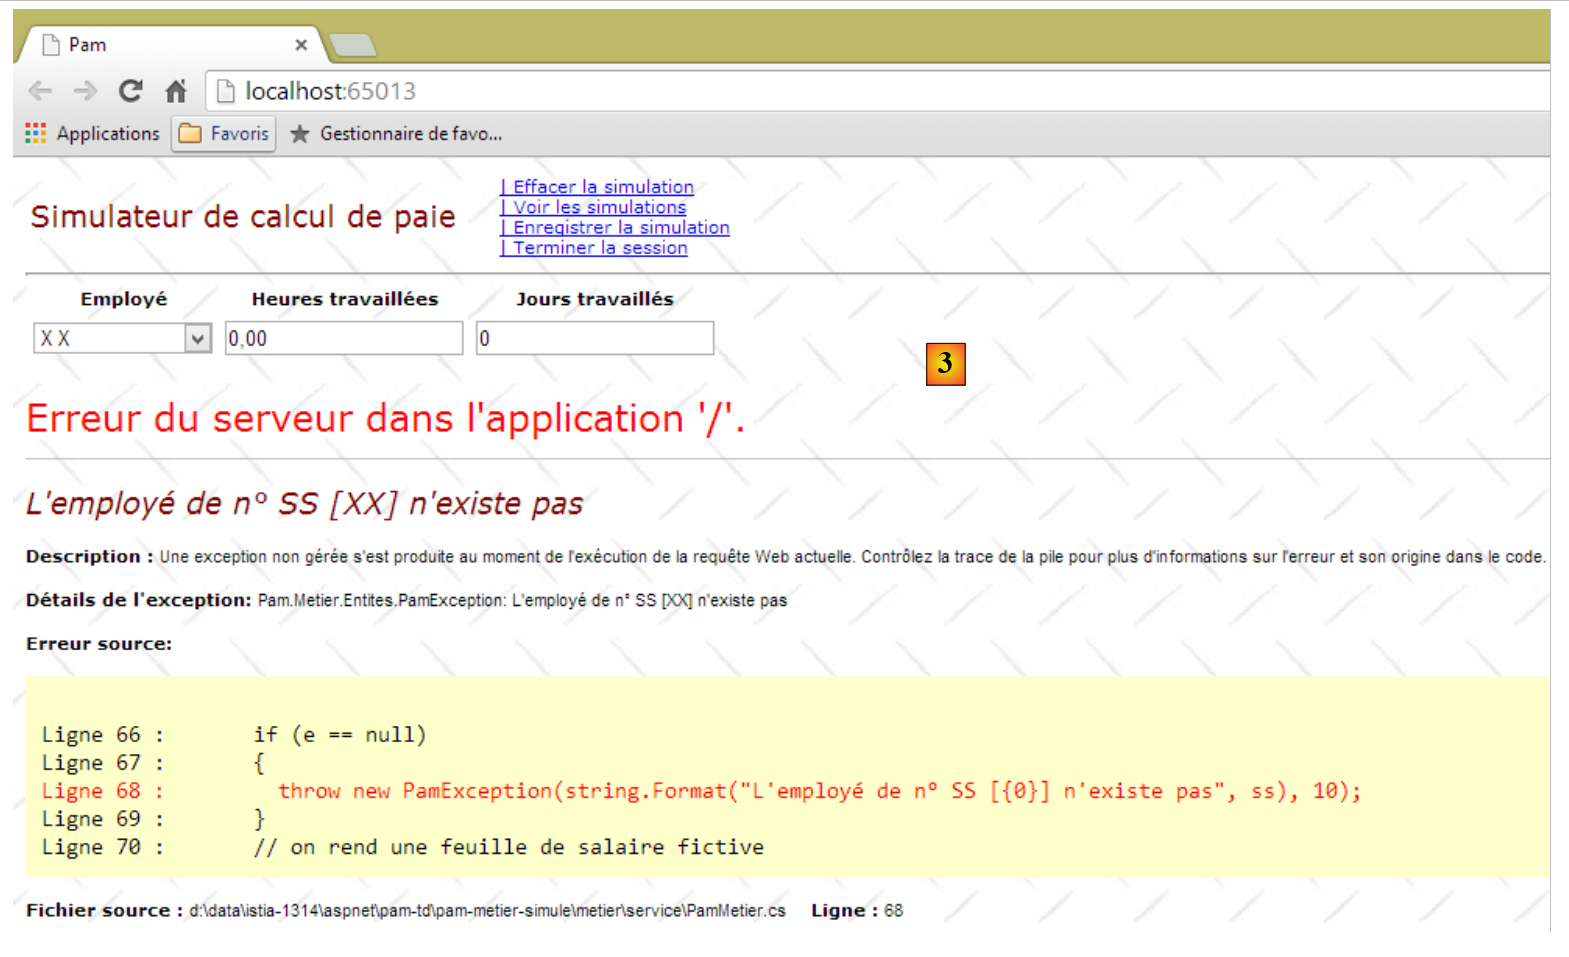 |
What happened?
The function JS [faireSimulation] was executed. Its code looks like this:
function faireSimulation() {
...
  // make a manual Ajax call
  $.ajax({
    url: '/Pam/FaireSimulation',
...
    beforeSend: function () {
      // wait signal on
      loading.show();
    },
    success: function (data) {
...
    },
    error: function (jqXHR) {
      // error display
      simulation.html(jqXHR.responseText);
      simulation.show();
    },
    complete: function () {
      // wait signal off
      loading.hide();
    }
  });
  // menu
  setMenu([lnkEffacerSimulation, lnkEnregistrerSimulation, lnkTerminerSession, lnkVoirSimulations]);
}
The Ajax call failed, and the function in lines 14–18 was executed. The error page [jqXHR.responseText] returned by the server was displayed. This page is quite specific. The simulated [métier] layer threw an exception because the SS number provided to it does not belong to an existing employee (see the code for the simulated [métier] layer in section 9.7.5). We need to handle this case properly.
We will create a partial view [Erreurs.chtml] that will be returned to the client JS whenever an error is detected on the server side:
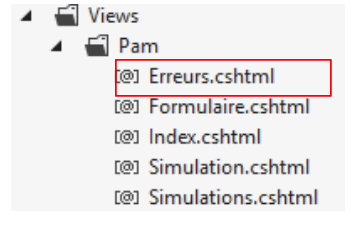 |
The code for the partial view [Erreurs.chtml] is as follows:
@model IEnumerable<string>

<hr />
<h2>Les erreurs suivantes se sont produites</h2>
<ul>
  @foreach (string msg in Model)
  {
    <li>@msg</li>
  }
</ul>
- line 1: the view receives a list of error messages as a model;
- lines 5–10: which are displayed in a HTML list;
Now, let’s modify the code for the [FaireSimulation] server action as follows:
    // make a simulation
    [HttpPost]
    public PartialViewResult FaireSimulation(ApplicationModel application, FormCollection data)
    {
    ...
      // salary calculation
      FeuilleSalaire feuilleSalaire = null;
      Exception exception=null;
      try
      {
        // salary calculation
        feuilleSalaire = ...
      }
      catch (Exception ex)
      {
        exception = ex;
      }
      // mistake?
      if (exception == null)
      {
        // the salary sheet is displayed
        return PartialView("Simulation", feuilleSalaire);
      }
      else
      {
        // the error page is displayed
        return PartialView("Erreurs", Static.GetErreursForException(exception));
      }
}
- lines 9–17: salary calculation is now performed within a try/catch block;
- line 27: if an error occurred, display the partial view [Erreurs.cshtml] using the list of error messages provided by the static method [Static.GetErreursForException(exception)] as a template.
The [Static] class contains two static utility functions, [1]:
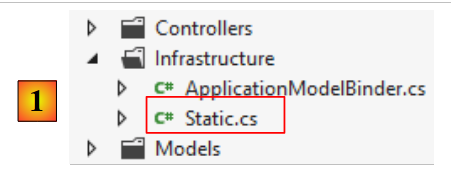 |
using System;
using System.Collections.Generic;
using System.Web.Mvc;

namespace PamWeb.Infrastructure
{
  public class Static
  {
    // list of exception error messages
    public static List<string> GetErreursForException(Exception ex)
    {
      List<string> erreurs = new List<string>();
      while (ex != null)
      {
        erreurs.Add(ex.Message);
        ex = ex.InnerException;
      }
      return erreurs;
    }

    // list of error messages linked to an invalid model
    public static List<string> GetErreursForModel(ModelStateDictionary état)
    {
      List<string> erreurs = new List<string>();
      if (!état.IsValid)
      {
        foreach (ModelState modelState in état.Values)
        {
          foreach (ModelError error in modelState.Errors)
          {
            erreurs.Add(getErrorMessageFor(error));
          }
        }
      }
      return erreurs;
    }

    // the error message linked to an element of the action model
    static private string getErrorMessageFor(ModelError error)
    {
      if (error.ErrorMessage != null && error.ErrorMessage.Trim() != string.Empty)
      {
        return error.ErrorMessage;
      }
      if (error.Exception != null && error.Exception.InnerException == null && error.Exception.Message != string.Empty)
      {
        return error.Exception.Message;
      }
      if (error.Exception != null && error.Exception.InnerException != null && error.Exception.InnerException.Message != string.Empty)
      {
        return error.Exception.InnerException.Message;
      }
      return string.Empty;
    }

  }
}
- lines 10–19: the static function [GetErreursForException] returns the list of errors from an exception stack;
- lines 22–36: the static function [GetErreursForModel] returns the list of errors from an invalid action template. The code for this function, as well as that of the private method [getErrorMessageFor] (lines 39–54), has already been encountered previously.
With that done, we can test the error case again:
 |
- in [1], we select the employee who does not exist;
- in [2], we run the simulation;
- in [3], we retrieve the new error page.
Let’s return to the server action [FaireSimulation]:
    // make a simulation
    [HttpPost]
    public PartialViewResult FaireSimulation(ApplicationModel application, FormCollection data)
    {
      // action model creation
      IndexModel modèle = new IndexModel() { Application = application};
      // we try to retrieve the values posted in the model
      TryUpdateModel(modèle, data);
      // salary calculation
...
}
In line 8, we update the model from line 6 with the values posted by the Ajax call. We do not validate the model. We must do this because we cannot know where the posted values come from. Someone could have tampered with a POST and sent us invalid data.
Task: Following the pattern we developed for the exception case, modify the server action [FaireSimulation] to send an error page when the posted data is invalid. To do this, we will use the static method [GetErreursForModel] of the [Static] class.
How do you test this change? In section 9.11.3, you ensured that the function JS [faireSimulation] does not process the entered values if they are invalid. Comment out the lines that perform this action, then perform the following test:
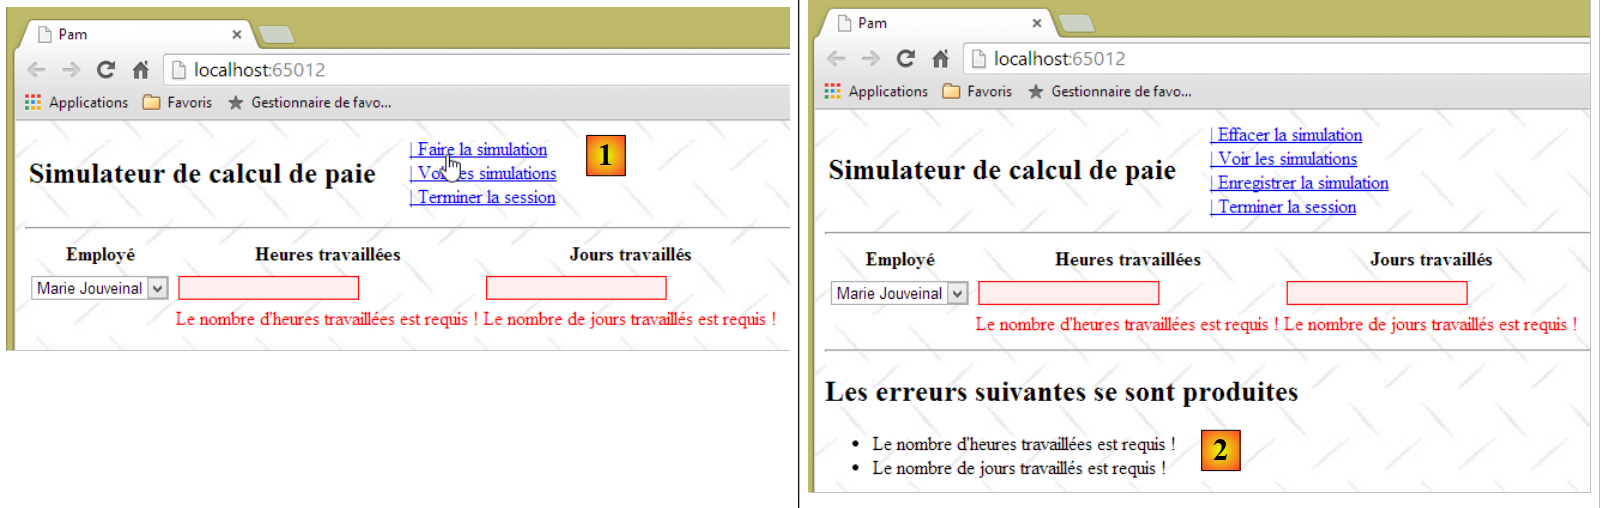 |
- In [1], run the simulation with invalid values;
- in [2], we successfully retrieve the error page we just built, proving that the server-side validators worked correctly.
Next, remember to uncomment the lines you just commented out in the JS and [faireSimulation] functions.
9.13. Step 7: Setting up a user session
The [Simulateur de calcul de paie] application allows the user to perform various payroll simulations using the [Faire la simulation] link, save them using the [Enregistrer la simulation] link, view them using the link [Voir les simulations], and delete them using the link [Retirer la simulation]. We know that between two successive user requests, there is no memory unless we create one via the session mechanism (see section 4.10). It is quite clear here that we must store in the session the list of simulations saved over time by the user. There is other data to store: when the user performs a simulation, it is only saved in the list of simulations if the user requests it using the link [Enregistrer la simulation]. When they do so, we must be able to retrieve the simulation calculated in the previous request. To do this, it will also be stored in the session. Finally, we will number the simulations starting from 1. To correctly number a new simulation, we must have retained the number of the previous simulation, again in the session.
In Section 4.10, we introduced the concept of a session model as an input parameter for an action so that the action could access the session. We will revisit this concept. Please review the relevant section if this concept is unclear to you.
We create the following class, [SessionModel]:
 |
Its code is as follows:
using Pam.Web.Models;
using System.Collections.Generic;

namespace Pam.Web.Models
{
  public class SessionModel
  {
    // list of simulations
    public List<Simulation> Simulations { get; set; }
    // n° of next simulation
    public int NumNextSimulation { get; set; }
    // the last simulation
    public Simulation Simulation { get; set; }

    // manufacturer
    public SessionModel()
    {
      // empty simulation list
      Simulations = new List<Simulation>();
      // next simulation no
      NumNextSimulation = 1;
    }
  }
}
The [Simulation] class in lines 9 and 13 will store information about a simulation. What do we need to store? The [Faire la simulation] link calculates a pay slip of type [FeuilleSalaire]. It seems natural to include this in the simulation. Furthermore, we need to store the information that led to this pay slip:
- the selected employee. This can be found in the [FeuilleSalaire.Employe] field. Therefore, there is no need to store it a second time;
- the number of hours and days worked. This information is not included in type [FeuilleSalaire]. We must therefore store it.
Finally, each simulation is identified by a number. We could therefore start with the following class:
using Pam.Metier.Entites;

namespace Pam.Web.Models
{
  public class Simulation
  {
    // simulation no
    public int Num { get; set; }
    // number of hours worked
    public double HeuresTravaillées { get; set; }
    // number of days worked
    public int JoursTravaillés { get; set; }
    // payslip
    public FeuilleSalaire FeuilleSalaire { get; set; }
  }
}
The server action [FaireSimulation] must, in addition to calculating a pay slip, create a simulation and place it in the session. To do this, it will receive the session model as a parameter:
// make a simulation
    [HttpPost]
    public PartialViewResult FaireSimulation(ApplicationModel application, SessionModel session, FormCollection data)
    {
      // action model creation
      IndexModel modèle = new IndexModel() { Application = application };
      // we try to retrieve the values posted in the model
      TryUpdateModel(modèle, data);
      // valid model?
      if (!ModelState.IsValid)
      {
        // the error page is displayed
        return PartialView("Erreurs", Static.GetErreursForModel(ModelState));
      }
      // salary calculation
      FeuilleSalaire feuilleSalaire = null;
      Exception exception = null;
      try
      {
        // salary calculation
        feuilleSalaire = application.PamMetier.GetSalaire(modèle.SS, modèle.HeuresTravaillées, (int)modèle.JoursTravaillés);
      }
      catch (Exception ex)
      {
        exception = ex;
      }
      // mistake?
      if (exception != null)
      {
        // the error page is displayed
        return PartialView("Erreurs", Static.GetErreursForException(exception));
      }
      // create a simulation and place it in the session
      session.Simulation = ...
      // the salary sheet is displayed
      return PartialView("Simulation", feuilleSalaire);
    }
- line 3: the action receives the session model as a parameter;
Task 1: Complete the action code, line 34
Task 2: Following the procedure in Section 4.10, do what is necessary to ensure that the action’s parameter [SessionModel session] is properly initialized by the framework. If nothing is done, this parameter will have a null pointer.
9.14. Step 8: Save a simulation
9.14.1. The problem
When we have performed a simulation, we can save it:
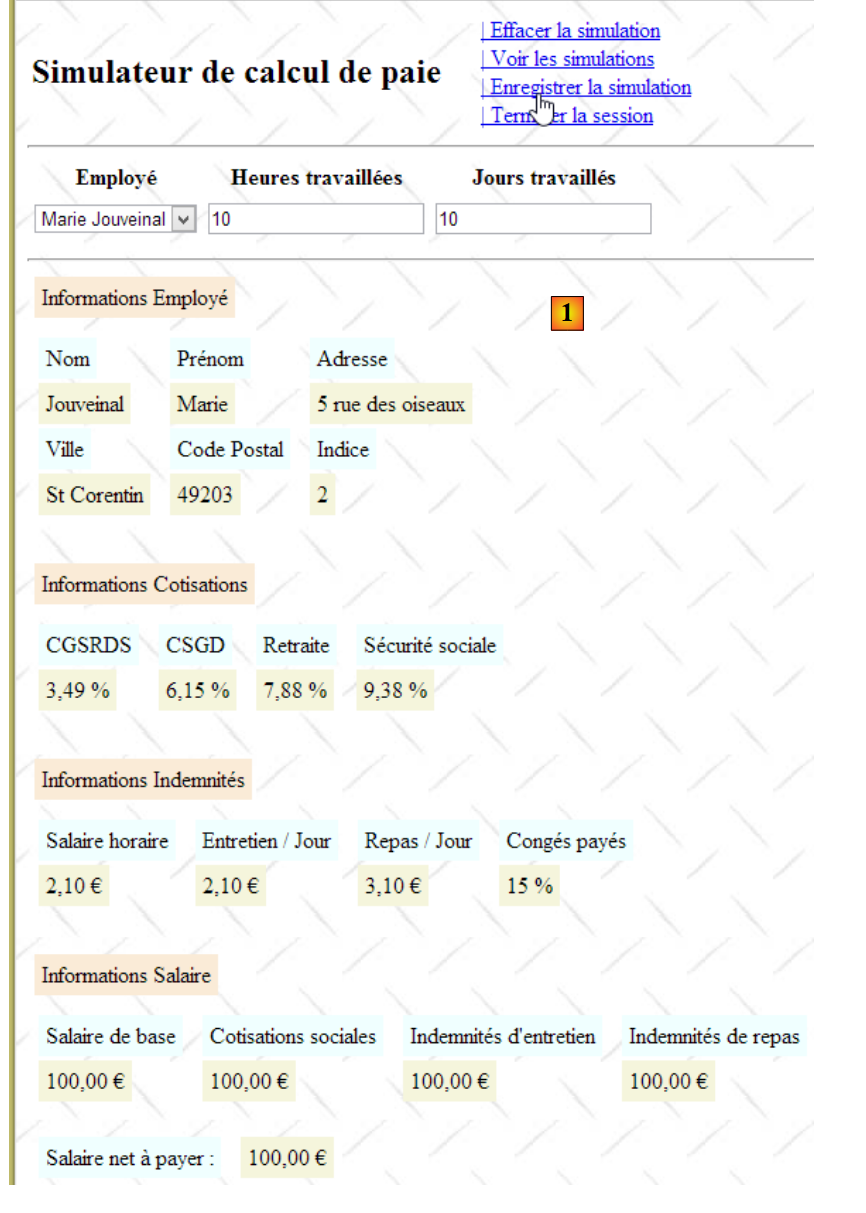 |
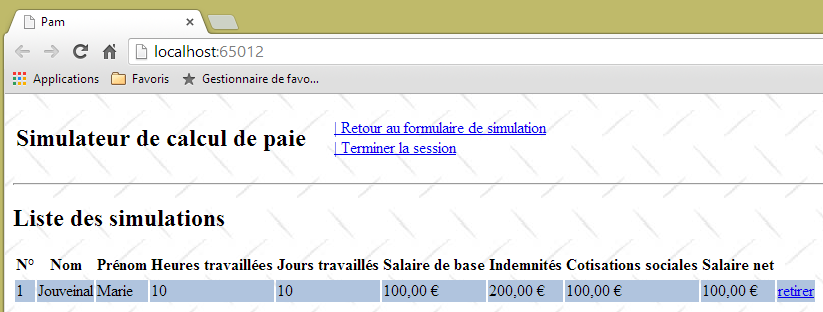
The partial view [Simulations.cshtml] now displays the list of simulations performed by the user. Note that the calculated pay stub is fictitious.
9.14.2. Writing the server action [EnregistrerSimulation]
The Ajax link [Enregistrer la simulation] calls the server action [EnregistrerSimulation], whose code was previously as follows:
    [HttpPost]
    public PartialViewResult EnregistrerSimulation()
    {
      return PartialView("Simulations");
}
It works as follows:
    // save a simulation
    [HttpPost]
    public PartialViewResult EnregistrerSimulation(SessionModel session)
    {
      // save the last simulation run in the session's simulation list
      ...
      // increment the number of the next simulation in the session
      ...
      // the list of simulations is displayed
      ...
}
- Line 1: The [EnregistrerSimulation] action requires access to the session. This is why it takes the session model as a parameter.
Task: Complete the server action [EnregistrerSimulation].
9.14.3. Writing the partial view [Simulations.cshtml]
The previous action [EnregistrerSimulation] displays the partial view [Simulations.cshtml] using the list of simulations performed by the user as its model. Its code is as follows:
@model IEnumerable<Simulation>

@using Pam.Web.Models

@if (Model.Count() == 0)
{
  <h2>Votre liste de simulations est vide</h2>
}
@if (Model.Count() != 0)
{
  <h2>Liste des simulations</h2>
...
}
Task 1: Complete the code for the partial view [Simulations.cshtml]. Use a table named HTML to display the simulations. You may refer to the examples in Section 5.4.
Note: The [retirer] link for each simulation in the HTML table will be a Javascript link in the following format:
where N is the simulation number.
Task 2: Test your application by running simulations. To do this, repeat the following sequence: 1) load the application page via [F5], 2) perform a simulation, 3) save it. The simulations will accumulate in the session, which should be reflected in the [Simulations.cshtml] view.
Task 3: Modify the partial view [Simulations.cshtml] so that the row colors in table HTML alternate.
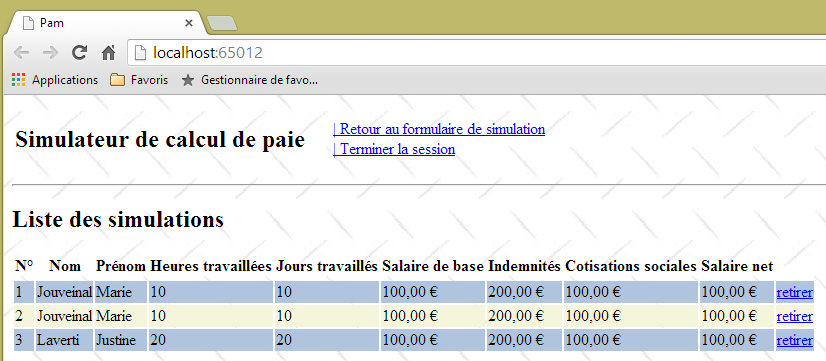
We will assign the following colors alternately to the <tr> rows in table HTML, the classes CSS, [pair], and [impair] defined in the stylesheet [/Content/Site.css]:
.impair {
  background-color: beige;
}

.pair {
  background-color: lightsteelblue;
}
9.15. Step 9: Return to the input form
9.15.1. The problem
Once we have obtained the list of simulations, we can return to the input form, which we haven’t been able to do for a while:
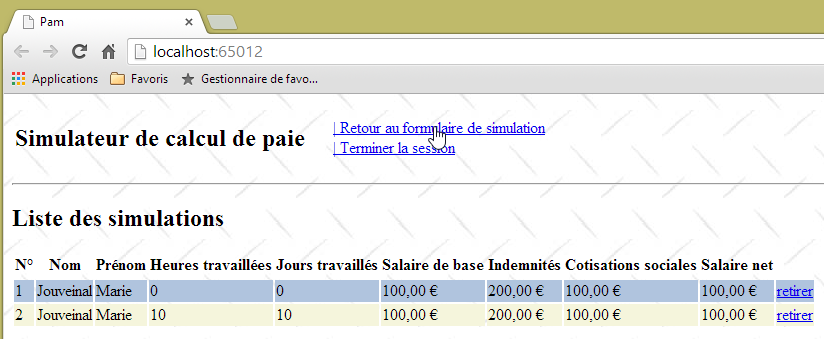
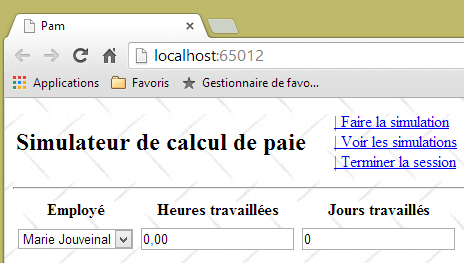
9.15.2. Writing the server action [Formulaire]
The Ajax link [Retour au formulaire de simulation] calls the server action [Formulaire], whose code was previously as follows:
    [HttpPost]
    public PartialViewResult Formulaire()
    {
      return PartialView("Formulaire");
}
The partial view [Formulaire] that it displays expects a model [IndexModel] (line 1 below):
@model Pam.Web.Models.IndexModel

@using (Html.BeginForm("FaireSimulation", "Pam", FormMethod.Post, new { id = "formulaire" }))
{
...
}
<div id="simulation" />
This is why the link [Retour au formulaire de simulation] was no longer working.
Task: rewrite the new version from the [Formulaire] server action (2 lines to rewrite), then run tests.
9.15.3. Modification of the Javascript function [retourFormulaire]
With the modification made previously, we can now return to the form, but an error then appears:
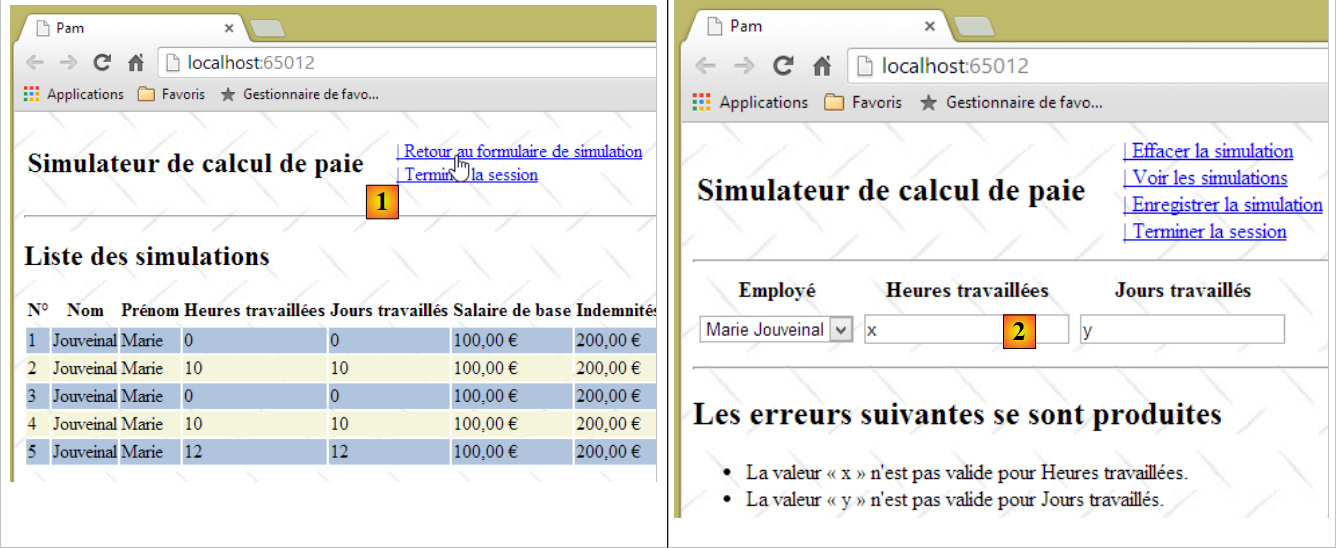 |
- In [1], we return to the input form;
- in [2], we perform a simulation with incorrect entries. We then discover that the client-side validators no longer work. Here, the server was called and returned an error page thanks to the work done in section 9.12.4.
This issue was identified and addressed in section 7.6.7.
Task: Following the procedure in section 7.6.7, correct the function Javascript [retourFormulaire], then run tests to verify that the client-side validators are working again.
9.16. Step 10: View the list of simulations
9.16.1. The problem
When working with the simulation form, you can view the list of simulations you have performed:
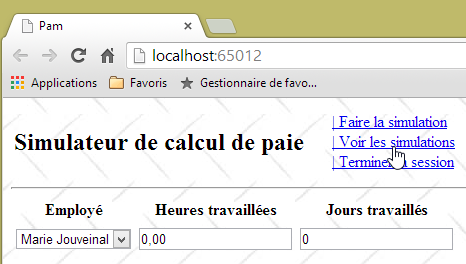 | 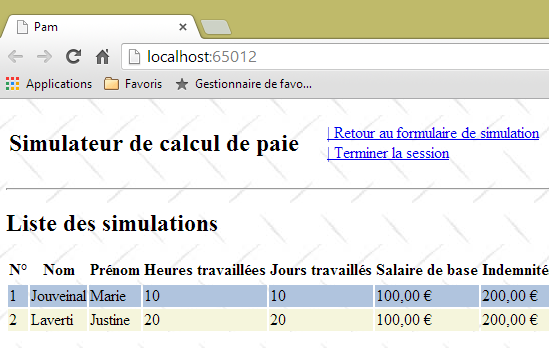 |
9.16.2. Definition of the server action [VoirSimulations]
The Ajax link [Voir les simulations] calls the server action [VoirSimulations], whose code was previously as follows:
    // see simulations
    [HttpPost]
    public PartialViewResult VoirSimulations()
    {
      return PartialView("Simulations");
}
The partial view [Simulations] that it displays expects a model [IEnumerable<Simulation>] (line 1 below):
@model IEnumerable<Simulation>

@using Pam.Web.Models

@if (Model.Count() == 0)
{
  <h2>Votre liste de simulations est vide</h2>
}
@if (Model.Count() != 0)
{
  <h2>Liste des simulations</h2>
...
}
This is why the link [Voir les simulations] was no longer working.
Task: Write the new version for the [VoirSimulations] server action (2 lines to rewrite), then run the tests.
9.17. Step 11: End the session
9.17.1. The problem
You can end the user’s session at any time using the link [Ajax] [Terminer la session]. This causes the current session to be abandoned and a new one to begin. Additionally, you return to the form view:
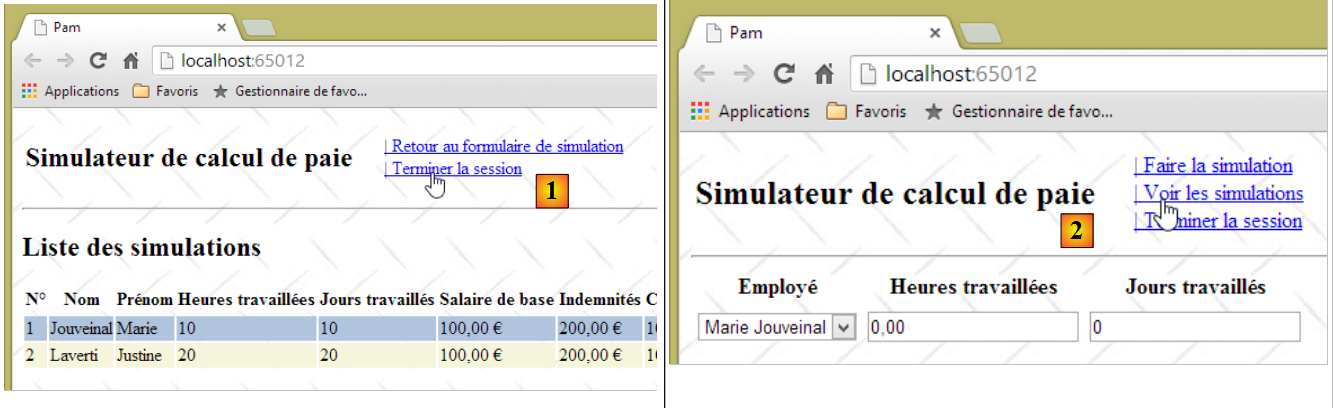 |
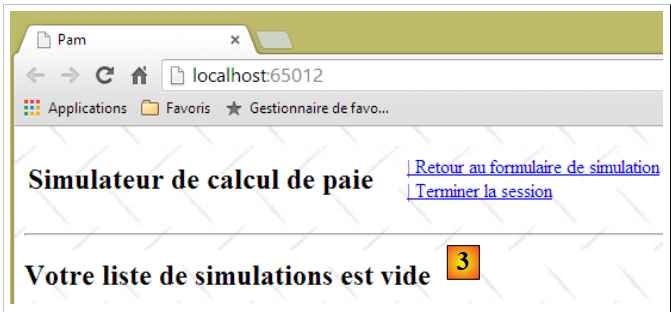 |
- in [1], we ran two simulations and then ended the session;
- in [2], we returned to the input form. We want to view the simulations;
- in [3], due to the session change, the list of simulations is now empty.
9.17.2. Writing the server action [TerminerSession]
The Ajax link [Terminer la session] calls the server action [TerminerSession], whose code was, until now, as follows:
    // end session
    [HttpPost]
    public PartialViewResult TerminerSession()
    {
      return PartialView("Formulaire");
}
The partial view [Formulaire] that it displays expects a model [IndexModel] (line 1 below):
@model Pam.Web.Models.IndexModel

@using (Html.BeginForm("FaireSimulation", "Pam", FormMethod.Post, new { id = "formulaire" }))
{
...
}
<div id="simulation" />
That is why the link [Terminer la session] was no longer working.
Task: Write the new version for the [TerminerSession] server action (2 lines to rewrite), then run the tests.
Note: To abandon the session in the action, write:
9.17.3. Modification of the Javascript function [terminerSession]
With the modification made previously, we can now return to the form, but an anomaly then appears, the one described earlier in section 9.15.3.
Task: Following the procedure you used in section 9.15.3, correct the function Javascript [terminerSession], then run tests to verify that the client-side validators are working again.
9.18. Step 12: Clear the simulation
9.18.1. The problem
Once a simulation has been performed, it can be cleared using the link Javascript [Effacer la simulation]:
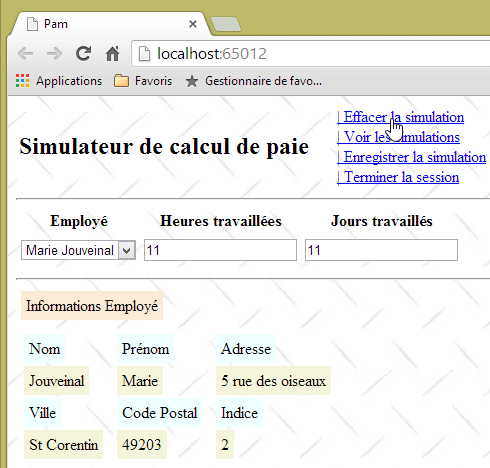 | 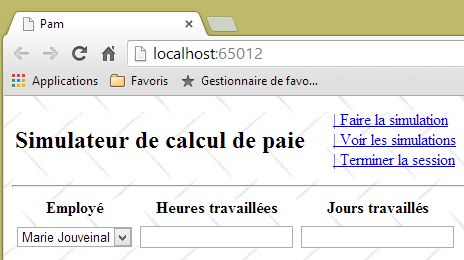 |
9.18.2. Writing the client action [effacerSimulation]
The function Javascript [effacerSimulation] currently has the following code:
function effacerSimulation() {
  // delete form entries
  // ...
  // hide the simulation if it exists
  $("#simulation").hide();
  // menu
  setMenu([lnkFaireSimulation, lnkTerminerSession, lnkVoirSimulations]);
}
Task: complete this code. You can use the example in section 7.6.6 as a guide
9.19. Step 13: Remove a simulation
9.19.1. The problem
When on the simulations page, you can delete certain simulations using the link Javascript [retirer]:
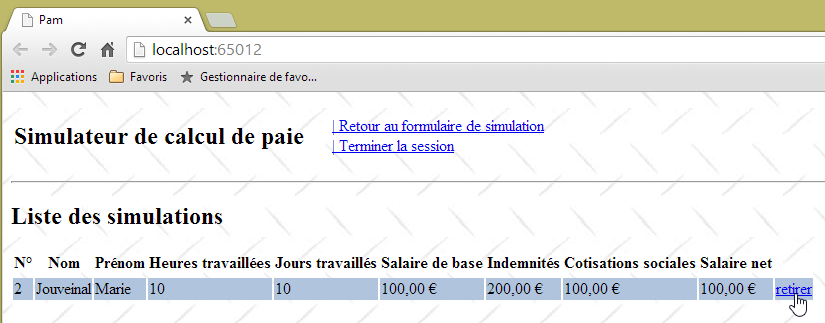
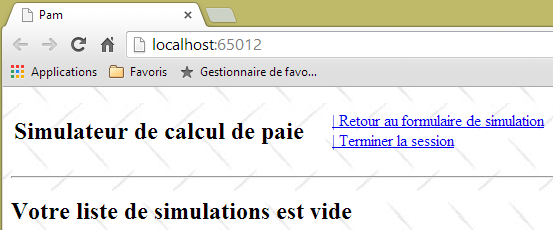
9.19.2. Writing the client action [retirerSimulation]
The [retirer] links have the following format:
where N is the simulation number.
Task: Following the procedure in sections 9.9.3, write the function JS [retirerSimulation]. This function will send an Ajax call of type POST to the action [/Pam/RetirerSimulation]. It will post the data N in the form num=N.
Note: The function JS [retirerSimulation] is similar to the other JS functions you have written that make an Ajax call to the server. The only new feature here is the POST of a value that is not in a form. We know that the posted values are combined into a string in the form:
The function JS [retirerSimulation] will therefore take the following form:
function retirerSimulation(N) {
  // make a manual Ajax call
  $.ajax({
    url: '/Pam/RetirerSimulation',
...
    data:"num="+N,
...
  });
  // menu
  setMenu([lnkRetourFormulaire, lnkTerminerSession]);
}
- line 6: the [data] property of an Ajax call JQuery represents the string posted to the server.
9.19.3. Writing the server action [RetirerSimulation]
The server action [RetirerSimulation]:
- receives a posted parameter named [num], which is the number of a simulation;
- must remove the simulation with this number from the list of simulations saved in the session;
- must then display the new list of simulations.
Task: Write the server action [RetirerSimulation]. Review Section 4.1 to learn how to retrieve the posted parameter named [num].
9.20. Step 14: Improving the Application Initialization Method
Our web application is complete. It is functional with a simulated [métier] class. Let’s review the architecture we’ve developed:
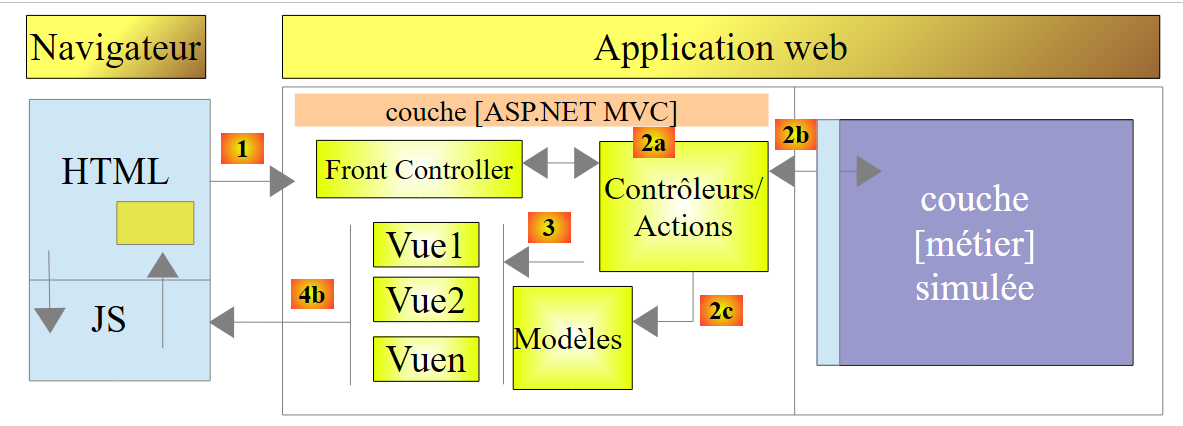 |
There are a few details left to iron out before moving on to the actual implementation of the [métier] layer, and this takes place in the application initialization method: the [Application_Start] method in [Global.asax]:
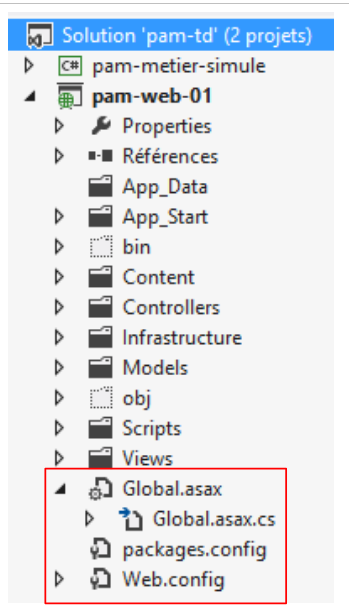 |
The [Application_Start] method in [Global.asax] is executed only once when the application starts. This is where the [Web.config] configuration file can be utilized. For now, our [Application_Start] method looks like this:
// application
    protected void Application_Start()
    {
      // ----------Auto-generated
      AreaRegistration.RegisterAllAreas();
      WebApiConfig.Register(GlobalConfiguration.Configuration);
      FilterConfig.RegisterGlobalFilters(GlobalFilters.Filters);
      RouteConfig.RegisterRoutes(RouteTable.Routes);
      BundleConfig.RegisterBundles(BundleTable.Bundles);
      // -------------------------------------------------------------------
      // ---------- specific configuration
      // -------------------------------------------------------------------
      // application scope data
      ApplicationModel application = new ApplicationModel();
      Application["data"] = application;
      // instantiation layer [business]
      application.PamMetier = new PamMetier();
...
      // model binders
...
}
On line 17, the business layer is instantiated using the new operator. Additionally, the application model is defined as follows:
  public class ApplicationModel
  {
    // --- application scope data ---
    public Employe[] Employes { get; set; }
    public IPamMetier PamMetier { get; set; }
    public SelectListItem[] EmployesItems { get; set; }
}
In line 5 above, we see that the type of the [PamMetier] property is that of the [IPamMetier] interface. This means that this property can be initialized by any object implementing this interface. However, on line 17 of [Application_Start], we have hard-coded the name of a class that implements [IPamMetier]. So if the [métier] layer were to be implemented with a new class that implements [IPamMetier], this line would need to be changed. It’s not a big deal, but it can be avoided. The definition of the implementation class for the [IPamMetier] interface can be moved to a configuration file. To change the implementation, you then modify the contents of this configuration file. The .NET code does not need to be changed.
Here, we will use the [Spring.net] dependency injection container. There are other .NET frameworks that can do the same thing, perhaps better and more simply.
The project architecture evolves as follows:
 |
- In [A], the initialization method for layer [ASP.NET MVC] will request a reference to the simulated layer [métier] from [Spring.net];
- In [B], [Spring.net] will create the simulated layer [métier] by using its configuration file to determine which class to instantiate;
- In [C], [Spring.net] will return the reference of the simulated layer [métier] to the layer [ASP.NET MVC].
Note that by default, the objects managed by [Spring.net] are singletons: there is only one instance of each. Thus, if later in our example, code requests a reference from [Spring.net] to the simulated layer [métier], [Spring.net] simply returns the reference to the object initially created.
9.20.1. Adding [Spring] references to the web project
We will use [Spring.net]. This framework comes in the form of DLL, which must be added to the project references. You can proceed as follows:
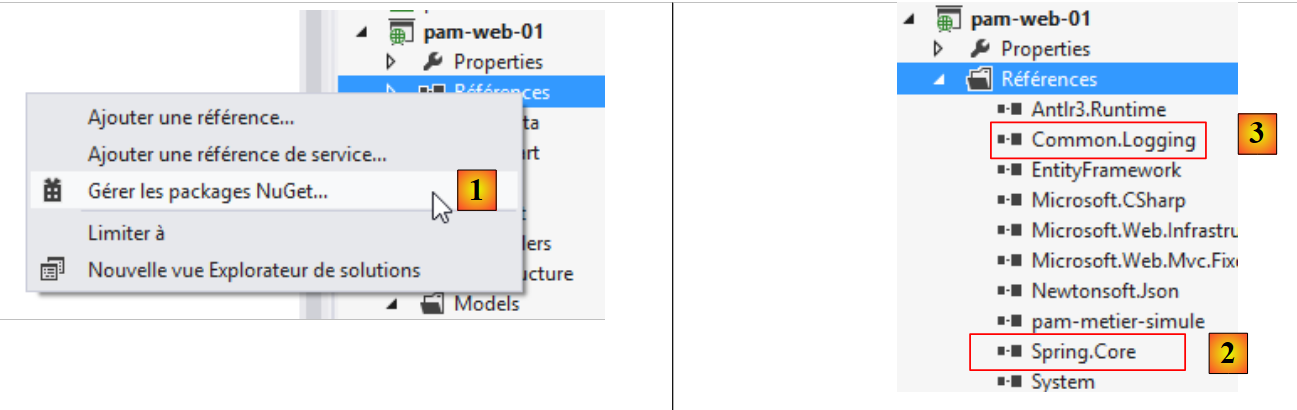 |
In [1], right-click on the [References] branch of the project, then select option and [Gérer les packages NuGet]. An internet connection is required. Next, proceed as previously done for the JQuery and [Globalize] libraries. Search for the keyword [Spring.core] and install this package. The installation includes two DLL packages: [Spring.core] and [2], as well as [Common.Logging] and [3]. In the following examples, Spring's version 1.3.2 was used.
Note: If you do not have an Internet connection, you will find these DLL files in a [lib] folder on the media for this case study.
9.20.2. Configuring [web.config]
The implementation class for the [IPamMetier] interface is defined in the [web.config] file.
<configuration>
  <configSections>
...
    <sectionGroup name="spring">
      <section name="objects" type="Spring.Context.Support.DefaultSectionHandler, Spring.Core" />
      <section name="context" type="Spring.Context.Support.ContextHandler, Spring.Core" />
    </sectionGroup>
  </configSections>
  <!-- spring configuration -->
  <spring>
    <context>
      <resource uri="config://spring/objects" />
    </context>
    <objects xmlns="http://www.springframework.net">
      <object id="pammetier" type="Pam.Metier.Service.PamMetier, pam-metier-simule"/>
    </objects>
  </spring>
...
- lines 2–8: locate the <configSections> tag in the file and insert lines 4–7 into it;
- line 4: the [name="spring"] attribute provides information regarding the [spring] section in lines 10-17;
- line 5: defines the class [Spring.Context.Support.DefaultSectionHandler] located within DLL [Spring.Core] as the one capable of processing the section [objects] in lines 14–16;
- line 6: defines the class [Spring.Context.Support.ContextHandler] located within DLL and [Spring.Core] as the one capable of processing the [context] section of lines 11–13;
- lines 11–13: this section provides the [<resource uri="config://spring/objects" />] information indicating that the Spring objects are located in the configuration file within the [/spring/objects] section, i.e., on lines 14–16;
- lines 14–16: the [objects] tag introduces the Spring objects;
- line 15: defines an object identified by [id="pammetier"], which is an instance of the [Pam.Metier.Service.PamMetier] class located in the DLL [pam-metier-simule]. Be careful not to make a mistake here. For the [id] attribute, you can enter whatever you like. You will use this identifier in [Global.asax]. The [Pam.Metier.Service.PamMetier] class is that of our simulated [métier] layer. You need to go back to its definition to find its full name:
namespace Pam.Metier.Service
{
  public class PamMetier : IPamMetier
  {
    ...
For DLL and [pam-metier-simule], you need to check the properties of the C# project [pam-metier-simule]:
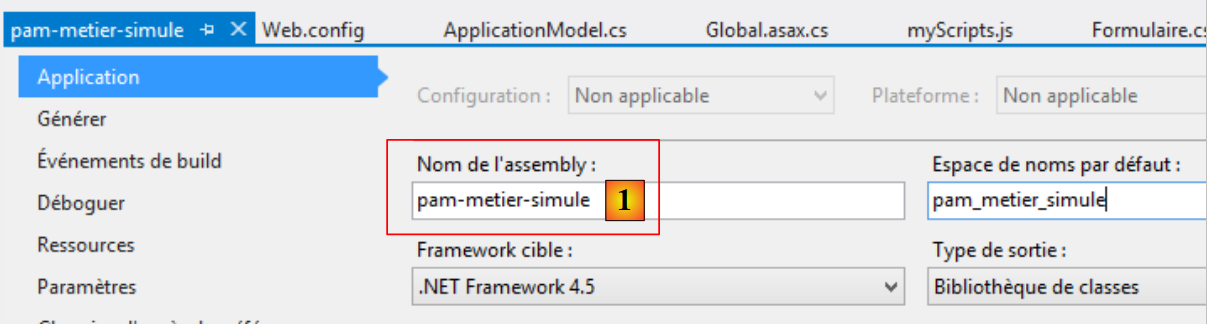 |
You must use the name specified in [1].
9.20.3. Modification of [Application_Start]
The [Application_Start] method is updated as follows:
using Spring.Context.Support;

// application
    protected void Application_Start()
    {
      // ----------Auto-generated
      AreaRegistration.RegisterAllAreas();
      WebApiConfig.Register(GlobalConfiguration.Configuration);
      FilterConfig.RegisterGlobalFilters(GlobalFilters.Filters);
      RouteConfig.RegisterRoutes(RouteTable.Routes);
      BundleConfig.RegisterBundles(BundleTable.Bundles);
      // -------------------------------------------------------------------
      // ---------- specific configuration
      // -------------------------------------------------------------------
      // application scope data
      ApplicationModel application = new ApplicationModel();
      Application["data"] = application;
      // instantiation layer [business]
      application.PamMetier = ContextRegistry.GetContext().GetObject("pammetier") as IPamMetier;
...
      // model binders
...
}
- Line 19: We use the Spring class [ContextRegistry], which is capable of processing the file [web.config]. To do this, we need to import the namespace from line 1. The static method [GetContext] allows us to retrieve the content of the [context] tags, which indicate where the Spring objects are located. The static method [GetObject] then allows us to retrieve a specific object identified by its id attribute. Note that the name of the class implementing the [IPamMetier] interface is no longer hard-coded in the code. It is now in the [web.config] file.
After making all these changes, test your application. It should work.
9.20.4. Handling an Application Initialization Error
In the [Application_Start] method, we wrote:
application.PamMetier = ContextRegistry.GetContext().GetObject("pammetier") as IPamMetier;
The statement to the right of the = sign may fail. There are various reasons for this:
- the most obvious is that the name of the object to be instantiated is incorrect;
- another is that the instantiation of the [métier] layer fails. This cannot be the case for our simulated [métier] layer, but it could be for our actual [métier] layer, which will be connected to a database. The SGBD may not be launched, the information about the database to be managed may be incorrect, etc...
We will handle any exceptions in a try/catch block. The code evolves as follows:
// application
    protected void Application_Start()
    {
      // ----------Auto-generated
...
      // -------------------------------------------------------------------
      // ---------- specific configuration
      // -------------------------------------------------------------------
      // application scope data
      ApplicationModel application = new ApplicationModel();
      Application["data"] = application;
      application.InitException = null;
      try
      {
        // instantiation layer [business]
        application.PamMetier = ContextRegistry.GetContext().GetObject("pammetier") as IPamMetier;
      }
      catch (Exception ex)
      {
        application.InitException = ex;
      }
      //if no error
      if (application.InitException == null)
      {
....
      }
      // model binders
...
    }
- line 12, we introduce a new property named [InitException] in the application model:
  public class ApplicationModel
  {
    // --- application scope data ---
    public Employe[] Employes { get; set; }
    public IPamMetier PamMetier { get; set; }
    public SelectListItem[] EmployesItems { get; set; }
    public Exception InitException { get; set; }
}
- line 7 above, the exception that may occur during application initialization;
- lines 13–21 of [Application_Start]: the instantiation of the [métier] layer is now performed within a try/catch block;
- line 20: the exception is logged;
- lines 23–26: if no error occurred, the code from before is executed;
- line 28: the [ModelBinders] instances are created regardless of whether an error occurred. This is important. We want to ensure that the [ApplicationModel] application model is properly bound by the framework.
We know that when the application starts, the server action [Index] is executed. For now, it is as follows:
    [HttpGet]
    public ViewResult Index(ApplicationModel application)
    {
      return View(new IndexModel() { Application = application });
}
Line 2: The [Index] action receives the application model. It can therefore determine whether initialization was successful or not and display an error page if initialization failed for any reason. We update the code as follows:
    [HttpGet]
    public ViewResult Index(ApplicationModel application)
    {
      // initialization error?
      if (application.InitException != null)
      {
        // error page without menu
        return View("InitFailed",Static.GetErreursForException(application.InitException));
      }
      // no error
      return View(new IndexModel() { Application = application });
}
Line 8: In the event of an initialization error, we display the view [InitFailed.cshtml], using the list of error messages from the exception that occurred during initialization as the template. The [Static.GetErreursForException] method was introduced and explained in section 9.12.4. The [InitFailed.cshtml] view will be as follows:
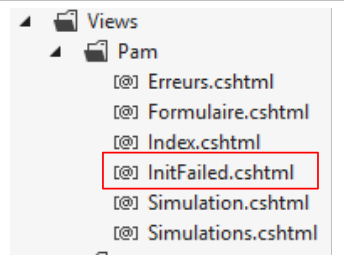 |
Here is the code:
@model IEnumerable<string>
@{
  Layout = null;
}
<!DOCTYPE html>
<html>
<head>
  <title>@ViewBag.Title</title>
  <meta charset="utf-8" />
  <meta name="viewport" content="width=device-width" />
  <link rel="stylesheet" href="~/Content/Site.css" />
</head>
<body>
  <table>
    <tbody>
      <tr>
        <td>
          <h2>Simulateur de calcul de paie</h2>
        </td>
    </tbody>
  </table>
  <hr />
  <h2>Les erreurs suivantes se sont produites à l'application initialization: </h2>
  <ul>
    @foreach (string msg in Model)
    {
      <li>@msg</li>
    }
  </ul>
</body>
</html>
- line 1: the view template is a list of error messages. These are displayed in a list HTML on lines 24–29;
- line 3: this view does not use the master page [_Layout.cshtml]. This is because we do not want the menu provided by that document. We therefore construct a complete HTML page (lines 5–23).
To test this, simply modify the instantiation of layer [métier] in [Application_Start] as follows:
      try
      {
        // instantiation layer [business]
        application.PamMetier = ContextRegistry.GetContext().GetObject("xx") as IPamMetier;
      }
      catch (Exception ex)
      {
        application.InitException = ex;
}
Line 4: We are looking for an object that does not exist in the Spring objects.
When we save these changes and run the application, we get the following page:
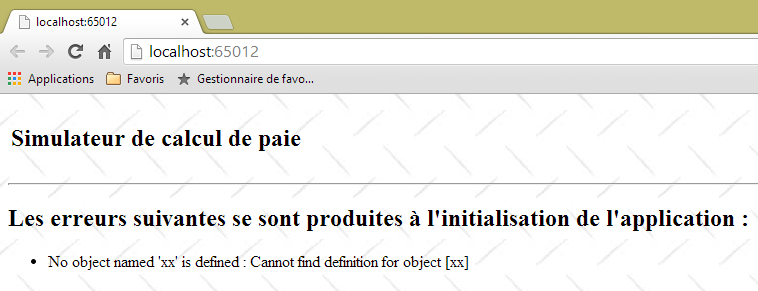 |
We get an error page with no menu. The user can do nothing but acknowledge the error. This is what we wanted.
9.21. Where are we now?
We now have a working web application that operates with a simulated business layer. Its architecture is as follows:
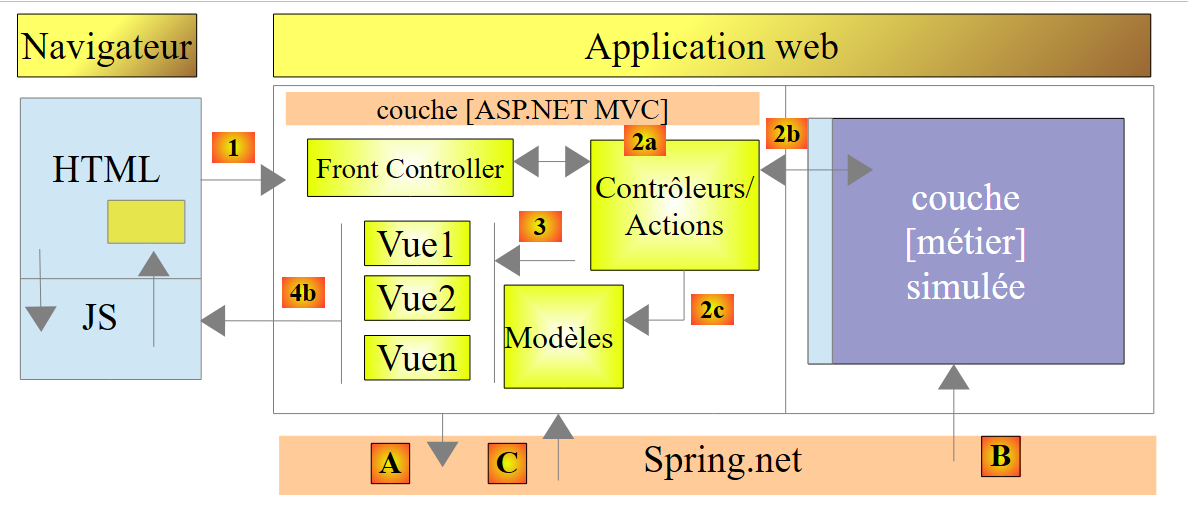 |
The [ASP.NET MVC] layer works with the simulated business layer through the [IPamMetier] interface. If we replace this simulated business layer with a real business layer that implements this interface, we won’t have to modify the web layer code. Thanks to [Spring.net], we will only need to change the implementation class of the [IPamMetier] interface in [web.config]. We are proceeding in this direction.
The new architecture will be as follows:
 |
We will describe the following in order:
- the [EF5] layer connected to SGBD. It will be implemented using Entity Framework 5 (EF5);
- the [DAO] layer, which manages data access via the [EF5] layer. This allows it to ignore the existence of SGBD. This layer simply manipulates the entities of the [Employe, Cotisations, Indemnites] application;
- the [métier] layer, which implements salary calculation.
The new architecture is the one presented at the very beginning of this document in section 1.1, which we now summarize:
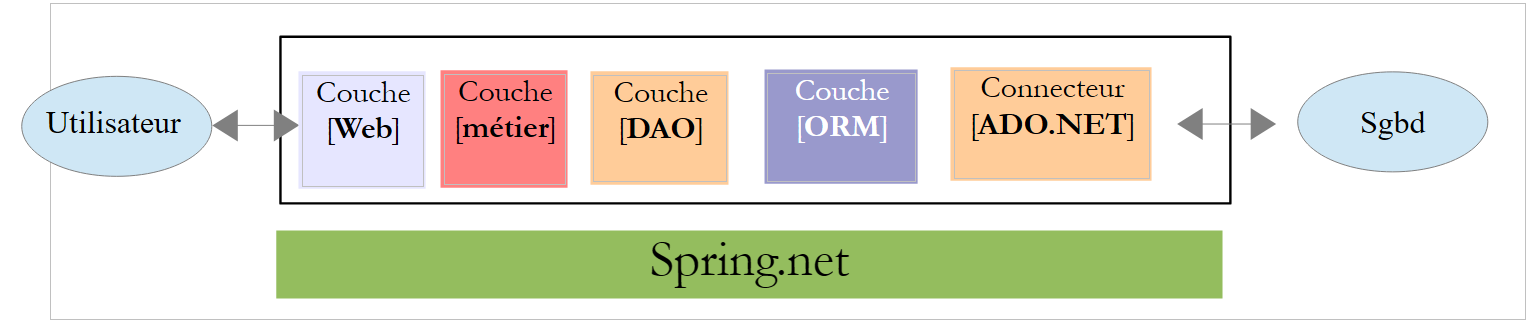 |
- the [Web] layer is the layer that interacts with the web application user. The user interacts with the web application through web pages displayed by a browser. It is in this layer that ASP.NET and MVC are located, and only in this layer;
- The [métier] layer implements the application's business rules, such as calculating a salary or an invoice. This layer uses data from the user via the [Web] layer and from SGBD via the [DAO] layer;
- the [DAO] layer (Data Access Objects), the [ORM] layer (Object Relational Mapper), and the ADO connector.NET manages access to the data in SGBD. The [ORM] layer bridges the objects handled by the [DAO] layer and the rows and columns of data in a relational database. Two ORMs are commonly used in the .NET, NHibernate (http://sourceforge.net/projects/nhibernate/ ) and Entity Framework (http://msdn.microsoft.com/en-us/data/ef.aspx);
- the integration of the layers can be performed by a dependency injection container such as Spring (http://www.springframework.net/);
The layers [métier], [DAO], and [EF5] will be implemented using C# projects. From this point on, we will be working with Visual Studio Express 2012 for Desktop.
9.22. Step 15: Setting up the Entity Framework 5 layer
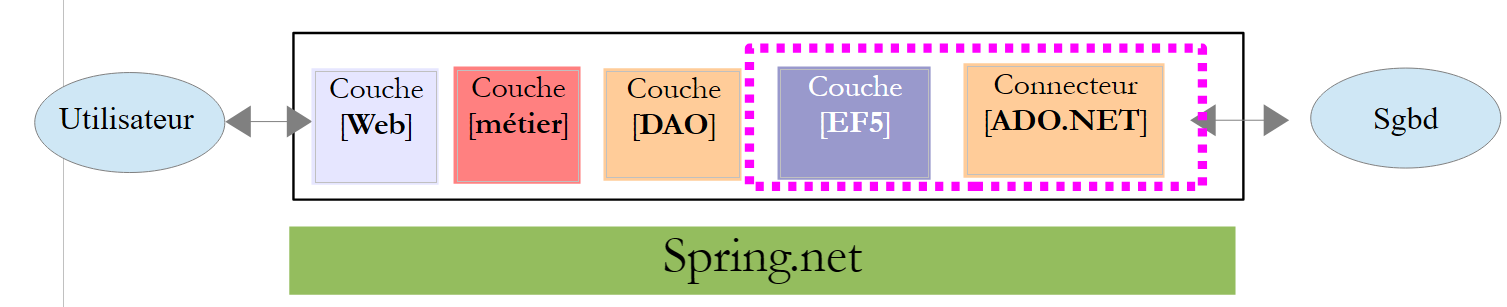 |
Creating the [EF5] layer is less about coding and more about configuration. To understand how to write this layer, read the [Introduction à Entity Framework 5 Code First] document available at URL [http://tahe.developpez.com/dotnet/ef5cf-02/]. This is a fairly lengthy document. The fundamentals are covered in the first four chapters. The specific sections to read will be indicated. When we refer to this document, we will use the notation [refEF5].
In addition, we will sometimes need C# concepts. In such cases, we will refer to the course [Introduction au langage C#], available at URL and [http://tahe.developpez.com/dotnet/csharp/], using the notation [refC#].
9.22.1. The Database
The application’s database was presented in Section 9.4. It is a MySQL database named [dbpam_ef5] (pam=Paie Assistante Maternelle). This database has an administrator named root with no password.
Let’s review the database schema. It has three tables:
There is a foreign key relationship between the column EMPLOYES (INDEMNITE_ID) and the column INDEMNITES (ID). Part of this database’s structure is dictated by its use with EF5.
The SQL script for creating the database is as follows:
-- phpMyAdmin SQL Dump
-- version 3.5.1
-- http://www.phpmyadmin.net
--
-- Customer: localhost
-- Generated on: Mon November 04, 2013 at 09:34 am
-- Version of server: 5.5.24-log
-- Version from PHP: 5.4.3

SET SQL_MODE="NO_AUTO_VALUE_ON_ZERO";
SET time_zone = "+00:00";


/*!40101 SET @OLD_CHARACTER_SET_CLIENT=@@CHARACTER_SET_CLIENT */;
/*!40101 SET @OLD_CHARACTER_SET_RESULTS=@@CHARACTER_SET_RESULTS */;
/*!40101 SET @OLD_COLLATION_CONNECTION=@@COLLATION_CONNECTION */;
/*!40101 SET NAMES utf8 */;

--
-- Database: `dbpam_ef5`
--

-- --------------------------------------------------------

--
-- Table structure `cotisations`
--

CREATE TABLE IF NOT EXISTS `cotisations` (
  `ID` bigint(20) NOT NULL AUTO_INCREMENT,
  `SECU` double NOT NULL,
  `RETRAITE` double NOT NULL,
  `CSGD` double NOT NULL,
  `CSGRDS` double NOT NULL,
  `VERSIONING` int(11) NOT NULL,
  PRIMARY KEY (`ID`)
) ENGINE=InnoDB  DEFAULT CHARSET=utf8 AUTO_INCREMENT=12 ;

--
-- Contents of table `cotisations`
--

INSERT INTO `cotisations` (`ID`, `SECU`, `RETRAITE`, `CSGD`, `CSGRDS`, `VERSIONING`) VALUES
(11, 9.39, 7.88, 6.15, 3.49, 1);

--
-- Triggers `cotisations`
--
DROP TRIGGER IF EXISTS `INCR_VERSIONING_COTISATIONS`;
DELIMITER //
CREATE TRIGGER `INCR_VERSIONING_COTISATIONS` BEFORE UPDATE ON `cotisations`
 FOR EACH ROW BEGIN
  SET NEW.VERSIONING:=OLD.VERSIONING+1;
END
//
DELIMITER ;
DROP TRIGGER IF EXISTS `START_VERSIONING_COTISATIONS`;
DELIMITER //
CREATE TRIGGER `START_VERSIONING_COTISATIONS` BEFORE INSERT ON `cotisations`
 FOR EACH ROW BEGIN
  SET NEW.VERSIONING:=1;
END
//
DELIMITER ;

-- --------------------------------------------------------

--
-- Structure of the `employees` table
--

CREATE TABLE IF NOT EXISTS `employes` (
  `ID` bigint(20) NOT NULL AUTO_INCREMENT,
  `PRENOM` varchar(20) CHARACTER SET latin1 NOT NULL,
  `SS` varchar(15) CHARACTER SET latin1 NOT NULL,
  `ADRESSE` varchar(50) CHARACTER SET latin1 NOT NULL,
  `CP` varchar(5) CHARACTER SET latin1 NOT NULL,
  `VILLE` varchar(30) CHARACTER SET latin1 NOT NULL,
  `NOM` varchar(30) CHARACTER SET latin1 NOT NULL,
  `VERSIONING` int(11) NOT NULL,
  `INDEMNITE_ID` bigint(20) NOT NULL,
  PRIMARY KEY (`ID`),
  UNIQUE KEY `SS` (`SS`),
  KEY `FK_EMPLOYES_INDEMNITE_ID` (`INDEMNITE_ID`)
) ENGINE=InnoDB  DEFAULT CHARSET=utf8 AUTO_INCREMENT=26 ;

--
-- Contents of the `employees` table
--

INSERT INTO `employes` (`ID`, `PRENOM`, `SS`, `ADRESSE`, `CP`, `VILLE`, `NOM`, `VERSIONING`, `INDEMNITE_ID`) VALUES
(24, 'Marie', '254104940426058', '5 rue des oiseaux', '49203', 'St Corentin', 'Jouveinal', 1, 93),
(25, 'Justine', '260124402111742', 'La Brûlerie', '49014', 'St Marcel', 'Laverti', 1, 94);

--
-- Used' triggers
--
DROP TRIGGER IF EXISTS `INCR_VERSIONING_EMPLOYES`;
DELIMITER //
CREATE TRIGGER `INCR_VERSIONING_EMPLOYES` BEFORE UPDATE ON `employes`
 FOR EACH ROW BEGIN
  SET NEW.VERSIONING:=OLD.VERSIONING+1;
END
//
DELIMITER ;
DROP TRIGGER IF EXISTS `START_VERSIONING_EMPLOYES`;
DELIMITER //
CREATE TRIGGER `START_VERSIONING_EMPLOYES` BEFORE INSERT ON `employes`
 FOR EACH ROW BEGIN
  SET NEW.VERSIONING:=1;
END
//
DELIMITER ;

-- --------------------------------------------------------

--
-- Table structure `indemnites`
--

CREATE TABLE IF NOT EXISTS `indemnites` (
  `ID` bigint(20) NOT NULL AUTO_INCREMENT,
  `ENTRETIEN_JOUR` double NOT NULL,
  `REPAS_JOUR` double NOT NULL,
  `INDICE` int(11) NOT NULL,
  `INDEMNITES_CP` double NOT NULL,
  `BASE_HEURE` double NOT NULL,
  `VERSIONING` int(11) NOT NULL,
  PRIMARY KEY (`ID`),
  UNIQUE KEY `INDICE` (`INDICE`)
) ENGINE=InnoDB  DEFAULT CHARSET=utf8 AUTO_INCREMENT=95 ;

--
-- Contents of table `indemnites`
--

INSERT INTO `indemnites` (`ID`, `ENTRETIEN_JOUR`, `REPAS_JOUR`, `INDICE`, `INDEMNITES_CP`, `BASE_HEURE`, `VERSIONING`) VALUES
(93, 2.1, 3.1, 2, 15, 2.1, 1),
(94, 2, 3, 1, 12, 1.93, 1);

--
-- Triggers `indemnites`
--
DROP TRIGGER IF EXISTS `INCR_VERSIONING_INDEMNITES`;
DELIMITER //
CREATE TRIGGER `INCR_VERSIONING_INDEMNITES` BEFORE UPDATE ON `indemnites`
 FOR EACH ROW BEGIN
  SET NEW.VERSIONING:=OLD.VERSIONING+1;
END
//
DELIMITER ;
DROP TRIGGER IF EXISTS `START_VERSIONING_INDEMNITES`;
DELIMITER //
CREATE TRIGGER `START_VERSIONING_INDEMNITES` BEFORE INSERT ON `indemnites`
 FOR EACH ROW BEGIN
  SET NEW.VERSIONING:=1;
END
//
DELIMITER ;

--
-- Constraints for exported tables
--

--
-- Constraints for the `employees` table
--
ALTER TABLE `employes`
  ADD CONSTRAINT `FK_EMPLOYES_INDEMNITE_ID` FOREIGN KEY (`INDEMNITE_ID`) REFERENCES `indemnites` (`ID`);

/*!40101 SET CHARACTER_SET_CLIENT=@OLD_CHARACTER_SET_CLIENT */;
/*!40101 SET CHARACTER_SET_RESULTS=@OLD_CHARACTER_SET_RESULTS */;
/*!40101 SET COLLATION_CONNECTION=@OLD_COLLATION_CONNECTION */;
Note the following points:
- lines 30, 73, 122: the primary keys of the tables are in [AUTO_INCREMENT] mode. They are managed by MySQL, not EF5;
- line 83: the SS number has a uniqueness constraint;
- line 130: the employee ID has a uniqueness constraint;
- Lines 168–169: the foreign key from table [employes] to table [indemnites];
- line 49: a trigger named [Trigger] is a script named SQL embedded within SGBD and executed at certain times;
- lines 51–54: the trigger [INCR_VERSIONING_COTISATIONS] fires before any modification of a row in the table [cotisations]. It then increments the column [VERSIONING] by one;
- lines 59–62: The trigger [START_VERSIONING_COTISATIONS] fires before any new row is inserted into the table [cotisations]. It then sets the column [VERSIONING] to 1;
- Ultimately, the [VERSIONING] column is set to 1 when a row is created in the [cotisations] table and is then incremented by 1 each time a modification is made to that row. This mechanism allows EF5 to manage concurrent access to a row in the [cotisations] table as follows:
- A process P1 reads a row L from the table [cotisations] at time T1. The row has column [VERSIONING] V1;
- A process P2 reads the same row L from table [cotisations] at time T2. The row has column [VERSIONING] V1 because process P1 has not yet committed its modification;
- Process P1 modifies row L and commits its change. Column [VERSIONING] of row L then changes to V1+1 due to trigger [INCR_VERSIONING_COTISATIONS];
- process P2 then does the same. EF5 then throws an exception because process P2 has a row with a [VERSIONING] column whose V1 value differs from the one found in the database, which is V1+1. A row can only be modified if it has the same value for [VERSIONING] as in the database.
This is called optimistic concurrency control. With EF5, a field playing this role must have the annotation [ConcurrencyCheck].
- A similar mechanism is created for table [employes] (lines 98–113) and table [indemnites] (lines 144–159).
Task: Create the database MySQL [dbpam_ef5] using the previous script SQL. The [dbpam_ef5] database must be created beforehand because the script does not create it. We will then run the SQL script on this database.
9.22.2. The Visual Studio Project
Using Visual Studio Express 2012 for Desktop, we load the [pam-td] solution used when building the [web] layer:
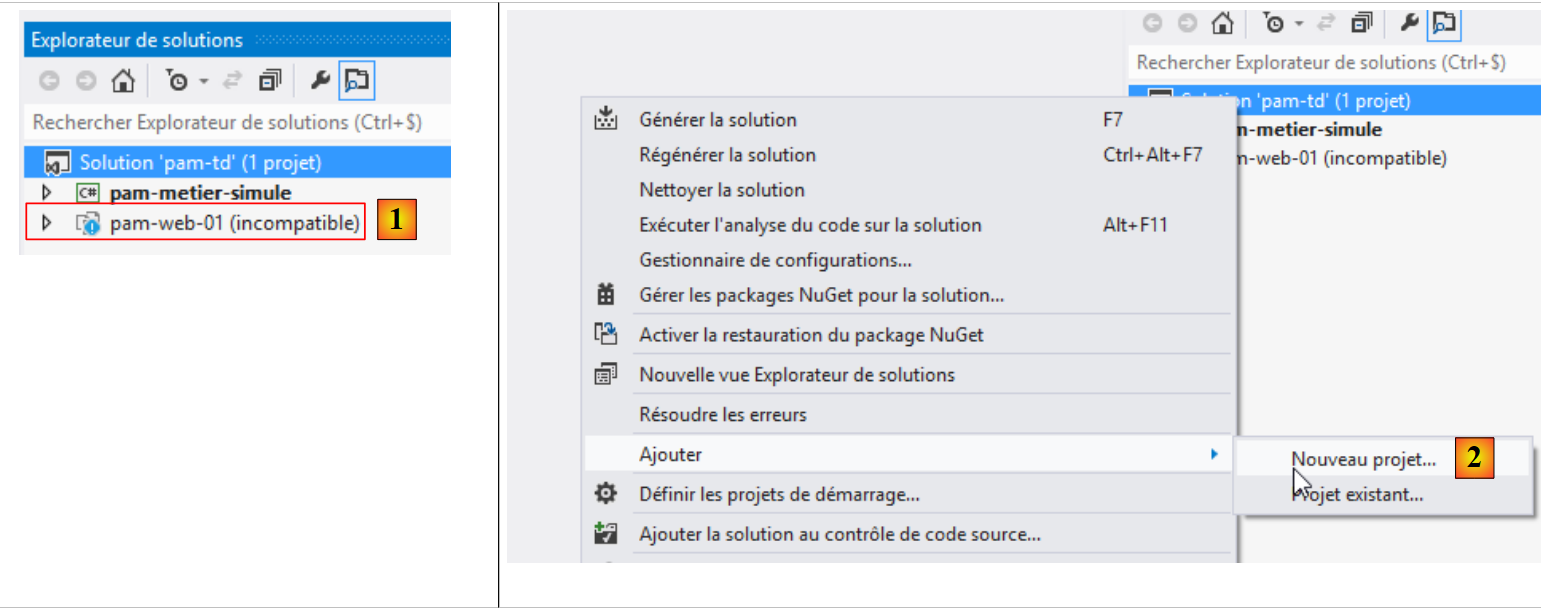 |
- In [1], VS 2012 Express for the Desktop is unable to load the web project [pam-web-01]. This is normal and not a problem;
- In [2], a new project is added to the [pam-td] solution;
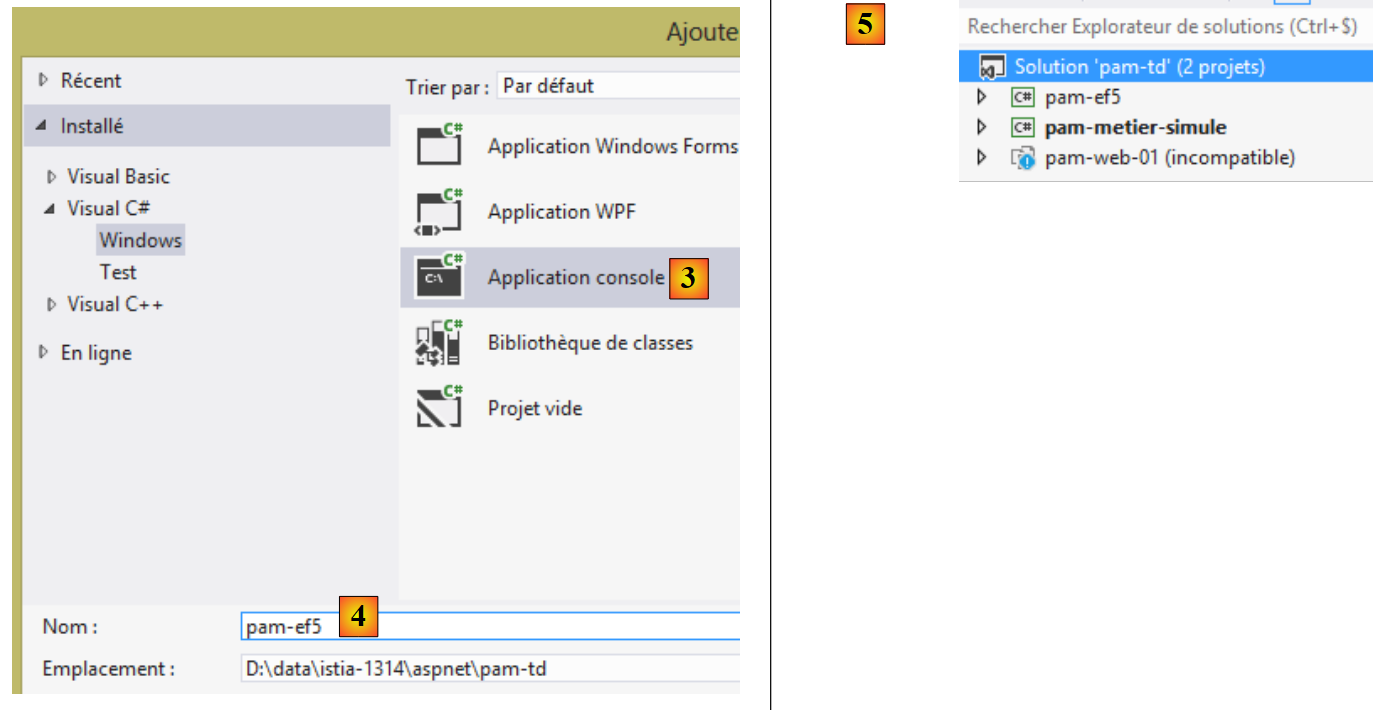 |
- In [3], the project is of type [console] and is named [4] [pam-ef5];
- in [5], the project is created. Its name is not in bold, so it is not the solution's startup project;
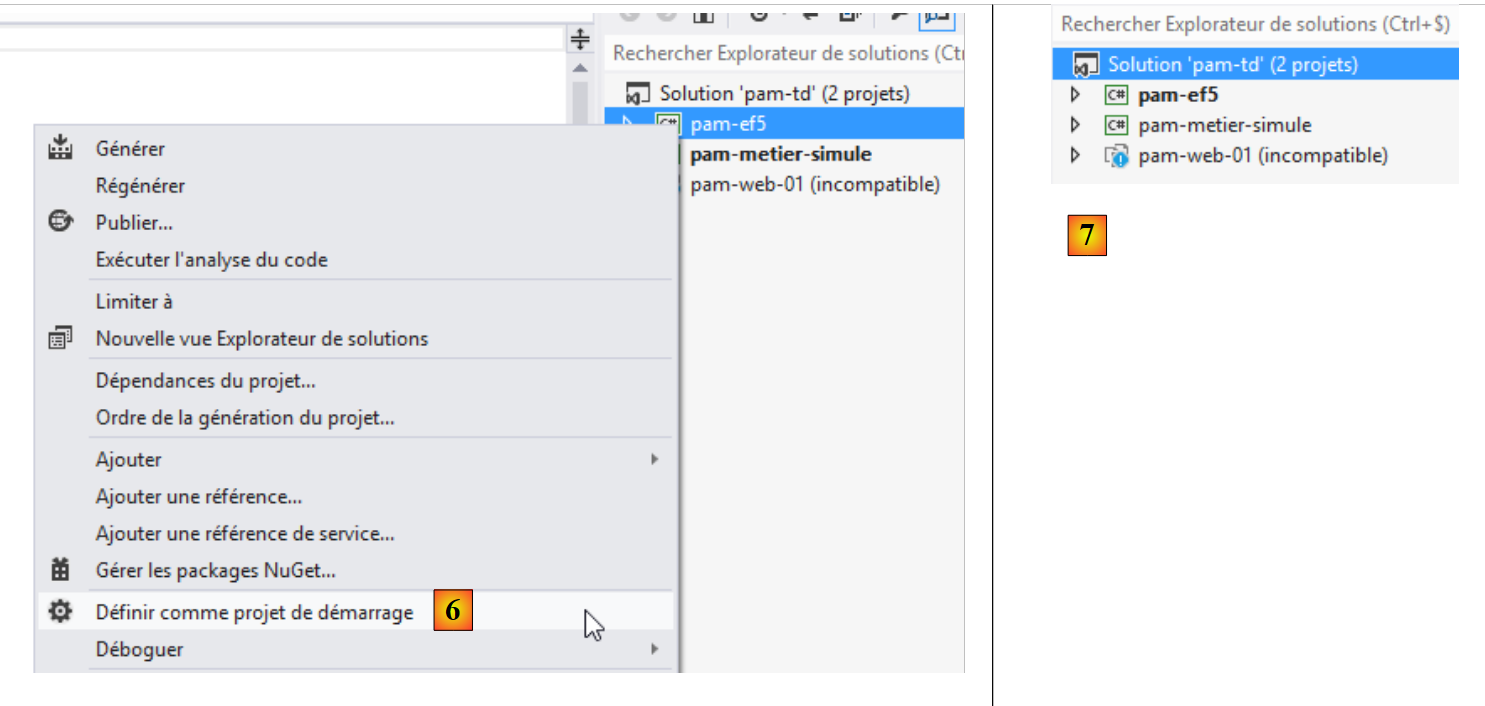 |
- In [6] and [7], we set the new project as the startup project.
9.22.3. Adding the necessary references to the project
Let’s look at the project as a whole:
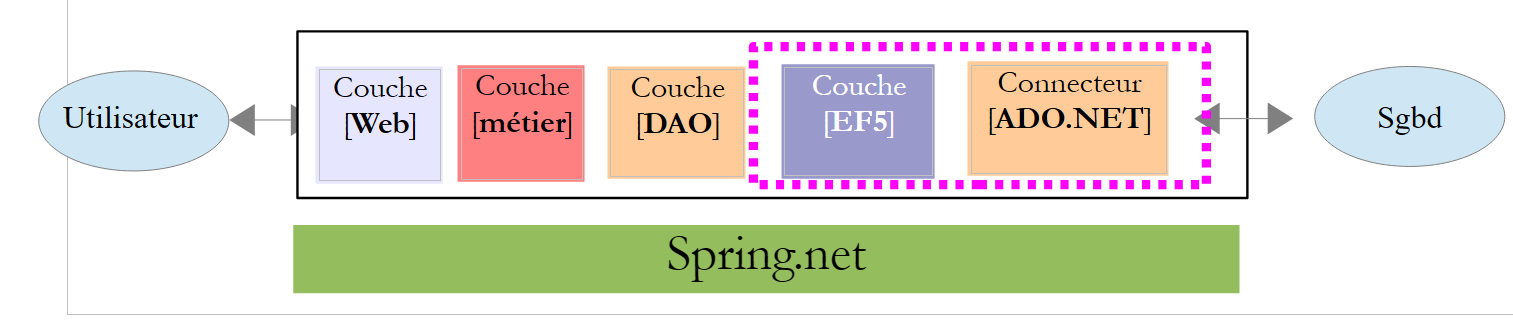 |
Our project requires a number of DLL:
- the DLL from Entity Framework 5;
- the DLL for the ADO.NET connector of the SGBD MySQL.
Section 4.2 of [refEF5] explains how to install these DLL files using the [NuGet] tool. Currently (Nov 2013), the version available from Entity Framework is version 6 (EF6). Unfortunately, it appears that the ADO.NET from the SGBD MySQL available (Nov 2013) via [NuGet] is not compatible with EF6. Therefore, we placed DLL fromEF5, along with the other DLL files required for the [pam-ef5] project
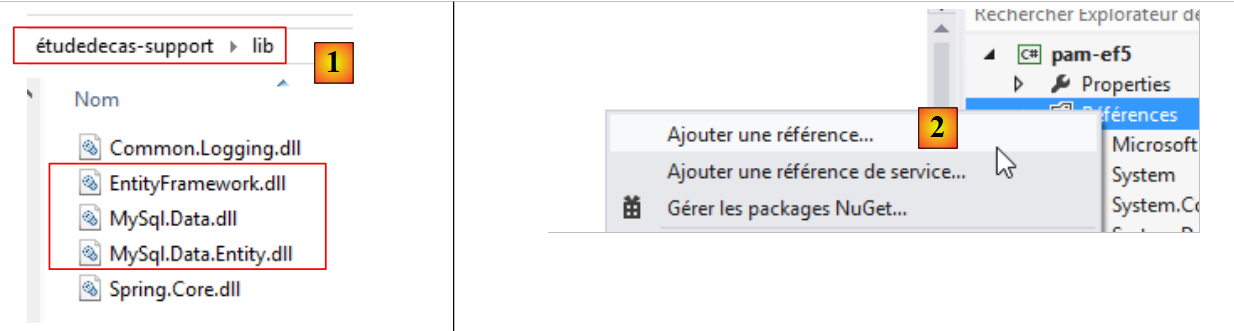 |
We have placed additional DLL files in the [lib] folder. We will use them later. In [2], we add these new DLL files to the project.
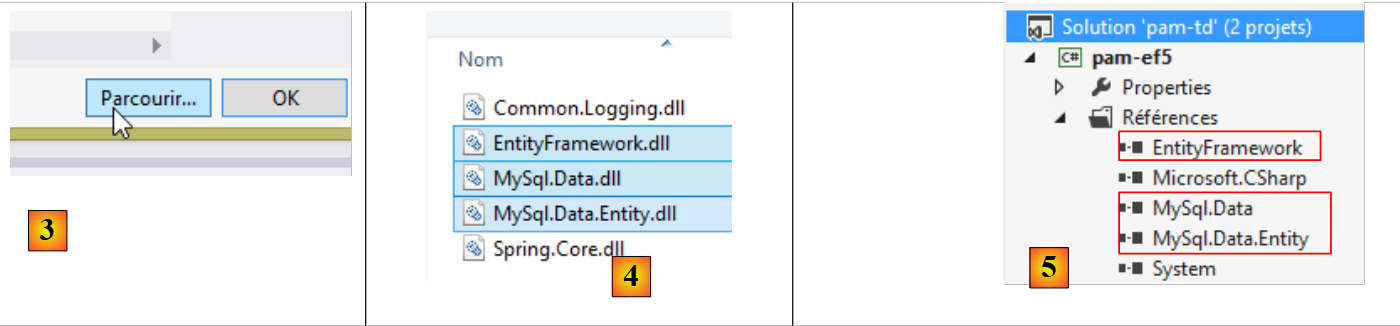 |
- In [3], navigate through the file system to the [lib] folder;
- In [4], we select the three DLL files and then confirm twice;
- In [5], the three DLL files have been added to the project references.
We need another DLL. This one will be found among those in the machine’s .NET framework.
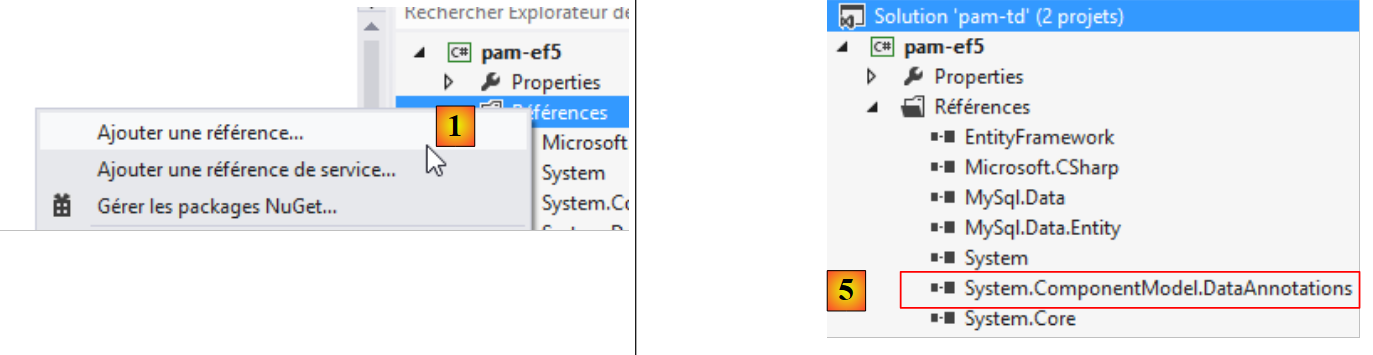 |
- In [1], add a new reference to the project;
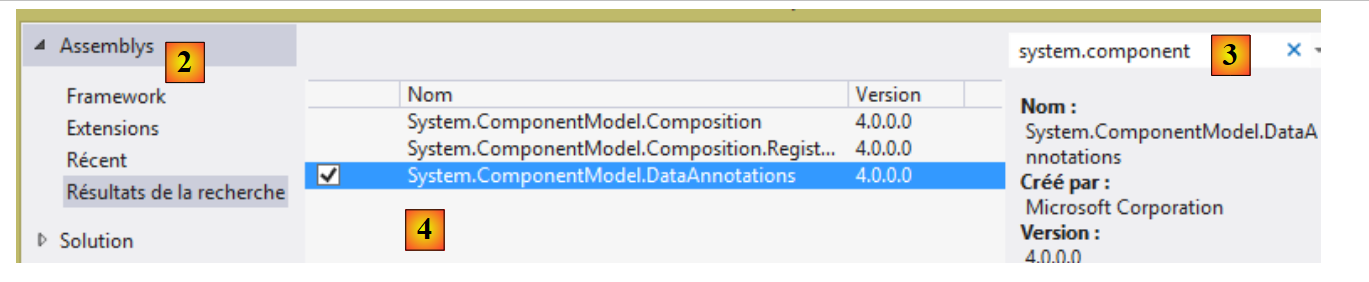 |
- In [2], select [Assemblys];
- In [3], type [system.component];
- In [4], select the assembly [System.ComponentModel.DataAnnotations];
- In [5], the reference has been added.
We are now ready to code and configure.
9.22.4. Entity Framework Entities
Entity Framework entities are classes that encapsulate the rows of the various database tables. Let’s review them:
In the [web] layer, we used the [Employe, Cotisations, Indemnités] entities (see section 9.7.3, page 219). They were not exact representations of the tables. Thus, the [ID, VERSIONING] columns were ignored. Here, that will not be the case because they are used by ORM and EF5. We will therefore add the missing properties to them. We create these entities in a [Models] folder within the project:
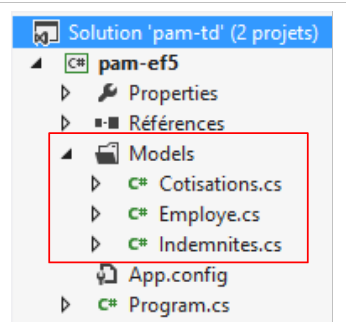 |
Their new code is now as follows:
Class [Cotisations]
using System;

namespace Pam.EF5.Entites
{
  public class Cotisations
  {
    public int Id { get; set; }
    public double CsgRds { get; set; }
    public double Csgd { get; set; }
    public double Secu { get; set; }
    public double Retraite { get; set; }
    public int Versioning { get; set; }

    // signature
    public override string ToString()
    {
      return string.Format("Cotisations[{0},{1},{2},{3}, {4}, {5}]", Id, Versioning, CsgRds, Csgd, Secu, Retraite);
    }
  }
}
- line 3: the namespace has been adapted to the new project;
- the properties in lines 7 and 12 have been added to reflect the structure of the [cotisations] table;
- line 17: the method [ToString] now displays the two new fields.
Class [Indemnites]
using System;

namespace Pam.EF5.Entites
{
  public class Indemnites
  {
    public int Id { get; set; }
    public int Indice { get; set; }
    public double BaseHeure { get; set; }
    public double EntretienJour { get; set; }
    public double RepasJour { get; set; }
    public double IndemnitesCp { get; set; }
    public int Versioning { get; set; }

    // signature
    public override string ToString()
    {
      return string.Format("Indemnités[{0},{1},{2},{3},{4}, {5}, {6}]", Id, Versioning, Indice, BaseHeure, EntretienJour, RepasJour, IndemnitesCp);
    }
  }
}
- line 3: the namespace has been adapted to the new project;
- the properties in lines 7 and 13 have been added to reflect the structure of the [indemnites] table;
- line 18: the method [ToString] now displays the two new fields.
Class [Employe]
using System;

namespace Pam.EF5.Entites
{

  public class Employe
  {
    public int Id { get; set; }
    public string SS { get; set; }
    public string Nom { get; set; }
    public string Prenom { get; set; }
    public string Adresse { get; set; }
    public string Ville { get; set; }
    public string CodePostal { get; set; }
    public Indemnites Indemnites { get; set; }
    public int Versioning { get; set; }

    // signature
    public override string ToString()
    {
      return string.Format("Employé[{0},{1},{2},{3},{4},{5}, {6}, {7}]", Id, Versioning, SS, Nom, Prenom, Adresse, Ville, CodePostal);
    }
  }
}
- line 3: the namespace has been adapted to the new project;
- the properties in lines 8 and 16 have been added to reflect the structure of the [employes] table;
- line 21: the [ToString] method now displays the two new fields.
To be usable by ORM and EF5, the properties of these classes must be annotated.
Task: Using section 3.4 of [Création de la base à partir des entités] from [refEF5], add the necessary annotations to the [Employe, Cotisations, Indemnites] entities.
Tips:
- You only need to create annotations. Do not follow the [création de base] section of the referenced paragraph;
- for annotation [Table], follow the example MySQL from section 4.2 of [refEF5];
- For the annotation [ConcurrencyCheck] on the property [Versioning], follow the Oracle example in paragraph 5.2 of [refEF5];
- For the foreign key that table [employes] has on table [indemnités], follow example 3.4.2 in [refEF5]. You will thus add a new property to the entity [Employe]:
public int IndemniteId { get; set; }
whose value will be that of the [INDEMNITES_ID] column in the [employes] table. You will add foreign key annotations to the properties [IndemniteId] and [Indemnites] of the entity [Employe]. To do this, follow Example 3.4.2 for [refEF5];
- You will not manage the reverse relationships of the foreign keys;
- this task requires some reading of [refEF5].
9.22.5. Configuration of ORM and EF5
Let’s put the project into context:
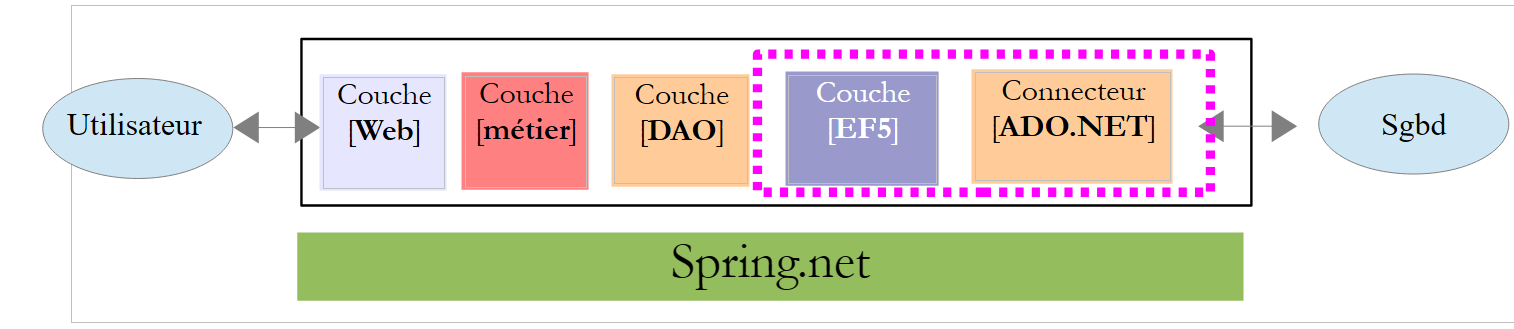 |
The [EF5] layer will access the database via the [ADO.NET] connector of the SGBD MySQL. It requires certain information to access this database. This information is located in various parts of the project.
First, we must create the database context. This context is a class derived from the system class [System.Data.Entity.DbContext]. It is used to define the object maps of the database tables. We will place this class in the [Models] folder of the project along with the EF5 entities:
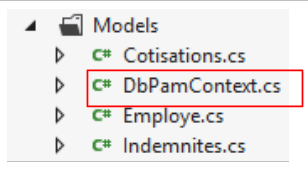 |
The [DbPamContext] class will be as follows:
using Pam.EF5.Entites;
using System.Data.Entity;

namespace Pam.Models
{
  public class DbPamContext : DbContext
  {
    public DbSet<Employe> Employes { get; set; }
    public DbSet<Cotisations> Cotisations { get; set; }
    public DbSet<Indemnites> Indemnites { get; set; }
  }
}
- line 6: the class [DbPamContext] derives from the system class [DbContext];
- lines 8–10: the object models of the three database tables. Their type is [DbSet<Entity>], where [Entity] is one of the Entity Framework entities we just defined. The type [DbSet] can be viewed as a collection of entities. It can be queried using LINQ (Language INtegrated Query). Readers unfamiliar with LINQ are encouraged to read section 3.5.4 [Apprentissage de LINQ avec LINQPad] of [refEF5].
We will hereafter refer to the class [DbPamContext] as the persistence context of the database [dbpam_ef5]. This is standard terminology in ORM (Object Relational Mapper). This persistence context is an object representation of the database. We also refer to the synchronization of the persistence context with the database: changes, additions, and deletions made to the persistence context are reflected in the database. This synchronization occurs at specific times: when the persistence context is closed, at the end of a transaction, or before a query on the database.
Information about SGBD and the database is stored in [App.config].
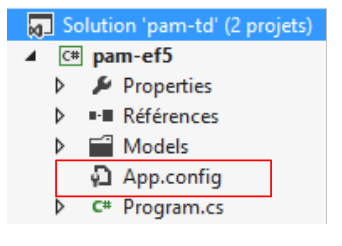 |
The necessary configuration in [app.config] is explained in the following sections of [refEF5]:
- 3.4 for the SGBD SQL Server. This is where the basic principles of configuring EF5 are laid out;
- 4.2 for the SGBD MySQL.
We follow this last paragraph and configure the [app.config] file as follows:
<?xml version="1.0" encoding="utf-8" ?>
<configuration>
  <startup>
    <supportedRuntime version="v4.0" sku=".NETFramework,Version=v4.5" />
  </startup>
    <!-- configuration EF5 -->
    <!-- database connection string [dbam_ef5] -->
    <connectionStrings>
        <add name="DbPamContext"
         connectionString="Server=localhost;Database=dbpam_ef5;Uid=root;Pwd=;"
         providerName="MySql.Data.MySqlClient" />
    </connectionStrings>
    <!-- the MySQL factory provider -->
    <system.data>
        <DbProviderFactories>
            <remove invariant="MySql.Data.MySqlClient"/>
            <add name="MySQL Data Provider" invariant="MySql.Data.MySqlClient" description=".Net Framework Data Provider for MySQL"
          type="MySql.Data.MySqlClient.MySqlClientFactory, MySql.Data, Version=6.5.4.0, Culture=neutral, PublicKeyToken=C5687FC88969C44D"
        />
        </DbProviderFactories>
    </system.data>
</configuration>
- Lines 6–21 have been added. They must be inserted within the <configuration> tag on lines 2 and 22;
- lines 8–12: define connection strings to databases, an ADO concept (see section 7.3.5 in [refC#]);
- lines 9–11: define the connection string to the MySQL [dbpam_ef5] database;
- line 9: the name of the connection string. Here, you cannot enter just anything. By default, you must enter the name of the class implementing the database context:
  public class DbPamContext : DbContext
  {
    public DbSet<Employe> Employes { get; set; }
    public DbSet<Cotisations> Cotisations { get; set; }
    public DbSet<Indemnites> Indemnites { get; set; }
}
The class is called [DbPamContext]. Line 9 of [app.config] should be changed to [name="DbPamContext"];
- line 10: a connection string specific to SGBD MySQL:
- [Server=localhost]: address of the machine hosting SGBD. Here, it is the local machine [localhost];
- [Database=dbpam_ef5;]: database name,
- [Uid=root;]: login used to connect to the database,
- [Pwd=;]: password for this login. Here, no password;
- line 10: [providerName="MySql.Data.MySqlClient"] is the name of the ADO.NET connector to be used. This name is that of the [invariant] attribute on line 17. You can use any name as long as you follow the previous rule and a provider with the same invariant has not already been registered;
- Lines 15–20: define a factory for ADO.NET connectors (providers). [DbProviderFactory] is a somewhat vague concept to me. If I am to believe its name, it would be a class capable of generating the ADO.NET connector that provides access to SGBD, here MySQL5. We generally copy and paste these lines. They are necessary. Pay attention to the [Version=6.5.4.0] attribute on line 16. This version number must match the version number of the DLL [MySql.Data] that you added to the project references:
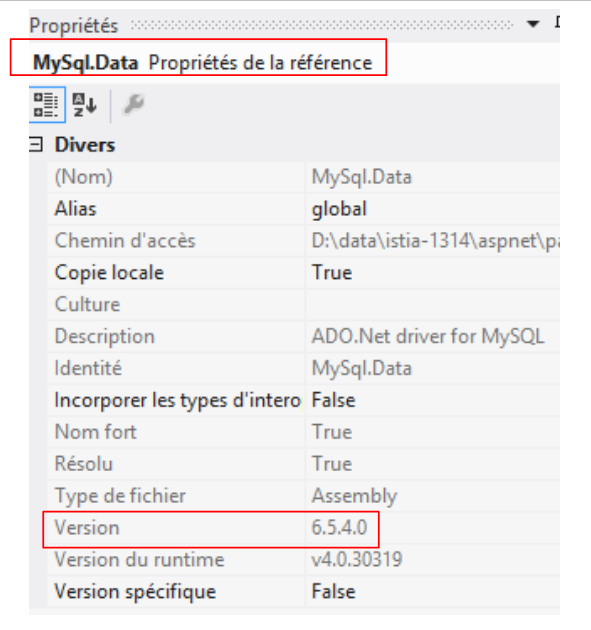 |
- Line 16 is important. Because you cannot install two providers with the same name, start by removing any existing provider that might have the same name as the one you are installing on line 17;
That’s it. It’s complicated and confusing the first time you do it, but over time it becomes simple because it’s always the same process you repeat.
9.22.6. Testing the [EF5] layer
We are ready to test our [EF5] layer. We do this using the [Program.cs] program that is already present:
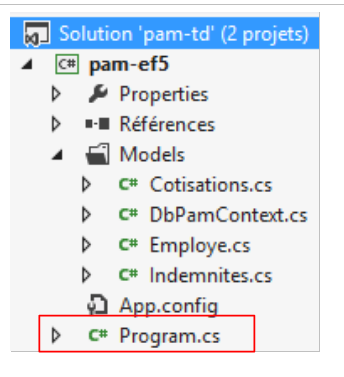 |
We will display the database contents. If we succeed, this will be an initial indication that our configuration is correct. A code example is available in section 3.5.3 of [refEF5]. The code for [Program.cs] will be as follows:
using Pam.EF5.Entites;
using Pam.Models;
using System;

namespace Pam
{
  class Program
  {
    static void Main(string[] args)
    {
      try
      {
        using (var context = new DbPamContext())
        {
          // display table contents
          Console.WriteLine("Liste des employés ----------------------------------------");
          foreach (Employe employe in context.Employes)
          {
            Console.WriteLine(employe);
          }
          Console.WriteLine("Liste des indemnités --------------------------------------");
          foreach (Indemnites indemnite in context.Indemnites)
          {
            Console.WriteLine(indemnite);
          }
          Console.WriteLine("Liste des cotisations -------------------------------------");
          foreach (Cotisations cotisations in context.Cotisations)
          {
            Console.WriteLine(cotisations);
          }
        }
      }
      catch (Exception e)
      {
        Console.WriteLine(e);
        return;
      }
    }
  }
}
- line 13: all operations on BD are performed through the context of this database. We have implemented this context using the [DbPamContext] class. We have also referred to it as the database's persistence context;
- lines 13, 31: operations on the persistence context are performed within a [using] clause. The persistence context is opened at the beginning of the [using] clause and automatically closed upon exiting this clause. This means that any changes made to the persistence context within the [using] clause will be reflected in the database upon exiting the clause. A series of SQL commands is then sent to BD within a transaction. This means that if a SQL command fails, all previously issued SQL commands are canceled. An exception is then thrown by EF5;
- line 17: the expression [context.Employes] refers to the object model of the table [employes]. Recall that [Employes] is a property of the persistence context [DbPamContext]:
  public class DbPamContext : DbContext
  {
    public DbSet<Employe> Employes { get; set; }
    public DbSet<Cotisations> Cotisations { get; set; }
    public DbSet<Indemnites> Indemnites { get; set; }
}
- Line 17: The fact that [foreach] iterates over the [context.Employes] collection will load all employees from the database into the persistence context. A SQL SELECT order will therefore be issued by EF5;
- lines 17–20: we iterate through the employee collection, and on line 19, we use the [ToString] method of the [Employe] class to display the employees on the console;
- lines 21–25: same for the collection of allowances;
- lines 27-30: same for the cotisations collection.
Let’s revisit the definition of the [Employe] entity:
using System;

namespace Pam.EF5.Entites
{

  public class Employe
  {
    public int Id { get; set; }
    public string SS { get; set; }
    public string Nom { get; set; }
    public string Prenom { get; set; }
    public string Adresse { get; set; }
    public string Ville { get; set; }
    public string CodePostal { get; set; }
    public Indemnites Indemnites { get; set; }
    public int Versioning { get; set; }

    // signature
    public override string ToString()
    {
      return string.Format("Employé[{0},{1},{2},{3},{4},{5}, {6}, {7}]", Id, Versioning, SS, Nom, Prenom, Adresse, Ville, CodePostal);
    }
  }
}
- Line 15: An employee has a reference to a benefit.
When an employee is brought back into the persistence context, is their allowance brought back with them? The answer is no by default. This is the concept of [Lazy Loading]. Entities referenced within another entity are not brought into the persistence context along with that other entity. They are only brought in when requested by the code within an open persistence context. If the persistence context is closed, an exception is thrown.
Thus, if the [ToString] method had referenced the [Indemnites] property as follows:
    // signature
    public override string ToString()
    {
      return string.Format("Employé[{0},{1},{2},{3},{4},{5},{6},{7},{8}]", Id, Versioning, SS, Nom, Prenom, Adresse, Ville, CodePostal, Indemnites);
}
the following operation in [Program.cs]:
          foreach (Employe employe in context.Employes)
          {
            Console.WriteLine(employe);
}
would have returned not only the employees but also their benefits to the persistence context, because on line 3, the method [Employe.ToString] is called and it references the entity [Indemnites].
Executing [Program.cs] yields the following results:
What to do if it doesn't work? You're in trouble... There are many possible sources of error:
- check the configuration of EF5 (section 9.22.5);
- check your Entity Framework entities (section 9.22.4).
9.22.7. DLL from the [EF5] layer
We are converting our project into a class library so that, upon generation, a .dll assembly is generated instead of an .exe. This is done in the project properties as shown in section 9.7.6 for the simulated business layer.
Task: Change the type of the [pam-ef5] project to a class library, then regenerate the project.
9.23. Step 16: Setting up the [DAO] layer
9.23.1. The interface of the [DAO] layer
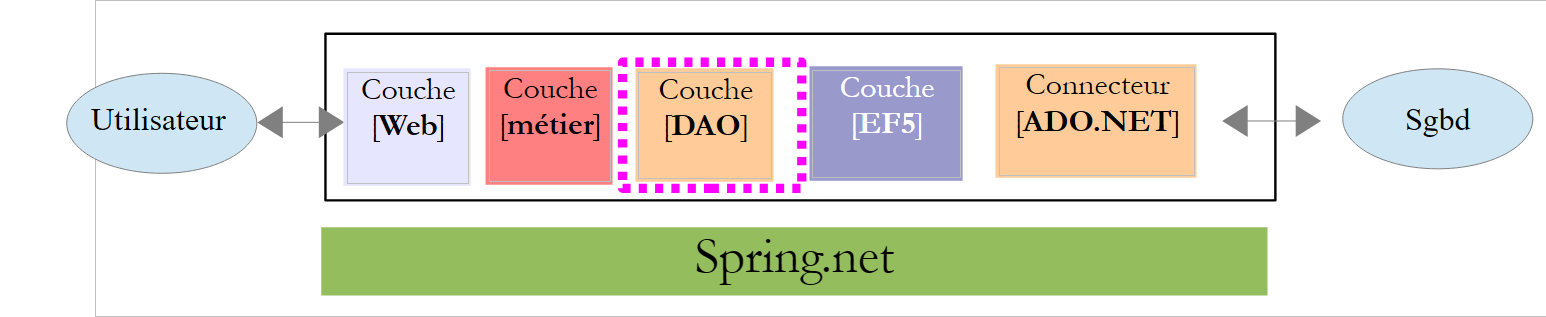 |
As we did for the simulated layer [métier], the layer [DAO] will be accessible via an interface. What will it be?
Let’s look at the [IPamMetier] interface of the simulated [métier] layer that we built:
    public interface IPamMetier {
        // list of all employee identities
        Employe[] GetAllIdentitesEmployes();

        // ------- salary calculation
        FeuilleSalaire GetSalaire(string ss, double heuresTravaillées, int joursTravaillés);
}
Line 3: The [GetAllIdentitesEmployes] method is used to populate the drop-down list on the home page:
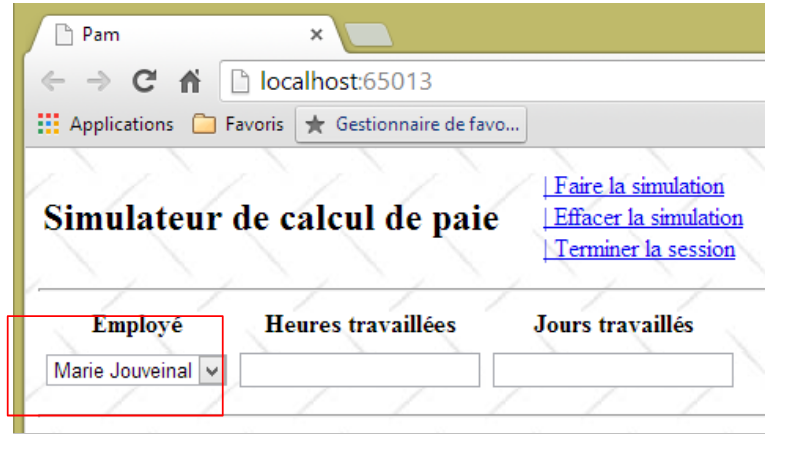 |
These employees must be retrieved from the database.
Line 6, the [GetSalaire] method calculates the pay stub for an employee whose ID is SS. Recall the definition of the [FeuilleSalaire] type:
  public class FeuilleSalaire
  {

    // automatic properties
    public Employe Employe { get; set; }
    public Cotisations Cotisations { get; set; }
    public ElementsSalaire ElementsSalaire { get; set; }
}
The information in lines 5 and 6 will come from the database. Recall that an employee has a property [Indemnites]. This information must also be retrieved.
We could therefore start with the following interface for the [DAO] layer:
    public interface IPamDao {
        // list of all employee identities
        Employe[] GetAllIdentitesEmployes();
        // an individual employee with benefits
        Employe GetEmploye(string ss);
        // list of all cotisations
        Cotisations GetCotisations();
}
9.23.2. The Visual Studio project
Task: Add a new project of type [console] named [pam-dao] to the [pam-td] solution. Set it as the solution's startup project.
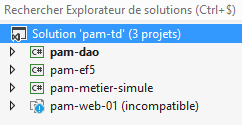 |
9.23.3. Adding the necessary references to the project
Let’s look at the project as a whole:
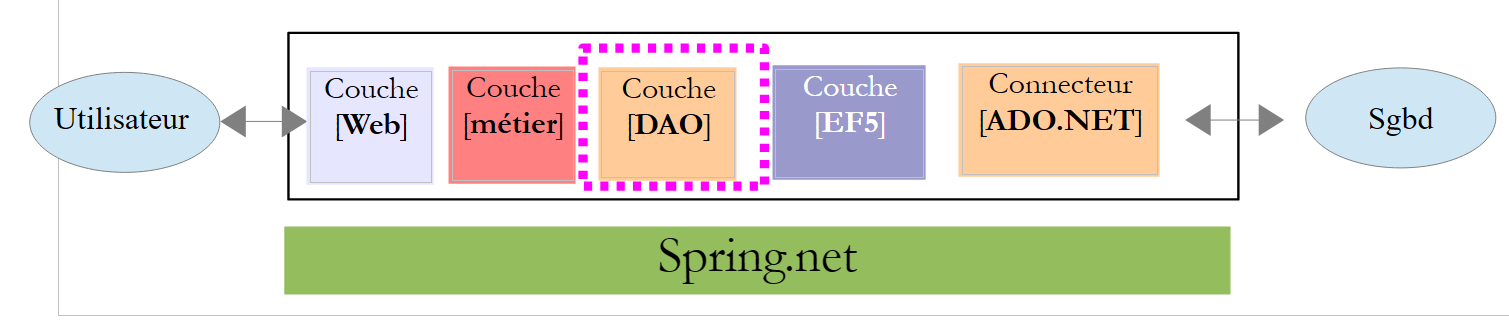 |
The [pam-dao] project requires a number of DLL projects:
- all those referenced by the [pam-ef5] project;
- the one from the [pam-ef5] project itself.
Additionally, we will use [Spring.net] to instantiate the [DAO] layer. To do this, we need DLL, [Spring.core], and [Common.Logging]. These DLL files are located in the [lib] folder of the case study materials.
Task: Add these different references to the [pam-dao] project.
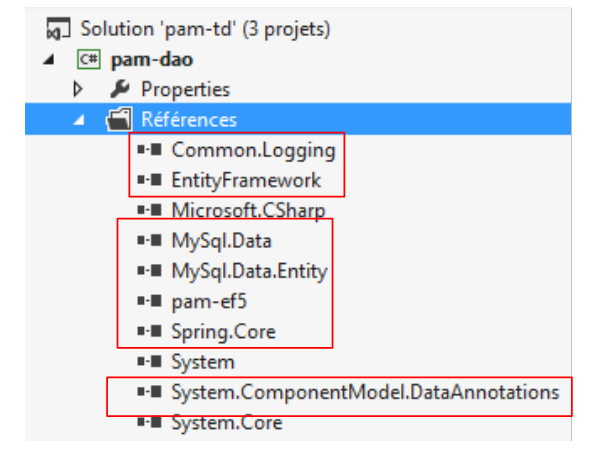 |
9.23.4. Implementation of the [DAO] layer
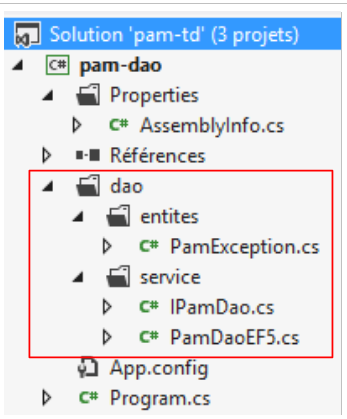 |
Above, the [PamException] class is the one defined in section 9.7.4. We simply change its namespace (line 1 below):
namespace Pam.Dao.Entites
{
  // exceptional class
  public class PamException : Exception
  {
....
  }
}
The [IPamDao] interface is the one we just defined in section 9.23.1:
using Pam.EF5.Entites;

namespace Pam.Dao.Service
{
  public interface IPamDao
  {
    // list of all employee identities
    Employe[] GetAllIdentitesEmployes();
    // an individual employee with benefits
    Employe GetEmploye(string ss);
    // list of all cotisations
    Cotisations GetCotisations();
  }
}
The [PamDaoEF5] class implements this interface using ORM and EF5. Its code is as follows:
using Pam.Dao.Entites;
using Pam.EF5.Entites;
using Pam.Models;
using System;
using System.Linq;

namespace Pam.Dao.Service
{

  public class PamDaoEF5 : IPamDao
  {
    // private fields
    private Cotisations cotisations;
    private Employe[] employes;

    // Manufacturer
    public PamDaoEF5()
    {
      // contribution
      try
      {
....
      }
      catch (Exception e)
      {
        throw new PamException("Erreur système lors de la construction de la couche [DAO]", e, 1);
      }
    }

    // GetCotisations
    public Cotisations GetCotisations()
    {
      return cotisations;
    }

    // GetAllIdentitesEmploye
    public Employe[] GetAllIdentitesEmployes()
    {
      return employes;
    }

    // GetEmploye
    public Employe GetEmploye(string SS)
    {
      try
      {
....
      catch (Exception e)
      {
        throw new PamException(string.Format("Erreur système lors de la recherche de l'employé [{0}]", SS), e, 2);
      }
    }
  }
}
Note:
- Line 10: The class [PamDaoEF5] implements the interface [IPamDao];
- the tables [cotisations] and [employes] are cached in the properties of lines 13–14. Employees are shown without their allowances;
- lines 17–28: the constructor initializes lines 13–14;
- lines 43–52: the [GetEmploye] method returns an employee along with their indemnites. It receives the employee’s social security number as a parameter. If the employee does not exist in the database, the method will return a null pointer.
Task: Complete the code for the [PamDaoEF5] class.
For the constructor, use the test code for the [EF5] layer presented in section 9.22.6 as a guide. For the [GetEmploye] method, use the example in section 3.5.7 [Eager and Lazy loading] of [refEF5] as a guide.
9.23.5. Configuring the [DAO] layer
As done in section 9.22.5, we need to configure EF5 in the project’s [App.config] file:
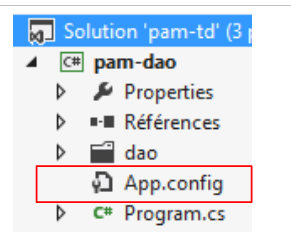 |
Task 1: Configure EF5 in [App.config]. Simply replicate what was done in the [App.config] file for the [EF5] layer.
Our test program will use [Spring.net] to obtain a reference on the [DAO] layer.
Task 2: Using what was done in Section 9.20.2, modify the configuration file [app.config] of the project [pam-dao] so that it defines a Spring object named [pamdao] associated with the class [PamDaoEF5] that we just created. The files [app.config] and [web.config] have the same structure. Make sure that the <configSections> tag is the first tag encountered after the root <configuration> tag.
9.23.6. Testing the [DAO] layer
We are ready to test our [DAO] layer. We do this using the existing [Program.cs] program:
 |
We will test the various features of the [DAO] layer interface. The code for [Program.cs] will be as follows:
using Pam.Dao.Service;
using Pam.EF5.Entites;
using Spring.Context.Support;
using System;

namespace Pam.Dao.Tests
{
  public class Program
  {
    public static void Main()
    {
      try
      {
        // instantiation layer [dao]
        IPamDao pamDao = (IPamDao)ContextRegistry.GetContext().GetObject("pamdao");
        // list of employee identities
        foreach (Employe Employe in pamDao.GetAllIdentitesEmployes())
        {
          Console.WriteLine(Employe.ToString());
        }
            // an employee with benefits
            Console.WriteLine("------------------------------------");
            Employe e = pamDao.GetEmploye("254104940426058");
            Console.WriteLine("employé= {0}, indemnités={1}", e, e.Indemnites);
            Console.WriteLine("------------------------------------");
        // an employee who doesn't exist
        Employe employe = pamDao.GetEmploye("xx");
        Console.WriteLine("Employé n° xx");
        Console.WriteLine((employe == null ? "null" : employe.ToString()));
        Console.WriteLine("------------------------------------");
        // cotisations list
        Cotisations cotisations = pamDao.GetCotisations();
        Console.WriteLine(cotisations.ToString());
      }
      catch (Exception ex)
      {
        // exception display
        Console.WriteLine(ex.ToString());
      }
      //break
      Console.ReadLine();
    }
  }
}
- Line 15: We obtain a reference to the [DAO] layer using [Spring.net].
The results of running this program are as follows:
9.23.7. DLL from layer [DAO]
Task: Change the type of the [pam-dao] project to a class library, then regenerate the project (repeat the steps described in section 9.22.7).
9.24. Step 17: Setting up layer [métier]
9.24.1. The interface of layer [métier]
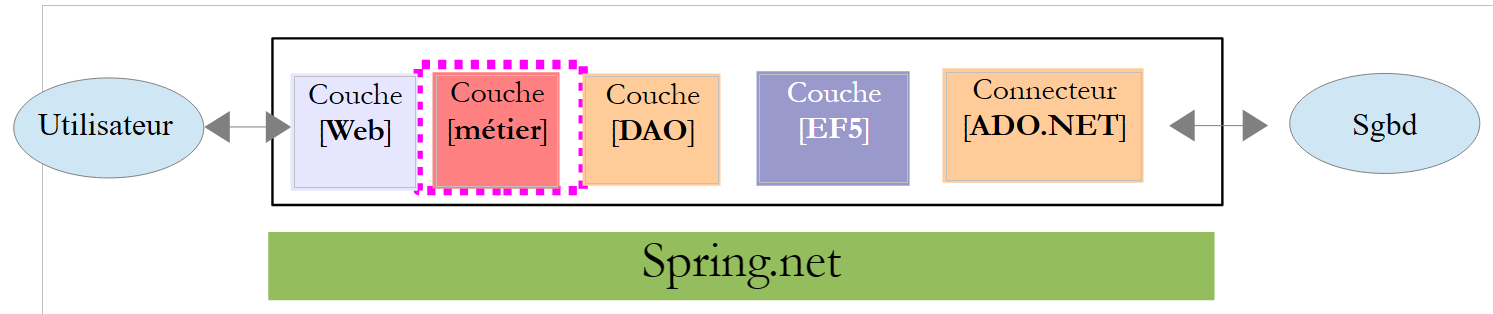 |
The interface of the [métier] layer will be the [IPamMetier] interface of the simulated [métier] layer that we built in section 9.7.2.
    public interface IPamMetier {
        // list of all employee identities
        Employe[] GetAllIdentitesEmployes();

        // ------- salary calculation
        FeuilleSalaire GetSalaire(string ss, double heuresTravaillées, int joursTravaillés);
}
9.24.2. The Visual Studio project
Task: Add a new project of type [console] named [pam-metier] to the [pam-td] solution. Set it as the solution's startup project.
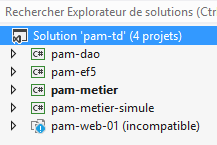 |
9.24.3. Adding the necessary references to the project
Let’s look at the project as a whole:
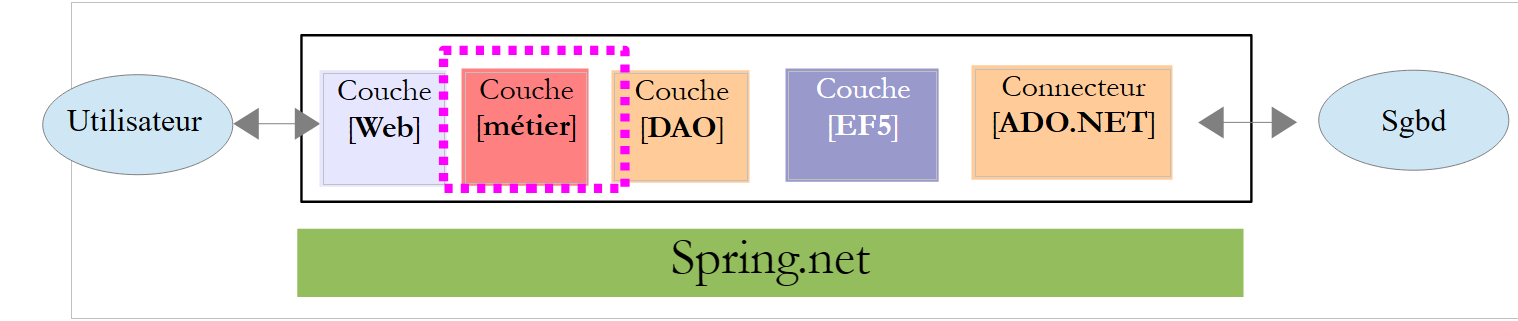 |
The [pam-metier] project requires a number of DLL projects:
- all those referenced by the [pam-dao] and [pam-ef5] projects;
- those from projects [pam-dao] and [pam-ef5] themselves.
Task: Add these various references to the [pam-metier] project.
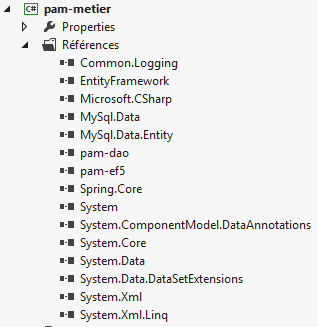 |
9.24.4. Implementation of layer [métier]
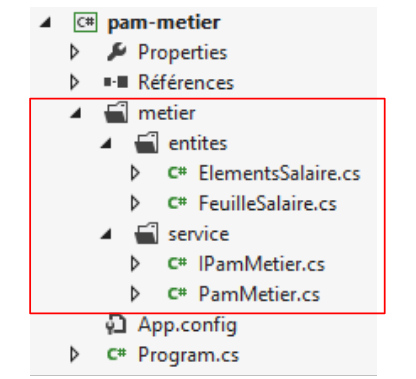 |
Above, we find four elements already used in the simulated layer [métier] (see section 9.7). There may be changes to the namespaces imported by these different classes. Manage them. The [PamMetier] class implements the [IPamMetier] interface as follows:
using Pam.Dao.Service;
using Pam.EF5.Entites;
using Pam.Metier.Entites;
using System;

namespace Pam.Metier.Service
{

  public class PamMetier : IPamMetier
  {

    // reference to layer [DAO] initialized by Spring
    public IPamDao PamDao { get; set; }

    // list of all employee identities
    public Employe[] GetAllIdentitesEmployes()
    {
      ...
    }

    // an individual employee with benefits
    public Employe GetEmploye(string ss)
    {
      ...
    }

    // the cotisations
    public Cotisations GetCotisations()
    {
      ...
    }

    // wage calculation
    public FeuilleSalaire GetSalaire(string ss, double heuresTravaillées, int joursTravaillés)
    {
      // SS : employee's SS number
      // HeuresTravaillées: number of hours worked
      // Days worked: number of days worked
...
  }
}
- Line 13: we have a reference to the [DAO] layer. It will be initialized by Spring when the [PamMetier] class is instantiated. So when the various methods are executed, line 13 has already been initialized.
Task: Complete the code for the [PamMetier] class. If, in [GetSalaire], it is discovered that the employee with ID ss does not exist, a [PamException] will be launched. The salary calculation method is explained in section 9.5. Be sure to round all intermediate calculations to two decimal places.
9.24.5. Configuring the [métier] layer
As done in section 9.22.5, we need to configure EF5 in the project’s [app.config] file:
 |
Task 1: Configure EF5 in [app.config]. Simply repeat what was done in the [app.config] file for the [EF5] layer.
Our test program will use [Spring.net] to obtain a reference on the [métier] layer.
Task 2: Using what you did previously in Section 9.23.5, modify the configuration file [app.config] of the project [pam-metier] so that it defines a Spring object named [pammetier] associated with the class [PamMetier] that we just created. The easiest way is to copy the [app.config] file from the [pam-dao] project and add what is missing.
There is a challenge here. Not only must the [métier] layer be instantiated with the [PamMetier] class, but its [PamDao] property must also be initialized:
    // reference to layer [DAO] initialized by Spring
    public IPamDao PamDao { get; set; }
The Spring configuration in [app.config] is then as follows:
  <spring>
    <context>
      <resource uri="config://spring/objects" />
    </context>
    <objects xmlns="http://www.springframework.net">
      <object id="pamdao" type=" Pam.Dao.Service.PamDaoEF5, pam-dao"/>
      <object id="pammetier" type="Pam.Metier.Service.PamMetier, pam-metier">
        <property name="PamDao" ref="pamdao" />
      </object>
    </objects>
</spring>
- line 6: defines the object [pamdao] associated with the class [PamDaoEF5];
- line 7: defines the [pammetier] object associated with the [PamMetier] class;
- line 8: the [property] tag is used to initialize a public property of the [PamMetier] class. The [name="PamDao"] attribute corresponds to the name of the property to be initialized in the [PamMetier] class. The [ref="pamdao"] attribute indicates that the property is initialized with a reference, specifically that of the [pamdao] object from line 6, and thus with the reference of the [DAO] layer. This is exactly what we wanted.
9.24.6. Testing the [métier] layer
We are ready to test our layer [métier]. We do this using the existing program [Program.cs]:
 |
We will test the various features of the [métier] layer interface. The code for [Program.cs] will be as follows:
using System;
using Pam.Dao.Entites;
using Pam.Metier.Service;
using Spring.Context.Support;
using Pam.EF5.Entites;

namespace Pam.Metier.Tests
{
  public class Program
  {
    public static void Main()
    {
      try
      {
        // instantiation layer [business]
        IPamMetier pamMetier = ContextRegistry.GetContext().GetObject("pammetier") as IPamMetier;
        // list of employee identities
        Console.WriteLine("Employés -----------------------------");
        foreach (Employe Employe in pamMetier.GetAllIdentitesEmployes())
        {
          Console.WriteLine(Employe);
        }

        // payslip calculations
        Console.WriteLine("salaires -----------------------------");
        Console.WriteLine(pamMetier.GetSalaire("260124402111742", 30, 5));
        Console.WriteLine(pamMetier.GetSalaire("254104940426058", 150, 20));
        try
        {
          Console.WriteLine(pamMetier.GetSalaire("xx", 150, 20));
        }
        catch (PamException ex)
        {
          Console.WriteLine(string.Format("PamException : {0}", ex.Message));
        }
      }
      catch (Exception ex)
      {
        Console.WriteLine(string.Format("Exception : {0}, Exception interne : {1}", ex.Message, ex.InnerException == null ? "" : ex.InnerException.Message));
      }
      // break
      Console.ReadLine();
    }
  }
}
- Line 16: We obtain a reference to layer [métier] using [Spring.net].
The results of running this program are as follows:
9.24.7. DLL from layer [métier]
Task: Convert the type of project [pam-metier] to a class library, then regenerate the project (repeat the steps in section 9.22.7).
9.25. Step 18: Setting up the [web] layer
We have reached the final layer of our architecture, the [web] layer:
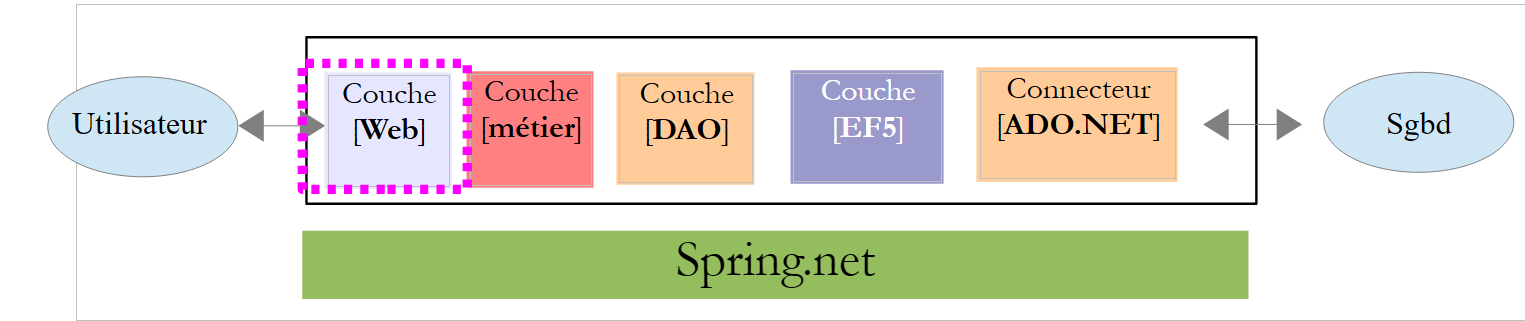 |
We will reuse the [web] layer that we developed with the help of a simulated [métier] layer.
9.25.1. The Visual Studio Project
We return to Visual Studio Express 2012 for the Web to connect our web layer to the [métier, DAO, EF5] layers we just developed. There is mostly configuration work to do and a few namespace changes.
In Visual Studio Express 2012 for the Web, load the [pam-td] solution:
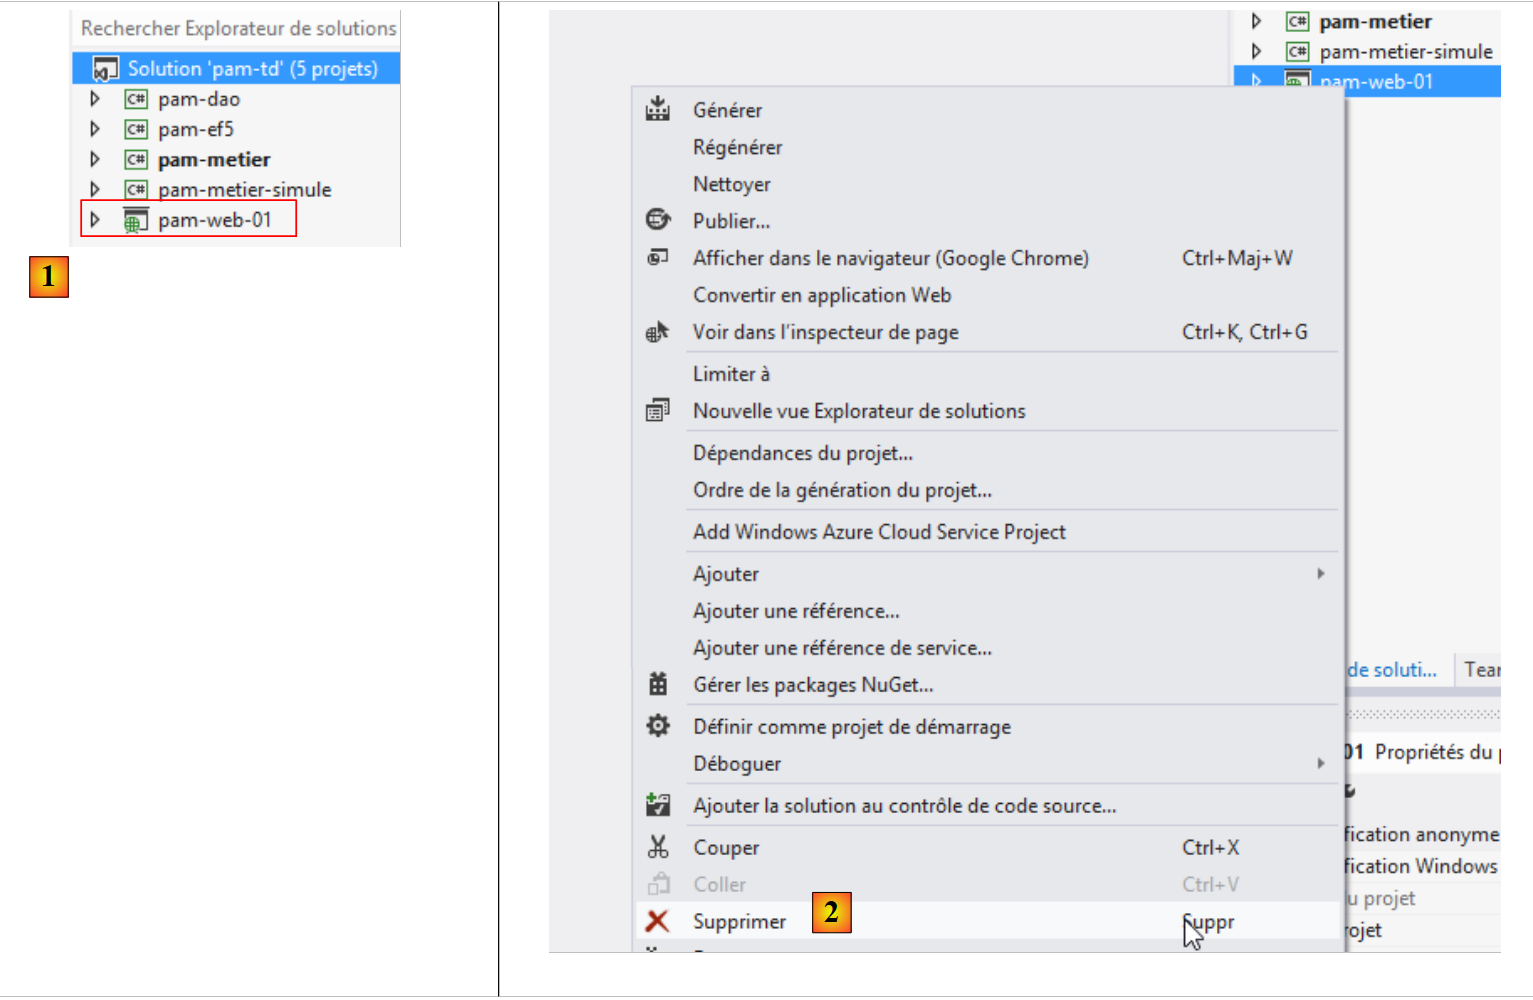 |
- in [1], the [pam-td] solution in VS Studio for the Web. The web project [pam-web-01] becomes visible again. We had lost it in VS Studio for the desktop.
- The configuration of the [pam-web-01] web project will need to be modified. Rather than modifying a working project, we will make the changes to a copy of that project. First, in [2], we remove the project from the solution (this does not delete anything from the file system).
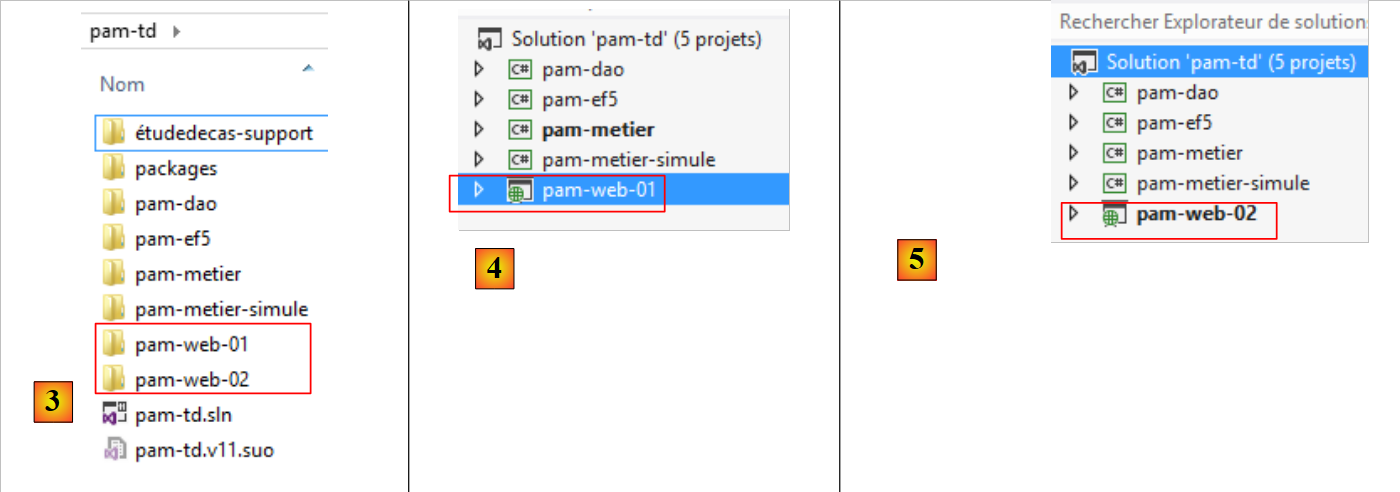 |
- In [3], using Windows Explorer, duplicate the [pam-web-01] folder into [pam-web-02];
- In [4], load the [pam-web-02] project into the [pam-td] solution. It will appear with the name [pam-web-01];
- In [5], change this name to [pam-web-02] and set this project as the startup project;
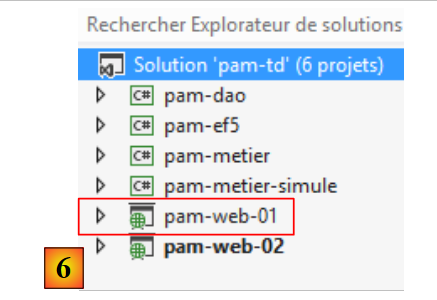 |
- In [6], load the old project [pam-web-01]. You now have all your projects. Be careful to work with [pam-web-02].
9.25.2. Adding the necessary references to the project
Let’s look at the project as a whole:
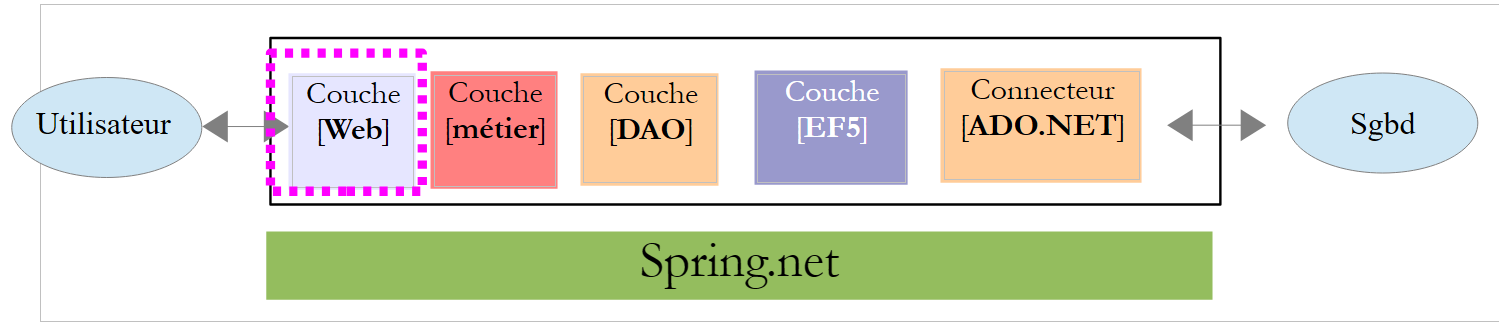 |
The [pam-web-02] project requires a certain number of DLL projects:
- all those referenced by projects [pam-metier], [pam-dao], and [pam-ef5];
- those from projects [pam-metier], [pam-dao], and [pam-ef5] themselves.
Task: Add these various references to project [pam-web-02]. The reference to project [pam-metier-simule] must be removed. We are switching to layer [métier]. Some DLL references are already present. Delete them and then make your additions.
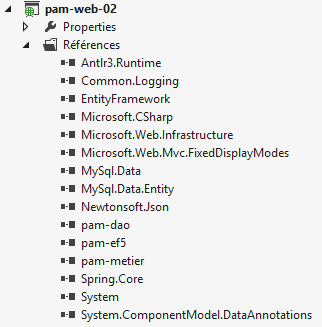 |
9.25.3. Implementation of the [web] layer
Generate the [pam-web-02] project. Errors such as the following will appear:
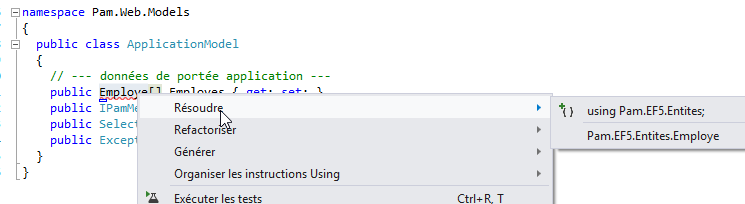 |
The class [ApplicationModel] uses the type [Employe]. With the [métier] layer simulated, this type was defined in the [Pam.Metier.Entites] namespace. It is now in the [Pam.EF5.Entites] namespace. Correct these errors as shown above.
9.25.4. Configuring the [web] layer
As done in section 9.24.5, we need to configure EF5 in the project’s [web.config] file:
 |
Task 1: Replace the entire current content of [web.config] with that of the [app.config] file from the [pam-metier] project.
The [Global.asax] file in our web application uses [Spring.net] to retrieve a reference to the [métier] layer:
      try
      {
        // instantiation layer [business]
        application.PamMetier = ContextRegistry.GetContext().GetObject("pammetier") as IPamMetier;
      }
      catch (Exception ex)
      {
        application.InitException = ex;
}
Line 4: We request a reference to the Spring object named [pammetier]. This is indeed the name given to the [métier] layer (check it in your [web.config] file).
9.25.5. Testing the [web] layer
We are ready to test our [web] layer. First, we will change its working port. By default, [pam-web-02] has the configuration of [pam-web-01] and therefore operates on the same port. Experience shows that this causes a problem: IIS then continues to use the codes from the [pam-web-01] project. Proceed as follows:
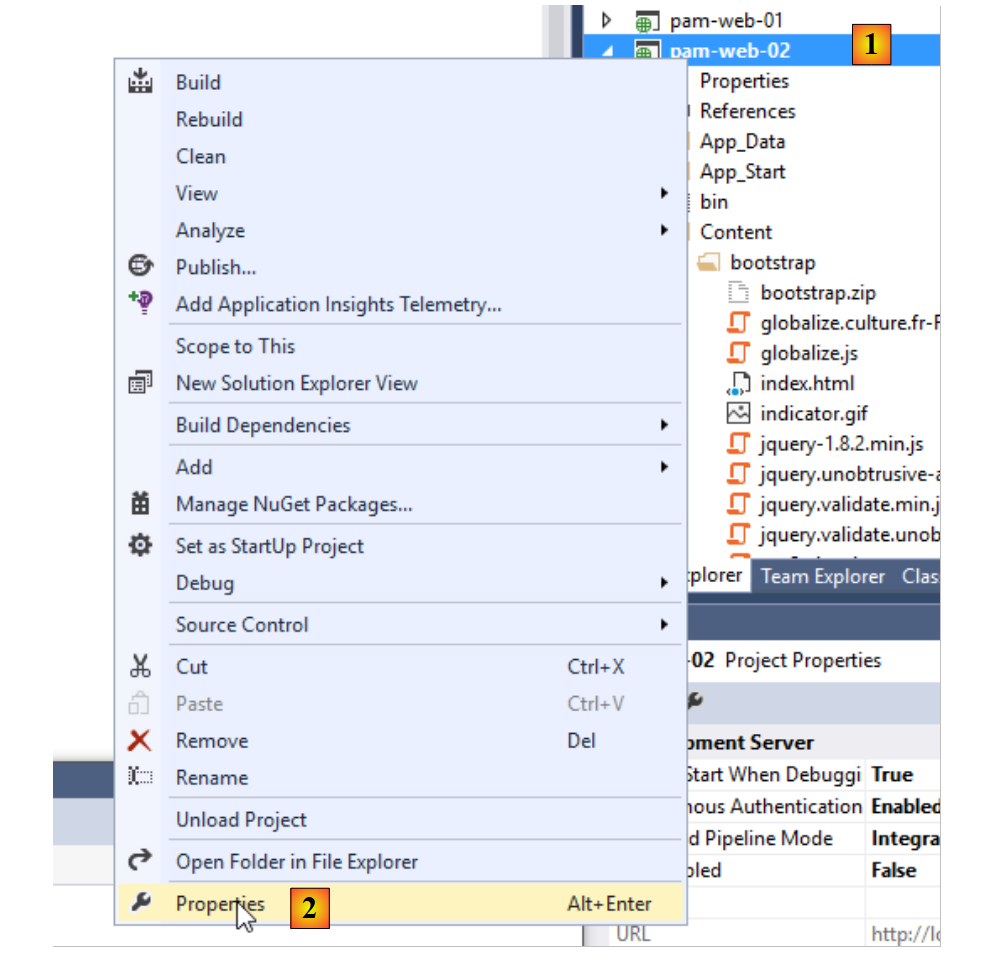 |
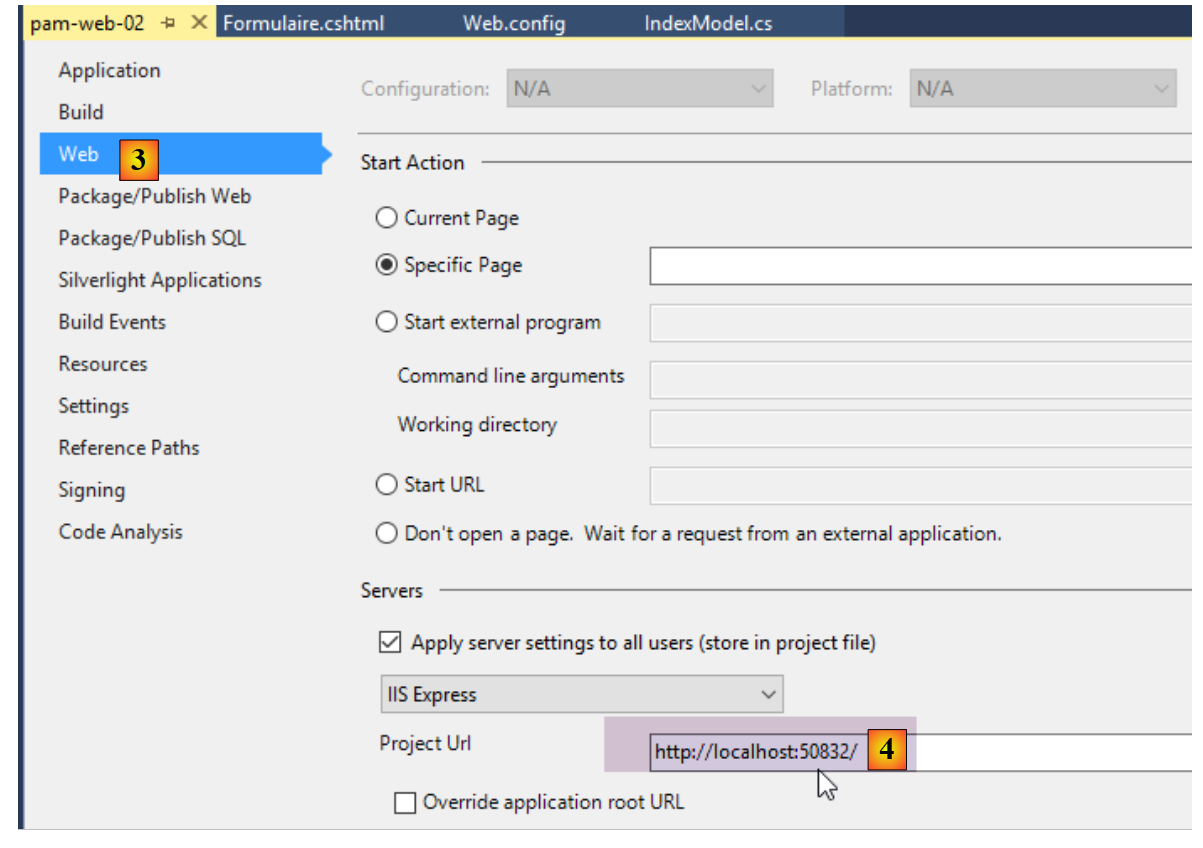 |
In [4], change the port number, for example by changing the units digit.
Run the [pam-web-02] project via [Ctrl-F5]. You will then see the following home page:
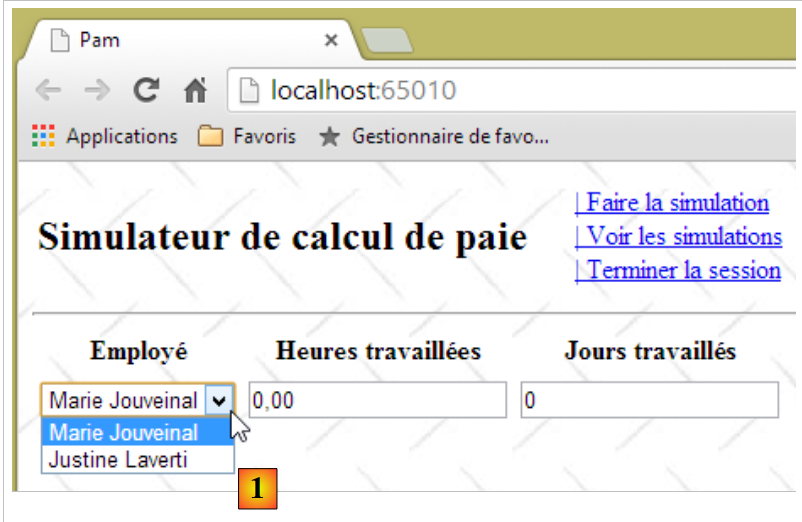 |
In [1], you get the employees from the [dbpam_ef5] database. Note that the employee [X X], which we had with the simulated layer [métier], is no longer present. Let’s run a simulation:
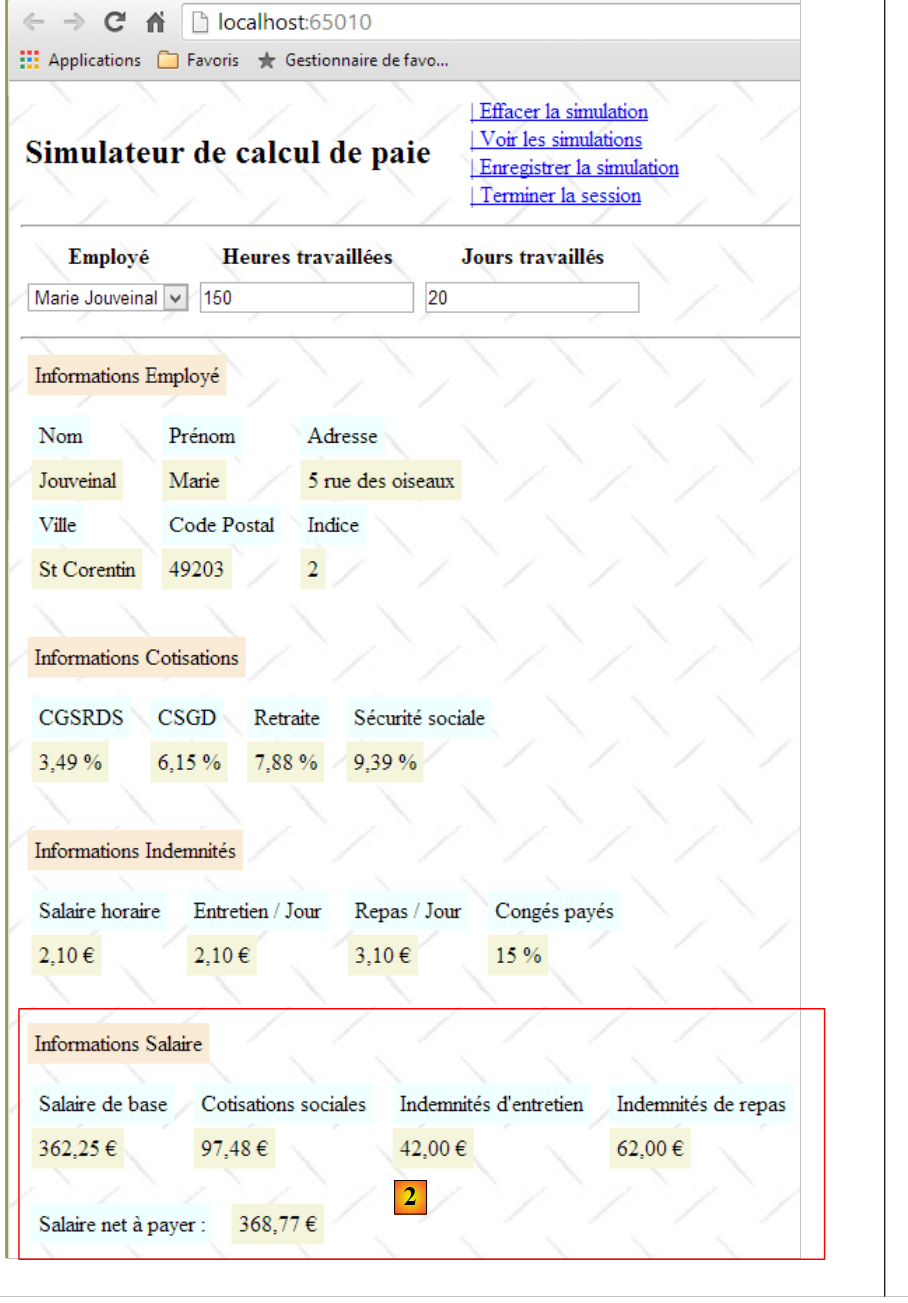 |
In [2], we do indeed get the actual salary and no longer a fictitious one. Now let’s stop SGBD and MySQL5 and run another simulation:
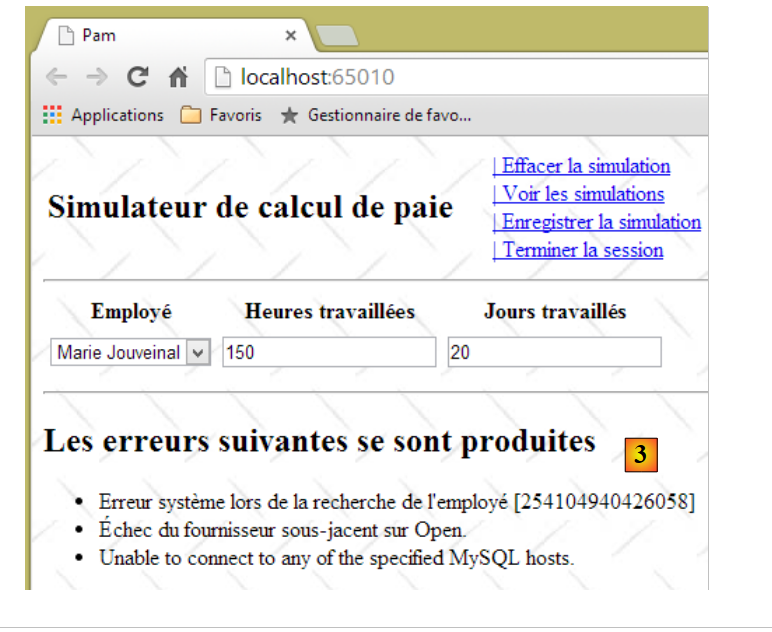 |
In [3], we obtained a readable error page even though some messages are in English. Now let’s stop MySQL again and rerun the application in VS via [Ctrl-F5]:
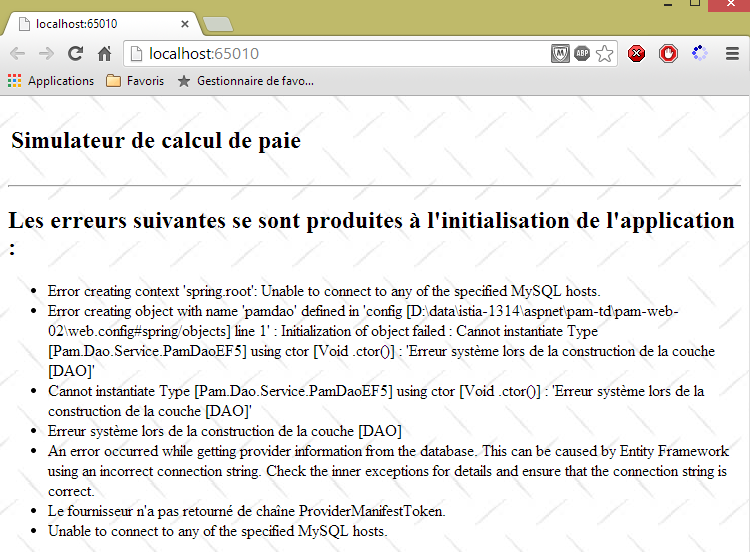 |
We get the [initFailed.cshtml] view created in Section 9.20.4. It displays the error messages from the exception stack. The reader is invited to perform further tests.
9.26. Step 19: Making the ASP.NET application accessible on the Internet
When developing a ASP.NET application with Visual Studio, the default configuration ensures that the developed application is accessible only at the address [localhost]. Any other address is rejected by Visual Studio’s embedded server, which then returns the error [400 Bad Request].
This can be observed as follows:
- in a DOS window, note the address IP of your development machine:
Microsoft Windows [version 6.3.9600]
(c) 2013 Microsoft Corporation. Tous droits réservés.

dos>ipconfig

Configuration IP de Windows


Carte Ethernet Connexion au réseau local :

   Suffixe DNS propre à la connexion. . . : ad.univ-angers.fr
   Adresse IPv6 de liaison locale. . . . .: fe80::698b:455a:925:6b13%4
   Adresse IPv4. . . . . . . . . . . . . .: 172.19.81.34
   Masque de sous-réseau. . . . . . . . . : 255.255.0.0
   Passerelle par défaut. . . . . . . . . : 172.19.0.254

Carte réseau sans fil Wi-Fi :

   Statut du média. . . . . . . . . . . . : Média déconnecté
   Suffixe DNS propre à la connexion. . . :
The address IP is listed here on line 14. If you have a Wi-Fi connection, the device’s Wi-Fi address will appear on lines 20 and following.
- Check the properties of the [clic droit sur projet / propriétés / onglet web] project:
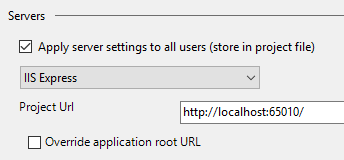 |
The application will run on port [65010] of the machine [localhost].
- Run your project using [Ctrl-F5]
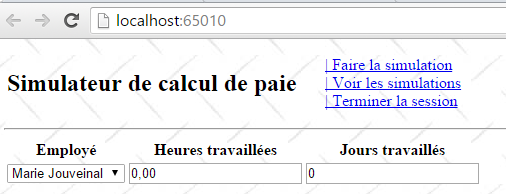
- Replace [localhost] with the address IP of the workstation:
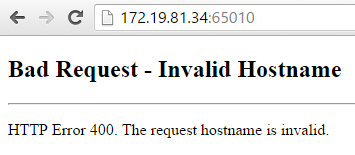
The server returned a response with the ID [400 Bad Request]. The IIS Express server used by Visual Studio only accepts the name [localhost].
To make the developed application accessible to a URL of the [http://adresseIP/contexte/...] type, you must use a server other than IIS Express, such as a IIS server (not Express). To check for its presence (normally in Pro versions of Windows), go to the [Panneau de configuration\Système et sécurité\Outils d’administration] Control Panel:
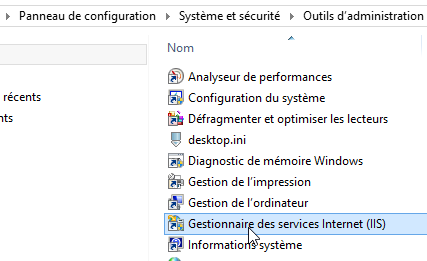
This option is not always present. In that case, go to [ Panneau de configuration \ Programmes] and install the Web Administration Tools.
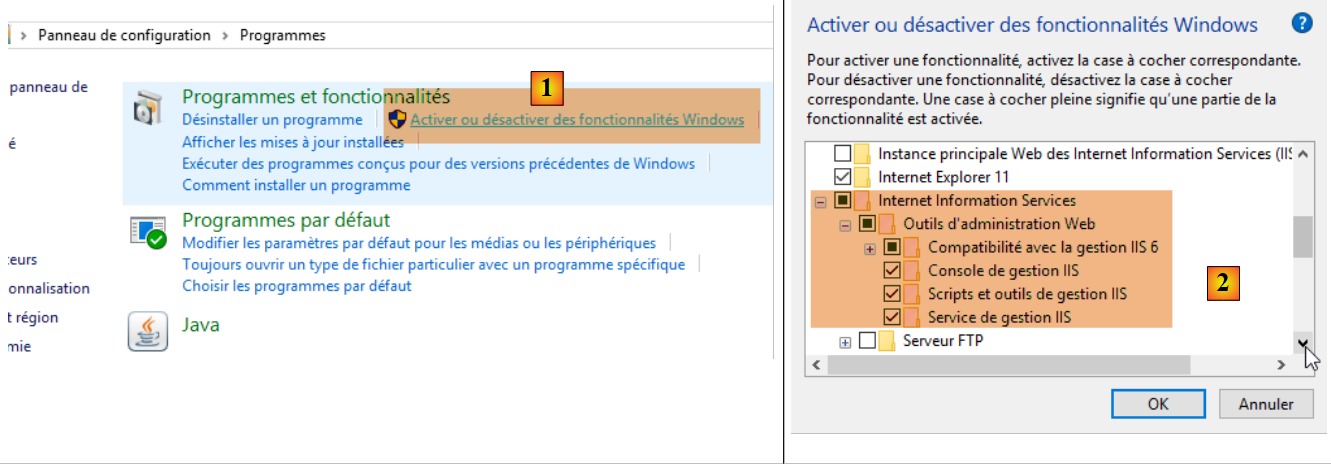 |
Once option and [Gestionnaire des services internet (IIS)] are present, activate them:
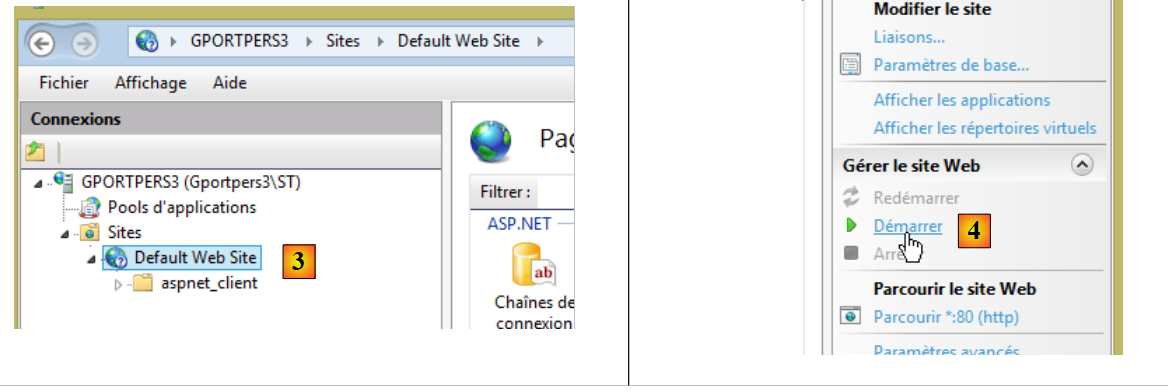 |
Start the default website. To do this, the [Service de publication World Wide Web] service must be running first:
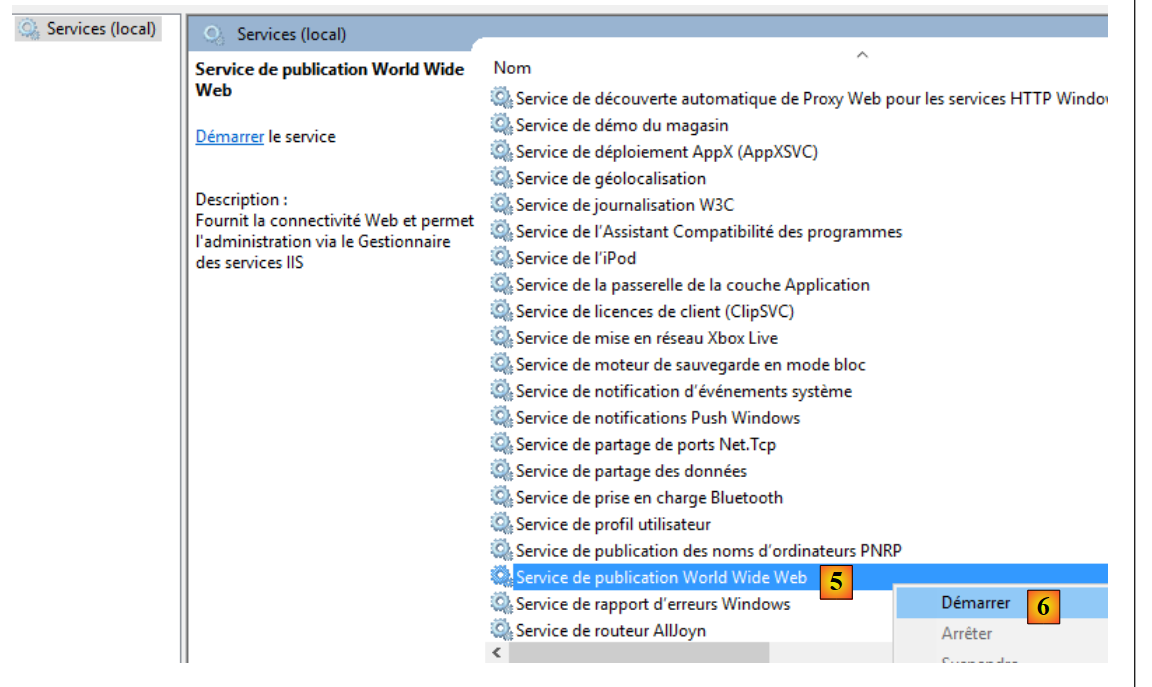 |
Once this is done, access URL [http://localhost] using a browser. First, verify that another web server is not already using port 80. If so, stop it.
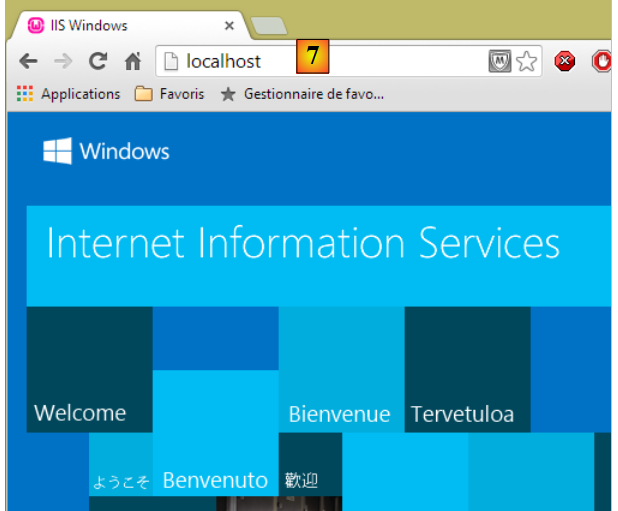 |
The IIS server responded. Now replace [localhost] with the address IP for your computer:
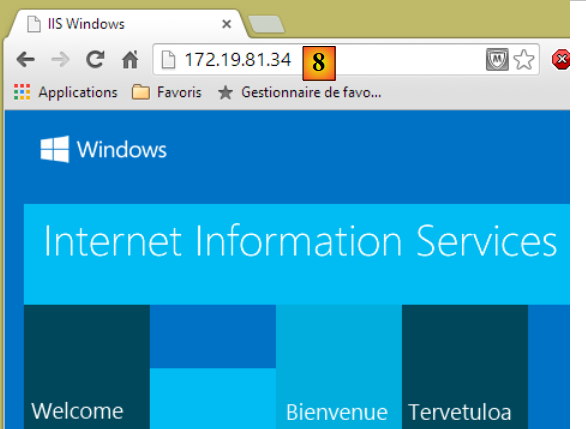 |
It works. Now let’s go back to Visual Studio:
- First, you need to launch Visual Studio in [administrateur] mode
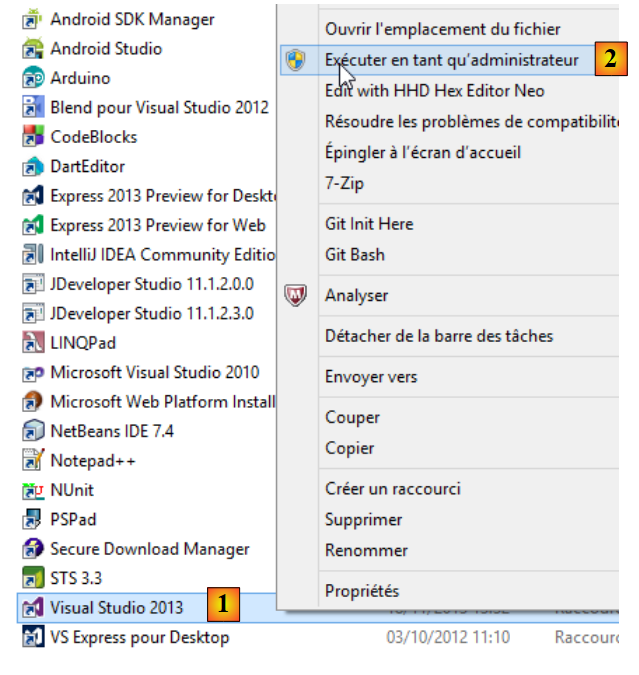 |
Once that’s done, you need to change the configuration of the web project you want to deploy [clic droit sur projet / propriétés / onglet web]:
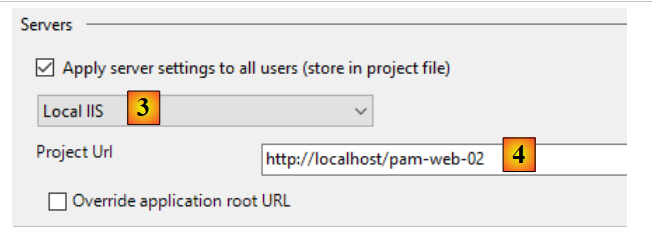 |
You must select the local IIS server as the deployment server. Visual Studio sets the URL for the application. You can change it. Run the project via [Ctrl-F5]:
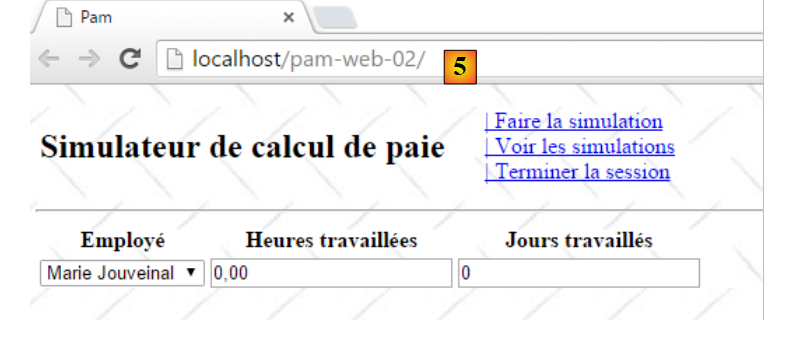 |
Now replace [localhost] with the address of your machine:
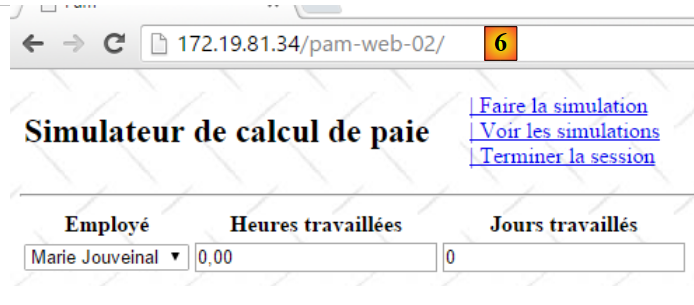 |
If you do not have the IIS server, you can use a free ASP.NET server such as [Ultidev Web Server Pro], available at URL [http://ultidev.com/Download/ ]. Once installed, there are two ways to launch a web application with this server:
The quick way
Open a Windows Explorer window and select the folder containing the ASP.NET application to be deployed:
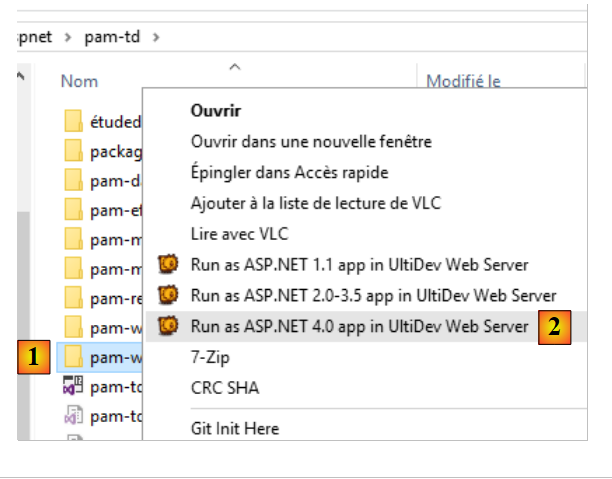 |
The web server will then launch and the web application will be displayed in a browser:
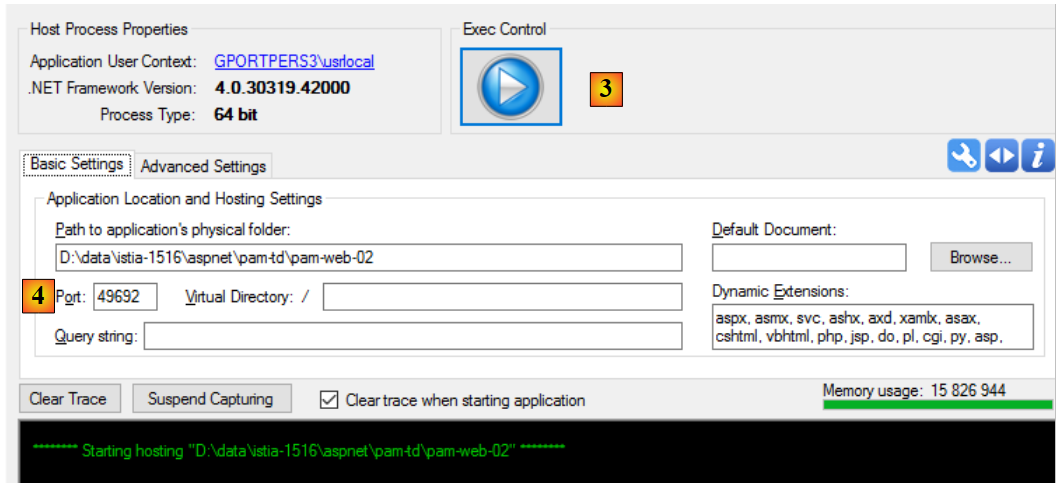 |
- In [3], you can stop or start the web server;
- In [4], you can change the web application’s service port;
Before starting the server, the [UWS HiPriv Services] service below must be started:
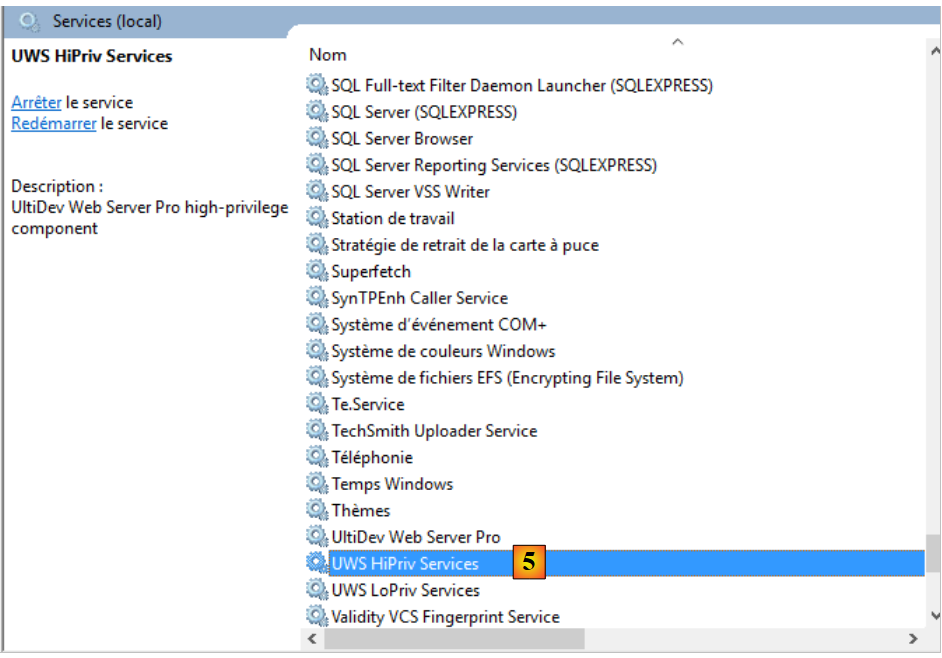 |
Once the server is running, the interface appears as follows:
 |
Clicking the [6] link displays the application’s first page:
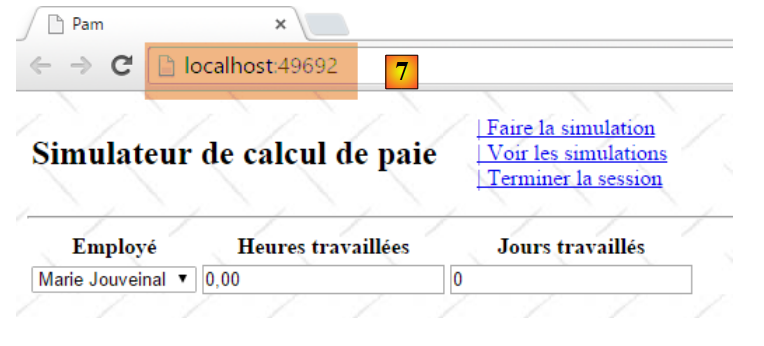 |
You can then replace [localhost] with the machine’s address, IP:
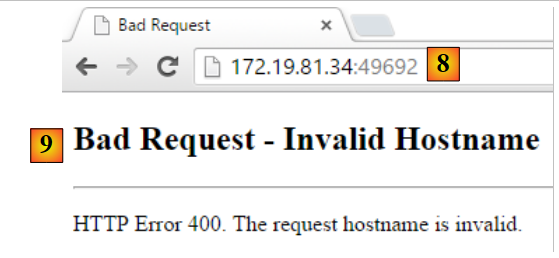 |
So here as well, only the name [localhost] is accepted.
The long way
Launch the Ultidev Web Explorer application
 |
and follow these steps:
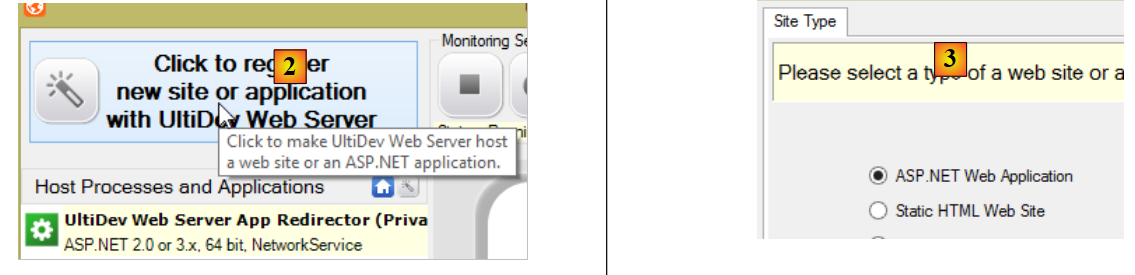 |
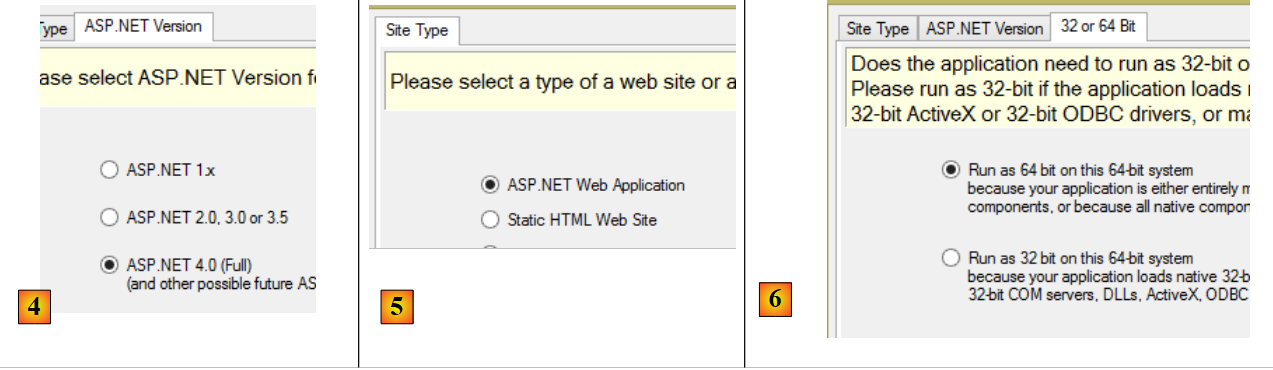 |
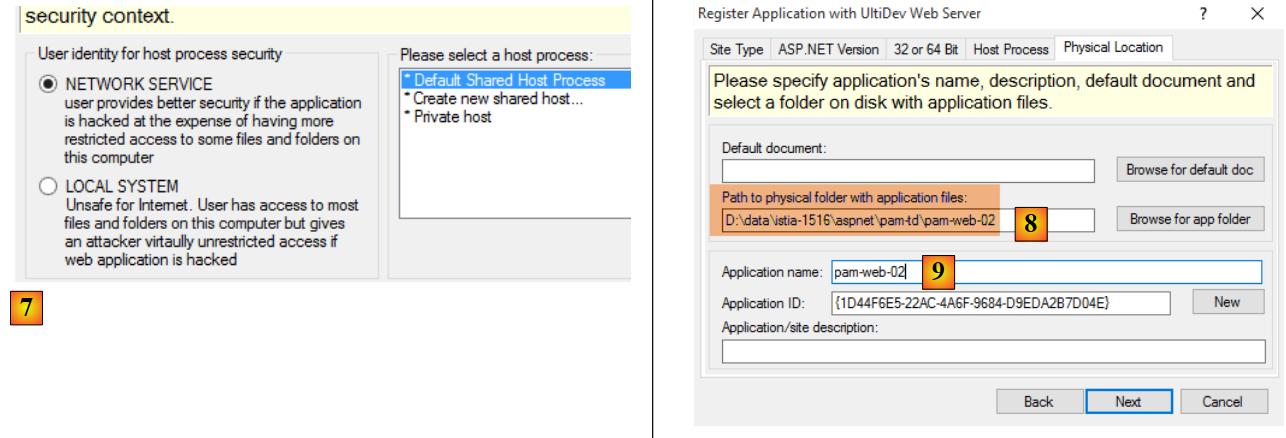 |
- In [8], specify the folder for the web application to be deployed;
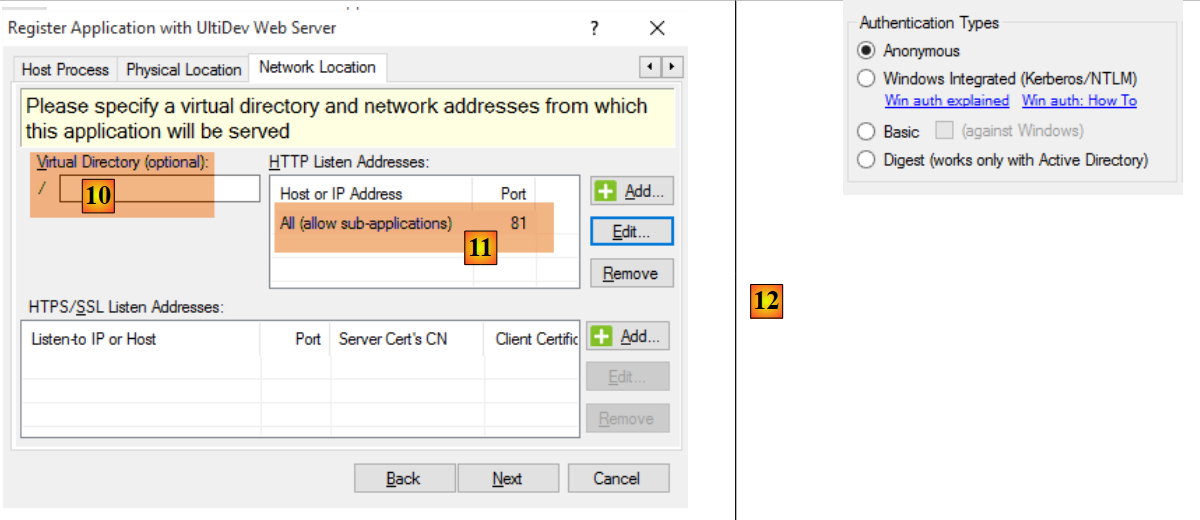 |
- Using [10-11], the web application must be requested with URL and [http://localhost:81/];
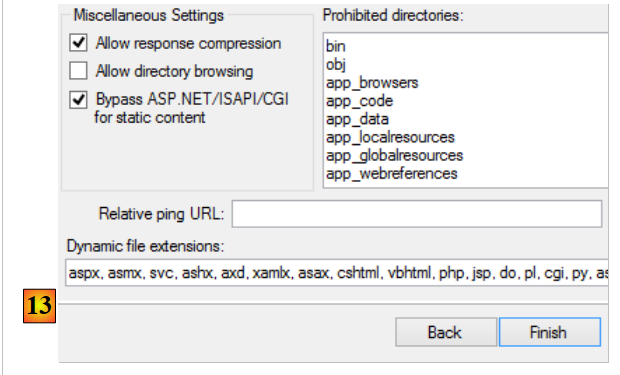 |
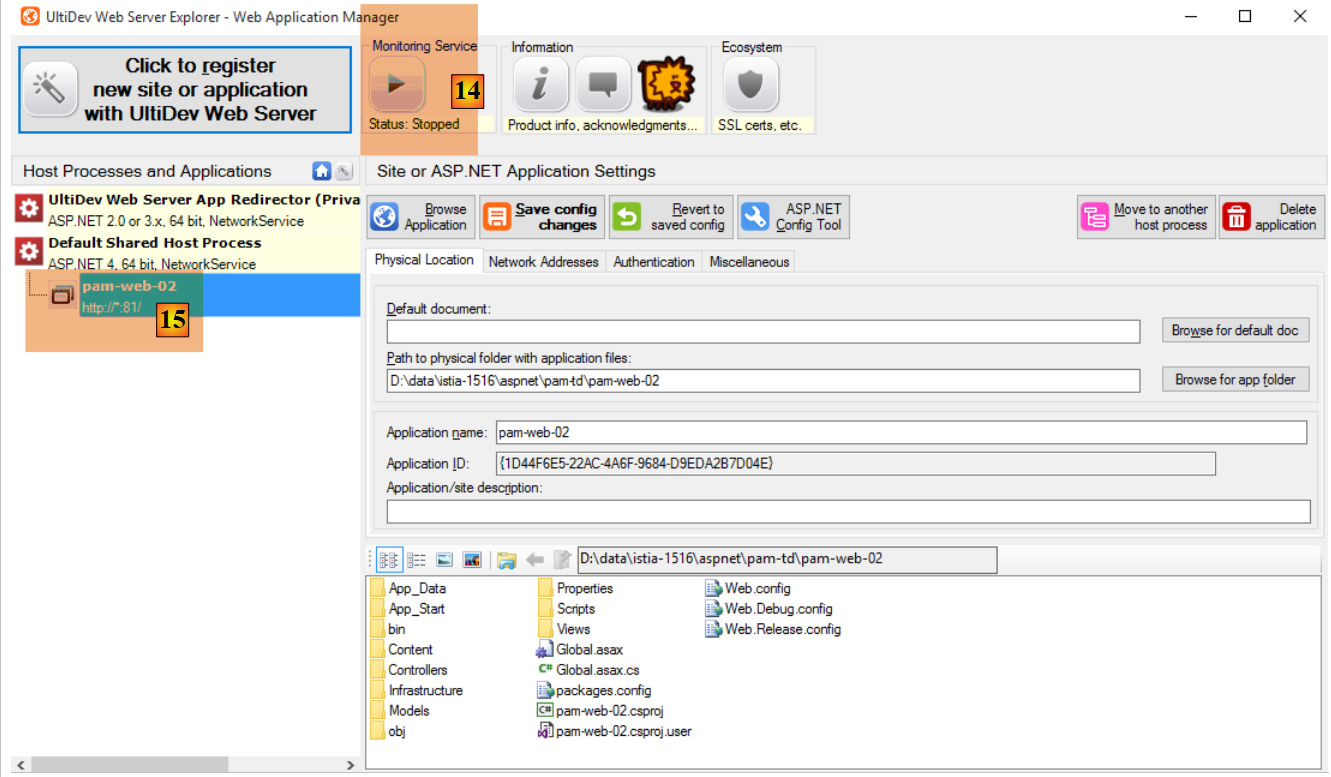 |
- Start the web server using [14];
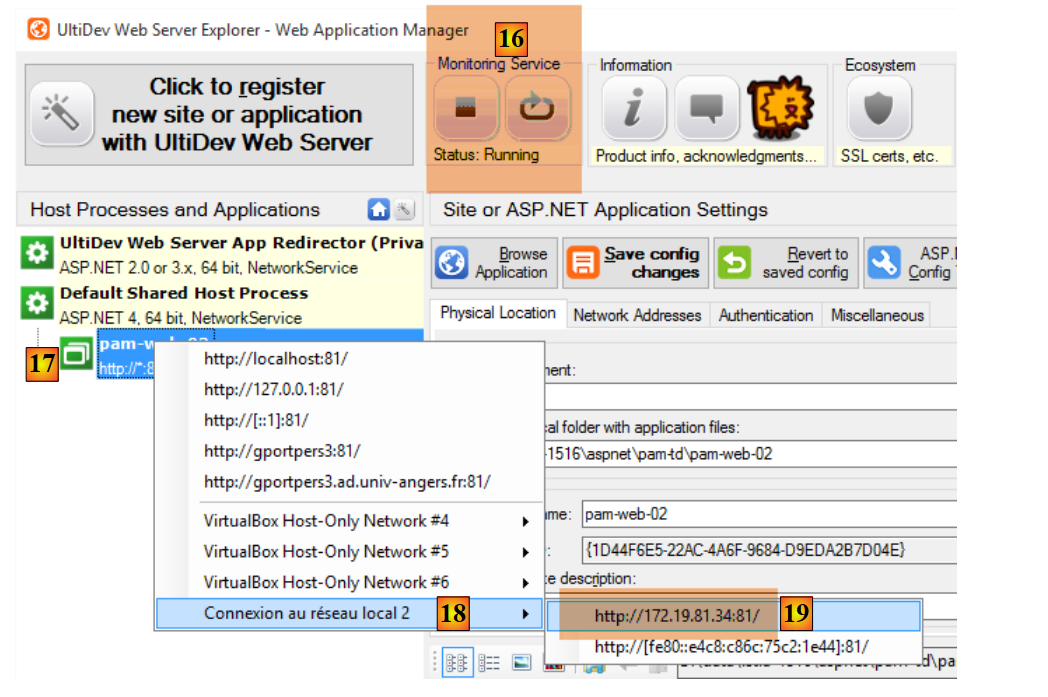 |
- Request URL and [19];
 |
- In [20], we obtained the desired page by using the machine’s local address IP rather than the name [localhost]. This is what we were looking for;
The Ultidev server is installed as a Windows service that starts automatically. You can disable the automatic startup of the Ultidev server as follows:
- select option [Panneau de configuration\Système et sécurité\Outils d’administration];
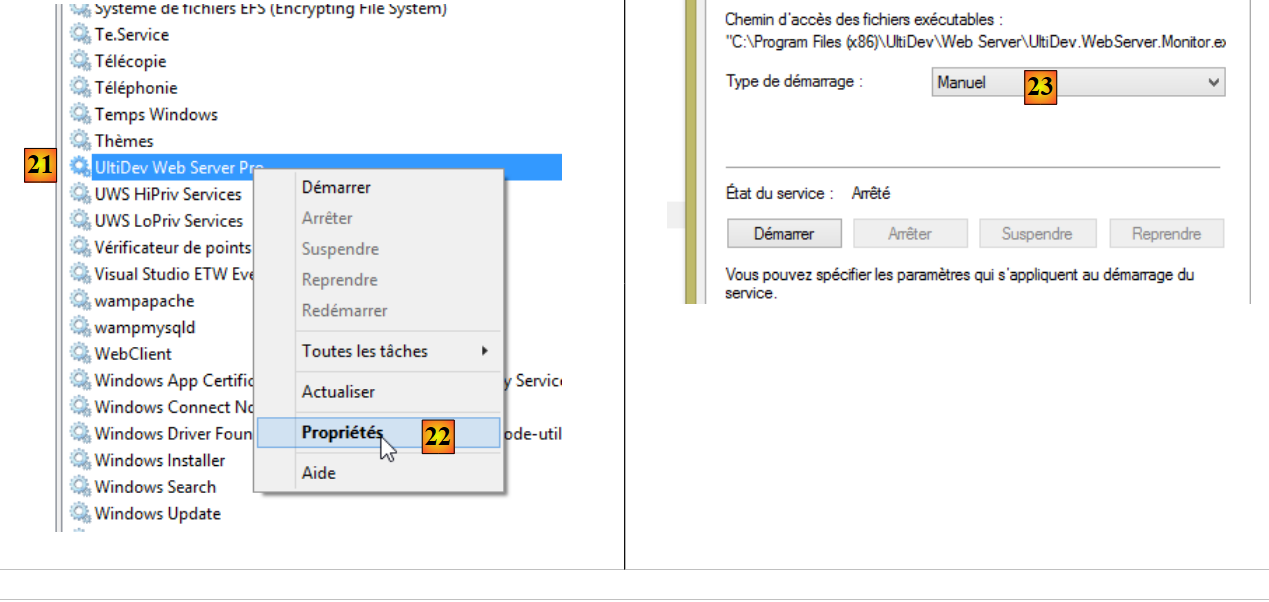 |
- [1, 2]: select the properties of the [Ultidev Web Server Pro] service;
- [3]: set it to manual startup.
To start the server manually, use, for example, the [Ultidev Web Explorer] application:
 |
9.27. Step 20: Generating a native Android app
When you have a web application of the type APU (Single-Page Application), you can generate a mobile executable (Android, IoS, Windows 8, ...) using the [Phonegap] [http://phonegap.com/] tool. There are other ways to do this, notably with the open-source product Apache Cordova [https://cordova.apache.org/]. The online tool available on the PhoneGap website [http://build.phonegap.com/apps] 'uploads' the ZIP file of the website to be converted. The homepage must be named [index.html] and must be a static page, i.e., not generated by a web framework (ASP.NET, JEE, PHP, ...). We will start by building this one.
9.27.1. The application architecture
It is important to remember here that we want to create an Android application. Such an application often has the following architecture:
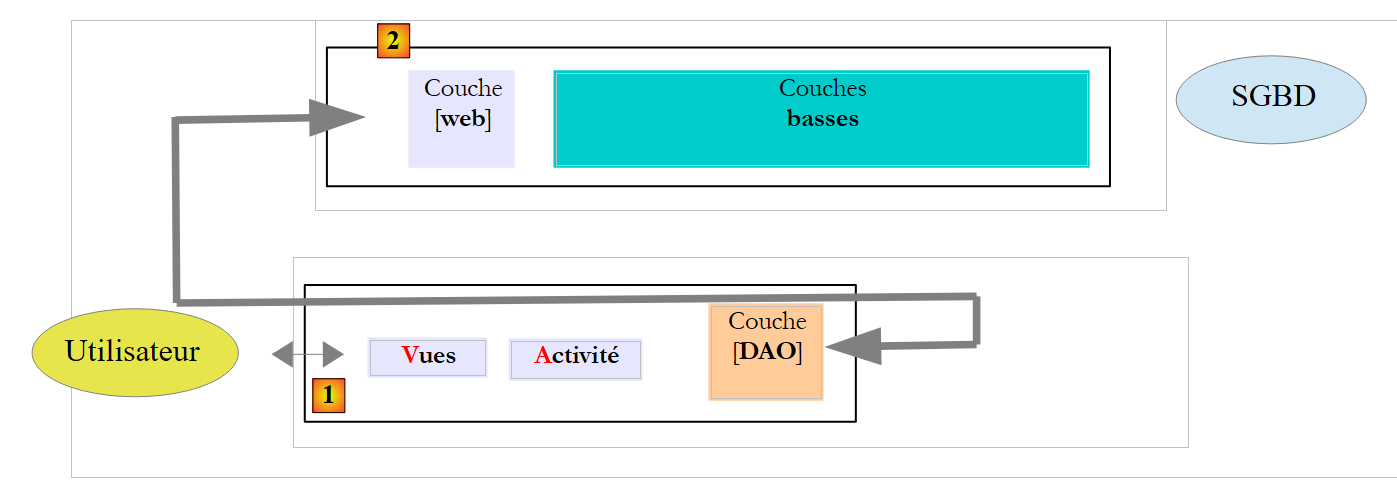 |
- In [1], the user uses an Android tablet that communicates with one or more [2] web services;
Let’s return to the APU model:
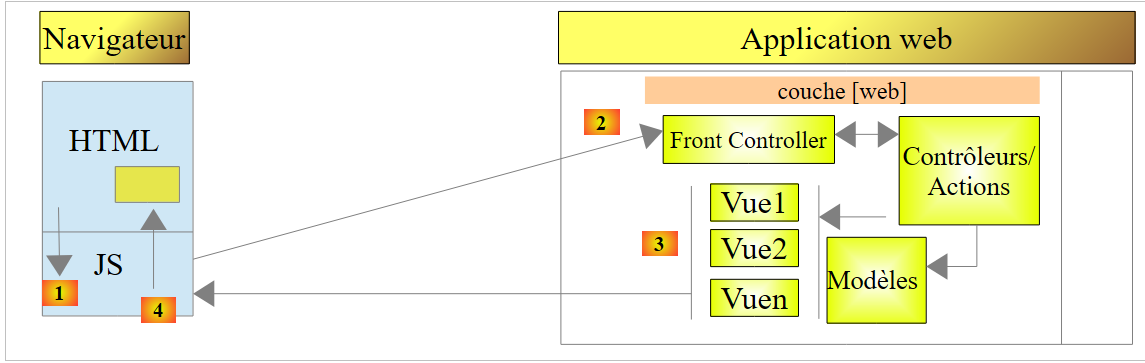 |
- an initial page is loaded in the browser (the diagram above does not specify where it comes from);
- subsequent views are obtained via Ajax calls [1-4]. No new pages will be loaded by the browser;
The initial view may or may not be served by the same server as the other views obtained via Ajax calls. If it is not served by the same server, the Javascript of the initial page must know the URL of the web server that will deliver the other views. This will be the case in the Android application we are going to build:
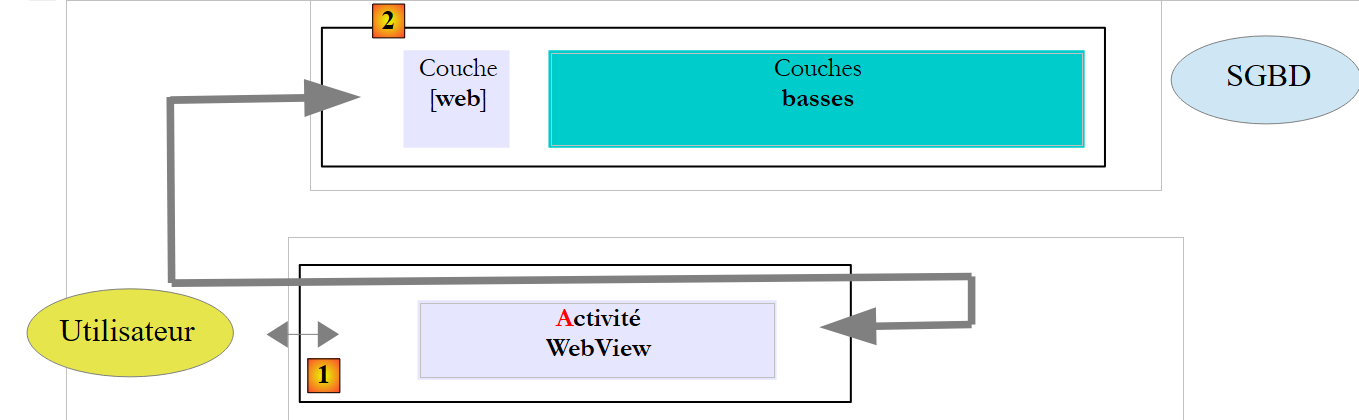 |
- The static page [index.html] will be embedded in a native Android application, [1], which has browser capabilities, and is therefore capable of executing the Javascript embedded in the [index.html] page;
- this page will retrieve the other views via Ajax calls to the [2] server. To do this, it needs to know the URL of the web server;
We will refactor the [pam-web-02] application so that it operates in this mode. Thus, the first page will be as follows:
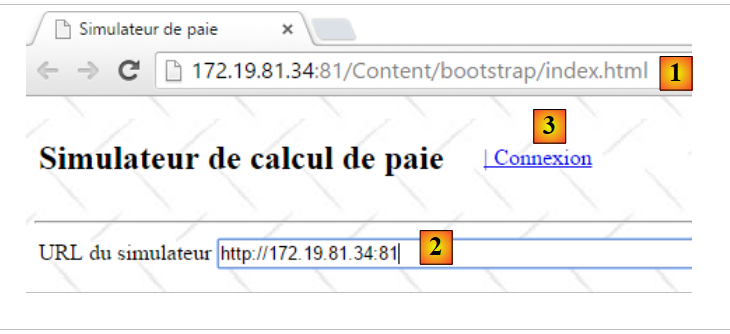 |
- in [1], the URL of the application’s initial page. This will be provided by the Ultidev server discussed in Section 9.26;
- in [2], the user must enter the URL of the payroll simulator. We could hard-code it into the Javascript of the initial page, but that would complicate testing: as soon as the simulator’s address IP (or port) is changed, it would then need to be changed in the code Javascript;
- in [3], the link [Connexion] that fetches the next view:
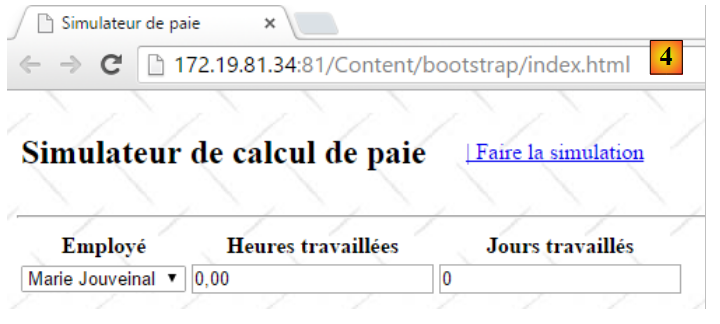 |
- Note that in [4], the browser’s URL has not changed. It is still that of the initial page and will remain so for the entire lifetime of the application.
Once this view is obtained, everything works as before: the various views are retrieved via Ajax calls. We will see that very little code needs to be modified.
9.27.2. Refactoring the [pam-web-02] project
Inside the [Content] folder of the [pam-web-02] project, we create the following [bootstrap] folder (the name doesn’t matter):
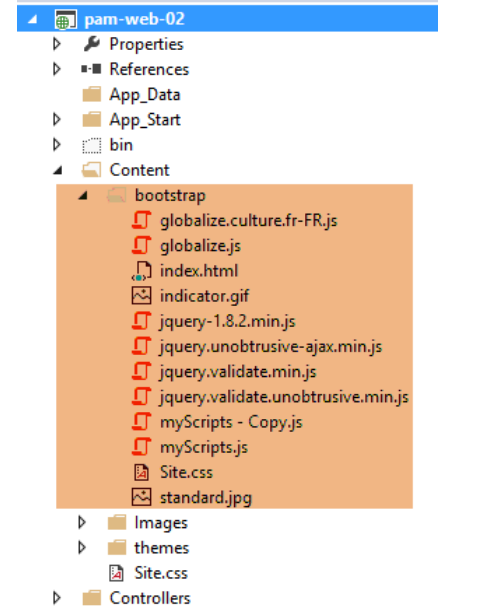 |
We have included the static page [index.html] and all the resources it needs (files CSS and JS). The page [index.html] uses the code from the master page [_Layout.cshtml] of the Visual Studio project, removing everything that is not static. This results in the following code:
<!DOCTYPE html>
<html xmlns="http://www.w3.org/1999/xhtml">
<head>
    <title>Simulateur de paie</title>
    <meta charset="utf-8" />
    <meta name="viewport" content="width=device-width" />
    <link rel="stylesheet" href="Site.css" />
    <script type="text/javascript" src="jquery-1.8.2.min.js"></script>
    <script type="text/javascript" src="jquery.validate.min.js"></script>
    <script type="text/javascript" src="jquery.validate.unobtrusive.min.js"></script>
    <script type="text/javascript" src="globalize.js"></script>
    <script type="text/javascript" src="globalize.culture.fr-FR.js"></script>
    <script type="text/javascript" src="jquery.unobtrusive-ajax.min.js"></script>
    <script type="text/javascript" src="myScripts.js"></script>
</head>
<body>
    <table>
        <tbody>
            <tr>
                <td>
                    <h2>Simulateur de calcul de paie</h2>
                </td>
                <td style="width: 20px">
                    <img id="loading" style="display: none" src="indicator.gif" />
                </td>
                <td>
                    <a id="lnkConnexion" href="javascript:connexion()">
                        | Connexion<br />
                    </a>
                    <a id="lnkFaireSimulation" href="javascript:faireSimulation()">
                        | Faire la simulation<br />
                    </a>
                    <a id="lnkEffacerSimulation" href="javascript:effacerSimulation()">
                        | Effacer la simulation<br />
                    </a>
                    <a id="lnkVoirSimulations" href="javascript:voirSimulations()">
                        | Voir les simulations<br />
                    </a>
                    <a id="lnkRetourFormulaire" href="javascript:retourFormulaire()">
                        | Retour au formulaire de simulation<br />
                    </a>
                    <a id="lnkEnregistrerSimulation" href="javascript:enregistrerSimulation()">
                        | Enregistrer la simulation<br />
                    </a>
                    <a id="lnkTerminerSession" href="javascript:terminerSession()">
                        | Terminer la session<br />
                    </a>
                </td>
        </tbody>
    </table>
    <hr />
    <div id="content">
        <table>
            <tr>
                <td>URL du simulateur</td>
                <td><input type="text" id="urlServiceWeb" name="urlServiceWeb" size="80"></td>
            </tr>
        </table>
        <div id="erreur">
            <h3>Réponse du serveur :</h3>
            <div id="erreur1"></div>
            <div id="erreur2"></div>
        </div>
    </div>
</body>
</html>
We have added the following items:
- lines 27-29: we added the option menu item to [Connexion] to enable connection to the simulation service;
- lines 55-56: entry of the simulator's URL;
- lines 59-63: an error message if the connection fails;
The code refactoring is performed only in the [myScripts.js] code on line 14 above. Nothing else changes. The code evolves as follows:
// document loading
$(document).ready(function () {
    // retrieve the references of the page's various components
    loading = $("#loading");
    content = $("#content");
    erreur = $("#erreur");
    erreur1 = $("#erreur1");
    erreur2 = $("#erreur2");
    // menu links
    lnkConnexion = $("#lnkConnexion");
    lnkFaireSimulation = $("#lnkFaireSimulation");
    lnkEffacerSimulation = $("#lnkEffacerSimulation");
    lnkEnregistrerSimulation = $("#lnkEnregistrerSimulation");
    lnkVoirSimulations = $("#lnkVoirSimulations");
    lnkTerminerSession = $("#lnkTerminerSession");
    lnkRetourFormulaire = $("#lnkRetourFormulaire");
    // we put them in a table
    options = [lnkConnexion, lnkFaireSimulation, lnkEffacerSimulation, lnkEnregistrerSimulation, lnkVoirSimulations, lnkTerminerSession, lnkRetourFormulaire];
    // hide certain page elements
    loading.hide();
    erreur.hide();
    // set the menu
    setMenu([lnkConnexion]);
});
- lines 6-8: the identifiers for the area that displays connection errors on page [index.html];
- line 10: the new link for connecting to the simulator;
- line 21: the error area is initially hidden;
- line 23: only the connection link is displayed;
On the [index.html] page, the connection link is defined as follows:
<a id="lnkConnexion" href="javascript:connexion()">
| Connexion<br />
</a>
The function JS [connexion] (line 1) is as follows:
var urlServiceWeb;
var erreur, erreur1, erreur2;


function connexion() {
    // retrieve the urlServiceWeb from the web service
    urlServiceWeb = $("#urlServiceWeb").val();
    // retrieve the input form
    $.ajax({
        url: urlServiceWeb + '/Pam/Formulaire',
        type: 'POST',
        dataType: 'html',
        beforeSend: function () {
            // wait signal on
            loading.show();
        },
        success: function (data) {
            // displaying results
            content.html(data);
            // menu
            setMenu([lnkFaireSimulation]);
        },
        error: function (jqXHR) {
            erreur2.html(jqXHR.responseText);
            erreur1.html(jqXHR.getAllResponseHeaders().replace(/\r\n/g, "<br/>").replace(/\r/g, "<br/>").replace(/\n/g, "<br/>"));
            erreur.show();
        },
        complete: function () {
            // wait signal off
            loading.hide();
        }
    });
}
- line 7: we retrieve the URL entered by the user. It is stored in the global variable from line 1. This way, it will be available in the other functions of the file;
- line 10: We make an Ajax call to the URL [/Pam/Formulaire] of the simulator. This URL renders the partial view of the simulation data entry (employees, hours worked, days worked). In the initial version of [pam-web-02], this URL was sufficient. It was automatically prefixed by the URL that had loaded the initial page. Now, we assume that the initial page can be provided by a server other than the one hosting the simulator. We must then prefix the URL [/Pam/Formulaire] with the [urlServiceWeb] variable from line 1, which is the simulator’s URL (for example, http://172.19.81.34/pam-web-02). This must be done for all Ajax calls in the file;
- lines 17–22: If the connection is successful, the partial view [Formulaire.cshtml] is displayed, and a menu is shown containing only the link [Faire la simulation] (line 21);
- lines 23–27: if the connection fails:
- on line 24, the response HTML sent by the web server is displayed (if there is one);
- on line 25, the headers HTTP sent by the web server are displayed (if it responded);
That’s it. If successful, the following page is displayed:
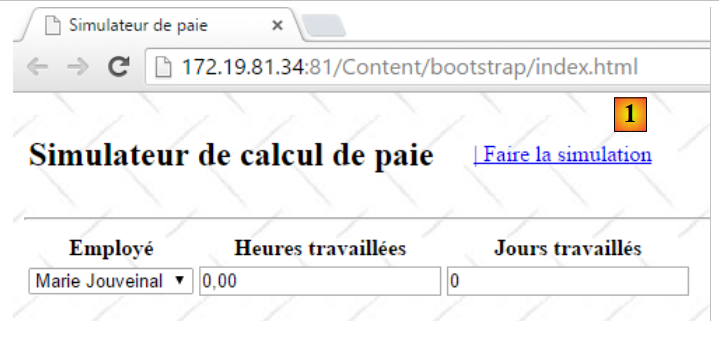 |
We are now in the previous situation, where views are now obtained via Ajax calls. Thus, as shown above, clicking the link [Faire la simulation] will be executed by the following code in the file [myScripts.js]:
function faireSimulation() {
    // retrieve references
    var simulation = $("#simulation");
    var formulaire = $("#formulaire");
    // valid form?
    var formValid = formulaire.validate().form();
    if (!formValid) return;
    // make a manual Ajax call
    $.ajax({
        url: urlServiceWeb + '/Pam/FaireSimulation',
        type: 'POST',
        data: formulaire.serialize(),
        dataType: 'html',
        ...
    });
    // menu
    setMenu([lnkEffacerSimulation, lnkEnregistrerSimulation, lnkTerminerSession, lnkVoirSimulations]);
}
- A single change has been made, on line 10, where the previous URL is now prefixed with the simulator's identifier;
9.27.3. Testing the refactored project
In section 9.26, we showed how to install the [pam-web-02] application on the Ultidev server. We will start from there:
 |
- In [6], we request the display of the [bootstrap/index.html] page. We get the following view:
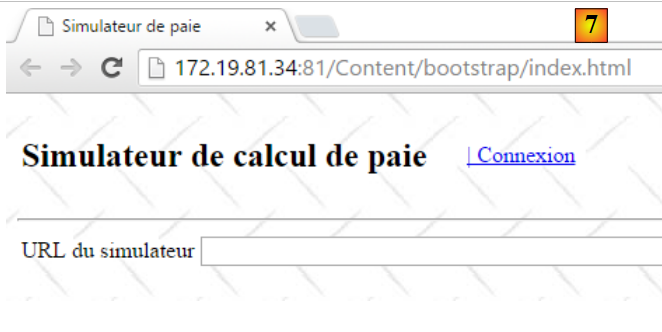 |
Let’s enter an incorrect URL:
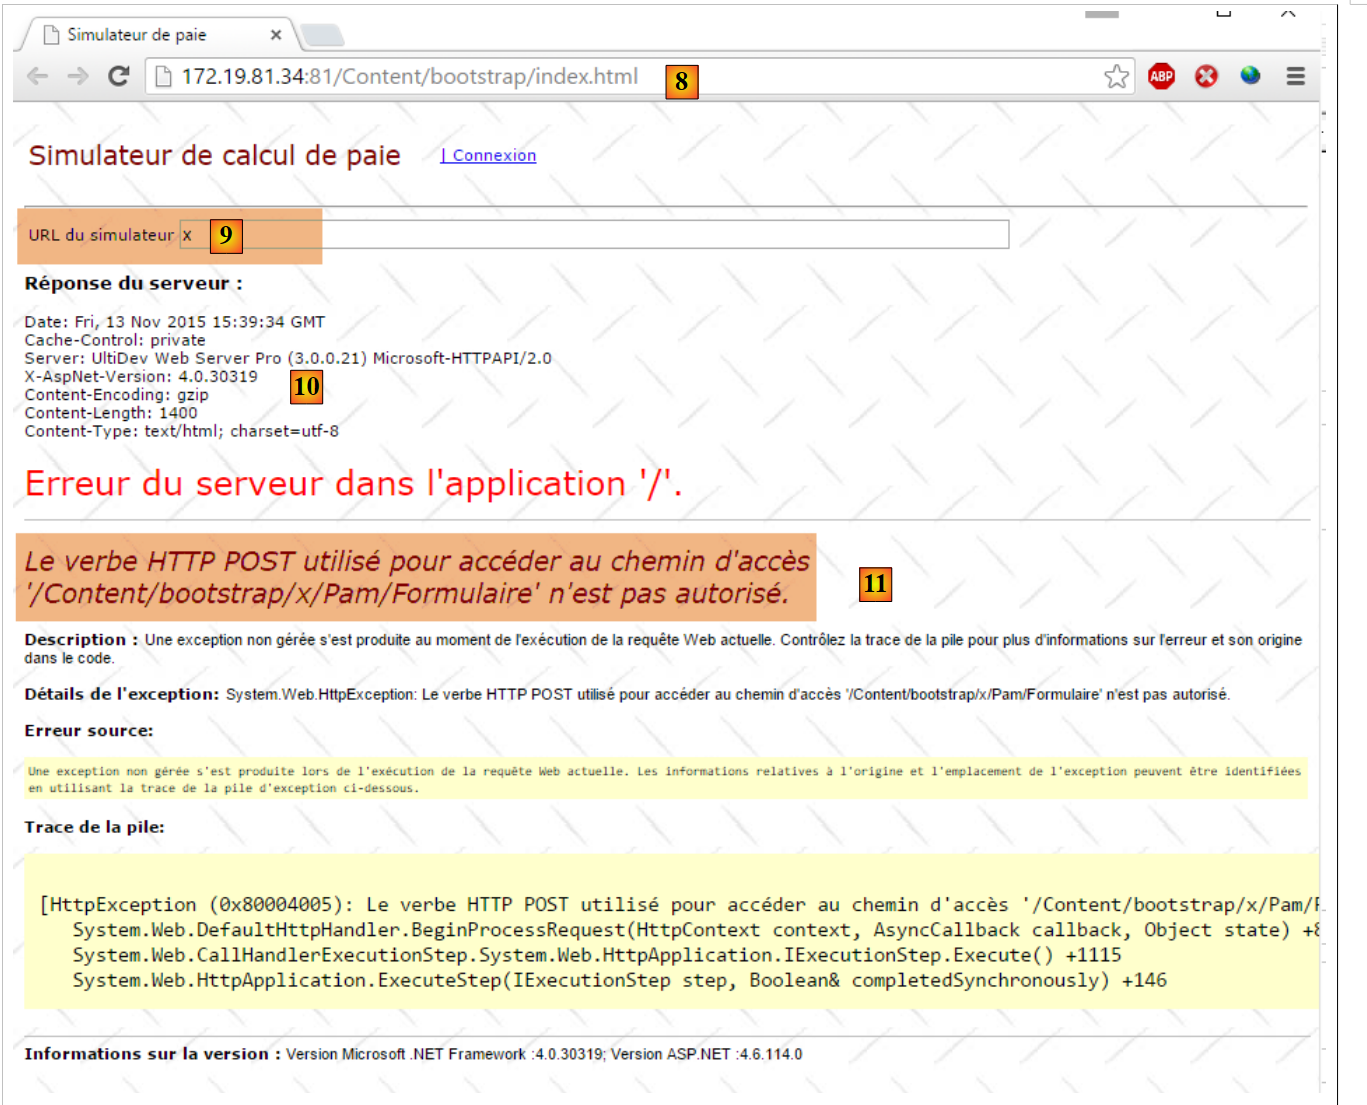 |
- in [10], the headers from the server's response in HTTP;
- in [11], the HTML document from the server response;
If you enter the correct URL:
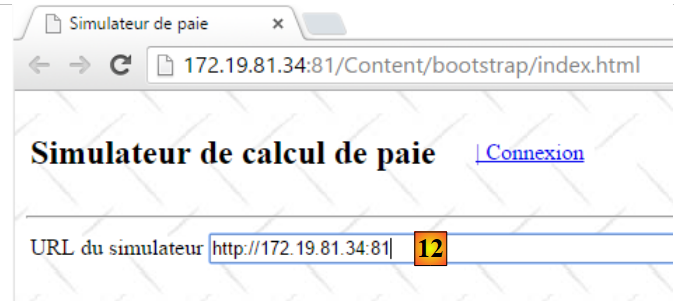 |
you get the following response:
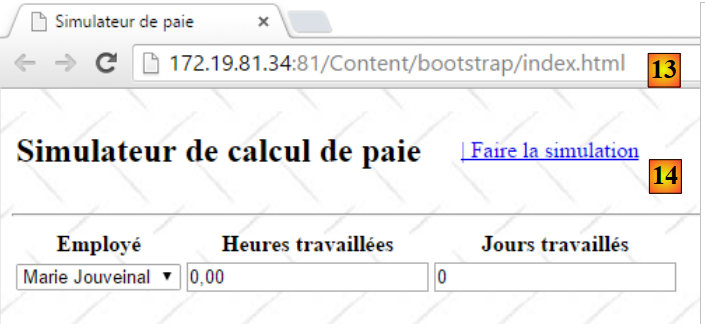 |
9.27.4. Creating the Android binary
We will create the Android binary from the static site we just created and test [1]:
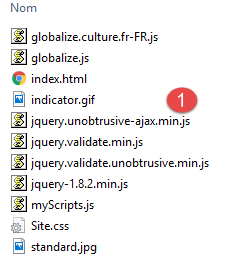 | 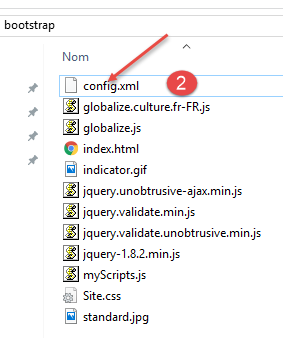 |
We add a file named [config.xml] in [2], which will be used to configure the [Phonegap] plugin that will generate the Android binary. Its code is as follows:
<?xml version='1.0' encoding='utf-8'?>
<widget id="android.exemples.pam" version="0.0.1" xmlns="http://www.w3.org/ns/widgets" xmlns:cdv="http://cordova.apache.org/ns/1.0">
    <name>Pam</name>
    <description>
        IstiA - Université d'Angers
    </description>
    <author email="serge.tahe@univ-angers.fr">
      Serge Tahé
    </author>
    <content src="index.html" />
    <access origin="*" />
    <allow-navigation href="*" />
    <allow-intent href="*" />
    <plugin name="cordova-plugin-whitelist" />
</widget>
- lines 7-9: enter your contact information here;
- lines 11-13: these lines allow the Javascript embedded in the web application running on the Android device to query URL files outside the device;
We zip the contents of the [Content/bootstrap] folder:
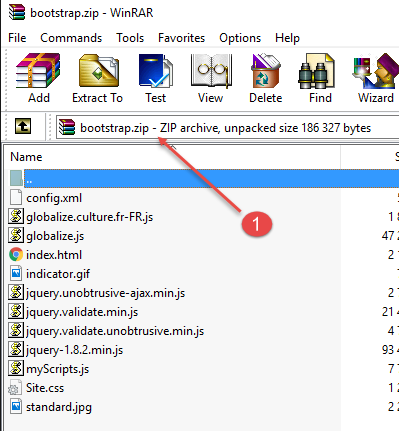 |
Next, we go to the Phonegap website:
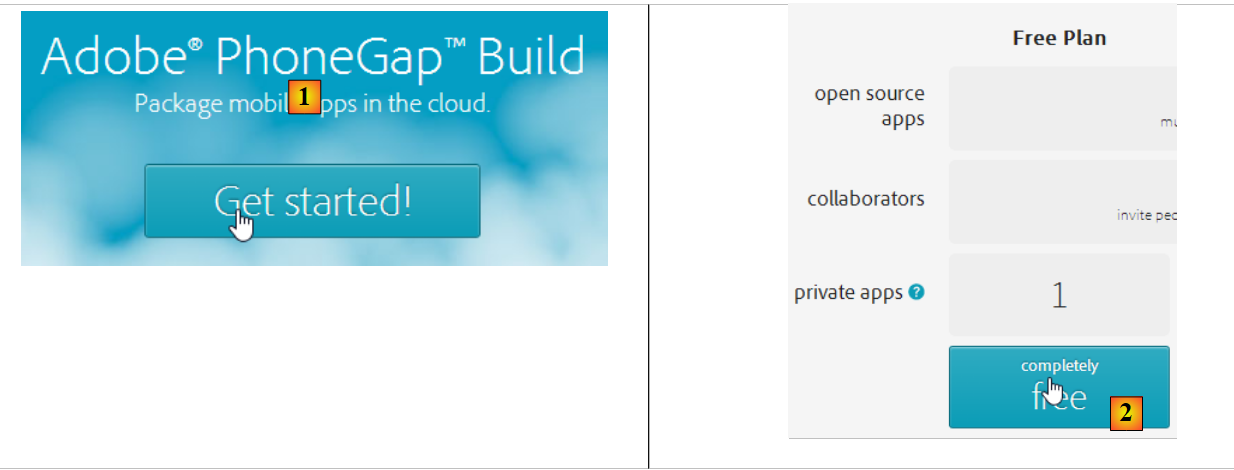 |
- Before [1], you may need to create an account;
- In [1], we get started;
- In [2], we choose a free plan that allows only one Phonegap app;
- in [3], download the zipped app [4];
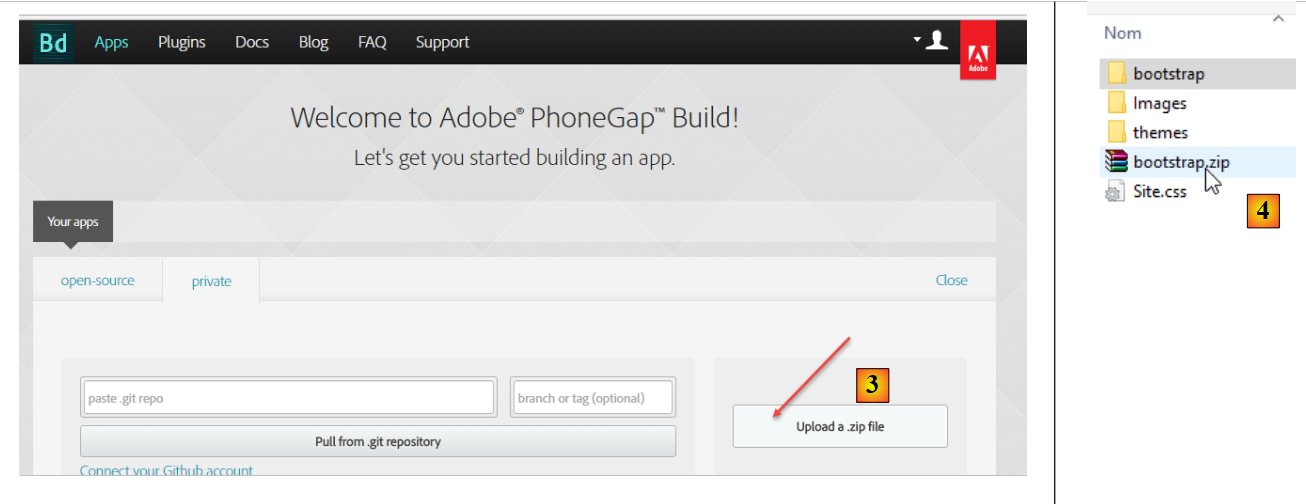 |
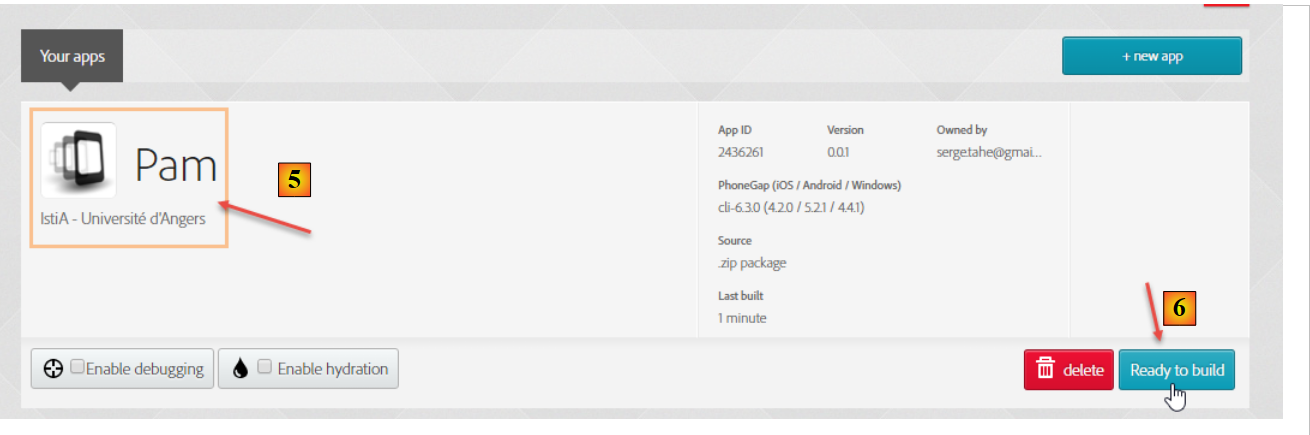 |
- in [5], enter the app name;
- click the link [6] to build the binaries for OS and IoS, Android, and Windows. This may take a few seconds;
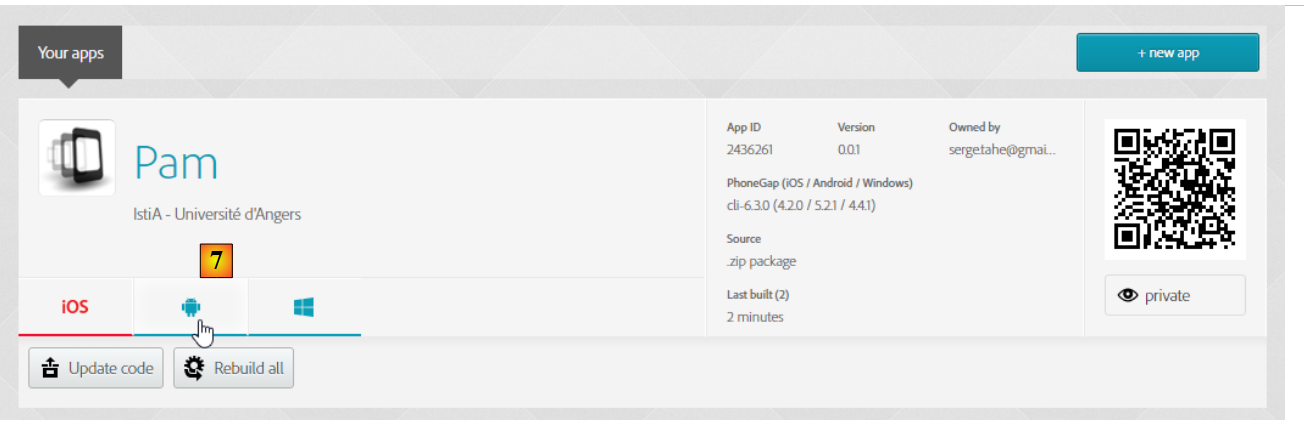 |
- in [7-9], download the Android binary;
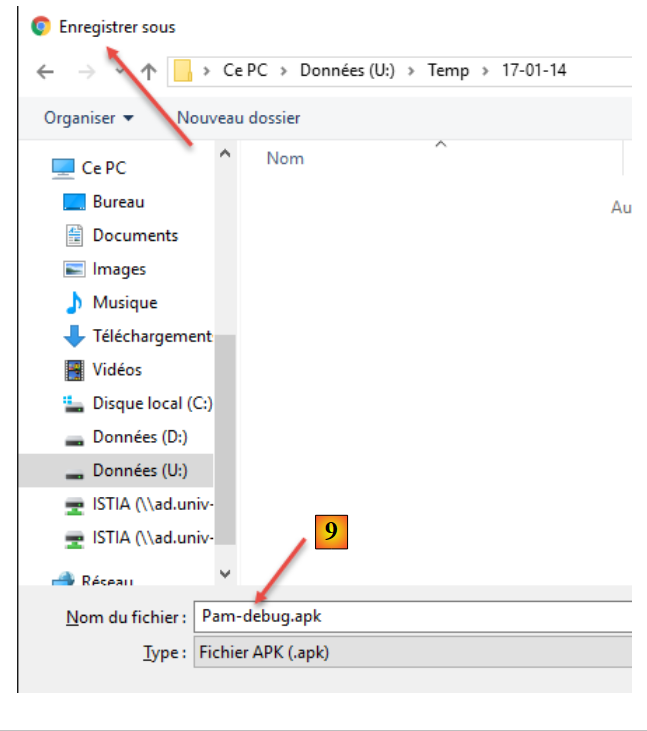 |
Launch a [GenyMotion] emulator for an Android tablet (see section 11.1):
 |
Above, we are launching a tablet emulator with Android version 21. Once the emulator is launched,
- unlock it by dragging the lock (if present) to the side and then releasing it;
- using the mouse, drag the [Pam-debug.apk] file you downloaded and drop it onto the emulator. It will then be installed and run;
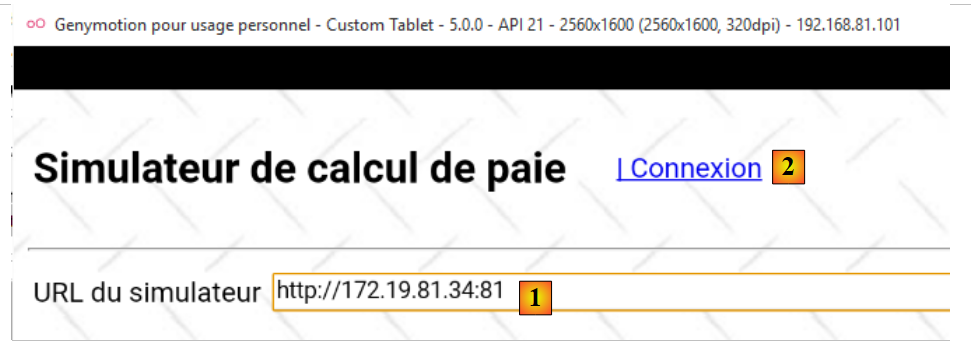 |
Set the simulator’s [1] to URL as described in section 9.27.3. Once this is done, connect to the simulator using the [2] link:
 |
Test the application on the emulator. It should work.