7. ASP Server Components - 1
7.1. Introduction
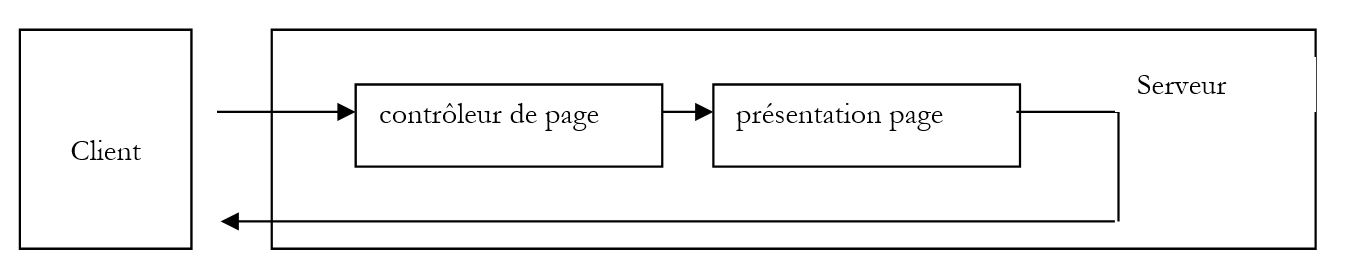
In this chapter, we describe the technology recommended in ASP.NET for building the user interface. We know that there are two distinct phases in the web server’s processing of an .aspx page:
- First, the page controller is executed. This consists of code located either within the .aspx page itself (WebMatrix solution) or in a separate file (Visual Studio.NET solution).
- Then the presentation code of the .aspx page is executed to be converted into HTML code sent to the client.
ASP.NET offers three tag libraries for writing the page’s presentation code:
- the classic HTML tags. This is what we have used so far.
- HTML server tags
- WebForms tags
Regardless of the tag library used, the role of the page controller remains the same. It must calculate the value of the dynamic parameters appearing in the presentation code. Until now, these dynamic parameters were simple: they were objects of type [String]. Thus, if in the presentation code we have a <%=name%> tag:
- the page controller declares a [nom] variable of type [String] and calculates its value
- once the page controller has finished its work and the presentation code is executed to generate the response HTML, the <%=name%> tag is replaced by the value calculated by the controller code
We know that the controller/presentation separation is arbitrary and that controller code and presentation code can be mixed on the same page. We have explained why this method is not recommended, and we will continue to adhere to the controller/presentation separation.
The [HTML serveur] and [WebForms] tags allow you to introduce objects into the presentation code that are more complex than the simple [String] object. This can sometimes be very useful. Let’s take the example of a form with a list. This list must be presented to the client using a html code that looks like this:
<select name="uneListe" size="3">
    <option value="opt1">option1</option>
    <option value="opt2">option2</option>
    <option value="opt3" selected>option3</option>
</select>
The list content and the option to be selected are dynamic elements and must therefore be generated by the page controller. We have already encountered this issue and resolved it by including the following tag in the presentation code
This tag will be replaced by the value [String] of the variable [uneListeHTML]. This value, calculated by the controller, should be the HTML code for the list, c.a.d. "<select name=..>...</select>". This isn’t particularly difficult to do and seems like an elegant solution that avoids putting generation code directly in the page’s presentation layer. Here, there would be a loop with tests to insert into it, which would thus be heavily “cluttered.” Nevertheless, this method has a drawback. The separation of control and presentation in a page also serves to delineate two areas of responsibility:
- that of the developer .NET, who handles the page controller
- that of the graphic designer, who handles the presentation part of the page
Here, we see that the generation of the HTML code for the list has been moved to the controller. The graphic designer may want to modify this HTML code to change the "visual" appearance of the list. They would be forced to work in the [contrôleur] section and thus step outside their area of expertise, with the associated risk of inadvertently introducing errors into the code.
Server tag libraries solve this problem. They provide an object representing a HTML list. Thus, the [WebForms] library offers the following tag:
This tag represents an object of type [ListBox] that can be manipulated by the page controller. This object has properties to represent the various options in the list HTML and to designate the selected item option. The page controller will therefore assign the appropriate values to these properties. When the presentation layer is executed, the tag
tag will be replaced by the code HTML representing the object [uneListe], c.a.d. the code "<select ..>...</select>". For now, there is no fundamental difference from the previous method other than an object-oriented coding approach, which is interesting. Let’s return to our graphic designer who needs to modify the “look” of the list. Server tags have style attributes (Bordercolor, BackColor, etc.) that allow you to set the visual appearance of the corresponding object. So we can write:
<asp:ListBox id="ListBox1" runat="server" BackColor="#ffff99"></asp:ListBox></P>
The advantage is that the graphic designer remains within the presentation code to make these modifications. This is a definite advantage over the previous method. Server tag libraries thus simplify the construction of the presentation layer of pages, which we have referred to in previous chapters as the user interface. The purpose of this chapter is to introduce them. We will see that they sometimes offer complex objects such as calendars or tables linked to data sources. They are extensible, c.a.d. allowing the user to create their own tag library. They can thus create a tag that generates a banner on a page. All pages using this tag will then have the same banner.
The HTML code generated for a tag adapts to the type of client browser. When the client sends a request to the web server, it includes among its headers HTTP and a [User-Agent: xx] header, where [xx] identifies the client. Here is an example:
With this information, the web server can determine the client’s capabilities, including the type of HTML code it can handle. Over time, there have been several versions of the HTML language. Modern browsers support the latest versions of the language, whereas older browsers do not. Depending on the HTTP [User-Agent:] header that the client sent it, the server will send the client a version HTML that it can understand. This is an interesting and useful idea because the developer then doesn’t have to worry about the type of client browser their application is running on.
Finally, advanced IDE tools such as Visual Studio.NET, WebMatrix, ... enable a "Windows-style" design of the web interface. While these tools are not essential, they provide significant assistance to the developer. The developer designs the web interface using graphical components that they place on the interface. They have direct access to the properties of each interface component, which they can configure as desired. These properties are translated into the HTML code for rendering the interface as attributes of the component’s <asp:> tag. The benefit for the developer is that they do not have to memorize either the list or the syntax of the attributes for each tag. This is a significant advantage when one is not fully familiar with the server tag libraries provided by ASP.NET. Once this syntax is mastered, some developers may prefer to code the tags directly into the page’s presentation code without going through the graphic design phase. A IDE is then no longer necessary. A simple text editor suffices. Depending on your workflow, the focus is then on components (using a IDE) or tags (using a text editor). These two terms are equivalent. The component is the object that will be manipulated by the page control code. The IDE gives us access to its properties during the design phase. The values assigned to these properties are immediately translated into the component’s tag attributes in the presentation code. During runtime, the page’s control code will manipulate the component and assign values to some of its properties. The presentation code will generate the component’s HTML code using, on the one hand, the attributes set at design time for the corresponding server tag, and on the other hand, the values of the component’s properties calculated by the control code.
7.2. The execution context of the examples
We will illustrate the design of web interfaces based on server components using programs whose execution context will mostly be as follows:
- the web application will consist of a single page P containing a form F,
- the client will make its first request directly to this page P. This will consist of requesting the url of page P using a browser. This is therefore a request GET that will be made on this url P. The server will deliver page P and thus the form F it contains,
- the user will fill it out and submit it, c.a.d. that is, they will perform an action that forces the browser to submit form F to the server. The browser’s operation POST will still be directed to page P. The server will again deliver page P with form F, the contents of which may have been modified by the user’s action.
- Then steps 2 and 3 will resume.
This is a very specific execution process outside of which certain concepts discussed below no longer function. We are no longer in a MVC architecture context in which a multi-page application is controlled by a specific page that we have called the "application controller." In this type of architecture, form submissions target the controller and not the forms themselves. However, we will see that building a form with server components implies that this form is submitted to itself.
7.3. The Label Component
7.3.1. Usage
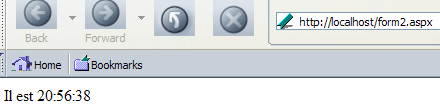
The <asp:label> tag allows you to insert dynamic text into a page’s presentation code. It therefore does no more than the <%=variable%> tag used up to now. Studying this first tag will help us understand how server tags work. We’ll create a page with a [form1.aspx.vb] control section and a [form1.aspx] presentation section. The goal is to display the time:
This issue was already covered in Chapter 2, and the reader is invited to refer to it if they wish to know how it was handled. The presentation code [form1.aspx] is as follows:
<%@ page src="form1.aspx.vb" inherits="form1" AutoEventWireup="false" %>
<HTML>
    <HEAD>
        <title>Webforms</title>
    </HEAD>
    <body>
        <asp:Label Runat="server" ID="lblHeure" />
    </body>
</HTML>
We are introducing the <asp:label> tag. In the tag libraries, the [runat="server"] attribute is required. The ID attribute identifies the component. The controller must reference it using this identifier. The code for the [form1.aspx.vb] controller is as follows:
Imports System.Web.UI.WebControls

Public Class form1
    Inherits System.Web.UI.Page

    Protected lblHeure As Label

    Private Sub Page_Init(ByVal sender As Object, ByVal e As System.EventArgs) Handles MyBase.Init
        ' saves the current query in request.txt of the page folder
        Dim requestFileName As String = Me.MapPath(Me.TemplateSourceDirectory) + "\request.txt"
        Me.Request.SaveAs(requestFileName, True)
    End Sub

    Private Sub Page_Load(ByVal sender As Object, ByVal e As System.EventArgs) Handles MyBase.Load
        ' sets time in lblHeure
        lblHeure.Text = "Il est " + Date.Now.ToString("T")
    End Sub

End Class
The controller must assign a value to the [lblHeure] object of type [System.Web.UI.WebControls.Label]. All objects displayed by <asp:> tags belong to the [System.Web.UI.WebControls] namespace. Therefore, we can systematically import this namespace:
Imports System.Web.UI.WebControls
The [Label] object has various properties, including the [Text] property, which represents the text that will be displayed by the corresponding <asp:label> tag. Here, we set this property to the current time. We do this in the [Form_Load] procedure of the controller, which is always executed. In the [Form_Init] procedure, which is also always executed but before the [Form_Load] procedure, we store the client request in a [request.txt] file in the application folder. We will have the opportunity to examine this file to understand certain aspects of how pages using server tags work.
The [Label] object has numerous properties, methods, and events. The reader is encouraged to consult the documentation on the [Label] class to explore them. This will be the case throughout the rest of the text. For each tag, we present only the few properties we need.
7.3.2. Tests
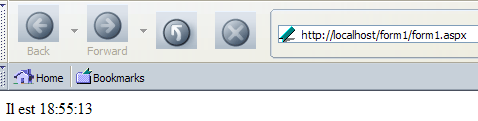
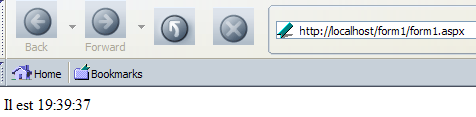
We place the files (form1.aspx, form1.aspx.vb) in a folder <application-path> and launch Cassini with the parameters (<application-path>,/form1). Then we request url and [http://localhost/form1/form1.aspx]. We get the following result:
The HTML code received by the browser is as follows:
<HTML>
    <HEAD>
        <title>Webforms</title>
    </HEAD>
    <body>
        <span id="lblHeure">Il est 19:39:37</span>
    </body>
</HTML>
We can see that the server tag
<asp:Label Runat="server" ID="lblHeure" />
has been converted into the following HTML code:
It is the [Text] property of the [lblHeure] object that has been placed between the <span> and </span> tags. The request made by the client and stored in [request.txt] is as follows:
GET /form1/form1.aspx HTTP/1.1
Cache-Control: max-age=0
Connection: keep-alive
Keep-Alive: 300
Accept: application/x-shockwave-flash,text/xml,application/xml,application/xhtml+xml,text/html;q=0.9,text/plain;q=0.8,image/png,image/jpeg,image/gif;q=0.2,*/*;q=0.1
Accept-Charset: ISO-8859-1,utf-8;q=0.7,*;q=0.7
Accept-Encoding: gzip,deflate
Accept-Language: en-us,en;q=0.5
Host: localhost
User-Agent: Mozilla/5.0 (Windows; U; Windows NT 5.1; en-US; rv:1.7b) Gecko/20040316
Nothing out of the ordinary.
7.3.3. Building the application with WebMatrix
We built the page layout code for [form1.aspx] by hand. This method is usable if you know the tags. A simple text editor is then sufficient to build the user interface. To get started, a graphical design tool combined with automatic code generation is often necessary because you don’t know the syntax of the tags you need. We will now build the same application using the WebMatrix tool. Once WebMatrix is launched, we select the option [File/New File]:

We create a page named ASP.NET. Once the previous wizard is confirmed, we get the page design window:


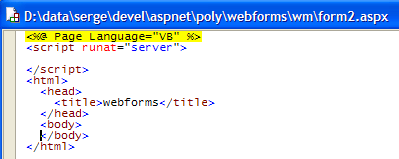
Note that WebMatrix places the page’s control code and presentation code in the same file, in this case [form2.aspx]. The [All] tab displays the contents of this text file. We can already see that it is not empty:
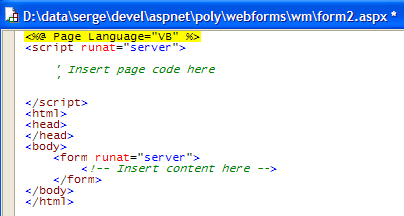
The downside of this type of tool is that they often generate unnecessary code. This is the case here, where WebMatrix generated a <form> tag even though we are not going to build a form... Furthermore, we can see that the document lacks a <title> tag. We’ll fix both of these issues right away to get the following new version:
What we call the controller code will be inserted between the <script> and </script> tags, ensuring at least a visual separation between the two types of code: control and presentation. We return to the [Design] tab to design our interface. A list of components is available in a tool window to the left of the design window:
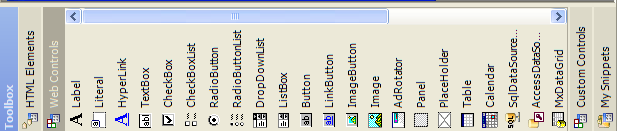
The tool window provides access to two types of components:
- [WebControls] components, which translate to <asp:> tags
- [HTML Elements] components, which translate to standard HTML tags. However, the [runat="server"] attribute can be added to the attributes of a HTML tag. In this case, the HTML tag and its attributes are accessible to the controller via an object whose properties are those of the HTML tag it represents. We previously referred to these tags as server HTML tags.
Double-click the [Label] component in the [WebControls] control list. In the [Design] tab, the following result is obtained:

In the [All] tab, the code has become the following:
<%@ Page Language="VB" %>
<html>
<head>
    <title>webforms</title>
</head>
<body>
    <asp:Label id="Label1" runat="server">Label</asp:Label>
</body>
</html>
First, you’ll notice that the <script> tag is missing. An <asp:label> tag has been generated. It has a name of [Label1] and a value of [Label]. Let’s return to the [Design] tab to modify these two values. Click once on the [Label] component to bring up its properties window, located at the bottom right:
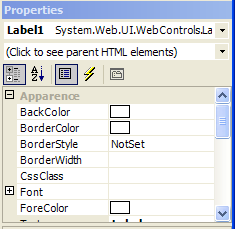
The reader is invited to review the properties of the [Label] object. Two of them are of interest here:
- Text: this is the text the label should display—we set the string to empty (c.a.d. nothing)
- ID: this is its identifier—we set it to lblHeure
The [Design] tab becomes this:

and the code for [All] becomes:
<%@ Page Language="VB" %>
<html>
<head>
    <title>webforms</title>
</head>
<body>
    <asp:Label id="lblHeure" runat="server"></asp:Label>
</body>
</html>
The layout of the page is complete. We now need to write the control code responsible for setting the time in the [Text] property of [lblHeure]. We add the following code to the [All] tab:
<%@ Page Language="VB" %>

<script runat="server">
    Private Sub Page_Load(ByVal sender As Object, ByVal e As System.EventArgs) Handles MyBase.Load
        ' sets time in lblHeure
        lblHeure.Text = "Il est " + Date.Now.ToString("T")
    End Sub
</script>

<html>
<head>
    <title>webforms</title>
</head>
<body>
    <asp:Label id="lblHeure" runat="server"></asp:Label>
</body>
</html>
Note that in the controller code, the [lblHeure] object is not declared as it was previously:
Protected lblHeure As New System.Web.UI.WebControls.Label
In fact, all <asp:> server components in the presentation layer are implicitly declared in the control code. Declaring them explicitly causes a compilation error, indicating that the object is already declared. We are ready to run the program. We use the option [View/Start] file or the [F5] shortcut. Cassini launches automatically with the following settings:
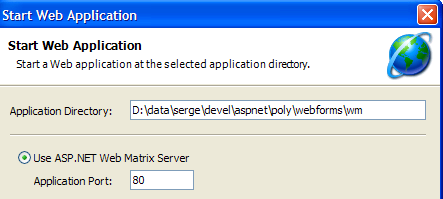
We accept these values. The system’s default browser is automatically launched to open the url [http://localhost/form2.aspx]. We obtain the following result:
From now on, we will mainly use the WebMatrix tool to facilitate the construction and testing of the short programs we will write.
7.4. The Literal Component
7.4.1. Usage
The <asp:literal> tag allows you to insert dynamic text into a page’s presentation code, similar to the <asp:label> tag. Its main attribute is [Text], which represents the text that will be inserted as-is into the page’s HTML flow. This tag is sufficient if you do not intend to format the text you want to insert into the HTML flow. In fact, while the [Label] class allows for formatting using attributes such as [BorderColor, BorderWidth, Font, ...], the [Literal] class has none of these attributes. The reader can reproduce the previous example in its entirety by replacing the [Label] component with a [Literal] component.
7.5. The Button Component
7.5.1. Usage
The <asp:Button> tag allows you to insert a [Submit]-type button into a form, which brings with it event handling similar to that found in Windows applications. This is the point we want to explore further here. We create the following [form3.aspx] page:
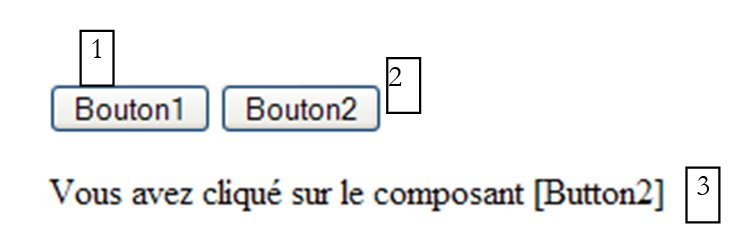
This page, built with WebMatrix, has three components:
No. | name | type | properties | role |
1 | Button | text=Button1 | button submit | |
2 | Button | text=Button2 | button submit | |
3 | Label | text= | information message |
The code generated by WebMatrix for this section is as follows:
<%@ Page Language="VB" %>
<script runat="server">
</script>
<html>
<head>
    <title>asp:button</title>
</head>
<body>
    <form runat="server">
        <p>
            <asp:Button id="Button1" runat="server" Text="Bouton1"></asp:Button>
            <asp:Button id="Button2" runat="server" Text="Bouton2"></asp:Button>
        </p>
        <p>
            <asp:Label id="lblInfo" runat="server"></asp:Label>
        </p>
    </form>
</body>
</html>
We find the components [Button] and [Label] used during the page's graphic design within <asp:> tags. Note the <form runat="server"> tag, which was generated automatically. This is a server-side tag, HTML, c.a.d. A classic HTML tag, nevertheless represented by an object that can be manipulated by the controller. The code for the <form> tag will be generated based on the value the controller assigns to this object.
Let’s add the [Page_Init] procedure to the controller section of the code, which handles the [Init] event on the page. We place the code that saves the client request to the [request.txt] file there. We will need this to understand how the buttons work.
<script runat="server">
    Private Sub Page_Init(ByVal sender As Object, ByVal e As System.EventArgs)
        ' saves the current request in request.txt of the page folder
        Dim requestFileName As String = Me.MapPath(Me.TemplateSourceDirectory) + "\request.txt"
        Me.Request.SaveAs(requestFileName, True)
    End Sub
</script>
Note that we did not place the [Handles MyBase.Init] clause after the declaration of the [Page_Init] procedure. In fact, the [Init] event of the [Page] object has a default handler named [Page_Init]. If we use this handler name, the [Handles Page.Init] clause becomes unnecessary. However, including it does not cause an error.
7.5.2. Tests
We launch the application under WebMatrix via [F5]. We get the following page:
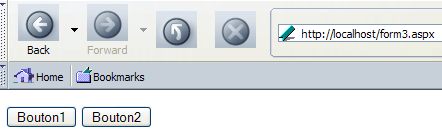
The HTML code received by the browser is as follows:
<html>
<head>
    <title>asp:button</title>
</head>
<body>
    <form name="_ctl0" method="post" action="form3.aspx" id="_ctl0">
<input type="hidden" name="__VIEWSTATE" value="dDwxNTY0NjIwMjUwOzs+2mcnJczeuvF2PEfvmtv7uiUhWUw=" />

        <p>
            <input type="submit" name="Button1" value="Bouton1" id="Button1" />
            <input type="submit" name="Button2" value="Bouton2" id="Button2" />

        </p>
        <p>
            <span id="lblInfo"></span>
        </p>
    </form>
</body>
</html>
Note the following points:
- the <form runat="server"> tag has been converted to the HTML tag
Two attributes have been set: [method="post"] and [action="form3.aspx"]. Can we assign different values to these attributes? We will try to clarify this point a little later. Note here that the form will be posted to url and [form3.aspx]. Two other [name, id] attributes have also been set. Most of the time, they are ignored. However, if the page contains Javascript code executed on the browser side, the [name] attribute of the <form> tag is useful.
- The <asp:button> tags have become HTML tags for [submit] buttons. Clicking any of these buttons will therefore trigger a "post" submission of the form from [_ctl10] to url [form3.aspx].
- The <asp:label> tag has become a HTML <span> tag
- A hidden field [__VIEWSTATE] was generated with a strange value:
This field represents, in an encoded form, the state of the form sent to the client. This state represents the value of all the form’s components. Since [__VIEWSTATE] is part of the form, its value will be posted along with the rest to the server. This will allow the server to know which form component has changed its value and, if necessary, to make decisions. These decisions will take the form of events such as "the TextBox component has changed its value."
7.5.3. Client requests
Once the page [form3.aspx] has loaded in the browser, let’s reload it and then examine the request that the browser sent to retrieve it. Recall that our application stores this request in the file [request.txt] in the application folder:
GET /form3.aspx HTTP/1.1
Connection: keep-alive
Keep-Alive: 300
Accept: application/x-shockwave-flash,text/xml,application/xml,application/xhtml+xml,text/html;q=0.9,text/plain;q=0.8,image/png,image/jpeg,image/gif;q=0.2,*/*;q=0.1
Accept-Charset: ISO-8859-1,utf-8;q=0.7,*;q=0.7
Accept-Encoding: gzip,deflate
Accept-Language: en-us,en;q=0.5
Host: localhost
User-Agent: Mozilla/5.0 (Windows; U; Windows NT 5.1; en-US; rv:1.7b) Gecko/20040316
This is a classic GET. Now let’s click the [Bouton1] button on the page in the browser. Nothing seems to happen. Yet we know the form has been submitted. The HTML code on the page tells us so. This is confirmed by the new content of [request.txt]:
POST /form3.aspx HTTP/1.1
Connection: keep-alive
Keep-Alive: 300
Content-Length: 80
Content-Type: application/x-www-form-urlencoded
Accept: application/x-shockwave-flash,text/xml,application/xml,application/xhtml+xml,text/html;q=0.9,text/plain;q=0.8,image/png,image/jpeg,image/gif;q=0.2,*/*;q=0.1
Accept-Charset: ISO-8859-1,utf-8;q=0.7,*;q=0.7
Accept-Encoding: gzip,deflate
Accept-Language: en-us,en;q=0.5
Host: localhost
Referer: http://localhost/form3.aspx
User-Agent: Mozilla/5.0 (Windows; U; Windows NT 5.1; en-US; rv:1.7b) Gecko/20040316

__VIEWSTATE=dDwxNTY0NjIwMjUwOzs%2B2mcnJczeuvF2PEfvmtv7uiUhWUw%3D&Button1=Bouton1
The first header HTTP clearly indicates that the client sent a POST to the url [/form3.aspx]. The last line shows the posted values:
- the value of the hidden field __VIEWSTATE
- the value of the button that was clicked
If we click on [Bouton2], the values posted by the browser are as follows:
The value of the hidden field is always the same, but it is the value of [Button2] that was posted. The server can therefore determine which button was used. It will use this to trigger an event that can be handled by the page once it has loaded.
7.5.4. Handling the Click Event of a Button Object
Let’s review how an .aspx page works. It is an object derived from the [Page] class. Let’s call the derived class [unePage]. When the server receives a request for such a page, an object of type [unePage] is instantiated by a new unePage(...) operation. Then, the server generates two events called [Init] and [Load] in that order. The [unePage] object can handle them by providing the [Page_Init] and [Page_Load] event handlers. Then other events will be generated. We will have the opportunity to revisit this later. If the client’s request is a POST, the server will generate the [Click] event for the button that triggered this POST. If the [unePage] class has defined a handler for this event, it will be called. Let’s examine this mechanism using WebMatrix. In the [Design] tab of [form3.aspx], double-click the [Bouton1] button. We are then automatically taken to the [Code] tab, within the body of a procedure named [Button1_Click]. To better understand this, let’s go to the [All] tab and look at the entire code. The following changes have been made:
<%@ Page Language="VB" %>
<script runat="server">

...
    Sub Button1_Click(sender As Object, e As EventArgs)

    End Sub

</script>
<html>
...
<body>
    <form runat="server">
...
            <asp:Button id="Button1" onclick="Button1_Click" runat="server" Text="Bouton1"></asp:Button>
    </form>
</body>
</html>
A new attribute [onclick="Button1_Click"] has been added to the <asp:Button> tag in [Button1]. This attribute specifies the procedure responsible for handling the [Click] event on the [Button1] object, in this case the [Button1_Click] procedure. All that remains is to write it:
    Sub Button1_Click(sender As Object, e As EventArgs)
        ' click on button 1
        lblInfo.Text="Vous avez cliqué sur [Bouton1]"
    End Sub
The procedure displays an informational message in the [lblInfo] label. We proceed in the same way for the [Bouton2] button to obtain the following new page [form3.aspx]:
<%@ Page Language="VB" %>
<script runat="server">

    Private Sub Page_Init(ByVal sender As Object, ByVal e As System.EventArgs)
        ' saves the current request in request.txt of the page folder
        Dim requestFileName As String = Me.MapPath(Me.TemplateSourceDirectory) + "\request.txt"
        Me.Request.SaveAs(requestFileName, True)
    End Sub

    Sub Button1_Click(sender As Object, e As EventArgs)
        ' click on button 1
        lblInfo.Text="Vous avez cliqué sur [Bouton1]"
    End Sub

    Sub Button2_Click(sender As Object, e As EventArgs)
        ' click on button 2
        lblInfo.Text="Vous avez cliqué sur [Bouton2]"
    End Sub

</script>
<html>
<head>
    <title>asp:button</title>
</head>
<body>
    <form runat="server">
        <p>
            <asp:Button id="Button1" onclick="Button1_Click" runat="server" Text="Bouton1"></asp:Button>
            <asp:Button id="Button2" onclick="Button2_Click" runat="server" Text="Bouton2" BorderStyle="None"></asp:Button>
        </p>
        <p>
            <asp:Label id="lblInfo" runat="server"></asp:Label>
        </p>
    </form>
</body>
</html>
We run the process using [F5] to obtain the following page:
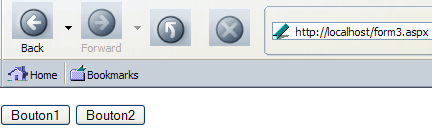
If we look at the received HTML code, we will see that it has not changed from that of the previous version on the page:
<html>
<head>
    <title>asp:button</title>
</head>
<body>
    <form name="_ctl0" method="post" action="form3.aspx" id="_ctl0">
<input type="hidden" name="__VIEWSTATE" value="dDwxNTY0NjIwMjUwOzs+2mcnJczeuvF2PEfvmtv7uiUhWUw=" />

        <p>
            <input type="submit" name="Button1" value="Bouton1" id="Button1" />
            <input type="submit" name="Button2" value="Bouton2" id="Button2" />
        </p>
        <p>
            <span id="lblInfo"></span>
        </p>
    </form>
</body>
</html>
If we click on [Bouton1], we get the following response:

The code HTML received for this response is as follows:
<html>
<head>
    <title>asp:button</title>
</head>
<body>
    <form name="_ctl0" method="post" action="form3.aspx" id="_ctl0">
<input type="hidden" name="__VIEWSTATE" value="dDwxNTY0NjIwMjUwO3Q8O2w8aTwxPjs+O2w8dDw7bDxpPDU+Oz47bDx0PHA8cDxsPFRleHQ7PjtsPFZvdXMgYXZleiBjbGlxdcOpIHN1ciBbQm91dG9uMV07Pj47Pjs7Pjs+Pjs+Pjs+4oO98Vd244kj0lPMXReWOwJ1WW0=" />

        <p>
            <input type="submit" name="Button1" value="Bouton1" id="Button1" />
            <input type="submit" name="Button2" value="Bouton2" id="Button2" />
        </p>
        <p>
            <span id="lblInfo">Vous avez cliqué sur [Bouton1]</span>
        </p>
    </form>
</body>
</html>
We can see that the hidden field [__VIEWSTATE] has changed its value. This reflects the change in value of the component [lblInfo].
7.5.5. Events in the Lifecycle of an Application ASP.NET
The ASP.NET documentation lists the events generated by the server during the life of an application:
- When the application receives its very first request, the [Start] event on the application’s [HttpApplication] object will be generated. This event can be handled by the [Application_Start] procedure in the application’s [global.asax] file.
Next, we will have a series of events that will repeat for each received request:
- if the request did not send a session token, a new session is started and a [Start] event on the [Session] object associated with the request is generated. This event can be handled by the [Session_Start] procedure in the application’s [global.asax] file.
- The server generates the [BeginRequest] event on the [HttpApplication] object. It can be handled by the [Application_BeginRequest] procedure in the application’s [global.asax] file.
- The server loads the page requested by the request. It will instantiate a [Page] object and then generate two events on this object: [Init] and then [Load]. These two events can be handled by the [Page_Init] and [Page_Load] procedures on the page.
- Based on the posted values received, the server will generate other events: [TextChanged] for a [TextBox] component whose value has changed, [CheckedChanged] for a radio button whose value has changed, [SelectedIndexChanged] for a list whose selected item has changed, ... We will have the opportunity to mention the main events for each of the server components we will present. Each event E on an object named O can be handled by a procedure named O_E.
- The order in which the preceding events are handled is not guaranteed. Therefore, handlers must not make any assumptions about this order. However, we can be certain that the event [Click] from the button that triggered POST is processed last.
- Once the page is ready, the server will send it to the client. Before doing so, it generates the [PreRender] event, which can be handled by the page’s [Page_PreRender] procedure.
- Once the HTML response is sent to the client, the page is unloaded from memory. Two events are generated at this time: [Unload] and [Disposed]. The page can use these events to free up resources.
The application can also receive events outside of a client request:
- the [End] event on a [Session] object in the application occurs when a session ends. This can happen either upon an explicit request from the page’s code or because the session’s lifetime has expired. The procedure [Session_End] in the file [global.asax] handles this event. It generally releases resources obtained in [Session_Start].
- The [End] event on the application’s [HttpApplication] object occurs when the application terminates. This happens, in particular, when the web server is shut down. The procedure [Application_End] in the file [global.asax] handles this event. It generally releases resources obtained in [Application_Start].
The following points should be noted:
- The previous event model relies on standard client-server HTTP exchanges. This is clearly evident when examining the exchanged HTTP headers.
- The processing of previous events always takes place on the server side. Clicking a button can, of course, be handled by a server-side script. However, this is not a server event, and we are dealing here with a technology independent of ASP.NET.
When are events processed, whether on the server side (events related to server components) or on the browser side by Javascript scripts?
Let’s take the example of a drop-down list. When the user changes the selected item in it, the event (change of the selected item) may or may not be processed, and if it is processed, it can be processed at different times.
- If you want to handle it immediately, there are two solutions:
- It can be handled by the browser using a Javascript script. The server does not intervene in this case. For this to be possible, the page must be able to be reconstructed using values present on the page.
- It can be processed by the server. For this, there is only one solution: the form must be sent to the server for processing. We therefore have an operation [submit]. We will see that in this case, we use a server component called [DropDownList] and set its attribute [AutoPostBack] to [true]. This means that if the selected item in the drop-down list changes, the form must be immediately posted to the server. In this case, the server generates for the [DropDownList] object, a code HTML associated with a function Javascript responsible for creating a [submit] as soon as the "selected item changed" event occurs. This [submit] will submit the form to the server, and hidden fields will be included in the submission to indicate that the [post] resulted from a selection change in the dropdown list. The server will then generate the [SelectedIndexChanged] event, which the page can handle.
- If you want to process it but not immediately, set the [AutoPostBack] attribute of the [DropDownList] server component to [false]. In this case, the server generates, for the [DropDownList] object, the standard HTML code for a <select> list without an associated Javascript function. Nothing happens when the user changes the selection in the drop-down list. However, when the user submits the form using a button such as [submit], the server will be able to recognize that there has been a change in selection. We have indeed seen that the form sent to the server contains a hidden field [__VIEWSTATE] that represents, in an encoded form, the state of all elements in the submitted form. When the server receives the new form posted by the client, it will be able to verify whether or not the selected item in the drop-down list has changed. If so, it will generate the [SelectedIndexChanged] event, which the page can then handle. To distinguish this mechanism from the previous one, some authors say that the "selection change" event was "cached" when it occurred in the browser. It will only be processed by the server when the browser posts the form to it, often following a click on a [submit] button.
- Finally, if you do not wish to handle the event, we set the [AutoPostBack] attribute of the [DropDownList] server component to [false] and do not write the handler for its [SelectedIndexChanged] event.
Once the event handling mechanism is understood, the developer will not design a web application like a Windows application. Indeed, while a selection change in a combo box of a Windows application can be used to immediately change the appearance of the form in which it is located, one would be more hesitant to process this event immediately in a web application if it involves a "post" from the form to the server—and thus a round-trip between the client and the server. This is why the [AutoPostBack] property of server components is set to [false] by default. Furthermore, the [AutoPostBack] mechanism, which relies on javascript scripts automatically generated by the web server in the form sent to the client, can only be used if you are certain that the client browser has allowed the execution of javascript scripts on its browser. Forms are therefore often constructed as follows:
- the form’s server components have their [AutoPostBack] to [false] properties
- the form has one or more buttons responsible for performing the [POST] operation on the form
- In the page’s controller code, we write handlers for only the events we want to manage, most often the [Click] event on one of the buttons.
7.6. The TextBox component
7.6.1. Usage
The <asp:TextBox> tag allows you to insert an input field into a page’s presentation code. We create a [form4.aspx] page to obtain the following layout:
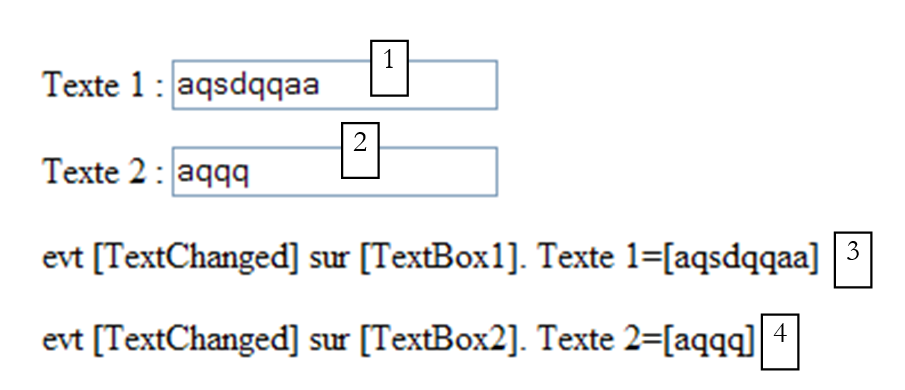
1234This page, built using WebMatrix, contains the following components:
No. | Name | type | properties | role |
1 | TextBox | AutoPostback=true Text= | input field | |
2 | TextBox | AutoPostback=false Text= | input field | |
3 | Label | text= | Information message about the content of [TextBox1] | |
3 | Label | text= | Information message about the content of [TextBox2] |
The code generated by WebMatrix for this section is as follows:
<%@ Page Language="VB" %>
<script runat="server">
</script>
<html>
<head>
    <title>asp:textbox</title>
</head>
<body>
    <form runat="server">
        <p>
            Texte 1 :
            <asp:TextBox id="TextBox1" runat="server" AutoPostBack="True"></asp:TextBox>
        </p>
        <p>
            Texte 2 :
            <asp:TextBox id="TextBox2" runat="server"></asp:TextBox>
        </p>
        <p>
            <asp:Label id="lblInfo1" runat="server"></asp:Label>
        </p>
        <p>
            <asp:Label id="lblInfo2" runat="server"></asp:Label>
        </p>
    </form>
</body>
</html>
On the [Design] tab, double-click the [TextBox1] component. The skeleton of the [TextChanged] event handler for this object is then generated ([All] tab):
<%@ Page Language="VB" %>
<script runat="server">

    Sub TextBox1_TextChanged(sender As Object, e As EventArgs)
    End Sub
</script>
<html>
...
<body>
...
            <asp:TextBox id="TextBox1" runat="server" AutoPostBack="True" OnTextChanged="TextBox1_TextChanged"></asp:TextBox>
        </p>
....
    </form>
</body>
</html>
The attribute [OnTextChanged="TextBox1_TextChanged"] has been added to the tag <asp:TextBox id="TextBox1"> tag to designate the event handler [TextChanged] on [TextBox1]. This is the procedure [TextBox1_Changed] that we are now writing.
    Sub TextBox1_TextChanged(sender As Object, e As EventArgs)
      ' text change
      lblInfo1.text=Date.now.Tostring("T") + ": evt [TextChanged] sur [TextBox1]. Texte 1=["+textbox1.Text+"]"
    End Sub
In the procedure, we write a message in the [lblInfo1] label to indicate the event and specify the contents of [TextBox1]. We do the same for [TextBox2]. We also include the time to better track event processing. The final code for [form4.aspx] is as follows:
<%@ Page Language="VB" %>
<script runat="server">

    Private Sub Page_Init(ByVal sender As Object, ByVal e As System.EventArgs)
        ' saves the current request in request.txt of the page folder
        Dim requestFileName As String = Me.MapPath(Me.TemplateSourceDirectory) + "\request.txt"
        Me.Request.SaveAs(requestFileName, True)
    End Sub

    Sub TextBox1_TextChanged(sender As Object, e As EventArgs)
      ' text change
      lblInfo1.text=Date.now.Tostring("T") + ": evt [TextChanged] sur [TextBox1]. Texte 1=["+textbox1.Text+"]"
    End Sub

    Sub TextBox2_TextChanged(sender As Object, e As EventArgs)
      ' text change
      lblInfo2.text=Date.now.Tostring("T") + ": evt [TextChanged] sur [TextBox2]. Texte 2=["+textbox2.Text+"]"
    End Sub

</script>
<html>
<head>
    <title>asp:textbox</title>
</head>
<body>
    <form runat="server">
        <p>
            Texte 1 :
            <asp:TextBox id="TextBox1" runat="server" AutoPostBack="True" OnTextChanged="TextBox1_TextChanged"></asp:TextBox>
        </p>
        <p>
            Texte 2 :
            <asp:TextBox id="TextBox2" runat="server" OnTextChanged="TextBox2_TextChanged"></asp:TextBox>
        </p>
        <p>
            <asp:Label id="lblInfo1" runat="server"></asp:Label>
        </p>
        <p>
            <asp:Label id="lblInfo2" runat="server"></asp:Label>
        </p>
    </form>
</body>
</html>
We have added the [Page_Init] procedure to store the client's request as in the previous example.
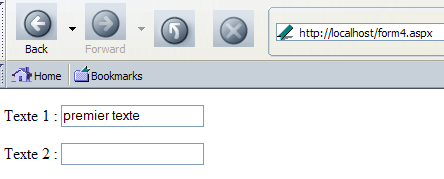
7.6.2. Tests
We launch the application under WebMatrix via [F5]. We get the following page:

The HTML code received by the browser is as follows:
<html>
<head>
    <title>asp:textbox</title>
</head>
<body>
    <form name="_ctl0" method="post" action="form4.aspx" id="_ctl0">
<input type="hidden" name="__EVENTTARGET" value="" />
<input type="hidden" name="__EVENTARGUMENT" value="" />
<input type="hidden" name="__VIEWSTATE" value="dDwtMTY4MDc0MTUxOTs7PoqpeSYSCX7lCiWZvw5p7u+/OrTD" />

<script language="javascript">
<!--
    function __doPostBack(eventTarget, eventArgument) {
        var theform = document._ctl0;
        theform.__EVENTTARGET.value = eventTarget;
        theform.__EVENTARGUMENT.value = eventArgument;
        theform.submit();
    }
// -->
</script>

        <p>
            Texte 1 :
            <input name="TextBox1" type="text" id="TextBox1" onchange="__doPostBack('TextBox1','')" language="javascript" />
        </p>
        <p>
            Texte 2 :
            <input name="TextBox2" type="text" id="TextBox2" />
        </p>
        <p>
            <span id="lblInfo1"></span>

        </p>
        <p>
            <span id="lblInfo2"></span>
        </p>
    </form>
</body>
</html>
There are many elements in this code that were automatically generated by the server. Note the following points:
- There are three hidden fields: [__VIEWSTATE], which we have already encountered, [__EventTarget], and [__EventArgument]. The latter two fields are used to handle the browser's "change" event on the [TextBox1] input field
- the <asp:textbox> server tags generated the HTML <input type="text" ...> tags, which correspond to the input fields
- the server tag <asp:textbox id="TextBox1" AutoPostBack="true" ...> has generated an <input type="text" ...> tag> with an attribute [onchange="__doPostBack('TextBox1','')"]. This attribute specifies that if the content of [TextBox1] changes, the function Javascript [_doPostBack(...)] must be executed. This function is as follows:
<script language="javascript">
<!--
    function __doPostBack(eventTarget, eventArgument) {
        var theform = document._ctl0;
        theform.__EVENTTARGET.value = eventTarget;
        theform.__EVENTARGUMENT.value = eventArgument;
        theform.submit();
    }
// -->
</script>
What does the function above do? It assigns a value to each of the two hidden fields [__EventTarget] and [__EventArgument], then submits the form. The form is then sent to the server. This is the effect of [AutoPostBack]. The browser "change" event triggers the execution of the code "__doPostBack('TextBox1','')". We can deduce that in the submitted form, the hidden field [__EventTarget] will have the value 'TextBox1' and the hidden field [__EventArgument] will have the value ''. This will allow the server to identify the component that triggered POST.
- The server tag <asp:textbox id="TextBox2"...> generated a standard <input type="text" ...> tag because its [AutoPostBack] attribute was not set to [true].
- The <form> tag indicates that the form will be posted to [form4.aspx]:
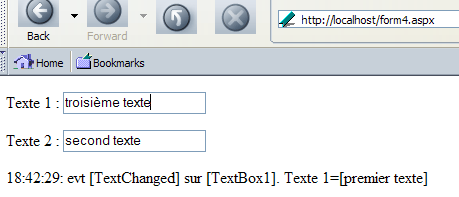
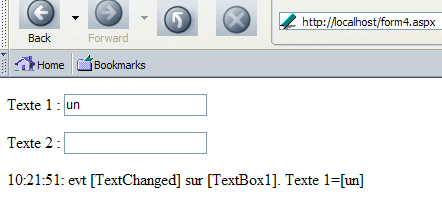
Let’s run our first test. Type some text into the first input field:
then move the cursor to the second input field. Immediately, we get a new page:
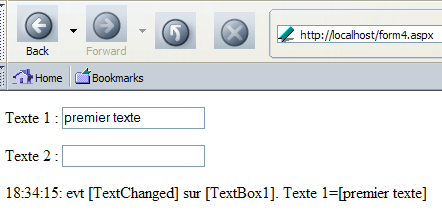
What happened? When the cursor left the first input field, the browser checked to see if its content had changed. It had. So it generated, on the browser side, the [change] event on the HTML [TextBox1] field. We then saw that a Javascript function executed and submitted the form to [form4.aspx]. This page was therefore reloaded by the server. The values posted by the form allowed the server to recognize that the content of the server tag [TextBox1] had changed. The procedure [TextBox1_Changed] was therefore executed on the server side. It placed a message in the label [lblInfo1]. Once this procedure was complete, [form4.aspx] was sent to the browser. That is why we now have text in [lblInfo1]. That said, it may seem surprising to see something in the input field [TextBox1]. In fact, no server-side procedure assigns a value to this field. This is a general mechanism of ASP.NET web forms: the server returns the form in the state in which it received it. To do this, it reassigns to the components the value that was posted for them by the client. For some components, the client does not post any value. This is the case, for example, with <asp:label> components, which are translated into <span> tags. Recall that the form has a hidden field that represents the form’s state when it is sent to the client. This state is the sum of the states of all form components, including any <asp:label> components. Since the hidden field [__VIEWSTATE] is posted by the client browser, the server is able to restore the previous state of all form components. All that remains is to modify those whose values were changed by POST.
Let’s now look at the request made by the browser in [request.txt]:
POST /form4.aspx HTTP/1.1
Connection: keep-alive
Keep-Alive: 300
Content-Length: 137
Content-Type: application/x-www-form-urlencoded
Accept: application/x-shockwave-flash,text/xml,application/xml,application/xhtml+xml,text/html;q=0.9,text/plain;q=0.8,image/png,image/jpeg,image/gif;q=0.2,*/*;q=0.1
Accept-Charset: ISO-8859-1,utf-8;q=0.7,*;q=0.7
Accept-Encoding: gzip,deflate
Accept-Language: en-us,en;q=0.5
Host: localhost
Referer: http://localhost/form4.aspx
User-Agent: Mozilla/5.0 (Windows; U; Windows NT 5.1; en-US; rv:1.7b) Gecko/20040316

__EVENTTARGET=TextBox1&__EVENTARGUMENT=&__VIEWSTATE=dDwtMTY4MDc0MTUxOTs7PoqpeSYSCX7lCiWZvw5p7u%2B%2FOrTD&TextBox1=premier+texte&TextBox2=
We can clearly see the POST as well as the posted parameters. Let’s go back to our browser and enter some text in the second input field:
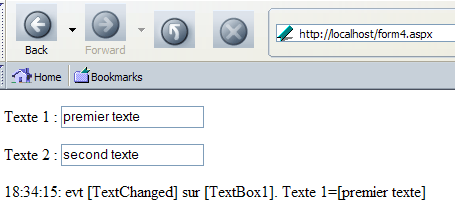
Let’s go back to input field #1 to enter new text: nothing happens this time. Why? Because the input field [TextBox2] does not have its property [AutoPostBack] set to [true], so the <input type="text"...> generated for it does not handle the [Change] event, as shown by its code HTML:
Therefore, no event occurs when you leave input field #2. Now let’s enter new text in field #1:
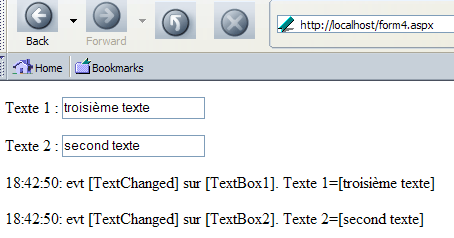
Let's leave input field #1. Immediately, the event [Change] is triggered on this field, and the form is submitted to the server, which returns the following page:
What happened? First, the browser posted the form. This is reflected in the client request stored in [request.txt]:
POST /form4.aspx HTTP/1.1
....
User-Agent: Mozilla/5.0 (Windows; U; Windows NT 5.1; en-US; rv:1.7b) Gecko/20040316

__EVENTTARGET=TextBox1&__EVENTARGUMENT=&__VIEWSTATE=dDwtMTY4MDc0MTUxOTt0PDtsPGk8MT47PjtsPHQ8O2w8aTwxPjtpPDU%2BOz47bDx0PHA8cDxsPFRleHQ7PjtsPHByZW1pZXIgdGV4dGU7Pj47Pjs7Pjt0PHA8cDxsPFRleHQ7PjtsPDE4OjQyOjI5OiBldnQgW1RleHRDaGFuZ2VkXSBzdXIgW1RleHRCb3gxXS4gVGV4dGUgMT1bcHJlbWllciB0ZXh0ZV07Pj47Pjs7Pjs%2BPjs%2BPjs%2BxLOermpUUUz5rTAa%2FFsjda6lVmo%3D&TextBox1=troisi%C3%A8me+texte&TextBox2=second+texte
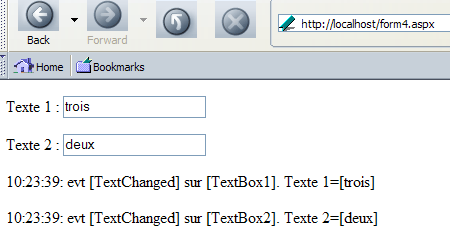
The server begins by restoring the components to their previous values using the hidden field [__VIEWSTATE] that the client sent to it. Using the posted fields [TextBox1] and [TextBox2], it assigns the values that were posted to the components [TextBox1] and [TextBox2]. It is through this mechanism that the client will retrieve the form as it was posted. Then, again using the posted fields [__VIEWSTATE], [TextBox1], and [TextBox2], the server will detect that the values of the input fields [TextBox1] and [TextBox2] have changed. It will therefore generate the [TextChanged] events for these two objects. The procedures [TextBox1_TextChanged] and [TextBox2_TextChanged] will be executed, and the labels [labelInfo1] and [labelInfo2] will receive a new value. Then the modified page [form4.aspx] is sent back to the client.
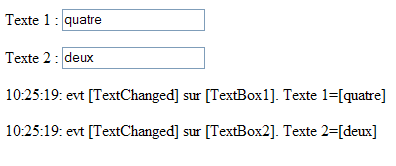
Now we modify input field #1 again:
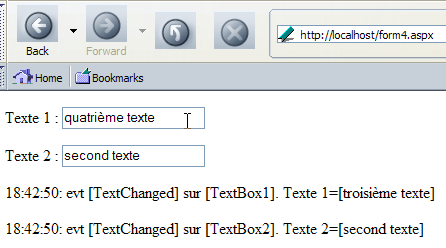
When we move the cursor out of field 1, the event [Change] occurs in the browser. Then the sequence of events already explained (post from the browser to the server, ..., sending the server’s response) takes place. We receive the following response:

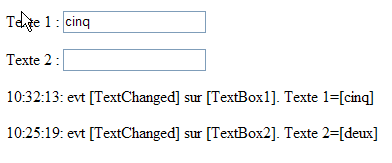
Based on the timestamps displayed for each message, we can see that only procedure [TextBox1_Changed] was executed on the server. Procedure [TextBox2_TextChanged] was not executed because the value of [TextBox2] did not change. Finally, let’s enter new text in field #2:
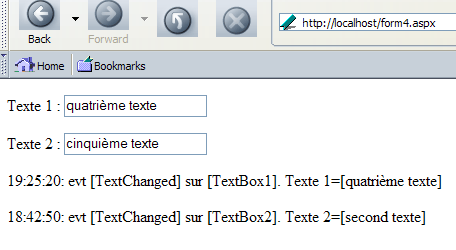
Then place the cursor in field #1 and move it back to field #2. The page does not change. Why? Because we are not changing the value of field #1, the browser event [Change] does not occur when we leave that field. As a result, the form is not submitted to the server. So nothing changes on the page. It is the fact that the content of [lblInfo2] does not change that shows us there is no POST. If there were one, the server would detect that the content of [TextBox2] has changed and would need to reflect this in [lblInfo2].
The lesson from this example is that there is no point in setting the [AutoPostBack] property of a [TextBox] to [true]. This causes unnecessary client-server round trips most of the time.
7.6.3. The role of the __VIEWSTATE field
We saw that the server systematically included a hidden field called __VIEWSTATE in the form it generated. We noted that this field represents the form’s state and that if this hidden field is returned to the server, the server can reconstruct the form’s previous value. A form’s state is the sum of the states of its components. Each component has a [EnableViewState] property with a Boolean value indicating whether or not the component’s state should be placed in the hidden field [__VIEWSATE]. By default, this property has the value [true], which means that the state of all components in a form is placed in [__VIEWSTATE]. Sometimes, this is not desirable.
Let’s run a few tests to better understand the role of the [EnableViewState] property. Let’s set this property to [false] for both input fields:
...
            <asp:TextBox id="TextBox1" runat="server" OnTextChanged="TextBox1_TextChanged" AutoPostBack="True" EnableViewState="False"></asp:TextBox>
...
            <asp:TextBox id="TextBox2" runat="server" OnTextChanged="TextBox2_TextChanged" EnableViewState="False"></asp:TextBox>
...
Now let’s run the application and type some text into field #1 before moving to field #2. A POST request is then sent to the server, and we get the following response:
Type some text into field #2, modify the text in field #1, then return to field #2 (in that order). A new POST request is sent to the server, and we receive the following response:
For now, everything is as before. Now let’s modify the content of field #1 and then move to field #2. A new POST request is sent. The server's response is as follows:
This time, there is a change. The server detected a [TextChanged] event on field #2 because the time of [lblInfo2] was modified. However, there was no change. This is explained by the [EnableViewState=false] property of [TextBox2]. It causes the server not to include the previous state of [TextBox2] in the [__VIEWSTATE] field of the form. This is equivalent to assigning the empty string as the previous state. When POST occurred due to the change in the content of [TextBox1], the server compared the current value of [TextBox2], which was [deux], to its previous value (the empty string). It concluded that [TextBox2] had changed in value and generated the event [TextChanged] for [TextBox2]. We can verify this behavior by setting the empty string in [TextBox2]. Based on what has just been explained, the server should not generate the event [TextChanged] for [TextBox2]. Let’s try it:
That is indeed what happened. The time and content of [lblInfo2] show that the [TextBox2_TextChanged] procedure was not executed. With that in mind, let’s examine the [EnableViewState] property of the four form components:
we want to track the state of this component so the server knows whether it has changed or not | |
same | |
We do not want to maintain the state of this component. We want the text to be recalculated with each new POST. If it is not recalculated, it must be empty. All of this is achieved with [EnableViewState=false] | |
same |
Our presentation page becomes the following:
...
            <asp:TextBox id="TextBox1" runat="server" OnTextChanged="TextBox1_TextChanged" AutoPostBack="True"></asp:TextBox>
...
            <asp:TextBox id="TextBox2" runat="server" OnTextChanged="TextBox2_TextChanged"></asp:TextBox>
....
            <asp:Label id="lblInfo1" runat="server" enableviewstate="False"></asp:Label>
...
            <asp:Label id="lblInfo2" runat="server" enableviewstate="False"></asp:Label>
...
Let's run the same series of tests as before. Where we got the screen
version 1
we now get:
version 2

In this step, the content of field 1 was changed without changing that of field 2, causing procedure [TextBox2_TextChanged] not to be executed on the server side, which meant that field [lblInfo2] did not receive a new value. It is therefore displayed with its previous value. In version 1 [EnableViewState=true], this previous value was the entered value. In version 2 [EnableViewState=false], this previous value is the empty string.
It is sometimes unnecessary to preserve the previous state of components. Rather than setting [EnableViewState=false] for each of them, you can specify that the page should not maintain its state. This is done in the [Page] directive in the presentation code:
In this case, regardless of the value of its [EnableViewState] property, a component’s state is not stored in the hidden field [__VIEWSTATE]. Everything then behaves as if its previous state were the empty string.
Let’s now use the [curl] client to highlight other mechanisms. First, we request the url [http://localhost/form4.aspx]:
dos>curl --include --url http://localhost/form4.aspx

HTTP/1.1 200 OK
Server: Microsoft ASP.NET Web Matrix Server/0.6.0.0
Date: Sun, 04 Apr 2004 17:51:14 GMT
Cache-Control: private
Content-Type: text/html; charset=utf-8
Content-Length: 1077
Connection: Close


<html>
<head>
    <title>asp:textbox</title>
</head>
<body>
    <form name="_ctl0" method="post" action="form4.aspx" id="_ctl0">
<input type="hidden" name="__EVENTTARGET" value="" />
<input type="hidden" name="__EVENTARGUMENT" value="" />
<input type="hidden" name="__VIEWSTATE" value="dDwtMTY4MDc0MTUxOTs7PoqpeSYSCX7lCiWZvw5p7u+/OrTD" />

<script language="javascript">
<!--
    function __doPostBack(eventTarget, eventArgument) {
        var theform = document._ctl0;
        theform.__EVENTTARGET.value = eventTarget;
        theform.__EVENTARGUMENT.value = eventArgument;
        theform.submit();
    }
// -->
</script>

        <p>
            Texte 1 :
            <input name="TextBox1" type="text" id="TextBox1" onchange="__doPostBack('TextBox1','')" language="javascript" />
        </p>
        <p>
            Texte 2 :
            <input name="TextBox2" type="text" id="TextBox2" />
        </p>
        <p>
            <span id="lblInfo1"></span>
        </p>
        <p>
            <span id="lblInfo2"></span>
        </p>
    </form>
</body>
</html>
We receive the code HTML from the server, derived from [form4.aspx]. It is identical to the one received by the browser. Recall the request made by the browser when it submitted the form:
POST /form4.aspx HTTP/1.1
Connection: keep-alive
...
User-Agent: Mozilla/5.0 (Windows; U; Windows NT 5.1; en-US; rv:1.7b) Gecko/20040316

__EVENTTARGET=TextBox1&__EVENTARGUMENT=&__VIEWSTATE=dDwtMTY4MDc0MTUxOTs7PoqpeSYSCX7lCiWZvw5p7u%2B%2FOrTD&TextBox1=premier+texte&TextBox2=
Let's do the same POST but without sending the [__VIEWSTATE] field:
dos>curl --include --url http://localhost/form4.aspx --data __EVENTTARGET=TextBox1 --data __EVENTARGUMENT= --data TextBox1=premier+texte --data TextBox2=

...................
        <p>
            Texte 1 :
            <input name="TextBox1" type="text" value="premier texte" id="TextBox1" onchange="__doPostBack('TextBox1','')" language="javascript" />
        </p>
        <p>
            Texte 2 :
            <input name="TextBox2" type="text" id="TextBox2" />
        </p>
        <p>
            <span id="lblInfo1">19:57:48: evt [TextChanged] sur [TextBox1]. Texte 1=[premier texte]</span>
        </p>
        <p>
            <span id="lblInfo2"></span>
        </p>
..............
Note the following points:
- The server detected an event [TextChanged] on [TextBox1] since it generated the text [lblInfo1]. The absence of [__VIEWSTATE] did not interfere with this. In its absence, it assumes that the previous value of an input field is the empty string.
- It was able to restore the text posted for [TextBox1] into the [value] attribute of the [TextBox1] tag so that the [TextBox1] field reappeared with the entered value. To do this, he does not need [__VIEWSTATE] but only the value posted for [TextBox1]
Now, let’s make the same request again without changing anything. We get the following new response:
dos>curl --include --url http://localhost/form4.aspx --data __EVENTTARGET=TextBox1 --data __EVENTARGUMENT= --data TextBox1=premier+texte --data TextBox2=


        <p>
            Texte 1 :
            <input name="TextBox1" type="text" value="premier texte" id="TextBox1" onchange="__doPostBack('TextBox1','')" language="javascript" />
        </p>
        <p>
            Texte 2 :
            <input name="TextBox2" type="text" id="TextBox2" />
        </p>
        <p>
            <span id="lblInfo1">20:05:47: evt [TextChanged] sur [TextBox1]. Texte 1=[premier texte]</span>
        </p>
        <p>
            <span id="lblInfo2"></span>
        </p>
In the absence of [__VIEWSTATE], the server could not see that the value of the [TextBox1] field had not changed. It therefore acts as if the previous value were the empty string. It therefore generated the [TextChanged] event on [TextBox1] here. Let’s run the same request again, this time with the [TextBox1] field empty and [TextBox2] non-empty:
dos>curl --include --url http://localhost/form4.aspx --data __EVENTTARGET=TextBox1 --data __EVENTARGUMENT= --data TextBox2=second+text --data TextBox1=
......
        <p>
            Texte 1 :
            <input name="TextBox1" type="text" id="TextBox1" onchange="__doPostBack('TextBox1','')" language="javascript" />
        </p>
        <p>
            Texte 2 :
            <input name="TextBox2" type="text" value="second texte" id="TextBox2" />
        </p>
        <p>
            <span id="lblInfo1"></span>
        </p>
        <p>
            <span id="lblInfo2">20:11:54: evt [TextChanged] sur [TextBox2]. Texte 2=[second texte]</span>
        </p>
......
In the absence of [__VIEWSTATE], the previous value of [TextBox1] was considered to be the empty string. Since the posted value of [TextBox1] is also the empty string, the event [TextChanged] on [TextBox1] was not generated. The procedure [TextBox1_TextChanged] was not executed, and therefore the field [lblInfo1] did not receive a new value. We know that in this case, the component retains its old value. However, that is not the case here; [lblInfo1] has lost its previous value. This is because this value is looked up in [__VIEWSTATE]. Since this field is missing, the empty string was assigned to [lblInfo1]. For [TextBox2], the server compared its posted value [second texte] to its previous value. Since [__VIEWSTATE] is absent, this previous value is equal to the empty string. Since the posted value of [TextBox2] is different from the empty string, the event [TextChanged] on [TextBox2] was generated. The procedure [TextBox2_TextChanged] was executed, and the field [lblInfo2] received a new value.
One might wonder whether the parameters [__EVENTTARGET] and [__EVENTARGUMENT] are actually useful. By not sending these parameters, the server will not know which event triggered [submit]. Let’s try:
dos>curl --include --url http://localhost/form4.aspx --data TextBox2=second+text --data TextBox1=first+text
..............................
        <p>
            Texte 1 :
            <input name="TextBox1" type="text" id="TextBox1" onchange="__doPostBack('TextBox1','')" language="javascript" />
        </p>
        <p>
            Texte 2 :
            <input name="TextBox2" type="text" id="TextBox2" />
        </p>
        <p>
            <span id="lblInfo1"></span>
        </p>
        <p>
            <span id="lblInfo2"></span>
        </p>
    </form>
.....................
We can see that no [TextChanged] event has been processed. Furthermore, the posted fields [TextBox1] and [TextBox2] do not retain their posted values. In fact, everything behaves as if a GET had been performed. Everything returns to normal if the [__EVENTTARGET] field is included in the posted fields, even if it has no value:
dos>curl --include --url http://localhost/form4.aspx --data __EVENTTARGET= --data TextBox2=second+text --data TextBox1=first+text
.......
        <p>
            Texte 1 :
            <input name="TextBox1" type="text" value="premier texte" id="TextBox1" onchange="__doPostBack('TextBox1','')" language="javascript" />
        </p>
        <p>
            Texte 2 :
            <input name="TextBox2" type="text" value="second texte" id="TextBox2" />
        </p>
        <p>
            <span id="lblInfo1">20:34:14: evt [TextChanged] sur [TextBox1]. Texte 1=[premier texte]</span>
        </p>
        <p>
            <span id="lblInfo2">20:34:14: evt [TextChanged] sur [TextBox2]. Texte 2=[second texte]</span>
        </p>
........
7.6.4. Other properties of the TextBox component
The [TextBox] server component also allows you to generate the HTML <input type="password"..> and <textarea>..</textarea> tags, c.a.d. These tags correspond to a secure input field and a multi-line input field, respectively. This generation is controlled by the [TextMode] property of the [TextBox] component. It has three possible values:
value | generated HTML tag |
<input type="text" ...> | |
<textarea>...</textarea> | |
<input type="password ...> |
We examine the use of these properties with the following example: [form5.aspx]
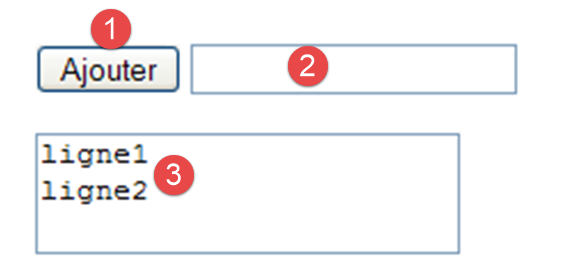
No. | name | type | properties | role |
1 | Button | button [submit] - used to add the content of [TextBox1] to that of [TextBox2] | ||
2 | TextBox | TextMode=Password Text= | protected input field | |
3 | TextBox | TextMode=Multi-line Text= | combines the entries made in [TextBox1] |
The page's [EnableViewState] property is set to [false]. On the server side, we handle the click event on the [btnAjouter] button:
Sub btnAjouter_Click(sender As Object, e As EventArgs)
  ' the contents of [textBox1] are added to those of [TextBox2]
  textbox2.text=textbox2.text + textbox1.text+controlchars.crlf
End Sub
To understand this code, you need to recall how the POST event is handled in a form. The [Page_Init] and [Page_Load] procedures are executed first. Then come all the cached event procedures. Finally, the procedure handling the event that triggered [POST] is executed—in this case, the [btnAjouter_Click] procedure. When the event handlers run, all page components with a value in POST have taken on that value. The others revert to their previous value if their [EnableViewState] property was set to [true], or to their design value if their [EnableViewState] property was set to [false]. Here, the values of the fields [TextBox1] and [TextBox2] will be part of the POST created by the client. Also, in the previous code, [textbox1.text] will have the value posted by the client, and the same applies to [textbox2.text]. The procedure [btnAjouter_Click] sets the field [TextBox2] to the value posted for [TextBox2] added to the value posted for [TextBox1] added to the end-of-line marker [ControlChars.CrLf] defined in the namespace [Microsoft.VisualBasic]. It is not necessary to import this namespace; the web server imports it by default.
The final code for [form5.aspx] is as follows:
<%@ Page Language="VB" EnableViewState="False" %>
<script runat="server">

    Sub btnAjouter_Click(sender As Object, e As EventArgs)
      ' the contents of [textBox1] are added to those of [TextBox2]
      textbox2.text+=textbox1.text+controlchars.crlf
    End Sub

</script>
<html>
<head>
</head>
<body>
    <form runat="server">
        <p>
            <asp:Button id="btnAjouter" onclick="btnAjouter_Click" runat="server" Text="Ajouter" EnableViewState="False"></asp:Button>
            <asp:TextBox id="TextBox1" runat="server" TextMode="Password" Width="353px" EnableViewState="False"></asp:TextBox>
        </p>
        <p>
            <asp:TextBox id="TextBox2" runat="server" TextMode="MultiLine" Width="419px" Height="121px" EnableViewState="False"></asp:TextBox>
        </p>
    </form>
</body>
</html>
A little earlier, we provided a screenshot of a run.
7.7. The DropDownList component
The <asp:DropDownList> tag allows you to insert a drop-down list into a page’s presentation code. We create a [form6.aspx] page to obtain the following layout:
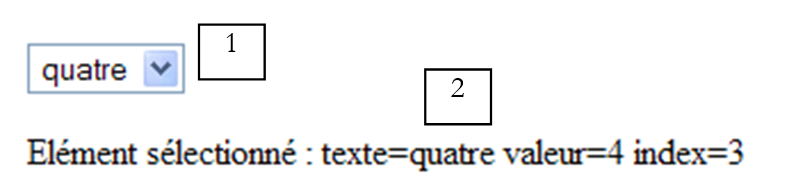
No. | name | type | properties | role |
1 | QZXW2HTMLP003482ZQX | AutoPostback=true EnableViewState=true | drop-down list | |
2 | Label | EnableViewState=false | information message |
The generated presentation code is as follows:
Page Language="VB" %>
<script runat="server">

</script>
<html>
<head>
</head>
<body>
    <form runat="server">
        <p>
            <asp:DropDownList id="DropDownList1" runat="server" OnSelectedIndexChanged="DropDownList1_SelectedIndexChanged" AutoPostBack="True"></asp:DropDownList>
        </p>
        <p>
            <asp:Label id="lblInfo" runat="server" enableviewstate="False"></asp:Label>
        </p>
    </form>
</body>
</html>
For now, the drop-down list contains no items. We will populate it in the [Page_Load] procedure. To do this, we need to know some of the properties and methods of the [DropDownList] class:
A collection of type [ListItemCollection] containing the items in the drop-down list. The members of this collection are of type [ListItem]. | |
number of items in the [Items] collection | |
element number i in the list - of type [ListItem] | |
to add a new element [ListItem] to the collection [Items] | |
to remove all items from the collection [Items] | |
to remove item number i from the [Items] collection | |
The first element [ListItem] in the collection [Items] whose property [Selected] is true | |
index of element [SelectedItem] in the collection [Items] |
The elements of the [Items] collection of the [DropDownList] class are of type [ListItem]. Each [ListItem] element generates a HTML <option> tag:
We describe some properties and methods of the [ListItem] class:
constructor - creates an element [ListItem] with the properties [texte] and [value]. An element ListItem(T,V) will generate the tag HTML <option value="V">T</option>. The [ListITem] class therefore allows you to describe the elements of a HTML list | |
boolean. If true, the corresponding option in the HTML list will have the [selected="selected"] attribute. This attribute tells the browser that the corresponding element should appear selected in the list HTML | |
the text T of the option HTML <option value="V" [selected="selected"]>T</option> | |
the value V of the [Value] attribute of the option HTML <option value="V" [selected="selected"]>T</option> |
We have enough information to write the code for populating the [DropDownList1] drop-down list in the [Page_Load] procedure on the page:
    Sub Page_Load(sender As Object, e As EventArgs)
        ' fill in the combo if it's the 1st time you've been called
        if not IsPostBack then
          dim valeurs() as String = {"1","2","3","4"}
            dim textes() as  String = {"un","deux","trois","quatre"}

            dim i as integer
            for i=0 to valeurs.length-1
                DropDownList1.Items.Add(new ListItem(textes(i),valeurs(i)))
            next
        end if
    end sub
Once the [DropDownList1] component has been initialized in this way, its translation HTML will be as follows:
<select name="DropDownList1" id="DropDownList1" onchange="__doPostBack('DropDownList1','')" language="javascript">

    <option value="1">un</option>
    <option value="2">deux</option>
    <option value="3">trois</option>
    <option value="4">quatre</option>

</select>
We know that procedure [Page_Load] is executed each time page [form6.aspx] is executed. This is called the first time by a GET, then by a POST each time the user selects a new item from the drop-down list. Should the code for populating this list in [Page_Load] be executed every time? The answer depends on the [EnableViewState] attribute of the [DropDownList1] component. If this attribute is set to true, we know that the state of the [DropDownList1] component will be preserved across requests in the hidden field [__VIEWSTATE]. This state includes two things:
- the list of all values in the drop-down list
- the value of the selected item in this list
It might then seem tempting to set the [EnableViewState] property of the [DropDownList1] component to [true] so as not to have to recalculate the values to be placed in the list. The problem, however, is that since the procedure [Page_Load] is executed every time the page [form6.aspx] is requested, these values will still be calculated. The object [Page], of which [form6.aspx] is an instance, has a Boolean attribute named [IsPostBack]. If this attribute is true, it means the page was called by a POST. If false, it means the page was called by a GET. In our client-server round-trip system, the client always requests the same page, [form6.aspx], from the server. The first time, it requests it with a GET; on subsequent requests, with a POST. We conclude that the [IsPostBack] property can be used to detect the client’s first GET call. We generate the values of the drop-down list only during this first call. For subsequent requests, these values will be generated by the [VIEWSTATE] mechanism. In other situations, the content of a list may vary from one request to another and must therefore be recalculated for each one. In this case, set the [EnableViewState] attribute of the list to [false] to avoid unnecessary double calculation of the list’s content, unless you need to know the previously selected items in the list, as this information is stored in [VIEWSTATE].
The [AutoPostBack] attribute of the [DropDownList1] list has been set to true. This means that the browser will submit the form as soon as it detects the "selected item changed" event in the drop-down list. The server, in turn, will detect via [VIEWSTATE] and the posted values that the selected item in the [DropDownList1] component has changed. It will then trigger the [SelectedIndexChanged] event on that component. We will handle it with the following procedure:
    Sub DropDownList1_SelectedIndexChanged(sender As Object, e As EventArgs)
      ' selection change
      lblInfo.text="Elément sélectionné : texte="+dropdownlist1.selecteditem.text+ _
        " valeur=" + dropdownlist1.selecteditem.value + _
        " index="+ dropdownlist1.selectedindex.tostring
    End Sub
When this procedure runs, the [DropDownList1] object has retrieved its [ListItem]-type elements via [VIEWSTATE]. Furthermore, one of them of type [ListItem] has its [Selected] attribute set to true—the one whose value was posted by the browser. This element can be accessed in several ways:
is the first element [ListItem] in the list with its [Selected] attribute set to true | |
corresponds to the [texte] part of the HTML tag of the <option value="...">text</option> element selected by the user | |
corresponds to the [value] part of the HTML tag of the <option value="...">text</option> element selected by the user | |
index in the [DropDownList1.Items] collection of the first [ListItem] element whose [Selected] attribute is true |
The final code for [form6.aspx] is as follows:
<%@ Page Language="VB" %>
<script runat="server">

    Sub Page_Load(sender As Object, e As EventArgs)
        ' fill in the combo if it's the 1st time you've been called
        if not IsPostBack then
          dim valeurs() as String = {"1","2","3","4"}
            dim textes() as  String = {"un","deux","trois","quatre"}

            dim i as integer
            for i=0 to valeurs.length-1
                DropDownList1.Items.Add(new ListItem(textes(i),valeurs(i)))
            next
        end if
    end sub

    Sub DropDownList1_SelectedIndexChanged(sender As Object, e As EventArgs)
      ' selection change
      lblInfo.text="Elément sélectionné : texte="+dropdownlist1.selecteditem.text+ _
        " valeur=" + dropdownlist1.selecteditem.value + _
        " index="+ dropdownlist1.selectedindex.tostring
    End Sub

</script>
<html>
<head>
</head>
<body>
    <form runat="server">
        <p>
            <asp:DropDownList id="DropDownList1" runat="server" OnSelectedIndexChanged="DropDownList1_SelectedIndexChanged" AutoPostBack="True"></asp:DropDownList>
        </p>
        <p>
            <asp:Label id="lblInfo" runat="server" enableviewstate="False"></asp:Label>
        </p>
    </form>
</body>
</html>
7.8. The ListBox component
The <asp:ListBox> tag allows you to insert a list into a page's presentation code. We create [form7.aspx] to obtain the following presentation:
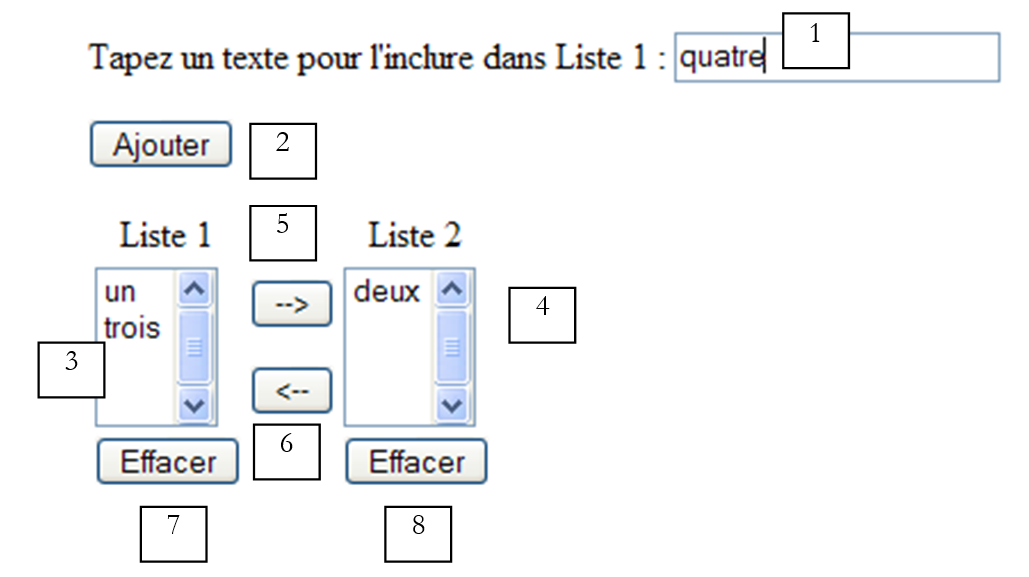
No. | name | type | properties | role |
1 | TextBox | EnableViewState=false | input field | |
2 | Button | button [submit] that transfers the content of txtSaisie to List 1 if it is not empty. | ||
3 | ListBox | EnableViewState=true SelectionMode=Single | single-selection list | |
4 | ListBox | EnableViewState=true SelectionMode=Multiple | list of values for multiple selection | |
5 | Button | Button [submit] that transfers the selected item from [liste 1] to [liste 2] | ||
6 | Button | Button [submit] that transfers the selected elements from [liste 2] to [liste 1] |
The generated presentation code is as follows:
<%@ Page Language="VB" %>
<script runat="server">
</script>
<html>
<head>
</head>
<body>
    <form runat="server">
        <p>
            Tapez un texte pour l'include in List 1 :
            <asp:TextBox id="txtSaisie" runat="server" EnableViewState="False"></asp:TextBox>
        </p>
        <p>
            <asp:Button id="btnAjouter" onclick="btnAjouter_Click" runat="server" Text="Ajouter"></asp:Button>
        </p>
        <p>
            <table>
                <tbody>
                    <tr>
                        <td>
                            <p align="center">
                                Liste 1
                            </p>
                        </td>
                        <td>
                        </td>
                        <td>
                            <p align="center">
                                Liste 2
                            </p>
                        </td>
                    </tr>
                    <tr>
                        <td>
                            <asp:ListBox id="ListBox1" runat="server"></asp:ListBox>
                        </td>
                        <td>
                            <p>
                                <asp:Button id="btn1vers2" onclick="btn1vers2_Click" runat="server" Text="-->"></asp:Button>
                            </p>
                            <p>
                                <asp:Button id="btn2vers1" onclick="btn2vers1_Click" runat="server" Text="<--"></asp:Button>
                            </p>
                        </td>
                        <td>
                            <p>
                                <asp:ListBox id="ListBox2" runat="server" SelectionMode="Multiple"></asp:ListBox>
                            </p>
                        </td>
                    </tr>
                    <tr>
                        <td>
                            <p align="center">
                                <asp:Button id="btnRaz1" onclick="btnRaz1_Click" runat="server" Text="Effacer"></asp:Button>
                            </p>
                        </td>
                        <td>
                        </td>
                        <td>
                            <p align="center">
                                <asp:Button id="btnRaz2" onclick="btnRaz2_Click" runat="server" Text="Effacer"></asp:Button>
                            </p>
                        </td>
                    </tr>
                </tbody>
            </table>
        </p>
    </form>
</body>
</html>
The class [ListBox] is derived from the same class, [ListControl], as the class [DropDownList] discussed earlier. It contains all the properties and methods seen for [DropDownList], as they actually belonged to [ListControl]. A new property appears:
sets the selection mode for the HTML <select> list that will be generated from the component. If SelectionMode=Single, then only a single item can be selected. If SelectionMode=Multiple, multiple items can be selected. To achieve this, the [multiple="multiple"] attribute will be generated within the <select> tag of the HTML list. |
Let’s handle the events. A click on the [Ajouter] button will be handled by the following [btnAjouter_Click] procedure:
    Sub btnAjouter_Click(sender As Object, e As EventArgs)
      ' added to list 1
      dim texte as string=txtSaisie.text.trim
      if texte<> "" then ListBox1.Items.Add(New ListItem(texte))
      ' raz txtSaisie
      txtSaisie.text=""
    End Sub
If the text entered in [txtSaisie] is not an empty or blank string, a new item is added to the [ListBox1] list. We know that we need to add an item of type [ListItem]. Previously, we used the [ListItem(T as String, V as String)] constructor to perform a similar task. Such an element generates the HTML and [<option value="V">T</option>] tags. Here, we use the [ListItem(T as String)] constructor, which generates the HTML, [<option value="T">T</option>], and c.a.d tags. The text [T] from option is used to form the value of option. Once the content of [txtSaisie] is added to the list [ListBox1], the field [txTSaisie] is cleared.
Clicks on the [Effacer] buttons will be handled by the following procedures:
    Sub btnRaz1_Click(sender As Object, e As EventArgs)
      ' raz list 1
      ListBox1.Items.Clear
    End Sub

    Sub btnRaz2_Click(sender As Object, e As EventArgs)
      ' raz list 2
      ListBox2.Items.Clear
    End Sub
Clicks on the buttons for transferring between lists are handled by the following procedures:
    Sub btn1vers2_Click(sender As Object, e As EventArgs)
      ' transfer the item selected in list 1 to list 2
      transfert(ListBox1,ListBox2)
    End Sub

    Sub btn2vers1_Click(sender As Object, e As EventArgs)
      ' transfer the item selected in list 2 to list 1
      transfert(ListBox2,ListBox1)
    End Sub

    sub transfert(l1 as listbox, l2 as listbox)
      ' transfer items selected in l1 to l2
       ' anything to do?
      if l1.selectedindex=-1 then return
      dim i as integer
      ' we start at the end
      for i=l1.items.count-1 to 0 step -1
        ' selected?
        if l1.items(i).selected then
            ' more selected
            l1.items(i).selected=false
          ' transfer to l2
          l2.items.add(l1.items(i))
          ' deletion in l1
          l1.items.removeAt(i)
        end if
      next
    end sub
Since both buttons perform the same task—transferring items from one list to another—we can reduce this to a single transfer procedure with two parameters:
- l1 of type [ListBox], which is the source list
- l2 of type [ListBox], which is the destination list
First, we check whether there is at least one selected item in list l1; if not, there is nothing to do. To do this, we examine the property [l1.selectedindex], which represents the index of the first selected item in the list. If there are none, its value is -1. If there is at least one selected item in l1, we transfer it to l2. To do this, we iterate through the entire list of items in l1 and check for each one whether its attribute [selected] is true. If so, its [selected] attribute is set to [false], then it is copied to list l2, and finally it is removed from list l1. This removal causes the elements in list l1 to be renumbered. This is why the list of elements in l1 is traversed in reverse order. If we traverse it in forward order and delete element #10, element #11 becomes #10 and #12 becomes #11. After processing element #10, our forward loop will process element #11, which, as we just explained, is the former #12. The element that was #11 and is now #10 is overlooked. By traversing the elements of list l1 in the opposite direction, we avoid this problem.
7.9. The components CheckBox, RadioButton
The <asp:RadioButton> and <asp:CheckBox> tags are used to insert a radio button and a checkbox, respectively, into a page's layout code. We create a page named [form8.aspx] to produce the following layout:
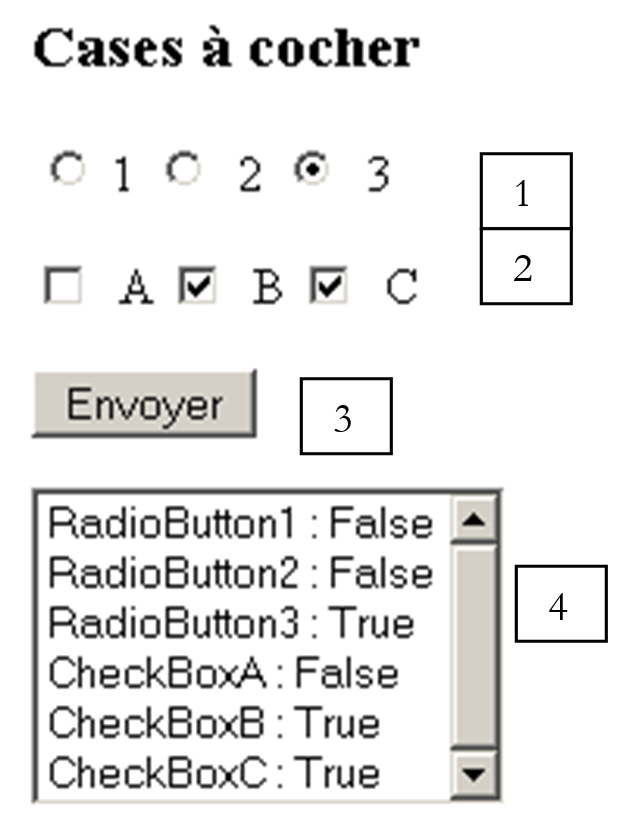
No. | name | type | properties | role |
1 | RadioButton | RadioButton1.Checked=true RadioButton1.Text=1 RadioButton2.Checked=false RadioButton2.Text=2 RadioButton3.Checked=false RadioButton3.Text=3 for the 3 buttons: GroupName=radio | radio buttons | |
2 | CheckBox | Checked=false for all CheckBoxA.Text=A CheckBoxB.Text=B CheckBoxC.Text=C | checkboxes | |
3 | Button | button [submit] | ||
4 | ListBox | information list |
To ensure the browser treats the three radio buttons as mutually exclusive, they must be grouped together in a radio button group. This is done using the [GroupName] attribute of the [RadioButton] class. The page state does not need to be maintained in this application. Therefore, we set the [EnableViewState="false"] attribute on the page. The presentation code is as follows:
<html>
<head>
</head>
<body>
<form id="frmControls" runat="server">
<h3>Cases à cocher
</h3>
<p>
<asp:RadioButton id="RadioButton1" runat="server" Checked="True" EnableViewState="False" GroupName="radio" Text="1"></asp:RadioButton>
<asp:RadioButton id="RadioButton2" runat="server" EnableViewState="False" GroupName="radio" Text="2"></asp:RadioButton>
<asp:RadioButton id="RadioButton3" runat="server" EnableViewState="False" GroupName="radio" Text="3"></asp:RadioButton>
</p>
<p>
<asp:CheckBox id="CheckBoxA" runat="server" EnableViewState="False" Text="A"></asp:CheckBox>
<asp:CheckBox id="CheckBoxB" runat="server" EnableViewState="False" Text="B"></asp:CheckBox>
<asp:CheckBox id="CheckBoxC" runat="server" EnableViewState="False" Text="C"></asp:CheckBox>
</p>
<p>
<asp:Button id="btnEnvoyer" onclick="btnEnvoyer_Click" runat="server" Text="Envoyer"></asp:Button>
<asp:Button id="btnTree" onclick="btnTree_Click" runat="server" Text="Contrôles"></asp:Button>
</p>
<p>
<asp:ListBox id="lstInfos" runat="server" EnableViewState="False" Rows="6" Height="131px"></asp:ListBox>
</p>
</form>
</body>
</html>
We need to write the [btnEnvoyer_Click] procedure to handle the [Click] event on this button. The state of a radio button or checkbox is given by its [Checked] attribute, which is true if the box is checked and false otherwise. We therefore simply need to write the value of the [Checked] attribute for the six radio buttons and checkboxes into the [lstInfos] list. Since there is no particular difficulty in doing this, we’ll try something a little different:
<script runat="server">

    Sub btnEnvoyer_Click(sender As Object, e As EventArgs)
      ' place information in the listbox
      for each c as control in FindControl("frmControls").controls
          ' is the control derived from CheckBox?
          if TypeOf(c) is CheckBox then
              lstInfos.Items.Add(c.ID + " : " + Ctype(c,CheckBox).Checked.ToString)
          end if
      next
    End Sub

</script>
The page can be viewed as a tree structure of controls. In our example, our page contains text and server controls. The text is treated as a specific control called [LiteralControl]. Even a single space between two controls creates this control. Each control has a ID attribute that identifies it. It is the ID attribute that appears in the tags:
If we ignore the [LiteralControl] controls, the page in question has the following controls:
- [HtmlForm], which is the form [ID=frmControls]. This, in turn, is a control container. It contains the following controls:
-- [ID=RadioButton1] of type [RadioButton]
-- [ID=RadioButton2] of type [RadioButton]
-- [ID=RadioButton3] of type [RadioButton]
-- [ID=CheckBoxA] of type [CheckBox]
-- [ID=CheckBoxA] of type [CheckBox]
-- [ID=CheckBoxA] of type [CheckBox]
-- [ID=btnEnvoyer] of type [Button]
A control has the following properties:
returns the collection of child controls of [Control], if any | |
returns the control identified by ID located at the root of the tree of child controls of [Control]. In the example above: Page.FindControl("frmControls") refers to the container [HtmlForm]. To access the radio button [RadioButton1], you would write Page.FindControl("frmControls").FindControl("RadioButton1") | |
ID of [Control] |
Let’s return to the code for the [btnEnvoyer_Click] procedure:
    Sub btnEnvoyer_Click(sender As Object, e As EventArgs)
      ' place information in the listbox
      for each c as control in FindControl("frmControls").controls
          ' is the control derived from CheckBox?
          if TypeOf(c) is CheckBox then
              lstInfos.Items.Add(c.ID + " : " + Ctype(c,CheckBox).Checked.ToString)
          end if
      next
    End Sub
We want to display the state of the radio buttons and checkboxes in the form. We iterate through all the controls in the form. If the current control is of a type derived from [CheckBox], we display its [Checked] property. Since the [RadioButton] class is derived from the [CheckBox] class, the test applies to both types of controls. The screenshot shown above displays an example of the execution.
7.10. The components CheckBoxList, RadioButtonList
Sometimes, you want to allow the user to choose between values that are unknown at the time the page is designed. These choices come from a configuration file, a database, etc., and are only known at runtime. There are solutions to this problem, and we have encountered them. A single-select list works well when the user can make only one choice, and a multi-select list works well when the user can make multiple choices. From an aesthetic standpoint, and if the number of choices is not large, you may prefer to use radio buttons instead of the single-select list or checkboxes instead of the multi-select list. This is possible with the [CheckBoxList] and [RadioButtonList] components.
The classes [CheckBoxList] and [RadioButtonList] are derived from the same class [ListControl] as the classes [DropDownList] and [ListBox] discussed previously. Therefore, we will find some of the properties and methods seen for these classes—those that actually belonged to [ListControl].
A collection of type [ListItemCollection] containing the items in the drop-down list. The members of this collection are of type [ListItem]. | |
number of items in the [Items] collection | |
Element number i in the list - of type [ListItem] | |
to add a new element [ListItem] to the collection [Items] | |
to remove all items from the collection [Items] | |
to remove item #i from the [Items] collection | |
The first element [ListItem] in the collection [Items] whose property [Selected] is true | |
index of the previous element in the [Items] collection |
Some properties are specific to the classes [CheckBoxList] and [RadioButtonList]:
[horizontal] or [vertical] for horizontal or vertical lists. |
The elements in the [Items] collection are of type [ListItem]. Each [ListItem] element will generate a different tag depending on whether it is a [CheckBoxList] or [RadioButtonList] object:
Or
We describe some properties and methods of the [ListItem] class:
constructor - creates a [ListItem] element with the text and value properties. A ListItem(T,V) element will generate the HTML tag <input type="checkbox" value="V">T or <input type="radio" value="V">T, as appropriate. | |
Boolean. If true, the corresponding option in the HTML list will have the [selected="selected"] attribute. This attribute tells the browser that the corresponding element must appear selected in the list | |
the text T of the option HTML <input type=".." value="V" [selected="selected"]>T | |
the value of the Value attribute of the option HTML <input type=".." value="V" [selected="selected"]>T |
We propose to build the following [form8b.aspx] page:
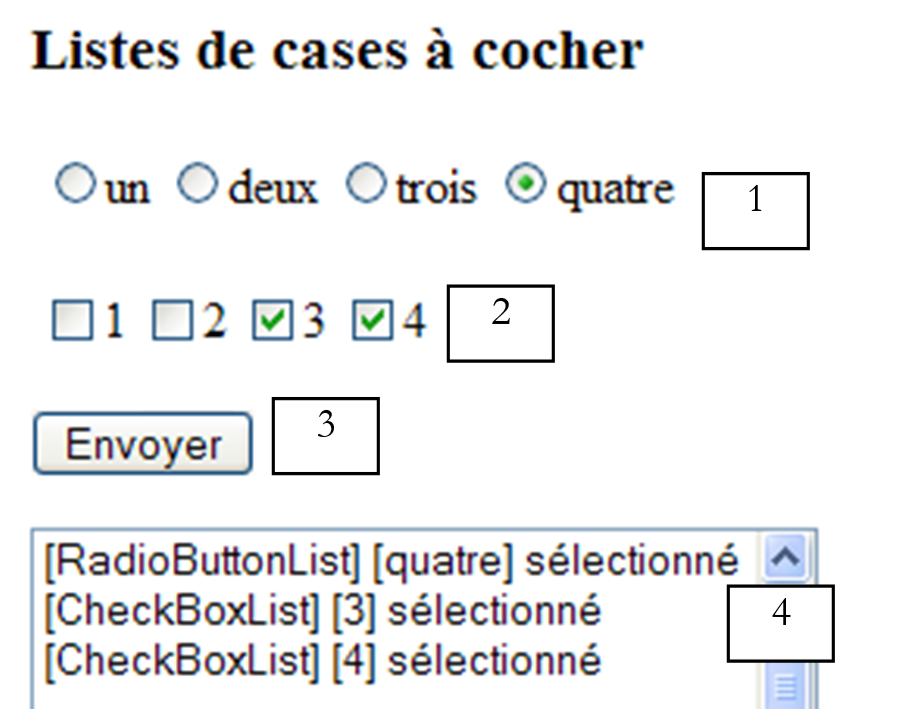
No. | name | type | properties | role |
1 | RadioButtonList | EnableViewState=true RepeatDirection=horizontal | radio button list | |
2 | CheckBoxList | EnableViewState=true RepeatDirection=horizontal | checkbox list | |
3 | Button | button [submit] that displays in [4] the list of items selected from both lists | ||
4 | ListBox | EnableViewState=false | list of values |
The page presentation code is as follows:
<%@ Page Language="VB" autoeventwireup="false" %>
<script runat="server">
...
</script>
<html>
<head>
</head>
<body>
    <form id="frmControls" runat="server">
        <h3>Listes de cases à cocher
        </h3>
        <p>
            <asp:RadioButtonList id="RadioButtonList1" runat="server" RepeatDirection="Horizontal"></asp:RadioButtonList>
        </p>
        <p>
            <asp:CheckBoxList id="CheckBoxList1" runat="server" RepeatDirection="Horizontal"></asp:CheckBoxList>
        </p>
        <p>
            <asp:Button id="btnEnvoyer" onclick="btnEnvoyer_Click" runat="server" Text="Envoyer"></asp:Button>
        </p>
        <p>
            <asp:ListBox id="lstInfos" runat="server" EnableViewState="False" Rows="6"></asp:ListBox>
        </p>
    </form>
</body>
</html>
The control code is as follows:
<script runat="server">

    Sub Page_Load(sender As Object, e As EventArgs) handles MyBase.Load
        ' fill in the lists if it's the 1st time you're called
        if not IsPostBack then
            ' texts for the RadioButton list
          dim textesRadio() as String = {"1","2","3","4"}
          ' texts for the CheckBox list
          dim textesCheckBox() as  String = {"un","deux","trois","quatre"}
                 ' radio list filling
            dim i as integer
            for i=0 to textesRadio.length-1
                RadioButtonList1.Items.Add(new ListItem(textesRadio(i)))
            next
             ' selection item no. 1
            RadioButtonList1.SelectedIndex=1
            ' fill list checkbox
            for i=0 to textesCheckBox.length-1
                CheckBoxList1.Items.Add(new ListItem(textesCheckBox(i)))
            next
        end if
    end sub


    Sub btnEnvoyer_Click(sender As Object, e As EventArgs)
      ' place information in the lstinfos listbox
      affiche(RadioButtonList1)
      affiche(CheckBoxList1)
    End Sub

    sub affiche(l1 as ListControl)
      ' displays the values of selected elements of l1
       ' anything to do?
      if l1.selectedindex=-1 then return
      dim i as integer
      ' we start at the end
      for i= 0 to l1.items.count-1
        ' selected?
        if l1.items(i).selected then
          lstInfos.Items.Add("["+TypeName(l1)+"] ["+l1.items(i).text+"] sélectionné")
        end if
      next
    end sub

</script>
In the [Page_Load] procedure, which runs every time the page is loaded, both lists are initialized. To prevent them from being initialized every time, the [IsPostBack] property is used to ensure this happens only the first time. On subsequent runs, the lists will be regenerated automatically by the [VIEWSTATE] mechanism. Once the page is displayed, the user checks certain checkboxes and clicks the [Envoyer] button. The form values are then submitted to the form itself. After [Page_Load] is executed, the [btnEnvoyer_Click] procedure is executed. This procedure calls the [affiche] procedure to populate the [lstInfos] list. This procedure receives as a parameter an object of type [ListControl], which allows it to be passed either a [RadioButtonList] object or a [CheckBoxList] object, both of which are classes derived from [ListControl]. The list [lstInfos] can have its attribute set from [EnableViewState] to [false] since its state does not need to be maintained between different requests.
7.11. The Panel Components, LinkButton
The <asp:panel> tag allows you to insert a container of controls into a page. The advantage of the container is that some of its properties apply to all the controls it contains. This is the case with its [Visible] property. This property exists for every server control. If a container has the [Visible=false] property, each of its controls will be governed by its own [Visible] property. If it has the [Visible=false] property, then the container and everything it contains is not displayed. This can be simpler than managing the [Visible] property for each of the container’s controls.
The <asp:LinkButton> tag allows you to insert a link into a page’s presentation code. It serves a similar purpose to the [Button] button. It triggers a client-side event using an associated function. We create a page to produce the following layout:
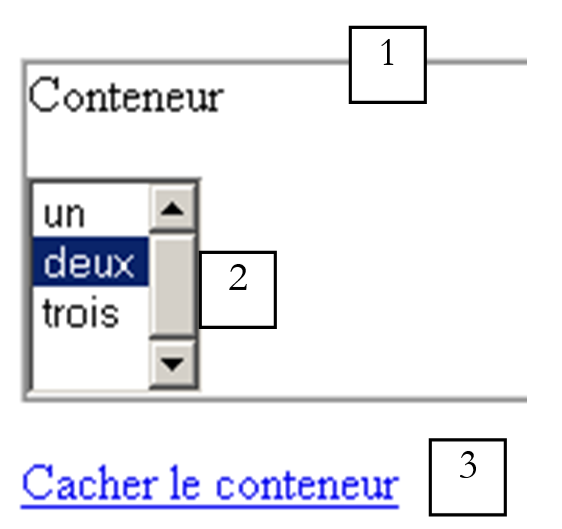
No. | name | type | properties | role |
1 | Panel | EnableViewState=true | control container | |
2 | ListBox | EnableViewState=true | a list of three values | |
3 | LinkButton | EnableViewState=false | link to hide the container |
When the container is hidden, a new link appears:
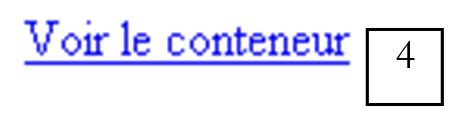
No. | name | type | properties | role |
4 | LinkButton | EnableViewState=false | link to display the container |
The page's presentation code is as follows:
<html>
<head>
</head>
<body>
    <form runat="server">
        <p>
            <asp:Panel id="Panel1" runat="server" BorderStyle="Ridge" BorderWidth="1px">
                <p>
                    Conteneur
                </p>
                <p>
                    <asp:ListBox id="ListBox1" runat="server">
                        <asp:ListItem Value="1">un</asp:ListItem>
                        <asp:ListItem Value="2">deux</asp:ListItem>
                        <asp:ListItem Value="3" Selected="True">trois</asp:ListItem>
                    </asp:ListBox>
                </p>
            </asp:Panel>
        </p>
        <p>
            <asp:LinkButton id="lnkVoir" onclick="lnkVoir_Click" runat="server">Voir le conteneur</asp:LinkButton>
        </p>
        <p>
            <asp:LinkButton id="lnkCacher" onclick="lnkCacher_Click" runat="server">Cacher le conteneur</asp:LinkButton>
        </p>
    </form>
</body>
</html>
Note that this code initializes the [ListBox1] list with three values. The [Clic] event handlers for the two links are as follows:
<%@ Page Language="VB" %>
<script runat="server">

    Sub Page_Load(sender As Object, e As EventArgs)
...
    end sub

    Sub lnkVoir_Click(sender As Object, e As EventArgs)
        ' displays container 1
        panel1.Visible=true
         ' changing links
        lnkVoir.visible=false
        lnkCacher.visible=true
    End Sub

    Sub lnkCacher_Click(sender As Object, e As EventArgs)
        ' hides container 1
        panel1.Visible=false
         ' changing links
        lnkVoir.visible=true
        lnkCacher.visible=false
    End Sub
</script>
We will use procedure [Page_Load] to initialize the form. We will do this on the first request (IsPostBack=false):
<%@ Page Language="VB" %>
<script runat="server">

    Sub Page_Load(sender As Object, e As EventArgs)
        ' the 1st time
        if not IsPostBack then
            ' the container is shown
            lnkVoir_Click(nothing,nothing)
        end if
    end sub
.....
</script>
7.12. To continue...
The preceding paragraphs have introduced a number of server components. Only a few of their properties were presented each time. To further explore these components, the reader can proceed in various ways:
- explore the properties of a component using a IDE such as WebMatrix. This file lists the main properties of the components used in a form
- consult the .NET documentation to discover all the classes corresponding to each server component. This is the preferred method for gaining full mastery of the component. There, you will find the class hierarchy leading to the components, as well as the properties, methods, constructors, and events of each. Additionally, the documentation sometimes provides examples.
In this chapter, we used the all-in-one technique, [WebMatrix], where we placed the presentation code and the control code for a page in the same file. Generally speaking, we do not recommend this method but rather the so-called [codebehind] method used previously, which places these two codes in two separate files. We remind you that the advantage of this separation lies in the fact that the control code can be compiled without having to run the web application. Furthermore, our examples—as we explained at the beginning of the chapter—had a very specific profile: they consisted of a single page that was a form exchanged between the client and the server in successive request-response cycles, with the first client request being a GET, and the subsequent ones being POST.
7.13. Server and Application Controller Components
In the previous chapters, we built several web applications. They were all built using the MVC (Model-View-Controller) architecture, which breaks the application down into distinct blocks and makes it easier to maintain. We built our user interfaces using standard HTML tags. Given what we’ve just covered, it’s natural to want to start using server components now. Let’s revisit a problem we’ve already studied at length: calculating a tax. Its MVC architecture was as follows:
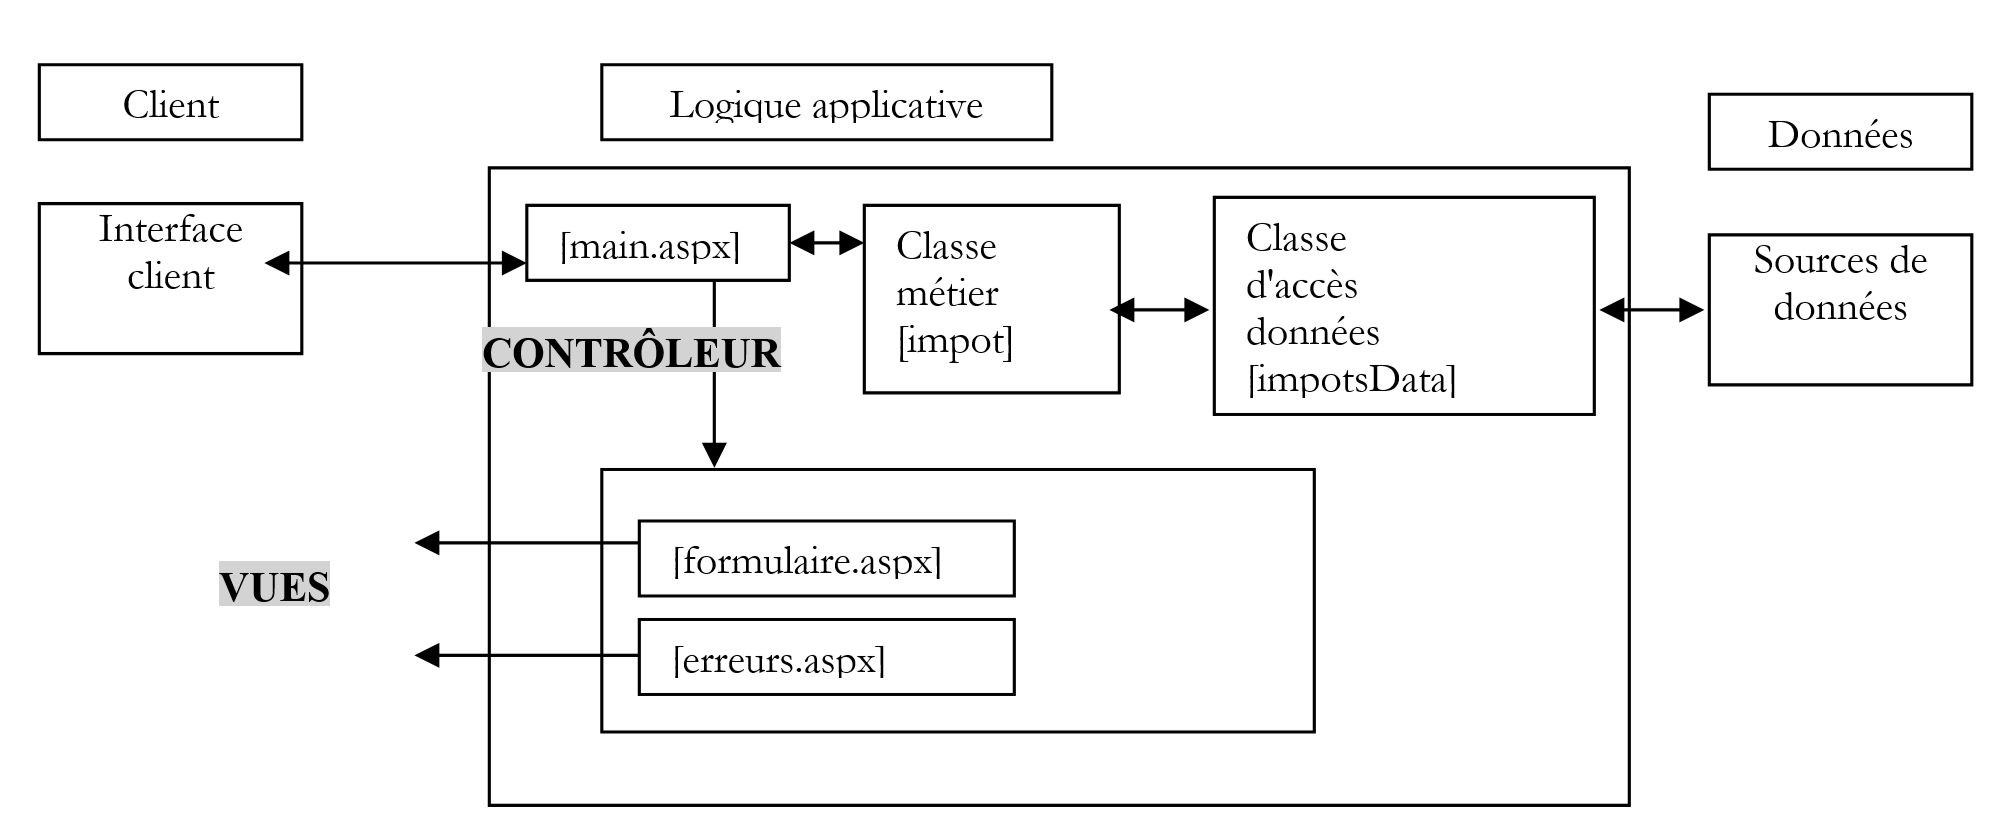
The application has two views: [formulaire.aspx] and [erreurs.aspx]. The [formulaire.aspx] view is displayed when url is requested for the first time:
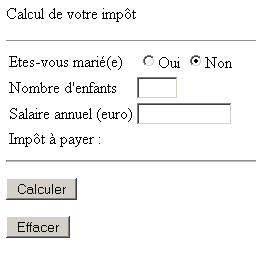
The user fills out the form:
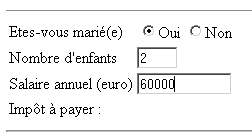
and uses the [Calculer] button to obtain the following response:
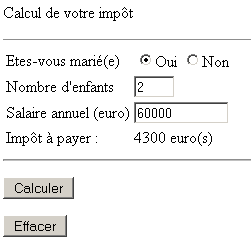
In a MVC application, every request must go through the controller, in this case [main.aspx]. This means that once the [formulaire.aspx] form has been filled out by the user, it must be posted to [main.aspx] and not to [formulaire.aspx]. This is simply not possible if we build the [formulaire.aspx] user interface using ASP server components. To see this, let’s build a [formtest.aspx] form with an <asp:button> component:
<%@ Page Language="VB" EnableViewState="false"%>
<html>
<head>
    <title>test</title>
</head>
<body>
    <form action="main.aspx" runat="server">
        <p>
            <asp:Button id="btnTest" runat="server" EnableViewState="false" Text="Test"></asp:Button>
        </p>
    </form>
</body>
</html>
Note the [action="main.aspx"] attribute of the <form...> tag. Let’s run this application. The presentation page displays only a button:

Let’s look at the HTML code sent by the server:
<html>
<head>
    <title>test</title>
</head>
<body>
    <form name="_ctl0" method="post" action="formtest.aspx" id="_ctl0">
<input type="hidden" name="__VIEWSTATE" value="dDwtNTMwNzcxMzI0Ozs+" />

        <p>
            <input type="submit" name="btnTest" value="Test" id="btnTest" />
        </p>

    </form>
</body>
</html>
We can see that the form's POST tag targets the form itself ([action="formtest.aspx"]), whereas we had written the server-side HTML tag in [formtest.aspx]:
The [runat="server"] attribute of the <form> tag is required when using server components. A compilation error occurs if we do not include this attribute. When we include it, the [action] attribute of the <form> tag is ignored. The server always generates a [action] attribute that points to the form itself. We can conclude that in a MVC application, we cannot use forms built with the <form ... runat="server"> tag. However, this tag is essential for all ASP server components that retrieve user input. In other words, you cannot use server-side forms in a MVC application. This is a major revelation. Indeed, one of the key selling points of ASP.NET is that you can build a web application just like a Windows application. This is true if our application does not adhere to the MVC architecture, but even more so otherwise. However, the MVC architecture appears to be a fundamental concept in current web development that is difficult to ignore.
It is possible to use the MVC architecture in conjunction with ASP component forms for applications with few different views using the following workaround:
- the application consists of a single page that acts as a controller
- the views are represented on this page by different containers, one container per view. To display a view, we make its container visible and hide the others
This is an elegant solution that we will now implement in a few examples
7.14. Examples of MVC applications with ASP server components
7.14.1. Example 1
In this first example, we implement the server components we have presented. The page [form10.aspx] will look as follows:
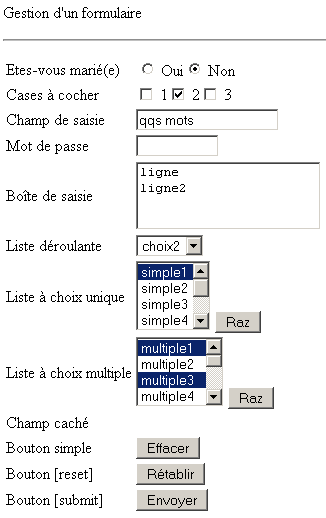 | 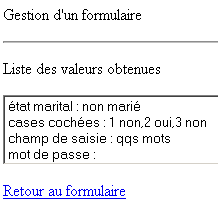 |
The screenshot on the left above shows the form as it appears to the user. The user fills it out and submits it via [Envoyer]. The server returns a view showing a list of the entered values (right screenshot). A link allows the user to return to the form. They see it exactly as they submitted it. The presentation code for [form10.aspx] is as follows:
<html>
<head>
    <title>Exemple</title> <script language="javascript">
        function effacer(){
            alert("Vous avez cliqué sur [Effacer]")
        }
    </script>
</head>
<body>
    <p>
        Gestion d'a form
    </p>
    <p>
        <hr />
    </p>
    <form runat="server">
        <p>
            <asp:Panel id="panelinfo" runat="server" EnableViewState="False">
                <p>
                    Liste des valeurs obtenues
                </p>
                <p>
                    <asp:ListBox id="lstInfos" runat="server" EnableViewState="False"></asp:ListBox>
                </p>
                <p>
                    <asp:LinkButton id="LinkButton1" onclick="LinkButton1_Click" runat="server">Retour au formulaire</asp:LinkButton>
                </p>
                <p>
                    <hr />
                </p>
            </asp:Panel>
        </p>
        <p>
            <asp:Panel id="panelform" runat="server" >
                <table>
                    <tbody>
                        <tr>
                            <td>
                                Etes-vous marié(e)</td>
                            <td>
                                <asp:RadioButton id="rdOui" runat="server"  GroupName="rdmarie"></asp:RadioButton>
                                Oui<asp:RadioButton id="rdNon" runat="server"  GroupName="rdmarie" Checked="True"></asp:RadioButton>
                                Non</td>
                        </tr>
                        <tr>
                            <td>
                                Cases à cocher</td>
                            <td>
                                <asp:CheckBox id="chk1" runat="server"></asp:CheckBox>
                                1<asp:CheckBox id="chk2" runat="server"></asp:CheckBox>
                                2<asp:CheckBox id="chk3" runat="server"></asp:CheckBox>
                                3</td>
                        </tr>
                        <tr>
                            <td>
                                Champ de saisie</td>
                            <td>
                                <asp:TextBox id="txtSaisie" runat="server"  MaxLength="20" Columns="20"></asp:TextBox>
                            </td>
                        </tr>
                        <tr>
                            <td>
                                Mot de passe</td>
                            <td>
                                <asp:TextBox id="txtmdp" runat="server"  MaxLength="10" Columns="10" TextMode="Password"></asp:TextBox>
                            </td>
                        </tr>
                        <tr>
                            <td>
                                Boîte de saisie</td>
                            <td>
                                <asp:TextBox id="txtArea" runat="server"  Columns="20" TextMode="MultiLine" Rows="3"></asp:TextBox>
                            </td>
                        </tr>
                        <tr>
                            <td>
                                Liste déroulante</td>
                            <td>
                                <asp:DropDownList id="cmbValeurs" runat="server"></asp:DropDownList>
                            </td>
                        </tr>
                        <tr>
                            <td>
                                Liste à choix unique</td>
                            <td>
                                <asp:ListBox id="lstSimple" runat="server"></asp:ListBox>
                                <asp:Button id="btnRazSimple" onclick="btnRazSimple_Click" runat="server" EnableViewState="False" Text="Raz"></asp:Button>
                            </td>
                        </tr>
                        <tr>
                            <td>
                                Liste à choix multiple</td>
                            <td>
                                <asp:ListBox id="lstMultiple" runat="server" SelectionMode="Multiple"></asp:ListBox>
                                <asp:Button id="razMultiple" onclick="razMultiple_Click" runat="server" EnableViewState="False" Text="Raz"></asp:Button>
                            </td>
                        </tr>
                        <tr>
                            <td>
                                Champ caché</td>
                            <td>
                                <asp:Label id="lblSecret" runat="server" visible="False"></asp:Label></td>
                        </tr>
                        <tr>
                            <td>
                                Bouton simple</td>
                            <td>
                                <input id="btnEffacer" onclick="effacer()" type="button" value="Effacer" /></td>
                        </tr>
                        <tr>
                            <td>
                                Bouton [reset]</td>
                            <td>
                                <input id="btnReset" type="reset" value="Rétablir" /></td>
                        </tr>
                        <tr>
                            <td>
                                Bouton [submit]</td>
                            <td>
                                <asp:Button id="btnEnvoyer" onclick="btnEnvoyer_Click" runat="server" EnableViewState="False" Text="Envoyer"></asp:Button>
                            </td>
                        </tr>
                    </tbody>
                </table>
            </asp:Panel>
        </p>
    </form>
</body>
</html>
The page has two containers, one for each view: [panelform] for the form view, [panelinfo] for the information view. The list of components in the [panelForm] container is as follows:
name | type | properties | role |
Panel | EnableViewState=true | form view | |
RadioButton | EnableViewState=true GroupName=rdmarie | radio buttons | |
CheckBox | EnableViewState=true | checkboxes | |
TextBox | EnableViewState=true | input field | |
TextBox | EnableViewState=true | protected input field | |
TextBox | EnableViewState=true | multi-line input box | |
DropDownList | EnableViewState=true | drop-down list | |
ListBox | EnableViewState=true SelectionMode=Single | single-select list | |
Button | EnableViewState=false | deselects all items in lstSimple | |
ListBox | EnableViewState=true SelectionMode=Multiple | multiple selection list | |
Button | EnableViewState=false | deselects all items in lstMultiple | |
Label | EnableViewState=true Visible=false | hidden field | |
HTML standard | displays an alert | ||
Button | EnableViewState=false | [submit] button on the form | |
HTML standard | [reset] button on the form |
The role of [VIEWSTATE] for components is important here. All components except buttons must have the [EnableViewState=true] property. To understand why, we need to recall how the application works. Suppose the [txtSaisie] field has the [EnableViewState=false] property:
- the customer requests the [form10.aspx] page for the first time. They see the form view
- fills it out, and submits it using the [Envoyer] button. The input fields are then submitted, and the server assigns the submitted value to the server components or their state [VIEWSTATE] if they had one. Thus, the field [txtSaisie] is assigned the value entered by the user. Also for this step, its status [VIEWSTATE] serves no purpose. As a result of the operation, the view [informations] is sent—in fact, it is still the page [form10.aspx] but with a different container displayed.
- The user views this new view and uses the link [Retour au formulaire] to return to it. A POST is then performed to [form10.aspx]. There is then at most one posted value: the value selected by the user from the information list, which is not used subsequently. In any case, there is no [txtSaisie] field posted.
- The server receives POST and assigns the posted value to the server components or their [VIEWSTATE] state if they had one. Here, [txtNom] has no posted value. If its [EnableViewState] attribute is set to [false], the empty string will be assigned to it. Since we want it to have the value entered by the user, it must have the [EnableViewState=true] property.
The container [panelinfo] has the following controls:
name | type | properties | role |
Panel | EnableViewState=false | information view | |
ListBox | EnableViewState=false | list of information summarizing the values entered by the user | |
LinkButton | EnableViewState=false | link back to the form |
During testing, if we look at the code HTML generated by the presentation code above, we may be surprised by the code generated for the hidden field [lblSecret]:
The component [lblSecret] is not translated to code HTML because it has the property [Visible=false]. However, because it has the property [EnableViewState=true], its value will nevertheless be retained in the hidden field [__VIEWSATE]. Therefore, we will be able to retrieve it, as the tests will demonstrate.
All that's left is to write the event handlers. In [Page_Load], we'll initialize the form:
Sub page_Load(sender As Object, e As EventArgs)
         ' la 1ère fois, on initialise les éléments
          ' subsequent times, they are reset to their values by VIEWSTATE
         if IsPostBack then return
         ' init form
          ' panelinfo not displayed
         panelinfo.visible=false
         ' paneform displayed
         panelform.visible=true
         ' radio buttons
         rdNon.Checked=true
         ' checkboxes
         chk2.Checked=true
          ' input field
         txtSaisie.Text="qqs mots"
          ' password field
         txtMdp.Text="ceciestsecret"
         ' input box
         txtArea.Text="ligne"+ControlChars.CrLf+"ligne2"+ControlChars.CrLf
         ' combo
         dim i as integer
         for i=1 to 4
             cmbValeurs.Items.Add(new ListItem("choix"+i.ToString,i.ToString))
         next
         cmbValeurs.SelectedIndex=1
         ' simple selection list
         for i=1 to 7
             lstSimple.Items.Add(new ListItem("simple"+i.ToString,i.ToString))
         next
         lstSimple.SelectedIndex=0
         ' multiple selection list
         for i=1 to 10
             lstMultiple.Items.Add(new ListItem("multiple"+i.ToString,i.ToString))
         next
         lstMultiple.Items(0).Selected=true
         lstMultiple.Items(2).Selected=true
         ' hidden field
         lblSecret.Text="secret"
End Sub
Clicking the [lstRazSimple] and [lstMultiple] buttons:
Sub btnRazSimple_Click(sender As Object, e As EventArgs)
    ' raz single list
    lstSimple.SelectedIndex=-1
End Sub

Sub razMultiple_Click(sender As Object, e As EventArgs)
    ' raz multiple list
    lstMultiple.SelectedIndex=-1
End Sub
Clicking the [Envoyer] button:
Sub btnEnvoyer_Click(sender As Object, e As EventArgs)
    ' the info panel is made visible and the form panel is hidden
  panelinfo.Visible=true
  panelform.visible=false
  ' we retrieve the posted values and put them in lstInfos
   ' radio buttons
  dim info as string="état marital : "+iif(rdoui.checked,"marié"," non marié")
  affiche(info)
   ' checkboxes
  info=" cases cochées : "+iif(chk1.checked,"1 oui","1 non")+","+ _
      iif(chk2.checked,"2 oui","2 non")+","+iif(chk3.checked,"3 oui","3 non")
  affiche(info)
   ' input field
  affiche("champ de saisie : " + txtSaisie.Text.Trim)
   ' password
  affiche("mot de passe : " + txtMdp.Text.Trim)
   ' input box
  dim lignes() as String
  lignes=new Regex("\r\n").Split(txtArea.Text.Trim)
  dim i as integer
  for i=0 to lignes.length-1
      lignes(i)="["+lignes(i).Trim+"]"
  next
  affiche("Boîte de saisie : " + String.Join(",",lignes))
   ' combo
  affiche("éléments sélectionnés dans combo : "+selection(cmbValeurs))
   ' simple list
  affiche("éléments sélectionnés dans liste simple : "+selection(lstSimple))
   ' multiple list
  affiche("éléments sélectionnés dans liste multiple : "+selection(lstMultiple))
   ' hidden field
  affiche ("Champ caché : " + lblSecret.Text)
End Sub

sub affiche(msg as String)
    ' displays msg in lstInfos
    lstInfos.Items.Add(msg)
end sub

       function selection(liste as ListControl) as string
           ' browse list elements
            ' to find those selected
           dim i as integer
           dim info as string=""
           for i=0 to liste.Items.Count-1
               if liste.Items(i).Selected then info+="[" + liste.Items(i).Text + "]"
           next
           return info
       end function
Finally, clicking the [Retour vers le formulaire ] link:
Sub LinkButton1_Click(sender As Object, e As EventArgs)
    ' display the form and hide the info panel
    panelform.visible=true
    panelinfo.visible=false
End Sub
7.14.2. Example 2
Here, we are revisiting an application previously covered that uses standard HTML forms. The application allows users to perform tax calculation simulations. It relies on a [impot] class, which we will not revisit here. This class requires data that it retrieves from a OLEDB data source. For this example, we will use a ACCESS data source.
7.14.2.1. The MVC structure of the application
The MVC structure of the application is as follows:

The three views will be incorporated into the presentation code of the [main.aspx] controller as containers. Therefore, this application has a single page, [main.aspx].
7.14.2.2. Web application views
The [formulaire] view is the form for entering information used to calculate a user’s tax:
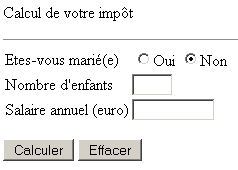
The user fills out the form:
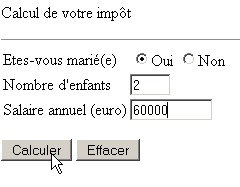
They use the [Envoyer] button to request their tax calculation. They see the following [simulations] view:

They return to the form via the link above. They find it in the state in which they entered it. They may make data entry errors:
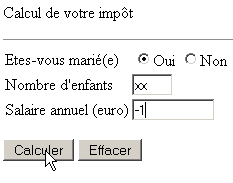
These are flagged by the [erreurs] view:
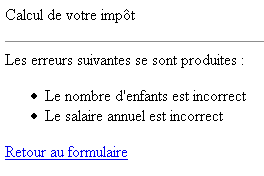
He returns to the form via the link above. He finds it in the state in which he entered it. He can perform new simulations:
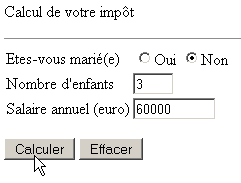
They then see view [simulations] with one additional simulation:
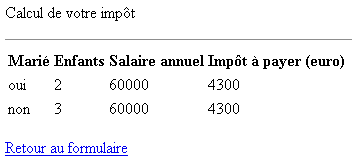
Finally, if the data source is unavailable, the user is notified in view [erreurs]:

7.14.2.3. The application’s presentation code
Recall that the [main.aspx] page brings together all the views. It is a single form with three containers:
- [panelform] for the [formulaire] view
- [panelerreurs] for view [erreurs]
- [panelsimulations] for view [simulations]
We are returning to the separation of presentation code and control code into two separate files. The first will be in [main.aspx] and the second in [main.aspx.vb]. The code for [main.aspx] is as follows:
<%@ page codebehind="main.aspx.vb" inherits="vs.main" AutoEventWireUp="false" %>
<HTML>
    <HEAD>
        <title>Calcul d'tax </title>
    </HEAD>
    <body>
        <P>Calcul de votre impôt</P>
        <HR width="100%" SIZE="1">
        <FORM id="Form1" runat="server">
            <asp:panel id="panelform" Runat="server">
                <TABLE id="Table1" cellSpacing="1" cellPadding="1" border="0">
                    <TR>
                        <TD height="19">Etes-vous marié(e)</TD>
                        <TD height="19">
                            <asp:RadioButton id="rdOui" runat="server" GroupName="rdMarie"></asp:RadioButton>Oui
                            <asp:RadioButton id="rdNon" runat="server" GroupName="rdMarie" Checked="True"></asp:RadioButton>Non</TD>
                    </TR>
                    <TR>
                        <TD>Nombre d'children</TD>
                        <TD>
                            <asp:TextBox id="txtEnfants" runat="server" MaxLength="3" Columns="3"></asp:TextBox></TD>
                    </TR>
                    <TR>
                        <TD>Salaire annuel (euro)</TD>
                        <TD>
                            <asp:TextBox id="txtSalaire" runat="server" MaxLength="10" Columns="10"></asp:TextBox></TD>
                    </TR>
                </TABLE>
                <P>
                    <asp:Button id="btnCalculer" runat="server" Text="Calculer"></asp:Button>
                    <asp:Button id="btnEffacer" runat="server" Text="Effacer"></asp:Button></P>
            </asp:panel>
          <asp:panel id="panelerreurs" runat="server">
                <P>Les erreurs suivantes se sont produites :</P>
                <P>
                    <asp:Literal id="erreursHTML" runat="server"></asp:Literal></P>
                <P></P>
                <asp:LinkButton id="lnkForm1" runat="server">Retour au formulaire</asp:LinkButton>
            </asp:panel>
          <asp:panel id="panelsimulations" runat="server">
                <P>
                    <TABLE>
                        <TR>
                            <TH>
                                Marié</TH>
                            <TH>
                                Enfants</TH>
                            <TH>
                                Salaire annuel</TH>
                            <TH>
                                Impôt à payer (euro)</TH></TR>
                        <asp:Literal id="simulationsHTML" runat="server"></asp:Literal></TABLE>
                    <asp:LinkButton id="lnkForm2" runat="server">Retour au formulaire</asp:LinkButton></P>
            </asp:panel>
      </FORM>
    </body>
</HTML>
We have defined the three containers. Note that they are all within the <form runat="server"> tag. This is mandatory, because to take advantage of server components, they must be placed within such a tag. The key point to understand is that we have a single form here that will be exchanged between the client and the web server. We are therefore using the configuration described throughout this chapter on server components. Let’s examine the components of each container:
[panelform] container:
name | type | properties | role |
Panel | EnableViewState=true | form view | |
RadioButton | EnableViewState=true GroupName=rdmarie | radio buttons | |
TextBox | EnableViewState=true | number of children | |
TextBox | EnableViewState=true | annual salary | |
Button | form button [submit] - starts tax calculation | ||
Button | Form button [submit] - clears the form |
Container [panelerreurs]:
name | type | properties | role |
Panel | EnableViewState=true | error view | |
LinkButton | EnableViewState=true | link to the form | |
Literal | HTML code from the error list |
Container [panelsimulations]:
name | type | properties | role |
Panel | EnableViewState=true | simulation view | |
LinkButton | EnableViewState=true | link to the form | |
Literal | Code HTML from the list of simulations in a table HTML |
7.14.2.4. The application control code
The application control code is distributed across the files [global.asax.vb] and [main.aspx.vb]. The file [global.asax] is defined as follows:
The file [global.asax.vb] is as follows:
Imports System
Imports System.Web
Imports System.Web.SessionState
Imports st.istia.univangers.fr
Imports System.Configuration
Imports System.Collections

Public Class Global
    Inherits System.Web.HttpApplication

    Sub Application_Start(ByVal sender As Object, ByVal e As EventArgs)
        ' create an impot object
        Dim objImpot As impot
        Try
            objImpot = New impot(New impotsOLEDB(ConfigurationSettings.AppSettings("chaineConnexion")))
            ' put the object in the application
            Application("objImpot") = objImpot
            ' no error
            Application("erreur") = False
        Catch ex As Exception
            'there has been an error, we note it in the application
            Application("erreur") = True
            Application("message") = ex.Message
        End Try
    End Sub

    Sub Session_Start(ByVal sender As Object, ByVal e As EventArgs)
        ' start of session - create a list of empty simulations
        Session.Item("simulations") = New ArrayList
    End Sub
End Class
When the application starts (first request made to the application), the [Application_Start] procedure is executed. It attempts to create an object of type [impot], taking its data from a source of type OLEDB. The reader is invited to refer to Chapter 5, where this class was defined, if they have forgotten it. The construction of the [impot] object may fail if the data source is unavailable. In this case, the error is stored in the application so that all subsequent queries know that it could not initialize correctly. If the creation is successful, the created [impot] object is also stored in the application. It will be used by all tax calculation queries. When a client makes their first request, a session is created for them by the [Application_Start] procedure. This session is intended to store the various tax calculation simulations they will perform. These will be stored in a [ArrayList] object associated with the "simulations" session key. When the session starts, this key is associated with an empty [ArrayList] object. The information required by the application is placed in its configuration file [wenConfig]:
<?xml version="1.0" encoding="utf-8" ?>
<configuration>
    <appSettings>
        <add key="chaineConnexion" value="Provider=Microsoft.Jet.OLEDB.4.0; Ole DB Services=-4; Data Source=D:\data\serge\devel\aspnet\poly\webforms\vs\impots5\impots.mdb" />
    </appSettings>
</configuration>
The key [chaineConnexion] refers to the connection string for the source OLEDB. The other part of the control code is located in [main.aspx.vb]:
Imports System.Collections
Imports Microsoft.VisualBasic
Imports st.istia.univangers.fr
Imports System

Public Class main
    Inherits System.Web.UI.Page

    Protected WithEvents rdOui As System.Web.UI.WebControls.RadioButton
    Protected WithEvents rdNon As System.Web.UI.WebControls.RadioButton
    Protected WithEvents txtEnfants As System.Web.UI.WebControls.TextBox
    Protected WithEvents txtSalaire As System.Web.UI.WebControls.TextBox
    Protected WithEvents btnCalculer As System.Web.UI.WebControls.Button
    Protected WithEvents btnEffacer As System.Web.UI.WebControls.Button
    Protected WithEvents panelform As System.Web.UI.WebControls.Panel
    Protected WithEvents lnkForm1 As System.Web.UI.WebControls.LinkButton
    Protected WithEvents lnkForm2 As System.Web.UI.WebControls.LinkButton
    Protected WithEvents panelerreurs As System.Web.UI.WebControls.Panel
    Protected WithEvents panelsimulations As System.Web.UI.WebControls.Panel
    Protected WithEvents simulationsHTML As System.Web.UI.WebControls.Literal
    Protected WithEvents erreursHTML As System.Web.UI.WebControls.Literal

    ' local variables

    Private Sub Page_Load(ByVal sender As System.Object, ByVal e As System.EventArgs) Handles MyBase.Load
...
    End Sub

    Private Sub afficheFormulaire()
...
    End Sub

    Private Sub afficheSimulations(ByRef simulations As ArrayList, ByRef lien As String)
...
    End Sub

    Private Sub btnCalculer_Click(ByVal sender As System.Object, ByVal e As System.EventArgs) Handles btnCalculer.Click
...
    End Sub

    Private Function checkData() As ArrayList
...
    End Function

    Private Sub lnkForm1_Click(ByVal sender As System.Object, ByVal e As System.EventArgs) Handles lnkForm1.Click
....
    End Sub

    Private Sub lnkForm2_Click(ByVal sender As System.Object, ByVal e As System.EventArgs) Handles lnkForm2.Click
...
    End Sub

    Private Sub btnEffacer_Click(ByVal sender As System.Object, ByVal e As System.EventArgs) Handles btnEffacer.Click
...
    End Sub

    Private Sub razForm()
...
    End Sub
End Class

Le premier événement traité par le code est [Page_Load] :

    Private Sub Page_Load(ByVal sender As System.Object, ByVal e As System.EventArgs) Handles MyBase.Load
        ' first, we look at the state of the application
        If CType(Application("erreur"), Boolean) Then
            ' the application failed to initialize
            ' the error view is displayed
            Dim erreurs As New ArrayList
            erreurs.Add("Application momentanément indisponible (" + CType(Application("message"), String) + ")")
            afficheErreurs(erreurs, "")
            Exit Sub
        End If
        ' no errors - on the 1st request, the form is presented
        If Not IsPostBack Then afficheFormulaire()
    End Sub
Note that when the [Page_Load] procedure runs on a POST client, all form components have a value: either the value posted by the client, if any, or the component’s previous value via [VIEWSTATE]. In this form, all components have the [EnableViewState=true] property. Before processing the request, we ensure that the application has initialized correctly. If not, we display the [erreurs] view using the [afficheErreurs] procedure. If this is the first request (IsPostBack=false), we display view [formulaire] using [afficheFormulaire].
The procedure displaying the view [erreurs] is as follows:
    Private Sub afficheErreurs(ByRef erreurs As ArrayList, ByRef lien As String)
        ' displays the error container
        panelerreurs.Visible = True
        Dim i As Integer
        erreursHTML.Text = ""
        For i = 0 To erreurs.Count - 1
            erreursHTML.Text += "<li>" + erreurs(i).ToString + "</li>" + ControlChars.CrLf
        Next
        lnkForm1.Text = lien
        ' the other containers are hidden
        panelform.Visible = False
        panelsimulations.Visible = False
    End Sub
The procedure has two parameters:
- a list of error messages in [erreurs]
- a link text in [lien]
The HTML code to be generated for the error list is placed in the [erreursHTML] literal. The link text is placed in the [Text] property of the [LinkButton] object in the view.
The procedure that displays the [formulaire] view is as follows:
    Private Sub afficheFormulaire()
        ' displays the form
        panelform.Visible = True
        ' the other containers are hidden
        panelerreurs.Visible = False
        panelsimulations.Visible = False
    End Sub
This procedure simply makes the [panelform] container visible. The components are displayed with their posted or previous value (VIEWSTATE).
When the user clicks the [Calculer] button in the [formulaire] view, a transition from POST to [main.aspx] is performed. The [Page_Load] procedure is executed, followed by the [btnCalculer_Click] procedure:
    Private Sub btnCalculer_Click(ByVal sender As System.Object, ByVal e As System.EventArgs) Handles btnCalculer.Click
        ' check the validity of the data entered
        Dim erreurs As ArrayList = checkData()
        ' if there are errors, we report them
        If erreurs.Count <> 0 Then
            ' the error page is displayed
            afficheErreurs(erreurs, "Retour au formulaire")
            Exit Sub
        End If
        ' no errors - tax is calculated
        Dim impot As Long = CType(Application("objImpot"), impot).calculer( _
        rdOui.Checked, CType(txtEnfants.Text, Integer), CType(txtSalaire.Text, Long))
        ' the result is added to existing simulations
        Dim simulation() As String = New String() {CType(IIf(rdOui.Checked, "oui", "non"), String), _
         txtEnfants.Text.Trim, txtSalaire.Text.Trim, impot.ToString}
        ' the result is added to existing simulations
        Dim simulations As ArrayList = CType(Session.Item("simulations"), ArrayList)
        simulations.Add(simulation)
        ' put simulations in session and context
        Session.Item("simulations") = simulations
        ' the result page is displayed
        afficheSimulations(simulations, "Retour au formulaire")
    End Sub
The procedure begins by validating the form fields using the [checkData] procedure, which returns a [ArrayList] list of error messages. If the list is not empty, the [erreurs] view is displayed and the procedure terminates. If the entered data is valid, the tax amount is calculated using the [impot] object that was stored in the application upon startup. This new simulation is added to the list of simulations already performed and stored in the session.
The [CheckData] function checks the validity of the data. It returns a [ArrayList] list of error messages, which is empty if the data is valid:
    Private Function checkData() As ArrayList
        ' initially no errors
        Dim erreurs As New ArrayList
        ' no. of children
        Try
            Dim nbEnfants As Integer = CType(txtEnfants.Text, Integer)
            If nbEnfants < 0 Then Throw New Exception
        Catch
            erreurs.Add("Le nombre d'enfants est incorrect")
        End Try
        ' salary
        Try
            Dim salaire As Long = CType(txtSalaire.Text, Long)
            If salaire < 0 Then Throw New Exception
        Catch
            erreurs.Add("Le salaire annuel est incorrect")
        End Try
        ' return the list of errors
        Return erreurs
    End Function
Finally, view [simulations] is displayed by the following procedure [afficheSimulations]:
    Private Sub afficheSimulations(ByRef simulations As ArrayList, ByRef lien As String)
        ' displays the simulations view
        panelsimulations.Visible = True
        ' the other containers are hidden
        panelerreurs.Visible = False
        panelform.Visible = False
        ' contents of simulations view
        ' each simulation is an array of 4 elements string
        Dim simulation() As String
        Dim i, j As Integer
        simulationsHTML.Text = ""
        For i = 0 To simulations.Count - 1
            simulation = CType(simulations(i), String())
            simulationsHTML.Text += "<tr>"
            For j = 0 To simulation.Length - 1
                simulationsHTML.Text += "<td>" + simulation(j) + "</td>"
            Next
            simulationsHTML.Text += "</tr>" + ControlChars.CrLf
        Next
        ' link
        lnkForm2.Text = lien
    End Sub
The procedure has two parameters:
- a list of simulations in [simulations]
- a link text in [lien]
The code HTML to be generated for the list of simulations is placed in the literal [simulationsHTML]. The link text is placed in the [Text] property of the [LinkButton] object in the view.
When the user clicks the [Effacer] button in the [formulaire] view, the [btnEffacer_click] procedure is executed (always after [Page_Load]):
    Private Sub btnEffacer_Click(ByVal sender As System.Object, ByVal e As System.EventArgs) Handles btnEffacer.Click
        ' displays the empty form
        razForm()
        afficheFormulaire()
    End Sub

    Private Sub razForm()
        ' empty the form
        rdOui.Checked = False
        rdNon.Checked = True
        txtEnfants.Text = ""
        txtSalaire.Text = ""
    End Sub
The code above is simple enough that it doesn't need any comments. We still need to handle clicks on the links in views [erreurs] and [simulations]:
    Private Sub lnkForm1_Click(ByVal sender As System.Object, ByVal e As System.EventArgs) Handles lnkForm1.Click
        ' displays the form
        afficheFormulaire()
    End Sub

    Private Sub lnkForm2_Click(ByVal sender As System.Object, ByVal e As System.EventArgs) Handles lnkForm2.Click
        ' displays the form
        afficheFormulaire()
    End Sub
Both procedures simply display the [formulaire] view. We know that the fields in this view will receive a value that is either the value posted for them or their previous value. Since, in this case, the client’s POST does not send any values for the form fields, these fields will revert to their previous values. The form is therefore displayed with the values entered by the user. We recall that, in the version without server components, we performed this restoration ourselves.
7.14.2.5. Tests
All files required by the application are located in a folder named <application-path>:  | The [bin] folder contains the DLL containing the [impot], [impotsData], and [impotsOLEDB] classes required by the application: |
The reader may, if desired, review Chapter 5, which explains how to create the [impot.dll] file mentioned above. Once this is done, the Cassini server is launched with the parameters (<application-path>,/impots5). Request the url and [http://impots5/main.aspx] files using a browser:
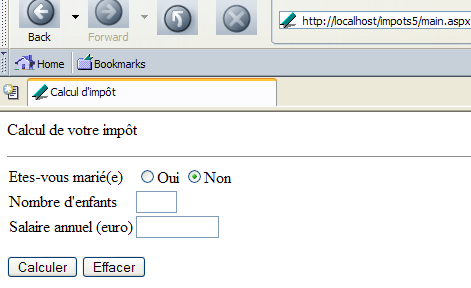
If we rename the file ACCESS [impots.mdb] to [impots1.mdb], we will get the following page:
7.14.3. Example 3
We have shown in these two examples that it is possible to build web applications that follow the MVC architecture using server components. The last example demonstrates that the solution using server components is simpler than the solution using standard HTML tags. Both of our examples had only one page with multiple views within the same page. It is possible to have a MVC architecture with multiple ASP server forms as long as the fact that these forms post their own values does not pose a problem. This is very often the case with applications that have menus. Let’s take the following example:
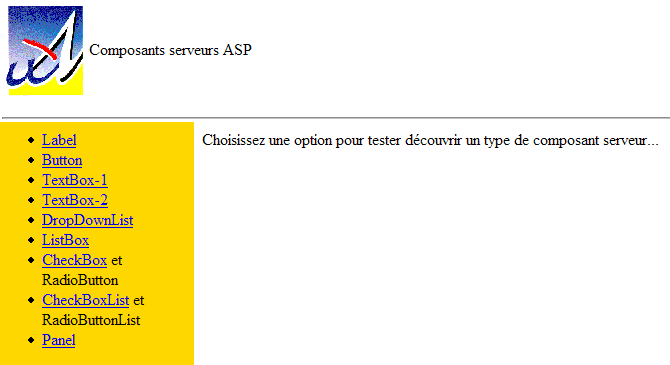
We have gathered links to the applications we have written so far on a single page. This type of application lends itself well to a MVC architecture. The only difference is that there is no longer one controller, but several.
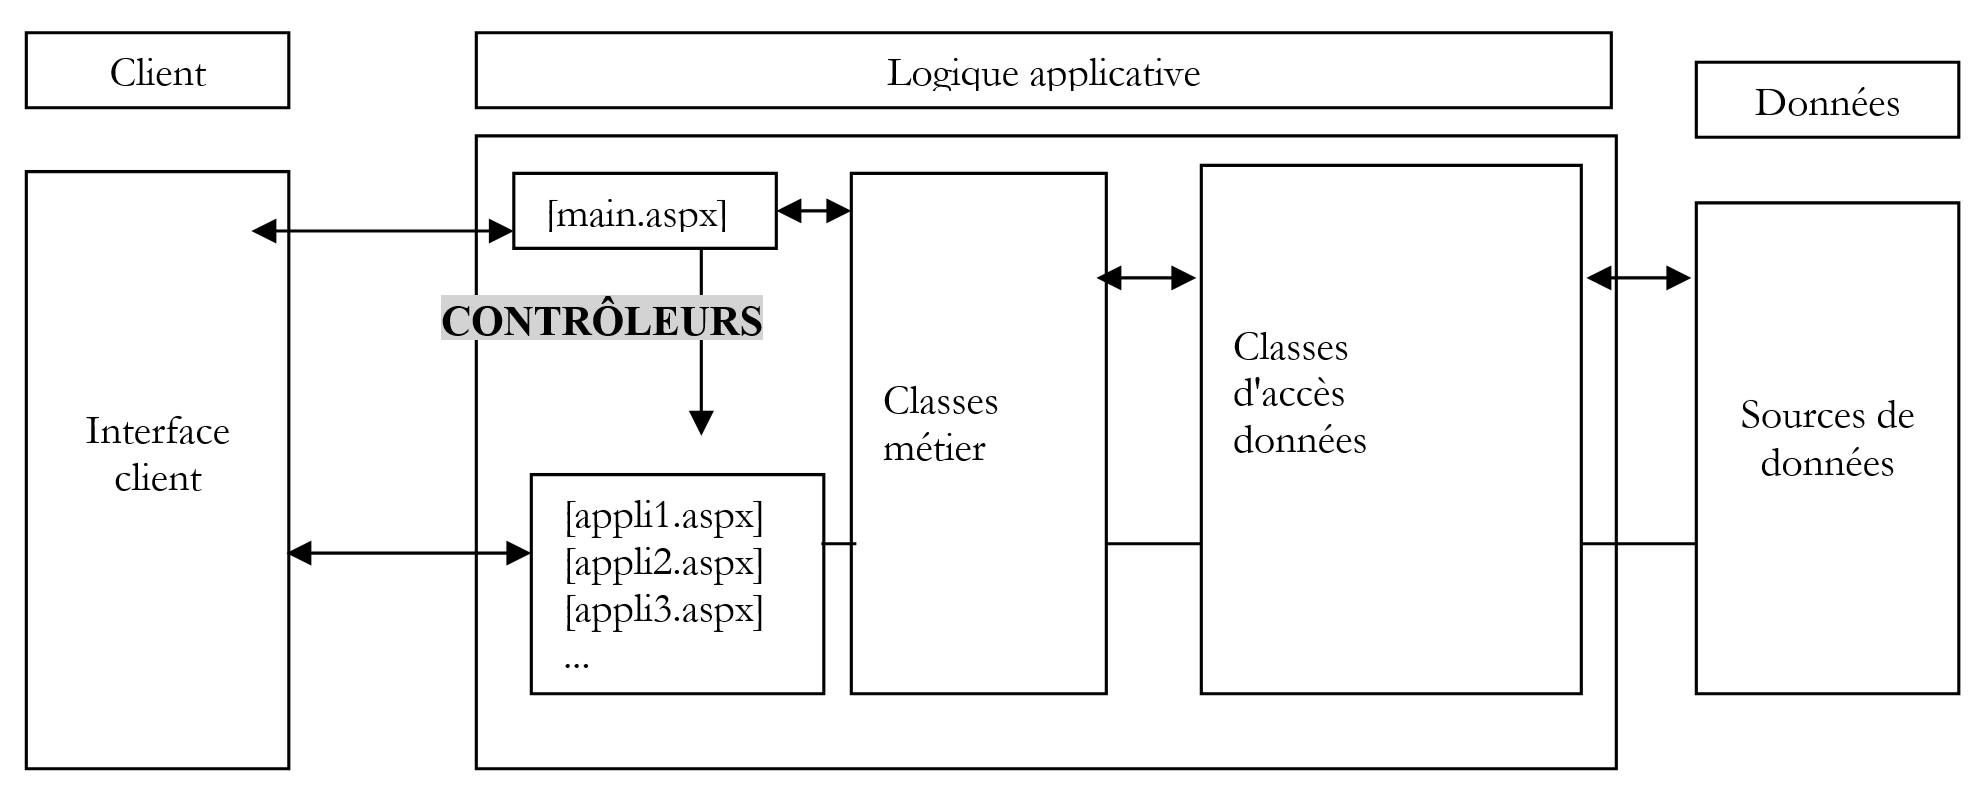
The [main.aspx] controller acts as the main controller. It is this controller that is called by the links on the application’s home page. It will perform operations common to all possible actions and then execute the specific action associated with the link used. It will then hand off to one of the secondary controllers, the one responsible for executing the action. From that point on, communication takes place between the client and that specific controller. We no longer go through the main controller [main.aspx]. We are therefore no longer within the MVC framework with a single controller that filters all requests. Each of the controllers above can present multiple views using the container mechanism within a single page, as we have described.
The fact that we no longer have a single controller that chooses which views to send to the client has its drawbacks. Let’s take the example of error handling. Each of the actions exposed by the application may need to display an error view. Each [applix.aspx] controller will have its own [erreurs] view because this view is simply a specific container within the controller’s page. There is no way to have a single [erreurs] view that would be used by all individual applications. In fact, such a view typically includes a link back to the form with errors, and the form must be restored to the state in which it was validated to allow the user to correct their errors. This restoration is performed by the [VIEWSTATE] mechanism, which does not work across different controllers. If applications are developed by different people, there is a risk of having error pages that look different depending on the action chosen by the user, which undermines the consistency of the overall application. We will see a little later that ASP.NET offers a solution to this specific view-sharing problem. This can be implemented as a new server component that we build ourselves. Simply using this component in the various applications ensures the consistency of the overall application. More difficult to manage is the issue of action order. When all requests pass through a single controller, that controller can verify that the requested action is compatible with the previous one. This validation code is located in a single place. Here, it will need to be distributed across the various controllers, complicating the maintenance of the overall application.
Let’s return to our application above. Its entry page is a classic HTML page:
<html>
    <head>
        <TITLE>Composants ASP Serveur</TITLE>
        <meta name="pragma" content="no-cache">
    </head>
    <frameset rows="130,*" frameborder="0">
        <frame name="banner" src="bandeau.htm" scrolling="no">
        <frameset cols="200,*">
            <frame name="contents" src="options.htm">
            <frame name="main" src="main.htm">
        </frameset>
        <noframes>
            <p id="p1">
                Ce jeu de frames HTML affiche plusieurs pages Web. Pour afficher ce jeu de
                frames, utilisez un navigateur Web qui prend en charge HTML 4.0 et version
                ultérieure.
            </p>
        </noframes>
    </frameset>
</html>
This home page consists of three frames called banner, contents, and main:
 |
The page [bandeau.htm] placed in the frame [banner] is as follows:
Its code HTML is as follows:
<html>
    <head>
        <META HTTP-EQUIV="PRAGMA" CONTENT="NO-CACHE" />
        <title>bandeau</title>
    </head>
    <body>
        <P>
            <TABLE>
                <TR>
                    <TD><IMG alt="logo université d'angers" src="univ01.gif"></TD>
                    <TD>Composants serveurs ASP</TD>
                </TR>
            </TABLE>
        </P>
        <HR>
    </body>
</html>
The page [options.htm] is placed in the banner [contents]. It is a set of links:
 | |
The various links all point to the main controller [main.aspx] with a parameter [action] indicating the action to be performed. We request that the link target be displayed in the frame [main] (target="main").
The first page displayed in the [main] frame is [main.htm]:
|
The main controller [main.aspx, main.aspx.vb] is as follows:
[main.aspx]
[main.aspx.vb]
Public Class main
Inherits System.Web.UI.Page
Private Sub Page_Load(ByVal sender As System.Object, ByVal e As System.EventArgs) Handles MyBase.Load
' retrieve the action to be performed
Dim action As String
If Request.QueryString("action") Is Nothing Then
action = "label"
Else
action = Request.QueryString("action").ToString.ToLower
End If
' execute the action
Select Case action
Case "label"
Server.Transfer("form2.aspx")
Case "button"
Server.Transfer("form3.aspx")
Case "textbox1"
Server.Transfer("form4.aspx")
Case "textbox2"
Server.Transfer("form5.aspx")
Case "dropdownlist"
Server.Transfer("form6.aspx")
Case "listbox"
Server.Transfer("form7.aspx")
Case "checkbox"
Server.Transfer("form8.aspx")
"checkbox list" case
Server.Transfer("form8b.aspx")
"panel" field
Server.Transfer("form9.aspx")
Case Else
Server.Transfer("form2.aspx")
End Select
End Sub
End Class
Our controller is simple. Depending on the value of the [action] parameter, it forwards the request to the appropriate page. It offers no added value compared to a HTML page with links. However, simply adding an authentication page would demonstrate its value. If the user had to authenticate (username, password) to access the applications, the [main.aspx] controller would be a good place to verify that this authentication has been completed.