10. Appendices - Web Development Tools
Here we indicate where to find and how to install free tools for web development in Java, php, ASP, and asp.net. Some tools have been updated, and the instructions provided here may no longer apply to the latest versions. Readers will need to adapt accordingly... :
- a recent browser capable of displaying XML. The examples in this course have been tested with Internet Explorer 6.
- a recent JDK (Java Development Kit). The JDK includes the Java 1.4 plug-in for browsers, which allows them to display Java applets using JDK 1.4.
- A Java development environment for writing Java servlets. Here, it is JBuilder 7.
- Web servers: Apache, PWS (Personal Web Server, Cassini), Tomcat.
- Apache can be used for developing web applications in PERL (Practical Extracting and Reporting Language) or PHP (Personal Home Page)
- PWS can be used for web application development in ASP (Active Server Pages) or PHP on Windows platforms. Cassini enables development in ASP.NET.
- Tomcat is used for web application development using Java servlets or JSP (Java Server Pages)
- a database management system: MySQL
- EasyPHP: a tool that brings together the Apache web server, the PHP language, and the SGBD MySQL
10.1. Web Servers, Browsers, Scripting Languages
- Major Web Servers
- Apache (Linux, Windows)
- Internet Information Server IIS (NT), Personal Web Server PWS (Windows 9x), Cassini (.NET platforms)
- Major browsers
- Internet Explorer (Windows)
- Netscape (Linux, Windows)
- Mozilla (Linux, Windows)
- Opera (Linux, Windows)
- Server-side scripting languages
- VBScript (IIS, PWS)
- JavaScript (IIS, PWS)
- Perl (Apache, IIS, PWS)
- PHP (Apache, IIS, PWS)
- Java (Apache, Tomcat)
- Languages .NET
- Browser-side scripting languages
- VBScript (IE)
- Javascript (IE, Netscape)
- PerlScript (IE)
- Java (IE, Netscape)
10.2. Where to find the tools
http://www.netscape.com/ (downloads link) | |
http://www.microsoft.com/windows/ie/default.asp | |
http://www.mozilla.org | |
http://www.php.net | |
http://www.activestate.com | |
http://msdn.microsoft.com/scripting (follow the Windows Script link) | |
http://java.sun.com/ | |
http://www.apache.org/ | |
included in NT 4.0 Option pack for Windows 95 included in Windows 98's CD http://www.microsoft.com/ntserver/nts/downloads/recommended/NT4OptPk/win95.asp | |
http://www.microsoft.com | |
http://jakarta.apache.org/tomcat/ | |
http://www.borland.com/jbuilder/ | |
http://www.easyphp.org/ | |
http://www.asp.net |
10.3. EasyPHP
This application is very convenient because it combines the following in a single package:
- the Apache web server
- a PHP interpreter
- the SGBD MySQL (3.23.x)
- a MySQL administration tool: PhpMyAdmin
The installation application looks like this:

Installing EasyPHP is straightforward, and a directory structure is created in the file system:
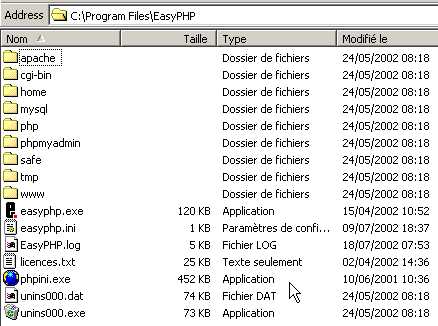
the application executable | |
the Apache server directory structure | |
the SGBD directory structure mysql | |
the directory structure of the phpmyadmin application | |
the directory structure of php | |
root of the directory tree for web pages served by the Apache server for EasyPHP | |
directory where CGI scripts for the Apache server can be placed |
The main advantage of EasyPHP is that the application comes preconfigured. Thus, Apache, PHP, and MySQL are already configured to work together. When you launch EasyPhp via its shortcut in the Programs menu, an icon appears in the bottom-right corner of the screen.
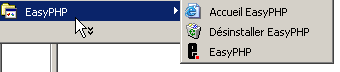 |
This is the letter E with a red dot, which should flash if the Apache web server and the MySQL database are operational. When you right-click on it, you access the menu options:
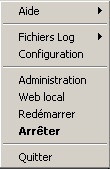
The option Administration allows you to configure settings and perform functionality tests:
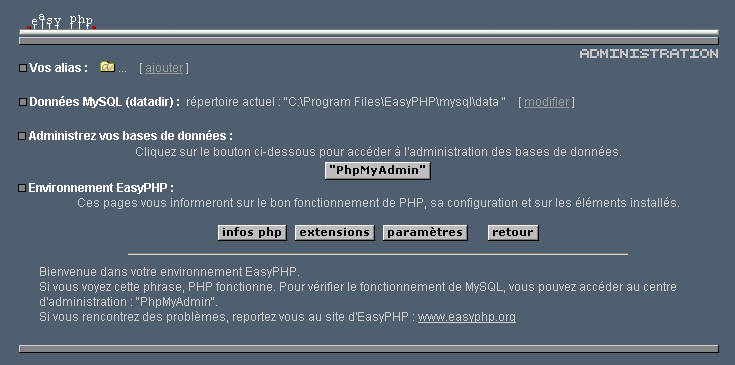
10.3.1. s for the PHP interpreter
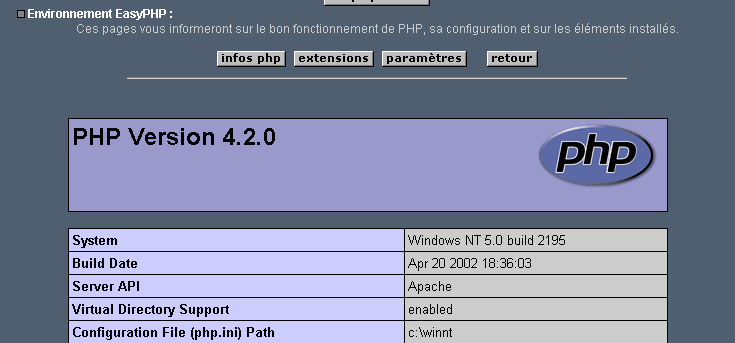
The php info button should allow you to verify that the Apache-PHP combination is working properly: a PHP information page should appear:
The Extensions button displays a list of extensions installed for php. These are actually function libraries.
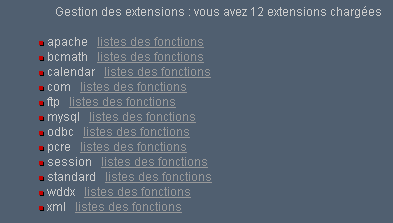
The screen above shows, for example, that the functions required to use the MySQL database are present.
The Settings button displays the login and password for the administrator of the MySQL database.
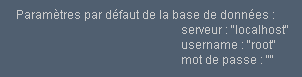
Using the MySQL database is beyond the scope of this quick overview, but it is clear here that a password should be set for the database administrator.
10.3.2. Apache Administration
Still on the EasyPHP administration page, the "Your Aliases" link allows you to define aliases associated with a directory. This allows you to place web pages outside the www directory in the easyPhp directory tree.
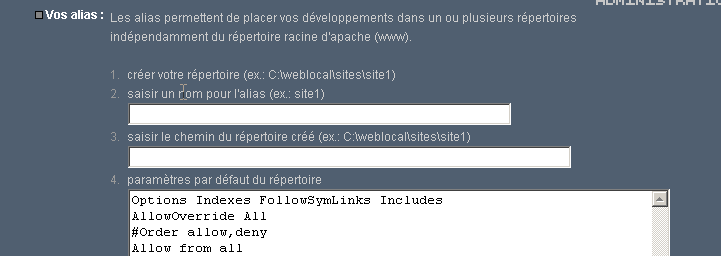
If you enter the following information on the page above:

and click the "Validate" button, the following lines are added to the file <easyphp>\apache\conf\httpd.conf:
    Alias /st/ "e:/data/serge/web/"

    <Directory "e:/data/serge/web">
        Options FollowSymLinks Indexes
        AllowOverride None
        Order deny,allow
        allow from 127.0.0.1
        deny from all
    </Directory>
<easyphp> refers to the installation directory of EasyPHP. httpd.conf is the Apache server configuration file. You can therefore achieve the same result by editing this file directly. Changes to the httpd.conf file are normally applied immediately by Apache. If this is not the case, you will need to stop and restart it, using the easyphp icon:
To finish our example, we can now place web pages in the directory tree e:\data\serge\web:
and request this page using the alias st:
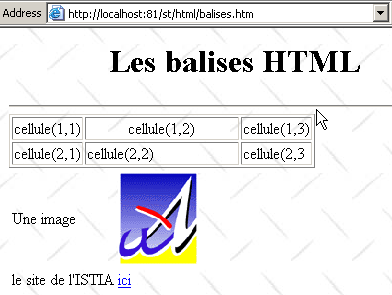
In this example, the Apache server has been configured to run on port 81. Its default port is 80. This setting is controlled by the following line in the httpd.conf file we encountered earlier:
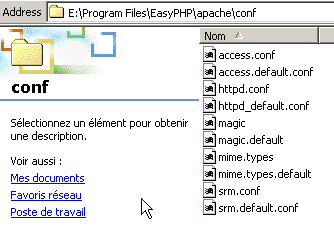
10.3.3. The Apache configuration file [htpd.conf] htpd.conf
When you want to fine-tune Apache, you have to manually edit its configuration file httpd.conf, located here in the <easyphp>\apache\conf folder:
Here are a few key points to note in this configuration file:
| role |
specifies the folder containing the Apache directory structure | |
specifies which port the web server will use. Typically, this is 80. By changing this line, you can have the web server run on a different port | |
the email address of the Apache server administrator | |
the name of the machine on which the Apache server is running | |
the installation directory of the Apache server. When relative file names appear in the configuration file, they are relative to this directory. | |
the root directory of the web page tree served by the server. Here, url http://machine/rep1/fic1.html will correspond to the file E:\Program Files\EasyPHP\www\rep1\fic1.html | |
sets the properties of the previous folder | |
logs folder, so actually <ServerRoot>\logs\error.log: E:\Program Files\EasyPHP\apache\logs\error.log. This is the file to check if you find that the Apache server is not working. | |
E:\Program Files\EasyPHP\cgi-bin will be the root of the directory tree where you can place CGI scripts. Thus, the URL http://machine/cgi-bin/rep1/script1.pl will be the url for the script CGI E:\Program Files\EasyPHP\cgi-bin \rep1\script1.pl. | |
sets the properties of the above folder | |
module loading lines allowing Apache to work with PHP4. | |
Sets the file extensions to be treated as files to be processed by PHP |
10.3.4. Administering MySQL with PhpMyAdmin
On the EasyPhp administration page, click the PhpMyAdmin button:
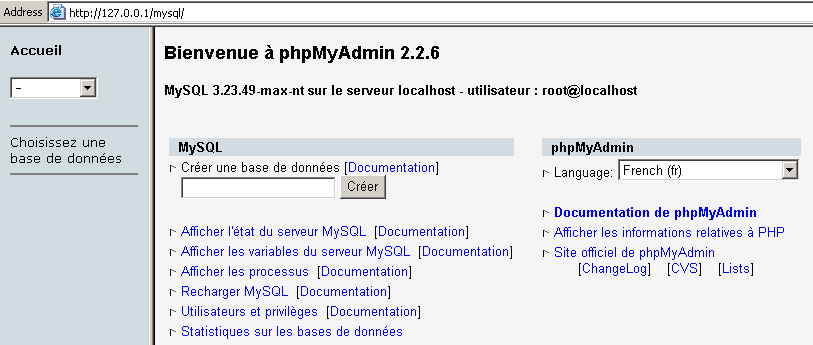
The drop-down list under Home allows you to view the current databases. | 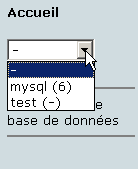 |
The number in parentheses is the number of tables. If you select a database, its tables are displayed: | 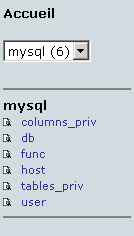 |
The web page offers a number of operations on the database:
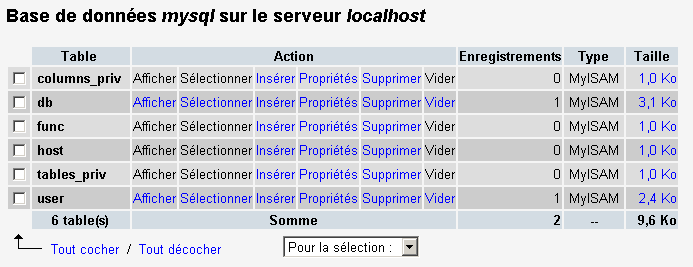
If you click the View User link:

There is only one user here: root, who is the administrator of MySQL. By following the Edit link, you could change their password, which is currently blank—a practice not recommended for an administrator. We won’t say any more about PhpMyAdmin, which is a feature-rich software that would merit a discussion spanning several pages.
10.4. PHP
We have seen how to obtain PHP through the EasyPhp application. To obtain PHP directly, go to the website http://www.php.net. PHP is not limited to web use. It can be used as a scripting language in Windows. Create the following script and save it as date.php:
<?
   // script php displaying the time
  $maintenant=date("j/m/y, H:i:s",time());
  echo "Nous sommes le $maintenant";
?>
In a DOS window, navigate to the [date.php] directory and run it:
dos>"e:\program files\easyphp\php\php.exe" date.php
X-Powered-By: PHP/4.2.0
Content-type: text/html

Nous sommes le 18/07/02, 09:31:01
10.5. PERL
It is best if Internet Explorer is already installed. If it is present, Active Perl will configure it to accept PERL scripts in HTML pages, scripts that will be executed by IE itself on the client side. The Active Perl website is at URL http://www.activestate.comA. Upon installation, PERL will be installed in a directory we will call <perl>. It contains the following directory structure:
DEISL1   ISU        32 403  23/06/00  17:16 DeIsL1.isu
BIN            <REP>        23/06/00  17:15 bin
LIB            <REP>        23/06/00  17:15 lib
HTML           <REP>        23/06/00  17:15 html
EG             <REP>        23/06/00  17:15 eg
SITE           <REP>        23/06/00  17:15 site
HTMLHELP       <REP>        28/06/00  18:37 htmlhelp
The executable perl.exe is located in <perl>\bin. Perl is a scripting language that runs on Windows and Unix. It is also used in the WEB program. Let’s write our first script:
# script PERL displaying the time

# modules
use strict;

# program
my ($secondes,$minutes,$heure)=localtime(time);
print "Il est $heure:$minutes:$secondes\n";
Save this script to a file named heure.pl. Open a DOS window, navigate to the directory containing the previous script, and run it:
10.6. Vbscript, Javascript, Perlscript
These are scripting languages for Windows. They can run in various environments such as
- Windows Scripting Host for direct use in Windows, particularly for writing system administration scripts
- Internet Explorer. It is then used within HTML pages, to which it brings a certain level of interactivity that cannot be achieved with HTML alone.
- Internet Information Server (IIS), Microsoft’s web server on NT/2000, and its equivalent, Personal Web Server (PWS), on Win9x. In this case, vbscript is used for server-side web programming, a technology called ASP (Active Server Pages) by Microsoft.
Download the installation file from URL: http://msdn.microsoft.com/scripting and follow the Windows Script links. The following are installed:
- the Windows Scripting Host container, which allows the use of various scripting languages, such as Vbscript and Javascript, as well as others like PerlScript, which comes with Active Perl.
- an interpreter VBscript
- an interpreter Javascript
Let’s run a few quick tests. Let’s build the following vbscript program:
' a class
class personne
  Dim nom
  Dim age
End class

' creation of a person object
Set p1=new personne
With p1
  .nom="dupont"
  .age=18
End With

' display properties person p1
With p1
  wscript.echo "nom=" & .nom
  wscript.echo "age=" & .age
End With
This program uses objects. Let's call it objets.vbs (the .vbs extension indicates a vbscript file). Navigate to the directory where it is located and run it:
dos>cscript objets.vbs
Microsoft (R) Windows Script Host Version 5.6
Copyright (C) Microsoft Corporation 1996-2001. All rights reserved.

nom=dupont
age=18
Now let's build the following javascript program that uses arrays:
// painting in a variant
// empty table
tableau=new Array();
affiche(tableau);
// table grows dynamically
for(i=0;i<3;i++){
  tableau.push(i*10);
}
// display panel
affiche(tableau);
// still
for(i=3;i<6;i++){
  tableau.push(i*10);
}
affiche(tableau);

// multi-dimensional tables
WScript.echo("-----------------------------");

tableau2=new Array();
for(i=0;i<3;i++){
  tableau2.push(new Array());
  for(j=0;j<4;j++){
    tableau2[i].push(i*10+j);
  }//for j
}// for i
affiche2(tableau2);

// end
WScript.quit(0);

// ---------------------------------------------------------
function affiche(tableau){
  // display panel
  for(i=0;i<tableau.length;i++){
    WScript.echo("tableau[" + i + "]=" + tableau[i]);
  }//for
}//function

// ---------------------------------------------------------
function affiche2(tableau){
  // display panel
  for(i=0;i<tableau.length;i++){
    for(j=0;j<tableau[i].length;j++){
      WScript.echo("tableau[" + i + "," + j + "]=" + tableau[i][j]);
    }// for j
  }//for i
}//function
This program uses arrays. Let’s call it arrays.js (the suffix js refers to a file named javascript). Navigate to the directory where it is located and run it:
dos>cscript tableaux.js
Microsoft (R) Windows Script Host Version 5.6
Copyright (C) Microsoft Corporation 1996-2001. Tous droits réservés.

tableau[0]=0
tableau[1]=10
tableau[2]=20
tableau[0]=0
tableau[1]=10
tableau[2]=20
tableau[3]=30
tableau[4]=40
tableau[5]=50
-----------------------------
tableau[0,0]=0
tableau[0,1]=1
tableau[0,2]=2
tableau[0,3]=3
tableau[1,0]=10
tableau[1,1]=11
tableau[1,2]=12
tableau[1,3]=13
tableau[2,0]=20
tableau[2,1]=21
tableau[2,2]=22
tableau[2,3]=23
One last example in PerlScript to finish up. You must have Active Perl installed to access PerlScript.
<job id="PERL1">
  <script language="PerlScript">
       # classic Perl
    %dico=("maurice"=>"juliette","philippe"=>"marianne");
    @cles= keys %dico;
    for ($i=0;$i<=$#cles;$i++){
        $cle=$cles[$i];
      $valeur=$dico{$cle};
        $WScript->echo ("clé=".$cle.", valeur=".$valeur);
    }
     # perlscript using Windows Script objects
    $dico=$WScript->CreateObject("Scripting.Dictionary");
    $dico->add("maurice","juliette");
    $dico->add("philippe","marianne");
    $WScript->echo($dico->item("maurice"));
    $WScript->echo($dico->item("philippe"));
  </script>
</job>
This program demonstrates how to create and use two dictionaries: one in the classic Perl style, and the other using the Windows Script Scripting Dictionary object. Let's save this code to the file dico.wsf (wsf is the file extension for Windows Script files). Navigate to the program's folder and run it:
dos>cscript dico.wsf
Microsoft (R) Windows Script Host Version 5.6
Copyright (C) Microsoft Corporation 1996-2001. Tous droits réservés.

clé=philippe, valeur=marianne
clé=maurice, valeur=juliette
juliette
marianne
Perlscript can use objects from the container in which it runs. Here, these were objects from the Windows Script container. In the context of web programming, the scripts VBscript, Javascript, Perlscript can be executed either within the IE browser or within a PWS or IIS server. If the script is somewhat complex, it may be wise to test it outside the web context, within the Windows Script container as discussed previously. This will only allow testing of script functions that do not use browser- or server-specific objects. Even with this limitation, this option remains useful because it is generally quite impractical to debug scripts running within web servers or browsers.
10.7. JAVA
Java is available at URL: http://www.sun.com and is installed in a directory structure named <java> that contains the following elements:
22/05/2002  05:51       <DIR>          .
22/05/2002  05:51       <DIR>          ..
22/05/2002  05:51       <DIR>          bin
22/05/2002  05:51       <DIR>          jre
07/02/2002  12:52                8 277 README.txt
07/02/2002  12:52               13 853 LICENSE
07/02/2002  12:52                4 516 COPYRIGHT
07/02/2002  12:52               15 290 readme.html
22/05/2002  05:51       <DIR>          lib
22/05/2002  05:51       <DIR>          include
22/05/2002  05:51       <DIR>          demo
07/02/2002  12:52           10 377 848 src.zip
11/02/2002  12:55       <DIR>          docs
In the bin directory, you will find javac.exe, the Java compiler, and java.exe, the Java Virtual Machine. You can perform the following tests:
- Write the following script:
//java program displaying the time

import java.io.*;
import java.util.*;

public class heure{
  public static void main(String arg[]){
     // retrieve date & time
     Date maintenant=new Date();
      // we display
     System.out.println("Il est "+maintenant.getHours()+
        ":"+maintenant.getMinutes()+":"+maintenant.getSeconds());
  }//hand
}//class
- Save this program as heure.java. Open a DOS window. Navigate to the directory containing the heure.java file and compile it:
dos>c:\jdk1.3\bin\javac heure.java
Note: heure.java uses or overrides a deprecated API.
Note: Recompile with -deprecation for details.
In the command above, [c:\jdk1.3\bin\javac] must be replaced with the exact path to the javac.exe compiler. In the same directory as heure.java, you should find a file named heure.class, which is the program that will now be executed by the java.exe virtual machine.
- Run the program:
In the command above, [c:\jdk1.3\bin\java] must be replaced with the exact path to the Java virtual machine [java.exe].
10.8. Apache Server
We have seen that the Apache server can be obtained using the EasyPhp application. To download it directly, go to the Apache website: http://www.apache.org. The installation creates a directory structure containing all the files needed for the server. Let’s call this directory <apache>. It contains a directory structure similar to the following:
UNINST   ISU       118 805  23/06/00  17:09 Uninst.isu
HTDOCS         <REP>        23/06/00  17:09 htdocs
APACHE~1 DLL       299 008  25/02/00  21:11 ApacheCore.dll
ANNOUN~1             3 000  23/02/00  16:51 Announcement
ABOUT_~1            13 197  31/03/99  18:42 ABOUT_APACHE
APACHE   EXE        20 480  25/02/00  21:04 Apache.exe
KEYS                36 437  20/08/99  11:57 KEYS
LICENSE              2 907  01/01/99  13:04 LICENSE
MAKEFI~1 TMP        27 370  11/01/00  13:47 Makefile.tmpl
README               2 109  01/04/98   6:59 README
README   NT          3 223  19/03/99   9:55 README.NT
WARNIN~1 TXT           339  21/09/98  13:09 WARNING-NT.TXT
BIN            <REP>        23/06/00  17:09 bin
MODULES        <REP>        23/06/00  17:09 modules
ICONS          <REP>        23/06/00  17:09 icons
LOGS           <REP>        23/06/00  17:09 logs
CONF           <REP>        23/06/00  17:09 conf
CGI-BIN        <REP>        23/06/00  17:09 cgi-bin
PROXY          <REP>        23/06/00  17:09 proxy
INSTALL  LOG         3 779  23/06/00  17:09 install.log
Apache configuration files directory | |
Apache log files (monitoring) directory | |
Apache executables |
10.8.1. Configuration
In the <Apache>\conf folder, you will find the following files: httpd.conf, srm.conf, access.conf. In the latest versions of Apache, these three files have been combined into httpd.conf. We have already covered the key points of this configuration file. In the following examples, the Apache instance version (derived from EasyPhp) was used for testing, and thus its configuration file. In this file, DocumentRoot, which designates the root of the web page directory tree, is e:\program files\easyphp\www.
10.8.2. Link PHP - Apache
To test, create the file intro.php with the following single line:
and place it in the root directory of the Apache server (DocumentRoot above). Request the URL URL://localhost/intro.http. You should see a list of information:
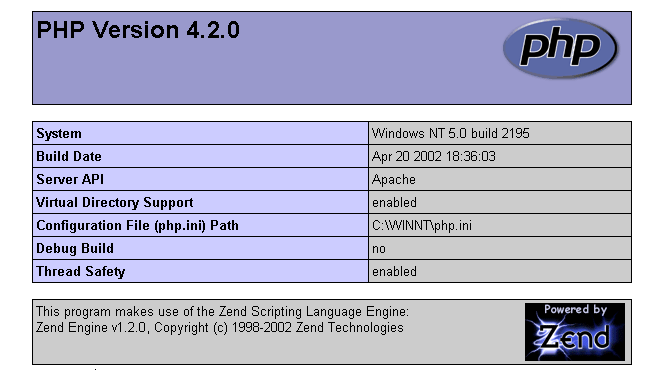
The following PHP script displays the time. We have already encountered it:
<?
// time: number of milliseconds since 01/01/1970
// "date-time display format
// d: 2-digit day
// m: 2-digit month
// y: 2-digit year
// H: hour 0.23
// i : minutes
// s: seconds
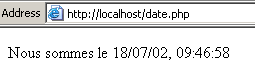
print "Nous sommes le " . date("d/m/y H:i:s",time());
?>
Place this text file in the root directory of the Apache server (DocumentRoot) and name it date.php. Use a browser to request URL http://localhost/date.php. The following page is displayed:
10.8.3. PERL-APACHE Link
It is created using a line in the following format: ScriptAlias /cgi-bin/ "E:/Program Files/EasyPHP/cgi-bin/" from the file <apache>\conf\httpd.conf. Its syntax is ScriptAlias /cgi-bin/ "<cgi-bin>" where <cgi-bin> is the folder where CGI scripts can be placed. CGI (Common Gateway Interface) is a standard for communication between the WEB server and applications. A client requests a dynamic page from the web server, c.a.d—a page generated by a program. The server must therefore instruct a program to generate the page. CGI defines the communication between the server and the program, including how information is transmitted between these two entities. If necessary, modify the line ScriptAlias /cgi-bin/ "<cgi-bin>" and restart the Apache server. Then perform the following test:
- Write the script:
#!c:\perl\bin\perl.exe

# script PERL displaying the time

# modules
use strict;

# program
my ($secondes,$minutes,$heure)=localtime(time);
print <<FINHTML
Content-Type: text/html

<html>
 <head>
  <title>heure</title>
 </head>
 <body>
  <h1>Il est $heure:$minutes:$secondes</h1>
 </body>
FINHTML
;
- Place this script in <cgi-bin>\heure.pl, where <cgi-bin> is the directory that can accept CGI scripts (see httpd.conf). The first line #!c:\perl\bin\perl.exe specifies the path to the perl.exe executable. Modify it if necessary.
- Start Apache if you haven't already
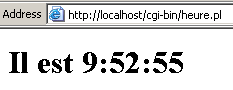
- Use a browser to request URL http://localhost/cgi-bin/heure.pl. The following page is displayed:
10.9. The PWS server
10.9.1. Installation
The PWS server (Personal Web Server) is a personal version of Microsoft's IIS server (Internet Information Server). The latter is available on Windows 98 and 2000 machines. On Win9x machines, PWS is normally available with the Internet Explorer installation package. However, it is not installed by default. You must perform a custom installation of IE and request the installation of PWS. It is also available in the NT 4.0 Option pack for Windows 95.
10.9.2. Initial Tests
The root directory of the PWS server’s web pages is drive:\inetpub\wwwroot, where drive is the disk on which you installed PWS. We will assume hereinafter that this drive is D. Thus, url http://machine/rep1/page1.html corresponds to the file d:\inetpub\wwwroot\rep1\page1.html. The PWS server interprets any file with the .asp (Active Server Pages) extension as a script that it must execute to generate a HTML page. PWS runs on port 80 by default. The Apache web server does too... You must therefore stop Apache to work with PWS if you have both servers. The other solution is to configure Apache to run on a different port. Thus, in the Apache configuration file, replace the line <mark style="background-color: #ffe994">Port 80 with <mark style="background-color: #ffe994">Port 81</mark>; Apache will now run on port 81 and can be used simultaneously with PWS. If PWS has been started and you request URL://localhost, you will see a page similar to the following:
10.9.3. Link PHP - PWS
- Below is a .reg file designed to modify the registry. Double-click this file to modify the registry. Here, the required DLL is located in d:\php4 along with the php executable. Modify as needed. The \ characters must be doubled in the DLL path.
REGEDIT4

[HKEY_LOCAL_MACHINE\SYSTEM\CurrentControlSet\Services\w3svc\parameters\Script Map]
".php"="d:\\php4\\php4isapi.dll"
- Restart the machine so that the registry change takes effect.
- Create a folder named php in d:\inetpub\wwwroot, which is the root directory of the PWS server. Once this is done, enable PWS and go to the "Advanced" tab. Select the "Add" button to create a virtual directory:
- Confirm the settings and restart PWS. Place the file intro.php, containing the following single line, in d:\inetpub\wwwroot\php:
- Request the file intro.php from the server at PWS via URL http://localhost/php/intro.php. You should see the list of information already displayed with Apache.
10.10. Tomcat: Java servlets and JSP pages (Java Server Pages)
Tomcat is a web server that allows you to generate HTML pages using servlets (Java programs executed by the web server) or JSP pages (Java Server Pages), which combine Java code and HTML code. This is the equivalent of ASP (Active Server Pages) on Microsoft’s IIS/PWS server, where VBScript or Javascript code is mixed with HTML code.
10.10.1. Installation
Tomcat is available at URL: http://jakarta.apache.org. Download the .exe installation file. When you run this program, it first prompts you to select which JDK to use. This is because Tomcat requires a JDK to install itself and then to compile and run Java servlets. You must therefore have a Java JDK installed before installing Tomcat. The most recent JDK is recommended. The installation will create a <tomcat> directory structure:
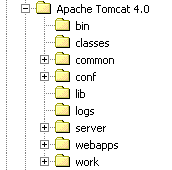
simply consists of extracting this archive into a directory. Choose a directory whose path contains only names without spaces (not, for example, "Program Files"), because there is a bug in the Tomcat installation process. For example, use C:\tomcat or D:\tomcat. Let’s call this directory <tomcat>. Inside it, you will find a folder named jakarta-tomcat, which contains the following directory structure:
LOGS           <REP>        15/11/00   9:04 logs
LICENSE              2 876  18/04/00  15:56 LICENSE
CONF           <REP>        15/11/00   8:53 conf
DOC            <REP>        15/11/00   8:53 doc
LIB            <REP>        15/11/00   8:53 lib
SRC            <REP>        15/11/00   8:53 src
WEBAPPS        <REP>        15/11/00   8:53 webapps
BIN            <REP>        15/11/00   8:53 bin
WORK           <REP>        15/11/00   9:04 work
10.10.2. Starting/Stopping the Tomcat Web Server
Tomcat is a web server, just like Apache or PWS. To launch it, use the links in the Programs menu:
to start Tomcat | |
to stop it |
When you start Tomcat, a DOS window appears with the following content:
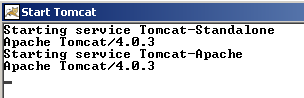
You can minimize this DOS window. It will remain open as long as Tomcat is running. You can then proceed to the initial tests. The Tomcat web server runs on port 8080. Once Tomcat is running, open a web browser and navigate to URL http://localhost:8080. You should see the following page:
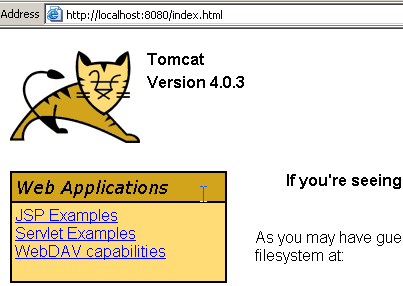
Follow the Servlet Examples link:
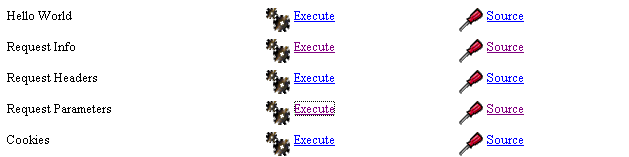
Click the "Execute" link for RequestParameters, then click the "Source" link. This will give you an initial overview of what a Java servlet is. You can do the same with the links on the JSP pages.
To stop Tomcat, use the Stop Tomcat link in the program menu.
10.11. JBuilder
JBuilder is a Java application development environment. To build Java servlets that do not have graphical interfaces, such an environment is not essential. A text editor and a JDK will suffice. However, JBuilder offers a few advantages over the previous method:
- ease of debugging: the compiler flags erroneous lines in a program, and it is easy to navigate to them
- code suggestions: when using a Java object, JBuilder displays a list of its properties and methods inline. This is very handy, given that most Java objects have a large number of properties and methods that are difficult to remember.
JBuilder can be found at http://www.borland.com/jbuilder. You must fill out a form to obtain the software. An activation key is sent via email. To install JBuilder 7, for example, the following steps were taken:
- Three ZIP files were downloaded: one for the application, one for the documentation, and one for the examples. Each of these ZIP files has a separate link on the JBuilder website.
- First, the application was installed, then the documentation, and finally the examples
- When you launch the application for the first time, an activation key is requested: this is the one that was sent to you by email. In version 7, this key is actually an entire text file that can be placed, for example, in the JB7 installation folder. When the key is requested, you then specify the file in question. Once this is done, the key will not be requested again.
There are a few useful configurations to set up if you want to use JBuilder to build Java servlets. In fact, the so-called "personal JBuilder" version is a stripped-down version of version that notably does not include all the classes necessary for Java web development. You can configure JBuilder to use the class libraries provided by Tomcat. Here’s how:
- Launch JBuilder
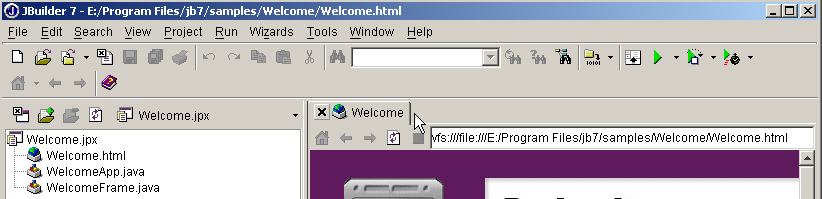
- Enable option Tools/Configure JDKs
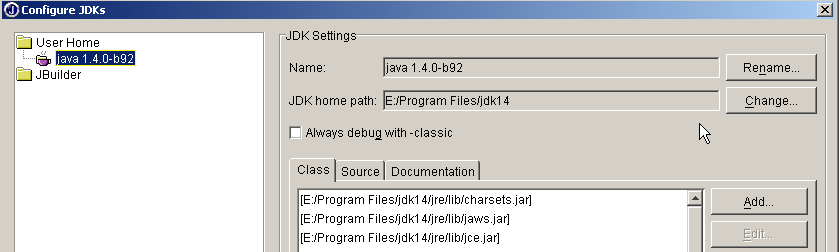
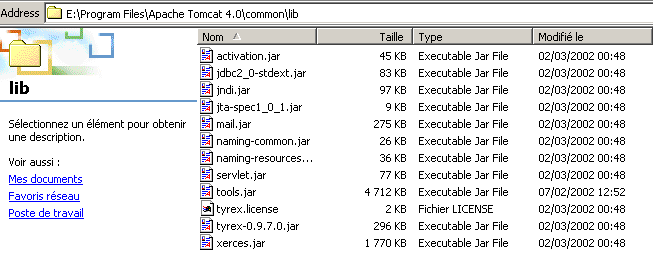
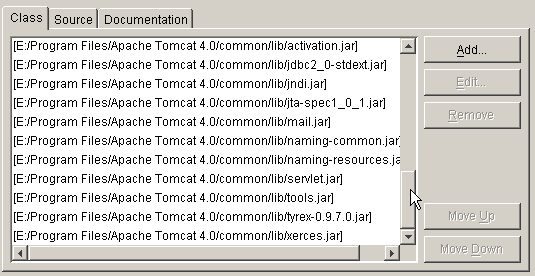
In the JDK Settings section above, the Name field normally displays JDK 1.3.1. If you have a newer version of JDK, use the Change button to specify its installation directory. Above, we have specified the directory E:\Program Files\jdk14 where a JDK 1.4 was installed. From now on, JBuilder will use this JDK for its compilations and executions. In the (Class, Source, Documentation) section, you’ll find a list of all the class libraries that will be explored by JBuilder—in this case, the classes from JDK 1.4. The classes in this version are not sufficient for Java web development. To add other class libraries, use the Add button and select the additional .jar files you want to use. The .jar files are class libraries. Tomcat 4.x includes all the class libraries necessary for web development. They are located in <tomcat>\common\lib, where <tomcat> is the Tomcat installation directory:
Using the Add button, we will add these libraries, one by one, to the list of libraries scanned by JBuilder:
From now on, you can compile Java programs compliant with the J2EE standard, including Java servlets. JBuilder is used only for compilation; execution is subsequently handled by Tomcat according to the procedures explained in the course.
10.12. The Cassini Web Server
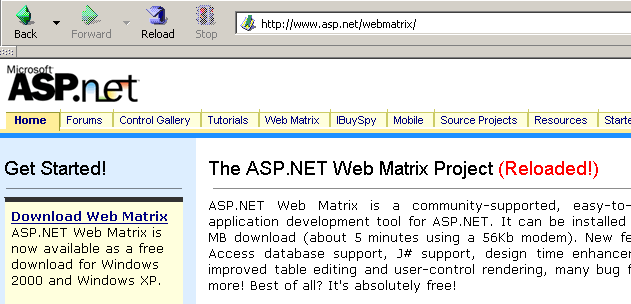
To work with Microsoft’s .NET platform, you can use the Cassini web server. This is available through another product called [WebMatrix], which is a free web development environment for .NET platforms available at url:
Follow the product installation procedure carefully:
- download and install the .NET platform (version 1.1 as of March 2004)
- download and install WebMatrix
- Download and install MSDE (Microsoft Data Engine), which is a limited version of SQL Server.
Once the installation is complete, the [WebMatrix] product is available in Installed Programs:
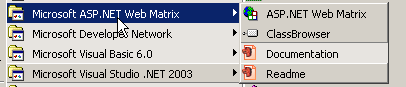
The [ASP.NET] Web Matrix link launches the IDE development tool:
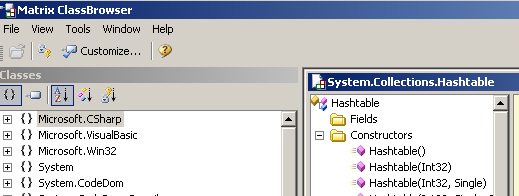
The [Class Browser] link launches a class explorer tool .NET:
To test the installation, let's run [WebMatrix]:
1234
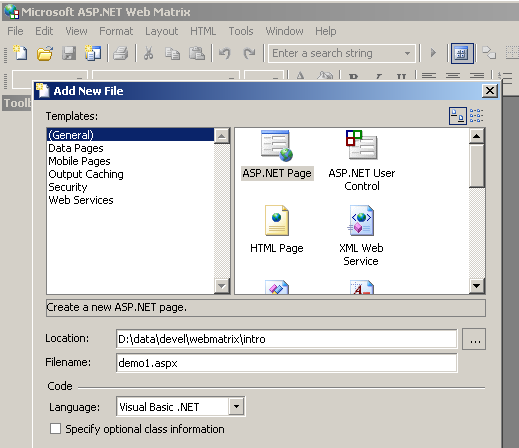
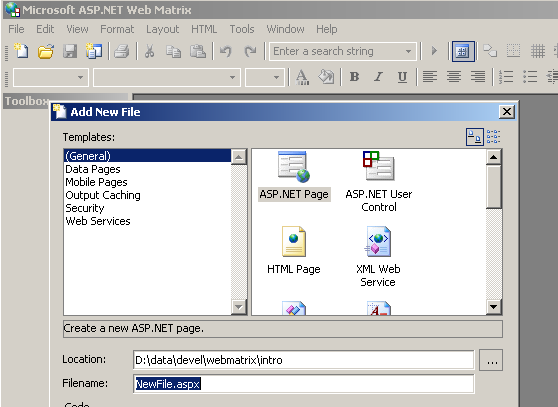
Upon initial startup, [WebMatrix] prompts for the specifications of the new projet.C, which is its default configuration. You can configure it so that this dialog box does not appear at startup. This is achieved using the [File/New File] option. [WebMatrix] allows you to build templates for various web applications. Above, we specified in (1) that we wanted to build a [ASP.ET Page] application, which is a web page. In (2), we specify the folder where this web page will be placed. In (3), we specify the name of the page. It must have the .aspx extension. Finally, in (4), we specify that we want to work with the VB.NET language, as [WebMatrix] also supports the C# and J# languages.
Once this is done, [WebMatrix] displays an editing page for the [demo1.aspx] file. We enter the following code there:
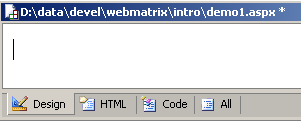
- The [Design] tab allows you to "design" the web page you want to build. This works similarly to a IDE for building Windows applications.
- The graphical design of the web page in [Design] will generate HTML code in the [HTML] tab
- The web page may contain controls that generate events requiring a response, such as a button. These events will be handled by VB.NET code, which will be placed in the [Code] tab
- Ultimately, the demo1.aspx file is a text file combining HTML code and VB.NET code, resulting from the graphic design created in [Design], the code from HTML that was manually added to [HTML], and the code from VB.NET placed in [Code]. The entire file is available in the [All] tab.
- An experienced ASP.ET developer can build the demo1.aspx file directly with a text editor without the help of any IDE.
Let's select the option [All] We can see that [WebMatrix] has already generated code:
<%@ Page Language="VB" %>
<script runat="server">

    ' Insert page code here
    '

</script>
<html>
<head>
</head>
<body>
    <form runat="server">
        <!-- Insert content here -->
    </form>
</body>
</html>
We won't attempt to explain this code here. We'll transform it as follows:
<html>
<head>
    <title>Démo asp.net </title>
</head>
<body>
    Il est <% =Date.Now.ToString("hh:mm:ss") %>
</body>
</html>
The code above is a combination of HTML and VB.NET code. It has been placed within the <% ... %> tags. To execute this code, we use the option [View/Start]. [WebMatrix] then launches the Cassini web server if it is not already running
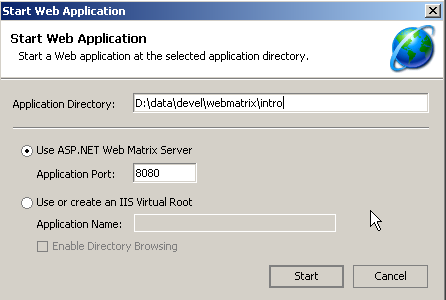
You can accept the default values offered in this dialog box and select option [Start]. The web server is then active. [WebMatrix] will then launch the default browser on the machine it is running on and request the URL http://localhost:8080/demo1.aspx:

It is possible to use the Cassini server outside of [WebMatrix]. The server executable is located in <WebMatrix>\<version>\WebServer.exe, where <WebMatrix> is the installation directory of [WebMatrix] and <version> is its version number:
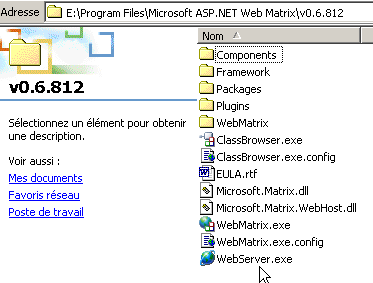
Open a Command Prompt window and navigate to the Cassini server folder:
E:\Program Files\Microsoft ASP.NET Web Matrix\v0.6.812>dir
...
29/05/2003  11:00               53 248 WebServer.exe
...
Let’s run [WebServer.exe] without any parameters:
We get a help window:
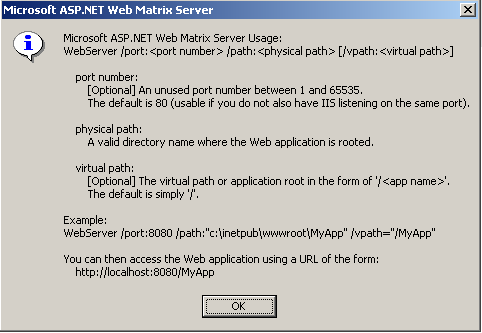
The [WebServer] application, also known as the Cassini web server, accepts three parameters:
- /port: port number of the web service. Can be any number. The default value is 80
- /path: physical path to a folder on the disk
- /vpath: virtual folder associated with the previous physical folder. Note that the syntax is not /path=path but /vpath:path, contrary to what the help panel above states.
Let’s place the file [demo1.aspx] in the following folder:
Let’s associate the virtual folder [/webmatrix] with the physical folder [d:\data\devel\webmatrix]. The web server could be started as follows:
E:\Program Files\Microsoft ASP.NET Web Matrix\v0.6.812>webserver /port:100 /path:"d:\data\devel\webmatrix" /vpath:"/webmatrix"
The Cassini server is now active, and its icon appears in the taskbar. If you double-click it:
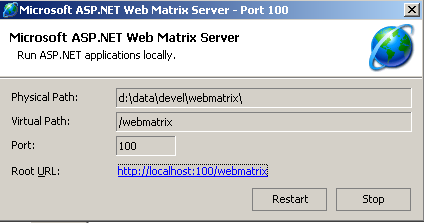
You will see the server's startup settings. You also have the option to stop [Stop] or restart [Restart] the web server. If you click the [Root URL] link, you’ll see the root of the server’s web directory in a browser:
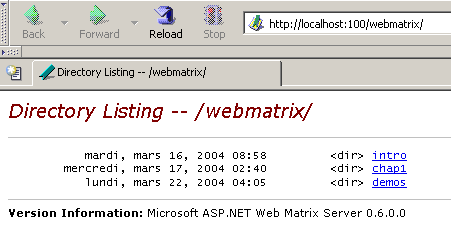
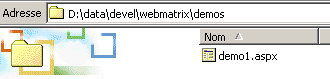
Let’s follow the [demos] link:

then the link [demo1.aspx]:
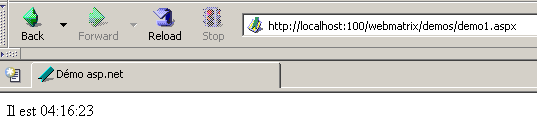
We can see, therefore, that if the physical folder P=[d:\data\devel\webmatrix] has been associated with the virtual folder V=[/webmatrix] and the server is running on port 100, the web page [demo1.aspx], which is physically located in [P\demos], will be accessible locally via URL and [http://localhost:100/V/demos/demo1.aspx].
In this specific case, we have shown that ASP.NET web development can be done using a simple text editor to write web pages and the Cassini web server to test them. This holds true regardless of the application’s complexity. IDE [WebMatrix] offers some development features, but not many. A tool like Visual Studio.NET is much more powerful, but it is a commercial product.