9. Appendices
Here we explain how to install the tools used in this document on Windows 7 or 8 machines.
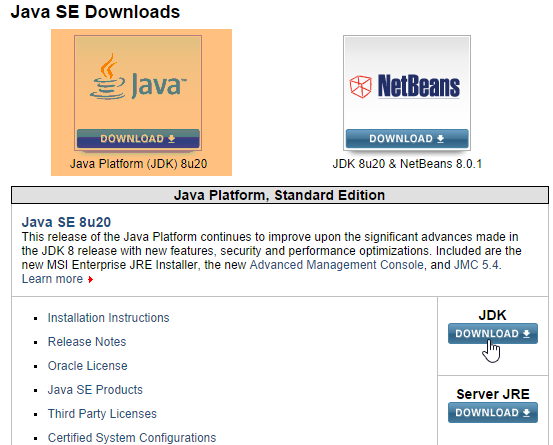
9.1. Installing JDK
The URL is based on [http://www.oracle.com/technetwork/java/javase/downloads/index.html] (October 2014), while JDK is the most recent version. We will refer to the JDK installation folder as <jdk-install>.
 |
9.2. Installing Maven
Maven is a tool for managing dependencies in a Java project and more. It is available at URL [http://maven.apache.org/download.cgi].
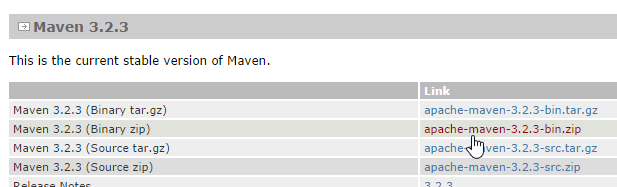 |
Download and unzip the archive. We will refer to the Maven installation folder as <maven-install>.
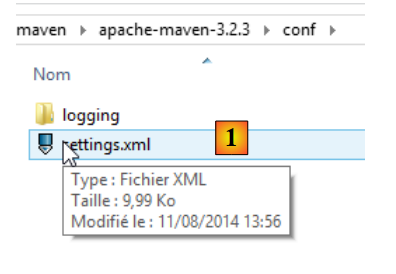 |
- In [1], the file [conf / settings.xml] configures Maven;
It contains the following lines:
  <!-- localRepository
   | The path to the local repository maven will use to store artifacts.
   |
   | Default: ${user.home}/.m2/repository
  <localRepository>/path/to/local/repo</localRepository>
-->
The default value on line 4, if like me your {user.home} has a space in its path (for example, [C:\Users\Serge Tahé]), can cause issues with certain software, including IntellijIDEA. You should then write something like:
  <!-- localRepository
   | The path to the local repository maven will use to store artifacts.
   |
   | Default: ${user.home}/.m2/repository
  <localRepository>/path/to/local/repo</localRepository>
  -->
<localRepository>D:\Programs\devjava\maven\.m2\repository</localRepository>
and on line 7, avoid using a path that contains spaces.
9.3. Installing STS (Spring Tool Suite)
We will install SpringSource Tool Suite [http://www.springsource.com/developer/sts], an Eclipse environment pre-configured with numerous plugins related to the Spring framework and also with a pre-installed Maven configuration.
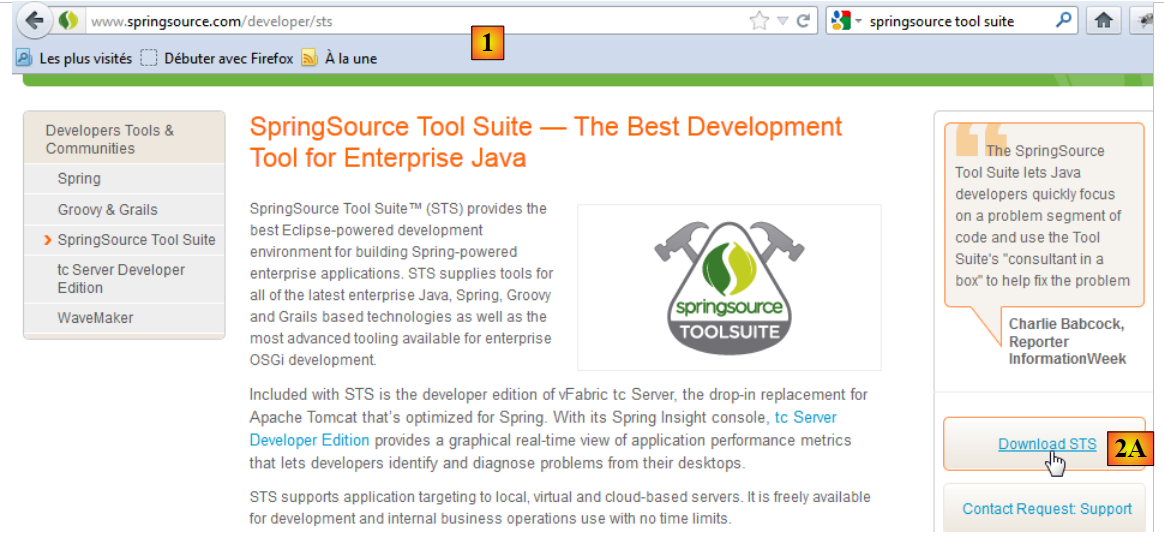 |
- Go to the SpringSource Tool Suite (STS) website [1], to download the latest version of version from STS, [2A], and [2B],
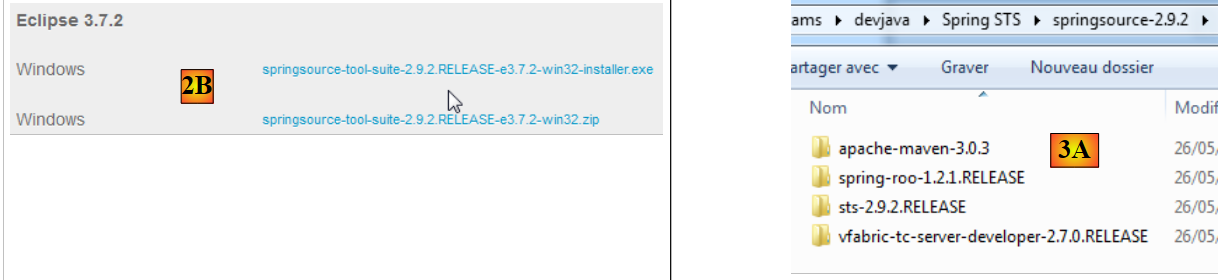 |
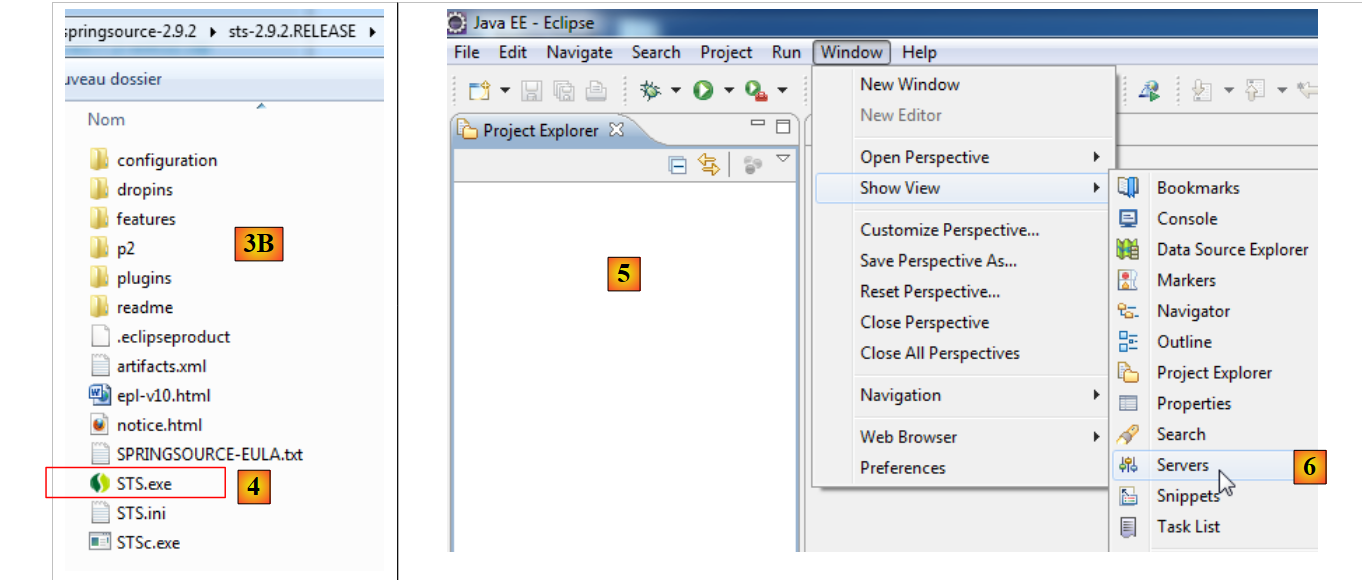 |
- the downloaded file is an installer that creates the [3A] [3B] file directory. In [4], launch the executable,
- in [5], the IDE work window appears after closing the welcome window. In [6], the application servers window is displayed,
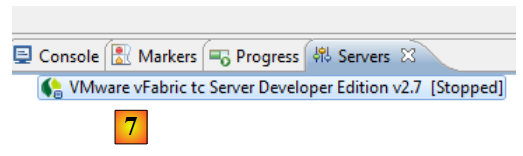 |
- in [7], the servers window. A server is registered. It is a Tomcat-compatible VMware server.
You must specify the Maven installation directory in STS:
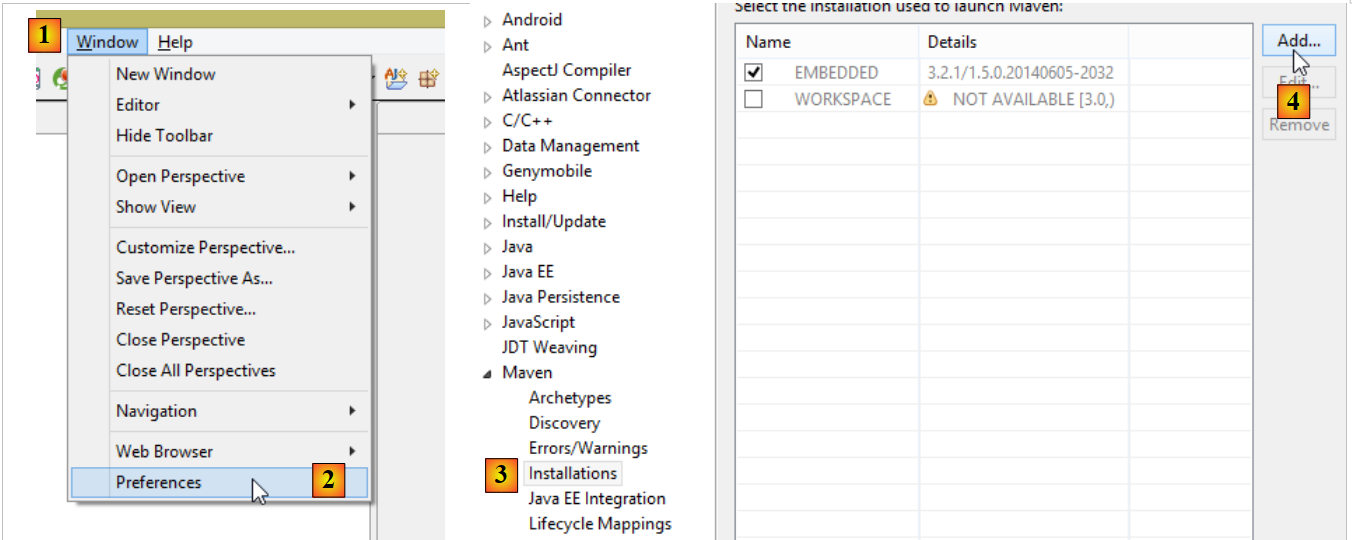 |
- in [1-2], configure STS;
- in [3-4], add a new Maven installation;
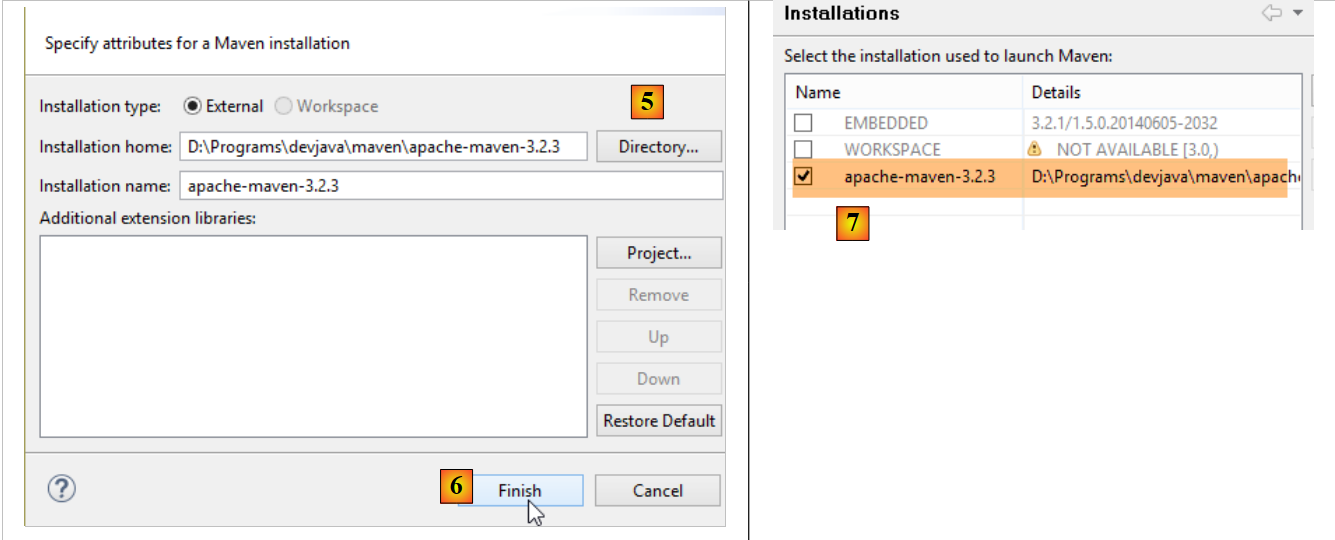 |
- In [5], specify the Maven installation directory;
- In [6], we finish the wizard;
- In [7], set the new Maven installation as the default;
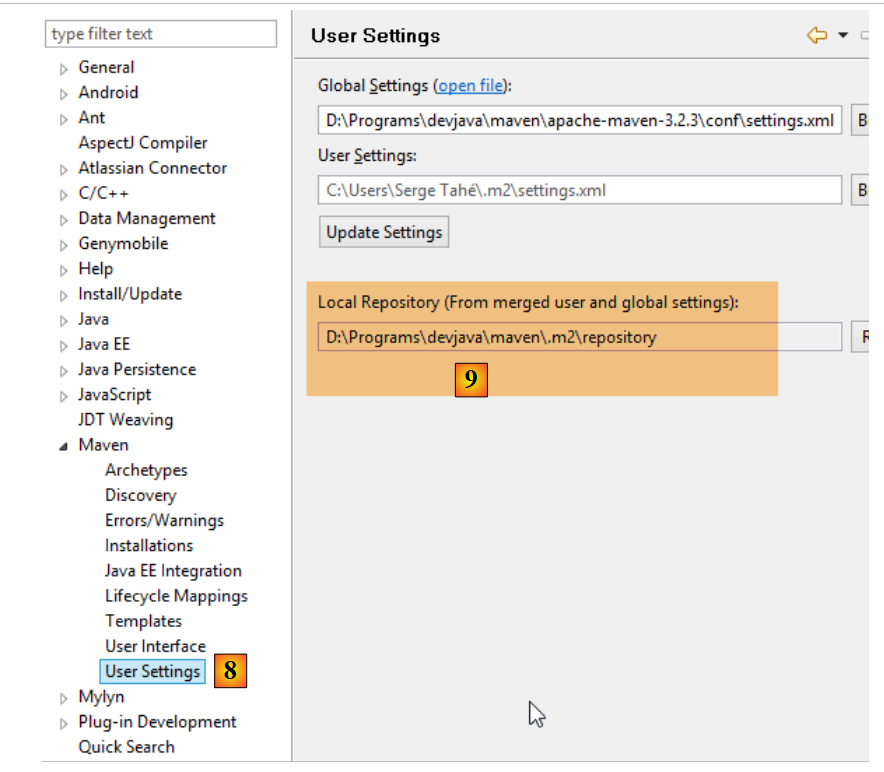 |
- In [8-9], verify the local Maven repository—the folder where it will store the dependencies it downloads and where STS will place the artifacts that will be built;
9.4. Installing a Tomcat server
Tomcat servers are available in URL and [http://tomcat.apache.org/download-80.cgi]. The examples in this document have been tested with version 8.0.9, available at URL [http://archive.apache.org/dist/tomcat/tomcat-8/v8.0.9/bin/].
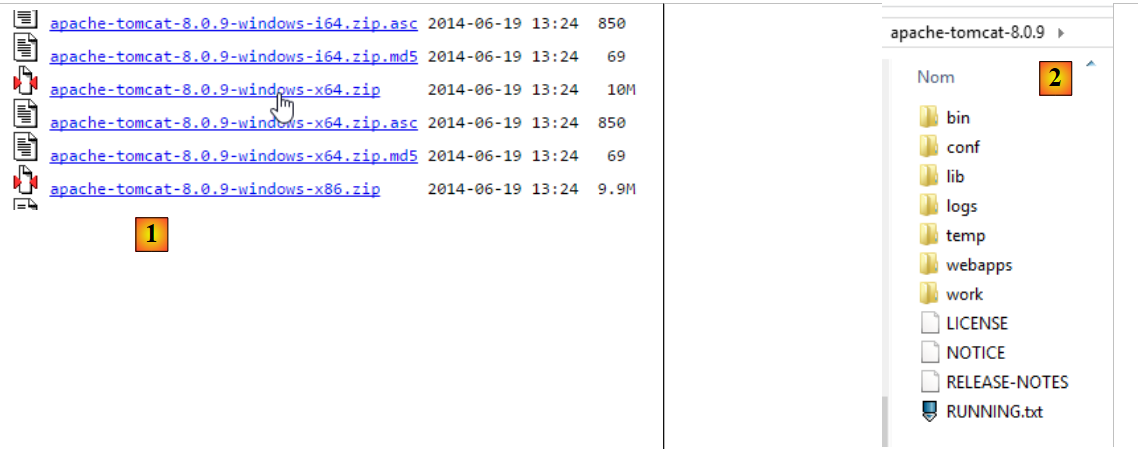 |
Download the appropriate ZIP file for your workstation. Once unzipped, you will obtain the directory structure. Once this is done, you can add this server to the servers in [2]:
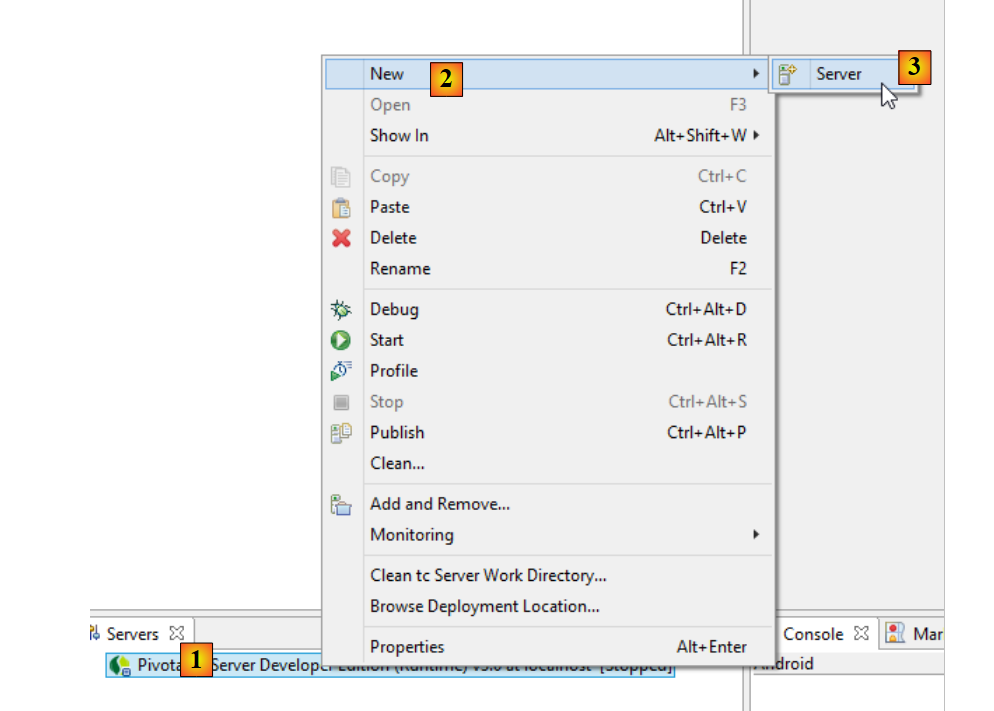 |
- In [1-3], add a new server in STS; (to open the Servers window, go to Window / Show View / Other / Server / Servers);
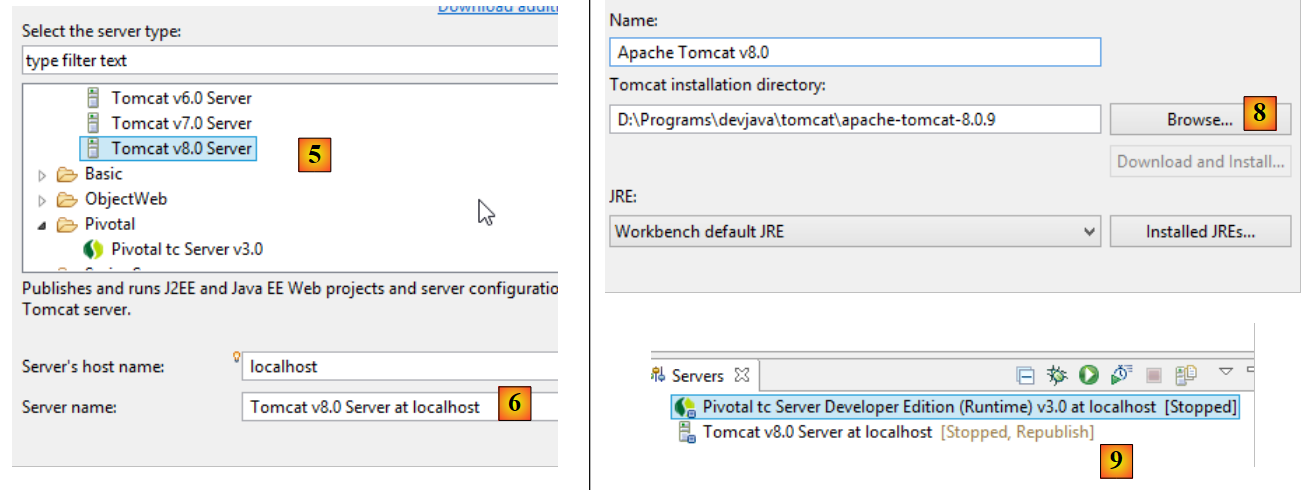 |
- In [5], select a Tomcat 8 server;
- In [6], give this server a name;
- In [8], specify the installation directory for the previously downloaded Tomcat;
- In [9], the new server;
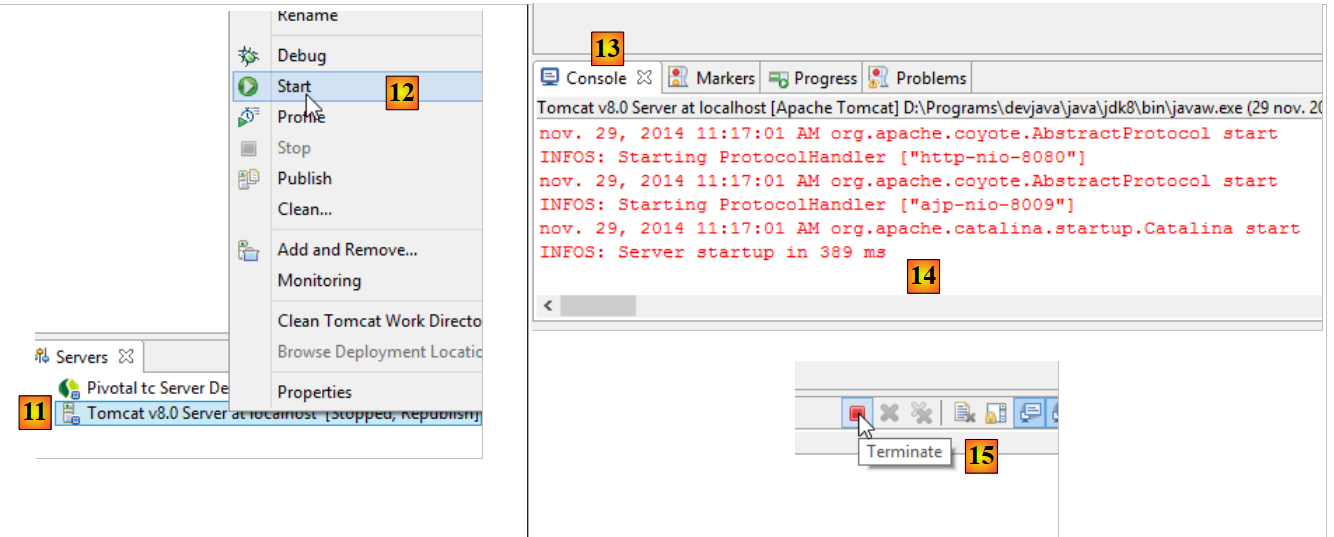 |
- In [11-12], start the Tomcat 8 server;
- in [13-14], its log window;
- in [15], to stop it;
9.5. Installation of [WampServer]
[WampServer] is a software package for developing PHP / MySQL / Apache on a Windows machine. We will use it only for SGBD and MySQL.
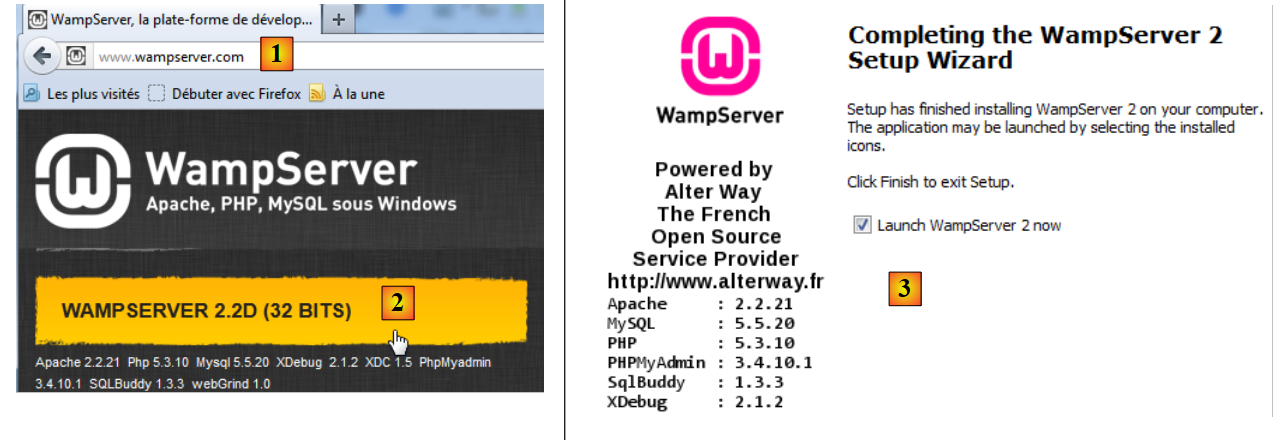 |
- On the [WampServer] [1] website, select the appropriate version [2],
- The downloaded executable is an installer. Various pieces of information are requested during installation. They do not concern MySQL. You can therefore ignore them. The [3] window appears at the end of the installation. Launch [WampServer],
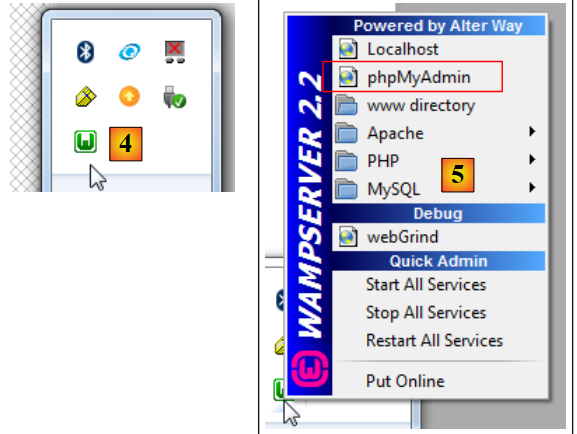 |
- in [4], the [WampServer] icon is installed in the taskbar at the bottom right of the screen [4],
- and when you click on it, the [5] menu appears. It allows you to manage the Apache server and the SGBD MySQL. To manage the server, use the option [PhpPmyAdmin],
- which brings up the window shown below.
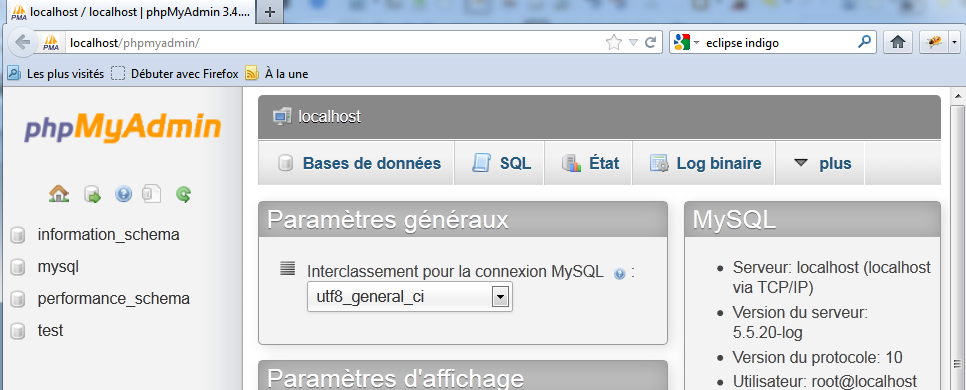
We will provide few details here on how to use [PhpMyAdmin]. The document provides the necessary information when needed.
9.6. Installing the Chrome plugin [Advanced Rest Client]
In this document, we use Google’s Chrome browser (http://www.google.fr/intl/fr/chrome/browser/). We will add the [Advanced Rest Client] extension to it. Here’s how to do it:
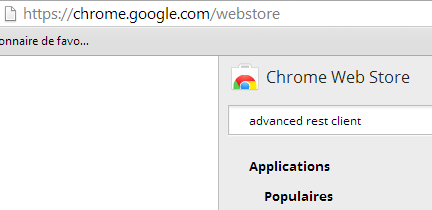
- Go to the [Google Web store] website (https://chrome.google.com/webstore) using the Chrome browser;
- search for the [Advanced Rest Client] application:
 |
- the app is then available for download:
 |
- to get it, you’ll need to create a Google account. [Google Web Store] then asks for confirmation [1]:
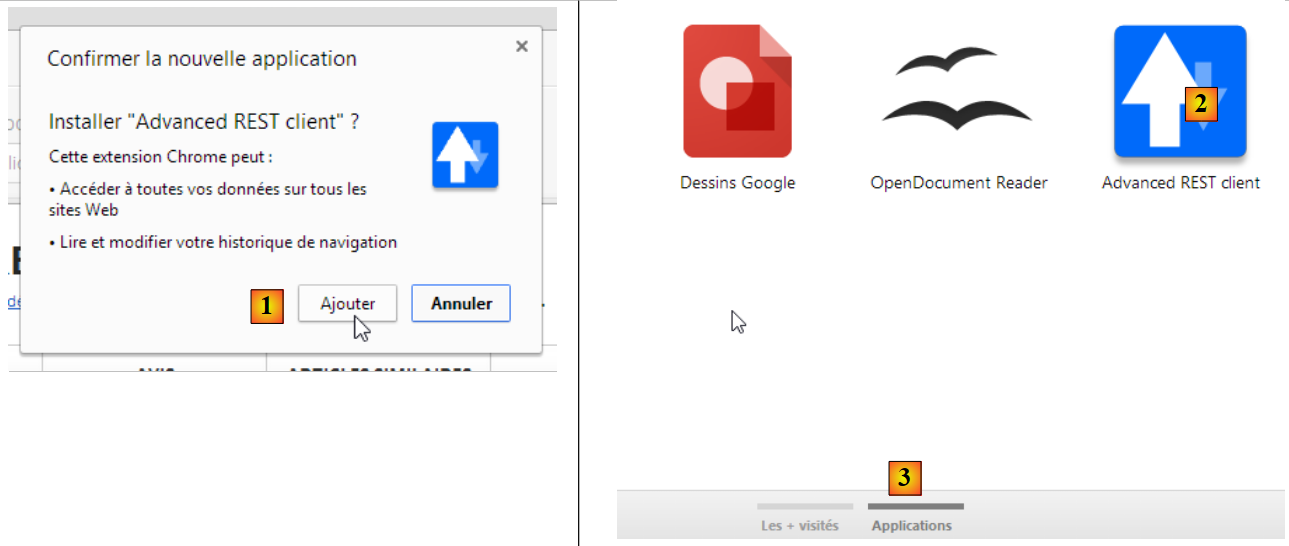 |
- In [2], the added extension is available in the option [Applications] [3]. This option is displayed on every new tab you create (CTRL-T) in the browser.
9.7. Managing the jSON in Java
Transparently for the developer, the [Spring MVC] framework uses the jSON [Jackson] library. To illustrate what jSON (JavaScript Object Notation), we present here a program that serializes objects into jSON and performs the reverse operation by deserializing the generated jSON strings to recreate the original objects.
The 'Jackson' library allows you to construct:
- the jSON string of an object: new ObjectMapper().writeValueAsString(object);
- an object from a string jSON: new ObjectMapper().readValue(jsonString, Object.class).
Both methods are likely to throw a IOException. Here is an example.
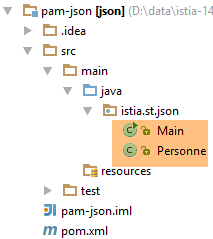 |
The project above is a Maven project with the following [pom.xml] file:
<?xml version="1.0" encoding="UTF-8"?>
<project xmlns="http://maven.apache.org/POM/4.0.0"
         xmlns:xsi="http://www.w3.org/2001/XMLSchema-instance"
         xsi:schemaLocation="http://maven.apache.org/POM/4.0.0 http://maven.apache.org/xsd/maven-4.0.0.xsd">
  <modelVersion>4.0.0</modelVersion>

  <groupId>istia.st.pam</groupId>
  <artifactId>json</artifactId>
  <version>1.0-SNAPSHOT</version>

  <dependencies>
    <dependency>
      <groupId>com.fasterxml.jackson.core</groupId>
      <artifactId>jackson-databind</artifactId>
      <version>2.3.3</version>
    </dependency>
  </dependencies>
</project>
- lines 12-16: the dependency that brings in the 'Jackson' library;
The [Personne] class is as follows:
package istia.st.json;

public class Personne {
    // data
    private String nom;
    private String prenom;
    private int age;

    // manufacturers
    public Personne() {

    }

    public Personne(String nom, String prénom, int âge) {
        this.nom = nom;
        this.prenom = prénom;
        this.age = âge;
    }

    // signature
    public String toString() {
        return String.format("Personne[%s, %s, %d]", nom, prenom, age);
    }

    // getters and setters
...
}
The [Main] class is as follows:
package istia.st.json;

import com.fasterxml.jackson.databind.ObjectMapper;

import java.io.IOException;
import java.util.HashMap;
import java.util.Map;

public class Main {
  // the serialization / deserialization tool
  static ObjectMapper mapper = new ObjectMapper();

  public static void main(String[] args) throws IOException {
    // creation of a person
    Personne paul = new Personne("Denis", "Paul", 40);
    // display jSON
    String json = mapper.writeValueAsString(paul);
    System.out.println("Json=" + json);
    // instantiation Person from Json
    Personne p = mapper.readValue(json, Personne.class);
    // person display
    System.out.println("Personne=" + p);
    // a picture
    Personne virginie = new Personne("Radot", "Virginie", 20);
    Personne[] personnes = new Personne[]{paul, virginie};
    // display Json
    json = mapper.writeValueAsString(personnes);
    System.out.println("Json personnes=" + json);
    // dictionary
    Map<String, Personne> hpersonnes = new HashMap<String, Personne>();
    hpersonnes.put("1", paul);
    hpersonnes.put("2", virginie);
    // display Json
    json = mapper.writeValueAsString(hpersonnes);
    System.out.println("Json hpersonnes=" + json);
  }
}
Executing this class produces the following screen output:
Key takeaways from the example:
- the object [ObjectMapper] required for the transformations jSON / Object: line 11;
- the transformation [Personne] --> jSON: line 17;
- the transformation jSON --> [Personne]: line 20;
- the exception [IOException] thrown by both methods: line 13.
9.8. Installation of [Webstorm]
[WebStorm] (WS) is the successor to IDE and JetBrains for developing HTML / CSS / JS. I found it perfect for developing Angular applications. The download site is [http://www.jetbrains.com/webstorm/download/]. It is a paid IDE, but a 30-day trial version is available for download. There are also affordable personal and student versions.
To install JS libraries within an application, WS uses a tool called [bower]. This tool is a module of [node.js], a set of JS libraries. Additionally, the JS libraries are fetched from a Git repository, requiring a Git client on the machine performing the download.
9.8.1. Installing [node.js]
The download site for [node.js] is [http://nodejs.org/]. Download the installer and then run it. There is nothing else to do at this time.
9.8.2. Installing the [bower] tool
There are several ways to install the [bower] tool, which will allow you to download the Javascript libraries. We will do this from the command line:
C:\Users\Serge Tahé>npm install -g bower
C:\Users\Serge Tahé\AppData\Roaming\npm\bower -> C:\Users\Serge Tahé\AppData\Roaming\npm\node_modules\bower\bin\bower
bower@1.3.7 C:\Users\Serge Tahé\AppData\Roaming\npm\node_modules\bower
├── stringify-object@0.2.1
├── is-root@0.1.0
├── junk@0.3.0
...
├── insight@0.3.1 (object-assign@0.1.2, async@0.2.10, lodash.debounce@2.4.1, req
uest@2.27.0, configstore@0.2.3, inquirer@0.4.1)
├── mout@0.9.1
└── inquirer@0.5.1 (readline2@0.1.0, mute-stream@0.0.4, through@2.3.4, async@0.8
.0, lodash@2.4.1, cli-color@0.3.2)
- line 1: the [node.js] command, which installs the [bower] module. For the command to work, the [npm] executable must be in the PATH directory on the machine (see section below);
9.8.3. Installing [Git]
Git is a software version control system. There is a Windows version called [msysgit], available at URL and [http://msysgit.github.io/]. We will not use [msysgit] to manage versions of our application, but simply to download JS libraries located on sites such as [https://github.com] that require a special access protocoland which is provided by the [msysgit] client
The installation wizard offers several steps, including the following:
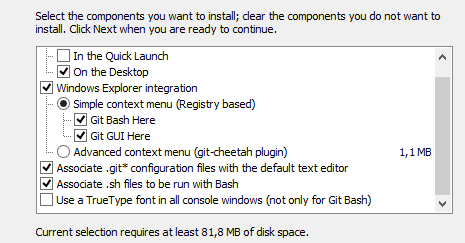 | 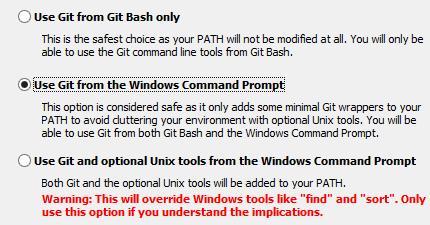 |
For the other installation steps, you can accept the default values provided.
Once Git is installed, verify that the executable is in the PATH directory on your machine: [Panneau de configuration / Système et sécurité / Système / Paramètres systèmes avancés]:
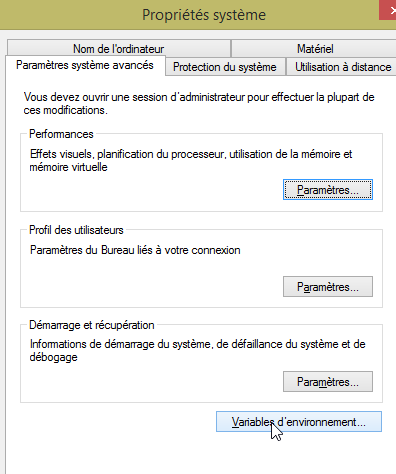 | 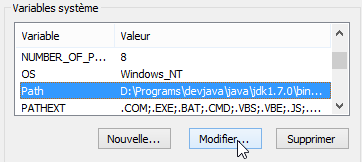 |
The PATH variable looks like this:
D:\Programs\devjava\java\jdk1.7.0\bin;D:\Programs\ActivePerl\Perl64\site\bin;D:\Programs\ActivePerl\Perl64\bin;D:\Programs\sgbd\OracleXE\app\oracle\product\11.2.0\client;D:\Programs\sgbd\OracleXE\app\oracle\product\11.2.0\client\bin;D:\Programs\sgbd\OracleXE\app\oracle\product\11.2.0\server\bin;...;D:\Programs\javascript\node.js\;D:\Programs\utilitaires\Git\cmd
Verify that:
- the path to the [node.js] installation folder is present (here D:\Programs\javascript\node.js);
- the path to the Git client executable is present (here D:\Program Files\Utilities\Git\cmd);
9.8.4. Configuration of [Webstorm]
Now let’s check the configuration of [Webstorm]
 |  |
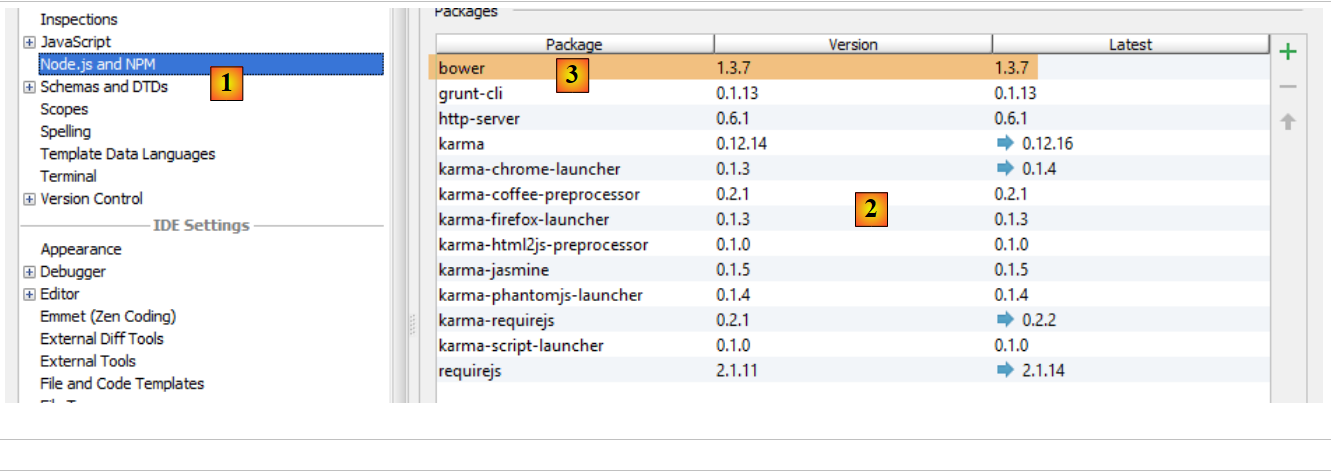 |
Above, select option [1]. The list of already installed [node.js] modules appears in [2]. This list should only contain the [3] line for the [bower] module if you followed the previous installation process.
9.9. Installing an Android emulator
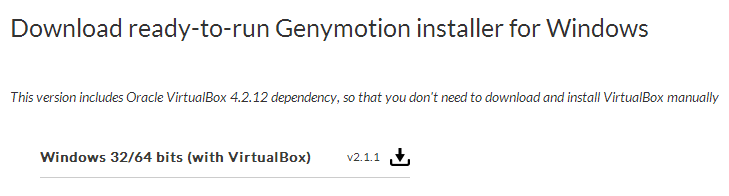
The emulators provided with Android's SDK are slow, which discourages their use. The company [Genymotion] offers a much more powerful emulator. It is available at URL [https://cloud.genymotion.com/page/launchpad/download/]
(February 2014).
You will need to register to obtain a version for personal use. Download the [Genymotion] product with the VirtualBox virtual machine;
Install and then launch [Genymotion]. Next, download an image for a tablet or phone:
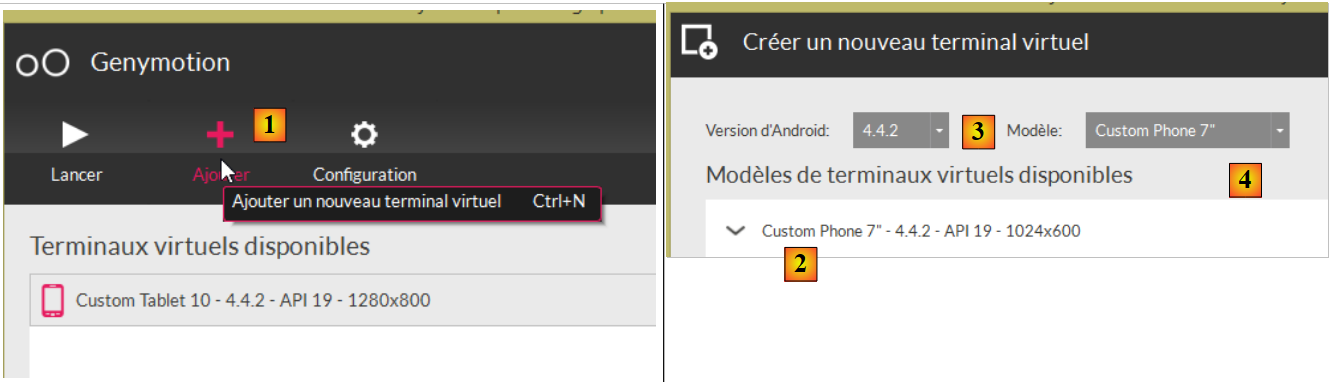 |
- In [1], add a virtual device;
- In [2], select one or more devices to install. You can refine the displayed list by specifying the desired Android version version as well as the device model [4];
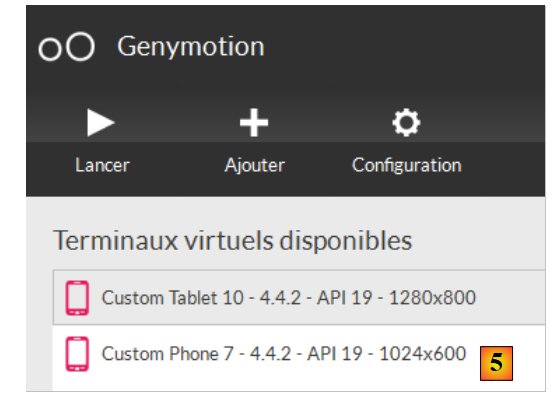 |
- once the download is complete, you will see a list of the virtual devices available for testing your Android apps;