7. Managing concurrent access to data
So far, we have used tables of which we were the sole users. In practice, on a multi-user machine, data is most often shared among different users. This raises the question: Who can use a given table and in what capacity (query, insert, delete, append, ...)?
7.1. Creating Firebird Users
When we worked with IB-Expert, we logged in as user SYSDBA. This information can be found in the properties of the open connection to SGBD:
 | 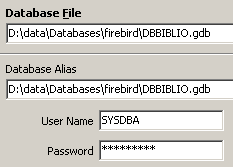 |
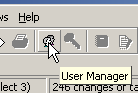
On the right, we see that the logged-in user is [SYSDBA]. What we cannot see is its password, [masterkey]. [SYSDBA] is a special Firebird user: it has full privileges on all objects managed by SGBD. You can create new users with IBExpert using option, [Tools / User Manager], or the following icon:
This brings up the user management window:
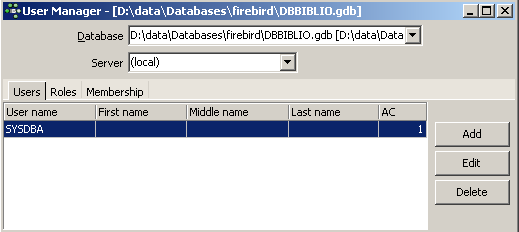
The [Add] button allows you to create new users:

Let’s create the following users:
username | password |
ADMIN1 | admin1 |
ADMIN2 | admin2 |
SELECT1 | select1 |
SELECT2 | select2 |
UPDATE1 | update1 |
UPDATE2 | update2 |
7.2. Granting Access Rights to Users
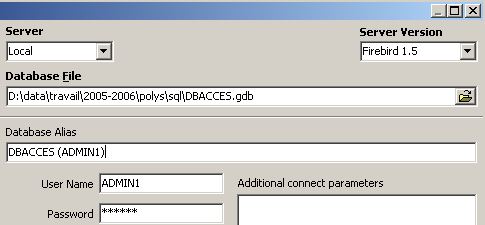
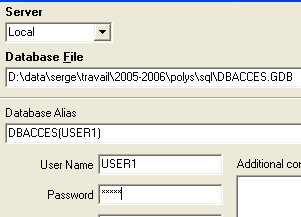
A database belongs to the user who created it. The databases we have created so far belonged to user [SYSDBA]. To illustrate the concept of permissions, let’s create (Database / Create Database) a new database under the identity [ADMIN1, admin1]:
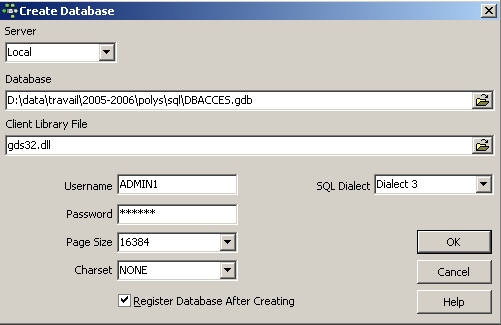
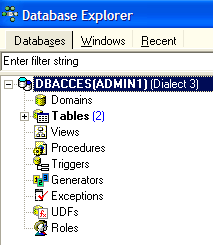
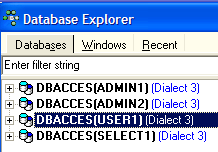
and save it with the alias DBACCES (ADMIN1). Using aliases allows you to open connections to the same database by giving them different identifiers, which makes it easier to locate them in the IBExpert database explorer:
 |  |
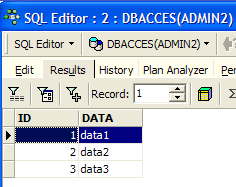
Now let’s create the following two tables, TA and TB:
Table TA
 |
Table TB
 |
These tables are not related to each other.
Using IB-Expert, let’s create a second connection to the [DBACCES] database, this time under the name [ADMIN2 / admin2]. To do this, we’ll use option and [Database / Register Database]:
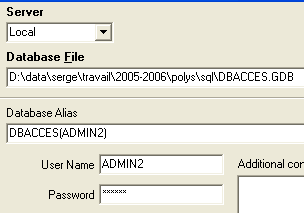 | 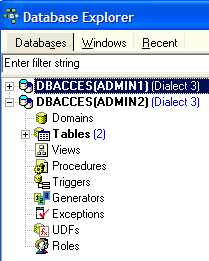 |
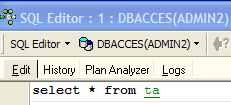
Let’s navigate to DBACCES (ADMIN2) and open an editor for SQL (Shift + F12):
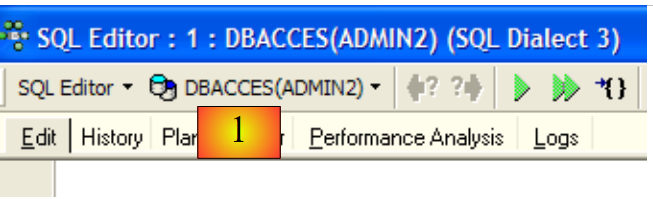 |
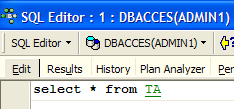
We will have the opportunity to use various connections to the same database [DBACCES]. For each of them, we will have an editor SQL. In [1], the SQL editor displays the alias of the connected database. Use this information to determine which SQL editor you are in. This is important because we will be creating connections that do not have the same access rights to the database objects.
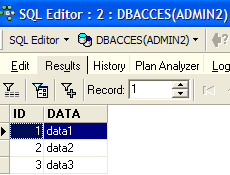
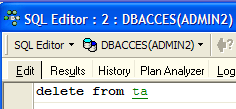
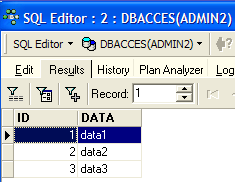
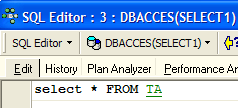
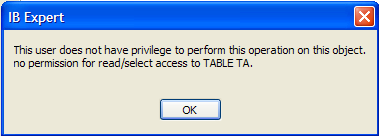
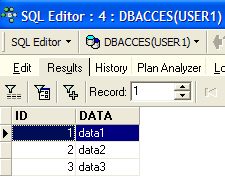
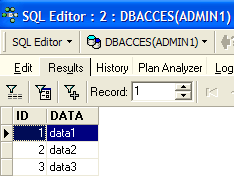
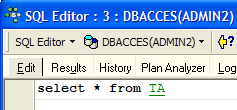
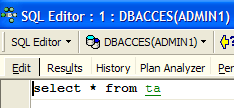
Let’s query the contents of the TA table:
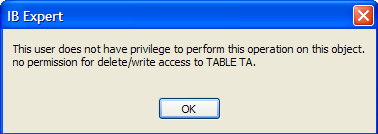
We receive the following error message:
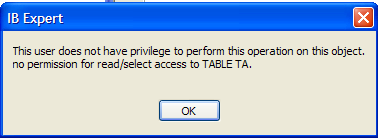
What does this mean? The database [DBACCESS] was created by the user [ADMIN1] and is therefore owned by them. Only this user has access to the various objects in this database. They can grant access rights to other users using the command SQL GRANT. This command has various syntaxes. One of them is as follows:
GRANT privilege1, privilege2, ...| ALL PRIVILEGES ON table/view TO user1, user2, ...| PUBLIC [ WITH GRANT OPTION ] | |
grants access privileges privilegei or all privileges (ALL PRIVILEGES) on the table or view to users useri or all users ( PUBLIC ). The clause WITH GRANT OPTION allows users who have been granted privileges to pass them on to other users. |
Among the privileges that can be granted are the following:
right to use the DELETE command on the table or view. | |
the right to use the INSERT command on the table or view | |
Permission to use the SELECT command on the table or view | |
right to use the UPDATE command on the table or view. This right can be restricted to certain columns using the following syntax: GRANT update ( col1, col2, ...) ON table/view TO user1, user2, ...| PUBLIC [ WITH GRANT OPTION ] |
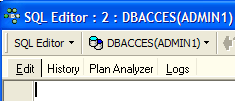
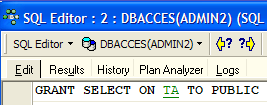
Let’s grant user [ADMIN2] the right SELECT on table TA. Only the table owner can grant this right, c.a.d. Here, [ADMIN1]. Let’s switch to the DBACCES connection (ADMIN1) and open a new editor SQL (Shift+F12):
Next, we will switch between the SQL editors. To navigate, you can use the option and [Windows] options in the menu:
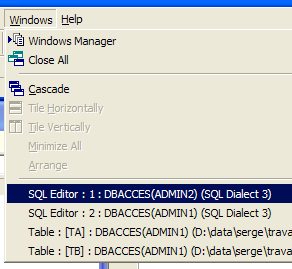
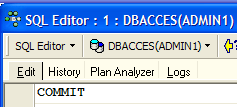
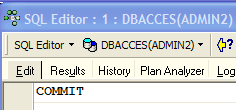
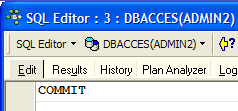
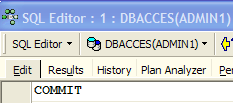
Above, we see the two SQL editors, each associated with a specific user. Let’s return to the SQL (ADMIN1) editor and issue the following command:
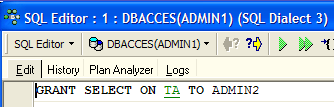
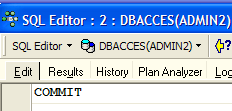
Then confirm it with a COMMIT:
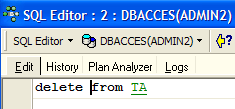
Once that is done, let’s switch to the editor for user ADMIN2 to redo the SELECT that failed:
We receive the following error message:
User [ADMIN2] still does not have permission to view table [TA]. In fact, it appears that a user’s permissions are loaded when they log in. [ADMIN2] would therefore still have the same permissions as when they first logged in, i.e., none. Let’s verify this. Let’s log out user [ADMIN2]:
- select their connection
- request logout by right-clicking on the connection and selecting option [Deconnect from database] or (Shift + Ctrl + D)
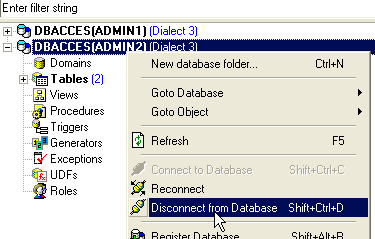
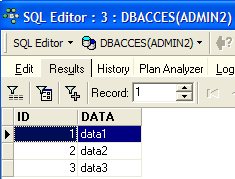
If a dialog box asks for a [COMMIT], enter [COMMIT]. Then reconnect the user [ADMIN2] by using the option [Reconnect] above. Once this is done, return to the SQL (ADMIN2) editor and replay the SELECT request that failed:
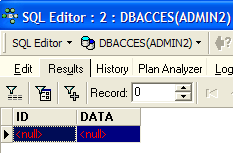
We then get the following result:
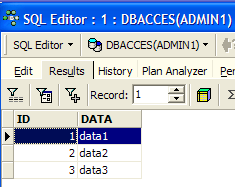
This time, ADMIN2 can view the table TA thanks to the permission SELECT granted to it by its owner, ADMIN1. Normally, this is the only permission it has. Let’s verify this. Still in the SQL (ADMIN2) editor:
 |  |
The screen on the right shows that ADMIN2 does not have permission DELETE on table TA.
Let’s return to the editor for SQL (ADMIN1) to grant additional permissions to user ADMIN2. We execute the following two commands in succession:
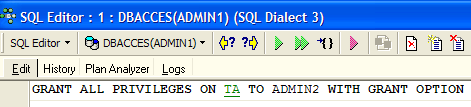 |  |
- The first command grants user ADMIN2 full access rights to table [TA], along with the ability to grant rights to others (WITH GRANT OPTION)
- The second command validates the previous one
Once this is done, as before, let’s refresh the connection for user [ADMIN2] (Disconnect / Reconnect), then in the editor SQL (ADMIN2), enter the following commands:
 |  |  |
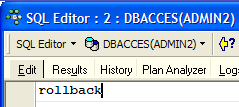
ADMIN2 was able to delete all rows from the table TA. Let’s undo this deletion with a ROLLBACK:
 | |  |
Let’s verify that ADMIN2 can in turn grant permissions on the TA table.
 |  |
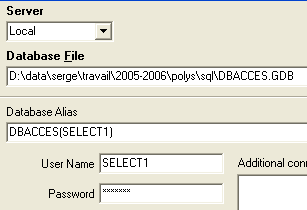
Now let’s open a connection to the [DBACCES] database (Database / Register database) under the name [SELECT1 / select1], one of the users created earlier, then double-click on the link created in [Database Explorer]:
 | 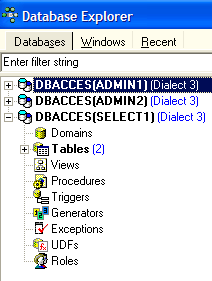 |
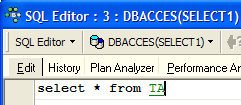
Switch to this new connection and open a new SQL editor (Shift + F12) to enter the following commands:
 |  |
The user SELECT1 does indeed have the SELECT permission on the table TA. Can they grant this permission to the user SELECT2?
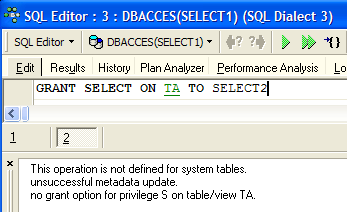 |
The operation failed because user SELECT1 was not granted the right to pass on the right SELECT that they received from user ADMIN2. For this to have happened,user ADMIN2 use the clause WITH GRANT OPTION in their order SQL GRANT. The delegation rules are simple:
- a user can only transmit the rights they have received and no more
- and they can only pass them on if they received them with the [WITH GRANT OPTION] privilege
A granted right can be revoked using the command REVOKE:
REVOKE privilege1, privilege2, ...| ALL PRIVILEGES ON table/view FROM user1, user2, ...| PUBLIC | |
removes access privileges privilegei or all privileges (ALL PRIVILEGES) on the table or view for users useri or all users (PUBLIC). |
Let's try it. Let's go back to the SQL editor from ADMIN2 to remove the right SELECT that we gave to user SELECT1:
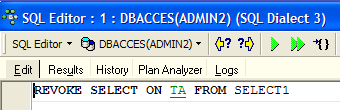 |  |
Let’s disconnect and then reconnect the user SELECT1. Then, in the editor SQL (SELECT1), let’s query the contents of the table TA:
 |  |
User SELECT1 has indeed lost their read permission for table TA. Note that it was ADMIN2 who granted this right, and it was ADMIN2 who revoked it. If ADMIN1 attempts to revoke it, no error is reported, but it can then be observed that SELECT1 has retained its right SELECT.
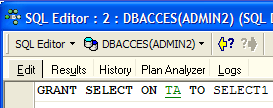
A right can be granted to everyone using the syntax: GRANT right(s) ON table / view TO PUBLIC. Let’s grant the right SELECT on the table TA to everyone. You can use ADMIN1 or ADMIN2 to do this. We’ll use ADMIN2:
 |  |
Let’s create a connection to the database using the user USER1 / user1:
 |  |
With the DBACCES (USER1) connection, open a new SQL editor (Shift + F12) and enter the following commands:
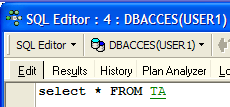 |  |
User USER1 does indeed have permission SELECT on table TA.
7.3. Transactions
7.3.1. Isolation Levels
We now move away from the issue of access rights to database objects to address that of concurrent access to these objects. Two users with sufficient access rights to a database object, such as a table, want to use it at the same time. What happens?
Each user works within a transaction. A transaction is a sequence of commands SQL that is executed "atomically":
- either all operations succeed
- or one of them fails, in which case all preceding operations are rolled back
Ultimately, the operations in a transaction are either all successfully applied or none are applied. When the user has control over the transaction (as is the case throughout this document), they commit a transaction with a COMMIT command or roll it back with a ROLLBACK command.
Each user works within a transaction that belongs to them. There are typically four levels of isolation between different users:
- Uncommitted Read
- Committed Read
- Repeatable Read
- Serializable
Uncommitted Read
This isolation level is also known as "Dirty Read." Here is an example of what can happen in this mode:
- User U1 starts a transaction on table T
- User U2 starts a transaction on the same table T
- User U1 modifies rows in table T but does not commit them yet
- User U2 "sees" these changes and makes decisions based on what they see
- the user rolls back their transaction using a ROLLBACK
We can see that in step 4, user U2 made a decision based on data that will later turn out to be incorrect.
Committed Read
This isolation level avoids the previous pitfall. In this mode, user U2 in step 4 will not "see" the changes made by user U1 to table T. They will only see them after U1 has committed their transaction with a COMMIT.
In this mode, also known as "Unrepeatable Read," the following situations may occur:
- User U1 starts a transaction on table T
- User U2 starts a transaction on the same table T
- User U2 performs a SELECT to obtain the average of column C for rows in T that meet a certain condition
- User U1 modifies (UPDATE) certain values in column C of T and commits them (COMMIT)
- User U2 runs the same SELECT as in step 3. They will find that the average of column C has changed due to the modifications made by U1.
Now user U2 sees only the changes "committed" by U1. But while remaining in the same transaction, two identical operations 3 and 5 yield different results. The term "Unrepeatable Read" refers to this situation. This is a frustrating situation for someone who wants a consistent view of table T.
Repeatable Read
In this isolation mode, a user is guaranteed to get the same results from database reads as long as they remain within the same transaction. They work on a snapshot that never reflects changes made by other transactions, even if those transactions have been committed. They will only see these changes once they themselves end their transaction with a COMMIT or ROLLBACK.
This isolation mode is not yet perfect, however. After operation 3 above, the rows queried by user U2 are locked. During operation 4, user U1 will not be able to modify (UPDATE) the values in column C of these rows. However, they can add rows (INSERT). If some of the added rows satisfy the condition tested in step 3, operation 5 will yield a different average than the one found in step 3 due to the added rows.
To resolve this new issue, you must switch to "Serializable" isolation.
Serializable
In this isolation mode, transactions are completely isolated from one another. It ensures that the result of two transactions performed simultaneously will be the same as if they were performed one after the other. To achieve this result, during operation 4, when user U1 attempts to add rows that would alter the result of user U1’s SELECT, they will be prevented from doing so. An error message will indicate that the insertion is not possible. It will become possible once user U2 has committed their transaction.
The four transaction isolation levels are not available in all systems. Firebird provides the following isolation levels:
- snapshot: default isolation mode. Corresponds to the "Repeatable Read" mode of the SQL standard.
- committed read: corresponds to the "committed read" mode of the standard
This isolation level is set by the SET command TRANSACTION:
SET TRANSACTION [READ WRITE | READ ONLY] [WAIT|NOWAIT] ISOLATION LEVEL [SNAPSHOT | READ COMMITTED] | |
Underlined keywords are the default values READ WRITE: The transaction can read and write READ ONLY: the transaction can only read WAIT: In the event of a conflict between two transactions, the one that was unable to perform its operation waits for the other transaction to be committed. It can no longer issue SQL commands. NOWAIT: The transaction that was unable to complete its operation is not blocked. It receives an error message and can continue processing. ISOLATION LEVEL [SNAPSHOT | READ COMMITTED]: isolation level |
Let’s try it. In the SQL (ADMIN1) editor, enter the following command:
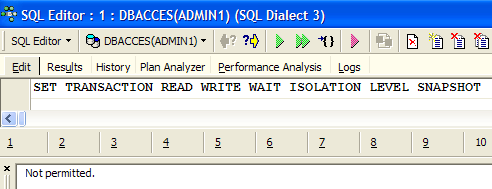
We see that it was not allowed. We don’t know why...
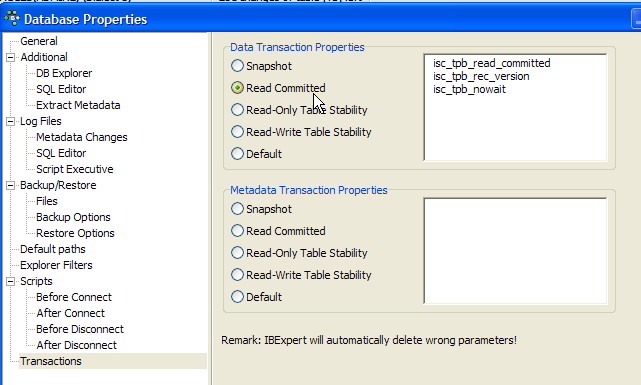
IB-Expert allows you to set the isolation mode in another way. Right-click on the DBACCES(ADMIN1) connection to select option [Database Registration Info]:
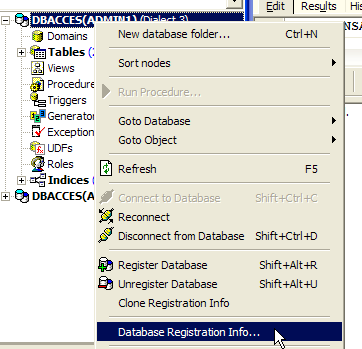 | 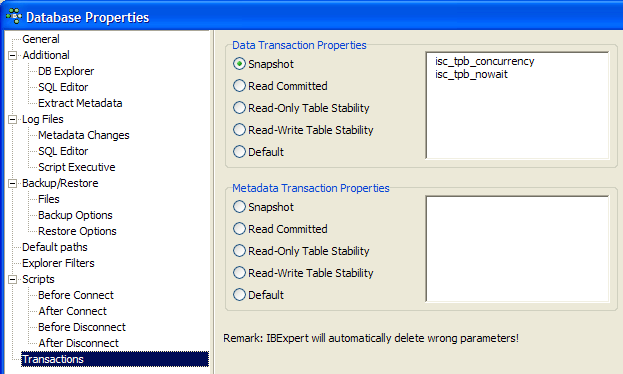 |
The screen on the right shows the presence of a option [Transactions]. This will allow us to set the transaction isolation level. We’ll set it here to [snapshot]. We do the same with the DBACCES(ADMIN2) connection.
7.3.2. Snapshot mode
Let’s examine the snapshot isolation level, which is Firebird’s default isolation mode. When a user starts a transaction, a snapshot of the database is taken. The user then works on this snapshot. Each user thus works on their own snapshot of the database. If they make changes to it, other users do not see them. They will only see them once the user who made the changes has committed them with a COMMIT.
There are two possible scenarios:
- one user reads the table (SELECT) while another is modifying it (INSERT, UPDATE, DELETE)
- both users want to modify the table at the same time
7.3.2.1. Principle of consistent reading
Let there be two users, U1 and U2, working on the same table TAB:
User U1's transaction begins at time T1a and ends at time T1b.
User U2's transaction begins at time T2a and ends at time T2b.
U1 is working on a photo of TAB taken at time T1a. Between T1a and T1b, he modifies TAB. Other users will not have access to these modifications until time T1b, when U1 creates COMMIT.
U2 is working on a photo of TAB taken at time T2a, which is the same photo used by U1 (provided that no other users have modified the original in the meantime). He does not "see" any changes that user U1 may have made to TAB. He will only be able to see them at time T1b.
Let’s illustrate this point using our database [DBACCES]. We will have both users [ADMIN1] and [ADMIN2] working simultaneously. Let’s go to the DBACCES (ADMIN1) connection and, in the SQL editor of ADMIN1, perform the following operations:
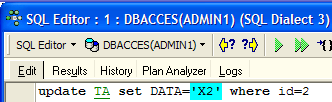 | 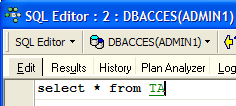 |  |
ADMIN1 has modified row 2 of table TA but has not yet committed (COMMIT) the operation. User ADMIN2 then performs a SELECT on table TA (we move to the SQL editor of ADMIN2). We are before time T2a in the example.
 |  |
Return to the SQL editor of ADMIN1, which validates its addition:
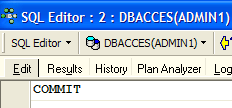 |
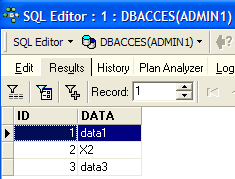
Return to the SQL editor from ADMIN2 to redo SELECT:
|  |
ADMIN2 sees the changes made by ADMIN1. In snapshot mode, a transaction does not see the changes made by other transactions until those transactions are complete.
7.3.2.2. Simultaneous modification of the same database object by two transactions
Let’s take an example from accounting: U1 and U2 are working on accounts. U1 debits accountX by an amount S and credits accountY by the same amount. He will do this in several steps:
U1 starts a transaction at time T1a, debits comptex at time T1b, credits comptey at time T1c, and commits both operations at time T1d. Let’s also assume that U2 wants to do the same thing, starting their transaction at time T2a and ending it at time T2d according to the following diagram:
      --------+----------+----+----+-------+------+-----+-------+---------
              T1a       T1b  T2a   T1c     T2b   T1d   T2c    T2d
At time T2, a snapshot of the account table is taken for U2. It is consistent according to the snapshot principle. U2 sees the initial state of the comptex and comptey accounts because U1 has not yet committed its transactions.
Suppose that comptex has an initial balance of €1,000 and that both users U1 and U2 want to debit it by €100.
- At time T1b, U1 decrements comptex by €100, bringing it to €90. This transaction will not be committed until time T1d.
- At time T2b, U2 sees comptex with €1,000 (consistent read principle) and decrements it by €100, bringing it to €90.
- In the end, at time T2d, when everything has been validated, comptex will have a balance of €90 instead of the expected €80.
The solution to this problem is to prevent U2 from modifying comptex until U1 has completed its transaction. U2 will thus be blocked until time T1d. The snapshot mode provides this mechanism.
Let’s illustrate this with the database DBACCES. ADMIN1 starts a transaction in its editor SQL (ADMIN1):
 | 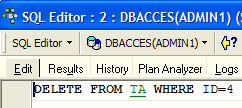 |  |  |
We started by creating a COMMIT to ensure we were starting a new transaction. Then we deleted line 4. The transaction has not yet been committed.
ADMIN2 then starts a transaction in its editor SQL (ADMIN2):
 | 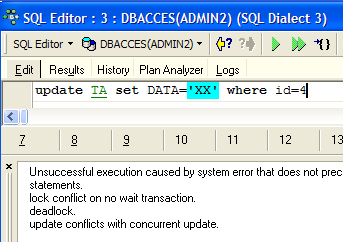 |
The screen on the right shows that ADMIN2 attempted to modify line 4. It was informed that this was not possible because someone else had already modified it but had not yet committed the change.
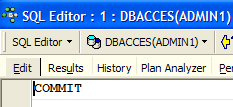
Let’s go back to the editor SQL(ADMIN1) to create COMMIT:
Let’s go back to the SQL (ADMIN2) editor to rerun the UPDATE command:
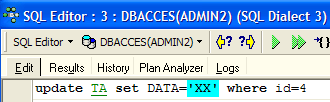 |  |
 |  |
The UPDATE operation proceeds successfully even though line #4 no longer exists, as shown by the following SELECT. It is at this point that ADMIN2 discovers that the line no longer exists.
7.3.2.3. Repeatable Read Mode
Let’s now illustrate “Repeatable Read” mode. This isolation level is provided by “snapshot” mode. It ensures that a transaction always obtains the same result when reading the database.
Let’s start by working with the editor SQL of ADMIN2:
 |  |  |
 |  |
Now let’s move on to the editor SQL for ADMIN1:
 |  |  |
 |  |  |
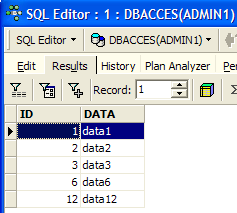 |  |
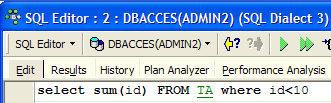
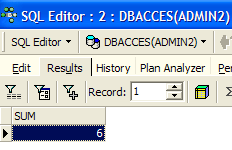
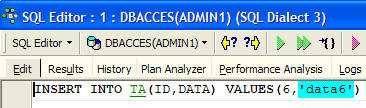
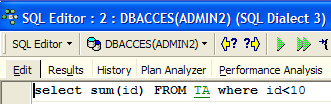
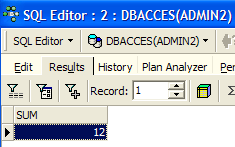
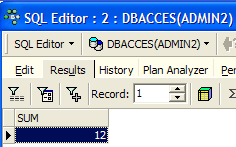
User ADMIN1 added two rows and committed the transaction. Let’s now return to the editor SQL (ADMIN2) to replay SELECT SUM:
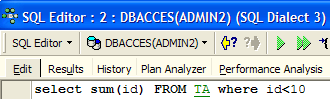 | 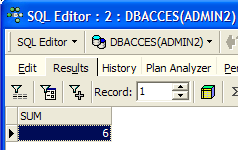 |
We can see that ADMIN2 does not see the line additions from ADMIN1, even though they were validated by a COMMIT. SELECT SUM yields the same result as before the additions. This is the principle of Repeatable Read.
Now, still in the SQL (ADMIN2), commit the transaction with a COMMIT, then replay the SELECT and SUM:
 |  |  |
The rows added by ADMIN1 are now taken into account.
7.3.3. Committed Read mode
Let’s now illustrate “Committed Read” mode. This isolation level is analogous to that of a snapshot, except with regard to “Repeatable Read”.
We start by changing the transaction isolation level for both connections.
- We disconnect the two users ADMIN1 and ADMIN2
- We change the isolation level of their transactions
- We reconnect the users ADMIN1 and ADMIN2
We will now revisit the previous example illustrating "Repeatable Read" to show that we no longer see the same behavior. Let’s start by working with the editor SQL of ADMIN2:
| | |
| |
Now let’s move on to the SQL editor from ADMIN1:
| | |
| | |
| |
User ADMIN1 added two lines and committed the transaction. Let’s now return to the editor SQL (ADMIN2) to replay SELECT SUM:
|  |
SELECT SUM does not produce the same result as before the additions made by ADMIN1. This is the difference between snapshot and read committed modes.