3. Introduction to the SQL Language
In this section, we present the first SQL commands for creating and using a single table. We generally provide a simplified version of these commands. Their complete syntax is available in the Firebird reference guides (see Section 2.2).
A database is used by people with various skill sets:
- the database administrator is generally someone proficient in the SQL language and databases. They are the ones who create the tables, as this operation is usually performed only once. Over time, they may need to modify the structure. A database is a set of tables linked by relationships. The database administrator defines these relationships. They also grant permissions to the various database users. For example, they may specify that a particular user has the right to view the contents of a table but not to modify it.
- The database user is the person who brings the data to life. Depending on the permissions granted by the database administrator, they will add, modify, and delete data in the database’s various tables. They will also analyze the data to extract information useful for the smooth operation of the business, the administration, etc.
In section 2.6, we introduced the SQL editor from the [IB-Expert] tool. This is the tool we will be using. Let’s review a few points:
- The SQL editor is accessed via the option menu item in the [Tools/SQL Editor] menu, or via the [F12] key

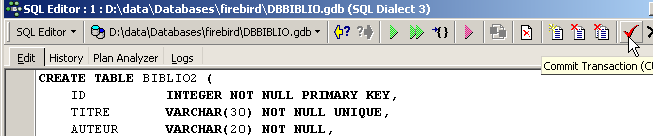
This opens a [SQL Editor] window where we can enter a SQL command:
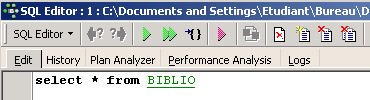
The screenshot above is often represented by the text below:
3.1. Firebird Data Types
When creating a table, we must specify the data type that a table column can contain. Here, we present the most common Firebird data types. Note that these data types may vary from one SGBD to another.
integer in the range [-32768, 32767]: 4 | |
integer in the range [–2 147 483 648, 2 147 483 647]: -100 | |
a real number with n digits, m of which are after the decimal point NUMERIC(5,2): -100.23, +027.30 | |
floating-point number approximated to 7 significant digits: 10.4 | |
real number approximated to 15 significant digits: -100.89 | |
string of exactly N characters. If the stored string has fewer than N characters, it is padded with spaces. CHAR(10): 'ANGERS ' (4 trailing spaces) | |
string of at most N characters VARCHAR(10): 'ANGERS' | |
a date: '2006-01-09' (YYYY-MM-DD format) | |
a time: '16:43:00' (format HH:MM:SS) | |
both date and time: '2006-01-09 16:43:00' (format YYYY-MM-DD HH:MM:SS) |
The CAST() function allows you to convert between types when necessary. To convert a value V declared as type T1 to type T2, write: CAST(V,T2). The following type conversions are supported:
- number to string. This type change is performed implicitly and does not require the use of the CAST function. Thus, the operation 1 + '3' does not require conversion of the character '3'. Its result is the number 4.
- DATE, TIME, TIMESTAMP to strings and vice versa. Thus
- TIMESTAMP to TIME or DATE and vice versa
In a table, a row may have columns with no value. We say that the value of the column is the constant NULL. We can check for the presence of this value using the operators
IS NULL / IS NOT NULL
3.2. Creating a table
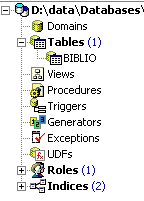
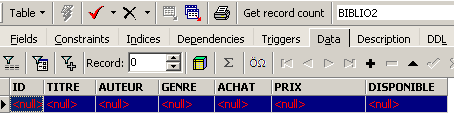
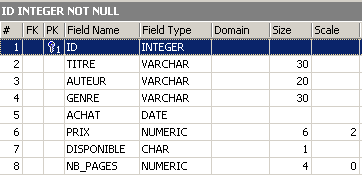
To learn how to create a table, we’ll start by creating one in [Design] mode using IBExpert. To do this, we’ll follow the method described in section 2.3. This creates the following table:
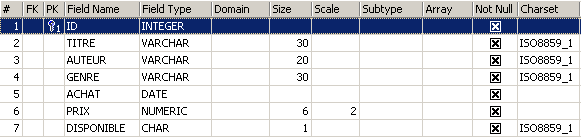
This table will be used to record the books purchased by a library. The fields have the following meanings:
Name | Type | Constraint | Meaning |
This table, which was created using the IBEXPERT tool as a wizard, could have been created directly using SQL commands. To find these, simply consult the [DDL] tab of the table:
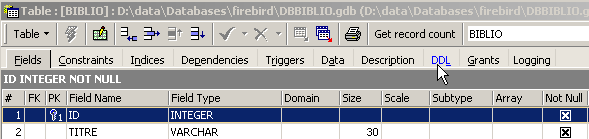
The code SQL used to create the table [BIBLIO] is as follows:
- line 1: Firebird owner - specifies the SQL dialect level used
- line 2: Firebird owner - specifies the character set used
- lines 6–14: SQL standard: creates the BIBLIO table by defining the name and type of each of its columns.
- line 16: SQL standard: creates a constraint specifying that the TITRE column does not allow duplicates
- line 17: standard SQL: specifies that the column [ID] is the primary key of the table. This means that no two rows in the table can have the same ID. This is similar to the [UNIQUE NOT NULL] constraint on the [TITRE] column, and in fact the TITRE column could have served as the primary key. The current trend is to use primary keys that have no meaning and are generated by the SGBD.
The syntax of the [CREATE TABLE] command is as follows:
CREATE TABLE table (nom_colonne1 type_colonne1 contrainte_colonne1, nom_colonne2 type_colonne2 contrainte_colonne2, ..., nom_colonnen type_colonnen contrainte_colonnen, other constraints) | |||||||||
creates the table table with the specified columns
|
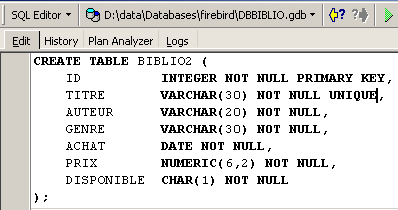
The table [BIBLIO] could also have been created with the following SQL order:
Let's demonstrate this. Let's open this command in a SQL editor (F12) to create a table that we will call [BIBLIO2]:
After execution, you must commit the transaction to see the result in the database:
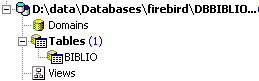
Once this is done, the table appears in the database:
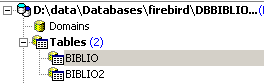
By double-clicking on its name, we can view its structure:
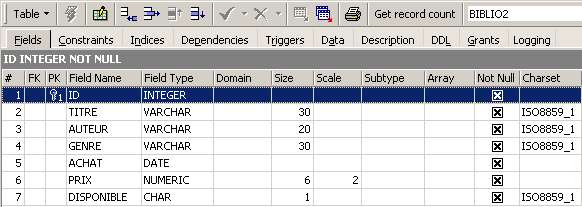
We can see the definition we created for the table [BIBLIO2]
3.3. Deleting a table
The command SQL to delete a table is as follows:
DROP TABLE table | |
Deletes [table] |
To delete the table [BIBLIO2] that we just created, we now execute the following command SQL:
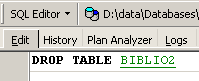
and we validate it using [Commit]. The table [BIBLIO2] is deleted:
3.4. Filling a table
Let’s insert a row into the table [BIBLIO] that we just created:
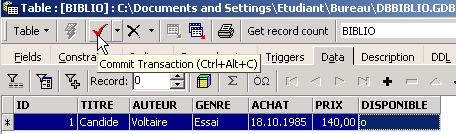
Validate the addition of the row using [Commit], then right-click on the added row:

and, as shown above, request that the inserted row be copied to the clipboard as a SQL INSERT command. Next, open any text editor and paste what we just copied. We get the following SQL code:
INSERT INTO BIBLIO (ID,TITRE,AUTEUR,GENRE,ACHAT,PRIX,DISPONIBLE) VALUES (1,'Candide','Voltaire','Essai','18-OCT-1985',140,'o');
The syntax for a SQL INSERT statement is as follows:
insert into table [(colonne1, colonne2, ..)] values (value1, value2, ....) | |
adds a row (value1, value2, ..) to the table. These values are assigned to column1, column2, ... if they exist; otherwise, to the table's columns in the order in which they were defined. |
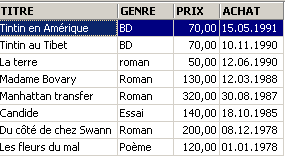
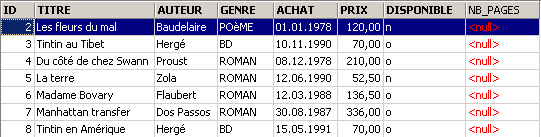
To insert new rows into the [BIBLIO] table, enter the following INSERT commands in the SQL editor. Execute and confirm these commands one by one. Use the button to move to the next command.
After validating [Commit] and the various orders SQL, we obtain the following table:
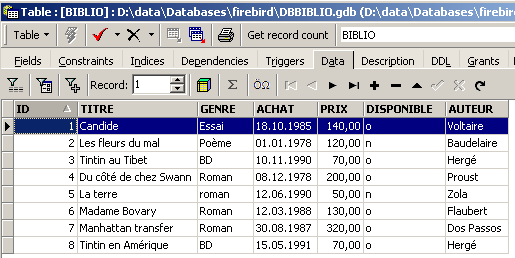 |
3.5. Querying a table
3.5.1. Introduction
In the SQL editor, type the following command:
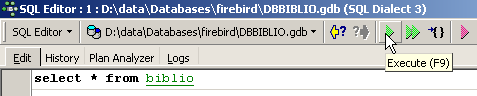
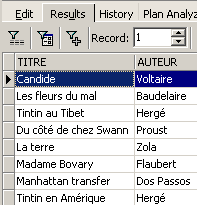
and execute it. We obtain the following result:

The SELECT command allows you to view the contents of database tables. This command has a very rich syntax. Here, we will present the syntax for querying a single table. We will cover querying multiple tables simultaneously at a later time. The syntax for the command SQL [SELECT] is as follows:
SELECT [ALL|DISTINCT] [*|expression1 alias1, expression2 alias2, ...] FROM table | |
Displays the values of expressioni for all table rows. expressioni can be a column or a more complex expression. The * symbol denotes all columns. By default, all table rows (ALL) are displayed. If DISTINCT is present, identical selected rows are displayed only once. The values of `expressioni` are displayed in a column titled `expressioni` or `aliasi` if the latter was used. |
Examples:
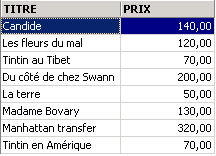
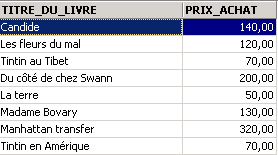
In the examples above, we have assigned aliases (TITRE_DU_LIVRE, PRIX_ACHAT) to the requested columns.
3.5.2. Displaying rows that meet a condition
SELECT .... WHERE condition | |
Only rows that meet the condition are displayed |
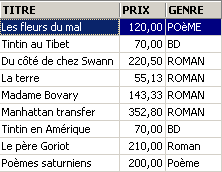
Examples
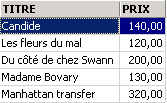
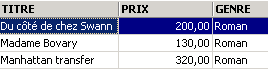
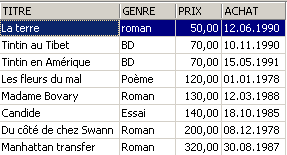
One of the books has the genre 'novel' rather than 'Novel'. We use the UPPER function, which converts a string to uppercase, to retrieve all the novels.
We can combine conditions using logical operators
ET logic | |
OU logical | |
Logical negation |

![]()
 |
3.5.3. Displaying rows in a specific order
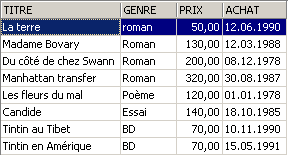
To the previous syntaxes, you can add a clause such as ORDER BY to specify the desired display order:
SELECT .... ORDER BY expression1 [asc|desc], expression2 [asc|dec], ... | |
The result rows of the selection are displayed in the order of 1: ascending (asc / ascending, which is the default) or descending (desc / descending) order of expression1 2: if expression1 is equal, the display is based on the values of expression2 etc. |
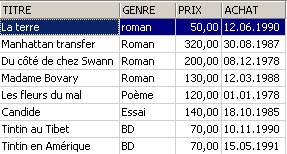
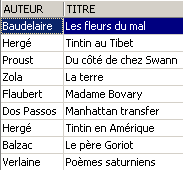
Examples:
3.6. Deleting rows from a table
DELETE FROM table [WHERE condition] | |
Deletes table rows that meet the condition. If no condition is specified, all rows are deleted. |
Examples:
The two commands below are executed one after the other:
3.7. Modifying the contents of a table
update table set column1 = expression1, column2 = expression2, ... [where condition] | |
For table rows that meet the condition (all rows if there is no condition), column1 is set to the value of expression1. |
Examples:
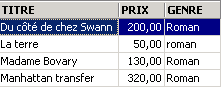
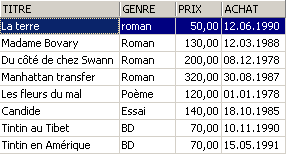
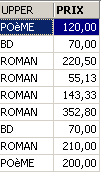
We capitalize all genres:
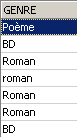
Let's check:
![]()
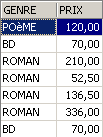
We display the prices:
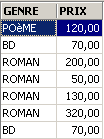
The price of novels increases by 5%:
We verify:
3.8. Permanent update of a table
When changes are made to a table, Firebird actually applies them to a copy of the table. These changes can then be made permanent or rolled back using the commands COMMIT and ROLLBACK.
COMMIT | |
Makes the updates made to the tables since the last COMMIT permanent. |
ROLLBACK | |
reverts all changes made to the tables since the last COMMIT. |
A COMMIT is performed implicitly at the following times: a) Upon logging out of Firebird b) After each command affecting the table structure: CREATE, ALTER, DROP. |
Examples
In the SQL editor, the database is brought to a known state by committing all operations performed since the last COMMIT or ROLLBACK:
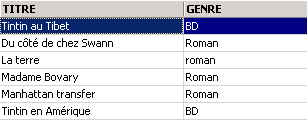
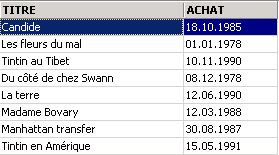
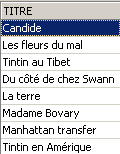
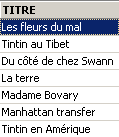
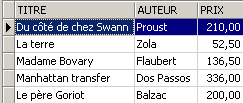
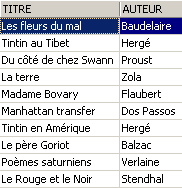
We request the list of titles:
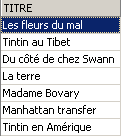
Deleting a title:
Verification:
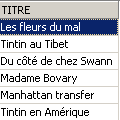
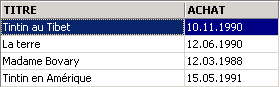
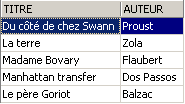
The title has been successfully deleted. Now we roll back all changes made since the last COMMIT / ROLLBACK:
Verification:
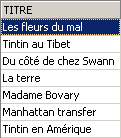
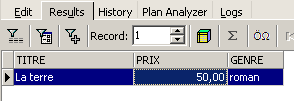
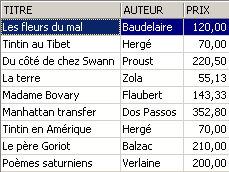
The deleted title has been restored. Now let’s retrieve the list of prices:
![]()
Let’s set all prices to zero.
Let's check the prices:
![]()
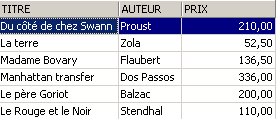
Let's undo the changes made to the database:
and check the prices again:
![]()
We have restored the original prices.
3.9. Adding rows from one table to another
It is possible to add rows from one table to another when their structures are compatible. To demonstrate this, let’s start by creating a table named [BIBLIO2] with the same structure as [BIBLIO].
In the IBExpert database explorer, double-click on the [BIBLIO] table to access the [DDL] tab:
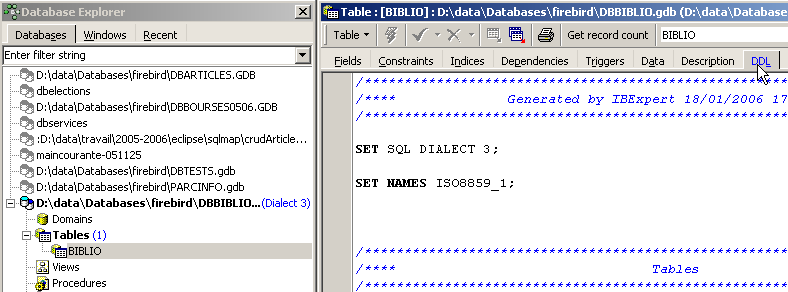
In this tab, you will find the list of SQL commands that generate the [BIBLIO] table. Copy all of this code to the clipboard (CTRL-A, CTRL-C). Then, call a tool called [Script Executive], which allows you to execute a list of SQL commands:

A text editor appears, into which we can paste (CTRL-V) the text previously copied to the clipboard:
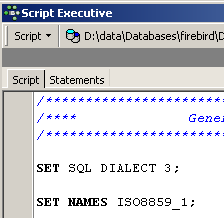
A list of commands SQL is often referred to as a script SQL. [Script Executive] will allow us to execute such a script, whereas the SQL editor only allowed the execution of a single command at a time. The current SQL script creates the [BIBLIO] table. Let’s make it create a table named [BIBLIO2]. To do this, simply change [BIBLIO] to [BIBLIO2]:
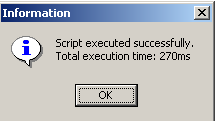
Let's run this script using the [Run Script] button below:

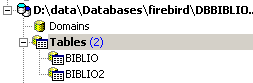
The script is executed:
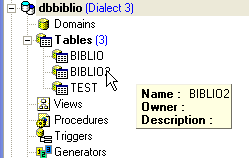
and we can see the new table in the database explorer:
If we double-click on [BIBLIO2] to check its contents, we find that it is empty, which is normal:
A variant of the SQL INSERT command allows you to insert rows from one table into another:
INSERT INTO table1 [(colonne1, colonne2, ...)] SELECT column1, column2, ... FROM table2 WHERE condition | |
The rows of table2 that satisfy condition are added to table1. The columns columnA, columnB, ... of table2 are assigned in order to column1, column2, ... of table1 and must therefore be of a compatible type. |
Let's return to the SQL editor:
and issue the following SQL command:
which inserts into [BIBLIO2] all rows from [BIBLIO] corresponding to a novel. After executing the SQL command, let’s commit it with a [Commit]:
Now, let’s view the data in the [BIBLIO2] table:

3.10. Deleting a table
DROP TABLE table | |
deletes table |
Example: Dropping the table BIBLIO2
Confirm the change:
In the database explorer, refresh the table view:
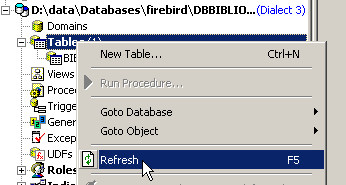
We see that the table [BIBLIO2] has been deleted:
3.11. Modifying a table's structure
ALTER TABLE table [ ADD nom_colonne1 type_colonne1 contrainte_colonne1] [ALTER nom_colonne2 TYPE type_colonne2] [DROP nom_colonne3] [ADD contrainte] [DROP CONSTRAINT nom_contrainte] | |
allows you to add (ADD), modify (ALTER), and delete (DROP) table columns. The syntax nom_colonnei type_colonnei contrainte_colonnei is the same as that of CREATE TABLE. You can also add or remove table constraints. |
Example: Execute the following two SQL commands sequentially in the SQL editor
In the database explorer, let’s check the structure of the [BIBLIO] table:
The changes have been applied. Let’s see how the table’s content has changed:
The new column [NB_PAGES] has been created but has no values. Let’s delete this column:
Let's check the new structure of the [BIBLIO] table:
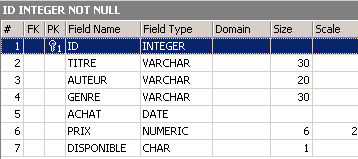
The column [NB_PAGES] has indeed disappeared.
3.12. Views
It is possible to have a partial view of a table or multiple tables. A view behaves like a table but does not contain data. Its data is extracted from other tables or views. A view has several advantages:
- A user may be interested only in certain columns and rows of a given table. The view allows them to see only those rows and columns.
- The owner of a table may wish to grant only limited access to other users. A view allows them to do so. The users they have authorized will only have access to the view they have defined.
3.12.1. Creating a view
CREATE VIEW nom_vue AS SELECT column1, column2, ... FROM table WHERE condition [ WITH CHECK OPTION ] | |
creates the view nom_vue. This is a table with the structure column1, column2, ... from table and, for rows, the rows of table that satisfy condition (all rows if there is no condition) | |
This optional clause specifies that inserts and updates on the view must not create rows that the view could not select. |
Note The syntax of CREATE VIEW is actually more complex than the one presented above and allows, in particular, the creation of a view from multiple tables. To do this, the query SELECT simply needs to involve multiple tables (see the following chapter).
Examples
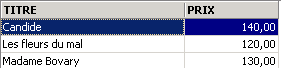
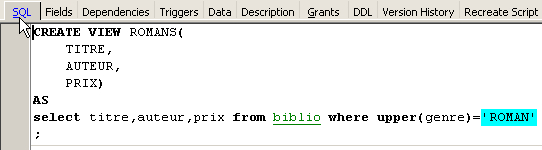
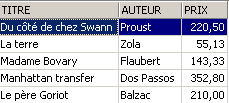
From the biblio table, we create a view containing only novels (row selection) and only the title, author, and price columns (column selection):
In the database explorer, refresh the view (F5). A view appears:
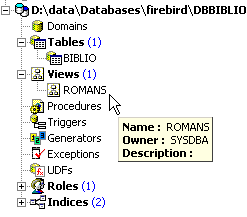
We can find out the SQL order associated with the view. To do this, double-click on the [ROMANS] view:
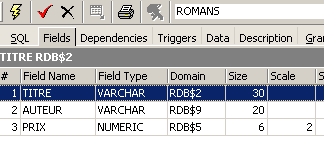
A view is like a table. It has a structure:
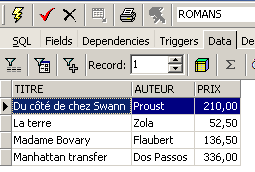
and content:
A view is used like a table. We can run queries on it. Here are a few examples to try in the editor:
Is the new novel visible in the [ROMANS] view?
Let’s add something other than a novel to the [BIBLIO] table:
SQL> insert into biblio(id,titre,auteur,genre,achat,prix,disponible) values (11,'Poèmes saturniens','Verlaine','Poème','02-sep-92',200,'o');
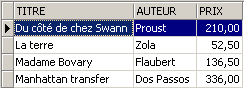
Let's check the [BIBLIO] table:
Let's check the view [ROMANS]:
The added book is not in the view [ROMANS] because it did not have upper(genre)='ROMAN'.
3.12.2. Updating a view
You can update a view just as you would a table. All tables from which the view’s data is extracted are affected by this update. Here are a few examples:
SQL> insert into biblio(id,titre,auteur,genre,achat,prix,disponible) values (13,'Le Rouge et le Noir','Stendhal','Roman','03-oct-92',110,'o')
We delete a row from the view [ROMANS]:

The row deleted from the [ROMANS] view was also deleted from the [BIBLIO] table. We will now increase the price of the books in the [ROMANS] view:
Let’s check in [ROMANS]:
What was the impact on the [BIBLIO] table?
The prices of the novels have indeed been increased by 5% in [BIBLIO] as well.
3.12.3. Delete a view
DROP VIEW nom_vue | |
deletes the view named |
Example
In the database explorer, you can refresh the view (F5) to see that the view [ROMANS] has disappeared:

3.13. Using Group Functions
There are functions that, instead of operating on each row of a table, operate on groups of rows. These are essentially statistical functions that allow us to calculate the mean, standard deviation, etc., of the data in a column.
SELECT f1, f2, .., fn FROM table [ WHERE condition ] | |
Calculates the FI statistical functions on all table rows that meet the specified condition. |
SELECT f1, f2, .., fn FROM table [ WHERE condition ] [ GROUP BY expr1, expr2, ..] | |
The keyword GROUP BY divides the table rows into groups. Each group contains the rows for which the expressions expr1, expr2, ... have the same value. Example: GROUP BY genre places books of the same genre in the same group. The clause GROUP BY author,genre would place books with the same author and genre in the same group. The WHERE condition first removes rows that do not meet the condition from the table. Then, groups are formed by the clause GROUP BY. The fi functions are then calculated for each group of rows. |
SELECT f1, f2, .., fn FROM table [ WHERE condition ] [ GROUP BY expression] [ HAVING condition_de_groupe] | |
The clause HAVING filters the groups formed by the clause GROUP BY. It is therefore always linked to the presence of this clause GROUP BY. Example: GROUP BY genre HAVING genre!='ROMAN' |
The following statistical functions are available:
average of expression | |
number of rows for which expression has a value | |
total number of rows in the table | |
Maximum value of expression | |
min of expression | |
sum of expression |
Examples
![]()
Average price? Maximum price? Minimum price?
![]()
Average price of a novel? Maximum price?
![]()
How many BD?
![]()
How many novels cost less than 100 F?
![]()
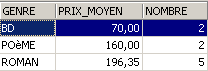
Number of books and average price per book for books of the same genre?
SQL> select upper(genre) GENRE,avg(prix) PRIX_MOYEN,count(*) NOMBRE from biblio group by upper(genre)
Same question, but only for books that are not novels:
SQL>
select upper(genre) GENRE,avg(prix) PRIX_MOYEN,count(*) NOMBRE
from biblio
group by upper(genre)
having upper(GENRE)!='ROMAN'
![]()
Same query, but only for books under 150 F:
SQL>
select upper(genre) GENRE,avg(prix) PRIX_MOYEN,count(*) NOMBRE
from biblio
where prix<150
group by upper(genre)
having upper(GENRE)!='ROMAN'
![]()
Same query, but we only keep groups with an average book price >100 F
SQL>
select upper(genre) GENRE, avg(prix) PRIX_MOYEN,count(*) NOMBRE
from biblio
group by upper(genre)
having avg(prix)>100
![]()
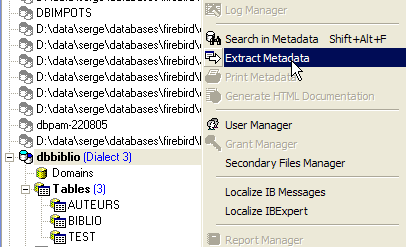
3.14. Create the SQL script for a table
The SQL language is a standard language that can be used with many SGBD scripts. To switch from one SGBD script to another, it is useful to export a database or simply certain elements of it in the form of a SQL script which, when re-run in another SGBD, will be able to recreate the elements exported in the script.
Here, we will export the [BIBLIO] table. Let’s take the option [Extract Metadata]:
Note above that you must be positioned on the database from which you want to export elements. The option launches a wizard:
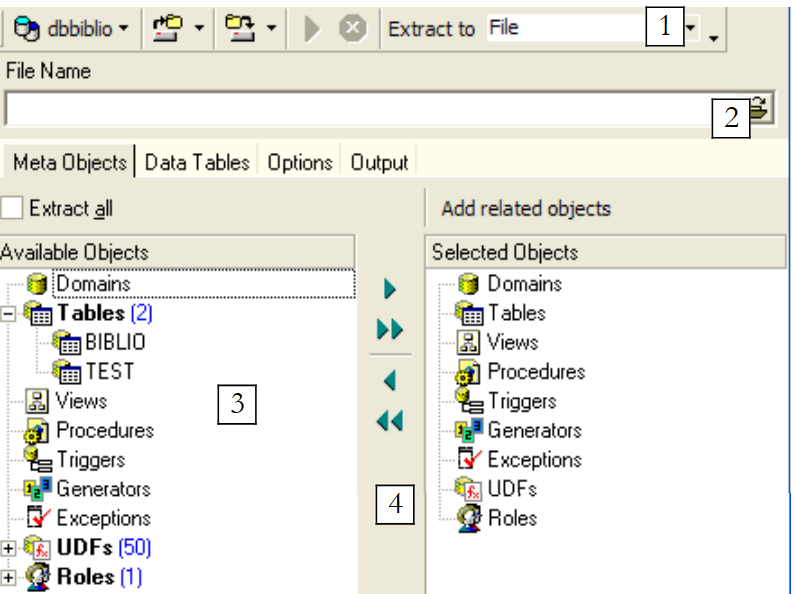 |
where to generate the SQL script:
| |
file name if option or [File] is selected | |
What to export | |
Buttons to select (->) or deselect (<-) the objects to export |
If we wanted to export the entire database, we would check the option and [Extract All] above. We simply want to export the BIBLIO table. To do this, with [4], we select the [BIBLIO] table, and with [2] we specify a file:
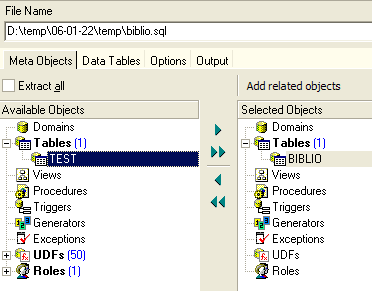
If we stop here, only the structure of table [BIBLIO] will be exported. To export its contents, we need to use the [Data Tables] tab:
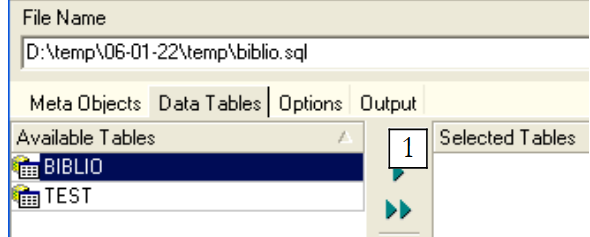 |
Let’s use [1] to select the table [BIBLIO]:
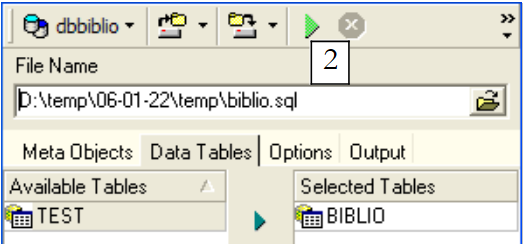 |
Use [2] to generate the script SQL:
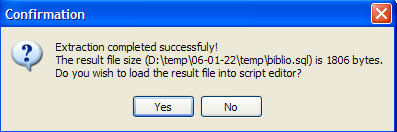
Let's accept the offer. This allows us to view the script that was generated in the file [biblio.sql]:
- Lines 1 through 3 are comments
- Lines 5 through 12 are from the Firebird-specific SQL
- the other lines are from the standard SQL, which should be able to be replayed in a SGBD that would have the data types declared in the BIBLIO table.
Let’s replay this script within Firebird to create a BIBLIO2 table that will be a clone of the BIBLIO table. To do this, let’s use [Script Executive] (Ctrl-F12):
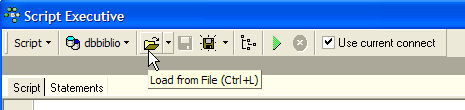
Let’s load the [biblio.sql] script we just generated:
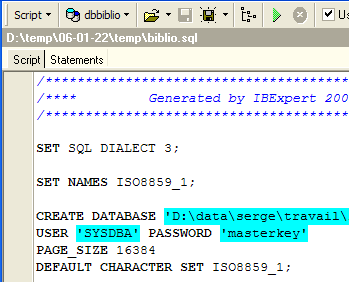
Modify it to keep only the table creation and row insertion parts. The table is renamed [BIBLIO2]:
CREATE TABLE BIBLIO2 (
ID INTEGER NOT NULL,
TITRE VARCHAR(30) NOT NULL,
AUTEUR VARCHAR(20) NOT NULL,
GENRE VARCHAR(30) NOT NULL,
ACHAT DATE NOT NULL,
PRIX NUMERIC(6,2) DEFAULT 10 NOT NULL,
DISPONIBLE CHAR(1) NOT NULL
);
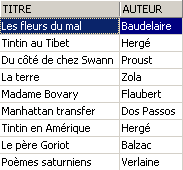
INSERT INTO BIBLIO2 (ID, TITRE, AUTEUR, GENRE, ACHAT, PRIX, DISPONIBLE) VALUES (2, 'Les fleurs du mal', 'Baudelaire', 'POèME', '1978-01-01', 120, 'n');
...
COMMIT WORK;
Let's run this script:
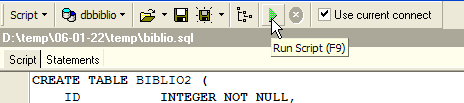 |  |
We can verify in the database explorer that the table [BIBLIO2] has been created and that it has the expected structure and content:
 | 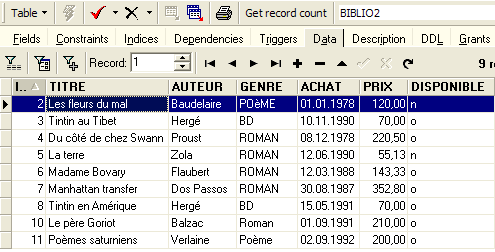 |