4. Running the Application
We now want to deploy the application outside of IDE, STS (for the server), and WebStorm (for the client).
4.1. Deploying the web service on a Tomcat server
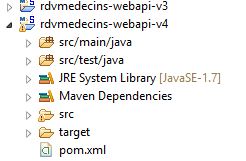
We saw in section 2.11.9 how to create a WAR archive for Tomcat. We will repeat the process here. First, to preserve the existing project, we duplicate the Eclipse project [rdvmedecins-webapi-v3] into [rdvmedecins-webapi-v4].
 |
The [pom.xml] file is modified as follows:
    <modelVersion>4.0.0</modelVersion>
    <groupId>istia.st.spring4.mvc</groupId>
    <artifactId>rdvmedecins-webapi-v4</artifactId>
    <version>0.0.1-SNAPSHOT</version>
    <packaging>war</packaging>

    <name>rdvmedecins-webapi-v3</name>
    <description>Gestion de RV Médecins</description>
    <parent>
        <groupId>org.springframework.boot</groupId>
        <artifactId>spring-boot-starter-parent</artifactId>
        <version>1.0.0.RELEASE</version>
    </parent>
    <dependencies>
        <dependency>
            <groupId>org.springframework.boot</groupId>
            <artifactId>spring-boot-starter-web</artifactId>
        </dependency>
        <dependency>
            <groupId>org.springframework.boot</groupId>
            <artifactId>spring-boot-starter-security</artifactId>
        </dependency>
        <dependency>
            <groupId>org.springframework.boot</groupId>
            <artifactId>spring-boot-starter-tomcat</artifactId>
            <scope>provided</scope>
        </dependency>
        <dependency>
            <groupId>istia.st.spring4.rdvmedecins</groupId>
            <artifactId>rdvmedecins-metier-dao-v2</artifactId>
            <version>0.0.1-SNAPSHOT</version>
        </dependency>
</dependencies>
Changes must be made in two places:
- line 5: you must specify that a WAR archive (Web ARchive) will be generated;
- lines 23–27: you must add a dependency on the artifact [spring-boot-starter-tomcat]. This artifact includes all Tomcat classes in the project’s dependencies;
- line 26: this artifact is [provided], meaning that the corresponding archives will not be included in the generated WAR. Instead, these archives will be located on the Tomcat server where the application will run;
The web application must also be configured. In the absence of the [web.xml] file, this is done using a class that inherits from [SpringBootServletInitializer]:
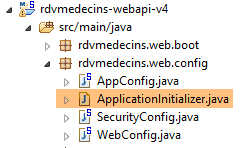 |
The [ApplicationInitializer] class is as follows:
package rdvmedecins.web.config;

import org.springframework.boot.builder.SpringApplicationBuilder;
import org.springframework.boot.context.web.SpringBootServletInitializer;

public class ApplicationInitializer extends SpringBootServletInitializer {
    @Override
    protected SpringApplicationBuilder configure(SpringApplicationBuilder application) {
        return application.sources(AppConfig.class);
    }

}
- line 6: the [ApplicationInitializer] class extends the [SpringBootServletInitializer] class;
- line 8: the [configure] method is redefined (line 7);
- line 9: the [AppConfig] class is provided to configure the project;
Once this is done, it may be necessary to update the Maven project (I had to do this): [clic droit sur projet / Maven / Update project] or [Alt-F5].
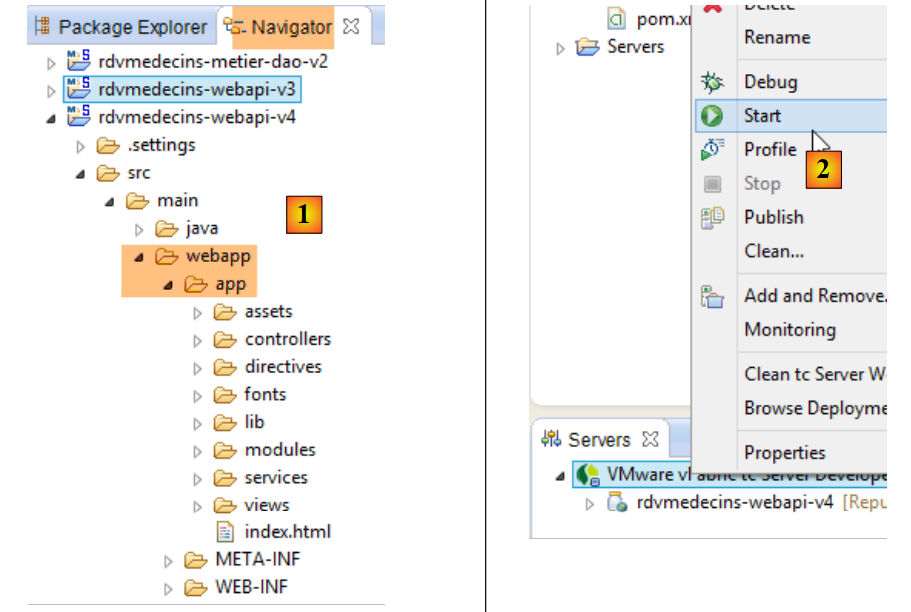
To run the project, proceed as follows:
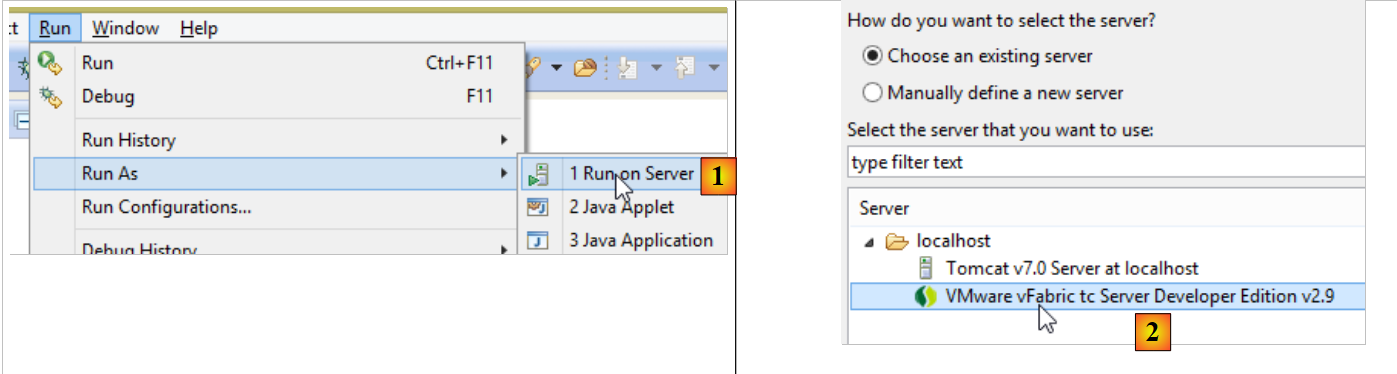 |
- In [1], run the project on one of the servers registered in the IDE Eclipse project;
- In [2], select [tc Server Developer], which is the default option. This is a variant of Tomcat;
The following result is obtained:
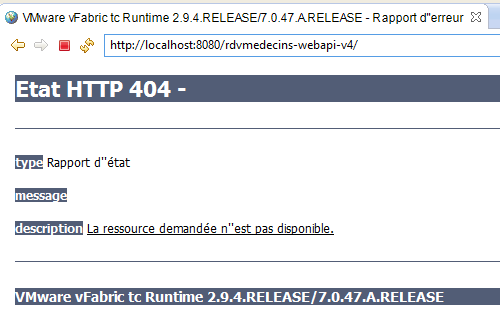 |
This is normal. Remember that the web service does not have URL [/] in its methods. When you try URL [/getAllMedecins], you get the following response:
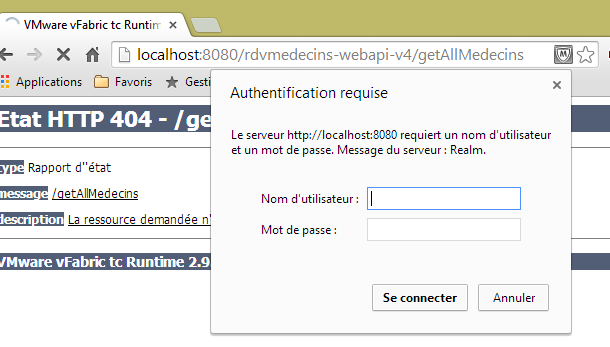 |
That's normal. The web service is protected.
Now let’s launch the [rdvmedecins-angular-v2] client in WebStorm:
 |
In [1], we set the URL for the new web service [http://localhost:8080/rdvmedecins-webapi-v4]. We get the following result:
To run the application outside of the IDE STS, there are various solutions. Here is one.
Download a version from Tomcat [http://tomcat.apache.org/download-80.cgi] (July 2014):
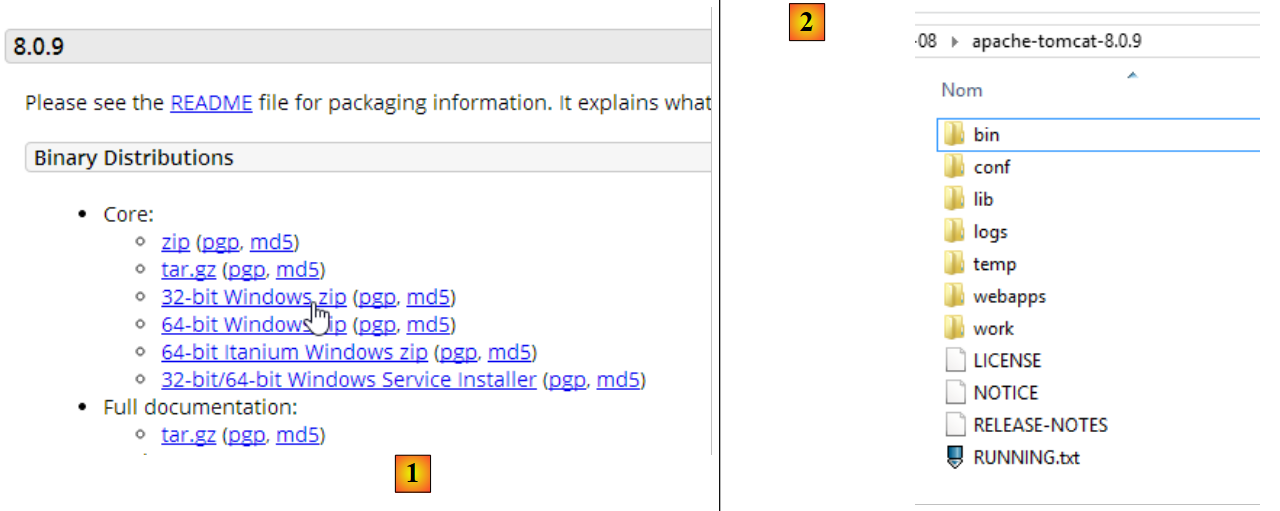 |
Select a zipped version in [1] and unzip it to [2]. Return to STS:
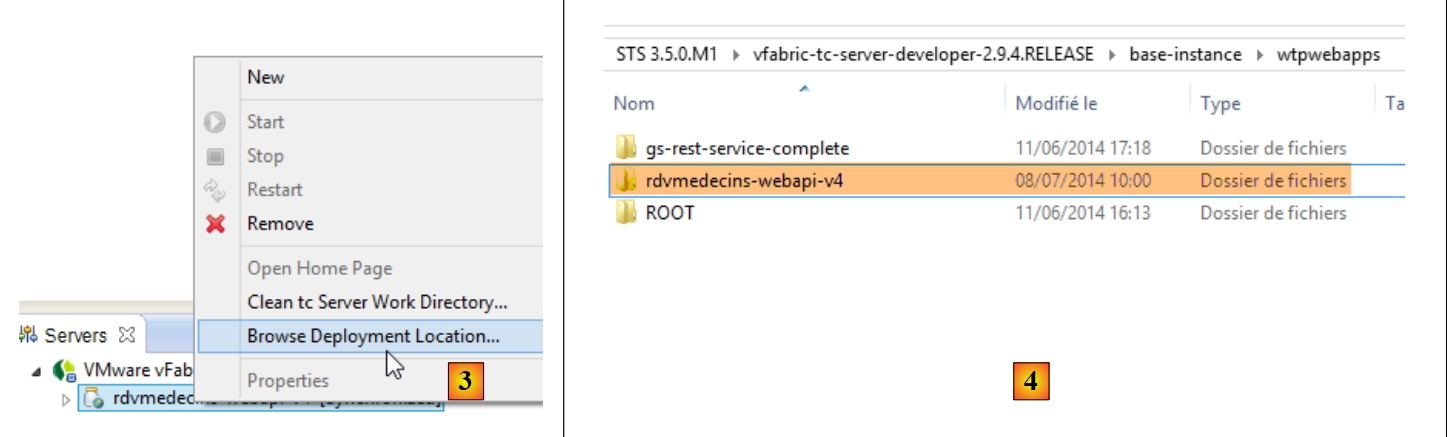 |
- in the [Servers] tab, right-click on the [rdvmedecins-webapi-v4] application and select option [Browse Deployment Location];
- In [4]: Copy the [rdvmedecins-webapi-v4] folder;
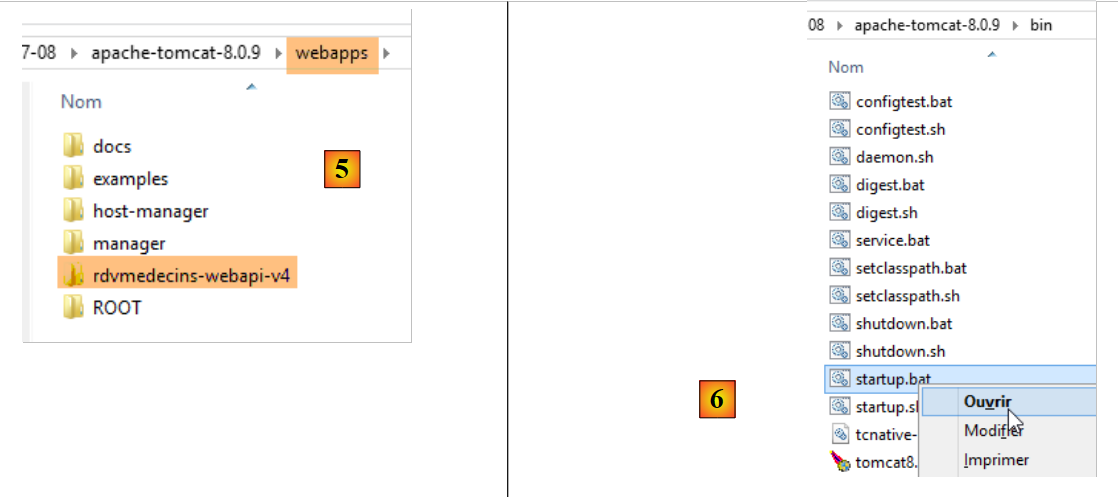 |
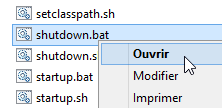
- In [5], paste the [rdvmedecins-webapi-v4] folder into the [webapps] folder in Tomcat;
- In [6], run the [startup.bat] command file (the Tomcat server integrated into STS must be stopped). A DOS window opens to display the Tomcat logs. They should show that the [rdvmedecins-webapi-v4] application has been launched.
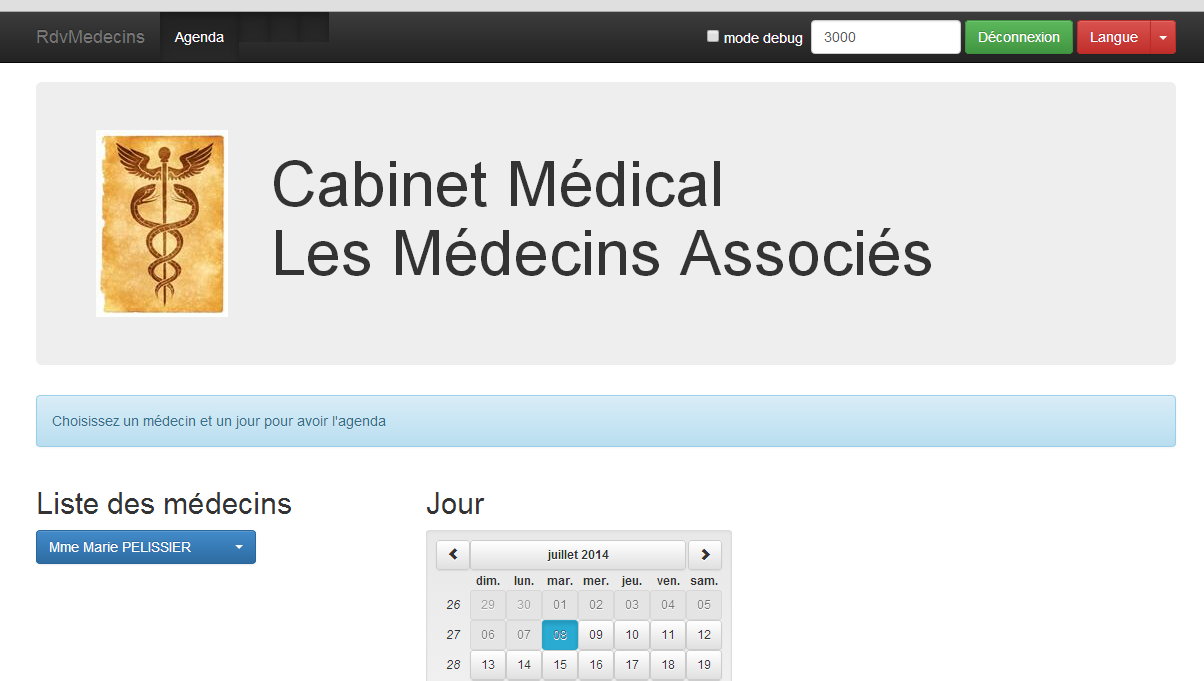
To verify this, run the Angular client [rdvmedecins-angular-v2] again in WebStorm:
 |
In [1], set the URL of the new web service [http://localhost:8080/rdvmedecins-webapi-v4]. You get the following result:
4.2. Deploying the Angular client to the Tomcat server
Now that the web service has been deployed on Tomcat, we will now deploy the Angular client on a server as well. This could very well be the server that is already hosting the web service. We will take this approach.
First, we duplicate the client [rdvmedecins-angular-v2] into [rdvmedecins-angular-v3] and make the following changes:
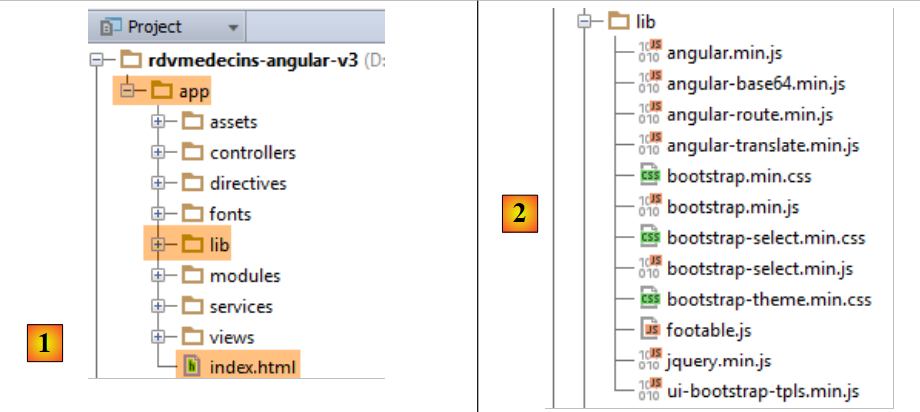 |
- In [1], everything has been moved to a folder named [app] ;
- In [1], the [bower-components] folder containing the various CSS and JS libraries required for the project was deleted. All these elements were copied into the [lib] and [2] folders;
- in [1], the file [app.html] was renamed to [index.html];
The file [index.html] has been modified to account for changes in the paths of the resources used:
<!DOCTYPE html>
<html ng-app="rdvmedecins">
<head>
  <title>RdvMedecins</title>
...
  <!-- on CSS -->
  ...
  <link href="lib/bootstrap-theme.min.css" rel="stylesheet"/>
  <link href="lib/bootstrap-select.min.css" rel="stylesheet"/>
</head>
<!-- [appCtrl] controller, [app] model -->
<body ng-controller="appCtrl">
<div class="container">
  ...
</div>
<!-- Bootstrap core JavaScript ================================================== -->
<script type="text/javascript" src="lib/jquery.min.js"></script>
<script type="text/javascript" src="lib/bootstrap.min.js"></script>
<script type="text/javascript" src="lib/bootstrap-select.min.js"></script>
<script type="text/javascript" src="lib/footable.js"></script>
<!-- angular js -->
<script type="text/javascript" src="lib/angular.min.js"></script>
<script type="text/javascript" src="lib/ui-bootstrap-tpls.min.js"></script>
<script type="text/javascript" src="lib/angular-route.min.js"></script>
<script type="text/javascript" src="lib/angular-translate.min.js"></script>
<script type="text/javascript" src="lib/angular-base64.min.js"></script>
<!-- modules -->
...
<!-- services -->
...
<!-- guidelines -->
...
<!-- controllers -->
....
</body>
</html>
Additionally, the [loginCtrl] controller has been modified to point to the correct server to prevent the user from having to type URL:
// credentials
app.serverUrl = "http://localhost:8080/rdvmedecins-webapi-v4";
app.username = "admin";
app.password = "admin";
Now that this is done, let’s run the [index.html] file:
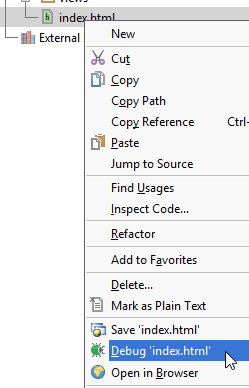 |  |
Then let’s log in to the web service. It should work. Once verified, let’s stop the Tomcat server. We’ll reuse the built-in server from STS.
In STS, copy all the contents of the [rdvmedecins-angular-v3/app] folder into the [webapp] folder of the [rdvmedecins-webapi-v4] project (Navigator tab) [1]:
 |
Once this is done, launch [2], the VMware server from STS, then request URL [http://localhost:8080/rdvmedecins-webapi-v4/app/index.html]:
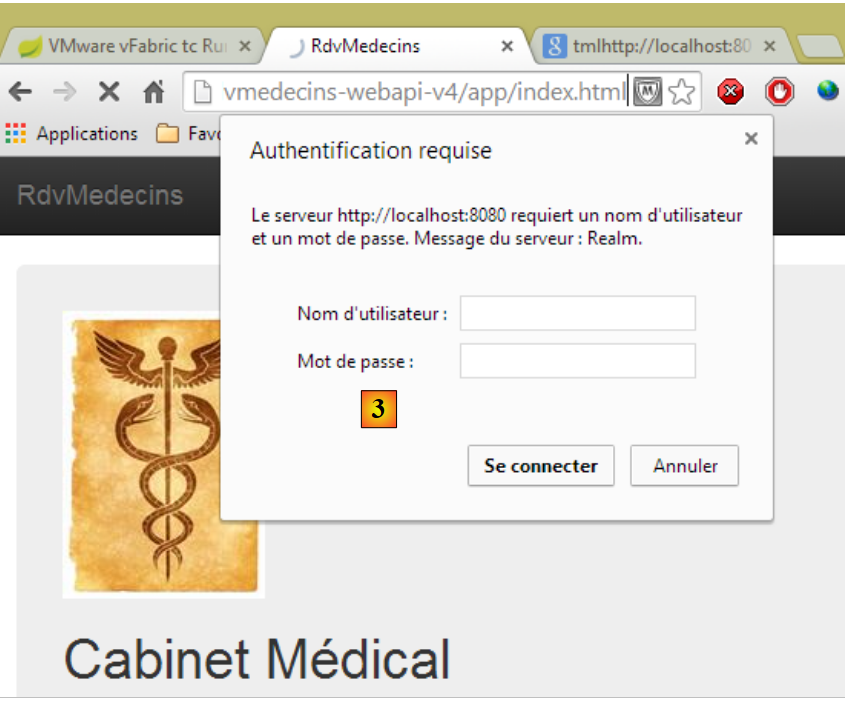 |
We have a permissions issue with [3]. This is not surprising since we have secured the web service. We need to specify that access to the [/app/index.html] file is unrestricted. Let’s go back to Eclipse:
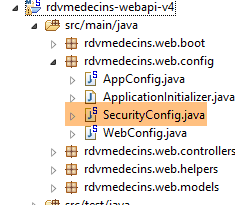 |
Remember that the access permissions were declared in the [SecurityConfig] class. Let’s modify it as follows:
    @Override
    protected void configure(HttpSecurity http) throws Exception {
        // CSRF
        http.csrf().disable();
        // the password is transmitted by the header Authorization: Basic xxxx
        http.httpBasic();
        // the HTTP OPTIONS method must be authorized for all
        http.authorizeRequests() //
                .antMatchers(HttpMethod.OPTIONS, "/", "/**").permitAll();
        // the [app] folder is accessible to all
        http.authorizeRequests() //
                .antMatchers(HttpMethod.GET, "/app", "/app/**").permitAll();
        // only the ADMIN role can use the application
        http.authorizeRequests() //
                .antMatchers("/", "/**") // all URL
                .hasRole("ADMIN");
}
- Lines 11-12: We allow everyone to read the [app] folder and its contents. To do this, we follow the example of the previous lines.
Now, restart the STS Tomcat server and request URL and [http://localhost:8080/rdvmedecins-webapi-v4/app/index.html] again:
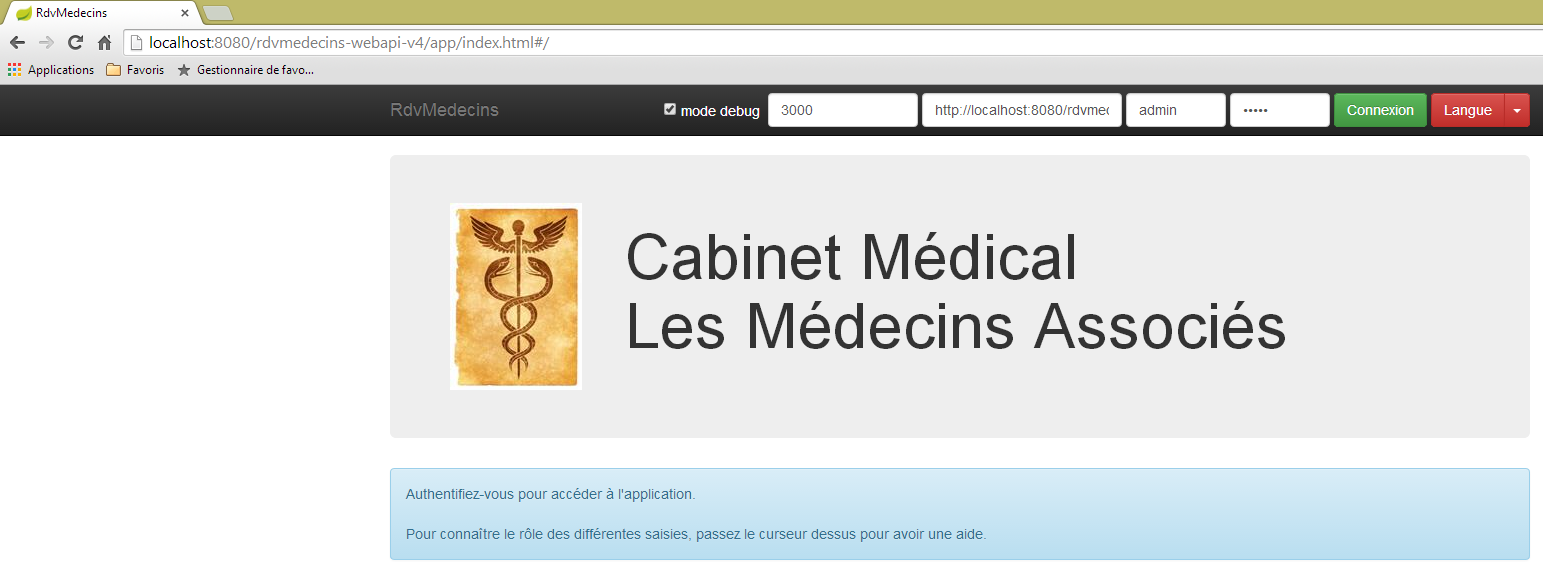
This time, it works.
4.3. The CORS headers
You may recall that we struggled quite a bit to handle the CORS headers. In the previous example:
- the web service is at URL [http://localhost:8080/rdvmedecins-webapi-v4];
- the client HTML is at URL [http://localhost:8080/rdvmedecins-webapi-v4/app];
The client HTML and the web service are therefore on the same server [http://localhost:8080]. There are no conflicts with CORS because these only occur when the client and server are not in the same domain. We should be able to verify this. Let’s return to STS:
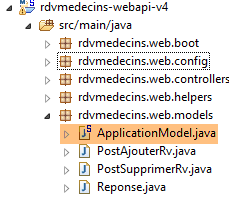 |
Whether or not CORS headers are generated is controlled by a Boolean defined in the [ApplicationModel] class:
    // configuration data
    private boolean CORSneeded = true;
We set the above boolean to false, restart the web service, and request the URL [http://localhost:8080/rdvmedecins-webapi-v4/app/index.html] again. We observe that the application works.
4.4. Deploying the Angular client on an Android tablet
The [Phonegap] [http://phonegap.com/] tool allows you to generate an executable for mobile devices (Android, IoS, Windows 8, ...) from a HTML / JS / CSS application. There are different ways to achieve this. We use the simplest one: an online tool available on the Phonegap website [http://build.phonegap.com/apps].
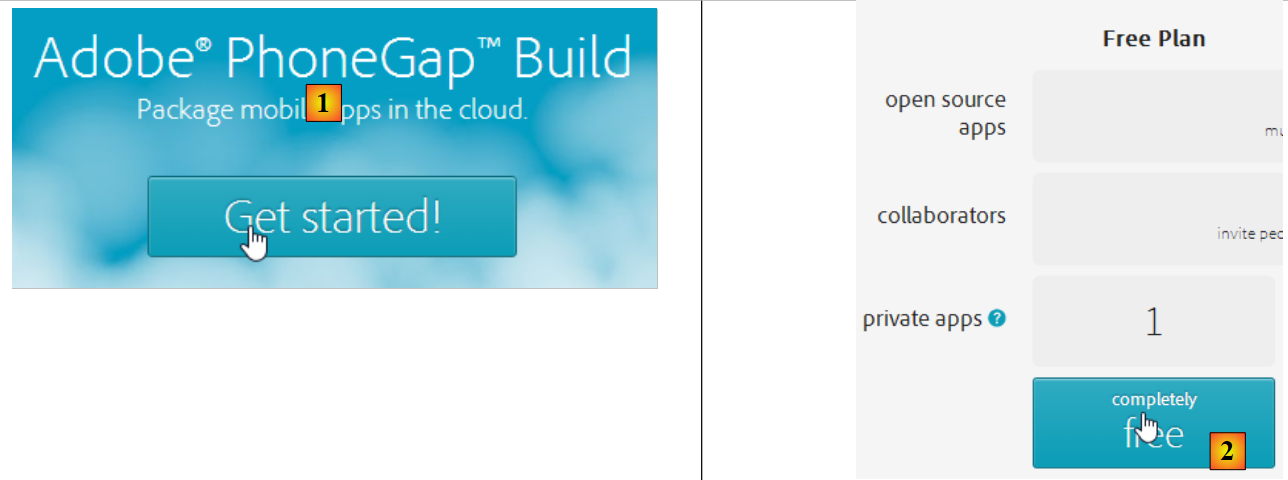 |
- Before [1], you may need to create an account;
- in [1], we get started;
- In [2], choose a free plan that allows only one Phonegap app;
 |
- in [3], download the zipped application [4] (the folder [app] created in section 4.2 is zipped);
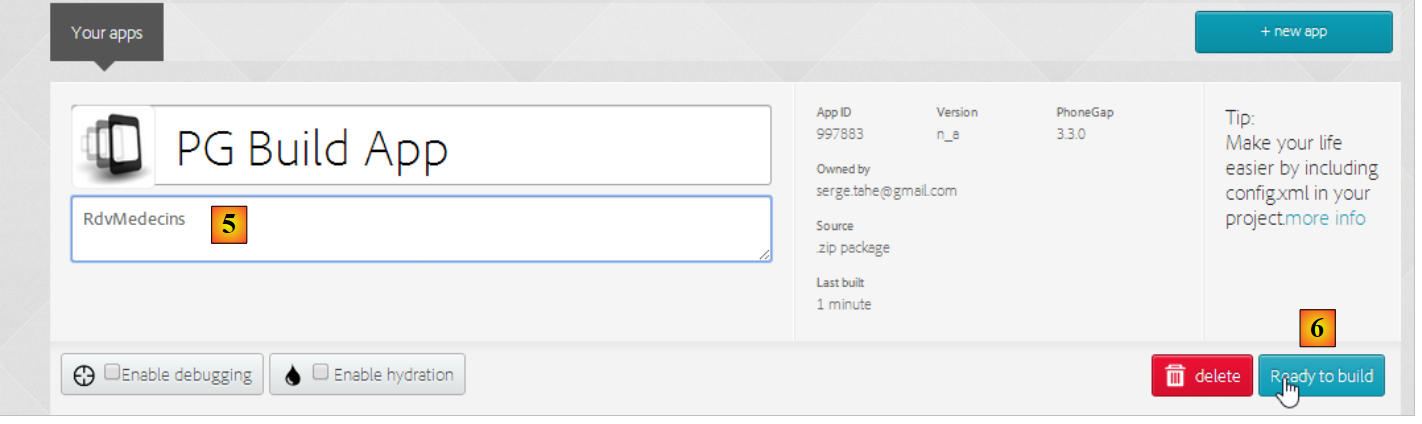 |
- In [5], name the app;
- In [6], build it. This operation may take 1 minute. Wait until the icons for the various mobile platforms indicate that the build is complete;
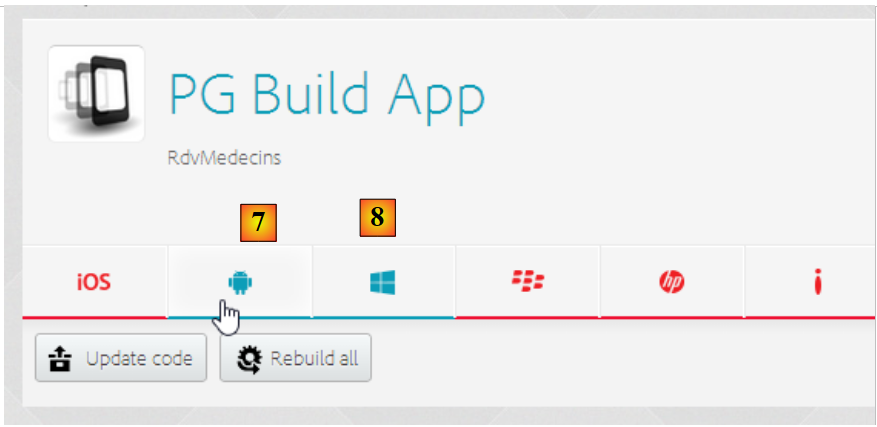 |
- only the Android binary [7] and the Windows binary [8] have been generated;
- Click on [7] to download the Android binary;
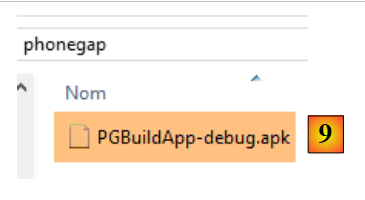 |
- In [9], the downloaded [apk] binary;
Launch a [GenyMotion] emulator for an Android tablet (see section 6.4):
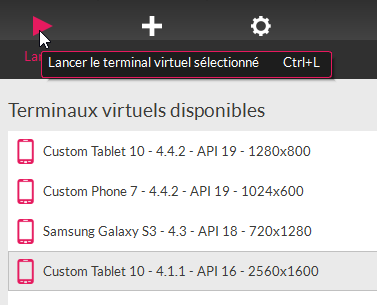 |
Above, we launch a tablet emulator with the Android API 16. Once the emulator is launched,
- unlock it by dragging the lock (if present) to the side and then releasing it;
- using the mouse, drag the [PGBuildApp-debug.apk] file you downloaded and drop it onto the emulator. It will then be installed and run;
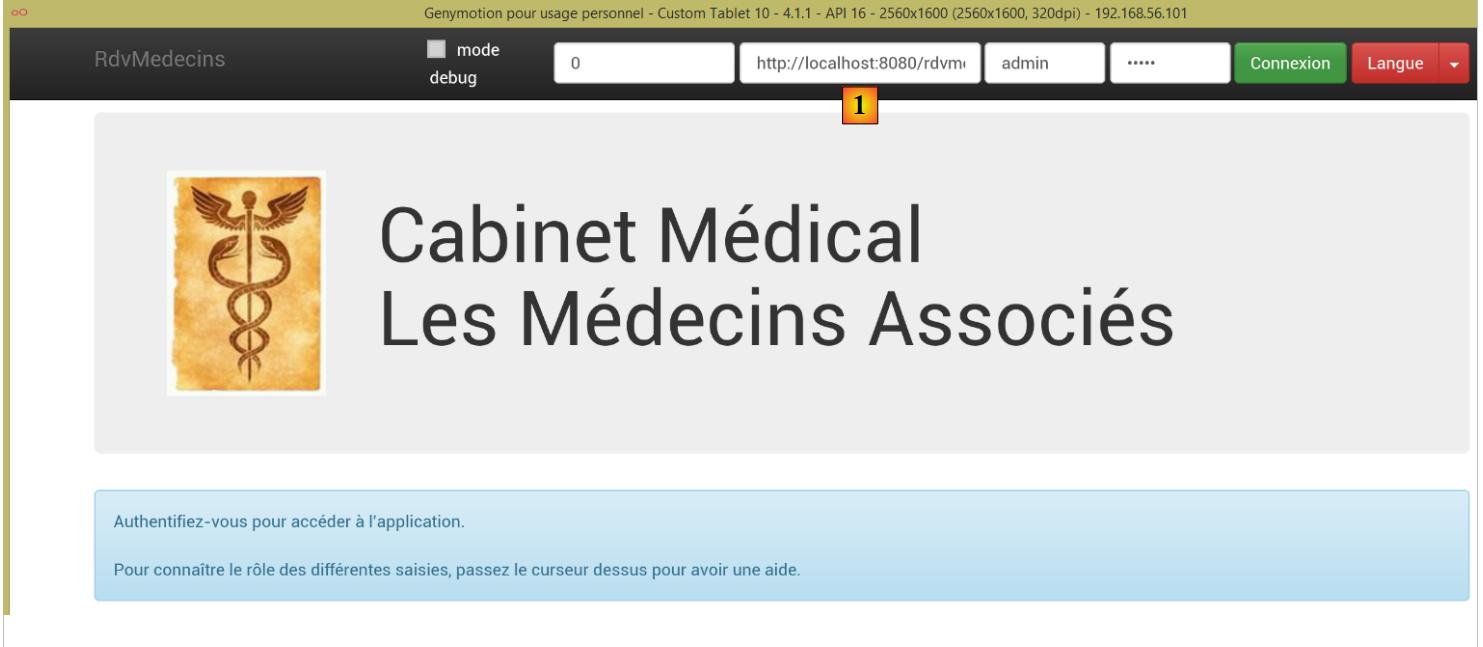 |
You need to change URL to [1]. To do this, in a command window, type the command [ipconfig] (line 1 below), which will display the various IP addresses on your machine:
C:\Users\Serge Tahé>ipconfig

Configuration IP de Windows


Carte réseau sans fil Connexion au réseau local* 15 :

   Statut du média. . . . . . . . . . . . : Média déconnecté
   Suffixe DNS propre à la connexion. . . :

Carte Ethernet Connexion au réseau local :

   Suffixe DNS propre à la connexion. . . : ad.univ-angers.fr
   Adresse IPv6 de liaison locale. . . . .: fe80::698b:455a:925:6b13%4
   Adresse IPv4. . . . . . . . . . . . . .: 172.19.81.34
   Masque de sous-réseau. . . . . . . . . : 255.255.0.0
   Passerelle par défaut. . . . . . . . . : 172.19.0.254

Carte réseau sans fil Wi-Fi :

   Statut du média. . . . . . . . . . . . : Média déconnecté
   Suffixe DNS propre à la connexion. . . :

...
Note either the IP Wi-Fi address (lines 6–9) or the IP address on the local network (lines 11–17). Then use this IP address in the URL section of the web server:
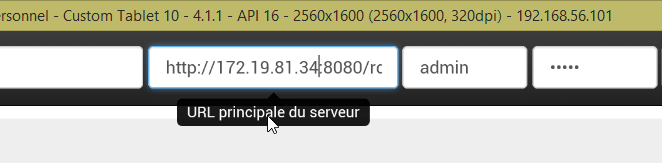 |
Once this is done, connect to the web service:
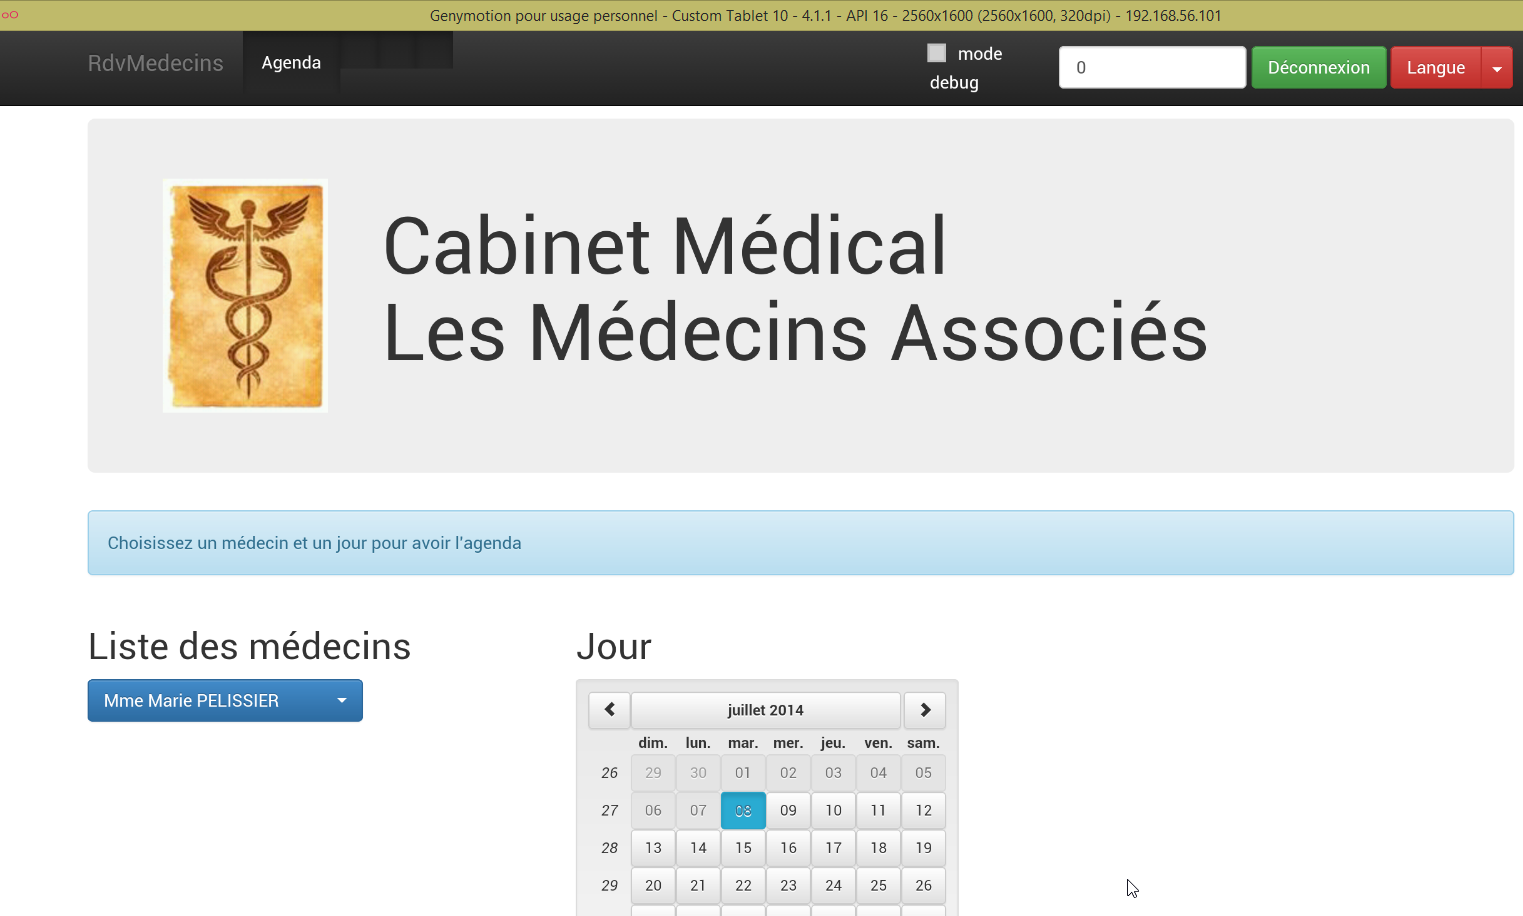 |
Test the application on the emulator. It should work. On the server side, you may or may not allow CORS headers in the [ApplicationModel] class:
    // configuration data
    private boolean CORSneeded = false;
This does not matter for the Android app. It does not run in a browser. However, the requirement for CORS headers comes from the browser, not the server.
4.5. Deploying the Angular client on an Android smartphone emulator
We repeat the previous step using a smartphone emulator. We want to check how our client behaves on small screens:
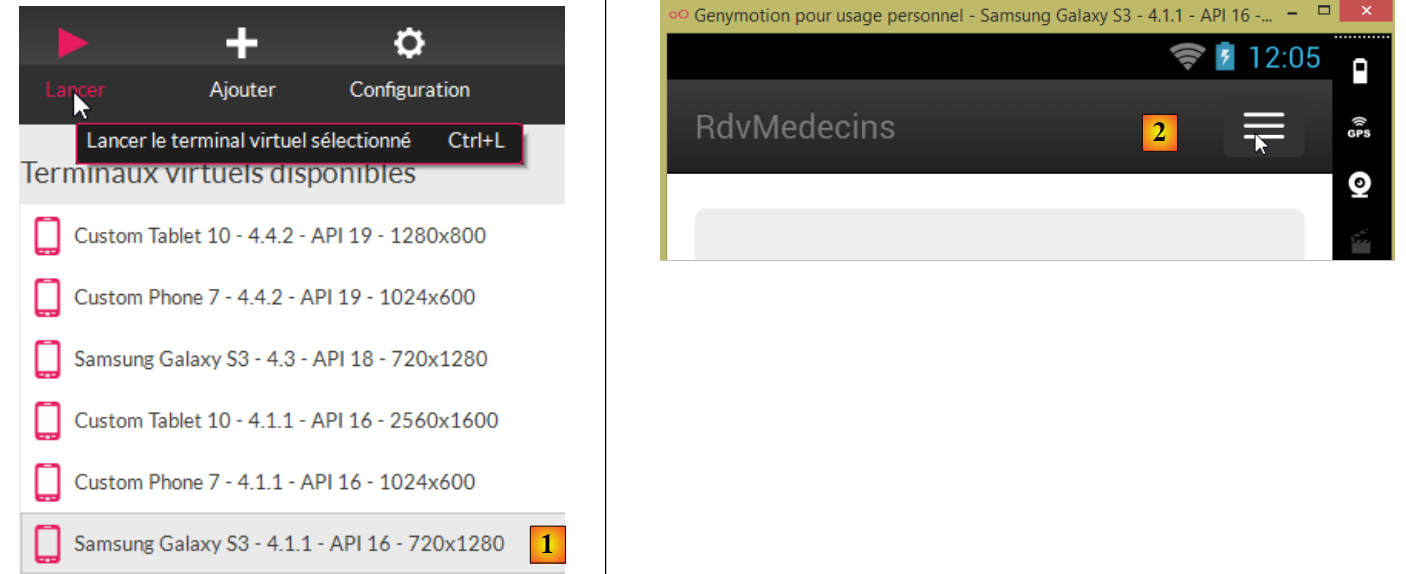 |
- In [1], we launch a smartphone emulator;
- in [2] and [3], the navigation bar has been collapsed into a menu;
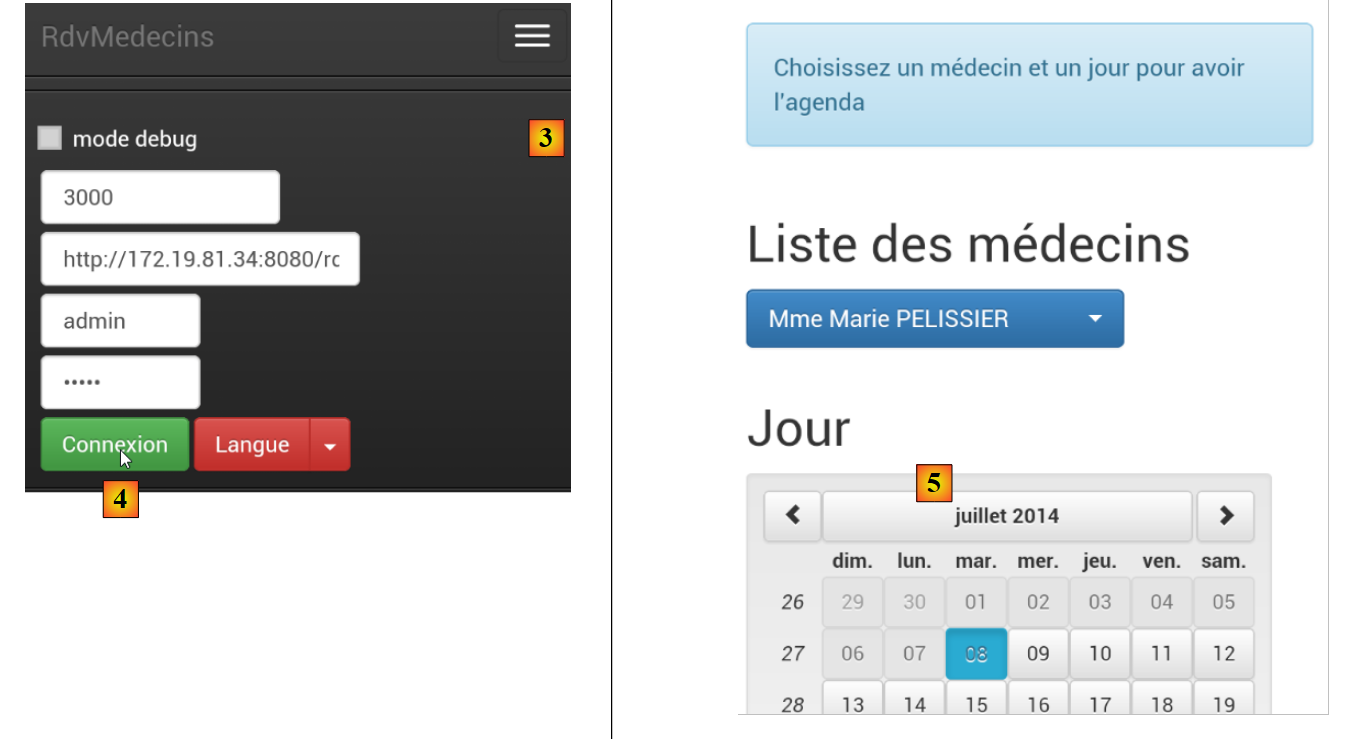 |
- in [4], the user logs in;
- in [5], the list and calendar are stacked one below the other instead of side by side;
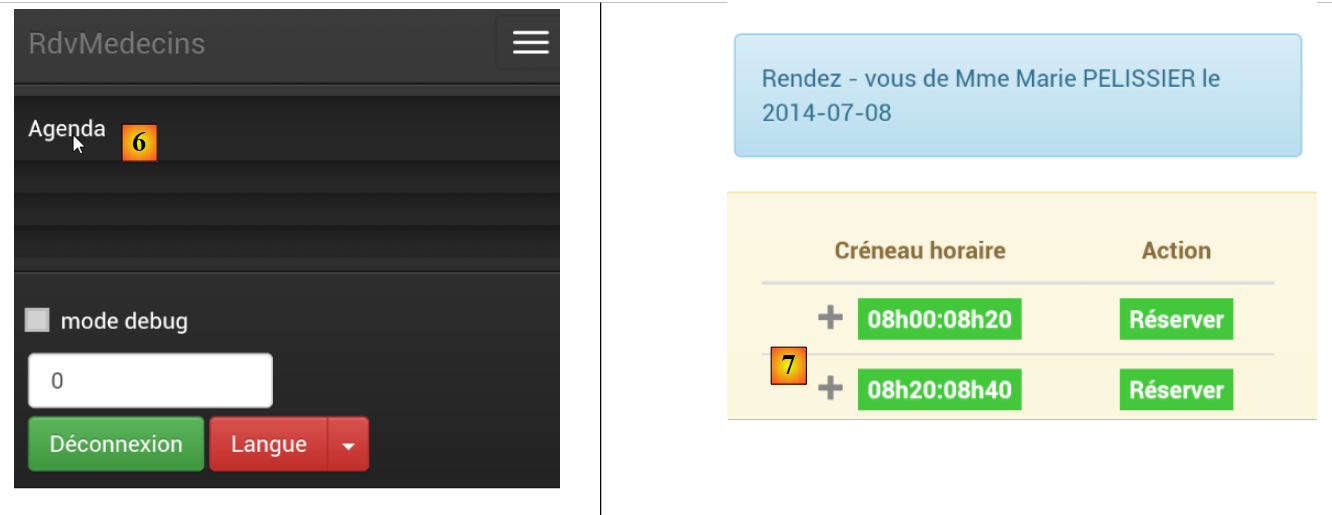 |
- in [6], you are prompted for agenda;
- in [7], because the screen is too small, part of the time slots is hidden. The [footable] library handled this;
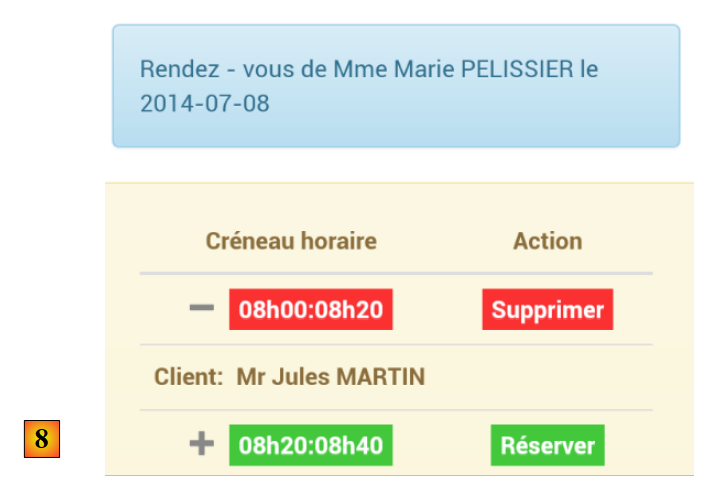 |
- In [8], the same view as before, but this time with an appointment.
All in all, our app adapts fairly well to the smartphone. It could certainly be better, but it remains usable.