8. Server components ASP - 2
8.1. Introduction
We continue our work on the user interface by exploring:
- data validation components
- how to bind data to server components
- HTML server components
8.2. data validation components
8.2.1. Introduction
In form-based applications, it is essential to verify the validity of the data entered into them. In the tax calculation example, we had the following form:
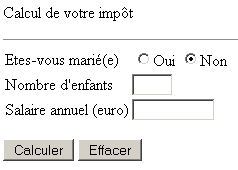
Upon receiving the values from this form, we must verify the validity of the entered data: the number of children and the salary must be positive integers or zero. If this is not the case, the form is returned to the client as entered, along with error messages. We handled this scenario using two views, one for the form above and the other for the errors:
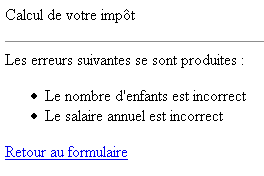
ASP.NET offers components called validation components that allow you to check the following cases:
Component | Role |
checks that a field is not empty | |
checks two values against each other | |
checks that a value falls within a range | |
checks that a field matches a regular expression | |
allows the developer to define their own validation rules—this component could replace all the others | |
allows you to gather error messages generated by the previous controls in a single location on the page |
We will now present each of these components.
8.2.2. RequiredFieldValidator
We are building the following page:
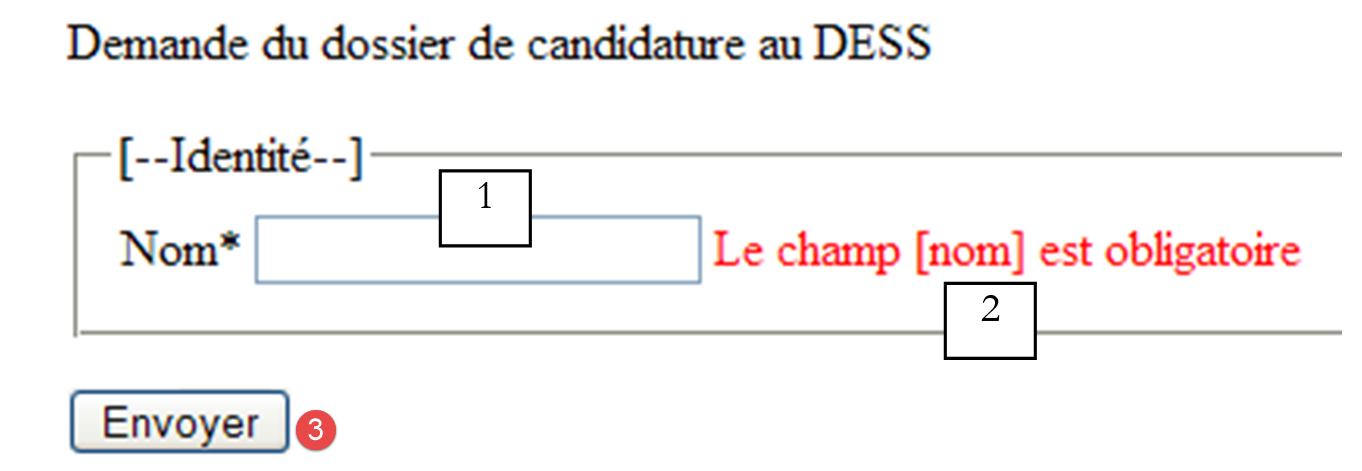 |
No. | name | type | properties | role |
1 | TextBox | EnableViewState=true | input field | |
2 | RequiredFieldValidator | EnableViewState=false EnableClientScript=true ErrorMessage=The [name] field is required | validation component | |
3 | Button | EnableViewState=false ValidationReasons=true | button [submit] |
The [RequiredFieldValidator1] field is used to display an error message if the [txtNom] field is empty or contains a string of spaces. Its properties are as follows:
The field whose value must be validated by the component. What does a component’s value mean? It is the value of the [value] attribute of the corresponding HTML tag. For a [TextBox], this will be the content of the input field; for a [DropDownList], it will be the value of the selected element. | |
Boolean - set to true indicates that the content of the previous field must also be validated on the client side. In this case, the form will only be submitted by the browser if the form contains no errors. However, validation checks are also performed on the server in case the client is not a browser, for example. | |
The error message that the component should display if an error is detected |
Data validation on the page is performed only if the button or link that triggered the [POST] on the page has the [CausesValidation=true] property. [true] is the default value for this property.
Let’s run this application. First, we use a [Mozilla] browser:
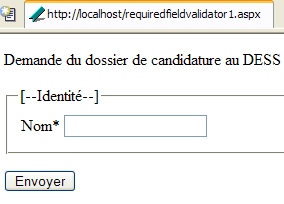
The code received by [Mozilla] is as follows:
<html>
<head>
</head>
<body>
<form name="_ctl0" method="post" action="requiredfieldvalidator1.aspx" id="_ctl0">
<input type="hidden" name="__VIEWSTATE" value="dDwxNDI1MDc1NTU1Ozs+SGtdZvVxefDCDxnsqbDnqCaROsk=" />
<p>
Demande du dossier de candidature au DESS
</p>
<fieldset>
<legend>[--Identity--]</legend>
<table>
<tbody>
<tr>
<td>
Nom*</td>
<td>
<input name="txtNom" type="text" id="txtNom" />
</td>
</tr>
</tbody>
</table>
</fieldset>
<p>
<input type="submit" name="btnEnvoyer" value="Envoyer" onclick="if (typeof(Page_ClientValidate) == 'function') Page_ClientValidate(); " language="javascript" id="btnEnvoyer" />
</p>
</form>
</body>
</html>
We can see that the [btnEnvoyer] button is linked to a Javascript function via its [onclick] attribute. We can also note that the page contains no [Javascript] code. The [typeof(Page_ClientValidate) == 'function'] test will fail, and the javascript function will not be called. The form will then be submitted to the server, which will perform the validity checks. Let’s use the [Envoyer] button without specifying a name. The server’s response is as follows:
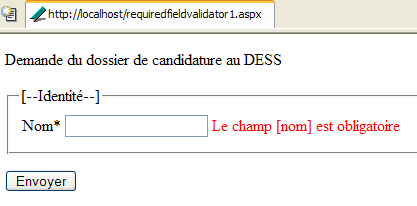
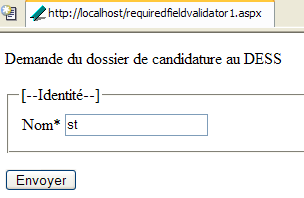
What happened? The form was submitted to the server. The server executed the code for all validation components on the page. Here, there is only one. If at least one validation component detects an error, the server returns the form as it was entered (in fact, for components with [EnableViewState=true], along with an error message for each validation component that detected an error). This message is the [ErrorMessage] attribute of the validation component. This is the mechanism we see at work above. If we enter something in the [nom] field, the error message no longer appears when the form is submitted:
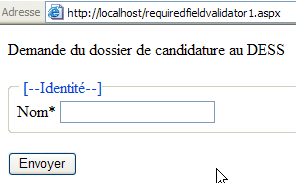
Now, let’s use Internet Explorer and request the url [http://localhost/requiredfieldvalidator1.aspx]. We get the following page:
The HTML code received by IE is as follows:
<html>
<head>
</head>
<body>
    <form name="_ctl0" method="post" action="requiredfieldvalidator1.aspx" language="javascript" onsubmit="ValidatorOnSubmit();" id="_ctl0">
<input type="hidden" name="__VIEWSTATE" value="dDwxNDI1MDc1NTU1Ozs+SGtdZvVxefDCDxnsqbDnqCaROsk=" />

<script language="javascript" src="/aspnet_client/system_web/1_1_4322/WebUIValidation.js"></script>


        <p>
            Demande du dossier de candidature au DESS
        </p>
        <fieldset>
            <legend>[--Identity--]</legend>
            <table>
                <tbody>
                    <tr>
                        <td>
                            Nom*</td>
                        <td>
                            <input name="txtNom" type="text" id="txtNom" />
                            <span id="RequiredFieldValidator1" controltovalidate="txtNom" errormessage="Le champ [nom] est obligatoire" evaluationfunction="RequiredFieldValidatorEvaluateIsValid" initialvalue="" style="color:Red;visibility:hidden;">Le champ [nom] est obligatoire</span>
                        </td>
                    </tr>
                </tbody>
            </table>
        </fieldset>
        <p>
            <input type="submit" name="btnEnvoyer" value="Envoyer" onclick="if (typeof(Page_ClientValidate) == 'function') Page_ClientValidate(); " language="javascript" id="btnEnvoyer" />
        </p>

<script language="javascript">
<!--
    var Page_Validators =  new Array(document.all["RequiredFieldValidator1"]);
        // -->
</script>


<script language="javascript">
<!--
var Page_ValidationActive = false;
if (typeof(clientInformation) != "undefined" && clientInformation.appName.indexOf("Explorer") != -1) {
    if (typeof(Page_ValidationVer) == "undefined")
        alert("Impossible de trouver la bibliothèque de scripts /aspnet_client/system_web/1_1_4322/WebUIValidation.js. Essayez de placer ce fichier manuellement ou effectuez une réinstallation en exécutant 'aspnet_regiis -c'.");
    else if (Page_ValidationVer != "125")
        alert("Cette page utilise une version incorrecte de WebUIValidation.js. La page requiert la version 125. La bibliothèque de scripts est " + Page_ValidationVer + ".");
    else
        ValidatorOnLoad();
}

function ValidatorOnSubmit() {
    if (Page_ValidationActive) {
        ValidatorCommonOnSubmit();
    }
}
// -->
</script>


        </form>
</body>
</html>
We can see that this code is much longer than the one received by [Mozilla]. We won’t go into the details. The difference stems from the fact that the server included javascript functions in the HTML document sent. Why are there two different HTML codes when the url requested by both browsers is the same? We have previously noted that ASP.NET technology causes the server to adapt the HTML document sent to the client to that client’s specifications. There are various browsers on the market, not all of which have the same capabilities. Microsoft and Netscape browsers, for example, do not use the same object model for the document they receive. Consequently, the Javascript code used to manipulate this document on the browser side differs between the two browsers. Similarly, browser vendors have released successive versions of their browsers, continuously improving their capabilities. Consequently, a document HTML that is understood by IE5 may not be understood by IE3. Above is an example of this server adaptation at the client level. For a reason not explored in detail here, the web server determined that the client [Mozilla] lacked the capability to handle the javascript validation code. Therefore, this code was not included in the HTML document sent to it, and validation was performed on the server side. For [IE6], this javascript code was included in the HTML document that was sent, as we can see. To see it in action, let’s try the following experiment:
- stop the web server
- use the [Envoyer] button without filling in the [nom] field
We get the following new page:
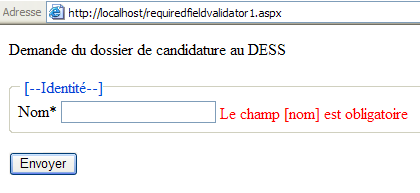
It is indeed the browser that displayed the error message. This is because the server is stopped. We can verify this by entering something in the [nom] field and submitting. This time, the response is as follows:
What happened? The browser executed the validation code Javascript. This code determined that the page was valid. The browser then submitted the form to the web server, which was shut down. The browser detected this and displayed the page above. If we restart the server, everything returns to normal.
What can we learn from this example?
- the value of the validation component, which allows any incorrect form to be returned to the client
- the value of [VIEWSTATE], which allows this form to be returned exactly as it was entered
- the server’s ability to adapt to its client. The client is identified by the HTTP [User-Agent:] header it sends to the server. It is therefore not the server that “guesses” who it is dealing with. This adaptability is of great interest to the developer, who does not have to worry about the type of client for their application.
8.2.3. CompareValidator
We build the following page:
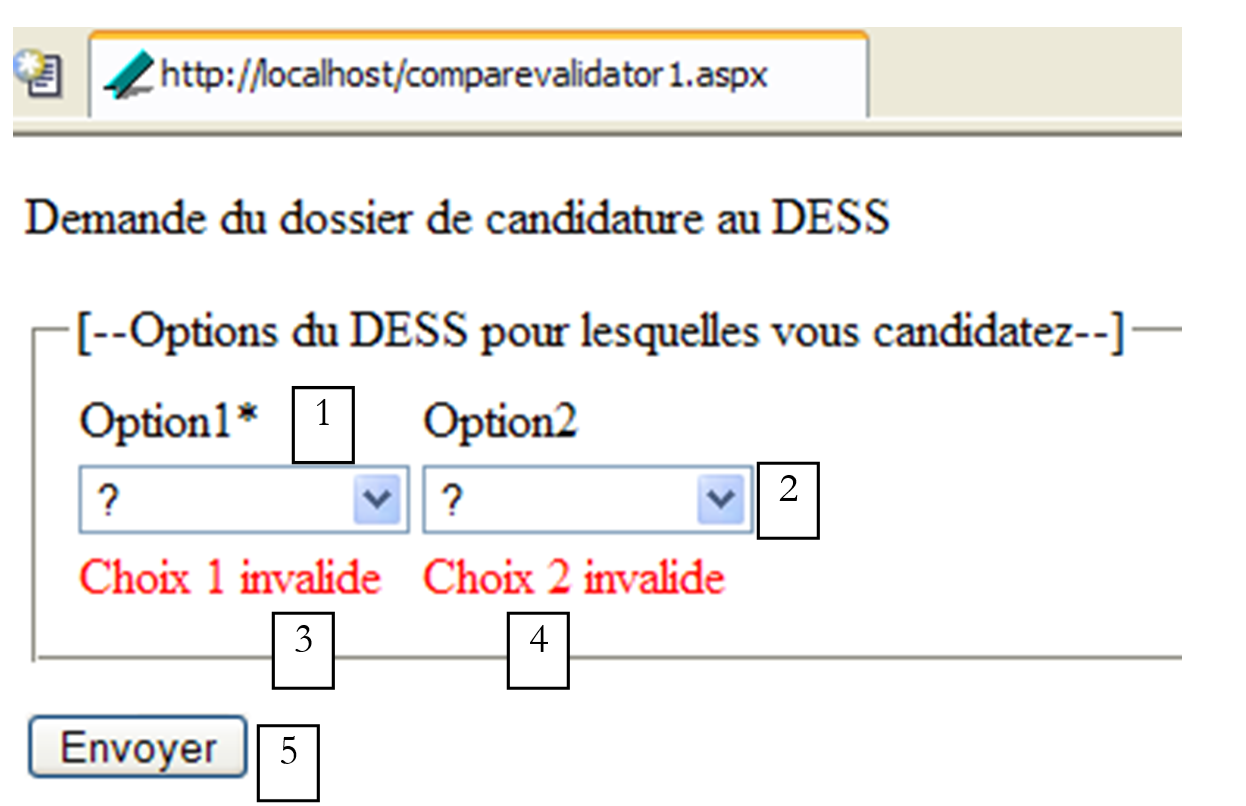
No. | name | type | properties | role |
1 | DropDownList | EnableViewState=true | drop-down list | |
2 | DropDownList | EnableViewState=true | drop-down list | |
3 | CompareValidator | EnableViewState=false EnableClientScript=true ErrorMessage=Invalid choice 1 ValueToCompare=? Operator=NotEqual Type=string | validation component | |
4 | CompareValidator | EnableViewState=false EnableClientScript=true ErrorMessage=Invalid choice 2 ControlToCompare=? Operator=NotEqual Type=string | validation component | |
5 | Button | EnableViewState=false ValidationReasons=true | button [submit] |
The [CompareValidator] component is used to compare two values. The operators that can be used are [Equal, NotEqual, LessThan, LessThanEqual, GreaterThan, GreaterThanEqual]. The first value is set by the [ControlToValidate] property, the second by [ValueToCompare] if the previous value is to be compared to a constant, or by [ControlToCompare] if it is to be compared to the value of another component. The important properties of component [CompareValidator] are as follows:
field whose content must be validated by the component | |
Boolean - set to true indicates that the content of the previous field must also be validated on the client side | |
the error message that the component should display if an error is detected | |
value against which the value of the [ControlToValidate] field must be compared | |
the component whose value the value of field [ControlToValidate] should be compared to | |
comparison operator between the two values | |
Type of the values to be compared |
The presentation code for this page is as follows:
<html>
<head>
</head>
<body>
    <form runat="server">
        <p>
            Demande du dossier de candidature au DESS
        </p>
        <fieldset>
            <legend>[--Options of the DESS you are applying for--]</legend>
            <table>
                <tbody>
                    <tr>
                        <td>
                            Option1*</td>
                        <td>
                            Option2</td>
                    </tr>
                    <tr>
                        <td>
                            <asp:DropDownList id="cmbChoix1" runat="server">
                                <asp:ListItem Value="?" Selected="True">?</asp:ListItem>
                                <asp:ListItem Value="Automatique">Automatique</asp:ListItem>
                                <asp:ListItem Value="Informatique">Informatique</asp:ListItem>
                            </asp:DropDownList>
                        </td>
                        <td>
                            <asp:DropDownList id="cmbChoix2" runat="server">
                                <asp:ListItem Value="?">?</asp:ListItem>
                                <asp:ListItem Value="Automatique">Automatique</asp:ListItem>
                                <asp:ListItem Value="Informatique">Informatique</asp:ListItem>
                            </asp:DropDownList>
                        </td>
                    </tr>
                    <tr>
                        <td>
                            <asp:CompareValidator id="CompareValidator1" runat="server" ErrorMessage="Choix 1 invalide" ControlToValidate="cmbChoix1" ValueToCompare="?" Operator="NotEqual"></asp:CompareValidator>
                        </td>
                        <td>
                            <asp:CompareValidator id="CompareValidator2" runat="server" ErrorMessage="Choix 2 invalide" ControlToValidate="cmbChoix2" Operator="NotEqual" ControlToCompare="cmbChoix1"></asp:CompareValidator>
                        </td>
                    </tr>
                </tbody>
            </table>
        </fieldset>
        <p>
            <asp:Button id="btnEnvoyer" runat="server" Text="Envoyer"></asp:Button>
        </p>
    </form>
</body>
</html>
The validation constraints for the page are as follows:
- The value selected in [cmbChoix1] must be different from the string "?". This implies the following properties for the [CompareValidator1] component: Operator=NotEqual, ValueToCompare=?, Type=string
- The value selected in [cmbChoix2] must be different from the value selected in [cmbChoix1]. This implies the following properties for the [CompareValidator2] component: Operator=NotEqual, ControlToCompare=cmbChoix1, Type=string
We run this application. Here is an example of a page received during client-server exchanges:
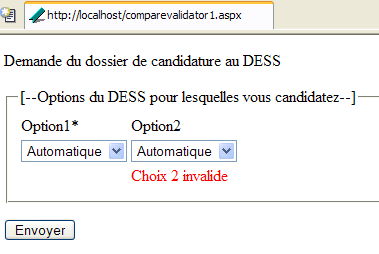
If the same page is requested by Internet Explorer 6, code Javascript is included in it, resulting in slightly different behavior. Any errors are reported as soon as the user changes a value in one of the drop-down lists. This improves the user experience.
8.2.4. CustomValidator , RangeValidator
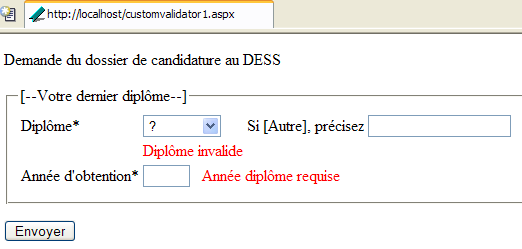
We are building the following page: [customvalidator1.aspx]:
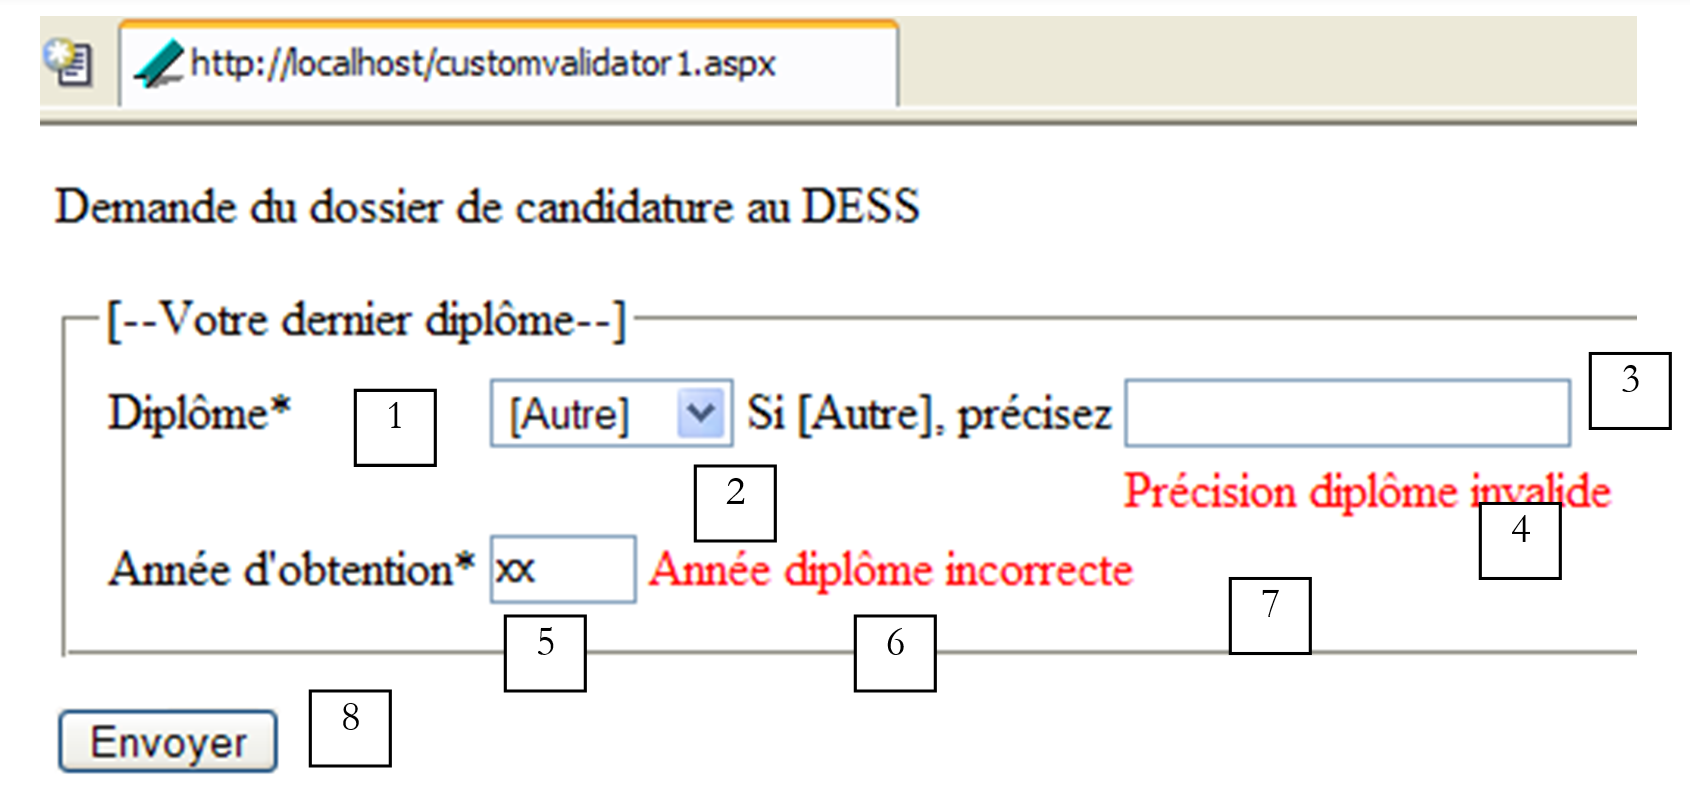
No. | name | type | properties | role |
DropDownList | EnableViewState=true | drop-down list | ||
CompareValidator | EnableViewState=false EnableClientScript=true ErrorMessage=Invalid diploma Operator=NotEqual ValueToCompare=? Type=String | validation component of control [1] | ||
TextBox | EnableViewState=false | input field | ||
CustomValidator | EnableViewState=false EnableClientScript=true ErrorMessage=Invalid degree specification ClientValidationFunction=chkOtherDegree | [3] field validation component | ||
TextBox | EnableViewState=false | input field | ||
RangeValidator | EnableViewState=false EnableClientScript=true ErrorMessage=Graduation year must be in the range [1990,2004] MinValue=1990 MaxValue=2004 Type=Integer ControlToValidate=txtAnDiplome | validation component for field [5] | ||
RequiredFieldValidator | EnableViewState=false EnableClientScript=true ErrorMessage=Graduation year required ControlToValidate=txtAnDiplome | field validation component [5] | ||
Button | EnableViewState=false ValidationReasons=true | button [submit] |
The [RangeValidator] field is used to verify that the value of a control falls between two limits, [MinValue] and [MaxValue]. Its properties are as follows:
field whose value must be validated by the component | |
Boolean - set to true indicates that the content of the previous field must also be validated on the client side | |
the error message that the component should display if an error is detected | |
minimum value of the field to be validated | |
maximum value of the field to be checked | |
Type of the field value to be validated |
The [CustomValidator] field allows for validations that cannot be performed by the validation components provided by ASP.NET. This validation is performed by a function written by the developer. This function is executed on the server side. Since the check can also be performed on the client side, the developer may need to develop a javascript function to include in the HTML document. Its properties are as follows:
field whose value must be checked by the component | |
Boolean – if true, indicates that the content of the previous field must also be validated on the client side | |
the error message that the component should display if an error is detected | |
The function to be executed on the client side |
The page template code is as follows:
<%@ Page Language="VB" %>
<script runat="server">
...
</script>
<html>
<head>
</head>
<body>
<form runat="server">
<p align="left">
Demande du dossier de candidature au DESS
</p>
<fieldset>
<legend>[--Your last diploma--]</legend>
<table>
<tbody>
<tr>
<td>
Diplôme*</td>
<td>
<asp:DropDownList id="cmbDiplomes" runat="server">
<asp:ListItem Value="?">?</asp:ListItem>
<asp:ListItem Value="[Autre]">[Autre]</asp:ListItem>
<asp:ListItem Value="Maîtrise">Maîtrise</asp:ListItem>
<asp:ListItem Value="DESS">DESS</asp:ListItem>
<asp:ListItem Value="DEA">DEA</asp:ListItem>
</asp:DropDownList>
</td>
<td>
Si [Autre], précisez</td>
<td>
<asp:TextBox id="txtAutreDiplome" runat="server" EnableViewState="False"></asp:TextBox>
</td>
</tr>
<tr>
<td>
</td>
<td>
<p>
<asp:CompareValidator id="CompareValidator2" runat="server" ErrorMessage="Diplôme invalide" ControlToValidate="cmbDiplomes" ValueToCompare="?" Operator="NotEqual" ></asp:CompareValidator>
</p>
</td>
<td>
</td>
<td>
<asp:CustomValidator id="CustomValidator1" runat="server" ErrorMessage="Précision diplôme invalide" OnServerValidate="CustomValidator1_ServerValidate_1" EnableViewState="False" ClientValidationFunction="chckAutreDiplome"></asp:CustomValidator>
</td>
</tr>
<tr>
<td>
Année d'obtention*</td>
<td colspan="3">
<asp:TextBox id="txtAnDiplome" runat="server" Columns="4"></asp:TextBox>
<asp:RangeValidator id="RangeValidator1" runat="server" ErrorMessage="Année diplôme doit être dans l'intervalle [1990,2004]" ControlToValidate="txtAnDiplome" MinimumValue="1990" MaximumValue="2004" Type="Integer"></asp:RangeValidator>
<asp:RequiredFieldValidator id="RequiredFieldValidator2" runat="server" ErrorMessage="Année diplôme requise" ControlToValidate="txtAnDiplome"></asp:RequiredFieldValidator>
</td>
</tr>
</tbody>
</table>
</fieldset>
<p>
<asp:Button id="btnEnvoyer" runat="server" Text="Envoyer"></asp:Button>
</p>
</form>
</body>
</html>
The [OnServerValidate] attribute of the [CustomValidator] component specifies the function responsible for server-side validation. In the example above, the [CustomValidator1] component calls the following [CustomValidator1_ServerValidate_1] procedure:
<%@ Page Language="VB" %>
<script runat="server">

    Sub CustomValidator1_ServerValidate_1(sender As Object, e As ServerValidateEventArgs)
        ' field [txtAutreDiplome] must be non-empty if [cmbDiplomes]=[other]
        e.isvalid=not (cmbDiplomes.selecteditem.text="[Autre]" and txtAutreDiplome.text.trim="") _
            and not (cmbDiplomes.selecteditem.text<>"[Autre]" and cmbDiplomes.selecteditem.text<>"?" and txtAutreDiplome.text.trim<>"")
    End Sub

</script>
....
A validation function associated with a [CustomValidator] component receives two parameters:
- sender: the object that triggered the event
- e: the event. The procedure must set the [e.IsValid] attribute to true if the validated data is correct, and to false otherwise.
Here, the following checks are performed:
- the drop-down list [cmbDiplomes] cannot have [?] as its value. This is verified by the component [CompareValidator2]
- The user selects a degree from the [cmbDiplomes] drop-down list. If their degree does not exist in the list, they can select option or [Autre] from the list. They must then enter their degree in the [txtAutreDiplome] input field. If [Autre] is selected in [cmbDiplomes], then the [txtAutreDiplome] field must not be empty. If neither [Autre] nor [?] is selected in [cmbDiplomes], then the field [txtAutreDiplome] must be empty. This is checked by the function associated with component [CustomValidator1].
- The year of graduation must be within the range of [1900-2004]. This is checked by [RangeValidator1]. However, if the user leaves the field blank, the validation function of [RangeValidator1] is not used. Therefore, the [RequiredFieldValidator2] component is added to check for the presence of content. This is a general rule. The content of a field is not checked if it is empty. The only case where it is checked is when it is associated with a [RequiredFieldValidator] component.
Here is an example of execution in the [Mozilla] browser:
If we use the [IE6] browser, we can add a client-side validation function for the [CustomValidator1] component. To do this, this component has the following properties:
- EnableClientScript=true
- ClientValidationFunction=chkAutreDiplome
The [chkAutreDiplome ] function is as follows:
<head>
    <meta http-equiv="pragma" content="no-cache" />
    <script language="javascript">
        function chkAutreDiplome(source,args){
             // checks the validity of the txtAutreDiplome field
            with(document.frmCandidature){
                diplome=cmbDiplomes.options[cmbDiplomes.selectedIndex].text;
                    args.IsValid= !(diplome=="[Autre]" && txtAutreDiplome.value=="")
                        && ! (diplome!="[Autre]" && diplome!="?" && txtAutreDiplome.value!="");
            }
        }
        </script>
</head>
The [chkAutreDiplome] function receives the same two parameters as the [CustomValidator1_ServerValidate_1] server function:
- source: the object that triggered the event
- args: the event. This has a [IsValid] attribute that must be set to true by the function if the validated data is correct. A value of false will display the associated error message at the validation component’s location, and the form will not be submitted to the server.
8.2.5. RegularExpressionValidator
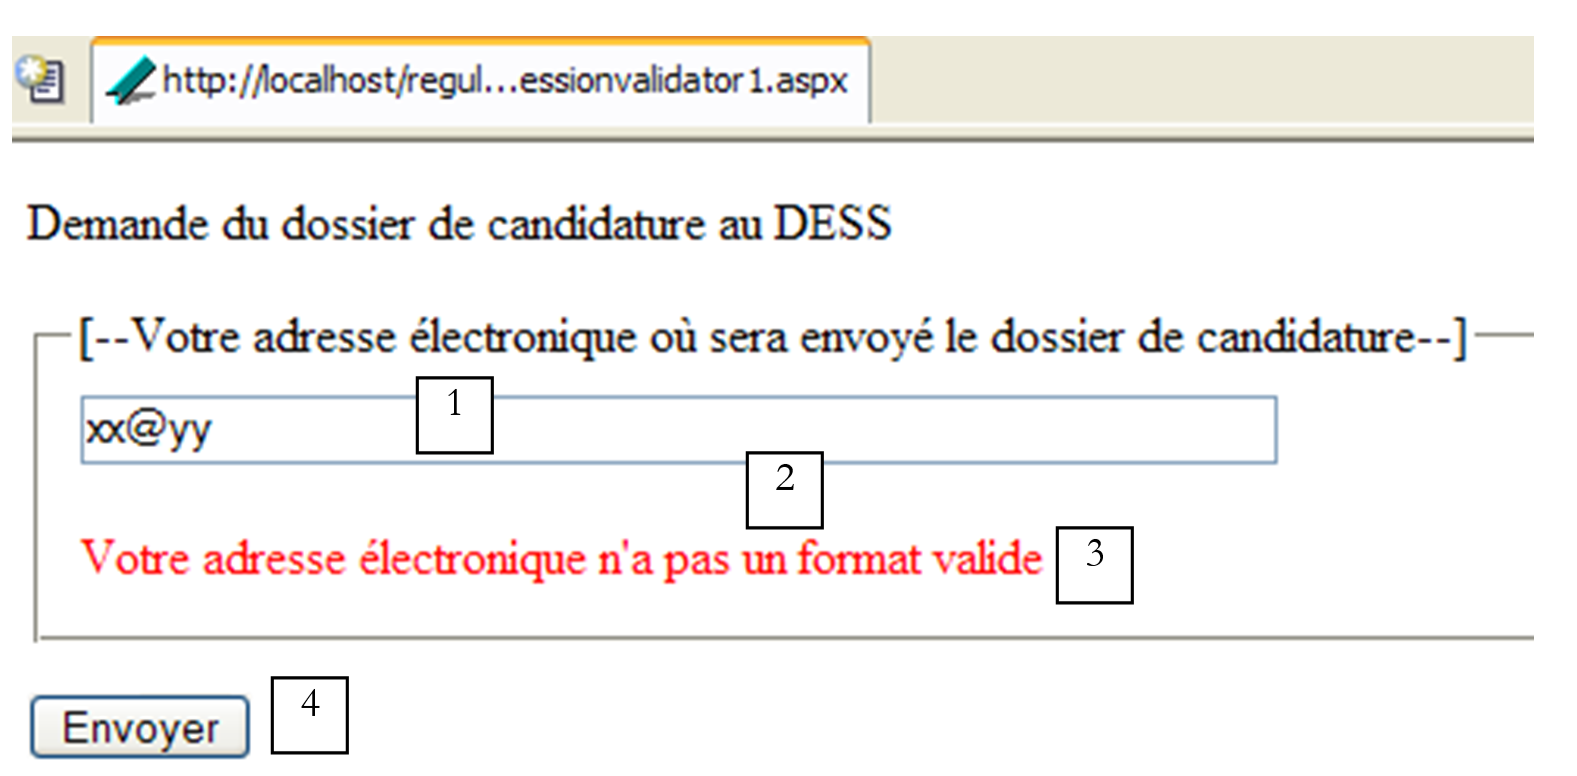
We are building the following page: [regularexpressionvalidator1.aspx]
No. | Name | type | properties | role |
TextBox | EnableViewState=true | input field | ||
RequiredFieldValidator | ControlToValidate=txtMel Display=Dynamic | [1] control validation component | ||
RegularExpressionValidator | ControlToValidate=txtMel Display=Dynamic | [1] control validation component | ||
Button | EnableViewState=false ValidationReasons=true | button [submit] |
Here, we want to validate the format of an email address. We do this using a [RegularExpressionValidator] component, which allows us to validate a field using a regular expression. As a reminder, a regular expression is a pattern of characters. We therefore check the content of a field against this pattern. Since the content of a field is not validated if it is empty, we also need a [RequiredFieldValidator] component to verify that the email address is not empty. The [RegularExpressionValidator] class has properties similar to those of the component classes already discussed:
field whose value must be checked by the component | |
boolean - when true, indicates that the content of the previous field must also be validated on the client side | |
the error message that the component should display if an error is detected | |
the regular expression against which the content of [ControlToValidate] will be compared | |
display mode: Static: the field is always present even if it does not display an error message; Dynamic: the field is present only if there is an error message; None: the error message is not displayed. This field also exists for other components but has not been used until now. |
The regular expression pattern for an email address could be the following: \s*[\w-]+(\.[\w-]+)*@[\w-]+(\.[\w-]+)+\s*
An email address is of the form [champ1.champ2....@champA.champB...]. There must be at least one field before the @ sign and at least two fields after it. These fields consist of alphanumeric characters and the - sign. The alphanumeric character is represented by the symbol \w. The sequence [\w-] stands for the character \w or the character -. The + sign after a sequence S means that it can be repeated 1 or more times; the * sign means that it can be repeated 0 or more times; the ? sign means that it can be repeated 0 or 1 time.
A field in the email address corresponds to the pattern [\w-]+. The fact that there must be at least one field before the @ sign and at least two after it, separated by the . sign, corresponds to the pattern: [\w-]+(\.[\w-]+)*@[\w-]+(\.[\w-]+)+. We can allow the user to include spaces before and after the address. These will be removed during processing. A sequence of spaces, which may be empty, is represented by the pattern \s*. Hence the regular expression for the email address: \s*[\w-]+(\.[\w-]+)*@[\w-]+(\.[\w-]+)+\s*.
The page template code is then as follows:
<html>
<head>
</head>
<body>
    <form runat="server">
        <p align="left">
            Demande du dossier de candidature au DESS
        </p>
        <fieldset>
            <legend>[--Your e-mail address where the application will be sent--]</legend>
            <table>
                <tbody>
                    <tr>
                        <td>
                            <asp:TextBox id="txtMel" runat="server" Columns="60"></asp:TextBox>
                        </td>
                    </tr>
                    <tr>
                        <td>
                            <p>
                                <asp:RequiredFieldValidator id="RequiredFieldValidator3" runat="server" Display="Dynamic" ControlToValidate="txtMel" ErrorMessage="Votre adresse électronique est requise"></asp:RequiredFieldValidator>
                            </p>
                            <p>
                                <asp:RegularExpressionValidator id="RegularExpressionValidator1" runat="server" Display="Dynamic" ControlToValidate="txtMel" ErrorMessage="Votre adresse électronique n'a pas un format valide" ValidationExpression="\s*[\w-]+(\.[\w-]+)*@[\w-]+(\.[\w-]+)+\s*"></asp:RegularExpressionValidator>
                            </p>
                        </td>
                    </tr>
                </tbody>
            </table>
        </fieldset>
        <p>
            <asp:Button id="btnEnvoyer" runat="server" Text="Envoyer"></asp:Button>
        </p>
    </form>
</body>
</html>
8.2.6. ValidationSummary
For aesthetic reasons, you may want to group error messages in a single location, as in the following example [summaryvalidator1.aspx], where we have combined all the previous examples into a single page:
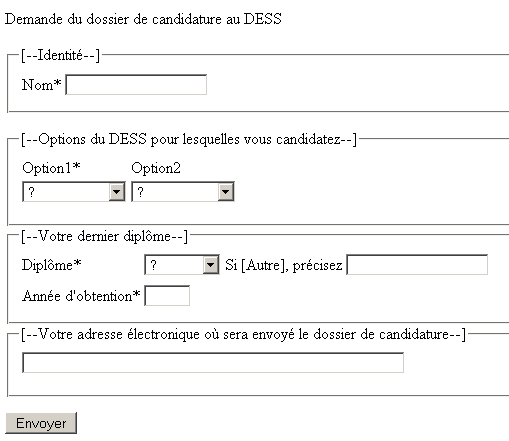
All validation controls have the following properties:
- [Display=Dynamic], which ensures that the controls do not take up space on the page if their error message is empty
- [EnableClientScript=false] to disable all client-side validation
- [Text=*]. This will be the message displayed in case of an error, while the content of the [ErrorMessage] attribute is displayed by the [ValidationSummary] control shown below.
This set of controls is placed in a component named [Panel] called [vueFormulaire]. In another component [Panel] named [vueErreurs], we place a control [ValidationSummary]:
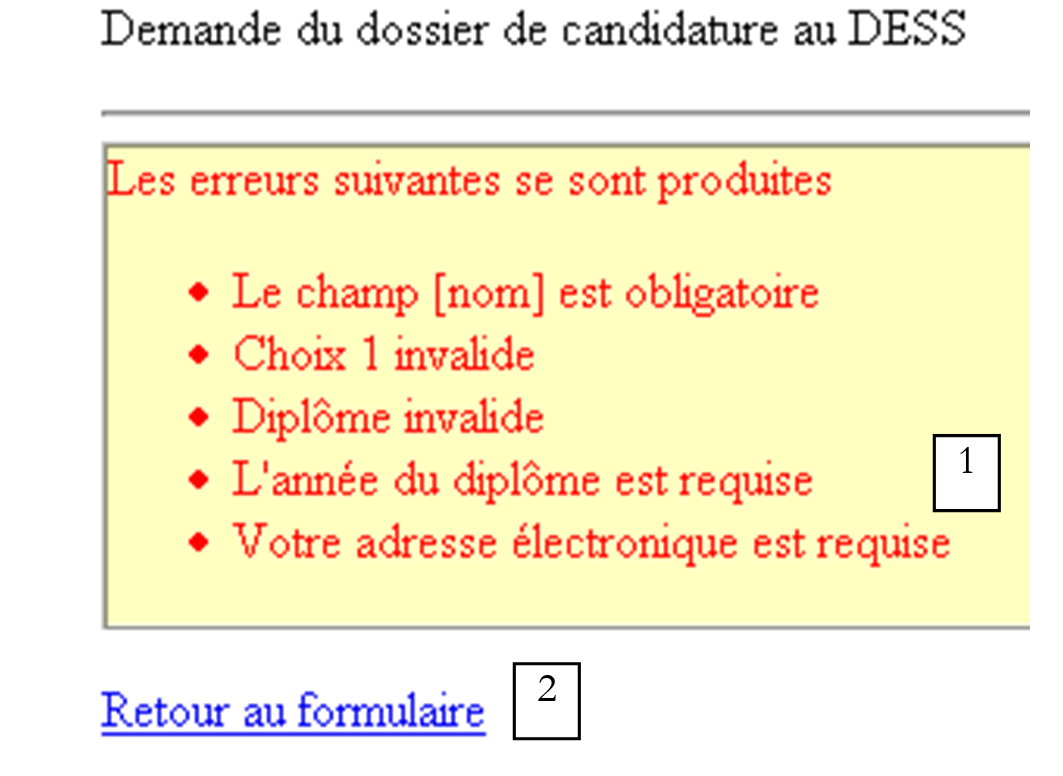
No. | name | type | properties | role |
1 | ValidationSummary | HeaderText=The following errors occurred, EnableClientScript=false, ShowSummary=true | displays errors from all validation controls on the page | |
2 | LinkButton | ValidationCauses=false | link back to the form |
For the link [lnkErreursToFormulaire], there is no need to enable validation since this link does not submit any values to be checked.
When all data is valid, the following view [infos] is displayed to the user:

1
No. | Name | Type | properties | role |
1 | Label | Information message for the user |
The source code for this page is as follows:
<html>
<head>
</head>
<body>
    <form runat="server">
        <p align="left">
            Demande du dossier de candidature au DESS
        </p>
        <p>
            <hr />
            <asp:panel id="vueErreurs" runat="server">
                <p align="left">
                    <asp:ValidationSummary id="ValidationSummary1" runat="server" ShowMessageBox="True" BorderColor="#C04000" BorderWidth="1px" BackColor="#FFFFC0" HeaderText="Les erreurs suivantes se sont produites"></asp:ValidationSummary>
                </p>
                <p>
                    <asp:LinkButton id="lnkErreursToFormulaire" onclick="lnkErreursToFormulaire_Click" runat="server" CausesValidation="False">Retour au formulaire</asp:LinkButton>
                </p>
            </asp:panel>
            <asp:panel id="vueFormulaire" runat="server">
....
                    <asp:Button id="btnEnvoyer" onclick="btnEnvoyer_Click" runat="server" Text="Envoyer"></asp:Button>
                </p>
            </asp:panel>
        <asp:panel id="vueInfos" runat="server">
            <asp:Label id="lblInfo" runat="server"></asp:Label>
        </asp:panel>
    </form>
</body>
</html>
Here are some examples of the results obtained. We validate the view [formulaire] without entering any values:
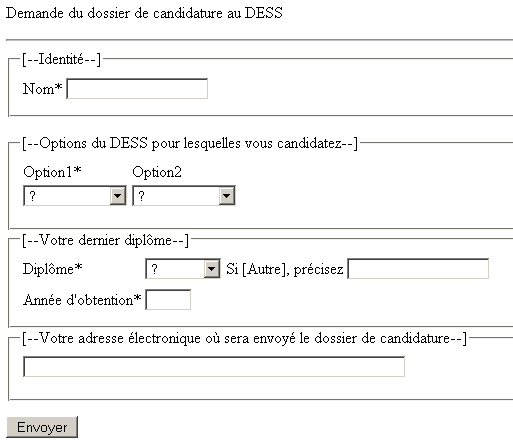
The [Envoyer] button gives us the following response:
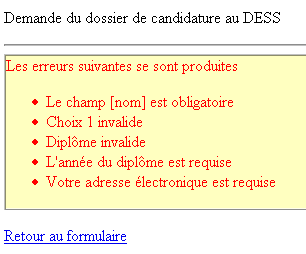
The view [erreurs] was displayed. If we use the link to return to the form, we find it in the following state:
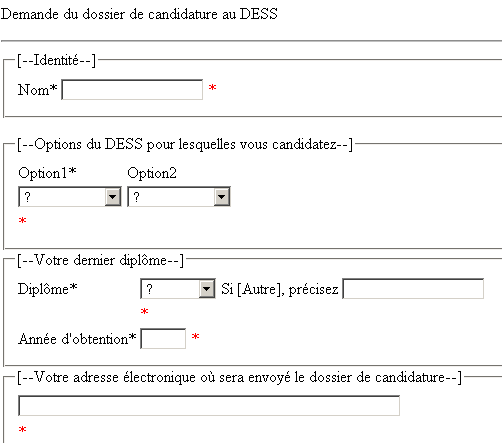
This is view [formulaire]. Note the character [*] next to the incorrect data. This is the [Text] field from the validation checks that was displayed. If we fill in the fields correctly, we will get the [infos] view:

The page control code is as follows:
<%@ Page Language="VB" %>
<script runat="server">

     ' procedure executed when the page is loaded
    Sub page_Load(sender As Object, e As EventArgs)
        ' on the 1st request, we present the [form] view
        if not ispostback then
            afficheVues(true,false,false)
        end if
    end sub

    sub afficheVues(byval formulaireVisible as boolean, _
        erreursVisible as boolean, infosVisible as boolean)
         ' set of views
        vueFormulaire.visible=formulaireVisible
        vueErreurs.visible=erreursVisible
        vueInfos.visible=infosVisible
    end sub

    Sub CustomValidator1_ServerValidate(sender As Object, e As ServerValidateEventArgs)
...
    End Sub

    Sub CustomValidator2_ServerValidate(sender As Object, e As ServerValidateEventArgs)
...
    End Sub

    Sub CustomValidator1_ServerValidate_1(sender As Object, e As ServerValidateEventArgs)
...
    End Sub

    Sub lnkErreursToFormulaire_Click(sender As Object, e As EventArgs)
        ' displays the form view
        afficheVues(true,false,false)
         ' redo validity checks
        Page.validate
    End Sub

    Sub btnEnvoyer_Click(sender As Object, e As EventArgs)
        ' is the page valid?
        if not Page.IsValid then
            ' the [errors] view is displayed
            afficheVues(false,true,false)
        else
             ' otherwise the view [infos]
            lblInfo.Text="Le dossier de candidature au DESS IAIE a été envoyé à l'adresse ["+ _
                        txtMel.Text + "]. Nous vous en souhaitons bonne réception.<br><br>Le secrétariat du DESS."
            afficheVues(false,false,true)
        end if
    end sub

</script>
<html>
...
</html>
- In the [Page_Load] procedure, which is executed for every client request, we display the [formulaire] view, while the others are hidden. This is done only on the first request. The procedure calls a utility procedure, [afficheVues], to which three Boolean values are passed to determine whether or not to display the three views.
- When procedure [btnEnvoyer_Click] is called, data checks are performed. The [btnEnvoyer] button, with the [CausesValidation=true] property, triggers these data checks. All validation checks have been executed, and their [IsValid] property has been set. This property indicates whether the data validated by the check was valid or not. Additionally, the [IsValid] property of the page itself has also been set. It is set to [vrai] only if the [IsValid] property of all validation checks on the page has the value [vrai]. Thus, the procedure [btnEnvoyer_Click] begins by checking whether the page is valid or not. If it is invalid, the view [erreurs] is displayed. This view contains the [ValidationSummary] control, which takes the [ErrorMessage] attributes from all controls (see screenshot above). If the page is valid, the [infos] view is displayed along with an informational message.
- Procedure [lnkErreursToFormulaire_Click] is responsible for displaying view [formulaire] in the state in which it was validated. All input fields in view [formulaire] that have the property [EnableViewState=true] have their state automatically regenerated. Curiously, the state of the validation components is not restored. One might have expected, upon returning to the [erreurs] view, to see the invalid controls display their [Text] field. This is not the case. We therefore forced the data validation using the [Page.Validate] method of the page. This must be done once the [vueFormulaire] panel has been made visible. There are therefore two validations in total. This should be avoided in practice. Here, the example allowed us to introduce new concepts regarding page validation.
8.3. ListControl Components and Data Binding
A number of the server components studied allow you to display a list of values (DropDownList, ListBox). Others that we have not yet presented allow you to display multiple lists of values in tables (HTML). For all of them, it is possible to programmatically associate the values in the lists with the associated component one by one. It is also possible to associate more complex objects with these components, such as objects of type [Array], [ArrayList], [DataSet], [HashTable], ... which simplifies the code that associates the data with the component. This association is called a data binding.
All components derived from the [ListControl] class can be associated with a data list. These are the components [DropDownList], [ListBox], [CheckButtonList], [RadioButtonList]. Each of these components can be linked to a data source. This can be one of several options: [Array], [ArrayList], [DataTable], [DataSet], [HashTable],...., generally an object implementing one of the interfaces IEnumerable, ICollection, or IListSource. We will present only a few of them. A [DataSet] object is an image object of a relational database. It is therefore a set of tables linked by relationships. The [DataTable] object represents such a table. The data source assigns the properties [Text] and [Value] to each of the members [Item] of the object [ListControl]. If T is the value of [Text] and V is the value of [Value], the HTML tag generated for each element of [ListControl] is as follows:
<option value="V">T</option> | |
<input type="checkbox" value="V">T | |
<input type="radio" value="V">T |
A [ListControl] component is associated with a data source using the following properties:
a data source [Array], [ArrayList], [DataTable], [DataSet], [HashTable], ... | |
if the data source is a [DataSet], represents the name of the table to be used as the data source. The actual data source is then a table. | |
in the case where the data source is a table ([DataTable], [DataSet]), represents the name of the table column that will provide values to the [Text] field of the elements in [ListControl] | |
If the data source is a table ([DataTable], [DataSet]), this represents the name of the table column that will provide values to the [Value] field of the elements in [ListControl] |
Associating a [ListControl] component with a data source does not initialize the component with the data source’s values. This is done by the [ListControl].DataBind operation.
Depending on the nature of the data source, linking it to a [ListControl] component will be done differently:
[ListControl].DataSource=A The fields [Text] and [Value] of the elements in [ListControl] will have the values of the elements in A | |
[ListControl].DataSource=AL the fields [Text] and [Value] of the elements of [ListControl] will have as values the elements of AL | |
[ListControl].DataSource=DT, [ListControl].DataTextField="col1", [ListControl]. DatavalueField ="col2" where col1 and col2 are two columns of the table DT. The fields [Text] and [Value] of the elements in [ListControl] will have the values of the columns col1 and col2 in the table DT | |
[ListControl].DataSource=DS, [ListControl].DataSource="table" where "table" is the name of one of the tables in DS. [ListControl].DataTextField="col1", [ListControl]. DatavalueField ="col2" where col1 and col2 are two columns of the "table" table. The fields [Text] and [Value] of the elements of [ListControl] will have the values of the columns col1 and col2 of the "table" table | |
[ListControl].DataSource=HT, [ListControl].DataTextField="key", [ListControl]. DatavalueField ="value" where [key] and [value] are respectively the keys and values of HT. |
We apply this information to the following example, [databind1.aspx]:
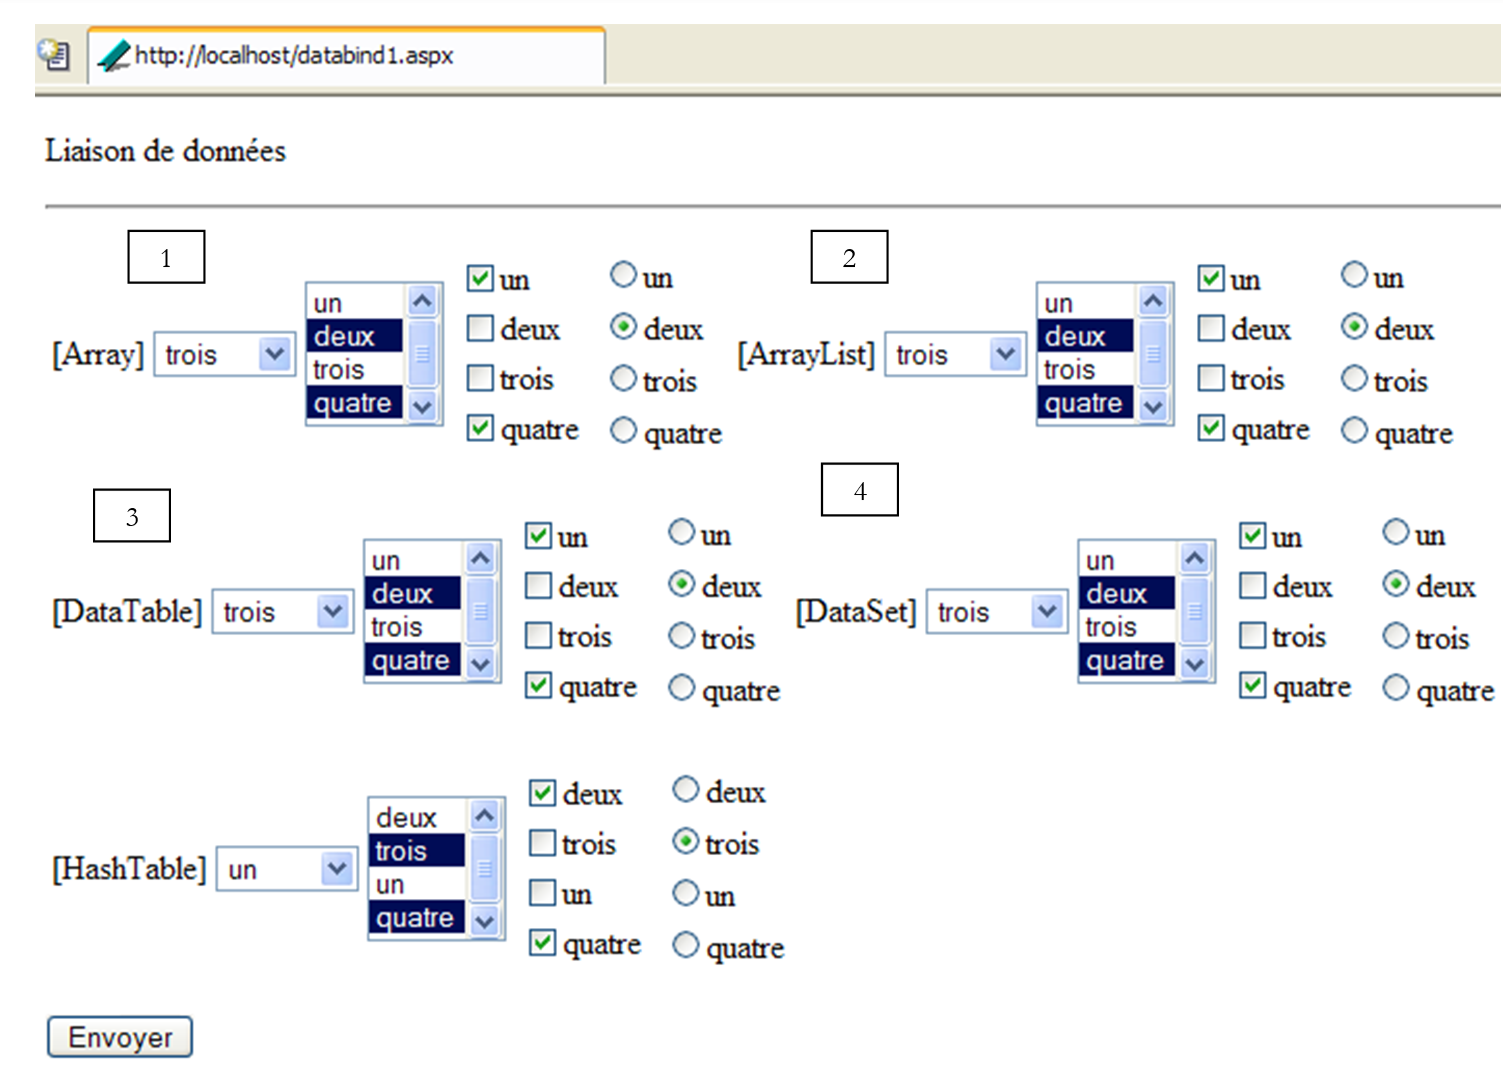 |
Here we have five data links, each with four controls of types [DropDownList], [ListBox], [CheckBoxList], and [RadioButtonList]. The five links under consideration differ in their data sources:
link | Data source |
Array | |
ArrayList | |
DataTable | |
DataSet | |
HashTable |
8.3.1. Component presentation code
The presentation code for the controls of link 1 is as follows:
<td>
<asp:DropDownList id="DropDownList1" runat="server"></asp:DropDownList>
</td>
<td>
<asp:ListBox id="ListBox1" runat="server" SelectionMode="Multiple"></asp:ListBox>
</td>
<td>
<asp:CheckBoxList id="CheckBoxList1" runat="server"></asp:CheckBoxList>
</td>
<td>
<asp:RadioButtonList id="RadioButtonList1" runat="server"></asp:RadioButtonList>
</td>
The one for links 2 through 5 is identical except for the link number.
8.3.2. Link to a data source of type Array
The binding of the four [ListBox] controls above is performed as follows in the [Page_Load] procedure of the control code:
' global data
dim textes() as string={"un","deux","trois","quatre"}
dim valeurs() as string={"1","2","3","4"}
dim myDataListe as new ArrayList
dim myDataTable as new DataTable("table1")
dim myDataSet as new DataSet
dim myHashTable as new HashTable

' procedure executed when the page is loaded
Sub page_Load(sender As Object, e As EventArgs)
    if not IsPostBack then
      ' create the data sources to be linked to the components
      createDataSources
       ' link to an array [Array]
      bindToArray
       ' link to a list [ArrayList]
      bindToArrayList
       ' link to a table [DataTable]
      bindToDataTable
       ' link to a data group [DataSet]
      bindToDataSet
       ' link to a dictionary [HashTable]
      bindToHashTable
    end if
End Sub

sub createDataSources
   ' creates data sources to be linked to components
  ' arraylist
  dim i as integer
  for i=0 to textes.length-1
    myDataListe.add(textes(i))
  next
   ' datatable
   ' we define its two columns
  myDataTable.Columns.Add("id",Type.GetType("System.Int32"))
  myDataTable.Columns.Add("texte",Type.GetType("System.String"))
  ' fill the table
  dim ligne as DataRow
  for i=0 to textes.length-1
    ligne=myDataTable.NewRow
    ligne("id")=i
    ligne("texte")=textes(i)
    myDataTable.Rows.Add(ligne)
  next
   ' dataset - a single table
  myDataSet.Tables.Add(myDataTable)
  ' hashtable
  for i=0 to textes.length-1
    myHashTable.add(valeurs(i),textes(i))
  next
end sub

' panel connection
sub bindToArray
         ' association with components
        with DropDownList1
            .DataSource=textes
            .DataBind
        end with
        with ListBox1
            .DataSource=textes
            .DataBind
        end with
        with CheckBoxList1
            .DataSource=textes
            .DataBind
        end with
        with RadioButtonList1
            .DataSource=textes
            .DataBind
        end with
        ' item selection
        ListBox1.Items(1).Selected=true
        ListBox1.Items(3).Selected=true
        CheckBoxList1.Items(0).Selected=true
        CheckBoxList1.Items(3).Selected=true
        DropDownList1.SelectedIndex=2
        RadioButtonList1.SelectedIndex=1
end sub

sub bindToArrayList
....
end sub

sub bindToDataTable
...
end sub

sub bindToDataSet
...
end sub
The controls are bound to the data here only on the first request. After that, the controls will retain their elements via the [VIEWSTATE] mechanism. The binding is performed in the [bindToArray] procedure. Since the data source is of type [Array], only the [DataSource] field of the [ListControl] components is initialized. The control is populated with values from the associated data source using the method [ListControl].DataBind. Only then do the [ListControl] objects contain elements. You can then select some of them.
8.3.3. Link to a ArrayList data source
The data source [myDataListe] is initialized in the procedure [createDataSources]:
' global data
dim textes() as string={"un","deux","trois","quatre"}
dim myDataListe as new ArrayList
..

' procedure executed when the page is loaded
Sub page_Load(sender As Object, e As EventArgs)
    if not IsPostBack then
      ' create the data sources to be linked to the components
      createDataSources
...
    end if
End Sub

sub createDataSources
   ' creates data sources to be linked to components
  ' arraylist
  dim i as integer
  for i=0 to textes.length-1
    myDataListe.add(textes(i))
  next
...
end sub
The binding of the four [ListBox] controls in binding 2 is performed as follows in the [bindToArrayList] procedure of the control code:
' arraylist link
sub bindToArrayList
         ' association with components
        with DropDownList2
            .DataSource=myDataListe
            .DataBind
        end with
        with ListBox2
            .DataSource=myDataListe
            .DataBind
        end with
        with CheckBoxList2
            .DataSource=myDataListe
            .DataBind
        end with
        with RadioButtonList2
            .DataSource=myDataListe
            .DataBind
        end with
        ' element selection
        ListBox2.Items(1).Selected=true
        ListBox2.Items(3).Selected=true
        CheckBoxList2.Items(0).Selected=true
        CheckBoxList2.Items(3).Selected=true
        DropDownList2.SelectedIndex=2
        RadioButtonList2.SelectedIndex=1
end sub
Since the data source is of type [ArrayList], only the [DataSource] field of the [ListControl] components is initialized.
8.3.4. Data source of type DataTable
The [myDataTable] data source is initialized in the [createDataSources] procedure:
' global data
dim textes() as string={"un","deux","trois","quatre"}
dim myDataTable as new DataTable("table1")
...

' procedure executed when the page is loaded
Sub page_Load(sender As Object, e As EventArgs)
    if not IsPostBack then
      ' create the data sources to be linked to the components
      createDataSources
...
    end if
End Sub

sub createDataSources
   ' creates data sources to be linked to components
...
   ' datatable
   ' we define its two columns
  myDataTable.Columns.Add("id",Type.GetType("System.Int32"))
  myDataTable.Columns.Add("texte",Type.GetType("System.String"))
  ' fill the table
  dim ligne as DataRow
  for i=0 to textes.length-1
    ligne=myDataTable.NewRow
    ligne("id")=i
    ligne("texte")=textes(i)
    myDataTable.Rows.Add(ligne)
  next
...
end sub
We start by creating a [DataTable] object with two columns: [id] and [texte]. The [id] column will populate the [Value] field of the [ListControl] elements, and the [texte] column will populate their [Text] fields. The [DataTable] table with two columns is constructed as follows:
  myDataTable.Columns.Add("id",Type.GetType("System.Int32"))
  myDataTable.Columns.Add("texte",Type.GetType("System.String"))
We therefore create a table with two columns:
- the first, named "id", is of type integer
- the second, named "text", is of type string
Now that the table structure has been created, we can populate it with the following code:
  dim ligne as DataRow
  for i=0 to textes.length-1
    ligne=myDataTable.NewRow
    ligne("id")=i
    ligne("texte")=textes(i)
    myDataTable.Rows.Add(ligne)
  next
The column [id] will contain integers from [0,1,..,n], while the column [texte] will contain the values from the array [data]. Once this is done, the [dataListe] table is populated. The binding of the four [ListBox] controls in binding 3 is performed as follows in the [bindToDataTable] procedure of the control code:
sub bindToDataTable
         ' association with components
        with DropDownList3
            .DataSource=myDataTable
            .DataValueField="id"
            .DataTextField="texte"
            .DataBind
        end with
        with ListBox3
            .DataSource=myDataTable
            .DataValueField="id"
            .DataTextField="texte"
            .DataBind
        end with
        with CheckBoxList3
            .DataSource=myDataTable
            .DataValueField="id"
            .DataTextField="texte"
            .DataBind
        end with
        with RadioButtonList3
            .DataSource=myDataTable
            .DataValueField="id"
            .DataTextField="texte"
            .DataBind
        end with
        ' element selection
        ListBox3.Items(1).Selected=true
        ListBox3.Items(3).Selected=true
        CheckBoxList3.Items(0).Selected=true
        CheckBoxList3.Items(3).Selected=true
        DropDownList3.SelectedIndex=2
        RadioButtonList3.SelectedIndex=1
end sub
Each [ListControl] component is linked to the [myDataTable] data source by setting the following for each one:
The table [myDataTable] is the data source. The [id] column of this table will populate the [Value] fields of the component elements, while the [texte] column will populate their [Text] fields.
8.3.5. Data source of type DataSet
The [myDataSet] data source is initialized in the [createDataSources] procedure:
' global data
dim myDataTable as new DataTable("table1")
dim myDataSet as new DataSet
...


' procedure executed when the page is loaded
Sub page_Load(sender As Object, e As EventArgs)
    if not IsPostBack then
      ' create the data sources to be linked to the components
      createDataSources
...
    end if
End Sub

sub createDataSources
   ' creates data sources to be linked to components
   ' dataset - a single table
  myDataSet.Tables.Add(myDataTable)
...
end sub
A [DataSet] object represents a set of tables of type [DataTable]. We add the previously created [myDataTable] table to the [DataSet]. The binding of the four [ListBox] controls in binding 4 is done as follows in the [bindToDataSet] procedure of the control code:
sub bindToDataSet
         ' association with components
        with DropDownList4
            .DataSource=myDataSet
            .DataMember="table1"
            .DataValueField="id"
            .DataTextField="texte"
            .DataBind
        end with
        with ListBox4
            .DataSource=myDataSet
            .DataMember="table1"
            .DataValueField="id"
            .DataTextField="texte"
            .DataBind
        end with
        with CheckBoxList4
            .DataSource=myDataSet
            .DataMember="table1"
            .DataValueField="id"
            .DataTextField="texte"
            .DataBind
        end with
        with RadioButtonList4
            .DataSource=myDataSet
            .DataMember="table1"
            .DataValueField="id"
            .DataTextField="texte"
            .DataBind
        end with
        ' item selection
        ListBox4.Items(1).Selected=true
        ListBox4.Items(3).Selected=true
        CheckBoxList4.Items(0).Selected=true
        CheckBoxList4.Items(3).Selected=true
        DropDownList4.SelectedIndex=2
        RadioButtonList4.SelectedIndex=1
end sub
Each [ListControl] component is linked to the data source as follows:
The [myDataSet] data group is the data source. Since this may include multiple tables, we specify in [DataMember] the name of the one we will use. The [id] column of this table will populate the [Value] fields of the component elements, while the [texte] column will populate their [Text] fields.
8.3.6. Data source of type HashTable
The [myHashTable] data source is initialized in the [createDataSources] procedure:
' global data
dim textes() as string={"un","deux","trois","quatre"}
dim valeurs() as string={"1","2","3","4"}
dim myHashTable as new HashTable
...

' procedure executed when the page is loaded
Sub page_Load(sender As Object, e As EventArgs)
    if not IsPostBack then
      ' create the data sources to be linked to the components
      createDataSources
...
    end if
End Sub

sub createDataSources
   ' creates data sources to be linked to components
...
  ' hashtable
  for i=0 to textes.length-1
    myHashTable.add(valeurs(i),textes(i))
  next
end sub
The dictionary [myHashTable] can be viewed as a table with two columns named "key" and "value". The column [key] represents the keys of the dictionary, and the column [value] represents the values associated with them. The [key] column here consists of the contents of the [valeurs] array, and the [value] column consists of the contents of the [textes] array. The binding of this source to the controls is performed in procedure [bindToHashTable]:
sub bindToHashTable
         ' association with components
        with DropDownList5
            .DataSource=myHashTable
            .DataValueField="key"
            .DataTextField="value"
            .DataBind
        end with
        with ListBox5
            .DataSource=myHashTable
            .DataValueField="key"
            .DataTextField="value"
            .DataBind
        end with
        with CheckBoxList5
            .DataSource=myHashTable
            .DataValueField="key"
            .DataTextField="value"
            .DataBind
        end with
        with RadioButtonList5
            .DataSource=myHashTable
            .DataValueField="key"
            .DataTextField="value"
            .DataBind
        end with
        ' element selection
        ListBox5.Items(1).Selected=true
        ListBox5.Items(3).Selected=true
        CheckBoxList5.Items(0).Selected=true
        CheckBoxList5.Items(3).Selected=true
        DropDownList5.SelectedIndex=2
        RadioButtonList5.SelectedIndex=1
end sub
For each component, the binding is established using the following statements:
The data source is the dictionary [myHashTable]. The control values are provided by the [key] column of the dictionary, and the texts by the [value] column. The dictionary elements are inserted into the controls in the order of the keys, which is initially random.
8.3.7. Directives for importing namespaces
A number of namespaces are automatically imported into a ASP.NET page. This is not the case for "System.Data," which contains the classes [DataTable] and [DataSet]. Therefore, this namespace must be imported. This is done as follows:
<%@ Page Language="VB" %>
<%@ import Namespace="System.Data" %>
<script runat="server">
...
</script>
<html>
...
</html>
8.4. DataGrid Component and Data Link
The [DataGrid] component allows you to display data in table format, but it goes far beyond simple display:
- it offers the ability to precisely configure the table’s “visual rendering”
- it allows the data source to be updated
The [DataGrid] component is both powerful and complex. We will present it step by step.
8.4.1. Displaying a Data Source Array, ArrayList, DataTable, DataSet
The [DataGrid] component allows you to display data sources of types [Array], [ArrayList], [DataTable], [DataSet]. For these four data types, simply associate the source with the [DataSource] property of the [DataGrid] component:
a data source [Array], [ArrayList], [DataTable], [DataSet], ... | |
if the data source is a [DataSet], represents the name of the table to be used as the data source. The actual data source is then a table. If this field is left blank, all tables in the [DataSet] are displayed. |
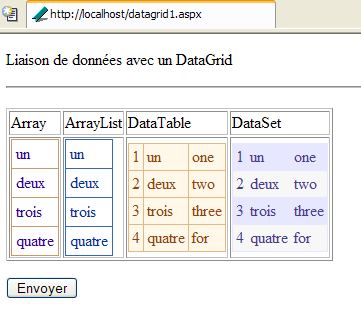
We now present the [datagrid1.aspx] page, which shows the association of a [DataGrid] with four different data sources:
The page contains four [DataGrid] components built with [WebMatrix] as follows. The component is dropped into its location in the [Design] tab:
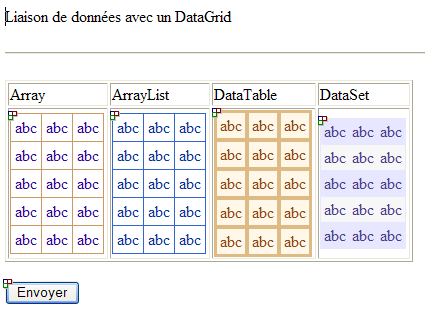
A generic HTML table is then drawn. The properties of a [DataGrid] can be defined at design time. This is what we are doing here for its formatting properties. To do this, we select the [DataGrid] to be configured. Its properties appear in a window at the bottom right:
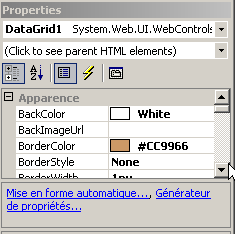
We will use the two links above. The [Générateur de propriétés] link provides access to the main properties of the [DataGrid]:
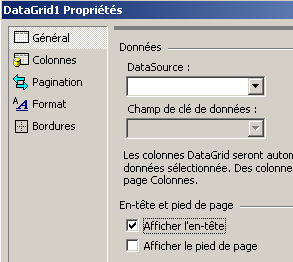
We uncheck the [Afficher l'en-tête] option for the four [DataGrid] components and save the page. The other link, [Mise en forme automatique], allows you to choose from several styles for the HTML table that will be displayed:
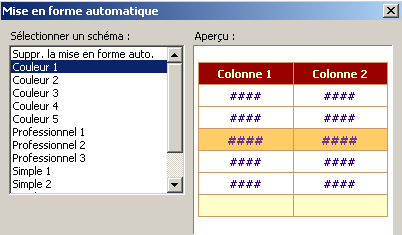
We select [couleur i] for [DataGrid] no. i. These design choices are reflected in the page’s presentation code:
<html>
<head>
</head>
<body>
    <form runat="server">
        <p>
            Liaison de données avec un DataGrid
        </p>
        <hr />
        <p>
            <table>
                <tbody>
                </tbody>
            </table>
            <table border="1">
                <tbody>
                    <tr>
                        <td>
                            Array</td>
                        <td>
                            ArrayList</td>
                        <td>
                            DataTable</td>
                        <td>
                            DataSet</td>
                    </tr>
                    <tr>
                        <td>
                            <asp:DataGrid id="DataGrid1" runat="server" ShowHeader="False" CellPadding="4" BackColor="White" BorderColor="#CC9966" BorderWidth="1px" BorderStyle="None">
                                <FooterStyle forecolor="#330099" backcolor="#FFFFCC"></FooterStyle>
                                <HeaderStyle font-bold="True" forecolor="#FFFFCC" backcolor="#990000"></HeaderStyle>
                                <PagerStyle horizontalalign="Center" forecolor="#330099" backcolor="#FFFFCC"></PagerStyle>
                                <SelectedItemStyle font-bold="True" forecolor="#663399" backcolor="#FFCC66"></SelectedItemStyle>
                                <ItemStyle forecolor="#330099" backcolor="White"></ItemStyle>
                            </asp:DataGrid>
                        </td>
                        <td>
                            <asp:DataGrid id="DataGrid2" runat="server" ShowHeader="False" CellPadding="4" BackColor="White" BorderColor="#3366CC" BorderWidth="1px" BorderStyle="None">
                                <FooterStyle forecolor="#003399" backcolor="#99CCCC"></FooterStyle>
                                <HeaderStyle font-bold="True" forecolor="#CCCCFF" backcolor="#003399"></HeaderStyle>
                                <PagerStyle horizontalalign="Left" forecolor="#003399" backcolor="#99CCCC" mode="NumericPages"></PagerStyle>
                                <SelectedItemStyle font-bold="True" forecolor="#CCFF99" backcolor="#009999"></SelectedItemStyle>
                                <ItemStyle forecolor="#003399" backcolor="White"></ItemStyle>
                            </asp:DataGrid>
                        </td>
                        <td>
                            <asp:DataGrid id="DataGrid3" runat="server" ShowHeader="False" CellPadding="3" BackColor="#DEBA84" BorderColor="#DEBA84" BorderWidth="1px" BorderStyle="None" CellSpacing="2">
                                <FooterStyle forecolor="#8C4510" backcolor="#F7DFB5"></FooterStyle>
                                <HeaderStyle font-bold="True" forecolor="White" backcolor="#A55129"></HeaderStyle>
                                <PagerStyle horizontalalign="Center" forecolor="#8C4510" mode="NumericPages"></PagerStyle>
                                <SelectedItemStyle font-bold="True" forecolor="White" backcolor="#738A9C"></SelectedItemStyle>
                                <ItemStyle forecolor="#8C4510" backcolor="#FFF7E7"></ItemStyle>
                            </asp:DataGrid>
                        </td>
                        <td>
                            <asp:DataGrid id="DataGrid4" runat="server" ShowHeader="False" CellPadding="3" BackColor="White" BorderColor="#E7E7FF" BorderWidth="1px" BorderStyle="None" GridLines="Horizontal">
                                <FooterStyle forecolor="#4A3C8C" backcolor="#B5C7DE"></FooterStyle>
                                <HeaderStyle font-bold="True" forecolor="#F7F7F7" backcolor="#4A3C8C"></HeaderStyle>
                                <PagerStyle horizontalalign="Right" forecolor="#4A3C8C" backcolor="#E7E7FF" mode="NumericPages"></PagerStyle>
                                <SelectedItemStyle font-bold="True" forecolor="#F7F7F7" backcolor="#738A9C"></SelectedItemStyle>
                                <AlternatingItemStyle backcolor="#F7F7F7"></AlternatingItemStyle>
                                <ItemStyle forecolor="#4A3C8C" backcolor="#E7E7FF"></ItemStyle>
                            </asp:DataGrid>
                        </td>
                    </tr>
                </tbody>
            </table>
        </p>
        <asp:Button id="Button1" runat="server" Text="Envoyer"></asp:Button>
    </form>
</body>
</html>
In design mode, we have only set formatting properties. It is in the control code that we associate data with the four components:
<%@ Page Language="VB" %>
<%@ import Namespace="system.data" %>
<script runat="server">

     ' global data
        dim textes1() as string={"un","deux","trois","quatre"}
        dim textes2() as string={"one","two","three","for"}
        dim valeurs() as string={"1","2","3","4"}
        dim myDataListe as new ArrayList
        dim myDataTable as new DataTable("table1")
        dim myDataSet as new DataSet

        ' procedure executed when the page is loaded
        Sub page_Load(sender As Object, e As EventArgs)
            if not IsPostBack then
              ' create the data sources to be linked to the components
              createDataSources
               ' link to an array [Array]
              bindToArray
               ' link to a list [ArrayList]
              bindToArrayList
               ' link to a table [DataTable]
              bindToDataTable
               ' link to a data group [DataSet]
              bindToDataSet
            end if
        End Sub

        sub createDataSources
           ' creates data sources to be linked to components
          ' arraylist
          dim i as integer
          for i=0 to textes1.length-1
            myDataListe.add(textes1(i))
          next
           ' datatable
           ' we define its two columns
          myDataTable.Columns.Add("id",Type.GetType("System.Int32"))
          myDataTable.Columns.Add("texte1",Type.GetType("System.String"))
          myDataTable.Columns.Add("texte2",Type.GetType("System.String"))
          ' fill the table
          dim ligne as DataRow
          for i=0 to textes1.length-1
            ligne=myDataTable.NewRow
            ligne("id")=valeurs(i)
            ligne("texte1")=textes1(i)
            ligne("texte2")=textes2(i)
            myDataTable.Rows.Add(ligne)
          next
           ' dataset - a single table
          myDataSet.Tables.Add(myDataTable)
        end sub

        ' panel connection
        sub bindToArray
          with DataGrid1
            .DataSource=textes1
            .DataBind
          end with
        end sub

        ' arraylist link
        sub bindToArrayList
          with DataGrid2
            .DataSource=myDataListe
            .DataBind
          end with
        end sub

        ' datatable link
        sub bindToDataTable
          with DataGrid3
            .DataSource=myDataTable
            .DataBind
          end with
        end sub

        ' dataset link
        sub bindToDataSet
          with DataGrid4
            .DataSource=myDataSet
            .DataBind
          end with
        end sub

</script>
<html>
...
</html>
The code is quite similar to that in the previous example, so we won’t comment on it specifically. Note, however, how the data binding is done. For each of the four controls, the following sequence is sufficient:
where [source de données] is of type [Array] or [ArrayList] or [DataTable] or [DataSet]. We can see, therefore, that this is a powerful tool for displaying data in tables:
- formatting is done with [WebMatrix] or any other IDE at the design stage
- data binding is done in the code. With [WebMatrix], it can be done at design time if the data source is a SQL server database or a ACCESS database. In this case, a component of type [SqlDataSource] or [AccessDataSource] is placed on the sheet. This component can be linked at design time to the physical data source, a SQL Server database or a ACCESS database, as appropriate. If you assign a [SqlDataSource] or [AccessDataSource] object linked to a physical source to the [DataSource] property of a [DataGrid] component, then, in design mode, the actual data in component [DataGrid].
8.5. ViewState for data list components
Here, we aim to highlight the mechanism of [VIEWSATE] for data list components. You may hesitate between two methods to maintain the state of a data list component between two client requests:
- set its [VIEWSTATE] attribute to true
- set its [VIEWSTATE] attribute to false and store its data source in the session so that the component can be linked to that source during the next request.
The following example illustrates certain aspects of the [VIEWSTATE] mechanism for data containers. On the client’s first request, the application displays the following view:
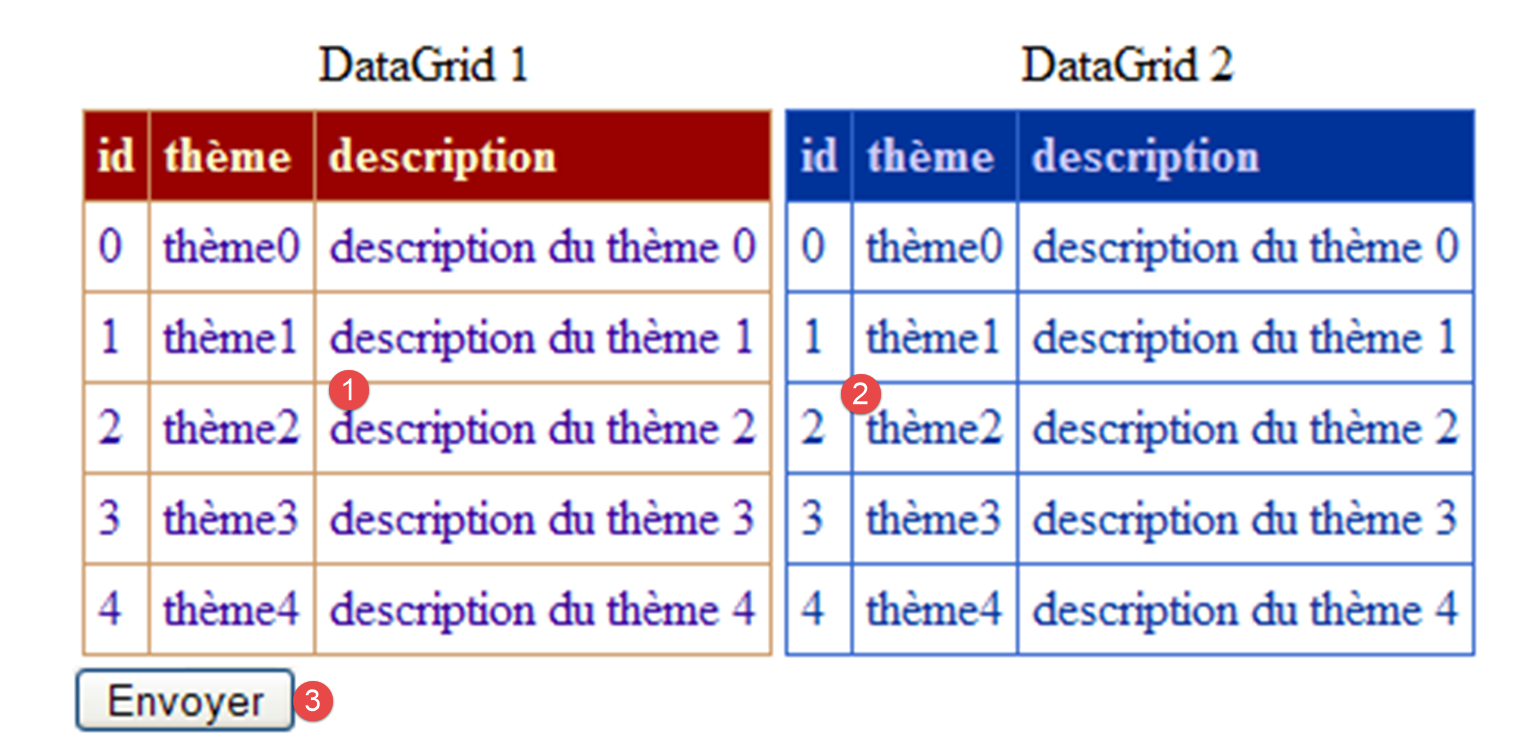 |
No. | name | type | properties | role |
1 | DataGrid | EnableViewState=true | displays a data source S | |
2 | DataGrid | EnableViewState=true | displays the same S data source as [DataGrid1] | |
3 | Button | EnableViewState=false | button [submit] |
The [DataGrid1] component is maintained by the [VIEWSTATE] mechanism. We are trying to determine whether this mechanism, which regenerates the display of [DataGrid1] with each request, also regenerates its data source. To do this, the data source is linked to the [DataGrid2] component. This component is generated for each request via an explicit link to the data source of [DataGrid1]. It also has its attribute [EnableViewState] linked to [vrai].
The application's presentation code [main.aspx] is as follows:
<%@ page src="main.aspx.vb" inherits="main" autoeventwireup="false" %>
<HTML>
    <HEAD>
        <title></title>
    </HEAD>
    <body>
        <form runat="server">
            <table>
                <tr>
                    <td align="center">DataGrid 1</td>
                    <td align="center">
                        DataGrid 2</td>
                </tr>
                <tr>
                    <td>
                      <asp:DataGrid id="DataGrid1" runat="server" ...>
                            <SelectedItemStyle ...></SelectedItemStyle>
....
                        </asp:DataGrid></td>
                    <td>
                      <asp:DataGrid id="Datagrid2" runat="server" ...>
....
                        </asp:DataGrid></td>
                </tr>
            </table>
            <asp:Button id="Button1" runat="server" Text="Envoyer"></asp:Button>
        </form>
    </body>
</HTML>
The [main.aspx.vb] controller is as follows:
Imports System.Data

Public Class main
    Inherits System.Web.UI.Page

    Protected WithEvents DataGrid1 As System.Web.UI.WebControls.DataGrid
    Protected WithEvents Datagrid2 As System.Web.UI.WebControls.DataGrid
    Protected WithEvents Button1 As System.Web.UI.WebControls.Button

    Private Sub Page_Load(ByVal sender As System.Object, ByVal e As System.EventArgs) Handles MyBase.Load
        ' on the 1st query, the data source is defined and linked to the 1st datagrid
        If Not IsPostBack Then
            'define data source
            With DataGrid1
                .DataSource = createDataSource()
                .DataBind()
            End With
        End If
        ' for each query, datagrid2 is linked to the source of the 1st datagrid
        With Datagrid2
            .DataSource = DataGrid1.DataSource
            .DataBind()
        End With
    End Sub

    Private Function createDataSource() As DataTable
        ' on initialise la source de données
        Dim thèmes As New DataTable
        ' columns
        With thèmes.Columns
            .Add("id", GetType(System.Int32))
            .Add("thème", GetType(System.String))
            .Add("description", GetType(System.String))
        End With
        ' column id will be primary key
        thèmes.Constraints.Add("cléprimaire", thèmes.Columns("id"), True)
        ' lines
        Dim ligne As DataRow
        For i As Integer = 0 To 4
            ligne = thèmes.NewRow
            ligne.Item("id") = i.ToString
            ligne.Item("thème") = "thème" + i.ToString
            ligne.Item("description") = "description du thème " + i.ToString
            thèmes.Rows.Add(ligne)
        Next
        Return thèmes
    End Function

    Private Sub InitializeComponent()

    End Sub
End Class
The [createDataSource] method creates an S source of type [DataTable]. We will not dwell on its code, as it is not the focus of this example. What interests us is the method used to build the two [DataGrid] components:
- The [DataGrid1] component is linked once to the S table during the first query. It is no longer linked thereafter.
- The [DataGrid2] component is linked to the [DataGrid1.DataSource] source with each new query.
During the first query, we get the following view:
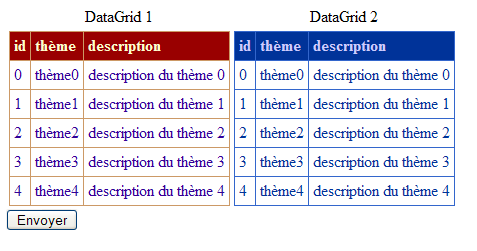
Quite logically, both components display the data source to which they were linked. We use the [Envoyer] button to trigger a [PostBack] request to the server. The resulting view is then as follows:
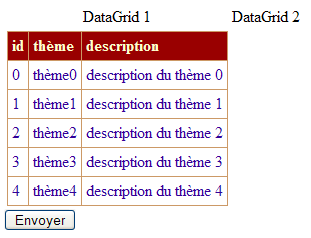
We observe that the [DataGrid1] component has retained its value, but the [DataGrid2] component has not. Explanations:
- Even before the [Page_Load] procedure began, the objects [DataGrid1] and [DataGrid2] had already reverted to the values they held during the previous query, due to the mechanism of [viewstate]. In fact, both have their [EnableViewState] property set to [vrai].
- The procedure [Page_Load] runs. Since this is a [PostBack] operation, the component [DataGrid1] is not modified by [Page_Load] (see code). Therefore, it retains the value retrieved via [viewstate]. This is shown in the screen above.
- The component [DataGrid2] is linked via [DataBind] to the data source [DataGrid1.DataSource]. It is therefore rebuilt, and the value it had just retrieved via [viewstate] is lost. It would therefore have been better here for it to have its property set from [EnableViewState] to [faux] in order to avoid unnecessary state management. The screen above shows that [DataGrid2] has been linked to an empty source. Since this source is [DataGrid1.DataSource], we can conclude that while the [viewstate] mechanism successfully restores the display of the [DataGrid1] component, it does not restore its properties such as [DataSource].
What can we conclude from this example? You should avoid setting the [EnableViewState] property of a data container to [vrai] if it must be linked (DataBind) to a data source for each query. However, there are certain cases where, even in this scenario, the container’s [EnableViewState] property must be kept at [vrai]; otherwise, events that you would like to handle are not triggered. We will encounter an example of this later.
Frequently, a data container’s data source changes over the course of requests. Therefore, with each request, the container must be linked to the data source. It is common for the data source to be scoped to the session so that requests can access it. Our second example demonstrates this mechanism. The application provides only a single view:
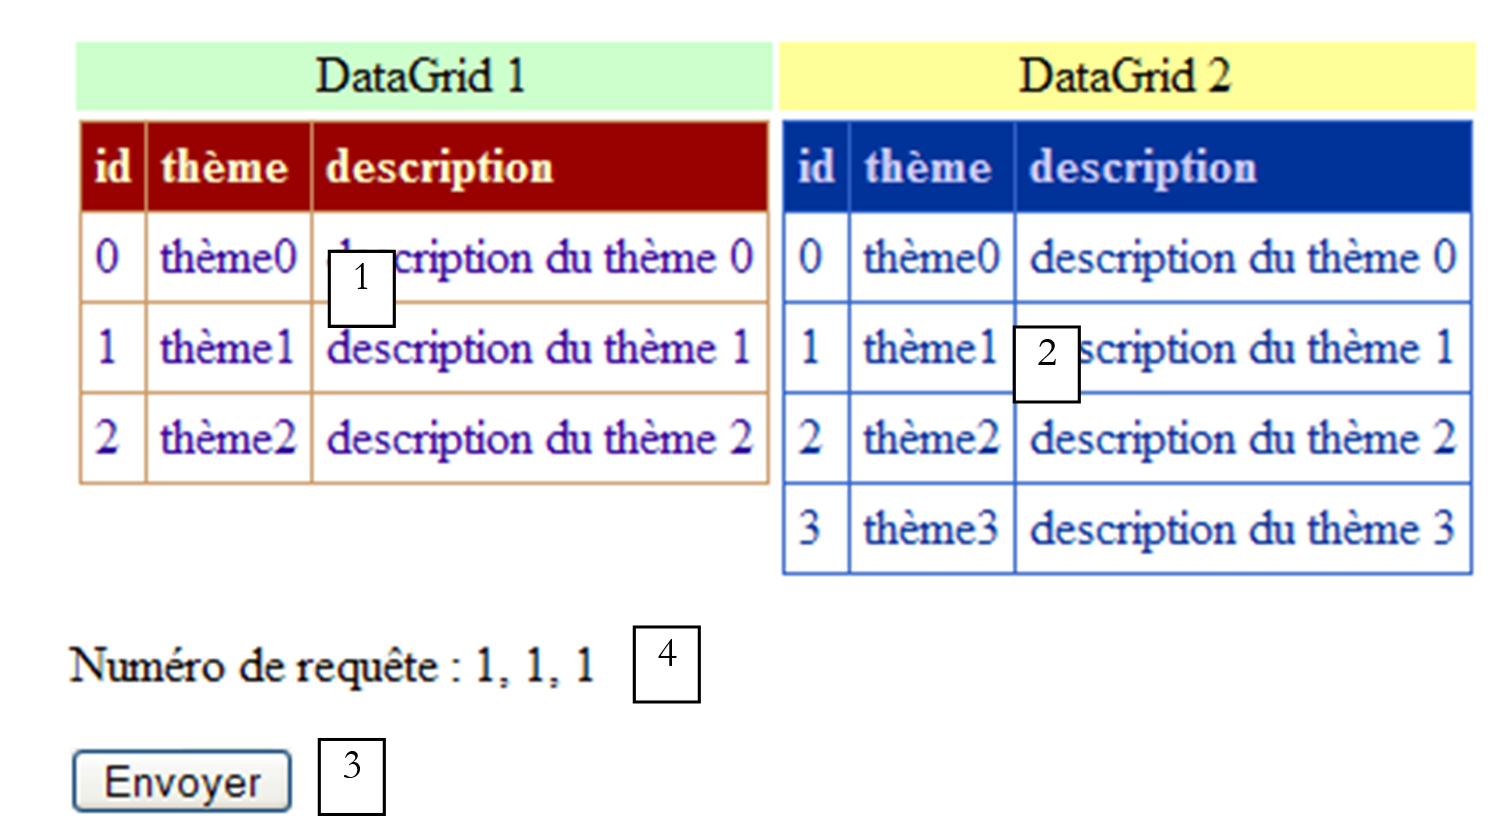 |
No. | name | type | properties | role |
1 | DataGrid | EnableViewState=true | displays a data source S | |
2 | DataGrid | EnableViewState=false | displays the same S data source as [DataGrid1] | |
3 | Button | EnableViewState=false | button [submit] | |
4 | Label | EnableViewState=false | Information texts |
The [DataGrid1] component is linked to the data only during the first query. It will retain its value across queries thanks to the mechanism of [viewstate]. The [DataGrid2] component is linked to a data source for each request, to which an element is added with each new request. Therefore, the [DataGrid2] component must be linked (DataBind) to each request. We have therefore set its attribute from [EnableViewState] to [faux], as previously recommended. Thus, during the second query (using the [Envoyer] button), we get the following response:
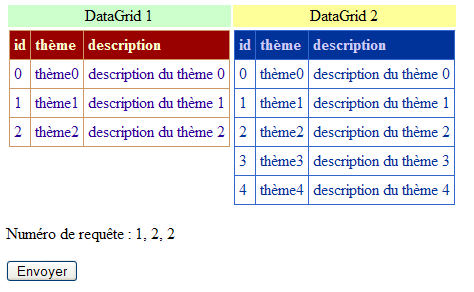
The [DataGrid1] component has retained its initial value. The [DataGrid2] component has one additional element. The three [1,2,2] entries represent the request number. We can see that one of the entries is incorrect. We will try to understand why.
The application's presentation code [main.aspx] is as follows:
<%@ Page src="main.aspx.vb" inherits="main" autoeventwireup="false" Language="vb" %>
<HTML>
<HEAD>
<title></title>
</HEAD>
<body>
<form runat="server">
<table>
<tr>
<td align="center" bgColor="#ccffcc">DataGrid 1</td>
<td align="center" bgColor="#ffff99">DataGrid 2</td>
</tr>
<tr>
<td vAlign="top">
<asp:DataGrid id="DataGrid1" runat="server" ...>
...
</asp:DataGrid>
</td>
<td vAlign="top">
<asp:DataGrid id="Datagrid2" runat="server" ... EnableViewState="False">
....
</asp:DataGrid>
</td>
</tr>
</table>
<P>Numéro de requête :
<asp:Label id="lblInfo1" runat="server" EnableViewState="False"></asp:Label>,
<asp:Label id="lblInfo2" runat="server" EnableViewState="False"></asp:Label>,
<asp:Label id="lblInfo3" runat="server" EnableViewState="False"></asp:Label></P>
<P>
<asp:Button id="Button1" runat="server" Text="Envoyer" EnableViewState="False"></asp:Button></P>
</form>
</body>
</HTML>
The code for the [main.aspx.vb] controller is as follows:
Imports System.Data
Imports System

Public Class main
    Inherits System.Web.UI.Page

    Protected WithEvents DataGrid1 As System.Web.UI.WebControls.DataGrid
    Protected WithEvents Datagrid2 As System.Web.UI.WebControls.DataGrid
    Protected WithEvents Button1 As System.Web.UI.WebControls.Button
    Protected WithEvents lblInfo1 As System.Web.UI.WebControls.Label
    Protected WithEvents lblInfo2 As System.Web.UI.WebControls.Label
    Protected WithEvents lblInfo3 As System.Web.UI.WebControls.Label

    Dim dtThèmes As DataTable
    Dim numRequête1 As Integer
    Dim numRequête2 As Integer
    Dim numRequête3 As New entier

    Private Sub Page_Load(ByVal sender As System.Object, ByVal e As System.EventArgs) Handles MyBase.Load
        ' on the 1st query, the data source is defined and linked to the 1st datagrid
        If Not IsPostBack Then
            'define data source
            dtThèmes = createDataSource()
            With DataGrid1
                .DataSource = dtThèmes
                .DataBind()
            End With
            ' store information in the session
            Session("source") = dtThèmes
            numRequête1 = 0 : Session("numRequête1") = numRequête1
            numRequête2 = 0 : Session("numRequête2") = numRequête2
            numRequête3.valeur = 0 : Session("numRequête3") = numRequête3
        End If
        ' a new theme is added to each query
        dtThèmes = CType(Session("source"), DataTable)
        Dim nbThèmes = dtThèmes.Rows.Count
        Dim ligne As DataRow = dtThèmes.NewRow
        With ligne
            .Item("id") = nbThèmes.ToString
            .Item("thème") = "thème" + nbThèmes.ToString
            .Item("description") = "description du thème " + nbThèmes.ToString
        End With
        dtThèmes.Rows.Add(ligne)
        'links datagrid2 with the data source
        With Datagrid2
            .DataSource = dtThèmes
            .DataBind()
        End With
        ' info no. of requests
        numRequête1 = CType(Session("numRequête1"), Integer)
        numRequête1 += 1
        lblInfo1.Text = numRequête1.ToString
        numRequête2 = CType(Session("numRequête2"), Integer)
        numRequête2 += 1
        lblInfo2.Text = numRequête2.ToString
        numRequête3 = CType(Session("numRequête3"), entier)
        numRequête3.valeur += 1
        lblInfo3.Text = numRequête3.valeur.ToString
        ' store some information in the session
        Session("numRequête2") = numRequête2
    End Sub

    Private Function createDataSource() As DataTable
....
    End Function
End Class

Public Class entier
    Private _valeur As Integer
    Public Property valeur() As Integer
        Get
            Return _valeur
        End Get
        Set(ByVal Value As Integer)
            _valeur = Value
        End Set
    End Property
End Class
We have not reproduced the code for the [createDataSource] method. It is the same as in the previous application, with the exception that only three lines are included in the source code. Let’s first look at how the data source and the two containers are handled:
    Private Sub Page_Load(ByVal sender As System.Object, ByVal e As System.EventArgs) Handles MyBase.Load
        ' on the 1st query, the data source is defined and linked to the 1st datagrid
        If Not IsPostBack Then
            'define data source
            dtThèmes = createDataSource()
            With DataGrid1
                .DataSource = dtThèmes
                .DataBind()
            End With
            ' store information in the session
            Session("source") = dtThèmes
...
        End If
        ' a new theme is added to each query
        dtThèmes = CType(Session("source"), DataTable)
        Dim nbThèmes = dtThèmes.Rows.Count
        Dim ligne As DataRow = dtThèmes.NewRow
        With ligne
            .Item("id") = nbThèmes.ToString
            .Item("thème") = "thème" + nbThèmes.ToString
            .Item("description") = "description du thème " + nbThèmes.ToString
        End With
        dtThèmes.Rows.Add(ligne)
        'links datagrid2 with the data source
        With Datagrid2
            .DataSource = dtThèmes
            .DataBind()
        End With
...
    End Sub
The component [DataGrid1] is linked to the data source S only during the first query (not IsPostBack). It is then placed in the session. It will not be placed there again thereafter. The data source S placed in the session is retrieved with each query, and a new row is added to it. The component [DataGrid2] is explicitly linked to the source S with each query. This is why its content increases by one row with each query. Note that after modifying the contents of source S, it is not explicitly re-added to the session via an operation:
Why? When a query starts, the session contains a Session("source") object of type [DataTable], which is the data source as it was during the last query. Let’s call the Session("source") object S. When we write:
dtThèmes = CType(Session("source"), DataTable)
[dtThèmes] and [S] are two references to the same object [DataTable]. Thus, when the code in [Page_Load] adds an element to the table referenced by [dtThèmes], it simultaneously adds it to the table referenced by [S]. At the end of the page execution, all objects present in the session will be saved, including the Session("source") object, c.a.d. S, c.a.d, and [dtThèmes] will be saved. It is therefore indeed the new content of the data source that is saved. There was no need to write:
to perform this save, because Session("source") is already equal to [dtThèmes]. This is no longer true when the data placed in the session are not objects, such as the structures [Integer, Float, ...]. This is demonstrated by the management of query counters:
    Dim numRequête1 As Integer
    Dim numRequête2 As Integer
    Dim numRequête3 As New entier

    Private Sub Page_Load(ByVal sender As System.Object, ByVal e As System.EventArgs) Handles MyBase.Load
        ' on the 1st query, the data source is defined and linked to the 1st datagrid
....
            ' store information in the session
            Session("source") = dtThèmes
            numRequête1 = 0 : Session("numRequête1") = numRequête1
            numRequête2 = 0 : Session("numRequête2") = numRequête2
            numRequête3.valeur = 0 : Session("numRequête3") = numRequête3
        End If
        ' a new theme is added to each query
....
        ' info no. of requests
        numRequête1 = CType(Session("numRequête1"), Integer)
        numRequête1 += 1
        lblInfo1.Text = numRequête1.ToString
        numRequête2 = CType(Session("numRequête2"), Integer)
        numRequête2 += 1
        lblInfo2.Text = numRequête2.ToString
        numRequête3 = CType(Session("numRequête3"), entier)
        numRequête3.valeur += 1
        lblInfo3.Text = numRequête3.valeur.ToString
        ' store some information in the session
        Session("numRequête2") = numRequête2
    End Sub

    Private Function createDataSource() As DataTable
....
    End Function

    Private Sub InitializeComponent()

    End Sub
End Class

Public Class entier
    Private _valeur As Integer
    Public Property valeur() As Integer
        Get
            Return _valeur
        End Get
        Set(ByVal Value As Integer)
            _valeur = Value
        End Set
    End Property
The request counters are stored in three elements:
- numRequête1 and numRequête2 of type [Integer] - [Integer] is not a class but a structure
- numRequête3 of type [entier] - [entier] is a class defined for this purpose
When we write:
        numRequête1 = CType(Session("numRequête1"), Integer)
..
        numRequête2 = CType(Session("numRequête2"), Integer)
..
        numRequête3 = CType(Session("numRequête3"), entier)
..
- The structure [Session("numRequête1")] is copied into [numRequête1]. Thus, when the element [numRequête1] is modified, the element [Session("numRequête1")] is not
- the same applies to [Session("numRequête2")] and [numRequête2]
- The elements [Session("numRequête3")] and [numRequête3] are both references to the same object of type [entier]. The referenced object can be modified by either reference.
From this, we can conclude that it is unnecessary to write:
to store the new value of [numRequête3] in the session. Instead, you should write:
to store the new values of the structures [numRequête1] and [numRequête2]. We do this only for [numRequête2], which explains why, in the screenshot obtained after the second query, the [numRequête1] counter is incorrect.
We should therefore note that once data has been loaded into a session, it does not need to be reloaded repeatedly if it is represented by an object. In other cases, it must be reloaded if it has been modified.
8.6. Displaying a list of data using a paginated and sorted DataGrid
The [DataGrid] component allows you to display the contents of a [DataSet]. So far, we have always built our [DataSet] files "by hand." This time, we are using a [DataSet] file retrieved from a database. We are building the following MVC application:
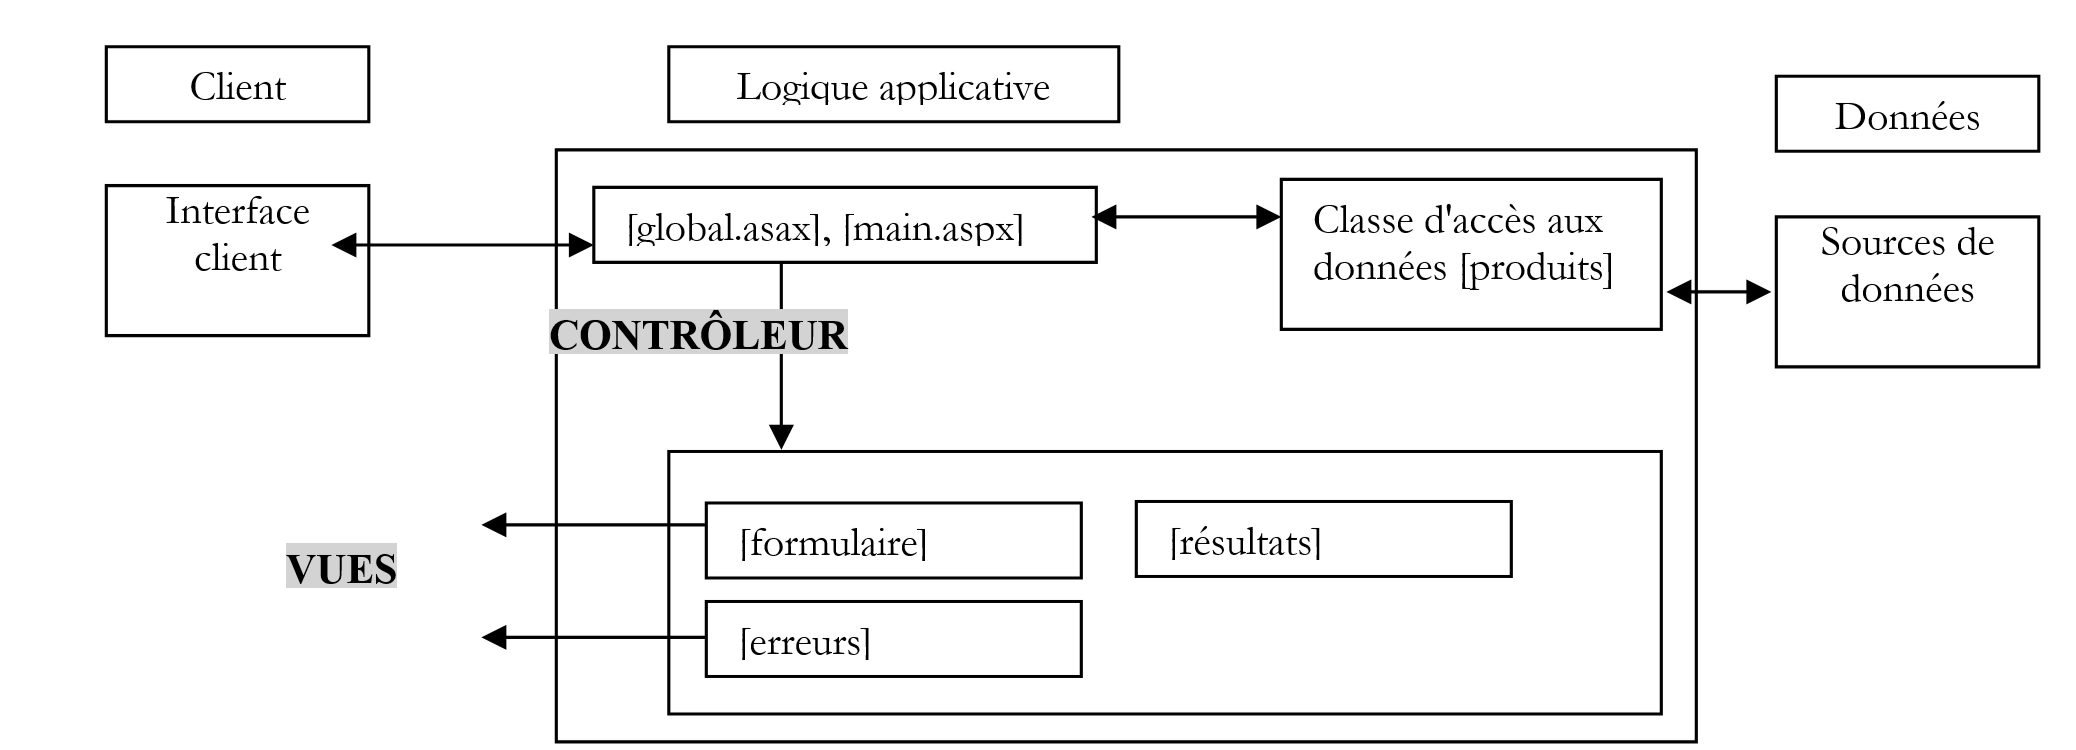 |
The three views will be incorporated into the presentation code of the [main.aspx] controller as containers. Therefore, this application has a single page, [main.aspx].
8.6.1. Business classes
The [produits] class provides access to the following database ACCESS:
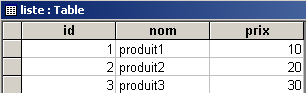
The code for the [produits] class is as follows:
Imports System
Imports System.Data
Imports System.Data.OleDb
Imports System.Xml

Namespace st.istia.univangers.fr

    Public Class produits
        Private chaineConnexionOLEDB As String

        Public Sub New(ByVal chaineConnexionOLEDB As String)
            ' save the connection string
            Me.chaineConnexionOLEDB = chaineConnexionOLEDB
        End Sub

        Public Function getDataSet(ByVal commande As String) As DataSet
            ' create a DataAdapter object to read data from source OLEDB
            Dim adaptateur As New OleDbDataAdapter(commande, chaineConnexionOLEDB)
            ' create a memory image of the select result
            Dim contenu As New DataSet
            Try
                adaptateur.Fill(contenu)
            Catch e As Exception
                Throw New Exception("Erreur d'accès à la base de données (" + e.Message + ")")
            End Try
            ' we return the result
            Return contenu
        End Function
    End Class
End Namespace
The ACCESS database will be managed via a OLEDB driver. We pass the connection string, the identifier, the OLEDB driver, and the database to be managed to the constructor of the [produits] class. The [produits] class has a method [getDataSet] that returns a [DataSet] obtained by executinga SQL query, [select], whose text is passed as a parameter. During the method, several operations take place: establishing the connection to the database, executing the [select] query, and closing the connection. All of this can generate an exception, which is handled here. A test program might look like this:
Option Explicit On
Option Strict On

' namespaces
Imports System
Imports System.Data
Imports Microsoft.VisualBasic

Namespace st.istia.univangers.fr

    ' test pg
    Module testproduits
        Sub Main(ByVal arguments() As String)
            ' displays the contents of a product table
            ' the table is in a ACCESS database whose pg receives the file name
            Const syntaxe1 As String = "pg bdACCESS"

            ' checking program parameters
            If arguments.Length <> 1 Then
                ' error msg
                Console.Error.WriteLine(syntaxe1)
                ' end
                Environment.Exit(1)
            End If

            ' prepare the connection chain
            Dim chaineConnexion As String = "Provider=Microsoft.Jet.OLEDB.4.0; Ole DB Services=-4; Data Source=" + arguments(0)

            ' creation of a product object
            Dim objProduits As produits = New produits(chaineConnexion)

            ' retrieve the product table from a dataset
            Dim contenu As DataSet
            Try
                contenu = objProduits.getDataSet("select id,nom,prix from liste")
            Catch ex As Exception
                Console.Error.WriteLine(("L'erreur suivante s'est produite : " + ex.Message))
                Environment.Exit(2)
            End Try

            ' display its contents
            Dim lignes As DataRowCollection = contenu.Tables(0).Rows
            For i As Integer = 0 To lignes.Count - 1
                ' table line i
                Console.Out.WriteLine(lignes(i).Item("id").ToString + "," + lignes(i).Item("nom").ToString + _
                "," + lignes(i).Item("prix").ToString)
            Next
        End Sub
    End Module
End Namespace
The various elements of this application are compiled as follows:
dos>vbc /t:library /r:system.dll /r:system.data.dll /r:system.xml.dll produits.vb

dos>vbc /r:produits.dll /r:system.data.dll /r:system.xml.dll /r:system.dll testproduits.vb

dos>dir
06/05/2004  16:52              118 784 produits.mdb
07/05/2004  11:07                  902 produits.vb
07/04/2004  07:01                1 532 testproduits.vb
07/05/2004  14:21                3 584 produits.dll
07/05/2004  14:22                4 608 testproduits.exe

dos>testproduits produits.mdb
1,produit1,10
2,produit2,20
3,produit3,30
8.6.2. The Views
Now that we have the data access class, we’ll write the controllers and views for this web application. Let’s first see how it works. The first view is as follows:
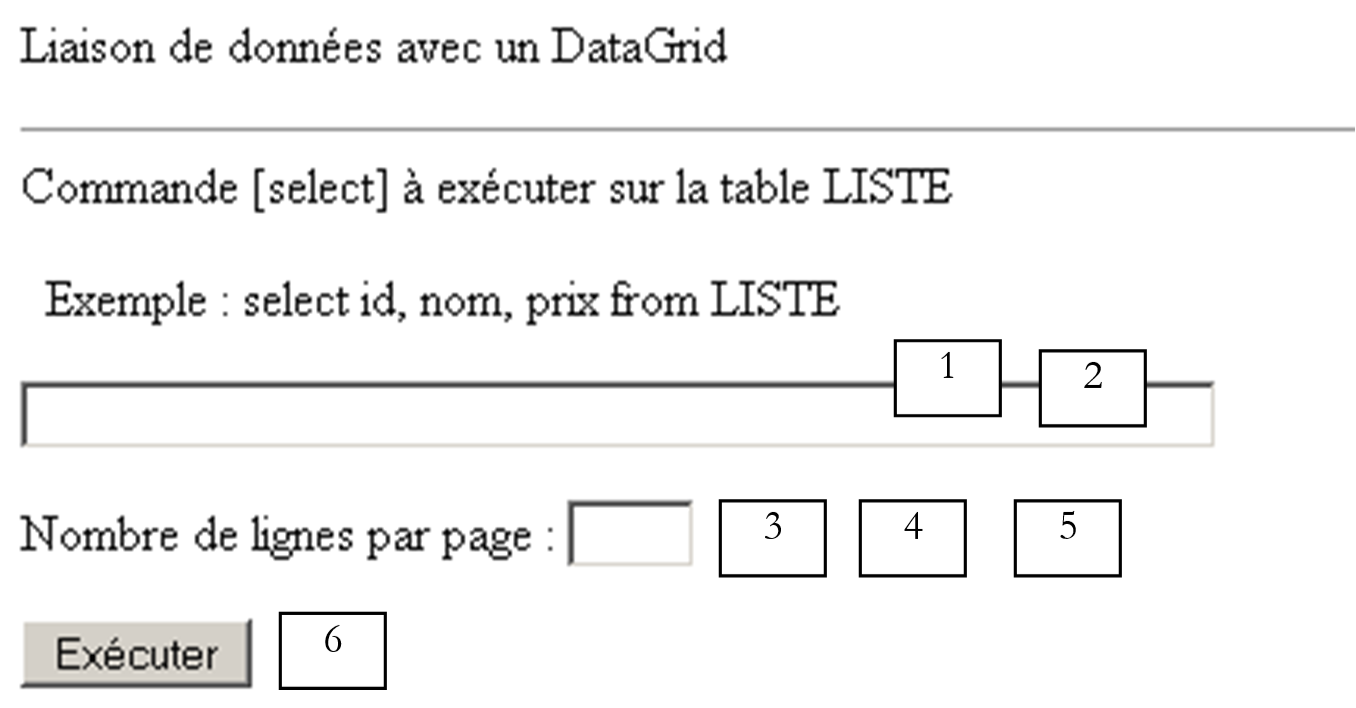 |
No. | name | type | properties | role |
1 | TextBox | EnableViewState=true | select query input field | |
2 | RequiredFieldValidator | EnableViewState=false | checks for the presence of 1 | |
3 | TextBox | EnableViewState=true | input field - specifies the number of data rows to display per results page | |
4 | RequiredFieldValidator | EnableViewState=false | checks for the presence of 3 | |
5 | RangeValidator | EnableViewState=false | checks that (3) is in the range [1,30] | |
6 | Button | EnableViewState=false | button [submit] |
We will call this view the [formulaire] view. It allows the user to execute a SQL SELECT query on the [produits.mdb] database. Executing the query creates a new view:
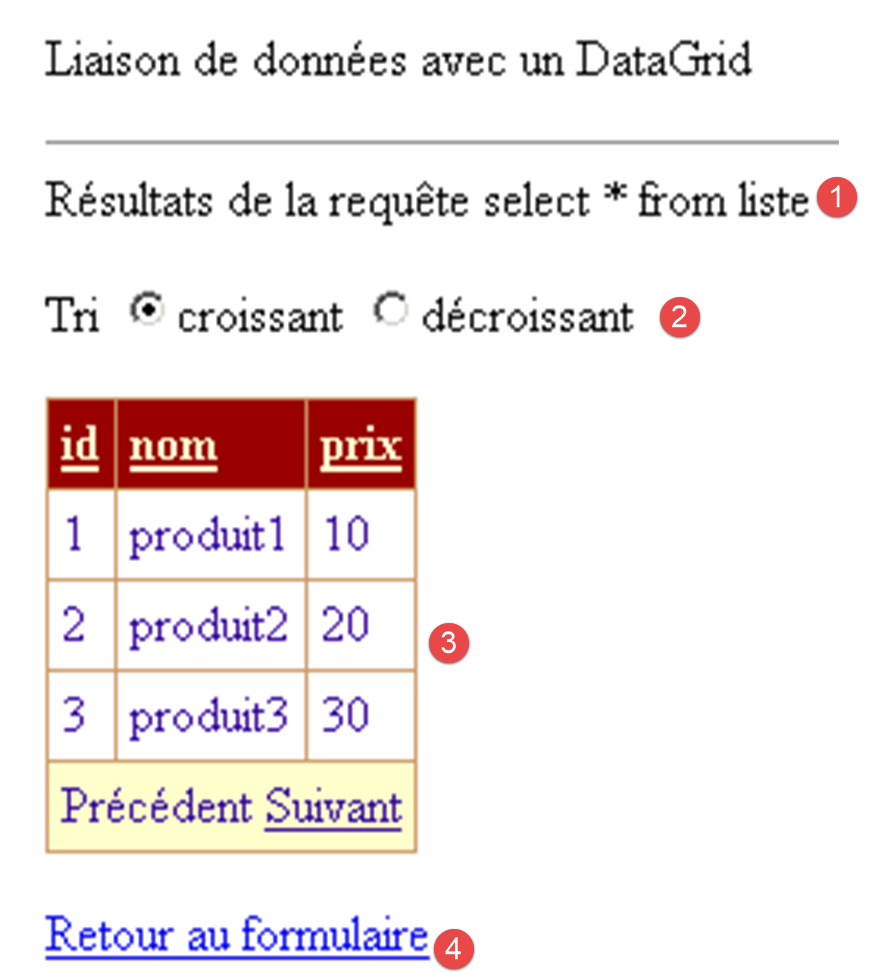 |
No. | name | type | properties | role |
1 | Label | EnableViewState=false | information field | |
2 | RadioButton | EnableViewState=false GroupName=rdTri | allows you to choose a sort order | |
3 | DataGrid | EnableViewState=true AllowPaging=true AllowSorting=true | table displaying the results of the select | |
4 | LinkButton | EnableViewState=false | link-button [submit] |
We will call this view the [résultats] view. It contains the [DataGrid] control that will display the result of the SQL select command. The user may make a mistake in their query. Some errors will be reported to them in the [erreurs] view thanks to validation checks.
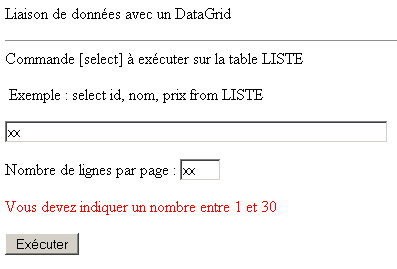
Other errors will be reported in the [erreurs] view:
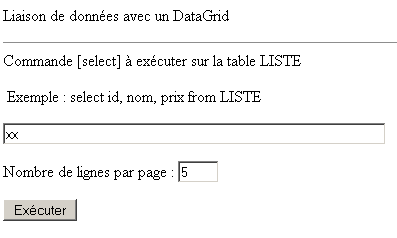
The [erreurs] view is displayed:
 |
No. | name | type | properties | role |
1 | variable | HTML code required to display errors | ||
3 | LinkButton | EnableViewState=false | link-button [submit] |
The three views of the application are three different containers (panels) within the same page [main.aspx]. Its presentation code is as follows:
<%@ Page src="main.aspx.vb" inherits="main" autoeventwireup="false" Language="vb" %>
<HTML>
<HEAD>
</HEAD>
<body>
<P>Liaison de données avec un DataGrid</P>
<HR width="100%" SIZE="1">
<form runat="server">
<asp:panel id="vueFormulaire" runat="server">
<P>Commande [select] à exécuter sur la table LISTE</P>
<P> Exemple : select id, nom, prix from LISTE
</P>
<P>
<asp:TextBox id="txtSelect" runat="server" Columns="60"></asp:TextBox></P>
<P>
<asp:RequiredFieldValidator id="RequiredFieldValidator1" runat="server" EnableViewState="False" EnableClientScript="False"
ErrorMessage="Indiquez la requête [select] à exécuter" ControlToValidate="txtSelect" Display="Dynamic"></asp:RequiredFieldValidator></P>
<P>Nombre de lignes par page :
<asp:TextBox id="txtPages" runat="server" Columns="3"></asp:TextBox></P>
<P>
<asp:RequiredFieldValidator id="RequiredFieldValidator2" runat="server" EnableViewState="False" EnableClientScript="False"
ErrorMessage="Indiquez le nombre de lignes par page désirées" ControlToValidate="txtPages" Display="Dynamic"></asp:RequiredFieldValidator>
<asp:RangeValidator id="RangeValidator1" runat="server" EnableViewState="False" EnableClientScript="False"
ErrorMessage="Vous devez indiquer un nombre entre 1 et 30" ControlToValidate="txtPages" Display="Dynamic"
Type="Integer" MinimumValue="1" MaximumValue="30"></asp:RangeValidator></P>
<P>
<asp:Button id="btnExécuter" runat="server" EnableViewState="False" Text="Exécuter"></asp:Button></P>
</asp:panel>
<asp:Panel id="vueRésultats" runat="server">
<P>Résultats de la requête
<asp:Label id="lblSelect" runat="server"></asp:Label></P>
<P>Tri
<asp:RadioButton id="rdCroissant" runat="server" Text="croissant" Checked="True" GroupName="rdTri"></asp:RadioButton>
<asp:RadioButton id="rdDécroissant" runat="server" Text="décroissant" GroupName="rdTri"></asp:RadioButton></P>
<P>
<asp:DataGrid id="DataGrid1" runat="server" BorderColor="#CC9966" BorderStyle="None" BorderWidth="1px"
BackColor="White" CellPadding="4" AllowPaging="True" PageSize="4" AllowSorting="True">
<SelectedItemStyle Font-Bold="True" ForeColor="#663399" BackColor="#FFCC66"></SelectedItemStyle>
<ItemStyle ForeColor="#330099" BackColor="White"></ItemStyle>
<HeaderStyle Font-Bold="True" ForeColor="#FFFFCC" BackColor="#990000"></HeaderStyle>
<FooterStyle ForeColor="#330099" BackColor="#FFFFCC"></FooterStyle>
<PagerStyle NextPageText="Suivant" PrevPageText="Précédent" HorizontalAlign="Center"
ForeColor="#330099" BackColor="#FFFFCC"></PagerStyle>
</asp:DataGrid></P>
<P>
<asp:LinkButton id="lnkRésultats" runat="server" EnableViewState="False">Retour au formulaire</asp:LinkButton></P>
</asp:Panel>
<asp:Panel id="vueErreurs" runat="server">
<P>Les erreurs suivantes se sont produites :</P>
<% =erreursHTML %>
<P>
<asp:LinkButton id="lnkErreurs" runat="server" EnableViewState="False">Retour vers le formulaire</asp:LinkButton></P>
</asp:Panel>
</form>
</body>
</HTML>
8.6.3. Configuration of DataGrid
Let’s take a closer look at the pagination of the [DataGrid] and option components, which we are encountering for the first time. In the code above, this pagination is controlled by the following attributes:
<asp:DataGrid id="DataGrid1" runat="server" PageSize="4" AllowPaging="True" ...>
...
<PagerStyle NextPageText="Suivant" PrevPageText="Précédent" ...></PagerStyle>
</asp:DataGrid></P>
enables pagination | |
four rows of data per page | |
The link text to go to the next page of the data source | |
The link text to go to the previous page of the data source |
This information can be entered directly in the attributes of the <asp:datagrid> tag. You can also use [WebMatrix]. In the properties window of [DataGrid], follow the link [Générateur de propriétés]:
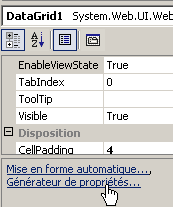
The following wizard appears:
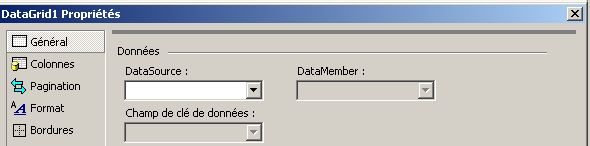
Select option [Pagination]:
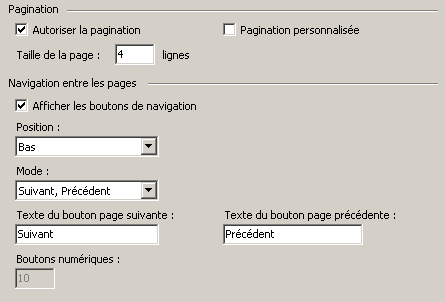
Above, we see the values of the pagination attributes for [DataGrid] from the presentation code.
Additionally, we enable sorting of the data on one of the columns of [DataGrid]. There are different ways to do this. One of them is to set the [AllowSorting=true] property in the properties window of [DataGrid]. You can also use the property generator. Regardless of the method used, this results in the presence of the [AllowSorting=true] attribute in the component’s <asp:DataGrid> tag:
<asp:DataGrid id="DataGrid1" runat="server" ... AllowPaging="True" PageSize="4" AllowSorting="True">
8.6.4. The controllers
The [global.asax, global.asax.vb] controller is as follows:
[global.asax]
[global.asax.vb]
Imports st.istia.univangers.fr
Imports System.Configuration

Public Class Global
    Inherits System.Web.HttpApplication

    Sub Application_Start(ByVal sender As Object, ByVal e As EventArgs)
        ' create a product object
        Dim objProduits As produits
        Try
            objProduits = New produits(ConfigurationSettings.AppSettings("OLEDBStringConnection"))
            ' put the object in the application
            Application("objProduits") = objProduits
            ' no error
            Application("erreur") = False
        Catch ex As Exception
            'there has been an error, we note it in the application
            Application("erreur") = True
            Application("message") = ex.Message
        End Try
    End Sub
End Class
When the application starts (Application_Start), we create a [produits] object and place it in the application so that it is available for all requests from all clients instances. If an exception occurs during this creation, it is logged in the application. The [Application_Start] procedure will only run once. After that, the [global.asax] controller will no longer be involved. The [main.aspx.vb] controller will then do the work:
Imports System.Collections
Imports Microsoft.VisualBasic
Imports System.Data
Imports st.istia.univangers.fr
Imports System
Imports System.Xml

Public Class main
    Inherits System.Web.UI.Page

    ' components page
    Protected WithEvents txtSelect As System.Web.UI.WebControls.TextBox
    Protected WithEvents RequiredFieldValidator1 As System.Web.UI.WebControls.RequiredFieldValidator
    Protected WithEvents txtPages As System.Web.UI.WebControls.TextBox
    Protected WithEvents RequiredFieldValidator2 As System.Web.UI.WebControls.RequiredFieldValidator
    Protected WithEvents RangeValidator1 As System.Web.UI.WebControls.RangeValidator
    Protected WithEvents btnExécuter As System.Web.UI.WebControls.Button
    Protected WithEvents vueFormulaire As System.Web.UI.WebControls.Panel
    Protected WithEvents lblSelect As System.Web.UI.WebControls.Label
    Protected WithEvents DataGrid1 As System.Web.UI.WebControls.DataGrid
    Protected WithEvents lnkRésultats As System.Web.UI.WebControls.LinkButton
    Protected WithEvents vueRésultats As System.Web.UI.WebControls.Panel
    Protected WithEvents lnkErreurs As System.Web.UI.WebControls.LinkButton
    Protected WithEvents vueErreurs As System.Web.UI.WebControls.Panel
    Protected WithEvents rdCroissant As System.Web.UI.WebControls.RadioButton
    Protected WithEvents rdDécroissant As System.Web.UI.WebControls.RadioButton
    ' data page
    Protected erreursHTML As String

    Private Sub Page_Load(ByVal sender As System.Object, ByVal e As System.EventArgs) Handles MyBase.Load
        ' check for application errors
        If CType(Application("erreur"), Boolean) Then
            ' the application has not initialized correctly
            Dim erreurs As New ArrayList
            erreurs.Add("Application momentanément indisponible (" + CType(Application("message"), String) + ")")
            afficheErreurs(erreurs, False)
            Exit Sub
        End If
        '1st request
        If Not IsPostBack Then
            ' the empty form is displayed
            afficheFormulaire()
        End If
    End Sub

    Private Sub afficheErreurs(ByVal erreurs As ArrayList, ByVal afficheLien As Boolean)
        ' displays the error view
        erreursHTML = ""
        For i As Integer = 0 To erreurs.Count - 1
            erreursHTML += "<li>" + erreurs(i).ToString + "</li>" + ControlChars.CrLf
        Next
        lnkErreurs.Visible = afficheLien
        ' the [errors] view is displayed
        vueErreurs.Visible = True
        vueFormulaire.Visible = False
        vueRésultats.Visible = False
    End Sub

    Private Sub afficheFormulaire()
        ' the [form] view is displayed
        vueFormulaire.Visible = True
        vueErreurs.Visible = False
        vueRésultats.Visible = False
    End Sub

    Private Sub afficheRésultats(ByVal sqlTexte As String, ByVal données As DataView)
        ' on initialise les contrôles
        lblSelect.Text = sqlTexte
        With DataGrid1
            .DataSource = données
            .PageSize = CType(txtPages.Text, Integer)
            .CurrentPageIndex = 0
            .DataBind()
        End With
        ' the [results] view is displayed
        vueRésultats.Visible = True
        vueFormulaire.Visible = False
        vueErreurs.Visible = False
    End Sub

    Private Sub btnExécuter_Click(ByVal sender As System.Object, ByVal e As System.EventArgs) Handles btnExécuter.Click
        ' valid page?
        If Not Page.IsValid Then
            afficheFormulaire()
            Exit Sub
        End If

        ' execute query SELECT customer
        Dim données As DataView
        Try
            données = CType(Application("objProduits"), produits).getDataSet(txtSelect.Text.Trim).Tables(0).DefaultView
        Catch ex As Exception
            Dim erreurs As New ArrayList
            erreurs.Add("erreur d'accès à la base de données (" + ex.Message + ")")
            afficheErreurs(erreurs, True)
            Exit Sub
        End Try
        ' all's well - the results are in
        afficheRésultats(txtSelect.Text.Trim, données)
        ' put the data in the session
        Session("données") = données
    End Sub

    Private Sub retourFormulaire(ByVal sender As System.Object, ByVal e As System.EventArgs) Handles lnkErreurs.Click, lnkRésultats.Click
        ' set of views
        vueErreurs.Visible = False
        vueFormulaire.Visible = True
        vueRésultats.Visible = False
    End Sub

    Private Sub DataGrid1_PageIndexChanged(ByVal source As Object, ByVal e As System.Web.UI.WebControls.DataGridPageChangedEventArgs) Handles DataGrid1.PageIndexChanged
        ' change page
        With DataGrid1
            .CurrentPageIndex = e.NewPageIndex
            .DataSource = CType(Session("données"), DataView)
            .DataBind()
        End With
    End Sub

    Private Sub DataGrid1_SortCommand(ByVal source As Object, ByVal e As System.Web.UI.WebControls.DataGridSortCommandEventArgs) Handles DataGrid1.SortCommand
        ' sort the dataview
        Dim données As DataView = CType(Session("données"), DataView)
        données.Sort = e.SortExpression + " " + CType(IIf(rdCroissant.Checked, "asc", "desc"), String)
        ' we display it
        With DataGrid1
            .CurrentPageIndex = 0
            .DataSource = données
            .DataBind()
        End With
    End Sub
End Class
When the [Page_Load] page loads, we first check whether the application was able to initialize correctly. If not, we display the [erreurs] view without a return link to the form, as this link is then unnecessary. In fact, only the [erreurs] view can be displayed if the application failed to initialize correctly. Otherwise, we display the [formulaire] view if this is the client’s first request. For the rest, we leave it to the reader to understand the code. We will focus only on three procedures: the [btnExécuter_Click] procedure, which runs when the user has requested execution of the SQL query entered in the [formulaire] view, the procedure [DataGrid1_PageIndexChanged], which is executed when theuser uses the links [Suivant] and [Précédent] in [DataGrid], and the procedure [DataGrid1_SortCommand], which is executed when the user clicks on a column header to sort the data inorder of that column. The direction of the sort, ascending or descending, is determined by the two sort radio buttons.
In procedure [btnExécuter_Click], we therefore begin by checking whether the page is valid or not. When procedure [btnExécuter_Click] runs, the checks related to the various validation controls on the page have already been performed. For each validation control, two attributes have been set:
set to true if the verified data is valid, to false otherwise | |
the error message if the verified data is invalid |
For the page itself, a [IsValid] attribute has been set. It is true only if all validation controls have their [IsValid] attribute set to true. If this is not the case, the [formulaire] view must be displayed. This view contains the validation controls that will display their [errorMessage] attribute. If the page is valid, the [produits] object created by [Application_Start] is used to obtain the [DataSet] corresponding to the execution of the SQL SELECT query. We convert this into a [DataView] object:
        Dim données As DataView
        Try
            données = CType(Application("objProduits"), produits).getDataSet(txtSelect.Text.Trim).Tables(0).DefaultView
...
We could have simply worked with [DataSet] and written:
        Dim données As DataSet
        Try
            données = CType(Application("objProduits"), produits).getDataSet(txtSelect.Text.Trim)
...
An object [DataSet] is essentially a set of tables linked by relationships. In our specific application, the [DataSet] obtained from the [produits] class contains only one table, the one resulting from the [select] statement. A table can be sorted, whereas a [DataSet] cannot; however, we are interested in sorting the obtained data. To work with the result table of [select], we could have written:
        Dim données As DataTable
        Try
            données = CType(Application("objProduits"), produits).getDataSet(txtSelect.Text.Trim).Tables(0)
...
The [DataTable] object, although representing a database table, does not have a sort method. To do this, you need a view of the table. A view is an object of type [DataView]. You can have different views of the same table using filters. A table has a default view, which is the one where no filters are defined. It therefore represents the entire table. This default view is obtained via [DataTable.DefaultView]. A view can be sorted using its [sort] property, which we will discuss later.
If retrieving the [DataSet] from the [produits] class is successful, the [résultats] view is displayed; otherwise, the [erreurs] view is displayed. The [résultats] view is displayed by the [afficheRésultats] procedure, to which two parameters are passed:
- the text to be placed in the [lblSelect] label
- the [DataView] to be linked to [DataGrid1]
This example demonstrates the great flexibility of the [DataGrid] component. It can recognize the structure of the [DataView] to which it is linked and adapt to it. Finally, the [btnExécuter_Click] procedure stores the [DataView] it has just obtained in the user’s session so that it is available when the user requests other pages from the same [DataView].
The [DataGrid1_PageIndexChanged] procedure is executed when the user uses the [Suivant] and [Précédent] links from the [DataGrid]. It receives two parameters:
Private Sub DataGrid1_PageIndexChanged(ByVal source As Object, ByVal e As System.Web.UI.WebControls.) Handles DataGrid1.PageIndexChanged
the object that triggered the event—in this case, one of the links [Suivant] or [Précédent] | |
information about the event. The e.NewPageIndex attribute is the page number to display in response to the client's request |
The complete code for the event handler is as follows:
    Private Sub DataGrid1_PageIndexChanged(ByVal source As Object, ByVal e As System.Web.UI.WebControls.DataGridPageChangedEventArgs) Handles DataGrid1.PageIndexChanged
        ' change page
        With DataGrid1
            .CurrentPageIndex = e.NewPageIndex
            .DataSource = CType(Session("données"), DataView)
            .DataBind()
        End With
    End Sub
The [DataGrid] component has a [CurrentPageIndex] attribute that specifies the page number it is displaying or will display. We assign the value [NewPageIndex] from the parameter [e] to this attribute. The [DataGrid] is then associated with the [DataView] that had been stored in the session by the [btnExécuter_Click] procedure.
One might wonder whether [DataGrid] needs the attribute [EnableViewState=true] since its content is calculated by the code each time the page is reloaded. One might think not. However, if [DataGrid] has the attribute [EnableViewState=false], we observe that the event [DataGrid1.PageIndexChanged] is never triggered. This is why we left [EnableViewState=true]. We know that this causes the content of [DataGrid] to be placed in the hidden field [__VIEWSTATE] on the page. This can cause significant page overload if [DataGrid] is large. If this is a problem, you can manage pagination yourself without using the automatic pagination of [DataGrid].
The [DataGrid1_SortCommand] procedure is executed when the user clicks on the title of one of the columns displayed by the [DataGrid] to request that the data be sorted in the order of that column. It receives two parameters:
Private Sub DataGrid1_SortCommand(ByVal source As Object, ByVal e As System.Web.UI.WebControls.DataGridSortCommandEventArgs) Handles DataGrid1.SortCommand
the object that triggered the event—in this case, one of the links [Suivant] or [Précédent] | |
information about the event. The [e.SortExpression] attribute is the name of the column clicked for sorting |
The complete code for the event handler is as follows:
    Private Sub DataGrid1_SortCommand(ByVal source As Object, ByVal e As System.Web.UI.WebControls.DataGridSortCommandEventArgs) Handles DataGrid1.SortCommand
        ' sort the dataview
        Dim données As DataView = CType(Session("données"), DataView)
        données.Sort = e.SortExpression + " " + CType(IIf(rdCroissant.Checked, "asc", "desc"), String)
        ' we display it
        With DataGrid1
            .CurrentPageIndex = 0
            .DataSource = données
            .DataBind()
        End With
    End Sub
We retrieve the [DataView] displayed by [DataGrid] in the current session. It was placed there by procedure [btnExécuter_Click]. The [DataView] component has a [Sort] property to which the sort expression is assigned. This expression follows the syntax [select ... order by expr1, expr2, ...], where each [expri] can be followed by the keyword [asc] for ascending sort or [desc] for descending sort. The expression [order by] used here is [order by colonne asc/desc]. The property [e.SortExpression] gives us the name of the column in [DataGrid] that was clicked for sorting. The string [asc/desc] is set based on the values of the radio buttons in the [rdTri] group. Once the sort expression for [DataView] is set, [DataGrid] is associated with it. We place [DataGrid] on its first page.
8.7. DataList component and data binding
We will now focus on the [DataList] component. It offers more formatting options than the [DataGrid] but is less flexible. Thus, it cannot automatically adapt to the data source to which it is linked. This adaptation must be done via code if desired. If the structure of the data source is known in advance, then this component offers formatting options that may make it preferable to [DataGrid].
8.7.1. Application
To illustrate the use of [DataList], we are building a MVC application similar to the previous one:
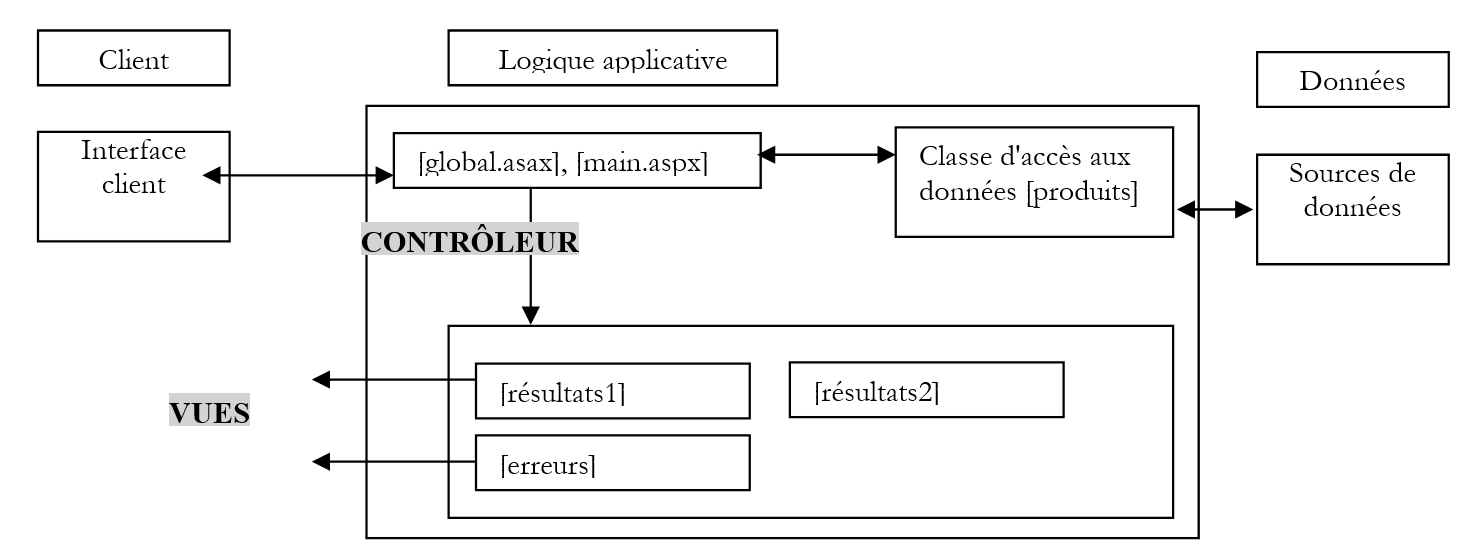 |
The three views will be incorporated into the presentation code of the [main.aspx] controller as containers. Therefore, this application has a single [main.aspx] page.
8.7.2. Business classes
The [produits] class is the same as before.
8.7.3. The views
When the user makes their first request to the application, they receive the following [résultats1] view:
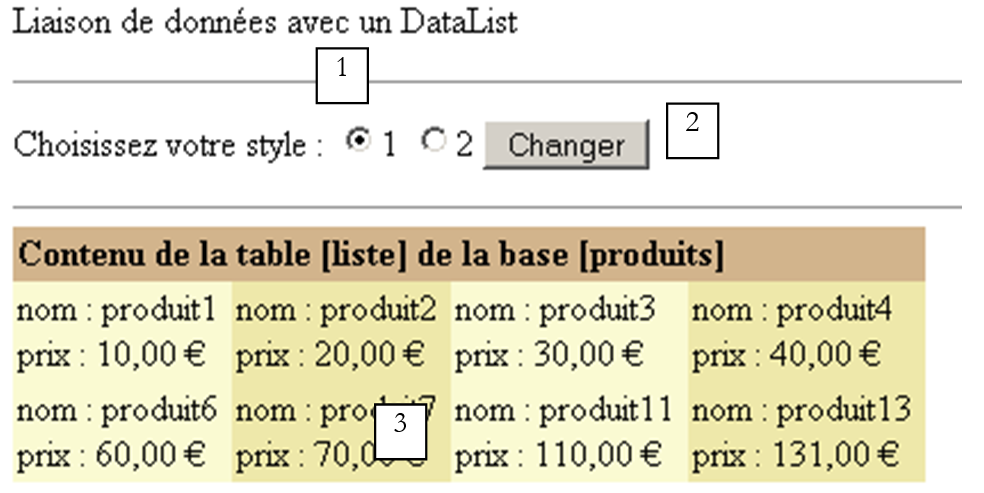 |
No. | Name | type | properties | role |
1 | RadioButton | EnableViewState=false | allows you to choose one of two styles for [DataList] | |
2 | Button | EnableViewState=false | button [submit] | |
3 | DataList | EnableViewState=true | Data list display field |
If the user selects style #2, they see the following view: [results2]
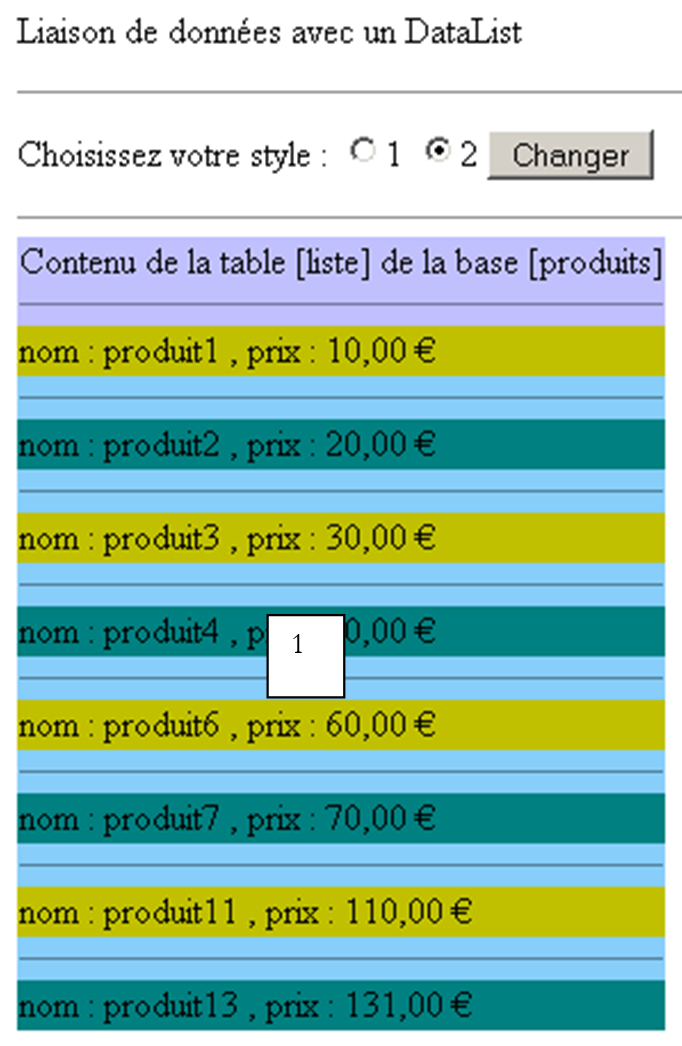 |
No. | Name | Type | properties | role |
1 | DataList | EnableViewState=true | Data list display field |
The view [erreurs] reports a problem accessing the data source:
 |
No. | Name | type | properties | role |
1 | variable | HTML code required to display errors |
The three views of the application are three different containers (panels) within the same page [main.aspx]. Its presentation code is as follows:
<%@ Page src="main.aspx.vb" inherits="main" autoeventwireup="false" Language="vb" %>
<HTML>
    <HEAD>
    </HEAD>
    <body>
        <P>Liaison de données avec un DataList</P>
        <HR width="100%" SIZE="1">
        <form runat="server" ID="Form1">
            <asp:Panel Runat="server" ID="bandeau">
                <P>Choisissez votre style :
                    <asp:RadioButton id="RadioButton1" runat="server" EnableViewState="False" Text="1" GroupName="rdstyle"
                        Checked="True"></asp:RadioButton>
                    <asp:RadioButton id="RadioButton2" runat="server" EnableViewState="False" Text="2" GroupName="rdstyle"></asp:RadioButton>
                    <asp:Button id="btnChanger" runat="server" EnableViewState="False" Text="Changer"></asp:Button></P>
                <HR width="100%" SIZE="1">
            </asp:Panel>
            <asp:Panel id="vueRésultats1" runat="server">
                <P>
                    <asp:DataList id="DataList1" runat="server" BorderColor="Tan" BorderWidth="1px" BackColor="LightGoldenrodYellow"
                        CellPadding="2" RepeatDirection="Horizontal" RepeatColumns="4" ForeColor="Black">
                        <SelectedItemStyle ForeColor="GhostWhite" BackColor="DarkSlateBlue"></SelectedItemStyle>
                        <HeaderTemplate>
                            Contenu de la table [liste] de la base [produits]
                        </HeaderTemplate>
                        <AlternatingItemStyle BackColor="PaleGoldenrod"></AlternatingItemStyle>
                        <ItemTemplate>
                            nom :
                            <%# Container.DataItem("name") %>
                            <br>
                            prix :
                            <%# databinder.eval(Container.DataItem,"prix","{0:C}") %>
                            <br>
                        </ItemTemplate>
                        <FooterStyle BackColor="Tan"></FooterStyle>
                        <HeaderStyle Font-Bold="True" BackColor="Tan"></HeaderStyle>
                    </asp:DataList></P>
            </asp:Panel>
            <asp:Panel id="vueRésultats2" runat="server">
                <P>
                    <asp:DataList id="DataList2" runat="server">
                        <HeaderTemplate>
                            Contenu de la table [liste] de la base [produits]
                            <HR width="100%" SIZE="1">
                        </HeaderTemplate>
                        <AlternatingItemStyle BackColor="Teal"></AlternatingItemStyle>
                        <SeparatorStyle BackColor="LightSkyBlue"></SeparatorStyle>
                        <ItemStyle BackColor="#C0C000"></ItemStyle>
                        <ItemTemplate>
                            nom :
                            <%# Container.DataItem("name") %>
                            , prix :
                            <%# databinder.eval(Container.DataItem,"prix","{0:C}") %>
                            <BR>
                        </ItemTemplate>
                        <SeparatorTemplate>
                            <HR width="100%" SIZE="1">
                        </SeparatorTemplate>
                        <HeaderStyle BackColor="#C0C0FF"></HeaderStyle>
                    </asp:DataList></P>
            </asp:Panel>
            <asp:Panel id="vueErreurs" runat="server">
                <P>Les erreurs suivantes se sont produites :</P>
                <%= erreursHTML %>
            </asp:Panel>
        </form>
    </body>
</HTML>
8.7.4. Configuring [DataList] Components
Let’s take a look at the various attributes of a [DataList] component. There are many of them, and we are only presenting a small selection here. You can define up to seven display templates within a [DataList]:
[DataList] header template | |
template for the rows displaying the items in the associated data list. Only this template is required. | |
To visually differentiate between successive displayed items, two templates can be used: ItemTemplate for item n, AlternatingItemTemplate for item n+1 | |
Template for the selected item in [DataList] | |
Template for the separator between two elements in [DataList] | |
A [DataList] allows you to modify the values it displays. [EditItemTemplate] is the template for an element of [DataList] for which you are in "edit" mode | |
footer template for [DataList] |
The [DataList1] component was created using [WebMatrix]. In its properties window, the [Mise en forme automatique] link was selected:
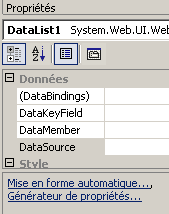 | 1234567 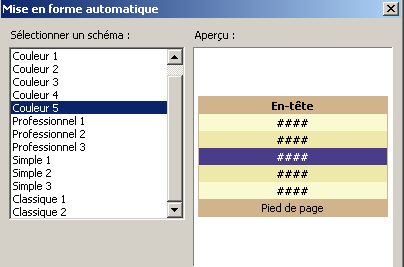 |
Above, the schema [Couleur 5] will generate a [DataList] with styles for the following templates: HeaderTemplate (1), ItemTemplate (2, 6), AlternatingTemplate (3, 5), SelectedItemTemplate (4), FooterTemplate (7). The generated code is as follows:
                    <asp:DataList id="DataList1" runat="server" BorderColor="Tan" BorderWidth="1px" BackColor="LightGoldenrodYellow"
                        CellPadding="2" ForeColor="Black">
                        <SelectedItemStyle ForeColor="GhostWhite" BackColor="DarkSlateBlue"></SelectedItemStyle>
                        <AlternatingItemStyle BackColor="PaleGoldenrod"></AlternatingItemStyle>
                        <FooterStyle BackColor="Tan"></FooterStyle>
                        <HeaderStyle Font-Bold="True" BackColor="Tan"></HeaderStyle>
                    </asp:DataList></P>
No templates have been defined. It's up to us to do so. We define the following templates:
| |
|
Note that the [ItemTemplate] template is used to display the elements of the data source linked to [DataList]. This data source is a set of data rows, each containing one or more values. The current row of the data source is represented by the [Container.DataItem] object. Such a row has columns. [Container.DataItem("col1")] is the value of the "col1" column of the current row. To include this value in the presentation code, we write <%# Container.DataItem("col") %>. Sometimes, we want to display an element of the current row in a special format. Here, we want to display the "price" column of the current row in euros. We then use the function [DataBinder.Eval], which accepts three parameters:
- the current row [Container.DataItem]
- the name of the column to format
- the formatting string in the form {0:format}, where [format] is one of the formats accepted by the [string.format] method.
Thus, the code <%# DataBinder.Eval(Container.DataItem,"price",{0:C}) %> will display the [prix] column of the current row in monetary form (format C=Currency).
We will therefore have a [DataList] that will look like this:
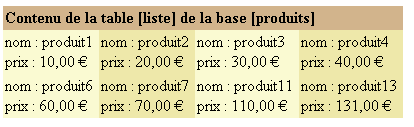
Above, the data has been arranged with four entries per row. This is achieved using the following attributes for [DataList]:
Horizontal | |
desired number of columns |
Ultimately, the code for [DataList1] is the one presented in the layout code a little earlier. We leave it to the reader to examine the layout code for [DataList2]. As with the [DataGrid] component, most of the properties of [DataList] can be set using a wizard in [WebMatrix]. To do this, use the [Générateur de propriétés] link in the [DataList] properties window:
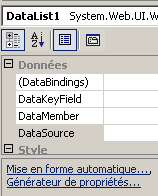 | 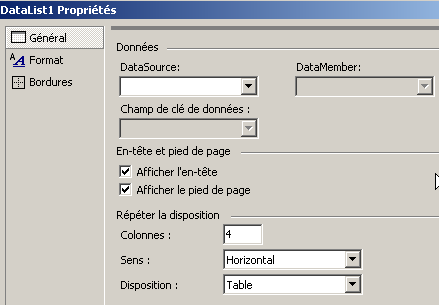 |
8.7.5. The controllers
The [global.asax, global.asax.vb] controller is as follows:
[global.asax]
[global.asax.vb]
Imports System
Imports System.Web
Imports System.Web.SessionState
Imports st.istia.univangers.fr
Imports System.Configuration
Imports System.Data
Imports System.Collections

Public Class Global
    Inherits System.Web.HttpApplication

    Sub Application_Start(ByVal sender As Object, ByVal e As EventArgs)
        ' create a product object
        Try
            Dim données As DataSet = New produits(ConfigurationSettings.AppSettings("OLEDBStringConnection")).getDataSet("select * from LISTE")
            ' put the object in the application
            Application("données") = données
            ' no error
            Application("erreur") = False
        Catch ex As Exception
            'there has been an error, we note it in the application
            Application("erreur") = True
            Application("message") = ex.Message
        End Try
    End Sub
End Class
When the application starts (Application_Start), we instantiate a [dataset] from the business class [produits] and place it in the application so that it is available for all requests from all clients instances. If an exception occurs during this creation, it is logged in the application. The procedure [Application_Start] will run only once. After that, the [global.asax] controller will no longer be involved. The [main.aspx.vb] controller will then do the work:
Imports System.Collections
Imports Microsoft.VisualBasic
Imports System.Data
Imports st.istia.univangers.fr
Imports System
Imports System.Xml

Public Class main
    Inherits System.Web.UI.Page

    ' components page
    Protected WithEvents vueErreurs As System.Web.UI.WebControls.Panel
    Protected WithEvents DataList1 As System.Web.UI.WebControls.DataList
    Protected WithEvents DataList2 As System.Web.UI.WebControls.DataList
    Protected WithEvents vueRésultats1 As System.Web.UI.WebControls.Panel
    Protected WithEvents vueRésultats2 As System.Web.UI.WebControls.Panel
    Protected WithEvents RadioButton1 As System.Web.UI.WebControls.RadioButton
    Protected WithEvents RadioButton2 As System.Web.UI.WebControls.RadioButton
    Protected WithEvents btnChanger As System.Web.UI.WebControls.Button
    Protected WithEvents bandeau As System.Web.UI.WebControls.Panel
    ' data page
    Protected erreursHTML As String

    Private Sub Page_Load(ByVal sender As System.Object, ByVal e As System.EventArgs) Handles MyBase.Load
        ' check for application errors
        If CType(Application("erreur"), Boolean) Then
            ' the application has not initialized correctly
            Dim erreurs As New ArrayList
            erreurs.Add("Application momentanément indisponible (" + CType(Application("message"), String) + ")")
            afficheErreurs(erreurs, False)
            Exit Sub
        End If
        '1st request
        If Not IsPostBack Then
            ' on initialise les contrôles
            With DataList1
                .DataSource = CType(Application("données"), DataSet)
                .DataBind()
            End With
            With DataList2
                .DataSource = CType(Application("données"), DataSet)
                .DataBind()
            End With
            ' the empty form is displayed
            afficheRésultats(True, False)
        End If
    End Sub

    Private Sub afficheErreurs(ByVal erreurs As ArrayList, ByVal afficheLien As Boolean)
        ' displays the error view
        erreursHTML = ""
        For i As Integer = 0 To erreurs.Count - 1
            erreursHTML += "<li>" + erreurs(i).ToString + "</li>" + ControlChars.CrLf
        Next
        ' the [errors] view is displayed
        vueErreurs.Visible = True
        vueRésultats1.Visible = False
        vueRésultats2.Visible = False
        bandeau.Visible = False
    End Sub

    Private Sub afficheRésultats(ByVal visible1 As Boolean, ByVal visible2 As Boolean)
        ' the [results] view is displayed
        vueRésultats1.Visible = visible1
        vueRésultats2.Visible = visible2
        vueErreurs.Visible = False
    End Sub

    Private Sub btnChanger_Click(ByVal sender As System.Object, ByVal e As System.EventArgs) Handles btnChanger.Click
        ' change the style
        afficheRésultats(RadioButton1.Checked, RadioButton2.Checked)
    End Sub
End Class
8.8. Repeater Component and Data Binding
The [Repeater] component allows you to repeat the HTML code for each item in a data list. Suppose you want to display a list of errors in the following format:
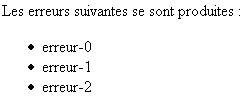
We have already encountered this problem and solved it by including a variable in the presentation code in the form <ul><% =erreursHTML %></ul>, where the value of erreursHTML is calculated by the controller. This value contains the code HTML, which represents a list. The drawback is that if you want to modify the presentation of this list (HTML), you are forced to go into the controller section, which goes against the controller/presentation separation. The [Repeater] component provides a solution. As with [DataList], we can define the templates <HeaderTemplate> for the header, <ItemTemplate> for the current item in the data list, and <FooterTemplate> for the end of the data. Here, we could have the following definition for the [Repeater] component:
            <asp:Repeater id="Repeater1" runat="server" EnableViewState="False">
                <HeaderTemplate>
                    Les erreurs suivantes se sont produites :
                    <ul>
                </HeaderTemplate>
                <ItemTemplate>
                    <li>
                        <%# Container.DataItem %>
                    </li>
                </ItemTemplate>
                <FooterTemplate>
                    </ul>
                </FooterTemplate>
            </asp:Repeater>
Note that [Container.DataItem] represents a row of data if the data source has multiple columns. It represents a single data point if the source has only one column. This will be the case here. For example, we are building the following application:
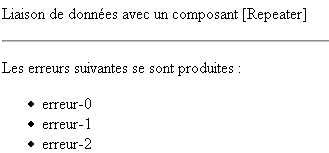
The page layout code is as follows:
<html>
<head>
</head>
<body>
    <form runat="server">
        <p>
            Liaison de données avec un composant [Repeater]
        </p>
        <hr />
        <p>
            <asp:Repeater id="Repeater1" runat="server" EnableViewState="False">
                <ItemTemplate>
                    <li>
                        <%# Container.DataItem %>
                    </li>
                </ItemTemplate>
                <HeaderTemplate>
                    Les erreurs suivantes se sont produites :
                    <ul>
                </HeaderTemplate>
                <FooterTemplate>
                    </ul>
                </FooterTemplate>
            </asp:Repeater>
        </p>
    </form>
</body>
</html>
The control code is as follows:
<%@ Page Language="VB" %>
<script runat="server">

     ' procedure executed when the page is loaded
    Sub page_Load(sender As Object, e As EventArgs)
        if not IsPostBack then
          ' create a data source
          with Repeater1
              .DataSource=createDataSource
              .DataBind
          end with
        end if
    End Sub

    function createDataSource as ArrayList
      ' create an arraylist
      dim erreurs as new ArrayList
      dim i as integer
      for i=0 to 5
        erreurs.add("erreur-"+i.ToString)
      next
      return erreurs
    end function

</script>
<html>
...
</html>
In response to the client's first request, we associate an object [ArrayList] with the component [Repeater], which is supposed to represent a list of errors.
8.9. Application
Here, we are revisiting an application that has already been implemented using server components. The application allows users to perform tax calculation simulations. It relies on a [impot] class, which we will not discuss further here. This class requires data that it retrieves from a OLEDB data source. For this example, we will use a ACCESS data source. We are introducing the following new features in this new version:
- the use of validation components to verify data validity
- the use of server components linked to data sources for displaying results
8.9.1. The MVC structure of the application
The MVC structure of the application is as follows:
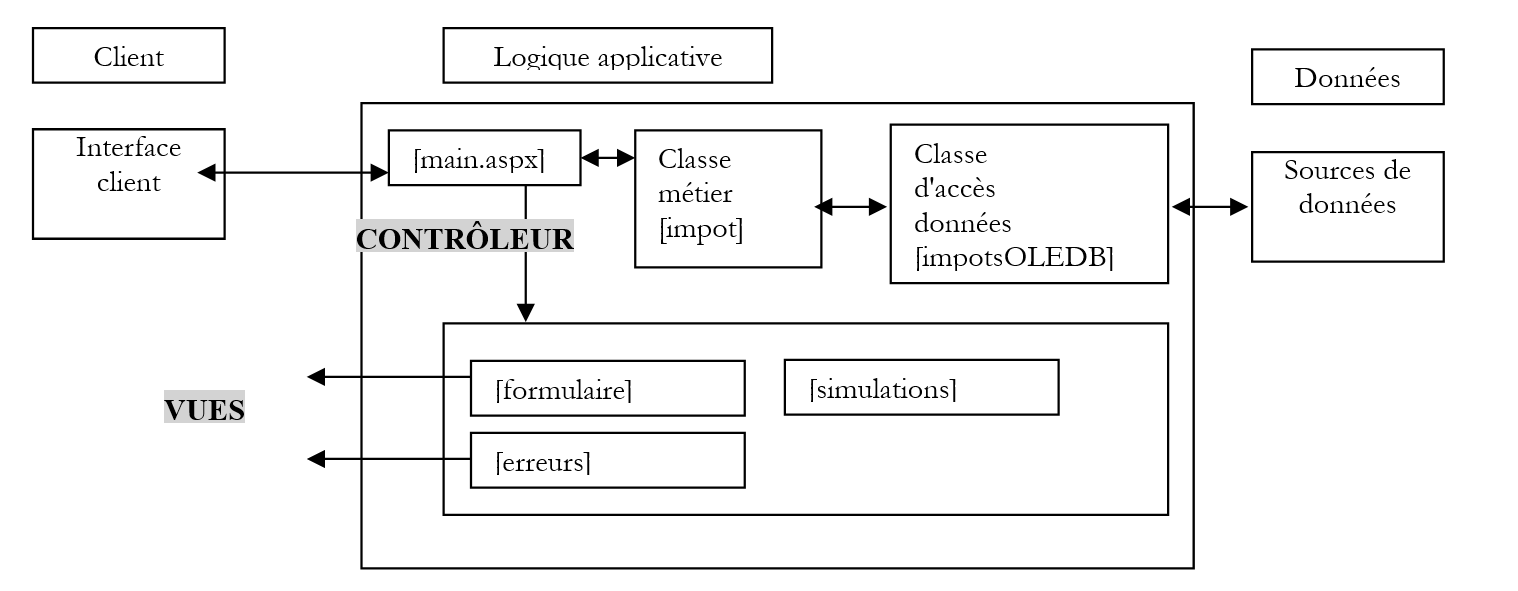 |
The three views will be incorporated into the presentation code of the [main.aspx] controller as containers. Therefore, this application has a single page, [main.aspx].
8.9.2. The application views
The [formulaire] view is the form for entering information used to calculate a user’s tax:
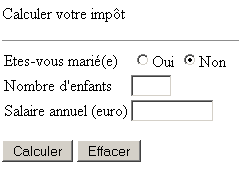
The user fills out the form:
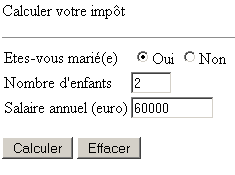
They use the [Envoyer] button to request their tax calculation. They see the following [simulations] view:
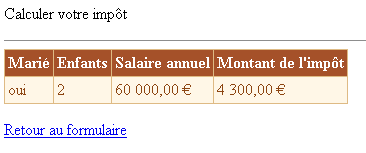
They return to the form via the link above. They find it in the state in which they entered it. They may make data entry errors:
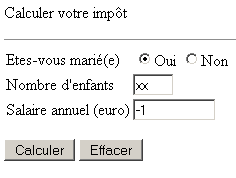
These are flagged on the [formulaire] view:
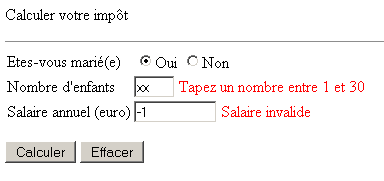
The user then corrects the errors. He can run new simulations:
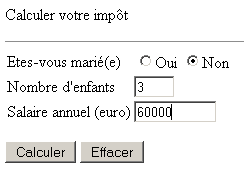
They then see the [simulations] view with one more simulation:
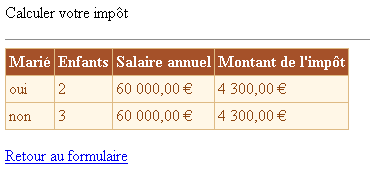
Finally, if the data source is unavailable, the user is notified of this in the [erreurs] view:

8.9.2.1. The presentation code
Recall that the [main.aspx] page brings together all the views. It is a single form with three containers:
- [panelform] for the [formulaire] view
- [panelerreurs] for view [erreurs]
- [panelsimulations] for view [simulations]
We will now detail the components of these three containers. The [panelform] container has the following visual representation:
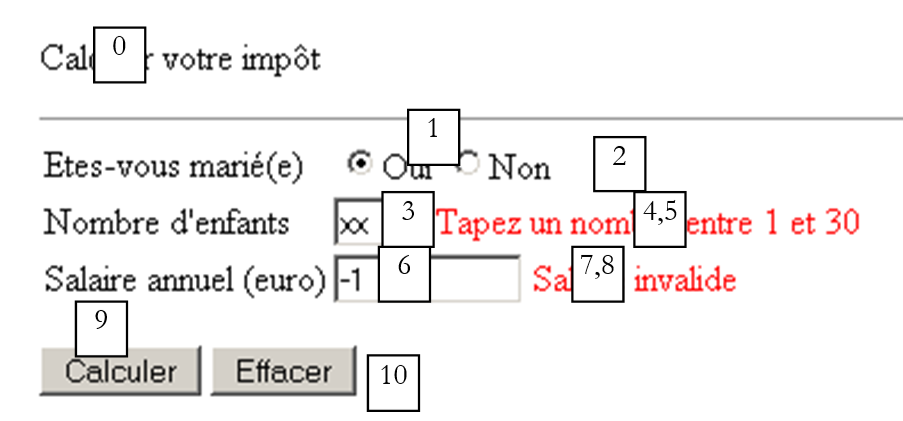 |
No. | name | type | properties | role |
Panel | form view | |||
RadioButton | GroupName=rdmarie | radio buttons | ||
CustomValidator | ErrorMessage=You have not specified your marital status EnableClientScript=false | checks that the client program has sent the expected marital status | ||
TextBox | number of children | |||
RequiredFieldValidator | ErrorMessage=Please enter the number of children ControlToValidate=txtChildren | checks that the field [txtEnfants] is not empty | ||
RangeValidator | ErrorMessage=Enter a number between 1 and 30 ControlToValidate=txtChildren | checks that the field [txtEnfants] is within the range [1,30] | ||
TextBox | EnableViewState=true | annual salary | ||
RequiredFieldValidator | ControlToValidate=txtSalary ErrorMessage=Enter your salary amount | checks that the field [txtSalaire] is not empty | ||
RegularExpressionValidator | ControlToValidate=txtSalary ErrorMessage=Invalid salary RegularExpression=\s*\d+\s* | checks that the [txtSalaire] field is a sequence of digits | ||
Button | ValidationCauses=true | [submit] button on the form - starts the tax calculation | ||
Button | CausesValidation=false | [submit] button on the form - clears the form |
One might be surprised by the [cvMarié] control responsible for verifying that the user has indeed checked one of the two radio buttons. Indeed, it cannot be otherwise if the user is using the form sent by the server. Since nothing can guarantee this, we are forced to verify all posted parameters. Note also the [CausesValidation=false] attribute of the [btnEffacer] button. When the user clicks this button, the posted data should not be checked, as it will be ignored.
All components of the container have the property [EnableViewState=false] except [panelForm, txtEnfants, txtSalaire, rdOui, rdNon]. The container [panelerreurs] has the following visual representation:
 |
No. | name | type | properties | role |
Panel | EnableViewState=false | error view | ||
Repeater | EnableViewState=false | displays a list of errors |
The [rptErreurs] component is defined as follows:
                <asp:Repeater id="rptErreurs" runat="server" EnableViewState="False">
                    <ItemTemplate>
                        <li>
                            <%# Container.Dataitem%>
                        </li>
                    </ItemTemplate>
                    <HeaderTemplate>
                        Les erreurs suivantes se sont produites
                        <ul>
                    </HeaderTemplate>
                    <FooterTemplate>
                        </ul>
                    </FooterTemplate>
                </asp:Repeater>
The data list associated with the [rptErreurs] component will be a [ArrayList] object containing a list of error messages. Thus, in the code above, <%# Container.Dataitem%> refers to the current error message. The [panelsimulations] container has the following visual representation:
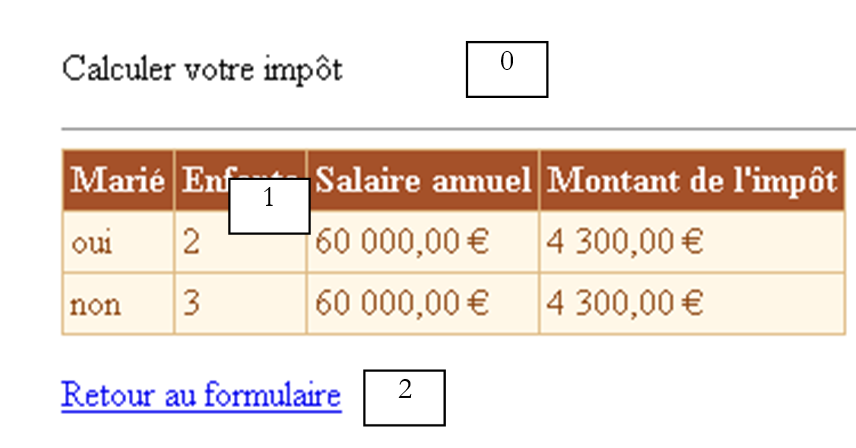 |
No. | name | type | properties | role |
Panel | EnableViewState=false | simulation view | ||
LinkButton | EnableViewState=false | link to the form | ||
DataGrid | EnableViewState=false | responsible for displaying simulations placed in an object [DataTable] |
The [dgSimulations] component is configured as follows under [Webmatrix]. In the properties window of [dgSimulations], we select the link [Mise en forme automatique] and select the schema [Couleur 3]:
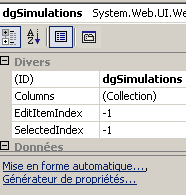 | 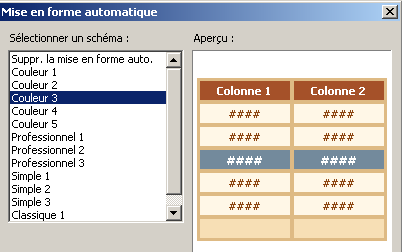 |
Then, still in the properties window for [dlgSimulations], we select the link [Générateur de propriétés]. We request that the column headers be displayed:
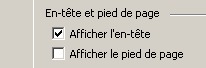
We select option and [Colonnes] to define the four columns of [DataGrid]:
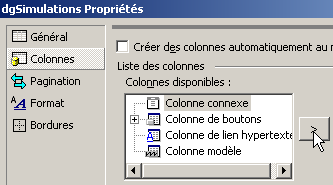
We uncheck the [Créer des colonnes automatiquement ...] entry. We will define the four columns of [DataGrid] ourselves. This will be associated with a [DataTable] object containing four columns named "married," "children," "salary," and "tax," respectively. To create a column in [DataGrid], we select option and [Colonnes connexe] and use the create button as shown above. A column is created, and we can define its properties. The first column of the simulation table will contain the "married" column from the [DataTable] object, which will be associated with [DataGrid]. This first column of [DataGrid] is defined as follows in the wizard:
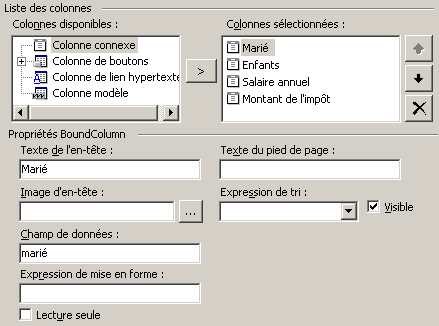
column title, here "Married" | |
Name of the column in the data source that will be displayed by this column in [DataGrid]. Here, it is the "married" column of [DataTable]. |
The second column is defined as follows:
Children | |
children |
The third column is defined as follows:
Annual salary | |
salary | |
{0:C} - currency display to obtain the euro sign |
The fourth column is defined as follows:
Tax amount | |
tax | |
{0:C} - currency display to obtain the euro sign |
We place the presentation code and the control code in two separate files. The first will be in [main.aspx] and the second in [main.aspx.vb]. The code for [main.aspx] is as follows:
<%@ page src="main.aspx.vb" inherits="main" AutoEventWireUp="false" %>
<HTML>
<HEAD>
<title>Calculer votre impôt</title>
</HEAD>
<body>
<P>Calculer votre impôt</P>
<HR width="100%" SIZE="1">
<FORM id="Form1" runat="server">
<asp:panel id="panelform" Runat="server">
<TABLE id="Table1" cellSpacing="1" cellPadding="1" border="0">
<TR>
<TD height="19">Etes-vous marié(e)</TD>
<TD height="19">
<asp:RadioButton id="rdOui" runat="server" GroupName="rdMarie"></asp:RadioButton>Oui
<asp:RadioButton id="rdNon" runat="server" GroupName="rdMarie" Checked="True"></asp:RadioButton>Non
<asp:CustomValidator id="cvMarie" runat="server" ErrorMessage="Vous n'avez pas indiqué votre état marital"
Display="Dynamic" EnableClientScript="False" Visible="False" EnableViewState="False"></asp:CustomValidator></TD>
</TR>
<TR>
<TD>Nombre d'children</TD>
<TD>
<asp:TextBox id="txtEnfants" runat="server" Columns="3" MaxLength="3"></asp:TextBox>
<asp:RequiredFieldValidator id="rfvEnfants" runat="server" ErrorMessage="Indiquez le nombre d'enfants" Display="Dynamic"
ControlToValidate="txtEnfants" EnableViewState="False"></asp:RequiredFieldValidator>
<asp:RangeValidator id="rvEnfants" runat="server" ErrorMessage="Tapez un nombre entre 1 et 30" Display="Dynamic"
ControlToValidate="txtEnfants" Type="Integer" MaximumValue="30" MinimumValue="0" EnableViewState="False"></asp:RangeValidator></TD>
</TR>
<TR>
<TD>Salaire annuel (euro)</TD>
<TD>
<asp:TextBox id="txtSalaire" runat="server" Columns="10" MaxLength="10"></asp:TextBox>
<asp:RequiredFieldValidator id="rfvSalaire" runat="server" ErrorMessage="Indiquez le montant de votre salaire"
Display="Dynamic" ControlToValidate="txtSalaire" EnableViewState="False"></asp:RequiredFieldValidator>
<asp:RegularExpressionValidator id="revSalaire" runat="server" ErrorMessage="Salaire invalide" Display="Dynamic"
ControlToValidate="txtSalaire" ValidationExpression="\s*\d+\s*" EnableViewState="False"></asp:RegularExpressionValidator></TD>
</TR>
</TABLE>
<P>
<asp:Button id="btnCalculer" runat="server" Text="Calculer"></asp:Button>
<asp:Button id="btnEffacer" runat="server" Text="Effacer" CausesValidation="False"></asp:Button></P>
</asp:panel>
<asp:panel id="panelerreurs" runat="server" EnableViewState="False">
<asp:Repeater id="rptErreurs" runat="server" EnableViewState="False">
<ItemTemplate>
<li>
<%# Container.Dataitem%>
</li>
</ItemTemplate>
<HeaderTemplate>
Les erreurs suivantes se sont produites
<ul>
</HeaderTemplate>
<FooterTemplate>
</ul>
</FooterTemplate>
</asp:Repeater>
</asp:panel>
<asp:panel id="panelsimulations" runat="server" EnableViewState="False">
<P>
<asp:DataGrid id="dgSimulations" runat="server" BorderColor="#DEBA84" BorderStyle="None" CellSpacing="2"
BorderWidth="1px" BackColor="#DEBA84" CellPadding="3" AutoGenerateColumns="False" EnableViewState="False">
<SelectedItemStyle Font-Bold="True" ForeColor="White" BackColor="#738A9C"></SelectedItemStyle>
<ItemStyle ForeColor="#8C4510" BackColor="#FFF7E7"></ItemStyle>
<HeaderStyle Font-Bold="True" ForeColor="White" BackColor="#A55129"></HeaderStyle>
<FooterStyle ForeColor="#8C4510" BackColor="#F7DFB5"></FooterStyle>
<Columns>
<asp:BoundColumn DataField="marié" HeaderText="Marié"></asp:BoundColumn>
<asp:BoundColumn DataField="enfants" HeaderText="Enfants"></asp:BoundColumn>
<asp:BoundColumn DataField="salaire" HeaderText="Salaire annuel" DataFormatString="{0:C}"></asp:BoundColumn>
<asp:BoundColumn DataField="impôt" HeaderText="Montant de l'impôt" DataFormatString="{0:C}"></asp:BoundColumn>
</Columns>
<PagerStyle HorizontalAlign="Center" ForeColor="#8C4510" Mode="NumericPages"></PagerStyle>
</asp:DataGrid></P>
<P>
<asp:LinkButton id="lnkForm2" runat="server" EnableViewState="False">Retour au formulaire</asp:LinkButton></P>
</asp:panel>
</FORM>
</body>
</HTML>
8.9.3. The application control code
The application control code is distributed across the files [global.asax.vb] and [main.aspx.vb]. The file [global.asax] is defined as follows:
The file [global.asax.vb] is as follows:
Imports System
Imports System.Web
Imports System.Web.SessionState
Imports st.istia.univangers.fr
Imports System.Configuration
Imports System.Collections
Imports System.Data

Public Class Global
    Inherits System.Web.HttpApplication

    Sub Application_Start(ByVal sender As Object, ByVal e As EventArgs)
        ' create an impot object
        Dim objImpot As impot
        Try
            objImpot = New impot(New impotsOLEDB(ConfigurationSettings.AppSettings("chaineConnexion")))
            ' put the object in the application
            Application("objImpot") = objImpot
            ' no error
            Application("erreur") = False
        Catch ex As Exception
            'there has been an error, we note it in the application
            Application("erreur") = True
            Application("message") = ex.Message
        End Try
    End Sub

    Sub Session_Start(ByVal sender As Object, ByVal e As EventArgs)
        ' start of session - create a list of empty simulations
        Dim simulations As New DataTable("simulations")
        simulations.Columns.Add("marié", Type.GetType("System.String"))
        simulations.Columns.Add("enfants", Type.GetType("System.String"))
        simulations.Columns.Add("salaire", Type.GetType("System.Int32"))
        simulations.Columns.Add("impôt", Type.GetType("System.Int32"))
        Session.Item("simulations") = simulations
    End Sub
End Class
When the application starts (first request made to the application), the [Application_Start] procedure is executed. It attempts to create an object of type [impot], taking its data from a source of type OLEDB. The reader is invited to refer to Chapter 5, where this class was defined, if they have forgotten it. The construction of the [impot] object may fail if the data source is not available. In this case, the error is stored in the application so that all subsequent queries know that it could not initialize correctly. If the creation is successful, the [impot] object created is also stored in the application. It will be used by all tax calculation queries. When a customer makes their first request, a session is created for them by procedure [Application_Start]. This session is intended to store the various tax calculation simulations they will perform. These will be stored in a [DataTable] object associated with the session key "simulations". When the session starts, this key is associated with an empty [DataTable] object, the structure of which has been defined. The information required by the application is stored in its configuration file [wenConfig]:
<?xml version="1.0" encoding="utf-8" ?>
<configuration>
    <appSettings>
        <add key="chaineConnexion" value="Provider=Microsoft.Jet.OLEDB.4.0; Ole DB Services=-4; Data Source=D:\data\devel\aspnet\poly\webforms2\vs\impots6\impots.mdb" />
    </appSettings>
</configuration>
The key [chaineConnexion] refers to the connection string for the source OLEDB. The other part of the control code is located in [main.aspx.vb]:
Imports System.Collections
Imports Microsoft.VisualBasic
Imports st.istia.univangers.fr
Imports System
Imports System.Web.UI.Control
Imports System.Data

Public Class main
    Inherits System.Web.UI.Page

    Protected WithEvents rdOui As System.Web.UI.WebControls.RadioButton
    Protected WithEvents rdNon As System.Web.UI.WebControls.RadioButton
    Protected WithEvents txtEnfants As System.Web.UI.WebControls.TextBox
    Protected WithEvents txtSalaire As System.Web.UI.WebControls.TextBox
    Protected WithEvents btnCalculer As System.Web.UI.WebControls.Button
    Protected WithEvents btnEffacer As System.Web.UI.WebControls.Button
    Protected WithEvents panelform As System.Web.UI.WebControls.Panel
    Protected WithEvents lnkForm2 As System.Web.UI.WebControls.LinkButton
    Protected WithEvents panelerreurs As System.Web.UI.WebControls.Panel
    Protected WithEvents rfvEnfants As System.Web.UI.WebControls.RequiredFieldValidator
    Protected WithEvents rvEnfants As System.Web.UI.WebControls.RangeValidator
    Protected WithEvents rfvSalaire As System.Web.UI.WebControls.RequiredFieldValidator
    Protected WithEvents rptErreurs As System.Web.UI.WebControls.Repeater
    Protected WithEvents dgSimulations As System.Web.UI.WebControls.DataGrid
    Protected WithEvents revSalaire As System.Web.UI.WebControls.RegularExpressionValidator
    Protected WithEvents cvMarie As System.Web.UI.WebControls.CustomValidator
    Protected WithEvents panelsimulations As System.Web.UI.WebControls.Panel

    ' local variables

    Private Sub Page_Load(ByVal sender As System.Object, ByVal e As System.EventArgs) Handles MyBase.Load
...
    End Sub

    Private Sub afficheErreurs(ByRef erreurs As ArrayList)
...
    End Sub

    Private Sub afficheFormulaire()
...
    End Sub

    Private Sub afficheSimulations(ByRef simulations As DataTable, ByRef lien As String)
...
    End Sub

    Private Sub btnCalculer_Click(ByVal sender As System.Object, ByVal e As System.EventArgs) Handles btnCalculer.Click
....
    End Sub

    Private Sub lnkForm1_Click(ByVal sender As System.Object, ByVal e As System.EventArgs)
...
    End Sub

    Private Sub lnkForm2_Click(ByVal sender As System.Object, ByVal e As System.EventArgs) Handles lnkForm2.Click
...
    End Sub

    Private Sub btnEffacer_Click(ByVal sender As System.Object, ByVal e As System.EventArgs) Handles btnEffacer.Click
...
    End Sub

    Private Sub razForm()
...
    End Sub

    Private Sub cvMarie_ServerValidate(ByVal source As System.Object, ByVal args As System.Web.UI.WebControls.ServerValidateEventArgs)
...
    End Sub
End Class
The first event handled by the code is [Page_Load]:
    Private Sub Page_Load(ByVal sender As System.Object, ByVal e As System.EventArgs) Handles MyBase.Load
        ' first, we look at the state of the application
        If CType(Application("erreur"), Boolean) Then
            ' the application failed to initialize
            ' the error view is displayed
            Dim erreurs As New ArrayList
            erreurs.Add("Application momentanément indisponible (" + CType(Application("message"), String) + ")")
            afficheErreurs(erreurs)
            Exit Sub
        End If
        ' no errors - on the 1st request, the form is presented
        If Not IsPostBack Then afficheFormulaire()
    End Sub
Before processing the request, we ensure that the application has initialized correctly. If not, we display view [erreurs] using procedure [afficheErreurs]. If this is the first request (IsPostBack=false), we display view [formulaire] using [afficheFormulaire].
The procedure displaying the view [erreurs] is as follows:
    Private Sub afficheErreurs(ByRef erreurs As ArrayList)
        ' builds a list of errors
        With rptErreurs
            .DataSource = erreurs
            .DataBind()
        End With
        ' container display
        panelerreurs.Visible = True
        panelform.Visible = False
        panelsimulations.Visible = False
        Exit Sub
    End Sub
The procedure receives as a parameter a list of error messages in [erreurs] of type [ArrayList]. We simply link this data source to the [rptErreurs] component responsible for displaying it.
The procedure displaying the [formulaire] view is as follows:
    Private Sub afficheFormulaire()
        ' displays the form
        panelform.Visible = True
        ' the other containers are hidden
        panelerreurs.Visible = False
        panelsimulations.Visible = False
    End Sub
This procedure simply makes the [panelform] container visible. The components are displayed with their posted or previous value (VIEWSTATE).
When the user clicks the [Calculer] button in the [formulaire] view, a transition from POST to [main.aspx] is performed. The [Page_Load] procedure is executed, followed by the [btnCalculer_Click] procedure:
    Private Sub btnCalculer_Click(ByVal sender As System.Object, ByVal e As System.EventArgs) Handles btnCalculer.Click
        ' we check the validity of the data entered; if there are any errors, we report them
        If Not Page.IsValid Then
            afficheFormulaire()
            Exit Sub
        End If
        ' no errors - tax is calculated
        Dim impot As Long = CType(Application("objImpot"), impot).calculer( _
        rdOui.Checked, CType(txtEnfants.Text, Integer), CType(txtSalaire.Text, Long))
        ' the result is added to existing simulations
        Dim simulations As DataTable = CType(Session.Item("simulations"), DataTable)
        Dim simulation As DataRow = simulations.NewRow
        simulation("marié") = CType(IIf(rdOui.Checked, "oui", "non"), String)
        simulation("enfants") = txtEnfants.Text.Trim
        simulation("salaire") = CType(txtSalaire.Text.Trim, Long)
        simulation("impôt") = impot
        simulations.Rows.Add(simulation)
        ' put the simulations in the session
        Session.Item("simulations") = simulations
        ' the simulations page is displayed
        afficheSimulations(simulations, "Retour au formulaire")
    End Sub
The procedure begins by checking the validity of the page. Note that when procedure [btnCalculer_Click] runs, the validation checks have already been performed and the [IsValid] attribute of the page has been set. If the page is invalid, then the [formulaire] view is displayed again and the procedure is terminated. The validation components of view [formulaire] with their [IsValid] attribute set to [false] will display their [ErrorMessage] attribute. If the page is valid, the tax amount is calculated using the object of type [impot] that was stored in the application when it started. This new simulation is added to the list of simulations already performed and stored in the session.
Finally, the [simulations] view is displayed by the following [afficheSimulations] procedure:
    Private Sub afficheSimulations(ByRef simulations As DataTable, ByRef lien As String)
        ' link the datagrid to the simulations source
        With dgSimulations
            .DataSource = simulations
            .DataBind()
        End With
        ' link
        lnkForm2.Text = lien
        ' the views
        panelsimulations.Visible = True
        panelerreurs.Visible = False
        panelform.Visible = False
    End Sub
The procedure has two parameters:
- a list of simulations in [simulations] of type [DataTable]
- a link text in [lien]
The data source [simulations] is linked to the component responsible for displaying it. The link text is placed in the [Text] property of the [LinkButton] object in the view.
When the user clicks the [Effacer] button in the [formulaire] view, the [btnEffacer_click] procedure is executed (always after [Page_Load]):
    Private Sub btnEffacer_Click(ByVal sender As System.Object, ByVal e As System.EventArgs) Handles btnEffacer.Click
        ' displays the empty form
        razForm()
        afficheFormulaire()
    End Sub

    Private Sub razForm()
        ' empty the form
        rdOui.Checked = False
        rdNon.Checked = True
        txtEnfants.Text = ""
        txtSalaire.Text = ""
    End Sub
The code above is simple enough that it doesn't need to be commented. We still need to handle clicks on the links in views [erreurs] and [simulations]:
    Private Sub lnkForm1_Click(ByVal sender As System.Object, ByVal e As System.EventArgs) Handles lnkForm1.Click
        ' displays the form
        afficheFormulaire()
    End Sub

    Private Sub lnkForm2_Click(ByVal sender As System.Object, ByVal e As System.EventArgs) Handles lnkForm2.Click
        ' displays the form
        afficheFormulaire()
    End Sub
Both procedures simply display the [formulaire] view. We know that the fields in this view will receive a value that is either the value posted for them or their previous value. Since, in this case, the client’s POST does not send any values for the form fields, these fields will revert to their previous values. The form is therefore displayed with the values entered by the user.
8.9.4. Tests
All files required for the application are placed in a folder named <application-path>:  | The [bin] folder contains the DLL containing the [impot], [impotsData], and [impotsOLEDB] classes required by the application:  |
The reader may, if desired, review Chapter 5, which explains how to create the [impot.dll] file mentioned above. Once this is done, the Cassini server is launched with the parameters (<application-path>,/impots6). Request the url and [http://impots6/main.aspx] files using a browser:
If we rename the file ACCESS [impots.mdb] to [impots1.mdb], we will get the following page:
8.9.5. Conclusion
We have an application MVC that uses only server components. Using these components has allowed us to completely separate the presentation layer of the application from its control layer. This had not been possible until now, as the presentation code previously contained variables calculated by the control code, with values that included the code HTML. Now this is no longer the case.