6. Appendices
Here we explain how to install the tools used in this document on Windows 7 through 10 machines. The reader should adapt these instructions to their own environment.
6.1. Installing the IDE Arduino
The official Arduino website is [http://www.arduino.cc/]. This is where you will find the IDE development board for Arduinos [http://arduino.cc/en/Main/Software]:
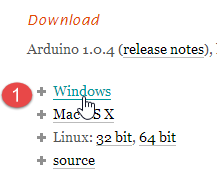
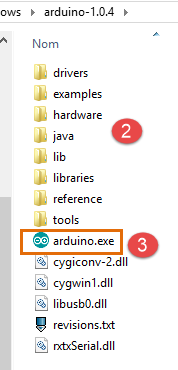
The downloaded file [1] is a ZIP file that, once extracted, creates the directory structure [2]. You can launch IDE by double-clicking the executable file [3].
6.2. Installing the Arduino driver
In order for IDE to communicate with an Arduino, the Arduino must be recognized by the host PC. To do this, proceed as follows:
- Connect the Arduino to a USB port on the host computer;
- The system will then attempt to find the driver for the new USB device. It will not find it. You must then specify that the driver is located on the disk at <arduino>/drivers, where <arduino> is the installation folder for the IDE Arduino.
6.3. Testing the IDE
To test the IDE, proceed as follows:
- launch the IDE;
- connect the Arduino to the PC using its USB cable. For now, do not include the network card;
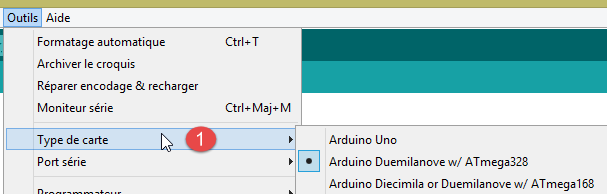
- in [1], select the type of Arduino board connected to port USB;
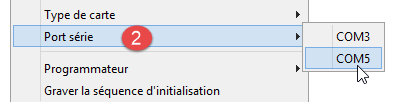
- In [2], specify the USB port to which the Arduino is connected. To find this out, unplug the Arduino and note the ports. Plug it back in and check the ports again: the one that has been added is the Arduino’s port;
Run some of the examples included in the IDE:
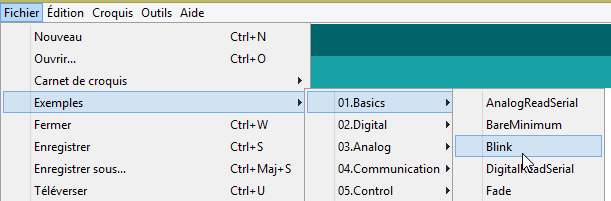
The example is loaded and displayed:
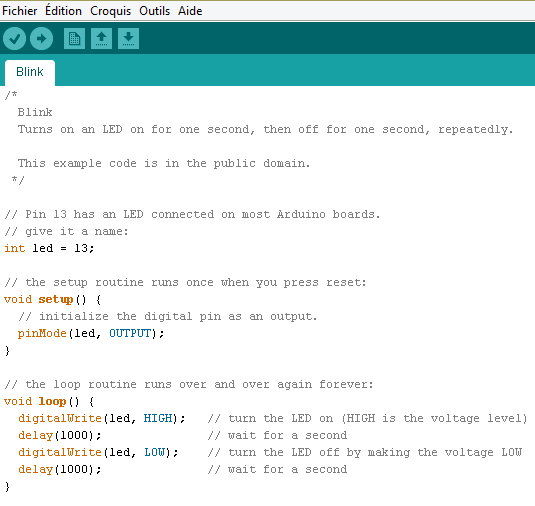
The examples included with the IDE are very educational and well-documented. Arduino code is written in C and consists of two distinct parts:
- a [setup] function that runs once when the application starts, either when it is "uploaded from the host PC to the Arduino, or when the application is already present on the Arduino and the [Reset] button is pressed. This is where the application’s initialization code goes;
- a [loop] function that runs continuously (infinite loop). This is where the core of the application goes.
Here,
- the [setup] function configures pin 13 as an output;
- the function [loop] turns it on and off repeatedly: led turns on and off every second.
1
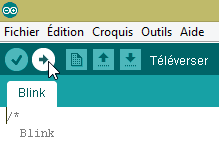
The displayed program is transferred (uploaded) to the Arduino using the [1] button. Once transferred, it runs and pin 13 (led) begins to flash indefinitely.
6.4. Arduino network connection
The Arduino(s) and the PC host must be on the same private network:
 |
If there is only one Arduino, it can be connected to the host PC using a simple RJ 45 cable. If there is more than one, the PC host and the Arduinos will be connected to the same network via a mini-hub.
The PC host and the Arduinos will be placed on the private network 192.168.2.x.
- The address IP for the Arduinos is set by the source code. We will see how;
- The host computer's address IP can be set as follows:
- Take option [Panneau de configuration\Réseau et Internet\Centre Réseau et partage]:
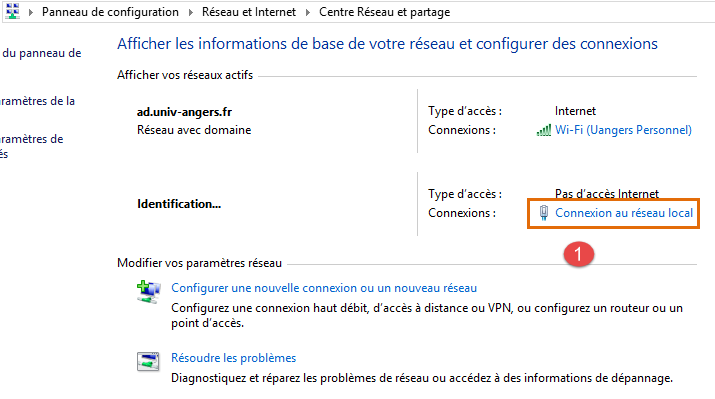
- in [1], follow the link [Connexion au réseau local]
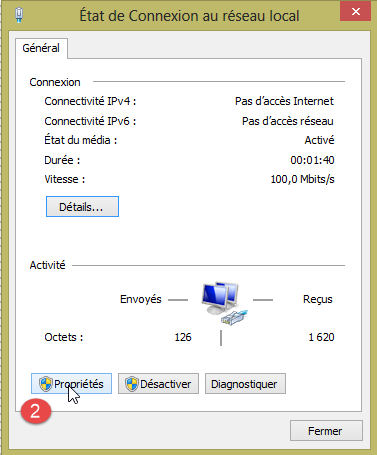
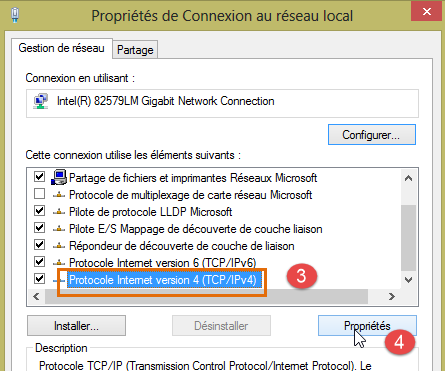
- to [2], view the connection properties;
- in [4], view the connection properties IP v4 [3];
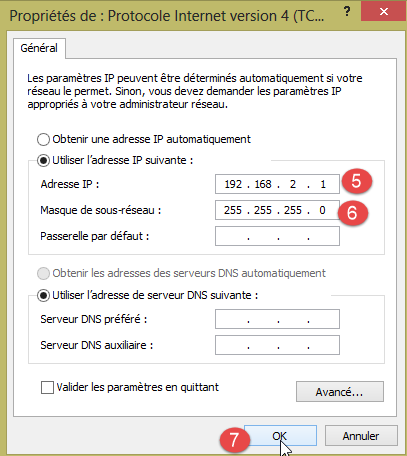
- in [5], assign the address IP [192.168.2.1] to the host computer;
- in [6], assign the subnet mask [255.255.255.0] to the network;
- validate everything in [7].
6.5. Testing a network application
Using IDE, load the example [Exemples / Ethernet / WebServer]:
/*
  Web Server

 A simple web server that shows the value of the analog input pins.
 using an Arduino Wiznet Ethernet shield.

 Circuit:
 * Ethernet shield attached to pins 10, 11, 12, 13
 * Analog inputs attached to pins A0 through A5 (optional)

 created 18 Dec 2009
 by David A. Mellis
 modified 9 Apr 2012
 by Tom Igoe

 */

#include <SPI.h>
#include <Ethernet.h>

// Enter a MAC address and IP address for your controller below.
// The IP address will be dependent on your local network:
byte mac[] = {
  0xDE, 0xAD, 0xBE, 0xEF, 0xFE, 0xED };
IPAddress ip(192,168,1, 177);

// Initialize the Ethernet server library
// with the IP address and port you want to use
// (port 80 is default for HTTP):
EthernetServer server(80);

void setup() {
 // Open serial communications and wait for port to open:
  Serial.begin(9600);
   while (!Serial) {
    ; // wait for serial port to connect. Needed for Leonardo only
  }


  // start the Ethernet connection and the server:
  Ethernet.begin(mac, ip);
  server.begin();
  Serial.print("server is at ");
  Serial.println(Ethernet.localIP());
}


void loop() {
  // listen for incoming clients
  EthernetClient client = server.available();
  if (client) {
    Serial.println("new client");
    // an http request ends with a blank line
    boolean currentLineIsBlank = true;
    while (client.connected()) {
      if (client.available()) {
        char c = client.read();
        Serial.write(c);
        // if you've gotten to the end of the line (received a newline
        // character) and the line is blank, the http request has ended,
        // so you can send a reply
        if (c == '\n' && currentLineIsBlank) {
          // send a standard http response header
          client.println("HTTP/1.1 200 OK");
          client.println("Content-Type: text/html");
          client.println("Connection: close");
          client.println();
          client.println("<!DOCTYPE HTML>");
          client.println("<html>");
                    // add a meta refresh tag, so the browser pulls again every 5 seconds:
          client.println("<meta http-equiv=\"refresh\" content=\"5\">");
          // output the value of each analog input pin
          for (int analogChannel = 0; analogChannel < 6; analogChannel++) {
            int sensorReading = analogRead(analogChannel);
            client.print("analog input ");
            client.print(analogChannel);
            client.print(" is ");
            client.print(sensorReading);
            client.println("<br />");
          }
          client.println("</html>");
          break;
        }
        if (c == '\n') {
          // you're starting a new line
          currentLineIsBlank = true;
        }
        else if (c != '\r') {
          // you've gotten a character on the current line
          currentLineIsBlank = false;
        }
      }
    }
    // give the web browser time to receive the data
    delay(1);
    // close the connection:
    client.stop();
    Serial.println("client disconnected");
  }
}
This application creates a web server on port 80 (line 30) at the address IP on line 25. The address MAC on line 23 is the address MAC specified on the Arduino’s network card.
The [setup] function initializes the web server:
- line 34: initializes the serial port to which the application will send logs. We will monitor these;
- line 41: the node TCP-IP (IP, port) is initialized;
- line 42: the server from line 30 is launched on this network node;
- lines 43–44: the web server’s address IP is logged;
The function [loop] implements the web server:
- line 50: if a client connects to the web server, [server].available returns that client; otherwise, it returns null;
- line 51: if the client is not null;
- line 55: as long as the client is connected;
- line 56: [client].available is true if the client has sent characters. These are stored in a buffer. [client].available returns true as long as this buffer is not empty;
- line 57: a character sent by the client is read;
- line 58: this character is echoed to the log console;
- line 62: in the HTTP protocol, the client and server exchange lines of text.
- The client sends a HTTP request to the web server by sending a series of text lines ending with an empty line;
- the server then responds to the client by sending a response and closing the connection;
Line 62: The server does nothing with the HTTP headers it receives from the client. It simply waits for the empty line: a line containing only the \n character;
- Lines 64–67: The server sends the client the standard text lines of the HTTP protocol. They end with a blank line (line 67);
- Starting on line 68, the server sends a document to its client. This document is dynamically generated by the server and is in HTML format (lines 68–69);
- line 71: a special HTML line that instructs the client browser to refresh the page every 5 seconds. Thus, the browser will request the same page every 5 seconds;
- lines 73–80: the server sends the values of the Arduino’s 6 analog inputs to the client browser;
- line 81: the HTML document is closed;
- line 82: the while loop from line 55 is exited;
- line 97: the connection with the client is closed;
- line 98: the event is logged in the log console;
- line 100: we loop back to the beginning of the loop function: the server will resume listening for clients requests. We mentioned that the client browser would request the same page every 5 seconds. The server will be ready to respond again.
Modify the code on line 25 to include your Arduino’s IP address, for example:
Upload the program to the Arduino. Launch the log console (Ctrl-M) (capital M):
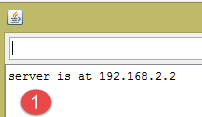
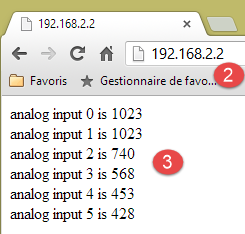
- in [1], the log console. The server has been launched;
- in [2], using a browser, we request the Arduino’s address IP. Here, [192.168.2.2] is translated by default as [http://198.162.2.2:80];
- in [3], the information sent by the web server. If you view the source code of the browser page, you get:
Here, we can see the lines of text sent by the server. On the Arduino side, the log console displays what the client sends it:
- lines 2-9: standard HTTP headers;
- line 10: the empty line that terminates them.
Study this example carefully. It will help you understand the Arduino programming used in the TP.
6.6. The aJson library
In the TP to be written, the Arduinos exchange lines of text in jSON format with their clients. By default, the IDE Arduino does not include a library to manage the jSON. We will install the aJson library available on GitHub.
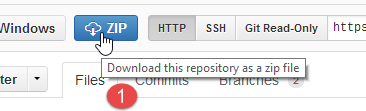
- In [1], download the zipped version file from the GitHub repository;
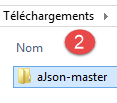
- unzip the folder and copy the [aJson-master] [2] folder into the [<arduino>/libraries] [3] folder, where <arduino> is the installation folder for theIDE Arduino;
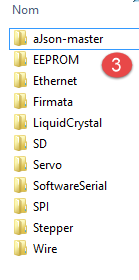
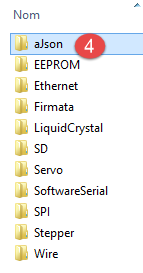
- In [4], rename this folder to [aJson];
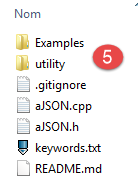
- to [5], its contents.
Now, launch the IDE Arduino:
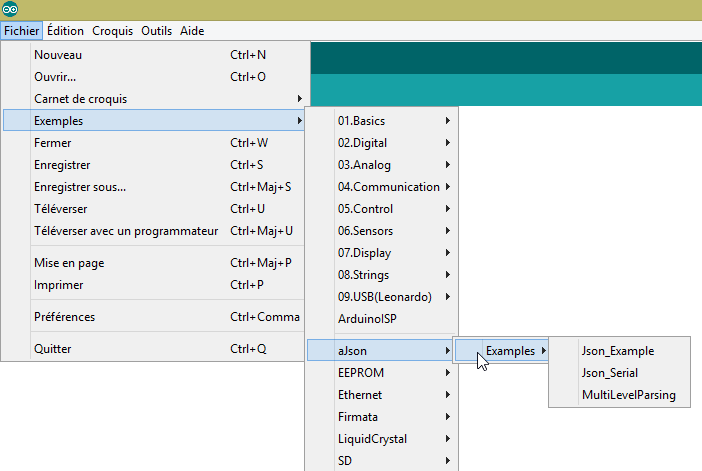
Verify that in the examples, you now have examples for the aJson library. Run and study these examples.
6.7. The Android tablet
The examples have been tested with the Samsung Galaxy Tab 2.
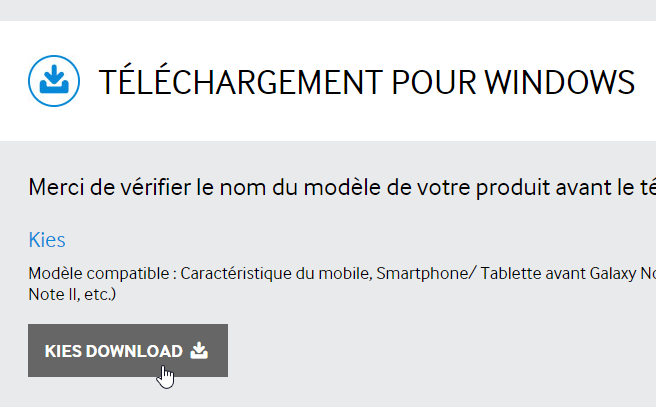
To test the examples on a tablet, you must first install the tablet’s driver on your development machine. The driver for the Samsung Galaxy Tab 2 can be found at URL [http://www.samsung.com/fr/support/usefulsoftware/KIES/]:
To test the examples, you will need to connect the tablet to a network (likely Wi-Fi) and know its IP address on that network. Here’s how to proceed (Samsung Galaxy Tab 2):
- Turn on your tablet;
- Look through the apps available on the tablet (top right) for the one called [paramètres] with a gear icon;
- in the left-hand section, turn on Wi-Fi;
- in the right-hand section, select a Wi-Fi network;
- Once connected to the network, tap briefly on the selected network. The tablet’s IP address will be displayed. Write it down. You’ll need it;
Still in the [Paramètres] app,
- select option [Options de développement] on the left (at the very bottom of the options);
- make sure that option [Débogage USB] is checked on the right.
To return to the menu, tap the middle icon in the status bar at the bottom—the one that looks like a house. Still in the status bar at the bottom,
- the icon on the far left is the back button: it takes you back to the previous view;
- the icon on the far right is for task management. You can view and manage all tasks currently running on your tablet;
Connect your tablet to your PC using the included USB cable.
Install the Wi-Fi dongle into one of the USB ports on the PC, then connect to the same Wi-Fi network as the tablet. Once this is done, in a DOS window, type the command [ipconfig]:
Your PC has two network cards and therefore two IP addresses:
- the one on line 9, which is that of the PC on the wired network;
- the one on line 17, which is for the PC on the Wi-Fi network;
Make a note of these two pieces of information. You will need them. You are now in the following configuration:
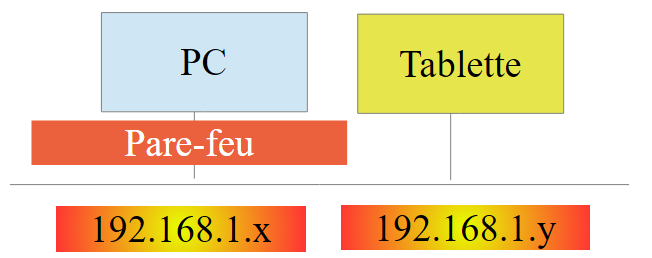 |
The tablet will need to connect to your PC. This is normally protected by a firewall that prevents any external device from establishing a connection with the PC. You must therefore disable the firewall. Do this using the option and [Panneau de configuration\Système et sécurité\Pare-feu Windows]. Sometimes you also need to disable the firewall set up by your antivirus software. This depends on your antivirus program.
Now, on your PC, check the network connection with the tablet using a [ping 192.168.1.y] command, where [192.168.1.y] is the tablet’s IP address. You should get something that looks like this:
Lines 4-7 indicate that the address tablet IP [192.168.1.y] responded to the command [ping].
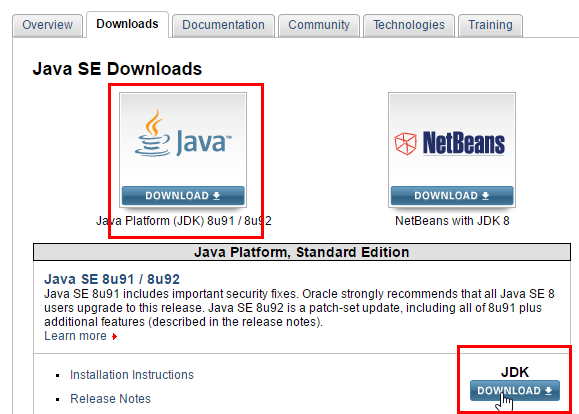
6.8. Installation of a JDK
The most recent JDK can be found in the URL [http://www.oracle.com/technetwork/java/javase/downloads/index.html] (June 2016). We will refer to the JDK installation folder as <jdk-install>.
6.9. Installing the Genymotion emulator manager
The company [Genymotion] offers a high-performance Android emulator. It is available at URL [https://cloud.genymotion.com/page/launchpad/download/] (June 2016).
You will need to register to obtain a version for personal use. Download the [Genymotion] product with the VirtualBox virtual machine:

We will refer to the [Genymotion] installation folder as <genymotion-install>. Launch [Genymotion]. Then download an image for a tablet:
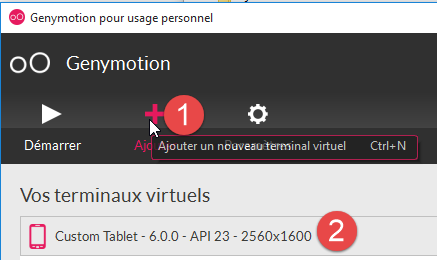
- in [1], add the virtual terminal described in [2];
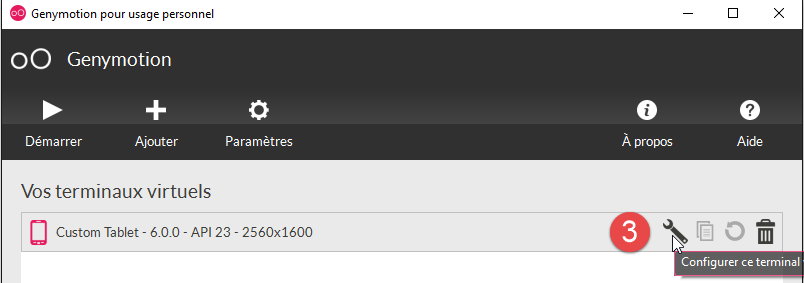
- in [3], configure the terminal;
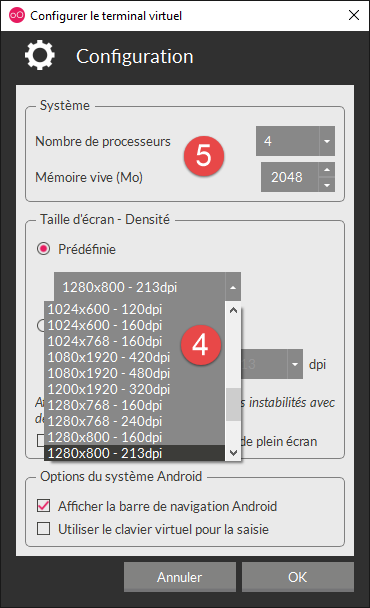
- in [4-5], customize the terminal for your environment;
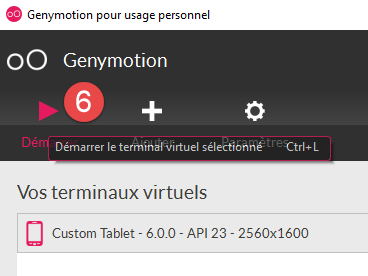
- In [6], launch the virtual terminal;
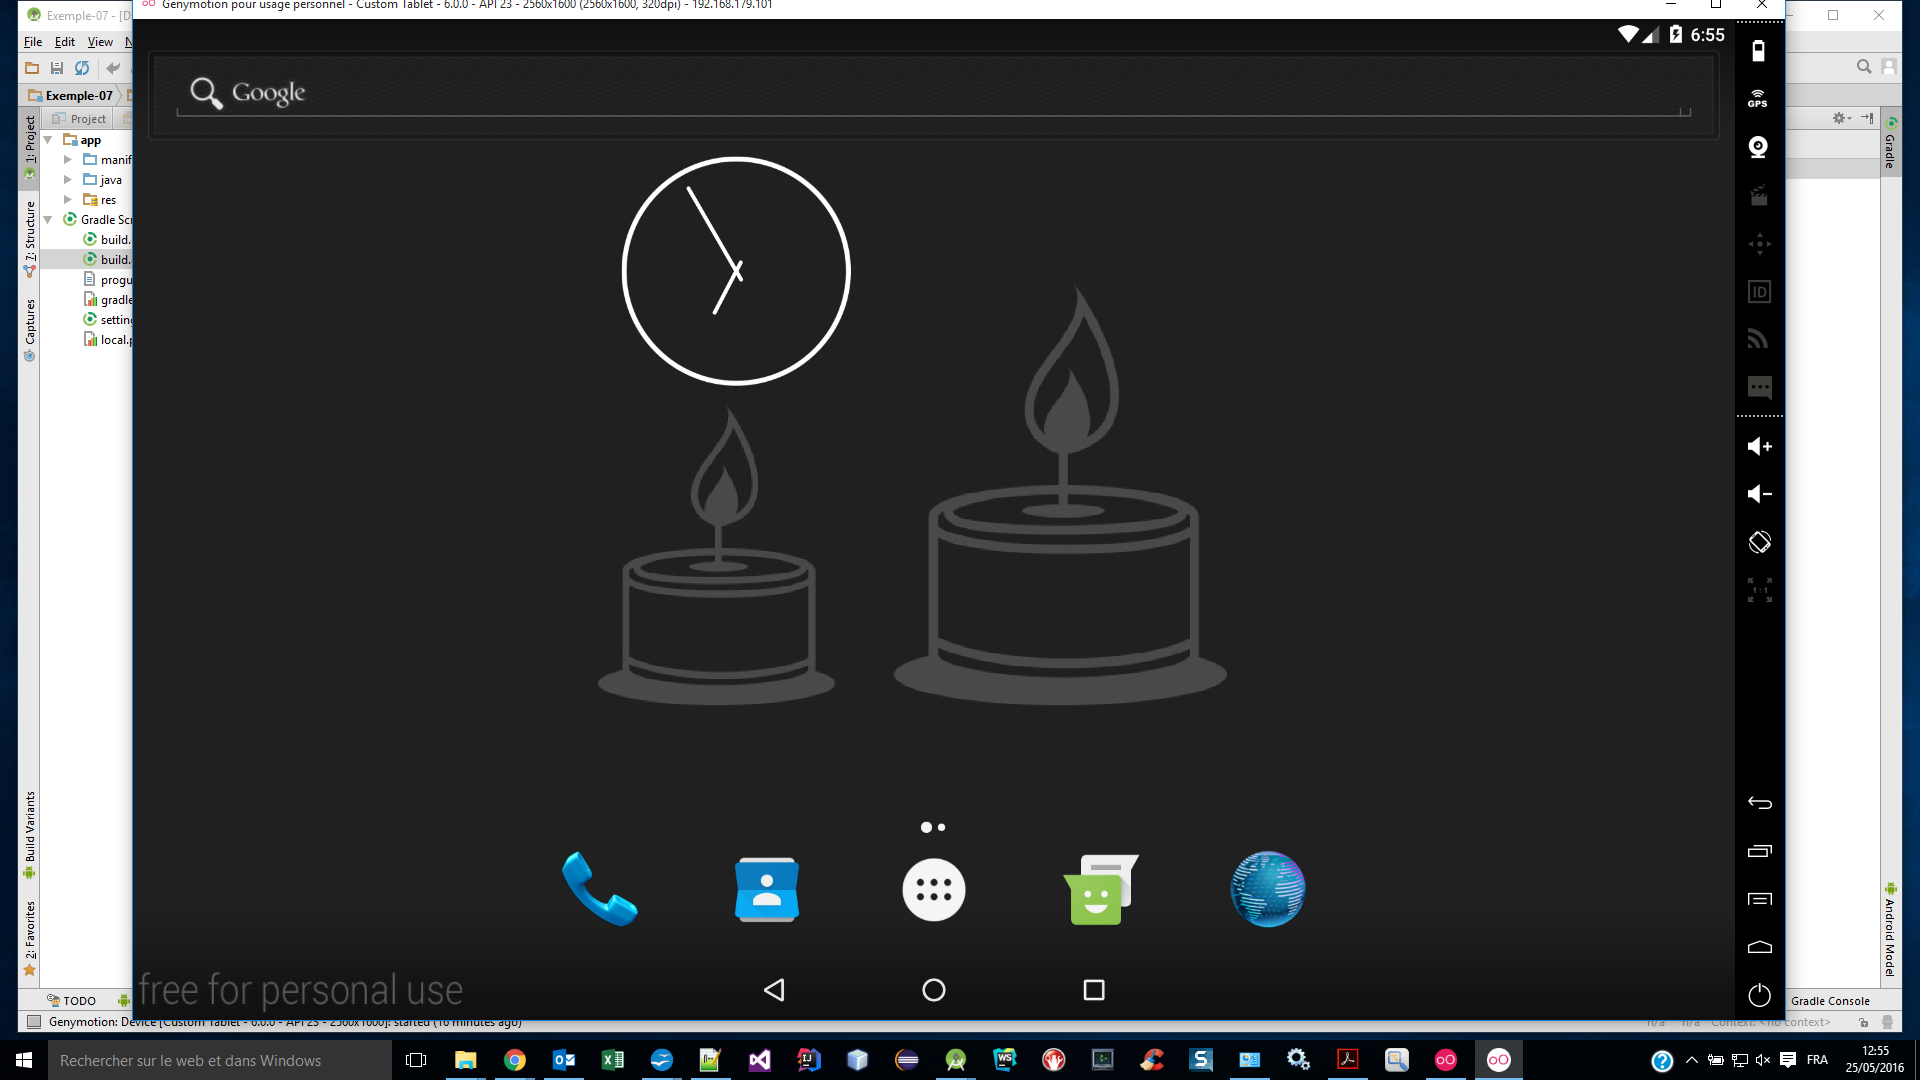
If all goes well, you will see the Android emulator window:
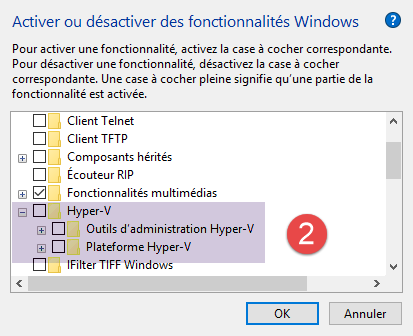
Sometimes, the Android emulator does not launch. On a Windows machine, you can check the following two points:
- check that the [Hyper-V] virtual machine is not installed. If necessary, uninstall it ([1-2]);
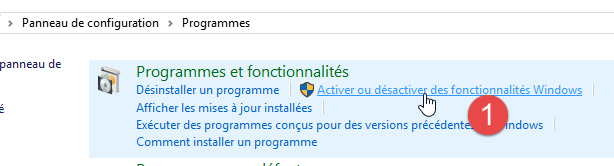
- then in the [Centre Réseau et partage] [1] configuration wizard:
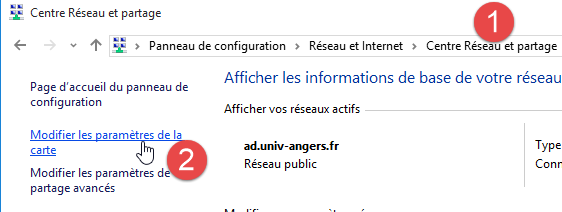
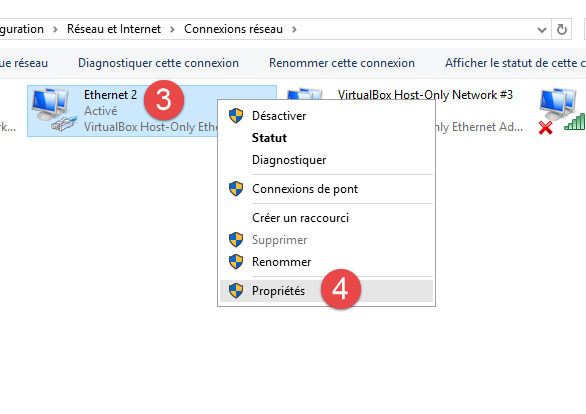
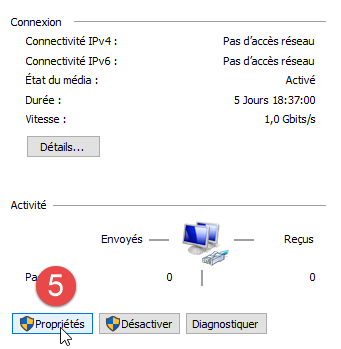
- in [3], select the card(s) associated with the VirtualBox virtual machine;
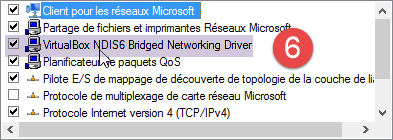
- verify that in [6], the driver for VirtualBox is checked. Repeat the process for all cards associated with the VirtualBox virtual machine;
6.10. Installing Maven
Maven is a tool for managing dependencies in a Java project and more. It is available at URL [http://maven.apache.org/download.cgi].

Download and unzip the archive. We will refer to the Maven installation folder as <maven-install>.
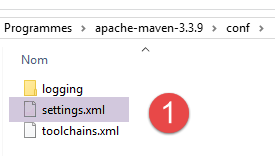
- In [1], the file [conf / settings.xml] configures Maven;
It contains the following lines:
  <!-- localRepository
   | The path to the local repository maven will use to store artifacts.
   |
   | Default: ${user.home}/.m2/repository
  <localRepository>/path/to/local/repo</localRepository>
-->
The default value on line 4, if—as in my case—your {user.home} has a space in its path (for example, [C:\Users\Serge Tahé]), may cause issues with certain software. In that case, you would write something like:
  <!-- localRepository
   | The path to the local repository maven will use to store artifacts.
   |
   | Default: ${user.home}/.m2/repository
  <localRepository>/path/to/local/repo</localRepository>
  -->
<localRepository>D:\Programs\devjava\maven\.m2\repository</localRepository>
and on line 7, avoid using a path that contains spaces.
6.11. Installing IDE Android Studio
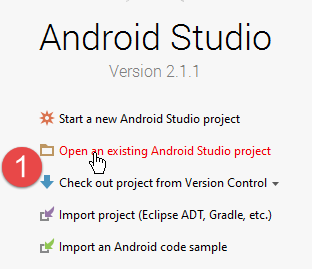
The IDE Android Studio Community Edition is available in the URL [https://developer.android.com/studio/index.html] (June 2016) release:

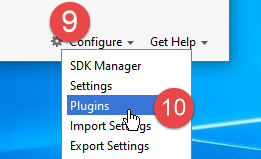
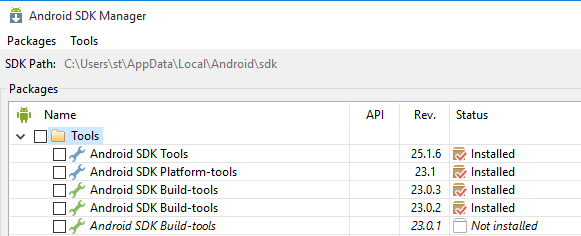
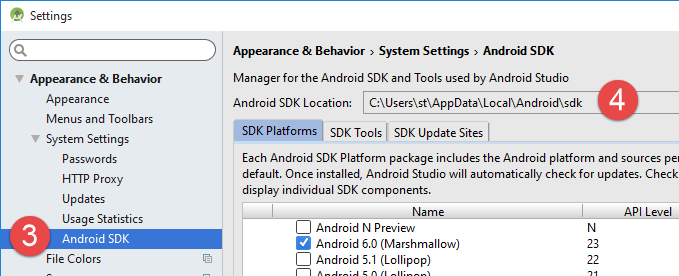
Install IDE and then launch it. Following the procedure in [1-8], install the SDK Manager components used by the examples that follow. If you decide to install newer components, you will likely receive warnings from Android Studio stating that the example configuration references components from SDK that do not exist in your environment. You can then follow the suggestions provided by IDE.

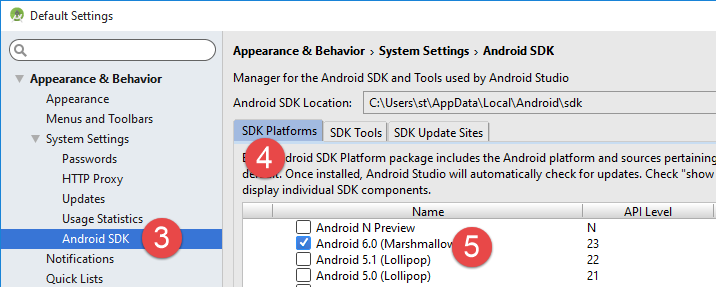
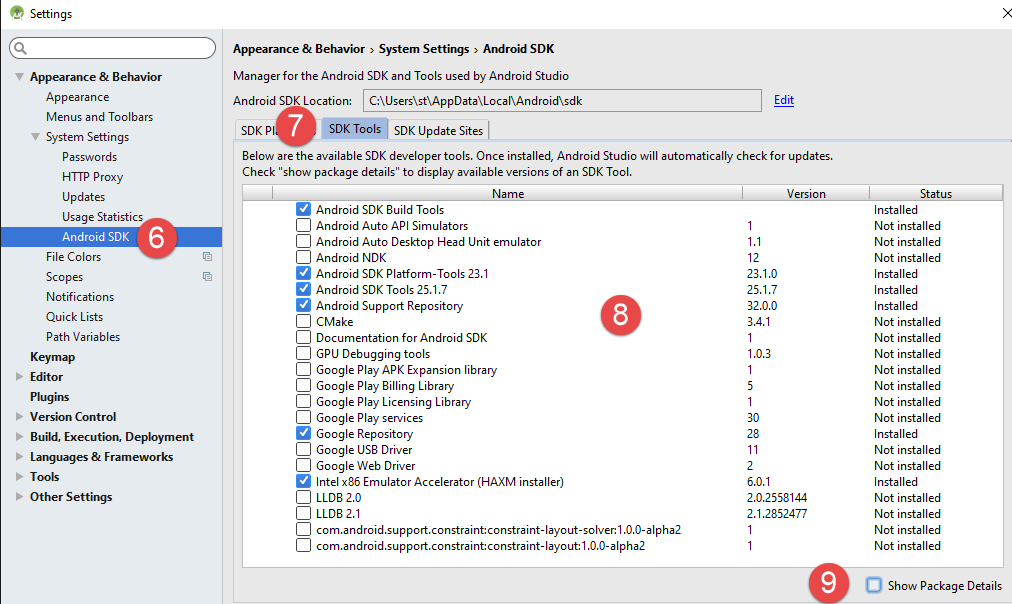
- In [9], view the package details:
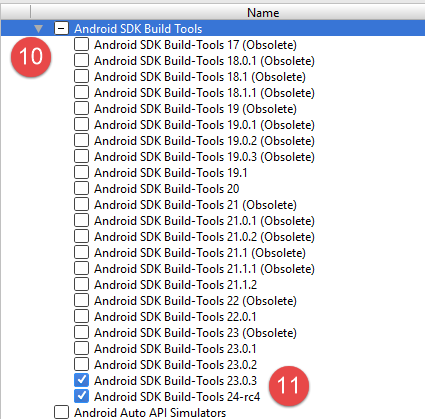
- In [11] above, the examples used SDK Build-Tools 23.0.3;
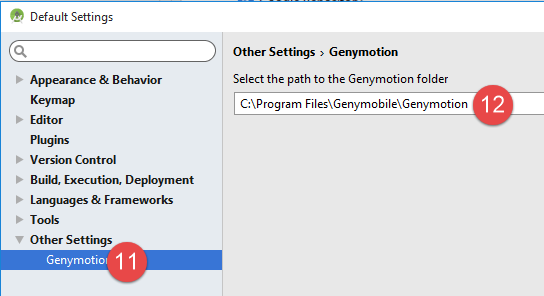
- In [9-12] below, specify the folder where you installed the [Genymotion] emulator manager;
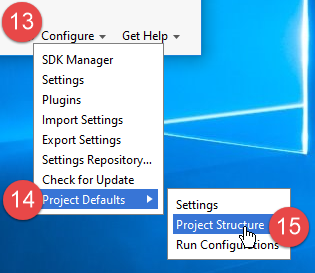
- in [13-18], configure the default project type;
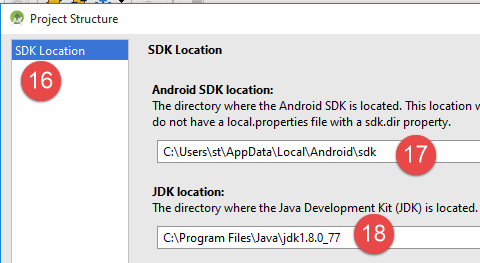
- in [17], the default value is usually correct;
- In [18], make sure you have JDK 1.8;
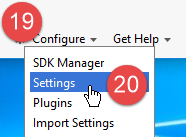
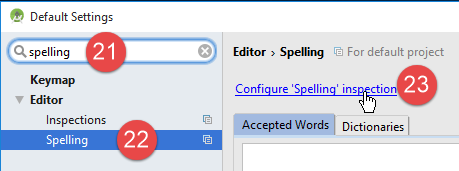
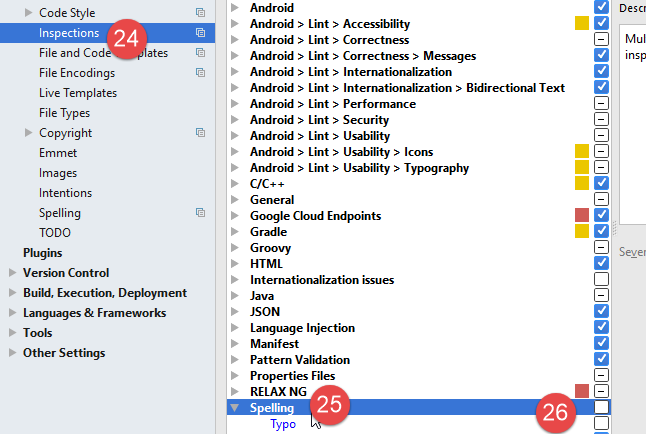
Below, in [19-26], disable spell check, which is set to English by default;
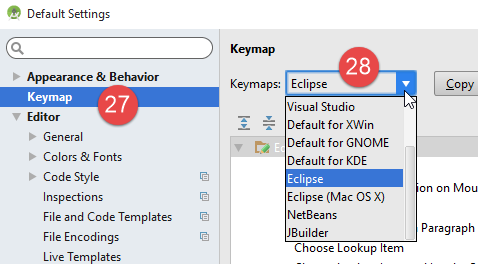
- below, in [27-28], choose the type of keyboard shortcuts you want. You can keep the default one from Intellij or choose one from another IDE that you are more accustomed to;
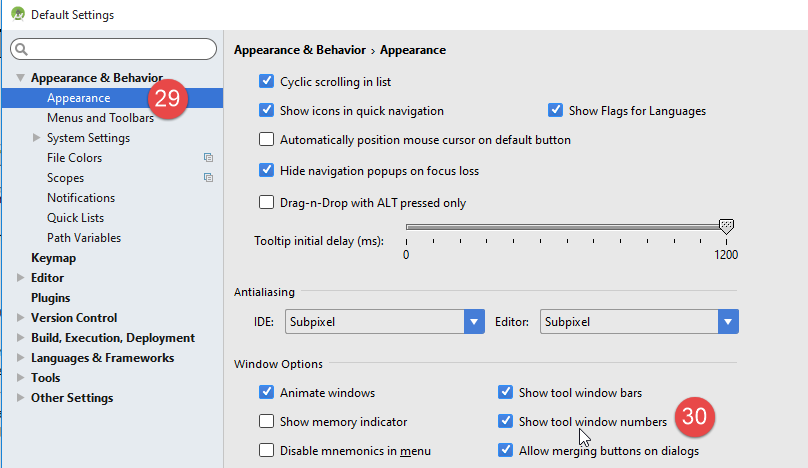
- Below, in [29-30], enable line numbers in the code;
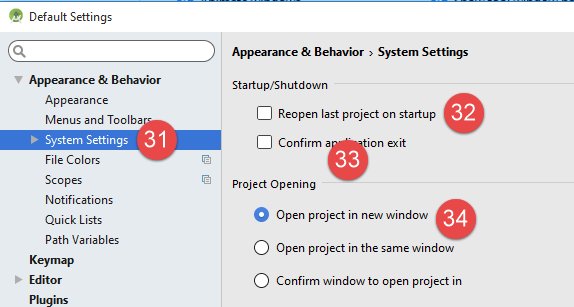
- Below, in [31-34], specify how you want to handle the first project when launching IDE and subsequent projects;
With Android 2.1 (May 2016), the [Instant Run] technology sometimes causes issues. In this document, we have disabled it:
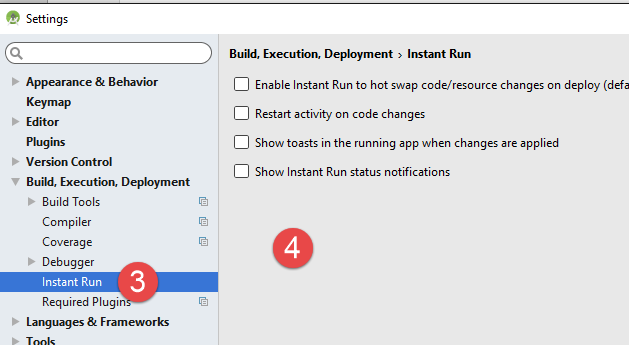
- In [3-4], everything has been disabled;
6.12. Using the examples
The Android Studio projects for the examples are available at ICI|. Download them.
The examples were built with the components defined previously:
- JDK 1.8;
- Android SDK Platform 23 for runtime;
The following SDK tools:
If your environment does not match the one described above, you will need to change the project configuration. This can be quite tedious. Initially, it is probably easier to set up a working environment similar to the one described above.
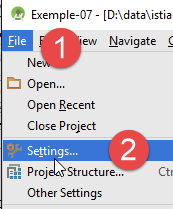
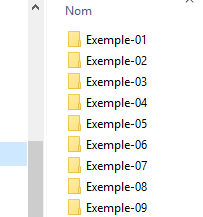
Launch Android Studio and open the [exemple-07] project, for example:
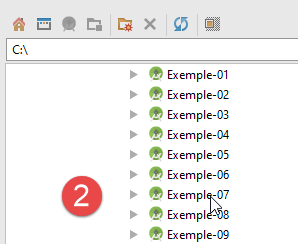
- in [1-3], open the [Exemple-07] project;
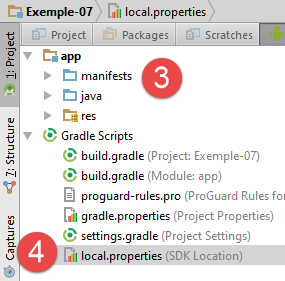
- in [4], check the file [local.properties];
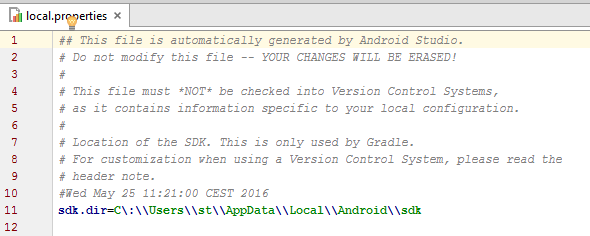
- on line 11 above, enter the location of the Android Manager <sdk-manager-install>. You can find this by following the procedure [1-4]:
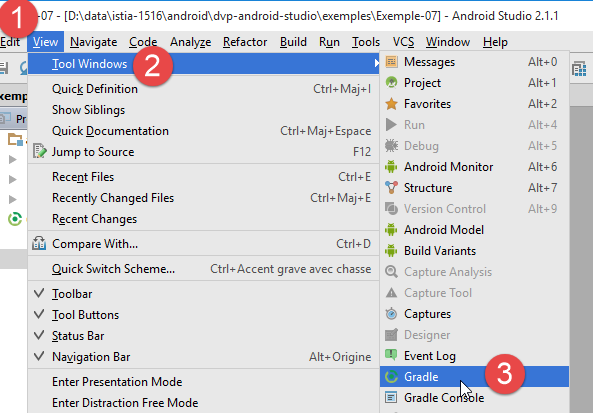
All examples in this document are Gradle projects configured by a [build.gradle] [1-2] file:
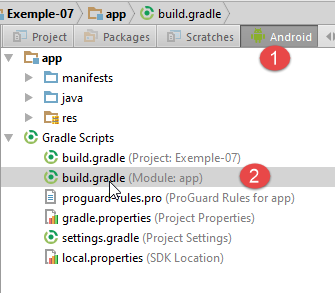
The [build.gradle] file from Example 07 is as follows:
buildscript {
  repositories {
    mavenCentral()
    mavenLocal()
  }
  dependencies {
    // replace with the current version of the Android plugin
    classpath 'com.android.tools.build:gradle:2.1.0'
    // Since Android's Gradle plugin 0.11, you have to use android-apt >= 1.3
    classpath 'com.neenbedankt.gradle.plugins:android-apt:1.8'
  }
}

apply plugin: 'com.android.application'
apply plugin: 'android-apt'
def AAVersion = '4.0.0'

dependencies {
  apt "org.androidannotations:androidannotations:$AAVersion"
  compile "org.androidannotations:androidannotations-api:$AAVersion"
  compile 'com.android.support:appcompat-v7:23.4.0'
  compile 'com.android.support:design:23.4.0'
  compile fileTree(dir: 'libs', include: ['*.jar'])
}

repositories {
  jcenter()
}

apt {
  arguments {
    androidManifestFile variant.outputs[0].processResources.manifestFile
    resourcePackageName android.defaultConfig.applicationId
  }
}

android {
  compileSdkVersion 23
  buildToolsVersion "23.0.3"
  defaultConfig {
    applicationId "android.exemples"
    minSdkVersion 15
    targetSdkVersion 23
    versionCode 1
    versionName "1.0"
  }

  buildTypes {
    release {
      minifyEnabled false
      proguardFiles getDefaultProguardFile('proguard-android.txt'), 'proguard-rules.pro'
    }
  }

  compileOptions {
    sourceCompatibility JavaVersion.VERSION_1_7
    targetCompatibility JavaVersion.VERSION_1_7
  }
}
Depending on the Android environment (SDK and tools) you have built, you may need to change the versions in lines 8, 21, 22, 38, and 39. Android Studio helps by making suggestions. The easiest approach is to follow these suggestions.
The elements of the [build.gradle] file can be accessed in another way:
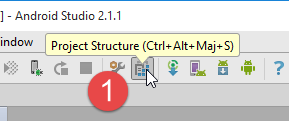
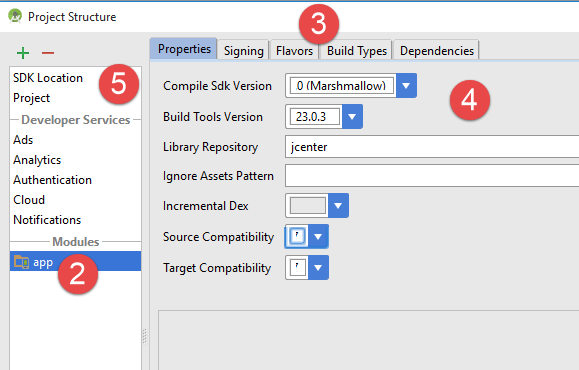
- the various tabs in [3] reflect the different values in the [build.gradle] file. You can therefore build this file in this way, which allows you to avoid the syntax issues in the [build.gradle] file;
Another point to check is the JDK used by the IDE and [5]:
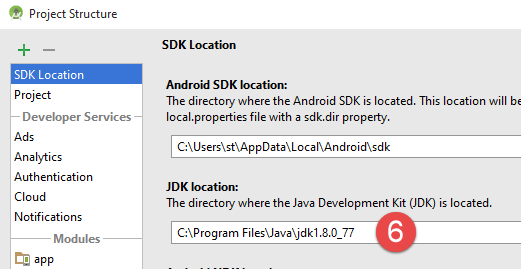
In [6], check JDK.
All examples are Gradle projects with dependencies that need to be downloaded. To do this, proceed as follows:

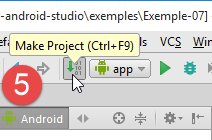
- In [5], compile the project;
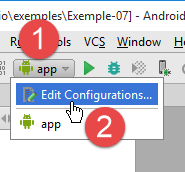
Once the project is error-free, create a run configuration [1-8]:
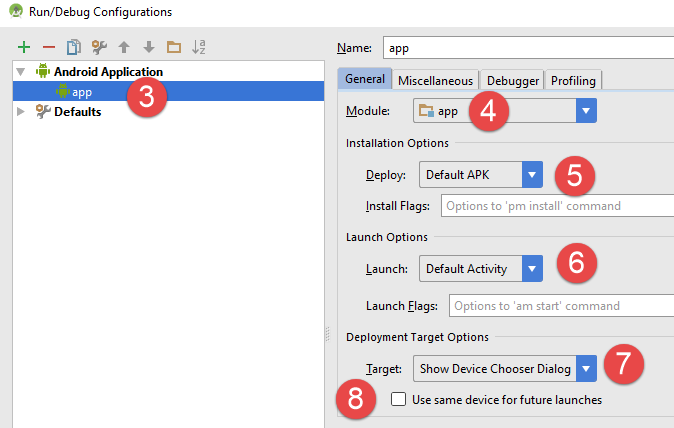
- In [8], you can specify that you always want to use the same device for execution. Generally, this option option is checked to avoid having to specify the device to use for each new execution. Here, we leave it unchecked because we are specifically going to test different Android devices;
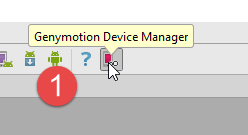
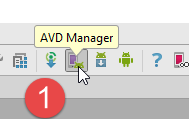
- once the execution configuration has been created, launch the Android emulator manager [1-3];
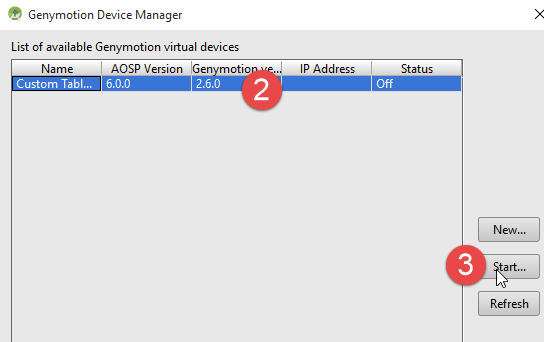
- if the Android emulator does not launch, check the points mentioned in the section 6.11 ;
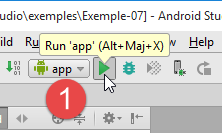
To launch the app on the emulator, proceed as follows:
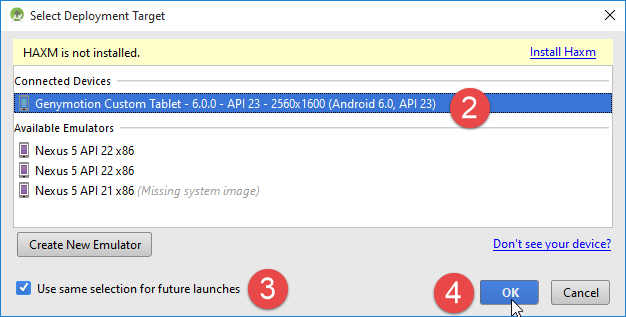
- In [2], you should see the emulator that you previously launched;

- In [5], the view displayed by the emulator;
Now connect an Android tablet to a USB port on the PC and run the application on it:
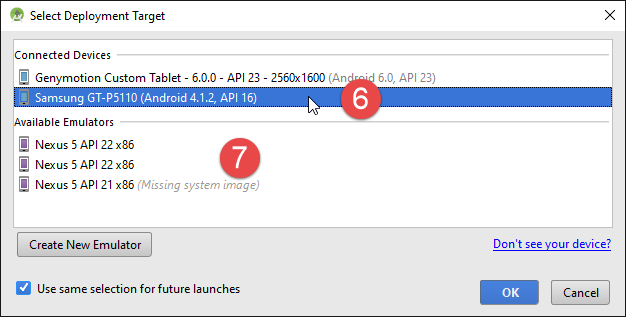
- In [6], select the Android tablet and test the application.
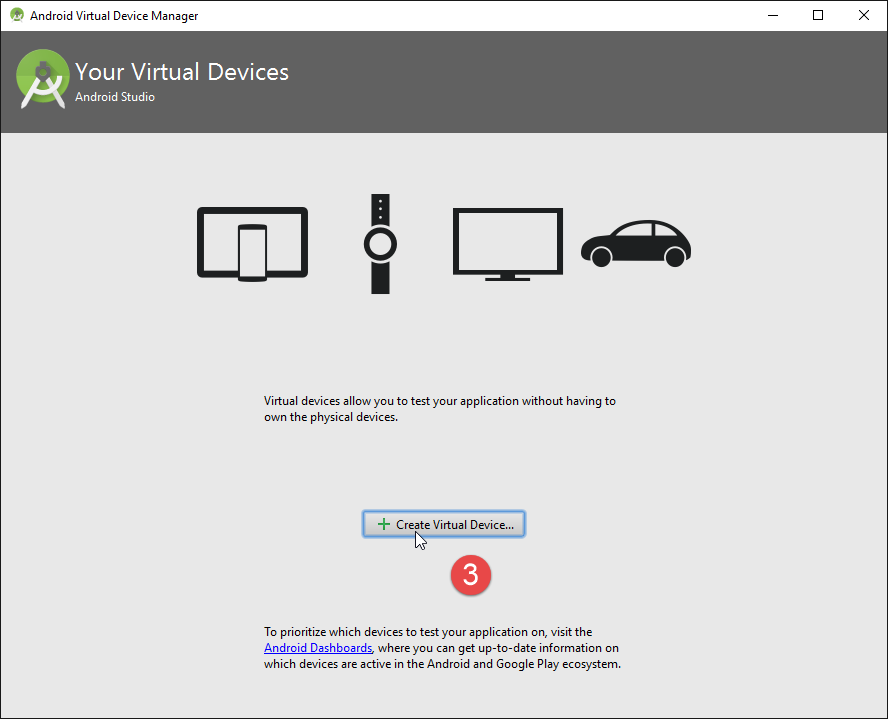
In [7], we have predefined virtual terminals. We will learn how to add and remove them.
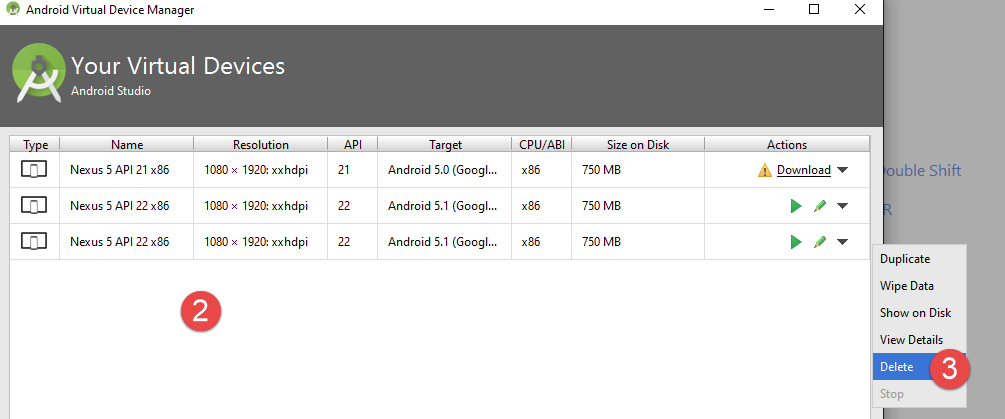
In the screenshot above, the available terminals all use API 22. We’ll remove them all because we want to use API 23. We’ll follow the procedure in [2-3] to remove the terminals.

- In [4-5], we add a tablet;
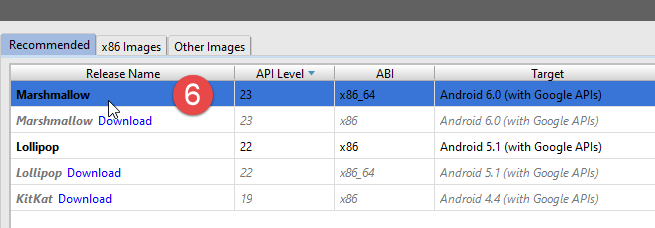
- in [6], we select a API. Above, we select API 23 for a 64-bit Windows system;
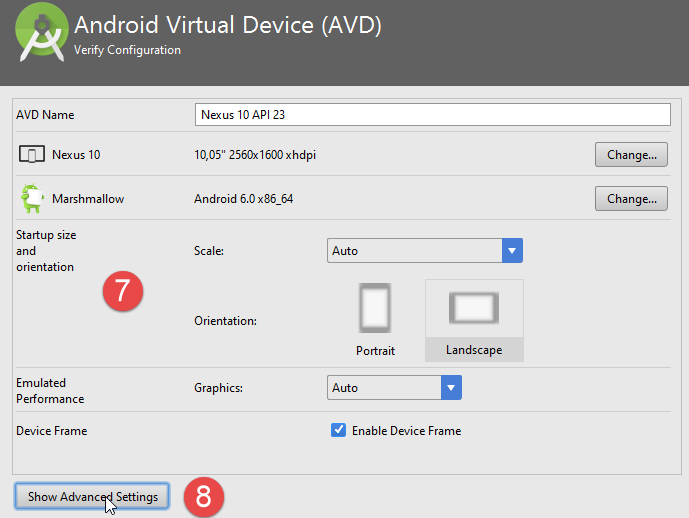
- In [7], the summary of the configuration;
- in [8], more advanced configuration of the virtual terminal can be performed;
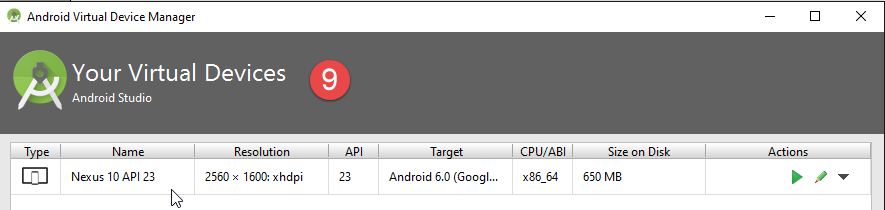
Once the wizard is complete, the created terminal appears in [9].
Once this is done, if you run [Exemple-07] again, you will now see the following window:
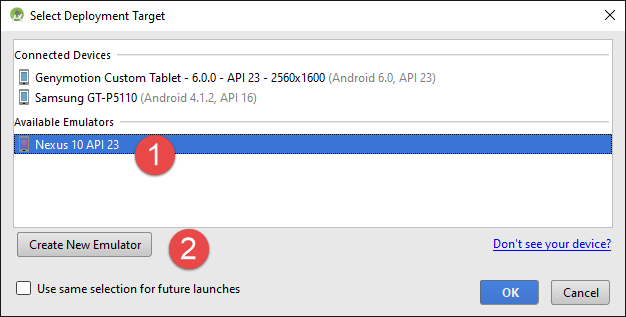
- In [1], the new virtual terminal appears;
- In [2], you can create new ones;
Test different options to determine the virtual terminal best suited for your workstation. In this document, the examples have been tested primarily with the Genymotion emulator.
Regardless of the virtual terminal chosen, logs are displayed in the window named [Logcat] [1-2]:
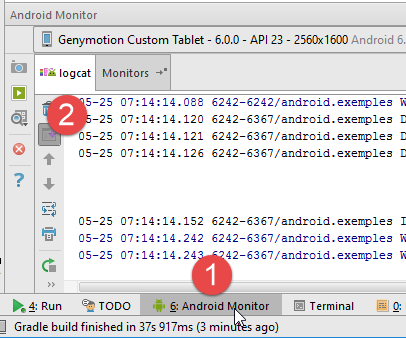
Check these logs regularly. This is where the exceptions that caused your program to crash will be reported.
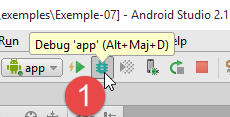
You can also debug your program using standard debugging tools:
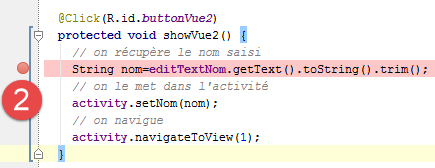
- in [2], set a breakpoint by clicking once on the column to the left of the target line. Clicking again removes the breakpoint;
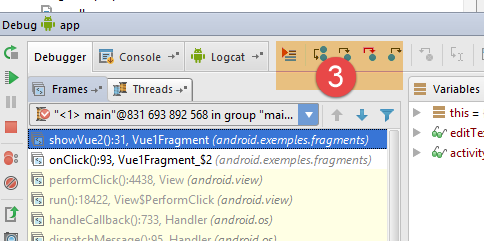
- in [3], at the breakpoint, enter:
- [F6], to execute the line without entering the methods if the line contains method calls,
- [F5], to execute the line by entering the methods if the line contains method calls,
- [F8], to continue to the next breakpoint;
- [Ctrl-F2] to stop debugging;
6.13. Installing the Chrome plugin [Advanced Rest Client]
In this document, we use Google's Chrome browser (http://www.google.fr/intl/fr/chrome/browser/). We will install the [Advanced Rest Client] extension . Here's how to do it:
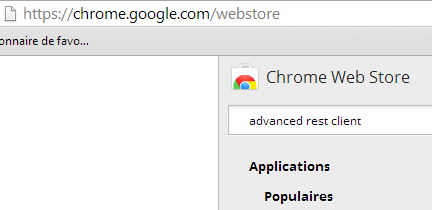
- Go to the [Google Web store] website (https://chrome.google.com/webstore) using the Chrome browser;
- search for the [Advanced Rest Client] app:
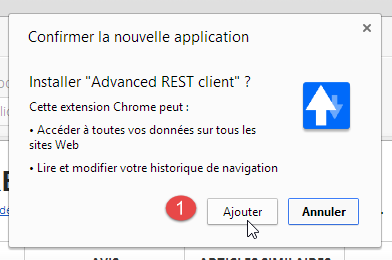
- the app is then available for download:

- to get it, you’ll need to create a Google account. [Google Web Store] then asks for confirmation [1]:
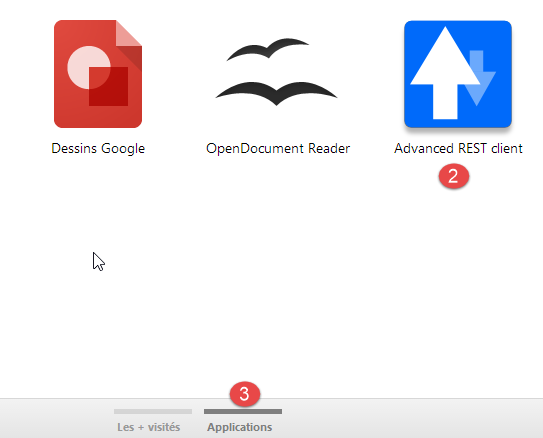
- In [2], the added extension is available in the option [Applications] [3]. This option is displayed on every new tab you create (CTRL-T) in the browser.
6.14. Management of the jSON framework in Java
Transparently for the developer, the [Spring MVC] framework uses the jSON [Jackson] library. To illustrate what jSON (JavaScript Object Notation), we present here a program that serializes objects into jSON and performs the reverse operation by deserializing the generated jSON strings to recreate the original objects.
The 'Jackson' library allows you to construct:
- the jSON string of an object: new ObjectMapper().writeValueAsString(object);
- an object from a string jSON: new ObjectMapper().readValue(jsonString, Object.class).
Both methods are likely to throw a IOException. Here is an example.
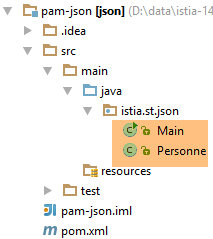
The project above is a Maven project with the following [pom.xml] file:
<?xml version="1.0" encoding="UTF-8"?>
<project xmlns="http://maven.apache.org/POM/4.0.0"
         xmlns:xsi="http://www.w3.org/2001/XMLSchema-instance"
         xsi:schemaLocation="http://maven.apache.org/POM/4.0.0 http://maven.apache.org/xsd/maven-4.0.0.xsd">
  <modelVersion>4.0.0</modelVersion>

  <groupId>istia.st.pam</groupId>
  <artifactId>json</artifactId>
  <version>1.0-SNAPSHOT</version>

  <dependencies>
    <dependency>
      <groupId>com.fasterxml.jackson.core</groupId>
      <artifactId>jackson-databind</artifactId>
      <version>2.3.3</version>
    </dependency>
  </dependencies>
</project>
- lines 12-16: the dependency that brings in the 'Jackson' library;
The [Personne] class is as follows:
package istia.st.json;

public class Personne {
    // data
    private String nom;
    private String prenom;
    private int age;

    // manufacturers
    public Personne() {

    }

    public Personne(String nom, String prénom, int âge) {
        this.nom = nom;
        this.prenom = prénom;
        this.age = âge;
    }

    // signature
    public String toString() {
        return String.format("Personne[%s, %s, %d]", nom, prenom, age);
    }

    // getters and setters
...
}
The [Main] class is as follows:
package istia.st.json;

import com.fasterxml.jackson.databind.ObjectMapper;

import java.io.IOException;
import java.util.HashMap;
import java.util.Map;

public class Main {
  // the serialization / deserialization tool
  static ObjectMapper mapper = new ObjectMapper();

  public static void main(String[] args) throws IOException {
    // creation of a person
    Personne paul = new Personne("Denis", "Paul", 40);
    // display Json
    String json = mapper.writeValueAsString(paul);
    System.out.println("Json=" + json);
    // instantiation Person from Json
    Personne p = mapper.readValue(json, Personne.class);
    // person display
    System.out.println("Personne=" + p);
    // a picture
    Personne virginie = new Personne("Radot", "Virginie", 20);
    Personne[] personnes = new Personne[]{paul, virginie};
    // display Json
    json = mapper.writeValueAsString(personnes);
    System.out.println("Json personnes=" + json);
    // dictionary
    Map<String, Personne> hpersonnes = new HashMap<String, Personne>();
    hpersonnes.put("1", paul);
    hpersonnes.put("2", virginie);
    // display Json
    json = mapper.writeValueAsString(hpersonnes);
    System.out.println("Json hpersonnes=" + json);
  }
}
Executing this class produces the following screen output:
Key takeaways from the example:
- the object [ObjectMapper] required for the transformations jSON / Object: line 11;
- the transformation [Personne] --> jSON: line 17;
- the transformation jSON --> [Personne]: line 20;
- the exception [IOException] thrown by both methods: line 13.
6.15. Installation of [WampServer]
[WampServer] is a software package for developing in PHP / MySQL / Apache on a Windows machine. We will use it only for SGBD MySQL.
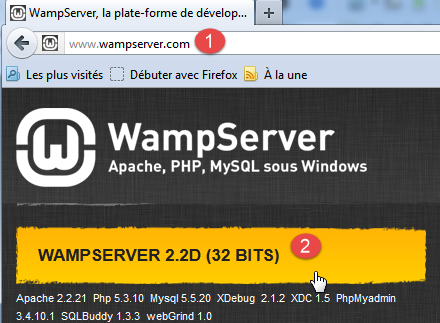
- On the [WampServer] [1] website, select the appropriate version [2],
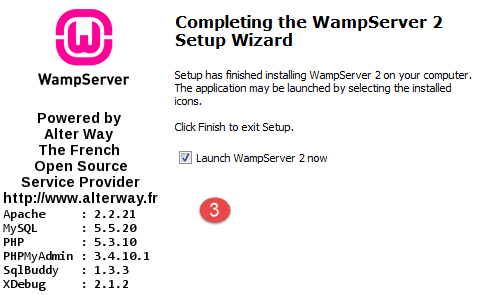
- The downloaded executable is an installer. Various pieces of information are requested during installation. They do not concern MySQL. You can therefore ignore them. The [3] window appears at the end of the installation. Launch [WampServer],
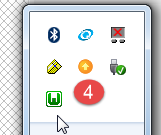
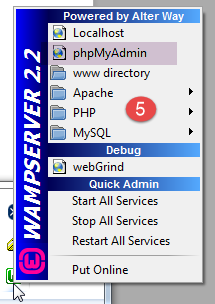
- in [4], the [WampServer] icon is installed in the taskbar at the bottom right of the screen [4],
- and when you click on it, the [5] menu appears. It allows you to manage the Apache server and the SGBD MySQL. To manage the server, use the option [PhpPmyAdmin],
- which brings up the window shown below.
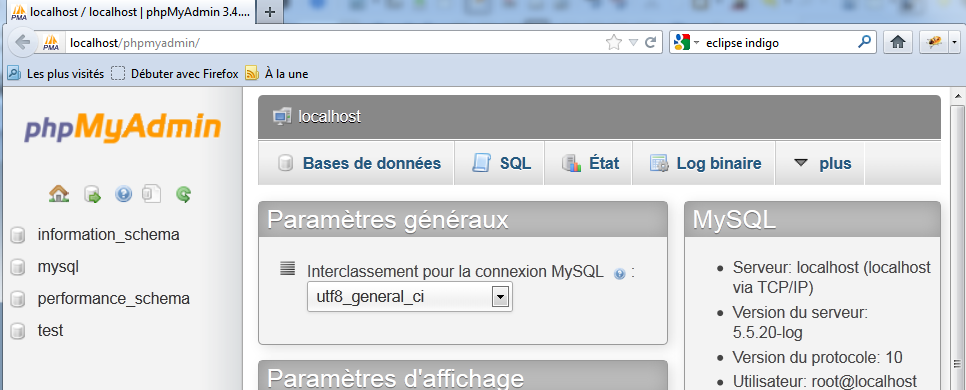
We will provide few details on how to use [PhpMyAdmin]. We demonstrate how to use it in the document.