16. 网络函数
现在我们来讨论 PHP 的网络函数,它们使我们能够使用 TCP / IP(传输控制协议 / 网际协议)进行编程。本章的脚本位于课程代码的 [scripts-console/inet] 文件夹中:
| php8-oct-2026
└── scripts-console
└── inet
├── http
├── imap
├── ip
├── mailpit
├── smtp
└── utilities
|
16.1. Web 编程基础
16.1.1. 概述
考虑两台远程机器 A 和 B 之间的通信:
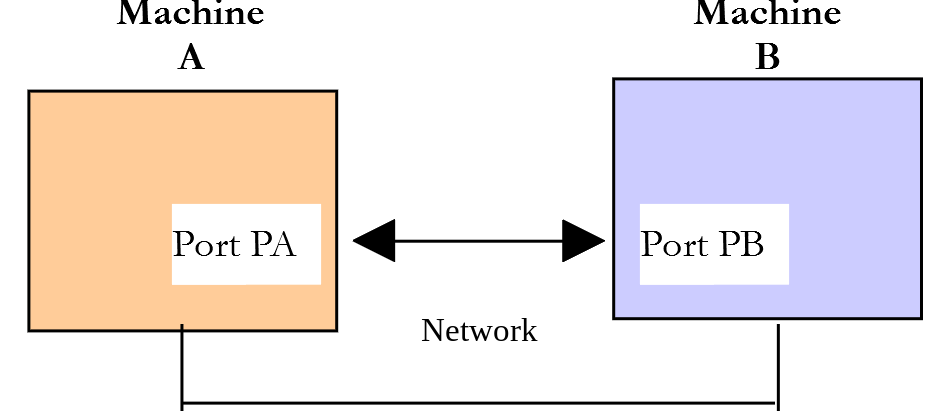
当机器 A 上的应用程序 AppA 想要通过 Internet 与机器 B 上的应用程序 AppB 通信时,它必须知道几件事情:
- 机器 B 的 IP(网际协议)地址或名称;
- AppB 应用程序所使用的端口号。这是因为机器 B 上可能运行着许多在 Internet 上工作的应用程序。当它从网络收到信息时,必须知道这些信息是发给哪个应用程序的。机器 B 上的应用程序通过称为通信端口的接口访问网络。这一信息包含在机器 B 收到的数据包中,以便将其递交给正确的应用程序;
- 机器 B 能够理解的通信协议。在我们的学习中,我们只使用 TCP / IP 协议;
- AppB 应用程序所支持的通信协议。实际上,机器 A 和机器 B 会彼此“通信”。它们所说的内容将被封装在 TCP 和 IP 协议中。然而,当链路另一端的 AppB 应用程序收到 AppA 应用程序发送的信息时,它必须能够解释这些信息。这类似于 A 和 B 两个人通过电话交谈的情形:他们的对话由电话承载。话音被电话 A 编码为信号,经由电话线路传输,到达电话 B 后被解码。然后 B 听到话音。通信协议的概念就在这里发挥作用:如果 A 说法语而 B 听不懂这种语言,A 和 B 就无法有效地交流。
因此,通信的两个应用程序必须就它们所使用的对话类型达成一致。例如,与名为 FTP 的服务的对话,不同于与名为 POP 的服务的对话:这两个服务不接受相同的命令。它们有不同的对话协议。
16.1.2. TCP 协议的特点
这里,我们只关注使用 TCP 传输协议的网络通信,其主要特点如下:
- 希望传输数据的进程,首先与将要接收其所传输信息的进程建立连接。这个连接建立在发送方机器的一个端口和接收方机器的一个端口之间。这样,两个端口之间就创建了一条虚拟路径,它将被专门保留给建立了该连接的两个进程;
- 源进程发送的所有数据包都沿着这条虚拟路径传输,并按照发送的顺序到达;
- 传输的数据看起来是连续的。发送进程按照自己的节奏发送数据。这些数据不一定会立即发出:TCP 协议会等到积累了足够的数据再发送。数据被存放在称为 TCP 段的结构中。一旦该段被填满,就会被传送给 IP 层,在那里被封装成 IP 数据包;
- TCP 协议发送的每个段都有编号。接收方的 TCP 协议会验证它是否按顺序收到各个段。对于每个正确收到的段,它都会向发送方发送一个确认;
- 当发送方收到这个确认时,会通知发送进程。因此,发送进程可以确认某个段已被成功送达;
- 如果在一定时间之后,发送某个段的 TCP 协议没有收到确认,它就会重传该段,从而确保信息传递服务的质量;
- 在两个通信进程之间建立的虚电路是全双工的:这意味着信息可以双向流动。因此,即使源进程仍在继续发送信息,目的进程也可以发送确认。例如,这使得源 TCP 协议可以不等待确认就发送多个段。如果在一定时间之后,它发现没有收到某个特定的第 n 号段的确认,它将从该处开始重新发送各个段。
16.1.3. 客户端-服务器关系
Internet 上的通信通常是不对称的:机器 A 发起连接,向机器 B 请求某项服务。它指明想要与机器 B 的 SB1 服务建立连接。机器 B 接受或拒绝该请求。如果接受,机器 A 就可以向服务 SB1 发送它的请求。这些请求必须符合服务 SB1 所理解的通信协议。这样,在被称为客户端机器的机器 A 和被称为服务器机器的机器 B 之间就建立起了请求-响应式的对话。两个伙伴中的一方将关闭连接。
16.1.4. 客户端架构
请求服务器应用程序提供服务的网络程序,其架构如下:
| open the connection with the SB1 service of machine B
if successful then
while not finished
prepare a request
send it to machine B
wait for and retrieve the response
process it
end while
end if
close the connection
|
16.1.5. 服务器架构
提供服务的程序,其架构如下:
| open the service on the local machine
while the service is open
listen for connection requests on a port called the listening port
when there is a request, have it handled by another task on another port called the service port
end while
|
服务器程序对待客户端最初的连接请求与随后的服务请求方式不同。该程序自己并不提供服务。如果它自己提供服务,那么在服务进行期间它就不再监听连接请求,客户端也就得不到服务。因此它采用不同的做法:一旦在监听端口上收到连接请求并接受之后,服务器就创建一个任务,负责提供客户端所请求的服务。该服务是在服务器机器的另一个端口(称为服务端口)上提供的。这使得可以同时为多个客户端服务。
服务任务将具有如下结构:
| while the service has not been fully provided
wait for a request on the service port
when there is one, build the response
send the response through the service port
end while
release the service port
|
同时为多个客户端服务而不创建任务的另一种方法,是使用一个函数同时监视监听端口和各个服务端口,该函数会等待其中某一个有内容要发送。我们要编写的 TCP 服务器就是这样做的,它使用 PHP 的 [stream_select] 函数。
16.2. 探索 Internet 通信协议
16.2.1. 简介
当客户端连接到服务器时,它们之间就建立起了一种对话。这种对话的性质就构成了所谓服务器的通信协议。最常见的 Internet 协议包括:
- HTTP:超文本传输协议——与 Web 服务器(HTTP 服务器)通信的协议;
- SMTP:简单邮件传输协议——与邮件发送服务器(SMTP 服务器)通信的协议;
- POP:邮局协议——与邮件存储服务器(POP 服务器)通信的协议。它用于取回收到的邮件,而不是发送邮件;
- IMAP:Internet 邮件访问协议——与邮件存储服务器(IMAP 服务器)通信的协议。该协议已逐渐取代了较旧的 POP 协议;
- FTP:文件传输协议——与文件存储服务器(FTP 服务器)通信的协议。
所有这些协议都是基于文本的:客户端和服务器交换的是文本行。如果你有一个客户端,它能够:
- 与 TCP 服务器建立连接;
- 把服务器发送的文本行显示在控制台上;
- 把用户在键盘上键入的文本行发送给服务器;
那么,只要我们知道该协议的规则,就可以与使用基于文本的协议的 TCP 服务器通信。
16.2.2. TCP 实用工具
PHP 7 课程提供了两个用 C# 编写的 Windows 实用工具 [RawTcpClient] 和 [RawTcpServer]。这里我们用两个 PHP 脚本取代它们,我们现在就来研究这两个脚本:这是探索 PHP 网络函数的一个机会。它们位于 [inet/utilities] 文件夹中:
| utilities
├── keyboard.php
├── tcp-client.php
└── tcp-server.php
|
- [tcp-client.php] 允许你连接到服务器 S 的端口 P;
- [tcp-server.php] 创建一个在端口 P 上监听客户端的服务器;
- [keyboard.php] 包含前两个脚本所使用的两个函数。
请注意,也有现成的工具可用于这类测试。在 Windows 上,PowerShell 命令 [Test-NetConnection localhost -Port 80] 可以简单地检查某个端口上是否有服务在响应。我们在 HTTP 协议部分会遇到的 [curl] 工具可以与许多服务器通信,其 [-v] (详细)选项会显示客户端/服务器之间的交换。而我们的这两个脚本则让我们自己键入协议命令。
16.2.2.1. [tcp-server.php] 服务器
TCP 服务器 [tcp-server.php] 使用语法 [php tcp-server.php port] 调用,在本机(你正在使用的计算机)的端口 [port] 上创建一个 TCP 服务:
- 服务器可以同时为多个客户端服务;
- 服务器执行用户通过键盘输入的命令。这些命令如下:
- list:列出当前连接到服务器的客户端。它们以 [id=x - name=y] 的格式显示。[id] 字段用于标识客户端;
- send x [text]:向 x 号客户端(id=x)发送文本。方括号 [] 不会被发送,但它们在命令中是必需的。它们用于在视觉上界定发送给客户端的文本;
- close x:关闭与 x 号客户端的连接;
- quit:关闭所有连接并停止服务;
- 客户端发送给服务器的行显示在控制台上;
- 与客户端的所有通信都记录在名为 [logs/machine-port.txt],的文本文件中,其中 [machine-port] 标识客户端(其 IP 地址及其使用的端口)。
服务器代码如下:
| <?php
declare(strict_types=1);
// 通用 TCP 服务器
// 语法:php tcp-server.php port
// - 在本机的端口 [port] 上等待客户端,可同时服务多个客户端;
// - 显示客户端发送的文本行;
// - 执行在键盘上输入的命令:
// list:列出已连接的客户端;
// send id [text]:向编号为 id 的客户端发送 [text](不含方括号);
// close id:关闭与编号为 id 的客户端的连接;
// quit:关闭所有连接并停止服务器;
// - 将与每个客户端的交互记录在文件 [logs/machine-port.txt] 中
// 其中 [machine-port] 用于标识客户端
require_once __DIR__ . "/keyboard.php";
// 分析命令行参数
if (count($argv) !== 2 || !ctype_digit($argv[1])) {
print "Syntax: php tcp-server.php port\n";
exit(1);
}
$port = $argv[1];
// 在本机的所有网络接口上开放服务
$server = @stream_socket_server("tcp://0.0.0.0:$port", $errorNumber, $error);
if ($server === false) {
print "Unable to open the service on the port [$port]: $error\n";
exit(2);
}
print "Server listening on the port [$port]\n";
print "Commands: list, send id [text], close id, quit\n";
if (!is_dir(__DIR__ . "/logs")) {
mkdir(__DIR__ . "/logs");
}
// 已连接的客户端:id => [套接字, 名称, 日志文件, 缓冲区]
$clients = [];
$nextId = 1;
// 由子进程读取键盘
[$reader, $keyboard] = startKeyboardReader();
$echo = !stream_isatty(STDIN);
$keyboardBuffer = "";
// 服务循环
$done = false;
while (!$done) {
// 我们监视:监听端口、客户端和键盘
$reads = [$server, $keyboard, ...array_column($clients, "socket")];
$writes = $exceptions = null;
stream_select($reads, $writes, $exceptions, null);
foreach ($reads as $stream) {
if ($stream === $server) {
// 有新客户端连接
$socket = stream_socket_accept($server, 0, $name);
if ($socket !== false) {
$id = $nextId++;
$log = fopen(__DIR__ . "/logs/" . str_replace(":", "-", $name) . ".txt", "w");
$clients[$id] = ["socket" => $socket, "name" => $name, "log" => $log, "buffer" => ""];
print "Client no. $id [$name] connected\n";
}
} elseif ($stream === $keyboard) {
// 键盘上输入了一条命令
$data = fread($keyboard, 8192);
if ($data === false || $data === "") {
// 标准输入结束:停止服务器
$done = true;
break;
}
foreach (extractLines($keyboardBuffer, $data) as $command) {
if ($echo) {
print "$command\n";
}
if (execute($command, $clients)) {
$done = true;
break;
}
}
} else {
// 某个客户端发来了数据
$id = array_find_key($clients, fn(array $client): bool => $client["socket"] === $stream);
if ($id === null) {
// 客户端在此期间已被 [close] 命令关闭
continue;
}
$data = fread($stream, 8192);
if ($data === false || $data === "") {
print "The client no. $id has closed the connection\n";
close($clients, $id);
continue;
}
foreach (extractLines($clients[$id]["buffer"], $data) as $line) {
print "<-- client no. $id [$line]\n";
fwrite($clients[$id]["log"], "<-- [$line]\n");
}
}
}
}
// 停止服务
foreach (array_keys($clients) as $id) {
close($clients, $id);
}
fclose($server);
proc_terminate($reader);
print "Server stopped\n";
// --------------------------------------------------------------------------
// 执行键盘上输入的命令 - 如果是 [quit] 命令则返回 true
function execute(string $command, array &$clients): bool
{
// send id [text]
if (preg_match('/^send\s+(\d+)\s+\[(.*)\]$/', $command, $fields)) {
$id = (int) $fields[1];
if (!isset($clients[$id])) {
print "Unknown client no. $id\n";
} else {
fwrite($clients[$id]["socket"], "$fields[2]\r\n");
fwrite($clients[$id]["log"], "--> [$fields[2]]\n");
}
return false;
}
// 其他命令
$words = preg_split('/\s+/', trim($command));
switch ($words[0]) {
case "list":
foreach ($clients as $id => $client) {
print "id=$id - name={$client["name"]}\n";
}
return false;
case "close":
$id = (int) ($words[1] ?? 0);
if (!isset($clients[$id])) {
print "Unknown client no. $id\n";
} else {
close($clients, $id);
print "Connection with the client no. $id closed\n";
}
return false;
case "quit":
return true;
default:
print "Unknown command [$command]. Commands: list, send id [text], close id, quit\n";
return false;
}
}
// --------------------------------------------------------------------------
// 关闭与编号为 [$id] 的客户端的连接
function close(array &$clients, int $id): void
{
fclose($clients[$id]["socket"]);
fclose($clients[$id]["log"]);
unset($clients[$id]);
}
|
说明:
- 第 17 行:加载文件 [keyboard.php];我们稍后再讨论它;
- 第 20 行:数组 [$argv] 包含命令行参数。[$argv[0]] 是脚本的名称,[$argv[1]] 是第一个参数,在这里是端口号。[ctype_digit] 函数验证端口号是否只由数字组成;
- 第 27 行:[stream_socket_server] 函数启动一个 TCP 服务。它的第一个参数是形如 [tcp://interface:port] 的地址。接口 [0.0.0.0] 指本机的所有网络接口:既可以通过 [localhost] 也可以通过本机的局域网 IP 地址访问该服务器。如果失败(例如端口已被占用),函数返回 [false] ,并把错误编号和错误消息存入作为第二和第三个参数传入的两个变量中。运算符 [@] 阻止 PHP 显示它自己的警告:我们显示我们自己的消息;
- 第 39 行:已连接客户端的字典。每个客户端由以下内容描述:它的套接字(把它与服务器连接起来的连接)、它的名称 [address:port]、它的日志文件,以及一个缓冲区,其用途我们稍后再讨论;
- 第 42 行:键盘由一个子进程读取。我们将在 [keyboard.php] 文件中看到原因。[$keyboard] 是一个流,在键盘上键入的行被送入这个流;
- 第 43 行:[stream_isatty] 函数判断标准输入是否为键盘(终端)。如果标准输入已被重定向到文件([php tcp-server.php 100 < commands.txt]),读取的命令不会显示在屏幕上。此时服务器将自己显示它们;
- 第 48–52 行:服务循环。每次迭代时,服务器等待它所监视的某个流有内容要告诉它:监听端口(有新客户端连接)、键盘(键入了命令)或某个客户端(它发送了文本)。[...] 运算符把客户端套接字数组(用 [array_column] 得到)展开到 [$reads] 数组中;
- 第 52 行:[stream_select] 函数等待 [$reads] 数组中的某个流变为可读。最后一个参数 [null], 表示:无限期等待。返回时,函数已把没有内容可读的流从数组 [$reads] 中移除。第二和第三个参数涉及我们想要写入的流和异常事件:我们对它们不感兴趣。由于它们是按引用传递的,我们必须给它们传入变量——这里是 [$writes] 和 [$exceptions],它们等于 [null];
- 第 54–60 行:有新客户端连接。[stream_socket_accept] 函数接受该连接。它返回把服务器与该客户端连接起来的服务套接字,并以 [$name] 的形式把客户端的身份存入 [address:port]。超时为 0 表示不等待:[stream_select] 已经告诉我们有客户端在等待;
- 第 63–75 行:在键盘上键入了一条命令。[fread] 函数读取所有可用的内容(最多 8,192 字节)。空字符串表示流已被关闭。[extractLines] 函数把读取到的内容拆分成完整的行;
- 第 81–95 行:客户端发送了文本。[array_find_key] 函数(PHP 8.4)返回第一个满足条件的数组元素的键,该条件由作为第二个参数传入的箭头函数 [fn] 表达:这样就可以根据套接字取回客户端的 ID。如果 [fread] 返回空字符串,说明客户端已关闭连接。否则,每条收到的行都会被显示,并记录到该客户端的日志文件中;
- 第 110–141 行:[execute] 函数执行通过键盘输入的命令。[send id [text]] 命令由正则表达式识别。文本被发送给客户端,后面跟序列 \r\n:Internet 协议以 CR(\r)和 LF(\n)这两个字符来结束文本行;
- 第 150 行:[close] 函数关闭与某个客户端的连接,并把它从字典 [$clients] 中移除,该字典是按引用传递的([&])。
16.2.2.2. 文件 [keyboard.php]
文件 [keyboard.php] 如下:
| <?php
declare(strict_types=1);
// [tcp-client.php] 和 [tcp-server.php] 共用的工具
// --------------------------------------------------------------------------
// 启动一个读取键盘的子进程,并通过套接字把每一行输入发回给我们
// 为什么要这样?我们的程序必须用 [stream_select] 函数同时监视网络和
// 键盘。但在 Windows 上,[stream_select]
// 只能监视套接字,不能监视键盘 (STDIN)。
// [proc_open] 的 ['socket'] 描述符(PHP 8.0)通过套接字把子进程与
// 父进程连接起来,[stream_select] 可以在所有操作系统上监视它。
// 返回子进程以及传送键盘输入行的套接字
function startKeyboardReader(): array
{
$process = proc_open(
// 子进程:一个单行 PHP 脚本,将其输入复制到输出
[PHP_BINARY, "-r", 'while (($line = fgets(STDIN)) !== false) { echo $line; }'],
// 其输入是我们的键盘,其输出是一个套接字
[0 => STDIN, 1 => ["socket"], 2 => STDERR],
$pipes
);
if ($process === false) {
throw new RuntimeException("Unable to start the keyboard reader");
}
return [$process, $pipes[1]];
}
// --------------------------------------------------------------------------
// 将字节 [$data] 追加到缓冲区 [$buffer],并从中提取完整的行,
// 返回的行不含行尾标记(\n 或 \r\n);
// 缓冲区的末尾(不完整的行)留在缓冲区中
function extractLines(string &$buffer, string $data): array
{
$buffer .= $data;
$lines = explode("\n", $buffer);
// 最后一个元素是当前行,尚未结束
$buffer = array_pop($lines);
return array_map(fn(string $line): string => rtrim($line, "\r"), $lines);
}
|
说明:
- 第 15 行:我们的两个脚本必须同时监视网络和键盘。在 Linux 或 macOS 上,我们可以把 [STDIN] 流(键盘)传给 [stream_select]。在 Windows 上这是不可能的:在那里 [stream_select] 只能监视套接字。变通办法是让第二个进程读取键盘,并通过套接字把键入的行发给我们;
- 第 17–22 行:[proc_open] 函数启动一个子进程。它的第一个参数是要执行的命令,以数组形式给出:当前正在运行的 PHP 解释器([PHP_BINARY])加上 [-r] 选项,该选项执行作为参数传入的 PHP 代码。这段代码把从其输入读取的每一行复制到其输出。第二个参数描述子进程的流:它的输入(0)是我们的标准输入(键盘),它的输出(1)是由 PHP 创建的一个套接字(描述符 [['socket']],自 PHP 8.0 起可用),它的错误(2)被送往我们的错误输出。第三个参数接收所创建的流:[$pipes[1]] 是我们这一端的套接字;
- 第 34 行:当 [stream_select] 发出信号表示某个流已可读时,[fread] 返回收到的内容:它可能是一行、多行,或一行的一部分。[extractLines] 函数把这些字节添加到缓冲区 [$buffer] (按引用传递)中,从中提取完整的行,并把未完成的行保留在缓冲区中。请注意箭头函数 [fn(string $line): string => rtrim($line, "\r")], 它会从以 \r\n 结尾的行中去掉末尾的 \r。
我们本来也可以用函数 [fgets] 来读取行。然而,[fgets] 是按块读取数据的,并把尚未交出的行存放在 PHP 的内部缓冲区中。只监视网络的 [stream_select] 看不到它们。使用 [fread] 读取并由我们自己拆分行,就可以避开这个陷阱。
16.2.2.3. [tcp-client.php] 客户端
TCP 客户端 [tcp-client.php] 使用语法 [php tcp-client.php [--quit command] [--tls] server port] 调用,以连接到端口 [port] (位于服务器 [server] 上):
- 用户在键盘上键入的行被发送给服务器;
- 服务器发送的行一到达就显示在控制台上;
- 所有通信都记录在名为 [logs/server-port.txt] 的文本文件中;
- 命令 [quit] 会停止客户端。选项 [--quit] 允许你选择另一条命令;
- 选项 [--tls] 对连接进行加密。与安全服务器通信时我们需要它。
其代码如下:
| <?php
declare(strict_types=1);
// 通用 TCP 客户端
// 语法:php tcp-client.php [--quit command] [--tls] server port
// - 连接到机器 [server] 的端口 [port];
// - 一收到服务器发送的文本行就立即显示;
// - 向服务器发送在键盘上输入的文本行;
// - 将所有交互记录在文件 [logs/server-port.txt] 中
// 选项:
// --quit command:停止客户端的命令(默认为 [quit])
// --tls:连接一打开即进行加密 (TLS)
require_once __DIR__ . "/keyboard.php";
// 分析命令行参数
$quit = "quit";
$tls = false;
$arguments = [];
for ($i = 1; $i < count($argv); $i++) {
match ($argv[$i]) {
"--quit" => $quit = $argv[++$i] ?? $quit,
"--tls" => $tls = true,
default => $arguments[] = $argv[$i],
};
}
if (count($arguments) !== 2 || !ctype_digit($arguments[1])) {
print "Syntax: php tcp-client.php [--quit command] [--tls] server port\n";
exit(1);
}
[$server, $port] = $arguments;
// 打开与服务器的连接
// 使用 --tls 时,不检查服务器证书:这是一个探索性工具
$context = stream_context_create(["ssl" => ["verify_peer" => false, "verify_peer_name" => false]]);
$transport = $tls ? "tls" : "tcp";
$connection = @stream_socket_client("$transport://$server:$port", $errorNumber, $error, 10,
STREAM_CLIENT_CONNECT, $context);
if ($connection === false) {
print "Failed to connect to the server [$server:$port]: $error\n";
exit(2);
}
$client = stream_socket_get_name($connection, false);
print "Client [$client] connected to the server [$server:$port]\n";
print "Type your commands ($quit to stop):\n";
// 日志文件
if (!is_dir(__DIR__ . "/logs")) {
mkdir(__DIR__ . "/logs");
}
$log = fopen(__DIR__ . "/logs/$server-$port.txt", "w");
// 由子进程读取键盘
[$reader, $keyboard] = startKeyboardReader();
// 如果标准输入是文件 (php tcp-client.php ... < commands.txt),
// 读取的命令不会显示在屏幕上:我们将自己显示它们
$echo = !stream_isatty(STDIN);
// 从服务器和键盘接收的不完整行的缓冲区
$serverBuffer = "";
$keyboardBuffer = "";
// 与服务器的对话循环
$done = false;
while (!$done) {
// 等待服务器或键盘有消息要告诉我们
$reads = $keyboard !== null ? [$connection, $keyboard] : [$connection];
$writes = $exceptions = null;
// 没有键盘时(标准输入结束),等待服务器的时间不超过 2 秒
if (stream_select($reads, $writes, $exceptions, $keyboard !== null ? null : 2) === 0) {
break;
}
// 服务器是否发来了数据?
if (in_array($connection, $reads, true)) {
$data = fread($connection, 8192);
if ($data === false || $data === "") {
// 服务器已关闭连接
if ($serverBuffer !== "") {
display("<-- [$serverBuffer]", $log);
}
print "Connection with the server lost...\n";
break;
}
foreach (extractLines($serverBuffer, $data) as $line) {
display("<-- [$line]", $log);
}
}
// 键盘上是否输入了一行?
if ($keyboard !== null && in_array($keyboard, $reads, true)) {
$data = fread($keyboard, 8192);
if ($data === false || $data === "") {
// 标准输入结束
$keyboard = null;
continue;
}
foreach (extractLines($keyboardBuffer, $data) as $command) {
if ($echo) {
print "$command\n";
}
// 客户端是否结束?
if ($command === $quit) {
$done = true;
break;
}
// 我们向服务器发送命令:互联网协议
// 以序列 \r\n 结束每一行
fwrite($connection, "$command\r\n");
fwrite($log, "--> [$command]\n");
}
}
}
// 关闭连接、日志文件和键盘读取器
fclose($connection);
fclose($log);
proc_terminate($reader);
print "End of the client\n";
// --------------------------------------------------------------------------
// 显示接收到的行并将其记录到日志文件中
function display(string $line, $log): void
{
print "$line\n";
fwrite($log, "$line\n");
}
|
说明:
- 第 21–26 行:参数解析。[match] 表达式(PHP 8.0)使用运算符 [===] 把它的参数与各分支的值进行比较,并对相应的分支求值。这里每个分支都是一个赋值。[$argv[++$i] ?? $quit] 在 [--quit] 后面有参数时返回该参数,否则返回 [$quit] ;
- 第 32 行:数组解包:[$server] 接收 [$arguments[0]], 而 [$port] 接收 [$arguments[1]];
- 第 36–39 行:[stream_socket_client] 函数与 [tcp://server:port] 服务建立连接。使用 [--tls] 选项时,地址变为 [tls://server:port]:此时 PHP 使用 TLS 协议(传输层安全)对连接加密。由 [stream_context_create] 创建的上下文在这里指定不验证服务器证书:对于一个探索性工具而言,这样可以避免遇到使用自签名证书的测试服务器时出现问题。第四个参数是建立连接所允许的最长时间(以秒为单位);
- 第 44 行:[stream_socket_get_name] 函数根据连接是本地(false)还是远程(true),以 [address:port] 的形式返回相应的名称;
- 第 65–70 行:对话循环。它的结构与服务器的相同:[stream_select] 等待服务器或键盘发送内容。当标准输入结束时(例如输入被重定向到文件的情形),客户端继续显示服务器发送的内容,但等待时间不超过 2 秒;
- 第 73–85 行:服务器发送的行用方括号括起来显示,并写入日志文件。如果服务器关闭连接,循环就停止;
- 第 88–108 行:在键盘上键入的每一行都被发送给服务器,后面跟 \r\n 序列,客户端的停止命令除外;
- 第 115 行:最后,终止从键盘读取的子进程。
16.2.2.4. 一个示例
我们来看一个示例。打开两个终端(在 VS Code 中,[+] 按钮位于 [Terminal] 视图中,单击它即可打开一个新终端),并在每个终端中进入 [inet/utilities] 文件夹。在第一个终端中,在端口 100 上启动服务器。在第二个终端中,启动客户端,并让它连接到本机 [localhost] 的端口 100,然后键入一行文本。回到服务器,回应 1 号客户端,请求客户端列表,关闭与 1 号客户端的连接,并停止服务器。
下面是服务器显示的内容(在键盘上键入的命令是 [send 1 ...]、[list]、[close 1]、和 [quit] 这几行):
| > php tcp-server.php 100
Server listening on the port [100]
Commands: list, send id [text], close id, quit
Client no. 1 [127.0.0.1:47966] connected
<-- client no. 1 [hello from client]
send 1 [hello from server]
list
id=1 - name=127.0.0.1:47966
close 1
Connection with the client no. 1 closed
quit
Server stopped
|
- [Client no. 1 [127.0.0.1:47966] connected]:检测到了一个客户端。服务器给它分配了编号 1。该客户端使用的是 IP 地址为 127.0.0.1 的机器上的端口 47966。这个地址属于 [localhost],即本机;
- [<-- client no. 1 [hello from client]]:从客户端收到的行被方括号括起来;
- [send 1 [hello from server]]:发送给 1 号客户端的响应。只有方括号内的文本会被发送,方括号本身不会;
- [list]:客户端列表及其响应;
- [close 1] 之后是 [quit]:与 1 号客户端的连接被关闭,然后服务器被关闭。
下面是客户端显示的内容:
| > php tcp-client.php localhost 100
Client [127.0.0.1:47966] connected to the server [localhost:100]
Type your commands (quit to stop):
hello from client
<-- [hello from server]
Connection with the server lost...
End of the client
|
- [hello from client]:在键盘上键入的行;
- [<-- [hello from server]]:从服务器收到的响应。收到的文本是方括号中的内容;
- [Connection with the server lost...]:客户端检测到服务器关闭了连接。
在 [utilities/logs] 文件夹中创建了两个日志文件,一个由服务器创建,一个由客户端创建。服务器的文件以客户端命名,为 [127.0.0.1-47966.txt]:
| <-- [hello from client]
--> [hello from server]
|
客户端的文件以服务器命名,为 [localhost-100.txt]:
| --> [hello from client]
<-- [hello from server]
|
16.3. 获取 Internet 上某台机器的名称或 IP 地址
Internet 上的计算机由地址(IP,即 IPv4 或 IPv6)标识,而且大多数情况下还有名称。然而,最终实际使用的只是地址。因此,有时需要知道由名称标识的某台机器的 IP 地址。这就是 DNS 服务(域名系统)的作用。
[inet/ip/ip-01.php] 脚本如下:
| <?php
declare(strict_types=1);
// 互联网上的 IP 地址和机器名
// 我们想要获取其 IP 地址和名称的机器
const HOSTS = ["istia.univ-angers.fr", "www.univ-angers.fr", "www.ibm.com", "www.php.net", "yahoo.com", "localhost", "xx"];
// 我们添加本机,其名称由 [gethostname] 给出
foreach ([...HOSTS, gethostname()] as $host) {
getIPandName($host);
}
// 结束
print "Done\n";
// --------------------------------------------------------------------------
function getIPandName(string $machineName): void
{
// $machineName:我们想要获取其 IP 地址的机器的名称
print "---------------\n";
// machineName → IP 地址
$ip = gethostbyname($machineName);
if ($ip === $machineName) {
print "Error, machine [$machineName] not found\n";
return;
}
print "ip[$machineName]=$ip\n";
// 该机器的所有 IPv4 地址
$ips = gethostbynamel($machineName);
if ($ips !== false && count($ips) > 1) {
print "all the IPv4 addresses of [$machineName]: " . implode(", ", $ips) . "\n";
}
// IP 地址 → machineName
$name = gethostbyaddr($ip);
if ($name === false || $name === $ip) {
print "Error, no name for the address [$ip]\n";
} else {
print "name[$ip]=$name\n";
}
}
|
说明:
- 第 8 行:我们想要获取其名称和 IP 地址的机器列表;
- 第 11 行:由 [gethostname] 函数返回的本机名称被添加到该列表中。运算符 [...] 把数组 [HOSTS] 的元素复制到新数组中;
- 第 18 行:PHP 的网络函数在 [getIPandName] 函数中使用;
- 第 23 行:[gethostbyname($machineName)] 函数返回名为 $machineName 的机器的 IPv4 地址 "ip3.ip2.ip1.ip0"。如果机器 $machineName 不存在,函数就把 $machineName 作为结果返回;
- 第 30 行:一台机器可能有多个地址,例如 IPv4 地址。[gethostbynamel] 函数以数组形式返回所有这些地址(如果操作失败,则返回 [false] );
- 第 35 行:[gethostbyaddr($ip)] 函数获取地址为 $ip 的机器的名称。如果地址 $ip 没有名称,函数就把 $ip 作为结果返回;如果地址格式错误,则返回 [false] 。
函数 [gethostbyname] 和 [gethostbynamel] 只能识别 IPv4 形式的地址。要获取某台机器的 IPv6 地址,应使用带有 [dns_get_record] 类型 [DNS_AAAA] 的函数。
结果:
| > php ip-01.php
---------------
ip[istia.univ-angers.fr]=193.49.144.41
name[193.49.144.41]=ametys-fo-2.univ-angers.fr
---------------
ip[www.univ-angers.fr]=193.49.144.41
name[193.49.144.41]=ametys-fo-2.univ-angers.fr
---------------
ip[www.ibm.com]=23.217.77.36
name[23.217.77.36]=a23-217-77-36.deploy.static.akamaitechnologies.com
---------------
ip[www.php.net]=107.150.176.1
name[107.150.176.1]=107-150-176-1.bunnyinfra.net
---------------
ip[yahoo.com]=98.137.11.163
all the IPv4 addresses of [yahoo.com]: 98.137.11.164, 98.137.11.163, 74.6.231.21, 74.6.143.25, 74.6.231.20, 74.6.143.26
name[98.137.11.163]=media-router-fp74.prod.media.vip.gq1.yahoo.com
---------------
ip[localhost]=127.0.0.1
name[127.0.0.1]=localhost
---------------
Error, machine [xx] not found
---------------
ip[vm]=127.0.0.1
name[127.0.0.1]=localhost
Done
|
- 机器 [istia.univ-angers.fr] 和 [www.univ-angers.fr] 具有相同的 IP 地址。由该 IP 地址得到的名称——称为规范名称——则是另一个名称;
- 名称 [www.ibm.com] 与 Akamai 的一台服务器相关联,Akamai 是一家为众多企业托管网站的公司;
- 机器 [yahoo.com] 有六个 IPv4 地址:请求被分散到多台服务器上;
- [localhost] 的地址是 127.0.0.1,称为回环地址:它始终指向本机;
- 机器 [xx] 不存在;
- 最后一台机器是本机,这里名为 [vm]。结果取决于机器的配置:在 Windows 计算机上,你会得到计算机的名称,并且根据配置,还会得到它在局域网中的地址(例如 192.168.x.y)。
所得到的 Internet 上机器的结果会随时间变化:你很可能得不到相同的结果。
16.4. HTTP 协议(超文本传输协议)
16.4.1. 示例 1
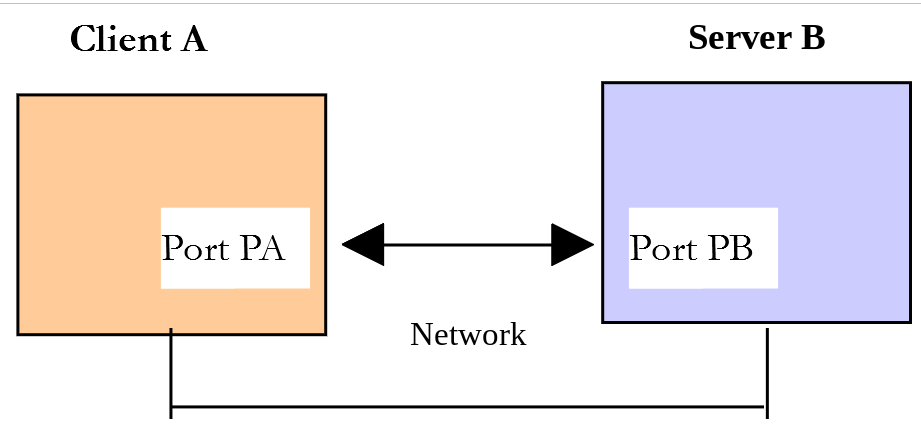
当浏览器显示一个 URL 时,它充当的是 Web 服务器——换句话说,即 HTTP 服务器——的客户端。浏览器主动发起,首先向服务器发送若干命令。在第一个示例中:
- 服务器将是 [tcp-server.php] 实用工具;
- 客户端将是一个 Web 浏览器。
首先,我们在端口 100 上启动服务器,然后使用浏览器请求 URL [http://localhost:100],也就是告诉 HTTP 服务器:我们所查询的 HTTP 服务器运行在本机的端口 100 上。浏览器等待响应。我们回到服务器窗口。在那里,我们看到浏览器发送的行。然后我们逐行键入 HTTP 格式的响应,接着关闭连接并停止服务器:
| > php tcp-server.php 100
Server listening on the port [100]
Commands: list, send id [text], close id, quit
Client no. 1 [127.0.0.1:45752] connected
<-- client no. 1 [GET / HTTP/1.1]
<-- client no. 1 [Host: localhost:100]
<-- client no. 1 [Connection: keep-alive]
<-- client no. 1 [sec-ch-ua: "HeadlessChrome";v="141", "Not?A_Brand";v="8", "Chromium";v="141"]
<-- client no. 1 [sec-ch-ua-mobile: ?0]
<-- client no. 1 [sec-ch-ua-platform: "Linux"]
<-- client no. 1 [Upgrade-Insecure-Requests: 1]
<-- client no. 1 [User-Agent: Mozilla/5.0 (X11; Linux x86_64) AppleWebKit/537.36 (KHTML, like Gecko) HeadlessChrome/141.0.7390.37 Safari/537.36]
<-- client no. 1 [Accept-Language: en-US]
<-- client no. 1 [Accept: text/html,application/xhtml+xml,application/xml;q=0.9,image/avif,image/webp,image/apng,*/*;q=0.8,application/signed-exchange;v=b3;q=0.7]
<-- client no. 1 [Sec-Fetch-Site: none]
<-- client no. 1 [Sec-Fetch-Mode: navigate]
<-- client no. 1 [Sec-Fetch-User: ?1]
<-- client no. 1 [Sec-Fetch-Dest: document]
<-- client no. 1 [Accept-Encoding: gzip, deflate, br, zstd]
<-- client no. 1 []
send 1 [HTTP/1.1 200 OK]
send 1 [Content-Type: text/html; charset=utf-8]
send 1 [Connection: close]
send 1 []
send 1 [<h1>Hello from the TCP server!</h1>]
close 1
Connection with the client no. 1 closed
list
quit
Server stopped
|
- [Client no. 1]:已连接的浏览器;
- 后面是它发送的文本行:
- [GET / HTTP/1.1]:这一行的格式为 [GET URL HTTP/1.1]。它请求 URL /,并指示服务器使用 HTTP 1.1 协议;
- [Host: localhost:100]:这一行的格式为 [Host: server:port]。标头 [Host] 的大小写无关紧要。请注意,客户端查询的是运行在端口 100 上的本地服务器;
- 标头 [Connection] 指定所需的连接模式:[keep-alive] 表示响应之后必须保持连接,以便处理后续的请求;
- [User-Agent] 标头提供客户端的身份。这里是一个 Chromium 浏览器。[sec-ch-ua...] 和 [Sec-Fetch...] 标头是较新的浏览器所特有的。具体的值取决于所使用的浏览器和操作系统;
- [Accept] 标头指定客户端接受哪些文档类型;
- [Accept-Language] 标头指定当所请求的文档有多种语言版本时的首选语言;
- [Accept-Encoding] 标头表示客户端接受压缩的文档;
- 客户端以一个空行结束它的命令;
- [send 1 [...]] 命令把响应发送给浏览器:第一行 [HTTP/1.1 200 OK],表示找到了所请求的文档;然后是标头;一个空行;最后是文档。[Content-Type] 标头指定文档类型——这里是以 UTF-8 编码的 HTML——而 [Connection: close] 标头表示服务器将在文档结束时关闭连接;
- [close 1]:关闭连接向浏览器表明文档已经完整。
然后浏览器显示收到的文档:

我们刚刚“从零开始”编写了一个 Web 服务器!
16.4.2. 示例 2
既然我们知道了浏览器为请求 URL 而发送的命令,现在我们将使用我们的 TCP 客户端 [tcp-client.php] 来请求一个 URL。[Laragon] 的 Apache 服务器将作为我们的 Web 服务器:启动它([Start All] 按钮位于 [Laragon] 中)。[inet/http/pages] 文件夹包含一个静态 HTML 页面:
| <!DOCTYPE html>
<html lang="en">
<head>
<meta charset="utf-8">
<title>Hello</title>
</head>
<body>
<h1>Hello!</h1>
<p>A static page served by the web server.</p>
</body>
</html>
|
由于 [php8-oct-2026] 目录位于 [<laragon>/www] 目录中,因此可以通过 URL [http://localhost/php8-oct-2026/scripts-console/inet/http/pages/hello.html] 访问该页面。让我们用我们的 TCP 客户端来请求它,连接到服务器 [localhost] 的端口 80,Web 服务器就运行在那里。我们输入在上一段中发现的命令:
| > php tcp-client.php localhost 80
Client [127.0.0.1:59734] connected to the server [localhost:80]
Type your commands (quit to stop):
GET /php8-oct-2026/scripts-console/inet/http/pages/hello.html HTTP/1.1
Host: localhost:80
<-- [HTTP/1.1 200 OK]
<-- [Date: Thu, 01 Oct 2026 15:32:51 GMT]
<-- [Server: Apache/2.4.58 (Ubuntu)]
<-- [Last-Modified: Thu, 01 Oct 2026 15:02:24 GMT]
<-- [ETag: "e2-65cc8b40e550d"]
<-- [Accept-Ranges: bytes]
<-- [Content-Length: 226]
<-- [Vary: Accept-Encoding]
<-- [Content-Type: text/html]
<-- []
<-- [<!DOCTYPE html>]
<-- [<html lang="en">]
<-- [ <head>]
<-- [ <meta charset="utf-8">]
<-- [ <title>Hello</title>]
<-- [ </head>]
<-- [ <body>]
<-- [ <h1>Hello!</h1>]
<-- [ <p>A static page served by the web server.</p>]
<-- [ </body>]
<-- [</html>]
quit
End of the client
|
- [GET ... HTTP/1.1]:命令 [GET] ,带有所请求文档的路径;
- [Host: localhost:80]:标头 [Host];
- 这是仅有的两条必不可少的命令。对于其他标头,Web 服务器将使用默认值;
- 必须用来结束客户端命令的空行;
- 空行之后是 Apache Web 服务器的响应:
- [HTTP/1.1 200 OK]:状态行。代码 200 表示找到了文档;
- 接下来是 HTTP 响应标头,后面跟一个空行。标头 [Content-Length] 指定文档的大小,以字节为单位;
- 空行之后是所请求的 HTML 文档;
- 标头 [Server] 标识 Web 服务器:这里是 Apache 2.4 服务器。使用 [Laragon] 时,你会看到条目 [(Win64)] 以及 OpenSSL 和 PHP 的版本;
- [quit]:我们输入 [quit] 来终止客户端连接。而服务器则会把连接再保持打开几秒钟(HTTP/1.1 keep-alive 模式),等待另一个请求,然后将其关闭。
日志文件 [utilities/logs/localhost-80.txt] 包含这些交换:
| --> [GET /php8-oct-2026/scripts-console/inet/http/pages/hello.html HTTP/1.1]
--> [Host: localhost:80]
--> []
<-- [HTTP/1.1 200 OK]
<-- [Date: Thu, 01 Oct 2026 15:32:51 GMT]
<-- [Server: Apache/2.4.58 (Ubuntu)]
<-- [Last-Modified: Thu, 01 Oct 2026 15:02:24 GMT]
<-- [ETag: "e2-65cc8b40e550d"]
<-- [Accept-Ranges: bytes]
<-- [Content-Length: 226]
<-- [Vary: Accept-Encoding]
<-- [Content-Type: text/html]
<-- []
<-- [<!DOCTYPE html>]
<-- [<html lang="en">]
<-- [ <head>]
<-- [ <meta charset="utf-8">]
<-- [ <title>Hello</title>]
<-- [ </head>]
<-- [ <body>]
<-- [ <h1>Hello!</h1>]
<-- [ <p>A static page served by the web server.</p>]
<-- [ </body>]
<-- [</html>]
|
现在我们已经掌握了编写请求 URL 的 TCP 客户端的基础知识。
16.4.3. 示例 3
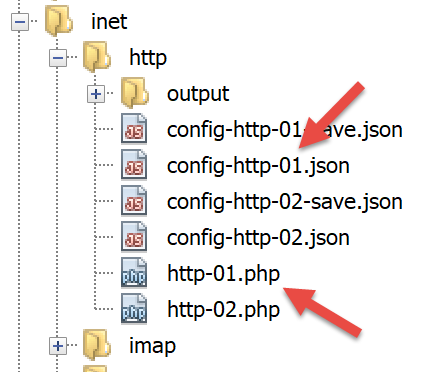
[inet/http/http-01.php] 脚本是一个 HTTP 客户端,由 JSON 文件 [config-http-01.json] 配置。后者的内容如下:
| {
"localhost": {
"port": 80,
"GET": "/php8-oct-2026/scripts-console/inet/http/pages/hello.html",
"Host": "localhost:80",
"User-Agent": "client PHP",
"Accept": "text/html",
"Accept-Language": "en",
"Connection": "close",
"endOfLine": "\r\n"
}
}
|
- 第 2 行:托管要访问的 Web 服务器的机器的名称;
- 第 3 行:该 Web 服务器运行所在的端口;
- 第 4 行:所需文档的 URL;
- 第 5 行:目标机器,格式为 machine:port;
- 第 6 行:HTTP 客户端标识符:你可以输入任何你想要的内容;
- 第 7 行:客户端接受的文档类型,这里是 HTML 文本;
- 第 8 行:所请求文档的期望语言;
- 第 9 行:指示服务器在发送完文档后关闭连接。没有这个标头,HTTP/1.1 服务器会把连接保持打开几秒钟,等待另一个请求,而我们的客户端——它一直读取到连接关闭为止——就会白白地等待;
- 第 10 行:客户端所发送命令的行结束字符。HTTP 协议要求使用 \r\n 序列。
[http-01.php] 脚本如下:
| <?php
declare(strict_types=1);
// 基本的 HTTP 客户端:向 Web 服务器请求文档并将其保存到文件中
// 配置文件可以作为参数传入 (php http-01.php config.json)
$configFileName = $argv[1] ?? "config-http-01.json";
// 获取配置
$config = json_decode(file_get_contents($configFileName), true);
// 获取配置文件中各 URL 的 HTML 文本
foreach ($config as $site => $protocol) {
// 读取站点 $site 的 URL
$result = getURL($site, $protocol);
// 显示结果
print "$result\n";
}
// --------------------------------------------------------------------------
function getURL(string $site, array $protocol, bool $tracking = true): string
{
// 读取站点 $site 的 URL $protocol["GET"] 并将其存入文件 output/$site.html
// 客户端 / 服务器的对话遵循协议 $protocol
//
// 在 $site 的端口 $protocol["port"] 上打开连接
$connection = @stream_socket_client("tcp://$site:{$protocol["port"]}", $errorNumber, $error, 10);
// 出错则返回
if ($connection === false) {
return "Failed to connect to the site [$site:{$protocol["port"]}]: $error";
}
// $connection 表示一个双向通信流
// 位于客户端(本程序)和所联系的 Web 服务器之间
// 此通道用于交换命令和信息
// 对话协议是 HTTP
//
// 创建文件 output/$site.html
if (!is_dir("output")) {
mkdir("output");
}
$html = fopen("output/$site.html", "w");
if ($html === false) {
fclose($connection);
return "Error while creating the file [output/$site.html]";
}
// 客户端即将开始与服务器的 HTTP 对话
if ($tracking) {
print "Client: start of the communication with the server [$site] ----------------------------\n";
}
// 客户端发送的行必须以 \r\n 结尾
$endOfLine = $protocol["endOfLine"];
// 为简化起见,不测试客户端 / 服务器通信中的错误情况
// 客户端发送 GET 命令以请求 URL $protocol["GET"]
// 语法 GET URL HTTP/1.1
$command = "GET {$protocol["GET"]} HTTP/1.1$endOfLine";
if ($tracking) {
print "--> $command";
}
fwrite($connection, $command);
// 发送其他 HTTP 头
foreach ($protocol as $verb => $value) {
if (!in_array($verb, ["GET", "port", "endOfLine"], true)) {
// 构建命令
$command = "$verb: $value$endOfLine";
if ($tracking) {
print "--> $command";
}
// 向服务器发送命令
fwrite($connection, $command);
}
}
// HTTP 协议的头必须以一个空行结束
fwrite($connection, $endOfLine);
//
// 服务器现在将在通道 $connection 上应答。它会发送全部
// 数据,然后关闭通道 (Connection: close)。因此客户端读取
// 来自 $connection 的所有内容,直到通道关闭
//
// 我们首先读取服务器发送的 HTTP 头
// 它们同样以一个空行结束
if ($tracking) {
print "Response of the server [$site] ----------------------------\n";
}
while (($line = fgets($connection)) !== false) {
// 去掉行尾空白(包括 \r\n)
$line = rtrim($line);
// 是否遇到了结束头部的空行?
if ($line === "") {
break;
}
// 显示 HTTP 头
if ($tracking) {
print "<-- $line\n";
}
}
// 读取空行之后的 HTML 文档并将其存入文件
while (($line = fgets($connection)) !== false) {
fwrite($html, $line);
}
// 服务器已关闭连接 - 客户端也随之关闭
fclose($connection);
fclose($html);
// 返回
return "End of the communication with the site [$site]. Check the file [output/$site.html]";
}
|
代码说明:
- 第 7 行:配置文件可以作为参数传入。我们将使用多个配置文件;
- 第 10 行:使用配置文件创建一个字典:
- 字典的键是要查询的 Web 服务器;
- 值指定要使用的 HTTP 协议;
- 第 12 行:程序遍历配置中的 Web 服务器列表;
- 第 20 行:[getURL($site, $protocol, $tracking)] 函数向网站 $site 请求一个文档,并把它存入文本文件 [output/$site.html] 中。默认情况下,客户端/服务器之间的交换会显示在控制台上($tracking=true);
- 第 26 行:[stream_socket_client] 函数与机器 $site 上运行在端口 [port] 的 TCP / IP 服务建立连接。一旦客户端/服务器连接打开,许多 TCP / IP 服务都会交换文本行。这里的 HTTP 协议就是如此。这样,从服务器到客户端的数据流就可以当作文本文件,用 [fgets] 来读取。从客户端到服务器的数据流也是如此,可以用 [fwrite] 来写入;
- 第 40 行:创建文件 [output/$site.html],用于存放收到的 HTML 文档;
- 第 54 行:客户端的第一条命令必须是 [GET URL HTTP/1.1]。它的意思是:“我想要(GET)我所连接的网站上的页面 [URL] 。我使用的是 HTTP 协议,版本 1.1”;
- 第 60–70 行:发送 HTTP 协议的其余各行 [Host, User-Agent, Accept, Accept-Language, Connection]。它们的顺序无关紧要。PHP 7 课程是逐个测试要排除的键;而使用 [in_array] 函数并把第三个参数设为 [true] (严格比较)则更具可读性;
- 第 72 行:向服务器发送一个空行,表示客户端已发送完它的 HTTP 标头,现在正在等待所请求的文档;
- 第 83–94 行:服务器会先发送一系列 HTTP 标头,提供有关所请求文档的各种细节。这些标头以一个空行结束。我们用 [fgets] 读取一行,用 [rtrim] 去掉末尾的空白字符(包括 \r\n),并检查它是否是标志标头结束的空行。如果不是,就显示该标头;
- 第 95–97 行:可以使用 while 循环逐行读取文档的文本行,并保存到文本文件 [output/$site.html] 中。一旦 Web 服务器发送完整个文档,它就会关闭与客户端的连接。在客户端,这会被检测为文件结束:[fgets] 变为 [false]。
让我们在 [inet/http] 文件夹中打开的终端里运行该脚本。控制台显示如下日志:
| > php http-01.php
Client: start of the communication with the server [localhost] ----------------------------
--> GET /php8-oct-2026/scripts-console/inet/http/pages/hello.html HTTP/1.1
--> Host: localhost:80
--> User-Agent: client PHP
--> Accept: text/html
--> Accept-Language: en
--> Connection: close
Response of the server [localhost] ----------------------------
<-- HTTP/1.1 200 OK
<-- Date: Thu, 01 Oct 2026 16:47:43 GMT
<-- Server: Apache/2.4.58 (Ubuntu)
<-- Last-Modified: Thu, 01 Oct 2026 15:02:24 GMT
<-- ETag: "e2-65cc8b40e550d"
<-- Accept-Ranges: bytes
<-- Content-Length: 226
<-- Vary: Accept-Encoding
<-- Connection: close
<-- Content-Type: text/html
End of the communication with the site [localhost]. Check the file [output/localhost.html]
|
在我们的示例中,收到的文件 [output/localhost.html] 如下:
| <!DOCTYPE html>
<html lang="en">
<head>
<meta charset="utf-8">
<title>Hello</title>
</head>
<body>
<h1>Hello!</h1>
<p>A static page served by the web server.</p>
</body>
</html>
|
这确实就是 [hello.html] 文档:它也是浏览器所显示的那个文档。
16.4.4. 示例 4
在这个示例中,我们将说明我们编写的 HTTP 客户端是不够的。
16.4.4.1. HTTPS 协议
让我们更新配置文件。文件 [config-http-01-https.json] 如下:
| {
"localhost": {
"port": 443,
"GET": "/php8-oct-2026/scripts-console/inet/http/pages/hello.html",
"Host": "localhost:443",
"User-Agent": "client PHP",
"Accept": "text/html",
"Accept-Language": "en",
"Connection": "close",
"endOfLine": "\r\n"
}
}
|
在这里,我们将请求文档 [hello.html] ,来自服务器 [localhost] 的端口 443。端口 443 是安全 HTTP 协议(称为 HTTPS)所使用的端口。在该协议中,客户端与服务器之间的对话以一次保护连接安全的信息交换开始:连接将由 TLS 协议加密。因此客户端必须使用 HTTPS 协议而不是 HTTP 协议,而我们的客户端并没有这样做。
[Laragon] 的 Apache 服务器支持 HTTPS 协议,但默认没有启用。可以通过 [Laragon] 菜单启用它:在 [Laragon] 窗口中右键单击,然后选择 [Apache / SSL / Enabled]。随后 Apache 服务器重启,现在监听两个端口:端口 80(HTTP)和端口 443(HTTPS)。[Laragon] 已为它生成了一个所谓的自签名证书。我们将在下一章再回到这一点。
使用这个配置文件([php http-01.php config-http-01-https.json]),控制台输出如下:
| > php http-01.php config-http-01-https.json
Client: start of the communication with the server [localhost] ----------------------------
--> GET /php8-oct-2026/scripts-console/inet/http/pages/hello.html HTTP/1.1
--> Host: localhost:443
--> User-Agent: client PHP
--> Accept: text/html
--> Accept-Language: en
--> Connection: close
Response of the server [localhost] ----------------------------
<-- HTTP/1.1 400 Bad Request
<-- Date: Thu, 01 Oct 2026 16:47:43 GMT
<-- Server: Apache/2.4.58 (Ubuntu)
<-- Content-Length: 438
<-- Connection: close
<-- Content-Type: text/html; charset=iso-8859-1
End of the communication with the site [localhost]. Check the file [output/localhost.html]
|
- [HTTP/1.1 400 Bad Request]:服务器回应说客户端的请求无效。
文件 [output/localhost.html] 的内容如下:
| <!DOCTYPE HTML PUBLIC "-//IETF//DTD HTML 2.0//EN">
<html><head>
<title>400 Bad Request</title>
</head><body>
<h1>Bad Request</h1>
<p>Your browser sent a request that this server could not understand.<br />
Reason: You're speaking plain HTTP to an SSL-enabled server port.<br />
Instead use the HTTPS scheme to access this URL, please.<br />
</p>
<hr>
<address>Apache/2.4.58 (Ubuntu) Server at 127.0.0.1 Port 443</address>
</body></html>
|
服务器明确指出我们没有使用正确的协议:“You’re speaking plain HTTP to an SSL-enabled server port”(你正对一个为 SSL——TLS 的旧称——保留的端口说 HTTP)。
16.4.4.2. 分块发送的文档
[inet/http/pages] 文件夹包含第二个文档,即 PHP 脚本 [index.php]:
| <?php
declare(strict_types=1);
// 分多个部分发送的页面:[flush] 强制立即发送已写入的内容
// 因此服务器在发送头部时并不知道文档的总大小
print "<!DOCTYPE html>\n<html lang=\"en\">\n<head><meta charset=\"utf-8\"><title>Chunks</title></head>\n<body>\n";
flush();
for ($i = 1; $i <= 3; $i++) {
print "<p>chunk no. $i</p>\n";
flush();
}
print "</body>\n</html>\n";
|
- 第 8 行:[flush] 函数指示服务器立即把脚本已经写出的内容发送给客户端。因此,脚本把它的文档分成五个独立的部分发送。所以,在发送 HTTP 响应标头时,服务器并不知道文档的总大小。
现在我们使用下面的配置文件 [config-http-01-chunks.json]:
| {
"localhost": {
"port": 80,
"GET": "/php8-oct-2026/scripts-console/inet/http/pages/",
"Host": "localhost:80",
"User-Agent": "client PHP",
"Accept": "text/html",
"Accept-Language": "en",
"Connection": "close",
"endOfLine": "\r\n"
}
}
|
- 第 4 行:我们请求文件 [pages/]。于是 Apache 服务器发送它的默认文档,这里是 [index.php]。
控制台输出如下:
| > php http-01.php config-http-01-chunks.json
Client: start of the communication with the server [localhost] ----------------------------
--> GET /php8-oct-2026/scripts-console/inet/http/pages/ HTTP/1.1
--> Host: localhost:80
--> User-Agent: client PHP
--> Accept: text/html
--> Accept-Language: en
--> Connection: close
Response of the server [localhost] ----------------------------
<-- HTTP/1.1 200 OK
<-- Date: Thu, 01 Oct 2026 16:47:43 GMT
<-- Server: Apache/2.4.58 (Ubuntu)
<-- X-Powered-By: PHP/8.5.11
<-- Vary: Accept-Encoding
<-- Connection: close
<-- Transfer-Encoding: chunked
<-- Content-Type: text/html; charset=UTF-8
End of the communication with the site [localhost]. Check the file [output/localhost.html]
|
- 标头 [X-Powered-By] 表明该文档由 PHP 8.5 生成;
- 标头 [Transfer-Encoding: chunked] 表明服务器正在分块发送文档。没有 [Content-Length] 标头:服务器没有宣告文档的大小。
这导致发送给客户端的流中出现数字:每个块之前有一行,以十六进制表示其大小,文档以大小为 0 的块结束。下面是 [output/localhost.html] 文件:
| 61
<!DOCTYPE html>
<html lang="en">
<head><meta charset="utf-8"><title>Chunks</title></head>
<body>
13
<p>chunk no. 1</p>
13
<p>chunk no. 2</p>
13
<p>chunk no. 3</p>
10
</body>
</html>
0
|
- [61]:第一个块的十六进制大小,即 97 字节:文档的前四行;
- [13]:接下来三个块的大小,即 19 字节;
- [10]:最后一个块的大小,16 字节;
- [0]:结束文档的 0 字节块。
一个合格的 HTTP 客户端不应把这些数字留在最终的文档中。
16.4.4.3. 重定向
这是最后一个配置文件 [config-http-01-redirect.json]:
| {
"localhost": {
"port": 80,
"GET": "/php8-oct-2026/scripts-console/inet/http/pages",
"Host": "localhost:80",
"User-Agent": "client PHP",
"Accept": "text/html",
"Accept-Language": "en",
"Connection": "close",
"endOfLine": "\r\n"
}
}
|
它与前面的示例相似,但所请求的 URL 不是以 / 字符结尾的。这是两个不同的 URL。运行 HTTP 客户端后,得到如下控制台输出:
| > php http-01.php config-http-01-redirect.json
Client: start of the communication with the server [localhost] ----------------------------
--> GET /php8-oct-2026/scripts-console/inet/http/pages HTTP/1.1
--> Host: localhost:80
--> User-Agent: client PHP
--> Accept: text/html
--> Accept-Language: en
--> Connection: close
Response of the server [localhost] ----------------------------
<-- HTTP/1.1 301 Moved Permanently
<-- Date: Thu, 01 Oct 2026 16:47:43 GMT
<-- Server: Apache/2.4.58 (Ubuntu)
<-- Location: http://localhost/php8-oct-2026/scripts-console/inet/http/pages/
<-- Content-Length: 346
<-- Connection: close
<-- Content-Type: text/html; charset=iso-8859-1
End of the communication with the site [localhost]. Check the file [output/localhost.html]
|
- [HTTP/1.1 301 Moved Permanently]:代码 301 表示所请求的文档已被永久移动到 URL;
- [Location: ...]:新的 URL。请注意这次末尾有 / 字符:[pages] 是一个目录,Apache 服务器指示客户端把它引用为以 / 结尾的 URL。
此时文件 [output/localhost.html] 如下:
| <!DOCTYPE HTML PUBLIC "-//IETF//DTD HTML 2.0//EN">
<html><head>
<title>301 Moved Permanently</title>
</head><body>
<h1>Moved Permanently</h1>
<p>The document has moved <a href="http://localhost/php8-oct-2026/scripts-console/inet/http/pages/">here</a>.</p>
<hr>
<address>Apache/2.4.58 (Ubuntu) Server at localhost Port 80</address>
</body></html>
|
HTTP 客户端应当能够跟随重定向。在这种情况下,它应当自动请求新的 URL [http://localhost/php8-oct-2026/scripts-console/inet/http/pages/]。
16.4.5. 示例 5
前面的示例向我们表明,我们的 HTTP 客户端是不够的。现在我们将介绍一个名为 [curl] 的工具,它可以在处理上述问题的同时获取 Web 文档:HTTPS 协议、分块发送的文档、重定向……[curl] 工具随 Windows(从 Windows 10 开始)以及 [Laragon] 一起提供。在 PowerShell 终端中,必须键入 [curl.exe],而不是 [curl]:在 PowerShell 5 中,[curl] 是另一个命令 [Invoke-WebRequest] 的别名。
命令 [curl --help] 显示 [curl] 的主要配置选项。它们有几十个,我们只会用到其中很少几个。要请求一个 URL,只需键入命令 [curl URL]。该命令会把所请求的文档显示在控制台上。如果你还想查看客户端与服务器之间的 HTTP 交换,请键入 [curl --verbose URL]。最后,要把所请求的 HTML 文档保存到文件中,请键入 [curl --verbose --output file URL]。
为了避免弄乱课程文件夹,我们进入一个工作文件夹——例如 [c:\temp\curl] (如果不存在就创建它)——并请求页面 [hello.html]:
| > curl --verbose --output localhost.html http://localhost/php8-oct-2026/scripts-console/inet/http/pages/hello.html
* Host localhost:80 was resolved.
* IPv6: ::1
* IPv4: 127.0.0.1
% Total % Received % Xferd Average Speed Time Time Time Current
Dload Upload Total Spent Left Speed
0 0 0 0 0 0 0 0 --:--:-- --:--:-- --:--:-- 0* Trying 127.0.0.1:80...
* Connected to localhost (127.0.0.1) port 80
> GET /php8-oct-2026/scripts-console/inet/http/pages/hello.html HTTP/1.1
> Host: localhost
> User-Agent: curl/8.5.0
> Accept: */*
>
< HTTP/1.1 200 OK
< Date: Thu, 01 Oct 2026 15:32:56 GMT
< Server: Apache/2.4.58 (Ubuntu)
< Last-Modified: Thu, 01 Oct 2026 15:02:24 GMT
< ETag: "e2-65cc8b40e550d"
< Accept-Ranges: bytes
< Content-Length: 226
< Vary: Accept-Encoding
< Content-Type: text/html
<
{ [226 bytes data]
100 226 100 226 0 0 306k 0 --:--:-- --:--:-- --:--:-- 230k
* Connection #0 to host localhost left intact
|
- 以 [*] 开头的行包含来自 [curl] 的信息:它为 [localhost] 找到了两个地址,即 IPv6 地址 [::1] 和 IPv4 地址 [127.0.0.1],并连接到了第二个;
- 以 [>] 开头的行是 [curl] 发送给服务器 [localhost] 的行。可以看出使用的是 HTTP 协议;
- 以 [<] 开头的行是服务器作为响应发送的行;
- 其余的行显示下载进度条。
文件 [localhost.html] 包含所请求的文档。你可以在文本编辑器中打开该文件来验证这一点。
现在我们请求 URL [https://localhost/php8-oct-2026/scripts-console/inet/http/pages/hello.html]。要获取该 URL,HTTP 客户端必须能够使用 HTTPS 通信。客户端 [curl] 就能做到这一点。服务器的证书是自签名的:[curl] 会拒绝继续。选项 [--insecure] 指示它不验证证书。控制台输出如下:
| > curl --verbose --insecure --output localhost-https.html https://localhost/php8-oct-2026/scripts-console/inet/http/pages/hello.html
* Host localhost:443 was resolved.
* IPv6: ::1
* IPv4: 127.0.0.1
% Total % Received % Xferd Average Speed Time Time Time Current
Dload Upload Total Spent Left Speed
0 0 0 0 0 0 0 0 --:--:-- --:--:-- --:--:-- 0* Trying 127.0.0.1:443...
* Connected to localhost (127.0.0.1) port 443
* ALPN: curl offers h2,http/1.1
} [5 bytes data]
* TLSv1.3 (OUT), TLS handshake, Client hello (1):
} [512 bytes data]
* TLSv1.3 (IN), TLS handshake, Server hello (2):
{ [122 bytes data]
* TLSv1.3 (IN), TLS handshake, Encrypted Extensions (8):
{ [21 bytes data]
* TLSv1.3 (IN), TLS handshake, Certificate (11):
{ [822 bytes data]
* TLSv1.3 (IN), TLS handshake, CERT verify (15):
{ [264 bytes data]
* TLSv1.3 (IN), TLS handshake, Finished (20):
{ [52 bytes data]
* TLSv1.3 (OUT), TLS change cipher, Change cipher spec (1):
} [1 bytes data]
* TLSv1.3 (OUT), TLS handshake, Finished (20):
} [52 bytes data]
* SSL connection using TLSv1.3 / TLS_AES_256_GCM_SHA384 / X25519 / RSASSA-PSS
* ALPN: server accepted http/1.1
* Server certificate:
* subject: CN=localhost
* start date: Oct 1 14:55:35 2026 GMT
* expire date: Sep 28 14:55:35 2036 GMT
* issuer: CN=localhost
* SSL certificate verify result: self-signed certificate (18), continuing anyway.
* Certificate level 0: Public key type RSA (2048/112 Bits/secBits), signed using sha256WithRSAEncryption
* using HTTP/1.x
} [5 bytes data]
> GET /php8-oct-2026/scripts-console/inet/http/pages/hello.html HTTP/1.1
> Host: localhost
> User-Agent: curl/8.5.0
> Accept: */*
>
{ [5 bytes data]
* TLSv1.3 (IN), TLS handshake, Newsession Ticket (4):
{ [57 bytes data]
* TLSv1.3 (IN), TLS handshake, Newsession Ticket (4):
{ [57 bytes data]
* old SSL session ID is stale, removing
{ [5 bytes data]
< HTTP/1.1 200 OK
< Date: Thu, 01 Oct 2026 15:32:56 GMT
< Server: Apache/2.4.58 (Ubuntu)
< Last-Modified: Thu, 01 Oct 2026 15:02:24 GMT
< ETag: "e2-65cc8b40e550d"
< Accept-Ranges: bytes
< Content-Length: 226
< Vary: Accept-Encoding
< Content-Type: text/html
<
{ [226 bytes data]
100 226 100 226 0 0 45798 0 --:--:-- --:--:-- --:--:-- 47200
* Connection #0 to host localhost left intact
|
- 以 [TLSv1.3 ...] 开头的行显示为保护连接安全而进行的客户端/服务器交换:连接将被加密;
- [Server certificate] 各行描述服务器发送的证书。它是为机器 [localhost] (CN=localhost)颁发的,颁发者是这台机器本身(issuer: CN=localhost):这是一个自签名证书。[curl] 报告说它无法验证该证书,但仍然继续;
- 接下来是通常的加密 HTTP 交换。[HTTP/1.1 200 OK]:找到了所请求的文档。
现在我们请求 URL [http://localhost/php8-oct-2026/scripts-console/inet/http/pages]。我们此前已经看到,对于这个 URL,会重定向到以字符 / 结尾的同一个 URL。控制台输出如下:
| > curl --verbose --location --output pages.html http://localhost/php8-oct-2026/scripts-console/inet/http/pages
* Host localhost:80 was resolved.
* IPv6: ::1
* IPv4: 127.0.0.1
% Total % Received % Xferd Average Speed Time Time Time Current
Dload Upload Total Spent Left Speed
0 0 0 0 0 0 0 0 --:--:-- --:--:-- --:--:-- 0* Trying 127.0.0.1:80...
* Connected to localhost (127.0.0.1) port 80
> GET /php8-oct-2026/scripts-console/inet/http/pages HTTP/1.1
> Host: localhost
> User-Agent: curl/8.5.0
> Accept: */*
>
< HTTP/1.1 301 Moved Permanently
< Date: Thu, 01 Oct 2026 15:32:56 GMT
< Server: Apache/2.4.58 (Ubuntu)
< Location: http://localhost/php8-oct-2026/scripts-console/inet/http/pages/
< Content-Length: 346
< Content-Type: text/html; charset=iso-8859-1
<
* Ignoring the response-body
100 346 100 346 0 0 637k 0 --:--:-- --:--:-- --:--:-- 337k
* Connection #0 to host localhost left intact
* Issue another request to this URL: 'http://localhost/php8-oct-2026/scripts-console/inet/http/pages/'
* Found bundle for host: 0x562ea38dc400 [serially]
* Can not multiplex, even if we wanted to
* Re-using existing connection with host localhost
> GET /php8-oct-2026/scripts-console/inet/http/pages/ HTTP/1.1
> Host: localhost
> User-Agent: curl/8.5.0
> Accept: */*
>
< HTTP/1.1 200 OK
< Date: Thu, 01 Oct 2026 15:32:56 GMT
< Server: Apache/2.4.58 (Ubuntu)
< X-Powered-By: PHP/8.5.11
< Vary: Accept-Encoding
< Transfer-Encoding: chunked
< Content-Type: text/html; charset=UTF-8
<
{ [97 bytes data]
100 170 0 170 0 0 147k 0 --:--:-- --:--:-- --:--:-- 147k
* Connection #0 to host localhost left intact
|
- 我们使用 [--location] 选项来表示我们想要跟随服务器发送的重定向;
- [HTTP/1.1 301 Moved Permanently] 和 [Location]:服务器表明所请求的文档位于另一个 URL;
- [Issue another request to this URL]:[curl] 发送一个新的请求,这次是发往新的 URL,并重用同一个连接;
- [HTTP/1.1 200 OK]:服务器回应说它找到了所请求的文档;
- [Transfer-Encoding: chunked]:它分块发送文档。[curl] 会去掉块的大小。
所请求的文档将保存在文件 [pages.html] 中。
16.4.6. 示例 6
PHP 有一个名为 [curl] 的扩展,使得可以在 PHP 程序中使用 [curl] 工具的功能。它在 [Laragon] 的 PHP 中已启用:可以用 [php -m] 命令验证这一点,该命令列出已加载的扩展。如果它没有启用,你需要取消 [extension=curl] 这一行的注释,它位于文件 [php.ini] 中。
我们将编写一个名为 [http-02.php] 的脚本,它将使用下面的配置文件 JSON [config-http-02.json]:
| {
"localhost": {
"timeout": 5,
"url": "http://localhost/php8-oct-2026/scripts-console/inet/http/pages"
},
"localhost-https": {
"timeout": 5,
"url": "https://localhost/php8-oct-2026/scripts-console/inet/http/pages/hello.html",
"verify-peer": false
}
}
|
[key => value] 字典中的每个条目具有如下结构:
- key:一个名称,将用于命名保存文档的文件;
- value:一个字典,包含以下键:
- timeout:等待服务器响应的最长时间。超过此时间后,客户端将断开连接;
- url:所请求文档的 URL;
- verify-peer:是否应验证服务器的证书(HTTPS)?默认为 True。
[http-02.php] 脚本的代码如下:
| <?php
declare(strict_types=1);
// 使用 PHP 的 [curl] 扩展编写的 HTTP 客户端
// 可以使用 HTTPS、跟随重定向并接收分块发送的文档
// 常量
const CONFIG_FILE_NAME = "config-http-02.json";
// 获取配置
$config = json_decode(file_get_contents(CONFIG_FILE_NAME), true);
// 获取配置文件中各 URL 的 HTML 文本
foreach ($config as $site => $info) {
// 读取站点 $site 的 URL
$result = getUrl($site, $info["url"], $info["timeout"], $info["verify-peer"] ?? true);
// 显示结果
print "$result\n";
}
// --------------------------------------------------------------------------
function getUrl(string $site, string $url, int $timeout, bool $verifyPeer = true): string
{
// 读取 URL $url 并将其存入文件 output/$site.html
//
// 跟踪
print "Client: start of the communication with the server [$site] ----------------------------\n";
// 初始化 cURL 会话:自 PHP 8.0 起,[curl_init] 返回 [CurlHandle] 对象
$curl = curl_init($url);
if ($curl === false) {
return "Error while initializing the cURL session for the site [$site]";
}
// curl 选项
$options = [
// 详细模式:显示客户端 / 服务器的交互……
CURLOPT_VERBOSE => true,
// ……输出到标准输出(默认是错误输出)
CURLOPT_STDERR => STDOUT,
// 新建连接 - 不使用缓存
CURLOPT_FRESH_CONNECT => true,
// 请求超时(单位:秒)
CURLOPT_TIMEOUT => $timeout,
CURLOPT_CONNECTTIMEOUT => $timeout,
// 是否检查服务器证书的有效性 (HTTPS)
CURLOPT_SSL_VERIFYPEER => $verifyPeer,
CURLOPT_SSL_VERIFYHOST => $verifyPeer ? 2 : 0,
// 跟随重定向
CURLOPT_FOLLOWLOCATION => true,
// 以字符串形式获取所请求的文档
CURLOPT_RETURNTRANSFER => true,
];
// curl 配置
curl_setopt_array($curl, $options);
// 执行请求
$pageContent = curl_exec($curl);
// 当对象 $curl 消失时,cURL 会话自动关闭
// ([curl_close] 自 PHP 8.0 起已无用,自 PHP 8.5 起已弃用)
//
// 使用结果
if ($pageContent === false) {
// 发生了通信错误
return "Error communicating with the server [$site]: " . curl_error($curl);
}
// 将结果保存到 output/$site.html
if (!is_dir("output")) {
mkdir("output");
}
if (file_put_contents("output/$site.html", $pageContent) === false) {
return "Error while creating the file [output/$site.html]";
}
// 成功返回
return "End of the communication with the server [$site]. Check the file [output/$site.html]";
}
|
说明:
- 第 12 行:使用配置文件创建字典 [$config];
- 第 15 行:我们遍历配置中的站点列表;
- 第 17 行:对每个站点,调用函数 [getUrl] 下载 URL [$info["url"]],超时时间为 [$info["timeout"]];
- 第 30 行:启动一个 [curl] 会话。[curl_init] 此时还不会连接到 Web 服务器。从 PHP 8.0 起,它返回 [CurlHandle] 类的对象(而不是资源),该对象将作为所有后续 [curl] 函数的参数。如果会话初始化失败,函数返回布尔值 [false];
- 第 35–52 行:字典 [$options] 配置到服务器的 [curl] 连接:
- [CURLOPT_VERBOSE]:显示客户端/服务器之间的交换,类似于 [--verbose] 选项,该选项属于 [curl] 工具。[CURLOPT_STDERR] 把它们送往标准输出([STDOUT])而不是错误输出,这样可以保持显示的顺序;
- [CURLOPT_SSL_VERIFYPEER] 和 [CURLOPT_SSL_VERIFYHOST]:验证服务器证书及其中包含的名称;
- [CURLOPT_FOLLOWLOCATION]:跟随重定向,类似于 [--location] 选项;
- [CURLOPT_RETURNTRANSFER]:以字符串形式返回收到的文档;
- 第 54 行:把连接选项传给 [$curl] 对象;
- 第 56 行:使用所定义的选项连接到所请求的 URL。由于有 [CURLOPT_RETURNTRANSFER => true] 选项,[curl_exec] 函数以字符串形式返回服务器发送的文档,如果文档是分块发送的,则已去掉块的大小。如果连接失败,[curl_exec] 函数返回布尔值 [false] 。此时 [curl_error] 函数返回错误的原因;
- 第 57 行:PHP 7 课程使用 [curl_close] 函数关闭会话。自 PHP 8.0 起,这个函数不再起任何作用:当 [CurlHandle] 对象不再被使用时,会话就会关闭。它自 PHP 8.5 起已被弃用;
- 第 69 行:收到的页面被保存到本地文件中。
运行 [http-02.php] 脚本时,会显示如下控制台输出:
| > php http-02.php
Client: start of the communication with the server [localhost] ----------------------------
* Host localhost:80 was resolved.
* IPv6: ::1
* IPv4: 127.0.0.1
* Trying 127.0.0.1:80...
* Connected to localhost (127.0.0.1) port 80
> GET /php8-oct-2026/scripts-console/inet/http/pages HTTP/1.1
Host: localhost
Accept: */*
< HTTP/1.1 301 Moved Permanently
< Date: Thu, 01 Oct 2026 16:47:51 GMT
< Server: Apache/2.4.58 (Ubuntu)
< Location: http://localhost/php8-oct-2026/scripts-console/inet/http/pages/
< Content-Length: 346
< Content-Type: text/html; charset=iso-8859-1
<
* Ignoring the response-body
* Connection #0 to host localhost left intact
* Issue another request to this URL: 'http://localhost/php8-oct-2026/scripts-console/inet/http/pages/'
* Found bundle for host: 0x557b108f4920 [serially]
* Can not multiplex, even if we wanted to
* Re-using existing connection with host localhost
> GET /php8-oct-2026/scripts-console/inet/http/pages/ HTTP/1.1
Host: localhost
Accept: */*
< HTTP/1.1 200 OK
< Date: Thu, 01 Oct 2026 16:47:51 GMT
< Server: Apache/2.4.58 (Ubuntu)
< X-Powered-By: PHP/8.5.11
< Vary: Accept-Encoding
< Transfer-Encoding: chunked
< Content-Type: text/html; charset=UTF-8
<
* Connection #0 to host localhost left intact
End of the communication with the server [localhost]. Check the file [output/localhost.html]
Client: start of the communication with the server [localhost-https] ----------------------------
* Host localhost:443 was resolved.
* IPv6: ::1
* IPv4: 127.0.0.1
* Trying 127.0.0.1:443...
* Connected to localhost (127.0.0.1) port 443
* ALPN: curl offers h2,http/1.1
* SSL connection using TLSv1.3 / TLS_AES_256_GCM_SHA384 / X25519 / RSASSA-PSS
* ALPN: server accepted http/1.1
* Server certificate:
* subject: CN=localhost
* start date: Oct 1 14:55:35 2026 GMT
* expire date: Sep 28 14:55:35 2036 GMT
* issuer: CN=localhost
* SSL certificate verify result: self-signed certificate (18), continuing anyway.
* Certificate level 0: Public key type RSA (2048/112 Bits/secBits), signed using sha256WithRSAEncryption
* using HTTP/1.x
> GET /php8-oct-2026/scripts-console/inet/http/pages/hello.html HTTP/1.1
Host: localhost
Accept: */*
* old SSL session ID is stale, removing
< HTTP/1.1 200 OK
< Date: Thu, 01 Oct 2026 16:47:51 GMT
< Server: Apache/2.4.58 (Ubuntu)
< Last-Modified: Thu, 01 Oct 2026 15:02:24 GMT
< ETag: "e2-65cc8b40e550d"
< Accept-Ranges: bytes
< Content-Length: 226
< Vary: Accept-Encoding
< Content-Type: text/html
<
* Connection #0 to host localhost left intact
End of the communication with the server [localhost-https]. Check the file [output/localhost-https.html]
|
发生的数据交换与 [curl] 工具相同:以 [>] 开头的行是发送给服务器的;以 [<] 开头的行是从服务器接收的;以 [*] 开头的行包含来自 [curl] 的信息。重定向被跟随了,HTTPS 连接也已建立。
16.4.7. 结论
在本节中,我们探索了 HTTP 协议,并编写了一个能够从网上下载 URL 的 [http-02.php] 脚本。在下一章中,我们将为此目的使用 Symfony 框架的 [HttpClient] 组件。
16.5. SMTP 协议(简单邮件传输协议)
16.5.1. 简介
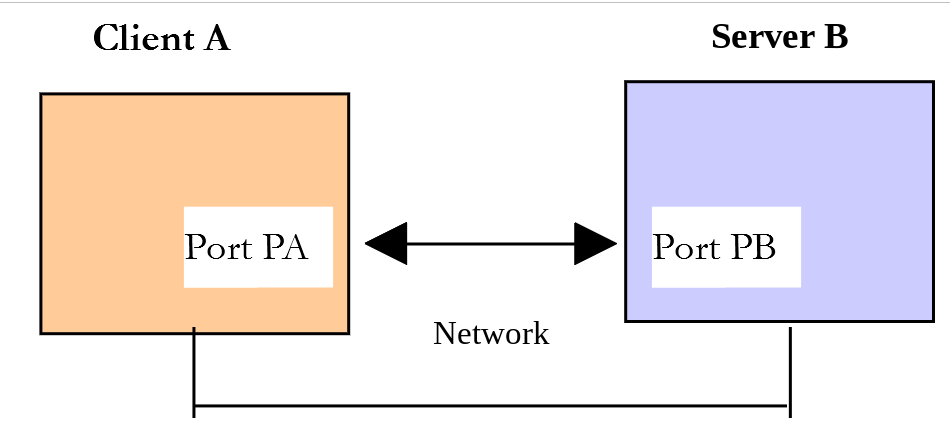
在本章中:
- [Server B] 将是我们要安装的本地 SMTP 服务器;
- [Client A] 将是各种形式的 SMTP 客户端:
- 用来探索 SMTP 协议的 [tcp-client.php] 客户端;
- 一个重现用 [tcp-client.php] 所发现的 SMTP 协议的 PHP 脚本;
- 一个使用 [Symfony Mailer] 库发送各种电子邮件的 PHP 脚本。
16.5.2. 安装测试用 SMTP 服务器:[Mailpit]
PHP 7 课程安装了 [hMailServer] 邮件服务器——它已不再维护——并将其配置为通过 Gmail 的 SMTP 服务器转发电子邮件。我们将改用 [Mailpit] (https://mailpit.axllent.org),这是一款面向开发人员设计的免费工具:
- 它是一个 SMTP 服务器,接受发给它的所有电子邮件,无论发件人或收件人是谁,但不会转发它们——而是把它们存储起来。这意味着你可以向任何地址发送电子邮件,而不必担心打扰到任何人;
- 它提供一个 Web 界面,让你可以阅读收到的电子邮件;
- 它还提供一个 POP3 服务器,我们将用它以编程方式读取电子邮件;
- 它是一个无需安装的单一可执行文件。
[Mailpit] 可以从 https://github.com/axllent/mailpit/releases下载。在 Windows 上,从最新版本中下载 [mailpit-windows-amd64.zip] 文件,并把其中包含的 [mailpit.exe] 文件复制到课程代码的 [inet/mailpit] 文件夹中。该文件夹中已经包含以下文件:
| mailpit
├── mailpit.bat
├── mailpit-secure.bat
├── pop3-users.txt
├── relay.yml
└── smtp-users.txt
|
[pop3-users.txt] 文件以 [Mailpit] 的 POP3 服务器的用户,格式为 [user:password]。只有一个用户:
文件 [mailpit.bat] 使用这个用户文件启动 [Mailpit] :
| @echo off
rem main instance of Mailpit: SMTP on port 1025, POP3 on port 1110, web interface on port 8025
"%~dp0mailpit.exe" --pop3-auth-file "%~dp0pop3-users.txt"
|
- [%~dp0] 指定文件 [.bat] 所在的文件夹:因此,你可以从任何文件夹启动 [mailpit.bat] ,例如在 Windows 资源管理器中双击它;
- 选项 [--pop3-auth-file] 启动 [Mailpit] 的 POP3 服务器。
你也可以直接在 [inet/mailpit] 文件夹中打开的终端里键入该命令:[.\mailpit.exe --pop3-auth-file pop3-users.txt]。随后 [Mailpit] 会显示日志行,表明它提供三种服务:
- 端口 1025 上的 SMTP 服务器(SMTP 协议的标准端口是 25,但 1024 以下的端口通常被保留或被阻止);
- 端口 1110 上的 POP3 服务器(标准端口是 110);
- 一个 Web 界面,URL 为 [http://localhost:8025]。
只要你想使用 [Mailpit],终端就必须保持打开:组合键 [Ctrl-C] 会将其关闭。只要 [Mailpit] 在运行,收到的电子邮件就保存在内存中。在税款计算服务器的后续版本中,我们还会再见到 [Mailpit],届时服务器将向其管理员发送电子邮件。
第二个文件 [mailpit-secure.bat] 启动 [Mailpit] 的第二个实例,我们稍后将用它来考察安全连接:
| @echo off
rem secure instance of Mailpit: SMTP with mandatory STARTTLS and authentication on port 1587,
rem web interface over HTTPS on port 8026, relay of the messages to the main instance (port 1025)
"%~dp0mailpit.exe" --smtp 0.0.0.0:1587 --listen 0.0.0.0:8026 --ui-tls-cert sans:localhost --ui-tls-key sans:localhost --smtp-tls-cert sans:localhost --smtp-tls-key sans:localhost --smtp-require-starttls --smtp-auth-file "%~dp0smtp-users.txt" --smtp-relay-config "%~dp0relay.yml" --smtp-relay-all
|
- [--smtp 0.0.0.0:1587]:该实例的 SMTP 服务器监听端口 1587;
- [--listen 0.0.0.0:8026 --ui-tls-cert sans:localhost --ui-tls-key sans:localhost]:它的 Web 界面位于端口 8026(端口 8025 已被第一个实例占用),使用 HTTPS;
- [--smtp-tls-cert sans:localhost --smtp-tls-key sans:localhost]:[Mailpit] 为机器 [localhost] 生成它自己的自签名证书。这个证书使它能够加密与其客户端之间的通信;
- [--smtp-require-starttls]:客户端必须在发送电子邮件之前加密连接(使用 STARTTLS 命令,我们稍后会讨论);
- [--smtp-auth-file smtp-users.txt]:客户端必须使用 [smtp-users.txt] 文件中的某个账户进行身份验证。只有一个账户:[guest@localhost] ,密码为 [guest];
- [--smtp-relay-config relay.yml --smtp-relay-all]:收到的电子邮件被转发到 [relay.yml] 中定义的 SMTP 服务器,也就是 [Mailpit] 的第一个实例(localhost,端口 1025):
| # Mailpit 的“secure”实例的 SMTP 中继(端口 1587)
# 发往主实例(端口 1025)
host: localhost
port: 1025
|
这第二个实例的行为就像一个公共 SMTP 服务器,例如 Gmail 的服务器([smtp.gmail.com],端口 587),后者同样要求加密连接和身份验证。届时我们将在有 Gmail 账户的情况下使用它,供拥有账户的读者使用。
让我们启动 [Mailpit] 的第一个实例,并在浏览器中打开其 Web 界面 [http://localhost:8025] :
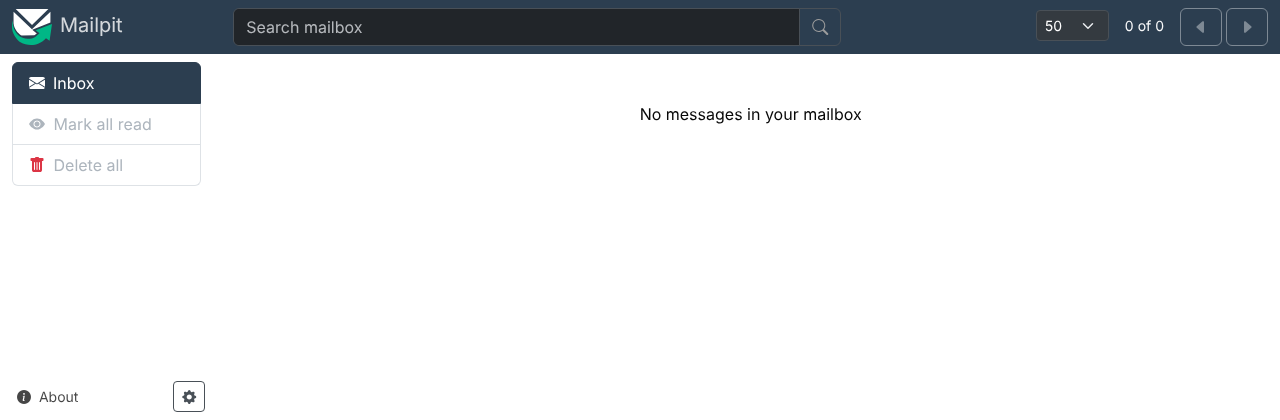
随着示例的进行,我们会看到这个页面逐渐被填满。
16.5.3. SMTP 协议
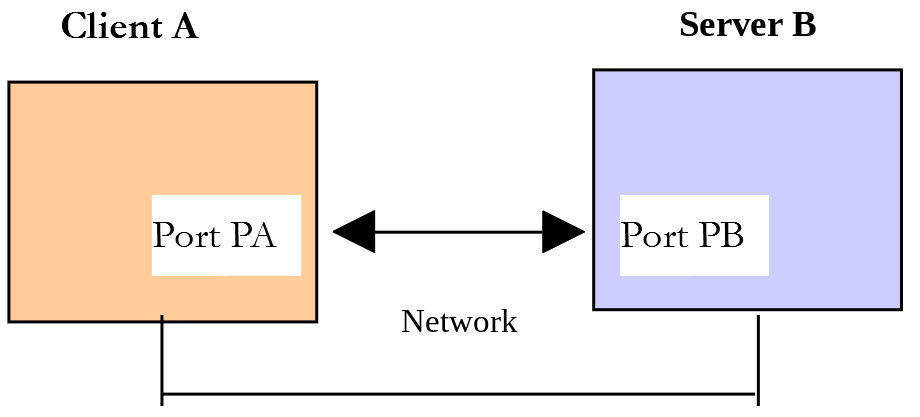
我们将在下面的环境中探索 SMTP 协议:
- 客户端 A 将是通用的 TCP 客户端([tcp-client.php]);
- 服务器 B 将是 [Mailpit] 的 SMTP 服务器;
- 客户端 A 将请求服务器 B 向用户 [guest@localhost] 投递一封电子邮件;
- 我们将通过 [Mailpit] 的 Web 界面验证邮件已被成功接收。
在 [inet/utilities] 文件夹中打开的终端窗口里,我们启动客户端并输入 SMTP 协议的命令:
| > php tcp-client.php --quit bye localhost 1025
Client [127.0.0.1:50072] connected to the server [localhost:1025]
Type your commands (bye to stop):
<-- [220 vm Mailpit ESMTP Service ready]
EHLO localhost
<-- [250-vm greets localhost]
<-- [250-SIZE 52428800]
<-- [250-ENHANCEDSTATUSCODES]
<-- [250-8BITMIME]
<-- [250 SMTPUTF8]
MAIL FROM: <guest@localhost>
<-- [250 2.1.0 Ok]
RCPT TO: <guest@localhost>
<-- [250 2.1.5 Ok]
DATA
<-- [354 Start mail input; end with <CR><LF>.<CR><LF>]
Subject: test
From: guest@localhost
To: guest@localhost
line 1
line 2
.
<-- [250 2.0.0 Ok: queued as 0d0daBzXhAGBiM8Aw3oxZ7]
QUIT
<-- [221 2.0.0 vm Mailpit ESMTP Service closing transmission channel]
Connection with the server lost...
End of the client
|
- [php tcp-client.php --quit bye localhost 1025]:我们连接到本机的端口 1025,那里运行着 [Mailpit] 的 SMTP 服务。[--quit bye] 参数表示用户将通过输入命令 [bye] 退出程序。没有这个参数时,结束程序的命令是 [quit]。然而,[QUIT] 也是 SMTP 协议中的一条命令。因此我们必须避免这种歧义;
- [220 vm Mailpit ESMTP Service ready]:连接一建立,服务器就发送它的欢迎消息。代码 [220] 表示服务器已就绪。[vm] 是运行 [Mailpit] 的机器的名称:你会看到你自己计算机的名称;
- [EHLO localhost]:客户端发送命令 [EHLO client-machine-name]。服务器以一系列形如 [250-xx] 的行作出响应,其中最后一行的形式为 [250 xx](代码后面是空格,而不是连字符)。代码 [250] 表示客户端发送的命令成功了。后面的行列出服务器所支持的 SMTP 协议扩展,例如最大邮件大小 [SIZE];
- [MAIL FROM: <guest@localhost>]:客户端指定邮件的发件人,服务器接受它(代码 250);
- [RCPT TO: <guest@localhost>]:客户端指定邮件的收件人。对于多个收件人,可以有多条 [RCPT TO] 命令;
- [DATA]:该命令通知服务器客户端即将发送邮件内容。服务器以代码 [354] 作出响应,并指明如何结束邮件;
- 然后客户端发送一系列文本行,以只包含一个句点的行结束。邮件可以以 [Subject:, From:, To:] 行开头,分别定义邮件的主题、发件人和收件人。这些标头之后必须跟一个空行,然后才是邮件正文;
- [250 2.0.0 Ok: queued as ...]:服务器一旦收到只包含一个句点的行,就把邮件放入投递队列;
- [QUIT]:客户端通知服务器它已经完成。服务器以代码 [221] 作出响应,然后关闭连接,客户端会检测到这一点。
让我们在 [Mailpit] Web 界面中检查,以确认用户 [guest@localhost] 确实收到了这封邮件:
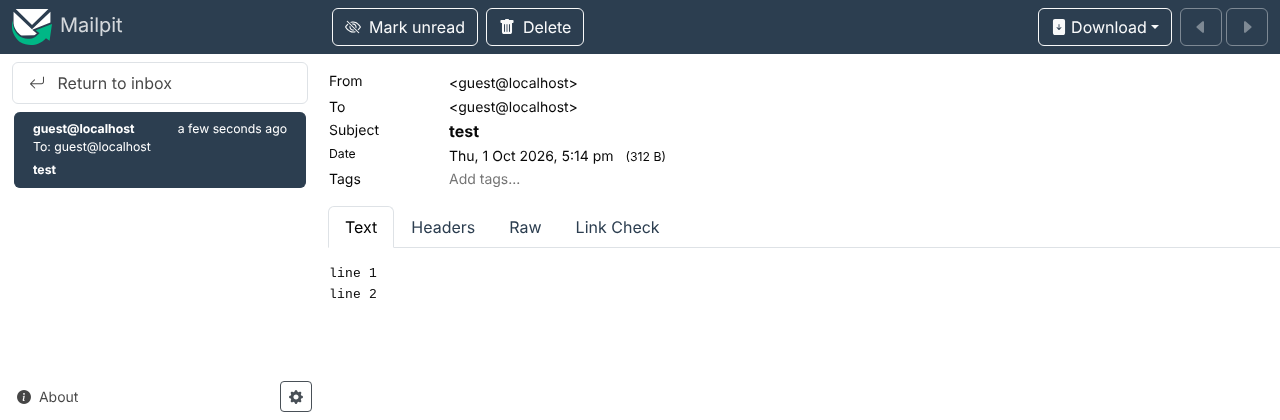
发件人是 [From],收件人是 [To],主题是 [Subject],并显示邮件正文。[Headers] 选项卡显示邮件的所有标头,[Raw] 选项卡显示 [Mailpit] 收到的纯文本。
我们的客户端 [tcp-client.php] 成功发送了邮件。现在我们有了创建用 PHP 编写的 SMTP 客户端的基础。
16.5.4. 一个用 PHP 编写的基本 SMTP 客户端
我们将用 PHP 重现前面学到的关于 SMTP 协议的内容。
[inet/smtp/smtp-01.php] 脚本由下面的 JSON 文件 [config-smtp-01.json] 配置:
| {
"mail to localhost via localhost": {
"smtp-server": "localhost",
"smtp-port": 1025,
"from": "guest@localhost",
"to": "guest@localhost",
"subject": "to localhost via localhost",
"message": "line 1\nline 2\nline 3"
},
"mail to gmail via localhost": {
"smtp-server": "localhost",
"smtp-port": 1025,
"from": "guest@localhost",
"to": "php8parlexemple@gmail.com",
"subject": "to gmail via localhost",
"message": "line 1\nline 2\nline 3"
},
"mail via a secure server": {
"smtp-server": "localhost",
"smtp-port": 1587,
"from": "guest@localhost",
"to": "guest@localhost",
"subject": "via a secure server",
"message": "line 1\nline 2\nline 3"
}
}
|
[config-smtp-01.json] 是一个字典,其中每个元素的形式为 [name => info]。值 [info] 本身也是一个字典,具有如下键和值:
- [smtp-server]:要使用的 SMTP 服务器的名称;
- [smtp-port]:SMTP 服务的端口号;
- [from]:邮件的发件人;
- [to]:邮件的收件人;
- [subject]:邮件的主题;
- [message]:要发送的邮件正文。
共发送三封邮件:
- 第一封使用 [Mailpit] 的 SMTP 服务器 向用户 [guest@localhost] 发送电子邮件;
- 第二封使用同一个服务器向一个 Gmail 地址发送电子邮件。[Mailpit] 会保留这封邮件而不投递;
- 第三封使用 [Mailpit] 的第二个实例,即端口 1587 上要求加密连接的那个。因此,必须已经启动了 [mailpit-secure.bat]。
SMTP 客户端的代码 [smtp-01.php] 如下:
| <?php
declare(strict_types=1);
// 用于发送邮件的 SMTP (Simple Mail Transfer Protocol) 客户端
// SMTP 客户端 / 服务器通信协议
// -> 客户端连接到 SMTP 服务器的端口(25、587、1025……)
// <- 服务器向其发送欢迎消息
// -> 客户端发送命令 EHLO 其机器名
// <- 服务器回答 OK 或不 OK
// -> 客户端发送命令 MAIL FROM: <sender>
// <- 服务器回答 OK 或不 OK
// -> 客户端发送命令 RCPT TO: <recipient>
// <- 服务器回答 OK 或不 OK
// -> 客户端发送命令 DATA
// <- 服务器回答 OK 或不 OK
// -> 客户端发送其消息的所有行,并以仅含
// 单个字符 . 的一行结束
// <- 服务器回答 OK 或不 OK
// -> 客户端发送命令 QUIT
// <- 服务器回答 OK 或不 OK
// 服务器的响应形如 xxx text,其中 xxx 是 3 位数字。任何
// 数字 xxx >= 400 都表示错误。
// 响应可以有多行,形如 xxx-text,只有最后一行
// 形如 xxx text(代码后有空格)
// 交换的文本行必须以字符 CR (13) 和 LF (10) 结束
// 发送邮件的参数
const CONFIG_FILE_NAME = "config-smtp-01.json";
// 获取配置
$mails = json_decode(file_get_contents(CONFIG_FILE_NAME), true);
// 发送邮件
foreach ($mails as $name => $info) {
// 跟踪
print "Sending the mail [$name]\n";
// 发送邮件
$result = sendmail($info, verbose: true);
// 显示结果
print "$result\n";
}
// 结束
print "Done\n";
// --------------------------------------------------------------------------
function sendmail(array $info, bool $verbose = true): string
{
// 发送由 [$info] 描述的消息
// 如果 $verbose=true,则跟踪客户端与服务器的交互
//
// 客户端机器的名称
$client = gethostname();
// 打开与 SMTP 服务器的连接
$connection = @stream_socket_client("tcp://{$info["smtp-server"]}:{$info["smtp-port"]}", $errorNumber, $error);
if ($connection === false) {
return "Failed to connect to the server [{$info["smtp-server"]}:{$info["smtp-port"]}]: $error";
}
// $connection 表示一个双向通信流
// 位于客户端(本程序)和所联系的 SMTP 服务器之间
try {
// 连接之后,服务器会发送一条欢迎消息,我们读取它
sendCommand($connection, "", $verbose);
// EHLO 命令
sendCommand($connection, "EHLO $client", $verbose);
// MAIL FROM: 命令
sendCommand($connection, "MAIL FROM: <{$info["from"]}>", $verbose);
// RCPT TO: 命令
sendCommand($connection, "RCPT TO: <{$info["to"]}>", $verbose);
// DATA 命令
sendCommand($connection, "DATA", $verbose);
// 消息:头部(From、To、Subject)、一个空行、正文
// 以及仅含一个点的一行
// 正文的行尾必须是 \r\n
$text = str_replace("\n", "\r\n", $info["message"]);
// 正文中以点开头的行必须以两个点开头
$text = preg_replace('/^\./m', '..', $text);
$data = "From: {$info["from"]}\r\nTo: {$info["to"]}\r\nSubject: {$info["subject"]}\r\n\r\n$text\r\n.";
sendCommand($connection, $data, $verbose);
// QUIT 命令
sendCommand($connection, "QUIT", $verbose);
return "Message sent";
} catch (RuntimeException $ex) {
// 服务器报告了错误
return "Error: " . $ex->getMessage();
} finally {
// 无论如何,我们都关闭连接
fclose($connection);
}
}
// --------------------------------------------------------------------------
function sendCommand($connection, string $command, bool $verbose): void
{
// 向通道 $connection 发送 $command 并读取服务器的响应
// 如果 $verbose=true 则为详细模式
// 如果服务器报告错误,则抛出 RuntimeException
//
// 如果命令不为空,则发送命令
if ($command !== "") {
fwrite($connection, "$command\r\n");
if ($verbose) {
display($command, 1);
}
}
// 读取响应:形如 [xxx-text] 的行,以形如 [xxx text] 的行结束
do {
$response = fgets($connection);
if ($response === false) {
throw new RuntimeException("the server has closed the connection");
}
if ($verbose) {
display($response, 2);
}
} while (substr($response, 3, 1) === "-");
// 响应代码
$code = (int) substr($response, 0, 3);
// 服务器返回了错误?
if ($code >= 400) {
throw new RuntimeException(rtrim(substr($response, 4)));
}
}
// --------------------------------------------------------------------------
function display(string $exchange, int $direction): void
{
// 在屏幕上显示 $exchange
// 如果 $direction=1,则显示 → [$exchange](行尾用 \n 而不是 \r\n)
// 如果 $direction=2,则显示 ← [$exchange],不含行尾字符 \r\n
print match ($direction) {
1 => "--> [" . str_replace("\r\n", "\n", $exchange) . "]\n",
2 => "<-- [" . rtrim($exchange, "\r\n") . "]\n",
};
}
|
说明:
- 第 32 行:处理配置文件。第二个参数 [true], 传给 [json_decode] ,要求返回关联数组而不是对象;
- 第 35 行:我们遍历字典 [$mails] 的元素。每个元素的形式为 [name => info],其中 [name] 是任意名称,[info] 是 一个包含发送电子邮件所需信息的字典;
- 第 39 行:电子邮件由函数 [sendmail] 发送,该函数接受两个参数:
- $info:包含发送电子邮件所需信息的字典;
- $verbose:一个布尔值,指示是否应在控制台上显示客户端/服务器之间的交换。请注意名为 [verbose: true] 的命名参数(PHP 8.0),它使调用比单纯的 [true] 更易读;
- 第 53 行:客户端机器的名称,由 EHLO 命令使用;
- 第 55 行:打开到 SMTP 服务器的连接。PHP 7 课程使用的是 [fsockopen] 函数,它至今仍然可用。[stream_socket_client] 更通用:这就是我们在 [tcp-client.php] 中使用的那个;
- 第 61–86 行:[sendmail] 函数发送 SMTP 客户端必须发送的各种命令:读取欢迎消息、EHLO、MAIL FROM、RCPT TO、DATA、邮件正文、QUIT。每条命令都由 [sendCommand] 函数发送,如果服务器以错误代码作出响应,该函数就抛出 [RuntimeException] 异常。因此,所有命令都包含在一个 [try] 块中:第一个错误会使程序进入 [catch] 块,该块返回错误消息。[finally] 块在所有情况下都会执行:连接就是在这里关闭的。因此,这段代码比 PHP 7 课程的代码短得多,后者要检查每条命令的结果;
- 第 75–78 行:准备邮件。邮件的各行必须以 \r\n 结尾。如果某一行文本只包含一个句点,服务器就会认为邮件已经结束。为避免这种情况,SMTP 协议要求客户端把行首的句点加倍:服务器会去掉这个多出来的句点。正则表达式 [/^\./m] (选项 m:多行)匹配行首的句点;
- 第 93 行:[sendCommand] 函数负责把客户端的命令发送给 SMTP 服务器并读取响应。它接受三个参数:
- [$connection]:连接客户端与服务器的连接;
- [$command]:要发送的命令。如果它为空,则不发送任何内容;函数只是读取一个响应(如欢迎消息的情形);
- [$verbose]:如果为 true,则在控制台上显示客户端/服务器之间的交换;
- 第 107–115 行:读取响应的所有行。每一行的形式为 [XXX-YYY],其中 XXX 是数字代码,只有响应的最后一行例外,它的形式为 [XXX YYY] (没有连字符)。因此,当行的第四个字符不是连字符时,[do ... while] 循环就停止;
- 第 119 行:如果数字代码 XXX 大于或等于 400,则说明服务器返回了错误(4xx 代码表示临时性错误,5xx 代码表示永久性错误);
- 第 125 行:函数 [display] 使用 [match] 表达式,根据交换的方向选择要显示的文本。
运行该脚本会产生如下控制台输出:
| > php smtp-01.php
Sending the mail [mail to localhost via localhost]
<-- [220 vm Mailpit ESMTP Service ready]
--> [EHLO vm]
<-- [250-vm greets vm]
<-- [250-SIZE 52428800]
<-- [250-ENHANCEDSTATUSCODES]
<-- [250-8BITMIME]
<-- [250 SMTPUTF8]
--> [MAIL FROM: <guest@localhost>]
<-- [250 2.1.0 Ok]
--> [RCPT TO: <guest@localhost>]
<-- [250 2.1.5 Ok]
--> [DATA]
<-- [354 Start mail input; end with <CR><LF>.<CR><LF>]
--> [From: guest@localhost
To: guest@localhost
Subject: to localhost via localhost
line 1
line 2
line 3
.]
<-- [250 2.0.0 Ok: queued as 5SoJJqMUYg3ZrkBqoVKLQo]
--> [QUIT]
<-- [221 2.0.0 vm Mailpit ESMTP Service closing transmission channel]
Message sent
Sending the mail [mail to gmail via localhost]
<-- [220 vm Mailpit ESMTP Service ready]
--> [EHLO vm]
<-- [250-vm greets vm]
<-- [250-SIZE 52428800]
<-- [250-ENHANCEDSTATUSCODES]
<-- [250-8BITMIME]
<-- [250 SMTPUTF8]
--> [MAIL FROM: <guest@localhost>]
<-- [250 2.1.0 Ok]
--> [RCPT TO: <php8parlexemple@gmail.com>]
<-- [250 2.1.5 Ok]
--> [DATA]
<-- [354 Start mail input; end with <CR><LF>.<CR><LF>]
--> [From: guest@localhost
To: php8parlexemple@gmail.com
Subject: to gmail via localhost
line 1
line 2
line 3
.]
<-- [250 2.0.0 Ok: queued as 78JcBpdQn6ACCrBcnniPz3]
--> [QUIT]
<-- [221 2.0.0 vm Mailpit ESMTP Service closing transmission channel]
Message sent
Sending the mail [mail via a secure server]
<-- [220 vm Mailpit ESMTP Service ready]
--> [EHLO vm]
<-- [250-vm greets vm]
<-- [250-SIZE 52428800]
<-- [250-STARTTLS]
<-- [250-AUTH LOGIN PLAIN]
<-- [250-ENHANCEDSTATUSCODES]
<-- [250-8BITMIME]
<-- [250 SMTPUTF8]
--> [MAIL FROM: <guest@localhost>]
<-- [530 5.7.0 Must issue a STARTTLS command first]
Error: 5.7.0 Must issue a STARTTLS command first
Done
|
- 前两次发送成功;
- 第三次失败:在 [MAIL FROM] 命令之后,端口 1587 上的服务器返回错误代码 530,消息为 [Must issue a STARTTLS command first]。请注意,在对 EHLO 命令的响应中,它宣告了扩展 [STARTTLS] 和身份验证 [AUTH LOGIN PLAIN]。SMTP 客户端必须先加密连接(命令 STARTTLS),然后再进行身份验证(命令 AUTH)。我们的客户端没有这样做,因此被拒绝了。Gmail 的 SMTP 服务器([smtp.gmail.com],端口 587)的响应方式完全相同。
[Mailpit] Web 界面显示收到的电子邮件。请注意,发给 [php8parlexemple@gmail.com] 的邮件确实在那里:[Mailpit] 没有把它转发给 Gmail。
16.5.5. 第二个 SMTP 客户端,使用 [Symfony Mailer] 库
前面的客户端至少有两个缺点:
- 如果服务器要求安全连接,它无法使用;
- 它无法给邮件添加附件。
在我们的新脚本中,我们将使用 [Symfony Mailer] 库(https://symfony.com/doc/current/mailer.html)。PHP 7 课程使用的是 [SwiftMailer] 库,该库自 2021 年起已不再维护:[Symfony Mailer] 是它的后继者,由同一个团队编写。该库是在安装课程的其他依赖项时,通过命令 [composer install] (参见 [composer.json] 文件,位于 [php8-oct-2026] 文件夹的根目录)一并安装的,位于 [vendor/symfony/mailer] 文件夹中。它使用 [symfony/mime] 组件,该组件可以生成任何格式的邮件。
[inet/smtp/smtp-02.php] 脚本将使用下面的配置文件 JSON [config-smtp-02.json]:
| {
"mail to localhost via localhost": {
"smtp-server": "localhost",
"smtp-port": 1025,
"from": "guest@localhost",
"to": "guest@localhost",
"subject": "test-localhost",
"message": "line 1\nline 2\nline 3",
"tls": false,
"attachments": [
"/attachments/Hello from Symfony Mailer.docx",
"/attachments/Hello from Symfony Mailer.pdf",
"/attachments/Hello from Symfony Mailer.odt",
"/attachments/Cours-Tutoriels-Serge-Tahé-1568x268.png",
"/attachments/test-localhost.eml"
]
},
"mail to localhost via a secure server": {
"smtp-server": "localhost",
"smtp-port": 1587,
"from": "guest@localhost",
"to": "guest@localhost",
"subject": "test-secure-server",
"message": "line 1\nline 2\nline 3",
"tls": true,
"user": "guest@localhost",
"password": "guest",
"verify-peer": false,
"attachments": [
"/attachments/Hello from Symfony Mailer.pdf"
]
},
"mail to gmail via gmail": {
"enabled": false,
"smtp-server": "smtp.gmail.com",
"smtp-port": 587,
"from": "php8parlexemple@gmail.com",
"to": "php8parlexemple@gmail.com",
"subject": "test-gmail-via-gmail",
"message": "line 1\nline 2\nline 3",
"tls": true,
"user": "php8parlexemple@gmail.com",
"password": "application password",
"verify-peer": true,
"attachments": [
"/attachments/Hello from Symfony Mailer.docx",
"/attachments/Hello from Symfony Mailer.pdf",
"/attachments/Hello from Symfony Mailer.odt",
"/attachments/Cours-Tutoriels-Serge-Tahé-1568x268.png",
"/attachments/test-localhost.eml"
]
}
}
|
它包含与 [config-smtp-01.json] 文件相同的字段,此外还有一些附加字段:
- [tls]:设置为 [true] 时,这表示必须与 SMTP 服务器使用安全且经过身份验证的连接。在这种情况下,必须添加以下字段:
- [user]:用于对连接进行身份验证的用户名;
- [password]:其密码;
- [verify-peer]:是否应验证服务器发送的证书?对于公共服务器必须这样做。对于我们使用自签名证书的测试服务器,必须把它设置为 [false];
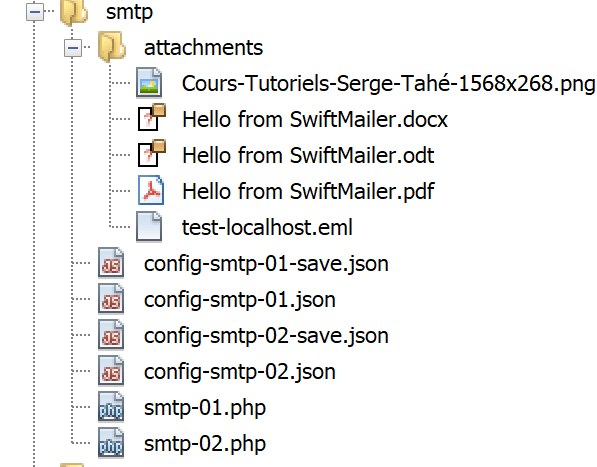
- [attachments]:指定要附加到邮件中的文件的名称。它们位于 [smtp/attachments] 文件夹中;
- [enabled]:当设置为 [false] 时,禁用发送。第三次发送就是这种情况,它使用的是 Gmail 的 SMTP 服务器。
要使用 Gmail 的 SMTP 服务器,你需要一个启用了两步验证的 Gmail 账户(把 [php8parlexemple@gmail.com] 替换为你的地址),并且必须在 Google 账户设置的 [Security] 部分为它创建一个“应用专用密码”。这个 16 位字符的密码在像我们这样的应用中代替账户密码。把它填入 [password] 字段,并把 [enabled] 的值改为 [true]。
[smtp-02.php] 脚本的代码如下:
| <?php
declare(strict_types=1);
// 使用 [Symfony Mailer] 库编写的 SMTP (Simple Mail Transfer Protocol) 客户端
// 可以使用安全连接并为消息添加附件
// 依赖
require_once __DIR__ . "/../../../vendor/autoload.php";
use Symfony\Component\Mailer\Mailer;
use Symfony\Component\Mailer\Transport;
use Symfony\Component\Mime\Email;
// 发送邮件的参数:配置文件
// 可以作为参数传入 (php smtp-02.php config.json)
$configFileName = $argv[1] ?? "config-smtp-02.json";
// 获取配置
$mails = json_decode(file_get_contents($configFileName), true);
// 发送邮件
foreach ($mails as $name => $info) {
// 配置中是否禁用了发送?
if (($info["enabled"] ?? true) === false) {
print "Sending of the mail [$name] disabled\n";
continue;
}
// 跟踪
print "Sending the mail [$name]\n";
// 发送邮件
$result = sendmail($name, $info);
// 显示结果
print "$result\n";
}
// 结束
print "Done\n";
// --------------------------------------------------------------------------
function sendmail(string $name, array $info): string
{
// 将 $info["message"] 发送到 SMTP 服务器 $info["smtp-server"] 的端口 $info["smtp-port"]
// 如果 $info["tls"] 为 true,则连接是安全且经过身份验证的
// 邮件以 $info["from"] 的名义发送
// 收件人为 $info["to"]
// 文档 $info["attachments"] 作为附件添加到消息中
// 消息的主题为 $info["subject"]
//
try {
// 创建消息
$email = (new Email())
// 发件人
->from($info["from"])
// 收件人(可以有多个:to(a, b, c)、cc(...)、bcc(...))
->to($info["to"])
// 消息的主题
->subject($info["subject"])
// 消息的正文
->text($info["message"])
// 正文的 HTML 版本
->html("<b>" . str_replace("\n", "<br/>", $info["message"]) . "</b>");
// 附件
foreach ($info["attachments"] as $attachment) {
// 附件的路径
$fileName = __DIR__ . $attachment;
// 检查文件是否存在
if (file_exists($fileName)) {
// 将文档作为附件添加到消息中
$email->attachFromPath($fileName);
} else {
print "The attachment [$fileName] does not exist\n";
}
}
// 消息的传输:形如
// smtp://user:password@server:port?options 的 DSN (Data Source Name)
$dsn = "smtp://{$info["smtp-server"]}:{$info["smtp-port"]}";
if ($info["tls"]) {
// 安全 (STARTTLS) 且经过身份验证的连接
$verifyPeer = ($info["verify-peer"] ?? true) ? 1 : 0;
$dsn = sprintf("smtp://%s:%s@%s:%d?require_tls=1&verify_peer=%d",
rawurlencode($info["user"]), rawurlencode($info["password"]),
$info["smtp-server"], $info["smtp-port"], $verifyPeer);
}
// 发送管理器
$mailer = new Mailer(Transport::fromDsn($dsn));
// 发送消息
$mailer->send($email);
// 结束
return "Message [$name] sent";
} catch (Throwable $ex) {
// 错误
return "Error while sending the message [$name]: " . $ex->getMessage();
}
}
|
说明:
- 第 9 行:我们加载由 Composer 创建的 [vendor/autoload.php] 文件。这个文件使我们可以在这些库的类被首次使用时,加载它们的类定义文件。这样,我们就不必编写与 [require] 文件 数量相当的语句,即为每个类以及 [Symfony Mailer] 将用到的接口文件各写一条。路径是相对于脚本文件夹([__DIR__])的:无论 [php8-oct-2026] 文件夹位于何处,脚本都能工作;
- 第 11–13 行:[Symfony Mailer] 中的类位于命名空间中。[use] 语句使我们可以用它们的短名称来引用它们;
- 第 17 行:配置文件可以作为参数传给脚本;否则,默认使用 [config-smtp-02.json];
- 第 25 行:如果某次发送的 [enabled] 字段被设置为 [false],则该发送被禁用。如果该字段缺失,[??] 运算符返回 [true] ;
- 第 40 行:新的函数 [sendmail] 有两个参数:
- [$name],用于区分各封邮件;
- [$info]:把邮件发送给收件人所需的信息;
- 第 51–61 行:我们使用 [Email] 类定义邮件。它的方法返回对象本身,这使得它们可以链式调用:
- [from] 设置邮件的发件人;
- [to] 设置邮件的收件人;
- [subject] 设置邮件的主题;
- [text] 设置邮件正文;
- [html] 定义邮件的一个变体(HTML)。这里,我们把行结束字符改为 HTML 标签 [<br/>] ,并把整段文本设为粗体。当邮件有多个变体时,电子邮件客户端会显示用户偏好的变体;
- 第 63–72 行:[attachFromPath] 方法给邮件添加一个文件作为附件。文件类型(application/pdf……)根据其扩展名推断;
- 第 76–82 行:一旦定义好要发送的邮件,就必须指定如何发送它。[Symfony Mailer] 通过一个称为 DSN(数据源名称)的字符串来描述邮件的传输,其形式为 [smtp://user:password@server:port?options]。对于安全连接,要添加用户名和密码,它们用 [rawurlencode] 编码([guest@localhost] 中的 @ 字符变为 %40),还要加上两个选项:[require_tls=1] 要求连接加密,[verify_peer=0] 禁用服务器证书验证。请注意,当服务器宣告 STARTTLS 命令时,[Symfony Mailer] 会自动使用它;
- 第 85 行:[Mailer] 类负责发送邮件。你必须向它传入所选的传输,它是用静态方法 [Transport::fromDsn] 根据 DSN 创建的;
- 第 87 行:发送邮件;
- 第 90 行:一旦出现问题,该库就会抛出异常。
运行脚本 [smtp-02.php](此时 [Mailpit] 的两个实例均已在运行)时,会显示如下控制台输出:
| > php smtp-02.php
Sending the mail [mail to localhost via localhost]
Message [mail to localhost via localhost] sent
Sending the mail [mail to localhost via a secure server]
Message [mail to localhost via a secure server] sent
Sending of the mail [mail to gmail via gmail] disabled
Done
|
[Mailpit] Web 界面显示了两封邮件。[test-secure-server] 邮件经过了安全实例,由它转发给主实例。下面是 [test-localhost] 邮件:
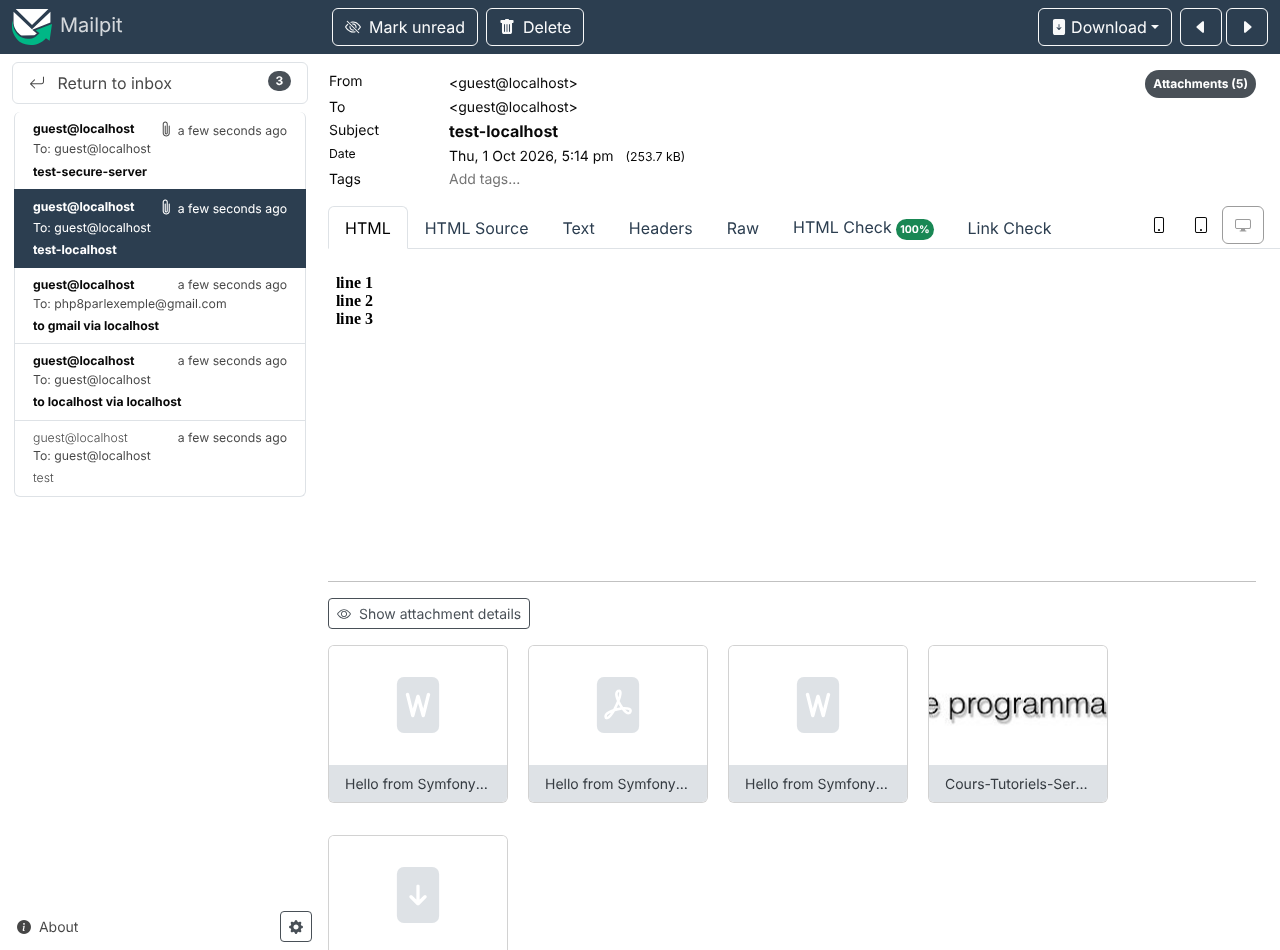
- 在右上角,[Attachments (5)] 徽标表示有五个附件,它们的缩略图显示在页面底部;
- [HTML] 选项卡显示邮件的 HTML 变体(粗体),而 [Text] 选项卡显示其文本变体。
[Raw] 选项卡显示收到邮件的纯文本。下面就是它,其中对附件内容进行编码的那些行已被删除:
| Return-Path: <guest@localhost>
Received: from [127.0.0.1] (localhost [127.0.0.1])
by vm (Mailpit) with SMTP
for <guest@localhost>; Thu, 1 Oct 2026 17:14:24 +0200 (CEST)
From: guest@localhost
To: guest@localhost
Subject: test-localhost
Message-ID: <d17f753f0db420a353457b730f2cfdec@localhost>
MIME-Version: 1.0
Date: Thu, 01 Oct 2026 17:14:24 +0200
Content-Type: multipart/mixed; boundary=jM982j4q
--jM982j4q
Content-Type: multipart/alternative; boundary=LUEVyqZR
--LUEVyqZR
Content-Type: text/plain; charset=utf-8
Content-Transfer-Encoding: quoted-printable
line 1
line 2
line 3
--LUEVyqZR
Content-Type: text/html; charset=utf-8
Content-Transfer-Encoding: quoted-printable
<b>line 1<br/>line 2<br/>line 3</b>
--LUEVyqZR--
--jM982j4q
Content-Type: application/vnd.openxmlformats-officedocument.wordprocessingml.document;
name="Hello from Symfony Mailer.docx"
Content-Transfer-Encoding: base64
Content-Disposition: attachment; name="Hello from Symfony Mailer.docx";
filename="Hello from Symfony Mailer.docx"
--jM982j4q
Content-Type: application/pdf; name="Hello from Symfony Mailer.pdf"
Content-Transfer-Encoding: base64
Content-Disposition: attachment; name="Hello from Symfony Mailer.pdf";
filename="Hello from Symfony Mailer.pdf"
--jM982j4q
Content-Type: application/vnd.oasis.opendocument.text;
name="Hello from Symfony Mailer.odt"
Content-Transfer-Encoding: base64
Content-Disposition: attachment; name="Hello from Symfony Mailer.odt";
filename="Hello from Symfony Mailer.odt"
--jM982j4q
Content-Type: image/png;
name="=?utf-8?Q?Cours-Tutoriels-Serge-Tah=C3=A9-1568x268=2Epng?="
Content-Transfer-Encoding: base64
Content-Disposition: attachment;
name*=utf-8''Cours-Tutoriels-Serge-Tah%C3%A9-1568x268.png;
filename*=utf-8''Cours-Tutoriels-Serge-Tah%C3%A9-1568x268.png
--jM982j4q
Content-Type: message/rfc822; name=test-localhost.eml
Content-Transfer-Encoding: base64
Content-Disposition: attachment; name=test-localhost.eml;
filename=test-localhost.eml
--jM982j4q--
|
- [Return-Path] 和 [Received]:这些标头是 [Mailpit] 在收到邮件时添加的。邮件经过的每个服务器都会添加一个 [Received] 标头;
- [From]、[To]、[Subject]:发件人、收件人和主题;
- [Content-Type: multipart/mixed; boundary=...]:邮件由若干部分组成,各部分之间用标有 [--boundary] 的行分隔。最后一部分之后是 [--boundary--] 行。这就是 MIME(多用途 Internet 邮件扩展)格式;
- 第一部分本身的类型是 [multipart/alternative]:它包含邮件的两个变体,分别为 [text/plain] 和 [text/html]。它们以 [quoted-printable] 编码,这种编码保留 ASCII 字符不编码,而对其他字符进行编码(é 变为 =C3=A9);
- 接下来是五个附件([Content-Disposition: attachment]),以 [base64] 编码,这种编码把任何二进制内容转换成由 ASCII 字符组成的行;
- 文件名 [Cours-Tutoriels-Serge-Tahé-1568x268.png] 包含字符 [é]。它以两种方式编码:[name="=?utf-8?Q?...?="] (称为 RFC 2047 编码)和 [filename*=utf-8''...%C3%A9...] (称为 RFC 2231 编码)。在读取邮件时,我们还会再次遇到它们;
- 最后一个附件的类型为 [message/rfc822],它本身就是一封电子邮件:文件 [test-localhost.eml],它也带有附件。
最后,我们来看两种常见的错误。文件 [config-smtp-02-errors.json] 描述了向安全实例的两次发送:第一次验证服务器的证书([verify-peer] 设为 [true]),第二次使用不正确的密码:
| {
"server certificate verified": {
"smtp-server": "localhost",
"smtp-port": 1587,
"from": "guest@localhost",
"to": "guest@localhost",
"subject": "test-errors",
"message": "line 1\nline 2\nline 3",
"tls": true,
"user": "guest@localhost",
"password": "guest",
"verify-peer": true,
"attachments": []
},
"wrong password": {
"smtp-server": "localhost",
"smtp-port": 1587,
"from": "guest@localhost",
"to": "guest@localhost",
"subject": "test-errors",
"message": "line 1\nline 2\nline 3",
"tls": true,
"user": "guest@localhost",
"password": "xx",
"verify-peer": false,
"attachments": []
}
}
|
让我们使用命令 [php smtp-02.php config-smtp-02-errors.json] 以这个配置文件运行脚本:
| > php smtp-02.php config-smtp-02-errors.json
Sending the mail [server certificate verified]
Error while sending the message [server certificate verified]: Unable to connect with STARTTLS: stream_socket_enable_crypto(): SSL operation failed with code 1. OpenSSL Error messages:
error:0A000086:SSL routines::certificate verify failed
Sending the mail [wrong password]
Error while sending the message [wrong password]: Failed to authenticate on SMTP server with username "guest@localhost" using the following authenticators: "LOGIN", "PLAIN". Authenticator "LOGIN" returned "Expected response code "235" but got code "535", with message "535 5.7.8 Authentication credentials invalid".". Authenticator "PLAIN" returned "Expected response code "235" but got code "535", with message "535 5.7.8 Authentication credentials invalid".".
Done
|
- 第一次尝试:[Mailpit] 的自签名证书不是由已知的证书颁发机构签发的。验证失败,客户端拒绝继续——这正是保护客户端免受服务器冒充的机制。对于证书有效的 [smtp.gmail.com],验证则会成功;
- 第二次尝试:服务器以错误代码 535 拒绝身份验证。
16.6. POP3(邮局协议)和 IMAP(Internet 邮件访问协议)协议
16.6.1. 简介
读取存放在邮件服务器上的电子邮件有两种协议:
- POP3 协议(邮局协议),历史上最早的协议,但如今很少使用;
- IMAP 协议(Internet 邮件访问协议),它比 POP3 更新,是目前使用最广泛的协议。
为了探索这些协议,我们将使用如下架构:
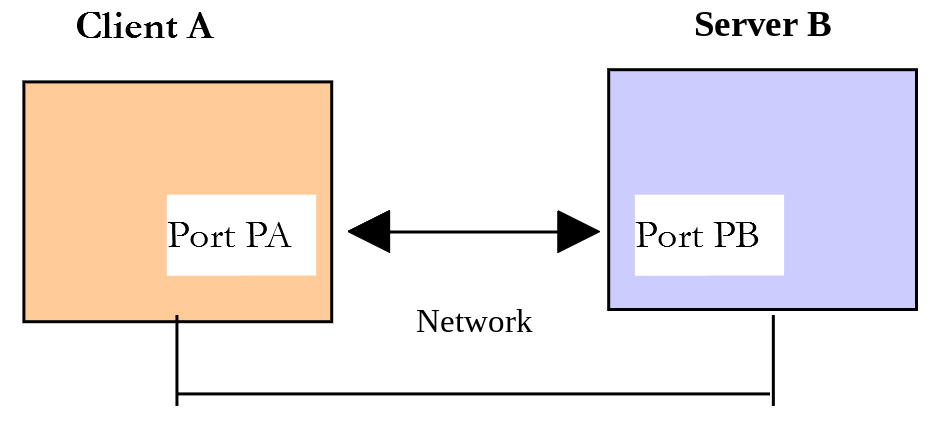
- [Server B] 将是:
- 对于 POP3,是 [Mailpit] 的 POP3 服务器(端口 1110);
- 对于 IMAP,是一个 IMAP 服务器。它可以是 Gmail 的服务器([imap.gmail.com],端口 993),使用在 SMTP 协议部分提到的 Gmail 账户和应用专用密码。这里给出的结果是使用本地 IMAP 服务器得到的,即开源的 [Dovecot] 服务器(https://www.dovecot.org),其中有一个名为 [guest@localhost] 的用户,密码为 [guest]。我们已把由 SMTP 脚本发送的电子邮件放入该用户的邮箱 INBOX 中。使用 Gmail 时,你会得到相同格式的结果;
- [Client A] 将是各种形式的 POP3 / IMAP 客户端:
- 用来探索 POP3 和 IMAP 协议的客户端 [tcp-client.php] ;
- 一个重现用 [tcp-client.php] 所发现的 POP3 协议的 PHP 脚本;
- 使用我们将要编写的 POP3 和 IMAP 类的 PHP 脚本,再配合库 [zbateson/mail-mime-parser] 来解析邮件。
PHP 7 课程使用了 PHP 的 [imap_*] 函数,它们来自 [imap] 扩展,该扩展同时支持 IMAP 和 POP3。这个扩展基于一个已被废弃多年的 C 库,已从 PHP 8.4 中移除。因此,我们将使用 PHP 的套接字函数,自己编写所需的 POP3 和 IMAP 客户端。这正是深入理解这两种协议的好机会。
16.6.2. 探索 POP3 协议
首先,我们使用 [smtp-01.php] 脚本发送两封电子邮件:一封发给 [guest@localhost] ,另一封发给 [php8parlexemple@gmail.com] (第三次尝试失败,如我们所见)。[Mailpit] 的 POP3 服务器把 [Mailpit] 收到的所有电子邮件显示在同一个邮箱中,而不管它们的收件人是谁。要读取它,必须使用 [pop3-users.txt] 文件中的某个用户登录——这里是 [guest]——密码为 [guest]。
让我们看看如何使用 [tcp-client.php] 客户端访问这个邮箱:
| > php tcp-client.php --quit bye localhost 1110
Client [127.0.0.1:47492] connected to the server [localhost:1110]
Type your commands (bye to stop):
<-- [+OK Mailpit POP3 server]
USER guest
<-- [+OK]
PASS guest
<-- [+OK signed in]
LIST
<-- [+OK 2 messages (682 octets)]
<-- [1 349]
<-- [2 333]
<-- [.]
RETR 1
<-- [+OK 349 octets]
<-- [Message-ID: <73n0AqT1QxqOYmrcWH5gK7@mailpit>]
<-- [Return-Path: <guest@localhost>]
<-- [Received: from vm (localhost [127.0.0.1])]
<-- [ by vm (Mailpit) with SMTP]
<-- [ for <php8parlexemple@gmail.com>; Thu, 1 Oct 2026 17:14:31 +0200 (CEST)]
<-- [From: guest@localhost]
<-- [To: php8parlexemple@gmail.com]
<-- [Subject: to gmail via localhost]
<-- []
<-- [line 1]
<-- [line 2]
<-- [line 3]
<-- []
<-- [.]
DELE 1
<-- [+OK message marked for deletion]
LIST
<-- [+OK 1 messages (333 octets)]
<-- [2 333]
<-- [.]
DELE 2
<-- [+OK message marked for deletion]
LIST
<-- [+OK 0 messages (0 octets)]
<-- [.]
QUIT
<-- [+OK goodbye]
Connection with the server lost...
End of the client
|
- [php tcp-client.php --quit bye localhost 1110]:POP3 服务器通常使用端口 110。这里是 [Mailpit] 上的端口 1110;
- [USER guest]:命令 [USER] 用于指定要读取其邮箱的用户;
- [PASS guest]:命令 [PASS] 用于设置用户的密码;
- [LIST]:命令 [LIST] 请求用户邮箱中的邮件列表。服务器响应邮件的数量及其总大小,后面每封邮件一行,形式为 [number size] ;
- [RETR 1]:命令 [RETR] 请求指定编号的邮件。其中包含标头 [From]、[To] 和 [Subject]——由 [smtp-01.php] 发送——以及由 [Mailpit] 添加的标头。[Mailpit] 按从新到旧的顺序显示邮件:1 号邮件是最近收到的;
- [DELE 1]:命令 [DELE] 把指定编号的邮件标记为“待删除”。该邮件不再出现在列表中;
- [QUIT]:命令 [QUIT] 告知服务器你已经完成。此时,服务器会删除已标记的邮件。两封邮件都已从 [Mailpit] Web 界面中消失。
服务器的响应可以采取几种形式:
- 以 [+OK] 开头的单独一行,表示客户端的上一条命令成功;
- 以 [-ERR] 开头的单独一行,表示客户端的上一条命令失败;
- 多行响应,其中:
- 第一行以 [+OK] 开头;
- 最后一行只包含一个句点。
16.6.3. 一个实现 POP3 协议的基本脚本
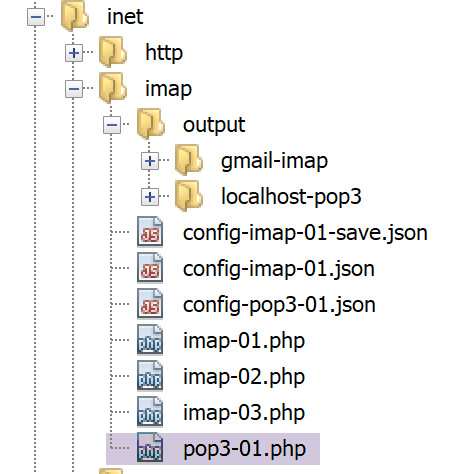
由于 POP3 协议与 SMTP 协议具有相同的结构,[inet/imap/pop3-01.php] 脚本是 [smtp-01.php] 脚本的移植版本。它有如下配置文件 [config-pop3-01.json]:
| {
"localhost:1110": {
"server": "localhost",
"port": 1110,
"user": "guest",
"password": "guest",
"maxmails": 5
}
}
|
- 第 3–4 行:所查询的 POP3 服务器是 [Mailpit] 的服务器;
- 第 5–6 行:用户及其密码;
- 第 7 行:最多获取 5 封电子邮件。
[pop3-01.php] 脚本如下:
| <?php
declare(strict_types=1);
// 用于读取邮箱中邮件的 POP3 (Post Office Protocol) 客户端
// POP3 客户端 / 服务器通信协议
// -> 客户端连接到 POP3 服务器的端口(110、1110……)
// <- 服务器向其发送欢迎消息
// -> 客户端发送命令 USER user
// <- 服务器回答 OK 或不 OK
// -> 客户端发送命令 PASS password
// <- 服务器回答 OK 或不 OK
// -> 客户端发送命令 LIST
// <- 服务器回答 OK 或不 OK。如果 OK,则发送邮件列表 [no. size]
// -> 客户端为每封邮件发送命令 RETR no.
// <- 服务器回答 OK 或不 OK。如果 OK,则发送所请求邮件的内容
// -> 客户端发送命令 DELE no. 以删除一封邮件
// <- 服务器回答 OK 或不 OK
// -> 客户端发送命令 QUIT 以结束与服务器的对话
// <- 服务器回答 OK 或不 OK
// 服务器的响应形如 +OK text 或 -ERR text
// 响应可以有多行。此时最后一行仅由一个点构成
// 交换的文本行必须以字符 CR (13) 和 LF (10) 结束
// 读取邮箱的参数
const CONFIG_FILE_NAME = "config-pop3-01.json";
// 获取配置
$mailboxes = json_decode(file_get_contents(CONFIG_FILE_NAME), true);
// 读取邮箱
foreach ($mailboxes as $name => $info) {
// 跟踪
print "Reading the mailbox [$name]\n";
// 读取邮箱
$result = readmail($info, verbose: true);
// 显示结果
print "$result\n";
}
// 结束
print "Done\n";
// --------------------------------------------------------------------------
function readmail(array $info, bool $verbose = true): string
{
// 读取 [$info] 所描述的邮箱中至多 $info["maxmails"] 封邮件
// 每封邮件读取后即被删除
// 如果 $verbose=true,则跟踪客户端与服务器的交互
//
// 打开与 POP3 服务器的连接
$connection = @stream_socket_client("tcp://{$info["server"]}:{$info["port"]}", $errorNumber, $error);
if ($connection === false) {
return "Failed to connect to the server [{$info["server"]}:{$info["port"]}]: $error";
}
try {
// 连接之后,服务器会发送一条欢迎消息,我们读取它
sendCommand($connection, "", $verbose);
// USER 命令
sendCommand($connection, "USER {$info["user"]}", $verbose);
// PASS 命令
sendCommand($connection, "PASS {$info["password"]}", $verbose);
// LIST 命令:响应的第 1 行形如 [+OK n messages...]
$response = sendCommand($connection, "LIST", $verbose, multiline: true);
preg_match('/^\+OK (\d+)/', $response[0], $fields);
$nbMessages = (int) ($fields[1] ?? 0);
// 遍历各封邮件
for ($i = 1; $i <= min($nbMessages, $info["maxmails"]); $i++) {
// RETR 命令:邮件位于响应的第 1 行到第 n-1 行
sendCommand($connection, "RETR $i", $verbose, multiline: true);
// DELE 命令
sendCommand($connection, "DELE $i", $verbose);
}
// QUIT 命令:正是它删除由 DELE 标记的邮件
sendCommand($connection, "QUIT", $verbose);
return "Reading done";
} catch (RuntimeException $ex) {
// 服务器报告了错误
return "Error: " . $ex->getMessage();
} finally {
// 无论如何,我们都关闭连接
fclose($connection);
}
}
// --------------------------------------------------------------------------
function sendCommand($connection, string $command, bool $verbose, bool $multiline = false): array
{
// 向通道 $connection 发送 $command 并返回响应的各行
// 如果 $verbose=true 则为详细模式
// 如果 $multiline=true,则响应以仅含一个点的行结束
// 如果服务器报告错误,则抛出 RuntimeException
//
// 如果命令不为空,则发送命令
if ($command !== "") {
fwrite($connection, "$command\r\n");
if ($verbose) {
display($command, 1);
}
}
// 读取响应的第 1 行
$line = readServerLine($connection, $verbose);
// 出错?
if (str_starts_with($line, "-ERR")) {
throw new RuntimeException(substr($line, 5));
}
$response = [$line];
// 多行响应?
if ($multiline) {
while (($line = readServerLine($connection, $verbose)) !== ".") {
// 收到了一行以点开头的邮件内容
// 它多带了一个点:我们将其去掉
$response[] = str_starts_with($line, "..") ? substr($line, 1) : $line;
}
}
return $response;
}
// --------------------------------------------------------------------------
function readServerLine($connection, bool $verbose): string
{
// 读取服务器发送的一行,并返回不含字符 \r\n 的内容
$line = fgets($connection);
if ($line === false) {
throw new RuntimeException("the server has closed the connection");
}
$line = rtrim($line, "\r\n");
if ($verbose) {
display($line, 2);
}
return $line;
}
// --------------------------------------------------------------------------
function display(string $exchange, int $direction): void
{
// 在屏幕上显示 $exchange
// 如果 $direction=1,则显示 → [$exchange]
// 如果 $direction=2,则显示 ← [$exchange]
print match ($direction) {
1 => "--> [$exchange]\n",
2 => "<-- [$exchange]\n",
};
}
|
说明
如前所述,[pop3-01.php] 是我们已经讨论过的 [smtp-01.php] 脚本的移植版本。我们只对主要的差异进行说明:
- 第 44 行:[readmail] 函数负责从邮箱中读取电子邮件。该邮箱的登录信息存放在 [$info] 字典中;
- 第 51 行:与 POP3 服务器建立连接;
- 第 57 行:读取服务器发送的欢迎消息;
- 第 59–61 行:发送命令 [USER] 和 [PASS] ,以标识要读取其邮件的用户;
- 第 63–65 行:发送命令 [LIST] 以确定邮箱中有多少封电子邮件。[sendCommand] 函数现在返回响应的各行。在对 LIST 命令的响应的第一行中,服务器指明有多少封邮件。这通过正则表达式获取。如果正则表达式没有找到任何内容,[$fields[1] ?? 0] 返回 0;
- 第 67–71 行:我们遍历这些邮件。对每一封,发送两条命令:
- RETR i:获取 i 号邮件;
- DELE i:在读取之后将其删除;
- 第 74 行:发送命令 [QUIT],告知服务器我们已经完成;
- 第 86 行:参数 [$multiline] 指示期望的响应是否有多行,其最后一行只包含一个句点。命令 [LIST] 和 [RETR] 就是这种情况。错误由以 [-ERR] 开头的第一行表示(使用 PHP 8.0 的函数 [str_starts_with] );
- 第 110–112 行:与 SMTP 一样,服务器会把邮件行首的句点加倍。客户端必须去掉这个多出来的句点。
我们再用 [smtp-01.php] 发送两封电子邮件,然后运行 [pop3-01.php]:
| > php pop3-01.php
Reading the mailbox [localhost:1110]
<-- [+OK Mailpit POP3 server]
--> [USER guest]
<-- [+OK]
--> [PASS guest]
<-- [+OK signed in]
--> [LIST]
<-- [+OK 2 messages (682 octets)]
<-- [1 349]
<-- [2 333]
<-- [.]
--> [RETR 1]
<-- [+OK 349 octets]
<-- [Message-ID: <67n1volg9CfPFES6KhEOf7@mailpit>]
<-- [Return-Path: <guest@localhost>]
<-- [Received: from vm (localhost [127.0.0.1])]
<-- [ by vm (Mailpit) with SMTP]
<-- [ for <php8parlexemple@gmail.com>; Thu, 1 Oct 2026 17:14:39 +0200 (CEST)]
<-- [From: guest@localhost]
<-- [To: php8parlexemple@gmail.com]
<-- [Subject: to gmail via localhost]
<-- []
<-- [line 1]
<-- [line 2]
<-- [line 3]
<-- []
<-- [.]
--> [DELE 1]
<-- [+OK message marked for deletion]
--> [RETR 2]
<-- [+OK 333 octets]
<-- [Message-ID: <6ZFzliytBzUvTLo2fEhfiC@mailpit>]
<-- [Return-Path: <guest@localhost>]
<-- [Received: from vm (localhost [127.0.0.1])]
<-- [ by vm (Mailpit) with SMTP]
<-- [ for <guest@localhost>; Thu, 1 Oct 2026 17:14:39 +0200 (CEST)]
<-- [From: guest@localhost]
<-- [To: guest@localhost]
<-- [Subject: to localhost via localhost]
<-- []
<-- [line 1]
<-- [line 2]
<-- [line 3]
<-- []
<-- [.]
--> [DELE 2]
<-- [+OK message marked for deletion]
--> [QUIT]
<-- [+OK goodbye]
Reading done
Done
|
这里我们有了一个基本的 POP3 客户端,它缺少某些功能:
在添加这些功能之前,让我们先探索 IMAP 协议。
16.6.4. 探索 IMAP 协议
IMAP 协议比 POP3 协议的功能更丰富。服务器为每个用户管理多个邮箱(INBOX、Sent、Trash 等),并跟踪邮件的状态:已读、已回复、待删除……这些状态称为标志。最重要的是,客户端可以向服务器请求邮件的结构,并且只下载其中的一部分。
每条客户端命令之前都有一个由客户端选择的标签,例如 [A1]。服务器以若干以星号 [*] 开头的行作出响应,后面是一行以该命令的标签开头的行,其后跟着 [OK] (成功)、[NO] (失败)或 [BAD] (无效命令)。
公共 IMAP 服务器从启动之时起,在端口 993 上只接受加密连接。对于 Gmail,你需要用 [--tls] 选项启动 TCP 客户端:[php tcp-client.php --tls --quit bye imap.gmail.com 993]。我们的本地服务器还接受标准端口 143 上的未加密连接,这对于探索很有用。我们用 [smtp-02.php] 脚本(配置为 [config-smtp-02.json])发送了两封电子邮件,它们被投递到了用户 [guest@localhost] 的收件箱 INBOX 中。下面是与 IMAP 服务器的一段对话:
| > php tcp-client.php --quit bye localhost 143
Client [127.0.0.1:39098] connected to the server [localhost:143]
Type your commands (bye to stop):
<-- [* OK [CAPABILITY IMAP4rev1 SASL-IR LOGIN-REFERRALS ID ENABLE IDLE LITERAL+ STARTTLS AUTH=PLAIN AUTH=LOGIN] Dovecot ready.]
A1 LOGIN guest@localhost guest
<-- [A1 OK [CAPABILITY IMAP4rev1 SASL-IR LOGIN-REFERRALS ID ENABLE IDLE SORT SORT=DISPLAY THREAD=REFERENCES THREAD=REFS THREAD=ORDEREDSUBJECT MULTIAPPEND URL-PARTIAL CATENATE UNSELECT CHILDREN NAMESPACE UIDPLUS LIST-EXTENDED I18NLEVEL=1 CONDSTORE QRESYNC ESEARCH ESORT SEARCHRES WITHIN CONTEXT=SEARCH LIST-STATUS BINARY MOVE SNIPPET=FUZZY PREVIEW=FUZZY PREVIEW STATUS=SIZE SAVEDATE LITERAL+ NOTIFY SPECIAL-USE] Logged in]
A2 SELECT INBOX
<-- [* FLAGS (\Answered \Flagged \Deleted \Seen \Draft)]
<-- [* OK [PERMANENTFLAGS (\Answered \Flagged \Deleted \Seen \Draft \*)] Flags permitted.]
<-- [* 2 EXISTS]
<-- [* 2 RECENT]
<-- [* OK [UNSEEN 1] First unseen.]
<-- [* OK [UIDVALIDITY 1790865054] UIDs valid]
<-- [* OK [UIDNEXT 10] Predicted next UID]
<-- [A2 OK [READ-WRITE] Select completed (0.001 + 0.000 secs).]
A3 SEARCH UNSEEN
<-- [* SEARCH 1 2]
<-- [A3 OK Search completed (0.001 + 0.000 secs).]
A4 FETCH 2 (FLAGS RFC822.SIZE BODY.PEEK[HEADER.FIELDS (FROM TO SUBJECT DATE)])
<-- [* 2 FETCH (FLAGS (\Recent) RFC822.SIZE 28101 BODY[HEADER.FIELDS (FROM TO SUBJECT DATE)] {114}]
<-- [From: guest@localhost]
<-- [To: guest@localhost]
<-- [Subject: test-secure-server]
<-- [Date: Thu, 01 Oct 2026 17:14:39 +0200]
<-- []
<-- [)]
<-- [A4 OK Fetch completed (0.001 + 0.000 secs).]
A5 FETCH 2 BODY.PEEK[1.1]
<-- [* 2 FETCH (BODY[1.1] {22}]
<-- [line 1]
<-- [line 2]
<-- [line 3)]
<-- [A5 OK Fetch completed (0.002 + 0.000 + 0.001 secs).]
A6 FETCH 1 BODYSTRUCTURE
<-- [* 1 FETCH (BODYSTRUCTURE ((("text" "plain" ("charset" "utf-8") NIL NIL "quoted-printable" 22 2 NIL NIL NIL NIL)("text" "html" ("charset" "utf-8") NIL NIL "quoted-printable" 35 0 NIL NIL NIL NIL) "alternative" ("boundary" "7tEIKgyZ") NIL NIL NIL)("application" "vnd.openxmlformats-officedocument.wordprocessingml.document" ("name" "Hello from Symfony Mailer.docx") NIL NIL "base64" 13518 NIL ("attachment" ("name" "Hello from Symfony Mailer.docx" "filename" "Hello from Symfony Mailer.docx")) NIL NIL)("application" "pdf" ("name" "Hello from Symfony Mailer.pdf") NIL NIL "base64" 26926 NIL ("attachment" ("name" "Hello from Symfony Mailer.pdf" "filename" "Hello from Symfony Mailer.pdf")) NIL NIL)("application" "vnd.oasis.opendocument.text" ("name" "Hello from Symfony Mailer.odt") NIL NIL "base64" 9514 NIL ("attachment" ("name" "Hello from Symfony Mailer.odt" "filename" "Hello from Symfony Mailer.odt")) NIL NIL)("image" "png" ("name" "=?utf-8?Q?Cours-Tutoriels-Serge-Tah=C3=A9-1568x268=2Epng?=") NIL NIL "base64" 57834 NIL ("attachment" ("filename*" "utf-8''Cours-Tutoriels-Serge-Tah%C3%A9-1568x268.png" "name*" "utf-8''Cours-Tutoriels-Serge-Tah%C3%A9-1568x268.png")) NIL NIL)("message" "rfc822" ("name" "test-localhost.eml") NIL NIL "base64" 149814 (NIL NIL NIL NIL NIL NIL NIL NIL NIL NIL) ("text" "plain" ("charset" "us-ascii") NIL NIL "7bit" 0 0 NIL NIL NIL NIL) 1921 NIL ("attachment" ("name" "test-localhost.eml" "filename" "test-localhost.eml")) NIL NIL) "mixed" ("boundary" "9UJIzQkk") NIL NIL NIL))]
<-- [A6 OK Fetch completed (0.001 + 0.000 secs).]
A7 LOGOUT
<-- [* BYE Logging out]
<-- [A7 OK Logout completed (0.001 + 0.000 secs).]
Connection with the server lost...
End of the client
|
- [A1 LOGIN guest@localhost guest]:命令 [LOGIN user password] 对用户进行身份验证。服务器响应该用户的功能列表(CAPABILITY);
- [A2 SELECT INBOX]:命令 [SELECT] 选择后续命令所作用的邮箱。服务器列出可用的标志(FLAGS)、邮件数量(2 EXISTS)以及第一封未读邮件的编号(UNSEEN 1)等;
- [A3 SEARCH UNSEEN]:命令 [SEARCH] 根据某个条件搜索邮件。这样的条件大约有二十个。这里,我们搜索尚未被阅读的邮件(UNSEEN)。服务器返回它们的编号:1 和 2;
- [A4 FETCH 2 (...)]:命令 [FETCH] 请求有关某封邮件的信息。这里,它获取邮件的标志(FLAGS)、大小(RFC822.SIZE)以及它的四个标头。格式 [BODY.PEEK[...]] 请求邮件的一部分而不将其标记为已读。标头文本以字面量形式发送:行末的 [{114}] 表示接下来的 114 个字节属于响应的一部分,不论其内容如何(包括换行符)。响应以字面量之后的一个右括号结束;
- [A5 FETCH 2 BODY.PEEK[1.1]]:请求 2 号邮件的 1.1 部分;这里,它的文本是 [text/plain]。我们很快就会看到邮件各部分是如何编号的;
- [A6 FETCH 1 BODYSTRUCTURE]:我们请求 1 号邮件(带有五个附件的那封)的结构。响应是由括号括起来的列表组成的列表。我们可以辨认出在 [Mailpit] 中看到过的邮件各部分:针对 [(("text" "plain" ...)("text" "html" ...) "alternative" ...)] 部分 [multipart/alternative] 的一个列表,后面是每个附件的一个列表,其中包括其类型、参数(名称)、编码(base64)、大小和布局(带文件名的“attachment”)。该结构以整封邮件的 [mixed] 子类型结束;
- [A7 LOGOUT]:对话结束。
16.6.5. POP3 和 IMAP 协议的类
我们的邮件读取脚本将可以互换地使用 POP3 服务器或 IMAP 服务器。因此,我们将编写:
- 一个接口 [MailClient] ,描述电子邮件客户端能做什么;
- 一个抽象类 [TcpClient] ,把两种协议的共同之处归并在一起:一个 TCP 连接——可以是加密的——在其上交换文本行;
- 两个类 [Pop3Client] 和 [ImapClient],它们继承自 [TcpClient] 并实现 [MailClient] 接口;
- 一个名为 [MimePart] 的类,描述通过 IMAP 命令 [BODYSTRUCTURE] 获得的邮件结构。
它们位于 [inet/imap] 文件夹中:
| imap
├── ImapClient.php
├── MailClient.php
├── MimePart.php
├── Pop3Client.php
├── TcpClient.php
├── config-imap-01.json
├── config-pop3-01.json
├── imap-01.php
├── imap-02.php
├── imap-03.php
└── pop3-01.php
|
16.6.5.1. [MailClient] 接口
| <?php
declare(strict_types=1);
// 邮件读取客户端能做的事情,无论它使用 POP3 还是 IMAP
// 邮件通过其在邮箱中的编号(1、2……)来指定
interface MailClient
{
// 连接并认证 - 返回邮箱中的邮件数
public function connect(): int;
// 未读邮件的编号
public function unread(): array;
// 第 $n 号邮件的主要头部(Date、From、To、Subject……)
public function headers(int $n): array;
// 第 $n 号邮件的完整文本(头部和正文)
public function message(int $n): string;
// 将第 $n 号邮件标记为“待删除”
public function delete(int $n): void;
// 删除已标记的邮件并关闭连接
public function close(): void;
}
|
- 第 10 行:连接到服务器并对用户进行身份验证。该方法返回邮箱中的邮件数量;
- 第 13 行:未读邮件的编号;
- 第 16 行:邮件的主要标头,以字典形式给出;
- 第 19 行:邮件的完整文本,即我们在 [Raw] 选项卡中看到的内容,该选项卡属于 [Mailpit];
- 第 22 行:将邮件标记为“待删除”;
- 第 25 行:删除已标记的邮件并关闭连接。
16.6.5.2. [TcpClient] 类
| <?php
declare(strict_types=1);
// POP3 和 IMAP 客户端的基类:一个 TCP 连接,可能
// 经过加密 (TLS),在其上交换以 \r\n 结尾的文本行
abstract class TcpClient
{
// 与服务器的连接(stream 类型的资源)
protected mixed $connection = null;
// $info:服务器的配置(server、port、tls、verify-peer、user、password……)
// $tracking:如果为 true,则在控制台显示客户端 / 服务器的交互
public function __construct(protected readonly array $info, protected readonly bool $tracking = false)
{
}
// 打开与服务器的连接
protected function openConnection(): void
{
// 连接一打开就加密 (tls://) 还是不加密 (tcp://)?
$transport = ($this->info["tls"] ?? false) ? "tls" : "tcp";
// 是否应检查服务器证书?(默认检查)
$verify = $this->info["verify-peer"] ?? true;
$context = stream_context_create(["ssl" => ["verify_peer" => $verify, "verify_peer_name" => $verify]]);
$connection = @stream_socket_client("$transport://{$this->info["server"]}:{$this->info["port"]}",
$errorNumber, $error, 10, STREAM_CLIENT_CONNECT, $context);
if ($connection === false) {
throw new RuntimeException("failed to connect to the server "
. "[{$this->info["server"]}:{$this->info["port"]}]: $error");
}
$this->connection = $connection;
}
// 向服务器发送一行 - $display:在跟踪模式下应显示的内容
protected function send(string $line, ?string $display = null): void
{
fwrite($this->connection, "$line\r\n");
$this->display("--> " . ($display ?? $line));
}
// 读取服务器发送的一行,返回时不含字符 \r\n
// $display:在跟踪模式下是否应显示这一行?
protected function readLine(bool $display = true): string
{
$line = fgets($this->connection);
if ($line === false) {
throw new RuntimeException("the server has closed the connection");
}
$line = rtrim($line, "\r\n");
if ($display) {
$this->display("<-- $line");
}
return $line;
}
// 读取服务器发送的 $nbBytes 个字节
protected function readBytes(int $nbBytes): string
{
$bytes = "";
while (strlen($bytes) < $nbBytes) {
$chunk = fread($this->connection, $nbBytes - strlen($bytes));
if ($chunk === false || $chunk === "") {
throw new RuntimeException("the server has closed the connection");
}
$bytes .= $chunk;
}
$this->display("<-- ... $nbBytes bytes ...");
return $bytes;
}
// 关闭连接
protected function closeConnection(): void
{
if ($this->connection !== null) {
fclose($this->connection);
$this->connection = null;
}
}
// 在跟踪模式下显示
protected function display(string $message): void
{
if ($this->tracking) {
print "$message\n";
}
}
// 分析邮件的头部:返回已解码头部的字典 [名称 => 值]
// (非 ASCII 的头部是经过编码的,例如 =?utf-8?Q?...?=)
protected static function parseHeaders(string $headers): array
{
$dictionary = iconv_mime_decode_headers($headers, ICONV_MIME_DECODE_CONTINUE_ON_ERROR, "UTF-8");
return $dictionary === false ? [] : $dictionary;
}
}
|
- 第 7 行:该类是抽象的,不能被实例化。它充当 [Pop3Client] 和 [ImapClient] 类的父类;
- 第 10 行:到服务器的连接。PHP 的函数把它表示为资源,而资源是 PHP 中无法声明的类型:因此使用类型 [mixed];
- 第 14 行:构造函数使用参数提升(PHP 8.0):参数 [$info] 和 [$tracking] 成为类的属性,这里是只读的([readonly],PHP 8.1)。构造函数的函数体为空。[$info] 是服务器配置,从 JSON 文件中读取。[$tracking] 要求显示客户端/服务器之间的交换;
- 第 19–32 行:建立连接。如果配置中包含 [tls: true],则连接一经建立就被加密(传输 [tls://])。上下文指定是否应验证服务器的证书(条目 [verify-peer],默认为 true);
- 第 36 行:向服务器发送一行。[$display] 参数使你可以显示与所发送内容不同的东西:我们将用它来隐藏密码;
- 第 44 行:读取一行。如果服务器已关闭连接,则抛出异常;
- 第 58 行:读取指定数量的字节。我们将把它用于 IMAP 中的字面量。[fread] 函数返回的字节数可能少于请求的数量:我们循环读取,直到收到全部内容;
- 第 91 行:[iconv_mime_decode_headers] 函数解析一块电子邮件标头,并返回 [name => value] 字典。它会把分布在多行上的标头拼接起来,并对编码过的标头(=?utf-8?Q?...?=)进行解码。
16.6.5.3. [Pop3Client] 类
| <?php
declare(strict_types=1);
require_once __DIR__ . "/TcpClient.php";
require_once __DIR__ . "/MailClient.php";
// POP3 客户端:命令 USER、PASS、STAT、TOP、LIST、RETR、DELE、QUIT
final class Pop3Client extends TcpClient implements MailClient
{
// 邮箱中的邮件数
private int $nbMessages = 0;
#[\Override]
public function connect(): int
{
$this->openConnection();
// 服务器的欢迎消息
$this->command("");
// 认证
$this->command("USER {$this->info["user"]}");
$this->command("PASS {$this->info["password"]}", "PASS *****");
// STAT:响应形如 [+OK nbMessages totalSize]
$response = $this->command("STAT");
$this->nbMessages = (int) explode(" ", $response[0])[1];
return $this->nbMessages;
}
#[\Override]
public function unread(): array
{
// POP3 不记录已读邮件:所有存在的邮件都是新邮件
return $this->nbMessages === 0 ? [] : range(1, $this->nbMessages);
}
#[\Override]
public function headers(int $n): array
{
// TOP n 0:第 n 号邮件的头部,后跟正文的 0 行
$lines = $this->command("TOP $n 0", multiline: true);
$headers = self::parseHeaders(implode("\r\n", array_slice($lines, 1)));
// LIST n:响应形如 [+OK n size]
$response = $this->command("LIST $n");
// 我们只保留主要头部
$summary = array_intersect_key($headers, array_flip(["Date", "From", "To", "Subject", "Message-ID"]));
return [...$summary, "Size" => explode(" ", $response[0])[2]];
}
#[\Override]
public function message(int $n): string
{
// RETR n:响应的第 1 行是 [+OK...],后面的行是邮件内容
$lines = $this->command("RETR $n", multiline: true);
return implode("\r\n", array_slice($lines, 1)) . "\r\n";
}
#[\Override]
public function delete(int $n): void
{
$this->command("DELE $n");
}
#[\Override]
public function close(): void
{
// 如果无法打开连接,则无事可做
if ($this->connection === null) {
return;
}
try {
// 正是 QUIT 命令删除由 DELE 标记的邮件
$this->command("QUIT");
} finally {
$this->closeConnection();
}
}
// 向服务器发送命令(如果不为空)并返回响应的各行
// $multiline:响应是否以仅含一个点的行结束?
private function command(string $command, ?string $display = null, bool $multiline = false): array
{
if ($command !== "") {
$this->send($command, $display);
}
// 第 1 行:+OK 或 -ERR
$line = $this->readLine();
if (str_starts_with($line, "-ERR")) {
throw new RuntimeException("[" . ($display ?? $command) . "]: $line");
}
$response = [$line];
if ($multiline) {
// 后面的行,直到行 [.] 为止,在跟踪模式下不显示
while (($line = $this->readLine(false)) !== ".") {
// 服务器会把以点开头的行再加一个点:我们将其去掉
$response[] = str_starts_with($line, "..") ? substr($line, 1) : $line;
}
$this->display("<-- ... " . (count($response) - 1) . " lines ...");
$this->display("<-- .");
}
return $response;
}
}
|
- 第 9 行:该类继承自 [TcpClient] 并实现 [MailClient]。它被声明为 [final]:不能从它派生任何类;
- 第 14 行:属性 [#[\Override]] (PHP 8.3)表示该方法实现了接口中的方法或重写了父类中的方法。如果并非如此(例如名称中有拼写错误),PHP 会报告错误;
- 第 15–26 行:连接。[pop3-01.php] 中的命令出现在这里。命令 [STAT] 在一行中返回邮件的数量及其总大小。密码以 [*****] 的形式显示;
- 第 30–33 行:POP3 协议不跟踪已读邮件;所有邮件都被视为新邮件。[range(1, n)] 函数返回数组 [1, 2, ..., n];
- 第 37–46 行:命令 [TOP n 0] 返回 n 号邮件的标头,后面跟其正文的 0 行。命令 [LIST n] 返回它的大小。[array_intersect_key] 函数只保留那些名称是 [array_flip] 所返回数组中的键的标头。[...] 运算符把这些标头复制到返回的数组中,并在其中加上大小;
- 第 50–54 行:命令 [RETR n] 返回 n 号邮件;
- 第 64–74 行:命令 [QUIT] 删除由命令 [DELE] 标记的邮件。连接在所有情况下都会被关闭(块 [finally]);
- 第 80 行:方法 [command] 就是 [sendCommand] 函数,来自 [pop3-01.php]。在跟踪模式下,多行响应的各行不会被显示,只显示它们的行数。
16.6.5.4. 类 [ImapClient]
| <?php
declare(strict_types=1);
require_once __DIR__ . "/TcpClient.php";
require_once __DIR__ . "/MailClient.php";
require_once __DIR__ . "/MimePart.php";
// IMAP 客户端:命令 LOGIN、SELECT、SEARCH、FETCH、STORE、EXPUNGE、LOGOUT
// 每条命令前都有一个标签(A0001、A0002……);服务器发送
// [* ...] 响应,然后以 [tag OK|NO|BAD ...] 响应结束
final class ImapClient extends TcpClient implements MailClient
{
// 最后发送的命令的编号(用于构建标签)
private int $number = 0;
// 是否有标记为“待删除”的邮件?
private bool $deletions = false;
#[\Override]
public function connect(): int
{
$this->openConnection();
// 服务器的欢迎消息:[* OK ...]
[$welcome] = $this->readResponse();
if (!str_starts_with($welcome, "* OK")) {
throw new RuntimeException("the server refuses the connection: $welcome");
}
// 认证
$this->command("LOGIN " . self::quote($this->info["user"]) . " " . self::quote($this->info["password"]),
"LOGIN " . self::quote($this->info["user"]) . " *****");
// 选择邮箱:其中一个响应形如 [* n EXISTS]
$responses = $this->command("SELECT " . self::quote($this->info["mailbox"] ?? "INBOX"));
$exists = array_find($responses, fn(array $response): bool => ($response[1] ?? "") === "EXISTS");
return (int) ($exists[0] ?? 0);
}
#[\Override]
public function unread(): array
{
// 响应形如 [* SEARCH n1 n2 ...]
$responses = $this->command("SEARCH UNSEEN");
$search = array_find($responses, fn(array $response): bool => $response[0] === "SEARCH") ?? ["SEARCH"];
return array_map(intval(...), array_slice($search, 1));
}
#[\Override]
public function headers(int $n): array
{
// BODY.PEEK[HEADER]:邮件的头部,不将其标记为已读
$data = $this->fetch($n, "(FLAGS RFC822.SIZE BODY.PEEK[HEADER])");
$headers = self::parseHeaders($data["BODY[HEADER]"]);
// 我们只保留主要头部
$summary = array_intersect_key($headers, array_flip(["Date", "From", "To", "Subject", "Message-ID"]));
return [...$summary, "Flags" => implode(" ", $data["FLAGS"]), "Size" => $data["RFC822.SIZE"]];
}
#[\Override]
public function message(int $n): string
{
// BODY[]:整封邮件;服务器会将其标记为已读(\Seen 标志)
return $this->fetch($n, "BODY[]")["BODY[]"];
}
// 第 $n 号邮件的 MIME 结构
public function structure(int $n): MimePart
{
return MimePart::fromBodyStructure($this->fetch($n, "BODYSTRUCTURE")["BODYSTRUCTURE"]);
}
// 第 $n 号邮件的第 $section 部分(1、1.2……)的(已编码)内容
public function part(int $n, string $section): string
{
return $this->fetch($n, "BODY[$section]")["BODY[$section]"] ?? "";
}
#[\Override]
public function delete(int $n): void
{
// 我们给邮件添加 \Deleted 标志
$this->command("STORE $n +FLAGS (\\Deleted)");
$this->deletions = true;
}
#[\Override]
public function close(): void
{
// 如果无法打开连接,则无事可做
if ($this->connection === null) {
return;
}
try {
// EXPUNGE 删除带有 \Deleted 标志的邮件
if ($this->deletions) {
$this->command("EXPUNGE");
}
$this->command("LOGOUT");
} finally {
$this->closeConnection();
}
}
// FETCH n items 命令:返回响应的字典 [item => value]
// [* n FETCH (item1 value1 item2 value2 ...)]
private function fetch(int $n, string $items): array
{
$responses = $this->command("FETCH $n $items");
$fetch = array_find($responses, fn(array $response): bool => ($response[1] ?? "") === "FETCH");
if ($fetch === null) {
throw new RuntimeException("no message no. $n");
}
$dictionary = [];
foreach (array_chunk($fetch[2], 2) as [$key, $value]) {
$dictionary[strtoupper($key)] = $value;
}
return $dictionary;
}
// 发送带标签的命令并返回其 [* ...] 响应,每个响应拆分为标记
// $display:在跟踪模式下应显示的内容(用于隐藏密码)
private function command(string $command, ?string $display = null): array
{
$tag = sprintf("A%04d", ++$this->number);
$this->send("$tag $command", $display === null ? null : "$tag $display");
$responses = [];
while (true) {
[$text, $literals] = $this->readResponse();
// 最终响应 [tag OK|NO|BAD text]?
if (str_starts_with($text, "$tag ")) {
$status = substr($text, strlen($tag) + 1);
if (!str_starts_with($status, "OK")) {
throw new RuntimeException("[" . ($display ?? $command) . "]: $status");
}
return $responses;
}
// [* ...] 响应
if (str_starts_with($text, "* ")) {
$position = 2;
$responses[] = self::tokens($text, $position, $literals);
}
}
}
// 读取服务器的一个响应:可能包含字面量的一行。字面量
// 由行尾的 {n} 宣告:随后是 n 个字节,然后是该行的其余部分。
// 返回响应的文本,其中第 k 个字面量被替换为 \0k\0,以及这些字面量
private function readResponse(): array
{
$text = "";
$literals = [];
while (true) {
$line = $this->readLine();
if (preg_match('/\{(\d+)\}$/', $line, $fields) !== 1) {
return [$text . $line, $literals];
}
$text .= substr($line, 0, -strlen($fields[0])) . "\0" . count($literals) . "\0";
$literals[] = $this->readBytes((int) $fields[1]);
}
}
// 从位置 $position 开始把 $text 拆分为标记,直到文本结束或
// 直到右括号为止。列表 (...) 变成数组,NIL 变成 null,
// 字符串 "..." 或字面量变成字符串,其他一切(原子)也是如此
private static function tokens(string $text, int &$position, array $literals): array
{
$tokens = [];
$length = strlen($text);
while ($position < $length) {
$c = $text[$position];
if ($c === " ") {
$position++;
} elseif ($c === "(") {
// 一个列表:递归调用
$position++;
$tokens[] = self::tokens($text, $position, $literals);
} elseif ($c === ")") {
// 当前列表结束
$position++;
return $tokens;
} elseif ($c === '"') {
// 带引号的字符串,其中 \" 和 \\ 分别表示 " 和 \
$string = "";
for ($position++; $text[$position] !== '"'; $position++) {
if ($text[$position] === "\\") {
$position++;
}
$string .= $text[$position];
}
$position++;
$tokens[] = $string;
} elseif ($c === "\0") {
// 一个字面量
$end = strpos($text, "\0", $position + 1);
$tokens[] = $literals[(int) substr($text, $position + 1, $end - $position - 1)];
$position = $end + 1;
} else {
// 一个原子:直到下一个空格或括号为止,方括号内除外
// (BODY[HEADER.FIELDS (FROM TO)] 是单个原子)
$start = $position;
$brackets = 0;
while ($position < $length
&& ($brackets > 0 || !in_array($text[$position], [" ", "(", ")"], true))) {
$brackets += match ($text[$position]) { "[" => 1, "]" => -1, default => 0 };
$position++;
}
$atom = substr($text, $start, $position - $start);
$tokens[] = $atom === "NIL" ? null : $atom;
}
}
return $tokens;
}
// 一个 IMAP 字符串:置于引号之间,字符 " 和 \ 前加 \
private static function quote(string $text): string
{
return '"' . addcslashes($text, '"\\') . '"';
}
}
|
- 第 15 行:最后一条命令的编号。它用于生成标签 [A0001]、[A0002]……;
- 第 20–34 行:连接。服务器首先发送欢迎消息:[* OK ...]。然后发送命令 [LOGIN] 和 [SELECT] 。[command] 方法返回服务器的响应 [* ...],每个响应都被拆分为词元:响应 [* 2 EXISTS] 变为数组 [["2", "EXISTS"]]。函数 [array_find] (PHP 8.4)返回数组中第一个满足条件的元素,或 [null];
- 第 38–43 行:命令 [SEARCH UNSEEN]。结果 [* SEARCH 1 2] 变为 [["SEARCH", "1", "2"]]。我们保留从编号 1 开始的元素([array_slice]),它们由函数 [intval] 转换为整数。记法 [intval(...)] (PHP 8.1)根据函数 [intval] 创建一个函数:这就是一等可调用对象的语法;
- 第 47–54 行:命令 [FETCH n (FLAGS RFC822.SIZE BODY.PEEK[HEADER])] 返回 n 号邮件的标志、大小和标头;
- 第 58–61 行:命令 [FETCH n BODY[]] 返回完整的 n 号邮件。服务器会给它加上标志 [\Seen]:该邮件现在被标记为已读;
- 第 65–67 行:命令 [FETCH n BODYSTRUCTURE] 返回邮件结构,类 [MimePart] 把它转换为对象树;
- 第 71–73 行:命令 [FETCH n BODY[section]] 返回邮件第 [section] 部分的内容,保持其在邮件中的编码方式(Base64、quoted-printable 等);
- 第 77–81 行:命令 [STORE n +FLAGS (\Deleted)] 给邮件添加标志 [\Deleted] 。它尚未被移除;
- 第 85–98 行:命令 [EXPUNGE] 删除带有标志 [\Deleted] 的邮件。命令 [LOGOUT] 结束对话;
- 第 104–115 行:方法 [fetch] 发送一条 [FETCH] 命令,并将 [[* n FETCH (item1 value1 item2 value2...)]] 形式的响应列表转换为 [[item1 => value1, item2 => value2...]] 字典。[array_chunk] 函数将列表拆分为若干对,[foreach] 循环再将其解包为 [[$key, $value]];
- 第 120–133 行:[command] 方法发送一条带标签前缀的命令,然后读取服务器的各条响应,直到找到以该标签开头的那一条。如果这条最终响应不是 [OK],则抛出异常;
- 第 146–153 行:读取响应。如果某一行以 [{n}] 结尾,则其后跟着 n 个字节(字面量),然后是响应的其余部分。在响应文本中,每个字面量都被替换为一个标记 [\0k\0] (\0 是代码为 0 的字符,它不可能出现在 IMAP 的文本行中),其内容则存放在数组 [$literals] 中;
- 第 163–209 行:方法 [tokens] 将响应文本拆分为词元:
- 用括号括起来的列表变为数组。该方法通过自我调用(递归调用)来解析列表的内容,并在遇到右括号时返回;
- 用引号括起来的字符串或字面量变为字符串;
- [NIL] 变为 [null];
- 其他所有内容(原子)都变为字符串。原子中可以包含方括号,而方括号内部又可以包含空格和括号:[BODY[HEADER.FIELDS (FROM TO)]] 是一个单独的原子。表达式 [match] 在遇到 [[] 时将左方括号计数器加 1,遇到 []] 时减 1;
- 参数 [$position] 按引用传递,表示文本中的当前位置:它随着分析的推进而前移,包括在递归调用内部;
- 第 213 行:IMAP 字符串用引号括起来。函数 [addcslashes] 在字符 ["] 和 [\] 之前添加一个 [\] 字符。
16.6.5.5. 类 [MimePart]
| <?php
declare(strict_types=1);
// MIME 邮件的一个部分,如 IMAP 服务器的 BODYSTRUCTURE 响应所描述
// 邮件是由各部分构成的树:[multipart/xxx] 部分有子部分
final readonly class MimePart
{
public function __construct(
// 小写的 MIME 类型和子类型:text/plain、multipart/mixed、application/pdf……
public string $type,
public string $subType,
// 类型的参数,例如 [charset => utf-8]
public array $parameters = [],
// 内容的编码:7bit、8bit、base64、quoted-printable……
public string $encoding = "7bit",
// disposition(attachment、inline)或 null,及其参数,例如 [filename => x.pdf]
public ?string $disposition = null,
public array $dispositionParameters = [],
// [multipart/xxx] 部分的子部分
public array $parts = [],
) {
}
// 根据 BODYSTRUCTURE 标记列表构建部分树
public static function fromBodyStructure(array $structure): self
{
// 多部分:((子部分 1) (子部分 2)... "subtype" (parameters) disposition...)
if (is_array($structure[0])) {
// 子部分是开头那些列表元素
$parts = [];
$i = 0;
while (is_array($structure[$i])) {
$parts[] = self::fromBodyStructure($structure[$i++]);
}
return new self(
type: "multipart",
subType: strtolower($structure[$i]),
parameters: self::dictionary($structure[$i + 1] ?? null),
disposition: self::disposition($structure[$i + 2] ?? null)[0],
dispositionParameters: self::disposition($structure[$i + 2] ?? null)[1],
parts: $parts,
);
}
// 简单部分:("type" "subtype" (parameters) id description "encoding" size ...)
$type = strtolower($structure[0]);
$subType = strtolower($structure[1]);
// disposition 位于取决于部分类型的字段之后
$dispositionIndex = match (true) {
// text/xxx:... size nbLines md5 disposition
$type === "text" => 9,
// message/rfc822:... size envelope structure nbLines md5 disposition
$type === "message" && $subType === "rfc822" => 11,
// 其他:... size md5 disposition
default => 8,
};
[$disposition, $dispositionParameters] = self::disposition($structure[$dispositionIndex] ?? null);
return new self(
type: $type,
subType: $subType,
parameters: self::dictionary($structure[2]),
encoding: strtolower($structure[5] ?? "7bit"),
disposition: $disposition,
dispositionParameters: $dispositionParameters,
);
}
// 附件的文件名,或 null
public function fileName(): ?string
{
// 名称是 disposition 的 [filename] 参数,否则是类型的 [name] 参数
// 它可以用两种方式编码:
// - filename*=utf-8''Tah%C3%A9.png (RFC 2231);
// - name="=?utf-8?Q?Tah=C3=A9.png?=" (RFC 2047);
$encoded = $this->dispositionParameters["filename*"] ?? $this->parameters["name*"] ?? null;
if ($encoded !== null) {
// 字符集''经 URL 编码的名称
[$charset, , $name] = explode("'", $encoded, 3);
return mb_convert_encoding(rawurldecode($name), "UTF-8", $charset);
}
$name = $this->dispositionParameters["filename"] ?? $this->parameters["name"] ?? null;
return $name === null ? null : iconv_mime_decode($name, ICONV_MIME_DECODE_CONTINUE_ON_ERROR, "UTF-8");
}
// 将 IMAP 列表 (key1 value1 key2 value2...) 或 NIL 转换为字典
private static function dictionary(?array $list): array
{
$dictionary = [];
foreach (array_chunk($list ?? [], 2) as [$key, $value]) {
$dictionary[strtolower($key)] = $value;
}
return $dictionary;
}
// 一个 IMAP disposition ("attachment" (parameters)) 或 NIL:返回 [disposition, parameters]
private static function disposition(mixed $disposition): array
{
if (!is_array($disposition)) {
return [null, []];
}
return [strtolower($disposition[0]), self::dictionary($disposition[1] ?? null)];
}
}
|
- 第 7 行:[readonly] 类(PHP 8.2)只有只读属性:一旦构造完成,[MimePart] 对象就不能再被修改;
- 第 9–22 行:所有属性都通过构造函数参数提升来声明。它们带有默认值,因此只需通过名称传递部分参数(命名参数);
- 第 26 行:静态方法 [fromBodyStructure] 根据 [BODYSTRUCTURE] 响应中的词元列表构造部分树;
- 第 29–42 行:多部分以其子部分的列表开头,每个子部分都通过递归调用被转换为 [MimePart] 对象。接下来是其子类型(mixed、alternative 等)、其参数(boundary)以及其布局;
- 第 45–57 行:简单部分以其类型、子类型、参数、标识符、描述、编码和大小开头。布局的位置取决于部分的类型:[text/xxx] 部分还包含行数;[message/rfc822] 部分还包含邮件信封和结构,以及行数。表达式 [match (true)] 选择第一个条件为真的分支;
- 第 69–82 行:附件的文件名。我们在 [Mailpit] 中看到过,它可以用两种方式编码:
- RFC 2231 编码 [utf-8''Tah%C3%A9.png]:字符集、两个撇号,后跟按 URL 方式编码的名称。使用 [rawurldecode] 对其解码,然后使用 [mb_convert_encoding] 转换为 UTF-8;
- RFC 2047 编码 [=?utf-8?Q?Tah=C3=A9.png?=]:使用函数 [iconv_mime_decode] 对其解码;
- 第 86 行:IMAP 列表 [("charset" "utf-8")] 变为字典 [["charset" => "utf-8"]];
- 第 96 行:布局 [("attachment" ("filename" "x.pdf"))] 变为数组 [["attachment", ["filename" => "x.pdf"]]]。
16.6.6. POP3 / IMAP 客户端 [imap-01.php]
脚本 [imap-01.php] 的用途与 PHP 7 课程中同名的脚本相同,后者使用了函数 [imap_open]、[imap_num_msg]、[imap_search]、[imap_headerinfo]、[imap_body]、[imap_delete]、[imap_expunge] 和 [imap_close]。它使用以下 JSON 文件 [config-imap-01.json]:
| {
"imap.gmail.com:993": {
"enabled": false,
"protocol": "imap",
"server": "imap.gmail.com",
"port": 993,
"tls": true,
"verify-peer": true,
"user": "php8parlexemple@gmail.com",
"password": "application password",
"mailbox": "INBOX",
"output-dir": "output/gmail-imap"
},
"localhost:993": {
"protocol": "imap",
"server": "localhost",
"port": 993,
"tls": true,
"verify-peer": false,
"user": "guest@localhost",
"password": "guest",
"mailbox": "INBOX",
"output-dir": "output/localhost-imap"
},
"localhost:1110": {
"protocol": "pop3",
"server": "localhost",
"port": 1110,
"tls": false,
"user": "guest",
"password": "guest",
"output-dir": "output/localhost-pop3"
}
}
|
文件 [config-imap-01.json] 定义了一个要连接的 IMAP / POP3 服务器字典。每一项的形式为 [key => value],其中:
- [key]:是指代服务器的名称。这里有三个:
- [imap.gmail.com:993]:Gmail 的 IMAP 服务器,监听端口 993,使用加密连接。它处于禁用状态([enabled] 为 [false]):请在其中填入你的 Gmail 地址和应用密码,然后将 [enabled] 改为 [true];
- [localhost:993]:本地 IMAP 服务器,使用自签名证书加密连接,该证书不做验证;
- [localhost:1110]:[Mailpit] 的 POP3 服务器;
- [value]:是一个字典,指定以下几点:
- [protocol]:协议,[imap] 或 [pop3];
- [server]:服务器名称,IMAP 或 POP3 服务器;
- [port]:服务器端口(IMAP 或 POP3);
- [tls]:连接是否加密?
- [verify-peer]:是否验证服务器证书?在 Windows 上,如果对公共服务器的验证失败,请检查 [openssl.cafile] 指令在 [php.ini] 文件中是否指向一个证书颁发机构文件,就像 [Laragon] 所做的那样;
- [user]:邮箱所有者;
- [password]:邮箱所有者的密码;
- [mailbox]:要读取的 IMAP 邮箱,其中 INBOX 是新邮件到达的邮箱;
- [output-dir]:保存邮件的文件夹。
使用 POP3 协议时,读取邮件之后,该邮件会被删除。POP3 服务器通常就是这样工作的:已读取的邮件不会保留在服务器上。
脚本 [imap-01.php] 如下:
| <?php
declare(strict_types=1);
// 用于读取邮件的 IMAP (Internet Message Access Protocol) / POP3 客户端
// 要读取的邮箱在配置文件中描述
require_once __DIR__ . "/ImapClient.php";
require_once __DIR__ . "/Pop3Client.php";
// 读取邮件的参数
const CONFIG_FILE_NAME = "config-imap-01.json";
// 是否显示客户端 / 服务器的交互?
const TRACKING = false;
// 获取配置
$mailboxes = json_decode(file_get_contents(CONFIG_FILE_NAME), true);
// 读取邮箱
foreach ($mailboxes as $name => $info) {
// 配置中是否禁用了该邮箱?
if (($info["enabled"] ?? true) === false) {
print "------------Mailbox [$name] disabled\n";
continue;
}
// 跟踪
print "------------Reading the mailbox [$name]\n";
// 读取邮箱
readmailbox($name, $info);
}
// 结束
print "Done\n";
// --------------------------------------------------------------------------
function createClient(array $info): MailClient
{
// 根据配置选用 IMAP 或 POP3 客户端
return match ($info["protocol"]) {
"imap" => new ImapClient($info, TRACKING),
"pop3" => new Pop3Client($info, TRACKING),
};
}
// --------------------------------------------------------------------------
function readmailbox(string $name, array $info): void
{
// 邮箱的客户端
$client = createClient($info);
try {
// 连接
$nbmsg = $client->connect();
print "Connection established with the server [$name].\n";
// 邮箱中的邮件总数
print "There are [$nbmsg] messages in the mailbox [$name]\n";
if ($nbmsg === 0) {
return;
}
// 邮箱中的未读邮件
print "Retrieving the list of the unread messages of the mailbox [$name]\n";
$msgNumbers = $client->unread();
if (count($msgNumbers) === 0) {
print "There are no new messages in the mailbox [$name]\n";
return;
}
foreach ($msgNumbers as $msgNumber) {
// 我们获取第 $msgNumber 号邮件的头部
print "Headers of the message no. [$msgNumber] of the mailbox [$name]\n";
print_r($client->headers($msgNumber));
// 我们获取第 $msgNumber 号邮件的完整文本并保存
saveMessage($client->message($msgNumber), $msgNumber, $info);
// 如果协议是 POP3,我们删除该邮件
if ($info["protocol"] === "pop3") {
$client->delete($msgNumber);
}
}
} catch (RuntimeException $ex) {
print "Error: " . $ex->getMessage() . "\n";
} finally {
// 无论如何,我们都关闭连接
try {
$client->close();
print "Connection closed successfully.\n";
} catch (RuntimeException $ex) {
print "Closing the connection failed: " . $ex->getMessage() . "\n";
}
}
}
// --------------------------------------------------------------------------
function saveMessage(string $message, int $msgNumber, array $info): void
{
// 邮件保存在文件 [output-dir/message-N.eml] 中
$fileName = "{$info["output-dir"]}/message-$msgNumber.eml";
print "Saving the message in the file [$fileName]\n";
// 必要时创建文件夹(true:连同其父文件夹)
if (!is_dir($info["output-dir"])) {
mkdir($info["output-dir"], recursive: true);
}
// 我们保存邮件
if (file_put_contents($fileName, $message) === false) {
print "Saving failed\n";
}
}
|
说明:
- 第 8–9 行:加载两个客户端的类,它们又会加载 [TcpClient] 类和 [MailClient] 接口;
- 第 14 行:当值为 [true] 时,会显示客户端/服务器之间的交互。请试一试;
- 第 20–29 行:我们遍历配置文件中的所有服务器,已禁用的除外;
- 第 35–41 行:[createClient] 函数根据配置返回一个 IMAP 或 POP3 客户端。其返回类型是 [MailClient] 接口:脚本的其余部分并不知道自己面对的是哪种协议。这就是多态;
- 第 51 行:连接与身份验证;
- 第 60 行:未读邮件的编号;
- 第 68 行:使用 [print_r] 函数显示邮件头;
- 第 70 行:邮件的完整文本被保存到一个文件中;
- 第 72 行:使用 POP3 协议时,邮件被标记为待删除;
- 第 78–86 行:无论何种情况,连接都会被关闭,从而删除已标记的邮件。如果 [return] 语句在 [try] 块中被执行,[finally] 块也会被执行;
- 第 97 行:[mkdir] 函数借助名为 [recursive: true] 的参数创建该文件夹及其父文件夹。
让我们运行脚本 [smtp-02.php],使用户 [guest@localhost] 有新邮件。完成后,再运行脚本 [imap-01.php] 来读取各个邮箱。控制台输出如下:
| > php imap-01.php
------------Mailbox [imap.gmail.com:993] disabled
------------Reading the mailbox [localhost:993]
Connection established with the server [localhost:993].
There are [2] messages in the mailbox [localhost:993]
Retrieving the list of the unread messages of the mailbox [localhost:993]
Headers of the message no. [1] of the mailbox [localhost:993]
Array
(
[From] => guest@localhost
[To] => guest@localhost
[Subject] => test-localhost
[Message-ID] => <b80fff003b5b37b74244dc69674f3ce4@localhost>
[Date] => Thu, 01 Oct 2026 17:14:39 +0200
[Flags] =>
[Size] => 259683
)
Saving the message in the file [output/localhost-imap/message-1.eml]
Headers of the message no. [2] of the mailbox [localhost:993]
Array
(
[From] => guest@localhost
[To] => guest@localhost
[Subject] => test-secure-server
[Message-ID] => <759bf5367e3f1136ce964ded7f702e09@localhost>
[Date] => Thu, 01 Oct 2026 17:14:39 +0200
[Flags] =>
[Size] => 28101
)
Saving the message in the file [output/localhost-imap/message-2.eml]
Connection closed successfully.
------------Reading the mailbox [localhost:1110]
Connection established with the server [localhost:1110].
There are [2] messages in the mailbox [localhost:1110]
Retrieving the list of the unread messages of the mailbox [localhost:1110]
Headers of the message no. [1] of the mailbox [localhost:1110]
Array
(
[From] => guest@localhost
[To] => guest@localhost
[Subject] => test-secure-server
[Message-ID] => <759bf5367e3f1136ce964ded7f702e09@localhost>
[Date] => Thu, 01 Oct 2026 17:14:39 +0200
[Size] => 28101
)
Saving the message in the file [output/localhost-pop3/message-1.eml]
Headers of the message no. [2] of the mailbox [localhost:1110]
Array
(
[From] => guest@localhost
[To] => guest@localhost
[Subject] => test-localhost
[Message-ID] => <b80fff003b5b37b74244dc69674f3ce4@localhost>
[Date] => Thu, 01 Oct 2026 17:14:39 +0200
[Size] => 259683
)
Saving the message in the file [output/localhost-pop3/message-2.eml]
Connection closed successfully.
Done
|
- 使用 IMAP 时,会读取存放在 INBOX 邮箱中的两封邮件。[Flags] 标志为空:这些邮件尚未被读取;
- 使用 POP3 时,我们在 [Mailpit] 邮箱中找到相同的邮件,顺序相反。已读取的邮件被删除。
如果随后立即重新运行脚本 [imap-01.php],结果如下:
| > php imap-01.php
------------Mailbox [imap.gmail.com:993] disabled
------------Reading the mailbox [localhost:993]
Connection established with the server [localhost:993].
There are [2] messages in the mailbox [localhost:993]
Retrieving the list of the unread messages of the mailbox [localhost:993]
There are no new messages in the mailbox [localhost:993]
Connection closed successfully.
------------Reading the mailbox [localhost:1110]
Connection established with the server [localhost:1110].
There are [0] messages in the mailbox [localhost:1110]
Connection closed successfully.
Done
|
- IMAP 邮箱中的邮件数量仍然相同,但已经没有未读邮件了。这说明上一次执行将已读邮件的状态从“未读”改为了“已读”([\Seen] 标志);
- POP3 收件箱中已经没有邮件了:它们在上一次运行时被删除了。
邮件已在本地保存到 [output/localhost-imap] 和 [output/localhost-pop3] 文件夹中,文件名为 [message-1.eml] 和 [message-2.eml]。[.eml] 文件扩展名用于电子邮件文件:双击其中一个文件,会在 Windows 邮件客户端中打开它。文件内容由邮件的完整文本构成,正如我们在 [Raw] 选项卡([Mailpit] 中)里看到的那样:邮件正文和附件的编码内容混杂在一起。
让我们尝试改进这个脚本,使邮件的各个部分和附件分别存储在不同的文件中。
16.6.7. 改进的 IMAP 客户端([imap-02.php])
IMAP 服务器可以向我们提供邮件的结构(命令 [BODYSTRUCTURE]),然后提供其各个部分的内容(命令 [FETCH n BODY[section]])。我们将在脚本 [imap-02.php] 中使用这一点。而 POP3 协议只识别整封邮件:该脚本将只处理 IMAP 邮箱。
让我们回顾一下在学习 IMAP 协议时得到的 [BODYSTRUCTURE] 命令的响应。它描述了一封 [multipart/mixed] 类型的邮件,共有六个部分:
- 第一部分的类型是 [multipart/alternative]。它本身有两个子部分:[text/plain] 和 [text/html],以 [quoted-printable] 编码,并带有参数 [charset=utf-8];
- 接下来的五个部分是附件,以 [base64] 编码,每个附件的布局为 [attachment] 并带有文件名。
各部分的编号如下:
- 整封邮件(类型为 [multipart/mixed])没有编号。它的各部分编号为 1、2……;
- 当某个部分有子部分时,子部分的编号为 x.1、x.2……,其中 x 是外层部分的编号。因此,邮件中的 [text/plain] 文本是第 1.1 部分:这正是我们用命令 [FETCH 2 BODY.PEEK[1.1]] 请求的部分。
脚本 [imap-02.php] 如下:
| <?php
declare(strict_types=1);
// 分别保存未读邮件的正文和附件的 IMAP 客户端
// 它使用 IMAP 服务器提供的邮件 MIME 结构(BODYSTRUCTURE 命令)
require_once __DIR__ . "/ImapClient.php";
// 读取邮件的参数
const CONFIG_FILE_NAME = "config-imap-01.json";
// 获取配置
$mailboxes = json_decode(file_get_contents(CONFIG_FILE_NAME), true);
// 读取邮箱
foreach ($mailboxes as $name => $info) {
// 我们只关心处于活动状态的 IMAP 邮箱
if (($info["enabled"] ?? true) === false || $info["protocol"] !== "imap") {
continue;
}
print "------------Reading the mailbox [$name]\n";
readmailbox($name, $info);
}
// 结束
print "Done\n";
// --------------------------------------------------------------------------
function readmailbox(string $name, array $info): void
{
$client = new ImapClient($info);
try {
// 连接
$nbmsg = $client->connect();
print "Connection established with the server [$name].\n";
print "There are [$nbmsg] messages in the mailbox [$name]\n";
// 未读邮件
print "Retrieving the list of the unread messages of the mailbox [$name]\n";
$msgNumbers = $client->unread();
if (count($msgNumbers) === 0) {
print "There are no new messages in the mailbox [$name]\n";
}
foreach ($msgNumbers as $msgNumber) {
// 邮件的头部将用作其正文的前缀
$headers = $client->headers($msgNumber);
// 邮件的结构
$structure = $client->structure($msgNumber);
// 我们遍历它的各个部分
$outputDir = "{$info["output-dir"]}/message-$msgNumber";
getParts($client, $msgNumber, $structure, "", $outputDir, $headers);
}
} catch (RuntimeException $ex) {
print "Error: " . $ex->getMessage() . "\n";
} finally {
try {
$client->close();
print "Connection closed successfully.\n";
} catch (RuntimeException $ex) {
print "Closing the connection failed: " . $ex->getMessage() . "\n";
}
}
}
// --------------------------------------------------------------------------
function getParts(ImapClient $client, int $msgNumber, MimePart $part, string $section,
string $outputDir, array $headers): void
{
// 显示第 $msgNumber 号邮件的部分 [$part] 的类型,然后:
// - 如果它有子部分,则依次处理它们(递归调用);
// - 否则,将其保存到文件夹 [$outputDir] 中
// $section 是该部分的 IMAP 编号:1、2、1.1、1.2……
// 根部分(整封邮件)没有编号:我们显示 0
print "-----content of the part no. [" . ($section === "" ? "0" : $section) . "]\n";
print "Content-Type: " . strtoupper("$part->type/$part->subType") . "\n";
print "Transfer-Encoding: $part->encoding\n";
// 有子部分?
if ($part->type === "multipart") {
foreach ($part->parts as $i => $subpart) {
// 第 x 部分的子部分编号为 x.1、x.2……
$subsection = $section === "" ? (string) ($i + 1) : "$section." . ($i + 1);
getParts($client, $msgNumber, $subpart, $subsection, $outputDir, $headers);
}
return;
}
// 非 multipart 的邮件只有一个部分,编号为 1
if ($section === "") {
$section = "1";
}
// 我们保存该部分
savePart($client, $msgNumber, $part, $section, $outputDir, $headers);
}
// --------------------------------------------------------------------------
function savePart(ImapClient $client, int $msgNumber, MimePart $part, string $section,
string $outputDir, array $headers): void
{
// 如果文件夹不存在,我们创建它
if (!is_dir($outputDir)) {
mkdir($outputDir, recursive: true);
}
// 是附件?
$fileName = $part->fileName();
if ($part->disposition === "attachment" && $fileName !== null) {
saveAttachment($client->part($msgNumber, $section), $part, "$outputDir/$fileName");
return;
}
// 是文本?
match ("$part->type/$part->subType") {
"text/plain" => saveText("$outputDir/message.txt", false,
$client->part($msgNumber, $section), $part, $headers),
"text/html" => saveText("$outputDir/message.html", true,
$client->part($msgNumber, $section), $part, $headers),
// 其他情况:此部分不会被处理
default => print "Part [$section] ignored\n",
};
}
// --------------------------------------------------------------------------
function decode(string $text, string $encoding): string
{
// 解码以 base64 或 quoted-printable 编码的内容
return match ($encoding) {
"base64" => base64_decode($text),
"quoted-printable" => quoted_printable_decode($text),
// 7bit、8bit、binary:无编码
default => $text,
};
}
// --------------------------------------------------------------------------
function saveText(string $fileName, bool $html, string $text, MimePart $part, array $headers): void
{
// 文本被解码,如果使用其他字符集,则转换为 UTF-8
$text = decode($text, $part->encoding);
$charset = $part->parameters["charset"] ?? "utf-8";
if (strtolower($charset) !== "utf-8") {
$text = mb_convert_encoding($text, "UTF-8", $charset);
}
// 我们在前面加上邮件的 From、To、Subject 头部
$endOfLine = $html ? "<br/>\n" : "\n";
$content = "From: {$headers["From"]}$endOfLine"
. "To: {$headers["To"]}$endOfLine"
. "Subject: {$headers["Subject"]}$endOfLine$endOfLine"
. $text;
print "Saving a message in [$fileName]\n";
if (file_put_contents($fileName, $content) === false) {
print "Unable to create the file [$fileName]\n";
}
}
// --------------------------------------------------------------------------
function saveAttachment(string $content, MimePart $part, string $fileName): void
{
print "Saving the attachment in [$fileName]\n";
if (file_put_contents($fileName, decode($content, $part->encoding)) === false) {
print "The attachment could not be saved in [$fileName]\n";
}
}
|
说明:
- 第 19 行:只读取处于启用状态的 IMAP 邮箱;
- 第 45 行:邮件头将用作所存储文本的前缀;
- 第 47 行:邮件结构:一个 [MimePart] 对象;
- 第 50 行:[getParts] 函数遍历邮件的各个部分。它从根部分——即整封邮件——开始,根部分没有节编号;
- 第 65 行:函数 [getParts] 接收以下参数:
- [$client]:IMAP 客户端;
- [$msgNumber]:被请求各部分所属邮件的编号;
- [$part]:表示邮件某一部分的对象;
- [$section]:该部分的编号;
- [$outputDir]:保存各部分的文件夹;
- [$headers]:有关电子邮件的一般信息(发件人、收件人、主题等);
- 第 73–75 行:显示部分编号、内容类型和编码。整封邮件显示为第 0 部分;
- 第 77–83 行:如果该部分有子部分,则通过递归调用函数 [getParts] 来获取每个子部分。它们的节编号为 [$section.i];
- 第 86–87 行:非多部分(纯文本)的邮件只有一个部分,编号为 1;
- 第 90 行:当没有子部分时,存储该部分的内容;
- 第 94 行:函数 [savePart] 记录一个部分:
- 如果它是附件(设置 [attachment]),则使用函数 [saveAttachment] 以其文件名保存;
- 如果文本是 [text/plain] 或 [text/html],则使用 [saveText] 函数将其保存到文件 [message.txt] 或 [message.html] 中。其他部分被忽略;
- 在这两种情况下,都使用客户端的 [part] 方法向 IMAP 服务器请求该节的内容;
- 第 119 行:节的内容是经过编码的。函数 [base64_decode] 和 [quoted_printable_decode] 对其解码;
- 第 131 行:文本先被解码,如果它使用了其他字符集(参数 [charset]),则再使用 [mb_convert_encoding] 函数转换为 UTF-8。它的前面是邮件头 [From]、[To] 和 [Subject]。对于 HTML 文本,每个邮件头后面都跟有一个 [<br/>] 标签,使其在浏览器中单独显示为一行;
- 第 152 行:附件被解码,然后保存。
要测试脚本 [imap-02.php],首先用脚本 [smtp-02.php] 向 [guest@localhost] 发送一封电子邮件(邮件 [test-localhost] 及其五个附件),它会被存放到 IMAP 服务器的 INBOX 邮箱中。然后用 [imap-02.php] 读取它。控制台输出如下:
| > php imap-02.php
------------Reading the mailbox [localhost:993]
Connection established with the server [localhost:993].
There are [3] messages in the mailbox [localhost:993]
Retrieving the list of the unread messages of the mailbox [localhost:993]
-----content of the part no. [0]
Content-Type: MULTIPART/MIXED
Transfer-Encoding: 7bit
-----content of the part no. [1]
Content-Type: MULTIPART/ALTERNATIVE
Transfer-Encoding: 7bit
-----content of the part no. [1.1]
Content-Type: TEXT/PLAIN
Transfer-Encoding: quoted-printable
Saving a message in [output/localhost-imap/message-3/message.txt]
-----content of the part no. [1.2]
Content-Type: TEXT/HTML
Transfer-Encoding: quoted-printable
Saving a message in [output/localhost-imap/message-3/message.html]
-----content of the part no. [2]
Content-Type: APPLICATION/VND.OPENXMLFORMATS-OFFICEDOCUMENT.WORDPROCESSINGML.DOCUMENT
Transfer-Encoding: base64
Saving the attachment in [output/localhost-imap/message-3/Hello from Symfony Mailer.docx]
-----content of the part no. [3]
Content-Type: APPLICATION/PDF
Transfer-Encoding: base64
Saving the attachment in [output/localhost-imap/message-3/Hello from Symfony Mailer.pdf]
-----content of the part no. [4]
Content-Type: APPLICATION/VND.OASIS.OPENDOCUMENT.TEXT
Transfer-Encoding: base64
Saving the attachment in [output/localhost-imap/message-3/Hello from Symfony Mailer.odt]
-----content of the part no. [5]
Content-Type: IMAGE/PNG
Transfer-Encoding: base64
Saving the attachment in [output/localhost-imap/message-3/Cours-Tutoriels-Serge-Tahé-1568x268.png]
-----content of the part no. [6]
Content-Type: MESSAGE/RFC822
Transfer-Encoding: base64
Saving the attachment in [output/localhost-imap/message-3/test-localhost.eml]
Connection closed successfully.
Done
|
邮件结构被正确地保留了下来。文件被保存在 [output/localhost-imap/message-3] 文件夹中:
| message-3
├── Cours-Tutoriels-Serge-Tahé-1568x268.png
├── Hello from Symfony Mailer.docx
├── Hello from Symfony Mailer.odt
├── Hello from Symfony Mailer.pdf
├── message.html
├── message.txt
└── test-localhost.eml
|
Word 文档、PDF、OpenOffice 文档和图像都能正常打开:它们已被正确解码。
作为附件的邮件 [test-localhost.eml] 被保存为一个附件。然而,它本身就是一封电子邮件,其中又包含文本和附件。请注意在 [BODYSTRUCTURE] 响应中,服务器无法解析这封附件邮件,因为它是以 Base64 编码的:服务器返回了一个空信封([(NIL NIL ...)]) 以及一个简化为空文本的结构。要想更进一步,我们就需要下载这封附件邮件,对其解码,并自行分析其结构(MIME)。而这封邮件本身还可能包含一封附件邮件,如此层层嵌套。与其从头编写这个解析器,不如使用一个库。
16.6.8. 使用 [zbateson/mail-mime-parser] 库的 POP3 / IMAP 客户端
PHP 7 课程使用了 [php-mime-mail-parser] 库,它需要 PHP 的 [mailparse] 扩展,而该扩展必须单独下载并安装。我们将使用 [zbateson/mail-mime-parser] 库(https://github.com/zbateson/mail-mime-parser),它完全用 PHP 编写:它已通过 [composer install] 命令与本课程的其他依赖项一起安装好了,无需任何额外操作。它解析邮件的完整文本,即 POP3 的 [RETR] 命令和 IMAP 的 [FETCH n BODY[]] 命令所返回的内容。因此,[imap-03.php] 脚本对两种协议都适用。
为了测试它,我们将发送这样一封邮件:它的最后一个附件 [test-localhost-2.eml], 本身又包含一个电子邮件附件 [test-localhost.eml]:
- [test-localhost-2.eml] 包含 4 个附件(Word 文档、PDF、OpenOffice 文档和图像)以及电子邮件 [test-localhost.eml];
- [test-localhost.eml] 包含同样的 4 个附件。
配置文件 [config-smtp-03.json] 描述了这封电子邮件:
| {
"mail to localhost via localhost": {
"smtp-server": "localhost",
"smtp-port": 1025,
"from": "guest@localhost",
"to": "guest@localhost",
"subject": "test-localhost-3",
"message": "line 1\nline 2\nline 3",
"tls": false,
"attachments": [
"/attachments/Hello from Symfony Mailer.docx",
"/attachments/Hello from Symfony Mailer.pdf",
"/attachments/Hello from Symfony Mailer.odt",
"/attachments/Cours-Tutoriels-Serge-Tahé-1568x268.png",
"/attachments/test-localhost-2.eml"
]
}
}
|
使用命令 [php smtp-02.php config-smtp-03.json] 来使用它。
脚本 [imap-03.php] 与之前的脚本使用相同的配置文件 [config-imap-01.json]。它如下:
| <?php
declare(strict_types=1);
// 用于读取邮件的 IMAP / POP3 客户端
// 邮件的分析交给 [zbateson/mail-mime-parser] 库
// 可在 URL [https://github.com/zbateson/mail-mime-parser] 获得
// 依赖
require_once __DIR__ . "/../../../vendor/autoload.php";
require_once __DIR__ . "/ImapClient.php";
require_once __DIR__ . "/Pop3Client.php";
use ZBateson\MailMimeParser\IMessage;
use ZBateson\MailMimeParser\Message;
// 读取邮件的参数
const CONFIG_FILE_NAME = "config-imap-01.json";
// 获取配置
if (!file_exists(CONFIG_FILE_NAME)) {
print "The configuration file " . CONFIG_FILE_NAME . " does not exist\n";
exit(1);
}
$mailboxes = json_decode(file_get_contents(CONFIG_FILE_NAME), true);
// 读取邮箱
foreach ($mailboxes as $name => $info) {
if (($info["enabled"] ?? true) === false) {
continue;
}
print "------------Reading the mailbox [$name]\n";
readmailbox($name, $info);
}
// 结束
print "Done\n";
// --------------------------------------------------------------------------
function readmailbox(string $name, array $info): void
{
// 根据配置选用 IMAP 或 POP3 客户端
$client = match ($info["protocol"]) {
"imap" => new ImapClient($info),
"pop3" => new Pop3Client($info),
};
try {
// 连接
$nbmsg = $client->connect();
print "Connection established with the server [$name].\n";
print "There are [$nbmsg] messages in the mailbox [$name]\n";
// 未读邮件
print "Retrieving the list of the unread messages of the mailbox [$name]\n";
$msgNumbers = $client->unread();
if (count($msgNumbers) === 0) {
print "There are no new messages in the mailbox [$name]\n";
}
// 我们遍历未读邮件的列表
foreach ($msgNumbers as $msgNumber) {
print "---message no. [$msgNumber]\n";
// 我们获取邮件的完整文本并进行分析
getMailBody($client->message($msgNumber), "{$info["output-dir"]}/message-$msgNumber");
// 如果协议是 POP3,我们在获取邮件后将其删除
if ($info["protocol"] === "pop3") {
$client->delete($msgNumber);
}
}
} catch (RuntimeException $ex) {
print "Error: " . $ex->getMessage() . "\n";
} finally {
try {
$client->close();
print "Connection closed successfully.\n";
} catch (RuntimeException $ex) {
print "Closing the connection failed: " . $ex->getMessage() . "\n";
}
}
}
// --------------------------------------------------------------------------
// 分析邮件的完整文本
function getMailBody(string $text, string $outputDir): void
{
// 该库分析邮件的文本并将其转换为 [IMessage] 对象
// (false:对象构建完成后不再使用该文本)
$message = Message::from($text, false);
// 我们把邮件的各个部分保存到文件夹 [$outputDir] 中
getParts($message, $outputDir);
}
// --------------------------------------------------------------------------
// 保存邮件的各个部分
function getParts(IMessage $message, string $outputDir): void
{
// 必要时创建保存邮件的文件夹
if (!is_dir($outputDir) && !mkdir($outputDir, recursive: true)) {
print "The folder [$outputDir] could not be created\n";
return;
}
// 邮件的头部(from、to、subject……),已解码
$headers = [];
foreach ($message->getAllHeaders() as $header) {
$headers[] = "{$header->getName()}: {$header->getValue()}";
}
// 我们保存文本邮件
for ($i = 1; $i <= $message->getTextPartCount(); $i++) {
print "-- Saving a message of type [text/plain]\n";
saveMessage($message->getTextContent($i - 1), false, $headers, "$outputDir/message_$i.txt");
}
// 我们保存 html 邮件
for ($i = 1; $i <= $message->getHtmlPartCount(); $i++) {
print "-- Saving a message of type [text/html]\n";
saveMessage($message->getHtmlContent($i - 1), true, $headers, "$outputDir/message_$i.html");
}
// 我们遍历附件的列表
$iAttachment = 0;
foreach ($message->getAllAttachmentParts() as $attachment) {
// 附件的类型和名称
$fileType = $attachment->getContentType();
$fileName = freeName($outputDir, $attachment->getFilename() ?? "attachment");
print "-- Saving an attachment of type [$fileType] in the file [$fileName]\n";
// 我们保存附件,已解码
$attachment->saveContent($fileName);
// message/rfc822 类型的特殊情况
if ($fileType === "message/rfc822") {
// 附件本身就是一封邮件 - 我们递归地分析它
// 放在子文件夹 [rfc822-1]、[rfc822-2]……中
$iAttachment++;
$attachedMessage = Message::from($attachment->getBinaryContentStream()->getContents(), false);
getParts($attachedMessage, "$outputDir/rfc822-$iAttachment");
}
}
}
// --------------------------------------------------------------------------
// 文件夹 [$dir] 中的一个空闲文件名:x.pdf,否则 x_1.pdf、x_2.pdf……
function freeName(string $dir, string $name): string
{
$info = pathinfo($name);
$extension = isset($info["extension"]) ? ".{$info["extension"]}" : "";
$candidate = "$dir/$name";
for ($i = 1; file_exists($candidate); $i++) {
$candidate = "$dir/{$info["filename"]}_$i$extension";
}
return $candidate;
}
// --------------------------------------------------------------------------
// 保存以邮件头部为前缀的文本邮件
function saveMessage(string $text, bool $html, array $headers, string $filename): void
{
// 在 HTML 中,每个头部以 <br/> 结束,以便独占一行
$endOfLine = $html ? "<br/>\n" : "\n";
$contents = implode($endOfLine, $headers) . $endOfLine . $endOfLine . $text;
if (file_put_contents($filename, $contents) === false) {
print "The message could not be saved in the file [$filename]\n";
} else {
print "The message has been saved in the file [$filename]\n";
}
}
|
说明:
- 第 10 行:[zbateson/mail-mime-parser] 库的 Composer 类加载器;
- 第 14–15 行:我们使用的该库中的两个类型:[IMessage] 接口和实现它的 [Message] 类;
- 第 21 行:检查配置文件是否存在;
- 第 39 行:[readmailbox] 函数的结构与 [imap-01.php] 中相同。这一次,IMAP 或 POP3 客户端直接由 [match] 表达式创建;
- 第 61 行:向函数 [getMailBody] 请求完整的邮件文本;
- 第 81–87 行:静态方法 [Message::from] 解析邮件文本并返回一个 [IMessage] 对象。然后函数 [getParts] 保存其各个部分;
- 第 92 行:函数 [getParts] 接受两个参数:
- 要分析的邮件 [$message] ;
- [$outputDir]:用于保存邮件文本和附件的文件夹;
- 第 101–102 行:获取被分析邮件的邮件头(from、to、subject 等)。方法 [getValue] 返回邮件头解码后的值;
- 第 105–107 行:一封邮件可以有多个部分([text/plain])。[getTextContent($i - 1)] 方法返回第 i 个部分的文本(部分从 0 开始编号),已解码并转换为 UTF-8。我们将它们全部保存,并给每个文件取不同的文件名;
- 第 110–112 行:对 [text/html] 部分采用相同的处理方式;
- 第 116 行:遍历邮件中的附件列表;
- 第 118–119 行:附件类型(Content-Type 头)及其名称,无论其编码方式如何,都由该库解码。[freeName] 函数返回一个在该文件夹中尚不存在的文件名;
- 第 122 行:[saveContent] 方法将附件解码后的内容保存到文件中;
- 第 124–129 行:如果附件是一封电子邮件,则通过递归调用函数 [getParts] 对其再次解析。其解码后的内容由 [getBinaryContentStream] 方法获得,该方法返回一个流;然后使用 [getContents] 方法读取该流的全部内容。如果被分析的邮件有两个电子邮件附件,第一个将保存在 [$outputDir/rfc822-1] 文件夹中,第二个保存在 [$outputDir/rfc822-2] 文件夹中;
- 第 136 行:如果文件 [x.pdf] 已经存在,函数 [freeName] 会依次尝试名称 [x_1.pdf]、[x_2.pdf]……直到找到一个不存在的文件名。函数 [pathinfo] 将文件名拆分为文件名和扩展名;
- 第 149 行:函数 [saveMessage] 保存邮件文本,并在其前面加上邮件头。对于 HTML 文本,每个邮件头都以标签 [<br/>] 结尾。
我们使用 [php smtp-02.php config-smtp-03.json] 命令发送这封邮件。[Mailpit] 会存储它,我们同时也把它放入 IMAP 服务器的 INBOX 邮箱。然后运行脚本 [imap-03.php]。控制台输出如下:
| > php imap-03.php
------------Reading the mailbox [localhost:993]
Connection established with the server [localhost:993].
There are [4] messages in the mailbox [localhost:993]
Retrieving the list of the unread messages of the mailbox [localhost:993]
---message no. [4]
-- Saving a message of type [text/plain]
The message has been saved in the file [output/localhost-imap/message-4/message_1.txt]
-- Saving a message of type [text/html]
The message has been saved in the file [output/localhost-imap/message-4/message_1.html]
-- Saving an attachment of type [application/vnd.openxmlformats-officedocument.wordprocessingml.document] in the file [output/localhost-imap/message-4/Hello from Symfony Mailer.docx]
-- Saving an attachment of type [application/pdf] in the file [output/localhost-imap/message-4/Hello from Symfony Mailer.pdf]
-- Saving an attachment of type [application/vnd.oasis.opendocument.text] in the file [output/localhost-imap/message-4/Hello from Symfony Mailer.odt]
-- Saving an attachment of type [image/png] in the file [output/localhost-imap/message-4/Cours-Tutoriels-Serge-Tahé-1568x268.png]
-- Saving an attachment of type [message/rfc822] in the file [output/localhost-imap/message-4/test-localhost-2.eml]
-- Saving a message of type [text/plain]
The message has been saved in the file [output/localhost-imap/message-4/rfc822-1/message_1.txt]
-- Saving a message of type [text/html]
The message has been saved in the file [output/localhost-imap/message-4/rfc822-1/message_1.html]
-- Saving an attachment of type [application/vnd.openxmlformats-officedocument.wordprocessingml.document] in the file [output/localhost-imap/message-4/rfc822-1/Hello from Symfony Mailer.docx]
-- Saving an attachment of type [application/pdf] in the file [output/localhost-imap/message-4/rfc822-1/Hello from Symfony Mailer.pdf]
-- Saving an attachment of type [application/vnd.oasis.opendocument.text] in the file [output/localhost-imap/message-4/rfc822-1/Hello from Symfony Mailer.odt]
-- Saving an attachment of type [image/png] in the file [output/localhost-imap/message-4/rfc822-1/Cours-Tutoriels-Serge-Tahé-1568x268.png]
-- Saving an attachment of type [message/rfc822] in the file [output/localhost-imap/message-4/rfc822-1/test-localhost.eml]
-- Saving a message of type [text/plain]
The message has been saved in the file [output/localhost-imap/message-4/rfc822-1/rfc822-1/message_1.txt]
-- Saving a message of type [text/html]
The message has been saved in the file [output/localhost-imap/message-4/rfc822-1/rfc822-1/message_1.html]
-- Saving an attachment of type [application/vnd.openxmlformats-officedocument.wordprocessingml.document] in the file [output/localhost-imap/message-4/rfc822-1/rfc822-1/Hello from Symfony Mailer.docx]
-- Saving an attachment of type [application/pdf] in the file [output/localhost-imap/message-4/rfc822-1/rfc822-1/Hello from Symfony Mailer.pdf]
-- Saving an attachment of type [application/vnd.oasis.opendocument.text] in the file [output/localhost-imap/message-4/rfc822-1/rfc822-1/Hello from Symfony Mailer.odt]
-- Saving an attachment of type [image/png] in the file [output/localhost-imap/message-4/rfc822-1/rfc822-1/Cours-Tutoriels-Serge-Tahé-1568x268.png]
Connection closed successfully.
------------Reading the mailbox [localhost:1110]
Connection established with the server [localhost:1110].
There are [1] messages in the mailbox [localhost:1110]
Retrieving the list of the unread messages of the mailbox [localhost:1110]
---message no. [1]
-- Saving a message of type [text/plain]
The message has been saved in the file [output/localhost-pop3/message-1/message_1.txt]
-- Saving a message of type [text/html]
The message has been saved in the file [output/localhost-pop3/message-1/message_1.html]
-- Saving an attachment of type [application/vnd.openxmlformats-officedocument.wordprocessingml.document] in the file [output/localhost-pop3/message-1/Hello from Symfony Mailer.docx]
-- Saving an attachment of type [application/pdf] in the file [output/localhost-pop3/message-1/Hello from Symfony Mailer.pdf]
-- Saving an attachment of type [application/vnd.oasis.opendocument.text] in the file [output/localhost-pop3/message-1/Hello from Symfony Mailer.odt]
-- Saving an attachment of type [image/png] in the file [output/localhost-pop3/message-1/Cours-Tutoriels-Serge-Tahé-1568x268.png]
-- Saving an attachment of type [message/rfc822] in the file [output/localhost-pop3/message-1/test-localhost-2.eml]
-- Saving a message of type [text/plain]
The message has been saved in the file [output/localhost-pop3/message-1/rfc822-1/message_1.txt]
-- Saving a message of type [text/html]
The message has been saved in the file [output/localhost-pop3/message-1/rfc822-1/message_1.html]
-- Saving an attachment of type [application/vnd.openxmlformats-officedocument.wordprocessingml.document] in the file [output/localhost-pop3/message-1/rfc822-1/Hello from Symfony Mailer.docx]
-- Saving an attachment of type [application/pdf] in the file [output/localhost-pop3/message-1/rfc822-1/Hello from Symfony Mailer.pdf]
-- Saving an attachment of type [application/vnd.oasis.opendocument.text] in the file [output/localhost-pop3/message-1/rfc822-1/Hello from Symfony Mailer.odt]
-- Saving an attachment of type [image/png] in the file [output/localhost-pop3/message-1/rfc822-1/Cours-Tutoriels-Serge-Tahé-1568x268.png]
-- Saving an attachment of type [message/rfc822] in the file [output/localhost-pop3/message-1/rfc822-1/test-localhost.eml]
-- Saving a message of type [text/plain]
The message has been saved in the file [output/localhost-pop3/message-1/rfc822-1/rfc822-1/message_1.txt]
-- Saving a message of type [text/html]
The message has been saved in the file [output/localhost-pop3/message-1/rfc822-1/rfc822-1/message_1.html]
-- Saving an attachment of type [application/vnd.openxmlformats-officedocument.wordprocessingml.document] in the file [output/localhost-pop3/message-1/rfc822-1/rfc822-1/Hello from Symfony Mailer.docx]
-- Saving an attachment of type [application/pdf] in the file [output/localhost-pop3/message-1/rfc822-1/rfc822-1/Hello from Symfony Mailer.pdf]
-- Saving an attachment of type [application/vnd.oasis.opendocument.text] in the file [output/localhost-pop3/message-1/rfc822-1/rfc822-1/Hello from Symfony Mailer.odt]
-- Saving an attachment of type [image/png] in the file [output/localhost-pop3/message-1/rfc822-1/rfc822-1/Cours-Tutoriels-Serge-Tahé-1568x268.png]
Connection closed successfully.
Done
|
这封邮件被读取了两次——先通过 IMAP,再通过 POP3——每次都保存了它的各个部分。下面是 [output/localhost-imap/message-4] 文件夹的目录结构:
| message-4
├── rfc822-1
│ ├── rfc822-1
│ │ ├── Cours-Tutoriels-Serge-Tahé-1568x268.png
│ │ ├── Hello from Symfony Mailer.docx
│ │ ├── Hello from Symfony Mailer.odt
│ │ ├── Hello from Symfony Mailer.pdf
│ │ ├── message_1.html
│ │ └── message_1.txt
│ ├── Cours-Tutoriels-Serge-Tahé-1568x268.png
│ ├── Hello from Symfony Mailer.docx
│ ├── Hello from Symfony Mailer.odt
│ ├── Hello from Symfony Mailer.pdf
│ ├── message_1.html
│ ├── message_1.txt
│ └── test-localhost.eml
├── Cours-Tutoriels-Serge-Tahé-1568x268.png
├── Hello from Symfony Mailer.docx
├── Hello from Symfony Mailer.odt
├── Hello from Symfony Mailer.pdf
├── message_1.html
├── message_1.txt
└── test-localhost-2.eml
|
- 在顶层,是 [guest@localhost] 收到的电子邮件的文本和 5 个附件;
- 在 [rfc822-1] 文件夹中,是电子邮件 [test-localhost-2.eml] 的正文文本和 5 个附件;
- 在 [rfc822-1/rfc822-1] 文件夹中,是电子邮件 [test-localhost.eml] 的文本和 4 个附件。
如果在浏览器中查看文件 [rfc822-1/rfc822-1/message_1.html] ,将看到如下内容:
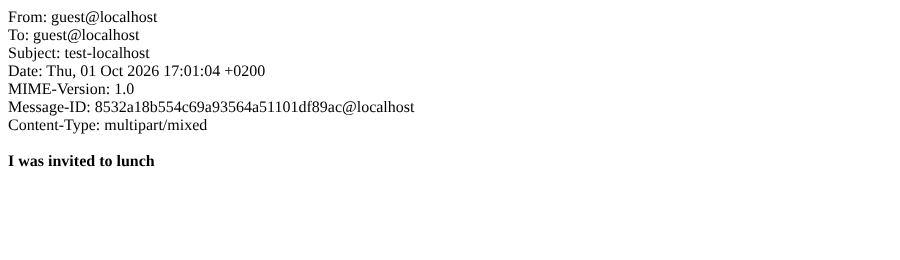
它包含电子邮件 [test-localhost.eml] 的邮件头,后面是其正文文本,带重音符号的字符已被正确解码。
使用 [zbateson/mail-mime-parser] 库使编写读取电子邮件的脚本变得容易得多。