3. Introduction to Web Programming in PHP
3.1. PHP Programming
It is worth noting here that PHP is a language in its own right, and while it is primarily used in web application development, it can also be used in other contexts. The document "PHP by Example" is available at URL http://shiva.istia.univ-angers.fr/~tahe/pub/php/php.pdf provides the basics of the language. We assume here that these are already known. Let’s use a simple example to demonstrate the procedure for running a PHP program on Windows. The following code has been saved under the name coucou.php.
This program is executed in a Windows DOS window:
dos>"e:\program files\easyphp\php\php.exe" coucou.php
X-Powered-By: PHP/4.3.0-dev
Content-type: text/html

coucou
Note that the PHP interpreter sends by default:
- The PHP interpreter is php.exe and is normally located in the <php> directory of the software installation.
- the HTTP X-Powered-By and Content-Type headers:
- the blank line separating the HTTP headers from the rest of the document
- the document formed here by the text written by the echo function
3.2. The configuration file for the PHP interpreter
The behavior of the PHP interpreter is configured by a configuration file named php.ini, which is stored, in Windows, in the Windows directory itself. It is a fairly large file; under Windows, for version 4.2 of PHP, it contains nearly 1,000 lines, three-quarters of which, fortunately, are comments. Let’s examine some of the configuration attributes of PHP:
allows instructions to be included between <? > tags. If set to off, they would need to be included between <?php ... > | |
When set to On, it allows the use of the <% =variable %> syntax used by ASP (Active Server Pages) | |
Enables sending the header HTTP X-Powered-By: PHP/4.3.0-dev. When set to Off, this header is removed. | |
sets the scope of error reporting. Here, all errors (E_ALL) except runtime warnings (~E_NOTICE) will be reported | |
When set to on, places errors in the HTML stream sent to the client. These are therefore displayed in the browser. It is recommended to set this option to off. | |
errors will be logged to a file | |
stores the last error that occurred in the $php_errormsg variable | |
sets the error log file (if log_errors=on) | |
When set to on, a number of variables become global. Considered a security hole. | |
generates the default header: Content-type: text/html | |
the list of directories that will be searched for files required by include or require directives | |
the directory where files storing the various active sessions will be saved. The disk in question is the one where PHP was installed. Here, /temp refers to e:\temp |
This configuration file affects the portability of the php program. Specifically, if a web application needs to retrieve the value of a C field from a web form, it can do so in different ways depending on whether the register_globals configuration variable is set to "on" or "off":
- off: the value will be retrieved by $HTTP_GET_VARS["C"] or _GET["C"] or $HTTP_POST_VARS["C"] or $_POST["C"] depending on the method (GET/POST) used by the client to send the form values
- on: same as above plus $C, because the value of field C has been made global in a variable with the same name as the field
If a developer writes a program using the notation $C because the web server/php they are using has the variable register_globals set to on, this program will no longer work if it is deployed to a web server/php where that same variable is set to off. Therefore, you should write programs that avoid using features dependent on the web server configuration/php.
3.3. Configuring PHP at runtime
To improve the portability of a PHP program, you can set certain PHP configuration variables yourself. These are modified while the program is running and only for that program. Two functions are useful in this process:
returns the value of the configuration variable confVariable | |
sets the value of the configuration variable confVariable |
Here is an example where we set the value of the configuration variable track_errors:
<?php
     // value of the track_errors configuration variable
    echo "track_errors=".ini_get("track_errors")."\n";
  // change this value
  ini_set("track_errors","off");
   // check
  echo "track_errors=".ini_get("track_errors")."\n";
?>
When executed, the following results are obtained:
E:\data\serge\web\php\poly\intro>"E:\Program Files\EasyPHP\php\php.exe" conf1.php
Content-type: text/html

track_errors=1
track_errors=off
The value of the configuration variable track_errors was initially 1 (~on). We set it to off. Note that if our application relies on certain configuration variable values, it is prudent to initialize them within the program itself.
3.4. Execution Context for the Examples
The examples in this handout will be run with the following configuration:
- PC on Windows 2000
- Apache 1.3 server
- PHP 4.3
The Apache server configuration is defined in the file httpd.conf. The following lines instruct Apache to load PHP as a module integrated into Apache and to pass any request for a document with certain suffixes, including .php, to the PHP interpreter. This is the default suffix we will use for our php programs.
LoadModule php4_module "E:/Program Files/EasyPHP/php/php4apache.dll"
AddModule mod_php4.c
AddType application/x-httpd-php .phtml .pwml .php3 .php4 .php .php2 .inc
Additionally, we have defined a poly alias for Apache:
Alias "/poly/" "e:/data/serge/web/php/poly/"
<Directory "e:/data/serge/web/php/poly">
  Options Indexes FollowSymLinks Includes
  AllowOverride All
   #Order allow,deny
  Allow from all
</Directory>
Let's call the path e:/data/serge/web/php/poly <poly>. If we want to request the document doc.php from the Apache server using a browser, we will use the URL URL://localhost/poly/doc.php. The Apache server will recognize the alias poly in URL and will then associate URL /poly/doc.php with the document <poly>\doc.php.
3.5. A first example
Let’s write a first web application/php. The following text is saved in the file heure.php:
<html>
  <head>
    <title>Une page php dynamique</title>
   </head>
   <body>
     <center>
     <h1>Une page PHP générée dynamiquement</h1>
     <h2>
            <?php
              $maintenant=time();
              echo date("j/m/y, h:i:s",$maintenant);
            ?>
     </h2>
     <br>
     A chaque fois que vous rafraîchissez la page, l'time changes.
   </body>
</html>
If we request this page using a browser, we get the following result:
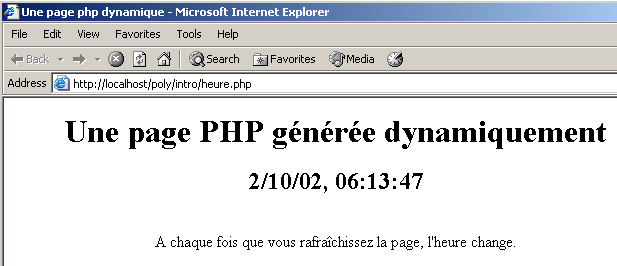
The dynamic part of the page was generated by code PHP:
What exactly happened? The browser requested the URL http://localhost/poly/intro/heure.php. The web server (Apache in this example) received this request and, due to the .php suffix of the requested document, determined that it should forward this request to the PHP interpreter. The interpreter then parses the document heure.php and executes all code segments located between the <?php> tags, replacing each of them with the lines written by the PHP echo or print statements. Thus, the PHP interpreter will execute the code segment above and replace it with the line written by the echo statement:
Once all portions of the PHP code have been executed, the PHP document becomes a simple HTML document, which is then sent to the client.
We will try to avoid mixing PHP code and HTML code as much as possible. To this end, we could rewrite the previous application as follows:
<!-- code PHP -->
<?php
    // on récupère l'heure du moment
    $maintenant=time();
    $maintenant=date("j/m/y, h:i:s",$maintenant);
?>
<!-- code HTML -->
<html>
  <head>
    <title>Une page php dynamique</title>
   </head>
   <body>
     <center>
     <h1>Une page PHP générée dynamiquement</h1>
     <h2>
            <?php echo  $maintenant ?>
     </h2>
     <br>
     A chaque fois que vous rafraîchissez la page, l'heure change.
   </body>
</html>
The result displayed in the browser is identical:
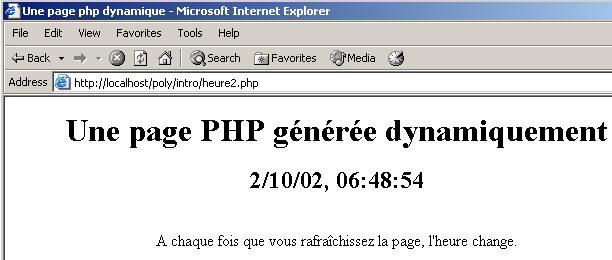
The second version is better than the first because there is less PHP code in the HTML code. The page structure is thus more visible. We can take this further by placing the PHP code and the HTML code in two separate files. The PHP code is stored in the file heure3.php:
<!-- code PHP -->
<?php
     // retrieve the current time
    $maintenant=time();
    $maintenant=date("j/m/y, h:i:s",$maintenant);
   // the answer is displayed
  include "heure3-page1.php";
?>
The code HTML is stored in the file heure3-page1.php:
<!-- code HTML -->
<html>
  <head>
    <title>Une page php dynamique</title>
   </head>
   <body>
     <center>
     <h1>Une page PHP générée dynamiquement</h1>
     <h2>
            <?php echo  $maintenant ?>
     </h2>
     <br>
     A chaque fois que vous rafraîchissez la page, l'heure change.
   </body>
</html>
When the browser requests the document heure3.php, it will be loaded and parsed by the PHP interpreter. Upon encountering the line
the interpreter will include the file heure3-page1.php into the source code of heure3.php and execute it. Thus, it is as if we had the following PHP code:
<!-- code PHP -->
<?php
    // on récupère l'heure du moment
    $maintenant=time();
    $maintenant=date("j/m/y, h:i:s",$maintenant);
?>
<!-- code HTML -->
<html>
  <head>
    <title>Une page php dynamique</title>
   </head>
   <body>
     <center>
     <h1>Une page PHP générée dynamiquement</h1>
     <h2>
            <?php echo  $maintenant ?>
     </h2>
     <br>
     A chaque fois que vous rafraîchissez la page, l'heure change.
   </body>
</html>
The result is the same as before:
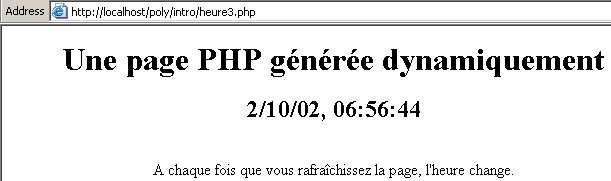
The solution of placing the codes PHP and HTML in separate files will be adopted going forward. It offers several advantages:
- the structure of the pages sent to the client is not buried in PHP code. This means they can be maintained by a "web designer" with graphic design skills but limited knowledge of PHP.
- The PHP code serves as a "front end" for clients requests. Its purpose is to calculate the data required for the page that will be returned to the client.
However, this solution has a drawback: instead of requiring the loading of a single document, it requires the loading of multiple documents, which can result in a loss of performance.
3.6. Retrieve the parameters sent by a web client
3.6.1. via a POST
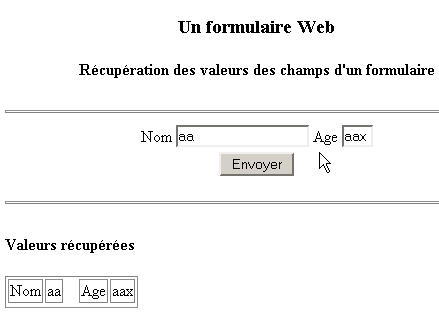
Consider the following form where the user must provide two pieces of information: a name and an age.
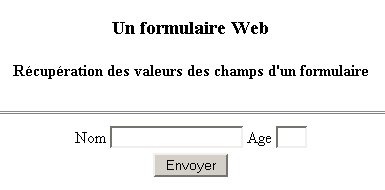
Once the user has filled in the Name and Age fields, they then click the Submit button, which is of type submit. The form values are then sent to the server. The server returns the form along with an array listing the values it received:
The browser requests the form from the following application: nomage.php:
<?php
   // do we have the expected parameters?
  $post=isset($_POST["txtNom"]) && isset($_POST["txtAge"]);
  if($post){
    // retrieve the txtNom and txtAge parameters "posted" by the client
    $nom=$_POST["txtNom"];
    $age=$_POST["txtAge"];
  } else {
      $nom="";
    $age="";
  }//if
   // page display
  include "nomage-p1.php";
?>
Some explanations:
- A form field named HTML can be sent to the server using the GET method or the POST method. If it is sent using the GET method, the server can retrieve it in the variable $_GET["champ"] and in the variable $_POST["champ"] ifif it is sent by the POST method.
- The existence of a piece of data can be checked using the isset(data) function, which returns true if the data exists, false otherwise.
- The nomage applicationphp creates three variables: $nom for the form name, $age for age, and $post to indicate whether values were "posted" or not. These three variables are passed to the page nomage-p1.php. Note that while this page is involved in generating the response to the client, the client is unaware of this. From the client’s perspective, it is the application nomage.php that responds.
- The first time a client requests the application nomage.php, $post is set to false. This is because, during this first call, no form values are sent to the server.
The page nomage-p1.php is as follows:
<html>
  <head>
    <title>Formulaire web</title>
  </head>

   <body>
     <center>
       <h3>Un formulaire Web</h3>
       <h4>Récupération des valeurs des champs d'a form</h4>
       <hr>
       <form name="frmPersonne" method="post">
         <table>
           <tr>
             <td>Nom</td>
             <td><input type="text" value="<?php echo $nom ?>" name="txtNom" size="20"></td>
             <td>Age</td>
             <td><input type="text" value="<?php echo $age ?>" name="txtAge" size="3"></td>
           <tr>
         </table>
         <input type="submit" name="cmdEffacer" value="Envoyer">
       </form>
     </center>
     <hr>
     <?php
          // were any values posted?
         if ($post) {
     ?>
         <h4>Valeurs récupérées</h4>
      <table border="1">
          <tr>
            <td>Nom</td><td><?php echo $nom ?></td>
          <td width="10"></td>
            <td>Age</td><td><?php echo $age ?></td>
        <tr>
      </table>
    <?php } ?>
   </body>
</html>
The application nomage-p1.php displays the form frmPersonne. This form is defined by the tag:
Since the action attribute of the tag is not defined, the browser will send the form data to the URL that it queried to obtain it, c.a.d. the application nomage.php.
Let’s distinguish between the two cases of calling the application nomage.php:
- This is the first time the user has called it. The application nomage.php therefore calls the application nomage-p1.php by providing it with the values ($nom,$age,$post)=("","",false). The application nomage-p1.php then displays an empty form.
- The user fills out the form and clicks the Submit button (of type submit). The form values (txtNom, txtAge) are then "posted" (method="post" in <form>) to the application nomage.php (action attribute not defined in <form>). The application nomage.php calculates ($nom,$age,$post)=(txtNom,txtAge,true) and transmits them to the application nomage-p1.php, which then displays a pre-filled form along with the table of retrieved values.
3.6.2. by a GET
If the form values are sent to the server via a GET, the application nomage.php becomes the following application nomage2.php:
<?php
   // do we have the expected parameters?
  $get=isset($_GET["txtNom"]) && isset($_GET["txtAge"]);
  if($get){
     // parameters txtNom and txtAge "GETTés" are retrieved by the client
    $nom=$_GET["txtNom"];
    $age=$_GET["txtAge"];
  } else {
      $nom="";
    $age="";
  }//if
   // page display
  include "nomage-p2.php";
?>
The application nomage-p2.php is identical to the application nomage-p1.php except for the following details:
- the form tag is modified:
- the application now retrieves a variable $get instead of $post:
At runtime, when values are entered into the form and sent to the server, the browser reflects in its URL field that the values were sent using the GET method:
![]()
3.7. Retrieving the HTTP headers sent by a web client
When a browser makes a request to a web server, it sends it a number of HTTP headers. It is sometimes useful to have access to these. We can start by using the associative array $_SERVER. This array contains various pieces of information provided by the web server, including, among other things, the HTTP headers supplied by the client. Consider the following program, which displays all the values of the $_SERVER array:
<?php
     // displays variables related to the web server
   // send simple text
  header("Content-type: text/plain");
   // associative array path $_SERVER
     reset($_SERVER);
     while (list($clé,$valeur)=each($_SERVER)){
      echo "$clé : $valeur\n";
     }//while
?>
Let's save this code in headers.php and request this URL with a browser:
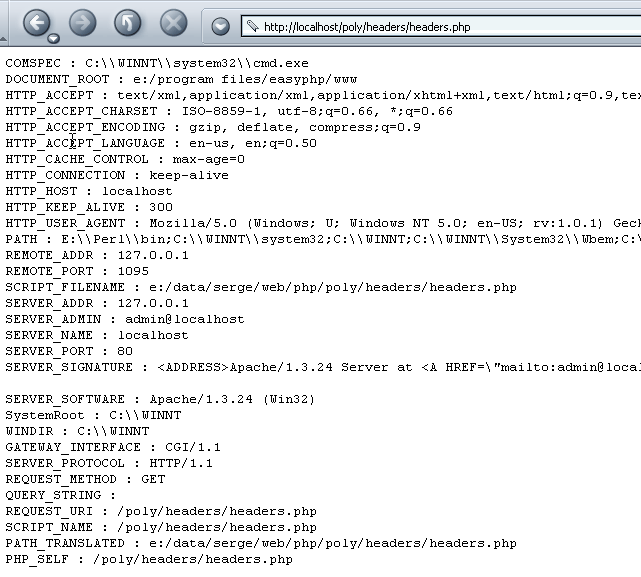
We retrieve a number of pieces of information, including the HTTP headers sent by the browser. These are the values associated with keys starting with HTTP. Let's break down some of the information obtained above:
document types accepted by the web client | |
character sets accepted in documents | |
encoding types accepted for documents | |
language types accepted for documents | |
connection type with the server. Keep-Alive: the server must keep the connection open after sending its response | |
? maximum connection duration | |
host machine queried by the client | |
client identity | |
client address IP | |
communication port used by the client | |
protocol used by the server | |
query method used by the client (GET or POST) | |
query ?param1=val1¶m2=val2&... appended to the requested URL (GET method) |
By slightly modifying the code from the previous program, we can retrieve only the HTTP headers:
<?php
     // displays variables related to the web server
   // send simple text
  header("Content-type: text/plain");
   // associative array path $_SERVER
     reset($_SERVER);
     while (list($clé,$valeur)=each($_SERVER)){
      // header HTTP ?
    if(strtolower(substr($clé,0,4))=="http")
          echo substr($clé,5)." : $valeur\n";
     }//while
?>
The result displayed in the browser is as follows:
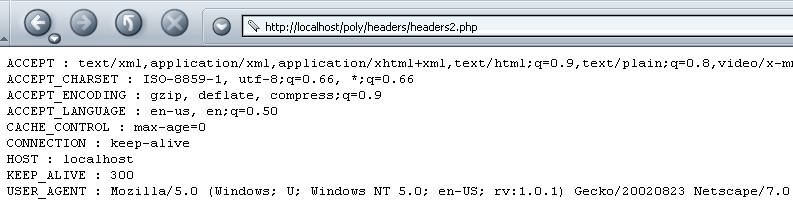
If you want a specific HTTP header, you would write, for example, $_SERVER["HTTP_ACCEPT"].
3.8. Retrieving environment information
The web server/php runs in an environment that can be accessed via the $_ENV array, which stores various characteristics of the runtime environment. Consider the following application env1.php:
<?php
     // displays variables related to the web server
   // send simple text
  header("Content-type: text/plain");
   // associative array path $_ENV
     reset($_ENV);
     while (list($clé,$valeur)=each($_ENV)){
      echo "$clé : $valeur\n";
     }//while
?>
It produces the following result in a browser (partial view):
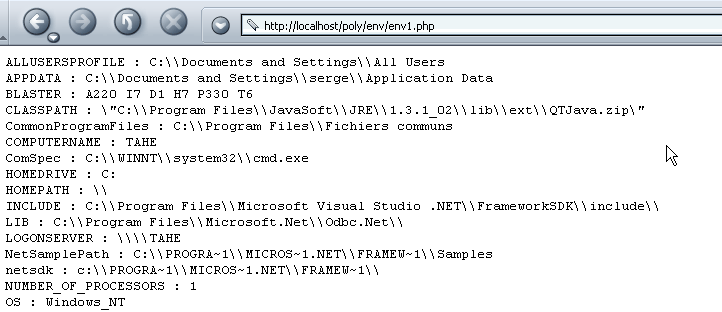
For example, as shown above, the web server/php is running on Windows OS NT.
3.9. Examples
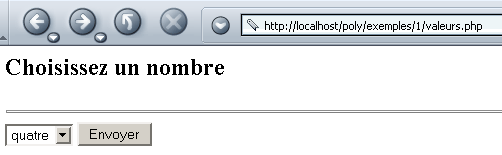
3.9.1. Dynamic form generation - 1
Let’s take as an example the generation of a form with only one control: a combo box. The contents of this combo box are dynamically constructed using values taken from an array. In reality, these values are often retrieved from a database. The form is as follows:
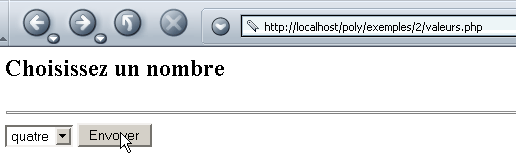
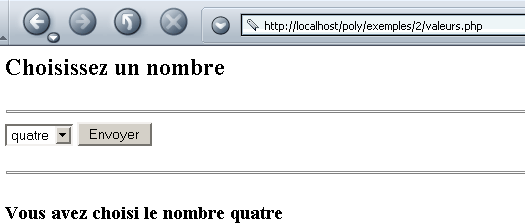
If you click Submit on the example above, you get the following response:

The HTML code for the initial form, once it has been generated, is as follows:
<html>
    <head>
      <title>Génération de formulaire</title>
  </head>
  <body>
      <h2>Choisissez un nombre</h2>
    <hr>
    <form name="frmvaleurs" method="post" action="valeurs.php">
        <select name="cmbValeurs" size="1">
          <option>un</option>
<option>deux</option>
<option>trois</option>
<option>quatre</option>
<option>cinq</option>
<option>six</option>
<option>sept</option>
<option>huit</option>
<option>neuf</option>
<option>dix</option>
      </select>
           <input type="submit" value="Envoyer" name="cmdEnvoyer">
       </form>
  </body>
</html>
The PHP application consists of a main page, valeurs.php, which is called both to retrieve the initial form (the list of values) and to process the values in it and provide the response (the selected value). The application generates two different pages:
- the initial form page, which will be generated by the program valeurs-p1.php
- the page displaying the response provided to the user, which will be generated by the program valeurs-p2.php
The application valeurs.php is as follows:
<?php

     // the values table
  $valeurs=array("un","deux","trois","quatre","cinq","six","sept","huit","neuf","dix");

     // do we have the expected parameters
  $requêteVide=! isset($_POST["cmbValeurs"]);

   // we retrieve the user's choice
  if ($requêteVide){
       // initial request
    include "valeurs-p1.php";
  }else{
       // response to a POST
      $choix=$_POST["cmbValeurs"];
      include "valeurs-p2.php";
  }
?>
It defines the array of values and calls valeurs-p1.php to generate the initial form if the client's request was empty, or valeurs-p2.php to generate the response if a valid request was received. The program valeurs1-php is as follows:
<html>
    <head>
      <title>Génération de formulaire</title>
  </head>
  <body>
      <h2>Choisissez un nombre</h2>
    <hr>
    <form name="frmvaleurs" method="post" action="valeurs.php">
        <select name="cmbValeurs" size="1">
          <?php
            for($i=0;$i<count($valeurs);$i++){
              echo "<option>$valeurs[$i]</option>\n";
          }//for
        ?>
      </select>
           <input type="submit" value="Envoyer" name="cmdEnvoyer">
       </form>
  </body>
</html>
The list of combo box values is dynamically generated from the $valeurs table transmitted by valeurs.php. The valeurs-p2.php program generates the response:
<html>
    <head>
      <title>réponse</title>
  </head>
  <body>
      <h2>Vous avez choisi le nombre <?php echo $choix ?></h2>
  </body>
</html>
Here, we simply display the value of the variable $choix, which is also passed by value.php.
3.9.2. Dynamic Form Generation - 2
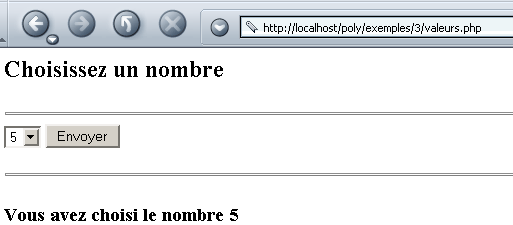
We’ll revisit the previous example and modify it as follows. The form remains the same:
But the response is different:
In the response, we return the form, with the number chosen by the user indicated below it. Furthermore, this number is the one that appears as selected in the list displayed by the response.
The code for values.php is as follows:
<?php

     // configuration
  ini_set("register_globals","off");

    // the values table
  $valeurs=array("un","deux","trois","quatre","cinq","six","sept","huit","neuf","dix");

   // we retrieve the user's possible choice
  $choix=$_POST["cmbValeurs"];

   // the answer is displayed
  include "valeurs-p1.php";
?>
Note that here we have taken care to configure PHP so that there are no global variables. This is generally a good precaution, as global variables pose security risks. An alternative is to initialize all the variables we use. This will "overwrite" any global variable with the same name.
The form page is displayed by valeurs-p1.php:
<html>
    <head>
      <title>Génération de formulaire</title>
  </head>
  <body>
      <h2>Choisissez un nombre</h2>
    <hr>
    <form name="frmvaleurs" method="post" action="valeurs.php">
        <select name="cmbValeurs" size="1">
          <?php
            for($i=0;$i<count($valeurs);$i++){
              // if the current option is equal to the choice, it is selected
              if (isset($choix) && $choix==$valeurs[$i])
                  echo "<option selected>$valeurs[$i]</option>\n";
            else echo "<option>$valeurs[$i]</option>\n";
          }//for
        ?>
      </select>
           <input type="submit" value="Envoyer" name="cmdEnvoyer">
       </form>
    <?php
         // continued on page
      if(isset($choix)){
          echo "<hr>\n";
          echo "<h3>Vous avez choisi le nombre $choix</h3>\n";
      }
    ?>
  </body>
</html>
The page generator program relies on the variable $choix passed by the program valeurs.php. Note here that the HTML structure of the page is starting to be seriously "polluted" by PHP code. The front-end values.php could do more work, as shown by the following new version:
<?php

     // configuration
  ini_set("register_globals","off");

    // the values table
  $valeurs=array("un","deux","trois","quatre","cinq","six","sept","huit","neuf","dix");

   // we retrieve the user's possible choice
  $choix=$_POST["cmbValeurs"];

   // calculate the list of values to be displayed
  $HTMLvaleurs="";
    for($i=0;$i<count($valeurs);$i++){
        // if the current option is equal to the choice, it is selected
        if (isset($choix) && $choix==$valeurs[$i])
            $HTMLvaleurs.="<option selected>$valeurs[$i]</option>\n";
      else $HTMLvaleurs.="<option>$valeurs[$i]</option>\n";
    }//for

   // calculate the second part of the page
  $HTMLpart2="";
     if(isset($choix)){
        $HTMLpart2="<hr>\n";
        $HTMLpart2.="<h3>Vous avez choisi le nombre $choix</h3>\n";
  }//if

   // the answer is displayed
  include "valeurs-p2.php";
?>
The page is now generated by the following program: valeurs-p2.php:
<html>
    <head>
      <title>Génération de formulaire</title>
  </head>
  <body>
      <h2>Choisissez un nombre</h2>
    <hr>
    <form name="frmvaleurs" method="post" action="valeurs.php">
        <select name="cmbValeurs" size="1">
          <?php
             // value list display
          echo $HTMLvaleurs;
        ?>
      </select>
           <input type="submit" value="Envoyer" name="cmdEnvoyer">
       </form>
    <?php
         // display part 2
      echo $HTMLpart2;
    ?>
  </body>
</html>
The code HTML has now been stripped of a significant portion of the code from PHP. However, let’s recall the purpose of splitting the system into a front-end program that analyzes and processes a client’s request and programs simply responsible for displaying pages configured with data transmitted by the front-end: it is to separate the work of the PHP developer from that of the graphic designer. The developer PHP works on the front-end, while the graphic designer works on the web pages. In our new version, the graphic designer can no longer, for example, work on part 2 of the page since they no longer have access to its HTML code. In the first version, they could. Neither method is therefore perfect.
3.9.3. Dynamic Form Generation - 3
We’re looking at the same problem as before, but this time the values are taken from a database. In our example, this is a database named MySQL:
- the database is named dbValeurs
- its owner is admDbValeurs with the password mdpDbValeurs
- the database has a single table named tvaleurs
- this table has only one integer field named value
dos> mysql --database=dbValeurs --user=admDbValeurs --password=mdpDbValeurs

mysql> show tables;
+---------------------+
| Tables_in_dbValeurs |
+---------------------+
| tvaleurs            |
+---------------------+
1 row in set (0.00 sec)

mysql> describe tvaleurs;
+--------+---------+------+-----+---------+-------+
| Field  | Type    | Null | Key | Default | Extra |
+--------+---------+------+-----+---------+-------+
| valeur | int(11) |      |     | 0       |       |
+--------+---------+------+-----+---------+-------+

mysql> select * from tvaleurs;
+--------+
| valeur |
+--------+
|      0 |
|      1 |
|      2 |
|      3 |
|      4 |
|      6 |
|      5 |
|      7 |
|      8 |
|      9 |
+--------+
10 rows in set (0.00 sec)
In a database application, the following steps are typically involved:
- Connection to SGBD
- Sending SQL queries to a SGBD database
- Processing the results of these queries
- Closing the connection to SGBD
Steps 2 and 3 are performed repeatedly; the connection is closed only at the end of database processing. This is a relatively standard pattern for anyone who has used a database interactively. The following table provides the PHP instructions for performing these various operations using SGBD and MySQL:
$connexion=mysql_pconnect($hote,$user,$pwd) $connexion=mysql_connect($hote,$user,$pwd) $hote: the hostname of the machine on which SGBD and MySQL are running. In fact, it is possible to work with remote SGBD and MySQL instances. $user: name of a known user of SGBD MySQL $pwd: their password $connexion: the connection created mysql_pconnect creates a persistent connection with SGBD and MySQL. Such a connection is not closed at the end of the script. It remains open. Thus, when a new connection needs to be opened with SGBD, PHP will search for an existing connection belonging to the same user. If it finds one, it uses it. This saves time. mysql_connect creates a non-persistent connection, which is therefore closed when the work with SGBD and MySQL is complete. | |
$résultats=mysql_db_query($base,$requête,$connexion) $base: the base of MySQL that we will be working with $requête: a query for SQL (insert, delete, update, select, ...) $connexion: the connection to SGBD MySQL $résultats: query results—differ depending on whether the query is a SELECT or an update operation (INSERT, UPDATE, DELETE, ...) | |
$résultats=mysql_db_query($base,"select ...",$connexion) The result of a SELECT is a table, i.e., a set of rows and columns. This table is accessible via $résultats. $ligne=mysql_fetch_row($résultats) reads a row from the table and places it in $ligne in the form of an array. Thus, $ligne[i] is column i of the retrieved row. The function mysql_fetch_row can be called repeatedly. Each time, it reads a new row from the table $résultats. When the end of the table is reached, the function returns the value false. Thus, the table $résultats can be used as follows: while($row = mysql_fetch_row($results)) { // process the current row $row }//while | |
$résultats=mysql_db_query($base,"insert ...",$connexion) The value $résultats is true or false depending on whether the operation succeeded or failed. If successful, the function mysql_affected_rows returns the number of rows modified by the update operation. | |
mysql_close($connection) $connexion: a connection to SGBD MySQL |
The front-end code for valeurs.php becomes the following:
<?php

     // configuration
  ini_set("register_globals","off");
    ini_set("display_errors","off");
    ini_set("track_errors","on");

    // the values table
  list($erreur,$valeurs)=getValeurs();

   // was there a mistake?
  if($erreur){
       // error page display
    include "valeurs-err.php";
     // end
    return;
  }//if

   // the user's possible choice is retrieved
  $choix=$_POST["cmbValeurs"];

   // calculate the list of values to be displayed
  $HTMLvaleurs="";
    for($i=0;$i<count($valeurs);$i++){
        // if the current option is equal to the choice, it is selected
        if (isset($choix) && $choix==$valeurs[$i])
            $HTMLvaleurs.="<option selected>$valeurs[$i]</option>\n";
      else $HTMLvaleurs.="<option>$valeurs[$i]</option>\n";
    }//for

   // calculate the second part of the page
  $HTMLpart2="";
     if(isset($choix)){
        $HTMLpart2="<hr>\n";
        $HTMLpart2.="<h3>Vous avez choisi le nombre $choix</h3>\n";
  }//if

   // the answer is displayed
  include "valeurs-p1.php";

   // end
  return;

  // ------------------------------------------------------------------------
  function getValeurs(){
       // retrieves values from a MySQL database
    $user="admDbValeurs";
    $pwd="mdpDbValeurs";
    $db="dbValeurs";
    $hote="localhost";
    $table="tvaleurs";
    $champ="valeur";

     // open a persistent connection to the MySQL server
     // or a normal connection
    ($connexion=mysql_pconnect($hote,$user,$pwd))
        || ($connexion=mysql_connect($hote,$user,$pwd));
    if(! $connexion)
        return array("Base de données indisponible(".mysql_error()."). Veuillez recommencer ultérieurement.");

     // obtaining values
    $selectValeurs=mysql_db_query($db,"select $champ from $table",$connexion);
    if(! $selectValeurs)
        return array("Base de données indisponible(".mysql_error()."). Veuillez recommencer ultérieurement.");

     // the values are displayed in a table
    $valeurs=array();
    while($ligne=mysql_fetch_row($selectValeurs)){
        $valeurs[]=$ligne[0];
    }//while

     // closing the connection (if it's persistent, it won't actually be closed)
    mysql_close($connexion);

     // result feedback
    return array("",$valeurs);
  }//getValeurs

?>
This time, the values to be entered in the combo box are not provided by an array but by the function getValeurs(). This function:
- opens a persistent connection (mysql_pconnect) to the mySQL server by passing a registered username and password.
- Once the connection is established, a SELECT query is issued to retrieve the values in the tvaleurs table of the dbValeurs database.
- The result of the SELECT is placed in the array $valeurs, which is returned to the calling program.
- The function actually returns an array with two results ($erreur, $valeurs), where the first element is an error message if one exists, or an empty string otherwise.
- The calling program checks whether an error occurred and, if so, displays the page `values-err.php`. This page is as follows:
<html>
    <head>
      <title>Erreur</title>
  </head>
  <body>
      <h3>L'following error occurred</h3>
    <font color="red">
        <h4><?php echo $erreur ?></h4>
    </font>
  </body>
</html>
- If there was no error, the calling program has access to the values in the array $valeurs. This brings us back to the previous problem.
Here are two examples of execution:
- with an error

- without error
3.9.4. Dynamic Form Generation - 4
In the previous example, what would happen if we changed SGBD? What if we switched from MySQL to Oracle or SQL Server, for example? We would need to rewrite the getValeurs() function that provides the values. The advantage of having consolidated the code needed to retrieve the values to be displayed in the list into a single function is that the code requiring modification is clearly targeted and not scattered throughout the entire program. The getValeurs() function can be rewritten so that it is independent of the SGBD being used. It simply needs to work with the ODBC driver of SGBD rather than directly with SGBD.
There are many databases on the market. To standardize database access under Windows, Microsoft has developed an interface called OQBC (Open QBC Connectivity). This layer hides the specific features of each database behind a standard interface. Under Windows, there are many drivers that facilitate access to databases. Here is an example of a list of drivers installed on a Windows machine:
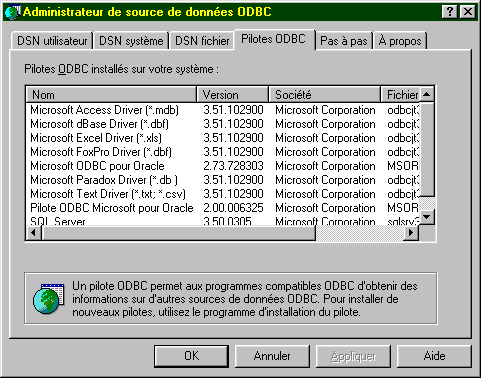
SGBD also has a MySQL driver. An application relying on ODBC drivers can use any of the above databases without rewriting.
 |
Let’s make our MySQL and dbValeurs databases accessible via a ODBC driver. The procedure below is for Windows 2000. For Win9x systems, the procedure is very similar. Activate the ODBC resource manager:
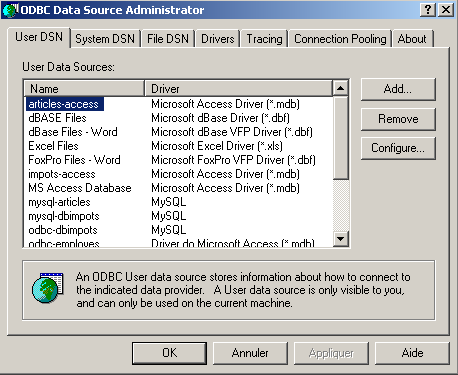
Use the [Add] button to add a new data source ODBC:
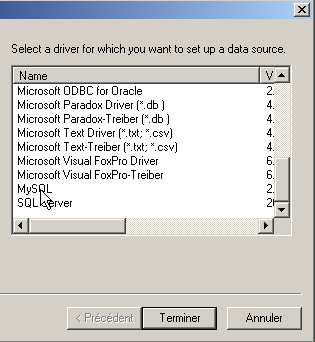
Select the ODBC MySQL driver, click [Terminer], then specify the data source properties:

the name given to the ODBC data source (odbc-values) | |
the name of the machine hosting SGBD MySQL that manages the data source (localhost) | |
the name of the MySQL database, which is the data source (dbValeurs) | |
A user with sufficient access rights to the MySQL database to be managed (admDbValeurs) | |
their password (mdpDbValeurs) |
PHP is capable of working with ODBC drivers. The following table lists the functions you need to know:
$connexion=odbc_pconnect($dsn,$user,$pwd) $connexion=odbc_connect($dsn,$user,$pwd) $dsn: name DSN (Data Source Name) of the machine on which SGBD is running $user: the username associated with SGBD $pwd: their password $connexion: the connection created odbc_pconnect creates a persistent connection with SGBD. Such a connection is not closed at the end of the script. It remains open. Thus, when a new connection needs to be opened with SGBD, PHP will search for an existing connection belonging to the same user. If it finds one, it uses it. This saves time. odbc_connect creates a non-persistent connection, which is therefore closed when the work with SGBD is finished. | |
$requêtePréparée=odbc_prepare($connexion,$requête) $requête: a SQL query (insert, delete, update, select, ...) $connexion: the connection to SGBD Parses the query $requête and prepares it for execution. The query thus "prepared" is referenced by the result $requêtePréparée. Preparing a query for execution is not mandatory but improves performance since the query is parsed only once. The prepared query is then executed. If an unprepared query is executed repeatedly, it is analyzed each time, which is unnecessary. Once prepared, the query is executed by $res=odbc_execute($requêtePréparée) returns true or false depending on whether the query execution succeeds or fails | |
The result of a SELECT is a table, i.e., a set of rows and columns. This table is accessible via $requêtePréparée. $res=odbc_fetch_row($requêtePréparée) reads a row from the table resulting from the SELECT. Returns true or false depending on whether the query execution succeeds or fails. The elements of the retrieved row are available via the odbc_result function: $val=odbc_result($requêtePréparée,i): column i of the row that has just been read $val=odbc_result($requêtePréparée,"nomColonne"): column nomColonne of the row that was just read The odbc_fetch_row function can be called repeatedly. Each time, it reads a new row from the result table. When the end of the table is reached, the function returns false. Thus, the result table can be processed as follows: | |
odbc_close($connection) $connexion: a connection to SGBD MySQL |
The getValeurs() function responsible for retrieving values from the ODBC database is as follows:
  // ------------------------------------------------------------------------
  function getValeurs(){
       // retrieves values from a MySQL database
    $user="admDbValeurs";
    $pwd="mdpDbValeurs";
    $db="dbValeurs";
    $dsn="odbc-valeurs";
    $table="tvaleurs";
    $champ="valeur";

     // open a persistent connection to the MySQL server
     // or a normal connection
    ($connexion=odbc_pconnect($dsn,$user,$pwd))
        || ($connexion=odbc_connect($dsn,$user,$pwd));
    if(! $connexion)
        return array("1 - Base de données indisponible(".odbc_error()."). Veuillez recommencer ultérieurement.");

     // obtaining values
    $selectValeurs=odbc_prepare($connexion,"select $champ from $table");
    if(! odbc_execute($selectValeurs))
        return array("2 - Base de données indisponible(".odbc_error()."). Veuillez recommencer ultérieurement.");

     // the values are displayed in a table
    $valeurs=array();
    while(odbc_fetch_row($selectValeurs)){
        $valeurs[]=odbc_result($selectValeurs,$champ);
    }//while

     // closing the connection (if it's persistent, it won't actually be closed)
    odbc_close($connexion);

     // result feedback
    return array("",$valeurs);
  }//getValeurs

?>
If we run the new application without activating the odbc-values database, we get the following result:
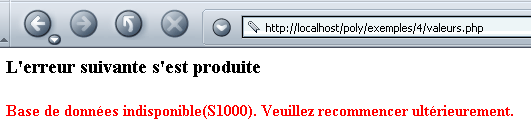
Note that the error code returned by the ODBC driver (odbc_error()=S1000) is not very clear. If the odbc-values database is made available, we get the same results as before.
In conclusion, we can say that this solution is good for application maintenance. Indeed, if the database needs to change, the application itself will not need to change. The system administrator will simply create a new data source ODBC for the new database. Still with maintenance in mind, it would be a good idea to place the database access parameters ($dsn, $user, $pwd) in a separate file that the application would load at startup (include).
3.9.5. Retrieving values from a form
We have already retrieved values from a form sent by a web client on several occasions. The following example shows a form that combines the most common HTML components and is designed to retrieve the parameters sent by the client browser. The form is as follows:
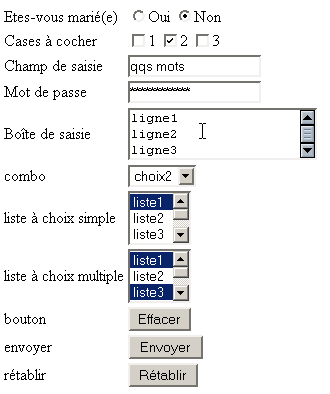
It arrives pre-filled. The user can then modify it:
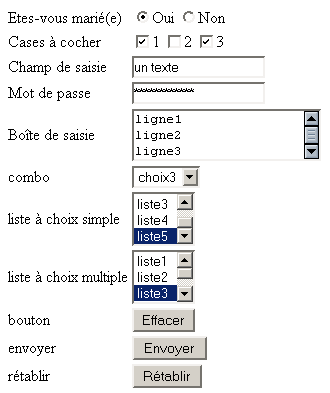
If they click the [Envoyer] button, the server returns the list of form values:
The form is a static HTML page with tags.html:
<html>

  <head>
      <title>balises</title>
    <script language="JavaScript">
        function effacer(){
          alert("Vous avez cliqué sur le bouton Effacer");
      }//delete
        </script>
  </head>

  <body background="/images/standard.jpg">
    <form method="POST" action="parameters.php">
      <table border="0">
        <tr>
          <td>Etes-vous marié(e)</td>
          <td>
              <input type="radio" value="oui" name="R1">Oui
              <input type="radio" name="R1" value="non" checked>Non
          </td>
        </tr>
        <tr>
          <td>Cases à cocher</td>
          <td>
              <input type="checkbox" name="C1" value="un">1
              <input type="checkbox" name="C2" value="deux" checked>2
              <input type="checkbox" name="C3" value="trois">3
          </td>
        </tr>
        <tr>
          <td>Champ de saisie</td>
          <td>
              <input type="text" name="txtSaisie" size="20" value="qqs mots">
          </td>
        </tr>
        <tr>
          <td>Mot de passe</td>
          <td>
              <input type="password" name="txtMdp" size="20" value="unMotDePasse">
          </td>
        </tr>
        <tr>
          <td>Boîte de saisie</td>
          <td>
               <textarea rows="2" name="areaSaisie" cols="20">
ligne1
ligne2
ligne3
</textarea>
          </td>
        </tr>
        <tr>
          <td>combo</td>
          <td>
              <select size="1" name="cmbValeurs">
                <option>choix1</option>
                <option selected>choix2</option>
                <option>choix3</option>
              </select>
          </td>
        </tr>
        <tr>
          <td>liste à choix simple</td>
          <td>
              <select size="3" name="lst1">
                <option selected>liste1</option>
                <option>liste2</option>
                <option>liste3</option>
                <option>liste4</option>
                <option>liste5</option>
              </select>
          </td>
        </tr>
        <tr>
          <td>liste à choix multiple</td>
          <td>
              <select size="3" name="lst2[]" multiple>
                <option selected>liste1</option>
                <option>liste2</option>
                <option selected>liste3</option>
                <option>liste4</option>
                <option>liste5</option>
              </select>
          </td>
        </tr>
        <tr>
          <td>bouton</td>
          <td>
              <input type="button" value="Effacer" name="cmdEffacer" onclick="effacer()">
          </td>
        </tr>
        <tr>
          <td>envoyer</td>
          <td>
              <input type="submit" value="Envoyer" name="cmdRenvoyer">
          </td>
        </tr>
        <tr>
          <td>rétablir</td>
          <td>
              <input type="reset" value="Rétablir" name="cmdRétablir">
          </td>
        </tr>
      </table>
      <input type="hidden" name="secret" value="uneValeur">
    </form>
  </body>
</html>
The table below summarizes the role of the various tags in this document and the value retrieved by PHP for the different types of form components. The value of a field named HTML C can be sent via a POST or a GET. In the first case, it will be retrieved in the variable $_GET["C"], and in the second case in the variable $_POST["C"]. The following table assumes the use of a POST.
Check | HTML tag | value retrieved by PHP |
<form method="POST" > | ||
<input type="text" name="txtSaisie" size="20" value="a few words"> | $_POST["txtSaisie"]: value contained in the txtSaisie field of the form | |
<input type="password" name="txtMdp" size="20" value="unMotDePasse"> | $_POST["txtmdp"]: value contained in the txtMdp field of the form | |
<textarea rows="2" name="areaSaisie" cols="20"> line1 line2 line3 </textarea> | $_POST["areaSaisie"]: lines contained in the areaSaisie field as a single string: "line1\r\nline2\r\nline3". The lines are separated from each other by the sequence "\r\n". | |
<input type="radio" value="Yes" name="R1">Yes <input type="radio" name="R1" value="no" checked>No | $_POST["R1"]: value (=value) of the radio button selected as "yes" or "no" as appropriate. | |
<input type="checkbox" name="C1" value="one">1 <input type="checkbox" name="C2" value="two" checked>2 <input type="checkbox" name="C3" value="three">3 | $_POST["C1"]: value of the checkbox if it is checked; otherwise, the variable does not exist. Thus, if box C1 has been checked, $_POST["C1"] is "one"; otherwise, $_POST["C1"] does not exist. | |
<select size="1" name="cmbValeurs"> <option>choice1</option> <option selected>choice2</option> <option>option3</option> </select> | $_POST["cmbValeurs"] : option selected from the list, for example "choice3". | |
<select size="3" name="lst1"> <option selected>list1</option> <option>list2</option> <option>list3</option> <option>list4</option> <option>list5</option> </select> | $_POST["lst1"]: option selected from the list, for example "list5". | |
<select size="3" name="lst2[]" multiple> <option>list1</option> <option>list2</option> <option selected>list3</option> <option>list4</option> <option>list5</option> </select> | $_POST["lst2"]: array of options selected from the list, for example ["liste3,"liste5"]. Note the specific syntax of the HTML tag for this particular case: lst2[]. | |
<input type="hidden" name="secret" value="uneValeur"> | $_POST["secret"]: value of the field, here "uneValeur". |
In our example, the form values are sent to the parameters.php program:
The code for the latter is as follows:
<?php

   // configuration
  ini_set("register_globals","off");
  ini_set("display_errors","off");

  // call method
  $méthode=$_SERVER["REQUEST_METHOD"];

   // parameter recovery
   // it depends on how they are sent
  if($méthode=="GET")
      $param=$_GET;
      else $param=$_POST;
  $R1=$param["R1"];
  $C1=$param["C1"];
  $C2=$param["C2"];
  $C3=$param["C3"];
  $txtSaisie=$param["txtSaisie"];
  $txtMdp=$param["txtMdp"];
  $areaSaisie=implode("<br>",explode("\r\n",$param["areaSaisie"]));
  $cmbValeurs=$param["cmbValeurs"];
  $lst1=$param["lst1"];
  $lst2=implode("<br>",$param["lst2"]);
  $secret=$param["secret"];

     // valid request?
    $requêteValide=isset($R1) && (isset($C1) || isset($C2) || isset($C3))
        && isset($txtSaisie) && isset($txtMdp) && isset($areaSaisie)
        && isset($cmbValeurs) && isset($lst1) && isset($lst2)
        && isset($secret);

   // page display
    if ($requêteValide)
      include "parameters-p1.php";
    else include "balises.html";
?>
Let's break down a few points of this program:
- The application is independent of the method used to pass form values to the server. In both possible cases (GET and POST), the dictionary of passed values is referenced by $param.
- From the contents of the field areaSaisie "line1\r\nline2\r\n..." we create an array of strings using explode("\r\n", $param["areaSaisie"]). We now have the array [ligne1,ligne2,...]. From this, we create the string "line1<br>line2<br>..." using the implode function.
- The value of the multi-select list lst2 is an array, for example ["option3","option5"]. From this, we create a string "option3<br>option5" using the implode function.
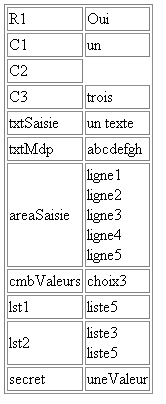
- The application verifies that all parameters have been set. It is important to note here that any URL can be called manually or programmatically, and that the expected parameters may not necessarily be present. If parameters are missing, the page balises.html is displayed; otherwise, the page parameters-p1.php is displayed. This page displays the values retrieved and calculated in parameters.php in a table:
<html>
    <head>
        <title>Récupération des paramètres d'a form</title>
    </head>
    <body>
        <table border="1">
            <tr>
                <td>R1</td>
                <td><?php echo $R1 ?></td>
            </tr>
            <tr>
                <td>C1</td>
                <td><?php echo $C1 ?></td>
            </tr>
            <tr>
                <td>C2</td>
                <td><?php echo $C2 ?></td>
            </tr>
            <tr>
                <td>C3</td>
                <td><?php echo $C3 ?></td>
            </tr>
            <tr>
                <td>txtSaisie</td>
                <td><?php echo $txtSaisie ?></td>
            </tr>
            <tr>
                <td>txtMdp</td>
                <td><?php echo $txtMdp ?></td>
            </tr>
            <tr>
                <td>areaSaisie</td>
                <td><?php echo $areaSaisie ?></td>
            </tr>
            <tr>
                <td>cmbValeurs</td>
                <td><?php echo $cmbValeurs ?></td>
            </tr>
            <tr>
                <td>lst1</td>
                <td><?php echo $lst1 ?></td>
            </tr>
            <tr>
                <td>lst2</td>
                <td><?php echo $lst2 ?></td>
            </tr>
            <tr>
                <td>secret</td>
                <td><?php echo $secret ?></td>
            </tr>
        </table>
    </body>
    </html>
3.10. Session tracking
3.10.1. The Problem
A web application may consist of multiple form exchanges between the server and the client. The process works as follows:
Step 1
- Client C1 establishes a connection with the server and makes its initial request.
- The server sends form F1 to client C1 and closes the connection opened in step 1.
Step 2
- Client C1 fills out the form and sends it back to the server. To do this, the browser opens a new connection with the server.
- The server processes the data from form 1, calculates information I1 from it, sends form F2 to client C1, and closes the connection opened in step 3.
Step 3
- The cycle of steps 3 and 4 repeats in steps 5 and 6. At the end of step 6, the server will have received two forms, F1 and F2, and will have calculated information I1 and I2 from them.
The problem is: how does the server retain the information I1 and I2 associated with client C1? This problem is called tracking the session of client C1. To understand its root cause, let’s examine the diagram of a server application TCP-IP serving multiple clients simultaneously:
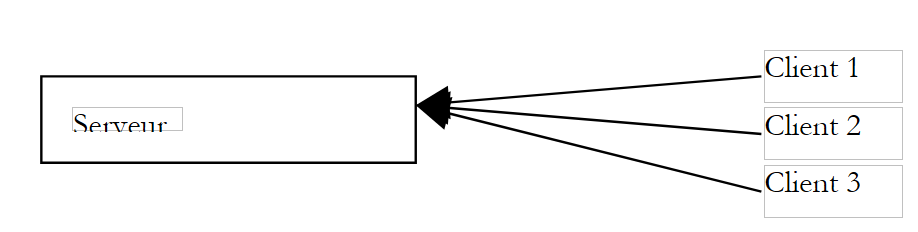 |
In a traditional TCP-IP client-server application:
- the client establishes a connection with the server
- exchanges data with the server through this connection
- the connection is closed by one of the two parties
The two key points of this mechanism are:
- a single connection is created for each clients
- this connection is used for the entire duration of the server’s dialogue with its client
What allows the server to know at any given moment which client it is working with is the connection—or, in other words, the "channel"—that links it to its client. Since this channel is dedicated to a specific client, everything that comes through this channel originates from that client, and everything sent through this channel reaches that same client.
The HTTP client-server mechanism follows the previous model, with the exception that the client-server interaction is limited to a single exchange between the client and the server:
- the client opens a connection to the server and makes its request
- the server responds and closes the connection
If, at time T1, a client C makes a request to the server, it obtains a connection C1 that will be used for the single request-response exchange. If, at time T2, this same client makes a second request to the server, it will obtain a connection C2 that is different from connection C1. For the server, there is then no difference between this second request from user C and their initial request: in both cases, the server treats the client as a new client. For there to be a link between client C’s different connections to the server, client C must be “recognized” by the server as a “regular” and the server must retrieve the information it has on this regular.
Let’s imagine a system that works as follows:
- There is a single queue
- There are multiple counters. Therefore, multiple clients can be served simultaneously. When a counter becomes available, a customer leaves the queue to be served at that counter
- If this is the customer’s first visit, the person at the counter gives them a token with a number. The customer may ask only one question. Once they have their answer, they must leave the counter and go to the end of the queue. The counter clerk records the customer’s information in a file bearing their number.
- When it is their turn again, the customer may be served by a different teller than the previous time. The teller asks for their token and retrieves the file with the token number. Once again, the customer makes a request, receives an answer, and information is added to their file.
- And so on... Over time, the customer will receive answers to all their requests. The connection between the different requests is maintained through the token and the file associated with it.
The session tracking mechanism in a client-server web application works similarly to the previous example:
- upon their first request, a client is given a token by the web server
- they will present this token with each subsequent request to identify themselves
The token can take various forms:
- a hidden field in a form
- the client makes its first request (the server recognizes it by the fact that the client has no token)
- The server sends its response (a form) and places the token in a hidden field within it. At this point, the connection is closed (the client leaves the server with its token). The server may have associated information with this token.
- The client makes a second request by resubmitting the form. The server retrieves the token from the form. It can then process the client’s second request by accessing, via the token, the information calculated during the first request. New information is added to the record associated with the token, a second response is sent to the client, and the connection is closed for the second time. The token has been included again in the response form so that the user can present it during their next request.
- and so on...
The main drawback of this technique is that the token must be placed in a form. If the server’s response is not a form, the hidden field method can no longer be used.
- The cookie method
- The client makes its first request (the server recognizes this because the client has no token)
- The server responds by adding a cookie to the HTTP headers of the response. This is done using the HTTP Set-Cookie command:
Set-Cookie: param1=value1;param2=value2;....
where param1 and param2 are parameter names and their respective values. Among the parameters will be the token. Often, only the token is included in the cookie, with the server storing the other information in the folder associated with the token. The browser that receives the cookie will store it in a file on the disk. After the server’s response, the connection is closed (the client leaves the session with its token).
- (continued)
- The client makes its second request to the server. Each time a request is made to a server, the browser checks among all the cookies it has to see if it has one from the requested server. If so, it sends it to the server in the form of a HTTP command, the Cookie command, which has a syntax similar to that of the Set-Cookie command used by the server:
Cookie: param1=value1;param2=value2;....
Among the headers sent by the browser, the server will find the token that allows it to recognize the client and retrieve the information associated with it.
This is the most commonly used form of token. It has one drawback: a user can configure their browser to reject cookies. Such users then cannot access web applications that use cookies.
- rewrite of URL
- The client makes its first request (the server recognizes this because the client has no token)
- The server sends its response. This response contains links that the user must use to continue with the application. In the URL of each of these links, the server appends the token in the form URL;token=value.
- When the user clicks on one of the links to continue the application, the browser sends a request to the web server, including the requested token in the headers as HTTP URL URL;token=value. The server is then able to retrieve the token.
3.10.2. API and PHP for session tracking
We will now present the main methods useful for session tracking:
starts the session to which the current request belongs. If the request was not yet part of a session, a session is created. | |
identifier of the current session | |
dictionary storing session data. Read-write accessible | |
deletes the data contained in the current session. This data remains available for the current client-server exchange but will be unavailable during the next exchange. |
3.10.3. Example 1
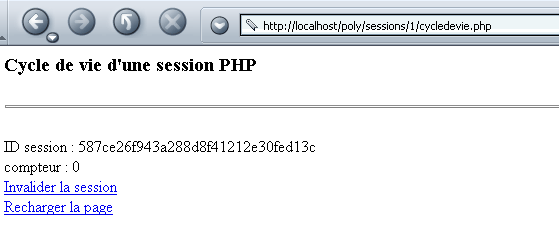
We present an example inspired by the book "Programming with J2EE" published by Wrox and distributed by Eyrolles. This example demonstrates how a PHP session works. The main page is as follows:
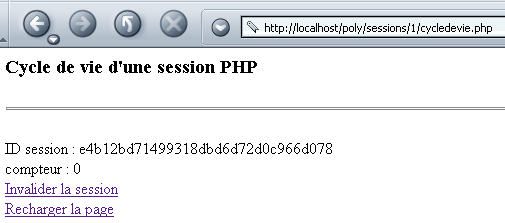
It contains the following elements:
- the ID session ID obtained by the session_id() function. This ID, generated by the browser, is sent to the client via a cookie that the browser returns when it requests a URL from the same tree structure. This is what maintains the session.
- A counter that is incremented with each browser request and indicates that the session is active.
- a link to delete the data associated with the current session. This is done by the function session_destroy()
- A link to reload the page
The code for the cycledevie.php application is as follows:
<?php
     //cycledevie.php

     // configuration
  ini_set("register_globals","off");
  ini_set("display_errors","off");

  // start a session
  session_start();

   // should it be invalidated?
  $action=$_GET["action"];
  if($action=="invalider"){
       // end of session
    session_destroy();
  }//if

     // meter management
  if(! isset($_SESSION["compteur"]))
         // the counter doesn't exist - we create it
      $_SESSION["compteur"]=0;
         // counter exists - increment it
    else $_SESSION["compteur"]++;

   // retrieve the ID of the current session
  $idSession=session_id();

   // we retrieve the counter
  $compteur=$_SESSION["compteur"];

   // hand over to the visualization page
  include "cycledevie-p1.php";
?>
Note the following points:
- As soon as the application starts, a session is initiated. If the client has sent a session token, the session with that identifier is resumed, and all associated data is placed in the $_SESSION dictionary. Otherwise, a new session token is created.
- If the client has sent an action parameter with the value "invalidate", the session data is marked as "to be deleted" for the next exchange. It will not be saved on the server at the end of the exchange, unlike in a normal exchange.
- A session-related counter is retrieved from the $_SESSION dictionary, along with the session's ID (session_id()).
- The page to be sent to the client is generated by the program cycledevie-p1.php
The page cycledevie-p1.php displays the page sent to the client:
<html>
    <head>
      <title>Gestion de sessions</title>
  </head>
  <body>
      <h3>Cycle de vie d'a PHP session</h3>
    <hr>
    <br>ID session : <?php echo $idSession ?>
    <br>compteur : <?php echo $compteur ?>
    <br><a href="cycledevie.php?action=invalider">Invalider la session</a>
    <br><a href="cycledevie.php">Recharger la page</a>
  </body>
</html>
Note the URL appended to each of the two links:
- cycledevie.php to reload the page
- cycledevie.php?action=invalider to invalidate the session. In this case, a parameter action=invalider is appended to the URL. It will be retrieved by the server program cycledevie.php via the instruction $action=$_GET["action"].
Let’s reload the page twice in a row:
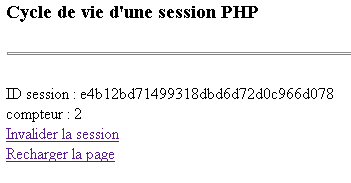
The counter has indeed been incremented. The session ID ID has not changed. Let's now invalidate the session:
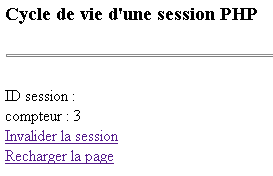
We can see that we’ve lost the session ID ID, but the counter has been incremented again. Let’s reload the page:
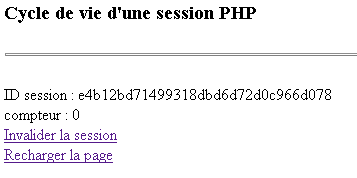
We see that we start again with the same session ID ID as before. The counter resets to zero. The session_destroy() function therefore does not have an immediate effect. The data from the current session is deleted only for the client-server exchange that follows the one in which the deletion is made. The ID session has not changed, which would suggest that session_destroy() does not start a new session by creating a new ID. The session token cookie was sent back by the client browser, and PHP retrieved the session from this token, a session that no longer contained any data.
The previous tests were performed with the Netscape browser configured to use cookies. Let’s now configure it to not use cookies. This means it will neither store nor send back the cookies sent by the server. We would then expect sessions to no longer work. Let’s try with an initial exchange:
We have a session token ID, the one generated by session_start(). Let’s reload the page using the link:
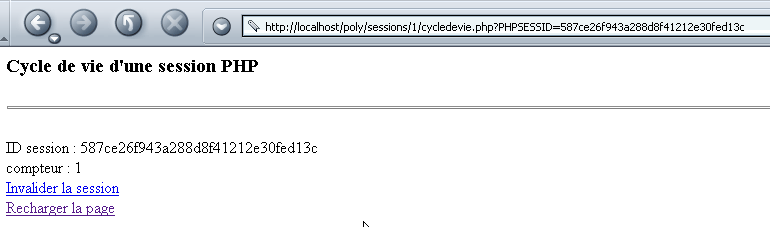
Surprisingly, the results above show that we have an active session and that the counter is being managed correctly. How is this possible, since cookies have been disabled and there is no longer any token exchange between the server and the browser? The URL from the screenshot above gives us the answer:
This is the URL from the "Reload page" link. Let's check the source code of the page displayed by the browser:
<a href="cycledevie.php?action=invalider&PHPSESSID=587ce26f943a288d8f41212e30fed13c">Invalider la session</a>
<a href="cycledevie.php?PHPSESSID=587ce26f943a288d8f41212e30fed13c">Recharger la page</a>
Note that the original code for the two links on the cycledevie-p1.php page is as follows:
    <a href="cycledevie.php?action=invalider">Invalider la session</a>
    <a href="cycledevie.php">Recharger la page</a>
The PHP interpreter therefore automatically rewrites the URL for both links by adding the session token. This ensures that the token is properly transmitted by the browser when the links are clicked. This explains why, even with cookies disabled, the session is still managed correctly.
3.10.4. Example 3
We propose to write a php application that would act as a client for the previous counter application. It would call it N times in a row, where N is passed as a parameter. Our goal is to demonstrate a programmed web client and how to manage the session token. Our starting point will be a generic web client called as follows:
webclient URL GET/HEAD
- URL: url requested
- GET/HEAD: GET to request the code HTML from the page, HEAD to limit to headers only HTTP
Here is an example with URL http://localhost/poly/sessions/2/cycledevie.php. This program is the one already described with a slight difference:
   // set the cookie path
    session_set_cookie_params(0,"/poly/sessions/2");
  // start a session
  session_start();
The session_set_cookie_params function allows you to set certain parameters of the cookie that will contain the session token. The first parameter is the cookie’s lifetime. A lifetime of zero means that the cookie is deleted by the browser that received it when the browser is closed. The second parameter is the path to the URL to which the browser must send the cookie. In the example above, if the browser received the cookie from the localhost machine, it will send the cookie back to any URL located in the http://localhost/poly/sessions/2/ directory tree.
dos>e:\php43\php.exe clientweb.php http://localhost/poly/sessions/2/cycledevie.php GET
HTTP/1.1 200 OK
Date: Wed, 09 Oct 2002 13:58:16 GMT
Server: Apache/1.3.24 (Win32)
Set-Cookie: PHPSESSID=48d5aaa0e99850b17c33a6e22d38e5c4; path=/poly/sessions/2
Expires: Thu, 19 Nov 1981 08:52:00 GMT
Cache-Control: no-store, no-cache, must-revalidate, post-check=0, pre-check=0
Pragma: no-cache
Transfer-Encoding: chunked
Content-Type: text/html

<html>
        <head>
        <title>Gestion de sessions</title>
  </head>
  <body>
        <h3>Cycle de vie d'a PHP session</h3>
    <hr>
    <br>ID session : 48d5aaa0e99850b17c33a6e22d38e5c4    <br>compteur : 0
    <br><a href="cycledevie.php?action=invalider&PHPSESSID=48d5aaa0e99850b17c33a6e22d38e5c4">Invalid
er la session</a>
    <br><a href="cycledevie.php?PHPSESSID=48d5aaa0e99850b17c33a6e22d38e5c4">Recharger la page</a>
  </body>
</html>
The clientweb program displays everything it receives from the server. Above, we see the command HTTP Set-cookie, which the server uses to send a cookie to its client. Here, the cookie contains two pieces of information:
- PHPSESSID, which is the session token
- path, which defines the URL to which the cookie belongs. path=/poly/sessions/2 tells the browser that it must send the cookie back to the server every time it requests a URL starting with /poly/sessions/2 from the machine that sent it the cookie.
- A cookie can also define an expiration time. Here, this information is missing. The cookie will therefore be deleted when the browser is closed. A cookie can have an expiration time of N days, for example. As long as it is valid, the browser will send it back every time one of the URL pages in its domain (Path) is visited. Consider an online store for CD. It can track a customer’s browsing path through its catalog and gradually determine their preferences—classical music, for example. These preferences can be stored in a cookie with a lifespan of 3 months. If that same customer returns to the site after a month, the browser will send the cookie back to the server application. Based on the information contained in the cookie, the server application can then tailor the generated pages to the customer’s preferences.
The web client code follows.
<?php

     // configuration
    dl("php_curl.dll");    // library CURL

     // syntax: $0 URL GET
   // you need three arguments
  if($argc != 3){
       // error msg
    fputs(STDERR,"Syntaxe : $argv[0] URL GET/HEAD");
    // stop
    exit(1);
  }//if

   // the third argument must be GET or HEAD
  $header=strtolower($argv[2]);
  if($header!="get" && $header!="head"){
       // error msg
    fputs(STDERR,"Syntaxe : $argv[0] URL GET/HEAD");
     // stop
    exit(2);
  }//if

   // the first argument is a URL
  $URL=strtolower($argv[1]);

  // preparing the connection
  $connexion=curl_init($URL);
   // connection settings
  curl_setopt($connexion,CURLOPT_HEADER,1);
  if($header=="head") curl_setopt($connexion,CURLOPT_NOBODY,1);
  // connection execution
  curl_exec($connexion);
   // closing the connection
  curl_close($connexion);
   // end
  exit(0);
?>
The previous program uses the CURL library:
initializes a CURL object with the URL URL to be accessed | |
sets the value of certain connection options. Here are the two used in the program: CURLOPT_HEADER=1: retrieves the HTTP headers sent by the server CURLOPT_NOBODY=1: allows the document sent by the server behind the headers to be ignored | |
establishes a connection to $URL with the specified options. Displays everything the server sends on the screen | |
closes the connection |
The previous program is fairly simple. However, the CURL library does not allow for fine-grained manipulation of the server response, such as parsing it line by line. The following program does the same thing as the previous one but using the basic network functions of PHP. It will serve as the starting point for writing a client for our cycledevie.php application.
<?php

     // syntax: $0 URL GET/HEAD
  // you need three arguments
  if($argc != 3){
       // error msg
    fputs(STDERR,"Syntaxe : $argv[0] URL GET/HEAD");
    // stop
    exit(1);
  }//if

   // connection and result display
  $résultats=getURL($argv[1],$argv[2]);
  if(isset($résultats->erreur)){
       // error
    echo "L'erreur suivante s'est produite : $résultats->erreur\n";
  }else{
       // display server response
    echo $résultats->réponse;
  }//if

   // end
  exit(0);

  //-----------------------------------------------------------------------
  function getURL($URL,$header){

      // connects to $URL
     // makes a GET or a HEAD depending on the header value
     // the server response forms the result of the

     // analysis of URL
    $url=parse_url($URL);
     // the protocol
    if(strtolower($url["scheme"])!="http"){
        $résultats->erreur="l'URL [$URL] n'est pas au format http://machine[:port][/chemin]";
      return $résultats;
    }//if
     // the machine
    $hote=$url["host"];
    if(! isset($hote)){
        $résultats->erreur="l'URL [$URL] n'est pas au format http://machine[:port][/chemin]";
      return $résultats;
    }//if
     // the port
    $port=$url["port"];
    if(! isset($port)) $port=80;
     // the way
    $chemin=$url["path"];
     // the request
    if(isset($url["query"])){
        $résultats->erreur="l'URL [$URL] n'est pas au format http://machine[:port][/chemin]";
      return $résultats;
    }//if

     // analysis of $header
    $header=strtoupper($header);
      if($header!="GET" && $header!="HEAD"){
          // error msg
        $résultats->erreur="méthode [$header] doit être GET ou HEAD";
         // stop
        return $résultats;
      }//if

     // open a connection on the $port port of $hote
    $connexion=fsockopen($hote,$port,&$errno,&$erreur);
     // return if error
    if(! $connexion){
      $résultats->erreur="Echec de la connexion au site ($hote,$port) : $erreur";
      return $résultats;
    }//if

     // $connexion represents a bidirectional communication flow
     // between the client (this program) and the contacted web server
     // this channel is used for the exchange of orders and information
     // the dialog protocol is HTTP

     // the customer sends the get command to request URL /
    // syntax get URL HTTP/1.0
    // protocol HTTP headers must end with an empty line
    fputs($connexion, "$header $chemin HTTP/1.0\n\n");

     // the server will now respond on channel $connexion. It will send all
     // then close the channel. The client therefore reads everything that arrives from $connexion
     // until the channel closes
    $résultats->réponse="";
    while($ligne=fgets($connexion,10000))
      $résultats->réponse.=$ligne;

     // the customer in turn closes the connection
    fclose($connexion);
     // return
    return $résultats;
  }//getURL

?>
Let's comment on a few points of this program:
- The program accepts two parameters:
- a URL or http file whose contents you want to display on the screen.
- a method (GET or HEAD) to use depending on whether you want only the headers (HTTP (HEAD) or also the body of the document associated with URL (GET).
- Both parameters are passed to the getURL function. This function returns a $résultats object. This object has an error field if there is an error, and a response field otherwise. The error field is used to store any error messages. The response field contains the response from the contacted web server.
- The function getURL analyzes the URL $URL using the function parse_url. The statement $url=parse_url($URL) will create the associative array $url with the following possible keys:
- scheme: the protocol of URL (http, ftp, etc.)
- host: the machine for URL
- port: the port of the URL
- path: the path of the URL
- querystring: the parameters of URL
A url will be valid if it is in the form http://machine[:port][/chemin].
- The $header parameter is also verified
- Once the parameters have been verified and are correct, a TCP connection is created on the machine ($hote,$port), then the command HTTP, GET, or HEAD is sent depending on the parameter $header.
- We then read the server's response and store it in $résultats->response.
Running the program yields the following results:
dos>"e:\php43\php.exe" geturl.php http://localhost/poly/sessions/2/cycledevie.php get

HTTP/1.1 200 OK
Date: Wed, 09 Oct 2002 14:56:55 GMT
Server: Apache/1.3.24 (Win32)
Set-Cookie: PHPSESSID=ea0d2673811ed069e7289d86933a4c0a; path=/poly/sessions/2
Expires: Thu, 19 Nov 1981 08:52:00 GMT
Cache-Control: no-store, no-cache, must-revalidate, post-check=0, pre-check=0
Pragma: no-cache
Connection: close
Content-Type: text/html

<html>
        <head>
        <title>Gestion de sessions</title>
  </head>
  <body>
        <h3>Cycle de vie d'a PHP session</h3>
    <hr>
    <br>ID session : ea0d2673811ed069e7289d86933a4c0a    <br>compteur : 0
    <br><a href="cycledevie.php?action=invalider&PHPSESSID=ea0d2673811ed069e7289d86933a4c0a">Invalid
er la session</a>
    <br><a href="cycledevie.php?PHPSESSID=ea0d2673811ed069e7289d86933a4c0a">Recharger la page</a>
  </body>
</html>
The attentive reader will have noticed that the server's response differs depending on the client program used. In the first case, the server sent a HTTP header: Transfer-Encoding: chunked, a header that was not sent in the second case. This is because the second client sent the header HTTP: get URL HTTP/1.0, which requests a URL and indicates that it is using the HTTP version 1.0 protocol, forcing the server to respond using that same protocol. However, the HTTP Transfer-Encoding: chunked header belongs to the HTTP version 1.1 protocol. Therefore, the server did not use it in its response. This shows us that the first client made its request indicating that it was working with the HTTP version 1.1 protocol.
We now create the program clientCompteur, which is called as follows:
clientCompteur URL N [JSESSIONID]
- URL: url from the cycledevie application
- N: number of calls to make to this application
- PHPSESSID: optional parameter - session token
The purpose of the program is to call the cycledevie.php application N times, managing the session cookie and displaying the counter value returned by the server each time. At the end of the N calls, the counter value must be N-1. Here is a first example of execution:
dos>"e:\php43\php.exe" clientCompteur2.php http://localhost/poly/sessions/2/cycledevie.php 3
--> GET /poly/sessions/2/cycledevie.php HTTP/1.1
--> Host: localhost:80
--> Connection: close
-->
<-- HTTP/1.1 200 OK
<-- Date: Thu, 10 Oct 2002 06:27:48 GMT
<-- Server: Apache/1.3.24 (Win32)
<-- Set-Cookie: PHPSESSID=2425e00d1d65c2bdcbafc1ce6244f7ea; path=/poly/sessions/2
<-- Expires: Thu, 19 Nov 1981 08:52:00 GMT
<-- Cache-Control: no-store, no-cache, must-revalidate, post-check=0, pre-check=0
<-- Pragma: no-cache
<-- Connection: close
<-- Transfer-Encoding: chunked
<-- Content-Type: text/html
<--

[Le compteur est égal à 0]

--> GET /poly/sessions/2/cycledevie.php HTTP/1.1
--> Host: localhost:80
--> Connection: close
--> Cookie: PHPSESSID=2425e00d1d65c2bdcbafc1ce6244f7ea
-->
<-- HTTP/1.1 200 OK
<-- Date: Thu, 10 Oct 2002 06:27:48 GMT
<-- Server: Apache/1.3.24 (Win32)
<-- Expires: Thu, 19 Nov 1981 08:52:00 GMT
<-- Cache-Control: no-store, no-cache, must-revalidate, post-check=0, pre-check=0
<-- Pragma: no-cache
<-- Connection: close
<-- Transfer-Encoding: chunked
<-- Content-Type: text/html
<--

[Le compteur est égal à 1]

--> GET /poly/sessions/2/cycledevie.php HTTP/1.1
--> Host: localhost:80
--> Connection: close
--> Cookie: PHPSESSID=2425e00d1d65c2bdcbafc1ce6244f7ea
-->
<-- HTTP/1.1 200 OK
<-- Date: Thu, 10 Oct 2002 06:27:48 GMT
<-- Server: Apache/1.3.24 (Win32)
<-- Expires: Thu, 19 Nov 1981 08:52:00 GMT
<-- Cache-Control: no-store, no-cache, must-revalidate, post-check=0, pre-check=0
<-- Pragma: no-cache
<-- Connection: close
<-- Transfer-Encoding: chunked
<-- Content-Type: text/html
<--

[Le compteur est égal à 2]
The program displays:
- the headers HTTP that it sends to the server in the form --> entêteEnvoyé
- the headers HTTP, which it receives in the form <-- entêteReçu
- the counter value after each call
We can see that during the first call:
- the client does not send a cookie
- the server sends one (Set-Cookie:)
For subsequent requests:
- the client systematically sends back the cookie it received from the server during the first request. This is what allows the server to recognize it and increment its counter.
- the server, for its part, no longer sends a cookie
We rerun the previous program by passing the token above as the third parameter:
dos>"e:\php43\php.exe" clientCompteur2.php http://localhost/poly/sessions/2/cycledevie.php 1 2425e00d1d65c2bdcbafc1ce6244f7ea

--> GET /poly/sessions/2/cycledevie.php HTTP/1.1
--> Host: localhost:80
--> Connection: close
--> Cookie: PHPSESSID=2425e00d1d65c2bdcbafc1ce6244f7ea
-->
<-- HTTP/1.1 200 OK
<-- Date: Thu, 10 Oct 2002 06:32:03 GMT
<-- Server: Apache/1.3.24 (Win32)
<-- Expires: Thu, 19 Nov 1981 08:52:00 GMT
<-- Cache-Control: no-store, no-cache, must-revalidate, post-check=0, pre-check=0
<-- Pragma: no-cache
<-- Connection: close
<-- Transfer-Encoding: chunked
<-- Content-Type: text/html
<--

[Le compteur est égal à 3]
Here we see that as soon as the client makes its first request, the server receives a valid session cookie. This may point to a potential security vulnerability. If I am able to intercept a session token on the network, I can then impersonate the user who initiated the session. In our example, the first request (without a session token) represents the user who initiates the session (perhaps with a username and password that grant them the right to a token), and the second request (with a session token) represents the user who has "hacked" the session token from the first request. If the current operation is a banking transaction, this could become problematic...
The client code is as follows:
<?php

     // syntax: $0 URL N [PHPSESSID]
   // you need three arguments
  if($argc!=3 && $argc!=4){
       // error msg
    fputs(STDERR,"Syntaxe : $argv[0] URL N [PHPSESSID]");
    // stop
    exit(1);
  }//if

   // parameter recovery
  $URL=$argv[1];
  $N=$argv[2];
  $PHPSESSID=$argv[3];

  // connection and result display
  $résultats=getURL($URL,$N,$PHPSESSID);
  if(isset($résultats->erreur)){
       // error
    echo "L'erreur suivante s'est produite : $résultats->erreur\n";
  }

   // end
  exit(0);

  //-----------------------------------------------------------------------
  function getURL($URL,$N,$PHPSESSID){

       // connects to URL
     // does a GET or a HEAD depending on the header value
     // the server response forms the result of the

     // analysis of URL
    $url=parse_url($URL);
     // the protocol
    if(strtolower($url["scheme"])!="http"){
        $résultats->erreur="l'URL [$URL] n'est pas au format http://machine[:port][/chemin]";
      return $résultats;
    }//if
     // the machine
    $hote=$url["host"];
    if(! isset($hote)){
        $résultats->erreur="l'URL [$URL] n'est pas au format http://machine[:port][/chemin]";
      return $résultats;
    }//if
     // the port
    $port=$url["port"];
    if(! isset($port)) $port=80;
     // the way
    $chemin=$url["path"];
     // the request
    if(isset($url["query"])){
        $résultats->erreur="l'URL [$URL] n'est pas au format http://machine[:port][/chemin]";
      return $résultats;
    }//if

         // verification of $N
    if (! preg_match("/^\d+$/",$N)){
        // error
      $résultats->erreur="nombre [$N] erroné";
       // end
      return $résultats;
    }//if

     // we make $N calls to $URL
    for($i=0;$i<$N;$i++){
      // open a connection on the $port port of $hote
      $connexion=fsockopen($hote,$port,&$errno,&$erreur);
       // return if error
      if(! $connexion){
        $résultats->erreur="Echec de la connexion au site ($hote,$port) : $erreur";
        return $résultats;
      }//if

       // $connexion represents a bidirectional communication flow
       // between the client (this program) and the contacted web server
       // this channel is used for the exchange of orders and information
       // the dialog protocol is HTTP

       // the client sends HTTP headers
      // get URL HTTP/1.1
      envoie($connexion, "GET $chemin HTTP/1.1\n");
       // host: host:port
      envoie($connexion, "Host: $hote:$port\n");
       // Connection: close
      envoie($connexion, "Connection: close\n");
       // Cookie: $PHPSESSID
      if($PHPSESSID) envoie($connexion, "Cookie: PHPSESSID=$PHPSESSID\n");
       // blank line
      envoie($connexion,"\n");

       // the server will now respond on channel $connexion. It will send all
       // then close the channel.
       // The client begins by reading HTTP headers terminated by an empty line
      $CHUNKED=0;
      while(($ligne=fgets($connexion,10000)) && (($ligne=rtrim($ligne))!="")){
           // echo line
        echo "<-- $ligne\n";
         // search for the token if you haven't found it yet
        if(! $PHPSESSID){
             // search for set-cookie line
          if(preg_match("/^Set-Cookie: PHPSESSID=(.*?);/i",$ligne,$champs)){
              // you have found the token - you memorize it
            $PHPSESSID=$champs[1];
          }//if
        }//if
        // search for document transfer mode
        if(! $CHUNKED){
             // search for Transfer-Encoding line: chunked
          if(preg_match("/^Transfer-Encoding: chunked/i",$ligne,$champs)){
              // piecewise transfer
            $CHUNKED=1;
          }//if
        }//if
      }//next line

       // echo line
      echo "<-- $ligne\n";

       // reading the document depends on how it was sent
      if($CHUNKED) $document=getChunkedDoc($connexion);
          else $document=getDoc($connexion);

       // search for counter in document
      if(preg_match("/<br>compteur : (\d+)/i",$document,$champs)){
           // counter found - displayed
        echo "\n[Le compteur est égal à $champs[1]]\n\n";
      }//if

       // the customer closes the connection
      fclose($connexion);
    }//for i
    }//getURL

  //--------------------------
  function getDoc($connexion){
      // reading the document on $connexion
    $doc="";
    while($ligne=fread($connexion,10000))
        $doc.=$ligne;
     // end
    return $doc;
  }//getDoc

  //--------------------------
  function getChunkedDoc($connexion){
       // reading the document on $connexion
     // this document is sent in pieces as
     // number of song characters in hexadecimal
     // next part
         // blank line

     // read the size of the piece in the 1st line
    $taille=hexdec(rtrim(fgets($connexion,10000)));
     // we read the following document
    $doc="";
    while($taille!=0){
         // playback piece of $taille characters
      $doc.=fread($connexion,$taille);
       // blank line
      fgets($connexion,10000);
       // next track
       // we read the size of the piece
      $taille=hexdec(rtrim(fgets($connexion,10000)));
    }//while
     // it's over
    return $doc;
  }// getChunkedDoc

  //--------------------------
  function envoie($flux,$msg){
       // sends $msg to $flux
    fwrite($flux,$msg);
     // echo screen
    echo "--> $msg";
  }//send
?>
Let's break down the key points of this program:
- We need to perform N client-server exchanges. That is why they are in a loop
- For each exchange, the client opens a TCP-IP connection with the server. Once the connection is established, it sends the HTTP headers of its request to the server:
<?php
...
       // the client sends HTTP headers
      // get URL HTTP/1.1
      envoie($connexion, "GET $chemin HTTP/1.1\n");
       // host: host:port
      envoie($connexion, "Host: $hote:$port\n");
       // Connection: close
      envoie($connexion, "Connection: close\n");
       // Cookie: $PHPSESSID
      if($PHPSESSID) envoie($connexion, "Cookie: PHPSESSID=$PHPSESSID\n");
       // blank line
      envoie($connexion,"\n");
If the PHPSESSID token is available, it is sent as a cookie; otherwise, it is not. Note that the client indicated it was using the HTTP/1.1 protocol. This explains why, later on, the server will send it the HTTP header: Transfer-Encoding: chunked, which belongs to the HTTP/1.1 protocol but not to the HTTP/1.0 protocol.
- Once its request is sent, the client waits for the server’s response. It begins by examining the HTTP headers in this response. It searches within it for two lines:
The Cookie: line is the HTTP header that contains the PHPSESSID session token. The client must retrieve it to send it back to the server during the next exchange. The Transfer-Encoding: chunked line, if present, indicates that the server will send a document in chunks. Each chunk is then sent to the client in the following format:
If the Transfer-Encoding: chunked line is not present, the document is sent in a single chunk following the blank line in the HTTP headers. Therefore, depending on whether this line is present or not, the way the document is received will differ. The code for processing the HTTP headers is as follows:
<?php
...
       // The client begins by reading HTTP headers terminated by an empty line
      $CHUNKED=0;
      while(($ligne=fgets($connexion,10000)) && (($ligne=rtrim($ligne))!="")){
           // echo line
        echo "<-- $ligne\n";
         // search for the token if you haven't found it yet
        if(! $PHPSESSID){
             // search for set-cookie line
          if(preg_match("/^Set-Cookie: PHPSESSID=(.*?);/i",$ligne,$champs)){
              // the token is found - it is memorized
            $PHPSESSID=$champs[1];
          }//if
        }//if
        // search for document transfer mode
        if(! $CHUNKED){
             // search for Transfer-Encoding line: chunked
          if(preg_match("/^Transfer-Encoding: chunked/i",$ligne,$champs)){
              // piecewise transfer
            $CHUNKED=1;
          }//if
        }//if
      }//next line
- Once the token has been found for the first time, it will no longer be searched for in subsequent calls to the server. Once the HTTP headers in the response have been processed, we move on to the document following the HTTP headers. This is read differently depending on its transfer mode:
<?php
...

       // reading the document depends on how it was sent
      if($CHUNKED) $document=getChunkedDoc($connexion);
          else $document=getDoc($connexion);
- In the received $document document, we search for the line that contains the counter value. This search is also performed using a regular expression:
<?php
...
       // search for counter in document
      if(preg_match("/<br>compteur : (\d+)/i",$document,$champs)){
           // counter found - displayed
        echo "\n[Le compteur est égal à $champs[1]]\n\n";
      }//if
- If the server sends the document all at once, receiving it is simple:
<?php
...

  //--------------------------
  function getDoc($connexion){
       // reading the document on $connexion
    $doc="";
    while($ligne=fgets($connexion,10000))
        $doc.=$ligne;
     // end
    return $doc;
  }//getDoc
- If the server sends the document in multiple chunks, reading it is more complex:
<?php
...
  function getChunkedDoc($connexion){
       // reading the document on $connexion
     // this document is sent in pieces as
     // number of song characters in hexadecimal
     // next part

     // read the size of the piece in the 1st line
    $taille=hexdec(rtrim(fgets($connexion,10000)));
     // we read the following document
    $doc="";
    while($taille!=0){
         // playback piece of $taille characters
      $doc.=fread($connexion,$taille);
       // blank line
      fgets($connexion,10000);
       // next track
       // we read the size of the piece
      $taille=hexdec(rtrim(fgets($connexion,10000)));
    }//while
     // it's over
    return $doc;
  }// getChunkedDoc
Remember that a document chunk is sent in the form
We therefore start by reading the document size. Once this is known, we ask the fread function to read $taille characters from the stream $connexion, followed by the empty line that comes next. We repeat this until the server sends the information that it is sending a document of size 0.
3.10.5. Example 4
In the previous example, the web client returns the token as a cookie. We saw that it could also return it within the requested URL itself in the form URL;PHPSESSID=xxx. Let’s verify this. The clientCompteur.php program is transformed into clientCompteur2.php and modified as follows:
<?php
...
....
       // the client sends HTTP headers
      // get URL HTTP/1.1
      if($PHPSESSID)
          envoie($connexion, "GET $chemin?PHPSESSID=$PHPSESSID HTTP/1.1\n");
        else envoie($connexion, "GET $chemin HTTP/1.1\n");
       // host: host:port
      envoie($connexion, "Host: $hote:$port\n");
       // Connection: close
      envoie($connexion, "Connection: close\n");
       // blank line
      envoie($connexion,"\n");
....
The client therefore requests the URL from the meter via GET URL;PHPSESSID=xx HTTP/1.1 and no longer sends a cookie. This is the only change. Here are the results of an initial call:
dos>"e:\php43\php.exe" clientCompteur2.php http://localhost/poly/sessions/2/cycledevie.php 2

--> GET /poly/sessions/2/cycledevie.php HTTP/1.1
--> Host: localhost:80
--> Connection: close
-->
<-- HTTP/1.1 200 OK
<-- Date: Thu, 10 Oct 2002 07:21:19 GMT
<-- Server: Apache/1.3.24 (Win32)
<-- Set-Cookie: PHPSESSID=573212ba82303d7903caf8944ee7a86f; path=/poly/sessions/2
<-- Expires: Thu, 19 Nov 1981 08:52:00 GMT
<-- Cache-Control: no-store, no-cache, must-revalidate, post-check=0, pre-check=0
<-- Pragma: no-cache
<-- Connection: close
<-- Transfer-Encoding: chunked
<-- Content-Type: text/html
<--

[Le compteur est égal à 0]

--> GET /poly/sessions/2/cycledevie.php?PHPSESSID=573212ba82303d7903caf8944ee7a86f HTTP/1.1
--> Host: localhost:80
--> Connection: close
-->
<-- HTTP/1.1 200 OK
<-- Date: Thu, 10 Oct 2002 07:21:19 GMT
<-- Server: Apache/1.3.24 (Win32)
<-- Expires: Thu, 19 Nov 1981 08:52:00 GMT
<-- Cache-Control: no-store, no-cache, must-revalidate, post-check=0, pre-check=0
<-- Pragma: no-cache
<-- Connection: close
<-- Transfer-Encoding: chunked
<-- Content-Type: text/html
<--

[Le compteur est égal à 1]
During the first request, the client requests URL without a session token. The server responds by sending the token. The client then re-requests the same URL, appending the received token to it. We can see that the counter has indeed been incremented, proving that the server correctly recognized that this was the same session.
3.10.6. Example 5
This example shows an application consisting of three pages, which we will call page1, page2, and page3. The user must access them in this order:
- page1 is a form requesting information: a name
- page2 is a form received in response to submitting the form on page1. It requests a second piece of information: an age
- page3 is a document named HTML that displays the name obtained from page1 and the age obtained from page2.
There are three client-server exchanges:
- In the first exchange, the page1 form is requested by the client and sent by the server
- In the second exchange, the client sends the page1 form (name) to the server. It receives the page2 form in return, or the page1 form again if it was incorrect.
- In the third exchange, the client sends the page2 form (age) to the server. It receives the page3 form in return, or the page2 form again if it was incorrect. The page3 document displays the name and age. The name was obtained by the server during the second exchange and has since been "forgotten." A session is used to store the name during exchange 2 so that it is available during exchange 3.
The page1 page obtained during the first exchange is as follows:
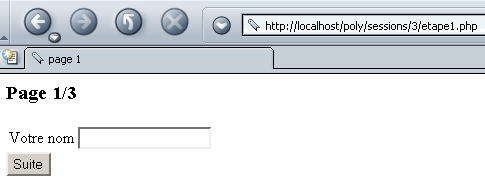
Fill in the name field:
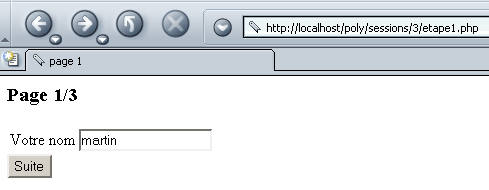
We use the [Suite] button and then get the following page2:
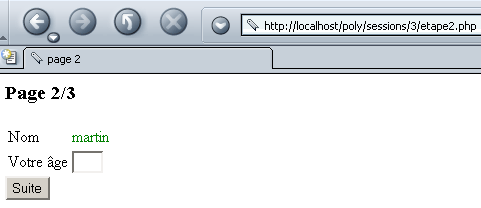
We fill in the age field:
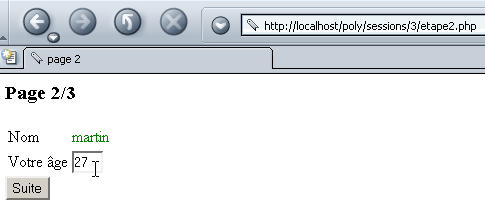
We use the [Suite] button and obtain the following page3:
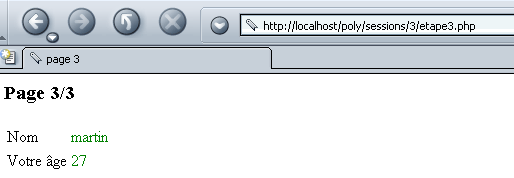
When page1 is submitted to the server, the server may return it with an error code if the name field is empty:
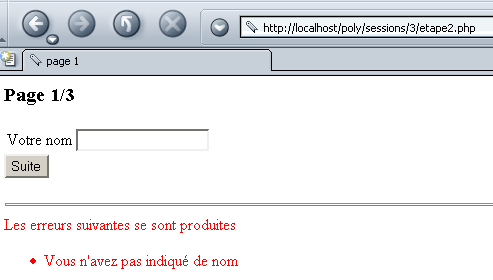
When you submit page2 to the server, the server may return it with an error code if the age is invalid:
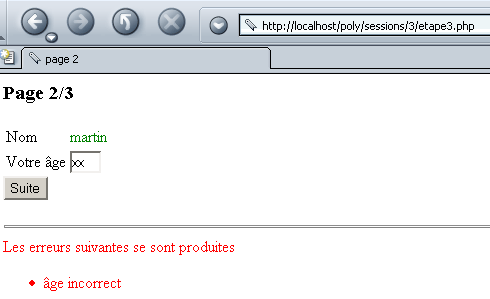
The application consists of six programs:
calls page1.php | |
displays page1. The form on page1 is processed by etape2.php. | |
processes the values from the page1 form. If there are errors, page1 is re-displayed by page1.php; otherwise, page2 is displayed by page2.php. | |
displays page2. The form on page2 is processed by etape3.php. | |
processes the values from the page2 form. If there are errors, page2 is re-displayed via page2.php; otherwise, page3 is displayed via page3.php. | |
displays page3. |
Step 1 of the application is handled by the following program: etape1.php:
<?php
   // etape1.php

   // configuration
  ini_set("register_globals","off");
  ini_set("display_errors","off");

  // session start
  session_start();
  $_SESSION["session"]="";    //raz variable session

   // preparation page1
    $requête->nom="";
  $requête->erreurs=array();
   // display page1
    include "page1.php";
   // end
  exit(0);
?>
Note the following points:
- The application requires session tracking. Therefore, each step of the process starts a session.
- The session information to be retained will be stored in an object named $session.
- The information required to display the application’s three pages will be placed in an object named $requête.
The program page1.php displays the information contained in $requête:
<? // page1.php ?>

<html>
  <head>
    <title>page 1</title>
  </head>
  <body>
    <h3>Page 1/3</h3>
    <form name="frmNom" method="POST" action="etape2.php">
      <table>
        <tr>
          <td>Votre nom</td>
          <td><input type="text" name="nom" value="<? echo $requête->nom ?>"></td>
        </tr>
      </table>
      <input type="submit" value="Suite">
    </form>
    <? // mistakes?
      if (count($requête->erreurs)!=0){
    ?>
      <hr>
      <font color="red">
        Les erreurs suivantes se sont produites
        <ul>
        <? for($i=0;$i<count($requête->erreurs);$i++){ ?>
            <li><? echo $requête->erreurs[$i] ?>
        <? }//for ?>
        </ul>
     <? }//if ?>
  </body>
</html>
- The page receives a $requête object containing two fields: name and errors. It displays the values of these two fields.
- It also displays a form. The values from this form (name) are sent via the POST method to the program etape2.php:
The application etape2.php is responsible for processing the values from the form on page1 and re-displaying page1 if there are errors (incorrect name); otherwise, it displays page2 to obtain the age.
<?php
   // etape2.php

   // configuration
  ini_set("register_globals","off");
  ini_set("display_errors","off");

  // session start
  session_start();

   // normally, you should have a name parameter
   // saved in the query
  $requête->nom=$_POST["nom"];

   // if no parameters, page1 is sent without errors
  if (! isset($requête->nom)){
      $requête->nom="";
    $requête->erreurs=array();
    include "page1.php";
    exit(0);
  }//if

  // if the name parameter is present - check its validity
  $page=calculerPage($requête);

   // were there any errors?
  if(count($page->erreurs)!=0){
     // page 1 with errors
    $requête->erreurs=$page->erreurs;
    include "page1.php";
    exit(0);
  }//if

  // no error - name stored in session
  unset($session);
  $session->nom=$requête->nom;
  $_SESSION["session"]=$session;

   // display page 2
  $requête->age="";
  $requête->erreurs=array();
  include "page2.php";

   // end
  exit(0);

   // ---------calculerPage
  function calculerPage($requête){
     // checks the validity of the $requête request
     // returns an array of errors in $page->errors

     // at the start, no mistakes
    $page->erreurs=array();
     // the name must not be empty
    if (preg_match("/^\s*$/",$requête->nom)){
      $page->erreurs[]="Vous n'avez pas indiqué de nom";
    }
     // back to page
    return $page;
  }//calculerPage
?>
- Step 2 begins by verifying that it has the expected "name" parameter. If not, it redisplays an empty page1. This scenario is possible if Step 2 is called directly by a client that does not pass any parameters to it.
- If the "name" parameter is present, its validity is checked. This is done via a procedure called calculerPage, whose role is to produce a $page object with an "errors" field that is an array of errors. Only a single error is possible, but we wanted to demonstrate that we could handle a list of errors.
- If there are errors, page1 is redisplayed along with the list of errors.
- If there are no errors, the name is stored in the $session object, which stores data related to the current session. Then page2 is displayed.
The program page2.php displays page2:
<? // page2.php ?>

<html>
  <head>
    <title>page 2</title>
  </head>
  <body>
    <h3>Page 2/3</h3>
    <form name="frmAge" method="POST" action="etape3.php">
      <table>
        <tr>
          <td>Nom</td>
          <td><font color="green"><? echo $requête->nom ?></font></td>
        </tr>
        <tr>
          <td>Votre âge</td>
          <td><input type="text" name="age" size="3" value="<? echo $requête->age ?>"></td>
        </tr>
      </table>
      <input type="submit" value="Suite">
    </form>
    <? // mistakes?
      if (count($requête->erreurs)!=0){
    ?>
      <hr>
      <font color="red">
        Les erreurs suivantes se sont produites
        <ul>
        <? for($i=0;$i<count($requête->erreurs);$i++){
            echo "<li>".$requête->erreurs[$i];
           }//for
        ?>
        </ul>
      </font>
     <? } ?>
  </body>
</html>
The concept behind this page is very similar to that of page2.php. It displays the contents of a $requête object containing the fields name, age, and errors. It displays a form whose values will be processed by etape3.php.
The program etape3.php therefore processes the values from the page2 form, reduced here to age:
<?php
   // etape3.php

   // configuration
  ini_set("register_globals","off");
  ini_set("display_errors","off");

  // session start
  session_start();

   // retrieve name and age parameters
  $requête->age=$_POST["age"];
  $session=$_SESSION["session"];
  $requête->nom=$session->nom;

   // normally, you must have a name and age
  if (! isset($requête->age) || ! isset($requête->nom)){
     // if wrong call, send page1
    $_SESSION["session"]="";    // as a precaution
    $requête->nom="";
    $requête->erreurs=array();
    include "page1.php";
    exit(0);
  }//if

  // the age parameter is present - check its validity
  $page=calculerPage($requête);

   // were there any errors?
  if(count($page->erreurs)!=0){
     // page 2 with errors
    $requête->erreurs=$page->erreurs;
    include "page2.php";
    exit(0);
  }//if

  // no errors - age stored in session
  $session->age=$requête->age;
  $_SESSION["session"]=$session;

   // display page 3
  include "page3.php";
   // end
  exit(0);

   // ---------calculerPage
  function calculerPage($requête){
     // checks the validity of the $requête request
     // returns an array of errors in $page->errors

     // at the start, no mistakes
    $page->erreurs=array();
     // age must have a valid format
    if (! preg_match("/^\s*\d{1,3}\s*$/",$requête->age)){
      $page->erreurs[]="âge incorrect";
    }
     // back to page
    return $page;
  }//calculerPage
?>
- The program begins by retrieving the name from the session (from page1) and the age from the form on page2. If either piece of information is missing, page1 is displayed.
- The age is then validated. If the age is incorrect, page2 is re-displayed with a list of errors. If the age is correct, page3 is displayed. This page simply displays the two values (name, age) obtained from the two forms (page1, page2).