4. 视图及其模板
到目前为止,动作都是自己生成响应:文本、JSON,以及用字符串写成的少量 HTML 标签。在 MVC 应用程序中,这是 视图的职责:一个描述 HTML 页面的文件,其中为动作传给它的数据——即 视图的模型——预留了占位符。[Spring MVC] 本身不提供视图语言:它可以与多种 视图引擎 ([Thymeleaf]、[FreeMarker]、[Mustache]、[JSP] 等)配合使用。本课程使用 [Thymeleaf],它是与 [Spring MVC] 搭配使用最广泛的视图引擎,[Spring Boot] 可以自行对其进行配置。
[Thymeleaf] 视图是一个标准的 [.html] 文件:一个有效的 HTML 文件,可以直接在浏览器中打开。数据通过以 属性 为前缀的额外 [th:] ([th:text]、[th:if]、[th:each] 等)插入其中,[Thymeleaf] 在服务器上执行这些属性,然后把它们从页面中移除。这就是 [Thymeleaf] 所说的 自然模板 ([natural templates]):平面设计师无需启动应用程序就可以处理视图,开发人员再向其中添加 [th:] 属性。这与 [Razor]([ASP.NET Core MVC] 的视图引擎)不同,后者把 HTML 和以字符 [C#] 代码混合在一起,代码之前要加上字符 [@]。
4.1. 示例 13:第一个视图
要使用 [Thymeleaf],只需在示例的 [pom.xml] 文件中添加一个依赖:
| <dependencies>
<!-- Thymeleaf 视图 -->
<dependency>
<groupId>org.springframework.boot</groupId>
<artifactId>spring-boot-starter-thymeleaf</artifactId>
</dependency>
</dependencies>
|
- 第 3–6 行:[spring-boot-starter-thymeleaf] starter。starter 是一个“一站式”依赖:它提供 [Thymeleaf]、它与 [Spring] 的集成([thymeleaf-spring6] 库),以及 [Spring Boot] 的自动配置,它把它们与 [Spring MVC] 连接起来。无需再写其他任何东西:没有版本(由父项目 [spring-boot-starter-parent] 设定),也没有配置类。
视图模型是一个简单的类。文件 [models/PageModel.java]:
| package example13.models;
// 视图的模型:操作传给视图的数据
public record PageModel(String title, String message, String time) {
}
|
- 第 4 行:record [Java] (见示例 03)是一个其字段由构造函数一次性设定的类:这里是三个字符串 [title]、[message] 和 [time]。编译器会自动生成构造函数以及为我们读取字段的 访问器 。注意:这些访问器以字段命名([title()]),而不是像名为 [getTitle()] 的 [JavaBean] 类那样(见示例 08)。这是编写一个单纯承载数据的类的简洁方式。
文件 [controllers/ViewsController.java]:
| package example13.controllers;
import java.time.LocalTime;
import java.time.format.DateTimeFormatter;
import java.util.Map;
import org.springframework.http.HttpStatus;
import org.springframework.stereotype.Controller;
import org.springframework.ui.Model;
import org.springframework.web.bind.annotation.GetMapping;
import org.springframework.web.bind.annotation.PathVariable;
import org.springframework.web.servlet.ModelAndView;
import example13.models.PageModel;
// @Controller:操作返回视图的名称
@Controller
public class ViewsController {
private static final DateTimeFormatter TIME = DateTimeFormatter.ofPattern("HH:mm:ss");
// Model:视图的模型,由操作填充的字典;
// 返回的字符串是视图的名称:templates/views/index.html
@GetMapping("/")
public String index(Model model) {
PageModel pageModel = new PageModel(
"My first view",
"This page was built by Thymeleaf, on the server.",
LocalTime.now().format(TIME));
model.addAttribute("model", pageModel);
return "views/index";
}
// ModelAndView:将视图、其模型以及(如有需要)响应状态码放在同一个对象中
@GetMapping("/hello/{name}")
public ModelAndView hello(@PathVariable String name) {
if (name.equals("unknown")) {
return new ModelAndView("views/unknown", Map.of("name", name), HttpStatus.NOT_FOUND);
}
PageModel pageModel = new PageModel(
"Hello " + name,
"This time, the action built a ModelAndView object.",
LocalTime.now().format(TIME));
return new ModelAndView("views/index", Map.of("model", pageModel));
}
}
|
我们来说明这段代码:
- 第 17 行:注解 [@Controller] 取代了前面示例中的注解 [@RestController] 。使用 [@RestController] 时,动作返回的 就是 响应(文本、JSON)。使用 [@Controller] 时,返回字符串的动作返回的是 视图名称:由视图来生成响应;
- 第 25 行:动作接收一个类型为 [Model] 的参数,由 [Spring MVC] 提供。这就是视图模型:一个字典,其中每个条目(一个 属性)把一个名称与一个对象关联起来;
- 第 26–30 行:动作创建一个 [PageModel] 对象(一个标题、一条消息、当前时间),并以名称 [model] 把它存入模型。视图将用这个名称取回它;
- 第 31 行:动作返回视图的名称 [views/index]。它不再创建响应;它只是指向一个视图,并已准备好该视图的数据;
- 第 36 行:动作 [hello] 返回一个 [ModelAndView] 对象,它把视图名称和它的模型合并为一个对象。这是编写使用视图的动作的另一种方式;
- 第 38 行:当视图取决于请求时,由动作选择视图。这里,名称 [unknown] 显示视图 [views/unknown],状态码为 404:[ModelAndView] 构造函数的第三个参数是响应码。该视图的模型只包含一个简单的字符串:所请求的名称。[Map.of(...)] 创建一个只读字典;
- 第 44 行:这两个动作共用同一个视图 [views/index],但模型不同。
[Spring MVC] 到哪里去找视图 [views/index]呢?它把视图名称交给一个 视图解析器 ([ViewResolver]),由它把名称转换为具体的视图。[Spring Boot] 为 [Thymeleaf] 配置的那个解析器([ThymeleafViewResolver])会添加一个 前缀 [classpath:/templates/] 和一个 后缀 [.html]:视图 [views/index] 就是 [templates/views/index.html] 文件,位于 类路径中——也就是 [Java] 虚拟机查找应用程序的类和资源的文件夹与归档文件。项目的 [src/main/resources] 文件夹是其中的一部分:它的内容由 [Maven] 复制到 [target/classes],与编译后的类放在一起。这两个值可以在 [application.properties] 中修改(属性 [spring.thymeleaf.prefix] 和 [spring.thymeleaf.suffix])。与 [ASP.NET Core MVC] 不同,这里没有根据控制器和动作的名称推导视图名称的约定:动作总是指定视图的路径,相对于 [templates] 文件夹。项目文件如下:
| 13-first-view/
├── src/
│ └── main/
│ ├── java/
│ │ └── example13/
│ │ ├── controllers/
│ │ │ └── ViewsController.java
│ │ ├── models/
│ │ │ └── PageModel.java
│ │ └── Example13Application.java
│ └── resources/
│ ├── templates/
│ │ └── views/
│ │ ├── index.html
│ │ └── unknown.html
│ └── application.properties
└── pom.xml
|
文件 [templates/views/index.html]:
| <!doctype html>
<!--/* xmlns:th:声明 th:... 属性的命名空间(对编辑器有用) */-->
<html lang="en" xmlns:th="http://www.thymeleaf.org">
<head>
<meta charset="utf-8">
<title th:text="${model.title}">Page title</title>
</head>
<body>
<h1 th:text="${model.title}">Page title</h1>
<p th:text="${model.message}">A message.</p>
<p>Page built at <span th:text="${model.time}">12:00:00</span>.</p>
</body>
</html>
|
我们来说明这段代码:
- 第 2 行:[Thymeleaf] 注释写作 [<!--/* ... */-->]。这是一个 HTML 注释,其内容由 [/*] 和 [*/] 括起来:[Thymeleaf] 会把它从渲染出的页面中移除,而普通的 HTML 注释([<!-- -->]) 则会被发送给浏览器;
- 第 3 行:[xmlns:th] 属性声明 [th:] 属性的命名空间。它仅供代码编辑器使用(自动补全、验证):即使没有它,[Thymeleaf] 也会处理 [th:] 属性,并把它从生成的页面中移除;
- 第 6 行:属性 [th:text] 用表达式的值替换标签的 内容。[${model.title}] 是一个 变量表达式:[model] 是由动作设置的模型属性,[.title] 调用它的访问器 [title()]。写在标签内部的文本“Page Title”只是一个示例,在直接用浏览器打开文件时显示;它会从生成的页面中消失;
- 第 9–11 行:标题、消息和时间遵循相同的原则。要在一段文本中间插入一个值,请把它包在 [<span>] 标签中,该标签带有属性 [th:text]。
[${...}] 表达式使用 [Spring] 表达式语言 [SpEL] ([Spring Expression Language])编写。[model.title] 对 [getTitle()] 方法 [JavaBean] 调用,或者对 record 的 [title()] 方法调用:两种情况下写的代码相同。
[Thymeleaf] 视图不会随应用程序一起编译:它是在请求页面时才被读取和解释的。因此,视图中的错误不会在编译时报告,而是在页面显示时才报告。如果你在视图中写入 [${model.titl}] ,请求就会失败(状态码 500),服务器控制台会显示:[Property or field 'titl' cannot be found on object of type 'example13.models.PageModel']。同样,与任何文件都不对应的视图名称会导致错误 [Error resolving template [views/missing], template might not exist or might not be accessible by any of the configured Template Resolvers]。在 http://localhost:5000/ 得到的结果:
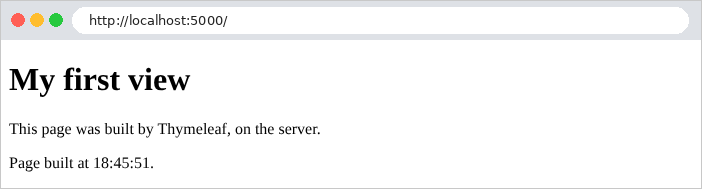
浏览器收到的页面的源代码中,不再有任何 [Thymeleaf] 的痕迹:
| curl http://localhost:5000/
|
| <!doctype html>
<html lang="en">
<head>
<meta charset="utf-8">
<title>My first view</title>
</head>
<body>
<h1>My first view</h1>
<p>This page was built by Thymeleaf, on the server.</p>
<p>Page built at <span>18:53:46</span>.</p>
</body>
</html>
|
请注意:
- [th:text] 属性已经消失,被模型中的值所取代,[xmlns:th] 属性也是如此;
- [Thymeleaf] 注释已经消失,但留下了一个空行;
- 带重音的字符(如果有的话;这个英文页面没有)会原样写出([é]、[è]……): [Thymeleaf] 只对在 HTML 中有特殊含义的字符进行转义([<]、[>]、[&]、["]、['])。[Razor] 则默认会对带重音的字符进行编码([è] 代表 [è]),这迫使 [ASP.NET Core MVC] 课程去修改一项设置;这里没有这样的要求。
URL http://localhost:5000/hello/martin 使用另一个模型显示同一个视图:
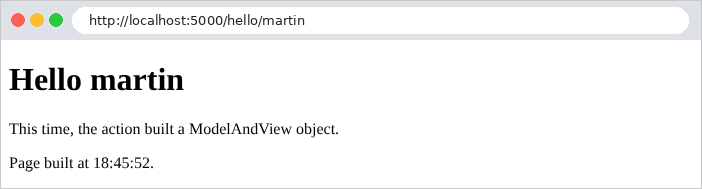
如果文本中包含撇号,这个页面的 HTML 代码会把它显示为 [']:这是被 [th:text] 转义的字符之一。URL http://localhost:5000/hello/unknown 显示另一个视图:
| curl -i http://localhost:5000/hello/unknown
|
| HTTP/1.1 404
Content-Type: text/html;charset=UTF-8
<!doctype html>
<html lang="en">
<head>
<meta charset="utf-8">
<title>Unknown</title>
</head>
<body>
<h1>Nobody is called [unknown] here.</h1>
</body>
</html>
|
该响应确实带有由 [ModelAndView] 对象设定的 404 状态码([Tomcat] 只发送状态码,不发送其标签 [Not Found])。[templates/views/unknown.html] 文件:
| <!doctype html>
<html lang="en" xmlns:th="http://www.thymeleaf.org">
<head>
<meta charset="utf-8">
<title>Unknown</title>
</head>
<body>
<!--/* |...|:其中的 ${...} 表达式会被替换的文本 */-->
<h1 th:text="|Nobody is called [${name}] here.|">Nobody is called [xx] here.</h1>
</body>
</html>
|
- 第 9 行:由两个竖线 [|...|] 括起来的文本是一个 字面量替换:它所包含的表达式 [${...}] 会被替换为其值。这比一连串的 [<span>] 更易读。[${name}] 是模型的 [name] 属性,是一个简单的字符串。
4.2. 示例 14:Thymeleaf 语言
[Thymeleaf] 视图不包含任何 [Java] 代码:一切都通过 [th:] 属性及其包含的表达式来处理。然而它包含条件、循环、局部变量和方法调用。这种能力需要自律:视图必须仅仅是排版元素;计算和决策属于动作和服务。示例 14 概述了这套语法。模型,文件 [models/BasicsModel.java]:
| package example14.models;
import java.math.BigDecimal;
import java.util.List;
public record BasicsModel(
String title,
String name,
String nickname,
String html,
boolean loggedIn,
String currency,
List<Product> products,
List<Product> cart,
Address address) {
public record Product(String name, BigDecimal price, boolean inStock) {
}
public record Address(String street, String city) {
}
}
|
- 第 6–15 行:模型是一个 record:几个字符串、一个布尔值、两个产品列表和一个地址;
- 第 17–21 行:两个 record 嵌套 在第一个 record 之内:[BasicsModel.Product] 和 [BasicsModel.Address]。价格是一个 [BigDecimal];这个 [Java] 类型表示精确的十进制数([double] 无法精确表示 [0.1])。
文件 [controllers/BasicsController.java]:
| package example14.controllers;
import java.math.BigDecimal;
import java.util.List;
import org.springframework.stereotype.Controller;
import org.springframework.ui.Model;
import org.springframework.web.bind.annotation.GetMapping;
import example14.models.BasicsModel;
import example14.models.BasicsModel.Address;
import example14.models.BasicsModel.Product;
@Controller
public class BasicsController {
@GetMapping("/")
public String index(Model model) {
BasicsModel basicsModel = new BasicsModel(
"Thymeleaf basics",
"Martin",
null,
"<b>this is HTML</b>",
true,
"€",
List.of(
new Product("Keyboard", new BigDecimal("25"), true),
new Product("Mouse", new BigDecimal("12.5"), false),
new Product("Screen", new BigDecimal("149"), true)),
List.of(),
new Address("12 rue des Lilas", "Angers"));
model.addAttribute("model", basicsModel);
return "basics/index";
}
}
|
- 第 19–31 行:动作填充模型:几个字符串、一个布尔值、一个包含三个产品的列表、一个空购物车和一个地址。昵称(第 22 行)被有意设为 [null]。[List.of(...)] 创建一个只读列表;[List.of()] 创建一个空列表。
视图,文件 [templates/basics/index.html]:
| <!doctype html>
<html lang="en" xmlns:th="http://www.thymeleaf.org">
<head>
<meta charset="utf-8">
<title th:text="${model.title}">Title</title>
</head>
<!--/* th:with:局部变量,可在该标签及其后代中使用 */-->
<body th:with="total=${#aggregates.sum(model.products.![price])}, count=${#lists.size(model.products)}">
<h1 th:text="${model.title}">Title</h1>
<!--/* 1. 显示模型的一个值;null 不显示任何内容。这条 Thymeleaf
comment does not appear in the produced page */-->
<p>1. Name: <span th:text="${model.name}">name</span> - nickname: [<span th:text="${model.nickname}">nickname</span>]</p>
<!--/* 2. th:text 会转义 HTML,th:utext 则原样插入 */-->
<p>2a. <span th:text="${model.html}">html</span></p>
<p>2b. <span th:utext="${model.html}">html</span></p>
<!--/* 3. 条件:th:if 在条件为真时显示该标签,th:unless 在条件为假时显示 */-->
<p th:if="${model.loggedIn}">3. You are logged in.</p>
<p th:unless="${model.loggedIn}">3. You are not logged in.</p>
<!--/* 4. 循环:带有 th:each 的标签会被重复;stat:循环的状态 */-->
<p>4. Our products:</p>
<ul>
<li th:each="product, stat : ${model.products}">no. [[${stat.index}]]: [[${product.name}]], [[${product.price}]] [[${model.currency}]]
<span th:text="${product.inStock} ? '(in stock)' : '(sold out)'">(in stock)</span>
<th:block th:if="${stat.first}">- the first one</th:block>
<th:block th:if="${stat.last}">- the last one, seen by [[${model.name}]]</th:block>
</li>
</ul>
<!--/* 5. 空列表 */-->
<p>5. Your cart:
<th:block th:if="${#lists.isEmpty(model.cart)}">it is empty.</th:block>
<span th:each="p : ${model.cart}" th:text="${p.name}">product</span>
</p>
<!--/* 6. 计算表达式、th:with 变量,以及一个工具对象(#numbers) */-->
<p th:text="|6. ${count} products, for a total of ${total} ${model.currency}; average price: ${#numbers.formatDecimal(total.doubleValue() / count, 1, 2)} ${model.currency}|">6.</p>
<p>7. Address: [[${model.address.street}]], [[${#strings.toUpperCase(model.address.city)}]]</p>
<p>8. An email address: contact@example.com</p>
</body>
</html>
|
我们来说明这段代码:
- 第 8 行:[th:with] 属性声明 局部变量 ,可以在包含它的标签及其所有子标签中使用——这里是 [total] 和 [count]——贯穿整个页面主体。[model.products.![price]] 是 [SpEL] 的投影:即产品价格列表。[#aggregates] 和 [#lists] 是 工具对象 ,属于 [Thymeleaf] (它们以 [#] 开头):[#aggregates.sum] 计算一个数字列表的和;[#lists.size] 统计列表中的元素个数;
- 第 10–11 行:一个 [Thymeleaf] 注释,它不会出现在生成的页面中;
- 第 12 行:值 [null] ([${model.nickname}])什么都不显示,也不会报错;
- 第 14–15 行:[th:text] 会对 HTML 中的特殊字符 进行转义([<] 变成 [<]……):文本按原样显示。[th:utext] ([unescaped text])不转义地插入它:它会被解释为 HTML。[th:utext] 只用于应用程序自己生成的 HTML,绝不用于用户输入的数据:用户可能会向页面注入 HTML,甚至是 [JavaScript](这种攻击称为 [XSS],即 [cross-site scripting]);
- 第 17–18 行:一个条件。如果表达式为真,[th:if] 就保留标签(及其内容),否则就移除它;[th:unless] 则相反。没有 [th:else]:我们写出相反的条件;
- 第 22 行:一个循环。属性 [th:each] 会对列表中的每一项重复包含它的标签——这里是 [<li>]——一次。[product] 是当前项;[stat] 是可选的,它是 迭代状态:[stat.index] (从 0 开始)、[stat.count] (从 1 开始)、[stat.size]、[stat.first]、[stat.last]、[stat.even]、[stat.odd]。在标签文本中,[[[${product.name}]]] 是一个 内联表达式:它像 [th:text] 一样插入经过转义的值,而不需要 [<span>] 标签(形式 [[(...)]] 则像 [th:utext] 一样不转义地插入);
- 第 23 行:条件运算符 [condition ? value1 : value2]。字面字符串写在单引号之间;
- 第 24–25 行:[th:block] 是 [Thymeleaf] 特有的标签:它只用来承载 [th:] 属性,并会从生成的页面中消失,只留下它的内容。[stat.first] 和 [stat.last] 检查在循环中的位置;
- 第 30–31 行:列表为空的情况。[#lists.isEmpty] 检查列表是否为空;对空列表执行 [th:each] 循环什么都不会产生;
- 第 34 行:一个使用 [|...|] 来自 [th:with] 的变量的字面量替换,以及两个方法调用:[total.doubleValue()] 把 [BigDecimal] 转换为 [double],而 [#numbers.formatDecimal(value, 1, 2)] 将数字格式化为小数点前至少一位、小数点后恰好两位;
- 第 35 行:指向 [model.address.street] 的引用,以及工具对象 [#strings],它汇集了字符串操作([toUpperCase]、[isEmpty]、[contains]、[startsWith] 等);
- 第 36 行:[Thymeleaf] 只处理 [th:] 属性和内联表达式 [[[...]]];文本的其余部分原样复制。字符 [@] 在这里没有特殊含义。
在 http://localhost:5000/ 得到的结果:
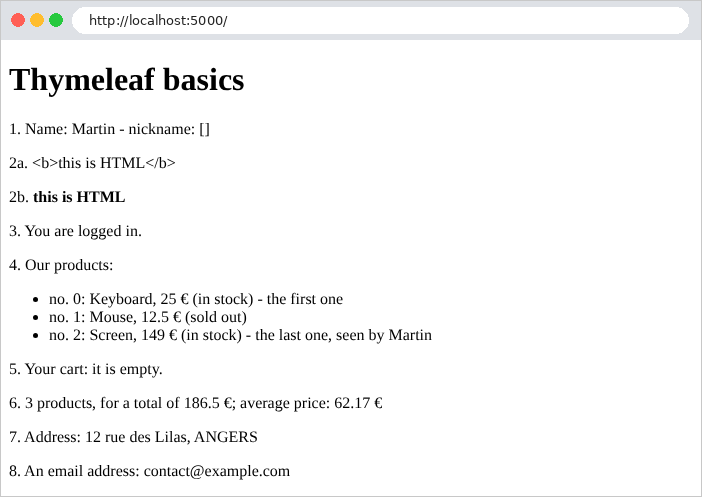
生成的 HTML 代码:
| curl http://localhost:5000/
|
| <!doctype html>
<html lang="en">
<head>
<meta charset="utf-8">
<title>Thymeleaf basics</title>
</head>
<body>
<h1>Thymeleaf basics</h1>
<p>1. Name: <span>Martin</span> - nickname: [<span></span>]</p>
<p>2a. <span><b>this is HTML</b></span></p>
<p>2b. <span><b>this is HTML</b></span></p>
<p>3. You are logged in.</p>
<p>4. Our products:</p>
<ul>
<li>no. 0: Keyboard, 25 €
<span>(in stock)</span>
- the first one
</li>
<li>no. 1: Mouse, 12.5 €
<span>(sold out)</span>
</li>
<li>no. 2: Screen, 149 €
<span>(in stock)</span>
- the last one, seen by Martin
</li>
</ul>
<p>5. Your cart:
it is empty.
</p>
<p>6. 3 products, for a total of 186.5 €; average price: 62.17 €</p>
<p>7. Address: 12 rue des Lilas, ANGERS</p>
<p>8. An email address: contact@example.com</p>
</body>
</html>
|
请注意:
- [th:block] 标签、[Thymeleaf] 注释,以及被 [th:if] / [th:unless] 移除的标签都会留下空行,但这些空行对显示没有影响;
- 平均价格对 [62.17] 来说是 [curl] ,而在浏览器中是 [62,17]。[#numbers.formatDecimal] 使用 请求的语言。默认情况下,[Spring MVC] 从浏览器发送的 HTTP [Accept-Language] 头中读取它:设置为法语的浏览器会发送 [Accept-Language: fr-FR] 并收到逗号;[curl] 不发送该头,此时使用的是服务器所在系统的语言(这里是英语;在设置为法语的计算机上,[curl] 也会收到逗号)。示例 16 和“国际化”一章会讨论这一机制;
- 价格本身([12.5])由 [toString] 方法生成,该方法属于 [BigDecimal],与语言无关。示例 16 会对它们进行格式化。
作为本示例的总结,下面是 [Thymeleaf] 中的五种表达式,它们将用于本章和下一章的示例:
表达式 | 作用 | 示例 |
[${...}] | 变量表达式([SpEL]):模型属性、属性值、方法调用、Bean([${@name...}])、工具对象([${#strings...}]) | 13, 14, 16 |
[*{...}] | 选择表达式:由属性 [th:object] 所指定对象的一个属性 | 18, 19, 21 |
[#{...}] | 消息:来自文件 [messages.properties] 的文本,使用请求的语言 | 下一章 |
[@{...}] | 链接:一个 URL,带有它的变量和参数 | 16, 21 |
[~{...}] | 片段:页面中要被插入的一部分 | 15 至 21 |
工具对象有很多:[#strings]、[#numbers]、[#lists]、[#aggregates]、[#dates]([java.util.Date] 日期)、[#temporals] ([java.time] 日期:[LocalDate]、[LocalDateTime] 等)、[#locale] (请求的语言)、[#ids],以及 [#fields] (表单,示例 18 和 19)等。[Thymeleaf] 的文档(https://www.thymeleaf.org)对它们都有说明。
4.3. 示例 15:模板、片段、静态文件
网站的各个页面共用一个公共模板(页眉、导航栏、页脚)。对于 [Thymeleaf],可复用的页面组成部分是 片段;而模板本身也是一个片段,每个页面把自己的内容插入其中。最后,页面还需要 静态文件(样式表、图片、脚本),它们按原样提供,不经过控制器。示例中的文件:
| 15-layout/
├── src/
│ └── main/
│ ├── java/
│ │ └── example15/
│ │ ├── config/
│ │ │ ├── CommonModel.java
│ │ │ └── WebConfig.java
│ │ ├── controllers/
│ │ │ └── PagesController.java
│ │ └── Example15Application.java
│ └── resources/
│ ├── static/
│ │ └── css/
│ │ └── styles.css
│ ├── templates/
│ │ ├── fragments/
│ │ │ ├── card.html
│ │ │ └── navbar.html
│ │ ├── pages/
│ │ │ ├── home.html
│ │ │ ├── raw.html
│ │ │ └── team.html
│ │ └── layout.html
│ └── application.properties
└── pom.xml
|
4.3.1. 静态文件
[Spring Boot] 无需控制器,自动提供来自 [static] 资源文件夹的文件:文件 [src/main/resources/static/css/styles.css] 通过 URL [/css/styles.css] 提供。如果没有文件与 URL 匹配,也没有动作处理它,响应就是 404。我们来验证一下:
| curl -i http://localhost:5000/css/styles.css
|
| HTTP/1.1 200
Last-Modified: Fri, 25 Sep 2026 16:02:53 GMT
Accept-Ranges: bytes
Content-Type: text/css
Content-Length: 430
/* a few settings on top of Bootstrap */
body {
background-color: #f5f7fa;
}
/* the footer of the layout */
.footer {
margin-top: 2rem;
font-size: 0.85rem;
color: #6c757d;
}
/* the error messages, at the bottom of the page, on a light pink background */
.error-area {
margin-top: 1.5rem;
padding: 0.75rem 1rem;
background-color: #fdecef;
border: 1px solid #f5c2c7;
border-radius: 0.375rem;
color: #842029;
}
|
[Last-Modified] 头给出文件的修改日期:浏览器会在请求该文件时带回这个日期,只有文件发生变化时才重新获取。
CSS 框架 [Bootstrap] 对所有示例是通用的:它只存放一份,位于示例资源之外的 [examples/common/bootstrap] 文件夹中。因此你必须告诉 [Spring MVC] 到哪里去找它。[config/WebConfig.java] 文件:
| package example15.config;
import org.springframework.context.annotation.Configuration;
import org.springframework.web.servlet.config.annotation.ResourceHandlerRegistry;
import org.springframework.web.servlet.config.annotation.WebMvcConfigurer;
// Spring MVC 的配置,已作补充
@Configuration
public class WebConfig implements WebMvcConfigurer {
// 各示例共享的 Bootstrap:examples/common/bootstrap 文件夹
// 通过 URL /bootstrap/... 提供
@Override
public void addResourceHandlers(ResourceHandlerRegistry registry) {
registry.addResourceHandler("/bootstrap/**")
// "file:":磁盘上的一个文件夹,相对于当前文件夹。尝试
// 两次:从示例所在文件夹启动,或从 [examples] 启动
.addResourceLocations("file:../common/bootstrap/", "file:common/bootstrap/");
}
}
|
我们来说明这段代码:
- 第 8 行:一个配置类(见示例 06);
- 第 9 行:[WebMvcConfigurer] 接口允许我们 补充由 [Spring MVC] [Spring Boot] 创建的配置,而不替换它:我们只重新定义我们感兴趣的方法(其他方法都有默认的空实现);
- 第 14–19 行:[addResourceHandlers] 方法声明静态文件目录。以 [/bootstrap/] 开头的 URL 文件(第 15 行;[**] 表示任意的目录和文件序列)从 [common/bootstrap] 目录提供;
- 第 18 行:前缀 [file:] 表示磁盘上的一个文件夹(不在类路径中)。路径相对于当前目录——即启动应用程序时所在的目录:如果从示例目录启动,则为 [../common/bootstrap/] ,如果从 [common/bootstrap/] 目录启动,则为 [examples]。两个位置会依次检查。因此,[examples/common/bootstrap/css/bootstrap.min.css] 通过 URL [/bootstrap/css/bootstrap.min.css] 提供。而案例研究则把 [Bootstrap] 放在它自己的文件夹 [static] 中。
下面所有的示例都使用这个文件:[WebConfig.java]。
4.3.2. 模板
文件 [templates/layout.html]:
| <!doctype html>
<!--/* 页面布局:一个带有两个参数的片段,即页面的标题和
page and its content (itself a fragment, provided by the page) */-->
<html lang="en" xmlns:th="http://www.thymeleaf.org" th:fragment="page(title, content)">
<head>
<meta charset="utf-8">
<meta name="viewport" content="width=device-width, initial-scale=1">
<title th:text="|${title} - My site|">My site</title>
<link rel="stylesheet" href="/bootstrap/css/bootstrap.min.css">
<link rel="stylesheet" href="/css/styles.css">
</head>
<body>
<div class="container py-3">
<!--/* 插入 fragments/navbar.html 文件中的 [navbar] 片段 */-->
<nav th:replace="~{fragments/navbar :: navbar}"></nav>
<!--/* 操作所请求页面的内容插入在此处 */-->
<main th:replace="${content}"></main>
<!--/* path:添加到所有视图的模型中(参见 config/CommonModel.java) */-->
<footer class="footer" th:text="|Page [${path}] - © ${#dates.year(#dates.createNow())}|">footer</footer>
</div>
</body>
</html>
|
我们来剖析这段代码:
- 第 4 行:[th:fragment] 属性把 [<html>] 标签——也就是整个页面——变成一个名为 片段 的 [page],它需要两个 参数:[title] 和 [content]。应用程序的页面将调用这个片段,并把自己的标题和内容传给它;
- 第 8 行:参数 [title] 被用作模板属性;
- 第 9–10 行:样式表,作为静态文件提供;
- 第 15 行:属性 [th:replace] 用一个片段 替换包含它的标签(这里是 [<nav>])。[~{fragments/navbar :: navbar}] 是一个 片段表达式:来自文件 [navbar] 片段 [templates/fragments/navbar.html] (在 [::] 的左边是视图名称,右边是片段名称);
- 第 17 行:页面内容(通过参数 [content] 接收)插入的位置;这个参数本身是一个片段,由 [th:replace] 插入到标签 [<main>] 的位置;
- 第 19 行:[path] 是所请求页面的路径。它不是片段的参数:它是由一个我们稍后会讨论的类添加到 所有 视图的模型中的属性。[#dates.createNow()] 是当前日期,而 [#dates.year] 从中提取年份。
还有第二个插入属性 [th:insert],它把片段 插入 宿主标签之内,而不是替换它。对于片段 [<span th:fragment="f">...</span>],写 [<div th:replace="~{:: f}"></div>] 会产生 [<span>...</span>],而 [<div th:insert="~{:: f}"></div>] 会产生 [<div><span>...</span></div>]([~{:: f}] 没有视图名称,指的是当前视图中的片段)。本课程的示例使用 [th:replace]。
文件 [templates/fragments/navbar.html]:
| <!--/* 片段文件:每个 th:fragment 标签都是一个可重用的页面片段 */-->
<nav class="navbar navbar-expand bg-light rounded mb-3 px-3" th:fragment="navbar">
<span class="navbar-brand">My site</span>
<div class="navbar-nav">
<a class="nav-link" href="/">Home</a>
<a class="nav-link" href="/team">Team</a>
<a class="nav-link" href="/raw">Page without layout</a>
</div>
</nav>
|
- 第 2 行:片段文件不是完整的页面;它包含一个或多个带有 [th:fragment] 属性的标签。这个片段没有参数。请注意,该文件没有声明 [xmlns:th] 命名空间;这并不是必需的。
文件 [templates/fragments/card.html]:
| <!--/* 一个 Bootstrap“卡片”;它的两个参数:姓名和角色 */-->
<div class="card" th:fragment="card(name, role)">
<div class="card-body">
<h5 class="card-title" th:text="${name}">Name</h5>
<p class="card-text" th:text="${role}">Role</p>
</div>
</div>
|
- 第 2 行:片段 [card] 有两个参数,一个名称和一个职能;
- 第 4–5 行:参数被用作模板属性。
4.3.3. 页面
文件 [controllers/PagesController.java]:
| package example15.controllers;
import java.util.List;
import org.springframework.stereotype.Controller;
import org.springframework.ui.Model;
import org.springframework.web.bind.annotation.GetMapping;
@Controller
public class PagesController {
// 团队成员
public record Member(String name, String role) {
}
@GetMapping("/")
public String home() {
return "pages/home";
}
@GetMapping("/team")
public String team(Model model) {
List<Member> members = List.of(
new Member("Marie Pélissier", "Director"),
new Member("Jacques Bromard", "Developer"),
new Member("Philippe Jandot", "Graphic designer"));
model.addAttribute("members", members);
return "pages/team";
}
@GetMapping("/raw")
public String raw() {
return "pages/raw";
}
}
|
- 第 13–14 行:团队成员的类型,一个在控制器中声明的 record([PagesController.Member]);
- 第 17–19 行:动作 [home] 没有模型;它不需要参数 [Model];
- 第 22–28 行:动作 [team] 传递一个成员列表。
文件 [templates/pages/home.html]:
| <!doctype html>
<!--/* 整个页面被布局中的 [page] 片段所替换,我们向它
pass the title and the [main] fragment of this page (~{::main}) */-->
<html xmlns:th="http://www.thymeleaf.org" th:replace="~{layout :: page('Home', ~{::main})}">
<body>
<main>
<h1>Welcome</h1>
<p>This page only contains its own content: the header, the navigation
bar and the footer come from the <code>layout.html</code> layout.</p>
<!--/* [card] 片段,其两个参数就地书写 */-->
<div th:replace="~{fragments/card :: card('A fragment', 'inserted with parameters written on the spot')}"></div>
</main>
</body>
</html>
|
我们来剖析这段代码:
- 第 4 行:[th:replace] 属性(属于 [<html>] 标签)用 整个页面 替换为来自 [page] 模板 [layout.html] 的片段。它向该片段传递两个参数:标题(一个括在单引号中的字面字符串)和内容 [~{::main}]。这个没有视图名称的片段表达式指的是 当前视图中的一个标签:这里是 [<main>] 标签(第 6–12 行)。这样就生成了模板,页面中的这个标签取代了模板自己的 [<main>] 标签;
- 第 11 行:对片段 [card] 的调用,两个参数已就位。
页面中不在 [<main>] 标签之内的任何内容(例如 [<body>] 标签)都会消失:只有传给模板的片段才有意义。包含 [<html>] 和 [<body>] 标签只是为了确保该文件仍然是可以在浏览器中打开的有效 HTML 页面。
[templates/pages/team.html] 文件:
| <!doctype html>
<html xmlns:th="http://www.thymeleaf.org" th:replace="~{layout :: page('Our team', ~{::main})}">
<body>
<main>
<h1>Our team</h1>
<div class="row g-3">
<div class="col-md-4" th:each="member : ${members}">
<!--/* 该片段接收当前成员的姓名和角色 */-->
<div th:replace="~{fragments/card :: card(${member.name}, ${member.role})}"></div>
</div>
</div>
</main>
</body>
</html>
|
- 第 7 行:[<div class="col-md-4">] 标签会为每个成员重复一次;
- 第 9 行:片段被赋予当前成员的姓名和职务:带有 [th:replace] 的标签嵌套在带有 [th:each] 的标签之内,变量 [member] 就是在那里定义的。
文件 [templates/pages/raw.html]:
| <!doctype html>
<!--/* 该视图不使用布局:它是一个完整的页面 */-->
<html lang="en">
<head>
<meta charset="utf-8">
<title>Raw page</title>
</head>
<body>
<p>This page does not use the layout: no Bootstrap, no navigation bar.</p>
<p><a href="/">Back to home</a></p>
</body>
</html>
|
- 第 3–11 行:这个视图不调用模板;它是一个没有 [th:] 属性的完整页面。[Thymeleaf] 按原样复制它(第 2 行的注释除外)。视图并非必须使用模板。
页面 http://localhost:5000/team 上的 HTML 代码显示了组装的结果:
| curl http://localhost:5000/team
|
| <!doctype html>
<html lang="en">
<head>
<meta charset="utf-8">
<meta name="viewport" content="width=device-width, initial-scale=1">
<title>Our team - My site</title>
<link rel="stylesheet" href="/bootstrap/css/bootstrap.min.css">
<link rel="stylesheet" href="/css/styles.css">
</head>
<body>
<div class="container py-3">
<nav class="navbar navbar-expand bg-light rounded mb-3 px-3">
<span class="navbar-brand">My site</span>
<div class="navbar-nav">
<a class="nav-link" href="/">Home</a>
<a class="nav-link" href="/team">Team</a>
<a class="nav-link" href="/raw">Page without layout</a>
</div>
</nav>
<main>
<h1>Our team</h1>
<div class="row g-3">
<div class="col-md-4">
<div class="card">
<div class="card-body">
<h5 class="card-title">Marie Pélissier</h5>
<p class="card-text">Director</p>
</div>
</div>
</div>
<div class="col-md-4">
<div class="card">
<div class="card-body">
<h5 class="card-title">Jacques Bromard</h5>
<p class="card-text">Developer</p>
</div>
</div>
</div>
<div class="col-md-4">
<div class="card">
<div class="card-body">
<h5 class="card-title">Philippe Jandot</h5>
<p class="card-text">Graphic designer</p>
</div>
</div>
</div>
</div>
</main>
<footer class="footer">Page [/team] - © 2026</footer>
</div>
</body>
</html>
|
标题、导航栏、三张卡片和页脚由四个文件组装而成:[layout.html]、[navbar.html]、[team.html] 和 [card.html]。
4.3.4. 所有视图共有的属性
模板的页脚显示所请求页面的路径 [path]。使用 [Razor] 时,视图可以直接访问当前请求。在 [Thymeleaf] 中,直到 3.0 版本为止,视图也可以做到这一点,使用 [#request] 对象:可以写成 [${#request.requestURI}]。从 3.1 版本起就不再如此。使用 [#request] 的视图会导致 500 错误,控制台显示:
| java.lang.IllegalArgumentException: The 'request','session','servletContext' and 'response' expression utility objects are no longer available by default for template expressions and their use is not recommended. In cases where they are really needed, they should be manually added as context variables.
|
对象 [#request]、[#session]、[#servletContext]、以及 [#response] 已被移除:它们允许视图读取任何查询参数,这会带来注入风险,并且把 [Thymeleaf] 与 Servlet 的 API 绑在了一起。写法 [${#ctx.request.requestURI}] 同样行不通:[#ctx.request] 等同于 [null]。错误消息给出了解决办法:把 视图所需的内容 添加到模型中。为了让它对所有视图生效,而不必让每个动作都去做,我们创建文件 [config/CommonModel.java]:
| package example15.config;
import org.springframework.web.bind.annotation.ControllerAdvice;
import org.springframework.web.bind.annotation.ModelAttribute;
import jakarta.servlet.http.HttpServletRequest;
// @ControllerAdvice:该类对应用的所有控制器进行补充
@ControllerAdvice
public class CommonModel {
// @ModelAttribute:在每个操作之前运行,该方法向所有视图的
// 模型添加 [path] 属性,即所请求页面的路径
@ModelAttribute("path")
public String path(HttpServletRequest request) {
return request.getRequestURI();
}
}
|
我们来说明这段代码:
- 第 9 行:注解 [@ControllerAdvice] 指定一个类,它 扩展应用程序中的所有控制器。它所声明的内容适用于每一个控制器,就像写在每个控制器中一样;
- 第 14 行:带有 [@ModelAttribute("path")] 注解的方法会 在每个动作之前执行;它的返回值以名称 [path] 添加到模型中。写在控制器中时,它作用于该控制器的各个动作(见示例 18);写在 [@ControllerAdvice] 类中时,它作用于应用程序中的所有动作;
- 第 15–16 行:该方法可以接受与动作相同的参数:这里是当前请求 [HttpServletRequest] (见示例 05)。[getRequestURI()] 返回所请求的路径,不含参数。
案例研究使用同样的做法(其文件 [web/CommonModel.java])向它的所有视图提供路径、语言和已登录的用户。
生成的页面,位于 URL http://localhost:5000/、 http://localhost:5000/team 和 http://localhost:5000/raw:
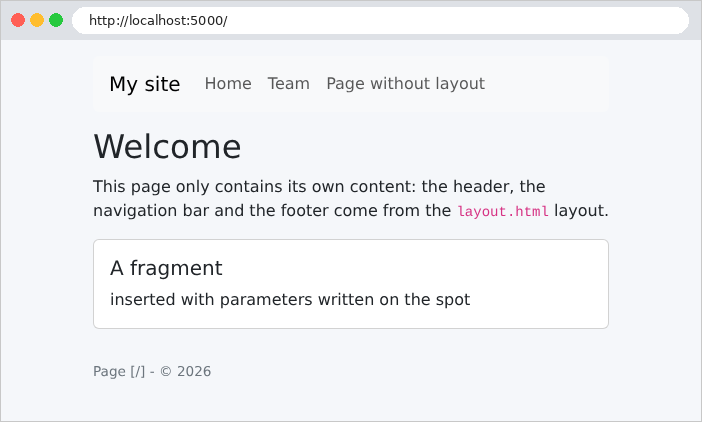
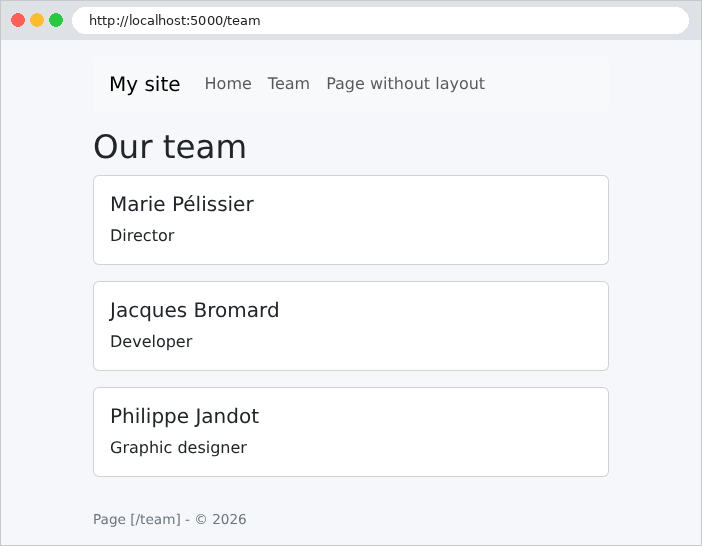

模板、片段以及公共属性 [path] 正是案例研究所使用的:一个 [layout.html] 模板,以及用于导航栏、消息和确认窗口的片段。
4.4. 示例 16:辅助函数
视图经常需要一些小的格式化函数:格式化日期或价格、把文本首字母大写、创建 HTML 徽章等等。这些就称为 辅助函数。在 [Thymeleaf] 中,它们是 [Spring] Bean 的方法,在表达式或片段中调用。[Thymeleaf] 还允许你创建自己的属性,并把它们归并为一个 方言。
4.4.1. 被视图调用的 Bean
[helpers/Formats.java] 文件:
| package example16.helpers;
import java.math.BigDecimal;
import java.text.NumberFormat;
import java.time.LocalDate;
import java.time.format.DateTimeFormatter;
import java.time.format.FormatStyle;
import java.util.Currency;
import java.util.Locale;
import org.springframework.context.i18n.LocaleContextHolder;
import org.springframework.stereotype.Component;
// @Component("formats"):一个名为 [formats] 的 Bean,视图通过
// ${@formats.money(...)} 调用它
@Component("formats")
public class Formats {
// "keyboard" -> "KEYBOARD";Locale.ROOT:结果不依赖于语言
public String uppercase(String text) {
return text == null ? "" : text.toUpperCase(Locale.ROOT);
}
// 以某种货币表示的金额,采用请求语言的格式
public String money(BigDecimal amount, String currency) {
// 当前请求的语言,由 LocaleResolver 设置(参见 WebConfig)
Locale language = LocaleContextHolder.getLocale();
NumberFormat format = NumberFormat.getCurrencyInstance(language);
format.setCurrency(Currency.getInstance(currency));
return format.format(amount);
}
// 同上,以欧元表示
public String money(BigDecimal amount) {
return money(amount, "EUR");
}
// 以完整文字表示的日期,使用请求的语言:"Friday, September 25, 2026"
public String date(LocalDate day) {
return day.format(DateTimeFormatter.ofLocalizedDate(FormatStyle.FULL).withLocale(LocaleContextHolder.getLocale()));
}
}
|
我们来说明这段代码:
- 第 16 行:注解 [@Component] 把该类变成一个 Bean:[Spring] 在启动时找到它(就像找到控制器一样),创建它的实例并保存它。["formats"] 是该 Bean 的名称:视图将用这个名称来调用它;
- 第 20–22 行:首字母大写。[Locale.ROOT] 使结果与用户的语言无关;
- 第 25–31 行:以某种货币表示的金额,按照 请求的语言格式化。[LocaleContextHolder.getLocale()] (第 27 行)获取这种语言,它是一个由 [Locale] 对象,由 [Spring MVC] 在每个请求开始时设置。[NumberFormat.getCurrencyInstance] 提供该语言的货币格式:小数分隔符、千位分隔符和货币符号的位置;[setCurrency] 选择货币,货币由其国际代码标识([EUR]、[USD]);
- 第 34–36 行:一个 重载 方法:名称相同,参数不同。如果没有指定货币,则默认为欧元;
- 第 39–41 行:以完整形式写出的日期([FormatStyle.FULL]),使用请求的语言。
页面 [templates/pages/products.html] 调用这些方法:
| <!doctype html>
<html xmlns:th="http://www.thymeleaf.org" th:replace="~{layout :: page('Products', ~{::main})}">
<body>
<main>
<h1>Products</h1>
<table class="table table-sm w-auto">
<thead><tr><th>Product</th><th>Price</th><th>Price in dollars</th><th>Stock</th></tr></thead>
<tbody>
<tr th:each="product : ${products}">
<td th:text="${@formats.uppercase(product.name)}">KEYBOARD</td>
<td th:text="${@formats.money(product.price)}">€25.00</td>
<td th:text="${@formats.money(product.price, 'USD')}">$25.00</td>
<!--/* [badge] 片段构建徽章的 HTML */-->
<td><span th:replace="~{fragments/badge :: badge(${product.stock})}">badge</span></td>
</tr>
</tbody>
</table>
</main>
</body>
</html>
|
- 第 10–12 行:在表达式 [${...}] 中,写法 [@formats] 指的是名为 Bean 的 [formats]:[${@formats.money(product.price)}] 调用它的方法 [money]。方法的返回值由 [th:text] 插入,因此会被转义;
- 第 14 行:徽章由一个片段创建,下面对它进行说明。
文件 [templates/fragments/badge.html]:
| <!--/* Bootstrap 徽章:商品有库存时为绿色,否则为红色。
A fragment is the Thymeleaf way of building a reusable piece of HTML */-->
<span class="badge" th:fragment="badge(stock)"
th:classappend="${stock > 0} ? 'text-bg-success' : 'text-bg-danger'"
th:text="${stock > 0} ? |${stock} in stock| : 'sold out'">12 in stock</span>
|
- 第 3 行:生成 HTML 的辅助函数在 [Thymeleaf] 中就是一个片段:这里是一个 [<span>] 标签,它接收产品的库存作为参数;
- 第 4 行:[th:classappend] 属性 向 标签现有的类([badge])添加一个 CSS 类:如果产品有库存则为绿色([text-bg-success]),否则为红色;
- 第 5 行:徽章文本,由 [th:text] 转义。与在字符串中生成 HTML 的辅助函数不同,片段不需要操心转义:[th:text] 会处理这件事。
控制器,文件 [controllers/PagesController.java]:
| package example16.controllers;
import java.math.BigDecimal;
import java.time.LocalDate;
import java.util.List;
import org.springframework.stereotype.Controller;
import org.springframework.ui.Model;
import org.springframework.web.bind.annotation.GetMapping;
@Controller
public class PagesController {
public record Product(String name, BigDecimal price, int stock) {
}
@GetMapping("/")
public String home(Model model) {
model.addAttribute("today", LocalDate.now());
return "pages/home";
}
@GetMapping("/products")
public String products(Model model) {
model.addAttribute("products", List.of(
new Product("keyboard", new BigDecimal("25"), 12),
new Product("mouse", new BigDecimal("12.5"), 0),
new Product("screen", new BigDecimal("1149.9"), 3)));
return "pages/products";
}
}
|
- 第 19 行:主页接收今天的日期,一个 [LocalDate] (不含时间的日期);
- 第 25–28 行:产品列表。
文件 [templates/pages/home.html]:
| <!doctype html>
<html xmlns:th="http://www.thymeleaf.org" th:replace="~{layout :: page('Home', ~{::main})}">
<body>
<main>
<h1>Home</h1>
<!--/* @formats:名为 [formats] 的 Bean;我们调用它的 date 方法 */-->
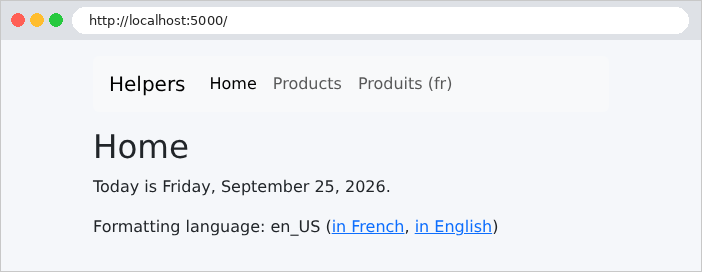
<p th:text="|Today is ${@formats.date(today)}.|">Today is...</p>
<!--/* #locale:请求的语言 */-->
<p>Formatting language: <span th:text="${#locale}">en_US</span>
(<a href="/?lang=fr">in French</a>, <a href="/">in English</a>)</p>
</main>
</body>
</html>
|
- 第 7 行:在字面量替换中,调用 [date] 方法,该方法属于 [formats] Bean;
- 第 9 行:工具对象 [#locale] 就是请求的语言。
4.4.2. 请求的语言
是什么决定了请求的语言?是 [Spring MVC] 的一个 Bean,即 语言解析器 ([LocaleResolver])。[Spring Boot] 默认安装的那个 [AcceptHeaderLocaleResolver],读取浏览器发送的 [Accept-Language] 头:这就是示例 14 中浏览器和 [curl] 得到不同结果的原因。为了便于测试两种语言,示例 16 用一个从 URL 中读取 [lang] 参数的解析器替换了它。[config/WebConfig.java] 文件:
| package example16.config;
import java.util.Locale;
import org.springframework.context.annotation.Bean;
import org.springframework.context.annotation.Configuration;
import org.springframework.web.servlet.LocaleResolver;
import org.springframework.web.servlet.config.annotation.ResourceHandlerRegistry;
import org.springframework.web.servlet.config.annotation.WebMvcConfigurer;
import example16.helpers.ActiveDialect;
import jakarta.servlet.http.HttpServletRequest;
import jakarta.servlet.http.HttpServletResponse;
// Spring MVC 的配置,已作补充
@Configuration
public class WebConfig implements WebMvcConfigurer {
// 各示例共享的 Bootstrap:examples/common/bootstrap 文件夹
// 通过 URL /bootstrap/... 提供
@Override
public void addResourceHandlers(ResourceHandlerRegistry registry) {
registry.addResourceHandler("/bootstrap/**")
// "file:":磁盘上的一个文件夹,相对于当前文件夹。尝试
// 两次:从示例所在文件夹启动,或从 [examples] 启动
.addResourceLocations("file:../common/bootstrap/", "file:common/bootstrap/");
}
// 我们的 Thymeleaf 方言(ex:active 属性),已添加到视图引擎中
@Bean
public ActiveDialect activeDialect() {
return new ActiveDialect();
}
// 每个请求的格式化语言:URL 的 ?lang=fr 参数,
// 否则为英语。该 Bean 必须命名为 [localeResolver]:Spring MVC
// 正是以这个名称查找它的。
@Bean
public LocaleResolver localeResolver() {
return new LanguageParameterResolver();
}
// LocaleResolver 设置每个请求的语言(Locale);Spring 将其存放
// 在 LocaleContextHolder 中,视图和辅助类可以在那里再次找到它
static class LanguageParameterResolver implements LocaleResolver {
@Override
public Locale resolveLocale(HttpServletRequest request) {
return "fr".equals(request.getParameter("lang")) ? Locale.FRANCE : Locale.US;
}
@Override
public void setLocale(HttpServletRequest request, HttpServletResponse response, Locale locale) {
throw new UnsupportedOperationException("the language is set by the URL");
}
}
}
|
我们来说明这段代码:
- 第 21–27 行:[Bootstrap] 文件,与示例 15 相同;
- 第 30–33 行:我们的 [Thymeleaf] 方言(下面会说明),被声明为 Bean。[Spring Boot] 会自动把所有作为方言的 Bean 添加到 [Thymeleaf] 引擎中;
- 第 38–41 行:我们的语言解析器。该 Bean 必须 命名为 [localeResolver]:[Spring MVC] 就是按这个名称来查找它的。名为 [@Bean] 的方法提供 Bean 的名称:[localeResolver()]。通过声明这个 Bean,我们替换了 [Spring Boot] 声明的那个;
- 第 45–56 行:解析器是一个实现 [LocaleResolver] 接口的嵌套类;
- 第 48–50 行:[resolveLocale] 方法在每个请求开始时被调用:如果 URL 包含 [lang=fr],它就返回法语([Locale.FRANCE]);否则返回美式英语([Locale.US])。[Spring MVC] 把这种语言存放在 [LocaleContextHolder] 中,[formats] Bean 和 [Thymeleaf] 的工具对象从那里取得它;
- 第 53–55 行:[setLocale] 方法本可以让语言 被更改(例如把它存放在 Cookie 中)。在这里,语言来自 URL:该方法通过抛出异常拒绝工作。
这是一种简单的测试方式;下一章将更全面地讨论它。
4.4.3. Thymeleaf 方言
导航栏会高亮当前页面的链接([active] CSS 类,属于 [Bootstrap])。文件 [templates/fragments/navbar.html] 展示了编写链接的三种方式:
| <!--/* xmlns:ex:我们方言的命名空间(仅对编辑器有用) */-->
<nav class="navbar navbar-expand bg-light rounded mb-3 px-3" th:fragment="navbar"
xmlns:th="http://www.thymeleaf.org" xmlns:ex="http://example16">
<span class="navbar-brand">Helpers</span>
<div class="navbar-nav">
<!--/* 1. 写在视图中的条件(path:参见 config/CommonModel.java) */-->
<a class="nav-link" th:classappend="${path == '/'} ? 'active'" href="/">Home</a>
<!--/* 2. 我们的方言:ex:active="..." 属性 */-->
<a class="nav-link" href="/products" ex:active="/products">Products</a>
<!--/* 3. 链接表达式 @{...}:Spring 构建 URL 及其参数 */-->
<a class="nav-link" th:href="@{/products(lang=fr)}">Produits (fr)</a>
</div>
</nav>
|
我们来剖析这段代码:
- 第 3 行:[xmlns:ex] 命名空间与 [xmlns:th] 一样,仅供编辑器使用;
- 第 7 行:高亮当前页面链接的第一种方式:写在视图中的条件,使用由 [path] 类提供的 [CommonModel] 属性(与示例 15 中的相同)。没有“else”子句时,条件运算符在条件为假时不产生任何内容,因此 [th:classappend] 不会添加任何类。这是案例研究中使用的方法;
- 第 9 行:第二种更简洁的方式:一个“自家”属性 [ex:active],由我们的方言提供;
- 第 11 行:一个 链接表达式 [@{...}]。[Spring] 生成 URL:括号中包含参数,这些参数会被添加到 URL 中([?lang=fr])。我们将在示例 21 中看到,它们也用于填充路径变量。当应用程序没有安装在服务器的根路径时,链接表达式还会在必要时添加应用程序的基础路径。
方言 是共用同一前缀的一组属性(或标签):[th:] 属性是 [Thymeleaf] 标准方言的属性。每个属性由一个 处理器处理。文件 [helpers/ActiveDialect.java]:
| package example16.helpers;
import java.util.Set;
import org.thymeleaf.dialect.AbstractProcessorDialect;
import org.thymeleaf.processor.IProcessor;
import org.thymeleaf.standard.StandardDialect;
// 一个 Thymeleaf 方言:一组“自制”属性,均以
// [ex:] 为前缀(ex:active="...")。它被声明为 Bean(参见 WebConfig),由 Spring Boot
// 自动添加到 Thymeleaf 引擎中。
public class ActiveDialect extends AbstractProcessorDialect {
public ActiveDialect() {
// 方言的名称、其属性的前缀、优先级(与 th: 属性相同)
super("Active", "ex", StandardDialect.PROCESSOR_PRECEDENCE);
}
// 方言的“处理器”:只有一个,用于 ex:active 属性
@Override
public Set<IProcessor> getProcessors(String prefix) {
return Set.of(new ActiveProcessor(prefix));
}
}
|
- 第 12 行:只提供处理器的方言派生自类 [AbstractProcessorDialect];
- 第 16 行:方言的名称、其属性的前缀([ex])以及它的优先级:与 [th:] 属性的优先级相同;
- 第 21–23 行:方言的处理器:只有一个,即 [ex:active] 属性的处理器。[Set.of(...)] 创建一个不可变集合。
文件 [helpers/ActiveProcessor.java]:
| package example16.helpers;
import org.thymeleaf.context.ITemplateContext;
import org.thymeleaf.context.IWebContext;
import org.thymeleaf.engine.AttributeName;
import org.thymeleaf.model.IProcessableElementTag;
import org.thymeleaf.processor.element.AbstractAttributeTagProcessor;
import org.thymeleaf.processor.element.IElementTagStructureHandler;
import org.thymeleaf.templatemode.TemplateMode;
// ex:active 属性的处理器:<a href="/products" ex:active="/products">
// 在当前页面位于该路径之下时获得 "active" 类
public class ActiveProcessor extends AbstractAttributeTagProcessor {
public ActiveProcessor(String prefix) {
// HTML;仅 <a> 标签;[ex:active] 属性;优先级;true:ex:active
// 属性会从生成的页面中移除
super(TemplateMode.HTML, prefix, "a", false, "active", true, 1000, true);
}
// 对每个带有 ex:active 属性的 <a> 标签调用
@Override
protected void doProcess(ITemplateContext context, IProcessableElementTag tag,
AttributeName attributeName, String value, IElementTagStructureHandler structure) {
// 页面的路径,从当前请求中读取
String path = context instanceof IWebContext web ? web.getExchange().getRequest().getRequestPath() : "";
boolean isActive = value.equals("/") ? path.equals("/") : path.startsWith(value);
if (isActive) {
// 我们把 "active" 类添加到标签的 class 属性中
String classes = tag.getAttributeValue("class");
structure.setAttribute("class", classes == null ? "active" : classes + " active");
}
}
}
|
我们来说明这段代码:
- 第 13 行:派生自 [AbstractAttributeTagProcessor] 类的属性处理器;
- 第 18 行:它的构造函数描述了它处理的对象:HTML 模式、方言前缀、仅限 [<a>] 标签、[active] 属性(带前缀:[ex:active])、一个优先级,以及 [true]:表示 [ex:active] 属性将从生成的页面中移除;
- 第 23–24 行:方法 [doProcess] 会对每个 [<a>] 标签(带有属性 [ex:active])调用。它接收视图上下文、标签和属性值;[structure] 对象允许修改标签;
- 第 26 行:处理器是 [Java] 代码,而不是视图表达式:它被授权读取当前请求。当视图为 Web 请求渲染时,上下文是一个 [IWebContext],它提供对 交换对象 (请求及其响应)的访问;[getRequestPath()] 返回所请求的路径。表达式 [context instanceof IWebContext web] 检查上下文的类型,并在合适时把它存入变量 [web];
- 第 27–32 行:如果页面路径以该属性值开头,就把类 [active] 添加到标签的 [class] 属性中。
在 URL [/products] 处的导航栏 HTML 代码:
| <nav class="navbar navbar-expand bg-light rounded mb-3 px-3" xmlns:ex="http://example16">
<span class="navbar-brand">Helpers</span>
<div class="navbar-nav">
<a class="nav-link" href="/">Home</a>
<a class="nav-link active" href="/products">Products</a>
<a class="nav-link" href="/products?lang=fr">Produits (fr)</a>
</div>
</nav>
|
“Products”链接被赋予了类 [active],并且属性 [ex:active] 被移除。链接表达式生成了 [/products?lang=fr]。请注意,[Thymeleaf] 移除了属性 [xmlns:th],但没有移除属性 [xmlns:ex]:它不认识后者。由于它只供编辑器使用,本来可以省略。
模板 [layout.html] 与示例 15 中的相同,只是没有页脚(并且页面标题以 [- Helpers] 结尾,而不是 [- My site])。生成的页面,先是英语(http://localhost:5000/、http://localhost:5000/products),然后是法语(http://localhost:5000/products?lang=fr):
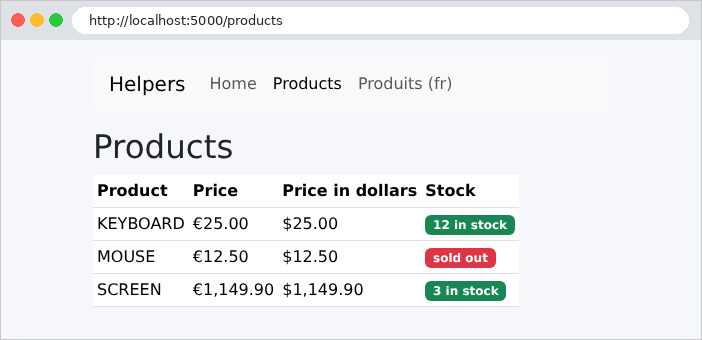
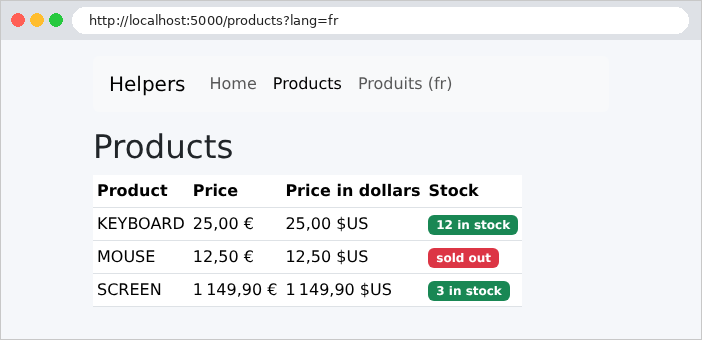
价格的格式随语言而变化:法语中是 [1 149,90 €] ,英语中是 [€1,149.90] 。在法语中,美元写作 [$US] ,以便与其他币种(加拿大元、澳大利亚元等)区分开。法语([/products?lang=fr])下表格的 HTML 代码:
| <tbody>
<tr>
<td>KEYBOARD</td>
<td>25,00 €</td>
<td>25,00 $US</td>
<td><span class="badge text-bg-success">12 in stock</span></td>
</tr>
<tr>
<td>MOUSE</td>
<td>12,50 €</td>
<td>12,50 $US</td>
<td><span class="badge text-bg-danger">sold out</span></td>
</tr>
<tr>
<td>SCREEN</td>
<td>1 149,90 €</td>
<td>1 149,90 $US</td>
<td><span class="badge text-bg-success">3 in stock</span></td>
</tr>
</tbody>
|
以及英语([/products])下的,其中美元直接写作 [$]:
| <tbody>
<tr>
<td>KEYBOARD</td>
<td>€25.00</td>
<td>$25.00</td>
<td><span class="badge text-bg-success">12 in stock</span></td>
</tr>
<tr>
<td>MOUSE</td>
<td>€12.50</td>
<td>$12.50</td>
<td><span class="badge text-bg-danger">sold out</span></td>
</tr>
<tr>
<td>SCREEN</td>
<td>€1,149.90</td>
<td>$1,149.90</td>
<td><span class="badge text-bg-success">3 in stock</span></td>
</tr>
</tbody>
|
只有金额发生了变化:徽章上的文本是硬编码在片段中的(下一章将翻译这些文本)。
4.5. 示例 17:GET 表单
通过 GET 方法发送的 HTML 表单会把它的字段放入 URL。这是搜索的合适方法:它不会修改任何内容,而且生成的 URL 可以被收藏或分享。案例研究用它来选择医生和日期。
文件 [models/Book.java] 和 [models/SearchModel.java] :
| package example17.models;
public record Book(String title, String author, String genre) {
}
|
| package example17.models;
import java.util.List;
// 视图模型:输入(用于重新显示)、类型、结果
public record SearchModel(String keyword, String genre, List<String> genres, List<Book> results) {
}
|
- 第 6 行:视图模型包含已输入的值([keyword]、[genre]),以便表单可以再次显示它们,同时还有体裁列表和结果。
文件 [controllers/BooksController.java]:
| package example17.controllers;
import java.util.List;
import java.util.Locale;
import org.springframework.stereotype.Controller;
import org.springframework.ui.Model;
import org.springframework.web.bind.annotation.GetMapping;
import org.springframework.web.bind.annotation.RequestParam;
import example17.models.Book;
import example17.models.SearchModel;
@Controller
public class BooksController {
private static final List<Book> BOOKS = List.of(
new Book("Le Rouge et le Noir", "Stendhal", "novel"),
new Book("Les Fleurs du mal", "Baudelaire", "poetry"),
new Book("Madame Bovary", "Flaubert", "novel"),
new Book("Alcools", "Apollinaire", "poetry"),
new Book("Le Cid", "Corneille", "drama"));
private static final List<String> GENRES = List.of("novel", "poetry", "drama");
// GET / 和 GET /search?keyword=...&genre=...:表单及其结果
@GetMapping({ "/", "/search" })
public String search(@RequestParam(required = false) String keyword,
@RequestParam(required = false) String genre, Model model) {
String word = keyword == null ? "" : keyword.trim().toLowerCase(Locale.ROOT);
List<Book> results = BOOKS.stream()
.filter(b -> word.isEmpty() || b.title().toLowerCase(Locale.ROOT).contains(word)
|| b.author().toLowerCase(Locale.ROOT).contains(word))
.filter(b -> genre == null || genre.isEmpty() || b.genre().equals(genre))
.toList();
model.addAttribute("model", new SearchModel(keyword == null ? "" : keyword,
genre == null ? "" : genre, GENRES, results));
return "books/search";
}
}
|
我们来剖析这段代码:
- 第 17–24 行:图书和体裁,保存在内存中;
- 第 27 行:同一个动作可以对应多个路径;它同时处理 [GET /] 和 [GET /search];
- 第 28–29 行:参数 [keyword] 和 [genre] 与 URL 中同名的参数关联(见示例 07)。[required = false] 使它们成为可选的:首次访问时,表单尚未提交,它们的值为 [null];
- 第 31–35 行:过滤,使用 流 ([stream])[Java] (见示例 06):[stream()] 遍历列表;每个 [filter] 只保留满足某个条件的图书;而 [toList()] 把选出的图书收集到一个新列表中。这些条件是 lambda 表达式:[b -> ...] 是一个接收图书 [b] 的匿名函数 并返回一个布尔值。空关键字或空体裁不做任何过滤;
- 第 36–37 行:视图模型。这里,[null] 被替换为空字符串。
[templates/layout.html] 模板被简化了:只有一个参数——页面内容——以及一个固定的标题:
| <!doctype html>
<html lang="en" xmlns:th="http://www.thymeleaf.org" th:fragment="page(content)">
<head>
<meta charset="utf-8">
<title>Books</title>
<link rel="stylesheet" href="/bootstrap/css/bootstrap.min.css">
<link rel="stylesheet" href="/css/styles.css">
</head>
<body>
<div class="container py-3">
<main th:replace="${content}"></main>
</div>
</body>
</html>
|
- 第 2 行:片段 [page] 现在只有一个参数 [content];
- 第 5 行:所有页面的标题都相同。
文件 [templates/books/search.html]:
| <!doctype html>
<html xmlns:th="http://www.thymeleaf.org" th:replace="~{layout :: page(~{::main})}">
<body>
<main>
<h1 class="h3">Book search</h1>
<!--/* method="get":字段通过 URL 发送(?keyword=...&genre=...) */-->
<form method="get" action="/search" class="row g-2 align-items-end mb-3">
<div class="col-auto">
<label class="form-label" for="keyword">Title or author</label>
<!--/* th:value:字段重新显示所输入的内容 */-->
<input class="form-control" id="keyword" name="keyword" th:value="${model.keyword}">
</div>
<div class="col-auto">
<label class="form-label" for="genre">Genre</label>
<select class="form-select" id="genre" name="genre">
<option value="">(all)</option>
<!--/* th:selected:布尔属性,条件为真时写出,否则省略 */-->
<option th:each="genre : ${model.genres}" th:value="${genre}" th:text="${genre}"
th:selected="${genre == model.genre}">novel</option>
</select>
</div>
<div class="col-auto">
<button class="btn btn-primary" type="submit">Search</button>
</div>
</form>
<p th:text="|${#lists.size(model.results)} book(s) found.|">0 book(s) found.</p>
<ul>
<li th:each="book : ${model.results}"><i th:text="${book.title}">Title</i>, [[${book.author}]] ([[${book.genre}]])</li>
</ul>
</main>
</body>
</html>
|
我们来剖析这段代码:
- 第 2 行:页面把它唯一的参数——[<main>] 标签——传给模板;
- 第 7 行:[method="get"] 和 [action="/search"]:提交表单就是一个 [GET /search?keyword=...&genre=...] 请求。参数名就是每个字段的 [name] 属性;
- 第 11 行:[th:value] 属性设置字段的 [value] 属性:它恢复已输入的值。一般来说,[th:xxx] 计算 HTML 属性 [xxx] 的值:[th:value]、[th:href]、[th:action]、[th:class]……
- 第 18–19 行:每个体裁一个选项。在同一个标签内,先处理 [th:each] ,然后是 [th:value] 和 [th:text],它们使用循环变量。[th:selected] 是一个 布尔属性:如果表达式为真,[Thymeleaf] 就写出 [selected="selected"];如果为假,则 根本不写这个属性。这正是 HTML 所要求的;对于这个属性,只要出现 [selected] 属性就足以选中该选项。[th:checked]、[th:disabled]、[th:required]、[th:readonly] 等也是如此;
- 第 26 行:结果的数量;
- 第 28 行:结果列表,带有一个 [<i>] 标签和两个内联表达式。
在执行诸如 [poetry] 这样的搜索之后,下拉列表的 HTML 代码:
| <select class="form-select" id="genre" name="genre">
<option value="">(all)</option>
<option value="novel">novel</option>
<option value="poetry" selected="selected">poetry</option>
<option value="drama">drama</option>
</select>
|
初始显示时(http://localhost:5000/),然后是搜索之后:
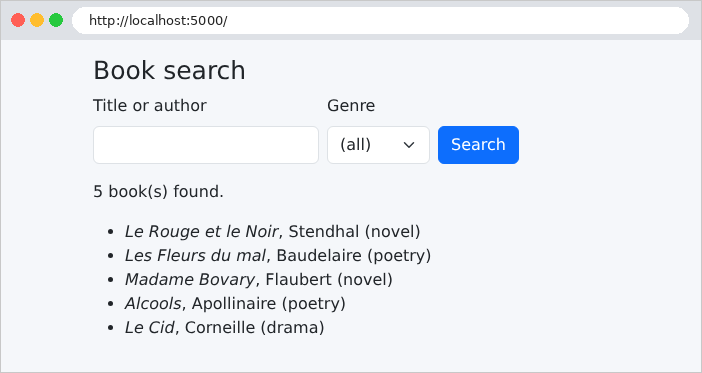
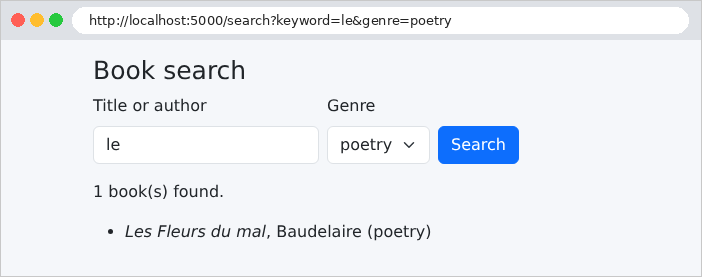
地址栏显示了所发送的参数。这里它们只包含普通字母;特殊字符会在其中被编码(例如带重音的 [é] 会变成 [%C3%A9]):这就是 URL 编码,[Spring MVC] 会在绑定参数之前对其解码。
4.6. 示例 18:表单字段
示例 18 汇集了所有类型的 HTML 字段:文本、密码、日期、单选按钮、复选框、下拉列表、多选列表、文本框和隐藏字段。它展示了服务器如何接收它们,以及视图如何显示它们。它还引入了 [th:field] 属性,该属性把表单字段与模型对象的属性关联起来。
文件 [services/ListsService.java]:
| package example18.services;
import java.util.List;
import org.springframework.stereotype.Service;
// 表单提供的列表。在真实的应用中,它们会
// 来自数据库:我们会在启动时只读取一次,
// 因为它们对所有用户都相同。
// @Service:一个 Bean(单例),与控制器一样由 Spring 发现
@Service
public class ListsService {
public record Country(String code, String name) {
}
public List<String> getTitles() {
return List.of("Mr", "Mme", "Melle");
}
public List<Country> getCountries() {
return List.of(new Country("fr", "France"), new Country("be", "Belgium"), new Country("ch", "Switzerland"),
new Country("ca", "Canada"));
}
public List<String> getHobbies() {
return List.of("reading", "music", "sport", "cinema");
}
public List<String> getLanguages() {
return List.of("French", "English", "Spanish", "German");
}
}
|
- 第 11 行:注解 [@Service] 使该类成为 Bean,就像 [@Component] (示例 16)一样:[Spring] 在启动时找到它并创建它的唯一实例,即 单例 (见示例 06),它可以被注入控制器。[@Service] 与 [@Component] 的区别仅在于它所表达的意图:该类是一个服务。表单所提供的列表对所有用户都是相同的:单例是存放它们的自然之处;
- 第 14–15 行:一个国家——包含代码和名称;
- 第 17–32 行:这些列表,由 [getXxx()] 方法返回。对视图来说,它们是该 Bean 的属性 [titles]、[countries]、[hobbies] 和 [languages] :[${lists.titles}] 会调用 [getTitles()]。
文件 [models/Input.java]:
| package example18.models;
import java.time.LocalDate;
import java.util.ArrayList;
import java.util.List;
import org.springframework.format.annotation.DateTimeFormat;
// 用户输入的内容:模型绑定用同名参数填充每个字段
// (列表会接收所有被勾选的值)
public class Input {
private String name;
private String password;
private String comment;
private String title;
private List<String> hobbies = new ArrayList<>();
private String country;
private List<String> languages = new ArrayList<>();
// <input type="date"> 字段以 ISO 格式发送日期:yyyy-mm-dd
@DateTimeFormat(iso = DateTimeFormat.ISO.DATE)
private LocalDate birthDate;
private String token;
public String getName() { return name; }
public void setName(String name) { this.name = name; }
public String getPassword() { return password; }
public void setPassword(String password) { this.password = password; }
public String getComment() { return comment; }
public void setComment(String comment) { this.comment = comment; }
public String getTitle() { return title; }
public void setTitle(String title) { this.title = title; }
public List<String> getHobbies() { return hobbies; }
public void setHobbies(List<String> hobbies) { this.hobbies = hobbies; }
public String getCountry() { return country; }
public void setCountry(String country) { this.country = country; }
public List<String> getLanguages() { return languages; }
public void setLanguages(List<String> languages) { this.languages = languages; }
public LocalDate getBirthDate() { return birthDate; }
public void setBirthDate(LocalDate birthDate) { this.birthDate = birthDate; }
public String getToken() { return token; }
public void setToken(String token) { this.token = token; }
}
|
我们来说明这段代码:
- 第 13–23 行:输入模型是一个 [JavaBean] 类(私有字段、无参构造函数,以及访问器 [getXxx] 和 [setXxx]),而不是 record:模型绑定先创建一个空对象,然后通过 setter [setXxx] 用同名参数填充每个属性;
- 第 17 行和第 19 行:复选框和多选列表是列表:它们接收所发送的所有值(见示例 10)。它们被初始化为空列表,绝不是 [null];
- 第 21–22 行:[<input type="date">] 字段以 [ISO 8601] [yyyy-mm-dd] 格式发送日期。注解 [@DateTimeFormat(iso = DateTimeFormat.ISO.DATE)] 向 [Spring] 指定这种格式,它在两个方向上都使用该格式:把收到的文本转换为 [LocalDate],以及把日期重新写入字段。
文件 [controllers/FormController.java]:
| package example18.controllers;
import java.util.List;
import java.util.Map;
import java.util.stream.Collectors;
import org.springframework.stereotype.Controller;
import org.springframework.ui.Model;
import org.springframework.web.bind.annotation.GetMapping;
import org.springframework.web.bind.annotation.ModelAttribute;
import org.springframework.web.bind.annotation.PostMapping;
import org.springframework.web.bind.annotation.RequestMapping;
import example18.models.Input;
import example18.services.ListsService;
import jakarta.servlet.http.HttpServletRequest;
@Controller
@RequestMapping("/form")
public class FormController {
private final ListsService lists;
public FormController(ListsService lists) {
this.lists = lists;
}
// 方法上的 @ModelAttribute:在该控制器的每个操作之前运行,
// 它把 [lists] 属性添加到模型中
@ModelAttribute("lists")
public ListsService lists() {
return lists;
}
// GET:带有初始值的表单
@GetMapping("")
public String display(Model model) {
Input initial = new Input();
initial.setTitle("Mme");
initial.setCountry("fr");
initial.setLanguages(List.of("French"));
initial.setToken("A7X2");
model.addAttribute("input", initial);
return "form/form";
}
// POST:模型绑定填充 [input],并以名称 "input"(其类名,首字母小写)
// 添加到模型中;我们再次显示它
@PostMapping("")
public String process(@ModelAttribute Input input, HttpServletRequest request, Model model) {
// 浏览器实际发送的内容,逐个参数列出
Map<String, String[]> parameters = request.getParameterMap();
String received = parameters.entrySet().stream()
.map(p -> p.getKey() + " = [" + String.join(", ", p.getValue()) + "]")
.collect(Collectors.joining("\n"));
model.addAttribute("received", received);
return "form/form";
}
}
|
我们来剖析这段代码:
- 第 22–26 行:列表服务通过构造函数注入(见示例 06);
- 第 30–33 行:在控制器中 [@ModelAttribute("lists")] 声明、带有该注解的方法 会在该控制器的每个动作之前 执行:两个动作都会在各自的模型中找到 [lists] 属性,而无需自己添加(对于应用程序中所有动作的情形,见示例 15 中的 [CommonModel]);
- 第 36–45 行:[GET /form] 显示带初始值的表单。该对象以名称 [input] 存放在模型中;
- 第 50 行:[POST /form] 接收用户输入。应用于 [@ModelAttribute] 参数 的注解,指示模型绑定根据查询参数创建对象(这是类类型参数的默认行为;见示例 08),并 把它存入视图模型。没有显式名称时,属性名称是类名且首字母小写:[input]。表单会带着收到的值重新显示;
- 第 52–56 行:[getParameterMap()] 还提供对 参数原始发送形式的访问:一个字典,其中每个值是一个字符串数组(参数可以重复)。它被转换为文本,每个参数一行,以名称 [received] 存放在模型中。[Collectors.joining("\n")] 把各行连接起来,以换行符分隔。
模板 [templates/layout.html] 与示例 17 中的相同(只有标题不同)。文件 [templates/form/form.html]:
| <!doctype html>
<html xmlns:th="http://www.thymeleaf.org" th:replace="~{layout :: page(~{::main})}">
<body>
<main>
<h1 class="h3">A complete form</h1>
<!--/* th:object:表单的对象;*{...} 指向该对象的一个字段 */-->
<form method="post" action="/form" th:object="${input}" style="max-width: 40rem">
<!--/* 隐藏字段:随表单一起发送,但不可见 */-->
<input type="hidden" th:field="*{token}">
<div class="mb-2">
<span class="form-label me-3">Title</span>
<!--/* 单选按钮:相同的 [name],只发送一个值 */-->
<div class="form-check form-check-inline" th:each="title : ${lists.titles}">
<input class="form-check-input" type="radio" th:field="*{title}" th:value="${title}">
<!--/* #ids.prev:th:field 赋予前一个字段的 id */-->
<label class="form-check-label" th:for="${#ids.prev('title')}" th:text="${title}">Mr</label>
</div>
</div>
<div class="row g-2 mb-2">
<div class="col">
<label class="form-label" for="name">Name</label>
<!--/* th:field 构建 id、name 和 value 属性 */-->
<input class="form-control" type="text" th:field="*{name}">
</div>
<div class="col">
<label class="form-label" for="password">Password</label>
<!--/* 密码绝不会在页面中回送:不使用 th:field */-->
<input class="form-control" type="password" id="password" name="password">
</div>
<div class="col">
<label class="form-label" for="birthDate">Date of birth</label>
<!--/* 日期字段以 yyyy-mm-dd 格式交换其值 */-->
<input class="form-control" type="date" th:field="*{birthDate}">
</div>
</div>
<div class="mb-2">
<span class="form-label me-3">Hobbies</span>
<!--/* 复选框:相同的 [name],可有多个值 */-->
<div class="form-check form-check-inline" th:each="hobby : ${lists.hobbies}">
<input class="form-check-input" type="checkbox" th:field="*{hobbies}" th:value="${hobby}">
<label class="form-check-label" th:for="${#ids.prev('hobbies')}" th:text="${hobby}">reading</label>
</div>
</div>
<div class="row g-2 mb-2">
<div class="col">
<label class="form-label" for="country">Country</label>
<select class="form-select" th:field="*{country}">
<option th:each="c : ${lists.countries}" th:value="${c.code}" th:text="${c.name}">France</option>
</select>
</div>
<div class="col">
<label class="form-label" for="languages">Spoken languages</label>
<!--/* 多选列表:可有多个值 */-->
<select class="form-select" th:field="*{languages}" multiple size="4">
<option th:each="language : ${lists.languages}" th:value="${language}" th:text="${language}">French</option>
</select>
</div>
</div>
<div class="mb-2">
<label class="form-label" for="comment">Comment</label>
<!--/* 文本区域:值位于标签之间 */-->
<textarea class="form-control" th:field="*{comment}" rows="2"></textarea>
</div>
<button class="btn btn-primary" type="submit">Send</button>
</form>
<th:block th:if="${received != null}">
<h2 class="h5 mt-3">What the server received</h2>
<pre class="bg-light p-2 border" th:text="${received}">name = [...]</pre>
</th:block>
</main>
</body>
</html>
|
我们来剖析这段代码:
- 第 7 行:[th:object] 属性指定 表单对象:即模型的 [input] 属性。在该标签内部,选择表达式 [*{name}] 指的是该对象的属性 [name] :这等价于 [${input.name}];
- 第 9 行:[th:field="*{token}"] 属性把该字段与 [token] 属性关联起来:它写出属性 [id] 和 [name] (属性名称)以及属性 [value] (其值)。隐藏字段会随表单一起提交,但不会显示。它用于把信息从一个页面传递到下一个页面(例如在案例研究中,它包含记录的版本)。注意:用户可以修改它;
- 第 14–18 行:单选按钮共用同一个 [name];只能选中一个,也只会发送一个值。对于单选按钮,[th:field] 不会把属性值写入 [value] ([th:value] 才提供按钮的值):如果按钮的值与属性匹配,它就 选中 该按钮。由于这些按钮的名称都相同,[th:field] 会给它们分配带编号的 [id] 值:[title1]、[title2] 等。工具对象 [#ids.prev('title')] (第 17 行)把最后一个字段 [title] 的值设为给定的 [id],用于其标签的 [for] 属性;
- 第 25 行:文本字段:[th:field] 写入 [id="name"]、[name="name"]以及值。因此第 23 行的 label 可以硬编码 [for="name"];
- 第 30 行:密码绝不会在页面中返回:该字段不使用 [th:field] ,也没有 [value] 属性;
- 第 35 行:日期字段。浏览器以自己的格式显示日期,但发送和接收时始终使用 [yyyy-mm-dd];[th:field] 借助注解 [@DateTimeFormat],以这种格式写入日期;
- 第 42–45 行:具有相同 [name] 的复选框:每个选中的复选框都会发送其值,因此该参数会重复出现。[th:field] 如果复选框的值 在 列表 [hobbies] 中,则选中该复选框;
- 第 51–53 行:下拉列表。[th:field] 位于 [<select>] 标签上,选中其值等于 [country] 属性的选项;
- 第 58–60 行:[multiple] 属性允许选择多个选项:[th:field] 选中属于 [languages] 列表的所有选项;
- 第 67 行:文本区域的值包含在其标签之间,而不在 [value] 属性中:[th:field] 知道这一点;
- 第 73–76 行:服务器收到的内容,仅在提交后显示,位于 [<pre>] 标签内,该标签会保留换行。
下面是由这些 [th:field] 属性生成的 HTML 代码片段(隐藏字段、第二个单选按钮、前两个复选框、下拉列表):
| <input type="hidden" id="token" name="token" value="A7X2">
...
<div class="form-check form-check-inline">
<input class="form-check-input" type="radio" value="Mme" id="title2" name="title" checked="checked">
<label class="form-check-label" for="title2">Mme</label>
</div>
...
<div class="form-check form-check-inline">
<input class="form-check-input" type="checkbox" value="reading" id="hobbies1" name="hobbies"><input type="hidden" name="_hobbies" value="on"/>
<label class="form-check-label" for="hobbies1">reading</label>
</div>
<div class="form-check form-check-inline">
<input class="form-check-input" type="checkbox" value="music" id="hobbies2" name="hobbies"><input type="hidden" name="_hobbies" value="on"/>
<label class="form-check-label" for="hobbies2">music</label>
</div>
...
<input type="hidden" name="_languages" value="1"/><select class="form-select" multiple size="4" id="languages" name="languages">
<option value="French" selected="selected">French</option>
|
请注意我们没有编写的隐藏字段:每个复选框之后的 [_hobbies] ,下拉列表之前的 [_languages] 。它们解决了 HTML 的一个问题:未选中的复选框根本不会被发送。如果用户取消选中所有复选框,请求中就会缺少 [hobbies] 参数,模型绑定也就不会更新 [hobbies] 属性,该属性将保留其先前的值。而 [_hobbies] 标记则始终会被发送:当 [Spring] 发现有该标记而没有 [hobbies] 参数时,它会清空列表(或将布尔值设置为 [false])。在这里,输入项是一个列表本来就为空的新对象,因此差别并不明显;当表单对象事先已被填充过(例如存储在会话中;参见“数据作用域”一章)时,这一差别就很重要。
初始表单(http://localhost:5000/form),以及提交之后的页面:
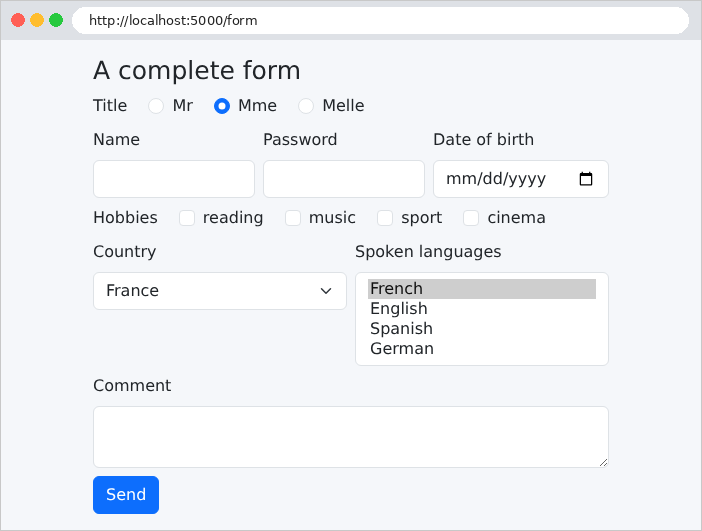
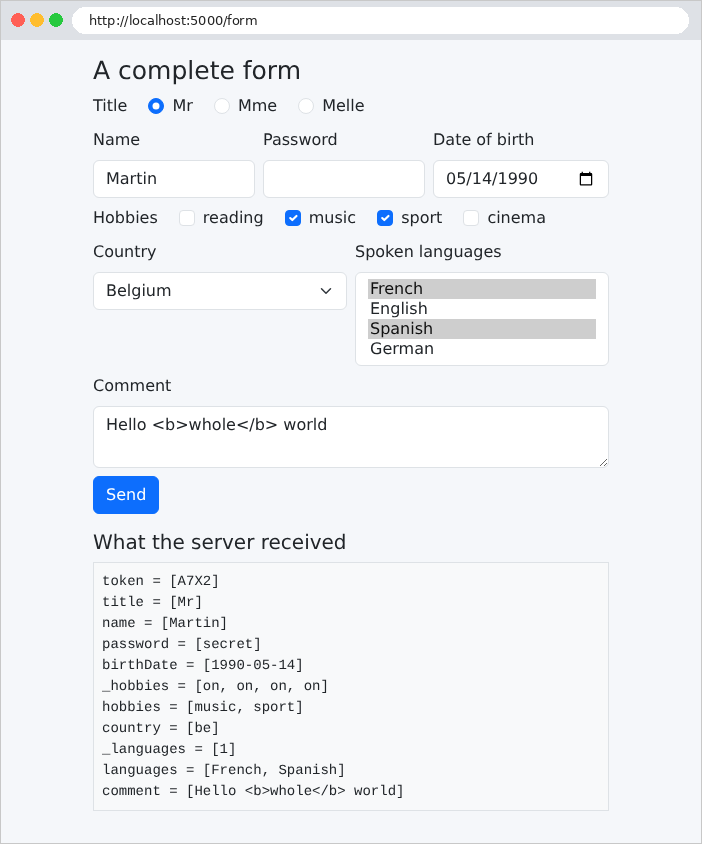
请注意:
- 文本框显示的“[Hello <b>whole</b> world]” 与输入时完全一致:“[th:field]” 会对值进行转义,输入的标签不会被解释;
- 密码已被接收,但不会显示;
- 浏览器发送了标记 [_hobbies] (每个复选框一个)和 [_languages]。
使用 [curl],我们可以看到选中一个复选框时的差别:
| curl -d "token=A7X2&title=Mr&name=Martin&hobbies=sport" http://localhost:5000/form
|
| <pre class="bg-light p-2 border">token = [A7X2]
title = [Mr]
name = [Martin]
hobbies = [sport]</pre>
|
以及选中两个复选框时的情况:
| curl -d "token=A7X2&title=Mr&name=Martin&hobbies=sport&hobbies=music" http://localhost:5000/form
|
| <pre class="bg-light p-2 border">token = [A7X2]
title = [Mr]
name = [Martin]
hobbies = [sport, music]</pre>
|
(仅复现页面中的 [<pre>] 标签)。[-d] 选项用于 [curl] 发送带有此请求体的 POST 请求,以及 HTML 表单的 [Content-Type: application/x-www-form-urlencoded] 标头。
4.7. 示例 19:表单验证
无效的表单必须重新显示,并保留已输入的值,同时在每个出错的字段下方显示一条消息。示例 19 将示例 09 的技术(由动作使用参数 [BindingResult] 执行验证)应用于一个注册表单,并演示 [Thymeleaf] 如何显示错误。
验证需要一个额外的依赖。文件 [pom.xml]:
| <dependencies>
<!-- Thymeleaf 视图 -->
<dependency>
<groupId>org.springframework.boot</groupId>
<artifactId>spring-boot-starter-thymeleaf</artifactId>
</dependency>
<!-- 验证(Bean Validation、Hibernate Validator) -->
<dependency>
<groupId>org.springframework.boot</groupId>
<artifactId>spring-boot-starter-validation</artifactId>
</dependency>
</dependencies>
|
- 第 7–11 行:验证启动器:API [Bean Validation] (注解 [@NotBlank]、[@Size]……)及其实现 [Hibernate Validator] (参见示例 08)。
文件 [models/RegistrationModel.java]:
| package example19.models;
import java.util.Objects;
import jakarta.validation.constraints.AssertTrue;
import jakarta.validation.constraints.Email;
import jakarta.validation.constraints.Max;
import jakarta.validation.constraints.Min;
import jakarta.validation.constraints.NotBlank;
import jakarta.validation.constraints.NotNull;
import jakarta.validation.constraints.Size;
// 表单字段及其约束
public class RegistrationModel {
@NotBlank(message = "The name is required.")
@Size(max = 20, message = "The name must not exceed 20 characters.")
private String name;
@NotBlank(message = "The email address is required.")
@Email(message = "Invalid email address.")
private String email;
// 来自表单的一切都是字符串:"42" -> 42
@NotNull(message = "The age is required.")
@Min(value = 18, message = "The age must be between 18 and 120 years.")
@Max(value = 120, message = "The age must be between 18 and 120 years.")
private Integer age;
@NotBlank(message = "The password is required.")
@Size(min = 6, message = "The password must have at least 6 characters.")
private String password;
private String confirmation;
// 一条涉及两个字段的规则:一个布尔方法,由
// @AssertTrue 验证。对于 Bean Validation,它是 [confirmationValid] 属性。
@AssertTrue(message = "The confirmation does not match the password.")
public boolean isConfirmationValid() {
return Objects.equals(password, confirmation);
}
public String getName() { return name; }
public void setName(String name) { this.name = name; }
public String getEmail() { return email; }
public void setEmail(String email) { this.email = email; }
public Integer getAge() { return age; }
public void setAge(Integer age) { this.age = age; }
public String getPassword() { return password; }
public void setPassword(String password) { this.password = password; }
public String getConfirmation() { return confirmation; }
public void setConfirmation(String confirmation) { this.confirmation = confirmation; }
}
|
我们来解释这段代码:
- 第 16–18 行:姓名为必填项([@NotBlank] 会拒绝 [null]、空字符串以及仅由空格组成的字符串),且限制为 20 个字符;
- 第 20–22 行:[@Email] 验证电子邮件地址的格式;
- 第 25–28 行:年龄先被转换为整数,然后再验证。类型 [Integer] (而非 [int])允许值 [null]:缺失的年龄会保持为 [null],由 [@NotNull] 将其标记为错误;
- 第 30–32 行:至少 6 个字符。[@Size] 不验证 [null] 值:那是 [@NotBlank] 的职责;
- 第 38–41 行:规则“确认密码与密码一致”涉及 两个字段。[Bean Validation] 没有为此预定义的注解;最简单的解决方案是编写一个执行比较的布尔方法,并用 [@AssertTrue] 注解它:如果该方法返回 [false],则违反约束。对于 [Bean Validation],名为 [isXxx()] 的方法是布尔属性的访问器:因此任何错误都将关联到属性 [confirmationValid]。[Objects.equals] 用于比较两个对象,对 [null] 同样适用。
文件 [controllers/RegistrationController.java]:
| package example19.controllers;
import org.springframework.beans.propertyeditors.StringTrimmerEditor;
import org.springframework.stereotype.Controller;
import org.springframework.ui.Model;
import org.springframework.validation.BindingResult;
import org.springframework.web.bind.WebDataBinder;
import org.springframework.web.bind.annotation.GetMapping;
import org.springframework.web.bind.annotation.InitBinder;
import org.springframework.web.bind.annotation.ModelAttribute;
import org.springframework.web.bind.annotation.PostMapping;
import org.springframework.web.bind.annotation.RequestMapping;
import org.springframework.web.bind.annotation.RequestParam;
import example19.models.RegistrationModel;
import jakarta.validation.Valid;
@Controller
@RequestMapping("/register")
public class RegistrationController {
// @InitBinder:配置该控制器各操作的模型绑定。
// StringTrimmerEditor(true):每个接收到的字符串都会去除多余的
// 空格,空字符串变为 null
@InitBinder
public void initBinder(WebDataBinder binder) {
binder.registerCustomEditor(String.class, new StringTrimmerEditor(true));
}
// ?html5=true:我们让浏览器在发送之前先验证表单
@GetMapping("")
public String display(@RequestParam(defaultValue = "false") boolean html5, Model model) {
model.addAttribute("registration", new RegistrationModel());
model.addAttribute("html5", html5);
return "registration/registration";
}
// @ModelAttribute("registration"):对象在视图模型中的名称
@PostMapping("")
public String register(@Valid @ModelAttribute("registration") RegistrationModel input, BindingResult result,
@RequestParam(defaultValue = "false") boolean html5, Model model) {
if (result.hasErrors()) {
// 我们再次显示表单:已输入的值(密码除外),
// 以及每个无效字段下方的消息(参见 fragments/field.html)
input.setPassword(null);
input.setConfirmation(null);
model.addAttribute("html5", html5);
model.addAttribute("error", "The form contains errors.");
return "registration/registration";
}
return "registration/welcome";
}
}
|
我们来分析这段代码:
- 第 25–28 行:用 [@InitBinder] 注解的方法为该控制器各动作的模型绑定进行配置。它接收执行绑定的 [WebDataBinder] 对象。在这里为类型 [String] 注册了一个属性编辑器:[StringTrimmerEditor] 会删除每个接收到的字符串首尾的空格;当参数为 [true] 时,空字符串会变成 [null]。输入的姓名 [" Martin "] 会变成 ["Martin"]。注意:这适用于所有字符串,包括密码;
- 第 31–36 行:空表单。参数 [html5] 稍后解释。表单对象以名称 [registration] 存储在模板中;
- 第 40 行:[@Valid] 请求对该对象进行验证;[@ModelAttribute("registration")] 将其以名称 [registration] 存入模型,与第 33 行相同,视图使用的正是这个名称。参数 [BindingResult] 必须紧跟在被验证的对象之后:它接收绑定和验证错误,此后动作总是会被执行(参见示例 09);
- 第 41 行:[@RequestParam] 从 URL 或请求体中读取参数:这里,[html5] 来自表单的 URL;
- 第 42–50 行:如果存在错误,则重新显示表单,保留已输入的值(密码除外),并显示存储在模板中的一条通用消息。无需再做其他事情:对象 [registration] 及其错误([BindingResult])已经在模型中,视图会在那里找到它们;
- 第 51 行:否则,显示欢迎页面,该页面同样使用模型中的 [registration] 对象。
转换错误(例如年龄 [abc])会生成一条难以阅读的默认英文消息:[Failed to convert property value of type java.lang.String to required type java.lang.Integer for property age; For input string: "abc"]。文件 [messages.properties] 会替换它:
| # 转换错误的消息(例如年龄 "abc"),默认是技术性的;
# 键:typeMismatch.<期望的 Java 类型>
typeMismatch.java.lang.Integer=The value entered is not an integer.
|
- 第 3 行:[Spring Boot] 自动读取资源文件 [messages.properties]:这是应用程序的消息文件(下一章将解释如何将其本地化为多种语言)。发生转换错误时,[Spring] 会按多个键依次查找消息,从最具体到最通用:[typeMismatch.registration.age] (对象及其属性)、[typeMismatch.age] (属性)、[typeMismatch.java.lang.Integer] (期望的类型),最后是 [typeMismatch]。找到的第一个优先;否则使用英文消息。在这类文件中,撇号必须写两次(例如法语中:[n''est]):这些消息由 [MessageFormat] 类处理,该类属于 [Java],对它而言单个撇号是特殊字符。案例研究因此替换了所有这些消息。
4.7.1. 字段片段
所有字段都遵循相同的模式:一个标签、一个字段和一条错误消息。片段将这些组成部分提取出来。文件 [templates/fragments/field.html]:
| <!--/* 一个输入字段,带有其标签和错误消息。该片段有
no signature: its parameters are named, optional variables:
name, label, type, and the HTML5 constraints required, maxlength, minlength,
min, max. [errorOf]: the property whose error is displayed (name by default) */-->
<div class="mb-2" th:fragment="field" th:with="key=${errorOf ?: name}">
<label class="form-label" th:for="${name}" th:text="${label}">Label</label>
<!--/* __${name}__:预处理;先对 ${name} 求值,其结果
("email") replaces the expression: th:field="*{email}" */-->
<input class="form-control" th:type="${type}" th:field="*{__${name}__}"
th:classappend="${#fields.hasErrors(key)} ? 'is-invalid'"
th:required="${required}"
th:attr="maxlength=${maxlength},minlength=${minlength},min=${min},max=${max}">
<!--/* 该字段的第一条错误消息,位于字段下方 */-->
<div class="invalid-feedback" th:if="${#fields.hasErrors(key)}" th:text="${#fields.errors(key)[0]}">error</div>
</div>
|
我们来解释这段代码:
- 第 5 行:片段 [field] 被声明为没有签名——也就是没有参数列表。调用它时将使用命名参数([field(name='age', label='Age', ...)]),这些参数会成为片段的变量;未提供的参数会被直接设置为 [null]。这对于带有许多可选参数的片段很有用。[th:with] 声明变量 [key]:即要显示错误的属性名。运算符 [?:] (称为“Elvis”)在其左操作数不为 [null] 时返回左操作数,否则返回右操作数:[errorOf] 若已提供则取它,否则取 [name];
- 第 9 行:[th:type] 写入属性 [type]。[th:field] 必须接收属性名,该属性名存储在变量 [name] 中。不能写 [*{name}] (那将表示属性 [name]):而要使用预处理 [__...__]。双下划线之间的表达式会被首先求值,其结果替换该文本:如果 [name] 等于 [email],则该属性变为 [th:field="*{email}"],然后再按正常方式求值。[th:field] 使用表单对象([th:object]),该对象由插入该片段的视图声明;
- 第 10 行:[#fields.hasErrors(key)] 指示该属性在表单对象的 [BindingResult] 中是否有错误。然后 [Bootstrap] 的 [is-invalid] 类会将该字段高亮为红色;
- 第 11 行:如果 [required] 为 true,则写入布尔属性 [required] ;否则省略它;
- 第 12 行:[th:attr] 一次写入多个属性。值为 [null] 的属性不会被写入:每个字段只接收适用于它的 HTML5 约束;
- 第 14 行:错误消息,位于字段下方(类 [Bootstrap] [invalid-feedback])。[#fields.errors(key)] 返回该属性的消息列表;一个属性可能违反多个约束,而只显示第一个([[0]])。
文件 [templates/registration/registration.html]:
| <!doctype html>
<html xmlns:th="http://www.thymeleaf.org" th:replace="~{layout :: page(~{::main})}">
<body>
<main>
<h1 class="h3">Registration</h1>
<p th:if="${html5}">Browser validation <b>enabled</b> - <a href="/register">disable it</a></p>
<p th:unless="${html5}">Browser validation <b>disabled</b> - <a href="/register?html5=true">enable it</a></p>
<!--/* novalidate:浏览器忽略 required、min…… 属性,并且
sends the form as is; only the server validates */-->
<form method="post" th:action="${html5} ? '/register?html5=true' : '/register'"
th:novalidate="${!html5}" th:object="${registration}">
<div th:replace="~{fragments/field :: field(name='name', label='Name', type='text', required=true, maxlength=20)}"></div>
<div th:replace="~{fragments/field :: field(name='email', label='Email address', type='email', required=true)}"></div>
<div th:replace="~{fragments/field :: field(name='age', label='Age', type='number', required=true, min=18, max=120)}"></div>
<div th:replace="~{fragments/field :: field(name='password', label='Password', type='password', required=true, minlength=6)}"></div>
<div th:replace="~{fragments/field :: field(name='confirmation', label='Confirmation', type='password', required=true, errorOf='confirmationValid')}"></div>
<button class="btn btn-primary" type="submit">Register</button>
</form>
</main>
</body>
</html>
|
- 第 6–7 行:启用或禁用浏览器验证的链接;
- 第 10 行:表单的 [action] 属性保存 [html5] 参数;
- 第 11 行:当 [novalidate] 为 false 时,设置布尔属性 [html5] 。[th:object] 引用表单对象 [registration];
- 第 12–16 行:每个字段都是对该片段的一次插入,并带有命名参数。对于确认密码(第 16 行),要显示的错误是 [confirmationValid] 属性的错误,即 [@AssertTrue] 规则的错误。
[templates/layout.html] 文件:
| <!doctype html>
<html lang="en" xmlns:th="http://www.thymeleaf.org" th:fragment="page(content)">
<head>
<meta charset="utf-8">
<title>Registration</title>
<link rel="stylesheet" href="/bootstrap/css/bootstrap.min.css">
<link rel="stylesheet" href="/css/styles.css">
</head>
<body>
<div class="container py-3" style="max-width: 36rem">
<main th:replace="${content}"></main>
<!--/* 全局错误,位于页面底部,背景为浅粉色;[error] 由操作设置 */-->
<div class="error-area" role="alert" th:if="${error != null}" th:text="${error}">error</div>
</div>
</body>
</html>
|
- 第 13 行:全局消息显示在页面底部,背景为浅粉色(类 [error-area] 源自 [static/css/styles.css]),如案例研究中所示。
文件 [templates/registration/welcome.html]:
| <!doctype html>
<html xmlns:th="http://www.thymeleaf.org" th:replace="~{layout :: page(~{::main})}">
<body>
<main th:object="${registration}">
<h1 class="h3" th:text="|Welcome *{name}|">Welcome</h1>
<p>Your registration is saved: address <b th:text="*{email}">email</b>, age <b th:text="*{age}">42</b> years.</p>
</main>
</body>
</html>
|
- 第 4 行:[th:object] 并不只用于表单:在 [<main>] 标签中,它允许你写 [*{name}] 而不是 [${registration.name}];
- 第 5–6 行:转换并清理后的值:年龄是一个数字,姓名中不再包含空格。
空表单(http://localhost:5000/register),然后在存在多个错误的情况下提交(姓名由空格组成、地址不完整、年龄太小、密码太短且两次不一致):
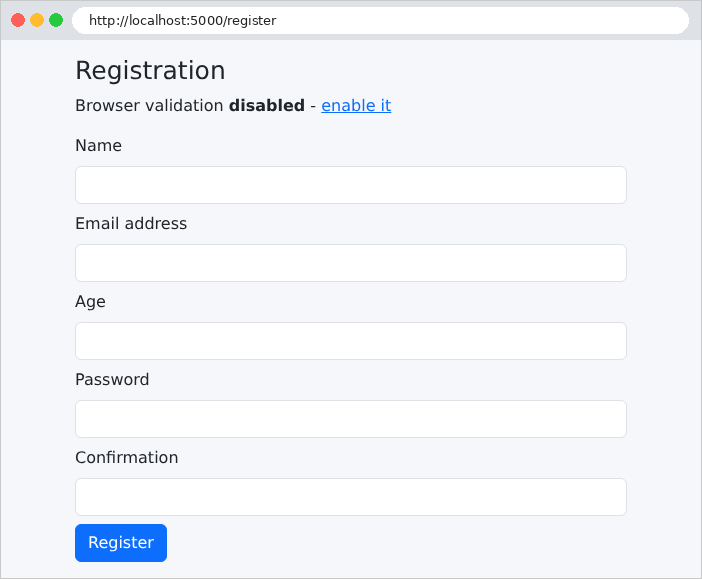
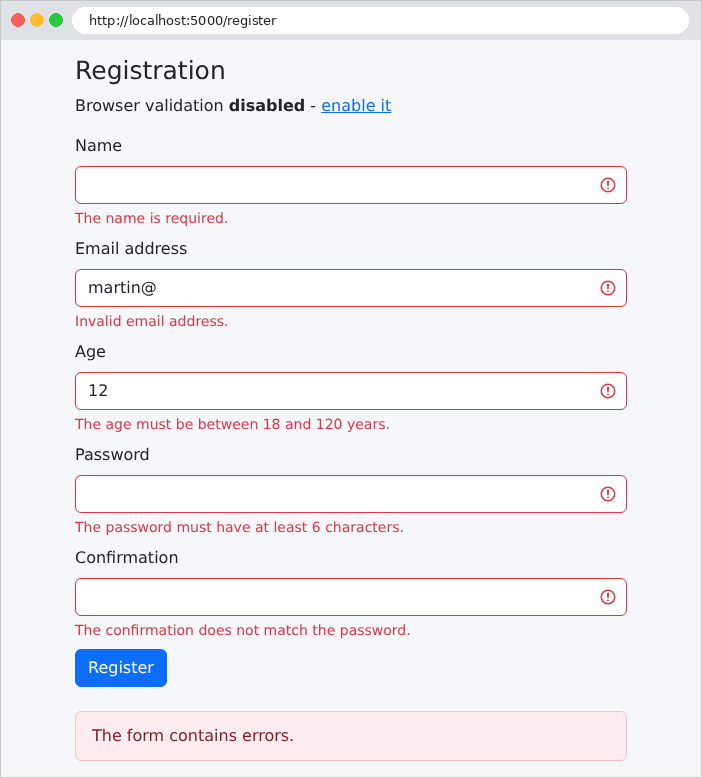
然后正确填写后提交(姓名两侧带有空格):
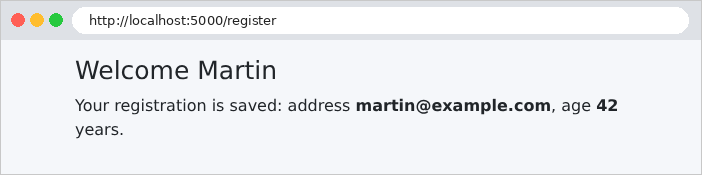
以及年龄不是数字的情况,通过 [curl] 提交(浏览器会在 [type="number"] 字段中拒绝它):
| curl -i -d "name=Martin&email=xx&age=abc" http://localhost:5000/register
|
| HTTP/1.1 200
Content-Type: text/html;charset=UTF-8
<!doctype html>
<html lang="en">
<head>
<meta charset="utf-8">
<title>Registration</title>
<link rel="stylesheet" href="/bootstrap/css/bootstrap.min.css">
<link rel="stylesheet" href="/css/styles.css">
</head>
<body>
<div class="container py-3" style="max-width: 36rem">
<main>
<h1 class="h3">Registration</h1>
<p>Browser validation <b>disabled</b> - <a href="/register?html5=true">enable it</a></p>
<form method="post" action="/register" novalidate="novalidate">
<div class="mb-2">
<label class="form-label" for="name">Name</label>
<input class="form-control" type="text" maxlength="20" required="required" id="name" name="name" value="Martin">
</div>
<div class="mb-2">
<label class="form-label" for="email">Email address</label>
<input class="form-control is-invalid" type="email" required="required" id="email" name="email" value="xx">
<div class="invalid-feedback">Invalid email address.</div>
</div>
<div class="mb-2">
<label class="form-label" for="age">Age</label>
<input class="form-control is-invalid" type="number" min="18" max="120" required="required" id="age" name="age" value="">
<div class="invalid-feedback">The value entered is not an integer.</div>
</div>
<div class="mb-2">
<label class="form-label" for="password">Password</label>
<input class="form-control is-invalid" type="password" minlength="6" required="required" id="password" name="password" value="">
<div class="invalid-feedback">The password is required.</div>
</div>
<div class="mb-2">
<label class="form-label" for="confirmation">Confirmation</label>
<input class="form-control" type="password" required="required" id="confirmation" name="confirmation" value="">
</div>
<button class="btn btn-primary" type="submit">Register</button>
</form>
</main>
<div class="error-area" role="alert">The form contains errors.</div>
</div>
</body>
</html>
|
请注意:
- 年龄转换错误使用的是 [messages.properties] 中的消息;
- [age] 字段不会重新显示被拒绝的值 [abc]:对于 [type="number"] 字段,[th:field] 不会写入不是数字的值(使用 [type="text"] 时,它会写入 [value="abc"]);
- 缺失的密码只有一个错误,即“必填”:[@Size] 不验证 [null] 值。然而确认密码没有错误:两个缺失的密码是相等的;
- 没有错误的字段不带有类 [is-invalid],其片段也不会生成消息。
4.7.2. 浏览器验证
属性 [required]、[maxlength]、[min]、[max]、[type="email"]…… 指示浏览器在提交表单之前对其进行验证:用户会立即通过工具提示得到通知,而无需与服务器进行任何往返通信。点击“enable it”链接(http://localhost:5000/register?html5=true)即可获得这种行为,它会从表单中移除 [novalidate] 属性。
这种验证只是一种便利,而不是安全措施:只需使用浏览器的开发者工具删除 [required] 属性,或使用 [curl] 发送请求,就可以绕过它。服务器端验证仍然必不可少。这正是本示例默认禁用浏览器验证的原因:为了演示服务器的工作方式。不过,案例研究同时保留了两者:HTML5 属性用于提供便利,服务器端验证用于保证安全。
4.8. 示例 20:Post/Redirect/Get 模式
当 POST 表单成功提交时,动作可以直接显示一个页面。问题在于,如果用户随后刷新该页面(F5 键):浏览器会重新提交表单,操作就会被执行第二次(订单被下了两次、预约被预约了两次……)。Post / Redirect / Get 模式(PRG)可以避免这个问题:成功的 POST 动作不生成页面;而是重定向到一个 GET 页面。重新加载该页面只会再触发一次 GET,不会产生任何影响。
还剩下一个细节:GET 页面必须显示一条消息(“任务已添加”),尽管这条消息是由 POST 动作在另一个请求中生成的。[Spring MVC] 为此提供了闪现属性:这些属性在重定向之前设置,并保留到下一个请求,在那里它们被添加到模板中,然后消失。这称为闪现消息。默认情况下,[Spring MVC] 将闪现属性存储在用户的 HTTP 会话中:这是服务器为每个浏览器关联的一块内存空间(“数据作用域”一章专门讨论这一主题)。
[services/TasksService.java] 文件:
| package example20.services;
import java.util.List;
import java.util.concurrent.CopyOnWriteArrayList;
import org.springframework.stereotype.Service;
// 任务列表,存放在内存中,由所有人共享(单例)。
// CopyOnWriteArrayList:可供多个同时发生的请求使用的列表
@Service
public class TasksService {
private final List<String> tasks = new CopyOnWriteArrayList<>(List.of("Read chapter 3"));
public List<String> list() {
return List.copyOf(tasks);
}
public void add(String label) {
tasks.add(label);
}
}
|
- 第 13 行:单例由所有请求共享,这些请求可能同时运行。标准的 [ArrayList] 不支持这一点;[CopyOnWriteArrayList] 是专为此目的设计的列表;
- 第 15–17 行:[List.copyOf] 返回列表的只读副本:调用者无法修改服务的列表。
文件 [controllers/TasksController.java]:
| package example20.controllers;
import org.springframework.stereotype.Controller;
import org.springframework.ui.Model;
import org.springframework.web.bind.annotation.GetMapping;
import org.springframework.web.bind.annotation.PostMapping;
import org.springframework.web.bind.annotation.RequestMapping;
import org.springframework.web.bind.annotation.RequestParam;
import org.springframework.web.servlet.mvc.support.RedirectAttributes;
import example20.services.TasksService;
@Controller
@RequestMapping("/tasks")
public class TasksController {
private final TasksService tasks;
public TasksController(TasksService tasks) {
this.tasks = tasks;
}
// GET /tasks:列表和添加表单
@GetMapping("")
public String display(Model model) {
model.addAttribute("tasks", tasks.list());
return "tasks/tasks";
}
// POST /tasks:Post / Redirect / Get 模式
@PostMapping("")
public String add(@RequestParam(required = false) String label, Model model,
RedirectAttributes redirect) {
String text = label == null ? "" : label.trim();
if (text.isEmpty() || text.length() > 40) {
// 输入无效:我们不重定向,直接再次显示页面
model.addAttribute("label", label);
model.addAttribute("error", "The label must have 1 to 40 characters.");
return display(model);
}
tasks.add(text);
// 一个“闪现”属性:它会在重定向之后保留,供下一次请求使用
redirect.addFlashAttribute("flash", "The task [" + text + "] has been added.");
// 不返回页面:重定向到 GET 页面
return "redirect:/tasks";
}
// POST /tasks/without-prg:反面示例(对 POST 直接返回页面)
@PostMapping("/without-prg")
public String addWithoutPrg(@RequestParam(required = false) String label, Model model) {
tasks.add(label == null || label.isBlank() ? "(untitled)" : label.trim());
model.addAttribute("withoutPrg", true);
return display(model);
}
}
|
我们来解释这段代码:
- 第 24–28 行:列表页面;
- 第 33 行:类型为 [RedirectAttributes] 的参数,由 [Spring MVC] 提供:即重定向属性;
- 第 35–40 行:无效的输入——页面不经重定向而重新显示(必须保留输入内容和错误消息)。第 39 行只是像调用任何 [display] 方法一样调用 [Java] 方法:它把任务列表添加到模板中并返回视图名称;
- 第 43 行:有效的输入:操作完成后,[addFlashAttribute] 使闪现消息得以显示;
- 第 45 行:以 [redirect:] 开头的字符串不是视图名称:[Spring MVC] 会以重定向(代码 302)响应,跳转到后面的地址(参见示例 04);
- 第 49–54 行:作为对照的反例:对 POST 直接返回页面。
文件 [templates/tasks/tasks.html]:
| <!doctype html>
<html xmlns:th="http://www.thymeleaf.org" th:replace="~{layout :: page(~{::main})}">
<body>
<main>
<h1 class="h3">My tasks</h1>
<ol>
<li th:each="task : ${tasks}" th:text="${task}">task</li>
</ol>
<form method="post" action="/tasks" class="d-flex gap-2">
<input class="form-control" name="label" th:value="${label}" placeholder="New task">
<button class="btn btn-primary text-nowrap" type="submit">Add</button>
<!--/* formaction:该按钮把同一个表单发送到另一个地址 */-->
<button class="btn btn-outline-secondary text-nowrap" type="submit" formaction="/tasks/without-prg">Add without PRG</button>
</form>
<p class="text-danger mt-2" th:if="${withoutPrg}">Page displayed in response to a POST: press F5 and the task will be added a second time.</p>
</main>
</body>
</html>
|
- 第 10 行:在出错后重新显示的输入内容([label] 属性在其他情况下不存在:字段为空);
- 第 13 行:按钮的 [formaction] 属性将表单提交到不同于表单 [action] 属性的地址。因此该表单有两个按钮,触发两个不同的动作。案例研究在其登录页面上使用了这种方法;
- 第 15 行:模板中缺失的属性会被设置为 [null],而 [th:if] 将 [null] 视为 false。
文件 [templates/layout.html]:
| <!doctype html>
<html lang="en" xmlns:th="http://www.thymeleaf.org" th:fragment="page(content)">
<head>
<meta charset="utf-8">
<title>Tasks</title>
<link rel="stylesheet" href="/bootstrap/css/bootstrap.min.css">
<link rel="stylesheet" href="/css/styles.css">
</head>
<body>
<div class="container py-3" style="max-width: 36rem">
<!--/* 闪现消息,位于页面顶部:一个模型属性,在重定向之前设置 */-->
<div class="alert alert-success" role="status" th:if="${flash != null}" th:text="${flash}">flash</div>
<main th:replace="${content}"></main>
<div class="error-area" role="alert" th:if="${error != null}" th:text="${error}">error</div>
</div>
</body>
</html>
|
闪现消息显示在页面顶部(第 12 行),错误显示在底部(第 14 行)。从视图的角度来看,闪现属性只是另一个模型属性。
下面是表单成功提交时 [curl] 所看到的内容。选项 [-c file] 保存收到的 Cookie,[-b file] 将它们发送回去;[--data-urlencode] 对字段中的空格和重音字符进行编码:
| curl -i -c cookies.txt -b cookies.txt --data-urlencode "label=Review Spring" http://localhost:5000/tasks
|
| HTTP/1.1 302
Set-Cookie: JSESSIONID=74250348252FFBFF6F46F1BDFDDF7DEA; Path=/; HttpOnly
Location: http://localhost:5000/tasks
Content-Length: 0
|
响应是重定向到 [/tasks]。为了存储闪现消息,[Spring MVC] 创建了一个 HTTP 会话:服务器([Tomcat])为其分配了一个标识符,并通过 Cookie [JSESSIONID] 发送给浏览器。随后的请求会将此 Cookie 发回,使服务器能够找回会话和消息:
| curl -i -c cookies.txt -b cookies.txt http://localhost:5000/tasks
|
| HTTP/1.1 200
Content-Type: text/html;charset=UTF-8
<!doctype html>
<html lang="en">
<head>
<meta charset="utf-8">
<title>Tasks</title>
<link rel="stylesheet" href="/bootstrap/css/bootstrap.min.css">
<link rel="stylesheet" href="/css/styles.css">
</head>
<body>
<div class="container py-3" style="max-width: 36rem">
<div class="alert alert-success" role="status">The task [Review Spring] has been added.</div>
<main>
<h1 class="h3">My tasks</h1>
<ol>
<li>Read chapter 3</li>
<li>Review Spring</li>
</ol>
<form method="post" action="/tasks" class="d-flex gap-2">
<input class="form-control" name="label" value="" placeholder="New task">
<button class="btn btn-primary text-nowrap" type="submit">Add</button>
<button class="btn btn-outline-secondary text-nowrap" type="submit" formaction="/tasks/without-prg">Add without PRG</button>
</form>
</main>
</div>
</body>
</html>
|
闪现消息被显示;如果重新加载页面,它就会消失。然而会话仍然保持打开:其标识符不会改变,服务器也不会再次发送 Cookie。
文件 [application.properties] 包含一项与会话相关的设置:
| # 服务器的监听端口(默认为 8080)
server.port=5000
# Spring Boot 的错误响应不包含调用栈
spring.web.error.include-stacktrace=never
# 会话(承载闪现属性)通过 Cookie 来跟踪,
# 绝不通过添加到 URL 中的 ";jsessionid=..."
server.servlet.session.tracking-modes=cookie
|
- 第 7 行:会话仅通过 Cookie 进行跟踪。如果没有这项设置,[Tomcat] 在首次响应时并不知道浏览器是否接受 Cookie:它会发送 Cookie,同时还会把会话 ID 添加到重定向的 URL 中。结果是:
| HTTP/1.1 302
Set-Cookie: JSESSIONID=836C471F9879CC83E0C2C4C1ED8FD048; Path=/; HttpOnly
Location: http://localhost:5000/tasks;jsessionid=836C471F9879CC83E0C2C4C1ED8FD048
Content-Length: 0
|
这两个 URL 和 [/tasks;jsessionid=...] 都可以工作,但它们会出现在浏览器的地址栏中,而会话 ID 在 URL 中流转(浏览历史、书签、复制的链接)会带来安全风险。所有使用闪现属性的示例都带有这项设置。
在浏览器中(http://localhost:5000/tasks),添加任务之后:
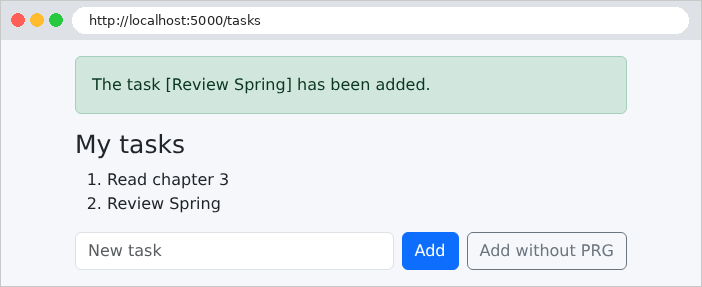
地址栏显示 [/tasks]:这是 GET 页面。你可以放心地重新加载它;消息会消失。输入包含空格的内容:
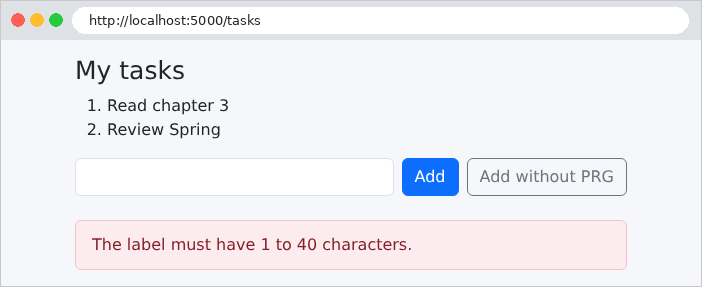
以及反例:
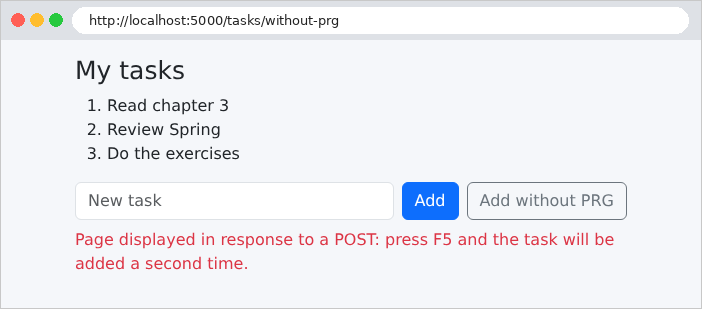
这里,地址栏显示的是 [/tasks/without-prg],即 POST 的地址。重新加载页面会触发浏览器警告(“确认重新提交表单”),然后第二次添加该任务。案例研究中的所有 POST 表单都遵循 PRG 模式。不过,案例研究将其闪现属性存储在 Cookie 中而不是会话中,因为它的服务器不会在请求之间保留任何数据。
4.9. 示例 21:链接、按钮与确认
一条简单的规则可以指导在链接与按钮之间的选择:
- 链接([<a href>])生成一个请求(GET)。GET 请求不得修改任何内容:浏览器、搜索引擎和杀毒程序可能会自行访问链接,以预取页面或对其进行分析;
- 修改数据的操作(添加、编辑、删除、注销)应当是 POST 表单中的按钮。
示例 21 管理一个联系人列表:你可以通过链接查看联系人,并通过按钮删除联系人,此时会打开一个确认窗口。该示例的文件如下:
| 21-links-buttons/
├── src/
│ └── main/
│ ├── java/
│ │ └── example21/
│ │ ├── config/
│ │ │ └── WebConfig.java
│ │ ├── controllers/
│ │ │ └── ContactsController.java
│ │ ├── services/
│ │ │ └── ContactsService.java
│ │ └── Example21Application.java
│ └── resources/
│ ├── static/
│ │ ├── css/
│ │ │ └── styles.css
│ │ └── js/
│ │ └── app.js
│ ├── templates/
│ │ ├── contacts/
│ │ │ ├── details.html
│ │ │ └── list.html
│ │ ├── fragments/
│ │ │ └── confirmation.html
│ │ └── layout.html
│ └── application.properties
└── pom.xml
|
[services/ContactsService.java] 文件:
| package example21.services;
import java.util.ArrayList;
import java.util.List;
import java.util.Optional;
import org.springframework.stereotype.Service;
// 联系人,存放在内存中,由所有人共享(单例)
@Service
public class ContactsService {
// 联系人:一个标识符、一个姓名、一个电话号码
public record Contact(int id, String name, String phone) {
}
private final List<Contact> contacts = new ArrayList<>(List.of(
new Contact(1, "Marie Durand", "01 23 45 67 89"),
new Contact(2, "Paul Martin", "06 12 34 56 78"),
new Contact(3, "Philippe Jandot", "02 98 76 54 32")));
private int lastId = 3;
// synchronized:同一时刻只有一个请求运行该方法
public synchronized List<Contact> list() {
return List.copyOf(contacts);
}
// Optional:一个联系人,或者在其不存在时为“空”
public synchronized Optional<Contact> read(int id) {
return contacts.stream().filter(c -> c.id() == id).findFirst();
}
public synchronized Optional<Contact> edit(int id, String name, String phone) {
for (int i = 0; i < contacts.size(); i++) {
if (contacts.get(i).id() == id) {
// record 是不可变的:我们用一个新的来替换它
Contact edited = new Contact(id, name, phone);
contacts.set(i, edited);
return Optional.of(edited);
}
}
return Optional.empty();
}
public synchronized Contact add(String name, String phone) {
Contact contact = new Contact(++lastId, name, phone);
contacts.add(contact);
return contact;
}
public synchronized Optional<Contact> delete(int id) {
Optional<Contact> contact = read(id);
contact.ifPresent(contacts::remove);
return contact;
}
}
|
我们来解释这段代码:
- 第 14–15 行:一个联系人;
- 第 17–20 行:联系人列表:一个 [ArrayList] (可修改),初始化时包含三个联系人;
- 第 24 行:关键字 [synchronized] 确保同一时刻只有一个请求执行对象的 [synchronized] 方法:同时到达的请求不能同时修改该列表。这与示例 20 中的 [CopyOnWriteArrayList] 列表是不同的解决方案;
- 第 29–31 行:[read] 返回一个 [Optional<Contact>] (参见示例 06):该对象包含一个联系人,如果没有联系人具有该 ID,则什么也不包含。[findFirst()] 以 [Optional] 的形式返回流的第一个元素;
- 第 36–38 行:record 是不可变的:它的字段不会被修改;而是用一个新的 record 来替换它;
- 第 46 行:[++lastId] 先递增计数器再使用它:后续的标识符是 4、5……;
- 第 53 行:如果 [ifPresent] 所作用的 [Optional] 包含联系人,则执行一个操作。[contacts::remove] 是一个方法引用:是编写 lambda [c -> contacts.remove(c)] 的简写方式。
文件 [controllers/ContactsController.java]:
| package example21.controllers;
import org.springframework.http.HttpStatus;
import org.springframework.stereotype.Controller;
import org.springframework.ui.Model;
import org.springframework.web.bind.annotation.GetMapping;
import org.springframework.web.bind.annotation.PathVariable;
import org.springframework.web.bind.annotation.PostMapping;
import org.springframework.web.bind.annotation.RequestMapping;
import org.springframework.web.bind.annotation.RequestParam;
import org.springframework.web.server.ResponseStatusException;
import org.springframework.web.servlet.mvc.support.RedirectAttributes;
import example21.services.ContactsService;
import example21.services.ContactsService.Contact;
@Controller
@RequestMapping("/contacts")
public class ContactsController {
private final ContactsService contacts;
public ContactsController(ContactsService contacts) {
this.contacts = contacts;
}
// 一个链接(<a href>):GET 请求,不修改任何内容
@GetMapping("")
public String list(Model model) {
model.addAttribute("contacts", contacts.list());
return "contacts/list";
}
@GetMapping("/{id:\\d+}")
public String details(@PathVariable int id, Model model) {
model.addAttribute("contact", contacts.read(id).orElseThrow(ContactsController::notFound));
return "contacts/details";
}
// POST 表单中的一个按钮:修改数据的请求
@PostMapping("/{id:\\d+}")
public String save(@PathVariable int id, @RequestParam String name, @RequestParam String phone,
RedirectAttributes redirect) {
Contact contact = contacts.edit(id, name, phone).orElseThrow(ContactsController::notFound);
redirect.addFlashAttribute("flash", "The contact [" + contact.name() + "] has been edited.");
return "redirect:/contacts";
}
// 同一个表单,另一个按钮(formaction 属性):另一个操作
@PostMapping("/{id:\\d+}/duplicate")
public String duplicate(@PathVariable int id, @RequestParam String name, @RequestParam String phone,
RedirectAttributes redirect) {
Contact copy = contacts.add(name + " (copy)", phone);
redirect.addFlashAttribute("flash", "The contact [" + copy.name() + "] has been created.");
return "redirect:/contacts";
}
@PostMapping("/{id:\\d+}/delete")
public String delete(@PathVariable int id, RedirectAttributes redirect) {
Contact contact = contacts.delete(id).orElseThrow(ContactsController::notFound);
redirect.addFlashAttribute("flash", "The contact [" + contact.name() + "] has been deleted.");
return "redirect:/contacts";
}
// 产生 404 响应的异常
private static ResponseStatusException notFound() {
return new ResponseStatusException(HttpStatus.NOT_FOUND, "unknown contact");
}
}
|
我们来解释这段代码:
- 第 28–38 行:两个页面——列表页和联系人资料页。约束 [{id:\\d+}] (参见示例 02)只接受由数字组成的标识符;
- 第 36 行:[orElseThrow] 返回 [Optional] 中包含的联系人,如果它为空,则抛出由传入的函数生成的异常:这里是方法引用 [ContactsController::notFound];
- 第 41–47 行:以 PRG 方式保存记录。参数 [name] and [phone] 是必需的:[@RequestParam] 不能在没有 [required = false] 的情况下使用;
- 第 50–56 行:复制,由同一表单上的第二个按钮触发(属性 [formaction]);
- 第 58–63 行:删除,通过 POST;
- 第 66–68 行:[ResponseStatusException] 异常携带一个 HTTP 代码和一个原因。由动作触发时,它会生成带有该代码的错误响应:这里是 404。因此,在动作 [details], [save], and [delete] 中,不存在的联系人会触发 404;而复制则不会重新读取联系人:它根据收到的字段创建一个副本。
[templates/contacts/list.html] 文件:
| <!doctype html>
<html xmlns:th="http://www.thymeleaf.org" th:replace="~{layout :: page(~{::main})}">
<body>
<main>
<h1 class="h3">Contacts</h1>
<table class="table align-middle">
<tbody>
<tr th:each="contact : ${contacts}">
<td th:text="${contact.name}">Marie Durand</td>
<td th:text="${contact.phone}">01 23 45 67 89</td>
<td class="text-end">
<!--/* 查看:一个简单的链接;@{/contacts/{id}(id=...)}:带变量的 URL */-->
<a class="btn btn-sm btn-outline-primary" th:href="@{/contacts/{id}(id=${contact.id})}">View</a>
<!--/* 删除:一个 POST 表单,其提交将需要确认 */-->
<form method="post" class="d-inline" th:action="@{/contacts/{id}/delete(id=${contact.id})}"
th:data-confirmation="|Delete the contact ${contact.name}?|">
<button class="btn btn-sm btn-outline-danger" type="submit">Delete</button>
</form>
</td>
</tr>
</tbody>
</table>
</main>
</body>
</html>
|
- 第 13 行:查看:一个链接,由 [Bootstrap] 显示为按钮。链接表达式 [@{/contacts/{id}(id=${contact.id})}] 包含一个路径变量 [{id}],由括号中的同名参数填充:[/contacts/1]。与任何路径变量都不对应的参数会被添加到 [?] 之后(参见示例 16);
- 第 15–16 行:删除:一个小型 POST 表单,只剩下它的按钮。属性 [data-confirmation] 包含提交前要询问的问题。属性 [data-*] 是未作规定的:HTML 会忽略它们,而页面上的 [JavaScript] 可以读取它们。[Thymeleaf] 可以写入任何属性:[th:data-confirmation] 计算 [data-confirmation] 属性,其值会被转义。
文件 [templates/contacts/details.html]:
| <!doctype html>
<html xmlns:th="http://www.thymeleaf.org" th:replace="~{layout :: page(~{::main})}">
<body>
<main th:object="${contact}">
<h1 class="h3" th:text="|Contact no. *{id}|">Contact no. 1</h1>
<form method="post" th:action="@{/contacts/{id}(id=*{id})}">
<div class="mb-2">
<label class="form-label" for="name">Name</label>
<input class="form-control" id="name" name="name" th:value="*{name}">
</div>
<div class="mb-3">
<label class="form-label" for="phone">Phone</label>
<input class="form-control" id="phone" name="phone" th:value="*{phone}">
</div>
<!--/* 同一个表单的两个提交按钮 */-->
<button class="btn btn-primary" type="submit">Save</button>
<button class="btn btn-outline-primary" type="submit" th:formaction="@{/contacts/{id}/duplicate(id=*{id})}">Duplicate</button>
<a class="btn btn-link" href="/contacts">Back to the list</a>
</form>
</main>
</body>
</html>
|
- 第 4 行:[th:object] 位于 [<main>] 标签上:联系人是被选中的对象,[*{id}] 指向它的 ID;
- 第 6 行:表单的地址,其中的路径变量由选择表达式填充;
- 第 9 行和第 13 行:该表单不使用 [th:field]:字段没有与表单对象关联,因此 [th:value] 就足够了;
- 第 16–17 行:同一表单的两个提交按钮;第二个按钮有自己的 [formaction] 属性。
4.9.1. 确认窗口
浏览器的对话框([window.confirm])无法设置格式或翻译:其按钮始终使用浏览器的语言。因此用一个 [Bootstrap] 窗口来替代它,该窗口嵌入在页面中,在需要之前保持隐藏。[templates/fragments/confirmation.html] 文件:
| <!--/* 整个页面只有一个窗口,最初是隐藏的(d-none) */-->
<div id="confirmation-modal" class="d-none" th:fragment="confirmation">
<div class="modal-backdrop fade show"></div>
<div class="modal fade show d-block" tabindex="-1" role="alertdialog" aria-modal="true">
<div class="modal-dialog modal-dialog-centered">
<div class="modal-content">
<div class="modal-header">
<h5 class="modal-title">Confirmation</h5>
</div>
<div class="modal-body">
<p class="mb-0" id="confirmation-modal-message"></p>
</div>
<div class="modal-footer">
<button type="button" class="btn btn-secondary" data-action="no">No, go back</button>
<button type="button" class="btn btn-danger" data-action="yes">Yes, confirm</button>
</div>
</div>
</div>
</div>
</div>
|
- 第 2 行:一个不带参数的片段。[d-none] 类用于隐藏该窗口;
- 第 3 行:灰色背景;
- 第 11 行:问题所在的位置;
- 第 14–15 行:两个按钮,由 [data-action] 属性标识。
文件 [templates/layout.html]:
| <!doctype html>
<html lang="en" xmlns:th="http://www.thymeleaf.org" th:fragment="page(content)">
<head>
<meta charset="utf-8">
<title>Contacts</title>
<link rel="stylesheet" href="/bootstrap/css/bootstrap.min.css">
<link rel="stylesheet" href="/css/styles.css">
</head>
<body>
<div class="container py-3" style="max-width: 40rem">
<div class="alert alert-success" role="status" th:if="${flash != null}" th:text="${flash}">flash</div>
<main th:replace="${content}"></main>
</div>
<!--/* 确认窗口,存在于所有页面中 */-->
<div th:replace="~{fragments/confirmation :: confirmation}"></div>
<!--/* 脚本,位于页面末尾:它查找的元素已经存在 */-->
<script src="/js/app.js"></script>
</body>
</html>
|
- 第 11 行:闪现消息;
- 第 15 行:该窗口出现在每个页面上;
- 第 17 行:脚本加载在页面底部;它运行时,所查找的元素已经存在。它作为静态文件由 [static/js/app.js] 提供。
一小段 [JavaScript] 将表单与窗口联系起来。文件 [static/js/app.js]:
| // 确认带有 data-confirmation="..." 属性的表单
// 没有 JavaScript 时,这些表单会不经确认直接发送。
(() => {
const modal = document.getElementById('confirmation-modal');
const message = document.getElementById('confirmation-modal-message');
let pending = null; // 用户确认时要发送的表单
// 1. 我们拦截需要确认的表单的提交
document.querySelectorAll('form[data-confirmation]').forEach((form) => {
form.addEventListener('submit', (event) => {
event.preventDefault(); // 提交被挂起
pending = form;
message.textContent = form.dataset.confirmation;
modal.classList.remove('d-none'); // 窗口出现
});
});
// 2. 窗口的两个按钮
modal.addEventListener('click', (event) => {
const action = event.target.dataset.action;
if (action === 'yes') {
pending.submit(); // 提交,且不再次触发 'submit' 事件
} else if (action === 'no') {
modal.classList.add('d-none');
pending = null;
}
});
})();
|
- 第 3 行:代码被包装在一个立即执行的函数中,以避免创建全局变量;
- 第 9–16 行:对每个带有属性 [data-confirmation] 的表单的提交都会被拦截。[preventDefault()] 会暂停提交;表单被保存下来,问题被放入窗口中([textContent],而不是 [innerHTML]:问题作为文本显示,绝不会被解释为 HTML),然后显示该窗口;
- 第 19–27 行:“是”会提交已缓存的表单。表单的 [submit()] 方法提交表单时不会触发 [submit] 事件:因此不会再次出现确认提示。“否”则隐藏该窗口。
如果禁用了 [JavaScript] ,表单会直接提交而不经确认:应用程序仍然可以正常运行。这就是渐进增强的原则:[JavaScript] 提供便利,但并非必不可少。案例研究遵循这一原则(它的 [static/js/app.js] 脚本增加了键盘处理:Esc 键、焦点)。得到的页面,来自 http://localhost:5000/contacts:列表、确认提示、删除后的列表,以及某个联系人的资料页:
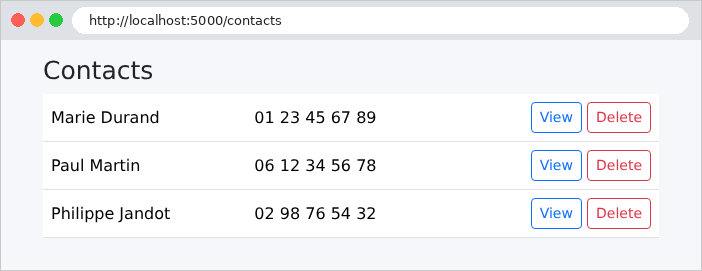
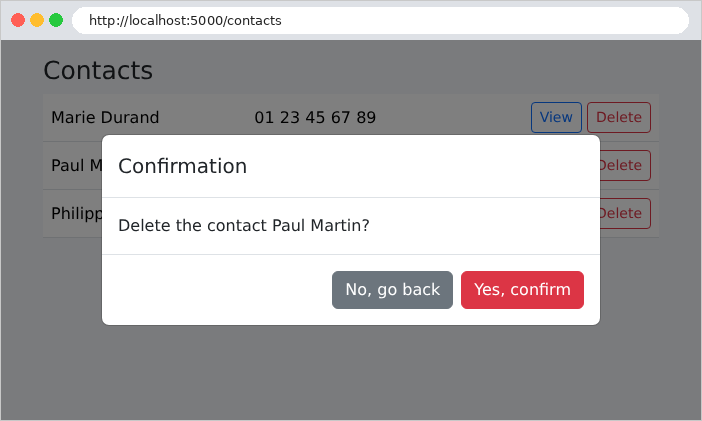
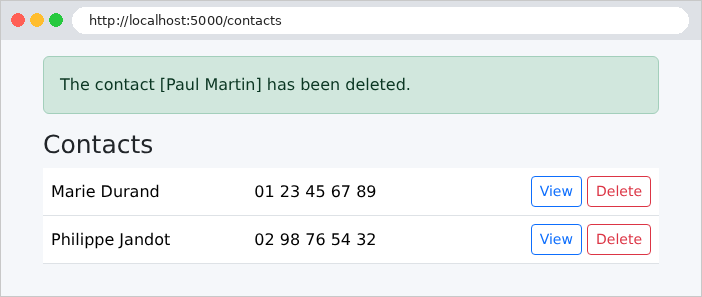
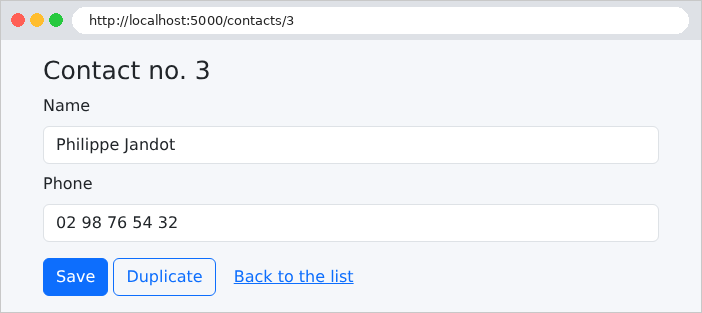
最后,我们验证删除操作不能通过 GET 请求触发:
| curl -i http://localhost:5000/contacts/2/delete
|
| HTTP/1.1 405
Allow: POST
Content-Type: application/json
{"timestamp":"2026-09-25T16:54:31.432Z","status":405,"error":"Method Not Allowed","message":"Method 'GET' is not supported.","path":"/contacts/2/delete"}
|
路径存在,但不支持 GET 方法:[Spring MVC] 返回 [405 Method Not Allowed],并且 [Allow] 标头指明了接受的方法。响应体是 [Spring Boot] 的错误响应,如 [curl] 中所见的 JSON 形式(请求 HTML 的浏览器会收到一个错误页面)。使用 POST:
| curl -i -X POST http://localhost:5000/contacts/2/delete
|
| HTTP/1.1 302
Set-Cookie: JSESSIONID=A9EDA1129B98CE1244D75669371DA9B0; Path=/; HttpOnly
Location: http://localhost:5000/contacts
Content-Length: 0
|
删除已执行,随后重定向到列表;[JSESSIONID] Cookie 是携带闪现消息的会话 Cookie。再来看一个不存在的联系人:
| curl -i http://localhost:5000/contacts/99
|
| HTTP/1.1 404
Content-Type: application/json
{"timestamp":"2026-09-25T16:54:31.498Z","status":404,"error":"Not Found","message":"unknown contact","path":"/contacts/99"}
|
404 响应重复了为异常 [ResponseStatusException] ([unknown contact])给出的原因。该字段 [message]仅在开发期间出现:[Spring Boot] 的开发工具([devtools],所有示例都有这个依赖)会启用它的显示;没有它们时,响应只包含代码、错误和路径。