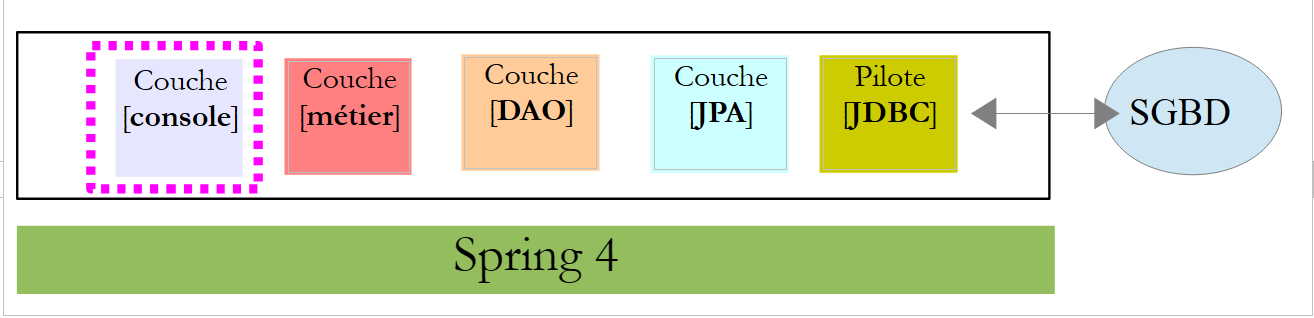
2. Spring 4 服务器
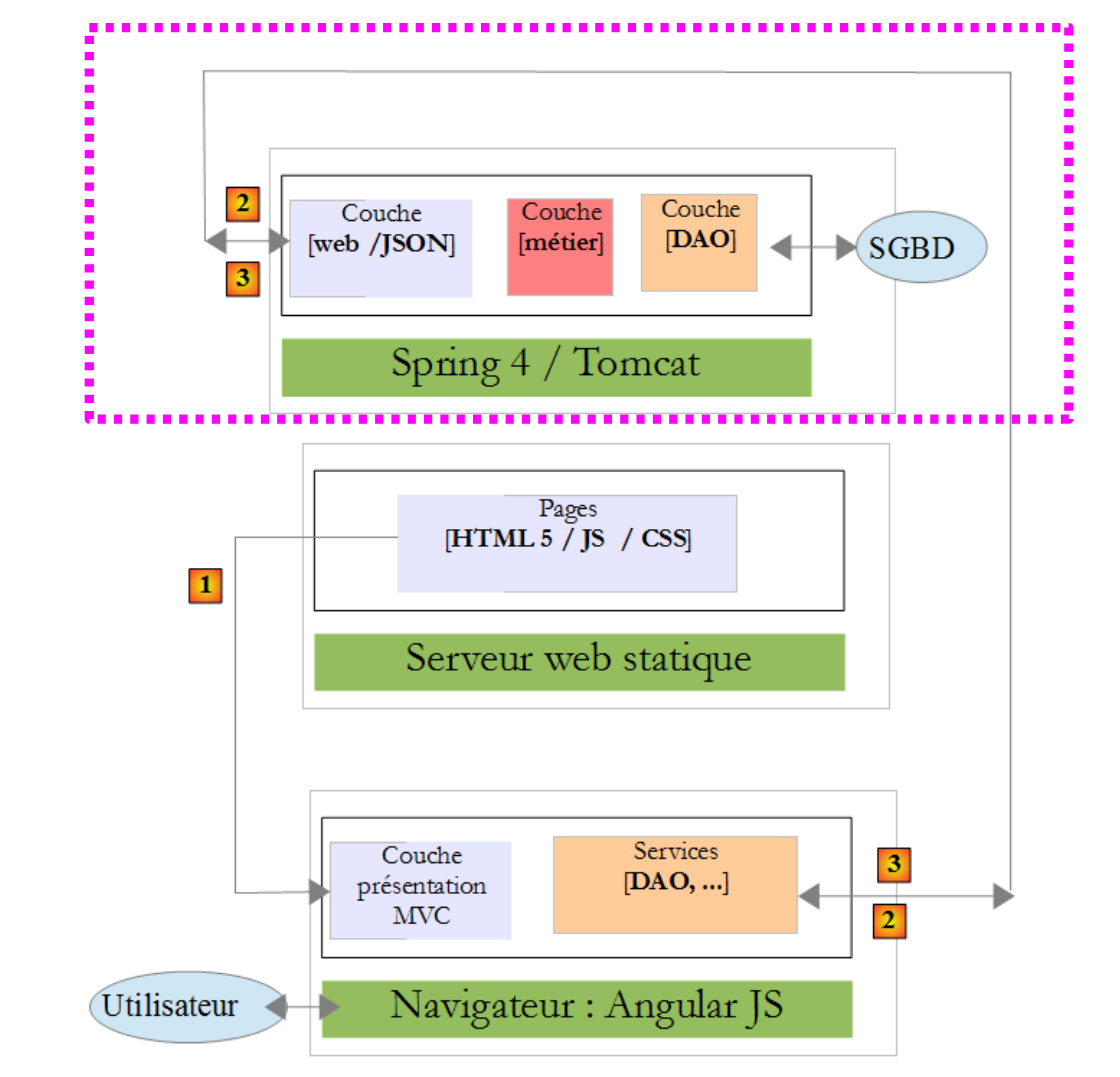 |
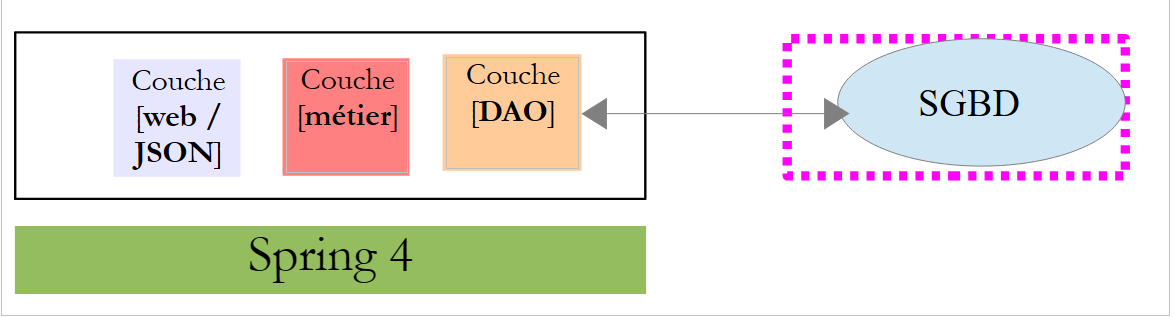
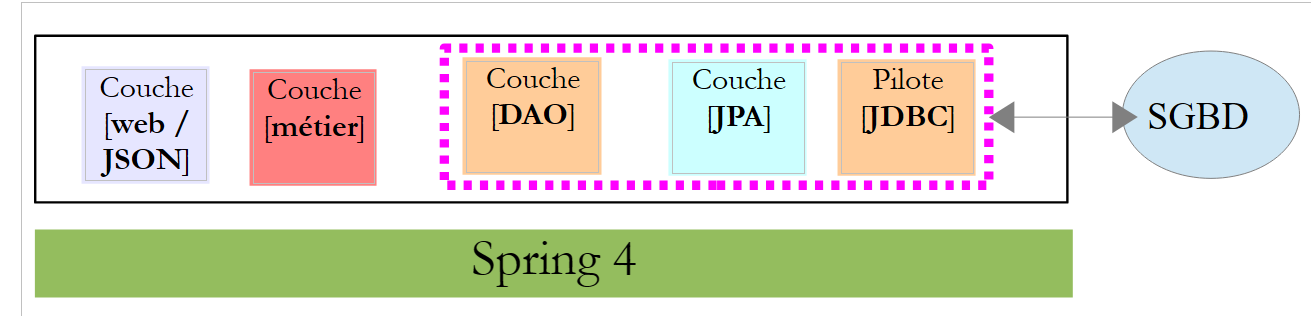
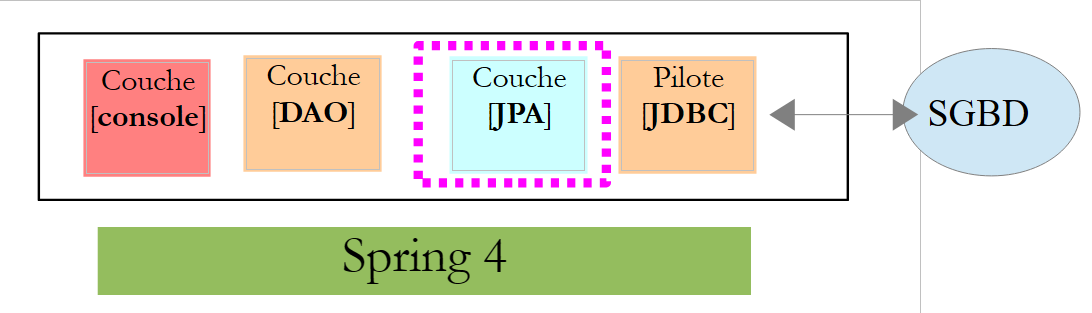
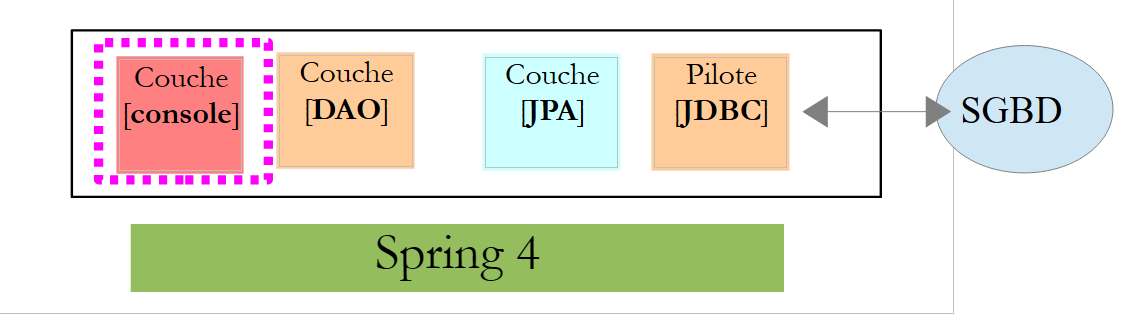
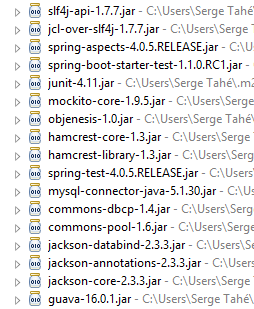
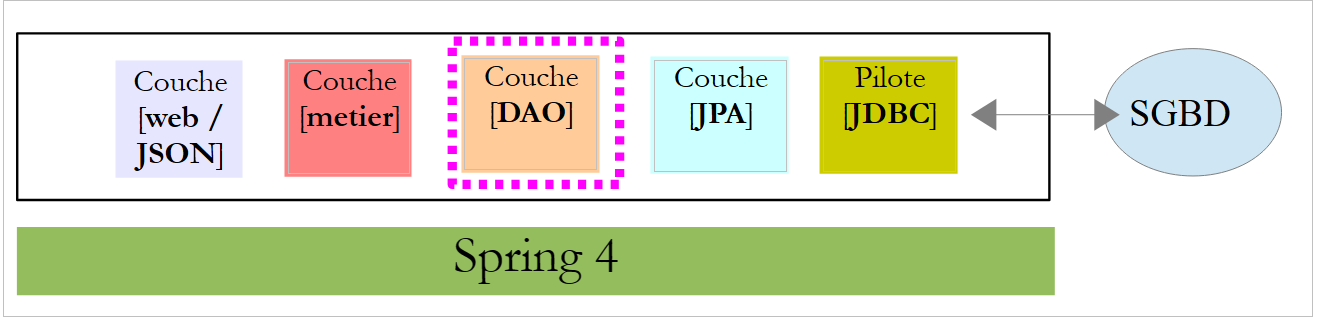
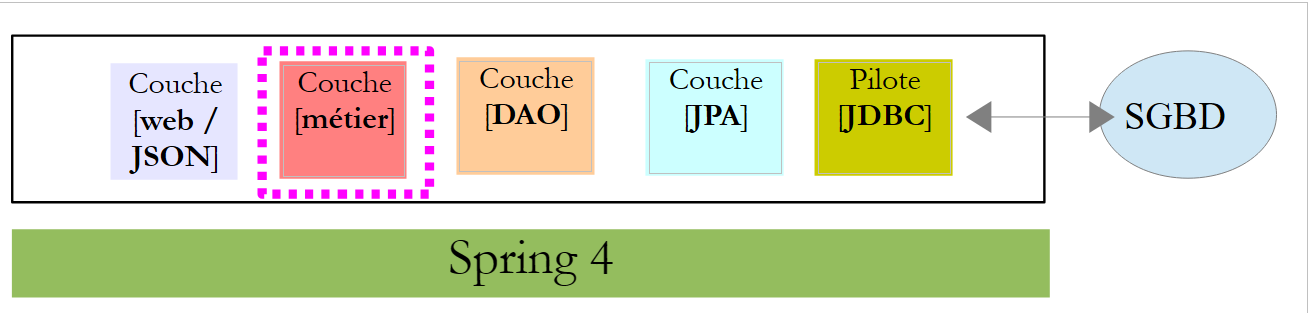
在上述架构中,我们将开始构建基于 Spring 4 框架的 Web 服务 / JSON。我们将分几个步骤编写:
- 首先是 [métier] 和 [DAO] 层(数据访问对象)。此处我们将使用 Spring Data;
- 接着是未启用身份验证的 Web 服务 JSON。此处我们将使用 Spring MVC;
- 随后将使用 Spring Security 添加身份验证功能。
首先,我们将详细说明支撑该应用程序的数据库结构。
2.1. 数据库
 |
后续将称为 [dbrdvmedecins] 的数据库 是一个包含以下表的 MySQL5 数据库:
 |
预约由以下表管理:
- [medecins]:包含诊所医生列表;
- [clients]:包含诊所的患者列表;
- [creneaux]:包含每位医生的可用时段;
- [rv]:包含医生预约列表。
表 [roles]、[users] 和 [users_roles] 是与身份验证相关的表。目前,我们暂不处理这些表。
管理预约的表之间的关系如下:
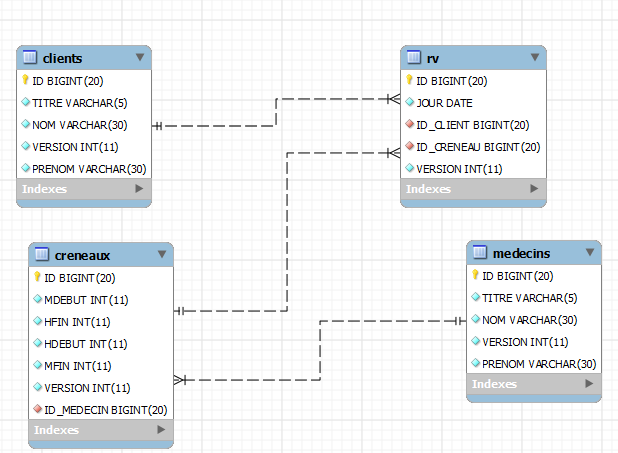 |
- 一个时段属于一位医生——一位医生拥有0个或多个时段;
- 一个预约通过医生的时段将客户与医生联系在一起;
- 一位客户拥有0个或多个预约;
- 一个时间段关联 0 个或多个预约(在不同的日期)。
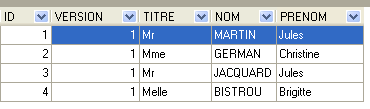
2.1.1. 表 [MEDECINS]
该表包含由应用程序 [RdvMedecins] 管理的医生信息。
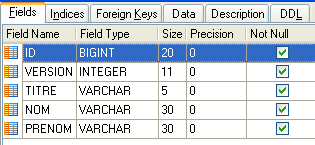 |  |
- ID:医生标识号——该表的主键
- VERSION:表中该行的版本标识号。每次对该行进行修改时,该数字都会增加 1。
- NOM:医生姓名
- PRENOM:其名字
- TITRE:其称谓(小姐、女士、先生)
2.1.2. 表 [CLIENTS]
各医生的患者信息存储在表 [CLIENTS] 中:
 |  |
- ID:客户标识号——该表的主键
- VERSION:标识表中该行版本的编号。每次对该行进行修改时,该数字都会递增1。
- NOM:客户姓名
- PRENOM:客户名字
- TITRE:其称谓(小姐、女士、先生)
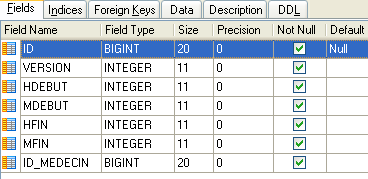
2.1.3. 表 [CRENEAUX]
该表列出了可进行 RV 操作的时间段:
 |
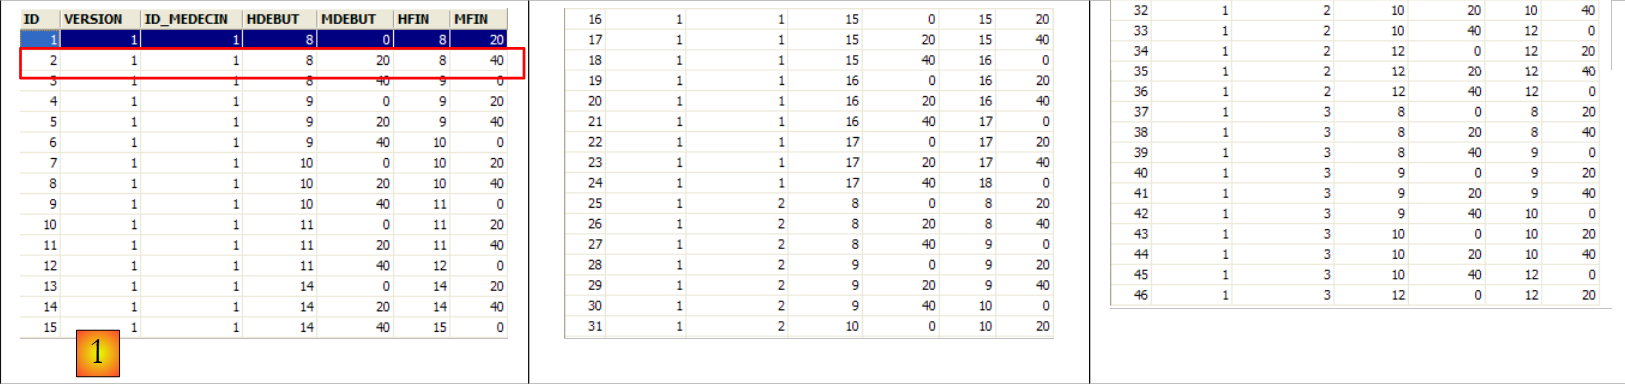 |
- ID:时间段标识号——该表的主键(第8行)
- VERSION:表中该行的版本标识号。每次对该行进行修改时,该数字会递增1。
- ID_MEDECIN:标识该时段所属医生的编号——MEDECINS(ID)列的外键。
- HDEBUT:时段开始时间
- MDEBUT:时段开始分钟
- HFIN:时段结束时间
- MFIN:时段结束分钟
例如,表 [CRENEAUX] 的第二行(参见上文 [1])表明,第 2 号时段于 8 点 20 分开始,8 点 40 分结束,归属于第 1 号医生 (玛丽女士 PELISSIER)。
2.1.4. 表 [RV]
该表列出了每位医生所分配的 RV:
 |
- ID:唯一标识RV的编号——主键
- JOUR:RV的日期
- ID_CRENEAU:RV的时间段——表[CRENEAUX]中字段[ID]的外键——同时确定时间段和相关医生。
- ID_CLIENT:预订对象的客户编号——作为表[CLIENTS]中字段[ID]的外键
该表的 对关联列(JOUR、ID_CRENEAU)的值施加了唯一性约束:
如果表[RV]中某行具有值 (JOUR1, ID_CRENEAU1) 作为列值(JOUR, ID_CRENEAU),则该值在其他任何地方都不能出现。 否则,这意味着同一时间针对同一位医生生成了两个 RV。从 Java 编程的角度来看,当这种情况发生时,数据库中的 JDBC 驱动程序会触发一个 SQLException。
id 行值为 3(参见上文的 [1]),表示 2006 年 8 月 23 日为第 20 个时段和第 4 号客户预订了一个 RV。 [CRENEAUX]表显示,第20号时段对应16:20-16:40的时间段,由第1号医生(Marie PELISSIER女士)负责。 表 [CLIENTS] 显示,第 4 号客户是布里吉特·BISTROU 小姐。
2.2. Spring Data 入门
我们将使用 Spring 生态系统中的一个分支——Spring Data,来实现该项目的 [DAO] 层。
 |
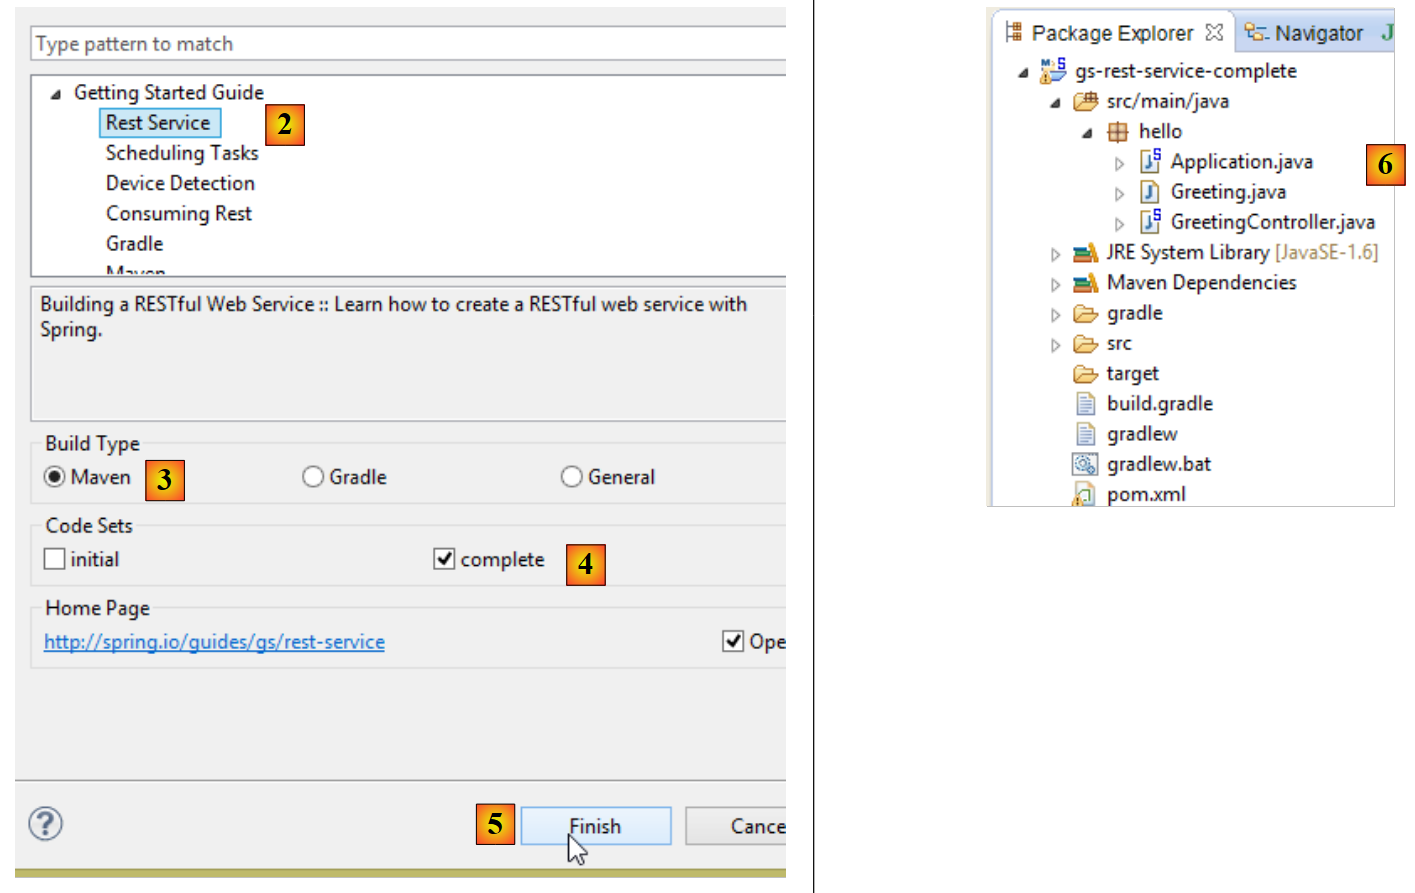
Spring 官网上有许多关于 Spring [http://spring.io/guides] 入门教程。我们将使用其中一个来介绍 Spring Data。为此,我们将使用 Spring Tool Suite (STS)。
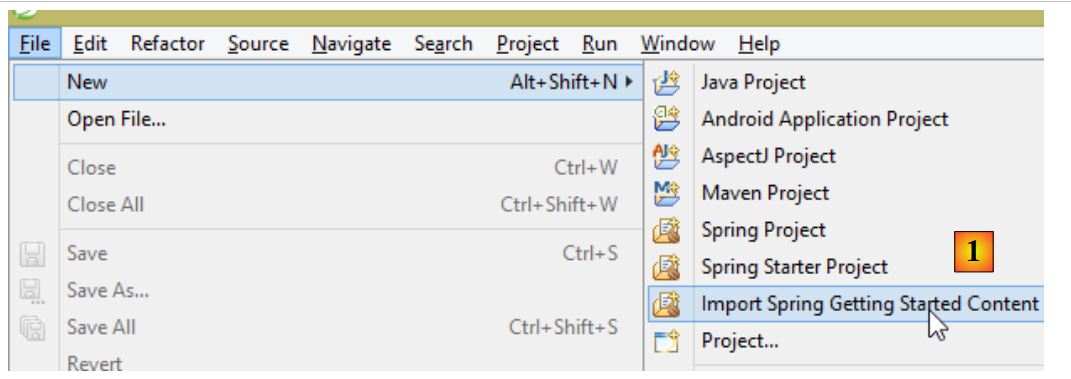 |
- 在 [1] 中,我们导入 [spring.io/guides] 中的一个教程;
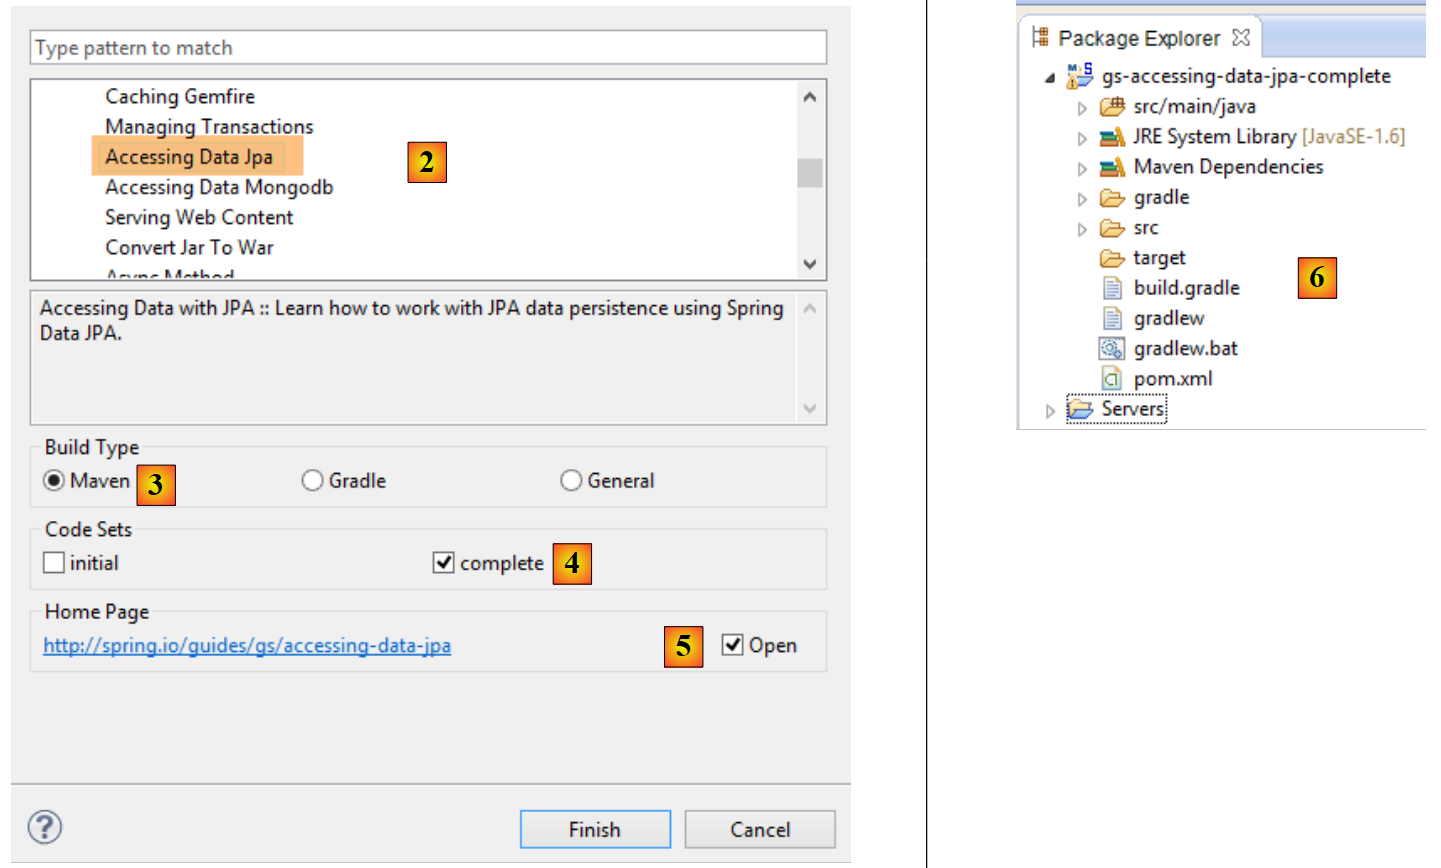 |
- 在 [2] 中,选择教程 [Accessing Data Jpa],该教程演示了如何使用 Spring Data 访问数据库;
- 在 [3] 中,选择一个由 Maven 配置的项目;
- 在 [4] 中,教程提供两种形式:[initial] 是一个空模板,需根据教程逐步填充;[complete] 则是教程的最终版本。我们选择后者;
- 在 [5] 中,我们可以选择在浏览器中查看教程;
- 在 [6] 中,是最终项目。
2.2.1. 项目的 Maven 配置
项目的 Maven 依赖项在文件 [pom.xml] 中配置:
    <groupId>org.springframework</groupId>
    <artifactId>gs-accessing-data-jpa</artifactId>
    <version>0.1.0</version>

    <parent>
        <groupId>org.springframework.boot</groupId>
        <artifactId>spring-boot-starter-parent</artifactId>
        <version>1.0.2.RELEASE</version>
    </parent>

    <dependencies>
        <dependency>
            <groupId>org.springframework.boot</groupId>
            <artifactId>spring-boot-starter-data-jpa</artifactId>
        </dependency>
        <dependency>
            <groupId>com.h2database</groupId>
            <artifactId>h2</artifactId>
        </dependency>
    </dependencies>

    <properties>
        <!-- 所有操作均使用 UTF-8 -->
        <project.build.sourceEncoding>UTF-8</project.build.sourceEncoding>
        <project.reporting.outputEncoding>UTF-8</project.reporting.outputEncoding>
        <start-class>hello.Application</start-class>
</properties>
- 第 5-9 行:定义了一个父级 Maven 项目。该项目定义了项目的大部分依赖。如果这些依赖已足够,则无需添加;否则,需补充缺失的依赖;
- 第 12-15 行:定义了对 [spring-boot-starter-data-jpa] 的依赖。该工件包含 Spring Data 的类;
- 第 16-19 行:定义了对 SGBD 和 H2 的依赖,这些依赖用于创建和管理内存数据库。
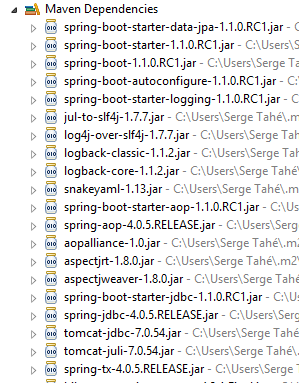
让我们看看这些依赖引入的类:
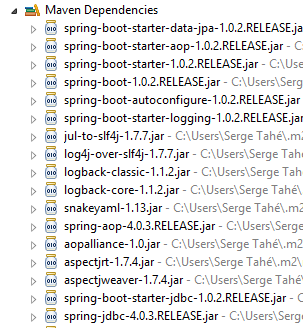 | 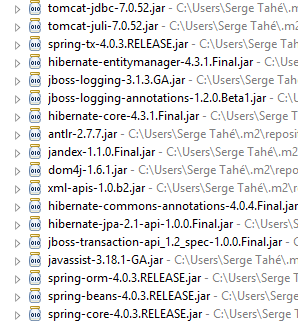 |  |
这些类数量众多:
- 部分属于 Spring 生态系统(以 spring 开头的);
- 另一些属于 Hibernate 生态系统(hibernate、jboss),其中我们在此使用的是 JPA 这一实现;
- 还有一些是测试库(junit、hamcrest);
- 还有日志库(log4j、logback、slf4j);
我们将保留所有这些库。对于生产环境中的应用程序,应仅保留必要的库。
在文件 [pom.xml] 的第 26 行,可以看到以下代码:
<start-class>hello.Application</start-class>
该行与以下几行相关:
<build>
        <plugins>
            <plugin>
                <artifactId>maven-compiler-plugin</artifactId>
            </plugin>
            <plugin>
                <groupId>org.springframework.boot</groupId>
                <artifactId>spring-boot-maven-plugin</artifactId>
            </plugin>
        </plugins>
    </build>
第6-9行,[spring-boot-maven-plugin]插件用于生成应用程序的可执行jar文件。因此,[pom.xml]文件的第26行指定了该jar文件的可执行类。
2.2.2. [JPA] 层
数据库访问通过 [JPA] 层实现,Java Persistence API:
 |
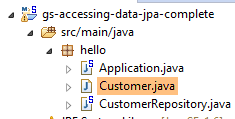 |
该应用程序较为基础,用于管理客户 [Customer]。类 [Customer] 属于 [JPA] 层,具体如下:
package hello;

import javax.persistence.Entity;
import javax.persistence.GeneratedValue;
import javax.persistence.GenerationType;
import javax.persistence.Id;

@Entity
public class Customer {

    @Id
    @GeneratedValue(strategy = GenerationType.AUTO)
    private long id;
    private String firstName;
    private String lastName;

    protected Customer() {
    }

    public Customer(String firstName, String lastName) {
        this.firstName = firstName;
        this.lastName = lastName;
    }

    @Override
    public String toString() {
        return String.format("Customer[id=%d, firstName='%s', lastName='%s']", id, firstName, lastName);
    }

}
一位客户拥有ID [id]、名字 [firstName] 和姓氏 [lastName]。每个 [Customer] 实例代表数据库表中的一行。
- 第8行:注解JPA,该注解使得实例[Customer]的持久化操作(创建、读取、更新、删除)将由实现类JPA进行管理。 根据 Maven 依赖关系,可以看到实际使用的是 JPA / Hibernate 实现;
- 第 11-12 行:JPA 注解将字段 [id] 关联到 [Customer] 表的主键。 第 12 行表明,JPA 实现将使用所用 SGBD 特有的主键生成方法,此处为 H2;
没有其他关于 JPA 的注释。因此将使用默认值:
- [Customer] 表将采用类名,即 [Customer];
- 该表的列名将采用类字段的名称:[id, firstName, lastName](需注意表列名不区分大小写);
需要注意的是,所使用的 JPA 实现从未被命名。
2.2.3. [DAO] 层
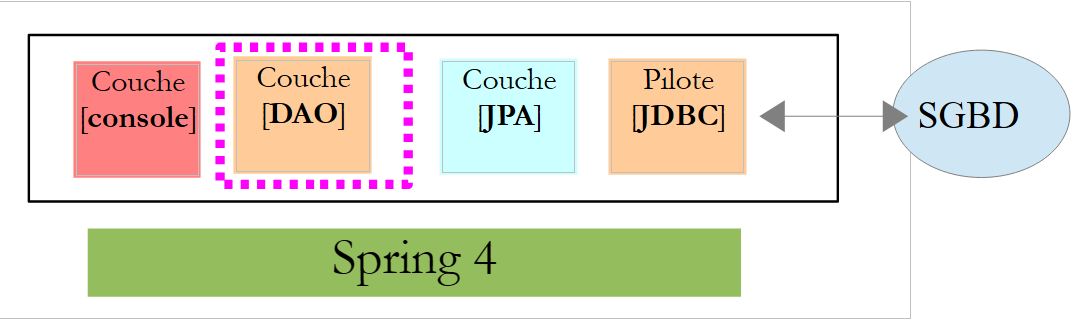 |
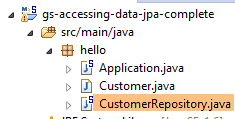 |
类 [CustomerRepository] 实现了 [DAO] 层。其代码如下:
package hello;

import java.util.List;

import org.springframework.data.repository.CrudRepository;

public interface CustomerRepository extends CrudRepository<Customer, Long> {

    List<Customer> findByLastName(String lastName);
}
因此,这是一个接口而非类(第7行)。它继承了Spring Data的接口[CrudRepository](第5行)。 该接口由两个类型进行参数化:第一个是所管理元素的类型,此处为类型 [Customer];第二个是所管理元素的主键类型,此处为类型 [Long]。接口 [CrudRepository] 如下所示:
package org.springframework.data.repository;

import java.io.Serializable;

@NoRepositoryBean
public interface CrudRepository<T, ID extends Serializable> extends Repository<T, ID> {

    <S extends T> S save(S entity);

    <S extends T> Iterable<S> save(Iterable<S> entities);

    T findOne(ID id);

    boolean exists(ID id);

    Iterable<T> findAll();

    Iterable<T> findAll(Iterable<ID> ids);

    long count();

    void delete(ID id);

    void delete(T entity);

    void delete(Iterable<? extends T> entities);

    void deleteAll();
}
该接口定义了可在类型 JPA T 上执行的操作 CRUD(创建 – 读取 – 更新 – 删除):
- 第 8 行:save 方法用于将实体 T 持久化到数据库中。它使用 SGBD 赋予的主键 id 将实体持久化。该方法还支持根据主键 id 更新实体 T。 具体执行哪种操作取决于主键 id 的值:若 id 为 null,则执行持久化操作;否则执行更新操作;
- 第10行:同上,但针对实体列表;
- 第 12 行:方法 findOne 用于检索通过主键 id 标识的 T 实体;
- 第 22 行:delete 方法用于删除通过主键 id 标识的实体 T;
- 第24-28行:方法[delete]的变体;
- 第 16 行:方法 [findAll] 用于检索所有持久化实体 T;
- 第 18 行:同上,但仅限于已传入标识符列表的实体;
让我们回到 [CustomerRepository] 接口:
package hello;

import java.util.List;

import org.springframework.data.repository.CrudRepository;

public interface CustomerRepository extends CrudRepository<Customer, Long> {

    List<Customer> findByLastName(String lastName);
}
- 第 9 行可通过名称 [lastName] 检索 [Customer];
关于 [DAO] 层的内容就到此为止。该接口没有实现类,它由 [Spring Data] 在运行时自动生成。 接口 [CrudRepository] 的方法会被自动实现。至于在接口 [CustomerRepository] 中添加的方法,则视情况而定。让我们回到 [Customer] 的定义:
    private long id;
    private String firstName;
private String lastName;
第 9 行中的方法由 [Spring Data] 自动实现,因为它引用了 [Customer] 中的字段 [lastName](第 3 行)。 当在待实现的接口中遇到 [findBySomething] 方法时,Spring Data 会通过以下 JPQL(Java 持久化查询语言)查询来实现它:
因此,类型 T 必须包含一个名为 [something] 的字段。这样,方法
将通过类似以下代码实现:
return [em].createQuery("select c from Customer c where c.lastName=:value").setParameter("value",lastName).getResultList()
其中 [em] 指代持久化上下文 JPA。这仅在类 [Customer] 拥有名为 [lastName] 的字段时才可行,而实际情况正是如此。
综上所述,在简单情况下,Spring Data 允许我们通过一个简单的接口来实现 [DAO] 层。
2.2.4. [console] 层
 |
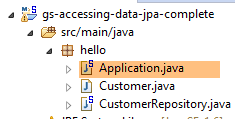 |
[Application] 类如下:
package hello;

import java.util.List;

import org.springframework.boot.SpringApplication;
import org.springframework.boot.autoconfigure.EnableAutoConfiguration;
import org.springframework.context.ConfigurableApplicationContext;
import org.springframework.context.annotation.Configuration;

@Configuration
@EnableAutoConfiguration
public class Application {

    public static void main(String[] args) {

        ConfigurableApplicationContext context = SpringApplication.run(Application.class);
        CustomerRepository repository = context.getBean(CustomerRepository.class);

        // 保存部分客户
        repository.save(new Customer("Jack", "Bauer"));
        repository.save(new Customer("Chloe", "O'Brian"));
        repository.save(new Customer("Kim", "Bauer"));
        repository.save(new Customer("David", "Palmer"));
        repository.save(new Customer("Michelle", "Dessler"));

        // 获取所有客户
        Iterable<Customer> customers = repository.findAll();
        System.out.println("Customers found with findAll():");
        System.out.println("-------------------------------");
        for (Customer customer : customers) {
            System.out.println(customer);
        }
        System.out.println();

        // 通过 ID 获取单个客户
        Customer customer = repository.findOne(1L);
        System.out.println("Customer found with findOne(1L):");
        System.out.println("--------------------------------");
        System.out.println(customer);
        System.out.println();

        // 按姓氏检索客户
        List<Customer> bauers = repository.findByLastName("Bauer");
        System.out.println("Customer found with findByLastName('Bauer'):");
        System.out.println("--------------------------------------------");
        for (Customer bauer : bauers) {
            System.out.println(bauer);
        }

        context.close();
    }

}
- 第 10 行:表明该类用于配置 Spring。Spring 的最新版本确实可以使用 Java 进行配置,而非 XML。这两种方法可以同时使用。 在带有 [Configuration] 注解的类代码中,通常会包含 Spring Bean,即待实例化的类定义。此处未定义任何 Bean。需要提醒的是,当使用 SGBD 时,必须定义各种 Spring Bean:
- 一个 [EntityManagerFactory],用于定义要使用的 JPA 实现;
- 一个 [DataSource],用于定义要使用的数据源,
- 一个 [TransactionManager],用于定义要使用的事务管理器;
此处未定义任何这些 Bean。
- 第 11 行:注解 [EnableAutoConfiguration] 源自项目 [Spring Boot](第 5-6 行)。 该注解通过类 [SpringApplication](第 16 行)要求 Spring Boot 根据其类路径中找到的库来配置应用程序。由于 Hibernate 库位于类路径中,因此 Bean [entityManagerFactory] 将使用 Hibernate 进行实现。 由于 SGBD 和 H2 库位于类路径中,因此 [dataSource] Bean 将使用 H2 进行实现。 在 [dataSource] Bean 中,还需定义用户及其密码。 在此情况下,Spring Boot 将使用 H2 的默认管理员,该管理员无需密码。由于 [spring-tx] 库位于类路径中,因此将使用 Spring 的事务管理器。
此外,系统将扫描包含类 [Application] 的文件夹,查找 Spring 隐式识别的 Bean 或通过 Spring 注解显式定义的 Bean。因此,类 [Customer] 和 [CustomerRepository] 将被检查。 由于第一个类带有 [@Entity] 注解,它将被归类为由 Hibernate 管理的实体。由于第二个类继承了 [CrudRepository] 接口,它将被注册为 Spring Bean。
让我们来分析代码的第 16-17 行:
ConfigurableApplicationContext context = SpringApplication.run(Application.class);
CustomerRepository repository = context.getBean(CustomerRepository.class);
- 第 1 行:执行 Spring Boot 项目中 [SpringApplication] 类的静态方法 [run]。其参数是带有 [Configuration] 或 [EnableAutoConfiguration] 注解的类。 此前所解释的所有内容将随之发生。结果是一个 Spring 应用上下文,即一组由 Spring 管理的 Bean;
- 第 17 行:向该 Spring 上下文请求一个实现 [CustomerRepository] 接口的 Bean。此处获取的是 Spring Data 为实现该接口而生成的类。
后续操作仅调用实现 [CustomerRepository] 接口的 Bean 中的方法。请注意第 50 行,此时上下文已被关闭。控制台输出结果如下:
- 第1-8行:Spring Boot项目的徽标;
- 第 9 行:执行 [hello.Application] 类;
- 第 10 行:[AnnotationConfigApplicationContext] 是实现 Spring 的 [ApplicationContext] 接口的类。这是一个 Bean 容器;
- 第 11 行:Bean [entityManagerFactory] 通过 Spring 类 [LocalContainerEntityManagerFactory] 实现;
- 第 12 行:出现了 [hibernate]。最终选定的是该实现类 JPA;
- 第 19 行:Hibernate 方言为 SQL,需与 SGBD 配合使用。 此处的 [H2Dialect] 方言表明,Hibernate 将与 SGBD 和 H2 配合使用;
- 第 22-24 行:创建了表 [CUSTOMER]。 这意味着Hibernate已被配置为根据JPA定义生成表,此处为类[Customer]的JPA定义;
- 第27-32行:Hibernate日志,显示了向表[CUSTOMER]插入的记录。这意味着Hibernate已被配置为生成日志;
- 第 35-39 行:已插入的五个客户;
- 第 42-44 行:接口中 [findOne] 方法的执行结果;
- 第 47-50 行:方法 [findByLastName] 的结果;
- 第 51 行及之后:Spring 上下文关闭的日志。
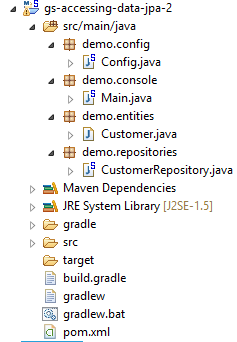
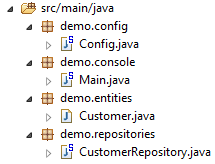
2.2.5. Spring Data 项目的手动配置
我们将前一个项目复制到 [gs-accessing-data-jpa-2] 项目中:
 |
在这个新项目中,我们将不依赖 Spring Boot 的自动配置,而是进行手动配置。如果默认配置不符合我们的需求,这将非常有用。
首先,我们在文件 [pom.xml] 中显式声明所需的依赖项:
<dependencies>
        <!-- Spring Core -->
        <dependency>
            <groupId>org.springframework</groupId>
            <artifactId>spring-core</artifactId>
            <version>4.0.5.RELEASE</version>
        </dependency>
        <dependency>
            <groupId>org.springframework</groupId>
            <artifactId>spring-context</artifactId>
            <version>4.0.5.RELEASE</version>
        </dependency>
        <dependency>
            <groupId>org.springframework</groupId>
            <artifactId>spring-beans</artifactId>
            <version>4.0.5.RELEASE</version>
        </dependency>
        <!-- Spring事务 -->
        <dependency>
            <groupId>org.springframework</groupId>
            <artifactId>spring-aop</artifactId>
            <version>4.0.5.RELEASE</version>
        </dependency>
        <dependency>
            <groupId>org.springframework</groupId>
            <artifactId>spring-tx</artifactId>
            <version>4.0.5.RELEASE</version>
        </dependency>
        <!-- Spring Data -->
        <dependency>
            <groupId>org.springframework.data</groupId>
            <artifactId>spring-data-jpa</artifactId>
            <version>1.5.2.RELEASE</version>
        </dependency>
        <!-- Spring Boot -->
        <dependency>
            <groupId>org.springframework.boot</groupId>
            <artifactId>spring-boot</artifactId>
            <version>1.0.2.RELEASE</version>
        </dependency>
        <!-- Hibernate -->
        <dependency>
            <groupId>org.hibernate</groupId>
            <artifactId>hibernate-entitymanager</artifactId>
            <version>4.3.4.Final</version>
        </dependency>
        <!-- H2 数据库 -->
        <dependency>
            <groupId>com.h2database</groupId>
            <artifactId>h2</artifactId>
            <version>1.4.178</version>
        </dependency>
        <!-- CommonsDBCP -->
        <dependency>
            <groupId>commons-dbcp</groupId>
            <artifactId>commons-dbcp</artifactId>
            <version>1.4</version>
        </dependency>
        <dependency>
            <groupId>commons-pool</groupId>
            <artifactId>commons-pool</artifactId>
            <version>1.6</version>
        </dependency>
    </dependencies>
- 第 3-17 行:Spring 的基础库;
- 第 19-28 行:用于管理数据库事务的 Spring 库;
- 第 30-34 行:用于访问数据库的 Spring Data;
- 第 36-40 行:用于启动应用程序的 Spring Boot;
- 第48-52行:SGBD H2;
- 第 54-63 行:数据库通常与连接池配合使用,以避免重复打开/关闭连接。此处采用的是 [commons-dbcp] 的实现;
同样在 [pom.xml] 中,修改了可执行类的名称:
    <properties>
...
        <start-class>demo.console.Main</start-class>
</properties>
在新项目中,实体 [Customer] 和接口 [CustomerRepository] 保持不变。我们将修改类 [Application],将其拆分为两个类:
- [Config],作为配置类:
- [Main],作为可执行类;
 |
可执行类 [Main] 与之前相同,只是去除了配置注解:
package demo.console;

import java.util.List;

import org.springframework.boot.SpringApplication;
import org.springframework.context.ConfigurableApplicationContext;

import demo.config.Config;
import demo.entities.Customer;
import demo.repositories.CustomerRepository;

public class Main {

    public static void main(String[] args) {

        ConfigurableApplicationContext context = SpringApplication.run(Config.class);
        CustomerRepository repository = context.getBean(CustomerRepository.class);
...

        context.close();
    }

}
- 第 12 行:类 [Main] 不再包含配置注解;
- 第 16 行:应用程序通过 Spring Boot 启动。参数 [Config.class] 是该项目的新配置类;
用于配置项目的类 [Config] 如下所示:
package demo.config;

import javax.persistence.EntityManagerFactory;
import javax.sql.DataSource;

import org.apache.commons.dbcp.BasicDataSource;
import org.springframework.context.annotation.Bean;
import org.springframework.context.annotation.Configuration;
import org.springframework.data.jpa.repository.config.EnableJpaRepositories;
import org.springframework.orm.jpa.JpaTransactionManager;
import org.springframework.orm.jpa.JpaVendorAdapter;
import org.springframework.orm.jpa.LocalContainerEntityManagerFactoryBean;
import org.springframework.orm.jpa.vendor.Database;
import org.springframework.orm.jpa.vendor.HibernateJpaVendorAdapter;
import org.springframework.transaction.PlatformTransactionManager;
import org.springframework.transaction.annotation.EnableTransactionManagement;

//@ComponentScan(basePackages = { "demo" })
//@EntityScan(basePackages = { "demo.entities" })
@EnableTransactionManagement
@EnableJpaRepositories(basePackages = { "demo.repositories" })
@Configuration
public class Config {
    // 数据源 H2
    @Bean
    public DataSource dataSource() {
        BasicDataSource dataSource = new BasicDataSource();
        dataSource.setDriverClassName("org.h2.Driver");
        dataSource.setUrl("jdbc:h2:./demo");
        dataSource.setUsername("sa");
        dataSource.setPassword("");
        return dataSource;
    }

    // 提供商 JPA
    @Bean
    public JpaVendorAdapter jpaVendorAdapter() {
        HibernateJpaVendorAdapter hibernateJpaVendorAdapter = new HibernateJpaVendorAdapter();
        hibernateJpaVendorAdapter.setShowSql(false);
        hibernateJpaVendorAdapter.setGenerateDdl(true);
        hibernateJpaVendorAdapter.setDatabase(Database.H2);
        return hibernateJpaVendorAdapter;
    }

    // EntityManagerFactory
    @Bean
    public EntityManagerFactory entityManagerFactory(JpaVendorAdapter jpaVendorAdapter, DataSource dataSource) {
        LocalContainerEntityManagerFactoryBean factory = new LocalContainerEntityManagerFactoryBean();
        factory.setJpaVendorAdapter(jpaVendorAdapter);
        factory.setPackagesToScan("demo.entities");
        factory.setDataSource(dataSource);
        factory.afterPropertiesSet();
        return factory.getObject();
    }

    // 事务管理器
    @Bean
    public PlatformTransactionManager transactionManager(EntityManagerFactory entityManagerFactory) {
        JpaTransactionManager txManager = new JpaTransactionManager();
        txManager.setEntityManagerFactory(entityManagerFactory);
        return txManager;
    }

}
- 第 22 行:注解 [@Configuration] 将类 [Config] 设为 Spring 配置类;
- 第 21 行:注解 [@EnableJpaRepositories] 用于指定 Spring Data 接口 [CrudRepository] 的所在目录。这些接口将作为 Spring 组件,并在 Spring 上下文中可用;
- 第 20 行:注解 [@EnableTransactionManagement] 表示 [CrudRepository] 接口的方法必须在事务内执行;
- 第 19 行:注解 [@EntityScan] 用于指定查找 JPA 实体的目录。 此处已将其注释掉,因为该信息已在第50行明确给出。如果使用[@EnableAutoConfiguration]模式,且JPA实体不在与配置类相同的文件夹中,则应保留此注解;
- 第 18 行:注解 [@ComponentScan] 用于列出需要搜索 Spring 组件的文件夹。 Spring组件是指带有@Service、@Component、@Controller等Spring注解的类。此处除[Config]类中定义的组件外别无其他,因此该注解已被注释掉;
- 第 25-33 行:定义数据源,即数据库 H2。正是第 25 行的 @Bean 注解,使得该方法创建的对象成为由 Spring 管理的组件。 此处方法名称可任意设定。但若第47行的EntityManagerFactory不存在且通过自动配置定义,则该方法必须命名为[dataSource];
- 第29行:数据库将命名为[demo],并生成在项目文件夹中;
- 第36-43行:定义所使用的JPA实现,此处为Hibernate实现。此处方法名可任意设定;
- 第 39 行:不生成 SQL 日志;
- 第 30 行:若数据库不存在,则创建数据库;
- 第46-54行:定义了将负责管理JPA持久化的EntityManagerFactory。该方法必须命名为[entityManagerFactory];
- 第 47 行:该方法接收两个参数,其类型与之前定义的两个 Bean 相同。Spring 将构建这些 Bean,并将其作为方法参数注入;
- 第 49 行:指定使用的 JPA 实现;
- 第 50 行:指定查找 JPA 实体的文件夹;
- 第 51 行:指定要管理的数据源;
- 第 57-62 行:事务管理器。该方法必须命名为 [transactionManager]。它接收第 46-54 行中的 Bean 作为参数;
- 第 60 行:将事务管理器关联至 EntityManagerFactory;
上述方法可以按任意顺序定义。
运行该项目将得到相同的结果。项目文件夹中会出现一个新文件,即数据库文件 H2:
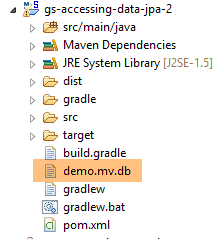 |
最后,我们可以不使用 Spring Boot。创建第二个可执行类 [Main2]:
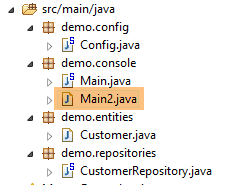 |
类 [Main2] 的代码如下:
package demo.console;

import java.util.List;

import org.springframework.context.annotation.AnnotationConfigApplicationContext;

import demo.config.Config;
import demo.entities.Customer;
import demo.repositories.CustomerRepository;

public class Main2 {

    public static void main(String[] args) {

        AnnotationConfigApplicationContext context = new AnnotationConfigApplicationContext(Config.class);
        CustomerRepository repository = context.getBean(CustomerRepository.class);
....

        context.close();
    }

}
- 第 15 行:配置类 [Config] 现由 Spring 类 [AnnotationConfigApplicationContext] 调用。从第 5 行可以看出,现在已不再依赖 Spring Boot。
运行结果与之前相同。
2.2.6. 创建可执行归档文件
要为该项目创建可执行归档文件,可按以下步骤操作:
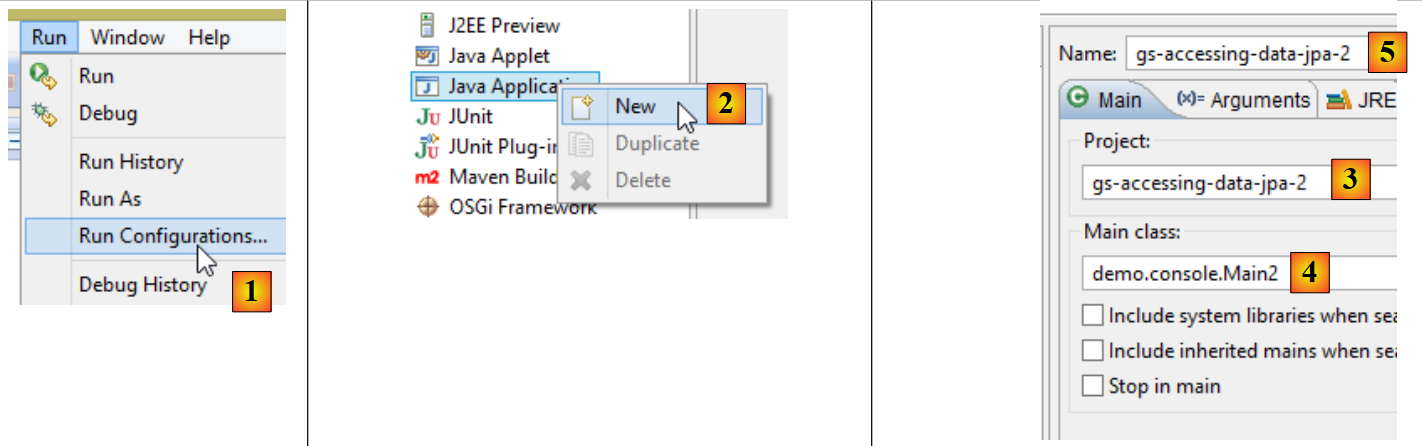 |
- 在 [1] 中:创建一个执行配置;
- 在 [2] 中:类型为 [Java Application]
- 在 [3] 中:指定要执行的项目(使用 Browse 按钮);
- 在 [4] 中:指定要执行的类;
- 在 [5] 中:运行配置的名称——可以是任意名称;
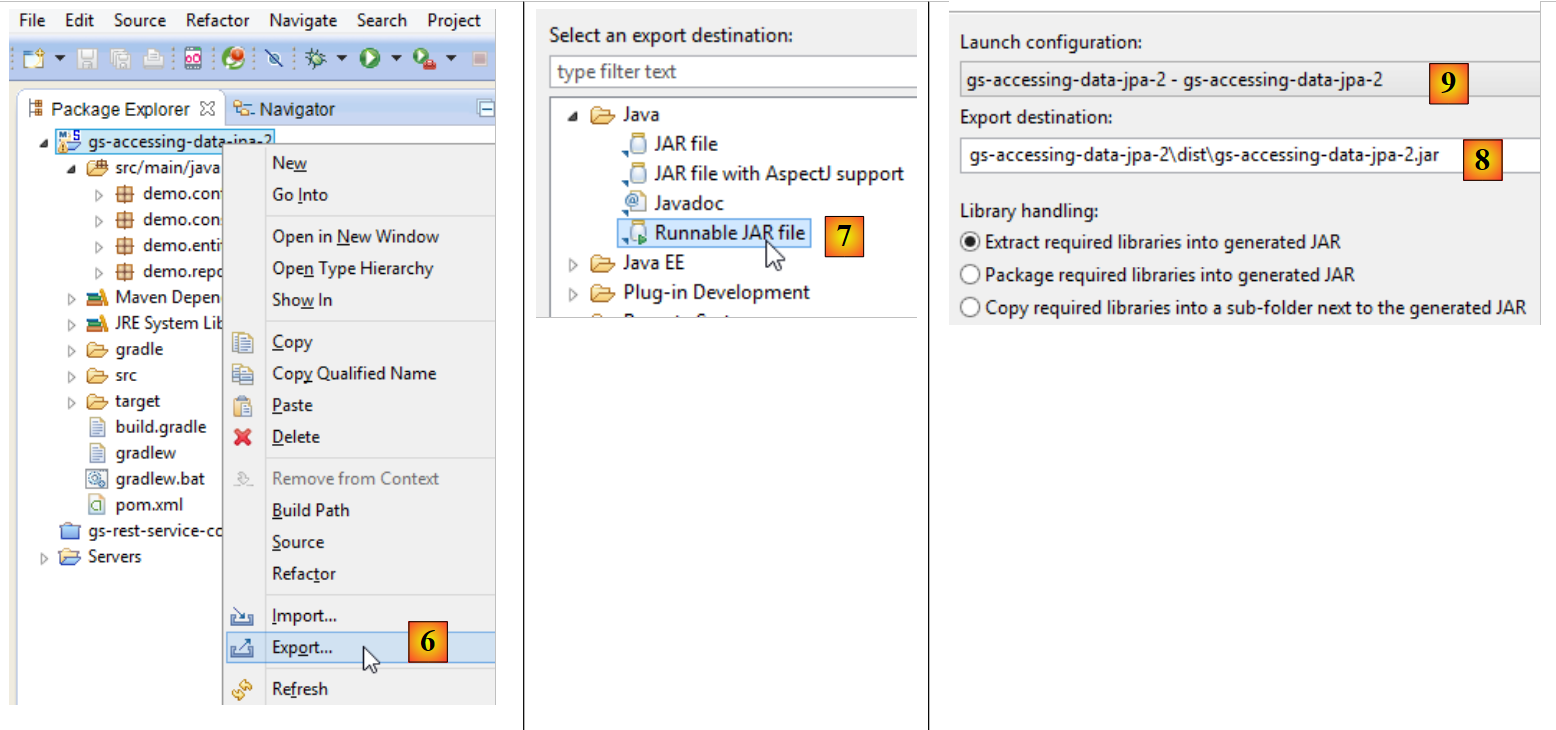 |
- 在 [6] 中:导出项目;
- 在 [7] 中:以可执行存档的形式;
- 在 [8] 中:指定要创建的可执行文件的路径和名称;
- 在 [9] 中:输入在 [5] 中创建的运行配置名称;
完成上述操作后,在包含可执行存档的文件夹中打开一个控制台:
按以下方式执行该归档文件:
.....\dist>java -jar gs-accessing-data-jpa-2.jar
控制台显示的结果如下:
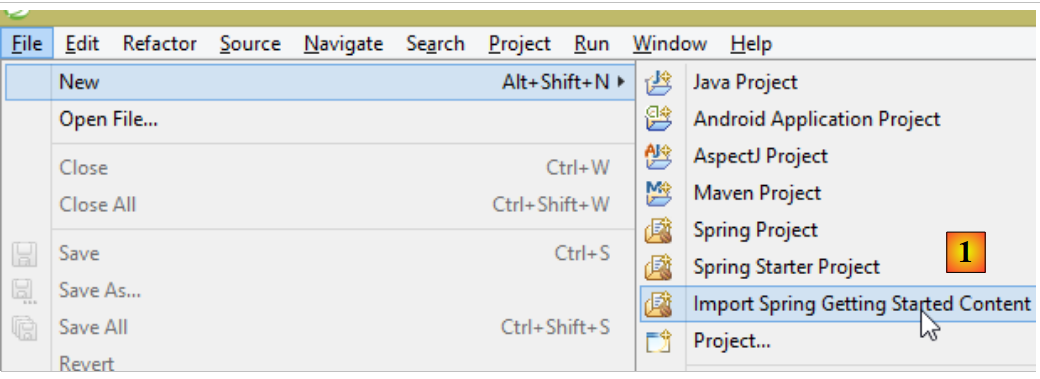
2.2.7. 创建一个新的 Spring Data 项目
要创建一个 Spring Data 项目骨架,可以按以下步骤操作:
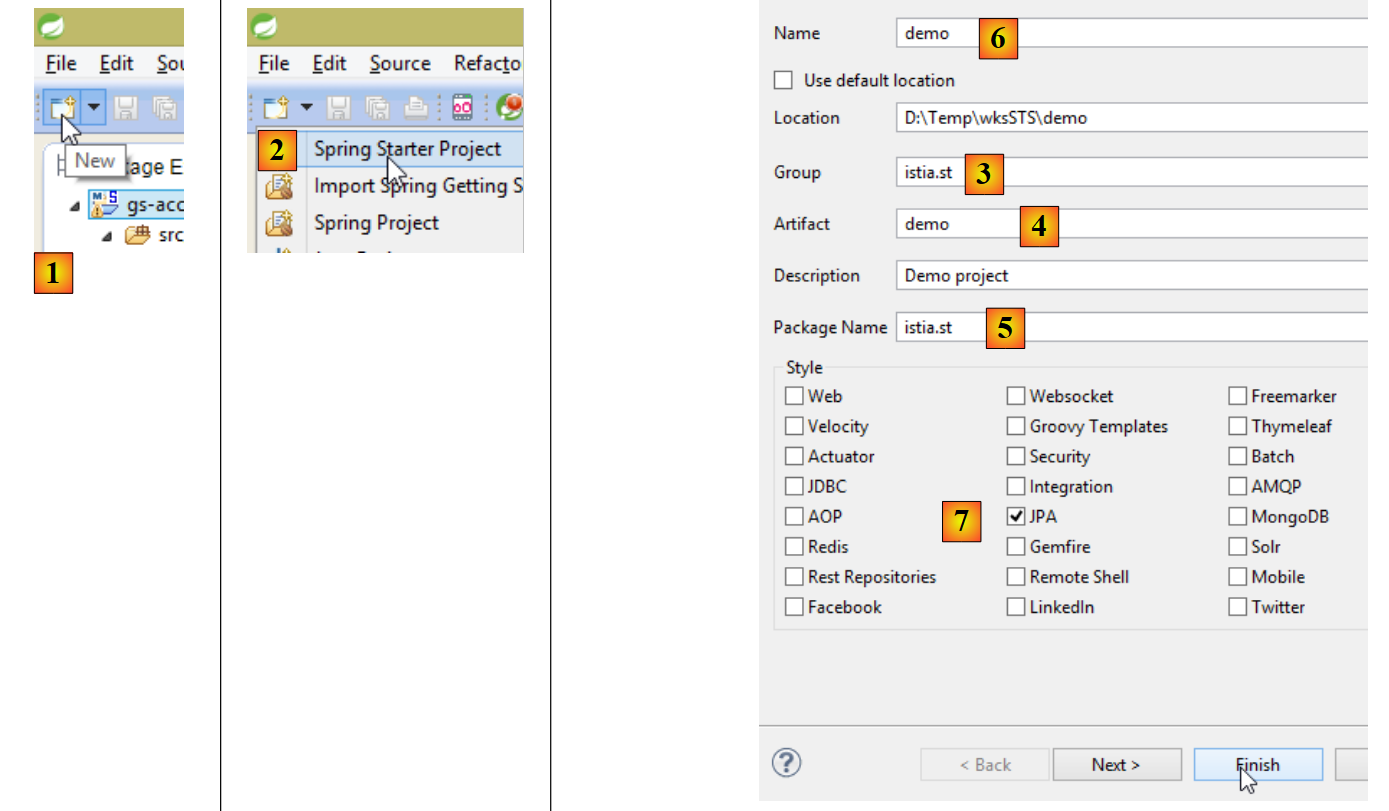 |
- 在 [1] 中,创建一个新项目;
- 在 [2] 中:类型为 [Spring Starter Project];
- 生成的项目将是一个 Maven 项目。在 [3] 中,指定项目组的名称;
- 在 [4] 中:指定构建项目时将生成的工件名称(此处为 jar);
- 在 [5] 中:指定将在项目中创建的可执行类的包;
- 在 [6] 中:指定项目的 Eclipse 名称——名称可任意设定(不必与 [4] 相同);
- 在 [7] 中:指定将创建一个具有 [JPA] 层的项目。此类项目所需的依赖项将被包含在 [pom.xml] 文件中;
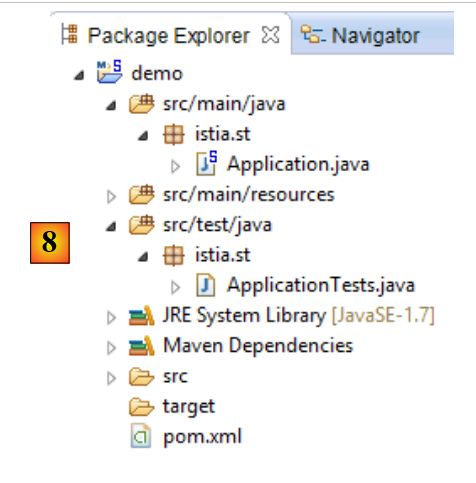 |
- 在 [8] 中:已创建的项目;
文件 [pom.xml] 包含项目 JPA 所需的依赖项:
    <parent>
        <groupId>org.springframework.boot</groupId>
        <artifactId>spring-boot-starter-parent</artifactId>
        <version>1.1.0.RELEASE</version>
        <relativePath/> <!-- 从存储库中查找父级 -->
    </parent>

    <dependencies>
        <dependency>
            <groupId>org.springframework.boot</groupId>
            <artifactId>spring-boot-starter-data-jpa</artifactId>
        </dependency>
        <dependency>
            <groupId>org.springframework.boot</groupId>
            <artifactId>spring-boot-starter-test</artifactId>
            <scope>test</scope>
        </dependency>
</dependencies>
- 第 9-12 行:JPA 所需的依赖项——将包含 [Spring Data];
- 第 13-17 行:JUnit 测试所需的依赖项(已集成 Spring);
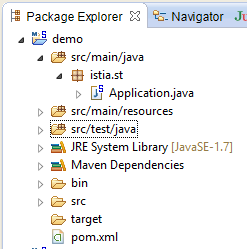
可执行类 [Application] 本身不执行任何操作,但已预先配置:
package istia.st;

import org.springframework.boot.SpringApplication;
import org.springframework.boot.autoconfigure.EnableAutoConfiguration;
import org.springframework.context.annotation.ComponentScan;
import org.springframework.context.annotation.Configuration;

@Configuration
@ComponentScan
@EnableAutoConfiguration
public class Application {

    public static void main(String[] args) {
        SpringApplication.run(Application.class, args);
    }
}
测试类 [ApplicationTests] 没有实际功能,但已预先配置:
package istia.st;

import org.junit.Test;
import org.junit.runner.RunWith;
import org.springframework.boot.test.SpringApplicationConfiguration;
import org.springframework.test.context.junit4.SpringJUnit4ClassRunner;

@RunWith(SpringJUnit4ClassRunner.class)
@SpringApplicationConfiguration(classes = Application.class)
public class ApplicationTests {

    @Test
    public void contextLoads() {
    }

}
- 第 9 行:注解 [@SpringApplicationConfiguration] 用于调用配置文件 [Application]。因此,该测试类将能够使用该文件中定义的所有 Bean;
- 第 8 行:注解 [@RunWith] 实现了 Spring 与 JUnit 的集成:该类将能够作为 JUnit 测试进行执行。 [@RunWith] 是一个 JUnit 注解(第 4 行),而类 [SpringJUnit4ClassRunner] 是一个 Spring 类(第 6 行);
现在我们已经有了一个 JPA 应用程序框架,可以对其进行补充,编写我们预约管理应用程序服务器持久层的项目。
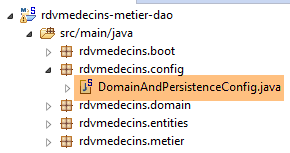
2.3. 服务器端的 Eclipse 项目
 |
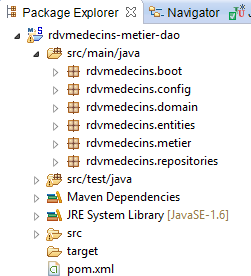 |
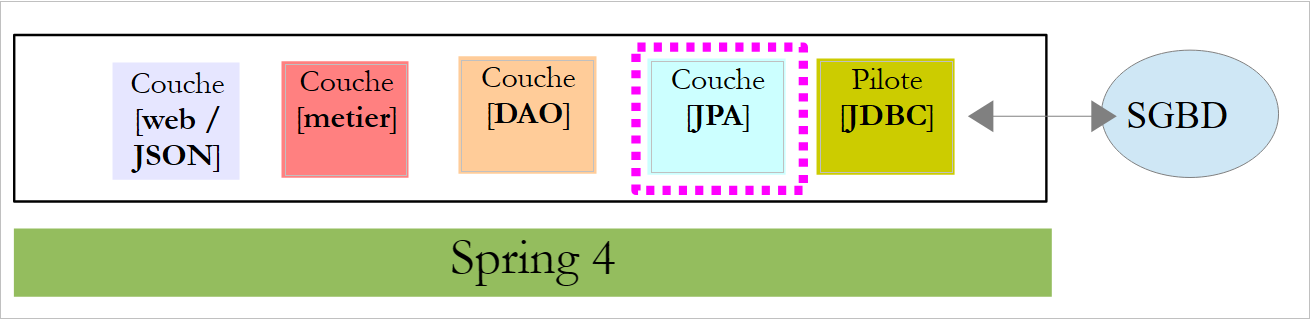
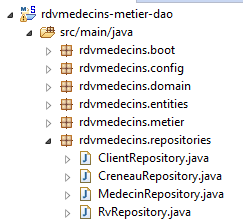
该项目的主要组成部分如下:
- [pom.xml]:项目的 Maven 配置文件;
- [rdvmedecins.entities]:实体 JPA;
- [rdvmedecins.repositories]:用于访问 JPA 实体的 Spring Data 接口;
- [rdvmedecins.metier]:[métier] 层;
- [rdvmedecins.domain]:由该层操作的实体 [métier];
- [rdvmdecins.config]:持久层配置类;
- [rdvmedecins.boot]:一个基本的控制台应用程序;
2.4. Maven 配置
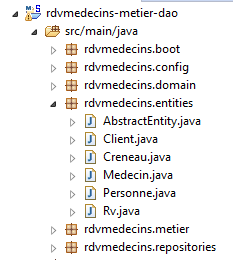
 | 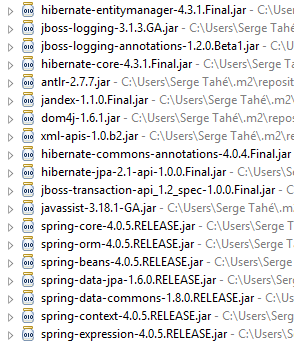 |  |
该项目的 [pom.xml] 文件如下:
<?xml version="1.0" encoding="UTF-8"?>
<project xmlns="http://maven.apache.org/POM/4.0.0" xsi:schemaLocation="http://maven.apache.org/POM/4.0.0 http://maven.apache.org/maven-v4_0_0.xsd"
    xmlns:xsi="http://www.w3.org/2001/XMLSchema-instance">
    <modelVersion>4.0.0</modelVersion>
    <groupId>istia.st.spring4.rdvmedecins</groupId>
    <artifactId>rdvmedecins-metier-dao</artifactId>
    <version>0.0.1-SNAPSHOT</version>
    <parent>
        <groupId>org.springframework.boot</groupId>
        <artifactId>spring-boot-starter-parent</artifactId>
        <version>1.0.0.RELEASE</version>
    </parent>
    <dependencies>
        <dependency>
            <groupId>org.springframework.boot</groupId>
            <artifactId>spring-boot-starter-data-jpa</artifactId>
        </dependency>
        <dependency>
            <groupId>org.springframework.boot</groupId>
            <artifactId>spring-boot-starter-test</artifactId>
            <scope>test</scope>
        </dependency>
        <dependency>
            <groupId>mysql</groupId>
            <artifactId>mysql-connector-java</artifactId>
        </dependency>
        <dependency>
            <groupId>commons-dbcp</groupId>
            <artifactId>commons-dbcp</artifactId>
        </dependency>
        <dependency>
            <groupId>commons-pool</groupId>
            <artifactId>commons-pool</artifactId>
        </dependency>
        <dependency>
            <groupId>com.fasterxml.jackson.core</groupId>
            <artifactId>jackson-databind</artifactId>
        </dependency>
        <dependency>
            <groupId>com.google.guava</groupId>
            <artifactId>guava</artifactId>
            <version>16.0.1</version>
        </dependency>
    </dependencies>
    <properties>
        <!-- 所有内容均使用 UTF-8 -->
        <project.build.sourceEncoding>UTF-8</project.build.sourceEncoding>
        <project.reporting.outputEncoding>UTF-8</project.reporting.outputEncoding>
        <start-class>istia.st.spring.data.main.Application</start-class>
    </properties>
    <build>
        <plugins>
            <plugin>
                <artifactId>maven-compiler-plugin</artifactId>
            </plugin>
            <plugin>
                <groupId>org.springframework.boot</groupId>
                <artifactId>spring-boot-maven-plugin</artifactId>
            </plugin>
        </plugins>
    </build>
    <repositories>
        <repository>
            <id>spring-milestones</id>
            <name>Spring Milestones</name>
            <url>http://repo.spring.io/libs-milestone</url>
            <snapshots>
                <enabled>false</enabled>
            </snapshots>
        </repository>
        <repository>
            <id>org.jboss.repository.releases</id>
            <name>JBoss Maven Release Repository</name>
            <url>https://repository.jboss.org/nexus/content/repositories/releases</url>
            <snapshots>
                <enabled>false</enabled>
            </snapshots>
        </repository>
    </repositories>
    <pluginRepositories>
        <pluginRepository>
            <id>spring-milestones</id>
            <name>Spring Milestones</name>
            <url>http://repo.spring.io/libs-milestone</url>
            <snapshots>
                <enabled>false</enabled>
            </snapshots>
        </pluginRepository>
    </pluginRepositories>
</project>
- 第 8-12 行:该项目基于父项目 [spring-boot-starter-parent]。对于父项目中已存在的依赖项,无需指定版本。将使用父项目中定义的版本。对于其他依赖项,则按常规方式声明;
- 第 14-17 行:用于 Spring Data;
- 第 18-22 行:用于测试的 JUnit;
- 第 23-26 行:JDBC 驱动程序(基于 SGBD 和 MySQL5);
- 第 27-34 行:Commons DBCP 连接池;
- 第 35-38 行:JSON 的 Jackson 管理库;
- 第 39-43 行:Google 集合管理库;
[spring-boot-starter-parent] 的 1.1.0.RC1 版本使用了以下库的版本:
2.5. 实体 JPA
 |
实体 JPA 是用于封装数据库表中各行的对象。
 |
类 [AbstractEntity] 是实体 [Personne, Creneau, Rv] 的父类。其定义如下:
package rdvmedecins.entities;

import java.io.Serializable;

import javax.persistence.GeneratedValue;
import javax.persistence.GenerationType;
import javax.persistence.Id;
import javax.persistence.MappedSuperclass;
import javax.persistence.Version;

@MappedSuperclass
public class AbstractEntity implements Serializable {

    private static final long serialVersionUID = 1L;
    @Id
    @GeneratedValue(strategy = GenerationType.AUTO)
    protected Long id;
    @Version
    protected Long version;

    @Override
    public int hashCode() {
        int hash = 0;
        hash += (id != null ? id.hashCode() : 0);
        return hash;
    }

    // 初始化
    public AbstractEntity build(Long id, Long version) {
        this.id = id;
        this.version = version;
        return this;
    }

    @Override
    public boolean equals(Object entity) {
        String class1 = this.getClass().getName();
        String class2 = entity.getClass().getName();
        if (!class2.equals(class1)) {
            return false;
        }
        AbstractEntity other = (AbstractEntity) entity;
        return this.id == other.id;
    }

    // 获取器和设置器
    ..
}
- 第 11 行:注解 [@MappedSuperclass] 表示被注解的类是实体 JPA 和 [@Entity] 的父类;
- 第15-17行:定义了每个实体的主键[id]。正是注释[@Id]将字段[id]设为主键。 注释 [@GeneratedValue(strategy = GenerationType.AUTO)] 表明该主键的值由 SGBD 生成,且未强制指定任何生成模式;
- 第18-19行:定义每个实体的版本号。JPA 实现每次修改该实体时都会递增此版本号。 该版本号用于防止两个不同用户同时更新该实体:两个用户 U1 和 U2 读取版本号为 V1 的实体 E。 U1 修改了 E 并将该修改保存到数据库中:此时版本号变为 V1+1。 U2 随后修改 E 并将该修改保存到数据库中:它将引发异常,因为其版本号(V1)与数据库中的版本号(V1+1)不一致;
- 第29-33行:方法[build]用于初始化[AbstractEntity]的两个字段。该方法将[AbstractEntity]实例的引用初始化为上述状态;
- 第36-44行:该类的[equals]方法被重新定义:若两个实体具有相同的类名和相同的id标识符,则被视为相等;
实体 [Personne] 是实体 [Medecin] 和 [Client] 的父类:
package rdvmedecins.entities;

import javax.persistence.Column;
import javax.persistence.MappedSuperclass;

@MappedSuperclass
public class Personne extends AbstractEntity {
    private static final long serialVersionUID = 1L;
    // 人员的属性
    @Column(length = 5)
    private String titre;
    @Column(length = 20)
    private String nom;
    @Column(length = 20)
    private String prenom;

    // 默认构造函数
    public Personne() {
    }

    // 带参数的构造函数
    public Personne(String titre, String nom, String prenom) {
        this.titre = titre;
        this.nom = nom;
        this.prenom = prenom;
    }

    // toString
    public String toString() {
        return String.format("Personne[%s, %s, %s, %s, %s]", id, version, titre, nom, prenom);
    }

    // 获取器和设置器
    ...
}
- 第 6 行:注释 [@MappedSuperclass] 表明被注释的类是实体 JPA 和 [@Entity] 的父类;
- 第10-15行:某人有一个头衔(Melle)、一个名字(Jacqueline)和一个姓氏(Tatou)。表的列未提供任何信息。因此,它们将默认使用与字段相同的名称;
实体 [Medecin] 如下:
package rdvmedecins.entities;

import javax.persistence.Entity;
import javax.persistence.Table;

@Entity
@Table(name = "medecins")
public class Medecin extends Personne {

    private static final long serialVersionUID = 1L;

    // 默认构造函数
    public Medecin() {
    }

    // 带参数的构造函数
    public Medecin(String titre, String nom, String prenom) {
        super(titre, nom, prenom);
    }

    public String toString() {
        return String.format("Medecin[%s]", super.toString());
    }

}
- 第 6 行:该类是一个 JPA 实体;
- 第 7 行:关联数据库中的表 [MEDECINS];
- 第 8 行:实体 [Medecin] 继承自实体 [Personne];
医生实体可按以下方式初始化:
此外,若需为其分配标识符和版本号,可写为:
其中方法 [build] 是 [AbstractEntity] 中定义的。
实体 [Client] 如下所示:
package rdvmedecins.entities;

import javax.persistence.Entity;
import javax.persistence.Table;

@Entity
@Table(name = "clients")
public class Client extends Personne {

    private static final long serialVersionUID = 1L;

    // 默认构造函数
    public Client() {
    }

    // 带参数的构造函数
    public Client(String titre, String nom, String prenom) {
        super(titre, nom, prenom);
    }

    // 身份
    public String toString() {
        return String.format("Client[%s]", super.toString());
    }

}
- 第 6 行:该类是一个 JPA 实体;
- 第 7 行:关联数据库中的表 [CLIENTS];
- 第 8 行:实体 [Client] 派生自实体 [Personne];
实体 [Creneau] 如下:
package rdvmedecins.entities;

import javax.persistence.Column;
import javax.persistence.Entity;
import javax.persistence.FetchType;
import javax.persistence.JoinColumn;
import javax.persistence.ManyToOne;
import javax.persistence.Table;

@Entity
@Table(name = "creneaux")
public class Creneau extends AbstractEntity {

    private static final long serialVersionUID = 1L;
    // RV 时段的特征
    private int hdebut;
    private int mdebut;
    private int hfin;
    private int mfin;

    // 一个时段与一名医生相关联
    @ManyToOne(fetch = FetchType.LAZY)
    @JoinColumn(name = "id_medecin")
    private Medecin medecin;

    // 外键
    @Column(name = "id_medecin", insertable = false, updatable = false)
    private long idMedecin;

    // 默认构造函数
    public Creneau() {
    }

    // 带参数的构造函数
    public Creneau(Medecin medecin, int hdebut, int mdebut, int hfin, int mfin) {
        this.medecin = medecin;
        this.hdebut = hdebut;
        this.mdebut = mdebut;
        this.hfin = hfin;
        this.mfin = mfin;
    }

    // toString
    public String toString() {
        return String.format("Créneau[%d, %d, %d, %d:%d, %d:%d]", id, version, idMedecin, hdebut, mdebut, hfin, mfin);
    }

    // 外键
    public long getIdMedecin() {
        return idMedecin;
    }

    // setter - getter
    ...
}
- 第 10 行:该类是一个实体 JPA;
- 第 11 行:关联数据库中的表 [CRENEAUX];
- 第 12 行:实体 [Creneau] 派生自实体 [AbstractEntity],因此继承了标识符 [id] 和版本 [version];
- 第 16 行:时段开始时间(14);
- 第17行:时段开始分钟(20);
- 第18行:时段结束时间(14);
- 第19行:时段结束分钟(40);
- 第22-24行:该时段所属的医生。表[CRENEAUX]对表[MEDECINS]设有外键。此关系由第22-24行体现;
- 第22行:注释[@ManyToOne]表示多对一关系(多个时段对应一名医生)。 属性 [fetch=FetchType.LAZY] 表示:当向持久化上下文请求实体 [Creneau] 且该实体需从数据库中检索时,实体 [Medecin] 不会随其一同返回。 此模式的优势在于,只有当开发人员明确请求时,才会检索实体 [Medecin]。这样既节省了内存,又提高了性能;
- 第 23 行:指定表 [CRENEAUX] 中外键列的名称;
- 第 27-28 行:表 [MEDECINS] 上的外键;
- 第27行:[ID_MEDECIN]列已在第23行被使用。这意味着该列可能通过两种不同途径被修改,而JPA标准不允许这种情况。 因此,我们添加了 [insertable = false, updatable = false] 属性,使得该列只能被读取;
实体 [Rv] 如下:
package rdvmedecins.entities;

import java.util.Date;

import javax.persistence.Column;
import javax.persistence.Entity;
import javax.persistence.FetchType;
import javax.persistence.JoinColumn;
import javax.persistence.ManyToOne;
import javax.persistence.Table;
import javax.persistence.Temporal;
import javax.persistence.TemporalType;

@Entity
@Table(name = "rv")
public class Rv extends AbstractEntity {
    private static final long serialVersionUID = 1L;

    // Rv 的特征
    @Temporal(TemporalType.DATE)
    private Date jour;

    // RV与客户相关联
    @ManyToOne(fetch = FetchType.LAZY)
    @JoinColumn(name = "id_client")
    private Client client;

    // RV 与时间段相关联
    @ManyToOne(fetch = FetchType.LAZY)
    @JoinColumn(name = "id_creneau")
    private Creneau creneau;

    // 外键
    @Column(name = "id_client", insertable = false, updatable = false)
    private long idClient;
    @Column(name = "id_creneau", insertable = false, updatable = false)
    private long idCreneau;

    // 默认制造商
    public Rv() {
    }

    // 带参数
    public Rv(Date jour, Client client, Creneau creneau) {
        this.jour = jour;
        this.client = client;
        this.creneau = creneau;
    }

    // toString
    public String toString() {
        return String.format("Rv[%d, %s, %d, %d]", id, jour, client.id, creneau.id);
    }

    // 外键
    public long getIdCreneau() {
        return idCreneau;
    }

    public long getIdClient() {
        return idClient;
    }

    // 获取器和设置器
...
}
- 第 14 行:该类是一个 JPA 实体;
- 第 15 行:关联数据库中的表 [RV];
- 第 16 行:实体 [Rv] 派生自实体 [AbstractEntity],因此继承了标识符 [id] 和版本 [version];
- 第 21 行:约会日期;
- 第20行:Java类型[Date]同时包含日期和时间。此处明确指出仅使用日期;
- 第24-26行:该预约对应的客户。表[RV]与表[CLIENTS]之间存在外键关系。此关系通过第24-26行体现;
- 第29-31行:约会的时段。表[RV]对表[CRENEAUX]具有外键。第29-31行体现了这一关系;
- 第34-35行:外键[idClient];
- 第36-37行:外键[idCreneau];
2.6. [DAO]层
 |
我们将使用 Spring Data 实现 [DAO] 层:
 |
[DAO] 层通过四个 Spring Data 接口实现:
- [ClientRepository]:提供对实体 JPA 和 [Client] 的访问;
- [CreneauRepository]:可访问实体 JPA 和 [Creneau];
- [MedecinRepository]:可访问实体 JPA [Medecin];
- [RvRepository]:提供对实体 JPA 和 [Rv] 的访问权限;
接口 [MedecinRepository] 如下所示:
package rdvmedecins.repositories;

import org.springframework.data.repository.CrudRepository;

import rdvmedecins.entities.Medecin;

public interface MedecinRepository extends CrudRepository<Medecin, Long> {
}
- 第 7 行:接口 [MedecinRepository] 仅继承了接口 [CrudRepository] 的方法,未添加其他方法;
接口 [ClientRepository] 如下:
package rdvmedecins.repositories;

import org.springframework.data.repository.CrudRepository;

import rdvmedecins.entities.Client;

public interface ClientRepository extends CrudRepository<Client, Long> {
}
- 第7行:接口 [ClientRepository] 仅继承了接口 [CrudRepository] 的方法,未添加其他方法;
接口 [CreneauRepository] 如下所示:
package rdvmedecins.repositories;

import org.springframework.data.jpa.repository.Query;
import org.springframework.data.repository.CrudRepository;

import rdvmedecins.entities.Creneau;

public interface CreneauRepository extends CrudRepository<Creneau, Long> {
    // 医生的时间段列表
    @Query("select c from Creneau c where c.medecin.id=?1")
    Iterable<Creneau> getAllCreneaux(long idMedecin);
}
- 第 8 行:接口 [CreneauRepository] 继承了接口 [CrudRepository] 的方法;
- 第10-11行:方法[getAllCreneaux]用于获取医生的可用时段;
- 第11行:参数为医生的标识符。结果是一个以[Iterable<Creneau>]对象形式呈现的时段列表;
- 第 10 行:注解 [@Query] 用于指定实现该方法的 JPQL 查询(Java 持久化查询语言); 参数 [?1] 将被该方法的参数 [idMedecin] 替换;
[RvRepository] 接口如下:
package rdvmedecins.repositories;

import java.util.Date;

import org.springframework.data.jpa.repository.Query;
import org.springframework.data.repository.CrudRepository;

import rdvmedecins.entities.Rv;

public interface RvRepository extends CrudRepository<Rv, Long> {

    @Query("select rv from Rv rv left join fetch rv.client c left join fetch rv.creneau cr where cr.medecin.id=?1 and rv.jour=?2")
    Iterable<Rv> getRvMedecinJour(long idMedecin, Date jour);
}
- 第 10 行:接口 [RvRepository] 继承了接口 [CrudRepository] 的方法;
- 第12-13行:方法[getRvMedecinJour]用于获取某位医生在指定日期的预约信息;
- 第13行:参数包括医生ID和日期。返回结果为以[Iterable<Rv>]对象形式呈现的预约列表;
- 第 12 行:注解 [@Query] 用于指定实现该方法的请求 JPQL。 参数 [?1] 将被该方法的参数 [idMedecin] 替换,参数 [?2] 将被该方法的参数 [jour] 替换。 不能仅满足于以下 JPQL 请求:
因为 Rv 类中类型为 [Client] 和 [Creneau] 的字段是在 [FetchType.LAZY] 模式下获取的,这意味着必须显式请求才能获取它们。 这在查询 JPQL 中通过语法 [left join fetch entité] 实现,该语法要求与外键指向的表进行连接,以便检索被引用的实体;
2.7. [métier] 层
 |
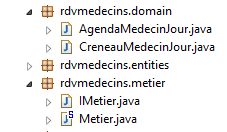 |
- [IMetier] 是 [métier] 层的接口,而 [Metier] 是其实现;
- [AgendaMedecinJour] 和 [CreneauMedecinJour] 是两个业务实体;
2.7.1. 实体
实体 [CreneauMedecinJour] 将一个时间段与其内可能安排的预约相关联:
package rdvmedecins.domain;

import java.io.Serializable;

import rdvmedecins.entities.Creneau;
import rdvmedecins.entities.Rv;

public class CreneauMedecinJour implements Serializable {

    private static final long serialVersionUID = 1L;
    // 字段
    private Creneau creneau;
    private Rv rv;

    // 构造函数
    public CreneauMedecinJour() {

    }

    public CreneauMedecinJour(Creneau creneau, Rv rv) {
        this.creneau=creneau;
        this.rv=rv;
    }

    // toString
    @Override
    public String toString() {
        return String.format("[%s %s]", creneau, rv);
    }

    // 获取器和设置器
...
}
- 第 12 行:时间段;
- 第 13 行:可能的预约——否则为 null;
实体 [AgendaMedecinJour] 表示某位医生在特定日期的日程表,即其预约列表:
package rdvmedecins.domain;

import java.io.Serializable;
import java.text.SimpleDateFormat;
import java.util.Date;

import rdvmedecins.entities.Medecin;

public class AgendaMedecinJour implements Serializable {

    private static final long serialVersionUID = 1L;
    // 字段
    private Medecin medecin;
    private Date jour;
    private CreneauMedecinJour[] creneauxMedecinJour;

    // 构造函数
    public AgendaMedecinJour() {

    }

    public AgendaMedecinJour(Medecin medecin, Date jour, CreneauMedecinJour[] creneauxMedecinJour) {
        this.medecin = medecin;
        this.jour = jour;
        this.creneauxMedecinJour = creneauxMedecinJour;
    }

    public String toString() {
        StringBuffer str = new StringBuffer("");
        for (CreneauMedecinJour cr : creneauxMedecinJour) {
            str.append(" ");
            str.append(cr.toString());
        }
        return String.format("Agenda[%s,%s,%s]", medecin, new SimpleDateFormat("dd/MM/yyyy").format(jour), str.toString());
    }

    // getter 和 setter
...
}
- 第13行:医生;
- 第14行:日程表中的日期;
- 第15行:其有预约或无预约的时间段;
2.7.2. 服务
[métier] 层面的界面如下:
package rdvmedecins.metier;

import java.util.Date;
import java.util.List;

import rdvmedecins.domain.AgendaMedecinJour;
import rdvmedecins.entities.Client;
import rdvmedecins.entities.Creneau;
import rdvmedecins.entities.Medecin;
import rdvmedecins.entities.Rv;

public interface IMetier {

    // 客户列表
    public List<Client> getAllClients();

    // 医生列表
    public List<Medecin> getAllMedecins();

    // 医生时段列表
    public List<Creneau> getAllCreneaux(long idMedecin);

    // 某医生在特定日期的预约列表
    public List<Rv> getRvMedecinJour(long idMedecin, Date jour);

    // 按ID查找客户
    public Client getClientById(long id);

    // 按ID查找客户
    public Medecin getMedecinById(long id);

    // 根据ID查找预约
    public Rv getRvById(long id);

    // 根据ID查找时间段
    public Creneau getCreneauById(long id);

    // 添加一个 RV
    public Rv ajouterRv(Date jour, Creneau créneau, Client client);

    // 删除一个 RV
    public void supprimerRv(Rv rv);

    // 业务
    public AgendaMedecinJour getAgendaMedecinJour(long idMedecin, Date jour);

}
注释说明了每个方法的作用。
[IMetier] 接口的实现是以下 [Metier] 类:
package rdvmedecins.metier;

import java.util.Date;
import java.util.Hashtable;
import java.util.List;
import java.util.Map;

import org.springframework.beans.factory.annotation.Autowired;
import org.springframework.stereotype.Service;

import rdvmedecins.domain.AgendaMedecinJour;
import rdvmedecins.domain.CreneauMedecinJour;
import rdvmedecins.entities.Client;
import rdvmedecins.entities.Creneau;
import rdvmedecins.entities.Medecin;
import rdvmedecins.entities.Rv;
import rdvmedecins.repositories.ClientRepository;
import rdvmedecins.repositories.CreneauRepository;
import rdvmedecins.repositories.MedecinRepository;
import rdvmedecins.repositories.RvRepository;

import com.google.common.collect.Lists;

@Service("métier")
public class Metier implements IMetier {

    // 存储库
    @Autowired
    private MedecinRepository medecinRepository;
    @Autowired
    private ClientRepository clientRepository;
    @Autowired
    private CreneauRepository creneauRepository;
    @Autowired
    private RvRepository rvRepository;

    // 接口实现
    @Override
    public List<Client> getAllClients() {
        return Lists.newArrayList(clientRepository.findAll());
    }

    @Override
    public List<Medecin> getAllMedecins() {
        return Lists.newArrayList(medecinRepository.findAll());
    }

    @Override
    public List<Creneau> getAllCreneaux(long idMedecin) {
        return Lists.newArrayList(creneauRepository.getAllCreneaux(idMedecin));
    }

    @Override
    public List<Rv> getRvMedecinJour(long idMedecin, Date jour) {
        return Lists.newArrayList(rvRepository.getRvMedecinJour(idMedecin, jour));
    }

    @Override
    public Client getClientById(long id) {
        return clientRepository.findOne(id);
    }

    @Override
    public Medecin getMedecinById(long id) {
        return medecinRepository.findOne(id);
    }

    @Override
    public Rv getRvById(long id) {
        return rvRepository.findOne(id);
    }

    @Override
    public Creneau getCreneauById(long id) {
        return creneauRepository.findOne(id);
    }

    @Override
    public Rv ajouterRv(Date jour, Creneau créneau, Client client) {
        return rvRepository.save(new Rv(jour, client, créneau));
    }

    @Override
    public void supprimerRv(Rv rv) {
        rvRepository.delete(rv.getId());
    }

    public AgendaMedecinJour getAgendaMedecinJour(long idMedecin, Date jour) {
    ...
    }

}
- 第 24 行:注解 [@Service] 是 Spring 注解,它将被注解的类设为由 Spring 管理的组件。组件可以命名,也可以不命名。此组件命名为 [métier];
- 第 25 行:类 [Metier] 实现了接口 [IMetier];
- 第 28 行:注解 [@Autowired] 是 Spring 注解。被该注解标注的字段值将由 Spring 通过指定类型或名称的 Spring 组件引用进行初始化(注入)。 此处注解 [@Autowired] 未指定名称。因此将进行基于类型的注入;
- 第 29 行:字段 [medecinRepository] 将通过类型为 [MedecinRepository] 的 Spring 组件引用进行初始化。该引用指向 Spring Data 为实现我们之前介绍过的接口 [MedecinRepository] 而生成的类;
- 第 30-35 行:此过程将针对其余三个已研究的接口重复执行;
- 第 39-41 行:实现 [getAllClients] 方法;
- 第 40 行:我们使用 [ClientRepository] 接口中的 [findAll] 方法。 该方法返回类型为 [Iterable<Client>],我们使用静态方法 [Lists.newArrayList] 将其转换为 [List<Client>]。 类 [Lists] 定义在 Google Guava 库中。在 [pom.xml] 中已导入该依赖项:
        <dependency>
            <groupId>com.google.guava</groupId>
            <artifactId>guava</artifactId>
            <version>16.0.1</version>
        </dependency>
- 第38-86行:[IMetier]接口的方法借助[DAO]层的类进行实现;
只有第88行的方法是专属于[métier]层面的。将其放置在此处是因为它执行的是业务处理,而不仅仅是简单的数据访问。如果没有这个方法,就没有必要创建[métier]层。 [getAgendaMedecinJour]方法如下:
public AgendaMedecinJour getAgendaMedecinJour(long idMedecin, Date jour) {
        // 医生的时间段列表
        List<Creneau> creneauxHoraires = getAllCreneaux(idMedecin);
        // 该医生同一天的预约列表
        List<Rv> reservations = getRvMedecinJour(idMedecin, jour);
        // 根据已预约的就诊时间创建字典
        Map<Long, Rv> hReservations = new Hashtable<Long, Rv>();
        for (Rv resa : reservations) {
            hReservations.put(resa.getCreneau().getId(), resa);
        }
        // 生成指定日期的日程表
        AgendaMedecinJour agenda = new AgendaMedecinJour();
        // 医生
        agenda.setMedecin(getMedecinById(idMedecin));
        // 日期
        agenda.setJour(jour);
        // 预约时段
        CreneauMedecinJour[] creneauxMedecinJour = new CreneauMedecinJour[creneauxHoraires.size()];
        agenda.setCreneauxMedecinJour(creneauxMedecinJour);
        // 预订时段的填充
        for (int i = 0; i < creneauxHoraires.size(); i++) {
            // 日程表第 i 行
            creneauxMedecinJour[i] = new CreneauMedecinJour();
            // 时间段
            Creneau créneau = creneauxHoraires.get(i);
            long idCreneau = créneau.getId();
            creneauxMedecinJour[i].setCreneau(créneau);
            // 该时段是空闲还是已预订?
            if (hReservations.containsKey(idCreneau)) {
                // 时段已被占用 - 记录预订
                Rv resa = hReservations.get(idCreneau);
                creneauxMedecinJour[i].setRv(resa);
            }
        }
        // 返回结果
        return agenda;
    }
建议读者阅读注释。算法如下:
- 检索指定医生的所有时间段;
- 获取该医生在指定日期内的所有预约;
- 利用这两项信息,即可判断某个时段是空闲还是已预约;
2.8. 项目配置
 |
类 [DomainAndPersitenceConfig] 负责配置整个项目:
package rdvmedecins.config;

import javax.sql.DataSource;

import org.apache.commons.dbcp.BasicDataSource;
import org.springframework.boot.autoconfigure.EnableAutoConfiguration;
import org.springframework.boot.orm.jpa.EntityScan;
import org.springframework.context.annotation.Bean;
import org.springframework.context.annotation.ComponentScan;
import org.springframework.data.jpa.repository.config.EnableJpaRepositories;
import org.springframework.orm.jpa.JpaVendorAdapter;
import org.springframework.orm.jpa.vendor.Database;
import org.springframework.orm.jpa.vendor.HibernateJpaVendorAdapter;
import org.springframework.transaction.annotation.EnableTransactionManagement;

@EnableJpaRepositories(basePackages = { "rdvmedecins.repositories" })
@EnableAutoConfiguration
@ComponentScan(basePackages = { "rdvmedecins" })
@EntityScan(basePackages = { "rdvmedecins.entities" })
@EnableTransactionManagement
public class DomainAndPersistenceConfig {

    // 数据源 MySQL
    @Bean
    public DataSource dataSource() {
        BasicDataSource dataSource = new BasicDataSource();
        dataSource.setDriverClassName("com.mysql.jdbc.Driver");
        dataSource.setUrl("jdbc:mysql://localhost:3306/dbrdvmedecins");
        dataSource.setUsername("root");
        dataSource.setPassword("");
        return dataSource;
    }

    // 提供程序 JPA - 如果对 Spring Boot 使用的默认值满意,则无需此项
    // 此处定义该提供程序用于启用/禁用日志SQL
    @Bean
    public JpaVendorAdapter jpaVendorAdapter() {
        HibernateJpaVendorAdapter hibernateJpaVendorAdapter = new HibernateJpaVendorAdapter();
        hibernateJpaVendorAdapter.setShowSql(false);
        hibernateJpaVendorAdapter.setGenerateDdl(false);
        hibernateJpaVendorAdapter.setDatabase(Database.MYSQL);
        return hibernateJpaVendorAdapter;
    }

    // EntityManagerFactory 和 TransactionManager 由 Spring Boot 设置了默认值

}
- 第 45 行:我们不会定义 [EntityManagerFactory] 和 [TransactionManager] 这两个 Bean。为此,我们将借助 Spring Boot 的 [@EnableAutoConfiguration] 注解(第 17 行);
- 第 24-32 行:定义数据源 MySQL5。这是一个通常无法被 Spring Boot 自动推断出的 Bean;
- 第 36-43 行:我们还配置了 JPA 实现,用于将 Hibernate 的 [showSql] 属性设为 false(第 39 行)。默认情况下,该属性为 true;
- 目前,Spring管理的组件仅包括第25行和第37行的Bean,以及通过自动配置生成的[EntityManagerFactory]和[TransactionManager]这两个Bean。 我们需要添加 [métier] 和 [DAO] 层的 Bean;
- 第 16 行将 [rdvmdecins.repositories] 包中继承自 [CrudRepository] 接口的接口添加到 Spring 上下文中;
- 第 18 行将 [rdvmedecins] 包及其所有带有 Spring 注解的子类添加到 Spring 上下文中。 在 [rdvmdecins.metier] 包中,带有 [@Service] 注解的 [Metier] 类将被找到并添加到 Spring 上下文中;
- 第 45 行:Spring Boot 将默认定义一个 [entityManagerFactory] Bean。必须向该 Bean 指定其需管理的 JPA 实体的位置。第 19 行负责执行此操作;
- 第 20 行:指定继承自 [CrudRepository] 接口的接口的方法必须在事务内执行;
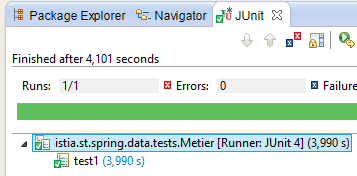
2.9. [métier]层的测试
类 [rdvmedecins.tests.Metier] 是 Spring / JUnit 4 的测试类:
package rdvmedecins.tests;

import java.text.ParseException;
import java.util.Date;
import java.util.List;

import org.junit.Assert;
import org.junit.Test;
import org.junit.runner.RunWith;
import org.springframework.beans.factory.annotation.Autowired;
import org.springframework.boot.test.SpringApplicationConfiguration;
import org.springframework.test.context.junit4.SpringJUnit4ClassRunner;

import rdvmedecins.config.DomainAndPersistenceConfig;
import rdvmedecins.domain.AgendaMedecinJour;
import rdvmedecins.entities.Client;
import rdvmedecins.entities.Creneau;
import rdvmedecins.entities.Medecin;
import rdvmedecins.entities.Rv;
import rdvmedecins.metier.IMetier;

@SpringApplicationConfiguration(classes = DomainAndPersistenceConfig.class)
@RunWith(SpringJUnit4ClassRunner.class)
public class Metier {

    @Autowired
    private IMetier métier;

    @Test
    public void test1(){
        // 客户显示
        List<Client> clients = métier.getAllClients();
        display("Liste des clients :", clients);
        // 医生列表
        List<Medecin> medecins = métier.getAllMedecins();
        display("Liste des médecins :", medecins);
        // 医生预约时段显示
        Medecin médecin = medecins.get(0);
        List<Creneau> creneaux = métier.getAllCreneaux(médecin.getId());
        display(String.format("Liste des créneaux du médecin %s", médecin), creneaux);
        // 某医生在特定日期的预约列表
        Date jour = new Date();
        display(String.format("Liste des rv du médecin %s, le [%s]", médecin, jour), métier.getRvMedecinJour(médecin.getId(), jour));
        // 添加 RV
        Rv rv = null;
        Creneau créneau = creneaux.get(2);
        Client client = clients.get(0);
        System.out.println(String.format("Ajout d'un Rv le [%s] dans le créneau %s pour le client %s", jour, créneau,
            client));
        rv = métier.ajouterRv(jour, créneau, client);
        // 验证
        Rv rv2 = métier.getRvById(rv.getId());
        Assert.assertEquals(rv, rv2);
        display(String.format("Liste des Rv du médecin %s, le [%s]", médecin, jour), métier.getRvMedecinJour(médecin.getId(), jour));
        // 在同一天的同一时段添加一个 RV
        // 应引发异常
        System.out.println(String.format("Ajout d'un Rv le [%s] dans le créneau %s pour le client %s", jour, créneau,
            client));
        Boolean erreur = false;
        try {
            rv = métier.ajouterRv(jour, créneau, client);
            System.out.println("Rv ajouté");
        } catch (Exception ex) {
            Throwable th = ex;
            while (th != null) {
                System.out.println(ex.getMessage());
                th = th.getCause();
            }
            // 记录错误
            erreur = true;
        }
        // 验证是否发生错误
        Assert.assertTrue(erreur);
        // 列出 RV
        display(String.format("Liste des Rv du médecin %s, le [%s]", médecin, jour), métier.getRvMedecinJour(médecin.getId(), jour));
        // 显示日程表
        AgendaMedecinJour agenda = métier.getAgendaMedecinJour(médecin.getId(), jour);
        System.out.println(agenda);
        Assert.assertEquals(rv, agenda.getCreneauxMedecinJour()[2].getRv());
        // 删除一个 RV
        System.out.println("Suppression du Rv ajouté");
        métier.supprimerRv(rv);
        // 验证
        rv2 = métier.getRvById(rv.getId());
        Assert.assertNull(rv2);
        display(String.format("Liste des Rv du médecin %s, le [%s]", médecin, jour), métier.getRvMedecinJour(médecin.getId(), jour));
    }

    // 实用程序方法——显示集合中的元素
    private void display(String message, Iterable<?> elements) {
        System.out.println(message);
        for (Object element : elements) {
            System.out.println(element);
        }
    }

}
- 第 22 行:注解 [@SpringApplicationConfiguration] 允许使用之前研究的配置文件 [DomainAndPersistenceConfig]。因此,该测试类可以利用该文件中定义的所有 Bean;
- 第 23 行:注解 [@RunWith] 实现了 Spring 与 JUnit 的集成:该类将能够作为 JUnit 测试进行执行。 [@RunWith] 是一个 JUnit 注解(第 9 行),而类 [SpringJUnit4ClassRunner] 是一个 Spring 类(第 12 行);
- 第26-27行:在测试类中注入对[métier]层的引用;
- 许多测试仅是简单的视觉测试:
- 第32-33行:客户列表;
- 第 35-36 行:医生列表;
- 第 39-40 行:医生预约时段列表;
- 第 43 行:某位医生的预约列表;
- 第50行:添加新预约。方法[ajouterRv]会返回该预约并附带额外信息——其主键id;
- 第 53 行:使用该主键在数据库中查询预约;
- 第54行:验证所查询的预约与检索到的预约是否一致。 需要提醒的是,实体 [Rv] 的方法 [equals] 已被重新定义:如果两个预约的 id 相同,则视为相等。此处表明,新增的预约已成功存入数据库;
- 第61-73行:尝试第二次添加同一条预约。由于存在唯一性约束,此操作应被SGBD拒绝:
CREATE TABLE IF NOT EXISTS `rv` (
  `ID` bigint(20) NOT NULL AUTO_INCREMENT,
  `JOUR` date NOT NULL,
  `ID_CLIENT` bigint(20) NOT NULL,
  `ID_CRENEAU` bigint(20) NOT NULL,
  `VERSION` int(11) NOT NULL DEFAULT '0',
  PRIMARY KEY (`ID`),
  UNIQUE KEY `UNQ1_RV` (`JOUR`,`ID_CRENEAU`),
  KEY `FK_RV_ID_CRENEAU` (`ID_CRENEAU`),
  KEY `FK_RV_ID_CLIENT` (`ID_CLIENT`)
) ENGINE=InnoDB  DEFAULT CHARSET=utf8 COLLATE=utf8_swedish_ci AUTO_INCREMENT=60 ;
上文第 8 行表明,[JOUR, ID_CRENEAU] 组合必须是唯一的,这阻止了在同一天的同一时间段内添加两个约会。
- 第73行:验证是否确实发生了异常;
- 第77行:查询刚刚为其添加了预约的医生的日程表;
- 第79行:验证所添加的预约是否已正确显示在该医生的日程表中;
- 第82行:删除已添加的预约;
- 第84行:从数据库中检索被删除的预约;
- 第85行:验证是否获取到了指针null,这表明所查找的预约不存在;
测试执行成功:
 |
2.10. 控制台程序
 |
该控制台程序非常基础。它演示了如何检索一个外部密钥:
package rdvmedecins.boot;

import java.text.SimpleDateFormat;
import java.util.Date;

import org.springframework.boot.SpringApplication;
import org.springframework.context.ConfigurableApplicationContext;

import rdvmedecins.config.DomainAndPersistenceConfig;
import rdvmedecins.entities.Client;
import rdvmedecins.entities.Creneau;
import rdvmedecins.entities.Rv;
import rdvmedecins.metier.IMetier;

public class Boot {
    // 启动
    public static void main(String[] args) {
        // 准备配置
        SpringApplication app = new SpringApplication(DomainAndPersistenceConfig.class);
        app.setLogStartupInfo(false);
        // 启动
        ConfigurableApplicationContext context = app.run(args);
        // 业务
        IMetier métier = context.getBean(IMetier.class);
        try {
            // 添加一个 RV
            Date jour = new Date();
            System.out.println(String.format("Ajout d'un Rv le [%s] dans le créneau 1 pour le client 1", new SimpleDateFormat("dd/MM/yyyy").format(jour)));
            Client client = (Client) new Client().build(1L, 1L);
            Creneau créneau = (Creneau) new Creneau().build(1L, 1L);
            Rv rv = métier.ajouterRv(jour, créneau, client);
            System.out.println(String.format("Rv ajouté = %s", rv));
            // 验证
            créneau = métier.getCreneauById(1L);
            long idMedecin = créneau.getIdMedecin();
            display("Liste des rendez-vous", métier.getRvMedecinJour(idMedecin, jour));
        } catch (Exception ex) {
            System.out.println("Exception : " + ex.getCause());
        }
        // 关闭 Spring 上下文
        context.close();
    }

    // 辅助方法 - 显示集合中的元素
    private static <T> void display(String message, Iterable<T> elements) {
        System.out.println(message);
        for (T element : elements) {
            System.out.println(element);
        }
    }

}
该程序会添加一个约会,然后验证是否已成功添加。
- 第 19 行:类 [SpringApplication] 将调用配置类 [DomainAndPersistenceConfig];
- 第 20 行:移除应用程序的启动日志;
- 第22行:执行类[SpringApplication]。该类返回一个Spring上下文,即已注册Bean的列表;
- 第 24 行:获取实现 [IMetier] 接口的 Bean 的引用。因此,这是一个指向 [métier] 层的引用;
- 第 27-31 行:为第 1 号客户在第 1 个时段内添加一个新的今日预约。客户和时段是专门创建的,旨在说明仅使用标识符。此处初始化了版本号,但其实可以填入任意值。该版本号在此处未被使用;
- 第34行:需要查询拥有第1号时段的医生。为此,需从数据库中检索第1号时段。由于当前处于[FetchType.LAZY]模式,系统不会随时段一并返回医生信息。 不过,我们在实体 [Creneau] 中特意预留了一个字段 [idMedecin],用于获取医生的主键;
- 第35行:获取医生的主表;
- 第36行:显示该医生的预约列表;
控制台输出结果如下:
2.11. Spring 入门 MVC
 |
现在我们开始构建Web层。该层主要由处理特定URL请求并以JSON(JavaScript对象表示法)格式返回一行文本的方法组成。 该Web层是一个Web接口,有时也被称为Web应用。我们将使用Spring Web(Spring生态系统的另一个分支)来实现该接口。首先,我们来研究一份在[http://spring.io]上找到的指南。
2.11.1. 演示项目
 |
- 在 [1] 中,我们导入了一个 Spring 指南;
 |
- 在 [2] 中,我们选择示例 [Rest Service];
- 在 [3] 中,我们选择 Maven 项目;
- 在 [4] 中,我们选用指南的最终版本;
- 在 [5] 中,进行确认;
- 在 [6] 中,导入该项目;
通过标准 URL 访问并返回文本 JSON 的 Web 服务通常被称为 REST 服务(REpresentational 状态传递)。 在本文中,我将把我们要构建的服务简称为 Web 服务 / JSON。如果一个服务遵循某些规则,则被称为 Restful 服务。我并未刻意遵循这些规则。
现在让我们来查看导入的项目,首先是其 Maven 配置。
2.11.2. Maven配置
文件 [pom.xml] 内容如下:
<?xml version="1.0" encoding="UTF-8"?>
<project xmlns="http://maven.apache.org/POM/4.0.0" xmlns:xsi="http://www.w3.org/2001/XMLSchema-instance"
    xsi:schemaLocation="http://maven.apache.org/POM/4.0.0 http://maven.apache.org/xsd/maven-4.0.0.xsd">
    <modelVersion>4.0.0</modelVersion>

    <groupId>org.springframework</groupId>
    <artifactId>gs-rest-service</artifactId>
    <version>0.1.0</version>

    <parent>
        <groupId>org.springframework.boot</groupId>
        <artifactId>spring-boot-starter-parent</artifactId>
        <version>1.1.0.RELEASE</version>
    </parent>

    <dependencies>
        <dependency>
            <groupId>org.springframework.boot</groupId>
            <artifactId>spring-boot-starter-web</artifactId>
        </dependency>
        <dependency>
            <groupId>com.fasterxml.jackson.core</groupId>
            <artifactId>jackson-databind</artifactId>
        </dependency>
    </dependencies>

    <properties>
        <start-class>hello.Application</start-class>
    </properties>

    <build>
        <plugins>
            <plugin>
                <artifactId>maven-compiler-plugin</artifactId>
            </plugin>
            <plugin>
                <groupId>org.springframework.boot</groupId>
                <artifactId>spring-boot-maven-plugin</artifactId>
            </plugin>
        </plugins>
    </build>

    <repositories>
        <repository>
            <id>spring-releases</id>
            <url>http://repo.spring.io/release</url>
        </repository>
    </repositories>
    <pluginRepositories>
        <pluginRepository>
            <id>spring-releases</id>
            <url>http://repo.spring.io/release</url>
        </pluginRepository>
    </pluginRepositories>
</project>
- 第 10-14 行:与项目 [Spring Data] 一样,这里包含父项目 [Spring Boot];
- 第 17-20 行:[spring-boot-starter-web] 构建产物为 Spring 项目 MVC 提供了所需的库。特别是,它包含了一个嵌入式 Tomcat 服务器。应用程序将在该服务器上运行;
- 第21-24行:Jackson库负责处理JSON:将Java对象转换为字符串JSON,反之亦然;
该配置引入的库非常多:
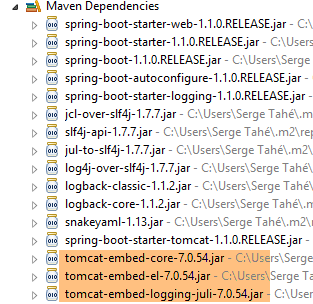 |  |
上图显示了 Tomcat 服务器的三个归档文件。
2.11.3. Spring REST服务的架构
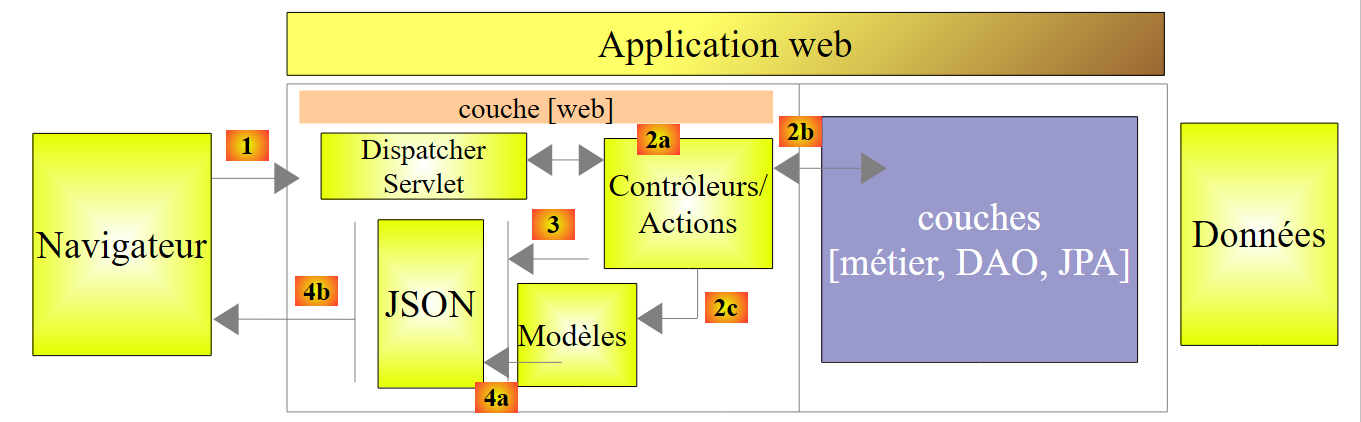
Spring MVC 通过以下方式实现了所谓的 MVC 架构模型(模型 – 视图 – 控制器):
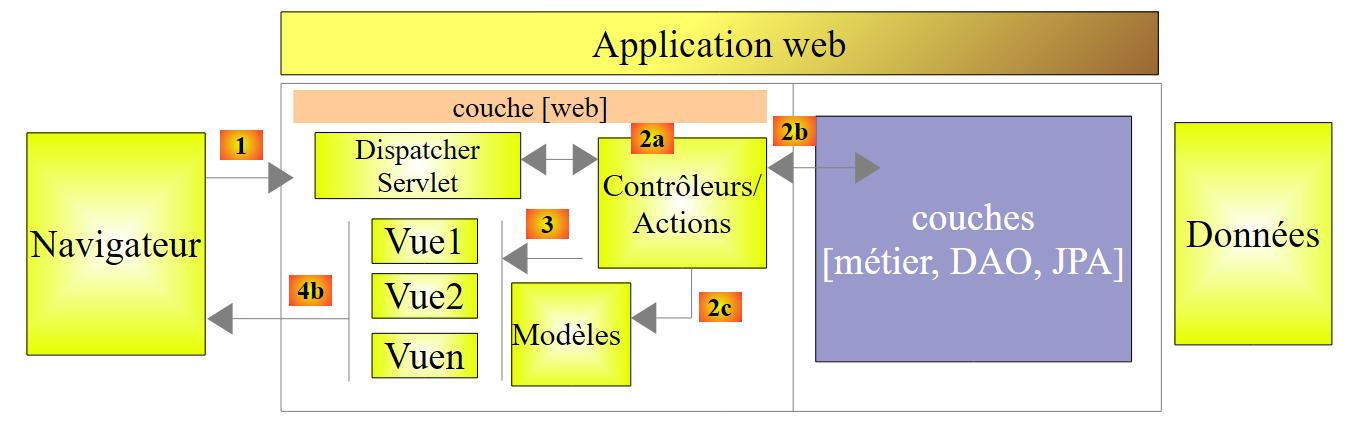 |
客户端请求的处理流程如下:
- 请求 - 请求的 URL 采用 http://machine:port/contexte/Action/param1/param2/....?p1=v1&p2=v2&... 格式[Dispatcher Servlet] 是 Spring 中的类,负责处理传入的 URL。 它将 URL “路由”到负责处理它的操作。这些操作是名为 [Contrôleurs] 的特定类的方法。此处 MVC 的 C 部分是字符串 [Dispatcher Servlet, Contrôleur, Action]。 如果未配置任何操作来处理传入的 URL,则 [Dispatcher Servlet] Servlet 将响应称未找到所请求的 URL (404 错误 NOT FOUND);
- 处理
- 所选操作可利用 parami 参数,这些参数由 [Dispatcher Servlet] Servlet 传递而来。这些参数可能来自多个来源:
- [/param1/param2/...] 的路径,
- 来自 URL 的 [p1=v1&p2=v2] 参数
- 浏览器随请求发送的参数;
- 在处理用户请求时,该操作可能需要 [metier] 和 [2b] 层。一旦处理了客户端的请求,该操作可能会触发各种响应。一个典型的例子是:
- 如果请求无法正确处理,则返回错误页面
- 否则显示确认页面
- 该操作会要求显示某个视图 [3]。该视图将显示被称为视图模型的数据。这就是 MVC 中的 M。 该操作将创建视图模型 M [2c],并要求显示视图 V [3];
- 响应——选定的视图 V 使用操作生成的模型 M 来初始化响应 HTML 的动态部分(该响应需发送给客户端),随后发送此响应。
对于 Web 服务 / JSON,上述架构稍作修改:
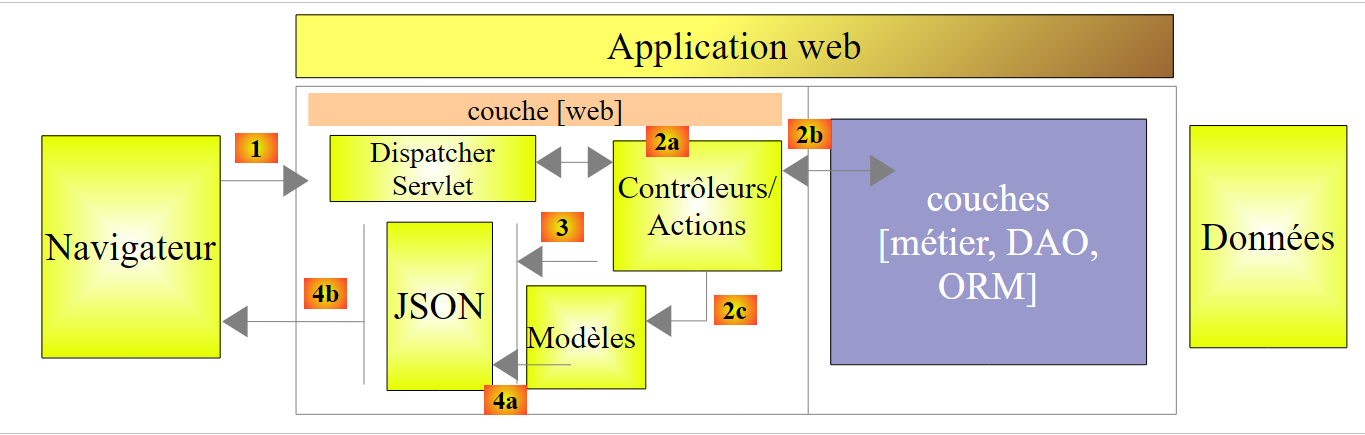 |
- 在 [4a] 中,作为 Java 类的模型通过 JSON 库转换为字符串 JSON;
- 在 [4b] 中,该字符串 JSON 被发送至浏览器;
2.11.4. C控制器
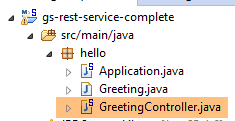 |
导入的应用程序具有以下控制器:
package hello;

import java.util.concurrent.atomic.AtomicLong;
import org.springframework.stereotype.Controller;
import org.springframework.web.bind.annotation.RequestMapping;
import org.springframework.web.bind.annotation.RequestParam;
import org.springframework.web.bind.annotation.ResponseBody;

@Controller
public class GreetingController {

    private static final String template = "Hello, %s!";
    private final AtomicLong counter = new AtomicLong();

    @RequestMapping("/greeting")
    public @ResponseBody
    Greeting greeting(@RequestParam(value = "name", required = false, defaultValue = "World") String name) {
        return new Greeting(counter.incrementAndGet(), String.format(template, name));
    }
}
- 第9行:注解[@Controller]将类[GreetingController]定义为Spring控制器,即其方法已被注册以处理URL;
- 第15行:注解 [@RequestMapping] 指明了该方法处理的 URL,此处为 URL [/greeting]。 我们稍后将看到,该 URL 可以进行参数设置,并且可以获取这些参数;
- 第 16 行:注解 [@ResponseBody] 表明该方法不会为视图生成模板(如 JSP、JSF、 Thymeleaf 等),该模板随后将发送至客户端浏览器,而是直接生成发送给浏览器的响应。在此,它生成一个 [Greeting] 类型的对象(第 18 行)。 虽然此处未显式显示,但该对象在发送至浏览器前会先被转换为 JSON。正是由于项目依赖中存在 JSON 库,Spring Boot 才会通过自动配置以这种方式配置项目;
- 第 17 行:方法 [greeting] 有一个参数 [String name]。 注解 [@RequestParam(value = "name", required = false, defaultValue = "World"] 表示该参数必须通过名为 [name](@RequestParam(value = "name")) 的参数进行初始化。 该参数可以是 GET 或 POST 的参数。该参数不是必填的(required = false)。 在后一种情况下,该方法的 [name] 参数将初始化为 [World](defaultValue = "World")。
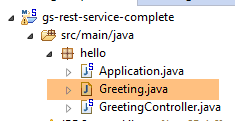
2.11.5. 模型 M
由前一个方法生成的 M 模型是以下 [Greeting] 对象:
 |
package hello;

public class Greeting {

    private final long id;
    private final String content;

    public Greeting(long id, String content) {
        this.id = id;
        this.content = content;
    }

    public long getId() {
        return id;
    }

    public String getContent() {
        return content;
    }
}
对该对象进行 JSON 转换将生成字符串 {"id":n,"content":"文本"}。最终,由控制器方法生成的 JSON 字符串将呈现如下形式:
或
2.11.6. 项目配置
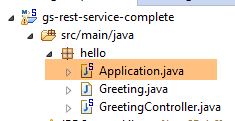 |
该项目由以下类 [Application] 进行配置:
package hello;

import org.springframework.boot.autoconfigure.EnableAutoConfiguration;
import org.springframework.boot.SpringApplication;
import org.springframework.context.annotation.ComponentScan;

@ComponentScan
@EnableAutoConfiguration
public class Application {

    public static void main(String[] args) {
        SpringApplication.run(Application.class, args);
    }
}
- 第 11 行:奇怪的是,该类可通过专用于控制台应用程序的 [main] 方法执行。确实如此。 第 12 行中的类 [SpringApplication] 将启动依赖项中的 Tomcat 服务器,并在其上部署服务 REST;
- 第 4 行:可以看到 [SpringApplication] 类属于 [Spring Boot] 项目;
- 第12行:第一个参数是配置项目的类,第二个参数是可能的配置参数;
- 第 8 行:注解 [@EnableAutoConfiguration] 要求 Spring Boot 进行项目配置;
- 第 7 行:注解 [@ComponentScan] 会扫描包含类 [Application] 的文件夹,以查找 Spring 组件。 将找到一个组件,即带有注解 [@Controller] 的类 [GreetingController],该注解使其成为 Spring 组件;
2.11.7. 运行项目
运行项目:
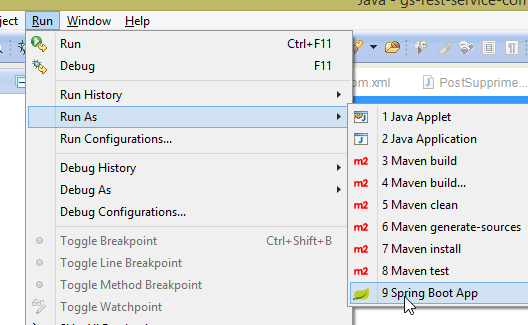 |
将获得以下控制台日志:
____ _ __ _ _
- 第 12 行:Tomcat 服务器在 8080 端口上启动(第 11 行);
- 第 16 行:存在 [DispatcherServlet] Servlet;
- 第 19 行:已发现方法 [GreetingController.greeting];
要测试该Web应用程序,请访问URL [http://localhost:8080/greeting]:
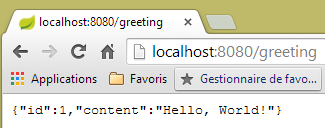 | 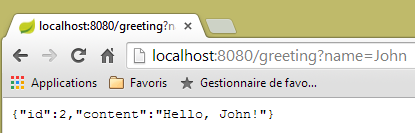 |
确实收到了预期的字符串 JSON。查看服务器发送的 HTTP 头部信息可能会很有趣。为此,我们将使用名为 [Advanced Rest Client] 的 Chrome 插件(参见附录):
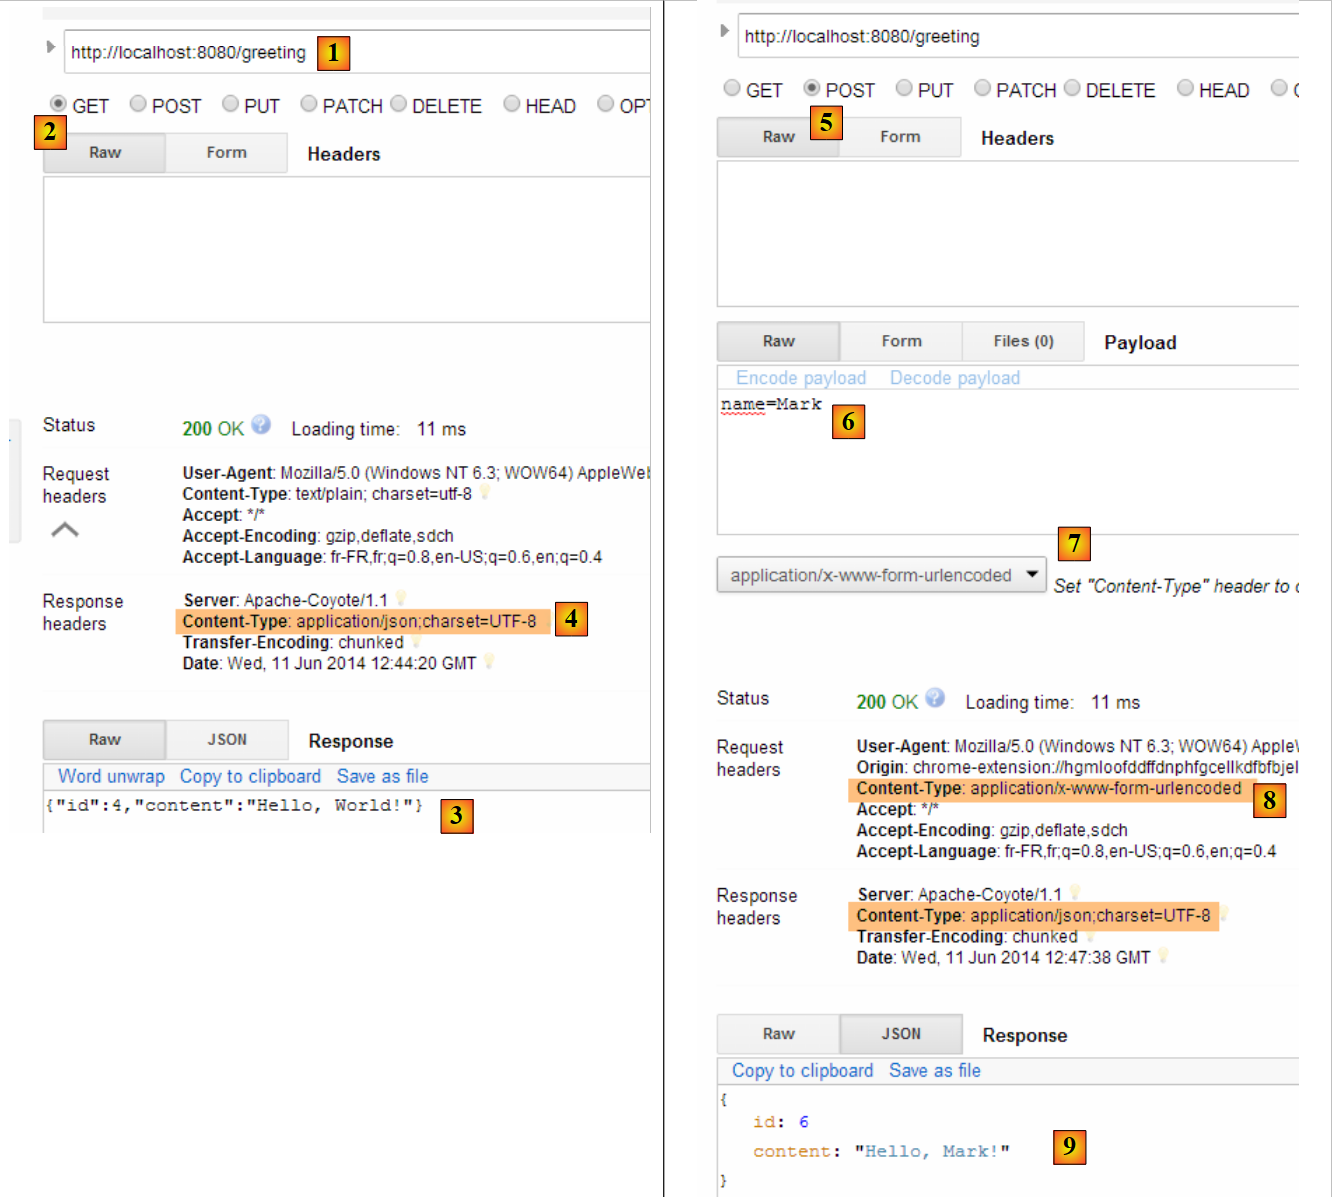 |
- 在 [1] 中,请求的是 URL;
- 在 [2] 中,使用了 GET 方法;
- 在 [3] 中,响应为 JSON;
- 在 [4] 中,服务器表示将发送格式为 JSON 的响应;
- 在 [5] 中,请求的是与 URL 相同的响应,但这次使用的是 POST;
- 在 [7] 中,信息以 [urlencoded] 的形式发送给服务器;
- 在 [6] 中,name 参数及其值;
- 在 [8] 中,浏览器告知服务器将发送 [urlencoded] 信息;
- 在 [9] 中,服务器的响应 JSON;
2.11.8. 创建可执行归档文件
可以在Eclipse外部创建可执行归档文件。所需的配置位于文件[pom.xml]中:
    <properties>
        <project.build.sourceEncoding>UTF-8</project.build.sourceEncoding>
        <start-class>istia.st.Application</start-class>
        <java.version>1.7</java.version>
    </properties>

    <build>
        <plugins>
            <plugin>
                <groupId>org.springframework.boot</groupId>
                <artifactId>spring-boot-maven-plugin</artifactId>
            </plugin>
        </plugins>
</build>
- 第 9-12 行定义了用于创建可执行归档的插件;
- 第 3 行定义了项目的可执行类;
操作步骤如下:
 |
- 在 [1] 中:执行一个 Maven 目标;
- 在 [2] 中:有两个目标(goals):[clean] 用于删除 Maven 项目中的 [target] 文件夹,[package] 用于重新生成该文件夹;
- 在 [3] 中:生成的 [target] 文件夹将位于此文件夹内;
- 在 [4] 中:生成目标;
在控制台显示的日志中,务必确认是否出现了插件 [spring-boot-maven-plugin]。正是它负责生成可执行压缩包。
在控制台中,进入生成的文件夹:
- 第 5 行:生成的压缩包;
该可执行包的运行方式如下:
现在 Web 应用程序已启动,可通过浏览器访问:
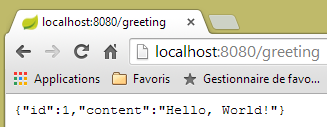 |
2.11.9. 将应用程序部署到 Tomcat 服务器
虽然 Spring Boot 在开发模式下非常实用,但生产环境中的应用程序很可能需要部署在真正的 Tomcat 服务器上。具体操作如下:
按以下方式修改文件 [pom.xml]:
<?xml version="1.0" encoding="UTF-8"?>
<project xmlns="http://maven.apache.org/POM/4.0.0" xmlns:xsi="http://www.w3.org/2001/XMLSchema-instance"
    xsi:schemaLocation="http://maven.apache.org/POM/4.0.0 http://maven.apache.org/xsd/maven-4.0.0.xsd">
    <modelVersion>4.0.0</modelVersion>

    <groupId>org.springframework</groupId>
    <artifactId>gs-rest-service</artifactId>
    <version>0.1.0</version>
    <packaging>war</packaging>

    <parent>
        <groupId>org.springframework.boot</groupId>
        <artifactId>spring-boot-starter-parent</artifactId>
        <version>1.1.0.RELEASE</version>
    </parent>

    <dependencies>
        <dependency>
            <groupId>org.springframework.boot</groupId>
            <artifactId>spring-boot-starter-web</artifactId>
        </dependency>
        <dependency>
            <groupId>com.fasterxml.jackson.core</groupId>
            <artifactId>jackson-databind</artifactId>
        </dependency>
        <dependency>
            <groupId>org.springframework.boot</groupId>
            <artifactId>spring-boot-starter-tomcat</artifactId>
            <scope>provided</scope>
        </dependency>
    </dependencies>

    <properties>
        <start-class>hello.Application</start-class>
    </properties>
....
</project>
需在两个位置进行修改:
- 第 9 行:需指定将生成一个 WAR 归档文件(Web ARchive);
- 第 26-30 行:需添加对 [spring-boot-starter-tomcat] 构建成果的依赖。该构建成果将把 Tomcat 的所有类引入到项目的依赖中;
- 第29行:该工件为[provided],这意味着相应的归档文件不会被放入生成的WAR中。实际上,这些归档文件将位于运行该应用程序的Tomcat服务器上;
此外,还需配置 Web 应用程序。若不存在 [web.xml] 文件,则需通过继承 [SpringBootServletInitializer] 的类来实现:
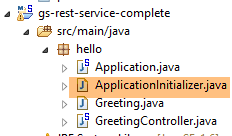 |
[ApplicationInitializer] 类的定义如下:
package hello;

import org.springframework.boot.builder.SpringApplicationBuilder;
import org.springframework.boot.context.web.SpringBootServletInitializer;

public class ApplicationInitializer extends SpringBootServletInitializer {

    @Override
    protected SpringApplicationBuilder configure(SpringApplicationBuilder application) {
        return application.sources(Application.class);
    }

}
- 第 6 行:类 [ApplicationInitializer] 继承自类 [SpringBootServletInitializer];
- 第 9 行:方法 [configure] 被重定义(第 8 行);
- 第 10 行:提供了配置该项目的类;
要运行该项目,可以按以下步骤操作:
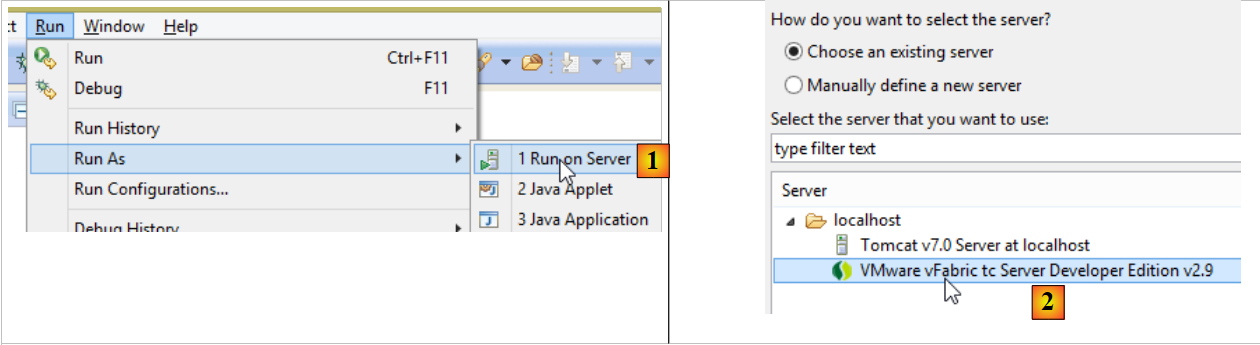 |
- 在 [1] 中,在 Eclipse 的 IDE 中注册的某台服务器上运行项目;
- 在 [2] 中,选择默认存在的 [tc Server Developer]。这是 Tomcat 的一个变体;
完成上述操作后,可在浏览器中访问 URL [http://localhost:8080/gs-rest-service/greeting/?name=Mitchell]:
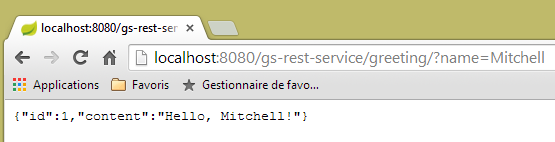 |
现在我们已经掌握了生成 WAR 包的方法。接下来,我们将继续使用 Spring Boot 及其可执行的 JAR 包进行开发。
2.11.10. 创建一个新的Web项目
要构建一个新的 Web 项目,可以按照以下步骤操作:
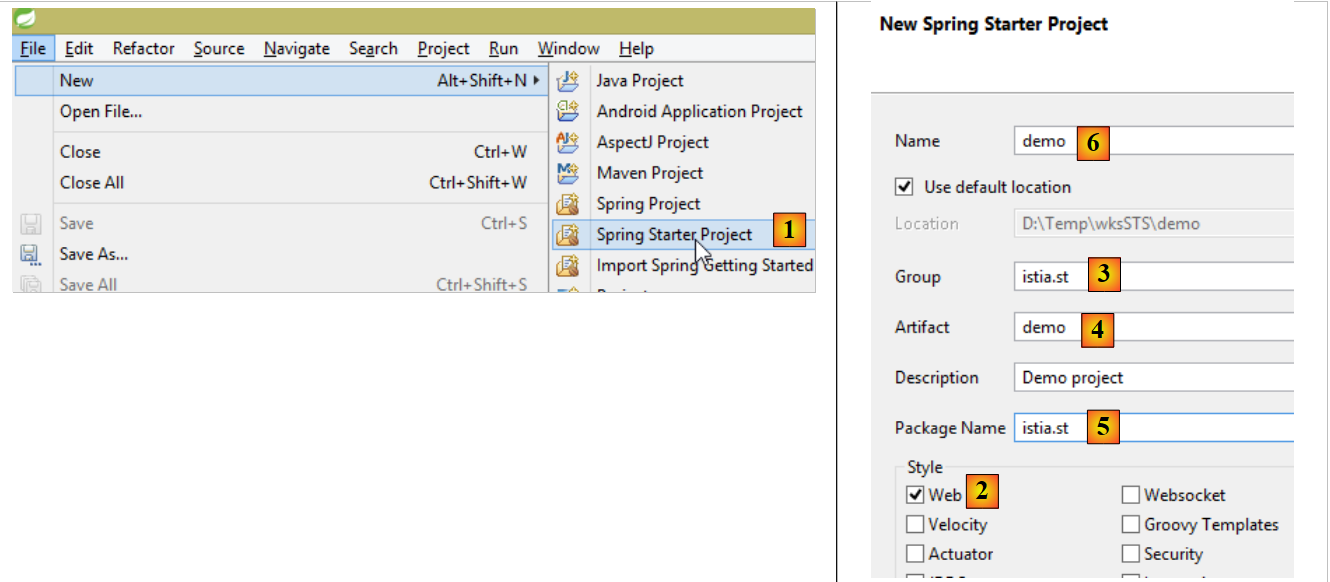 |
- 在 [1] 中:文件 / 新建 / Spring 启动项目
- 在 [2] 中:选择 [Web]。我们不选择视图库,因为在 Web 服务 / JSON 中,没有视图;
- 生成的项目将是一个 Maven 项目。在 [3] 中,填写将要创建的 Maven 工件的组名;在 [4] 中,填写工件名称;
- 在 [5] 中,填写 Spring 将放置项目配置类的包名;
- 在 [6] 中,为 Eclipse 项目命名——该名称可以与 [4] 不同;
 |
2.12. [web]层
 |
 |
我们将分几个步骤构建Web层:
- 步骤 1:构建一个不包含身份验证功能的运行中的 Web 层;
- 步骤 2:使用 Spring Security 实现身份验证;
- 步骤 3:配置 CORS [Cross-origin resource sharing (CORS) is a mechanism that allows many resources (e.g. fonts, JavaScript, etc.) on a web page to be requested from another domain outside the domain the resource originated from. (Wikipedia)]。我们的 Web 服务客户端将是一个 Angular Web 客户端,它未必与我们的 Web 服务位于同一域名下。默认情况下,除非 Web 服务授权,否则它无法访问该服务。我们将探讨具体实现方法;
2.12.1. Maven 配置
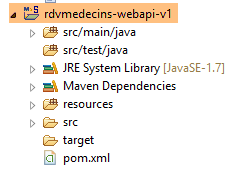
该项目的 [pom.xml] 文件如下:
<modelVersion>4.0.0</modelVersion>
    <groupId>istia.st.spring4.mvc</groupId>
    <artifactId>rdvmedecins-webapi-v1</artifactId>
    <version>0.0.1-SNAPSHOT</version>
    <name>rdvmedecins-webapi-v1</name>
    <description>Gestion de RV Médecins</description>
    <parent>
        <groupId>org.springframework.boot</groupId>
        <artifactId>spring-boot-starter-parent</artifactId>
        <version>1.0.0.RELEASE</version>
    </parent>
    <dependencies>
        <dependency>
            <groupId>org.springframework.boot</groupId>
            <artifactId>spring-boot-starter-web</artifactId>
        </dependency>
        <dependency>
            <groupId>istia.st.spring4.rdvmedecins</groupId>
            <artifactId>rdvmedecins-metier-dao</artifactId>
            <version>0.0.1-SNAPSHOT</version>
        </dependency>
    </dependencies>
- 第 7-11 行:父 Maven 项目;
- 第 13-16 行:Spring 项目 MVC 的依赖项;
- 第 17-21 行:[métier, DAO, JPA] 层级项目的依赖项;
2.12.2. Web 服务接口
 |
- 在 [1] 中,如上所述,浏览器只能请求数量有限的 URL,且必须采用特定语法;
- 在 [4] 中,它收到一个 JSON 响应;
我们Web服务的响应都将采用相同的形式,对应于将以下[Reponse]类型对象转换为JSON的过程:
package rdvmedecins.web.models;

public class Reponse {

    // ----------------- 属性
    // 操作状态
    private int status;
    // 响应JSON
    private Object data;

    // ---------------构造函数
    public Reponse() {
    }

    public Reponse(int status, Object data) {
        this.status = status;
        this.data = data;
    }

    // 方法
    public void incrStatusBy(int increment) {
        status += increment;
    }

    // ----------------------获取器和设置器
...
}
- 第 7 行:响应错误代码 0:OK,其他情况:KO;
- 第 9 行:响应正文;
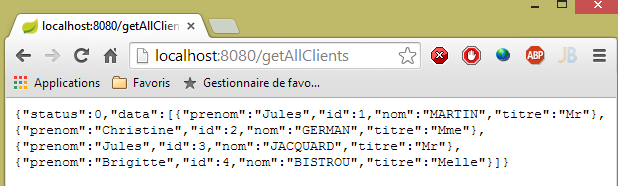
现在我们展示一些截图,以说明 Web 服务的界面 / JSON:
[/getAllClients] 诊所所有患者列表
 |
[/getAllMedecins] 诊所所有医生的列表
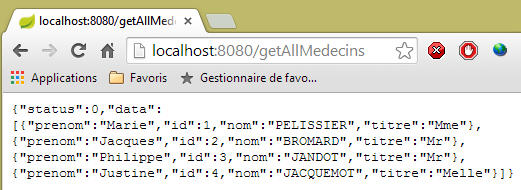 |
某位医生的预约时段列表 [/getAllCreneaux/{idMedecin}]
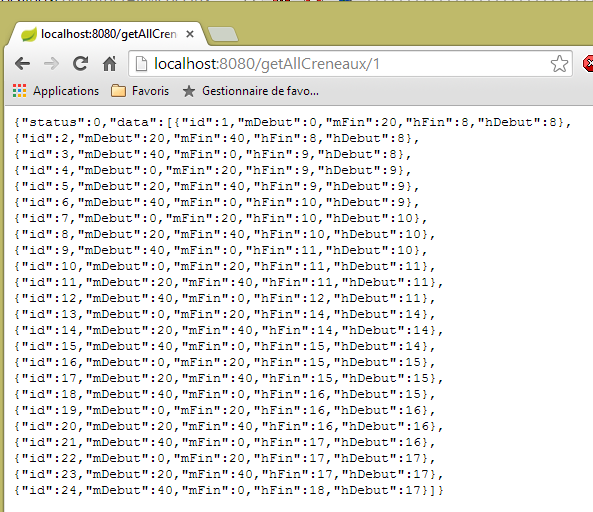 |
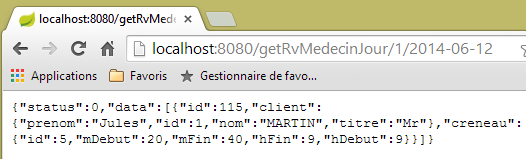
某位医生的预约列表 [/getRvMedecinJour/{idMedecin}/{yyyy-mm-dd}
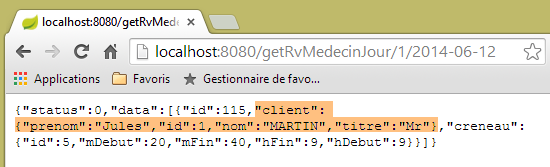 |
医生日程表 [/getAgendaMedecinJour/{idMedecin}/{aaaa-mm-jj}]
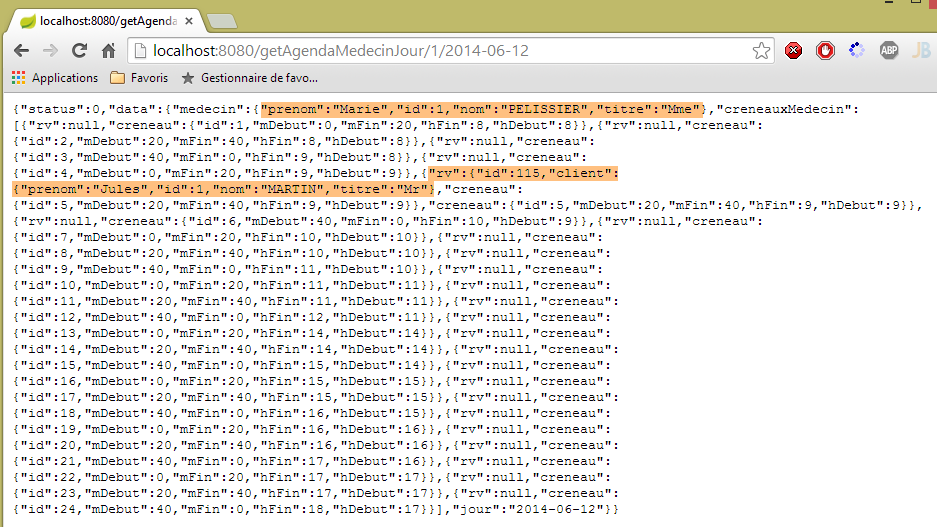 |
要添加/删除预约,我们使用 Chrome 扩展程序 [Advanced Rest Client],因为这些操作需要通过 POST 完成。
添加预约 [/ajouterRv]
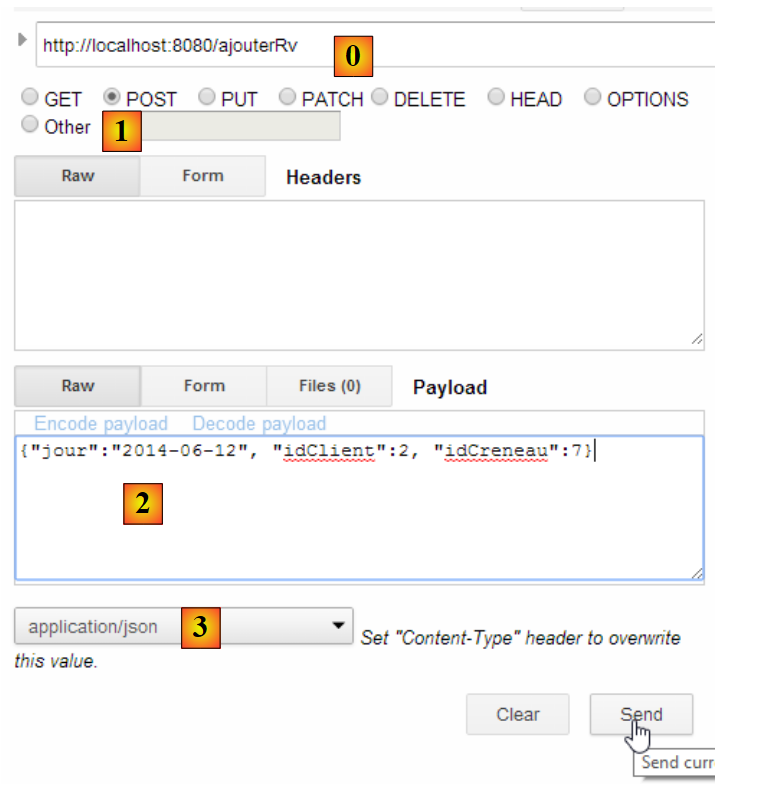 |
- 在 [0] 中,使用 Web 服务的 URL;
- 在 [1] 中,使用 POST 方法;
- 在 [2] 中,以 {day, JSON, idCreneau} 形式传输给 Web 服务的文本为 JSON;
- 在 [3] 中,客户端告知 Web 服务,其发送的信息格式为 JSON;
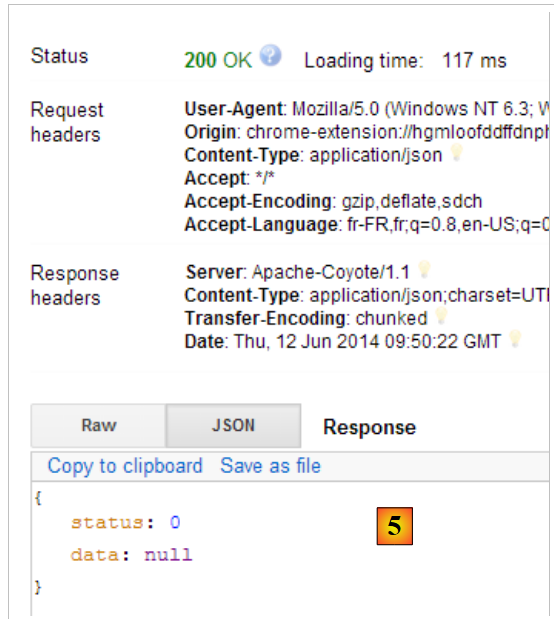
响应如下:
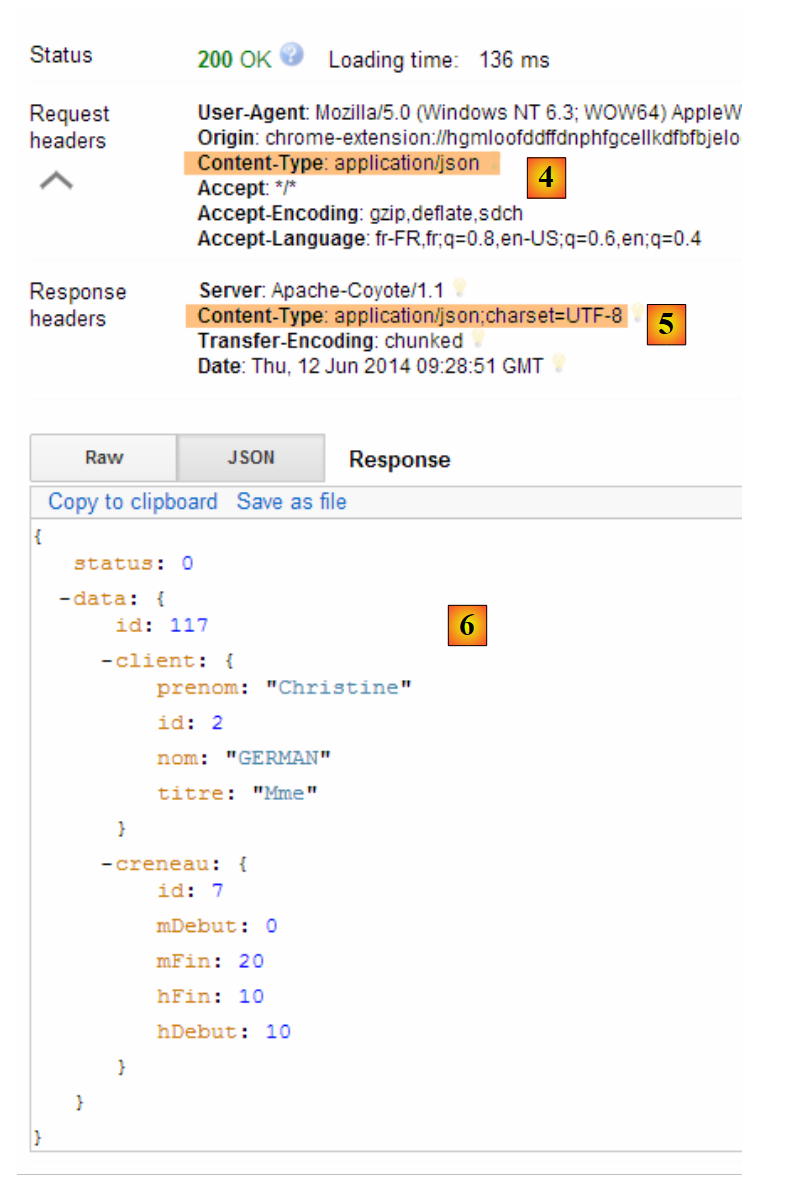 |
- 在 [4] 中:客户端发送的头部信息表明其发送的数据格式为 JSON;
- 变为 [5]:Web 服务响应称其同样发送 JSON;
- 在 [6] 中:Web 服务的响应为 JSON。字段 [data] 包含新增约会的 JSON 格式;
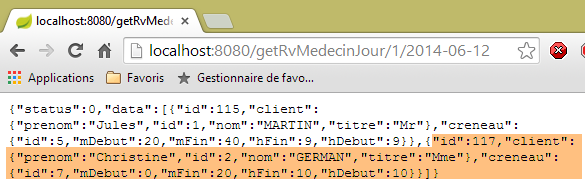
可验证新预约是否存在:
 |
删除预约 [/supprimerRv]
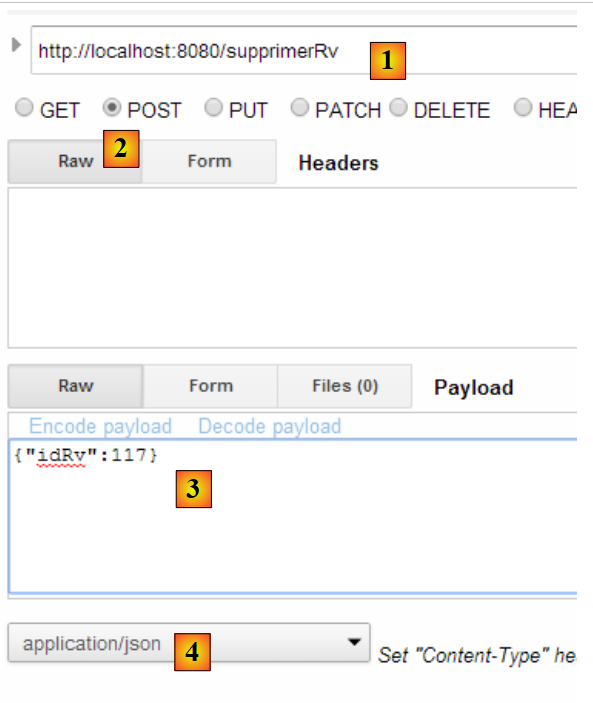 |
- 在 [1] 中,使用 Web 服务的 URL;
- 在 [2] 中,使用 POST 方法;
- 在 [3] 中,以 {idRv} 形式传输给 Web 服务的 JSON 文本;
- 在 [4] 中,客户端告知 Web 服务将向其发送 JSON 信息;
响应如下:
 |
- 在 [5] 中:字段 [status] 的值为 0,表明操作成功;
可验证预约已删除:
 |
如上所示,患者 [Mme GERMAN] 的预约已不存在。
该 Web 服务还支持通过标识符检索实体:
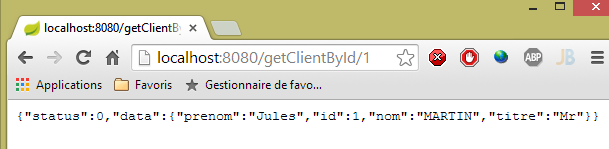 |
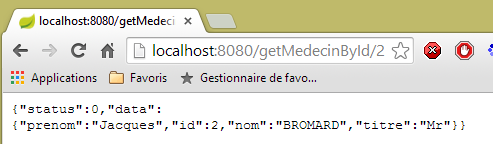 |
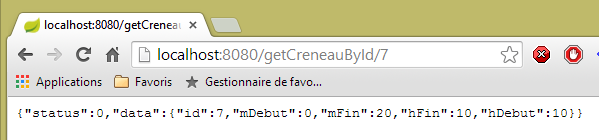 |
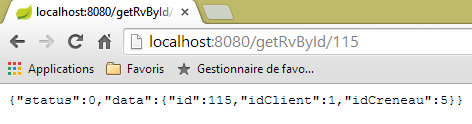 |
所有这些 URL 实体均由控制器 [RdvMedecinsController] 处理,我们现在将对此进行介绍。
2.12.3. 控制器 [RdvMedecinsController] 的框架
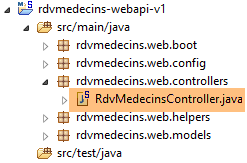 |
[RdvMedecinsController]控制器如下:
package rdvmedecins.web.controllers;

import java.text.ParseException;
...

@RestController
public class RdvMedecinsController {

    @Autowired
    private ApplicationModel application;
    private List<String> messages;

    @PostConstruct
    public void init() {
        // 应用程序错误消息
        messages = application.getMessages();
    }

    // 医生列表
    @RequestMapping(value = "/getAllMedecins", method = RequestMethod.GET)
    public Reponse getAllMedecins() {
...
    }

    // 客户列表
    @RequestMapping(value = "/getAllClients", method = RequestMethod.GET)
    public Reponse getAllClients() {
...
    }

    // 医生预约时段列表
    @RequestMapping(value = "/getAllCreneaux/{idMedecin}", method = RequestMethod.GET)
    public Reponse getAllCreneaux(@PathVariable("idMedecin") long idMedecin) {
...
    }

    // 医生预约列表
    @RequestMapping(value = "/getRvMedecinJour/{idMedecin}/{jour}", method = RequestMethod.GET)
    public Reponse getRvMedecinJour(@PathVariable("idMedecin") long idMedecin,
            @PathVariable("jour") String jour) {
...
    }

    @RequestMapping(value = "/getClientById/{id}", method = RequestMethod.GET)
    public Reponse getClientById(@PathVariable("id") long id) {
...
    }

    @RequestMapping(value = "/getMedecinById/{id}", method = RequestMethod.GET)
    public Reponse getMedecinById(@PathVariable("id") long id) {
...
    }

    @RequestMapping(value = "/getRvById/{id}", method = RequestMethod.GET)
    public Reponse getRvById(@PathVariable("id") long id) {
...
    }

    @RequestMapping(value = "/getCreneauById/{id}", method = RequestMethod.GET)
    public Reponse getCreneauById(@PathVariable("id") long id) {
...
    }

    @RequestMapping(value = "/ajouterRv", method = RequestMethod.POST, consumes = "application/json; charset=UTF-8")
    public Reponse ajouterRv(@RequestBody PostAjouterRv post) {
...
    }

    @RequestMapping(value = "/supprimerRv", method = RequestMethod.POST, consumes = "application/json; charset=UTF-8")
    public Reponse supprimerRv(@RequestBody PostSupprimerRv post) {
...
    }

    @RequestMapping(value = "/getAgendaMedecinJour/{idMedecin}/{jour}", method = RequestMethod.GET)
    public Reponse getAgendaMedecinJour(
            @PathVariable("idMedecin") long idMedecin,
            @PathVariable("jour") String jour) {
...
    }
}
- 第 6 行:注解 [@RestController] 将类 [RdvMedecinsController] 定义为 Spring 控制器。 此外,它还导致处理 URL 的方法生成的响应将自动转换为 JSON;
- 第 9-10 行:Spring 将在此处注入一个 [ApplicationModel] 类型的对象;
- 第13行:[@PostConstruct]注解标记了一个方法,该方法将在类实例化后立即执行。当该方法执行时,Spring注入的对象已可用;
- 所有方法返回如下 [Reponse] 类型的对象:
package rdvmedecins.web.models;

public class Reponse {

    // ----------------- 属性
    // 操作状态
    private int status;
    // 响应
    private Object data;
...
}
该对象在发送至客户端浏览器前会被序列化为 JSON;
- 第 20 行:注解 [@RequestMapping] 规定了方法的调用条件。此处该方法处理来自 URL 的 GET 请求。 如果该 URL 请求是由 POST 发起的,则会被拒绝,Spring MVC 会向 Web 客户端发送 HTTP 错误代码;
- 第 32 行:URL 由 {idMedecin} 进行配置。该参数通过第 33 行的注解 [@PathVariable] 获取;
- 第 33 行:唯一参数 [long idMedecin] 的值来自 URL 中的 {idMedecin} 参数; URL 中的参数与方法中的参数可能具有不同的名称。 这里需要注意的是,[@PathVariable("idMedecin")] 的类型为 String(整个 URL 都是 String),而参数 [long idMedecin] 的类型为 [long]。类型转换是自动进行的。 如果类型转换失败,将返回错误代码 HTTP;
- 第 65 行:注释 [@RequestBody] 指代请求正文。 在 GET 请求中,几乎从不包含请求主体(但可以添加)。而在 POST 请求中,通常包含请求主体(但也可以不包含)。 对于 URL 和 [ajouterRv],Web 客户端在其 POST 中发送以下字符串:
[@RequestBody PostAjouterRv post](第 65 行)的语法 加上该方法期望第64行的JSON [consumes = "application/json; charset=UTF-8"],将导致Web客户端发送的字符串JSON被反序列化为[PostAjouter]类型的对象。 该对象如下所示:
package rdvmedecins.web.models;

public class PostAjouterRv {

    // 帖子数据
    private String jour;
    private long idClient;
    private long idCreneau;

    // 获取器和设置器
    ...
}
在此处,必要的类型转换也会自动进行;
- 第 69-70 行中,针对 URL 和 [/supprimerRv] 采用了类似的机制。发送的字符串 JSON 如下:
而类型 [PostSupprimerRv] 如下:
package rdvmedecins.web.models;

public class PostSupprimerRv {

    // POST数据
    private long idRv;

    // 获取器和设置器
    ...
}
2.12.4. Web 服务的模板
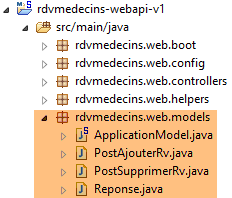 |
我们之前已经介绍过型号为[Reponse, PostAjouterRv, PostSupprimerRv]的产品。型号为[ApplicationModel]的产品如下:
package rdvmedecins.web.models;

import java.util.Date;
...

@Component
public class ApplicationModel implements IMetier {

    // [métier] 层
    @Autowired
    private IMetier métier;

    // 来自 [métier] 层的数据
    private List<Medecin> médecins;
    private List<Client> clients;
    // 错误消息
   private List<String> messages;

    @PostConstruct
    public void init() {
        // 获取医生和客户
        try {
            médecins = métier.getAllMedecins();
            clients = métier.getAllClients();
        } catch (Exception ex) {
            messages = Static.getErreursForException(ex);
        }
    }

    // getter
    public List<String> getMessages() {
        return messages;
    }

    // ------------------------- [métier] 层接口
    @Override
    public List<Client> getAllClients() {
        return clients;
    }

    @Override
    public List<Medecin> getAllMedecins() {
        return médecins;
    }

    @Override
    public List<Creneau> getAllCreneaux(long idMedecin) {
        return métier.getAllCreneaux(idMedecin);
    }

    @Override
    public List<Rv> getRvMedecinJour(long idMedecin, Date jour) {
        return métier.getRvMedecinJour(idMedecin, jour);
    }

    @Override
    public Client getClientById(long id) {
        return métier.getClientById(id);
    }

    @Override
    public Medecin getMedecinById(long id) {
        return métier.getMedecinById(id);
    }

    @Override
    public Rv getRvById(long id) {
        return métier.getRvById(id);
    }

    @Override
    public Creneau getCreneauById(long id) {
        return métier.getCreneauById(id);
    }

    @Override
    public Rv ajouterRv(Date jour, Creneau creneau, Client client) {
        return métier.ajouterRv(jour, creneau, client);
    }

    @Override
    public void supprimerRv(Rv rv) {
        métier.supprimerRv(rv);
    }

    @Override
    public AgendaMedecinJour getAgendaMedecinJour(long idMedecin, Date jour) {
        return métier.getAgendaMedecinJour(idMedecin, jour);
    }

}
- 第 6 行:注解 [@Component] 将类 [ApplicationModel] 定义为 Spring 组件。与迄今为止所见的所有 Spring 组件(@Controller 除外)一样,该类型的对象将仅实例化一个(单例);
- 第 7 行:类 [ApplicationModel] 实现了接口 [IMetier];
- 第 10-11 行:Spring 注入了一个指向 [métier] 层的引用;
- 第 19 行:注解 [@PostConstruct] 确保在 [ApplicationModel] 类实例化后立即执行方法 [init];
- 第 23-24 行:从 [métier] 层获取医生和客户列表;
- 第26行:若发生异常,将异常堆栈中的消息存储在第17行的字段中;
[ApplicationModel] 类将用于两个目的:
- 作为缓存,用于存储医生和患者(客户)列表;
- 作为控制器统一的接口;
Web 层的架构演变如下:
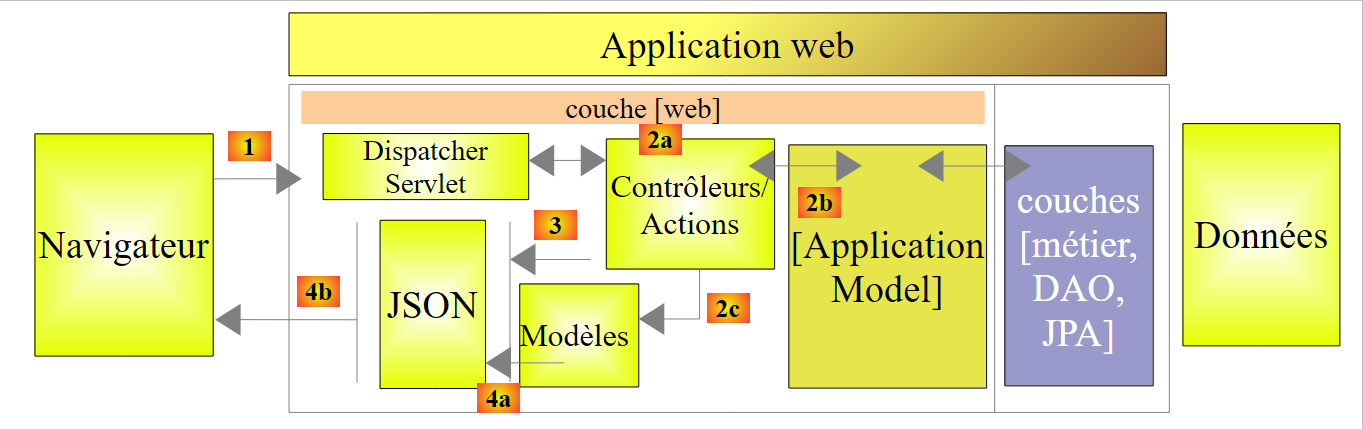 |
- 在 [2b] 中,控制器的方法与单例 [ApplicationModel] 进行通信;
该策略为缓存管理提供了灵活性。目前医生的预约时段并未被缓存。若要将其缓存,只需修改类 [ApplicationModel]。这不会对控制器产生任何影响,控制器将像以前一样继续使用方法 [List<Creneau> getAllCreneaux(long idMedecin)]。 需要修改的是该方法在 [ApplicationModel] 中的实现。
2.12.5. 静态类
类 [Static] 汇集了一组不涉及“业务”或“Web”方面的静态实用方法:
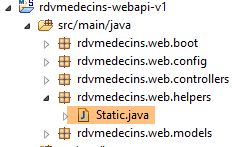 |
其代码如下:
package rdvmedecins.web.helpers;

import java.text.SimpleDateFormat;
...

public class Static {

    public Static() {
    }

    // 异常的错误消息列表
    public static List<String> getErreursForException(Exception exception) {
        // 获取异常的错误消息列表
        Throwable cause = exception;
        List<String> erreurs = new ArrayList<String>();
        while (cause != null) {
            erreurs.add(cause.getMessage());
            cause = cause.getCause();
        }
        return erreurs;
    }

    // Object --> Map 映射器
    // --------------------------------------------------------
....
}
- 第 12 行:方法 [Static.getErreursForException],该方法在类 [ApplicationModel] 的方法 [init] 中被调用(见下文第 8 行):
    @PostConstruct
    public void init() {
        // 获取医生和客户
        try {
            médecins = métier.getAllMedecins();
            clients = métier.getAllClients();
        } catch (Exception ex) {
            messages = Static.getErreursForException(ex);
        }
}
该方法使用异常 [exception] 及其包含的异常 [exception.getCause()] 的错误消息,构建一个 [List<String>] 对象。
[Static] 类包含其他辅助方法,我们将在遇到它们时再作说明。
接下来我们将详细说明 Web 服务中 URL 的处理流程。该处理涉及三个主要类:
- 控制器 [RdvMedecinsController];
- 辅助方法类 [Static];
- 缓存类 [ApplicationModel];
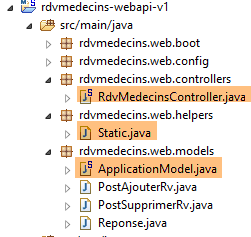 |
2.12.6. 控制器中的方法 [init]
控制器 [RdvMedecinsController](参见第 2.12.3 节)有一个方法 [init],该方法在其实例化后立即执行:
    @Autowired
    private ApplicationModel application;
    private List<String> messages;

    @PostConstruct
    public void init() {
        // 应用程序的错误信息
        messages = application.getMessages();
}
- 第 8 行:存储在 [ApplicationModel] 缓存应用程序中的错误消息被保存在第 3 行的字段中。这将使方法能够判断应用程序是否已正确初始化。
2.12.7. URL [/getAllMedecins]
URL [/getAllMedecins] 由控制器 [RdvMedecinsController] 的以下方法处理:
    // 医生列表
    @RequestMapping(value = "/getAllMedecins", method = RequestMethod.GET)
    public Reponse getAllMedecins() {
        // 应用程序状态
        if (messages != null) {
            return new Reponse(-1, messages);
        }
        // 医生列表
        try {
            return new Reponse(0, application.getAllMedecins());
        } catch (Exception e) {
            return new Reponse(1, Static.getErreursForException(e));
        }
}
- 第 5 行:检查应用程序是否已正确初始化(messages==null)。若未初始化,则返回包含 status=-1 和 data=messages 的响应;
- 第10行:否则,返回医生列表,此时 status 设为 0。方法 [application.getAllMedecins()] 不会抛出异常,因为它仅返回缓存中的列表。不过,为了应对医生信息不再被缓存的情况,我们仍保留此异常处理机制;
我们尚未说明应用程序初始化失败的情况。 现在停止 SGBD 和 MySQL5,启动 Web 服务,然后调用 URL 和 [/getAllMedecins]:
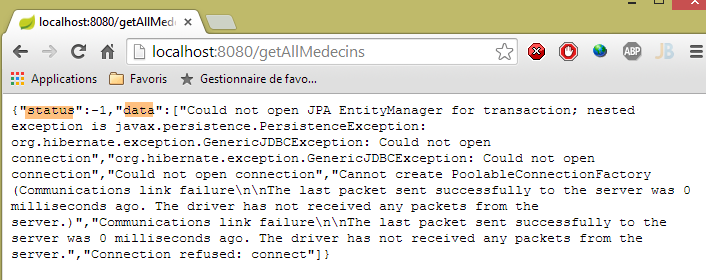
确实会出现错误。在正常情况下,会显示以下视图:
|
2.12.8. URL [/getAllClients]
URL [/getAllClients] 由控制器 [RdvMedecinsController] 的以下方法处理:
    // 客户列表
    @RequestMapping(value = "/getAllClients")
    public Reponse getAllClients() {
        // 应用程序状态
        if (messages != null) {
            return new Reponse(-1, messages);
        }
        // 客户列表
        try {
            return new Reponse(0, application.getAllClients());
        } catch (Exception e) {
            return new Reponse(1, Static.getErreursForException(e));
        }
}
该方法与先前研究的 [getAllMedecins] 方法类似。所得结果如下:
|
2.12.9. URL [/getAllCreneaux/{idMedecin}]
URL [/getAllCreneaux/{idMedecin}] 由控制器 [RdvMedecinsController] 的以下方法处理:
// 医生预约时段列表
    @RequestMapping(value = "/getAllCreneaux/{idMedecin}", method = RequestMethod.GET)
    public Reponse getAllCreneaux(@PathVariable("idMedecin") long idMedecin) {
        // 应用程序状态
        if (messages != null) {
            return new Reponse(-1, messages);
        }
        // 获取医生
        Reponse réponse = getMedecin(idMedecin);
        if (réponse.getStatus() != 0) {
            return réponse;
        }
        Medecin médecin = (Medecin) réponse.getData();
        // 医生排班
        List<Creneau> créneaux = null;
        try {
            créneaux = application.getAllCreneaux(médecin.getId());
        } catch (Exception e1) {
            return new Reponse(3, Static.getErreursForException(e1));
        }
        // 返回响应
        return new Reponse(0, Static.getListMapForCreneaux(créneaux));
    }
- 第 9 行:通过参数 [id] 标识的医生被调用至一个本地方法:
    private Reponse getMedecin(long id) {
        // 获取医生
        Medecin médecin = null;
        try {
            médecin = application.getMedecinById(id);
        } catch (Exception e1) {
            return new Reponse(1, Static.getErreursForException(e1));
        }
        // 已有医生?
        if (médecin == null) {
            return new Reponse(2, null);
        }
        // 好的
        return new Reponse(0, médecin);
}
该方法返回时,将 status 赋值给 [0,1,2]。让我们回到 [getAllCreneaux] 方法的代码:
- 第 10-12 行:如果为 status!=0,则立即返回响应;
- 第13行:获取该医生;
- 第17行:获取该医生的预约时段;
- 第22行:返回一个[Static.getListMapForCreneaux(créneaux)]对象;
回顾类 [Creneau] 的定义:
@Entity
@Table(name = "creneaux")
public class Creneau extends AbstractEntity {

    private static final long serialVersionUID = 1L;
    // RV 时段的特征
    private int hdebut;
    private int mdebut;
    private int hfin;
    private int mfin;

    // 一个时段与一位医生相关联
    @ManyToOne(fetch = FetchType.LAZY)
    @JoinColumn(name = "id_medecin")
    private Medecin medecin;

    // 外键
    @Column(name = "id_medecin", insertable = false, updatable = false)
    private long idMedecin;
...
}
- 第13行:以[FetchType.LAZY]模式查询医生;
回顾实现 [getAllCreneaux] 方法的 JPQL 请求(位于 [DAO] 层):
@Query("select c from Creneau c where c.medecin.id=?1")
[c.medecin.id] 这种命名方式强制要求对 [CRENEAUX] 和 [MEDECINS] 这两张表进行连接。 因此,该查询会返回该医生的所有时段,且每个时段中都包含该医生。当将这些时段序列化为 JSON 时,每个时段中都会出现该医生的字符串 JSON。这是多余的。 因此,与其序列化一个 [Creneau] 对象,不如序列化一个 [Map] 对象,并在其中仅包含所需的字段。
让我们回到最初研究的代码:
// 返回响应
return new Reponse(0, Static.getListMapForCreneaux(créneaux));
[Static.getListMapForCreneaux]方法如下:
    // List<Creneau> --> List<Map>
    public static List<Map<String, Object>> getListMapForCreneaux(List<Creneau> créneaux) {
        // <String,Object> 字典列表
        List<Map<String, Object>> liste = new ArrayList<Map<String, Object>>();
        for (Creneau créneau : créneaux) {
            liste.add(Static.getMapForCreneau(créneau));
        }
        // 返回列表
        return liste;
}
方法 [Static.getMapForCreneau] 如下:
    // Creneau --> Map
    public static Map<String, Object> getMapForCreneau(Creneau créneau) {
        // 需要做些什么?
        if (créneau == null) {
            return null;
        }
        // 字典 <String,Object>
        Map<String, Object> hash = new HashMap<String, Object>();
        hash.put("id", créneau.getId());
        hash.put("hDebut", créneau.getHdebut());
        hash.put("mDebut", créneau.getMdebut());
        hash.put("hFin", créneau.getHfin());
        hash.put("mFin", créneau.getMfin());
        // 将字典转换为
        return hash;
}
- 第 8 行:创建一个字典;
- 第 9-13 行:将需要保留在 JSON 字符串中的字段放入该字典中。字段 [medecin] 未包含其中;
- 第15行:返回该字典;
所得结果如下:
|
或者,如果该时段不存在,则为:
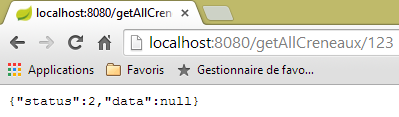 |
或者在访问数据库时出现错误的情况下:
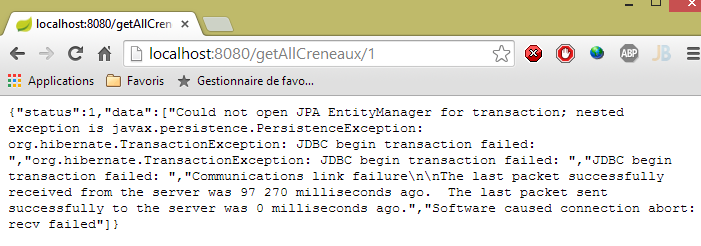 |
2.12.10. URL [/getRvMedecinJour/{idMedecin}/{jour}]
URL [/getRvMedecinJour/{idMedecin}/{jour}] 由控制器 [RdvMedecinsController] 的以下方法处理:
// 医生的预约列表
    @RequestMapping(value = "/getRvMedecinJour/{idMedecin}/{jour}", method = RequestMethod.GET)
    public Reponse getRvMedecinJour(@PathVariable("idMedecin") long idMedecin, @PathVariable("jour") String jour) {
        // 应用程序状态
        if (messages != null) {
            return new Reponse(-1, messages);
        }
        // 验证日期
        Date jourAgenda = null;
        SimpleDateFormat sdf = new SimpleDateFormat("yyyy-MM-dd");
        sdf.setLenient(false);
        try {
            jourAgenda = sdf.parse(jour);
        } catch (ParseException e) {
            return new Reponse(3, null);
        }
        // 获取医生
        Reponse réponse = getMedecin(idMedecin);
        if (réponse.getStatus() != 0) {
            return réponse;
        }
        Medecin médecin = (Medecin) réponse.getData();
        // 其预约列表
        List<Rv> rvs = null;
        try {
            rvs = application.getRvMedecinJour(médecin.getId(), jourAgenda);
        } catch (Exception e1) {
            return new Reponse(4, Static.getErreursForException(e1));
        }
        // 返回响应
        return new Reponse(0, Static.getListMapForRvs(rvs));
}
- 第 31 行:返回的是 List<Map<String,Object>> 对象,而不是 List<Rv> 对象。回顾一下 [Rv] 类的定义:
@Entity
@Table(name = "rv")
public class Rv extends AbstractEntity {
    private static final long serialVersionUID = 1L;

    // 预约详情
    @Temporal(TemporalType.DATE)
    private Date jour;

    // 预约与客户相关联
    @ManyToOne(fetch = FetchType.LAZY)
    @JoinColumn(name = "id_client")
    private Client client;

    // 预约与时段相关联
    @ManyToOne(fetch = FetchType.LAZY)
    @JoinColumn(name = "id_creneau")
    private Creneau creneau;

    // 外部键
    @Column(name = "id_client", insertable = false, updatable = false)
    private long idClient;
    @Column(name = "id_creneau", insertable = false, updatable = false)
    private long idCreneau;

...

}
- 第 11 行:使用 [FetchType.LAZY] 模式搜索客户;
- 第 18 行:使用 [FetchType.LAZY] 模式查询时段;
回顾用于查询约会的查询 JPQL:
@Query("select rv from Rv rv left join fetch rv.client c left join fetch rv.creneau cr where cr.medecin.id=?1 and rv.jour=?2")
通过显式连接操作,获取字段 [client] 和 [creneau]。 此外,由于 [cr.medecin.id=?1] 的连接操作,我们还将获得医生信息。因此,医生信息将出现在每个预约的 JSON 字符串中。然而,这种重复的信息是多余的。让我们回到方法的代码:
- 第 31 行:我们自己构建了待序列化的字典 JSON;
为一个预约构建的字典如下:
    // RV --> 地图
    public static Map<String, Object> getMapForRv(Rv rv) {
        // 需要做些什么?
        if (rv == null) {
            return null;
        }
        // <String,Object> 字典
        Map<String, Object> hash = new HashMap<String, Object>();
        hash.put("id", rv.getId());
        hash.put("client", rv.getClient());
        hash.put("creneau", getMapForCreneau(rv.getCreneau()));
        // 返回字典
        return hash;
}
- 第11行:我们采用了之前介绍过的[Creneau]对象的字典;
所得结果如下:
|
或者以下这些(日期有误):
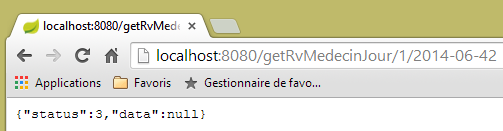 |
或者这些结果,其中医生信息有误:
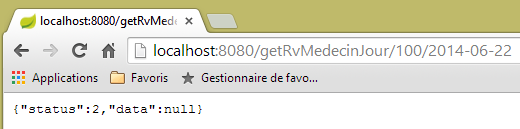 |
2.12.11. URL [/getAgendaMedecinJour/{idMedecin}/{jour}]
URL [/getAgendaMedecinJour/{idMedecin}/{jour}] 由 [RdvMedecinsController] 控制器通过以下方法处理:
@RequestMapping(value = "/getAgendaMedecinJour/{idMedecin}/{jour}", method = RequestMethod.GET)
    public Reponse getAgendaMedecinJour(@PathVariable("idMedecin") long idMedecin, @PathVariable("jour") String jour) {
        // 应用程序状态
        if (messages != null) {
            return new Reponse(-1, messages);
        }
        // 验证日期
        Date jourAgenda = null;
        SimpleDateFormat sdf = new SimpleDateFormat("yyyy-MM-dd");
        sdf.setLenient(false);
        try {
            jourAgenda = sdf.parse(jour);
        } catch (ParseException e) {
            return new Reponse(3, new String[] { String.format("jour [%s] invalide", jour) });
        }
        // 获取医生
        Reponse réponse = getMedecin(idMedecin);
        if (réponse.getStatus() != 0) {
            return réponse;
        }
        Medecin médecin = (Medecin) réponse.getData();
        // 获取其日程表
        AgendaMedecinJour agenda = null;
        try {
            agenda = application.getAgendaMedecinJour(médecin.getId(), jourAgenda);
        } catch (Exception e1) {
            return new Reponse(4, Static.getErreursForException(e1));
        }
        // 完成
        return new Reponse(0, Static.getMapForAgendaMedecinJour(agenda));
    }
}
- 第 30 行,返回一个 List<Map<String,Object>> 类型的对象。
[Static.getMapForAgendaMedecinJour] 方法如下:
    // AgendaMedecinJour --> 地图
    public static Map<String, Object> getMapForAgendaMedecinJour(AgendaMedecinJour agenda) {
        // 有什么需要做的吗?
        if (agenda == null) {
            return null;
        }
        // 字典 <String,Object>
        Map<String, Object> hash = new HashMap<String, Object>();
        hash.put("medecin", agenda.getMedecin());
        hash.put("jour", new SimpleDateFormat("yyyy-MM-dd").format(agenda.getJour()));
        List<Map<String, Object>> créneaux = new ArrayList<Map<String, Object>>();
        for (CreneauMedecinJour créneau : agenda.getCreneauxMedecinJour()) {
            créneaux.add(getMapForCreneauMedecinJour(créneau));
        }
        hash.put("creneauxMedecin", créneaux);
        // 生成字典
        return hash;
}
构建的字典包含三个字段:
- [medecin]:日程表所属的医生。保留此信息是因为它仅出现一次,而在之前的情况中,该信息在每个字符串中都会重复出现 JSON;
- [jour]:日程表的日期;
- [creneauxMedecin]:医生的可用时段列表,其中可能包含该时段内的预约;
第13行使用的[getMapForCreneauMedecinJour]方法如下:
    // CreneauMedecinJour --> 映射
    public static Map<String, Object> getMapForCreneauMedecinJour(CreneauMedecinJour créneau) {
        // 有什么需要做的吗?
        if (créneau == null) {
            return null;
        }
        // 字典 <String,Object>
        Map<String, Object> hash = new HashMap<String, Object>();
        hash.put("creneau", getMapForCreneau(créneau.getCreneau()));
        hash.put("rv", getMapForRv(créneau.getRv()));
        // 返回字典
        return hash;
}
- 第9-10行:使用已分析过的字典处理类型[Creneau]和[Rv],因此这些类型不包含[Medecin]对象;
所得结果如下:
|
或者,如果日期有误,则为:
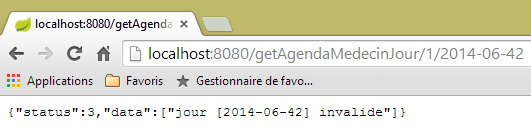 |
或者,如果医生编号无效,则为:
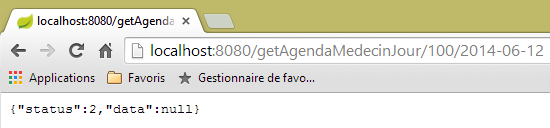 |
2.12.12. URL [/getMedecinById/{id}]
URL [/getMedecinById/{id}] 由 [RdvMedecinsController] 控制器通过以下方法处理:
    @RequestMapping(value = "/getMedecinById/{id}", method = RequestMethod.GET)
    public Reponse getMedecinById(@PathVariable("id") long id) {
        // 应用程序状态
        if (messages != null) {
            return new Reponse(-1, messages);
        }
        // 获取医生
        return getMedecin(id);
}
第 8 行,[getMedecin] 方法如下:
    private Reponse getMedecin(long id) {
        // 获取医生
        Medecin médecin = null;
        try {
            médecin = application.getMedecinById(id);
        } catch (Exception e1) {
            return new Reponse(1, Static.getErreursForException(e1));
        }
        // 医生是否存在?
        if (médecin == null) {
            return new Reponse(2, null);
        }
        // 成功
        return new Reponse(0, médecin);
}
所得结果如下:
|
或者,如果医生编号不正确,则显示以下结果:
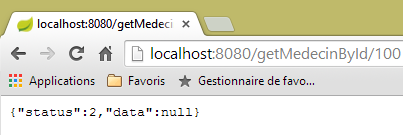 |
2.12.13. URL [/getClientById/{id}]
URL [/getClientById/{id}] 由控制器 [RdvMedecinsController] 通过以下方法处理:
    @RequestMapping(value = "/getClientById/{id}", method = RequestMethod.GET)
    public Reponse getClientById(@PathVariable("id") long id) {
        // 应用程序状态
        if (messages != null) {
            return new Reponse(-1, messages);
        }
        // 正在获取客户
        return getClient(id);
}
第 8 行,[getClient] 方法如下:
    private Reponse getClient(long id) {
        // 正在检索客户
        Client client = null;
        try {
            client = application.getClientById(id);
        } catch (Exception e1) {
            return new Reponse(1, Static.getErreursForException(e1));
        }
        // 客户是否已存在?
        if (client == null) {
            return new Reponse(2, null);
        }
        // ok
        return new Reponse(0, client);
}
所得结果如下:
|
或者,如果客户编号不正确,则显示如下:
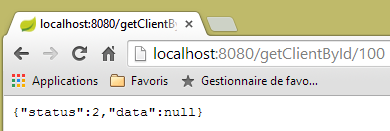 |
2.12.14. URL [/getCreneauById/{id}]
URL [/getCreneauById/{id}] 由控制器 [RdvMedecinsController] 通过以下方法处理:
    @RequestMapping(value = "/getCreneauById/{id}", method = RequestMethod.GET)
    public Reponse getCreneauById(@PathVariable("id") long id) {
        // 应用程序状态
        if (messages != null) {
            return new Reponse(-1, messages);
        }
        // 正在获取时段
        Reponse réponse = getCreneau(id);
        if (réponse.getStatus() == 0) {
            réponse.setData(Static.getMapForCreneau((Creneau) réponse.getData()));
        }
        // 结果
        return réponse;
}
第 8 行,[getCreneau] 方法如下:
    private Reponse getCreneau(long id) {
        // 正在获取时段
        Creneau créneau = null;
        try {
            créneau = application.getCreneauById(id);
        } catch (Exception e1) {
            return new Reponse(1, Static.getErreursForException(e1));
        }
        // 时段是否已存在?
        if (créneau == null) {
            return new Reponse(2, null);
        }
        // 成功
        return new Reponse(0, créneau);
}
所得结果如下:
|
若时段编号不正确,则显示如下:
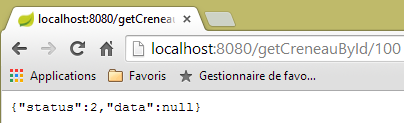 |
2.12.15. URL [/getRvById/{id}]
URL [/getRvById/{id}] 由控制器 [RdvMedecinsController] 通过以下方法处理:
    @RequestMapping(value = "/getRvById/{id}", method = RequestMethod.GET)
    public Reponse getRvById(@PathVariable("id") long id) {
        // 应用程序状态
        if (messages != null) {
            return new Reponse(-1, messages);
        }
        // 获取预约
        Reponse réponse = getRv(id);
        if (réponse.getStatus() == 0) {
            réponse.setData(Static.getMapForRv2((Rv) réponse.getData()));
        }
        // 结果
        return réponse;
}
第 8 行,[getRv] 方法如下:
    private Reponse getRv(long id) {
        // 获取 Rv
        Rv rv = null;
        try {
            rv = application.getRvById(id);
        } catch (Exception e1) {
            return new Reponse(1, Static.getErreursForException(e1));
        }
        // Rv是否已存在?
        if (rv == null) {
            return new Reponse(2, null);
        }
        // 成功
        return new Reponse(0, rv);
}
第 10 行,方法 [Static.getMapForRv2] 如下:
// Rv --> 地图
    public static Map<String, Object> getMapForRv2(Rv rv) {
        // 需要做些什么?
        if (rv == null) {
            return null;
        }
        // <String,Object> 字典
        Map<String, Object> hash = new HashMap<String, Object>();
        hash.put("id", rv.getId());
        hash.put("idClient", rv.getIdClient());
        hash.put("idCreneau", rv.getIdCreneau());
        // 返回字典
        return hash;
    }
所得结果如下:
|
或者,如果预约编号不正确,则显示如下:
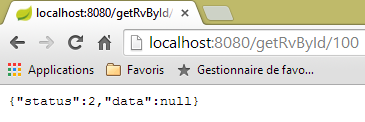 |
2.12.16. URL [/ajouterRv]
URL [/ajouterRv] 由控制器 [RdvMedecinsController] 通过以下方法处理:
@RequestMapping(value = "/ajouterRv", method = RequestMethod.POST, consumes = "application/json; charset=UTF-8")
    public Reponse ajouterRv(@RequestBody PostAjouterRv post) {
        // 应用程序状态
        if (messages != null) {
            return new Reponse(-1, messages);
        }
        // 获取提交的值
        String jour = post.getJour();
        long idCreneau = post.getIdCreneau();
        long idClient = post.getIdClient();
        // 验证日期
        Date jourAgenda = null;
        SimpleDateFormat sdf = new SimpleDateFormat("yyyy-MM-dd");
        sdf.setLenient(false);
        try {
            jourAgenda = sdf.parse(jour);
        } catch (ParseException e) {
            return new Reponse(6, null);
        }
        // 获取时间段
        Reponse réponse = getCreneau(idCreneau);
        if (réponse.getStatus() != 0) {
            return réponse;
        }
        Creneau créneau = (Creneau) réponse.getData();
        // 获取客户
        réponse = getClient(idClient);
        if (réponse.getStatus() != 0) {
            réponse.incrStatusBy(2);
            return réponse;
        }
        Client client = (Client) réponse.getData();
        // 添加预约
        Rv rv = null;
        try {
            rv = application.ajouterRv(jourAgenda, créneau, client);
        } catch (Exception e1) {
            return new Reponse(5, Static.getErreursForException(e1));
        }
        // 返回响应
        return new Reponse(0, Static.getMapForRv(rv));
    }
这里没有任何新内容。第41行,返回了第36行添加的约会。
使用客户端 [Advanced Rest Client] 时,所得结果如下:
 |
或者,如果输入一个不存在的时段编号,结果如下:
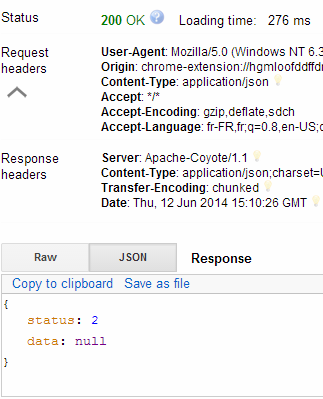 |
|
2.12.17. URL [/supprimerRv]
URL [/supprimerRv] 由控制器 [RdvMedecinsController] 的以下方法处理:
@RequestMapping(value = "/supprimerRv", method = RequestMethod.POST, consumes = "application/json; charset=UTF-8")
    public Reponse supprimerRv(@RequestBody PostSupprimerRv post) {
        // 应用程序状态
        if (messages != null) {
            return new Reponse(-1, messages);
        }
        // 获取提交的值
        long idRv = post.getIdRv();
        // 获取返回值
        Reponse réponse = getRv(idRv);
        if (réponse.getStatus() != 0) {
            return réponse;
        }
        // 删除返回值
        try {
            application.supprimerRv(idRv);
        } catch (Exception e1) {
            return new Reponse(3, Static.getErreursForException(e1));
        }
        // 完成
        return new Reponse(0, null);
    }
所得结果如下:
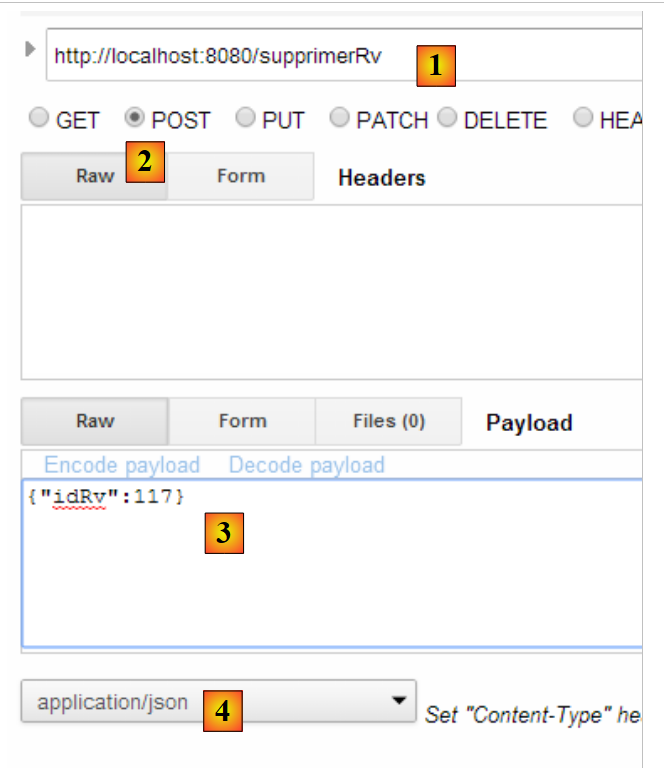 |
或者,如果预约编号不存在,则为以下结果:
 |
控制器部分到此结束。接下来我们将了解如何配置该项目。
2.12.18. Web服务配置
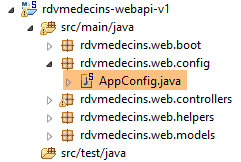 |
配置类 [AppConfig] 如下所示:
package rdvmedecins.web.config;

import org.springframework.boot.autoconfigure.EnableAutoConfiguration;
import org.springframework.context.annotation.ComponentScan;
import org.springframework.context.annotation.Import;

import rdvmedecins.config.DomainAndPersistenceConfig;

@EnableAutoConfiguration
@ComponentScan(basePackages = { "rdvmedecins.web" })
@Import({ DomainAndPersistenceConfig.class })
public class AppConfig {

}
- 第 9 行:切换至 [AutoConfiguration] 模式,以便 Spring Boot 能根据项目 Classpath 中找到的包来配置项目;
- 第 10 行:要求在 [rdvmedecins.web] 包及其子包中查找 Spring 组件。这样就能发现位于 [rdvmedecins.web.controllers] 包中的组件:
- [@RestController RdvMedecinsController] 位于 [rdvmedecins.web.controllers] 包中;
- [@Component ApplicationModel] 位于 [rdvmedecins.web.models] 包中;
- 第 11 行:导入类 [DomainAndPersistenceConfig],该类用于配置项目 [rdvmedecins-metier-dao],以便访问该项目的 Bean;
2.12.19. Web服务的可执行类
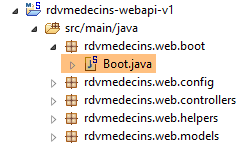 |
类 [Boot] 如下:
package rdvmedecins.web.boot;

import org.springframework.boot.SpringApplication;

import rdvmedecins.web.config.AppConfig;

public class Boot {

    public static void main(String[] args) {
        SpringApplication.run(AppConfig.class, args);
    }
}
第 10 行,静态方法 [SpringApplication.run] 被调用,其第一个参数是项目配置类 [AppConfig]。 该方法将执行项目的自动配置,启动依赖项中内置的 Tomcat 服务器,并在其中部署控制器 [RdvMedecinsController]。
执行时的日志如下:
- 第 17 行:Tomcat 服务器启动;
- 第 23-31 行:[métier, DAO, JPA] 层初始化;
- 第 34 行:已发现处理 URL 的 [/getRvMedecinJour/{idMedecin}/{jour}] 方法。此控制器方法的发现过程一直持续到第 44 行;
- 第 52 行:Spring Servlet MVC [DispatcherServlet] 已准备好响应 Web 客户端的请求;
现在,我们已经拥有了一个可通过Web客户端进行查询的、可正常运行的Web服务。接下来,我们将探讨如何对该服务进行安全加固:我们希望仅允许特定人员管理医生的预约。为此,我们将使用Spring Security框架,它是Spring生态系统的一个分支。
2.13. Spring Security 简介
我们将再次导入 Spring 指南,具体步骤如下:
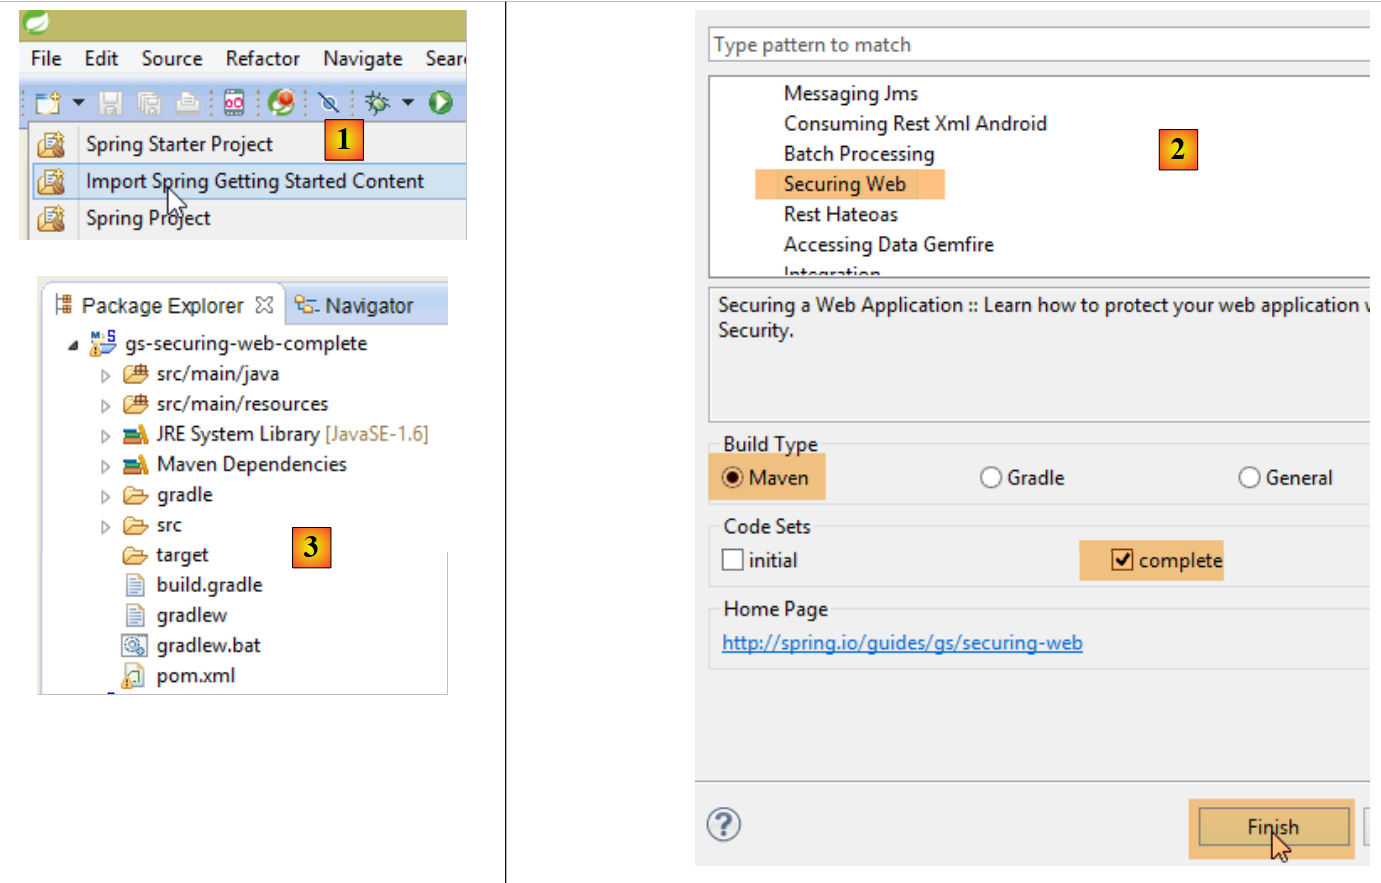 |
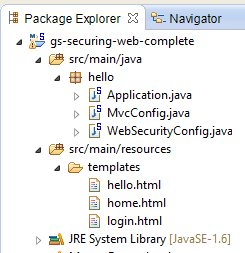 |
该项目由以下部分组成:
- 在 [templates] 文件夹中,包含项目的 HTML 页面;
- [Application]:是项目的可执行类;
- [MvcConfig]:是 Spring 的配置类;
- [WebSecurityConfig]:是 Spring Security 的配置类;
2.13.1. Maven 配置
项目 [3] 是一个 Maven 项目。让我们查看其 [pom.xml] 文件以了解其依赖关系:
    <parent>
        <groupId>org.springframework.boot</groupId>
        <artifactId>spring-boot-starter-parent</artifactId>
        <version>1.1.1.RELEASE</version>
    </parent>

    <dependencies>
        <dependency>
            <groupId>org.springframework.boot</groupId>
            <artifactId>spring-boot-starter-thymeleaf</artifactId>
        </dependency>
        <dependency>
            <groupId>org.springframework.boot</groupId>
            <artifactId>spring-boot-starter-security</artifactId>
        </dependency>
</dependencies>
- 第 1-5 行:该项目是一个 Spring Boot 项目;
- 第 8-11 行:依赖于 [Thymeleaf] 框架,该框架用于构建动态 HTML 页面。 该框架可替代此前默认使用的 JSP(Java Server Pages)页面,以及 Spring 的视图框架 MVC;
- 第 12-15 行:对 Spring Security 框架的依赖;
2.13.2. Thymeleaf视图
 |
视图 [home.html] 如下:
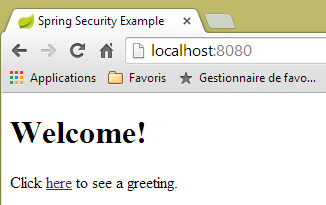 |
<!DOCTYPE html>
<html xmlns="http://www.w3.org/1999/xhtml"
    xmlns:th="http://www.thymeleaf.org"
    xmlns:sec="http://www.thymeleaf.org/thymeleaf-extras-springsecurity3">
<head>
<title>Spring Security Example</title>
</head>
<body>
    <h1>Welcome!</h1>

    <p>
        Click <a th:href="@{/hello}">here</a> to see a greeting.
    </p>
</body>
</html>
- [th:xx] 中的属性是 Thymeleaf 属性。在 HTML 页面发送给客户端之前,这些属性会被 Thymeleaf 解析。客户端无法看到这些属性;
- 第 12 行:[th:href="@{/hello}"] 属性将生成 <a> 标签的 [href] 属性。 值 [@{/hello}] 将生成路径 [<context>/hello],其中 [context] 是 Web 应用程序的上下文;
生成的代码 HTML 如下:
- 第 10 行:应用程序上下文为根目录 /;
视图 [hello.html] 如下:
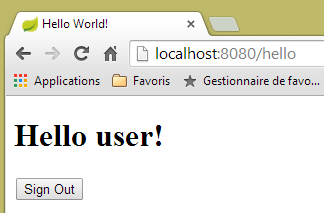 |
<!DOCTYPE html>
<html xmlns="http://www.w3.org/1999/xhtml"
    xmlns:th="http://www.thymeleaf.org"
    xmlns:sec="http://www.thymeleaf.org/thymeleaf-extras-springsecurity3">
<head>
<title>Hello World!</title>
</head>
<body>
    <h1 th:inline="text">Hello [[${#httpServletRequest.remoteUser}]]!</h1>
    <form th:action="@{/logout}" method="post">
        <input type="submit" value="Sign Out" />
    </form>
</body>
</html>
- 第 9 行:属性 [th:inline="text"] 将生成 <h1> 标签的文本。该文本包含一个需要求值的 $ 表达式。 元素 [[${#httpServletRequest.remoteUser}]] 是当前查询 HTTP 中 [RemoteUser] 属性的值。这是已登录用户的名称;
- 第 10 行:一个 HTML 表单。[th:action="@{/logout}"] 属性将生成 [form] 标签的 [action] 属性。 值 [@{/logout}] 将生成路径 [<context>/logout],其中 [context] 是 Web 应用程序的上下文;
生成的代码 HTML 如下:
- 第 8 行:Hello [[${#httpServletRequest.remoteUser}]]! 的翻译;
- 第 9 行:@{/logout} 的翻译;
- 第 11 行:一个名为 _csrf 的隐藏字段(属性 name);
最后一个视图 [login.html] 如下:
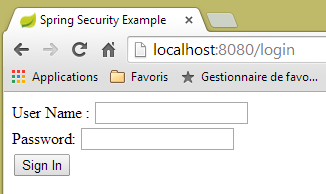 |
<!DOCTYPE html>
<html xmlns="http://www.w3.org/1999/xhtml"
    xmlns:th="http://www.thymeleaf.org"
    xmlns:sec="http://www.thymeleaf.org/thymeleaf-extras-springsecurity3">
<head>
<title>Spring Security Example</title>
</head>
<body>
    <div th:if="${param.error}">Invalid username and password.</div>
    <div th:if="${param.logout}">You have been logged out.</div>
    <form th:action="@{/login}" method="post">
        <div>
            <label> User Name : <input type="text" name="username" />
            </label>
        </div>
        <div>
            <label> Password: <input type="password" name="password" />
            </label>
        </div>
        <div>
            <input type="submit" value="Sign In" />
        </div>
    </form>
</body>
</html>
- 第 9 行:属性 [th:if="${param.error}"] 确保只有当显示登录页面的 URL 包含参数 [error](http://context/login?error)时,才会生成 <div> 标签;
- 第 10 行:属性 [th:if="${param.logout}"] 确保只有当显示登录页面的 URL 包含参数 [logout](http://context/login?logout)时,才会生成 <div> 标签;
- 第 11-23 行:一个 HTML 表单;
- 第 11 行:表单将提交至 URL [<context>/login],其中 <context> 是 Web 应用程序的上下文;
- 第 13 行:一个名为 [username] 的输入字段;
- 第 17 行:一个名为 [password] 的输入字段;
生成的代码 HTML 如下:
请注意第21行,Thymeleaf添加了一个名为[_csrf]的隐藏字段。
2.13.3. Spring 配置 MVC
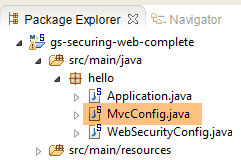 |
类 [MvcConfig] 配置了 Spring 框架 MVC:
package hello;

import org.springframework.context.annotation.Configuration;
import org.springframework.web.servlet.config.annotation.ViewControllerRegistry;
import org.springframework.web.servlet.config.annotation.WebMvcConfigurerAdapter;

@Configuration
public class MvcConfig extends WebMvcConfigurerAdapter {

    @Override
    public void addViewControllers(ViewControllerRegistry registry) {
        registry.addViewController("/home").setViewName("home");
        registry.addViewController("/").setViewName("home");
        registry.addViewController("/hello").setViewName("hello");
        registry.addViewController("/login").setViewName("login");
    }

}
- 第 7 行:注解 [@Configuration] 将类 [MvcConfig] 设为配置类;
- 第 8 行:类 [MvcConfig] 继承自类 [WebMvcConfigurerAdapter],以重写其中某些方法;
- 第 10 行:重定义父类的某个方法;
- 第 11-16 行:方法 [addViewControllers] 用于将 URL 与视图 HTML 关联。其中建立了以下关联:
视图 | |
/templates/home.html | |
/templates/hello.html | |
/templates/login.html |
后缀 [html] 和文件夹 [templates] 是 Thymeleaf 使用的默认值。它们可以通过配置进行更改。文件夹 [templates] 必须位于项目类路径的根目录下:
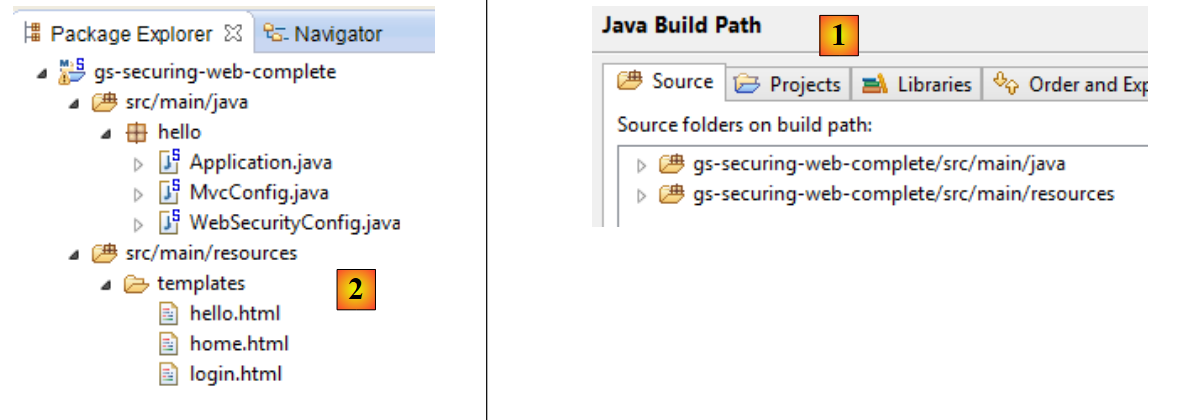 |
在 [1] 之上,文件夹 [main] 和 [resources] 均为源文件夹(source folders)。这意味着它们的内容将位于项目类路径的根目录下。 因此,在 [2] 中,文件夹 [hello] 和 [templates] 将位于类路径的根目录下。
2.13.4. Spring Security 配置
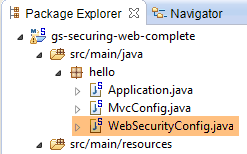 |
类 [WebSecurityConfig] 配置 Spring Security 框架:
package hello;

import org.springframework.context.annotation.Configuration;
import org.springframework.security.config.annotation.authentication.builders.AuthenticationManagerBuilder;
import org.springframework.security.config.annotation.web.builders.HttpSecurity;
import org.springframework.security.config.annotation.web.configuration.WebSecurityConfigurerAdapter;
import org.springframework.security.config.annotation.web.servlet.configuration.EnableWebMvcSecurity;

@Configuration
@EnableWebMvcSecurity
public class WebSecurityConfig extends WebSecurityConfigurerAdapter {
    @Override
    protected void configure(HttpSecurity http) throws Exception {
        http.authorizeRequests().antMatchers("/", "/home").permitAll().anyRequest().authenticated();
        http.formLogin().loginPage("/login").permitAll().and().logout().permitAll();
    }

    @Override
    protected void configure(AuthenticationManagerBuilder auth) throws Exception {
        auth.inMemoryAuthentication().withUser("user").password("password").roles("USER");
    }
}
- 第 9 行:注解 [@Configuration] 将类 [WebSecurityConfig] 设为配置类;
- 第 10 行:注解 [@EnableWebSecurity] 将类 [WebSecurityConfig] 设为 Spring Security 配置类;
- 第 11 行:类 [WebSecurity] 继承自类 [WebSecurityConfigurerAdapter],以重写其中某些方法;
- 第 12 行:重写父类的某个方法;
- 第 13-16 行:重写方法 [configure(HttpSecurity http)],用于定义应用程序中各个 URL 的访问权限;
- 第14行:方法[http.authorizeRequests()]用于将URL与访问权限关联。其中建立了以下关联:
规则 | 代码 | |
无需身份验证的访问 | | |
仅限经过身份验证的用户访问 |
- 第 15 行:定义身份验证方法。身份验证通过表单 URL [/login] 进行,该表单对所有人开放 [http.formLogin().loginPage("/login").permitAll()]。注销(logout)功能同样对所有人开放。
- 第19-21行:重新定义了管理用户的[configure(AuthenticationManagerBuilder auth)]方法;
- 第20行:身份验证使用“硬编码”定义的用户进行 [auth.inMemoryAuthentication()]。 此处定义的用户登录名 [user],密码 [password],角色 [USER]。可为具有相同角色的用户授予相同的权限;
2.13.5. 可执行类
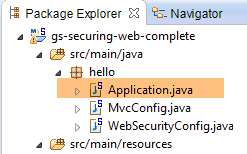 |
类 [Application] 如下所示:
package hello;

import org.springframework.boot.autoconfigure.EnableAutoConfiguration;
import org.springframework.boot.SpringApplication;
import org.springframework.context.annotation.ComponentScan;
import org.springframework.context.annotation.Configuration;

@EnableAutoConfiguration
@Configuration
@ComponentScan
public class Application {

    public static void main(String[] args) throws Throwable {
        SpringApplication.run(Application.class, args);
    }

}
- 第 8 行:注解 [@EnableAutoConfiguration] 要求 Spring Boot(第 3 行)进行开发者未显式配置的配置;
- 第 9 行:将类 [Application] 设为 Spring 配置类;
- 第 10 行:要求扫描 [Application] 类的文件夹,以查找 Spring 组件。 [MvcConfig] 和 [WebSecurityConfig] 这两个类将被发现,因为它们带有 [@Configuration] 注解;
- 第 13 行:可执行类的 [main] 方法;
- 第 14 行:静态方法 [SpringApplication.run] 被调用,其参数为配置类 [Application]。 我们之前已经遇到过这个过程,并且知道项目 Maven 依赖中嵌入的 Tomcat 服务器将被启动,项目也将部署到该服务器上。我们看到四个 URL 由 [/, /home, /login, /hello] 管理,其中部分受访问权限保护。
2.13.6. 应用程序测试
首先,我们请求 URL(即 [/]),这是四个被接受的 URL 之一。它关联的视图是 [/templates/home.html]:
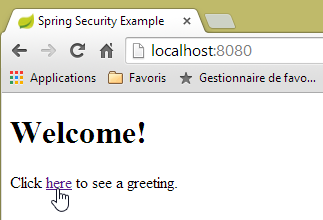 |
所请求的 URL(即 [/])对所有人开放。这就是我们获取它的原因。[here] 的链接如下:
点击该链接后,系统将请求 URL [/hello]。该文件受保护:
规则 | 代码 | |
无需认证即可访问 | | |
仅限经过身份验证的访问 |
必须经过身份验证才能获取。Spring Security 随后会将客户端浏览器重定向至身份验证页面。根据所见配置,该页面为 URL [/login]。该页面对所有人开放:
http.formLogin().loginPage("/login").permitAll().and().logout().permitAll();
因此我们得到 [1]:
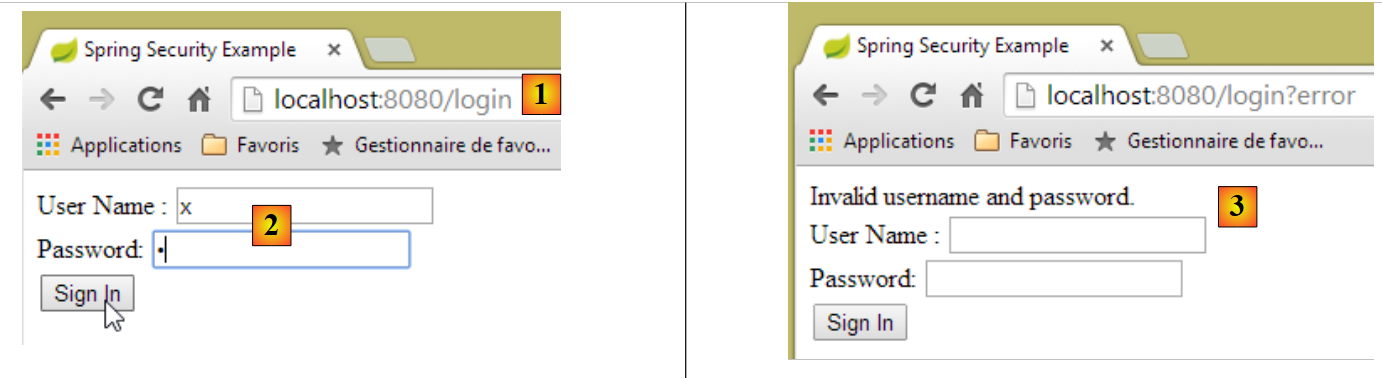 |
生成的页面源代码如下:
- 第7行出现了一个隐藏字段,该字段在原始页面[login.html]中并不存在。这是Thymeleaf添加的。该代码名为CSRF(跨站请求伪造),旨在消除一个安全漏洞。 该令牌必须随身份验证信息一并发送回 Spring Security,才能被后者接受;
我们记得,Spring Security 仅识别 user/password 用户名和密码。如果我们在 [2] 中输入其他内容,我们会得到同一页面,并在 [3] 中看到一条错误信息。 Spring Security 将浏览器重定向到了 URL [http://localhost:8080/login?error]。参数 [error] 的存在触发了以下标签的显示:
<div th:if="${param.error}">Invalid username and password.</div>
现在,请输入预期值 user/password [4]:
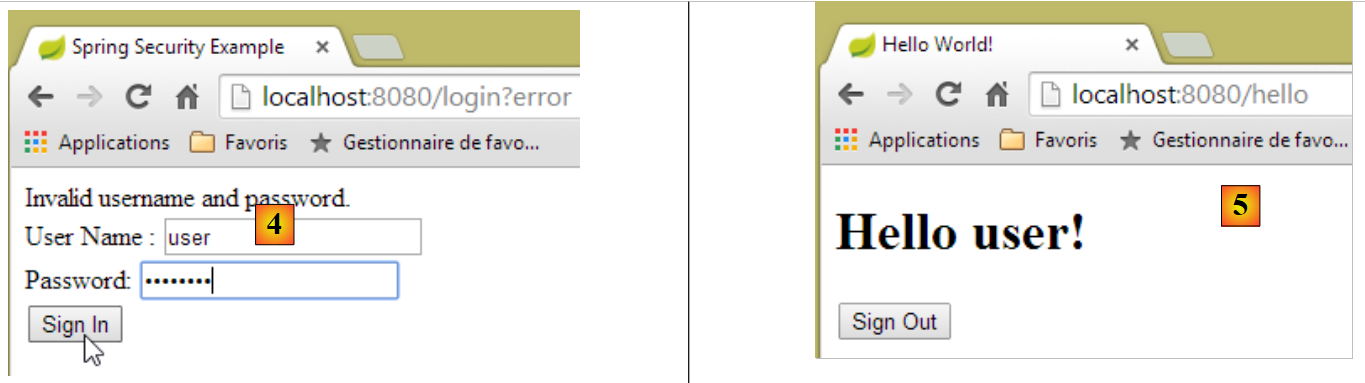 |
- 输入 [4] 进行身份验证;
- 在 [5] 时,Spring Security 将我们重定向至 URL [/hello],因为当我们被重定向到登录页面时,我们请求的是 URL。 用户身份由 [hello.html] 中的以下行显示:
页面 [5] 显示了以下表单:
    <form th:action="@{/logout}" method="post">
        <input type="submit" value="Sign Out" />
</form>
点击按钮 [Sign Out] 后,将在 URL 和 [/logout] 上生成 POST。 该文件与 URL、[/login] 一样,对所有人开放:
http.formLogin().loginPage("/login").permitAll().and().logout().permitAll();
在我们的关联 URL / 视图 中,我们未对 URL [/logout] 进行任何定义。会发生什么情况?让我们试一试:
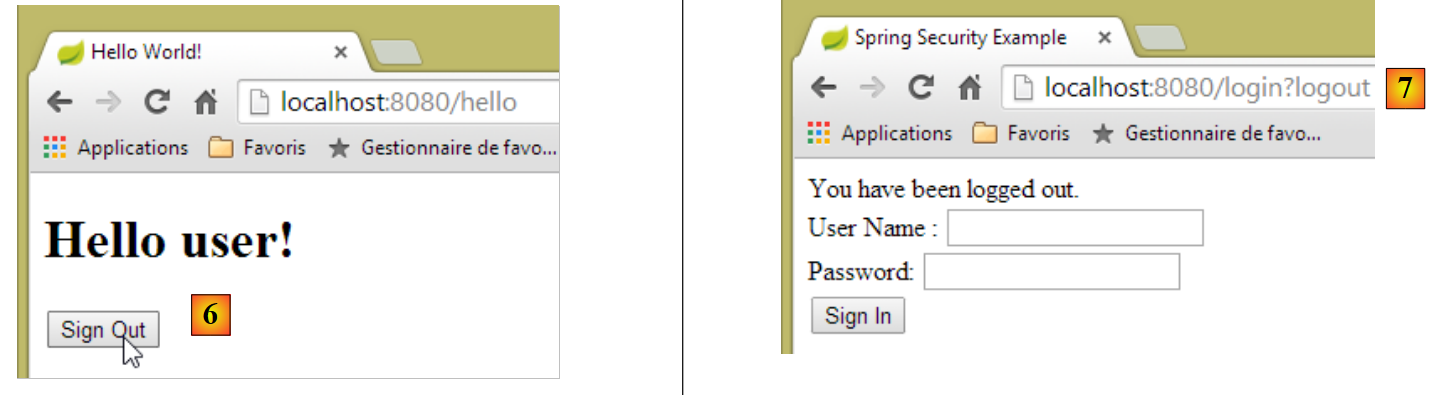 |
- 在 [6] 中,我们点击 [Sign Out] 按钮;
- 在 [7] 处,我们看到已被重定向至 URL [http://localhost:8080/login?logout]。这是 Spring Security 发起的重定向。 由于 [logout] 参数出现在 URL 中,导致视图中显示了以下内容:
<div th:if="${param.logout}">You have been logged out.</div>
2.13.7. 结论
在前面的示例中,我们本可以先编写 Web 应用程序,然后再对其进行安全加固。Spring Security 并不具有侵入性。我们可以为已经编写好的 Web 应用程序配置安全机制。此外,我们还发现了以下几点:
- 可以定义一个身份验证页面;
- 身份验证必须附带由 Spring Security 签发的令牌 CSRF;
- 若认证失败,系统将重定向至认证页面,且 URL 参数中会包含 error 字段;
- 若认证成功,将重定向至认证发生时请求的页面。 如果直接请求身份验证页面而不经过中间页面,则 Spring Security 会将我们重定向到 URL [/](此情况未被提及);
- 通过请求 URL [/logout] 并携带 POST 参数即可注销。 Spring Security 随后会将我们重定向至包含 logout 参数的 URL 认证页面;
所有这些结论均基于 Spring Security 的默认行为。通过重写 [WebSecurityConfigurerAdapter] 类的某些方法,可以配置更改这些行为。
之前的教程在后续内容中帮助不大。实际上,我们将使用:
- 一个数据库来存储用户、密码及其角色;
- 基于 HTTP 头部的身份验证;
关于我们此处要实现的功能,现有的教程相当有限。即将提出的解决方案是整合了从各处收集的代码。
2.14. 在预约Web服务上部署安全措施
2.14.1. 数据库
[rdvmedecins] 数据库进行了扩展,以支持用户、密码和角色的管理。新增了三个表:
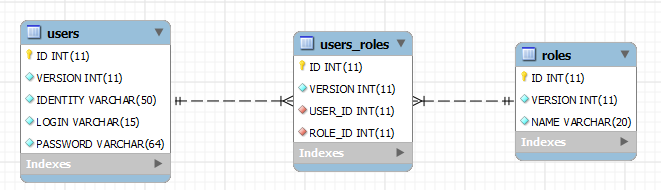
表 [USERS]:用户
- ID:主键;
- VERSION:行版本控制列;
- IDENTITY:用户的描述性标识;
- LOGIN:用户的登录名;
- PASSWORD:其密码;
在表 USERS 中,密码并非以明文形式存储:
 |
用于加密密码的算法是 BCRYPT 算法。
表 [ROLES]:角色
- ID:主键;
- VERSION:行版本控制列;
- NAME:角色名称。默认情况下,Spring Security 期望角色名称采用 ROLE_XX 的格式,例如 ROLE_ADMIN 或 ROLE_GUEST;
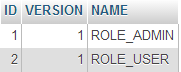 |
表 [USERS_ROLES]:USERS / ROLES 的关联表
一个用户可以拥有多个角色,一个角色可以包含多个用户。这种多对多关系由表 [USERS_ROLES] 体现。
- ID:主键;
- VERSION:行版本控制列;
- USER_ID:用户标识;
- ROLE_ID:角色标识符;
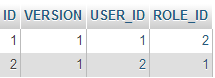 |
由于我们修改了数据库,因此项目 [métier, DAO, JPA] 的所有层都需要进行修改:
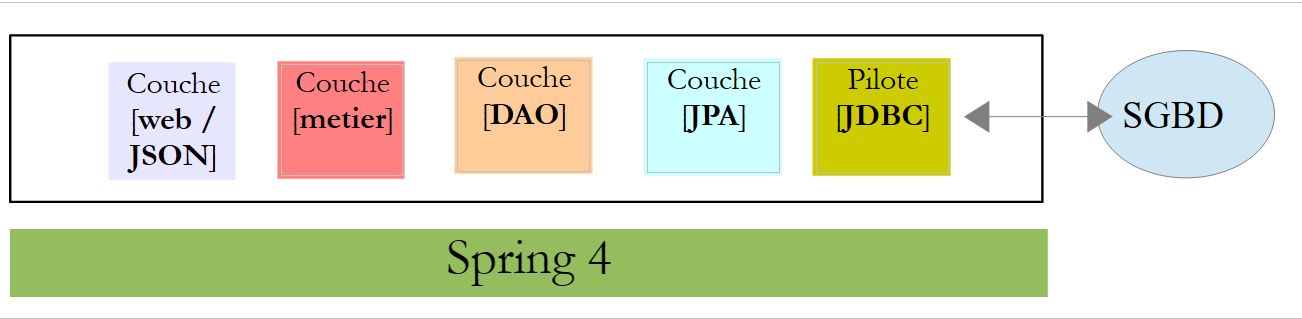 |
2.14.2. [métier, DAO, JPA]的新Eclipse项目
我们将原始项目 [rdvmedecins-metier-dao] 复制为 [rdvmedecins-metier-dao-v2]:
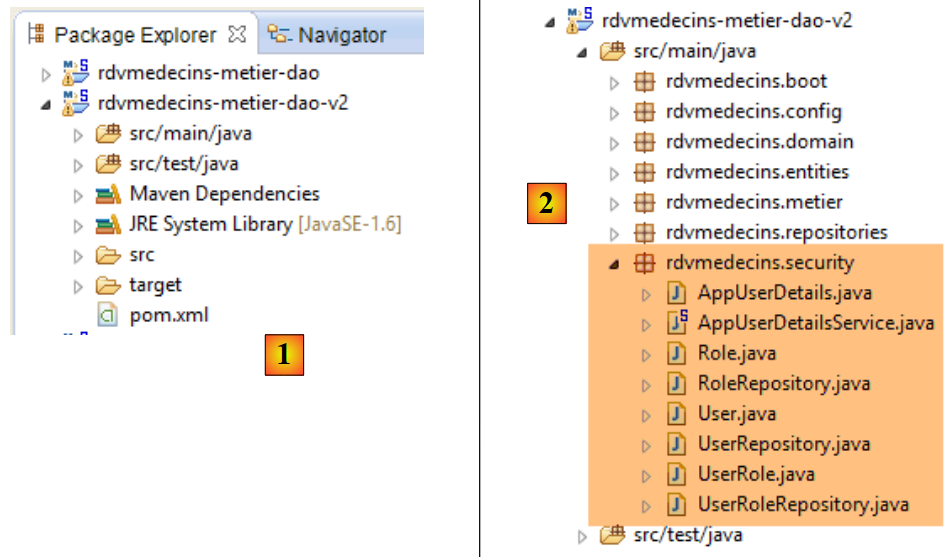 |
- 为 [1]:新项目;
- 并生成 [2]:因安全考量所做的修改已整合到单个包 [rdvmedecins.security] 中。 这些新组件原本属于 [JPA] 和 [DAO] 层,但为了简化,我将其合并到了同一个包中。
2.14.3. 新实体 [JPA]
 |
图层 JPA 定义了三个新实体:
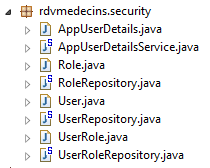 |
类 [User] 是表 [USERS] 的映射:
package rdvmedecins.entities;

import javax.persistence.Column;
import javax.persistence.Entity;
import javax.persistence.Table;

@Entity
@Table(name = "USERS")
public class User extends AbstractEntity {
    private static final long serialVersionUID = 1L;

    // 房产
    private String identity;
    private String login;
    private String password;

    // 构造函数
    public User() {
    }

    public User(String identity, String login, String password) {
        this.identity = identity;
        this.login = login;
        this.password = password;
    }

    // 身份
    @Override
    public String toString() {
        return String.format("User[%s,%s,%s]", identity, login, password);
    }

    // 获取器和设置器
....
}
- 第 9 行:该类继承了已用于其他实体的 [AbstractEntity] 类;
- 第13-15行:未指定列名,因为它们与关联字段的名称相同;
类 [Role] 是表 [ROLES] 的映射:
package rdvmedecins.entities;

import javax.persistence.Column;
import javax.persistence.Entity;
import javax.persistence.Table;

@Entity
@Table(name = "ROLES")
public class Role extends AbstractEntity {

    private static final long serialVersionUID = 1L;

    // 属性
    private String name;

    // 制造商
    public Role() {
    }

    public Role(String name) {
        this.name = name;
    }

    // 身份
    @Override
    public String toString() {
        return String.format("Role[%s]", name);
    }

    // 获取器和设置器
...
}
类 [UserRole] 是表 [USERS_ROLES] 的映射:
package rdvmedecins.entities;

import javax.persistence.Entity;
import javax.persistence.JoinColumn;
import javax.persistence.ManyToOne;
import javax.persistence.Table;

@Entity
@Table(name = "USERS_ROLES")
public class UserRole extends AbstractEntity {

    private static final long serialVersionUID = 1L;

    // 一个 UserRole 引用一个 User
    @ManyToOne
    @JoinColumn(name = "USER_ID")
    private User user;
    // 一个 UserRole 引用一个 Role
    @ManyToOne
    @JoinColumn(name = "ROLE_ID")
    private Role role;

    // 获取器和设置器
...
}
- 第 15-17 行:定义了表 [USERS_ROLES] 指向表 [USERS] 的外键;
- 第 19-21 行:实现表 [USERS_ROLES] 到表 [ROLES] 的外键;
2.14.4. [DAO] 层的修改
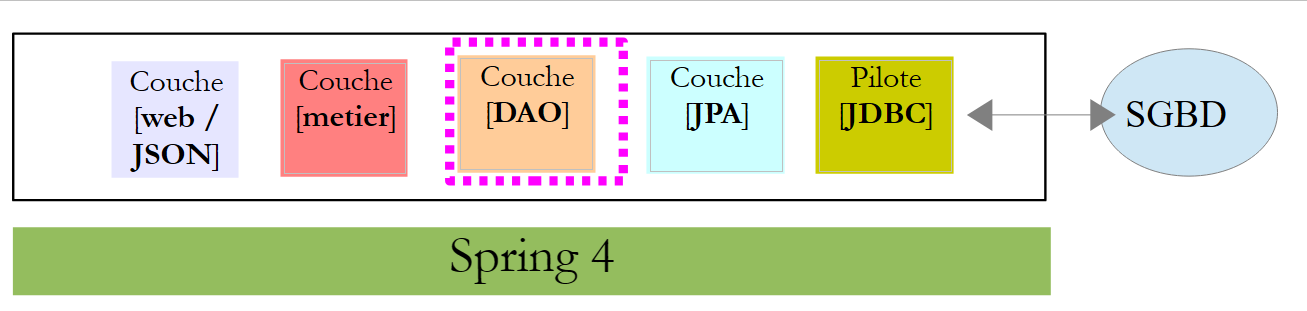 |
[DAO]层新增了三个[Repository]:
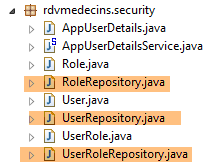 |
接口 [UserRepository] 管理对实体 [User] 的访问:
package rdvmedecins.repositories;

import org.springframework.data.jpa.repository.Query;
import org.springframework.data.repository.CrudRepository;

import rdvmedecins.entities.Role;
import rdvmedecins.entities.User;

public interface UserRepository extends CrudRepository<User, Long> {

    // 通过 ID 标识的用户角色列表
    @Query("select ur.role from UserRole ur where ur.user.id=?1")
    Iterable<Role> getRoles(long id);

    // 通过登录名和密码识别的用户角色列表
    @Query("select ur.role from UserRole ur where ur.user.login=?1 and ur.user.password=?2")
    Iterable<Role> getRoles(String login, String password);

    // 通过登录名查询用户
    User findUserByLogin(String login);
}
- 第 9 行:接口 [UserRepository] 继承了 Spring Data 的 [CrudRepository] 接口(第 4 行);
- 第 12-13 行:方法 [getRoles(User user)] 可获取通过 [id] 标识的用户的全部角色
- 第16-17行:同上,但针对通过登录名/密码识别的用户;
接口 [RoleRepository] 管理对实体 [Role] 的访问:
package rdvmedecins.security;

import org.springframework.data.repository.CrudRepository;

public interface RoleRepository extends CrudRepository<Role, Long> {

    // 通过角色名称搜索角色
    Role findRoleByName(String name);

}
- 第5行:接口[RoleRepository]扩展了接口[CrudRepository];
- 第 8 行:可通过名称搜索角色;
接口 [userRoleRepository] 管理对实体 [UserRole] 的访问:
package rdvmedecins.security;

import org.springframework.data.repository.CrudRepository;

public interface UserRoleRepository extends CrudRepository<UserRole, Long> {

}
- 第 5 行:接口 [UserRoleRepository] 仅继承了接口 [CrudRepository],未添加新方法;
2.14.5. 用户和角色管理类
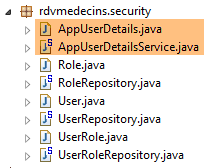 |
Spring Security 要求创建一个实现以下 [UsersDetail] 接口的类:
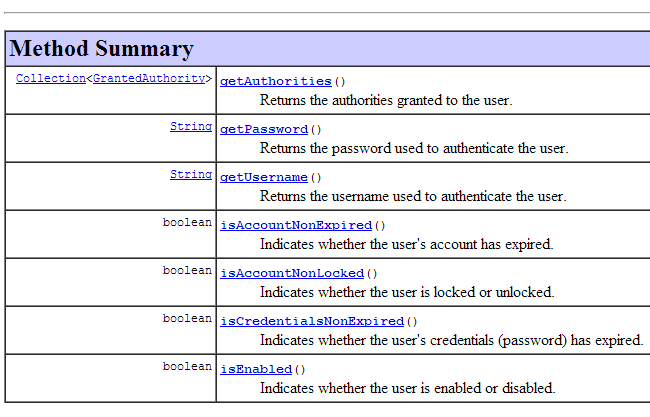 |
此接口在此由类 [AppUserDetails] 实现:
package rdvmedecins.security;

import java.util.ArrayList;
import java.util.Collection;

import org.springframework.security.core.GrantedAuthority;
import org.springframework.security.core.authority.SimpleGrantedAuthority;
import org.springframework.security.core.userdetails.UserDetails;

public class AppUserDetails implements UserDetails {

    private static final long serialVersionUID = 1L;

    // 属性
    private User user;
    private UserRepository userRepository;

    // 构造函数
    public AppUserDetails() {
    }

    public AppUserDetails(User user, UserRepository userRepository) {
        this.user = user;
        this.userRepository = userRepository;
    }

    // -------------------------接口
    @Override
    public Collection<? extends GrantedAuthority> getAuthorities() {
        Collection<GrantedAuthority> authorities = new ArrayList<>();
        for (Role role : userRepository.getRoles(user.getId())) {
            authorities.add(new SimpleGrantedAuthority(role.getName()));
        }
        return authorities;
    }

    @Override
    public String getPassword() {
        return user.getPassword();
    }

    @Override
    public String getUsername() {
        return user.getLogin();
    }

    @Override
    public boolean isAccountNonExpired() {
        return true;
    }

    @Override
    public boolean isAccountNonLocked() {
        return true;
    }

    @Override
    public boolean isCredentialsNonExpired() {
        return true;
    }

    @Override
    public boolean isEnabled() {
        return true;
    }

    // 获取器和设置器
    ...
}
- 第 10 行:类 [AppUserDetails] 实现了接口 [UserDetails];
- 第 15-16 行:该类封装了一个用户(第 15 行)以及用于获取该用户详细信息的存储库(第 16 行);
- 第22-25行:构造函数,用于通过用户及其存储库实例化该类;
- 第 28-35 行:实现了接口 [UserDetails] 中的方法 [getAuthorities]。该方法需构建一个由类型 [GrantedAuthority] 或其派生类型组成的集合。 此处,我们使用派生类型 [SimpleGrantedAuthority](第 32 行),该类型封装了第 15 行中用户的一个角色的名称;
- 第 31-33 行:遍历第 15 行用户角色的列表,以构建一个 [SimpleGrantedAuthority] 类型的元素列表;
- 第38-40行:实现接口[UserDetails]中的方法[getPassword]。返回第15行用户的密码;
- 第38-40行:实现接口[UserDetails]中的方法[getUserName]。返回第15行用户的登录名;
- 第47-50行:用户账户永不过期;
- 第52-55行:用户账户永不被锁定;
- 第57-60行:用户凭证永不过期;
- 第62-65行:用户账户始终处于活动状态;
Spring Security 还要求存在一个实现 [AppUserDetailsService] 接口的类:
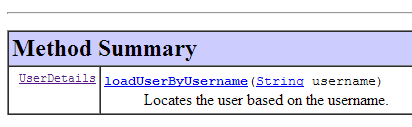 |
该接口由以下 [AppUserDetails] 类实现:
package rdvmedecins.security;

import org.springframework.beans.factory.annotation.Autowired;
import org.springframework.security.core.userdetails.UserDetails;
import org.springframework.security.core.userdetails.UserDetailsService;
import org.springframework.security.core.userdetails.UsernameNotFoundException;
import org.springframework.stereotype.Service;

@Service
public class AppUserDetailsService implements UserDetailsService {

    @Autowired
    private UserRepository userRepository;

    @Override
    public UserDetails loadUserByUsername(String login) throws UsernameNotFoundException {
        // 通过登录名查找用户
        User user = userRepository.findUserByLogin(login);
        // 找到了吗?
        if (user == null) {
            throw new UsernameNotFoundException(String.format("login [%s] inexistant", login));
        }
        // 返回用户详细信息
        return new AppUserDetails(user, userRepository);
    }

}
- 第 9 行:该类将作为 Spring 组件,因此可在其上下文中使用;
- 第 12-13 行:[UserRepository] 组件将在此处被注入;
- 第 16-25 行:实现了接口 [UserDetailsService](第 10 行)中的方法 [loadUserByUsername]。参数为用户登录名;
- 第 18 行:通过用户名搜索用户;
- 第 20-22 行:若未找到,则抛出异常;
- 第24行:构建并渲染一个[AppUserDetails]对象。该对象确实属于[UserDetails]类型(第16行);
2.14.6. [DAO] 层的测试
 |
首先,我们创建一个可执行类 [CreateUser],该类能够创建具有特定角色的用户:
package rdvmedecins.security;

import org.springframework.context.annotation.AnnotationConfigApplicationContext;
import org.springframework.security.crypto.bcrypt.BCrypt;

import rdvmedecins.config.DomainAndPersistenceConfig;
import rdvmedecins.security.Role;
import rdvmedecins.security.RoleRepository;
import rdvmedecins.security.User;
import rdvmedecins.security.UserRepository;
import rdvmedecins.security.UserRole;
import rdvmedecins.security.UserRoleRepository;

public class CreateUser {

    public static void main(String[] args) {
        // 语法:登录名 密码roleName

        // 需要三个参数
        if (args.length != 3) {
            System.out.println("Syntaxe : [pg] user password role");
            System.exit(0);
        }
        // 获取参数
        String login = args[0];
        String password = args[1];
        String roleName = String.format("ROLE_%s", args[2].toUpperCase());
        // Spring 上下文
        AnnotationConfigApplicationContext context = new AnnotationConfigApplicationContext(DomainAndPersistenceConfig.class);
        UserRepository userRepository = context.getBean(UserRepository.class);
        RoleRepository roleRepository = context.getBean(RoleRepository.class);
        UserRoleRepository userRoleRepository = context.getBean(UserRoleRepository.class);
        // 该角色是否已存在?
        Role role = roleRepository.findRoleByName(roleName);
        // 如果不存在则创建
        if (role == null) {
            role = roleRepository.save(new Role(roleName));
        }
        // 用户是否已存在?
        User user = userRepository.findUserByLogin(login);
        // 如果不存在则创建
        if (user == null) {
            // 使用 bcrypt 对密码进行哈希处理
            String crypt = BCrypt.hashpw(password, BCrypt.gensalt());
            // 保存用户
            user = userRepository.save(new User(login, login, crypt));
            // 建立与角色的关联
            userRoleRepository.save(new UserRole(user, role));
        } else {
            // 用户已存在——是否拥有所请求的角色?
            boolean trouvé = false;
            for (Role r : userRepository.getRoles(user.getId())) {
                if (r.getName().equals(roleName)) {
                    trouvé = true;
                    break;
                }
            }
            // 若未找到,则创建与角色的关联
            if (!trouvé) {
                userRoleRepository.save(new UserRole(user, role));
            }
        }

        // 关闭 Spring 上下文
        context.close();
    }

}
- 第 17 行:该类等待三个定义用户的参数:其登录名、密码和角色;
- 第25-27行:获取上述三个参数;
- 第 29 行:基于配置类 [DomainAndPersistenceConfig] 构建 Spring 上下文。该类在之前的项目中已存在。它应按以下方式进行修改:
@EnableJpaRepositories(basePackages = { "rdvmedecins.repositories", "rdvmedecins.security" })
@EnableAutoConfiguration
@ComponentScan(basePackages = { "rdvmedecins" })
@EntityScan(basePackages = { "rdvmedecins.entities", "rdvmedecins.security" })
@EnableTransactionManagement
public class DomainAndPersistenceConfig {
....
}
- 第 1 行:需注明 [rdvmedecins.security] 包中现已包含 [Repository] 组件;
- 第 4 行:需注明 [rdvmedecins.security] 包中现已包含 JPA 实体;
让我们回到创建用户的代码:
- 第30-32行:获取三个[Repository]的引用,这些引用可用于创建用户;
- 第 34 行:检查该角色是否已存在;
- 第36-38行:如果不存在,则在数据库中创建该角色。其名称将采用 [ROLE_XX] 这种格式;
- 第 40 行:检查该登录名是否已存在;
- 第42-49行:如果用户名不存在,则在数据库中创建;
- 第 44 行:对密码进行加密。此处使用了 Spring Security 的 [BCrypt] 类(第 4 行)。因此需要该框架的依赖包。[pom.xml] 文件包含一个新的依赖项:
        <dependency>
            <groupId>org.springframework.boot</groupId>
            <artifactId>spring-boot-starter-security</artifactId>
</dependency>
- 第 46 行:将用户信息写入数据库;
- 第 48 行:以及将其与角色关联的关系;
- 第 51-57 行:若登录用户已存在——则检查其现有角色中是否已包含要分配的角色;
- 第 59-61 行:若未找到目标角色,则在表 [USERS_ROLES] 中创建一条记录,将用户与其角色关联;
- 未对可能出现的异常进行防护。这是一个用于快速创建具有角色的用户的辅助类。
当使用参数 [x x guest] 执行该类时,数据库中将得到以下结果:
表 [USERS]
 表 |
表 [ROLES]
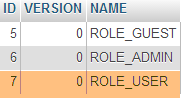 表 |
表 [USERS_ROLES]
 |
现在我们来看第二个类 [UsersTest],它是一个测试类 JUnit:
|
package rdvmedecins.security;

import java.util.List;

import org.junit.Assert;
import org.junit.Test;
import org.junit.runner.RunWith;
import org.springframework.beans.factory.annotation.Autowired;
import org.springframework.boot.test.SpringApplicationConfiguration;
import org.springframework.security.core.authority.SimpleGrantedAuthority;
import org.springframework.security.crypto.bcrypt.BCrypt;
import org.springframework.test.context.junit4.SpringJUnit4ClassRunner;

import rdvmedecins.config.DomainAndPersistenceConfig;

import com.google.common.collect.Lists;

@SpringApplicationConfiguration(classes = DomainAndPersistenceConfig.class)
@RunWith(SpringJUnit4ClassRunner.class)
public class UsersTest {

    @Autowired
    private UserRepository userRepository;
    @Autowired
    private AppUserDetailsService appUserDetailsService;

    @Test
    public void findAllUsersWithTheirRoles() {
        Iterable<User> users = userRepository.findAll();
        for (User user : users) {
            System.out.println(user);
            display("Roles :", userRepository.getRoles(user.getId()));
        }
    }

    @Test
    public void findUserByLogin() {
        // 获取用户 [admin]
        User user = userRepository.findUserByLogin("admin");
        // 验证其密码是否为 [admin]
        Assert.assertTrue(BCrypt.checkpw("admin", user.getPassword()));
        // 验证管理员角色 / 管理员
        List<Role> roles = Lists.newArrayList(userRepository.getRoles("admin", user.getPassword()));
        Assert.assertEquals(1L, roles.size());
        Assert.assertEquals("ROLE_ADMIN", roles.get(0).getName());
    }

    @Test
    public void loadUserByUsername() {
        // 检索用户 [admin]
        AppUserDetails userDetails = (AppUserDetails) appUserDetailsService.loadUserByUsername("admin");
        // 验证其密码为 [admin]
        Assert.assertTrue(BCrypt.checkpw("admin", userDetails.getPassword()));
        // 验证 admin / admin 角色
        @SuppressWarnings("unchecked")
        List<SimpleGrantedAuthority> authorities = (List<SimpleGrantedAuthority>) userDetails.getAuthorities();
        Assert.assertEquals(1L, authorities.size());
        Assert.assertEquals("ROLE_ADMIN", authorities.get(0).getAuthority());
    }

    // 实用方法 - 显示集合中的元素
    private void display(String message, Iterable<?> elements) {
        System.out.println(message);
        for (Object element : elements) {
            System.out.println(element);
        }
    }
}
- 第 27-34 行:视觉测试。显示所有用户及其角色;
- 第36-46行:通过使用仓库[UserRepository],验证用户[admin]是否拥有密码[admin]和角色[ROLE_ADMIN];
- 第 41 行:[admin] 是明文密码。 在数据库中,该密码是根据算法 BCrypt 加密的。方法 [ BCrypt.checkpw] 可用于验证加密后的明文密码是否与数据库中的密码一致;
- 第48-59行:通过调用服务[appUserDetailsService],验证用户[admin]的密码为[admin],且角色为[ROLE_ADMIN];
测试执行成功,日志如下:
2.14.7. 中期结论
在几乎不修改原始项目的情况下,成功向 Spring Security 添加了必要的类。回顾一下:
- 在文件 [pom.xml] 中添加了 Spring Security 依赖项;
- 在数据库中创建了三个额外表;
- 在 [rdvmedecins.security] 包中创建了 JPA 实体和 Spring 组件;
之所以能如此顺利,是因为数据库中新增的这三张表与现有表互不依赖。甚至可以将它们放在一个独立的数据库中。之所以能做到这一点,是因为我们决定将“用户”视为独立于“医生”和“客户”的存在。 如果医生和客户被视为潜在用户,就必须在表 [USERS] 与表 [MEDECINS] 及 [CLIENTS] 之间建立关联。这将对现有项目产生重大影响。
2.14.8. [web]层的Eclipse项目
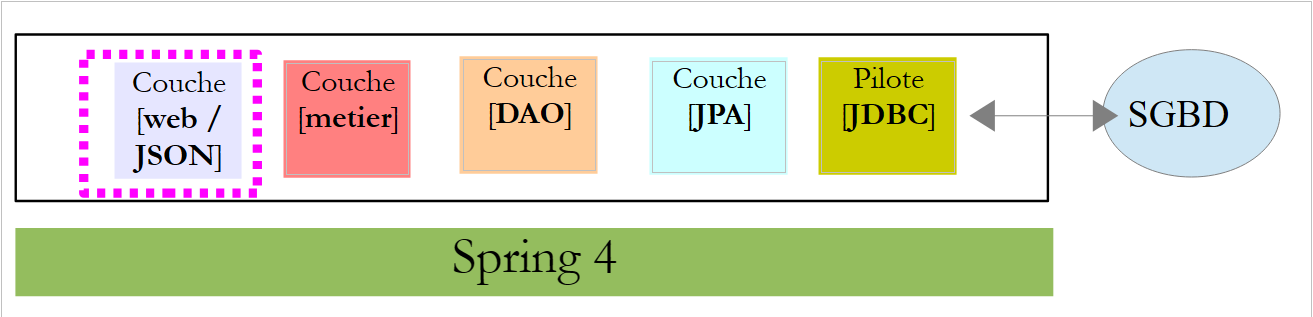 |
之前的 [rdvmedecins-webapi] 项目在 [rdvmedecins-webapi-v2] 和 [1] 项目中被复制:
 |
唯一需要修改的是 [rdvmedecins.web.config] 包,其中需要配置 Spring Security。我们已经遇到过一个 Spring Security 的配置类:
package hello;

import org.springframework.context.annotation.Configuration;
import org.springframework.security.config.annotation.authentication.builders.AuthenticationManagerBuilder;
import org.springframework.security.config.annotation.web.builders.HttpSecurity;
import org.springframework.security.config.annotation.web.configuration.WebSecurityConfigurerAdapter;
import org.springframework.security.config.annotation.web.servlet.configuration.EnableWebMvcSecurity;

@Configuration
@EnableWebMvcSecurity
public class WebSecurityConfig extends WebSecurityConfigurerAdapter {
    @Override
    protected void configure(HttpSecurity http) throws Exception {
        http.authorizeRequests().antMatchers("/", "/home").permitAll().anyRequest().authenticated();
        http.formLogin().loginPage("/login").permitAll().and().logout().permitAll();
    }

    @Override
    protected void configure(AuthenticationManagerBuilder auth) throws Exception {
        auth.inMemoryAuthentication().withUser("user").password("password").roles("USER");
    }
}
我们将采用相同的步骤:
- 第 11 行:定义一个继承自 [WebSecurityConfigurerAdapter] 类的类;
- 第 13 行:定义方法 [configure(HttpSecurity http)],用于定义 Web 服务中各个 URL 的访问权限;
- 第 19 行:定义方法 [configure(AuthenticationManagerBuilder auth)],用于定义用户及其角色;
Spring Security 的配置由类 [SecurityConfig] 负责:
package rdvmedecins.web.config;

import org.springframework.beans.factory.annotation.Autowired;
import org.springframework.boot.autoconfigure.EnableAutoConfiguration;
import org.springframework.http.HttpMethod;
import org.springframework.security.config.annotation.authentication.builders.AuthenticationManagerBuilder;
import org.springframework.security.config.annotation.web.builders.HttpSecurity;
import org.springframework.security.config.annotation.web.configuration.EnableWebSecurity;
import org.springframework.security.config.annotation.web.configuration.WebSecurityConfigurerAdapter;
import org.springframework.security.crypto.bcrypt.BCryptPasswordEncoder;

import rdvmedecins.security.AppUserDetailsService;

@EnableAutoConfiguration
@EnableWebSecurity
public class SecurityConfig extends WebSecurityConfigurerAdapter {
    @Autowired
    private AppUserDetailsService appUserDetailsService;

    @Override
    protected void configure(AuthenticationManagerBuilder registry) throws Exception {
        // 身份验证由 Bean 处理 [appUserDetailsService]
        // 密码通过 Bcrypt 哈希算法进行加密
        registry.userDetailsService(appUserDetailsService).passwordEncoder(new BCryptPasswordEncoder());
    }

    @Override
    protected void configure(HttpSecurity http) throws Exception {
        // CSRF
        http.csrf().disable();
        // 密码通过 Authorization: Basic xxxx 头部传递
        http.httpBasic();
        // 仅 ADMIN 角色可使用该应用程序
        http.authorizeRequests() //
                .antMatchers("/", "/**") // 所有 URL
                .hasRole("ADMIN");
    }
}
- 第 14-15 行:采用了示例中的注解;
- 第 17-18 行:注入了 [AppUserDetails] 类,该类为应用程序用户提供访问权限;
- 第 20-21 行:方法 [configure(HttpSecurity http)] 定义用户及其角色。该方法接收一个类型为 [AuthenticationManagerBuilder] 的参数。该参数包含两项信息:
- 第18行中服务[appUserDetailsService]的引用,该服务负责授予已注册用户访问权限。需注意的是,此处并未显示用户是否存储在数据库中。因此,这些用户信息可能存储在缓存中,或由Web服务提供……
- 密码所使用的加密类型。在此重申,我们采用了BCrypt算法;
- 第27-40行:方法[configure(HttpSecurity http)]定义了Web服务中URL的访问权限;
- 第 30 行:我们在入门项目中看到,默认情况下 Spring Security 会管理一个 CSRF 令牌(跨站请求伪造),需要进行身份验证的用户必须将该令牌发回给服务器。此处该机制已被禁用;
- 第 32 行:启用基于 HTTP 标头的身份验证模式。客户端需发送以下 HTTP 标头:
其中 code 是使用 Base64 算法对字符串 login:password 进行编码后的结果。例如,字符串 admin:admin 的 Base64 编码为 YWRtaW46YWRtaW4=。 因此,用户名 [admin] 和密码 [admin] 的用户将发送以下标头 HTTP 进行身份验证:
- 第34-36行:表示拥有角色[ROLE_ADMIN]的用户可以访问Web服务中的所有URL。这意味着没有该角色的用户无法访问该Web服务;
配置整个应用程序的类 [AppConfig] 演变如下:
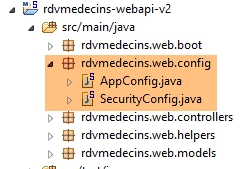 |
package rdvmedecins.web.config;

import org.springframework.boot.autoconfigure.EnableAutoConfiguration;
import org.springframework.context.annotation.ComponentScan;
import org.springframework.context.annotation.Import;

import rdvmedecins.config.DomainAndPersistenceConfig;

@EnableAutoConfiguration
@ComponentScan(basePackages = { "rdvmedecins.web" })
@Import({ DomainAndPersistenceConfig.class, SecurityConfig.class })
public class AppConfig {

}
- 修改发生在第11行:指出现在有两个配置文件可供使用:[DomainAndPersistenceConfig] 和 [SecurityConfig]。
2.14.9. Web服务测试
我们将使用 Chrome 客户端 [Advanced Rest Client] 测试 Web 服务。我们需要指定身份验证头 HTTP:
其中 [code] 是字符串 [login:password] 的 Base64 编码。要生成此代码,可以使用以下程序:
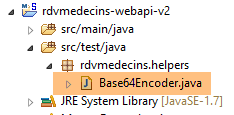 |
package rdvmedecins.helpers;

import org.springframework.security.crypto.codec.Base64;

public class Base64Encoder {

    public static void main(String[] args) {
        // 需要两个参数:登录名和密码
        if (args.length != 2) {
            System.out.println("Syntaxe : login password");
            System.exit(0);
        }
        // 获取这两个参数
        String chaîne = String.format("%s:%s", args[0], args[1]);
        // 对字符串进行编码
        byte[] data = Base64.encode(chaîne.getBytes());
        // 显示其 Base64 编码
        System.out.println(new String(data));
    }

}
如果我们使用两个参数 [admin admin] 运行该程序:
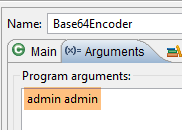 |
将得到以下结果:
现在我们已经知道如何生成 HTTP 身份验证头,接下来启动已加密的 Web 服务。然后使用 Chrome 客户端 [Advanced Rest Client] 请求所有医生的列表:
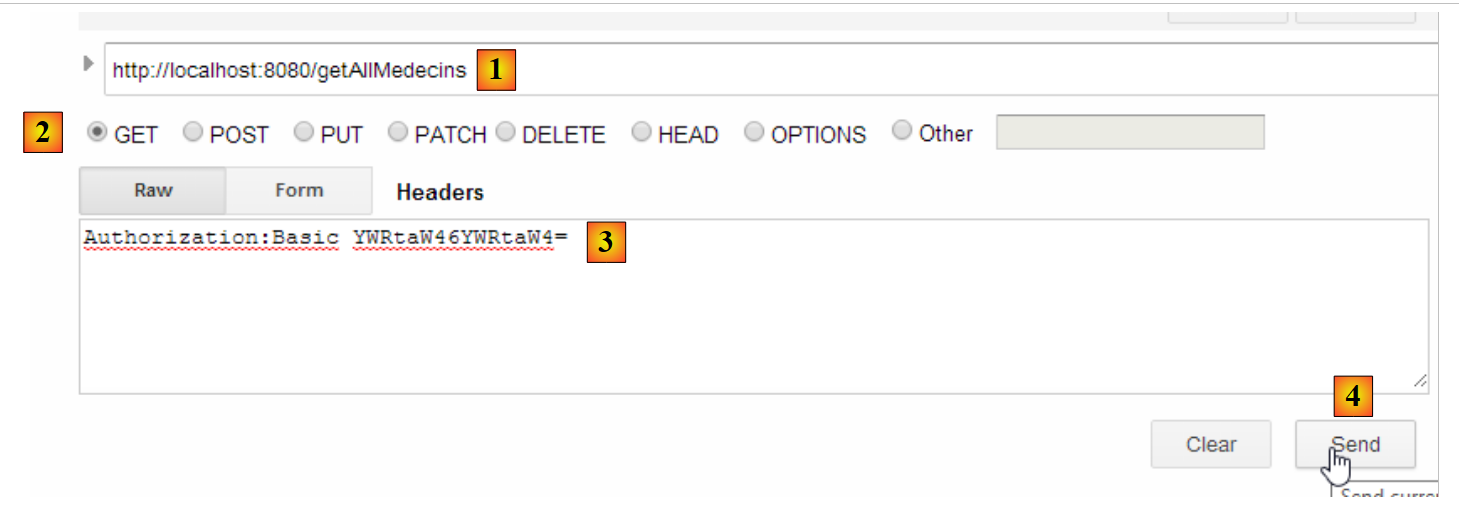 |
- 在 [1] 中,我们请求医生的 URL;
- 在 [2] 中,使用 GET 方法;
- 在 [3] 中,我们提供身份验证的 HTTP 头部。代码 [YWRtaW46YWRtaW4=] 是字符串 [admin:admin] 的 Base64 编码;
- 在 [4] 中,我们发送命令 HTTP;
服务器的响应如下:
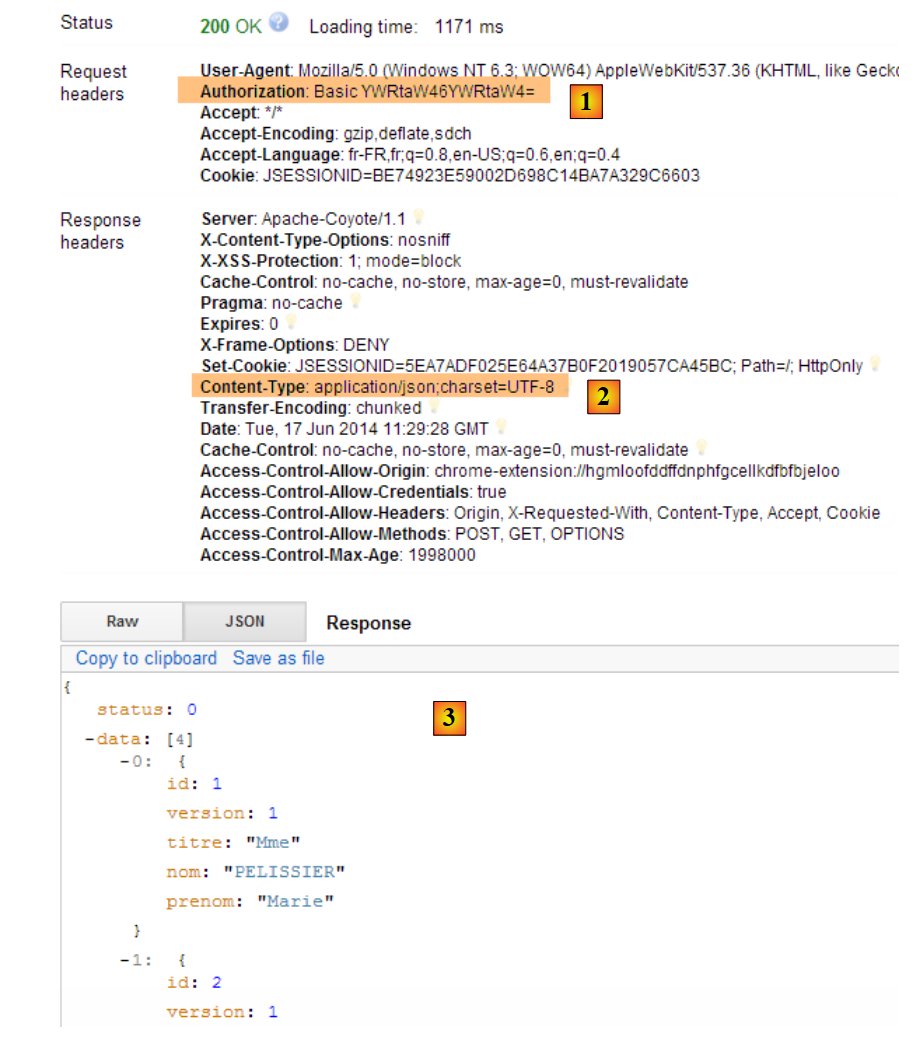 |
- 在 [1] 中,包含认证头 HTTP;
- 在 [2] 中,服务器返回响应 JSON;
- [3],医生列表。
现在,让我们尝试发送一个带有错误认证头部的 HTTP 请求。此时响应如下:
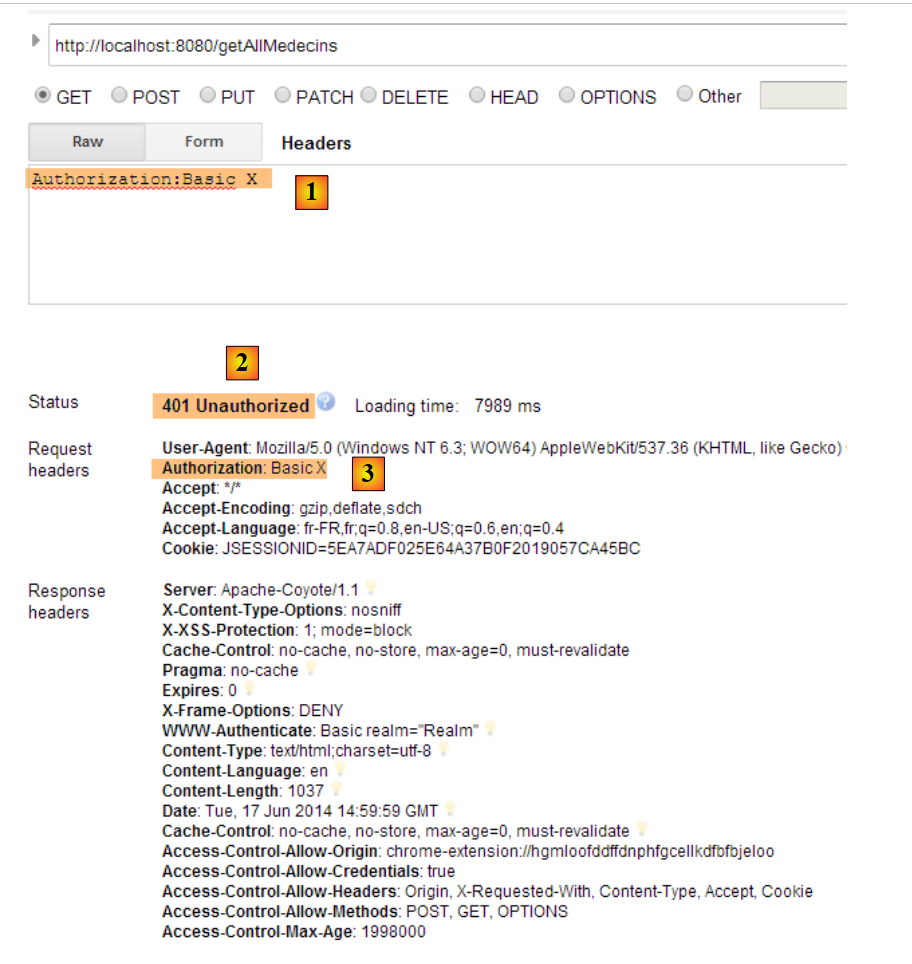 |
- 在 [1] 和 [3] 中:认证头 HTTP;
- [2]:Web服务的响应;
现在,我们来尝试用户 user / user。该用户存在,但无法访问 Web 服务。如果我们使用两个参数 [user user] 运行 Base64 编码程序:
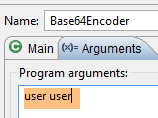 |
将得到以下结果:
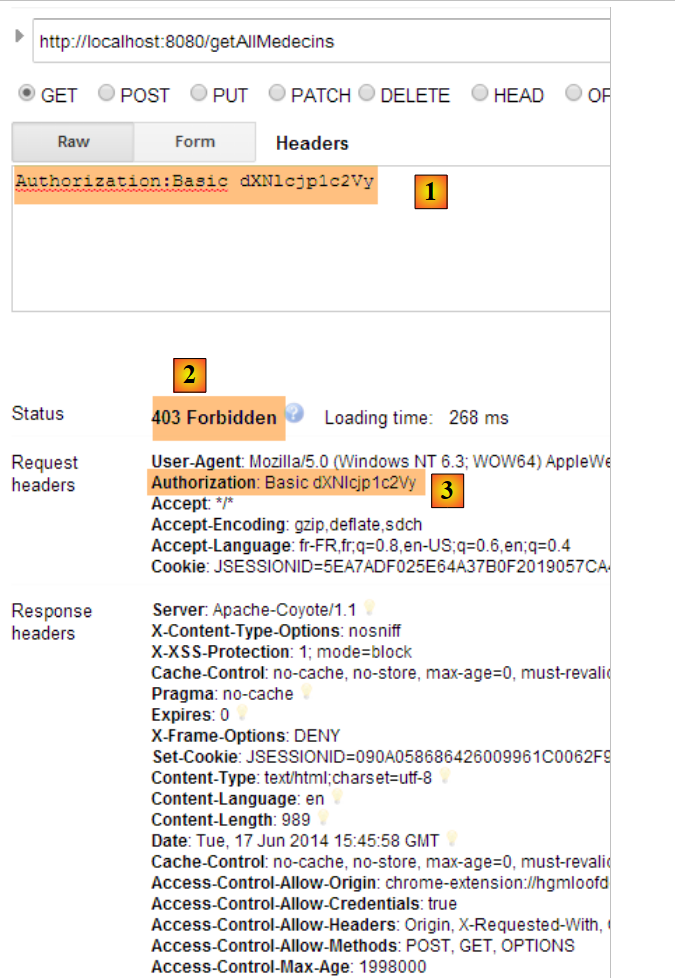 |
- 其中 [1] 和 [3] 表示认证头 HTTP;
- [2]:Web服务的响应。它与之前的[401 Unauthorized]不同。这次,用户已成功认证,但没有足够的权限访问URL;
2.15. Conclusion
回顾一下我们客户端/服务器应用程序的整体架构:
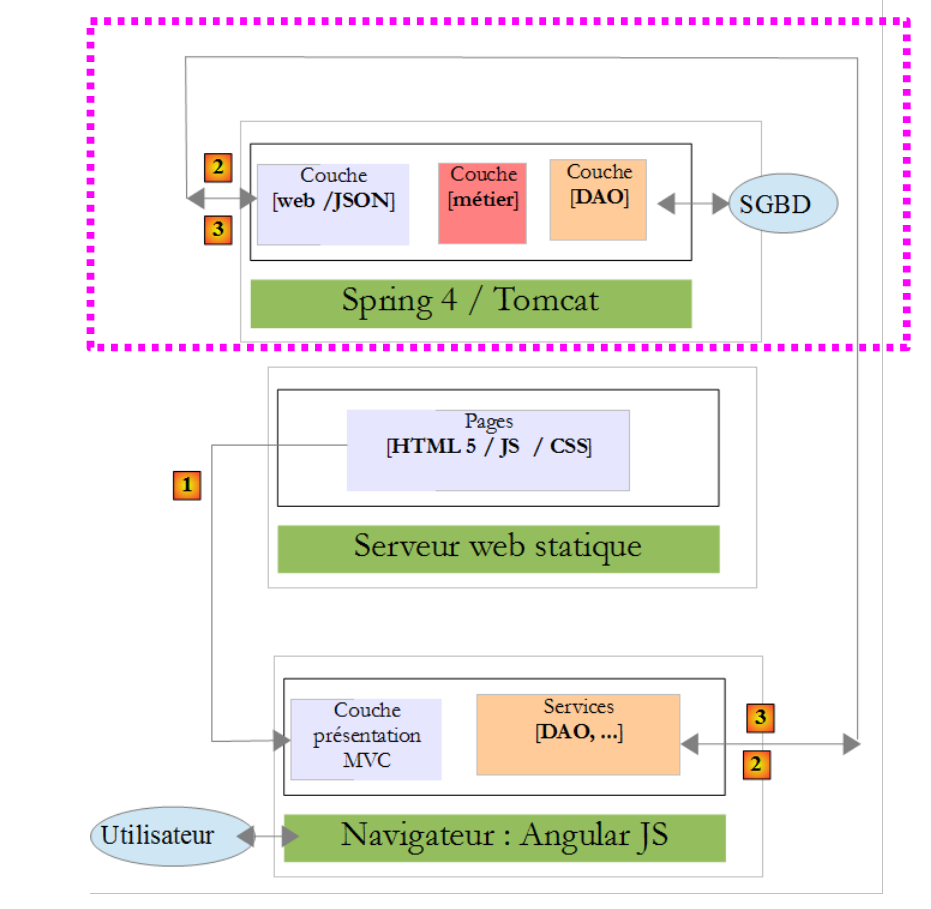 |
一个安全的 Web 服务现已投入运行。我们将看到,在构建 Angular 客户端 JS 时,由于出现的问题,该服务需要进行修改。但我们将在遇到问题时再进行解决。现在,我们将构建 Angular 客户端,该客户端将提供一个 Web 界面来管理医生的预约。