4. 应用程序的运行
现在,我们希望在 IDE、STS(用于服务器)和 Webstorm(用于客户端)之外运行该应用程序。
4.1. 在 Tomcat 服务器上部署 Web 服务
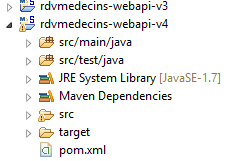
我们在第 2.11.9 节中已了解如何为 Tomcat 创建 WAR 归档文件。此处我们将重复该操作。首先,为了保留现有内容,我们将 Eclipse 项目 [rdvmedecins-webapi-v3] 复制为 [rdvmedecins-webapi-v4]。
 |
对文件 [pom.xml] 进行如下修改:
    <modelVersion>4.0.0</modelVersion>
    <groupId>istia.st.spring4.mvc</groupId>
    <artifactId>rdvmedecins-webapi-v4</artifactId>
    <version>0.0.1-SNAPSHOT</version>
    <packaging>war</packaging>

    <name>rdvmedecins-webapi-v3</name>
    <description>Gestion de RV Médecins</description>
    <parent>
        <groupId>org.springframework.boot</groupId>
        <artifactId>spring-boot-starter-parent</artifactId>
        <version>1.0.0.RELEASE</version>
    </parent>
    <dependencies>
        <dependency>
            <groupId>org.springframework.boot</groupId>
            <artifactId>spring-boot-starter-web</artifactId>
        </dependency>
        <dependency>
            <groupId>org.springframework.boot</groupId>
            <artifactId>spring-boot-starter-security</artifactId>
        </dependency>
        <dependency>
            <groupId>org.springframework.boot</groupId>
            <artifactId>spring-boot-starter-tomcat</artifactId>
            <scope>provided</scope>
        </dependency>
        <dependency>
            <groupId>istia.st.spring4.rdvmedecins</groupId>
            <artifactId>rdvmedecins-metier-dao-v2</artifactId>
            <version>0.0.1-SNAPSHOT</version>
        </dependency>
</dependencies>
需在两个位置进行修改:
- 第 5 行:需指定将生成一个 WAR 归档文件(Web ARchive);
- 第 23-27 行:需添加对构建产物 [spring-boot-starter-tomcat] 的依赖。该构建产物将 Tomcat 的所有类引入到项目依赖中;
- 第26行:该工件为[provided],这意味着相应的归档文件不会被放入生成的WAR包中。实际上,这些归档文件将位于运行该应用程序的Tomcat服务器上;
此外,还需配置 Web 应用程序。若不存在 [web.xml] 文件,则需通过继承 [SpringBootServletInitializer] 的类来实现:
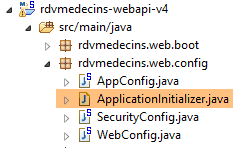 |
[ApplicationInitializer]类的定义如下:
package rdvmedecins.web.config;

import org.springframework.boot.builder.SpringApplicationBuilder;
import org.springframework.boot.context.web.SpringBootServletInitializer;

public class ApplicationInitializer extends SpringBootServletInitializer {
    @Override
    protected SpringApplicationBuilder configure(SpringApplicationBuilder application) {
        return application.sources(AppConfig.class);
    }

}
- 第 6 行:类 [ApplicationInitializer] 继承自类 [SpringBootServletInitializer];
- 第 8 行:方法 [configure] 被重新定义(第 7 行);
- 第 9 行:提供了用于配置项目的类 [AppConfig];
完成上述操作后,可能需要更新Maven项目(我不得不这样做):[clic droit sur projet / Maven / Update project] 或 [Alt-F5]。
要运行该项目,可以按以下步骤操作:
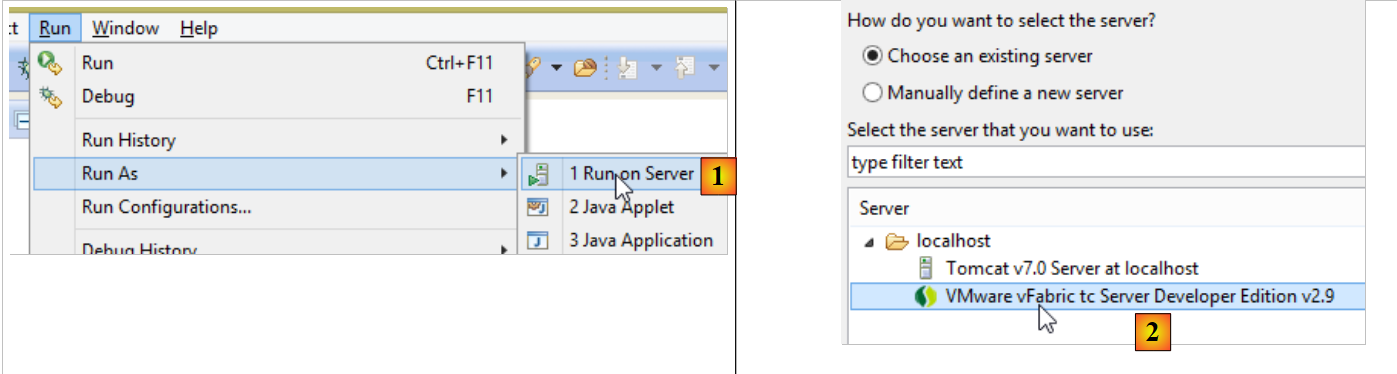 |
- 在 [1] 中,可在 Eclipse 中注册的任意服务器上运行该项目;
- 在 [2] 中,选择默认存在的 [tc Server Developer]。这是 Tomcat 的一个变体;
结果如下:
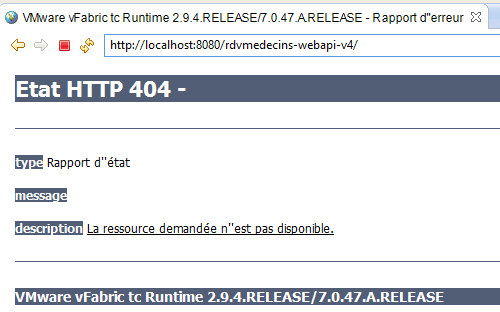 |
这是正常的。需要注意的是,该Web服务的方法中不包含URL和[/]。当尝试调用URL和[/getAllMedecins]时,会得到以下响应:
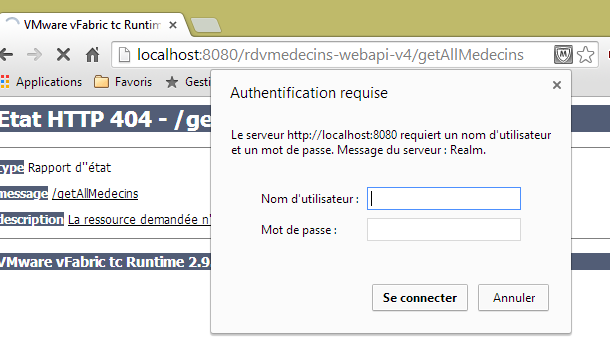 |
这是正常的。Web 服务受保护。
现在在 Webstorm 中启动 [rdvmedecins-angular-v2] 客户端:
 |
在 [1] 中,将新 Web 服务 [http://localhost:8080/rdvmedecins-webapi-v4] 的 URL 填入。结果如下:
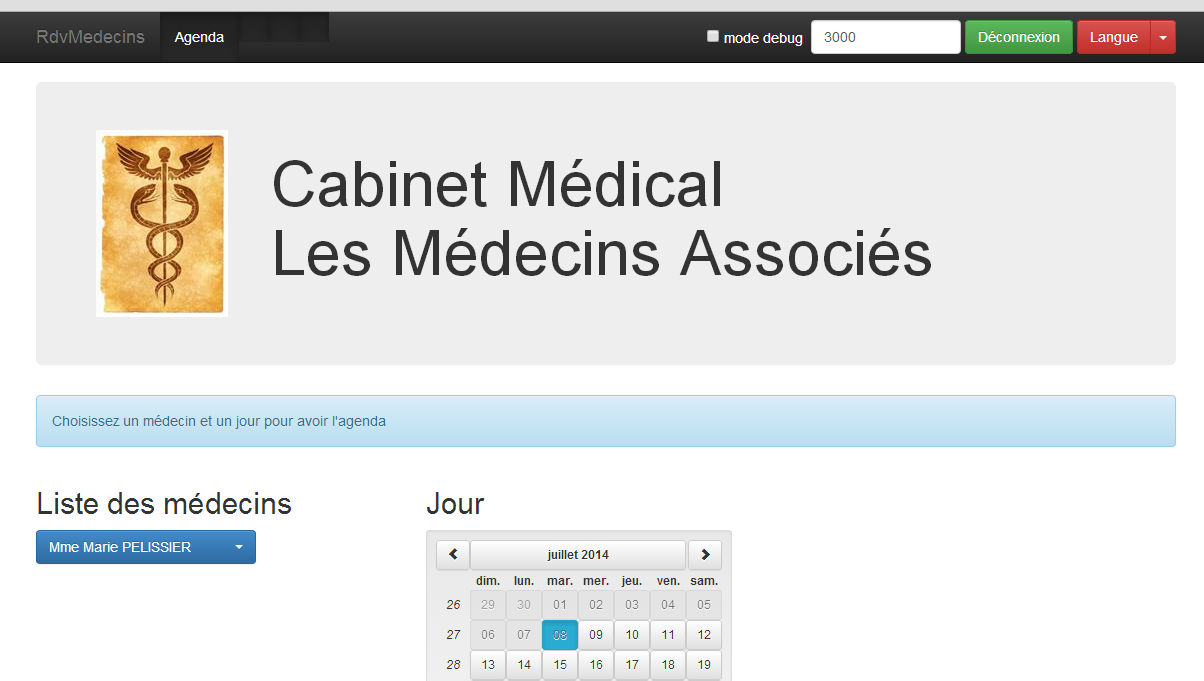
若要在 IDE STS 之外运行该应用程序,有多种解决方案。以下提供其中一种。
下载 Tomcat [http://tomcat.apache.org/download-80.cgi] 版本(2014 年 7 月):
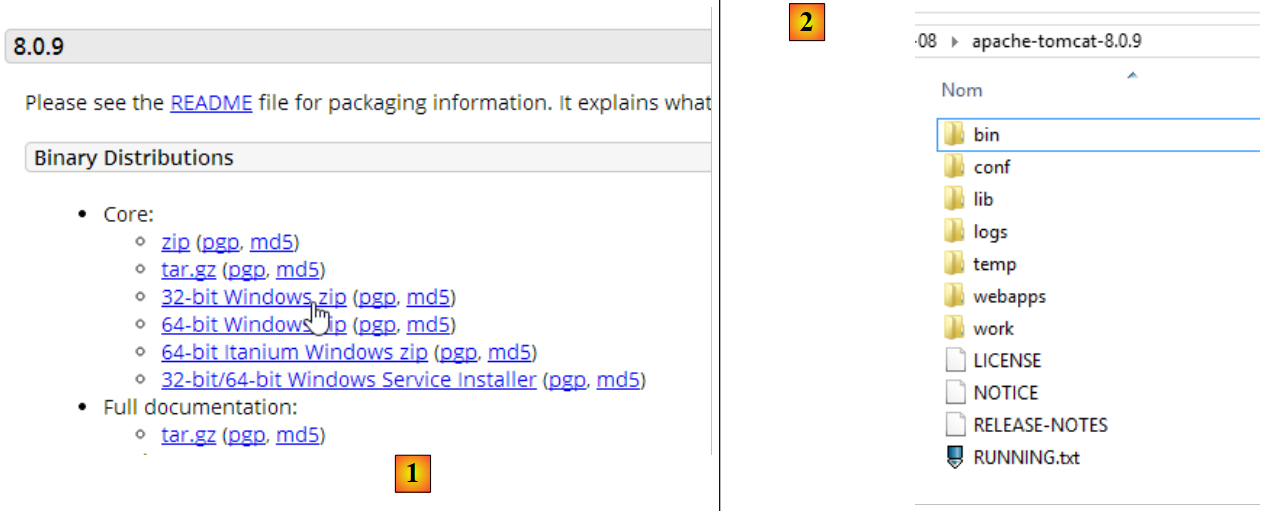 |
在 [1] 中选择压缩包,解压后得到 [2]。返回 STS:
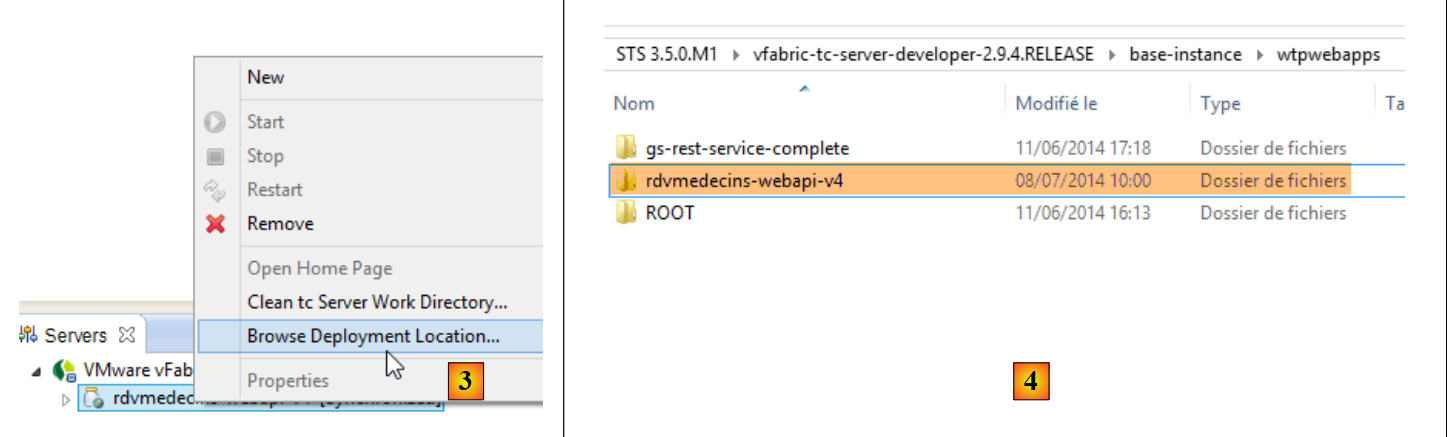 |
- 在 [Servers] 选项卡中,右键单击应用程序 [rdvmedecins-webapi-v4],并选择 [Browse Deployment Location] 选项;
- 在 [4] 中:复制文件夹 [rdvmedecins-webapi-v4];
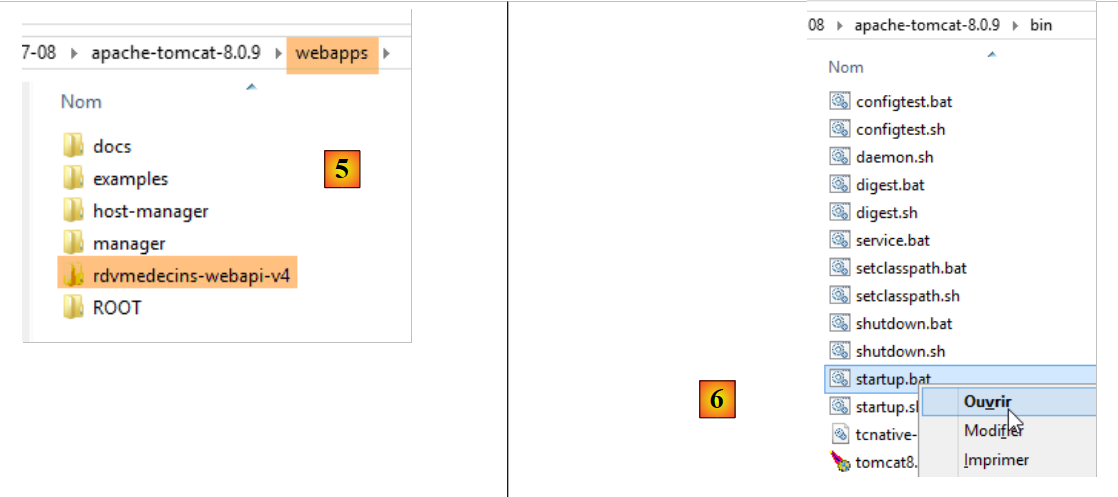 |
- 在 [5] 中,将文件夹 [rdvmedecins-webapi-v4] 粘贴到 Tomcat 的 [webapps] 文件夹中;
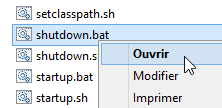
- 在 [6] 中,执行命令文件 [startup.bat](此时 STS 中集成的 Tomcat 服务器必须已停止)。 此时将打开一个名为 DOS 的窗口,用于显示 Tomcat 日志。日志应显示应用程序 [rdvmedecins-webapi-v4] 已成功启动。
为验证此情况,请在 Webstorm 中再次运行 Angular 客户端 [rdvmedecins-angular-v2]:
 |
在 [1] 中,将新 Web 服务 [http://localhost:8080/rdvmedecins-webapi-v4] 的 URL 作为参数传入。结果如下:
4.2. 在 Tomcat 服务器上部署 Angular 客户端
既然Web服务已部署到Tomcat上,接下来我们将把Angular客户端也部署到服务器上。这完全可以是已经托管Web服务的同一台服务器。我们将采用这种方式。
首先,我们将客户端 [rdvmedecins-angular-v2] 复制为 [rdvmedecins-angular-v3],并进行以下修改:
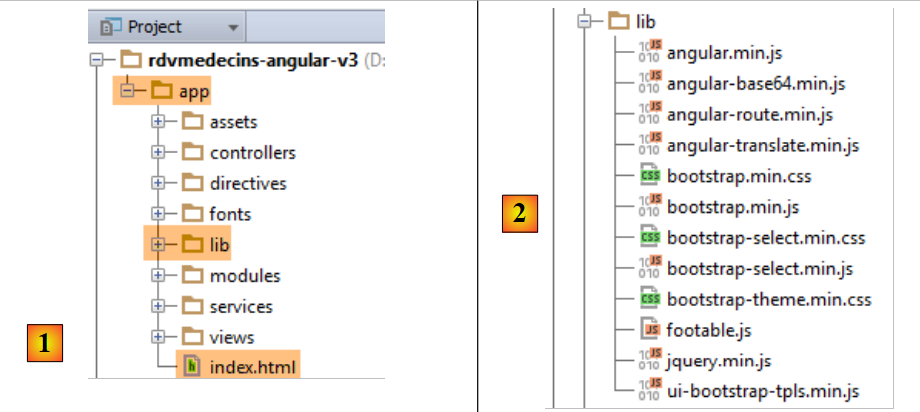 |
- 更名为 [1],所有内容已移至 [app] 文件夹 ;
- 在 [1] 中,删除了包含项目所需各类库(CSS 和 JS)的 [bower-components] 文件夹。 所有这些内容已复制到文件夹 [lib] [2] 中;
- 在 [1] 中,文件 [app.html] 已重命名为 [index.html];
文件 [index.html] 已进行修改,以适应所用资源路径的变化:
<!DOCTYPE html>
<html ng-app="rdvmedecins">
<head>
  <title>RdvMedecins</title>
...
  <!-- CSS -->
  ...
  <link href="lib/bootstrap-theme.min.css" rel="stylesheet"/>
  <link href="lib/bootstrap-select.min.css" rel="stylesheet"/>
</head>
<!-- 控制器 [appCtrl],模板 [app] -->
<body ng-controller="appCtrl">
<div class="container">
  ...
</div>
<!-- Bootstrap 核心 JavaScript ================================================== -->
<script type="text/javascript" src="lib/jquery.min.js"></script>
<script type="text/javascript" src="lib/bootstrap.min.js"></script>
<script type="text/javascript" src="lib/bootstrap-select.min.js"></script>
<script type="text/javascript" src="lib/footable.js"></script>
<!-- AngularJS -->
<script type="text/javascript" src="lib/angular.min.js"></script>
<script type="text/javascript" src="lib/ui-bootstrap-tpls.min.js"></script>
<script type="text/javascript" src="lib/angular-route.min.js"></script>
<script type="text/javascript" src="lib/angular-translate.min.js"></script>
<script type="text/javascript" src="lib/angular-base64.min.js"></script>
<!-- 模块 -->
...
<!-- 服务 -->
...
<!-- 指令 -->
...
<!-- 控制器 -->
....
</body>
</html>
此外,已修改控制器 [loginCtrl] 使其指向正确的服务器,以避免用户手动输入 URL:
// 凭据
app.serverUrl = "http://localhost:8080/rdvmedecins-webapi-v4";
app.username = "admin";
app.password = "admin";
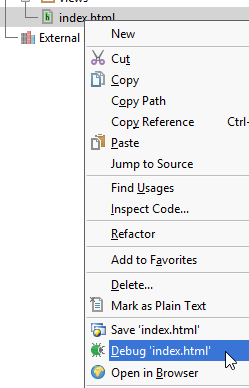
完成上述操作后,执行文件 [index.html]:
 |  |
然后连接到 Web 服务。应该可以正常运行。确认无误后,停止 Tomcat 服务器。我们将重新使用 STS 中的内置服务器。
在 STS 中,将 [rdvmedecins-angular-v3/app] 文件夹中的所有内容复制到 [rdvmedecins-webapi-v4] 项目的 [webapp] 文件夹中 (Navigator 选项卡)[1]:
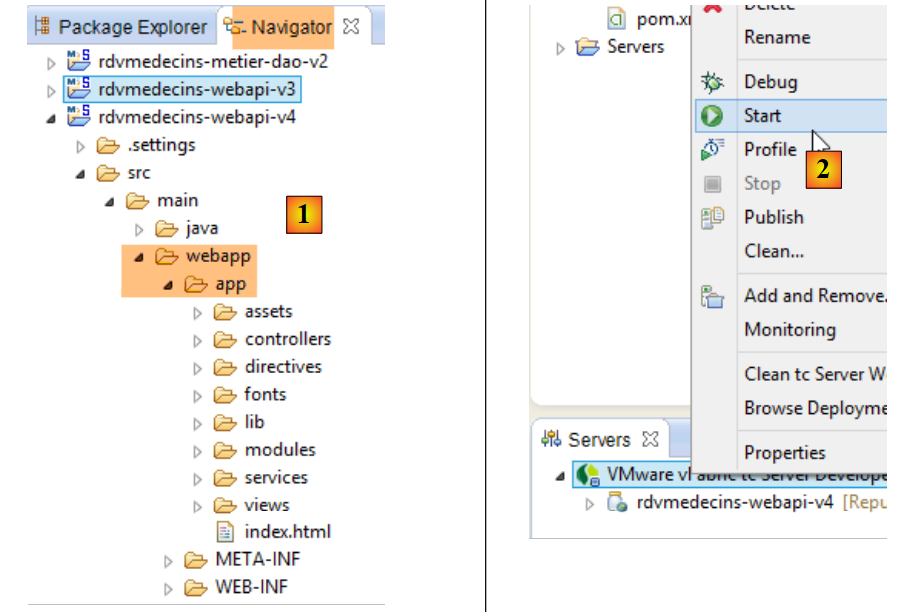 |
完成上述操作后,启动 [2],即 STS 的 VMware 服务器,然后请求 URL [http://localhost:8080/rdvmedecins-webapi-v4/app/index.html]:
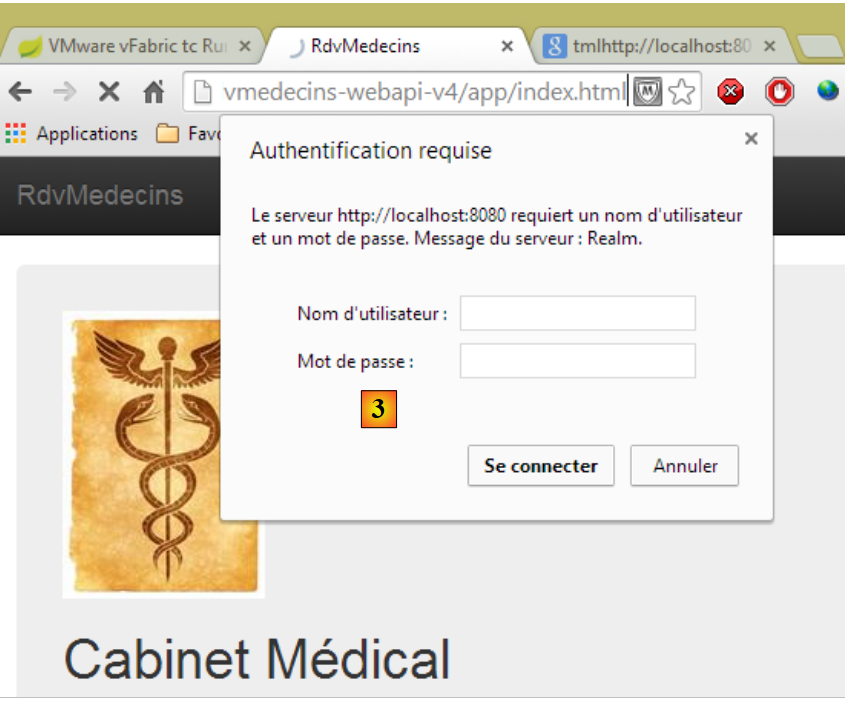 |
[3] 出现了权限问题。这并不奇怪,因为我们已对 Web 服务进行了保护。我们需要声明对文件 [/app/index.html] 的访问是开放的。回到 Eclipse:
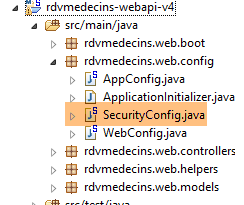 |
请注意,访问权限已在类 [SecurityConfig] 中声明。请按以下方式修改该类:
    @Override
    protected void configure(HttpSecurity http) throws Exception {
        // CSRF
        http.csrf().disable();
        // 密码通过 Authorization: Basic xxxx 头传递
        http.httpBasic();
        // 必须为所有人授权 HTTP OPTIONS 方法
        http.authorizeRequests() //
                .antMatchers(HttpMethod.OPTIONS, "/", "/**").permitAll();
        // 文件夹 [app] 对所有人开放
        http.authorizeRequests() //
                .antMatchers(HttpMethod.GET, "/app", "/app/**").permitAll();
        // 仅 ADMIN 角色可使用该应用程序
        http.authorizeRequests() //
                .antMatchers("/", "/**") // 所有 URL
                .hasRole("ADMIN");
}
- 第 11-12 行:允许所有人读取文件夹 [app] 及其内容。修改时可参考前面的代码行。
现在,重新启动 STS 的 Tomcat 服务器,然后再次请求 URL [http://localhost:8080/rdvmedecins-webapi-v4/app/index.html]:
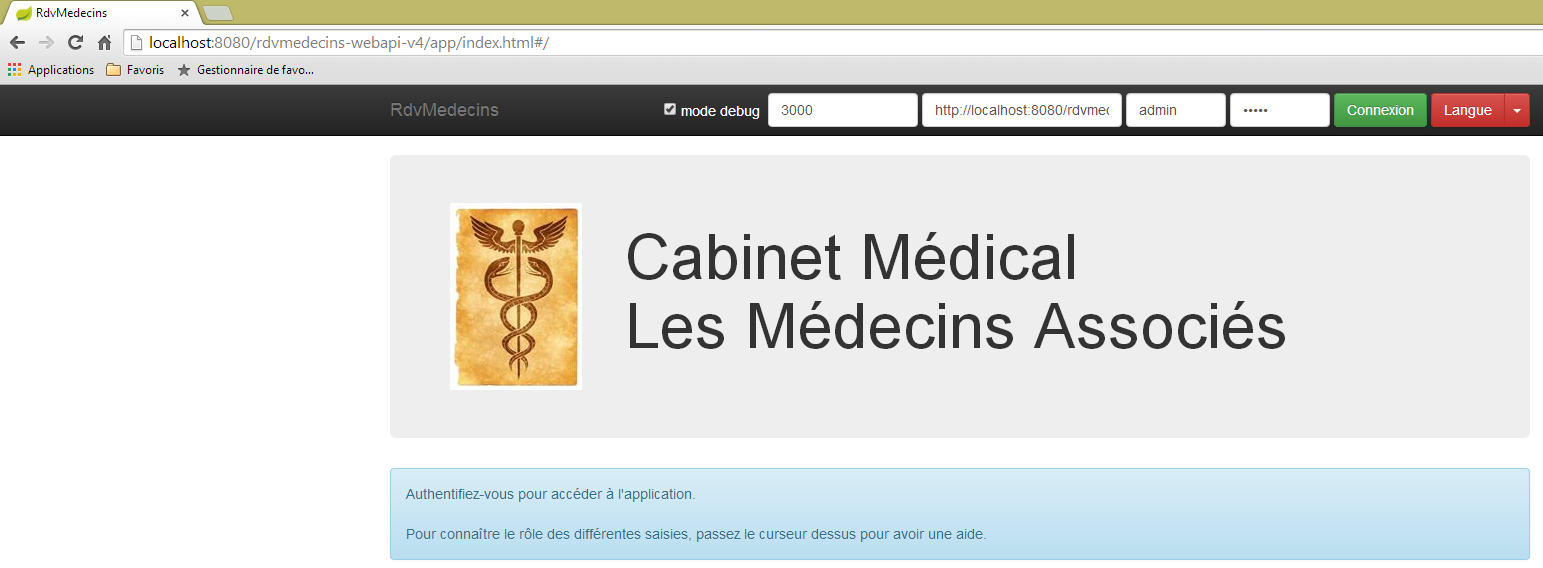
这次成功了。
4.3. CORS 头部
大家可能还记得,我们曾为处理 CORS 头部信息费尽周折。在前面的示例中:
- Web 服务位于 URL [http://localhost:8080/rdvmedecins-webapi-v4];
- 客户端 HTML 位于 URL [http://localhost:8080/rdvmedecins-webapi-v4/app];
因此,客户端 HTML 和 Web 服务位于同一台服务器 [http://localhost:8080] 上。此时不会出现 CORS 冲突,因为此类冲突仅在客户端和服务器不在同一域时才会发生。我们应该能够验证这一点。 我们回到 STS:
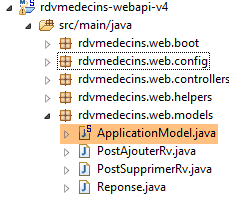 |
是否生成 CORS 头部由 [ApplicationModel] 类中定义的一个布尔值控制:
    // 配置数据
    private boolean CORSneeded = true;
我们将上述布尔值设为false,重启Web服务,并再次请求URL [http://localhost:8080/rdvmedecins-webapi-v4/app/index.html]。可以看到应用程序运行正常。
4.4. 在 Android 平板电脑上部署 Angular 客户端
[Phonegap] [http://phonegap.com/] 工具可用于生成移动端可执行文件(Android、IoS、Windows 8、 ...)生成移动端可执行文件。 实现这一目标的方法有多种。我们采用最简单的方式:使用 Phonegap 网站上的在线工具 [http://build.phonegap.com/apps]。
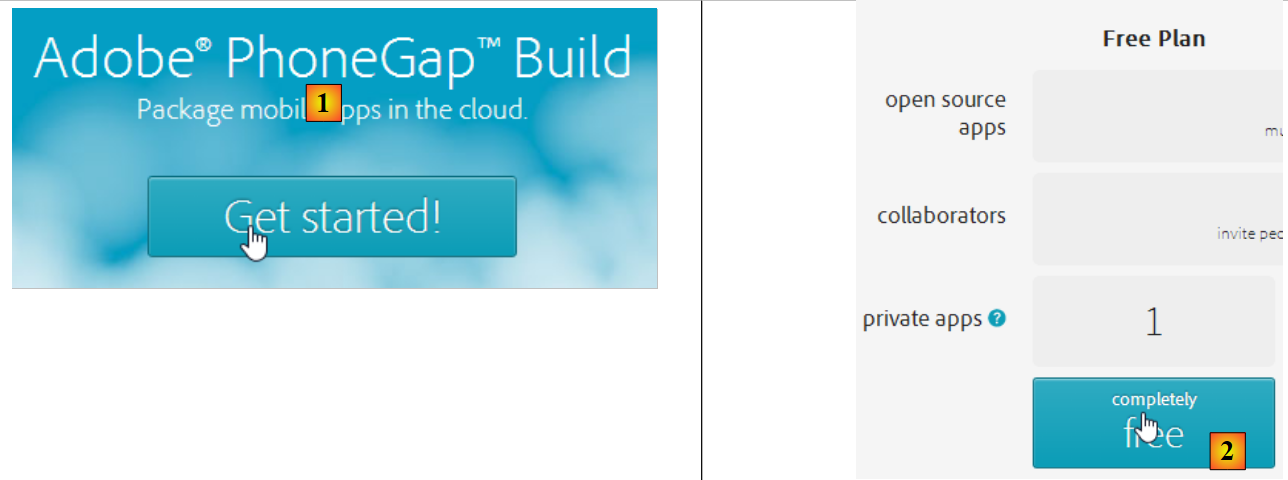 |
- 在 [1] 之前,您可能需要创建一个账户;
- 在 [1] 步骤中,开始操作;
- 在 [2] 步骤中,选择仅支持一个 Phonegap 应用的免费套餐;
 |
- 在 [3] 步骤中,下载压缩后的应用程序 [4](第 4.2 节创建的文件夹 [app] 已被压缩);
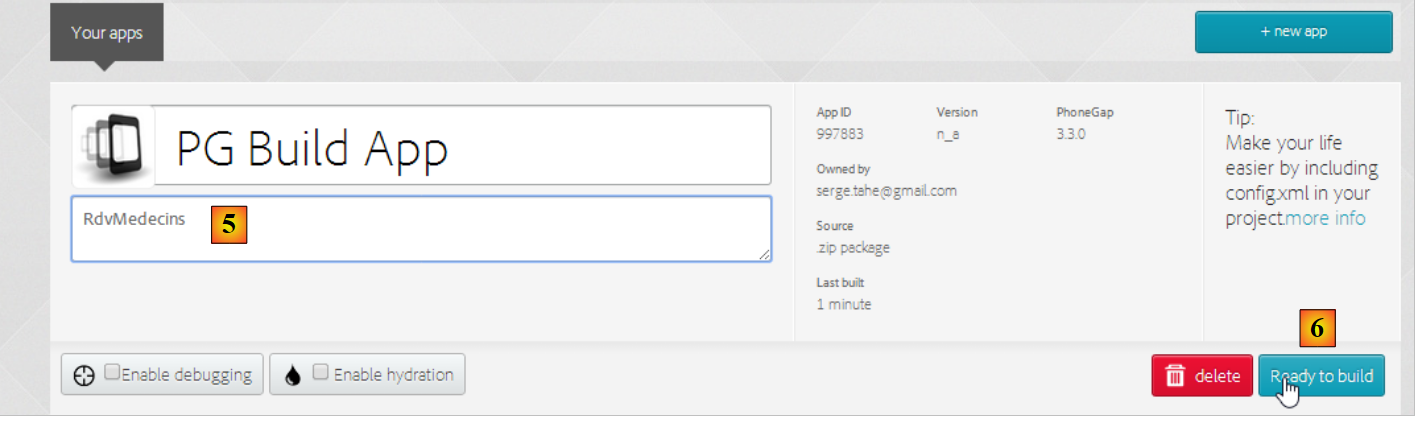 |
- 生成 [5],为应用程序命名;
- 在 [6] 中,构建该应用程序。此操作可能需要 1 分钟。请耐心等待,直到各移动平台的图标显示构建已完成;
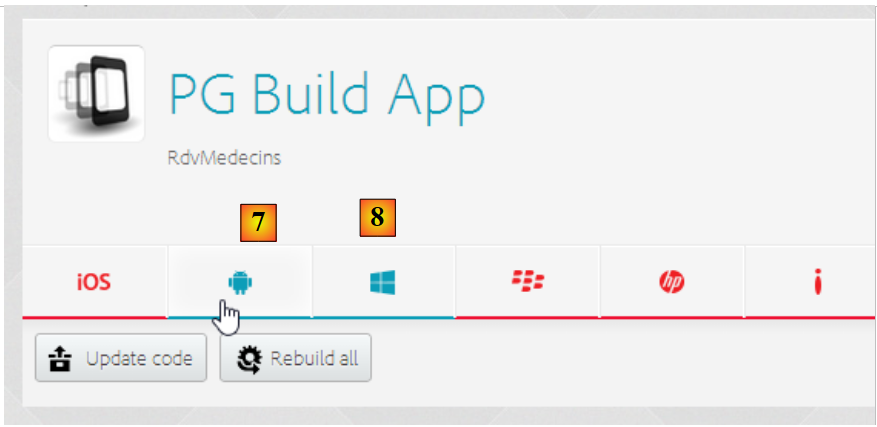 |
- 仅生成了 Android 二进制文件 [7] 和 Windows 二进制文件 [8];
- 点击 [7] 下载 Android 二进制文件;
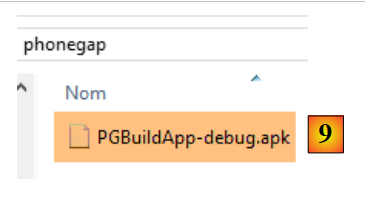 |
- 将下载的二进制文件 [apk] 转换为 [9];
启动适用于 Android 平板电脑的 [GenyMotion] 模拟器(参见第 6.4 节):
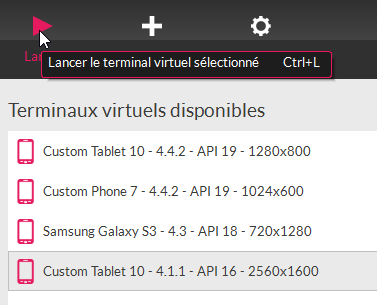 |
上图展示了使用 Android 16 系统(API)启动平板模拟器的过程。模拟器启动后,
- 请滑动侧边的锁定条(如有)将其解锁;
- 用鼠标拖动您下载的 [PGBuildApp-debug.apk] 文件,并将其拖放到模拟器上。该文件随即会被安装并运行;
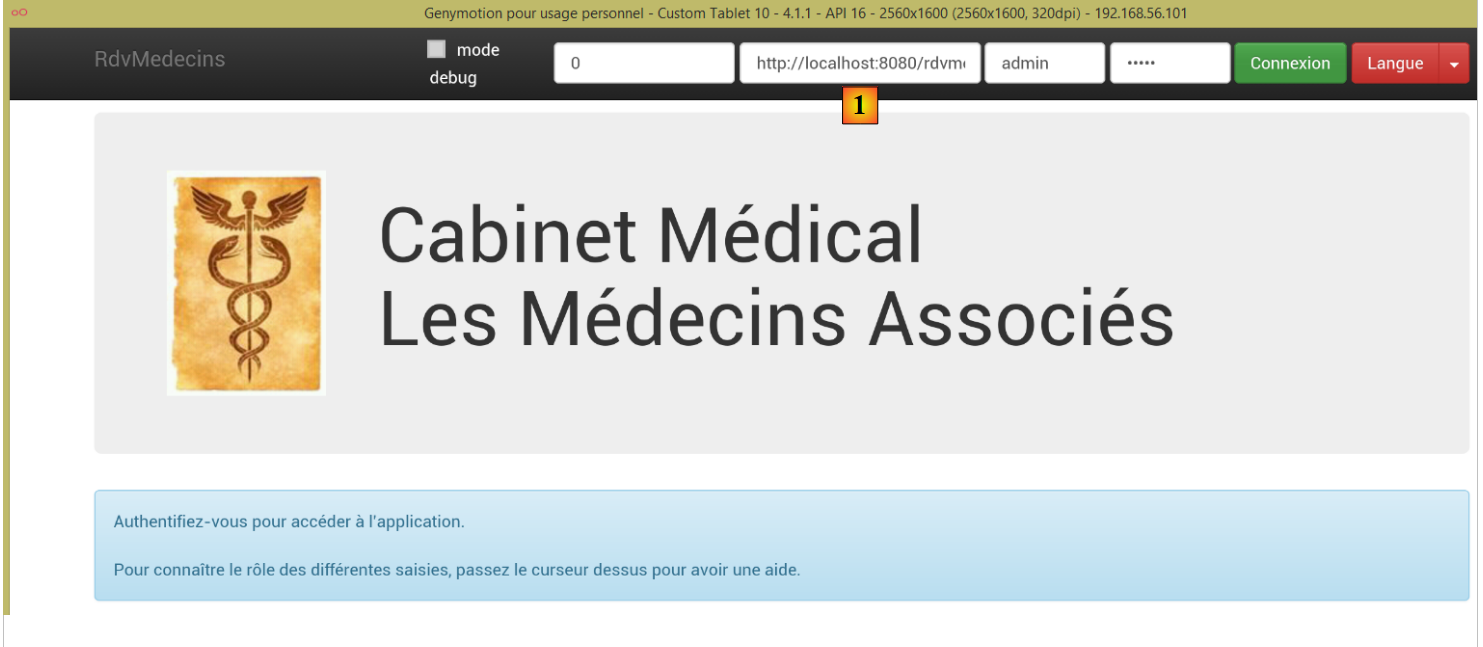 |
需将 URL 更改为 [1]。 为此,请在命令窗口中输入命令 [ipconfig](如下图第 1 行),该命令将显示您机器上的各个 IP 地址:
C:\Users\Serge Tahé>ipconfig

Configuration IP de Windows


Carte réseau sans fil Connexion au réseau local* 15 :

   Statut du média. . . . . . . . . . . . : Média déconnecté
   Suffixe DNS propre à la connexion. . . :

Carte Ethernet Connexion au réseau local :

   Suffixe DNS propre à la connexion. . . : ad.univ-angers.fr
   Adresse IPv6 de liaison locale. . . . .: fe80::698b:455a:925:6b13%4
   Adresse IPv4. . . . . . . . . . . . . .: 172.19.81.34
   Masque de sous-réseau. . . . . . . . . : 255.255.0.0
   Passerelle par défaut. . . . . . . . . : 172.19.0.254

Carte réseau sans fil Wi-Fi :

   Statut du média. . . . . . . . . . . . : Média déconnecté
   Suffixe DNS propre à la connexion. . . :

...
请记下以下地址之一:Wi-Fi 地址 IP(第 6-9 行),或局域网地址 IP(第 11-17 行)。 然后在 Web 服务器的 URL 中使用该地址 IP:
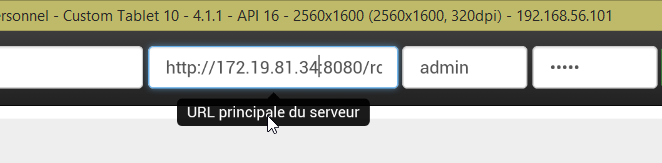 |
完成上述操作后,连接到 Web 服务:
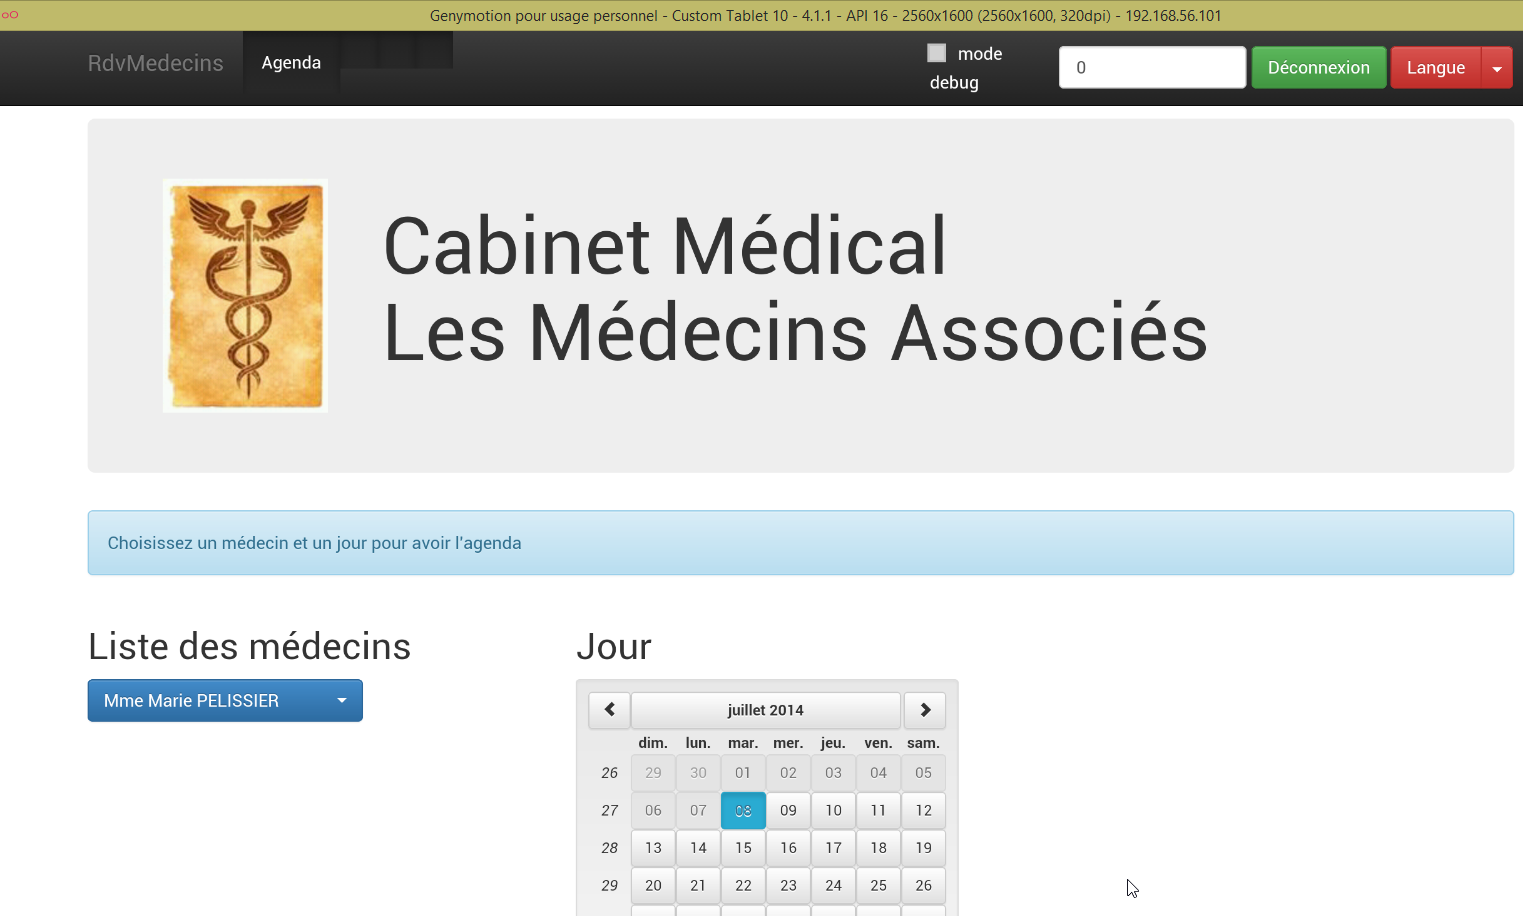 |
在模拟器上测试应用程序。它应该可以正常运行。在服务器端,可以在类 [ApplicationModel] 中选择是否允许 CORS 头部:
    // 配置数据
    private boolean CORSneeded = false;
这对 Android 应用来说并不重要。该应用并非在浏览器中运行。而 CORS 头的要求来自浏览器,而非服务器。
4.5. 在 Android 智能手机模拟器上部署 Angular 客户端
我们使用智能手机模拟器重复上述操作。目的是验证客户端在小屏幕上的表现:
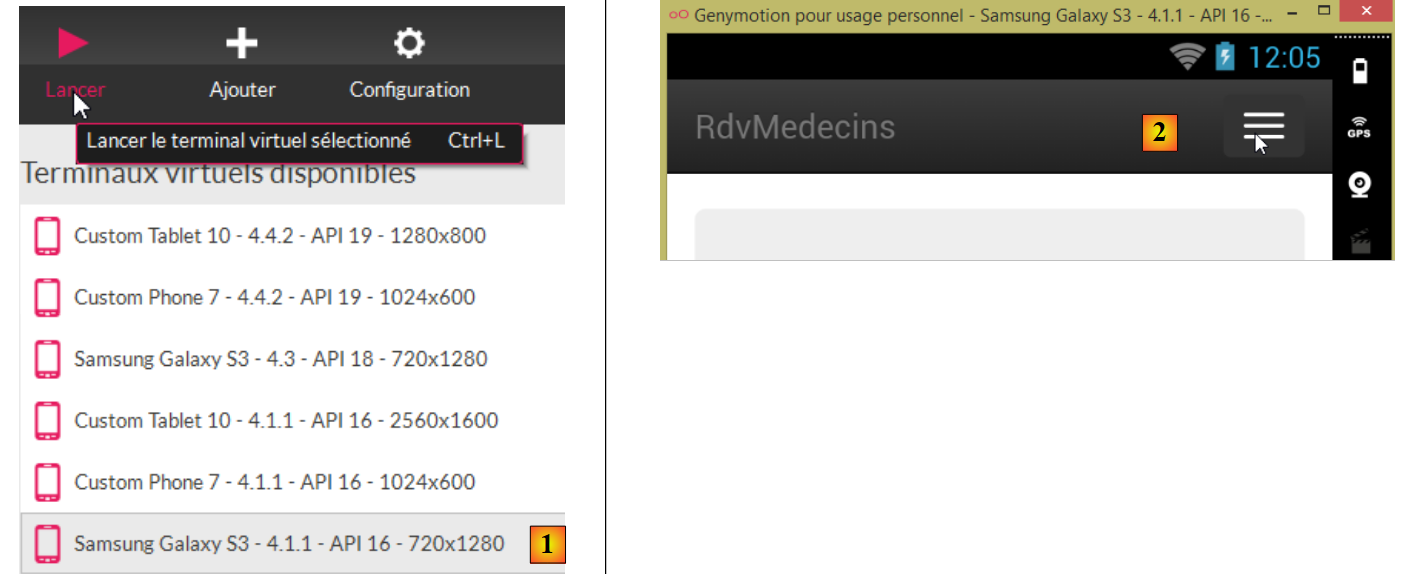 |
- 在 [1] 中,我们启动了一个智能手机模拟器;
- 在 [2] 和 [3] 中,导航栏已折叠至菜单中;
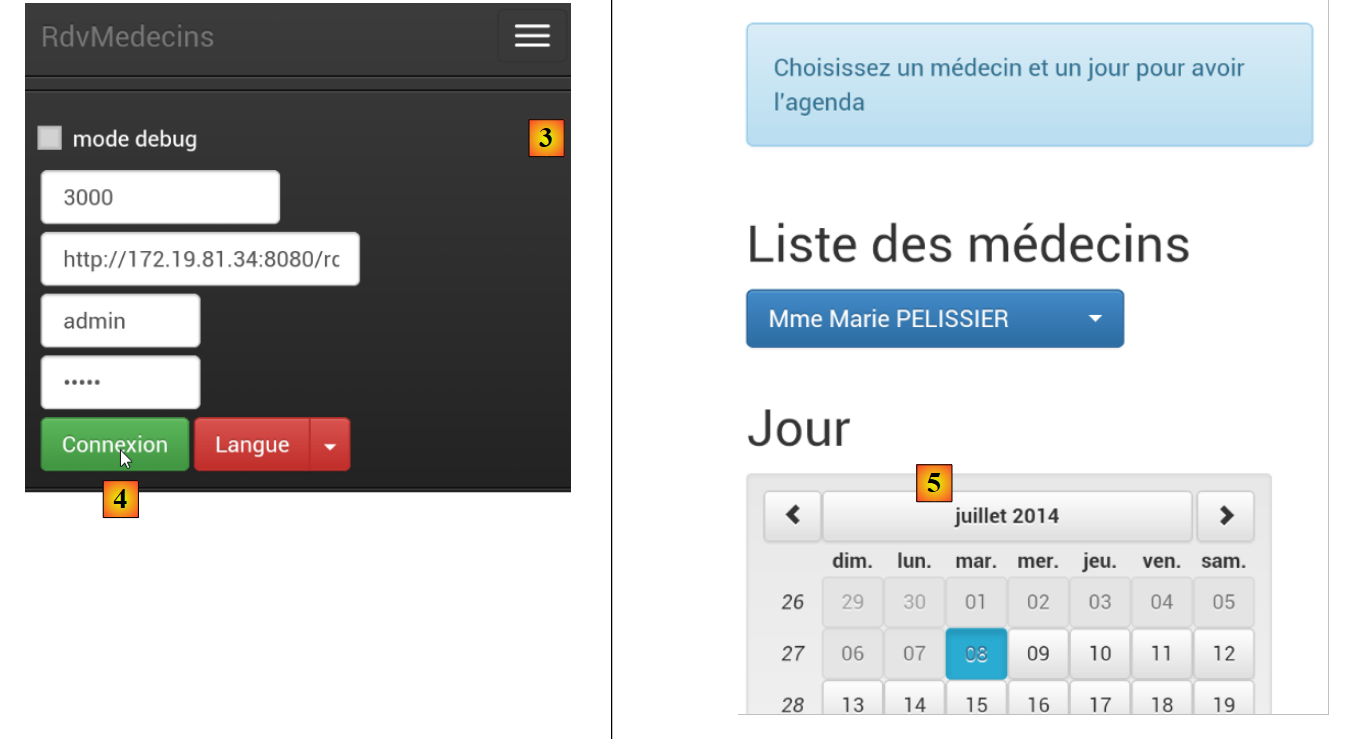 |
- 在 [4] 中,正在登录;
- 在 [5] 中,列表和日历是上下排列的,而不是并排的;
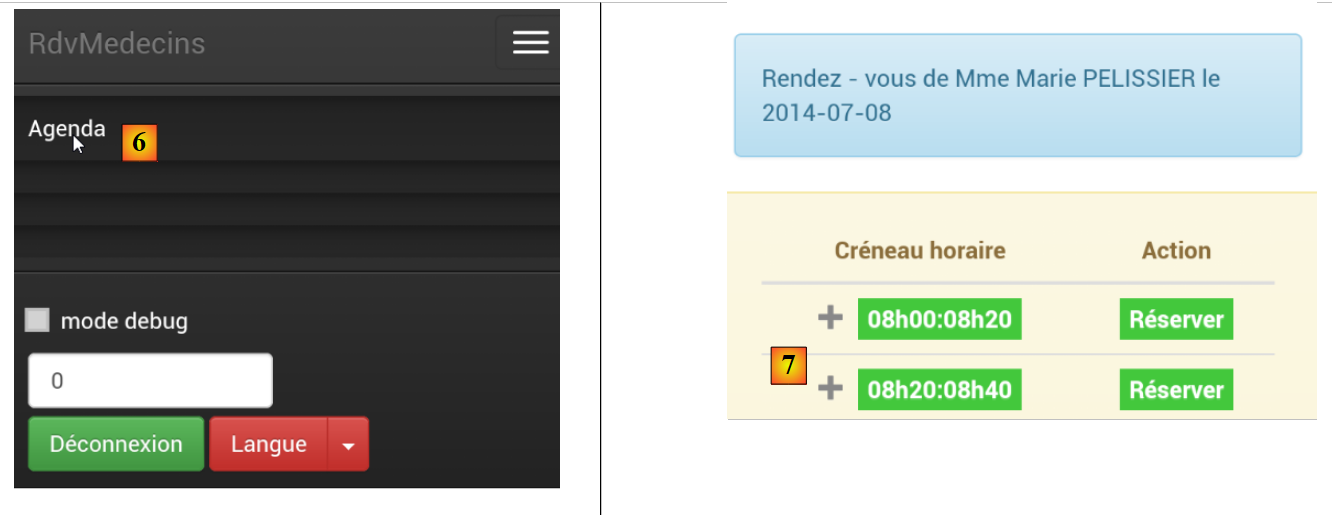 |
- 在 [6] 中,查询日程表;
- 在 [7] 中,由于屏幕过小,部分时段被遮挡。这是由 [footable] 库完成的;
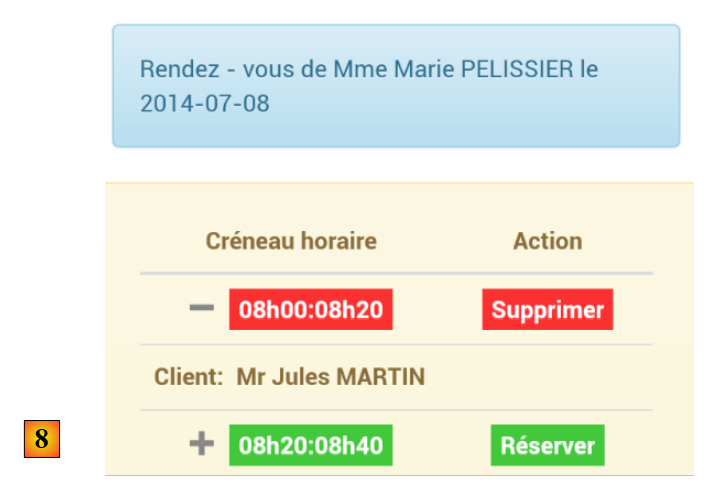 |
- 在 [8] 中,视图与之前相同,但这次显示了一个预约。
最终,我们的应用程序在智能手机上的适配效果相当不错。虽然还有改进空间,但目前已具备实用性。