3. Appendices
3.1. Building a web project with Visual Studio.net on XP family
Visual Studio.net allows you to build different types of projects:
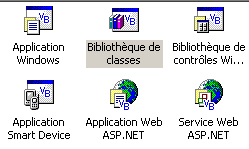
To build a web application project, you normally select the [Application Web ASP.NET] type. This type of project requires a local or remote IIS web server. If you are working on a Windows machine, this server does not exist and cannot be installed. Therefore, you cannot create a [Application Web ASP.NET] project.
You can work around this issue by accepting a few minor inconveniences. Simply:
- use the Cassini web server instead of the IIS server. It is freely available on the Microsoft website.
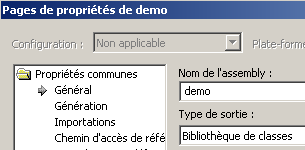
- use a [Bibliothèque de classes] project instead of the [Application Web ASP.NET] project
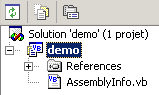
Let’s create a simple project to demonstrate how to do this.
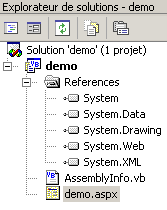
- Create a [Bibliothèque de classes] project
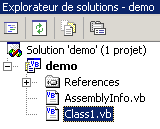 |  |
- Delete [Class1.vb]
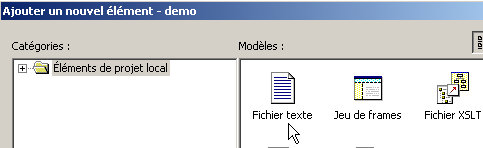
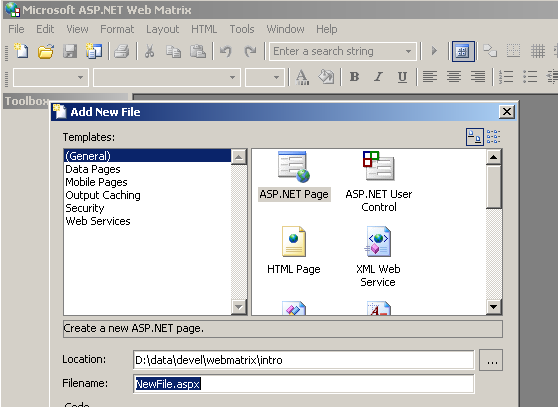
- Add a new element to the project, of type [Fichier texte], and name it [demo.aspx]:
 |  |
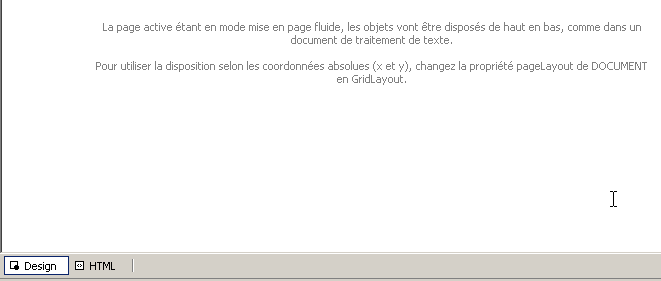
- The file [demo.aspx] is recognized as a web page, and a page editor is associated with it. This editor has two panels:
- [design] for building the page graphically
- [HTML] to access the page's code
- Click [Affichage/Code] to display the code section VB of the page. Nothing happens. We do not have access to the page's code VB.
- Go to the [HTML] panel and enter the code that will link the [demo.aspx] page to the [demo.aspx.vb] code:

- Request to view the control code associated with the page via [Affichage code - F7]. You will receive the file [demo.aspx.vb]:
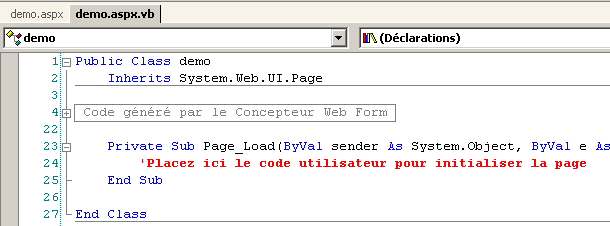
- The page [demo.aspx] is now recognized as a web page [.aspx] with an associated code [.aspx.vb].
- Let’s return to the [Design] panel of [demo.aspx] and draw the following page:
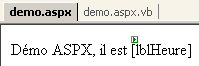
The page contains text and a server component of type [Label] with identifier [lblHeure].
- Let’s go to the [HTML] panel. There we find the following code:
<%@ Page codebehind="demo.aspx.vb" inherits="demo.demo" autoeventwireup="false" Language="vb" %>
Démo ASPX, il est
<asp:Label id="lblHeure" runat="server"></asp:Label>
This code is incomplete from a HTML syntax perspective. Let’s complete it:
<%@ Page codebehind="demo.aspx.vb" inherits="demo.demo" autoeventwireup="false" Language="vb" %>
<html>
    <head>
        <title>démo ASPX</title></head>
    <body>
        Démo ASPX, il est
        <asp:Label id="lblHeure" runat="server"></asp:Label>
    </body>
</html>
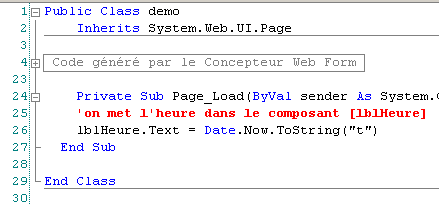
- Let’s go into the [demo.aspx.vb] code to write the control code that will set the time in the [lblHeure] component. We notice that this is not recognized by IntelliSense, the code completion tool.
- Close [demo.aspx] and [demo.aspx.vb] after saving them, then reopen them. Go to the code in [demo.aspx.vb]. This time, the [lblHeure] component of [demo.aspx] is recognized by IntelliSense in the code [demo.aspx.vb]. Complete the code:
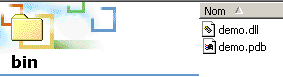
- Generate the project using [Générer/Générer demo]. If the generation is successful, DLL is then generated in the [bin] folder of the project:
- We are ready for testing. We configure the Cassini server (see next paragraph) as follows:
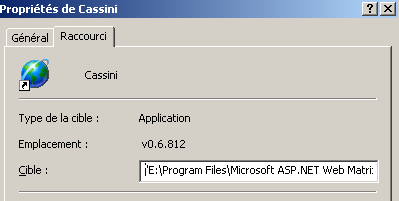
The target of the shortcut to Cassini is set as follows:
"E:\Program Files\Microsoft ASP.NET Web Matrix\v0.6.812\WebServer.exe" /path:"D:\temp\07-04-05\demo" /vpath:"/demo"
the path to the executable | |
the path to the Visual Studio web project folder | |
the associated virtual path |
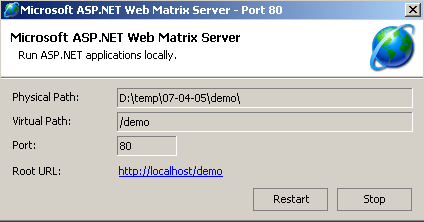
- Launch Cassini. Its icon appears in the taskbar. Right-click on it and select option [Show details] to verify that the web server is configured correctly:
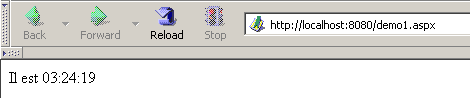
- Using a browser, request the page we built by entering URL [http://localhost/demo/demo.aspx]. We get the following result:
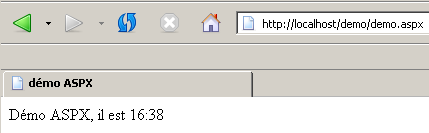
We have successfully created a web application in Visual Studio using:
- a [bibliothèque de classes] project
- the Cassini web server
We now know how to build web applications on machines that do not have the IIS server, such as Windows Home Edition machines.
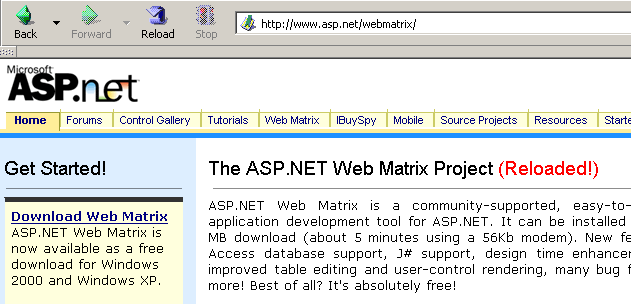
3.2. Where can I find the Cassini web server ( )?
To work with Microsoft’s .NET platform, you can use the Cassini web server. This is available via a product called [WebMatrix], which is a free web development environment for .NET platforms available at URL:
Follow the product installation procedure carefully:
- download and install the .NET platform (version 1.1 as of March 2004)
- download and install WebMatrix
- Download and install MSDE (Microsoft Data Engine), which is a limited version of SQL Server.
Once the installation is complete, the [WebMatrix] product is available in Installed Programs:
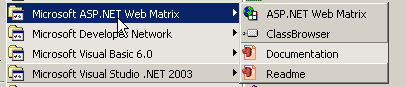
The [ASP.NET] Web Matrix link launches the IDE development tool:
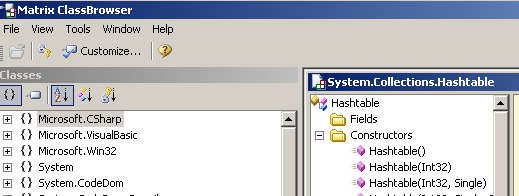
The [Class Browser] link launches a .NET class explorer tool:
To test the installation, let's run [WebMatrix]:
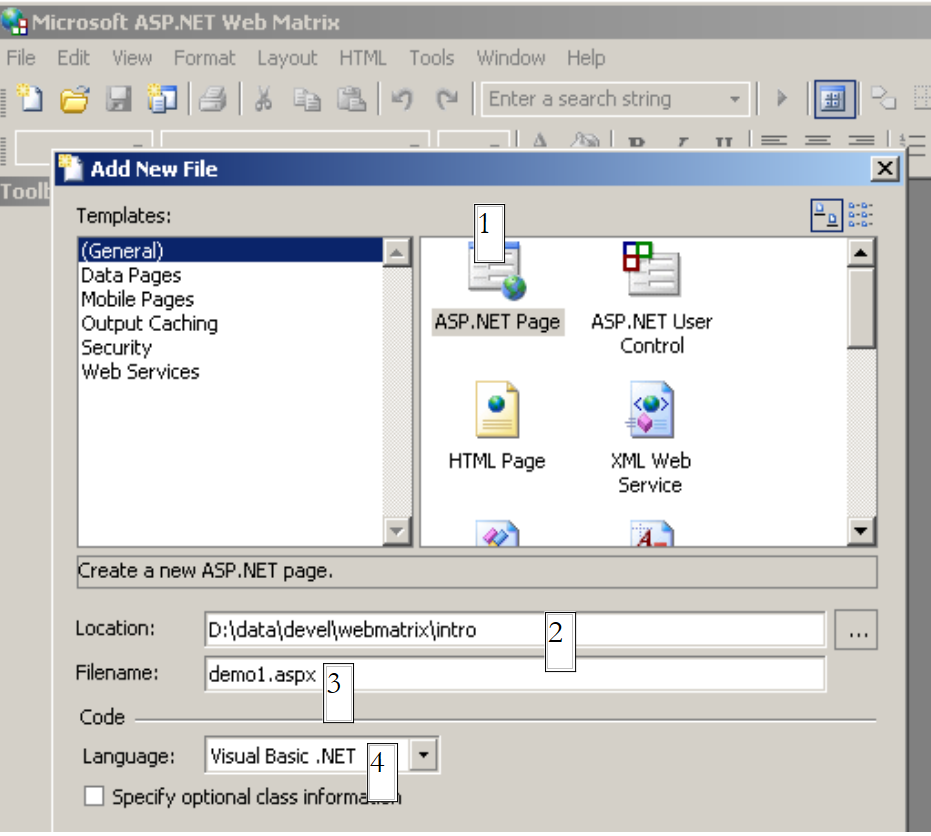 |
Upon initial startup, [WebMatrix] prompts for the specifications of the new projet.C, which is its default configuration. You can configure it so that this dialog box does not appear at startup. This is achieved using the [File/New File] option. [WebMatrix] allows you to build templates for various web applications. Above, we specified in (1) that we wanted to build a [ASP.ET Page] application, which is a web page. In (2), we specify the folder where this web page will be placed. In (3) we provide the name of the page. It must have the .aspx extension. Finally, in (4), we specify that we want to work with the VB.NET language, as [WebMatrix] also supports the C# and J# languages. Once this is done, [WebMatrix] displays an editing page for the [demo1.aspx] file. We enter the following code there:
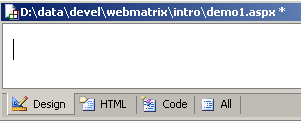
- The [Design] tab allows you to "design" the web page you want to build. This works similarly to a IDE for building Windows applications.
- The graphical design of the web page in [Design] will generate HTML code in the [HTML] tab
- The web page may contain controls that generate events requiring a response, such as a button. These events will be handled by VB.NET code, which will be placed in the [Code] tab
- Ultimately, the demo1.aspx file is a text file combining HTML code and VB.NET code, resulting from the graphic design created in [Design], the code from HTML that was manually added to [HTML], and the code from VB.NET placed in [Code]. The entire file is available in the [All] tab.
- An experienced ASP.ET developer can build the demo1.aspx file directly with a text editor without the help of any IDE.
Let's select the option [All] We can see that [WebMatrix] has already generated code:
<%@ Page Language="VB" %>
<script runat="server">

     ' Insert page code here
    '

</script>
<html>
<head>
</head>
<body>
    <form runat="server">
         <!-- Insert content here -->
    </form>
</body>
</html>
We won't attempt to explain this code here. We'll transform it as follows:
<html>
<head>
    <title>Démo asp.net </title>
</head>
<body>
    Il est <% =Date.Now.ToString("hh:mm:ss") %>
</body>
</html>
The code above is a combination of HTML and VB.NET code. It has been placed within the <% ... %> tags. To execute this code, we use the option [View/Start]. [WebMatrix] then launches the Cassini web server if it is not already running
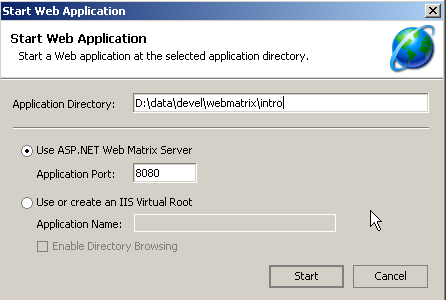
You can accept the default values offered in this dialog box and select option [Start]. The web server is then active. [WebMatrix] will then launch the default browser on the machine it is running on and request the URL http://localhost:8080/demo1.aspx:
It is possible to use the Cassini server outside of [WebMatrix]. The server executable is located in <WebMatrix>\<version>\WebServer.exe, where <WebMatrix> is the installation directory of [WebMatrix] and <version> is its version number:
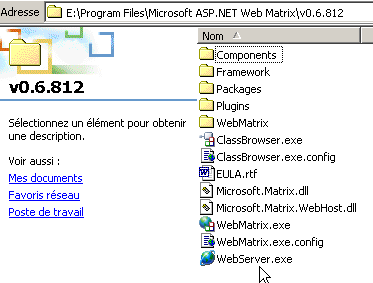
Open a Command Prompt window and navigate to the Cassini server folder:
E:\Program Files\Microsoft ASP.NET Web Matrix\v0.6.812>dir
...
29/05/2003  11:00               53 248 WebServer.exe
...
Let's run [WebServer.exe] without any parameters:
We get a help window:
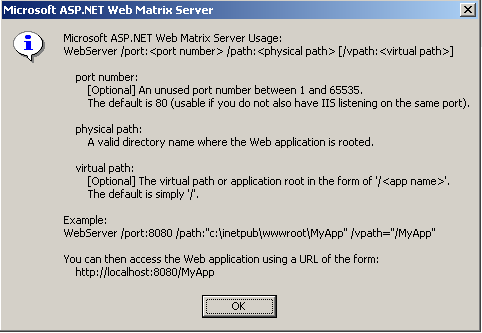
The [WebServer] application, also known as the Cassini web server, accepts three parameters:
- /port: port number of the web service. Can be any number. The default value is 80
- /path: physical path to a folder on the disk
- /vpath: virtual folder associated with the previous physical folder. Note that the syntax is not /path=path but /vpath:path, contrary to what the [Example] example in the help panel above states.
Let’s place the file [demo1.aspx] in the following folder:
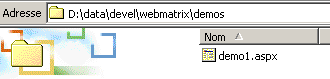
Let’s associate the physical folder [d:\data\devel\webmatrix] with the virtual folder [/webmatrix]. The web server could be started as follows:
E:\Program Files\Microsoft ASP.NET Web Matrix\v0.6.812>webserver /port:100 /path:"d:\data\devel\webmatrix" /vpath:"/webmatrix"
The Cassini server is now active, and its icon appears in the taskbar. If you double-click it:
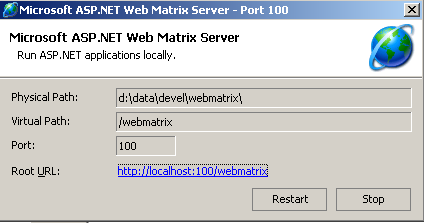
You will see the server's startup settings. You also have the option to stop [Stop] or restart [Restart] the web server. If you click the [Root URL] link, you’ll see the root of the server’s web directory in a browser:
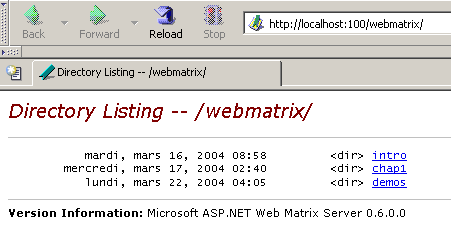
Let’s follow the [demos] link:
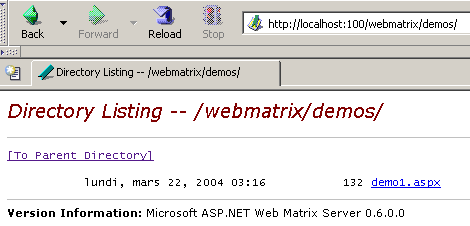
then the link [demo1.aspx]:
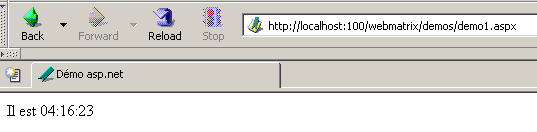
We can see, therefore, that if the physical folder P=[d:\data\devel\webmatrix] has been associated with the virtual folder V=[/webmatrix] and the server is running on port 100, the web page [demo1.aspx], which is physically located in [P\demos], will be accessible locally via URL and [http://localhost:100/V/demos/demo1.aspx].
To avoid having to use the DOS window to start the Cassini server, you can create a shortcut to the server executable with properties similar to the following:

"C:\Program Files\Microsoft ASP.NET Web Matrix\v0.6.812\WebServer.exe" /port:80 /path:"D:\data\serge\work\2004-2005\aspnet\webarticles-010405\version3\web" /vpath:"/webarticles" | |
"C:\Program Files\Microsoft ASP.NET Web Matrix\v0.6.812" |
3.3. Where can I find Spring?
The main Spring site is [http://www.springframework.org/]. This is the site for the version Java version. The version .NET currently under development (April 2005) is at url [http://www.springframework.net/].

The download site is at [SourceForge]:
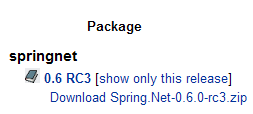
Once you have downloaded the zip file above, unzip it:
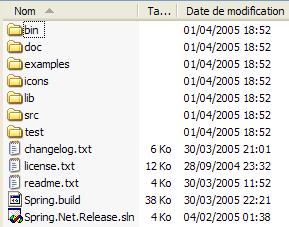
In this document, we have only used the contents of the [bin] folder:
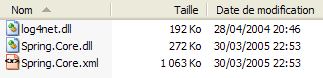
In a Visual Studio project using Spring, you must always do two things:
- place the files above in the project’s [bin] folder
- add a reference to the [Spring.Core.dll] assembly to the project
3.4. Where can I find Nunit?
The main NUnit website is [http://www.nunit.org/]. The version available in April 2005 is 2.2.0:
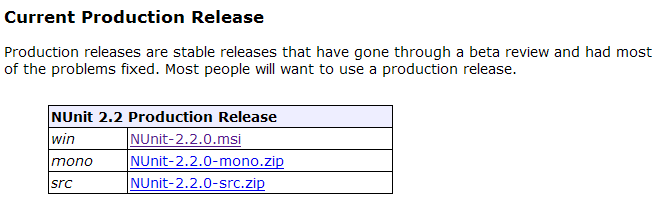
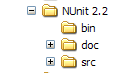
Download this version and install it. The installation creates a folder where you will find the version test graphics:
The interesting part is in the [bin] folder:
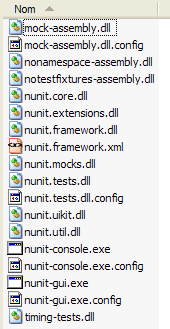
The arrow above points to the graphical test utility. The installation also added new items to the Visual Studio assembly repository, which we will explore now.
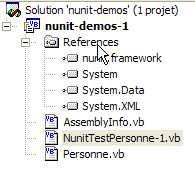
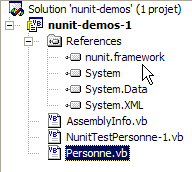
Let’s create the following Visual Studio project:
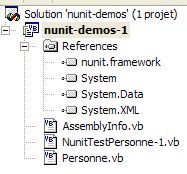
The class being tested is in [Personne.vb]:
Public Class Personne

     ' private fields
    Private _nom As String
    Private _age As Integer

     ' default builder
    Public Sub New()
    End Sub

     ' properties associated with private fields
    Public Property nom() As String
        Get
            Return _nom
        End Get
        Set(ByVal Value As String)
            _nom = Value
        End Set
    End Property

    Public Property age() As Integer
        Get
            Return _age
        End Get
        Set(ByVal Value As Integer)
            _age = Value
        End Set
    End Property

     ' identity chain
    Public Overrides Function tostring() As String
        Return String.Format("[{0},{1}]", nom, age)
    End Function

     ' init method
    Public Sub init()
        Console.WriteLine("init personne {0}", Me.ToString)
    End Sub

     ' close method
    Public Sub close()
        Console.WriteLine("destroy personne {0}", Me.ToString)
    End Sub

End Class
The test class is in [NunitTestPersonne-1.vb]:
Imports System
Imports NUnit.Framework

<TestFixture()> _
 Public Class NunitTestPersonne

     ' object tested
    Private personne1 As Personne

    <SetUp()> _
    Public Sub init()
         ' create an instance of Person
        personne1 = New Personne
         ' log
        Console.WriteLine("setup test")
    End Sub

    <Test()> _
    Public Sub demo()
         ' log screen
        Console.WriteLine("début test")
         ' init person1
        With personne1
            .nom = "paul"
            .age = 10
        End With
         ' tests
        Assert.AreEqual("paul", personne1.nom)
        Assert.AreEqual(10, personne1.age)
         ' log screen
        Console.WriteLine("fin test")
    End Sub

    <TearDown()> _
    Public Sub destroy()
         ' follow-up
        Console.WriteLine("teardown test")
    End Sub

End Class
Several things are worth noting:
- the methods are marked with attributes such as <Setup()>, <TearDown()>, ...
- for these attributes to be recognized, the following must be true:
- the project references the [nunit.framework.dll] assembly
- the test class imports the [NUnit.Framework] namespace
The reference is obtained by right-clicking on [References] in Solution Explorer:
 | 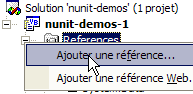 |

The [nunit.framework.dll] assembly should be in the list if the installation of [Nunit] was successful. Simply double-click the assembly to add it to the project:
Once this is done, the [NunitTestPersonne] test class must import the [NUnit.Framework] namespace:
The attributes of the [NunitTestPersonne] test class must then be recognized.
- The <Test()> attribute designates a method to be tested
- The <Setup()> attribute designates the method to be executed before each method being tested
- The <TearDown()> attribute designates the method to be executed after each tested method
- The method Assert.AreEqual allows testing the equality of two entités.Il. There are many other methods of type Assert.xx.
- The NUnit utility stops the execution of a tested method as soon as a [Assert] method fails and displays an error message. Otherwise, it displays a success message.
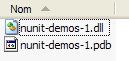
Let’s configure our project to generate a DLL:

The generated DLL will be named [nunit-demos-1.dll] and will be placed by default in the [bin] folder of the project. Let’s build our project. We get the following in the [bin] folder:
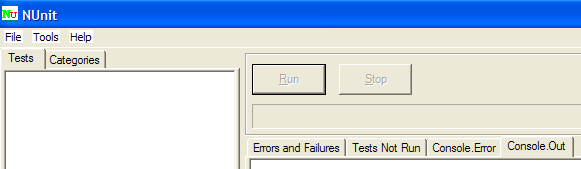
Now let’s launch the Nunit graphical testing utility. Remember that it is located in <Nunit>\bin and is named [nunit-gui.exe]. <Nunit> refers to the installation folder of [Nunit]. We get the following interface:
Let's use the option menu item from [File/Open] to load DLL and [nunit-demos-1.dll] from our project:

[Nunit] can automatically detect the test classes found in the loaded DLL. Here, it finds the [NunitTestPersonne] class. It then displays all methods of the class that have the <Test()> attribute. The [Run] button allows you to run tests on the selected object. If this is the [NunitTestPersonne] class, all displayed methods are tested. You can request a test for a specific method by selecting it and requesting its execution via [Run]. Let’s request the execution of the class:
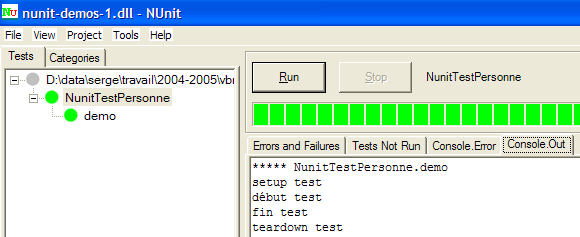
A successful test on a method is indicated by a green dot next to the method in the left window. A failed test is indicated by a red dot.
The [Console.Out] window on the right shows the screen displays produced by the tested methods. Here, we wanted to track the progress of a test:
- Line 1 shows that the <Setup()> attribute method is executed before the test
- Lines 2–3 are generated by the tested method [demo] (see the code above)
- Line 4 shows that the attribute method <TearDown()> is executed after the test
3.5. Where can I find the SGBD Firebird ?
The main Firebird website is [http://firebird.sourceforge.net/]. The downloads page offers the following links (April 2005):
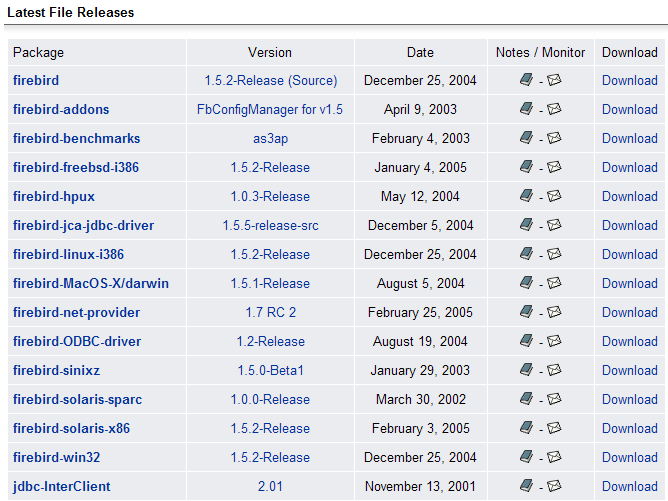
You will download the following items:
SGBD for Windows | |
a class library for .NET applications that allows access to Firebird without using a driver. | |
the Firebird ODBC driver |
Install these components. The SGBD is installed in a folder with contents similar to the following:

The binaries are in the [bin] folder:
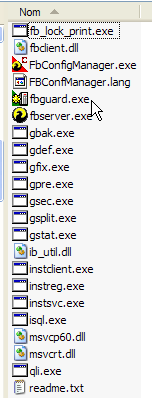
allows you to start/stop the SGBD | |
a command-line client for managing databases |
Note that by default, the administrator of SGBD is named [SYSDBA] and the password is [masterkey]. Menus have been installed in [Démarrer]:
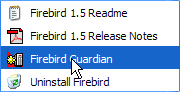
The option [Firebird Guardian] allows you to start/stop the SGBD. After startup, the SGBD icon remains in the Windows taskbar:
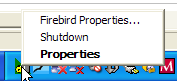 |
To create and manage Firebird databases using the [isql.exe] command-line client, you must read the documentation included with the product in the [doc] folder. A faster way to work with Firebird is to use a graphical client. One such client is IB-Expert, described in the following section.
3.6. Where can I find IB- Expert?
The main Firebird website is [http://www.ibexpert.com/]. The downloads page offers the following links:
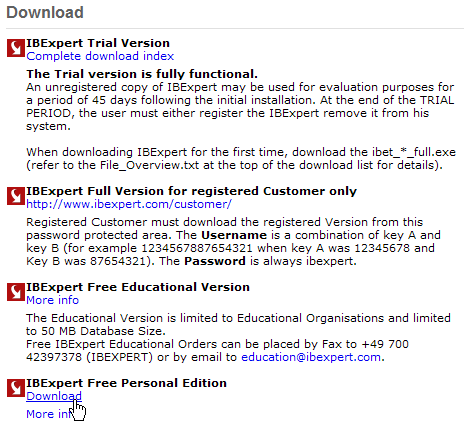
Select the free version version. Once downloaded and installed, you will have a folder similar to the following:
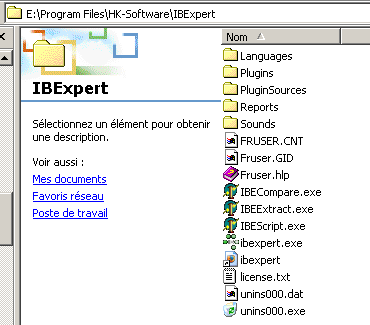
The executable is [ibexpert.exe]. A shortcut is normally available in the [Démarrer] menu:
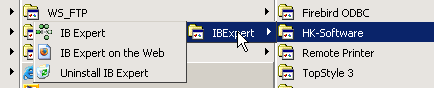
Once launched, IBExpert displays the following window:
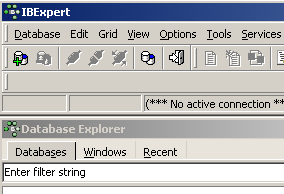
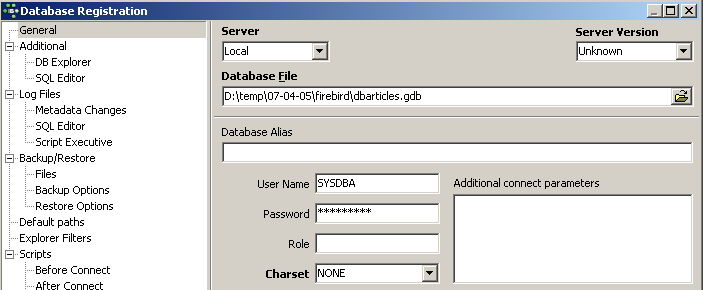
Let’s use option [Database/Create Database] to create a database:
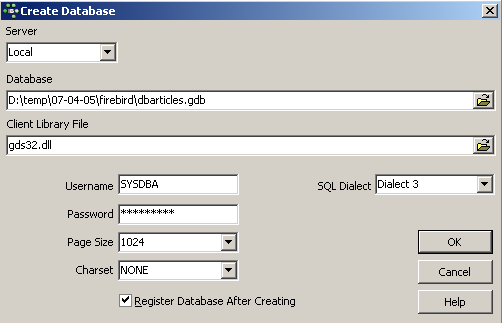
can be [local] or [remote]. Here, our server is on the same machine as [IBExpert]. We therefore choose [local] | |
Use the [dossier]-type button in the dropdown to select the database file. Firebird stores the entire database in a single file. This is one of its advantages. You can transfer the database from one computer to another by simply copying the file. The suffix [.gdb] is added automatically. | |
SYSDBA is the default administrator for current Firebird distributions | |
masterkey is the password for the administrator SYSDBA in current Firebird distributions | |
the SQL dialect to use | |
if this box is checked, IBExpert will display a link to the database after it has been created |
If, when clicking the [OK] create button, you receive the following warning:
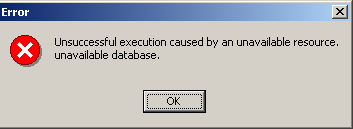
it means you haven't started Firebird. Start it. A new window will appear:
[IBExpert] can handle various SGBD databases derived from Interbase. Select the Firebird version database you have installed |
![]()
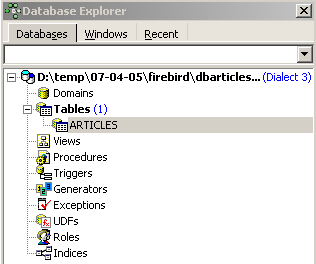
Once this new window is validated by [Register], you will see the following result:
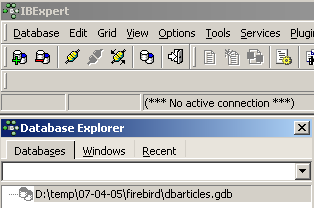
To access the created database, simply double-click on its link. IBExpert then displays a tree structure providing access to the database properties:
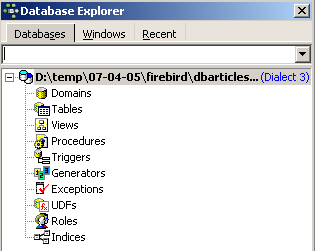
Let’s create a table. Right-click on [Tables] and select option [New Table]. This opens the table properties definition window:
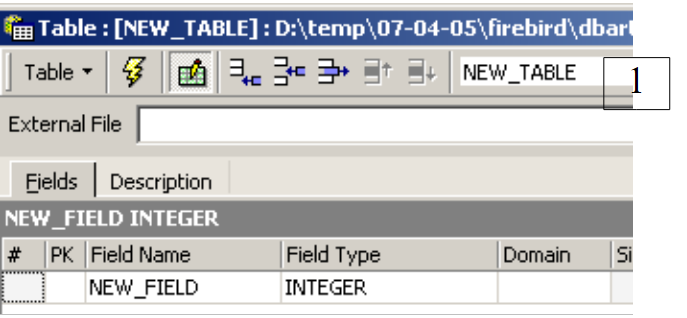 |
Let’s start by naming the table [ARTICLES] using the [1] input field:
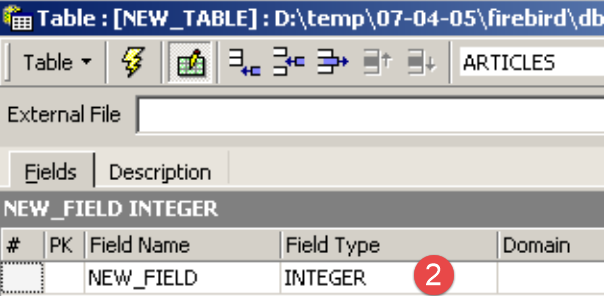 |
Let's use the input field [2] to define a primary key [ID]:
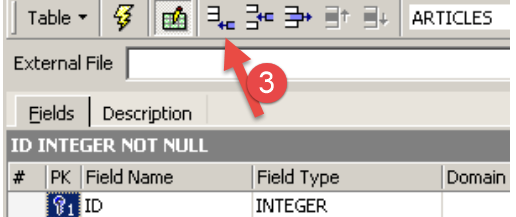 |
A field is made a primary key by double-clicking the [PK] (Primary Key) field. Let’s add fields using the [3] button:
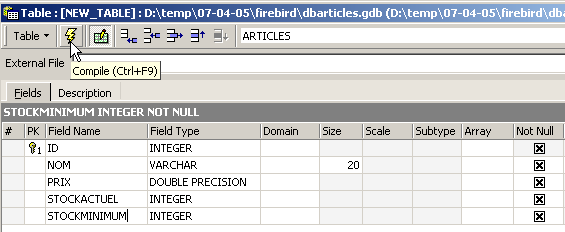
Until we have "compiled" our definition, the table is not created. Use the [Compile] button above to finalize the table definition. IBExpert prepares the SQL queries to generate the table and asks for confirmation:
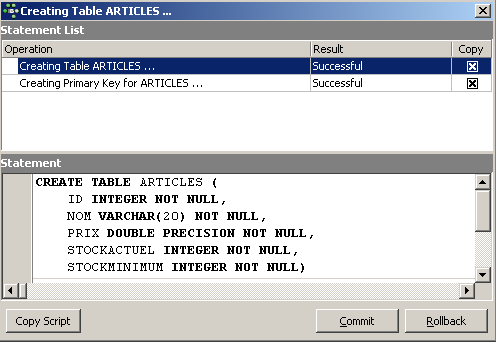
Interestingly, IBExpert displays the SQL queries it has executed. This allows you to learn both the SQL language and the potentially proprietary SQL dialect used. The [Commit] button validates the current transaction, while [Rollback] cancels it. Here, we accept it using [Commit]. Once this is done, IBExpert adds the created table to our database tree:
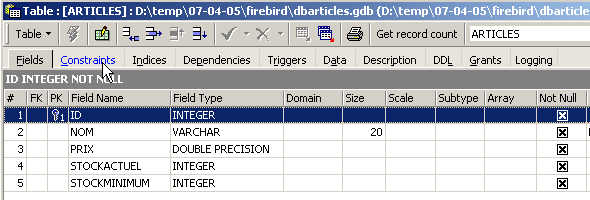
By double-clicking on the table, we can access its properties:
The [Constraints] panel allows us to add new integrity constraints to the table. Let’s open it:

We see the primary key constraint we created. We can add other constraints:
- foreign keys [Foreign Keys]
- field integrity constraints [Checks]
- field uniqueness constraints [Uniques]
Let’s specify that:
- the fields [ID, PRIX, STOCKACTUEL, STOKMINIMUM] must be >0
- the field [NOM] must be non-empty and unique
Open the [Checks] panel and right-click in its constraint definition area to add a new constraint:
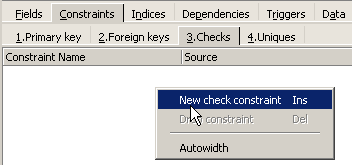
Let’s define the desired constraints:
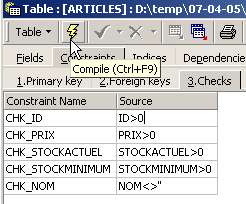
Note above that the constraint [NOM<>''] uses two apostrophes and not quotation marks. Compile these constraints using the [Compile] button above:
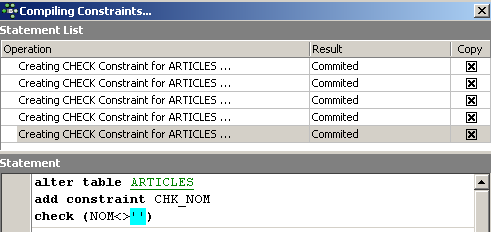
Once again, IBExpert demonstrates its educational value by listing the SQL queries it has executed. Let’s now move to the [Constraints/Uniques] panel to specify that the name must be unique:

Let’s define the constraint:
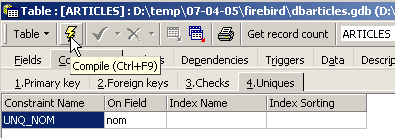
Let’s compile it. Once that’s done, let’s open the [DDL] panel for the [ARTICLES] table:

This panel provides the table generation code SQL with all its constraints. We can save this code in a script to run it later:
SET SQL DIALECT 3;
SET NAMES NONE;
CREATE TABLE ARTICLES (
    ID            INTEGER NOT NULL,
    NOM           VARCHAR(20) NOT NULL,
    PRIX          DOUBLE PRECISION NOT NULL,
    STOCKACTUEL   INTEGER NOT NULL,
    STOCKMINIMUM  INTEGER NOT NULL
);
ALTER TABLE ARTICLES ADD CONSTRAINT CHK_ID check (ID>0);
ALTER TABLE ARTICLES ADD CONSTRAINT CHK_PRIX check (PRIX>0);
ALTER TABLE ARTICLES ADD CONSTRAINT CHK_STOCKACTUEL check (STOCKACTUEL>0);
ALTER TABLE ARTICLES ADD CONSTRAINT CHK_STOCKMINIMUM check (STOCKMINIMUM>0);
ALTER TABLE ARTICLES ADD CONSTRAINT CHK_NOM check (NOM<>'');
ALTER TABLE ARTICLES ADD CONSTRAINT UNQ_NOM UNIQUE (NOM);
ALTER TABLE ARTICLES ADD CONSTRAINT PK_ARTICLES PRIMARY KEY (ID);
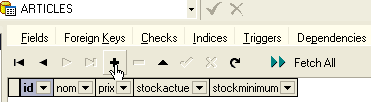
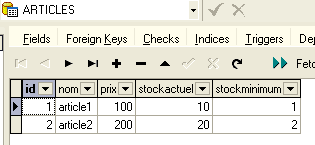
It is now time to enter data into the [ARTICLES] table. To do this, use its [Data] panel:

Data is entered by double-clicking on the input fields for each row in the table. A new row is added using the [+] button, and a row is deleted using the [-] button. These operations are performed within a transaction that is committed using the [Commit Transaction] button. Without this commit, the data will be lost.
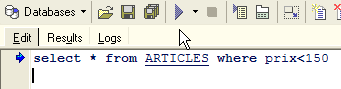
IBExpert allows you to issue SQL queries via option, [Tools/SQL Editor], or [F12]. You then have access to an advanced SQL query editor that allows you to run queries. Queries are saved, so you can revisit a query you’ve already run. Here’s an example:
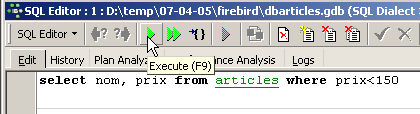
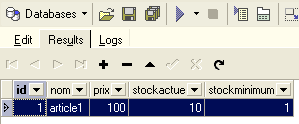
We execute the query SQL using the button [Execute] above. We get the following result:
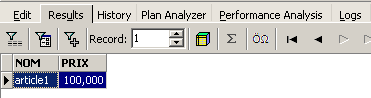
We will stop our demonstrations here. The IBExpert-Firebird combination proves to be excellent for learning databases.
3.7. Installing and using a driver ODBC for [Firebird]
3.8. Installing the driver
The link [firebird-odbc-provider] on the [Firebird] download page (section 3.5) provides access to a ODBC driver. Once installed, it appears in the list of installed ODBC drivers.
3.9. Create a ODBC source
- Launch the [Démarrer -> Paramètres -> Outil de configuration -> Outils d'administration -> Sources de données ODBC] tool:

- The following window appears:
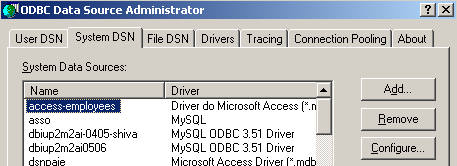
- Let’s add a new system data source ([System DSN] panel) that we will associate with the Firebird database we created in the previous section:
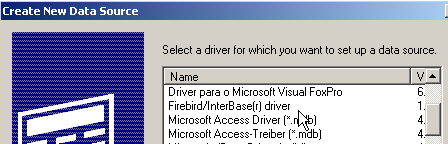
- First, we need to specify the ODBC driver to use. Above, we select the driver for Firebird and then enter [Terminer]. The Firebird ODBC driver wizard then takes over:
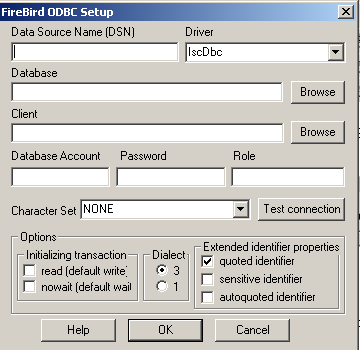
- We fill in the various fields:
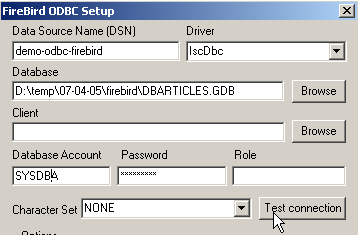
The name DSN of the source ODBC—can be anything | |
the name of the Firebird database to use - use [Browse] to specify the corresponding .gbd file | |
username to use to connect to the database | |
the password associated with this username |
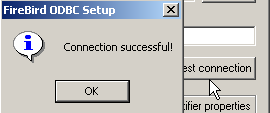
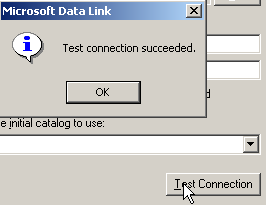
The [Test connection] button allows you to verify the validity of the information you have entered. Before using it, run SGBD and [Firebird]:
- Validate the ODBC wizard by running [OK] as many times as necessary
3.10. Test the ODBC source
There are various ways to verify that a source is working properly. Here, we will use Excel:
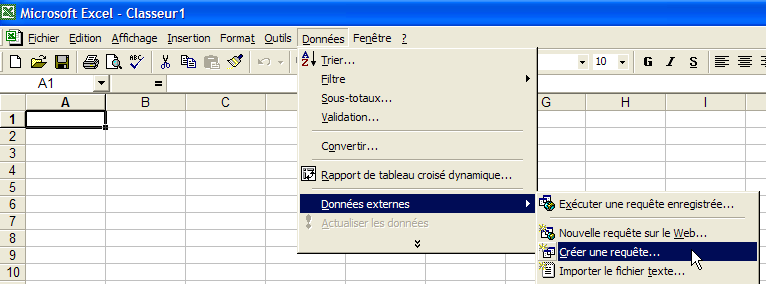
- Let’s use the option [Données -> Données externes -> Créer une requête] above. We see the first window of a data source definition wizard. The [Bases de données] pane lists the ODBC sources currently defined on the machine:
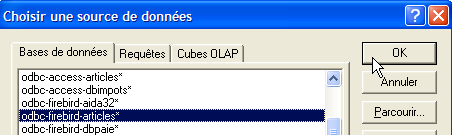
- Let’s select the ODBC [odbc-firebird-articles] source we just created and proceed to the next step with [OK]:
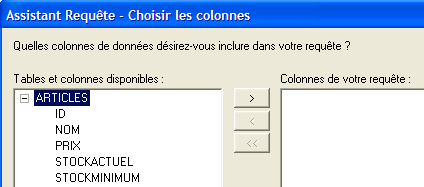
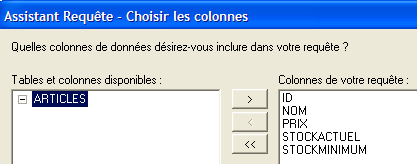
- This window lists the tables and columns available in the ODBC source. We select the entire table:
- Let’s move on to the next step with [Suivant]:
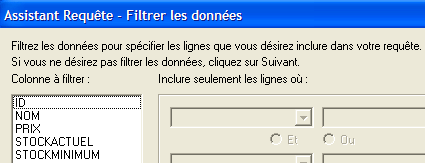
- This step allows us to filter the data. Here, we do not filter anything and move on to the next step:

- This step allows us to sort the data. We do not do this and move on to the next step:

- The final step asks what we want to do with the data. Here, we export it to Excel:
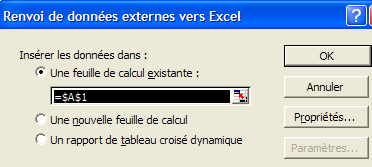
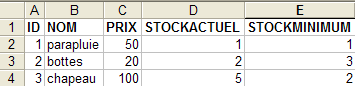
- Here, Excel asks where we want to place the retrieved data. We place it in the active sheet starting from cell A1. The data is then retrieved in the Excel sheet:
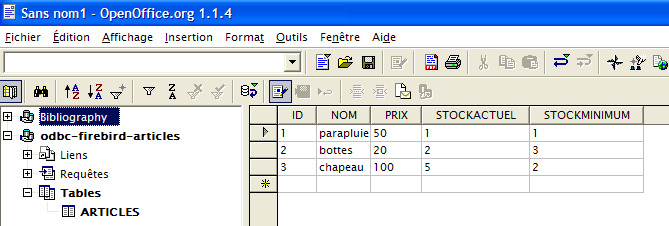
There are other ways to test the validity of a ODBC source. For example, you can use the free OpenOffice suite available at URL [http://www.openoffice.org]. Here is an example with a OpenOffice text file:
 | 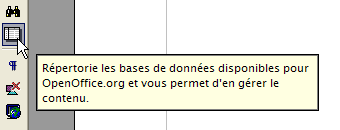 |
- An icon on the left side of the OpenOffice window provides access to data sources. The interface then changes to display a data source management area:
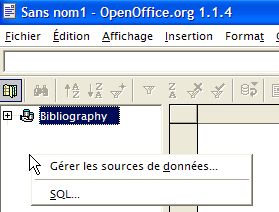
- A data source is predefined: the [Bibliography] source. Right-clicking on the data sources area allows us to create a new one using the option [Gérer les sources de données]:
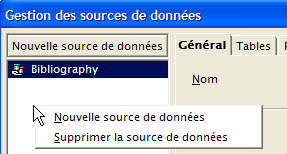
- A wizard ([Gestion des sources de données]) allows you to create data sources. Right-clicking on the data sources area allows you to create a new one using option and [Nouvelle source de données]:
Any name. Here we have used the name of the source ODBC | |
OpenOffice can handle different types of BD via JDBC, ODBC, or directly (MySQL, Dbase, ...). For our example, you must select ODBC | |
The button to the right of the input field gives us access to the list of ODBC sources on the machine. We select the [odbc-firebird-articles] source |
- We move to the [ODBC] panel to define the user under whose identity the connection will be made:
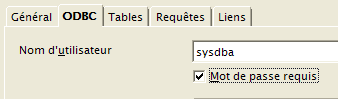
the owner of the ODBC source |
- We move to the [Tables] panel. The password is requested. Here it is [masterkey]:
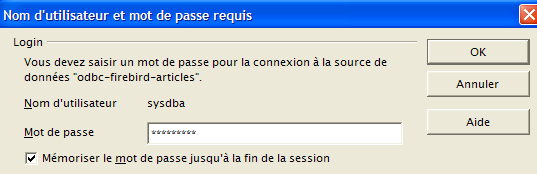
- proceed to [OK]. The list of tables from the source ODBC is then displayed:
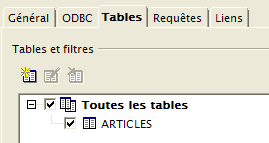
- You can define which tables will be displayed in the document [OpenOffice]. Here, we select the table [ARTICLES] and enter [OK]. The data source definition is complete. It then appears in the list of data sources for the active document:
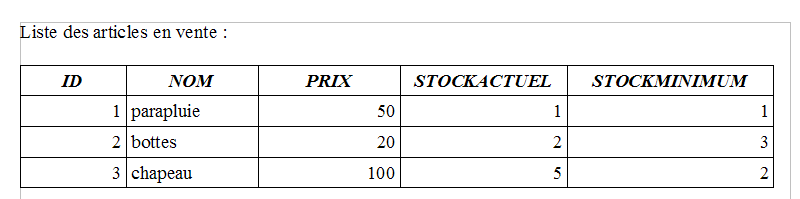
- You can use the mouse to drag the table [ARTICLES] above into the text [OpenOffice]:
3.11. Connection string for a ODBC Firebird source
- Launch Visual Studio and open the [Affichage/Explorateur de serveurs] Server Explorer:
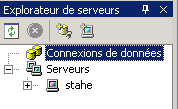 |
- Right-click on [Connexion de données] and select option [Ajouter une connexion]:
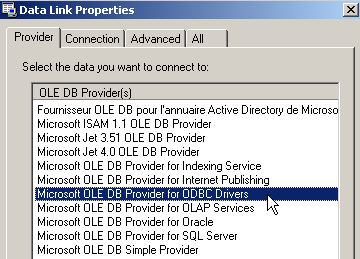
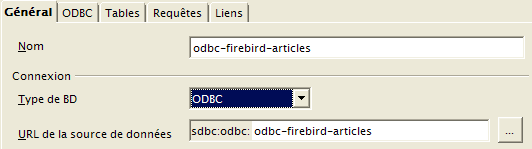
- In the [Provider] panel, specify that you want to use a ODBC data source (see above), then go to the [Connection] panel:

Select the ODBC source from the dropdown menu. The one you just created should appear. If necessary, use [Refresh] to refresh the list of ODBC sources. | |
Username to use to connect to the database | |
The password associated with this username |
Here again, a [Test Connection] button allows you to verify the validity of the information:
- Validate the wizard using [OK]. The data source then appears in the [Explorateur de serveurs] window in Visual Studio:
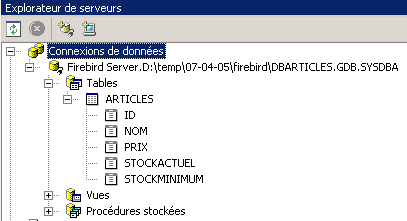
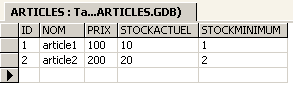
- By double-clicking on the table [ARTICLES], you can access the table's data:
- If we right-click on the link [Firebird Server D:\temp\... ] and select option [Propriétés], we can access the connection properties:
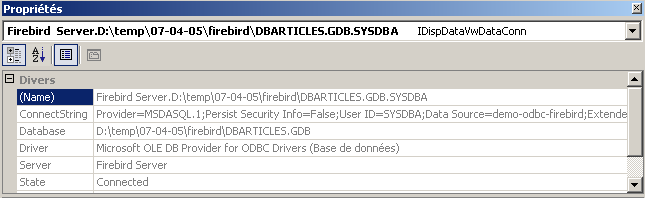
- The connection string [ConnectString] is an important property to know because the .NET code needs it to open a connection to the database. Here, this connection string is:
Provider=MSDASQL.1;Persist Security Info=False;User ID=SYSDBA;Data Source=demo-odbc-firebird;Extended Properties="DSN=demo-odbc-firebird;Driver=Firebird/InterBase(r) driver;Dbname=D:\temp\07-04-05\firebird\DBARTICLES.GDB;CHARSET=NONE;UID=SYSDBA"
Many elements of this connection string have default values. The following connection string will suffice:
This concludes our presentation of the ODBC driver from [Firebird].
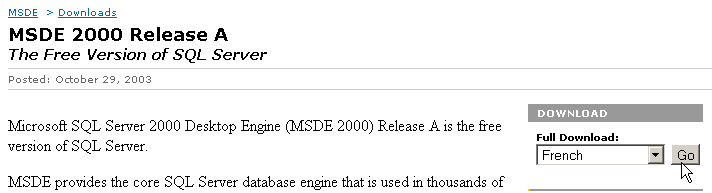
3.12. Where can I find the SGBD MSDE?
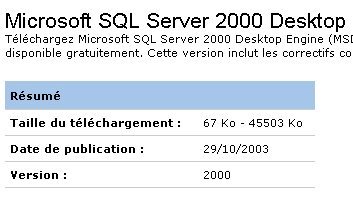
MSDE is the free version of the version SGBD SQL Server from Microsoft. It can be found at URL [http://www.microsoft.com/sql/msde/downloads/download.asp]:
 |
 | 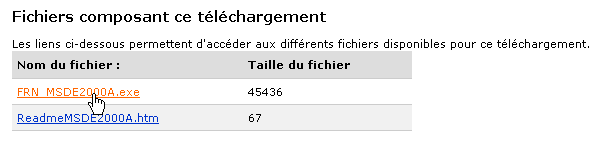 |
Download the installation file, then install SGBD by double-clicking the downloaded executable. A window will ask for the installation folder. The title is misleading. This is a temporary folder that can be deleted afterward:
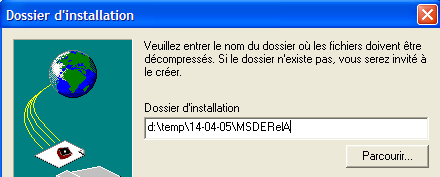 | 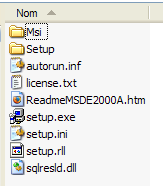 |
Carefully read the [ReadmeMSDE2000A.htm] file. The installer is [setup.exe] above. It runs from the command line so that parameters can be passed to it. The main ones are as follows:
Description | |
| Specifies a strong password to assign to the administrator login sa. |
| Defines the instance name. If INSTANCENAME is not specified, the installer installs a default instance. |
Other parameters often used to customize an installation are:
Description | |
| Specifies whether the instance will accept network connections from applications running on other computers. By default, or if you specify DISABLENTWORKPROTOCOL=1, the installer configures the instance to reject network connections. Specify DISABLENETWORKPROTOCOLS=0 to enable network connections. |
Specifies that the instance must be installed in mixed mode, meaning that the instance supports both Windows authentication and SQL authentication for connections | |
| Specifies the folder where the installer installs the system databases, error logs, and installation scripts. The value specified for chemin_dossier_données must end with a backslash (\). For a default instance, the installer appends MSSQL\ to the specified value. For a named instance, the installer appends MSSQL$NomInstance\, where NomInstance is the value specified via the INSTANCENAME parameter. The installer creates three folders at the specified location: a Data folder, a Log folder, and a Script folder. |
| Specifies the folder where the installer installs the MSDE 2000 executable files. The value specified for chemin_dossier_exécutables must end with a backslash (\). For a default instance, the installer appends MSSQL\Binn to the specified value. For a named instance, the installer appends MSSQL$NomInstance\Binn, where NomInstance is the value specified via the INSTANCENAME parameter. |
After reading the installation recommendations above, navigate to the folder where the installation files were extracted and run the following DOS command (using SGBD without a network):
- INSTANCENAME="MSDE140405" - this will be the name of our MSDE instance. You can install multiple instances.
- SECURITYMODE=SQL - the DBMS will run in mixed authentication mode. This allows you to connect to MSDE in two ways:
- with a Windows administrator account
- with a MSDE account—a username and password are then required. This is the mode to use in a program that connects to a SGBD database.
- SAPWD="azerty"—this will be the password for the user associated with SGBD. The user [sa] has administrative rights on SGBD.
To use SGBD on a network, you would run the following command:
The installation program is minimalistic and completes without any output... However, we can see that SGBD was installed via option and [Menu Démarrer -> Panneau de configuration -> Ajouter et supprimer des programmes]:
![]()
The installation is normally performed in C:\Program Files\Microsoft SQL Server\MSSQL$nomInstance:
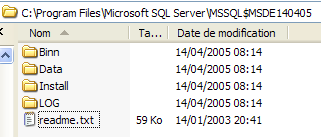 | 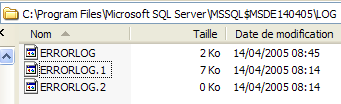 |
In the [LOG] folder within the installation directory, you will find the log file for the SGBD installation phase. It contains an important piece of information: the name of the MSDE instance:
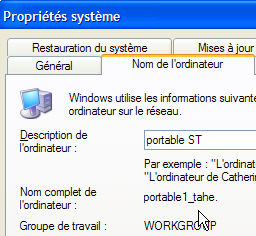
It is important to know this name because all clients instances of SGBD will need it. If these logs are missing, you can find the name of a MSDE server, which is [machine_windows\nom_instance_MSDE]. The machine name is available in several places. For example:
- right-click on [poste de travail] on the desktop, select option, then [propriétés], and finally the [Nom de l'ordinateur] panel:
We still don’t know how to start the MSDE server. A shortcut has normally been placed in [Démarrer/Démarrage].

If you look at the properties of this shortcut, you will find that the target is as follows:
In the [ C:\Program Files\Microsoft SQL Server] folder, there are subfolders:
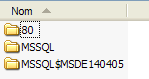
- MSSQL$MSDE140405 is the folder for the MSDE instance we just installed.
- MSSQL is the folder for a previous instance, MSDE. Since it has no name, we call it the default instance.
- The [80] folder is a shared folder for the various installed instances of MSDE. The target [sqlmangr.exe] of the shortcut that launches an instance of MSDE is in the folder [ 80\Tools\Binn].
Let’s launch MSDE via the [Démarrer -> Programmes -> Démarrage] shortcut. Almost nothing happens except that an icon appears in the system tray: | Double-click this icon: 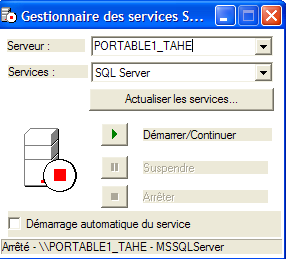 |
The MSDE server listed here is the default [PORTABLE1_TAHE] present on the machine. Remember that the MSDE server we installed is named [PORTABLE1_TAHE\MSDE140405]. We change the server name in the appropriate field: 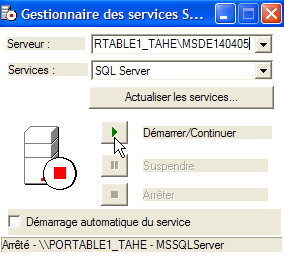 | If everything goes well, the [MSDE140405] instance should be launched: 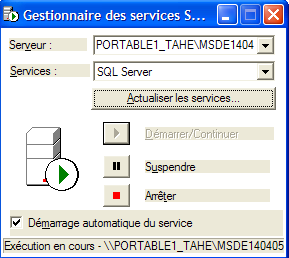 |
We can perform an initial check. In the same folder as [sqlmangr.exe], there is a console client named [osql.exe] that allows you to connect to a server named MSDE and issue commands to SQL. During installation, we assigned the password [azerty] to the administrator [sa] of our server MSDE. Using the console client, we will connect to the newly installed server. If we run the command [osql -?], the list of possible parameters is displayed:
C:\Program Files\Microsoft SQL Server\80\Tools\Binn>osql -?
utilisation : osql
  [-U ID de connexion]
  [-P mot de passe]
  [-S serveur]
  [-H nom de l'hôte]
  [-E connexion approuvée]
  [-d utiliser le nom de la base de données]
  [-l limite du temps de connexion]
  [-t limite du temps de requête]
  [-h en-têtes]
  [-s séparateur de colonnes]
  [-w largeur de colonne]
  [-a taille du paquet]
  [-e entrée d'écho]
  [-I Activer les identificateurs marqués]
  [-L liste des serveurs]
  [-c fin de cmd]           [-D nom ODBC DSN]
  [-q "requête cmdline"]
  [-Q "requête cmdline" et quitter]
  [-n supprimer la numérotation]
  [-m niveau d'erreur]
  [-r msgs vers stderr]
  [-V severitylevel]
  [-i fichier d'entrée]
  [-o fichier de sortie]
  [-p imprimer les statistiques]  [-b abandon du lot d'instruction après erreur]

  [-X[1] désactive les commandes [et quitte avec un avertissement]]
  [-O utiliser le comportement Old ISQL désactive les éléments suivants]
      <EOF> traitement par lot d'instructions
      Mise à l'échelle automatique de la largeur de la console
      Messages larges
      niveau d'erreur par défaut de  -1 au lieu de 1
  [-? description de la syntaxe]
Let's start the [MSDE140405] server as described above, then in a command prompt window, use [osql] to connect to the [portable1_tahe\msde140405] server using the [sa, azerty] identity:
C:\Program Files\Microsoft SQL Server\80\Tools\Binn>OSQL.EXE -U sa -S portable1_tahe\msde140405 -P azerty
1>
The [1>] prompt indicates that [osql] is waiting for a command. We are successfully connected. To use [osql] correctly, you must consult the MSDE documentation. It is available in various formats (pdf, htmlhelp, ...). This documentation is very extensive. It is generally preferable to use a graphical client to work with a MSDE database. This is what is suggested a little further on. To exit [osql], use the command [exit]:
We will now see how to create databases on the newly installed MSDE server. Before that, we will briefly introduce a tool, [MSDE Manager], that allows you to change the authentication mode of a MSDE server. In fact, if you install such a server using the default installation options, the server’s authentication mode is of the [authentification windows] type. This type of authentication only allows users identified on the Windows machine (possibly via a domain). For a VB.NET program that wants to connect to a database to access its content, this mode is impractical. It is even worse for Java applications that access the SGBD via a JDBC driver. In this case, mixed authentication is preferred, which, in addition to the previous authentication method, accepts login and password pairs declared in the SGBD. The [MSDE Manager] tool allows you to perform this operation.
3.13. Where can I find MSDE Manager?
[MSDE Manager] is an administration tool for SGBD and MSDE. It can be found at URL and [http://www.valesoftware.com/].
We download the free version by following the link above:

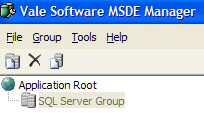
The trial version of version has a short lifespan. This is fine since we will only use it for a single, specific task. We download and install the product. A shortcut is placed on the desktop. We use it to launch MSDE Manager. After the initial windows, we arrive at this one:
- Start the MSDE140405 server
- You must be logged in to the Windows machine as an administrator
- Right-click on the [SQL Server Group] link and select option [New SQL Server Registration]:

The following properties page appears:
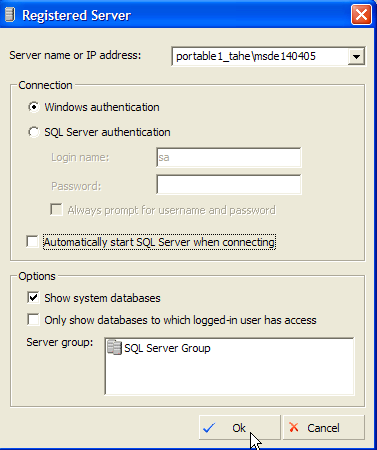 |
portable1_tahe\msde140405 - name of the MSDE instance you want to connect to | |
Windows Authentication - this mode is always available and allows a Windows machine administrator to connect to the server MSDE | |
Select the only server group displayed: [SQL Server Group] |
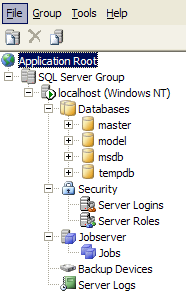
Once [OK] is clicked, the tree view of the MSDE140405 server properties is displayed:
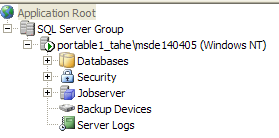
We could start creating databases. We won’t do that because we’ll be using another product, a clone of the IBExpert product we’ve already covered. We will simply change the authentication mode of MSDE. Right-click on the MSDE140405 server above and select option [Design]:
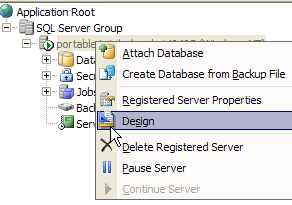
We get the following information window:
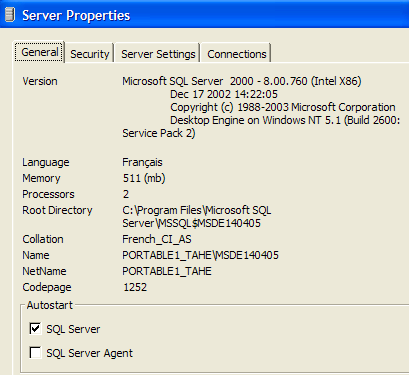
The [General] panel provides information about the MSDE server to which we are connected. The [Security] page is the one we are interested in:
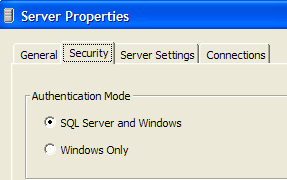
Here, we must ensure that the authentication mode for MSDE is indeed [SQL Server and Windows]. This will allow us to connect to MSDE in two ways:
- with a Windows administrator account—this is what was done here
- with a MSDE account—a username and password are then required. This is the mode to use in a program that connects to a SGBD database.
We confirm this choice and exit MSDE Manager. We won’t need it anymore. To create MSDE databases, we will use another tool: EMS MS SQL Manager.
3.14. Where can I find EMS , MS, and SQL Manager?
EMS MS SQL Manager is a graphical tool for working with the SGBD Microsoft SQL Server and therefore MSDE. It is very similar to the IB-Expert tool described earlier. It is available as of URL [http://sqlmanager.net/] (April 2005):
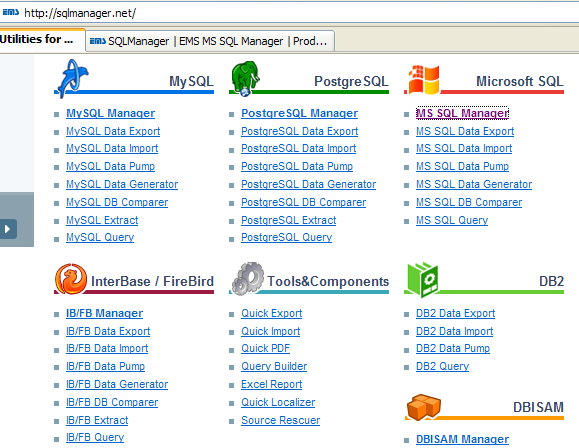
The site offers administration tools for many SGBD. Follow the link [MS SQL Manager]:
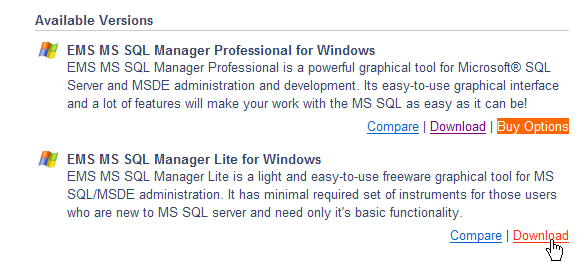
Above, we select the lightweight version of the product, version. Download and install it. You will have a folder similar to the following:

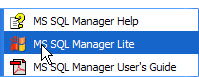
The executable is [MsManager.exe]. A shortcut is normally available in the [Démarrer] menu:
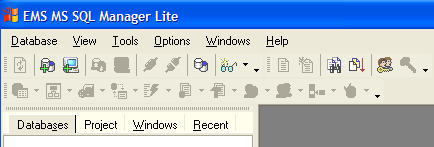
Once launched, MS SQL Manager displays the following window:
Let’s start by registering the MSDE server we want to work with using option [Database/Register Host]:
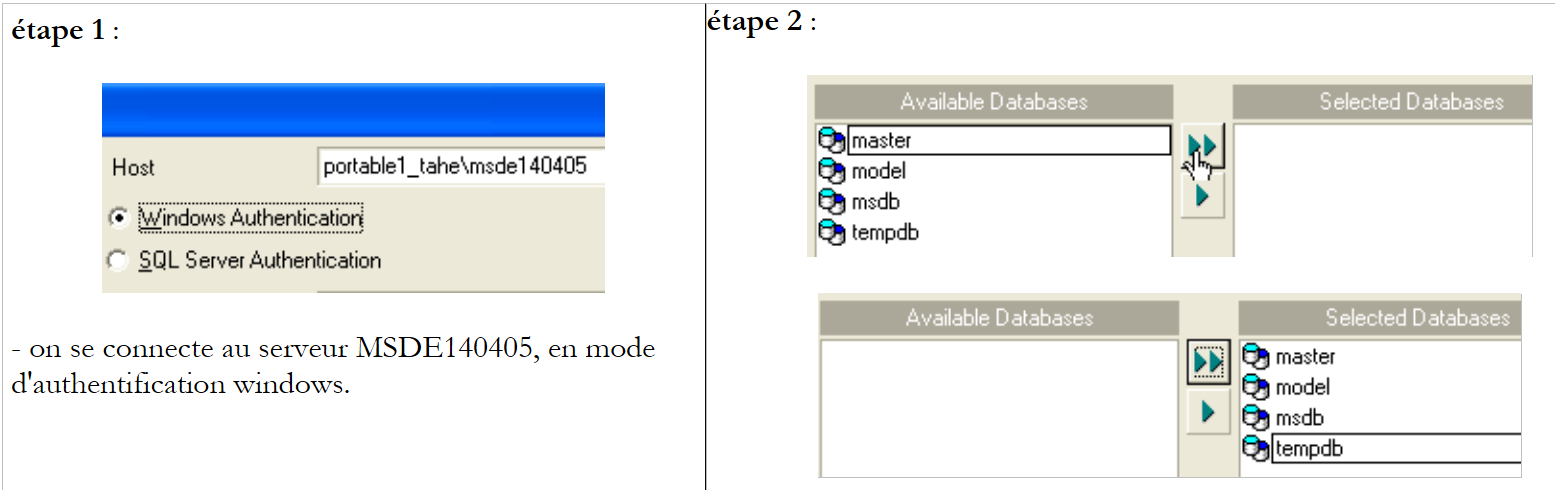 |
Comments:
- Step 1 - As mentioned, MSDE supports two authentication modes: Windows and SQL Server. In [windows] mode, the Windows machine’s accounts are used. In [SQL Server] mode, the SGBD accounts are used. [SQL Server] can operate in [Windows] mode or in [Windows, SQL Server] mixed mode. The [Windows] authentication mode is always available. The mixed authentication mode, however, is not always active. We have seen how to enable it using MSDE Manager. Above, the connection was made using an administrator account.
- Step 2 - Once authentication is successful, the default databases for MSDE are displayed. Above, all of them have been selected.
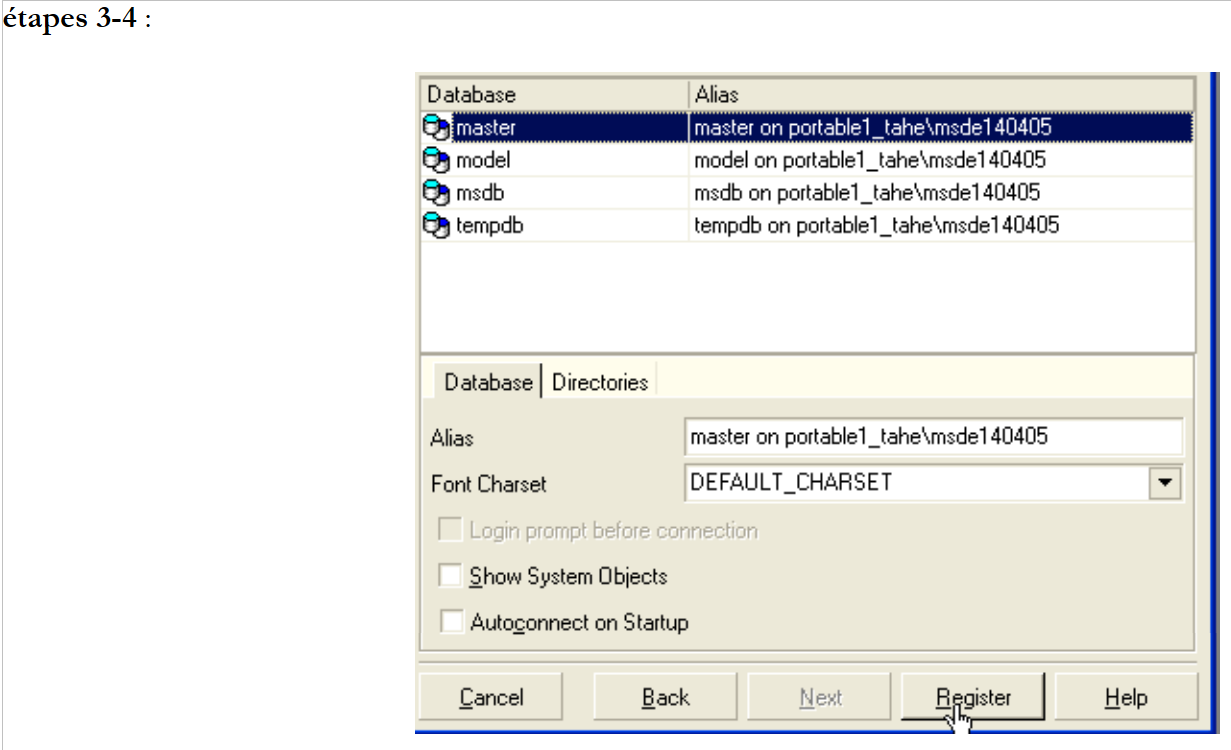 |
Comments:
- Step 3: You can select administration options for the chosen databases. Here, the default options have been retained.
- Step 4: We register the server MSDE using the [Register] button
The MSDE server then appears in the database explorer:

Let’s use option and [Database/Create Database] to create a database:
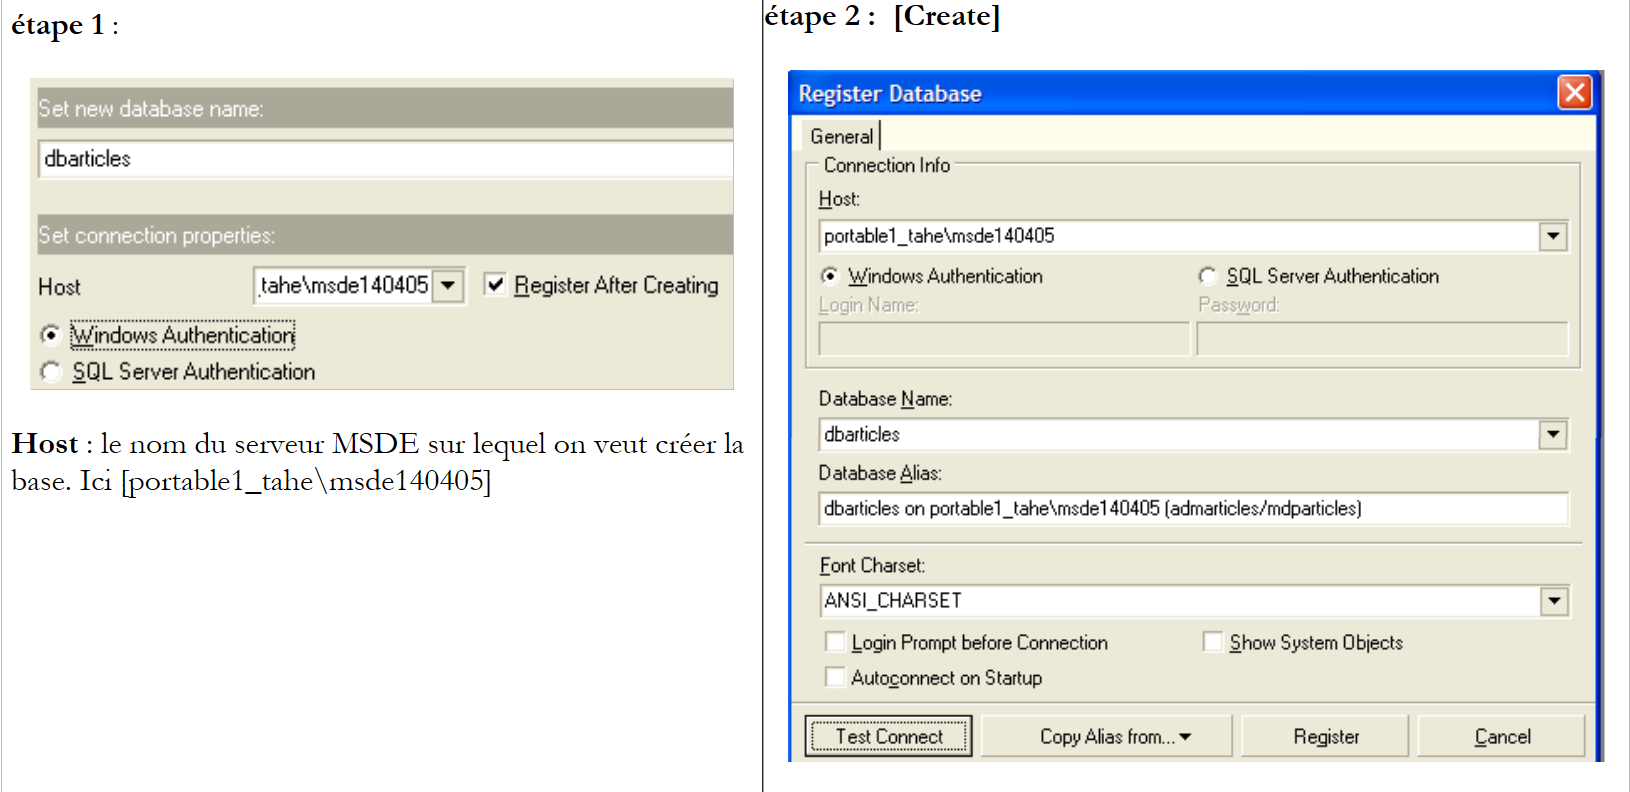 |
Step 2:
When this information page appears, the [dbarticles] database has been created. You can verify this using the [Test Connect] button. In the [Database alias] field, you can enter whatever you like. Here we have entered:
- the database name
- the name of the server MSDE on which it is located
- the user [admarticles] who will own this database and their password [mdparticles]. This user has not yet been created but will be soon.
Step 3:
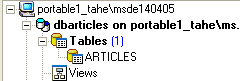
- Using the [Register] button, we save the new database in [MS SQL Server ]. After saving, the [admarticles] database appears in the list of databases. Double-clicking on it displays the tree view of its properties.
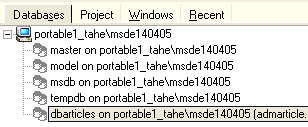 | 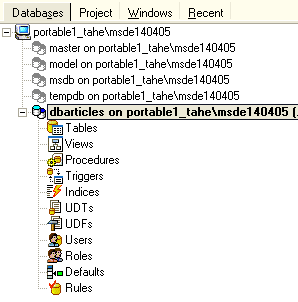 |
Let’s create a new login that will be the administrator of the [admarticles] database.
- Select option [Tools/Login manager]:
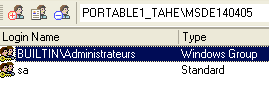
- We can see that two logins are already defined:
- [BUILTIN\Administrateurs]: this login uses Windows authentication. It represents the administrators of the Windows machine on which the server is located MSDE
- sa: this login uses SQL authentication. By default, this is the server administrator MSDE. Note that here, as configured during the installation of SGBD MSDE, its password is [azerty].
- Right-click on the login area and add a new login:
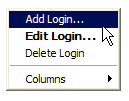 |
- An input form appears where we define the characteristics of the new login:
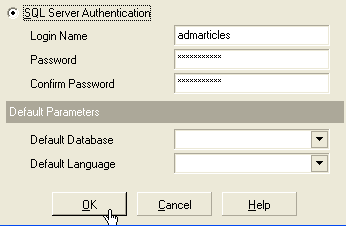
- Login Name: admarticles
- Password: mdparticles
- Once the [OK] button is pressed, MS Manager displays the SQL queries it will execute:

The SQL language shown above is Transact-SQL, the SQL language of MSDE. We request that this code be executed by [OK]
- The new login is added to the list of logins:

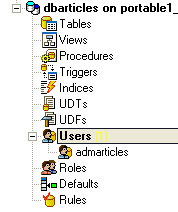
- In the properties window for the [dbarticles] database, right-click on [users] to create a user with permissions on the [dbarticles] database:

- The following window then appears:
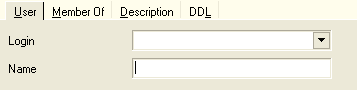
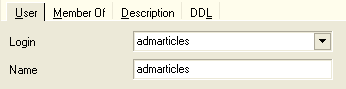
- In the [Login] dropdown, you’ll see the list of existing logins. Select the [admarticles] login.
- In [Name], enter a username. Multiple users can be associated with the same login. Therefore, in MSDE, creating a user first requires creating a login. The [User] panel now looks like this:
- Let’s now move on to the [Member Of] panel, which will allow us to define our user’s permissions:
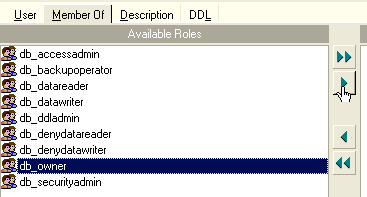
- I am not a regular user of MSDE and I am unsure of the exact meaning of each of the roles listed in the left-hand window. The role [db_owner] is tempting (owner=owner). So we select it for our user [admarticles]:
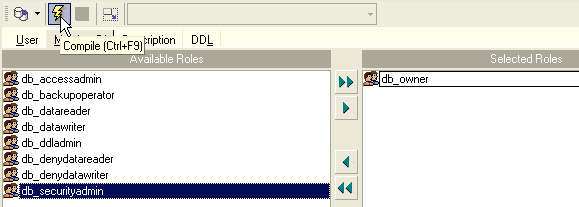
- we confirm our selections using the [Compile] button above. The SQL queries presented during execution are as follows:

- we compile them using [OK]. We now have a database user named [dbarticles]:
- Now let’s create a table. Right-click on [Tables] and select option [New Table]. This opens the table properties window:
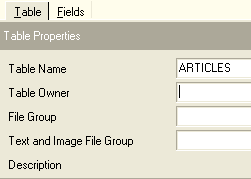
- Let’s start by naming the table [ARTICLES] using the [Table Name] input field. Next, move to the [Fields] panel:

- let’s define the following fields:
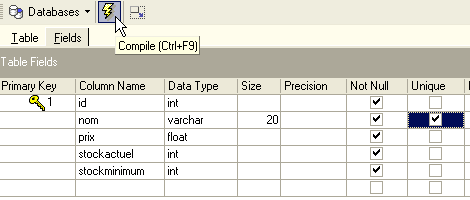
Until we have "compiled" our definition, the table is not created. Use the [Compile] button above to finalize the table definition. [MS SQL Manager] prepares the SQL queries to generate the table and asks for confirmation:
Interestingly, [MS SQL Manager] displays the SQL queries it has executed. This facilitates learning the Transact-SQL language. The [Commit] button validates the current transaction, while [Rollback] cancels it. Here, we accept it using [Commit]. Once this is done, [MS SQL Manager] adds the created table to our database tree:
By double-clicking on the table, we can access its properties:
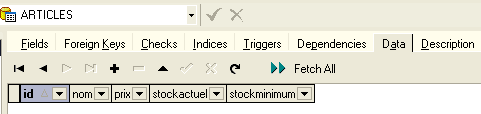
The [Checks] panel allows us to add new integrity constraints to the table. For the [ARTICLES] table, we will create the following constraints:
- the fields [ID, PRIX, STOCKACTUEL, STOKMINIMUM] must be >=0
- the [NOM] field must not be empty
In the [Checks] panel, right-click on the blank area to add a new constraint [New check]:
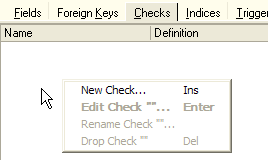
- The constraint editing sheet looks like this:
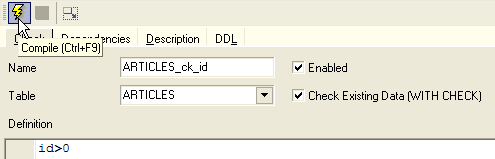
Name: constraint name
Table: table on which the constraint applies
Definition: constraint expression
The constraint is compiled using the [Compile] button above.
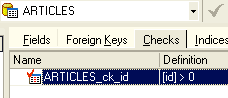
- The [MS SQL Manager] command displays the executed SQL commands:
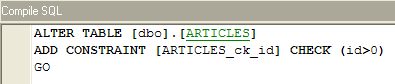
- We validate them using the [Commit] button (not shown). If we return to the [Checks] panel in the [ARTICLES] table, the new constraint appears:
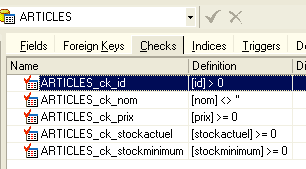
- We define the other constraints in the same way to finally obtain the following list:
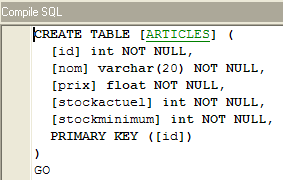
Once this is done, open the [DDL] panel of the [ARTICLES] table:
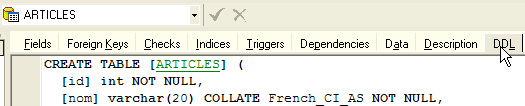
This provides the Transact-SQL code for generating the table with all its constraints. We can save this code in a script to run it later:
CREATE TABLE [ARTICLES] (
  [id] int NOT NULL,
  [nom] varchar(20) COLLATE French_CI_AS NOT NULL,
  [prix] float(53) NOT NULL,
  [stockactuel] int NOT NULL,
  [stockminimum] int NOT NULL,
  CONSTRAINT [ARTICLES_uq] UNIQUE ([nom]),
  PRIMARY KEY ([id]),
  CONSTRAINT [ARTICLES_ck_id] CHECK ([id] > 0),
  CONSTRAINT [ARTICLES_ck_nom] CHECK ([nom] <> ''),
  CONSTRAINT [ARTICLES_ck_prix] CHECK ([prix] >= 0),
  CONSTRAINT [ARTICLES_ck_stockactuel] CHECK ([stockactuel] >= 0),
  CONSTRAINT [ARTICLES_ck_stockminimum] CHECK ([stockminimum] >= 0)
)
ON [PRIMARY]
GO
It is now time to insert some data into the [ARTICLES] table. To do this, let’s use its [Data] panel:
The [+] button allows you to add a row, and the [-] button allows you to delete one. Data is entered by simply typing into the input fields of each row in the table. A row is validated using the [Post Edit] button below:
![]()
Let’s create two items:
[MS SQL Manager] allows you to run queries SQL via the option, [Tools/Show SQL Editor], or [F12] buttons. You then have access to an advanced SQL query editor with which you can run queries. They are saved, so you can revisit a query that has already been run. Here is an example:
We execute the query SQL using the button [Execute] above. We obtain the following result:
We will stop our demonstrations here. The pair [MS SQL Manager - MSDE], like the pair [IBExpert - Firebird], is also excellent for learning about databases.
3.15. Create a ODBC [MSDE] source
The ODBC driver for SQL Server is normally installed by default on Windows machines.
- Launch the [Démarrer -> Paramètres -> Outil de configuration -> Outils d'administration -> Sources de données ODBC] tool:
- The following window appears:
- Add [Add] as a new system data source ([System DSN] panel), which we will associate with the MSDE database we created in the previous section:
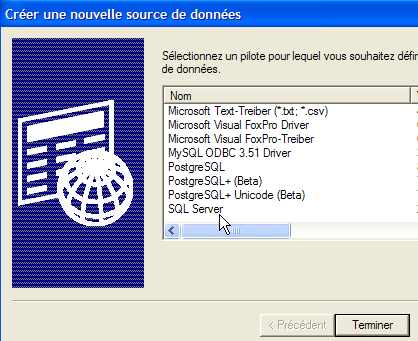
- First, we need to specify the driver to use. Above, we select the driver for [SQL Server], then proceed to [Terminer]. The driver wizard for ODBC from [SQL Server] then takes over:
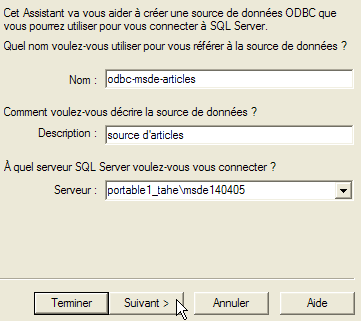
- We fill in the various fields:
The name of the source ODBC—can be anything | |
can be anything | |
Server name MSDE containing the data from source ODBC |
- We use [Suivant] to provide new information:
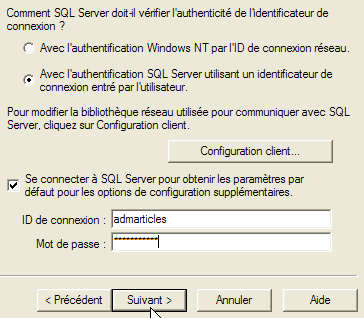
- We fill in the various fields:
We specify that we will connect to the ODBC data source using a username registered on the MSDE server | |
User login | |
User password |
- Note that we are using the user (admarticles, mdparticles) created in a previous section for the first time. Once again, we run [Suivant] to obtain the following new sheet:
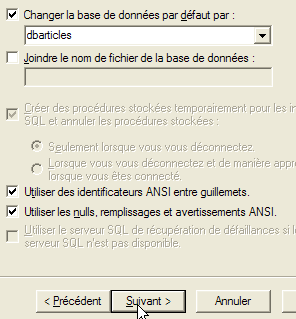
- We fill in the various fields:
We select the database [dbarticles] as the default database for the user [admarticles] |
- We run [Suivant] to obtain the following new sheet:

- We accept the default values and click [Terminer]. A summary of the characteristics of the ODBC source that will be created is provided:
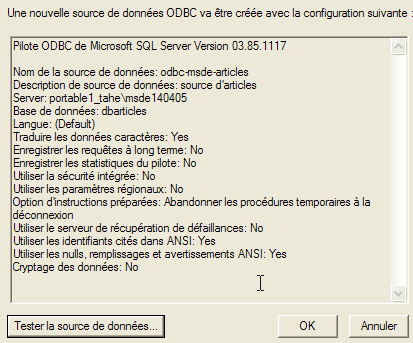
- The [Tester la source de données] button allows us to verify the validity of our information. Verify that MSDE has been launched, then test the connection:
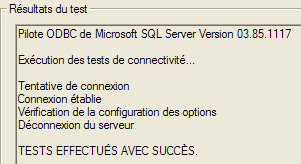
- we are now certain that the [admarticles, mdparticles] pair is recognized.
For further testing, the reader can follow the procedure explained in section 3.10.
3.16. Connection string to a MSDE database
- Launch Visual Studio and open the [Affichage/Explorateur de serveurs] server explorer:
|
- right-click on [Connexion de données] and select option [Ajouter une connexion]:
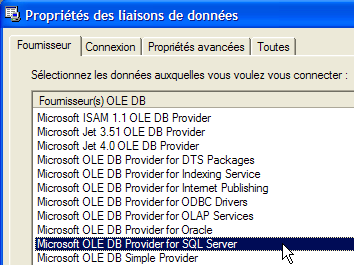
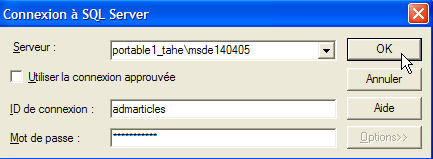
- In the [Provider] panel, specify that you want to use a SQL Server source, then switch to the [Connection] panel. Note that here you do not use a ODBC driver.
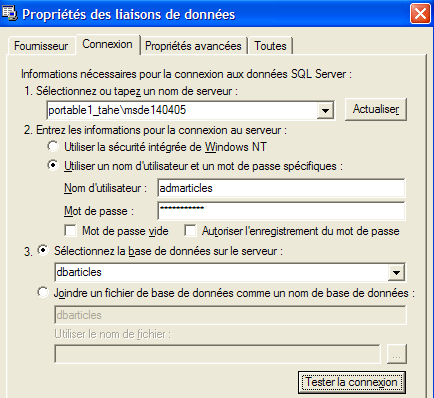
Name of the MSDE server you are connecting to | |
username to use to connect to the database | |
the password associated with this username | |
The database you want to work with |
A button labeled [Tester la connexion] allows you to verify the validity of the information:
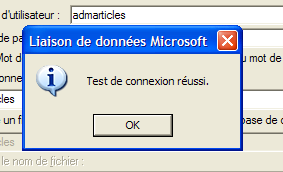
- Validate the wizard using [OK]. Curiously enough, a new window asks for the connection details:
- enter them again and click [OK]. The data source then appears in the [Explorateur de serveurs] window in Visual Studio:
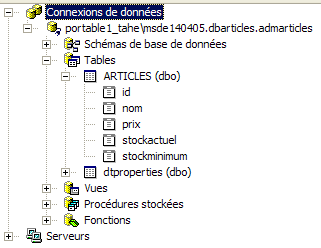
- by double-clicking on the [ARTICLES] table, you can access the table’s data:

- if we right-click the [portable1_tahe\msde140405.dbarticles.admarticles] link in the [Explorateur de serveurs] pane and select option [Propriétés], we can access the connection properties:
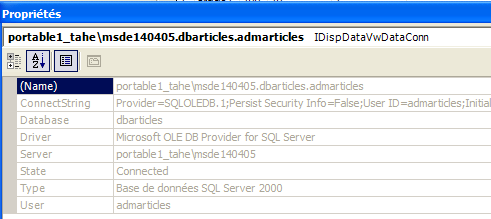
- The connection string [ConnectString] is an important property to know because the .NET code needs it to open a connection to the database. Here, this connection string is:
Provider=SQLOLEDB.1;Persist Security Info=False;User ID=admarticles;Initial Catalog=dbarticles;Data Source=portable1_tahe\msde140405;Use Procedure for Prepare=1;Auto Translate=True;Packet Size=4096;Workstation ID=PORTABLE1_TAHE;Use Encryption for Data=False;Tag with column collation when possible=False
Many elements of this connection string have default values. The following connection string will suffice: