2. Setting Up a Work Environment
The original document (2019) provided a detailed explanation of how to install [Laragon], [Netbeans], and [Visual Studio Code] on Windows 10, with numerous screenshots illustrating the configuration of PATH. In 2026, the installation is much simpler: we will use the following tools.
- [Visual Studio Code] to generate the TypeScript code;
- [Node.js], version 26 or later—this is the version that made the [Temporal] object, presented in the last chapter of this document, available without any special options;
- [TypeScript], version 6;
- [tsx], a tool that runs a .ts file directly without a prior compilation step—this is what we will use for all the scripts in this document;
- [npm] (Node Package Manager), included with Node.js, to install the libraries we’ll need;
2.1. Verifying the Installed Tools
Once Node.js and Visual Studio Code are installed, open a terminal (either within VSCode or outside of it) and verify the installed versions:
Result (the exact version may vary; 26.x or higher is recommended for this course):
Execution result:
2.2. Setting up the VSCode project
The code folder for this course is as follows:
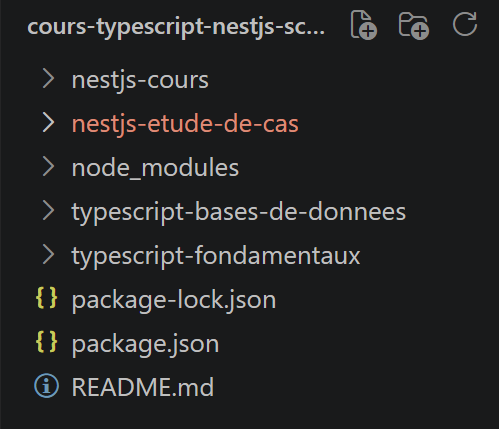
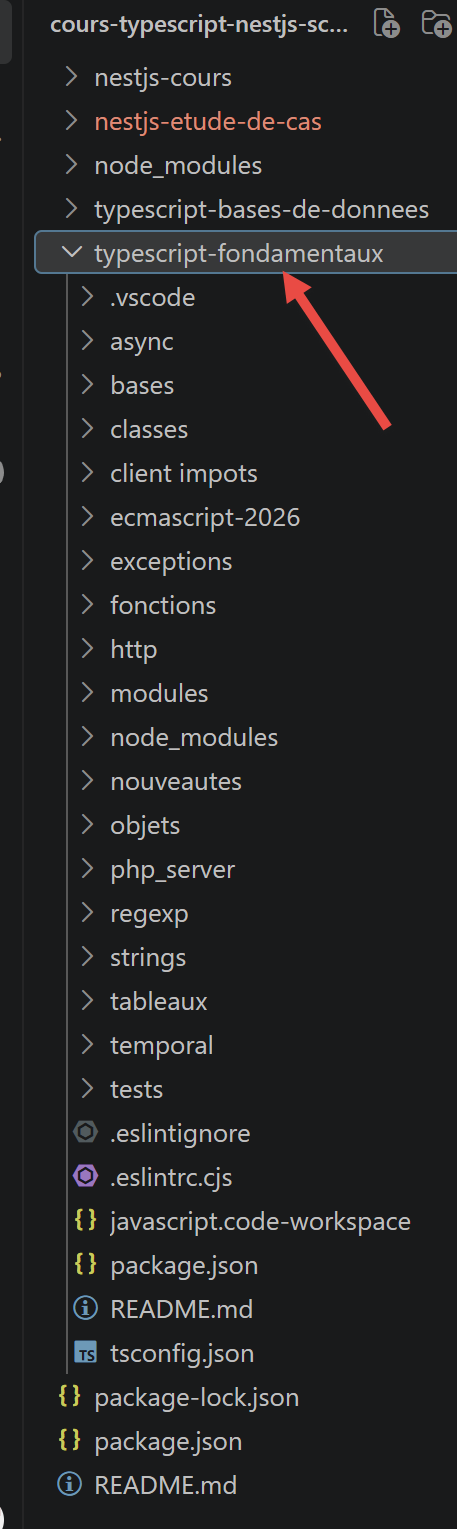
This folder corresponds to the complete script directory structure (cours-typescript-nestjs-scripts/) presented in the introduction to this document, which you have downloaded. Open the typescript-fundamentals/ subfolder in VSCode: this is where the scripts for the first chapters of this course are located. It already contains, at its root, the two files package.json and tsconfig.json—let’s take a look at them.
2.2.1. The file package.json
This file lists the project’s dependencies. It also specifies "type": "module", so that Node.js natively treats our files as ECMAScript modules (with import/export), without needing an intermediary tool as was the case in 2019 with the esm package.
{
  "type": "module",
  "scripts": {
    "check": "tsc --noEmit"
  },
  "devDependencies": {
    "eslint": "^8.57.0",
    "@typescript-eslint/eslint-plugin": "^7.18.0",
    "@typescript-eslint/parser": "^7.18.0",
    "typescript": "^6.0.3",
    "tsx": "^4.19.0",
    "@types/node": "^22.7.0"
  },
  "dependencies": {
    "axios": "^1.7.0",
    "moment": "^2.30.0",
    "qs": "^6.12.0",
    "sprintf-js": "^1.1.3"
  }
}
2.2.2. The tsconfig.json file
This file configures the TypeScript compiler. Strict mode is enabled: this is the recommended configuration, as it allows TypeScript to detect as many errors as possible during compilation.
{
  "compilerOptions": {
    "target": "ES2023",
    "lib": ["ESNext"],
    "module": "NodeNext",
    "moduleResolution": "NodeNext",
    "esModuleInterop": true,
    "strict": true,
    "types": ["node"],
    "noEmit": true
  },
  "include": ["**/*.ts"]
}
If you haven’t downloaded the directory structure yet, or if you need to reinstall its dependencies, here’s a reminder of the single command to run—just once—at the root directory; it will install all the Node.js modules required for all the course scripts:
The following commands are entered in a VSCode terminal with the directory set to [typescript-fondamentaux].
2.3. First script
Let’s create a file named tests/test-01.ts:
Run it from the terminal, in the project root directory:
Execution result:
2.4. Second script: type checking
Let’s create a second file, tests/test-02.ts, with an explicitly typed variable:
Execution result:
Now let's try assigning a string to this variable declared as a number:
Without even running the script, VSCode immediately highlights the line in red, and the type-checking command fails:
Execution result:
This is the key advantage of TypeScript over JavaScript: an entire category of errors (accidental type mixing) is detected before execution, directly in the editor, rather than discovered when the code crashes in production.
2.5. ESLint
[ESLint] is a tool that verifies that the code adheres to a set of style rules and best practices (unused variables, suspicious comparisons, etc.). The configuration file .eslintrc.cjs (the .cjs extension, not .js, is required because package.json declares "type": "module") uses the @typescript-eslint parser, which understands the TypeScript syntax (types, interfaces, private fields #x...):
module.exports = {
  root: true,
  env: { node: true, es2024: true },
  extends: ["eslint:recommended", "plugin:@typescript-eslint/recommended"],
  parser: "@typescript-eslint/parser",
  plugins: ["@typescript-eslint"],
  parserOptions: { ecmaVersion: "latest", sourceType: "module" }
};
We then analyze the entire project using:
2.6. VSCode ESLint
The VSCode extension, named [ESLint] (to be installed from the Extensions tab), displays ESLint warnings directly in the editor in real time—without having to run the command manually each time.
We now have a complete working environment. The next chapter covers the basics of the TypeScript language.