8. Appendices
8.1. Where can I find Spring?
The main Spring website is [http://www.springframework.org/]. This is the Java website. The version .NET currently under development (April 2005) is at url [http://www.springframework.net/].
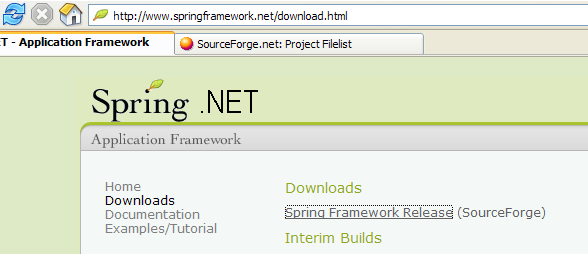
The download site is at [SourceForge]:
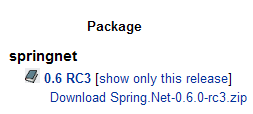
Once you have downloaded the zip file above, unzip it:
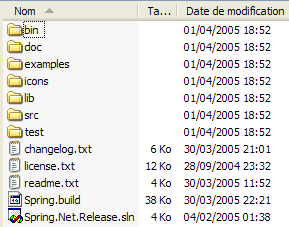
In this document, we have only used the contents of the [bin] folder:
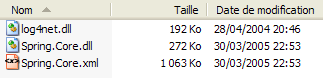
In a Visual Studio project using Spring, you must always do two things:
- place the files above in the project’s [bin] folder
- add a reference to the [Spring.Core.dll] assembly to the project
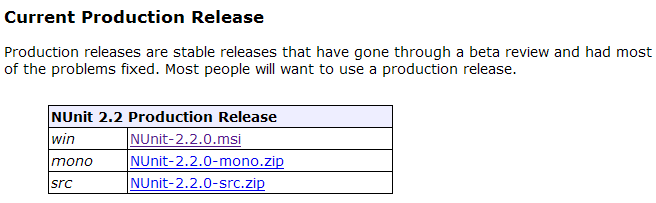
8.2. Where can I find Nunit?
The main NUnit website is [http://www.nunit.org/]. The version available in April 2005 is 2.2.0:
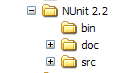
Download this version and install it. The installation creates a folder where you will find the version test graphics:
The interesting part is in the [bin] folder:
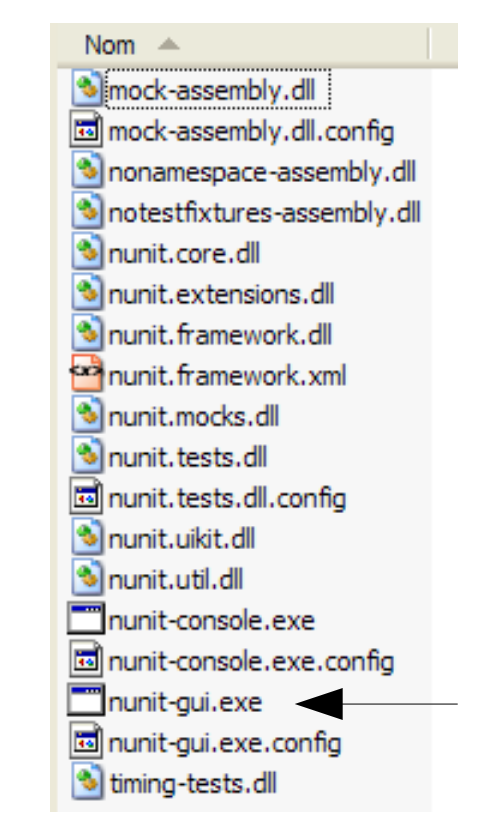
The arrow above points to the graphical test utility. The installation also added new items to the Visual Studio assembly repository, which we will explore now.
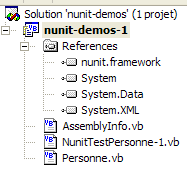
Let’s create the following Visual Studio project:
The class being tested is in [Personne.vb]:
Public Class Personne

     ' private fields
    Private _nom As String
    Private _age As Integer

     ' default builder
    Public Sub New()
    End Sub

     ' properties associated with private fields
    Public Property nom() As String
        Get
            Return _nom
        End Get
        Set(ByVal Value As String)
            _nom = Value
        End Set
    End Property

    Public Property age() As Integer
        Get
            Return _age
        End Get
        Set(ByVal Value As Integer)
            _age = Value
        End Set
    End Property

     ' identity chain
    Public Overrides Function tostring() As String
        Return String.Format("[{0},{1}]", nom, age)
    End Function

     ' init method
    Public Sub init()
        Console.WriteLine("init personne {0}", Me.ToString)
    End Sub

     ' close method
    Public Sub close()
        Console.WriteLine("destroy personne {0}", Me.ToString)
    End Sub

End Class
The test class is in [NunitTestPersonne-1.vb]:
Imports System
Imports NUnit.Framework

<TestFixture()> _
 Public Class NunitTestPersonne

     ' object tested
    Private personne1 As Personne

    <SetUp()> _
    Public Sub init()
         ' create an instance of Person
        personne1 = New Personne
         ' log
        Console.WriteLine("setup test")
    End Sub

    <Test()> _
    Public Sub demo()
         ' log screen
        Console.WriteLine("début test")
         ' init person1
        With personne1
            .nom = "paul"
            .age = 10
        End With
         ' tests
        Assert.AreEqual("paul", personne1.nom)
        Assert.AreEqual(10, personne1.age)
         ' log screen
        Console.WriteLine("fin test")
    End Sub

    <TearDown()> _
    Public Sub destroy()
         ' follow-up
        Console.WriteLine("teardown test")
    End Sub

End Class
Several things are worth noting:
- the methods are marked with attributes such as <Setup()>, <TearDown()>, ...
- for these attributes to be recognized, the following must be true:
- the project references the [nunit.framework.dll] assembly
- the test class imports the [NUnit.Framework] namespace
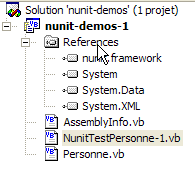
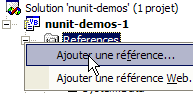
The reference is obtained by right-clicking on [References] in Solution Explorer:
 |  |
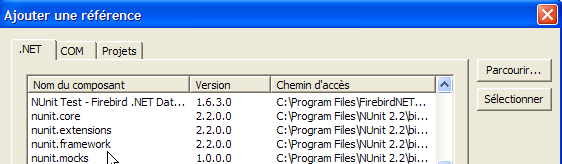
The [nunit.framework.dll] assembly should be in the list if the installation of [Nunit] was successful. Simply double-click the assembly to add it to the project:
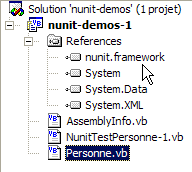
Once this is done, the [NunitTestPersonne] test class must import the [NUnit.Framework] namespace:
The attributes of the [NunitTestPersonne] test class must then be recognized.
- The <Test()> attribute designates a method to be tested
- The <Setup()> attribute designates the method to be executed before each method being tested
- The <TearDown()> attribute designates the method to be executed after each tested method
- The method Assert.AreEqual allows testing the equality of two entités.Il. There are many other methods of type Assert.xx.
- The NUnit utility stops the execution of a tested method as soon as a [Assert] method fails and displays an error message. Otherwise, it displays a success message.
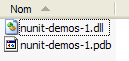
Let’s configure our project to generate a DLL:
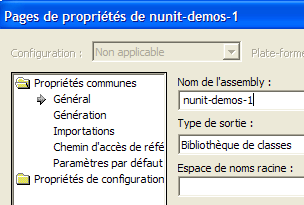
The generated DLL will be named [nunit-demos-1.dll] and will be placed by default in the [bin] folder of the project. Let’s build our project. We get the following in the [bin] folder:
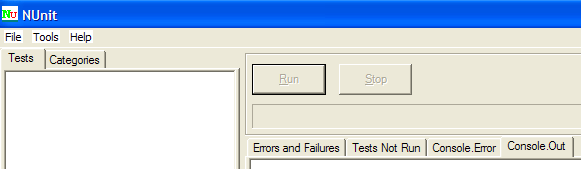
Now let’s launch the Nunit graphical testing utility. Remember that it is located in <Nunit>\bin and is named [nunit-gui.exe]. <Nunit> refers to the installation folder of [Nunit]. We get the following interface:
Let’s use the option menu item to load the DLL and [nunit-demos-1.dll] files from our project:

[Nunit] can automatically detect the test classes found in the loaded DLL. Here, it finds the [NunitTestPersonne] class. It then displays all methods of the class that have the <Test()> attribute. The [Run] button allows you to run tests on the selected object. If this is the [NunitTestPersonne] class, all displayed methods are tested. You can request a test for a specific method by selecting it and requesting its execution via [Run]. Let’s request the execution of the class:
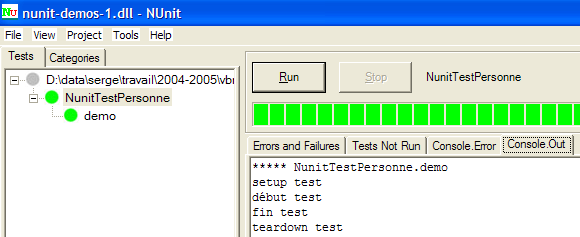
A successful test on a method is indicated by a green dot next to the method in the left window. A failed test is indicated by a red dot.
The [Console.Out] window on the right shows the screen displays produced by the tested methods. Here, we wanted to track the progress of a test:
- Line 1 shows that the <Setup()> attribute method is executed before the test
- Lines 2–3 are generated by the tested method [demo] (see the code above)
- Line 4 shows that the attribute method <TearDown()> is executed after the test